GW 10 791 GW 14 791 Cronotermostato EIB - da parete ... - Gewiss
GW 10 791 GW 14 791 Cronotermostato EIB - da parete ... - Gewiss
GW 10 791 GW 14 791 Cronotermostato EIB - da parete ... - Gewiss

Create successful ePaper yourself
Turn your PDF publications into a flip-book with our unique Google optimized e-Paper software.
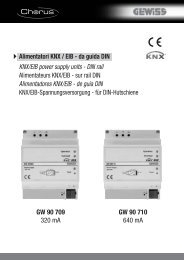
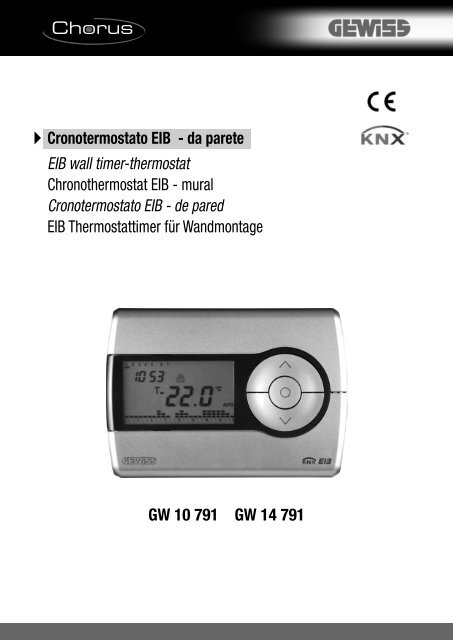
<strong>Cronotermostato</strong> <strong>EIB</strong> - <strong>da</strong> <strong>parete</strong><br />
<strong>EIB</strong> wall timer-thermostat<br />
Chronothermostat <strong>EIB</strong> - mural<br />
<strong>Cronotermostato</strong> <strong>EIB</strong> - de pared<br />
<strong>EIB</strong> Thermostattimer für Wandmontage<br />
<strong>GW</strong> <strong>10</strong> <strong>791</strong> <strong>GW</strong> <strong>14</strong> <strong>791</strong>
INDICE<br />
pag.<br />
AVVERTENZE GENERALI<br />
Contenuto della confezione ............................................................................... 4<br />
DESCRIZIONE GENERALE<br />
In breve ............................................................................................................ 5<br />
Posizione dei comandi posteriori ....................................................................... 7<br />
Posizione dei comandi....................................................................................... 8<br />
Descrizione comandi......................................................................................... 9<br />
Mo<strong>da</strong>lità di funzionamento ................................................................................ <strong>10</strong><br />
I<br />
T<br />
A<br />
L<br />
I<br />
A<br />
N<br />
O<br />
ISTRUZIONI D’IMPIEGO<br />
Selezione riscal<strong>da</strong>mento/condizionamento........................................................ 12<br />
Impostazione parametri..................................................................................... 12<br />
Personalizzazione programma giornaliero ......................................................... 21<br />
Forzatura temporanea della temperatura........................................................... 22<br />
Funzione Party .................................................................................................. 23<br />
Funzione Holi<strong>da</strong>y............................................................................................... 24<br />
Copia del programma festivo............................................................................. 25<br />
Segnalazione pile in esaurimento...................................................................... 26<br />
Reset e ripristino dei valori preimpostati............................................................ 26<br />
Programmi preimpostati.................................................................................... 27<br />
Parametri preimpostati...................................................................................... 28<br />
Comportamento alla caduta e al ripristino dell’alimentazione bus...................... 28<br />
Sostituzione pile................................................................................................ 29<br />
Pulizia del cronotermostato............................................................................... 30<br />
ISTRUZIONI D’INSTALLAZIONE<br />
Corretto posizionamento ................................................................................... 31<br />
Montaggio della base di supporto...................................................................... 31<br />
Avvertenze per l’installazione KNX/<strong>EIB</strong> .............................................................. 32<br />
Connessioni elettriche....................................................................................... 33<br />
Completamento ................................................................................................ 34<br />
DATI TECNICI ........................................................................................................ 35<br />
3
AVVERTENZE GENERALI<br />
Attenzione! La sicurezza dell’apparecchio è garantita solo attendendosi alle istruzioni qui<br />
riportate. Pertanto è necessario leggerle e conservarle. I prodotti Chorus devono essere<br />
installati conformemente a quanto previsto <strong>da</strong>lla norma CEI 64-8 per gli apparecchi per<br />
uso domestico e similare, in ambienti non polverosi e dove non sia necessaria una<br />
protezione speciale contro la penetrazione di acqua.<br />
L’organizzazione di vendita GEWISS è a disposizione per chiarimenti e informazioni<br />
tecniche.<br />
<strong>Gewiss</strong> SpA si riserva il diritto di apportare modifiche al prodotto descritto in questo<br />
manuale in qualsiasi momento e senza alcun preavviso.<br />
n. 1 <strong>Cronotermostato</strong> <strong>EIB</strong> <strong>da</strong> <strong>parete</strong><br />
n. 1 Base di supporto<br />
n. 1 Morsetto bus<br />
n. 1 Manuale di installazione e uso<br />
Contenuto della confezione<br />
4
DESCRIZIONE GENERALE<br />
In breve<br />
Il <strong>Cronotermostato</strong> <strong>EIB</strong> – <strong>da</strong> <strong>parete</strong> consente di gestire automaticamente, su base<br />
settimanale, la temperatura dell’ambiente in cui è installato. La regolazione della<br />
temperatura viene effettuata coman<strong>da</strong>ndo, attraverso il bus KNX/<strong>EIB</strong> del sistema di<br />
Building Automation, gli attuatori KNX/<strong>EIB</strong> che controllano l’impianto di riscal<strong>da</strong>mento o<br />
condizionamento.<br />
In unione coi Termostati <strong>EIB</strong> – <strong>da</strong> <strong>parete</strong> (<strong>GW</strong> <strong>10</strong> 793 - <strong>GW</strong> <strong>14</strong> 793), può essere utilizzato,<br />
con funzione master, per la regolazione della temperatura a zone.<br />
I<br />
T<br />
A<br />
L<br />
I<br />
A<br />
N<br />
O<br />
I profili di temperatura sono definiti su base settimanale. Per ogni giorno della settimana<br />
è possibile programmare un profilo orario indipendente, con risoluzione di 15 minuti e<br />
senza limite di variazioni giornaliere. Il cronotermostato prevede:<br />
• 2 tipi di funzionamento: riscal<strong>da</strong>mento e condizionamento;<br />
• 5 mo<strong>da</strong>lità di funzionamento: OFF, Economy, Precomfort, Comfort e Automatica;<br />
• 4 temperature di regolazione per il riscal<strong>da</strong>mento (TECONOMY, TPRECOMFORT, TCOMFORT,<br />
TANTIGELO);<br />
• 4 temperature di regolazione per il condizionamento (TECONOMY, TPRECOMFORT, TCOMFORT,<br />
TPROTEZIONE ALTE TEMPERATURE).<br />
Il cronotermostato è alimentato <strong>da</strong>lla linea bus ed è dotato di display LCD con<br />
retroilluminazione temporizzata, <strong>10</strong> pulsanti di comando, un sensore integrato per la<br />
rivelazione della temperatura ambientale (il cui valore può essere inviato sul bus), pile<br />
alcaline (AAA, non incluse) per il mantenimento di <strong>da</strong>ta e ora in caso di caduta della<br />
tensione bus.<br />
5
DESCRIZIONE GENERALE<br />
Il dispositivo viene configurato con il software ETS per realizzare le seguenti funzioni:<br />
Controllo temperatura<br />
• a 2 punti, con comandi ON/OFF o regolazione continua (0% / <strong>10</strong>0%)<br />
• controllo proporzionale, con comandi PWM o regolazione continua (0% ÷ <strong>10</strong>0%)<br />
Impostazione mo<strong>da</strong>lità di funzionamento<br />
• <strong>da</strong> bus con oggetti distinti a 1 bit (OFF, ECONOMY, PRECOMFORT, COMFORT, AUTO)<br />
• <strong>da</strong> bus con oggetto a un byte<br />
Misura temperatura<br />
• con sensore integrato o son<strong>da</strong> di temperatura<br />
• misto con definizione del peso relativo<br />
Controllo temperatura a zone<br />
• con trasmissione della mo<strong>da</strong>lità di funzionamento verso termostati slave<br />
• con trasmissione del set point verso termostati slave<br />
Scenari<br />
• memorizzazione e attivazione di 8 scenari (valore 0..63)<br />
Altre funzioni<br />
• impostazione del set point (OFF, ECONOMY, PRECOMFORT, COMFORT) <strong>da</strong>l bus<br />
• impostazione del tipo di funzionamento (riscal<strong>da</strong>mento/condizionamento) <strong>da</strong>l bus<br />
• impostazione di giorno e ora <strong>da</strong>l bus<br />
• trasmissione di giorno e ora sul bus verso termostati slave<br />
• trasmissione sul bus delle informazioni di stato (mo<strong>da</strong>lità, tipo) e della temperatura<br />
misurata<br />
• gestione dell’informazione di stato proveniente <strong>da</strong>ll’attuatore coman<strong>da</strong>to<br />
Il dispositivo viene installato a <strong>parete</strong> utilizzando la flangia in dotazione, che può essere<br />
fissata a muro con dei tasselli o avvitata sopra una scatola <strong>da</strong> incasso a 3 moduli.<br />
6
DESCRIZIONE GENERALE<br />
Posizione dei comandi posteriori<br />
I<br />
T<br />
A<br />
L<br />
I<br />
A<br />
N<br />
O<br />
LED di programmazione indirizzo fisico<br />
Tasto di programmazione indirizzo fisico<br />
7
DESCRIZIONE GENERALE<br />
Posizione dei comandi<br />
Il cronotermostato è dotato di un display, di 3 pulsanti di comando sempre accessibili e<br />
di 7 pulsanti di comando accessibili a sportello aperto.<br />
21<br />
22<br />
23<br />
24<br />
25<br />
26<br />
27<br />
28<br />
18<br />
17<br />
20<br />
16<br />
15<br />
<strong>14</strong><br />
19<br />
7<br />
8<br />
13<br />
9<br />
1<br />
2<br />
3<br />
4<br />
5<br />
6<br />
12<br />
11<br />
<strong>10</strong><br />
8
DESCRIZIONE GENERALE<br />
1<br />
2<br />
3<br />
4<br />
5<br />
6<br />
7<br />
8<br />
9<br />
Descrizione comandi<br />
PULSANTI DI COMANDO Simbolo Pag.<br />
Programmazione / impostazione<br />
Regolazione tempo<br />
Party 23<br />
Holi<strong>da</strong>y 24<br />
Selezione riscal<strong>da</strong>mento / condizionamento 12<br />
Copia 25<br />
Regolazione temperatura (+) / Selezione parametri<br />
Selezione mo<strong>da</strong>lità funzionamento / conferma<br />
Regolazione temperatura (–) / Selezione parametri<br />
I<br />
T<br />
A<br />
L<br />
I<br />
A<br />
N<br />
O<br />
<strong>10</strong><br />
11<br />
12<br />
13<br />
<strong>14</strong><br />
15<br />
16<br />
17<br />
18<br />
19<br />
20<br />
21<br />
22<br />
23<br />
24<br />
25<br />
26<br />
27<br />
28<br />
SEGNALAZIONI A DISPLAY<br />
Mo<strong>da</strong>lità di funzionamento<br />
Unità di misura temperatura<br />
Temperatura ambiente misurata<br />
AUTO<br />
°C / °F<br />
<strong>10</strong><br />
<strong>14</strong><br />
Profilo programma giornaliero 21<br />
Attivazione condizionamento 11<br />
Attivazione riscal<strong>da</strong>mento 11<br />
Differenziale termico 19<br />
Orologio <strong>14</strong><br />
Giorno della settimana <strong>14</strong><br />
Attivazione funzione autoapprendimento 19<br />
Set-point temperatura - Mo<strong>da</strong>lità di funzionamento 15<br />
Funzionamento in riscal<strong>da</strong>mento 11<br />
Stato impostazione parametri<br />
Funzionamento in condizionamento<br />
SET<br />
12<br />
12<br />
Stato programmazione PROG<br />
19<br />
Funzione holi<strong>da</strong>y 24<br />
Pile in esaurimento 26<br />
Funzione copia programma festivo 25<br />
Funzione party 23<br />
9
DESCRIZIONE GENERALE<br />
Mo<strong>da</strong>lità di funzionamento<br />
Il cronotermostato prevede 5 differenti mo<strong>da</strong>lità di funzionamento:<br />
• AUTOMATICO<br />
• ECONOMY<br />
• PRECOMFORT<br />
• COMFORT<br />
• OFF-ANTIGELO / PROTEZIONE ALTE TEMPERATURE<br />
Per commutare <strong>da</strong> una mo<strong>da</strong>lità a un'altra si utilizza il tasto .<br />
Nel funzionamento automatico il cronotermostato<br />
utilizza un programma che può essere differenziato per<br />
ogni giorno della settimana.<br />
Sul display appaiono la scritta AUTO, la temperatura<br />
ambiente misurata e il simbolo del set point relativo al<br />
quarto d’ora corrente.<br />
Nel profilo orario lampeggia la colonnina relativa all’ora<br />
corrente con la rappresentazione del set point attivo.<br />
Nei funzionamenti economy, precomfort e comfort il<br />
cronotermostato utilizza permanentemente i set point di<br />
temperatura corrispondenti.<br />
Sul display appaiono la temperatura ambiente misurata e<br />
il simbolo , o .<br />
SIGNIFICATO DI<br />
Simbolo<br />
Riscal<strong>da</strong>mento<br />
Condizionamento<br />
Set point<br />
Mo<strong>da</strong>lità<br />
Mo<strong>da</strong>lità<br />
Set point<br />
funzionamento<br />
funzionamento<br />
TECONOMY Economy TCOMFORT Comfort<br />
TPRECOMFORT Precomfort TPRECOMFORT Precomfort<br />
TCOMFORT Comfort TECONOMY Economy<br />
<strong>10</strong>
DESCRIZIONE GENERALE<br />
Il funzionamento antigelo è attivo solo in riscal<strong>da</strong>mento,<br />
a impianto di termoregolazione spento (OFF).<br />
In questo caso il cronotermostato utilizza il set point di<br />
temperatura antigelo impostato, riattivando l’impianto di<br />
riscal<strong>da</strong>mento solo se la temperatura ambientale scende<br />
sotto TANTIGELO .<br />
Sul display appaiono la scritta OFF e la temperatura<br />
ambiente misurata.<br />
I<br />
T<br />
A<br />
L<br />
I<br />
A<br />
N<br />
O<br />
Il funzionamento protezione alte temperature è attivo<br />
solo in condizionamento, a impianto di termoregolazione<br />
spento (OFF). In questo caso il cronotermostato utilizza il<br />
set point di protezione alte temperature impostato,<br />
riattivando l’impianto di condizionamento solo se la<br />
temperatura ambientale supera TPROTEZIONE ALTE TEMPERATURE.<br />
Sul display appaiono la scritta OFF e la temperatura<br />
ambiente misurata.<br />
Durante il funzionamento, l’attivazione del riscal<strong>da</strong>mento o del condizionamento sono<br />
segnalate nel modo seguente:<br />
Riscal<strong>da</strong>mento<br />
Il simbolo indica che il comando di attivazione è stato<br />
inviato all'attuatore di comando della cal<strong>da</strong>ia.<br />
Se via ETS sono state attivate le notifiche <strong>da</strong>l carico e il<br />
cronotermostato non riceve <strong>da</strong>ll’attuatore il riscontro<br />
dell’avvenuta attivazione, il simbolo inizia a lampeggiare.<br />
Successivamente, ad ogni minuto dell’orologio, il<br />
cronotermostato invia nuovamente il comando di<br />
attivazione finché non riceve un riscontro positivo.<br />
Condizionamento<br />
Il simbolo indica che il comando di attivazione è stato<br />
inviato all'attuatore di comando del condizionatore. Se via<br />
ETS sono state attivate le notifiche <strong>da</strong>l carico e il<br />
cronotermostato non riceve <strong>da</strong>ll’attuatore il riscontro<br />
dell’avvenuta attivazione, il simbolo inizia a lampeggiare.<br />
Successivamente, ad ogni minuto dell’orologio, il<br />
cronotermostato invia nuovamente il comando di attivazione<br />
finchè non riceve un riscontro positivo.<br />
11
ISTRUZIONI D’IMPIEGO<br />
Selezione riscal<strong>da</strong>mento/condizionamento<br />
Premendo il tasto è possibile commutare il tipo di funzionamento tra riscal<strong>da</strong>mento<br />
e condizionamento e viceversa.<br />
Riscal<strong>da</strong>mento<br />
Il simbolo identifica il riscal<strong>da</strong>mento.<br />
Condizionamento<br />
Il simbolo identifica il condizionamento.<br />
Impostazione parametri<br />
Per impostare i parametri del cronotermostato:<br />
1. selezionare con il tasto il tipo di funzionamento (riscal<strong>da</strong>mento o condizionamento),<br />
2. premere una volta il tasto .<br />
Sul display appaiono la scritta SET e l’orologio, mentre la barra del giorno della settimana<br />
inizia a lampeggiare.<br />
A questo punto, secondo il tipo di funzionamento, è possibile modificare in sequenza:<br />
12
ISTRUZIONI D’IMPIEGO<br />
Giorno della settimana<br />
Ore<br />
Minuti<br />
Unità di misura della temperatura<br />
Riscal<strong>da</strong>mento<br />
Condizionamento<br />
P01risc - Set Point<br />
P01cond - Set Point<br />
P02risc - Set Point<br />
P02cond - Set Point<br />
P03risc - Set Point<br />
P03cond - Set Point<br />
I<br />
T<br />
A<br />
L<br />
I<br />
A<br />
N<br />
O<br />
P04risc - Set Point TANTIGELO<br />
P05risc - Logica di controllo<br />
Se logica di controllo = proporzionale<br />
P04cond - Set Point TPROTEZIONE ALTE TEMPERATURE<br />
P05cond - Logica di controllo<br />
P06risc - Tempo di ciclo<br />
P06cond - Tempo di ciclo<br />
P07risc - Valore differenziale di<br />
regolazione proporzionale<br />
P07cond - Valore differenziale<br />
di regolazione proporzionale<br />
P08 - Valore percentuale minimo per invio comando<br />
(visibile se via ETS si è selezionato il formato di comando a 1 byte)<br />
Se logica di controllo = 2 punti<br />
P09risc - Valore differenziale<br />
di regolazione a 2 punti<br />
P<strong>10</strong>risc - Attivazione autoapprendimento<br />
P09cond - Valore differenziale<br />
di regolazione a 2 punti<br />
P11 Attivazione/disattivazione della funzione master<br />
P12 Invio giorno/ora ai dispositivi slave<br />
P13 Periodo di invio giorno e ora ai dispositivi slave<br />
P<strong>14</strong> Invio comando PARTY ai dispositivi slave<br />
P<strong>14</strong> Invio comando HOLIDAY ai dispositivi slave<br />
Per scorrere la sequenza, confermando il valore del parametro visualizzato, premere il<br />
tasto finché non appare il parametro che si desidera modificare.<br />
L’uscita <strong>da</strong>lla procedura di impostazione dei parametri avviene premendo nuovamente il<br />
tasto oppure, automaticamente, dopo 30 secondi <strong>da</strong>ll’ultima digitazione.<br />
Per impostare i parametri di riscal<strong>da</strong>mento e condizionamento occorre eseguire entrambe<br />
le sequenze (nella secon<strong>da</strong> sequenza si possono confermare i parametri uguali,<br />
modificando solo quelli specifici).<br />
13
ISTRUZIONI D’IMPIEGO<br />
Impostazione del giorno della settimana<br />
Quando la barra del giorno della settimana lampeggia,<br />
selezionare il giorno corrente con i tasti .<br />
Per confermare il valore impostato, premere il tasto<br />
entro 30 secondi.<br />
Impostazione dell’ora<br />
Quando le cifre dell’ora lampeggiano, impostare l’ora con<br />
i tasti .<br />
Per confermare il valore impostato, premere il tasto<br />
entro 30 secondi.<br />
Impostazione dei minuti<br />
Quando le cifre dei minuti lampeggiano, impostare i<br />
minuti con i tasti .<br />
Per confermare il valore impostato, premere il tasto<br />
entro 30 secondi.<br />
Impostazione unità di misura temperatura<br />
Quando il simbolo °C o °F della temperatura inizia a<br />
lampeggiare, selezionare l’unità di misura della<br />
temperatura con i tasti .<br />
Per confermare il valore impostato, premere il tasto<br />
entro 30 secondi.<br />
<strong>14</strong>
ISTRUZIONI D’IMPIEGO<br />
P01risc - Impostazione Set Point (riscal<strong>da</strong>mento)<br />
All’apparire del simbolo , il valore di temperatura inizia<br />
a lampeggiare. Regolare il valore di (TECONOMY) con i<br />
tasti .<br />
Per confermare il valore impostato, premere il tasto<br />
entro 30 secondi.<br />
P01cond - Impostazione Set Point (condizionamento)<br />
All’apparire del simbolo , il valore di temperatura<br />
inizia a lampeggiare. Regolare il valore di (TCOMFORT)<br />
con i tasti .<br />
Per confermare il valore impostato, premere il tasto<br />
entro 30 secondi.<br />
I<br />
T<br />
A<br />
L<br />
I<br />
A<br />
N<br />
O<br />
P02risc - Impostazione Set Point (riscal<strong>da</strong>mento)<br />
All’apparire del simbolo , il valore di temperatura<br />
inizia a lampeggiare. Regolare il valore di (TPRECOMFORT)<br />
con i tasti .<br />
Per confermare il valore impostato, premere il tasto<br />
entro 30 secondi.<br />
P02cond - Impostazione Set Point (condizionamento)<br />
All’apparire del simbolo , il valore di temperatura<br />
inizia a lampeggiare. Regolare il valore di (TPRECOMFORT)<br />
con i tasti .<br />
Per confermare il valore impostato, premere il tasto<br />
entro 30 secondi.<br />
15
ISTRUZIONI D’IMPIEGO<br />
P03risc - Impostazione Set Point (riscal<strong>da</strong>mento)<br />
All’apparire del simbolo , il valore di temperatura inizia<br />
a lampeggiare. Regolare il valore di (TCOMFORT) con i<br />
tasti .<br />
Per confermare il valore impostato, premere il tasto<br />
entro 30 secondi.<br />
P03cond - Impostazione Set Point (condizionamento)<br />
All’apparire del simbolo , il valore di temperatura<br />
inizia a lampeggiare. Regolare il valore di (TECONOMY)<br />
con i tasti .<br />
Per confermare il valore impostato, premere il tasto<br />
entro 30 secondi.<br />
P04risc - Impostazione valore temperatura antigelo<br />
All’apparire del simbolo , il valore di temperatura<br />
inizia a lampeggiare. Regolare il valore della temperatura<br />
antigelo con i tasti .<br />
Per confermare il valore impostato, premere il tasto<br />
entro 30 secondi.<br />
P04cond - Impostazione valore protezione alte temperature<br />
All’apparire del simbolo , il valore di temperatura inizia<br />
a lampeggiare. Regolare il valore della temperatura<br />
protezione alte temperature con i tasti .<br />
Per confermare il valore impostato, premere il tasto<br />
entro 30 secondi.<br />
ATTENZIONE!<br />
Tra i valori di set point esistono i seguenti vincoli:<br />
- Riscal<strong>da</strong>mento<br />
TANTIGELO<br />
- Condizionamento<br />
TPROTEZIONE ALTE TEMPERATURE<br />
16
ISTRUZIONI D’IMPIEGO<br />
P05 - Logica di controllo<br />
All’apparire della scritta P 05, impostare la logica di controllo<br />
dell’impianto di termoregolazione con i tasti .<br />
(00 = controllo a 2 punti, 01 = controllo proporzionale)<br />
Per confermare il valore impostato, premere il tasto<br />
entro 30 secondi.<br />
Si possono impostare logiche di controllo diverse per<br />
riscal<strong>da</strong>mento e condizionamento.<br />
I<br />
T<br />
A<br />
L<br />
I<br />
A<br />
N<br />
O<br />
Se si è scelto il controllo a 2 punti saltare al punto P09,<br />
per il controllo proporzionale an<strong>da</strong>re al punto P06.<br />
CONTROLLO A 2 PUNTI<br />
L’impianto di termoregolazione viene disattivato quando la<br />
temperatura ambientale è pari a set point e riattivato<br />
quando:<br />
- la temperatura è pari o inferiore a set point - per<br />
il riscal<strong>da</strong>mento;<br />
- la temperatura è pari o superiore a set point + per<br />
il condizionamento.<br />
I grafici che seguono mostrano i due tipi di funzionamento.<br />
RISCALDAMENTO<br />
set point<br />
T<br />
CONDIZIONAMENTO<br />
set point<br />
Se il formato dei comandi selezionato via ETS è 1 bit, il<br />
cronotermostato invia comandi ON/OFF; se il formato dei<br />
comandi selezionato via ETS è 1 byte, il cronotermostato<br />
invia i valori 0% o <strong>10</strong>0%.<br />
17<br />
T
ISTRUZIONI D’IMPIEGO<br />
CONTROLLO PROPORZIONALE<br />
Il cronotermostato controlla, al termine di ogni tempo di<br />
ciclo, la temperatura ambientale e, in base alla differenza<br />
riscontrata con il set point impostato, modula le attivazioni<br />
e disattivazioni della cal<strong>da</strong>ia (PWM) oppure invia un<br />
comando con un valore di 1 byte (controllo continuo) per<br />
il controllo dell'elemento riscal<strong>da</strong>nte o raffrescante, in<br />
funzione del comando selezionato <strong>da</strong> ETS (1 bit o 1 byte).<br />
P06 - Impostazione tempo di ciclo<br />
All’apparire della scritta P06, impostare la lunghezza<br />
del tempo di ciclo con i tasti .<br />
I possibili valori sono: 5, <strong>10</strong>, 20, 30, 40, 50, 60 minuti.<br />
Si possono impostare tempi di ciclo diversi per<br />
riscal<strong>da</strong>mento e condizionamento.<br />
Per confermare il valore impostato, premere il tasto<br />
entro 30 secondi.<br />
P07 - Impostazione valore differenziale di regolazione<br />
proporzionale<br />
All’apparire della scritta P07, impostare il valore del<br />
differenziale di regolazione con i tasti .<br />
Possibili valori: <strong>da</strong> 0,4 °C a 3,2 °C, con passo di 0,4 °C.<br />
Si possono impostare valori differenziali di regolazione<br />
diversi per riscal<strong>da</strong>mento e condizionamento.<br />
Per confermare il valore impostato, premere il tasto<br />
entro 30 secondi.<br />
Se durante la configurazione con ETS è stato scelto come<br />
valore di controllo il valore a 1 bit saltare al punto P11,<br />
altrimenti passare al punto P08.<br />
P08 - Valore percentuale minimo per invio comando<br />
All'apparire della scritta P08, impostare la risoluzione<br />
percentuale di invio del comando al dispositivo di controllo<br />
della termoregolazione.<br />
I possibili valori sono: 5%, <strong>10</strong>%, 20%.<br />
Per confermare il valore impostato, premere il tasto<br />
entro 30 secondi.<br />
18
ISTRUZIONI D’IMPIEGO<br />
P09 - Impostazione differenziale di regolazione a 2 punti<br />
All’apparire del simbolo , impostare il valore del<br />
differenziale di regolazione con i tasti .<br />
Per confermare il valore impostato, premere il tasto<br />
entro 30 secondi.<br />
Il differenziale di regolazione è lo scostamento tra il set<br />
point impostato e la temperatura effettiva di attivazione.<br />
Si possono impostare differenziali di regolazione diversi<br />
per riscal<strong>da</strong>mento e condizionamento.<br />
Salvo situazioni particolari, si consiglia di mantenere i<br />
valori preimpostati.<br />
I<br />
T<br />
A<br />
L<br />
I<br />
A<br />
N<br />
O<br />
P<strong>10</strong> - Attivazione autoapprendimento (solo riscal<strong>da</strong>mento)<br />
All’apparire del simbolo , attivare (ON) o disattivare<br />
(OFF) la funzione con i tasti .<br />
Per confermare il valore impostato, premere il tasto<br />
entro 30 secondi.<br />
L’autoapprendimento permette di ottimizzare l’anticipo<br />
(max. 2 ore) sull’attivazione del riscal<strong>da</strong>mento.<br />
Il cronotermostato gestisce automaticamente l’anticipo,<br />
in modo <strong>da</strong> garantire la temperatura impostata all’inizio di<br />
ogni periodo del profilo programmato.<br />
Questa funzione si attiva solo in riscal<strong>da</strong>mento, nella<br />
mo<strong>da</strong>lità di funzionamento automatico.<br />
I parametri seguenti sono significativi solo se il cronotermostato è stato configurato,<br />
tramite ETS, per il funzionamento master. Negli altri casi verranno ignorati.<br />
P11 - Attivazione/disattivazione funzione master<br />
All’apparire della scritta P11, è possibile disattivare<br />
momentaneamente il funzionamento master e attivare il<br />
funzionamento stand alone (01 = funzionamento<br />
master, 00 = funzionamento stand alone).<br />
Per confermare il valore impostato, premere il tasto<br />
entro 30 secondi.<br />
Se si è scelta l'opzione funzionamento master passare al<br />
punto P12, altrimenti la procedura è conclusa.<br />
19
ISTRUZIONI D’IMPIEGO<br />
P12 - Invio giorno/ora ai dispositivi slave<br />
All’apparire della scritta P12, è possibile definire quando<br />
il cronotermostato invia <strong>da</strong>ta e ora per allineare questi<br />
parametri nei dispositivi impostati come slave.<br />
(00 = il messaggio non viene mai inviato, 01 = il<br />
messaggio viene inviato solo al ritorno della tensione<br />
di alimentazione, 02 = il messaggio viene inviato solo<br />
quando cambia l'ora impostata, 03 = il messaggio<br />
viene inviato al ritorno della tensione di alimentazione<br />
o quando cambia l’ora impostata, 04 = il messaggio<br />
viene inviato al ritorno della tensione di<br />
alimentazione, quando cambia l’ora impostata e con<br />
la frequenza specificata in P13).<br />
Per confermare il valore impostato, premere il tasto<br />
entro 30 secondi.<br />
Se si è scelta l'opzione 04 passare al punto P13, altrimenti<br />
saltare al punto P<strong>14</strong><br />
P13 - Periodo di invio giorno/ora<br />
All’apparire della scritta P13, è possibile impostare il<br />
periodo di invio di <strong>da</strong>ta e ora per allineare questi parametri<br />
nei dispositivi impostati come slave etc.<br />
(00 = ogni 6 ore, 01 = ogni 12 ore, 02 = ogni 24 ore,<br />
03 = ogni settimana).<br />
Per confermare il valore impostato, premere il tasto<br />
entro 30 secondi.<br />
P<strong>14</strong> - Invio comando PARTY ai dispositivi slave<br />
All’apparire della scritta P<strong>14</strong>, è possibile attivare (ON) o<br />
disattivare (OFF), con i tasti , l'estensione del<br />
comando PARTY ai dispositivi impostati come slave del<br />
cronotermostato.<br />
Per confermare il valore impostato, premere il tasto<br />
entro 30 secondi.<br />
20
ISTRUZIONI D’IMPIEGO<br />
P15 - Invio comando HOLIDAY ai dispositivi slave<br />
All’apparire della scritta P15, è possibile attivare (ON) o<br />
disattivare (OFF), con i tasti , l'estensione del<br />
comando HOLIDAY ai dispositivi impostati come slave<br />
del cronotermostato.<br />
Per confermare il valore impostato, premere il tasto<br />
entro 30 secondi.<br />
La procedura di impostazione parametri è terminata.<br />
Premere il tasto per tornare al funzionamento normale<br />
I<br />
T<br />
A<br />
L<br />
I<br />
A<br />
N<br />
O<br />
Personalizzazione programma giornaliero<br />
Per personalizzare il programma giornaliero preimpostato, o apportare delle modifiche,<br />
premere due volte il tasto .<br />
Sul display appare la scritta PROG, mentre la barra del<br />
primo giorno della settimana inizia a lampeggiare.<br />
Selezionare il giorno desiderato con i tasti .<br />
Per confermare la selezione, premere il tasto entro 30<br />
secondi.<br />
Dopo la conferma del giorno sul display viene visualizzato<br />
il profilo corrente, relativo al giorno scelto.<br />
L’orario inizia a lampeggiare.<br />
I passi <strong>da</strong> eseguire per la personalizzazione sono:<br />
1- selezione dell’orario di inizio della variazione di<br />
temperatura<br />
2 - impostazione del nuovo set point di temperatura<br />
3 - completamento della personalizzazione<br />
1 - Selezione dell’orario di inizio della variazione di<br />
temperatura<br />
Con i tasti modificare l’orario fino al momento in<br />
cui si desidera variare il profilo proposto; durante<br />
l’incremento sul profilo orario lampeggia la colonnina<br />
relativa all’orario selezionato. L’orario viene<br />
decrementato/incrementato con passi di 15 minuti a ogni<br />
pressione dei tasti ; è perciò possibile avere fino<br />
a 4 periodi di programmazione per ogni ora.<br />
21
ISTRUZIONI D’IMPIEGO<br />
2 - Impostazione del nuovo set point di temperatura<br />
Sul display il valore corrispondente al set point attualmente<br />
impostato è indicato <strong>da</strong>l simbolo , o .<br />
Con i tasti selezionare il nuovo set point, che sarà<br />
applicato al profilo orario fino alla successiva<br />
variazione presente nel programma.<br />
3 - Completamento della personalizzazione<br />
Dopo aver ripetuto i passi 1 e 2 fino ad aver ottenuto il<br />
profilo orario di temperatura desiderato, si può:<br />
- copiare il programma sul giorno successivo e<br />
confermare la programmazione eseguita, premendo il<br />
tasto entro 30 secondi, oppure<br />
- confermare la programmazione senza copiarla,<br />
premendo il tasto entro 30 secondi (si passa<br />
automaticamente alla programmazione del giorno<br />
successivo).<br />
Al termine della programmazione settimanale premere il tasto<br />
funzionamento normale.<br />
per tornare al<br />
Per attivare il programma selezionare la mo<strong>da</strong>lità di funzionamento AUTO premendo il<br />
tasto fino all’apparire sul display della scritta AUTO.<br />
Forzatura temporanea della temperatura<br />
Nelle mo<strong>da</strong>lità di funzionamento AUTO, Economy, Precomfort e Comfort è possibile<br />
forzare temporaneamente il set point di temperatura attivo, utilizzando i tasti per<br />
impostare il valore desiderato. Confermare il nuovo valore premendo il tasto o<br />
attendere 5 secondi.<br />
L’attivazione della forzatura viene segnalata sul display<br />
<strong>da</strong>l lampeggio della scritta AUTO o, negli altri casi, <strong>da</strong>l<br />
lampeggio di , o . La forzatura nella mo<strong>da</strong>lità<br />
di funzionamento AUTO rimane attiva fino alla successiva<br />
variazione del profilo orario di temperatura.<br />
22
ISTRUZIONI D’IMPIEGO<br />
Funzione Party<br />
In AUTO, Economy, Precomfort e Comfort la funzione Party permette di escludere<br />
temporaneamente la mo<strong>da</strong>lità di funzionamento impostata e attivare la mo<strong>da</strong>lità comfort<br />
con un set point regolabile, per un periodo di tempo compreso tra 1 e 23 ore.<br />
Questa funzione può essere usata, ad esempio, per avere una temperatura più<br />
comfortevole durante una cena, una festa, ecc.<br />
I<br />
T<br />
A<br />
L<br />
I<br />
A<br />
N<br />
O<br />
Per attivare la funzione premere il tasto .<br />
Sul display appare il simbolo , mentre lampeggia il<br />
valore del set point .<br />
Con i tasti impostare la temperatura desiderata.<br />
Tramite i tasti impostare poi il numero delle ore<br />
di attivazione della funzione Party, che viene visualizzato<br />
in alto a sinistra sul display.<br />
Premere il tasto , o attendere 5 secondi, per<br />
confermare l’impostazione.<br />
Quando la funzione è attiva, si possono modificare il valore del set point premendo i tasti<br />
e quello del periodo di attivazione tramite i tasti .<br />
Durante il funzionamento il conteggio delle ore viene decrementato.<br />
La funzione Party resta attiva fino allo scadere del periodo impostato.<br />
Allo scadere del periodo impostato, la funzione Party si disattiva automaticamente e il<br />
cronotermostato ritorna alla mo<strong>da</strong>lità di funzionamento di partenza.<br />
Per disattivare anticipatamente la funzione Party premere il tasto .<br />
23
ISTRUZIONI D’IMPIEGO<br />
Funzione Holi<strong>da</strong>y<br />
In AUTO, Economy, Precomfort e Comfort la funzione Holi<strong>da</strong>y permette di escludere<br />
temporaneamente la mo<strong>da</strong>lità di funzionamento impostata e attivare la mo<strong>da</strong>lità Economy<br />
con un set point regolabile, per un periodo compreso tra 1 e 99 giorni.<br />
Questa funzione può essere usata, ad esempio, per impostare un funzionamento<br />
economico dell’impianto di termoregolazione durante una vacanza, o un lungo periodo<br />
di assenza, e ritrovare la temperatura desiderata il giorno del rientro.<br />
Per attivare la funzione premere il tasto .<br />
Sul display appare il simbolo , mentre lampeggia il<br />
valore del set point .<br />
Con i tasti impostare la temperatura desiderata.<br />
Tramite i tasti impostare poi il numero dei giorni<br />
di attivazione della funzione Holi<strong>da</strong>y, che viene<br />
visualizzato in alto a sinistra sul display.<br />
Premere il tasto , o attendere 5 secondi, per<br />
confermare l’impostazione.<br />
Quando la funzione è attiva, si possono modificare il valore del set point premendo i tasti<br />
e quello del periodo di attivazione tramite i tasti .<br />
Durante il funzionamento il conteggio dei giorni viene decrementato.<br />
La funzione Holi<strong>da</strong>y resta attiva fino allo scadere del periodo impostato, che termina alle<br />
ore 24. Nel calcolo dei giorni deve essere sempre incluso il giorno corrente.<br />
Ad esempio, se il venerdì sera si vuole impostare la funzione Holi<strong>da</strong>y in modo che termini<br />
a mezzanotte di domenica occorre impostare 3 giorni (venerdì, sabato e domenica).<br />
Allo scadere del periodo impostato, la funzione Holi<strong>da</strong>y si disattiva automaticamente e il<br />
cronotermostato ritorna alla mo<strong>da</strong>lità di funzionamento di partenza.<br />
Per disattivare anticipatamente la funzione Holi<strong>da</strong>y premere il tasto .<br />
24
ISTRUZIONI D’IMPIEGO<br />
Copia del programma festivo<br />
In mo<strong>da</strong>lità AUTO, è possibile copiare il profilo del giorno festivo (7) su un qualsiasi giorno<br />
della settimana.<br />
La funzione può essere attivata fino a 6 giorni prima del giorno scelto.<br />
Questa funzione è particolarmente utile quando c’è, ad esempio, una festività<br />
infrasettimanale.<br />
Per copiare il profilo del giorno festivo premere il tasto<br />
. Sul display lampeggiano il simbolo e la barra<br />
del giorno festivo.<br />
Tramite i tasti selezionare il giorno delle<br />
settimana sul quale copiare il profilo del giorno festivo.<br />
Premere il tasto , o attendere 30 secondi, per<br />
confermare l’impostazione.<br />
I<br />
T<br />
A<br />
L<br />
I<br />
A<br />
N<br />
O<br />
Quando la funzione è attiva, premendo il tasto si<br />
visualizza il giorno sul quale è stato copiato il profilo del<br />
giorno festivo; sul display la barra corrispondente<br />
lampeggia.<br />
Se si desidera disattivare la funzione, premere<br />
nuovamente il tasto ; se si desidera modificare il<br />
giorno della settimana, utilizzare i tasti e premere<br />
il tasto , o attendere 30 secondi, per confermare la<br />
nuova impostazione.<br />
Durante il giorno il simbolo è acceso fisso.<br />
La validità della copia del giorno festivo è temporanea;<br />
allo scadere della mezzanotte del giorno selezionato si<br />
ritorna al profilo settimanale programmato.<br />
25
ISTRUZIONI D’IMPIEGO<br />
Segnalazione pile in esaurimento<br />
Quando le pile sono in fase di esaurimento e manca<br />
l’alimentazione bus sul display inizia a lampeggiare il<br />
simbolo . Sul display scompare anche l’indicazione<br />
della temperatura ed è necessario procedere quanto<br />
prima alla sostituzione delle pile.<br />
Quando il simbolo è acceso fisso le pile devono<br />
essere assolutamente sostituite.<br />
Le pile servono solo a conservare le impostazioni di <strong>da</strong>ta<br />
e ora in caso di caduta di tensione del bus KNX/<strong>EIB</strong> (tutte<br />
le altre impostazioni sono mantenute in memoria non<br />
volatile).<br />
In presenza della tensione bus il funzionamento è<br />
comunque garantito anche in assenza di pile.<br />
Reset e ripristino dei valori preimpostati<br />
Premendo contemporaneamente i tasti , e si effettua un reset completo del<br />
cronotermostato.<br />
Attenzione: tutti i parametri impostati e i programmi personalizzati vengono<br />
cancellati.<br />
Alla riaccensione, il cronotermostato utilizza i parametri e i programmi preimpostati in<br />
fabbrica. Il cronotermostato si pone in riscal<strong>da</strong>mento, nella mo<strong>da</strong>lità OFF e le funzioni<br />
Party e Holi<strong>da</strong>y non sono attive.<br />
26
ISTRUZIONI D’IMPIEGO<br />
Il cronotermostato dispone di 2 programmi preimpostati, uno per il riscal<strong>da</strong>mento e uno<br />
per il condizionamento.<br />
PROGRAMMA RISCALDAMENTO<br />
Lunedì - Venerdì<br />
Programmi preimpostati<br />
I<br />
T<br />
A<br />
L<br />
I<br />
A<br />
N<br />
O<br />
Sabato - Domenica<br />
PROGRAMMA CONDIZIONAMENTO<br />
Tutti i giorni della settimana<br />
Questi programmi preimpostati possono essere modificati e personalizzati, secondo le<br />
proprie esigenze. Per modificare i parametri preimpostati, seguire le indicazioni<br />
contenute nel paragrafo “Personalizzazione programma giornaliero”.<br />
27
ISTRUZIONI D’IMPIEGO<br />
Giorno della settimana<br />
1: lunedì<br />
Ora 00:00<br />
16 °C<br />
18 °C<br />
Set point temperatura di riscal<strong>da</strong>mento<br />
20 °C<br />
TANTIGELO<br />
5 °C<br />
Set point temperatura di condizionamento<br />
Autoapprendimento<br />
Parametri preimpostati<br />
TPROTEZIONE ALTE TEMPERATURE<br />
24 °C<br />
26 °C<br />
28 °C<br />
35 °C<br />
OFF<br />
Differenziale di regolazione<br />
Riscal<strong>da</strong>mento<br />
Condizionamento<br />
0.2 °C<br />
0.5 °C<br />
Unità di misura temperatura °C<br />
Comportamento alla caduta<br />
e al ripristino dell’alimentazione bus<br />
Alla caduta dell’alimentazione bus il dispositivo non compie nessuna azione.<br />
Ora e <strong>da</strong>ta sono mantenute <strong>da</strong>ll’alimentazione tampone (pile), mentre tutte le altre<br />
impostazioni sono conservate in una memoria non volatile.<br />
Il dispositivo è pienamente operativo entro massimo 5 secondi <strong>da</strong>l ripristino<br />
dell’alimentazione bus.<br />
In assenza dell’alimentazione tampone (pile), al ripristino dell'alimentazione bus il<br />
cronotermostato si riattiva in mo<strong>da</strong>lità OFF.<br />
28
ISTRUZIONI D’IMPIEGO<br />
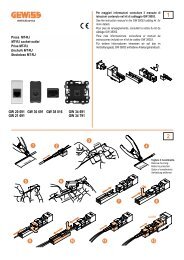
Togliere la vite di fissaggio, che si trova<br />
sotto il coperchietto frontale, e staccare il<br />
cronotermostato <strong>da</strong>lla base di supporto,<br />
seguendo la sequenza illustrata in figura.<br />
Sostituzione pile<br />
UP<br />
I<br />
T<br />
A<br />
L<br />
I<br />
A<br />
N<br />
O<br />
3<br />
2<br />
1<br />
Togliere il coperchietto di chiusura del<br />
vano pile e sostituire le pile esauste con<br />
altre due <strong>da</strong> 1,5 V (tipo AAA), rispettando<br />
le polarità indicate.<br />
29
ISTRUZIONI D’IMPIEGO<br />
Riagganciare il cronotermostato sulla base di supporto,<br />
seguendo la sequenza illustrata in figura, e fissarlo<br />
nuovamente con la vite frontale.<br />
1<br />
2<br />
ATTENZIONE<br />
- Se il cronotermostato non è stato alimentato <strong>da</strong>l bus durante la<br />
sostituzione delle pile, riaggiornare <strong>da</strong>ta e ora.<br />
- Sostituire tutte le pile contemporaneamente.<br />
- Non utilizzare insieme pile vecchie e nuove.<br />
- Utilizzare pile dello stesso tipo (non mischiare pile alcaline con pile allo<br />
zinco carbone).<br />
- Non gettare le pile nel fuoco.<br />
- Le pile sono rifiuti speciali, il cui smaltimento è regolamentato <strong>da</strong> precise<br />
predisposizione di legge, e devono essere conferite agli appositi centri di<br />
raccolta.<br />
Pulizia del cronotermostato<br />
Per pulire il cronotermostato utilizzare un panno asciutto.<br />
30
UP<br />
ISTRUZIONI D’INSTALLAZIONE<br />
ATTENZIONE: l’installazione del dispositivo deve essere effettuata<br />
esclusivamente <strong>da</strong> personale qualificato, seguendo la normativa<br />
vigente e le linee gui<strong>da</strong> per le installazioni KNX/<strong>EIB</strong>.<br />
Per la corretta rilevazione della<br />
temperatura dell’ambiente <strong>da</strong><br />
controllare, il cronotermostato non deve<br />
essere installato in nicchie, vicino a<br />
porte o finestre, accanto a termosifoni o<br />
condizionatori e non deve essere<br />
colpito <strong>da</strong> correnti d’aria e<br />
<strong>da</strong>ll’illuminazione solare diretta.<br />
Corretto posizionamento<br />
I<br />
T<br />
A<br />
L<br />
I<br />
A<br />
N<br />
O<br />
Montaggio della base di supporto<br />
La base di supporto va posta ad una altezza <strong>da</strong> terra di 160 cm circa e può essere fissata<br />
direttamente a <strong>parete</strong>, con dei tasselli, oppure sopra una scatola a 3 posti.<br />
ATTENZIONE Nel fissare la base di supporto rispettare il verso di montaggio indicato<br />
<strong>da</strong>lla freccia .<br />
Montaggio con tasselli<br />
31
ISTRUZIONI D’INSTALLAZIONE<br />
Montaggio su scatola a 3 posti<br />
UP<br />
Avvertenze per l’installazione KNX/<strong>EIB</strong><br />
1. La lunghezza della linea bus tra il cronotermostato <strong>EIB</strong> e l’alimentatore non deve<br />
superare i 350 metri.<br />
2. La lunghezza della linea bus tra il cronotermostato <strong>EIB</strong> e il più lontano dispositivo<br />
KNX/<strong>EIB</strong> <strong>da</strong> coman<strong>da</strong>re non deve superare i 700 metri.<br />
3. Per evitare segnali e sovratensioni non voluti, non <strong>da</strong>r vita se possibile a circuiti ad<br />
anello.<br />
4. Mantenere una distanza di almeno 4 mm tra i cavi singolarmente isolati della linea bus<br />
e quelli della linea elettrica.<br />
230 V<br />
Bus<br />
≥ 4 mm<br />
5. Non <strong>da</strong>nneggiare il conduttore di continuità elettrica della schermatura.<br />
Cavo bus<br />
Schermatura<br />
Conduttore di continuità<br />
elettrica<br />
32
ISTRUZIONI D’INSTALLAZIONE<br />
ATTENZIONE: i cavi di segnale del bus non utilizzati e il conduttore di<br />
continuità elettrica non devono mai toccare elementi sotto tensione o<br />
il conduttore di terra.<br />
Connessioni elettriche<br />
I<br />
T<br />
A<br />
L<br />
I<br />
A<br />
N<br />
O<br />
+ -<br />
+ - bus<br />
Schema delle connessioni elettriche<br />
1. Prima di procedere alla connessione al bus KNX/<strong>EIB</strong>, inserire le pile per la memoria<br />
tampone (vedere paragrafo Sostituzione pile).<br />
2. Connettere il filo rosso del cavo bus al morsetto rosso (+) del terminale e il filo nero<br />
al morsetto nero (-). Al terminale bus si possono collegare fino a 4 linee bus (fili dello<br />
stesso colore nello stesso morsetto).<br />
Connessione dispositivo bus<br />
Connessione cavo bus<br />
3. Isolare lo schermo, il conduttore di continuità elettrica e i rimanenti fili bianco e giallo<br />
del cavo bus (nel caso in cui si utilizzi un cavo bus a 4 conduttori), che non sono<br />
necessari.<br />
33
UP<br />
ISTRUZIONI D’INSTALLAZIONE<br />
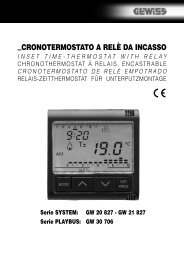
4. Inserire il morsetto bus negli appositi piedini del dispositivo. Il corretto senso di<br />
inserzione è determinato <strong>da</strong>lle guide di fissaggio.<br />
Completamento<br />
Agganciare il cronotermostato sulla base di<br />
supporto, seguendo la sequenza illustrata in<br />
figura, e fissarlo con la vite in dotazione.<br />
2<br />
3<br />
1<br />
34
DATI TECNICI<br />
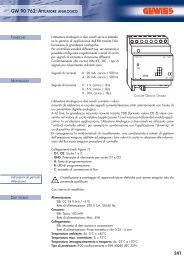
Comunicazione<br />
Bus KNX/<strong>EIB</strong><br />
Alimentazione<br />
Tramite bus KNX/<strong>EIB</strong>, 29 V dc SELV<br />
+ 2 pile alcaline 1,5 V AAA per l’aggiornamento<br />
<strong>da</strong>ta/ora in caso di assenza tensione bus<br />
Assorbimento corrente <strong>da</strong>l bus 5 mA<br />
Cavo bus<br />
KNX/<strong>EIB</strong> TP1<br />
Elementi di comando<br />
1 tasto di miniatura di programmazione<br />
indirizzo fisico<br />
<strong>10</strong> pulsanti di comando e configurazione<br />
Elementi di visualizzazione 1 display LCD retroilluminato a LED (temporizzato<br />
su intervento dell’utente)<br />
1 LED rosso di programmazione indirizzo fisico<br />
Intervallo di visualizzazione 0 ÷ +45 °C<br />
temperatura<br />
Elementi di misura<br />
1 sensore NTC<br />
risoluzione di misura: 0,1 °C<br />
accuratezza di misura: ± 0,5 °C a 20 °C<br />
intervallo tra misurazioni successive: 1 minuto<br />
Intervalli di regolazione temperature TANTIGELO : +2 ÷ +7 °C<br />
TPROTEZIONE ALTE TEMPERATURE : +30 ÷ +40 °C<br />
Altri set point: +5 ÷ +40 °C<br />
Ambiente di utilizzo<br />
Interno, luoghi asciutti<br />
Temperatura di funzionamento -5 ÷ +45 °C<br />
Temperatura di stoccaggio -25 ÷ +70 °C<br />
Umidità relativa<br />
Max 93% (non condensante)<br />
Connessione al bus<br />
Morsetto ad innesto, 2 pin Ø 1 mm<br />
Grado di protezione<br />
IP20<br />
Dimensione (B x H x P)<br />
130 x 92 x 23 mm<br />
Riferimenti normativi<br />
Direttiva bassa tensione 2006/95/CE<br />
Direttiva compatibilità elettromagnetica 89/336/CEE<br />
EN50090-2-2, EN60730-1<br />
Certificazioni<br />
KNX/<strong>EIB</strong><br />
I<br />
T<br />
A<br />
L<br />
I<br />
A<br />
N<br />
O<br />
35
CONTENTS<br />
page<br />
GENERAL INFORMATION<br />
Pack content..................................................................................................... 38<br />
GENERAL DESCRIPTION<br />
Summary ......................................................................................................... 39<br />
Position of the rear control buttons.................................................................... 41<br />
Position of the controls ..................................................................................... 42<br />
Control description............................................................................................ 43<br />
Operation mode ................................................................................................ 44<br />
USER INSTRUCTIONS<br />
Selecting heating/air conditioning ..................................................................... 46<br />
Setting parameters ........................................................................................... 46<br />
Customising the <strong>da</strong>ily programme..................................................................... 55<br />
Temporary temperature forcing ........................................................................ 56<br />
Party Function................................................................................................... 57<br />
Holi<strong>da</strong>y Function .............................................................................................. 58<br />
Copying the holi<strong>da</strong>y programme function ......................................................... 59<br />
Low Battery indicator........................................................................................ 60<br />
Reset and reinstatement of default settings....................................................... 60<br />
Preset programs ............................................................................................... 61<br />
Preset parameters ............................................................................................ 62<br />
Behaviour on the failure and reinstatement of the bus power supply ................. 62<br />
Replacing the batteries ..................................................................................... 63<br />
Cleaning the timer-thermostat ......................................................................... 64<br />
E<br />
N<br />
G<br />
L<br />
I<br />
S<br />
H<br />
INSTALLATION INSTRUCTIONS<br />
Correct installation position............................................................................... 65<br />
Assembly of the support base ........................................................................... 65<br />
Warnings for KMX/<strong>EIB</strong> installations ................................................................... 66<br />
Electrical connections ...................................................................................... 67<br />
Completing installation ..................................................................................... 68<br />
TECHNICAL DATA.................................................................................................. 69<br />
37
GENERAL INFORMATION<br />
Warning! The safety of this appliance is only guaranteed if all the instructions given here<br />
are followed scrupulously. These should be read thoroughly and kept in a safe place.<br />
The Chorus products must be installed in compliance with the requisites of stan<strong>da</strong>rd CEI<br />
64-8 for devices for domestic use and similar, in non-dusty atmospheres and where<br />
special protection against water penetration is not required.<br />
The GEWISS sales organisation is at your disposal for clarifications and technical<br />
information.<br />
<strong>Gewiss</strong> SpA reserves the right to make changes to the product described in this manual<br />
at any time and without giving any notice.<br />
n. 1 <strong>EIB</strong> wall timer-thermostat<br />
n. 1 Support base<br />
n. 1 Bus terminal<br />
n. 1 Installation and user manual<br />
Pack content<br />
38
GENERAL DESCRIPTION<br />
Summary<br />
The wall <strong>EIB</strong> Timer-Thermostat allows you to automatically manage the temperature in<br />
the area it is installed in on a weekly basis. The temperature is regulated by the KNX/<strong>EIB</strong><br />
actuators which are managed by the Building Automation KNX/<strong>EIB</strong> bus and control the<br />
heating or air-conditioning systems.<br />
When combined with wall <strong>EIB</strong> thermostats (<strong>GW</strong><strong>10</strong> 793 - <strong>GW</strong><strong>14</strong> 793 ), it can be used with<br />
master functions to regulate the temperature in zones.<br />
The temperature profiles are defined on a weekly basis. It is possible to programme an<br />
independent time profile for each <strong>da</strong>y of the week, with a 15 minute resolution and<br />
without limits to the <strong>da</strong>ily variations. The timer-thermostat comprises:<br />
• 2 function types: heating and air conditioning;<br />
• 5 operation modes: OFF, Economy, Precomfort, Comfort and Automatic;<br />
• 4 temperature settings for the heating function (TECONOMY, TPRECOMFORT, TCOMFORT,<br />
TFROSTPROTECT.)<br />
• 4 temperature settings for the air conditioning function (TECONOMY, TPRECOMFORT,<br />
TCOMFORT, THIGH TEMPERATURE PROTECTION).<br />
E<br />
N<br />
G<br />
L<br />
I<br />
S<br />
H<br />
The timer-thermostat is powered by the bus line and is fitted with a timed backlit LCD<br />
display, <strong>10</strong> control buttons, an integrated sensor to detect the ambient temperature (the<br />
value of which is sent to the bus), alkaline batteries (AAA) to maintain the <strong>da</strong>te and time<br />
on the display should the power be disconnected from the bus.<br />
39
GENERAL DESCRIPTION<br />
The device is configured by the ETS software to achieve one of the functions listed below.<br />
Temperature control<br />
• with 2 points, ON/OFF commands or constant regulation (0% <strong>10</strong>0%)<br />
• proportional control, with PMW commands or constant regulation (0%÷<strong>10</strong>0%)<br />
Setting the operation mode<br />
• from the bus with separate 1 bit objects (OFF, ECONOMY, PRECOMFORT, COMFORT,<br />
AUTO)<br />
• from the bus with 1 byte objects<br />
Temperature reading<br />
• with integrated sensor or temperature probe<br />
• mixed with definition of the relative weight<br />
Temperature control in zones<br />
• with transmission of the operation mode to the slave thermostats<br />
• with transmission of the set point to the slave thermostats<br />
Scenes<br />
• memorising and activating the 8 scenes (value 0.63)<br />
Other functions:<br />
• setting of the (OFF, ECONOMY, PRECOMFORT, COMFORT) set point by the bus<br />
• setting the function type (heating/air conditioning) by the bus;<br />
• setting of the time and <strong>da</strong>y by the bus<br />
• transmission of the time and <strong>da</strong>y from the bus to the slave thermostats<br />
• transmission to the bus of the status information (mode, type) and the temperature<br />
reading<br />
• management of status information sent from the controlled actuator<br />
The device is installed on the wall using the supplied flange that can be fixed to the wall<br />
using dowels or screwed onto a 3 module flush-mounted box.<br />
40
GENERAL DESCRIPTION<br />
Position of the rear controls<br />
E<br />
N<br />
G<br />
L<br />
I<br />
S<br />
H<br />
Physical address programming LED<br />
Physical address programming button<br />
41
GENERAL DESCRIPTION<br />
Position of the control buttons<br />
The timer-thermostat is fitted with a display, 3 control buttons which are always<br />
accessible and 7 control buttons which can be accessed when the cover is open.<br />
21<br />
22<br />
23<br />
24<br />
25<br />
26<br />
27<br />
28<br />
18<br />
17<br />
20<br />
16<br />
15<br />
<strong>14</strong><br />
19<br />
7<br />
8<br />
13<br />
9<br />
1<br />
2<br />
3<br />
4<br />
5<br />
6<br />
12<br />
11<br />
<strong>10</strong><br />
42
GENERAL DESCRIPTION<br />
1<br />
2<br />
3<br />
4<br />
5<br />
6<br />
7<br />
8<br />
9<br />
<strong>10</strong><br />
11<br />
12<br />
13<br />
<strong>14</strong><br />
15<br />
16<br />
17<br />
18<br />
19<br />
20<br />
21<br />
22<br />
23<br />
24<br />
25<br />
26<br />
27<br />
28<br />
Control description<br />
CONTROL BUTTONS Symbol Page<br />
Programming / setting<br />
Regulating the time<br />
Party 57<br />
Holi<strong>da</strong>y 58<br />
Selecting heating/air conditioning 46<br />
Copy 60<br />
Temperature regulation (+) / select settings<br />
Select operation mode / confirmation<br />
Temperature regulation (-) / select settings<br />
SCREEN SIGNALS<br />
Operation mode<br />
Temperature unit of measurement<br />
Ambient temperature measured<br />
AUTO<br />
°C / °F<br />
44<br />
48<br />
Daily program profile 55<br />
Activation of air-conditioning 45<br />
Activation of heating 45<br />
Thermal differential 53<br />
Clock 48<br />
Day of the week 48<br />
Activation of self-learning function 53<br />
Temperature set-point – operation mode 49<br />
Heating function 45<br />
Parameter setting status<br />
Air conditioning function<br />
SET<br />
46<br />
46<br />
Programming status PROG<br />
53<br />
Holi<strong>da</strong>y Function 58<br />
Low Batteries 60<br />
Copy holi<strong>da</strong>y programme function 59<br />
Party Function 57<br />
E<br />
N<br />
G<br />
L<br />
I<br />
S<br />
H<br />
43
GENERAL DESCRIPTION<br />
Operation Mode<br />
The timer-thermostat has 5 different operation modes:<br />
• AUTOMATIC<br />
• ECONOMY<br />
• PRECOMFORT<br />
• COMFORT<br />
• OFF-FROSTPROTECT./HIGH TEMPERATURE PROTECTION<br />
Use the<br />
key to switch from one mode to another.<br />
When in automatic mode the timer-thermostat uses a<br />
programme that can be customised for each <strong>da</strong>y of the<br />
week.<br />
The message “AUTO”, the measured ambient<br />
temperature and the set point symbol relative to the<br />
current quarter-hour are displayed on the screen.<br />
The column relative to the current time with the<br />
representation of the active set point blinks in the time<br />
profile.<br />
In the economy, precomfort and comfort function<br />
modes the timer-thermostat permanently uses the<br />
corresponding temperature set-points. The current<br />
ambient temperature and the symbol , or<br />
appear on the screen.<br />
MEANING OF<br />
Symbol<br />
Heating<br />
Air conditioning<br />
Set point<br />
Operation<br />
Operation<br />
Set point<br />
mode<br />
mode<br />
TECONOMY Economy TCOMFORT Comfort<br />
TPRECOMFORT Precomfort TPRECOMFORT Precomfort<br />
TCOMFORT Comfort TECONOMY Economy<br />
44
GENERAL DESCRIPTION<br />
The frostprotect. function is only enabled in heating<br />
function mode, when the thermal regulation system is OFF.<br />
In this case the timer-thermostat uses the set frostprotect.<br />
temperature set-point, re-starting the heating system only<br />
when the ambient temperature decreases below<br />
TFROSTPROTECT.<br />
The message OFF and the measured ambient<br />
temperature are displayed on the screen.<br />
The high-temperature protection function is only<br />
enabled in air-conditioning mode, when the thermal<br />
regulation system is OFF.<br />
In this case the timer-thermostat uses the set hightemperature<br />
set-point, re-starting the air-conditioning<br />
system only when the ambient temperature exceeds the<br />
THIGH TEMPERATURE PROTECTION.<br />
The message OFF and the measured ambient<br />
temperature are displayed on the screen.<br />
E<br />
N<br />
G<br />
L<br />
I<br />
S<br />
H<br />
The activation of the heating or air-conditioning functions are indicated as followed:<br />
Heating<br />
The symbol indicates that the activation command has<br />
been sent to the actuator which controls the boiler.<br />
If the load notice has been sent via the ETS and the timerthermostat<br />
does not receive confirmation from the<br />
actuator that the same has been activated, the symbol<br />
starts to flash. Subsequently, the timer-thermostat sends<br />
the activation command again, at one minute intervals,<br />
until it receives a positive response.<br />
Air conditioning<br />
The symbol indicates that the activation command<br />
has been sent to the actuator which controls the airconditioner.<br />
If the load notice has been sent via the ETS<br />
and the timer-thermostat does not receive confirmation<br />
from the actuator that the same has been activated, the<br />
symbol starts to flash. Subsequently, the timerthermostat<br />
sends the activation command again, at one<br />
minute intervals, until it receives a positive response.<br />
45
USER INSTRUCTIONS<br />
Selecting heating/air conditioning<br />
Press the<br />
vice-versa.<br />
key to switch the function modes from heating to air-conditioning and<br />
Heating<br />
The symbol indicates the heating mode.<br />
Air conditioning<br />
The symbol indicates the air-conditioning mode.<br />
Setting parameters<br />
To set the timer-thermostat parameters:<br />
1. use the key to select the function type (heating/air conditioning);<br />
2. Press the key once.<br />
The word SET and the clock appears on the screen, and the <strong>da</strong>y of the week cursor starts<br />
to flash.<br />
According to the function type, it is now possible to sequentially modify:<br />
46
USER INSTRUCTIONS<br />
Day of the week<br />
Hour<br />
Minutes<br />
Temperature unit of measurement<br />
Heating<br />
Air conditioning<br />
P01heat - Set Point<br />
P01cond - Set Point<br />
P02heat - Set Point<br />
P02cond - Set Point<br />
P03heat - Set Point<br />
P03cond - Set Point Ts<br />
P04heat - Set Point TFROSTPROTECT. P04cond - Set Point THIGH TEMPERATURE PROTECTION<br />
P05heat - Control logic<br />
P05cond - Control logic<br />
If the control logic = proportional<br />
P06heat - Cycle time<br />
P06cond - Cycle time<br />
P07heat - Proportional regulation P07cond - Proportional regulation<br />
differential value<br />
differential value<br />
P08 - Minimum percentage value for command sending<br />
(visible if the 1 byte command format is selected via ETS)<br />
E<br />
N<br />
G<br />
L<br />
I<br />
S<br />
H<br />
If the control logic = 2 points<br />
P09heat - 2 point regulation<br />
differential value<br />
P<strong>10</strong>heat - Activation of self-learning function<br />
47<br />
P09cond - 2 point regulation<br />
differential value<br />
P11 Enabling/Disabling of the master function<br />
P12 Day/time sent to the slave devices<br />
P13 Period of <strong>da</strong>y/time sent to the slave devices<br />
P12 PARTY command sent to the slave devices<br />
P12 HOLIDAY command sent to the slave devices<br />
To scroll the sequence, confirming the values displayed on the screen, press the<br />
key until you reach the parameter you want to change.<br />
Press the key again to exit the parameter setting procedure or it will exit<br />
automatically after a 30" time-out.<br />
It is necessary to perform both sequences to set the heating and air-conditioning<br />
parameters (in the second sequence it is possible to confirm the parameters which are<br />
the same, and just change the specific ones).
USER INSTRUCTIONS<br />
Setting the <strong>da</strong>y of the week<br />
When the <strong>da</strong>y of week bar is blinking, select the current<br />
<strong>da</strong>y using the keys.<br />
Press the key within 30 seconds to confirm the value<br />
set.<br />
Setting the hour<br />
When the hour figures blink, set the hour using the<br />
keys.<br />
Press the key within 30 seconds to confirm the value<br />
set.<br />
Setting the minutes<br />
When the minutes figures blink, set the minutes using the<br />
keys.<br />
Press the key within 30 seconds to confirm the value<br />
set.<br />
Setting the temperature unit of measurement<br />
When the temperature symbols °C or °F starts to blink,<br />
select the temperature unit of measurement using the<br />
keys.<br />
Press the key within 30 seconds to confirm the value<br />
set.<br />
48
USER INSTRUCTIONS<br />
P01heat - Set Point setting (heating)<br />
The temperature value starts to blink when the<br />
symbol appears. Regulate the value (TECONOMY) using<br />
the keys.<br />
Press the key within 30 seconds to confirm the value<br />
set.<br />
P01cond - Set Point setting (air conditioning)<br />
The temperature value starts to blink when the<br />
symbol appears. Regulate the value (TCOMFORT) using<br />
the keys.<br />
Press the key within 30 seconds to confirm the value<br />
set.<br />
E<br />
N<br />
G<br />
L<br />
I<br />
S<br />
H<br />
P02heat - Set Point setting (heating)<br />
The temperature value starts to blink when the<br />
symbol appears. Regulate the value (Tprecomfort)<br />
using the keys.<br />
Press the key within 30 seconds to confirm the value<br />
set.<br />
P02cond - Set Point setting (air conditioning)<br />
The temperature value starts to blink when the<br />
symbol appears. Regulate the value (TPRECOMFORT)<br />
using the keys.<br />
Press the key within 30 seconds to confirm the value<br />
set.<br />
49
USER INSTRUCTIONS<br />
P03heat - Set Point setting (heating)<br />
The temperature value starts to blink when the<br />
symbol appears. Regulate the value (TCOMFORT) using<br />
the keys.<br />
Press the key within 30 seconds to confirm the value<br />
set.<br />
P03cond - Set Point setting (air conditioning)<br />
The temperature value starts to blink when the<br />
symbol appears. Regulate the value (TECONOMY) using<br />
the buttons.<br />
Press the key within 30 seconds to confirm the value<br />
set.<br />
P04heat - Set frostprotect. temperature value<br />
The temperature value starts to blink when the<br />
symbol appears. Regulate the frostprotect. temperature<br />
value using the buttons.<br />
Press the key within 30 seconds to confirm the value<br />
set.<br />
P04cond - Set high temperature protection value<br />
The temperature value starts to blink when the<br />
symbol appears. Regulate the high temperature protection<br />
value using the buttons.<br />
Press key within 30 seconds to confirm the value set.<br />
WARNING!<br />
The set-point values have the following limits:<br />
- Heating<br />
TFROSTPROTECT<br />
- Air conditioning<br />
THIGH TEMPERATURES PROTECTION<br />
50
USER INSTRUCTIONS<br />
P05 - Control logic<br />
When the P05 code appears on the screen, set the thermal<br />
regulation control logic using the keys<br />
(00 = 2 point control, 01 = proportional control).<br />
Press the key within 30 seconds to confirm the value<br />
set.<br />
It is possible to set different control logics for the heating<br />
and air-conditioning functions.<br />
If you select a 2 point control, move on to point P09, for<br />
proportional control move on to point P06.<br />
2 POINT CONTROL<br />
The thermal regulation system is switched off when the<br />
room temperature is equal to the set point, and is switched<br />
back when:<br />
- the temperature is equal to or lower than the set point -<br />
for heating;<br />
- the temperature is equal to or higher than the set point +<br />
for air-conditioning;<br />
The diagrams below show the two function types.<br />
HEATING<br />
E<br />
N<br />
G<br />
L<br />
I<br />
S<br />
H<br />
set point<br />
T<br />
AIR CONDITIONING<br />
set point<br />
If the command format selected via ETS is 1 bit, the timerthermostat<br />
sends ON/OFF commands; if the command<br />
format selected via ETS is 1 byte, the timer-thermostat<br />
sends 0% or <strong>10</strong>0% values.<br />
51<br />
T
USER INSTRUCTIONS<br />
PROPORTIONAL CONTROL<br />
At the end of each cycle time, the timer-thermostat<br />
checks the ambient temperature and, according to the<br />
differences recorded compared to the set point setting, it<br />
modulates the activation or deactivation of the boiler<br />
(PMW) or it sends a 1 byte command (continuous control)<br />
to control the heating or cooling element, according to the<br />
command selected by ETS (1 bit or 1 byte).<br />
P06 - Setting the cycle time<br />
When the P06 code appears on the screen, set the cycle<br />
time using the keys.<br />
The values available are as follows: 5,<strong>10</strong>,20,30,40,50,60<br />
minutes. It is possible to set different cycle times for the<br />
heating and air-conditioning functions.<br />
Press the key within 30 seconds to confirm the value<br />
set.<br />
P07 - Setting the proportional regulation differential<br />
value<br />
When the P07 code appears on the screen, set the<br />
PMW regulation differential value using the keys.<br />
Possible values: from 0.4 °C to 3.2 °C with a pitch of<br />
0.4 °C.<br />
It is possible to set different regulation differentials for the<br />
heating and air-conditioning functions. Press the key<br />
within 30 seconds to confirm the value set.<br />
If a 1 bit value has been selected as the control value<br />
when configuring with ETS, move on to point P11,<br />
otherwise move on to point P08.<br />
P08 - Minimum percentage value to send the command<br />
When the P08 code appears on the screen, set the<br />
percentage resolution to send to the command to the<br />
thermal regulation control device. The values available<br />
are as follows: 5%, <strong>10</strong>%, 20%.<br />
Press the key within 30 seconds to confirm the value<br />
set.<br />
52
USER INSTRUCTIONS<br />
P09 - Setting the 2 point regulation differential value<br />
When the symbol appears, set the differential<br />
regulation value using the keys.<br />
Press the key within 30 seconds to confirm the value<br />
set.<br />
The regulation differential is the deviance between the<br />
set-point setting and the actual activation temperature. It<br />
is possible to set different regulation differentials for the<br />
heating and air-conditioning functions. It is recommended<br />
to retain the preset values except in special situations.<br />
P<strong>10</strong> - Enabling self-learning (heating only)<br />
When the symbol appears on the screen, use the<br />
keys to enable (ON) or disable (OFF) the function.<br />
Press the key within 30 seconds to confirm the value<br />
set.<br />
E<br />
N<br />
G<br />
L<br />
I<br />
S<br />
H<br />
The self-learning function optimises the activation of the<br />
heating in advance (max 2 hours).<br />
The timer-thermostat manages the advance automatically,<br />
so as to guarantee the set temperature at the beginning of<br />
every period of the programmed profile.<br />
This function is activated in heating, in automatic<br />
operation mode only.<br />
The following parameters are only significant if the timer-thermostat has been configured<br />
via ETS to function as the master device. In all other cases they will be ignored.<br />
P11 - Enabling/Disabling of the master function<br />
When the P11 code appears on the screen, it is possible<br />
to momentarily deactivate the master function mode and<br />
activate the stand alone function mode (01 = master<br />
function mode, 00 = stand alone function mode).<br />
Press the key within 30 seconds to confirm the value<br />
set. If the master function mode has been selected, move<br />
on to point P12, otherwise the procedure has now been<br />
completed.<br />
53
USER INSTRUCTIONS<br />
P12 - Sending <strong>da</strong>y/time to the slave devices<br />
When the P12 code appears on the screen, it is possible<br />
to define when the timer-thermostat should send the <strong>da</strong>te<br />
and time to align these parameters in the slave devices.<br />
(00 = the message is never sent, 01 = the message is<br />
only sent when the power supply returns, 02 = the<br />
message is only sent when the set time changes, 03<br />
= the message is sent when the power supply returns<br />
or when the set time changes, 04 = the message is<br />
sent when the power supply returns, when the set<br />
time changes and at the frequency indicated in P13).<br />
Press the key within 30 seconds to confirm the value<br />
set.<br />
If the 04 option has been selected, move on to point P13,<br />
otherwise move on to point P<strong>14</strong>.<br />
P13 - Day/time sending period<br />
When the P13 code appears on the screen, it is possible<br />
to set the sending period for the <strong>da</strong>te and time to align<br />
these parameters in the slave devices etc.<br />
(00 = every 6 hours, 01 = every 12 hours, 02 = every<br />
24 hours, 03 = every week).<br />
Press the key within 30 seconds to confirm the value<br />
set.<br />
P<strong>14</strong> - Sending the PARTY command to the slave devices<br />
When the P<strong>14</strong> code appears on the screen, it is possible<br />
to use the keys to enable (ON) or disable (OFF) the<br />
extension of the PARTY command to the slave devices to<br />
the timer-thermostat.<br />
Press the key within 30 seconds to confirm the value<br />
set.<br />
54
USER INSTRUCTIONS<br />
P15 - Sending the HOLIDAY command to the slave<br />
devices<br />
When the P15 code appears on the screen, it is possible<br />
to use the keys to enable (ON) or disable (OFF)<br />
the extension of the HOLIDAY command to the slave<br />
devices to the timer-thermostat. Press the key<br />
within 30 seconds to confirm the value set.<br />
The parameter setting procedure has now been completed.<br />
Press the key to return to normal operating mode.<br />
Customising the <strong>da</strong>ily programme<br />
To customise the preset <strong>da</strong>ily programme, or modify the settings, press the<br />
twice.<br />
key<br />
E<br />
N<br />
G<br />
L<br />
I<br />
S<br />
H<br />
The message “PROG” is displayed on the screen, while<br />
the bar of the first <strong>da</strong>y of the week starts to blink.<br />
Select the required <strong>da</strong>y using the keys.<br />
Press the key within 30 seconds to confirm the<br />
selection.<br />
After confirmation of the <strong>da</strong>y, the current profile, relative<br />
to the <strong>da</strong>y selected, is displayed on the screen. The time<br />
will start to blink.<br />
Follow the steps below to customise the settings:<br />
1 - select the starting time for the change in temperature<br />
2 - set the new temperature set point<br />
3 - completing the customisation process<br />
1 - select the starting time for the change in<br />
temperature<br />
Use the keys to modify the time until the time for<br />
modifying the proposed profile is reached: the column<br />
relative to the time selected will blink during the<br />
increment of the time profile. The time is<br />
decremented/incremented in steps of 15 minutes each<br />
time the keys are pressed, so it is possible to<br />
define up to 4 programming periods each hour.<br />
55
USER INSTRUCTIONS<br />
2 - setting the new temperature set point<br />
The current set point value is indicated on the screen by<br />
the symbol , or .<br />
The keys are then used to select the new set point,<br />
which will be applied to the time profile up to the next<br />
variation present in the program.<br />
3 - Completing the customisation process<br />
After repeating steps 1 and 2 to reach the desired<br />
temperature hour profile, it is possible to:<br />
- copy the programme to the next <strong>da</strong>y and confirm the<br />
performed programming phase by pressing the<br />
key within 30 seconds, or<br />
- confirm the performed programming without copying it,<br />
by pressing the key within 30 seconds (this moves<br />
the programming on to the next <strong>da</strong>y automatically).<br />
Press the<br />
key on completion of weekly programming to return to normal operation.<br />
To activate the program, select AUTO operation mode by pressing the<br />
message AUTO is displayed on the screen.<br />
key until the<br />
Temporary temperature forcing<br />
It is possible to temporarily force the active temperature set point in AUTO,<br />
Economy, Precomfort and Comfort operation modes by using the keys to set<br />
the required value.<br />
Confirm the new value by pressing the key or waiting for 5 seconds.<br />
The word AUTO will flash on the screen to indicate forcing<br />
is enabled or, in the other cases, when , or<br />
flashes. The forcing of the AUTO operation mode remains<br />
active until the next variation in the temperature time<br />
profile.<br />
56
USER INSTRUCTIONS<br />
Party Function<br />
When in AUTO, Economy, Precomfort and Comfort mode the Party function allows you to<br />
temporarily exclude the set operation mode and enable the comfort mode with an<br />
adjustable set point, for a period of time of from 1 – 23 hours.<br />
This function can be used, for instance, to set a more comfortable temperature during a<br />
dinner or a party etc.<br />
Press the key twice to enable the function.<br />
The symbol appears on the screen, whilst the set<br />
point value flashes.<br />
Use the keys to set the desired temperature.<br />
Use the keys to set the number of hours for which<br />
the Party function should be enabled, which is then<br />
indicated in the top left hand corner of the screen.<br />
Press the key or wait 5 seconds to confirm the<br />
setting made.<br />
E<br />
N<br />
G<br />
L<br />
I<br />
S<br />
H<br />
When the function is enabled, it is possible to change the set point value pressing the<br />
keys and the activation period using the keys.<br />
The count of the hours is decremented during operation.<br />
The Party function remains active until the set period elapses.<br />
When the set time expires, the Party function is automatically disabled and the timerthermostat<br />
returns to its regular operation mode.<br />
Press the key to disable the Party function before the expiry time.<br />
57
USER INSTRUCTIONS<br />
Holi<strong>da</strong>y Function<br />
When in AUTO, Economy, Precomfort and Comfort mode the Holi<strong>da</strong>y function allows you<br />
to temporarily exclude the set operation mode and enable the Economy mode with an<br />
adjustable set point, for a period of time of from 1 – 99 <strong>da</strong>ys.<br />
This function can be used, for instance, to set the thermal regulation system so it runs<br />
economically during a holi<strong>da</strong>y period, or during a prolonged period of absence, and<br />
adjusts the settings the <strong>da</strong>y you return.<br />
Press the key twice to enable the function.<br />
The symbol appears on the screen, whilst the<br />
set point value flashes.<br />
Use the keys to set the desired temperature.<br />
Use the keys to set the number of <strong>da</strong>ys for which<br />
the Holi<strong>da</strong>y function should be enabled, which is then<br />
indicated in the top left hand corner of the screen.<br />
Press the key or wait 5 seconds to confirm the<br />
setting made.<br />
When the function is enabled, it is possible to change the set point value pressing the<br />
keys and the activation period using the keys.<br />
The count of the <strong>da</strong>ys is decremented during operation.<br />
The Holi<strong>da</strong>y function remains on until the set expiry <strong>da</strong>te, which ends at midnight. When<br />
calculating the number of <strong>da</strong>y, always include the current <strong>da</strong>y.<br />
For instance, if you want to set the Holi<strong>da</strong>y function on Fri<strong>da</strong>y evening so that it ends on<br />
Sun<strong>da</strong>y at midnight, you should set 3 <strong>da</strong>ys (Fri<strong>da</strong>y, Satur<strong>da</strong>y and Sun<strong>da</strong>y).<br />
When the set time expires, the Holi<strong>da</strong>y function is automatically disabled and the timerthermostat<br />
returns to its regular operation mode.<br />
Press the key to disable the Holi<strong>da</strong>y function before the expiry time.<br />
58
USER INSTRUCTIONS<br />
Copying the holi<strong>da</strong>y programme function<br />
In AUTO mode it is possible to copy the holi<strong>da</strong>y profile (7) to any other <strong>da</strong>y of the week.<br />
This function can be activated up to 6 <strong>da</strong>ys before the selected <strong>da</strong>y.<br />
This function is particularly useful when, for instance, there is a <strong>da</strong>y’s holi<strong>da</strong>y during<br />
the week.<br />
Press the key to copy the holi<strong>da</strong>y profile.<br />
The symbol and the holi<strong>da</strong>y <strong>da</strong>y cursor will flash on<br />
the display.<br />
Use the keys to select the <strong>da</strong>y of the week to<br />
which the holi<strong>da</strong>y profile should be copied.<br />
Press the key or wait 30 seconds to confirm the<br />
setting made.<br />
E<br />
N<br />
G<br />
L<br />
I<br />
S<br />
H<br />
When the function is enabled, press the key to view<br />
the <strong>da</strong>y to which the holi<strong>da</strong>y profile was copied; the<br />
corresponding cursor will flash on the display.<br />
If you wish to disable the function, press the again;<br />
if you wish to change the <strong>da</strong>y of the week, use the<br />
keys and press the key, or wait 30 seconds,<br />
to confirm the new settings.<br />
During the <strong>da</strong>y the symbol indicator light is always<br />
ON.<br />
The validity of the holi<strong>da</strong>y copy function is temporary; at<br />
midnight of the selected <strong>da</strong>y the system returns to the<br />
normal weekly profile programme.<br />
59
USER INSTRUCTIONS<br />
Low Battery indicator<br />
When the batteries are low and there is not bus power<br />
the symbol will start to flash on the screen. The<br />
temperature indications also disappear from the screen<br />
and it is necessary to replace the batteries as soon as<br />
possible.<br />
When the symbol is ON with a fixed light, it is<br />
essential to replace them immediately.<br />
The batteries are only used to preserve the time and <strong>da</strong>te<br />
settings when there is no bus KNX/<strong>EIB</strong> power (all the other<br />
settings are stored in the non-volatile memory).<br />
When the bus power is present it will always function<br />
even without batteries.<br />
Reset and reinstatement of default settings<br />
Press the , and keys all together to completely rest the timer-thermostat.<br />
Caution: all the previously set parameters and customised programmes will be<br />
cancelled.<br />
When it is turned back on, the timer-thermostat will use the default factory settings. The<br />
timer-thermostat will be set to heating, in OFF mode and the Party and Holi<strong>da</strong>y functions<br />
will not be enabled.<br />
60
USER INSTRUCTIONS<br />
The timer-thermostat has 2 preset programs, one for heating and one for air<br />
conditioning.<br />
HEATING PROGRAM<br />
Mon<strong>da</strong>y - Fri<strong>da</strong>y<br />
Preset programs<br />
Satur<strong>da</strong>y - Sun<strong>da</strong>y<br />
E<br />
N<br />
G<br />
L<br />
I<br />
S<br />
H<br />
AIR CONDITIONING PROGRAM<br />
Every <strong>da</strong>y of the week<br />
These preset programs can be modified and personalised according to one’s own<br />
requirements. To change the preset parameters, follow the instructions provided in the<br />
“Customising the <strong>da</strong>ily programme” paragraph.<br />
61
USER INSTRUCTIONS<br />
Day of the week<br />
1: Mon<strong>da</strong>y<br />
Hour 00:00<br />
16 °C<br />
18 °C<br />
Heating temperature set-point<br />
20 °C<br />
TFROSTPROTECT<br />
5 °C<br />
Air-conditioning temperature set-point<br />
Self-learning<br />
Preset parameters<br />
THIGH TEMPERATURE PROTECTION<br />
24 °C<br />
26 °C<br />
28 °C<br />
35 °C<br />
OFF<br />
Differential regulation<br />
Heating<br />
Air conditioning<br />
0.2 °C<br />
0.5 °C<br />
Temperature unit of measurement °C<br />
Behaviour on the failure and reinstatement<br />
of the bus power supply<br />
When the bus power supply fails, the device performs no actions. The time and <strong>da</strong>te are<br />
maintained by the buffer power system (batteries) whilst all the other settings are saved<br />
to a non-volatile memory. The device is in full operating mode within a maximum of 5<br />
seconds from reinstatement of the bus power supply.<br />
If the buffer power (battery) is absent, the timer-thermostat will restart in OFF mode when<br />
the bus power is reinstated.<br />
62
USER INSTRUCTIONS<br />
Replacing the batteries<br />
Remove the fastener screws which are<br />
under the front cover, and remove the<br />
timer-thermostat from the support base,<br />
as seen in the figure below.<br />
UP<br />
2<br />
3<br />
1<br />
E<br />
N<br />
G<br />
L<br />
I<br />
S<br />
H<br />
Remove the battery holder cover and<br />
replace the dead batteries with another<br />
two 1.5 V (AAA) batteries, paying attention<br />
to the direction of the poles.<br />
63
USER INSTRUCTIONS<br />
Replace the timer-thermostat on the support base, as<br />
seen in the figure below, and fix it in place using the<br />
supplied screws.<br />
1<br />
2<br />
WARNING:<br />
- If the timer-thermostat was not powered by the bus whilst replacing the<br />
battery, up<strong>da</strong>te the time and <strong>da</strong>te.<br />
- Replace all the batteries at the same time.<br />
- Never use old and new batteries together.<br />
- Always use the same type of batteries (do not mix alkaline and carbon<br />
zinc batteries).<br />
- Never throw the batteries into a fire.<br />
- The batteries are a special waste product and therefore they must be<br />
disposed of according to the laws in force and taken to a special collection<br />
centre.<br />
Cleaning the timer-thermostat<br />
Use a dry cloth to clean the timer-thermostat.<br />
64
UP<br />
INSTALLATION INSTRUCTIONS<br />
WARNING: the installation of the device must be exclusively done by<br />
qualified personnel, following the regulations in force and the<br />
guidelines for KNX/<strong>EIB</strong> installations.<br />
In order for the timer-thermostat to<br />
take correct readings of the ambient<br />
temperature, it must not be installed in<br />
an alcove, near a door or window, next<br />
to radiators or air conditioner units and<br />
must not be placed in direct sunlight<br />
or in draughty areas.<br />
Correct installation position<br />
E<br />
N<br />
G<br />
L<br />
I<br />
S<br />
H<br />
Assembly of the support base<br />
The support base should be positioned at 160 cm from the ground and can be mounted<br />
on the wall, using dowels, or on top of a 3-place box.<br />
WARNING : When mounting the support base, make sure you follow the directions<br />
indicated by the arrow .<br />
Mounting with dowels<br />
65
INSTALLATION INSTRUCTIONS<br />
Mounting on a 3-place box<br />
UP<br />
Warnings for KNX/<strong>EIB</strong> installations<br />
1. The length of the bus line between the <strong>EIB</strong> timer-thermostat and the power supply unit<br />
must not exceed 350 metres.<br />
2. The length of the bus line between the <strong>EIB</strong> timer-thermostat and the most distant<br />
KNX/<strong>EIB</strong> device must not exceed 700 metres.<br />
3. If possible do not create ring circuits so as to prevent undesirable signals and<br />
overloads.<br />
4. Keep a distance of at least 4mm between the individually insulated cables of the bus<br />
line and those of the electric line.<br />
230 V<br />
Bus<br />
≥ 4 mm<br />
5. Do not <strong>da</strong>mage the electrical continuity conductor of the shielding.<br />
Bus cable<br />
Shield<br />
Electrical continuity<br />
conductor<br />
66
INSTALLATION INSTRUCTIONS<br />
WARNING: the unused bus signal cables and the electrical continuity<br />
conductor must never touch elements under power or the earth<br />
conductor.<br />
Electrical connections<br />
+ -<br />
E<br />
N<br />
G<br />
L<br />
I<br />
S<br />
H<br />
+ - bus<br />
Electrical connections diagram<br />
1. Before connecting the KNX/<strong>EIB</strong> bus, insert the buffer memory batteries (see Replacing<br />
the Batteries paragraph).<br />
2. Connect the bus cable’s red wire to the terminal’s red connector (+) and the black wire<br />
to the black connector (-). Up to 4 bus lines (wires of the same colour in the same<br />
connector) can be connected to the bus terminal.<br />
Bus device connection<br />
Bus cable connection<br />
3. Insulate the screen, the electrical continuity conductor and the remaining white and<br />
yellow wires of the bus cable (should a bus cable with 4 conductors be used), which<br />
are not needed.<br />
67
UP<br />
INSTALLATION INSTRUCTIONS<br />
4. Insert the bus connector into the special feet of the device. The fastener guides<br />
determine the direction it should be inserted.<br />
Completing installation<br />
Position the timer-thermostat on the support<br />
base, as seen in the figure below, and fix it in<br />
place using the supplied screws.<br />
2<br />
3<br />
1<br />
68
TECHNICAL DATA<br />
Communication<br />
KNX/<strong>EIB</strong> Bus<br />
Power Supply<br />
By KNX/<strong>EIB</strong> Bus, 29 V dc SELV<br />
+ 2 1.5 V AAA Alkaline batteries to up<strong>da</strong>te <strong>da</strong>te<br />
and time when there is a bus power failure<br />
Bus current consumption 5mA<br />
Bus cable<br />
KNX/<strong>EIB</strong> TP1<br />
Control elements<br />
1 mini physical address programming key,<br />
<strong>10</strong> command and configuration buttons<br />
Display elements<br />
1 LED backlit LCD display (timed to user<br />
intervention),<br />
1 red physical address programming LED<br />
Temperature display range 0 ÷ +45 °C<br />
Reading elements<br />
1 NTC sensor<br />
read resolution: 0.1 °C<br />
read accuracy: ± 0.5 °C to 20 °C<br />
intervals between the next readings: 1 minute<br />
Temperature regulation ranges TFROSTPROTECT.: +2 ÷ +7 °C<br />
THIGH TEMPERATURE PROTECTION +30 ÷ +40 °C<br />
Other set points: +5 ÷ +40 °C<br />
Ambit of use<br />
Indoors, dry places<br />
Operating temperature -5 ÷ +45 °C<br />
Storage temperature -25 ÷ +70 °C<br />
Relative humidity<br />
Max 93% (no condensation)<br />
Bus connection<br />
Slot in terminal, 2 pin Ø 1 mm<br />
Protection rating<br />
IP20<br />
Size (L x H x W)<br />
130 x 92 x 23 mm<br />
Reference stan<strong>da</strong>rds<br />
Low Voltage Stan<strong>da</strong>rd 2006/95/CE<br />
Electromagnetic Compatibility Stan<strong>da</strong>rd 89/336/CEE<br />
EN50090-2-2, EN60730-1<br />
Certifications<br />
KNX/<strong>EIB</strong><br />
E<br />
N<br />
G<br />
L<br />
I<br />
S<br />
H<br />
69
SOMMAIRE<br />
page<br />
AVERTISSEMENTS GÉNÉRAUX<br />
Contenu de la confection : ................................................................................... 72<br />
DESCRIPTION GENERALE<br />
En bref ............................................................................................................. 73<br />
Position des commandes postérieures ........................................................... 75<br />
Position des commandes ................................................................................. 76<br />
Description des commandes ............................................................................ 77<br />
Modes de fonctionnement................................................................................. 78<br />
INSTRUCTIONS D'UTILISATION<br />
Sélection chauffage/climatisation..................................................................... 80<br />
Programmation des paramètres ....................................................................... 80<br />
Personnalisation du programme journalier ........................................................ 89<br />
Forçage temporaire de la température ............................................................. 90<br />
Fonction Party................................................................................................... 91<br />
Fonction Holi<strong>da</strong>y .............................................................................................. 92<br />
Copie du programme jours de fête ................................................................... 93<br />
Signalisation piles en cours d’épuisement......................................................... 94<br />
Reset et rétablissement des valeurs préréglées................................................. 94<br />
Programmes prédéfinis..................................................................................... 95<br />
Paramètres préréglés........................................................................................ 96<br />
Comportement à la chute et au rétablissement de l’alimentation bus ................ 96<br />
Remplacement des piles................................................................................... 97<br />
Nettoyage du chronothermostat ...................................................................... 98<br />
INSTRUCTIONS POUR L’INSTALLATION<br />
Positionnement correct ..................................................................................... 99<br />
Montage de la base de support ......................................................................... 99<br />
Avertissements pour l’installation KMX/<strong>EIB</strong> ....................................................... <strong>10</strong>0<br />
Connexions électriques .................................................................................... <strong>10</strong>1<br />
Achèvement ..................................................................................................... <strong>10</strong>2<br />
DONNÉES TECHNIQUES ........................................................................................ <strong>10</strong>3<br />
F<br />
R<br />
A<br />
N<br />
Ç<br />
A<br />
I<br />
S<br />
71
AVERTISSEMENTS GÉNÉRAUX<br />
Attention ! La sécurité de l'appareil n'est garantie que si les instructions indiquées ici<br />
sont respectées. Il est donc nécessaire de les lire et de bien les conserver. Les produits<br />
de la gamme Chorus doivent être installés conformément aux dispositions de la norme<br />
CEI 64-8 pour les appareils à usage ménager et similaires, <strong>da</strong>ns des environnements<br />
non poussiéreux et là où il n’est pas nécessaire de mettre en place une protection<br />
spéciale contre la pénétration de l’eau. L’organisation de vente de la Société GEWISS est<br />
à votre disposition pour tous éclaircissements et toutes informations techniques.<br />
<strong>Gewiss</strong> SpA se réserve le droit de faire des modifications sur le produit décrit <strong>da</strong>ns ce<br />
manuel à n’importe quel moment et sans aucun préavis.<br />
n. 1 Chronothermostat <strong>EIB</strong> mural<br />
n. 1 Base de support<br />
n. 1 Borne bus<br />
n. 1 Manuel d’installation et d’emploi<br />
Contenu de la confection<br />
72
DESCRIPTION GENERALE<br />
En bref<br />
Le Chronothermostat <strong>EIB</strong> – mural permet de gérer automatiquement, sur base<br />
hebdoma<strong>da</strong>ire, la température de la pièce où il est installé. Le chronothermostat effectue<br />
le réglage de la température en comman<strong>da</strong>nt, par le biais du bus KNX/<strong>EIB</strong> du système<br />
de Building Automation, les actionneurs KNX/<strong>EIB</strong> qui contrôlent l’installation de chauffage<br />
ou de climatisation.<br />
On peut l’utiliser, en union avec les Thermostats <strong>EIB</strong> - muraux (<strong>GW</strong><strong>10</strong> 793 - <strong>GW</strong><strong>14</strong> 793),<br />
avec la fonction master, pour le réglage de la température par zones.<br />
Les profils de température sont définis sur une base hebdoma<strong>da</strong>ire. Pour chaque jour de<br />
la semaine il est possible de programmer un profil horaire indépen<strong>da</strong>nt, avec une<br />
résolution de 15 minutes, et sans limites de variations quotidiennes.<br />
Le chronothermostat prévoit :<br />
• 2 types de fonctionnement : chauffage et climatisation ;<br />
• 5 modes de fonctionnement : OFF, Economie, Préconfort, Confort et Automatique ;<br />
• 4 températures de réglage pour le chauffage (TÉCONOMIE, TPRÉCONFORT, TCONFORT, TANTIGEL) ;<br />
• 4 températures de réglage pour la climatisation (TÉCONOMIE, TPRÉCONFORT, TCONFORT,<br />
TANTIGEL) ;<br />
Le chronothermostat est alimenté par la ligne bus et est équipé d'afficheur LCD avec<br />
rétro-éclairage temporisé, <strong>10</strong> boutons de commande, un capteur intégré pour la détection<br />
de la température ambiante (dont la valeur peut être envoyée sur le bus), piles alcalines<br />
(AAA, non comprises <strong>da</strong>ns la fourniture) pour le maintien de la <strong>da</strong>te et de l'heure en cas<br />
de chute de la tension du bus.<br />
F<br />
R<br />
A<br />
N<br />
Ç<br />
A<br />
I<br />
S<br />
73
DESCRIPTION GENERALE<br />
Le dispositif est configuré avec le logiciel ETS pour réaliser les fonctions suivantes :<br />
Contrôle de la température<br />
• à 2 points, avec les commandes MARCHE/ARRET ou par réglage continu (0% /<strong>10</strong>0%)<br />
• contrôle proportionnel, avec les commandes PWM ou par réglage continu (0%<br />
4-<strong>10</strong>0%)<br />
Programmation du mode de fonctionnement<br />
• par bus avec objets distincts à 1 bit (ARRET, ECONOMIE, PRECONFORT, CONFORT, AUTO)<br />
• par bus avec objet à un byte<br />
Mesure de la température<br />
• avec capteur intégré ou sonde de température<br />
• mixte avec définition du poids relatif<br />
Contrôle de la température par zones<br />
• avec transmission du mode de fonctionnement vers les thermostats slave<br />
• avec transmission du set point vers les thermostats slave<br />
Scénarios<br />
• mémorisation et activation de 8 scénarios (valeur 0.63)<br />
Autres fonctions<br />
• programmation du set point (ARRET, ECONOMIE, PRECONFORT, CONFORT) par le bus<br />
• programmation du type de fonctionnement (chauffage / climatisation) par le bus<br />
• programmation du jour et de l’heure par le bus<br />
• transmission du jour et de l’heure sur le bus vers les thermostats slave<br />
• transmission sur le bus des informations d’état (mode, type) et de la température<br />
mesurée<br />
• gestion de l’informations d’état provenant de l’actionneur commandé<br />
On installe le dispositif au mur en utilisant la bride fournie, qui peut être fixée au mur avec<br />
des chevilles ou bien vissée au-dessus d’une boîte encastrable à 3 modules.<br />
74
DESCRIPTION GENERALE<br />
Position des commandes postérieures<br />
LED de programmation adresse physique<br />
Touche de programmation adresse physique<br />
F<br />
R<br />
A<br />
N<br />
Ç<br />
A<br />
I<br />
S<br />
75
DESCRIPTION GENERALE<br />
Position des commandes<br />
Le chronothermostat est muni d’un afficheur, de 3 boutons de commande toujours<br />
accessibles, et de 7 boutons de commande accessibles quand le volet est ouvert.<br />
21<br />
22<br />
23<br />
24<br />
25<br />
26<br />
27<br />
28<br />
18<br />
17<br />
20<br />
16<br />
15<br />
<strong>14</strong><br />
19<br />
7<br />
8<br />
13<br />
9<br />
1<br />
2<br />
3<br />
4<br />
5<br />
6<br />
12<br />
11<br />
<strong>10</strong><br />
76
DESCRIPTION GENERALE<br />
Description des commandes<br />
1<br />
2<br />
3<br />
4<br />
5<br />
6<br />
7<br />
8<br />
9<br />
BOUTONS DE COMMANDE Symbole page<br />
Programmation / réglage<br />
Réglage du temps<br />
Party 91<br />
Holi<strong>da</strong>y 92<br />
Sélection chauffage / climatisation 80<br />
Copier 93<br />
Réglage de la température (+) / Sélection des paramètres<br />
Sélection du mode de fonctionnement / confirmation<br />
Réglage de la température (-) / Sélection des paramètres<br />
<strong>10</strong><br />
11<br />
12<br />
13<br />
<strong>14</strong><br />
15<br />
16<br />
17<br />
18<br />
19<br />
20<br />
21<br />
22<br />
23<br />
24<br />
25<br />
26<br />
27<br />
28<br />
SIGNALISATIONS SUR L’AFFICHEUR<br />
Modes de fonctionnement<br />
Unité de mesure température<br />
Température ambiante mesurée<br />
AUTO<br />
°C / °F<br />
78<br />
82<br />
Profil du programme journalier 89<br />
Activation climatisation 79<br />
Activation chauffage 79<br />
Différentiel thermique 87<br />
Horloge 82<br />
Jour de la semaine 82<br />
Activation fonction autoapprentissage 87<br />
Set-point température – Mode de fonctionnement 83<br />
Fonctionnement en chauffage 79<br />
Etat définition des paramètres<br />
Fonctionnement en climatisation<br />
SET 80<br />
80<br />
Etat programmation PROG 87<br />
Fonction Holi<strong>da</strong>y 92<br />
Piles épuisées 94<br />
Fonction copier programme jour de fête 93<br />
Fonction Party 91<br />
F<br />
R<br />
A<br />
N<br />
Ç<br />
A<br />
I<br />
S<br />
77
DESCRIPTION GENERALE<br />
Modes de fonctionnement<br />
Le chronothermostat prévoit 5 modes de fonctionnement différents :<br />
• AUTOMATIQUE<br />
• ECONOMIE<br />
• PRECONFORT<br />
• CONFORT<br />
• ARRET - ANTIGEL / PROTECTION HAUTES TEMPERATURES<br />
Pour commuter d’un mode à un autre on utilise la touche .<br />
Dans le fonctionnement automatique, le<br />
chronothermostat utilise un programme qui peut être<br />
différencié pour chaque jour de la semaine.<br />
Sur l’afficheur apparaissent le message AUTO, la<br />
température ambiante mesurée, et le symbole du setpoint<br />
relatif au quart d’heure courant.<br />
Dans le profil horaire, la petite colonne relative à l'heure<br />
courante, avec la représentation du set point activé,<br />
clignote.<br />
Dans les fonctionnements économie, préconfort et<br />
confort, le chronothermostat utilise de façon permanente<br />
les set points de température correspon<strong>da</strong>nts. Sur<br />
l’afficheur apparaissent la température ambiante<br />
mesurée et le symbole , ou .<br />
SIGNIFICATION DE<br />
Symbole<br />
Chauffage<br />
Climatisation<br />
Set point<br />
Mode de<br />
Mode de<br />
Set point<br />
fonctionnement<br />
fonctionnement<br />
TÉCONOMIE Économie TCONFORT Confort<br />
TPRÉCONFORT Préconfort TPRÉCONFORT Préconfort<br />
TCONFORT Confort TÉCONOMIE Économie<br />
78
DESCRIPTION GENERALE<br />
Le fonctionnement antigel n’est activé qu’en mo<strong>da</strong>lité<br />
chauffage, avec l’installation de régulation thermique<br />
éteinte (ARRET). Dans ce cas le chronothermostat utilise<br />
le set point de température antigel défini, en réactivant<br />
l’installation de chauffage uniquement si la température<br />
ambiante descend au-dessous de TANTIGEL.<br />
Sur l’afficheur apparaissent le message ARRET et la<br />
température ambiante mesurée.<br />
Le fonctionnement de la protection contre les hautes<br />
températures n'est activé que <strong>da</strong>ns la mo<strong>da</strong>lité<br />
climatisation, avec l'installation de régulation thermique<br />
éteinte (ARRET). Dans ce cas, le chronothermostat utilise le<br />
set point de protection contre les hautes températures<br />
défini, en ne réactivant l’installation de climatisation que si<br />
la température ambiante dépasse TPROTECTION HAUTES<br />
TEMPÉRATURES. Sur l’afficheur apparaissent le message<br />
ARRET et la température ambiante mesurée.<br />
Pen<strong>da</strong>nt le fonctionnement, l’activation du chauffage ou de la climatisation est signalée<br />
de la façon suivante :<br />
Chauffage<br />
Le symbole indique que la commande d’activation a été<br />
envoyée à l’actionneur de commande de la chaudière. Si via<br />
ETS les notifications ont été activées par la charge et que le<br />
chronothermostat ne reçoit pas de l'actionneur la réponse<br />
que l'activation a été faite, le symbole commence à<br />
clignoter. Ensuite, à chaque minute de l’horloge, le<br />
chronothermostat envoie à nouveau la commande<br />
d’activation, jusqu’à ce qu’il reçoive une réponse positive.<br />
Climatisation<br />
Le symbole indique que la commande d’activation a été<br />
envoyée à l’actionneur de commande du climatiseur. Si via<br />
ETS les notifications ont été activées par la charge et que le<br />
chronothermostat ne reçoit pas de l'actionneur la réponse<br />
que l'activation a été faite, le symbole commence à<br />
clignoter. Ensuite, à chaque minute de l’horloge, le<br />
chronothermostat envoie à nouveau la commande<br />
d’activation, jusqu’à ce qu’il reçoive une réponse positive.<br />
79<br />
F<br />
R<br />
A<br />
N<br />
Ç<br />
A<br />
I<br />
S
INSTRUCTIONS D'UTILISATION<br />
Sélection chauffage / climatisation<br />
En appuyant sur la touche on peut commuter le type de fonctionnement de chauffage<br />
à climatisation, et vice-versa.<br />
Chauffage<br />
Le symbole<br />
identifie le chauffage.<br />
Climatisation<br />
Le symbole<br />
identifie la climatisation.<br />
Programmation paramètres<br />
Pour programmer les paramètres du chronothermostat :<br />
1. sélectionner, avec la touche , le type de fonctionnement (chauffage ou<br />
climatisation).<br />
2. appuyer une fois sur la touche .<br />
Sur l’afficheur apparaissent le symbole SET et l’horloge, et la barre du jour de la semaine<br />
commence à clignoter.<br />
On peut alors, suivant le type de fonctionnement, modifier en séquence :<br />
80
INSTRUCTIONS D'UTILISATION<br />
Jour de la semaine<br />
Heures<br />
Minutes<br />
Unité de mesure de la température<br />
Chauffage<br />
Climatisation<br />
P01chauff - Set Point<br />
P01climat - Set Point<br />
P02chauff - Set Point<br />
P02climat - Set Point<br />
P03chauff - Set Point<br />
P03climat - Set Point<br />
P04chauff - Set Point TANTIGEL P04climat - Set Point TPROTECTION HAUTES TEMPERATURES<br />
P05chauff - Logique de contrôle P05climat - Logique de contrôle<br />
Si logique de contrôle = proportionnelle<br />
P06chauff - Temps de cycle<br />
P06climat - Temps de cycle<br />
P07chauff - Valeur du différentiel de réglage P07climat - Valeur du différentiel de réglage<br />
proportionnel<br />
proportionnel<br />
P08 - Valeur pourcentage minimum pour envoi commande<br />
(visible si via ETS on a sélectionné le format de commande égal à 1 byte)<br />
Si logique de contrôle = 2 points<br />
P09chauff - Valeur du différentiel de réglage<br />
à 2 points<br />
P<strong>10</strong>chauff - Activation autoapprentissage<br />
P09climat - Valeur du différentiel de réglage<br />
à 2 points<br />
F<br />
R<br />
A<br />
N<br />
Ç<br />
A<br />
I<br />
S<br />
P11 Activation / désactivation de la fonction master<br />
P12 Envoi jour / heure aux dispositifs slave<br />
P13 Période d’envoi jour et heure aux dispositifs slave<br />
P<strong>14</strong> Envoi commande PARTY aux dispositifs slave<br />
P<strong>14</strong> Envoi commande HOLIDAY aux dispositifs slave<br />
Pour faire défiler la séquence, en confirmant la valeur du paramètre affiché, appuyer sur<br />
la touche jusqu’à ce que le paramètre que l’on désire modifier apparaisse.<br />
Pour sortir de la procédure de programmation des paramètres, appuyer à nouveau sur la<br />
touche , ou bien la sortie se fera automatiquement, 30 secondes après qu'on a appuyé<br />
sur la dernière touche. Pour programmer les paramètres de chauffage et de climatisation,<br />
il faut exécuter les deux séquences (<strong>da</strong>ns la deuxième séquence, on peut confirmer les<br />
paramètres qui sont identiques, et ne modifier que ceux qui sont spécifiques).<br />
81
INSTRUCTIONS D'UTILISATION<br />
Programmation du jour de la semaine<br />
Quand la barre du jour de la semaine clignote,<br />
sélectionner le jour courant avec les touches .<br />
Pour confirmer la valeur programmée, appuyer sur la<br />
touche <strong>da</strong>ns les 30 secondes qui suivent.<br />
Programmation de l’heure<br />
Quand les chiffres de l’heure clignotent, programmer<br />
l’heure avec les touches .<br />
Pour confirmer la valeur programmée, appuyer sur la<br />
touche <strong>da</strong>ns les 30 secondes qui suivent.<br />
Programmation minutes<br />
Quand les chiffres des minutes clignotent, programmer<br />
les minutes avec les touches .<br />
Pour confirmer la valeur programmée, appuyer sur la<br />
touche <strong>da</strong>ns les 30 secondes qui suivent.<br />
Programmation de l’unité de mesure de la température<br />
Lorsque le symbole °C ou °F de la température<br />
commence à clignoter, il faut sélectionner l’unité de<br />
mesure de la température avec les touches .<br />
Pour confirmer la valeur programmée, appuyer sur la<br />
touche <strong>da</strong>ns les 30 secondes qui suivent.<br />
82
INSTRUCTIONS D'UTILISATION<br />
P01chauff - Programmation du Set-point (chauffage)<br />
Quand le symbole apparaît, la valeur de température<br />
commence à clignoter. Régler la valeur de (TÉCONOMIE)<br />
avec les touches .<br />
Pour confirmer la valeur programmée, appuyer sur la<br />
touche <strong>da</strong>ns les 30 secondes qui suivent.<br />
P01climat. - Réglage du Set-point (climatisation)<br />
Quand le symbole apparaît, la valeur de température<br />
commence à clignoter. Régler la valeur de (TCONFORT)<br />
avec les touches .<br />
Pour confirmer la valeur programmée, appuyer sur la<br />
touche <strong>da</strong>ns les 30 secondes qui suivent.<br />
P02chauff - Réglage du Set-point (chauffage)<br />
Quand le symbole apparaît, la valeur de température<br />
commence à clignoter. Régler la valeur de<br />
(TPRÉCONFORT) avec les touches .<br />
Pour confirmer la valeur programmée, appuyer sur la<br />
touche <strong>da</strong>ns les 30 secondes qui suivent.<br />
P02climat. - Réglage du Set-point (climatisation)<br />
Quand le symbole apparaît, la valeur de température<br />
commence à clignoter. Régler la valeur de<br />
(TPRÉCONFORT) avec les touches .<br />
Pour confirmer la valeur programmée, appuyer sur la<br />
touche <strong>da</strong>ns les 30 secondes qui suivent.<br />
F<br />
R<br />
A<br />
N<br />
Ç<br />
A<br />
I<br />
S<br />
83
INSTRUCTIONS D'UTILISATION<br />
P03chauff - Réglage du Set-point (chauffage)<br />
Quand le symbole apparaît, la valeur de température<br />
commence à clignoter. Régler la valeur de (TCONFORT)<br />
avec les touches .<br />
Pour confirmer la valeur programmée, appuyer sur la<br />
touche <strong>da</strong>ns les 30 secondes qui suivent.<br />
P03climat. - Réglage du Set-point (climatisation)<br />
Quand le symbole apparaît, la valeur de température<br />
commence à clignoter. Régler la valeur de (TÉCONOMIE)<br />
avec les touches .<br />
Pour confirmer la valeur programmée, appuyer sur la<br />
touche <strong>da</strong>ns les 30 secondes qui suivent.<br />
P04chauff - Programmation de la valeur température<br />
antigel<br />
Quand le symbole apparaît, la valeur de température<br />
commence à clignoter. Régler la valeur de la température<br />
antigel avec les touches .<br />
Pour confirmer la valeur programmée, appuyer sur la<br />
touche <strong>da</strong>ns les 30 secondes qui suivent.<br />
P04climat - Programmation de la valeur de protection<br />
hautes températures<br />
Quand le symbole apparaît, la valeur de température<br />
commence à clignoter. Régler la valeur de la température de<br />
protection contre les hautes températures avec les touches<br />
. Pour confirmer la valeur programmée, appuyer sur<br />
la touche <strong>da</strong>ns les 30 secondes qui suivent.<br />
ATTENTION !<br />
Entre les valeurs de set-point il existe les rapports suivants:<br />
- Chauffage<br />
TANTIGEL<br />
- Climatisation<br />
TPROTECTION CONTRE LES HAUTES TEMPÉRATURES<br />
84
INSTRUCTIONS D'UTILISATION<br />
P05 - Logique de contrôle<br />
Quand le message P 05 apparaît, programmer la logique de<br />
contrôle de l’installation de régulation thermique, avec les<br />
touches .<br />
(00 = contrôle à 2 points, 01 = contrôle proportionnel).<br />
Pour confirmer la valeur programmée, appuyer sur la touche<br />
<strong>da</strong>ns les 30 secondes qui suivent.<br />
Il est possible de programmer diverses logiques de contrôle<br />
pour le chauffage et pour la climatisation.<br />
Si l’on a choisi le contrôle à 2 points, sauter au point P09,<br />
pour le contrôle proportionnel aller au point P06.<br />
CONTROLE A 2 POINTS<br />
L’installation de régulation thermique se désactive quand<br />
la température ambiante est égale au set point, et se<br />
réactive quand :<br />
- la température est égale ou inférieure au set point - T<br />
pour le chauffage ;<br />
- la température est égale ou supérieure au set point + T<br />
pour la climatisation.<br />
Les graphiques ci-après montrent les deux types de<br />
fonctionnement.<br />
CHAUFFAGE<br />
F<br />
R<br />
A<br />
N<br />
Ç<br />
A<br />
I<br />
S<br />
set point<br />
T<br />
CLIMATISATION<br />
set point<br />
T<br />
Si le format des commandes sélectionné via ETS est 1 bit,<br />
le chronothermostat envoie des commandes MARCHE /<br />
ARRET ; si le format des commandes sélectionné via ETS est<br />
1 byte, le chronothermostat envoie les valeurs 0% ou <strong>10</strong>0%.<br />
85
INSTRUCTIONS D'UTILISATION<br />
CONTRÔLE PROPORTIONNEL<br />
A la fin de chaque temps de cycle le chronothermostat<br />
contrôle la température ambiante et, en fonction de la<br />
différence trouvée avec le set point programmé, il module<br />
les activations et les désactivations de la chaudière<br />
(PWM), ou bien il envoie une commande avec une valeur<br />
de 1 byte (contrôle continu) pour le contrôle de l’élément<br />
chauffant ou refroidissant, en fonction de la commande<br />
sélectionnée par ETS (1 bit ou 1 byte).<br />
P06 - programmation du temps de cycle<br />
Lorsque le message P06 apparaît, il faut programmer la<br />
longueur du temps de cycle avec les touches .<br />
Les valeurs possibles sont : 5,<strong>10</strong>,20,30,40,50,60<br />
minutes. Il est possible de programmer des temps de<br />
cycle différents pour le chauffage et pour la climatisation.<br />
Pour confirmer la valeur programmée, appuyer sur la<br />
touche <strong>da</strong>ns les 30 secondes qui suivent.<br />
P07 - Définition de la valeur du différentiel de réglage<br />
proportionnel<br />
Quand le message P07 apparaît, programmer la valeur<br />
du différentiel de réglage avec les touches . Valeurs<br />
possibles : de 0,4°C à 3,2°C, avec un pas de 0,4 °C.<br />
Il est possible de programmer des valeurs de différentiels de<br />
réglage différentes pour le chauffage et pour la<br />
climatisation. Pour confirmer la valeur programmée, appuyer<br />
sur la touche <strong>da</strong>ns les 30 secondes qui suivent.<br />
Si pen<strong>da</strong>nt la configuration avec ETS on a choisi comme<br />
valeur de contrôle la valeur à 1 bit, sauter au point P11 ;<br />
sinon passer au point P08.<br />
P08 - Valeur pourcentage minimum pour l’envoi<br />
commande<br />
Quand le message P08 apparaît, programmer la<br />
résolution pourcentage d’envoi de la commande au<br />
dispositif de contrôle de la régulation thermique. Les<br />
valeurs possibles sont : 5%, <strong>10</strong>%, 20%.<br />
Pour confirmer la valeur programmée, appuyer sur la<br />
touche <strong>da</strong>ns les 30 secondes qui suivent.<br />
86
INSTRUCTIONS D'UTILISATION<br />
P09 - Programmation du différentiel de réglage à 2 points<br />
Quand le symbole apparaît, programmer la valeur du<br />
différentiel de réglage, avec les touches .<br />
Pour confirmer la valeur programmée, appuyer sur la<br />
touche <strong>da</strong>ns les 30 secondes qui suivent.<br />
Le différentiel de réglage est l’écart entre le set-point<br />
programmé et la température d’activation effective. Il est<br />
possible de programmer divers différentiels de réglage<br />
pour le chauffage et pour la climatisation. Sauf certaines<br />
situations particulières, nous vous conseillons de<br />
maintenir les valeurs préprogrammées.<br />
P<strong>10</strong> - Activation autoapprentissage (seulement chauffage).<br />
Quand le symbole apparaît, activer (Marche) ou<br />
désactiver (Arrêt) la fonction avec les touches .<br />
Pour confirmer la valeur programmée, appuyer sur la<br />
touche <strong>da</strong>ns les 30 secondes qui suivent.<br />
L’autoapprentissage permet d’optimiser l’avance (max. 2<br />
heures) sur l'activation du chauffage.<br />
Le chronothermostat gère automatiquement l'avance, de<br />
façon à garantir la température programmée au début de<br />
chaque période du profil programmé.<br />
Cette fonction ne s’active qu’en chauffage, <strong>da</strong>ns le mode<br />
de fonctionnement automatique.<br />
Les paramètres suivants n’ont une importance que si le chronothermostat a été configuré,<br />
par ETS, pour le fonctionnement master. Dans tous les autres cas ils seront ignorés.<br />
P11 - Activation / désactivation de la fonction master<br />
Quand le message P11 apparaît, il est possible de désactiver<br />
momentanément le fonctionnement master et d’activer le<br />
fonctionnement stand alone (01 = fonctionnement master,<br />
00 = fonctionnement stand alone).<br />
Pour confirmer la valeur programmée, appuyer sur la<br />
touche <strong>da</strong>ns les 30 secondes qui suivent.<br />
Si l’on a choisi l’option fonctionnement master, passer au<br />
point P12, sinon la procédure est terminée.<br />
87<br />
F<br />
R<br />
A<br />
N<br />
Ç<br />
A<br />
I<br />
S
INSTRUCTIONS D'UTILISATION<br />
P12 - Envoi de jour / heure aux dispositifs slave.<br />
Quand le message P12 apparaît, il est possible de définir<br />
quand le chronothermostat envoie la <strong>da</strong>te et l’heure, pour<br />
aligner ces paramètres <strong>da</strong>ns les dispositifs programmés<br />
comme slaves.<br />
(00 = le message n’est jamais envoyé, 01 = le<br />
message est envoyé seulement quand la tension<br />
d’alimentation revient, 02 = le message n’est envoyé<br />
que quand l’heure programmée change, 03 = le<br />
message est envoyé quand la tension d’alimentation<br />
revient ou quand l’heure programmée change, 04 =<br />
le message est envoyé quand la tension<br />
d’alimentation revient, quand l’heure programmée<br />
change, et avec la fréquence spécifiée au point P13).<br />
Pour confirmer la valeur programmée, appuyer sur la<br />
touche <strong>da</strong>ns les 30 secondes qui suivent.<br />
Si l’on a choisi l’option 04, passer au point P13, sinon<br />
sauter au point P<strong>14</strong>.<br />
P13 - Période d’envoi jour / heure<br />
Quand le message P13 apparaît, il est possible de définir<br />
la période d’envoi de la <strong>da</strong>te et de l’heure, pour aligner<br />
ces paramètres <strong>da</strong>ns les dispositifs programmés comme<br />
slaves etc.<br />
(00 = toutes les 6 heures, 01 = toutes les 12 heures,<br />
02 = toutes les 24 heures, 03 = toutes les semaines).<br />
Pour confirmer la valeur programmée, appuyer sur la<br />
touche <strong>da</strong>ns les 30 secondes qui suivent.<br />
P<strong>14</strong> - Envoi commande PARTY aux dispositifs slaves<br />
Quand le message P<strong>14</strong> apparaît, il est possible d’activer<br />
(Marche) ou de désactiver (Arrêt), avec les touches<br />
, l’extension de la commande PARTY aux dispositifs<br />
programmés comme slaves du chronothermostat.<br />
Pour confirmer la valeur programmée, appuyer sur la<br />
touche <strong>da</strong>ns les 30 secondes qui suivent.<br />
88
INSTRUCTIONS D'UTILISATION<br />
P15 - Envoi commande HOLIDAY aux dispositifs slaves<br />
Quand le message P15 apparaît, il est possible d’activer<br />
(Marche) ou de désactiver (Arrêt), avec les touches XXX<br />
, l’extension de la commande HOLIDAY aux dispositifs<br />
programmés comme slaves du chronothermostat.<br />
Pour confirmer la valeur programmée, appuyer sur la<br />
touche <strong>da</strong>ns les 30 secondes qui suivent.<br />
La procédure de programmation des paramètres est<br />
terminée. Appuyer sur la touche pour retourner au<br />
fonctionnement normal.<br />
Personnalisation du programme journalier<br />
Pour exécuter la personnalisation du programme journalier préprogrammé, ou pour<br />
faire des modifications, appuyer deux fois sur la touche .<br />
Sur l’afficheur apparaît le symbole PROG, et la barre du<br />
premier jour de la semaine commence à clignoter.<br />
Sélectionner le jour désiré, avec les touches .<br />
Pour confirmer la sélection, appuyer sur la touche<br />
avant 30 secondes.<br />
Après la confirmation du jour, l’afficheur visualise le<br />
profil courant relatif au jour choisi. L’horaire commence<br />
à clignoter.<br />
Les étapes à exécuter pour la personnalisation sont :<br />
1- sélection de l’heure du début de la variation de<br />
température<br />
2- programmer la nouvelle valeur du set-point de<br />
température<br />
3- achèvement de la personnalisation<br />
1 - Sélection de l’heure du début de la variation de<br />
température<br />
Avec les touches , modifier l’heure jusqu’au<br />
moment auquel on désire varier le profil proposé ; pen<strong>da</strong>nt<br />
cette augmentation, sur le profil horaire la petite colonne<br />
relative à l’heure sélectionnée clignote. L’heure<br />
diminue/augmente avec des pas de 15 minutes à chaque<br />
pression des touches ; il est donc possible d’avoir<br />
jusqu’à 4 périodes de programmation pour chaque heure.<br />
89<br />
F<br />
R<br />
A<br />
N<br />
Ç<br />
A<br />
I<br />
S
INSTRUCTIONS D'UTILISATION<br />
2 - Programmer la nouvelle valeur du set-point de<br />
température<br />
Sur l’afficheur la valeur correspon<strong>da</strong>nt au set point<br />
actuellement programmé est indiquée par le symbole<br />
, ou .<br />
Avec les touches , sélectionner le nouveau setpoint,<br />
qui sera appliqué au profil horaire jusqu’à la<br />
variation suivante présente <strong>da</strong>ns le programme.<br />
3 - Achèvement de la personnalisation<br />
Après avoir répété les pas 1 et 2 jusqu’à ce qu’on ait<br />
obtenu le profil horaire de température désiré, on peut :<br />
- copier le programme sur le jour suivant, confirmer la<br />
programmation exécutée en appuyant sur la touche<br />
avant 30 secondes, ou bien<br />
- confirmer la programmation sans la copier, appuyer<br />
sur la touche avant 30 secondes (on passe<br />
automatiquement à la programmation du jour suivant).<br />
Quand on a terminé la programmation de toute la semaine, appuyer sur la touche<br />
pour revenir au fonctionnement normal.<br />
Pour activer le programme, sélectionner le mode de fonctionnement AUTO en appuyant<br />
sur la touche jusqu’à ce que le symbole AUTO apparaisse sur l’afficheur.<br />
Forçage temporaire de la température<br />
Dans les mo<strong>da</strong>lités de fonctionnement AUTO, Economie, Préconfort et Confort, il est<br />
possible de forcer temporairement le set point de température activé, en utilisant les<br />
touches pour programmer la valeur désirée. Pour confirmer la valeur, appuyer<br />
sur la touche ou attendre 5 secondes.<br />
L’activation du forçage est signalé sur l’afficheur par le<br />
clignotement du message AUTO, ou, <strong>da</strong>ns les autres cas,<br />
par le clignotement de , o . Le forçage <strong>da</strong>ns<br />
la mo<strong>da</strong>lité de fonctionnement AUTO reste activé jusqu’à<br />
la prochaine variation du profil horaire de température.<br />
90
INSTRUCTIONS D'UTILISATION<br />
Fonction Party<br />
En AUTO, Economie, Préconfort et Confort la fonction Party permet de débrancher<br />
temporairement la mo<strong>da</strong>lité de fonctionnement programmée, et d’activer la mo<strong>da</strong>lité<br />
confort avec un set point réglable, pen<strong>da</strong>nt une période de temps comprise entre 1 et 23<br />
heures. On peut utiliser cette fonction, par exemple, pour avoir une température plus<br />
confortable pen<strong>da</strong>nt un dîner, une fête, etc.<br />
Pour activer cette fonction appuyer sur la touche .<br />
Sur l’afficheur le symbole apparaît, et la valeur du<br />
set-point clignote.<br />
Avec les touches régler la température désirée.<br />
Avec les touches , programmer ensuite le nombre<br />
des heures d’activation de la fonction Party, qui est affiché<br />
en haut à gauche sur l'afficheur.<br />
Appuyer sur la touche , ou attendre 5 secondes, pour<br />
confirmer la programmation.<br />
Quand la fonction est activée, on peut modifier la valeur du set point en appuyant sur les<br />
touches , et la valeur de la période d’activation en appuyant sur les touches .<br />
Pen<strong>da</strong>nt le fonctionnement le comptage des heures diminue.<br />
La fonction party reste active jusqu’à ce que la période programmée termine.<br />
Quand la période programmée expire, la fonction Party se désactive automatiquement et<br />
le chronothermostat retourne en mode de fonctionnement de départ.<br />
Pour désactiver la fonction Party plus tôt que prévu, appuyer sur la touche .<br />
F<br />
R<br />
A<br />
N<br />
Ç<br />
A<br />
I<br />
S<br />
91
INSTRUCTIONS D'UTILISATION<br />
Fonction Holi<strong>da</strong>y<br />
En AUTO, Economie, Préconfort et Confort, la fonction Holi<strong>da</strong>y permet de débrancher<br />
temporairement la mo<strong>da</strong>lité de fonctionnement programmée, et d’activer la mo<strong>da</strong>lité<br />
Economie avec un set point réglable, pen<strong>da</strong>nt une période de temps comprise entre 1 et<br />
99 jours.<br />
On peut utiliser cette fonction, par exemple, pour programmer un fonctionnement<br />
économique de l’installation de régulation thermique pen<strong>da</strong>nt des vacances, ou une<br />
longue période d’absence, et ensuite retrouver la température désirée le jour du retour.<br />
Pour activer cette fonction appuyer sur la touche .<br />
Sur l’afficheur le symbole apparaît, et la valeur du<br />
set-point clignote.<br />
Avec les touches régler la température désirée.<br />
Avec les touches , programmer ensuite le nombre<br />
des jours d’activation de la fonction Holi<strong>da</strong>y, qui est<br />
affiché en haut à gauche sur l'afficheur.<br />
Appuyer sur la touche , ou attendre 5 secondes, pour<br />
confirmer la programmation.<br />
Quand la fonction est activée, on peut modifier la valeur du set point en appuyant sur les<br />
touches , et la valeur de la période d’activation en appuyant sur les touches .<br />
Pen<strong>da</strong>nt le fonctionnement le comptage des jours diminue.<br />
La fonction Holi<strong>da</strong>y reste activée jusqu’à la fin de la période programmée, qui se termine<br />
à minuit (24 heures). Dans le calcul des jours le jour courant doit toujours être inclus.<br />
Par exemple, si le vendredi soir on veut programmer la fonction Holi<strong>da</strong>y pour qu’elle<br />
termine dimanche à minuit, il faut programmer 3 jours (vendredi, samedi et dimanche).<br />
Quand la période programmée expire, la fonction Holi<strong>da</strong>y se désactive automatiquement<br />
et le chronothermostat retourne en mo<strong>da</strong>lité de fonctionnement de départ.<br />
Pour désactiver la fonction Holi<strong>da</strong>y plus tôt que prévu, appuyer sur la touche .<br />
92
INSTRUCTIONS D'UTILISATION<br />
Copie du programme jours de fête<br />
Dans le mode AUTO il est possible de copier le profil du jour de fête (7) sur n’importe quel<br />
jour de la semaine.<br />
Cette fonction peut être activée jusqu’à 6 jours avant le jour choisi.<br />
Elle est particulièrement utile quand, par exemple, il y a un jour de fête au milieu de la<br />
semaine.<br />
Pour copier le profil du jour de fête, appuyer sur la touche<br />
. Le symbole et la barre du jour de fête clignotent<br />
sur l’afficheur.<br />
Avec les touches , sélectionner le jour de la<br />
semaine sur lequel on veut copier le profil du jour de fête.<br />
Appuyer sur la touche , ou attendre 30 secondes, pour<br />
confirmer la programmation.<br />
Quand la fonction est activée, appuyer sur la touche<br />
pour afficher le jour sur lequel on a copié le profil<br />
du jour de fête ; sur l’afficheur la barre correspon<strong>da</strong>nte<br />
clignote.<br />
Si l’on désire désactiver la fonction, appuyer à nouveau<br />
sur la touche ; si l’on désire modifier le jour de la<br />
semaine, utiliser les touches et appuyer sur la<br />
touche , ou bien attendre 30 secondes pour confirmer<br />
la nouvelle programmation.<br />
F<br />
R<br />
A<br />
N<br />
Ç<br />
A<br />
I<br />
S<br />
Pen<strong>da</strong>nt la journée le symbole est allumé fixe.<br />
La validité de la copie du jour de fête est temporaire ; à<br />
minuit du jour sélectionné on retourne au profil<br />
hebdoma<strong>da</strong>ire programmé.<br />
93
INSTRUCTIONS D'UTILISATION<br />
Signalisation piles en cours d’épuisement<br />
Quand les piles sont en phase d’épuisement et que<br />
l’alimentation manque au bus, sur l’afficheur le symbole<br />
commence à clignoter. Sur l’afficheur l’indication de<br />
la température disparaît elle aussi, et il faut procéder le<br />
plus tôt possible au remplacement des piles.<br />
Quand le symbole est allumé d’une lumière fixe, il<br />
faut absolument remplacer les piles.<br />
Les piles ne servent qu’à conserver les programmations<br />
de <strong>da</strong>te et d’heure en cas de chute de tension du bus<br />
KNX/<strong>EIB</strong> (toutes les autres programmations sont<br />
maintenues <strong>da</strong>ns une mémoire non volatile).<br />
Quand le bus est alimenté, le fonctionnement est de toute<br />
façon garanti, même en cas d’absence de piles.<br />
Reset et rétablissement des valeurs préprogrammées<br />
Si on appuie en même temps sur les touches , et , on effectue le reset<br />
complet du chronothermostat.<br />
Attention : tous les paramètres programmés et les programmes personnalisés<br />
seront annulés.<br />
Au rallumage, le chronothermostat utilise les paramètres et les programmes<br />
préprogrammés en usine. Le chronothermostat se met en chauffage, <strong>da</strong>ns la mo<strong>da</strong>lité<br />
OFF, et les fonctions Party et Holi<strong>da</strong>y ne sont pas activées.<br />
94
INSTRUCTIONS D'UTILISATION<br />
Le chronothermostat dispose de 2 programmes prédéfinis, un pour le chauffage et un<br />
pour la climatisation.<br />
PROGRAMME CHAUFFAGE<br />
Lundi - Vendredi<br />
Programmes prédéfinis<br />
Samedi - Dimanche<br />
PROGRAMME CLIMATISATION<br />
F<br />
R<br />
A<br />
N<br />
Ç<br />
A<br />
I<br />
S<br />
Tous les jours de la semaine<br />
Ces programmes prédéfinis peuvent être modifiés et personnalisés, suivant les exigences<br />
propres. Pour modifier les paramètres prédéfinis, suivre les indications contenues <strong>da</strong>ns<br />
le paragraphe « Personnalisation du programme quotidien ».<br />
95
INSTRUCTIONS D'UTILISATION<br />
Jour de la semaine<br />
1: lundi<br />
Heure 00:00<br />
16 °C<br />
18 °C<br />
Set-point de la température de chauffage<br />
20 °C<br />
TANTIGEL<br />
5 °C<br />
Set-point de la température de climatisation<br />
Autoapprentissage<br />
Paramètres prédéfinis<br />
TPROTECTION HAUTES TEMPÉRATURES<br />
24 °C<br />
26 °C<br />
28 °C<br />
35 °C<br />
OFF<br />
Différentiel de réglage<br />
Chauffage<br />
Climatisation<br />
0.2 °C<br />
0.5 °C<br />
Unité de mesure température °C<br />
Comportement à la chute et au rétablissement<br />
de l’alimentation bus<br />
A la chute de l’alimentation du bus, le dispositif n’effectue aucune action.<br />
L’heure et la <strong>da</strong>te sont maintenues par l’alimentation de secours (piles), tandis que tous<br />
les autres réglages sont conservés <strong>da</strong>ns une mémoire non volatile.<br />
Le dispositif redevient pleinement opérationnel environ 5 secondes au maximum après<br />
le rétablissement de l’alimentation bus.<br />
En absence de l’alimentation de secours (piles), au rétablissement de l’alimentation bus<br />
le chronothermostat se réactive en mo<strong>da</strong>lité Arrêt.<br />
96
INSTRUCTIONS D'UTILISATION<br />
Remplacement des piles<br />
Enlever la vis de fixation qui se trouve sous<br />
le couvercle frontal, et détacher le<br />
chronothermostat de la base de support, en<br />
suivant la séquence illustrée sur la figure.<br />
UP<br />
3<br />
2<br />
1<br />
Enlever le petit couvercle de fermeture du<br />
logement des piles, et remplacer les piles<br />
épuisées par deux autres piles de 1,5 V<br />
(type AAA), tout en respectant les polarités<br />
indiquées.<br />
F<br />
R<br />
A<br />
N<br />
Ç<br />
A<br />
I<br />
S<br />
97
INSTRUCTIONS D'UTILISATION<br />
Raccrocher le chronothermostat sur la base de support, en<br />
suivant la séquence illustrée sur la figure, et le fixer à nouveau<br />
avec la vis frontale.<br />
1<br />
2<br />
ATTENTION<br />
- Si le chronothermostat n’a pas été alimenté par le bus pen<strong>da</strong>nt le<br />
remplacement des piles, il faut remettre à jour la <strong>da</strong>te et l’heure.<br />
- Remplacer toutes les piles en même temps.<br />
- Ne pas utiliser en même temps des piles vieilles et des piles neuves.<br />
- Utiliser des piles du même type (ne pas mélanger des piles alcalines avec<br />
des piles au zinc carbone).<br />
- Ne pas jeter les piles au feu.<br />
- Les piles sont des déchets spéciaux, dont l’élimination est réglementée par<br />
des dispositions légales précises ; elles doivent être apportées <strong>da</strong>ns les<br />
centres de collecte prévus à cet effet.<br />
Nettoyage du chronothermostat<br />
Pour nettoyer le chronothermostat, n’utiliser qu’un chiffon sec.<br />
98
UP<br />
INSTRUCTIONS POUR L’INSTALLATION<br />
ATTENTION : l’installation du dispositif ne doit être effectuée que par du<br />
personnel qualifié, conformément à la réglementation en vigueur et<br />
aux lignes directrices pour les installations KNX/<strong>EIB</strong>.<br />
Pour pouvoir relever correctement la<br />
température de la pièce à contrôler, le<br />
chronothermostat ne doit pas être<br />
installé <strong>da</strong>ns des niches, ni à côté des<br />
portes ou fenêtres, ni à côté des<br />
radiateurs ou des conditionneurs d’air, et<br />
il ne doit pas être touché par les courants<br />
d’air, ni par l’éclairage direct du soleil.<br />
Positionnement correct<br />
Montage de la base de support<br />
La base de support doit être placée à une hauteur de 160 cm environ du sol ; elle peut<br />
être fixée directement au mur avec des chevilles, ou bien au-dessus d’une boîte à 3 places.<br />
ATTENTION : En fixant la base de support, respecter le sens de montage qui est<br />
indiqué par la flèche .<br />
F<br />
R<br />
A<br />
N<br />
Ç<br />
A<br />
I<br />
S<br />
Montage avec chevilles<br />
99
INSTRUCTIONS POUR L’INSTALLATION<br />
Montage sur boîte à 3 postes<br />
UP<br />
Avertissements pour l’installation KNX/<strong>EIB</strong><br />
1. La longueur de la ligne bus entre le chronothermostat <strong>EIB</strong> et l’alimentateur ne doit pas<br />
dépasser 350 mètres.<br />
2. La longueur de la ligne bus entre le chronothermostat <strong>EIB</strong> et le dispositif KNX/<strong>EIB</strong> à<br />
commander le plus éloigné ne doit pas dépasser 700 mètres.<br />
3. Pour éviter tous signaux et surtensions non désirés, ne pas créer, si possible, de<br />
circuits en boucle.<br />
4. Maintenir une distance d’au moins 4 mm entre les câbles isolés un par un de la ligne<br />
bus, et les câbles de la ligne électrique.<br />
230 V<br />
Bus<br />
≥ 4 mm<br />
5. Ne pas endommager le conducteur de continuité électrique du blin<strong>da</strong>ge.<br />
Câble bus<br />
Blin<strong>da</strong>ge<br />
Conducteur de continuité<br />
électrique<br />
<strong>10</strong>0
INSTRUCTIONS POUR L’INSTALLATION<br />
ATTENTION : les câbles de signal du bus non utilisés et le conducteur<br />
de continuité électrique ne doivent jamais toucher des éléments sous<br />
tension ni le conducteur de terre.<br />
Connexions électriques<br />
+ -<br />
+ - bus<br />
Schéma des connexions électriques<br />
1. Avant de procéder à la connexion au bus KNX/<strong>EIB</strong>, insérer les piles pour la mémoire<br />
de secours (voir le paragraphe Remplacement des piles).<br />
2. Connecter le fil rouge du câble bus à la borne rouge (+) du terminal, et le fil noir à la<br />
borne noire (-). On peut relier au terminal bus jusqu’à 4 lignes bus (fils de la même<br />
couleur <strong>da</strong>ns la même borne).<br />
F<br />
R<br />
A<br />
N<br />
Ç<br />
A<br />
I<br />
S<br />
Connexion dispositif bus<br />
Connexion câble bus<br />
3. Isoler l’écran, le conducteur de continuité électrique et les fils restants blanc et jaune<br />
du câble bus (au cas où l’on utilise un câble bus à 4 conducteurs), qui ne sont pas<br />
nécessaires.<br />
<strong>10</strong>1
UP<br />
INSTRUCTIONS POUR L’INSTALLATION<br />
4. Brancher la borne bus <strong>da</strong>ns les pieds du dispositif prévus. Le sens correct d’insertion<br />
est déterminé par les guides de fixation.<br />
Achèvement<br />
Accrocher le chronothermostat sur la base de<br />
support, en suivant la séquence illustrée sur la<br />
figure, et le fixer avec la vis fournie.<br />
2<br />
3<br />
1<br />
<strong>10</strong>2
DONNÉES TECHNIQUES<br />
Communication<br />
Bus KNX/<strong>EIB</strong><br />
Alimentation<br />
Avec bus KNX/<strong>EIB</strong>, 29 V cc SELV<br />
+ 2 piles alcalines 1,5 V AAA pour la mise à jour<br />
de la <strong>da</strong>te et de l’heure en cas d’absence de la<br />
tension au bus<br />
Absorption du courant par le bus 5mA<br />
Câble bus<br />
KNX/<strong>EIB</strong> TP1<br />
Eléments de commande 1 touche miniature de programmation adresse<br />
physique<br />
<strong>10</strong> boutons de commande et de configuration<br />
Eléments d’affichage<br />
1 afficheur LCD rétro éclairé à LED (temporisé sur<br />
intervention de l’utilisateur)<br />
1 LED rouge de programmation de l’adresse physique<br />
Intervalle d’affichage<br />
de température 0 ÷ +45 °C<br />
Eléments de mesure<br />
1 capteur NTC<br />
résolution de mesure : 0,1° C<br />
précision de la mesure : ± 0,5 °C à 20 °C<br />
intervalle entre les mesurages successifs : 1 minute<br />
Intervalles de régulation<br />
températures TANTIGEL : +2 ÷ +7 °C<br />
TPROTECTION HAUTES TEMPERATURES : +30 ÷ +40 °C<br />
Autres set points : +5 ÷ +40 °C<br />
Milieu d’utilisation<br />
A l’intérieur, lieux secs<br />
Température de fonctionnement -5 ÷ +45 °C<br />
Température de stockage -25 ÷ +70 °C<br />
Humidité relative<br />
Max. 93% (sans condensation)<br />
Connexion au bus<br />
Borne à fiche, 2 pin Ø 1 mm<br />
Degré de protection<br />
IP20<br />
Dimension (B x H x P) 130 x 92 x 23 mm<br />
Normes de référence<br />
Directive basse tension 2006/95/CE<br />
Directive compatibilité électromagnétique 89/336/CEE<br />
EN50090-2-2, EN60730-1<br />
Certifications<br />
KNX/<strong>EIB</strong><br />
<strong>10</strong>3<br />
F<br />
R<br />
A<br />
N<br />
Ç<br />
A<br />
I<br />
S
ÍNDICE<br />
pag.<br />
ADVERTENCIAS GENERALES<br />
Contenido del embalaje ................................................................................... <strong>10</strong>6<br />
DESCRIPCIÓN GENERAL<br />
En breve .......................................................................................................... <strong>10</strong>7<br />
Posición de los mandos posteriores ............................................................... <strong>10</strong>9<br />
Posición de los mandos .................................................................................... 1<strong>10</strong><br />
Descripción mandos ........................................................................................ 111<br />
Mo<strong>da</strong>li<strong>da</strong>d de funcionamiento ........................................................................... 112<br />
INSTRUCCIONES DE EMPLEO<br />
Selección calefacción/acondicionamiento ......................................................... 1<strong>14</strong><br />
Configuración parámetros ................................................................................ 1<strong>14</strong><br />
Personalización programa diario ....................................................................... 123<br />
Forzado temporal de la temperatura ................................................................. 124<br />
Función Party.................................................................................................... 125<br />
Función Holi<strong>da</strong>y ............................................................................................... 126<br />
Copia del programa festivo ............................................................................... 127<br />
Señalización pilas agota<strong>da</strong>s .............................................................................. 128<br />
Réset y reajuste de los valores preprogramados................................................ 128<br />
Programas preprogramados.............................................................................. 129<br />
Parámetros preprogramados............................................................................. 130<br />
Comportamiento a la caí<strong>da</strong> y al reajuste de la alimentación bus ........................ 130<br />
Sustitución pilas................................................................................................ 131<br />
Limpieza del cronotermostato ......................................................................... 132<br />
INSTRUCCIONES DE INSTALACIÓN<br />
Correcto posicionamiento.................................................................................. 133<br />
Montaje de la base de soporte .......................................................................... 133<br />
Advertencias para la instalación KMX/<strong>EIB</strong> ......................................................... 134<br />
Conexiones eléctricas ...................................................................................... 135<br />
Finalización ...................................................................................................... 136<br />
E<br />
S<br />
P<br />
A<br />
Ñ<br />
O<br />
L<br />
DATOS TÉCNICOS ................................................................................................. 137<br />
<strong>10</strong>5
ADVERTENCIAS GENERALES<br />
¡Atención! La seguri<strong>da</strong>d del aparato está garantiza<strong>da</strong> sólo si se respetan las<br />
instrucciones aquí indica<strong>da</strong>s. Por lo tanto es necesario leerlas y conservarlas. Los<br />
productos Chorus deben instalarse conforme a lo previsto por la norma CEI 64-8 para los<br />
aparatos para uso doméstico y similar, en ambientes sin polvo y donde no sea necesaria<br />
una protección especial contra la penetración de agua.<br />
La organización de venta GEWISS se encuentra a disposición para informaciones<br />
técnicas.<br />
<strong>Gewiss</strong> SpA se reserva el derecho de aportar cambios al producto descrito en este<br />
manual en cualquier momento y sin preaviso.<br />
n. 1 <strong>Cronotermostato</strong> <strong>EIB</strong> de pared<br />
n. 1 Base de soporte<br />
n. 1 Borna bus<br />
n. 1 Manual de instalación y uso<br />
Contenido del embalaje<br />
<strong>10</strong>6
DESCRIPCIÓN GENERAL<br />
En breve<br />
El <strong>Cronotermostato</strong> <strong>EIB</strong> - de pared permite controlar automáticamente, en base<br />
semanal, la temperatura del ambiente en la que se ha instalado. La regulación de la<br />
temperatura se efectúa controlando, a través del bus KNX/<strong>EIB</strong> del sistema de Building<br />
Automation, los actuadores KNX/<strong>EIB</strong> que controlan la instalación de calefacción o<br />
acondicionamiento.<br />
En unión con los Termostatos <strong>EIB</strong> – de pared (<strong>GW</strong><strong>10</strong> 793 - <strong>GW</strong><strong>14</strong> 793), puede ser<br />
utilizado, con función master, para la regulación de la temperatura de zonas.<br />
Los perfiles de temperatura están definidos sobre la base semanal. Para ca<strong>da</strong> día de la<br />
semana es posible programar un perfil horario independiente, con resolución de 15<br />
minutos y sin límite de variaciones diarias. El cronotermostato prevé:<br />
• 2 tipos de funcionamiento: calefacción y acondicionamiento;<br />
• 5 mo<strong>da</strong>li<strong>da</strong>des de funcionamiento: OFF, Económico, Preconfort, Confort e Automatica;<br />
• 4 temperaturas de regulación para el calefacción (TECONÓMICO, TPRECONFORT, TCONFORT,<br />
TANTIHIELO);<br />
• 4 temperaturas de regulación para el acondicionamiento ( TECONÓMICO, TPRECONFORT,<br />
TCONFORT, TPROTECCIÓN ALTAS TEMPERATURAS).<br />
El cronotermostato está alimentado desde la línea bus y está dotado de pantalla LCD<br />
con retroiluminación temporiza<strong>da</strong>,<strong>10</strong> pulsadores de mando, un sensor integrado para<br />
la detección de la temperatura ambiental (cuyo valor se envía al bus), pilas alcalinas<br />
(AAA, no inclui<strong>da</strong>s) para el mantenimiento de fecha y hora en caso de caí<strong>da</strong> de la<br />
tensión bus.<br />
E<br />
S<br />
P<br />
A<br />
Ñ<br />
O<br />
L<br />
<strong>10</strong>7
DESCRIPCIÓN GENERAL<br />
El dispositivo se configura con el software ETS para realizar las siguientes funciones:<br />
Control temperatura<br />
• de 2 puntos, con mandos ON/OFF o regulación continua (0% / <strong>10</strong>0%)<br />
• control proporcional, con mandos PWM o regulación continua (0%÷<strong>10</strong>0%)<br />
Programación mo<strong>da</strong>li<strong>da</strong>d de funcionamiento<br />
• desde bus con objetos diferentes de 1 bit (OFF, ECONÓMICO, PRECONFORT, CONFORT,<br />
AUTO)<br />
• desde bus con objeto a un byte<br />
Medi<strong>da</strong> temperatura<br />
• con sensor integrado o son<strong>da</strong> de temperatura<br />
• mixto con definición del peso relativo<br />
Control temperatura de zonas<br />
• con transmisión de la mo<strong>da</strong>li<strong>da</strong>d de funcionamiento hacia termostatos slave<br />
• con transmisión del set point hacia termostatos slave<br />
Escenarios<br />
• memorización y activación de 8 escenarios (valor 0.63)<br />
Otras funciones<br />
• configuración del set point (OFF, ECONOMICO, PRECONFORT, CONFORT) desde el bus<br />
• configuración del tipo di funcionamiento (calefacción/acondicionamiento) desde el<br />
bus<br />
• configuración de día y hora desde el bus<br />
• transmisión de día y hora en el bus hacia termostatos slave<br />
• transmisión en el bus de las informaciones de estado (mo<strong>da</strong>li<strong>da</strong>d, tipo) y de la<br />
temperatura medi<strong>da</strong><br />
• gestión de la información de estado que proviene del actuador controlado<br />
El dispositivo se instala en la pared utilizando la bri<strong>da</strong> suministra<strong>da</strong>, que puede fijarse al<br />
muro con los tacos o atornillar encima de una caja de 3 módulos.<br />
<strong>10</strong>8
DESCRIPCIÓN GENERAL<br />
Posición de los mandos posteriores<br />
LED de programación dirección física<br />
Tecla de programación dirección física<br />
E<br />
S<br />
P<br />
A<br />
Ñ<br />
O<br />
L<br />
<strong>10</strong>9
DESCRIPCIÓN GENERAL<br />
Posición de los mandos<br />
El cronotermostato está dotado de una pantalla de 3 pulsadores de mando siempre<br />
accesibles y de 7 pulsadores de mando accesibles de ventanilla abierta.<br />
21<br />
22<br />
23<br />
24<br />
25<br />
26<br />
27<br />
28<br />
18<br />
17<br />
20<br />
16<br />
15<br />
<strong>14</strong><br />
19<br />
7<br />
8<br />
13<br />
9<br />
1<br />
2<br />
3<br />
4<br />
5<br />
6<br />
12<br />
11<br />
<strong>10</strong><br />
1<strong>10</strong>
DESCRIPCIÓN GENERAL<br />
Descripción mandos<br />
1<br />
2<br />
3<br />
4<br />
5<br />
6<br />
7<br />
8<br />
9<br />
PULSADORES DE MANDO Símbolo Pag.<br />
Programación / configuración<br />
Regulación tiempo<br />
Party 125<br />
Holi<strong>da</strong>y 126<br />
Selección calefacción/acondicionamiento 1<strong>14</strong><br />
Copia 127<br />
Regulación temperatura (+) / Selección parámetros<br />
Selección mo<strong>da</strong>li<strong>da</strong>d funcionamiento / confirmación<br />
Regulación temperatura (-) / Selección parámetros<br />
<strong>10</strong><br />
11<br />
12<br />
13<br />
<strong>14</strong><br />
15<br />
16<br />
17<br />
18<br />
19<br />
20<br />
21<br />
22<br />
23<br />
24<br />
25<br />
26<br />
27<br />
28<br />
SEÑALIZACIONES EN LA PANTALLA<br />
Mo<strong>da</strong>li<strong>da</strong>d de funcionamiento<br />
Uni<strong>da</strong>d de medi<strong>da</strong> temperatura<br />
Temperatura ambiente medi<strong>da</strong><br />
AUTO<br />
°C / °F<br />
112<br />
116<br />
Perfil programa diario 123<br />
Activación acondicionamiento 113<br />
Activación calefacción 113<br />
Diferencial térmico 121<br />
Reloj 116<br />
Día de la semana 116<br />
Activación función autoaprendizaje 121<br />
Set-point temperatura – Mo<strong>da</strong>li<strong>da</strong>d de funcionamiento 117<br />
Funcionamiento en calefacción 113<br />
Estado de programación parámetros<br />
Funcionamiento en acondicionamiento<br />
SET<br />
1<strong>14</strong><br />
1<strong>14</strong><br />
Estado programación PROG 121<br />
Función holi<strong>da</strong>y 126<br />
Pilas agota<strong>da</strong>s 128<br />
Función copia programa festivo 127<br />
Función party 125<br />
E<br />
S<br />
P<br />
A<br />
Ñ<br />
O<br />
L<br />
111
DESCRIPCIÓN GENERAL<br />
Mo<strong>da</strong>li<strong>da</strong>d de funcionamiento<br />
El cronotermostato prevé 5 diferentes mo<strong>da</strong>li<strong>da</strong>des de funcionamiento:<br />
• AUTOMÁTICO<br />
• ECONÓMICO<br />
• PRECONFORT<br />
• CONFORT<br />
• OFF-ANTIHIELO / PROTECCIÓN ALTAS TEMPERATURAS<br />
Para conmutar de una mo<strong>da</strong>li<strong>da</strong>d a otra se usa la tecla .<br />
En el funcionamiento automático el cronotermostato<br />
utiliza un programa que puede ser diferenciado para ca<strong>da</strong><br />
día de la semana.<br />
En la pantalla aparecen la nota AUTO, la temperatura<br />
ambiente medi<strong>da</strong> y el símbolo de set point relativo al<br />
cuarto de hora corriente.<br />
En el perfil horario parpadea la columna relativa a la hora<br />
corriente con la representación del set point activo.<br />
En los funcionamientos económico, preconfort y<br />
confort el cronotermostato utiliza permanentemente los<br />
set point de temperatura correspondientes.<br />
En la pantalla aparecen la temperatura ambiente medi<strong>da</strong><br />
y el símbolo , o .<br />
SIGNIFICADO DE , o .<br />
Símbolo<br />
Calefacción<br />
Acondicionamiento<br />
Set point<br />
Mo<strong>da</strong>li<strong>da</strong>d<br />
Mo<strong>da</strong>li<strong>da</strong>d<br />
Set point<br />
funcionamiento<br />
funcionamiento<br />
TECONÓMICO Económico TCONFORT Confort<br />
TPRECONFORT Preconfort TPRECONFORT Preconfort<br />
TCONFORT Confort TECONÓMICO Económico<br />
112
DESCRIPCIÓN GENERAL<br />
El funcionamiento antihielo está activo solo en<br />
calefacción, de instalación de termorregulación apaga<strong>da</strong><br />
(OFF). En este caso el cronotermostato utiliza el set point<br />
de temperatura antihielo programado, reactivando la<br />
instalación de calefacción solo si la temperatura ambiente<br />
desciende bajo TANTIHIELO.<br />
En la pantalla aparecen la noto OFF y la temperatura<br />
ambiente medi<strong>da</strong>.<br />
El funcionamiento protección altas temperaturas está<br />
activo solo en acondicionamento, de instalación de<br />
termorregulación apaga<strong>da</strong> (OFF). En este caso el<br />
cronotermostato utiliza el set point de protección altas<br />
temperaturas programado, reactivando la instalación de<br />
acondicionamiento solo si la temperatura ambiente supera<br />
TPROTECCIÓN ALTAS TEMPERATURAS. En la pantalla aparecen la<br />
noto OFF y la temperatura ambiente medi<strong>da</strong>.<br />
Durante el funcionamiento, la activación de la calefacción o del acondicionamento están<br />
señala<strong>da</strong>s de la manera siguiente:<br />
Calefacción<br />
El símbolo indica que el mando de activación se ha<br />
enviado al actuador de mando de la caldera. Si mediante<br />
ETS se han activado las notificaciones de la carga y el<br />
cronotermostato no recibe del actuador el reconocimiento<br />
de la activación efectua<strong>da</strong>, el símbolo empieza a<br />
parpadear. Sucesivamente, a ca<strong>da</strong> minuto del reloj, el<br />
cronotermostato envía nuevamente el mando de<br />
activación hasta que no recibe un reconocimiento positivo.<br />
Acondicionamiento<br />
El símbolo indica que el mando de activación se ha<br />
enviado al actuador de mando del acondicionador. Si<br />
mediante ETS se han activado las notificaciones de la<br />
carga y el cronotermostato no recibe del actuador el<br />
reconocimiento de la activación efectua<strong>da</strong>, el símbolo<br />
empieza a parpadear. Sucesivamente, a ca<strong>da</strong> minuto del<br />
reloj, el cronotermostato envía nuevamente el mando de<br />
activación hasta que no recibe un reconocimiento positivo.<br />
E<br />
S<br />
P<br />
A<br />
Ñ<br />
O<br />
L<br />
113
INSTRUCCIONES DE EMPLEO<br />
Selección calefacción/condicionamiento<br />
Presionando la tecla es posible conmutar el tipo de funcionamiento entre calefacción<br />
y acondicionamiento y viceversa.<br />
Calefacción<br />
El símbolo<br />
identifica la calefacción.<br />
Acondicionamiento<br />
El símbolo identifica el acondicionamiento.<br />
Configuración parámetros<br />
Para programar los parámetros del cronotermostato:<br />
1. seleccionar con la tecla , el tipo de funcionamiento (calentamiento o<br />
acondicionamiento),<br />
2. presionar una vez la tecla .<br />
En la pantalla aparecen la nota SET y el reloj, mientras que en la barra del día de la<br />
semana empieza a parpadear.<br />
En este momento, según el tipo de funcionamiento, es posible modificar en secuencia:<br />
1<strong>14</strong>
INSTRUCCIONES DE EMPLEO<br />
Día de la semana<br />
Horas<br />
Minutos<br />
Uni<strong>da</strong>d de medi<strong>da</strong> temperatura<br />
Calefacción<br />
Acondicionamiento<br />
P01calef - Set Point<br />
P01acond - SetPoint<br />
P02calef - Set Point<br />
P02acond - Set Point<br />
P03calef - Set Point<br />
P03acond - Set Point<br />
P04calef - Set Point TANTIHIELO P04acond - Set Point TPROTECCIÓN ALTAS TEMPERATURAS<br />
P05calef - Lógica de control P05acond - Lógica de control<br />
Si lógica de control = proporcional<br />
P06calef - Tiempo de ciclo<br />
P06acond - Tiempo de ciclo<br />
P07calef -Valor diferencial de regulación P07acond - Valor diferencial de regulación<br />
proporcional<br />
proporcional<br />
P08 - Valor de porcentaje mínimo para envío mando<br />
(visible si mediante ETS se ha seleccionado el formato de mando de byte)<br />
Si lógica de control = 2 puntos<br />
P09calef - Valor diferencial de regulación<br />
de 2 puntos<br />
P<strong>10</strong>calef - Activación autoaprendizaje<br />
P09acond - Valor diferencial de regulación de<br />
2 puntos<br />
P11 Activación/desactivación de la función master<br />
P12 Envío día/hora a los dispositivos slave<br />
P13 Período de envío día y hora a los dispositivos slave<br />
P<strong>14</strong> Envío mando PARTY a los dispositivos slave<br />
P<strong>14</strong> Envío mando HOLIDAY a los dispositivos slave<br />
Para desplazar la secuencia, confirmando el valor del parámetro visualizado, presionar<br />
la tecla hasta que no aparezca el parámetro que se desea modificar.<br />
La sali<strong>da</strong> del procedimiento de configuración de los parámetros se efectúa presionando<br />
nuevamente la tecla o, automáticamente, después de 30 segundos desde la última<br />
vez que ha pulsado. Para programar los parámetros de calefacción y<br />
acondicionamiento es necesario efectuar ambas secuencias (en la segun<strong>da</strong> secuencia<br />
se pueden confirmar los parámetros iguales, modificando solo los específicos).<br />
E<br />
S<br />
P<br />
A<br />
Ñ<br />
O<br />
L<br />
115
INSTRUCCIONES DE EMPLEO<br />
Configuración del día de la semana<br />
Cuando la barra del día de la semana parpadea,<br />
seleccionar el día corriente con las teclas .<br />
Para confirmar el valor programado, presionar la tecla<br />
antes de 30 segundos.<br />
Configuración de la hora<br />
Cuando las cifras de la hora parpadean, programar la hora<br />
con las teclas .<br />
Para confirmar el valor programado, presionar la tecla<br />
antes de 30 segundos.<br />
Configuración de los minutos<br />
Cuando las cifras de los minutos parpadean, programar<br />
los minutos con las teclas .<br />
Para confirmar el valor programado, presionar la tecla<br />
antes de 30 segundos.<br />
Configuración uni<strong>da</strong>d de medi<strong>da</strong> temperatura<br />
Cuando el símbolo °C o °F de la temperatura empieza a<br />
parpadear, seleccionar la uni<strong>da</strong>d de medi<strong>da</strong> de la<br />
temperatura con las teclas .<br />
Para confirmar el valor programado, presionar la tecla<br />
antes de 30 segundos.<br />
116
INSTRUCCIONES DE EMPLEO<br />
P01calef. - Configuración Set Point (calefacción)<br />
Cuando aparezca el símbolo , el valor de temperatura<br />
empezará a parpadear. Regular el valor de<br />
(TECONÓMICO) con las teclas .<br />
Para confirmar el valor programado, presionar la tecla<br />
antes de 30 segundos.<br />
P01acond - Configuración Set Point (acondicionamiento)<br />
Cuando aparezca el símbolo , el valor de temperatura<br />
empezará a parpadear. Regular el valor de (TCONFORT)<br />
con las teclas .<br />
Para confirmar el valor programado, presionar la tecla<br />
antes de 30 segundos.<br />
P02calef. - Configuración Set Point (calefacción)<br />
Cuando aparezca el símbolo , el valor de temperatura<br />
empezará a parpadear. Regular el valor de<br />
(TPRECONFORT) con las teclas .<br />
Para confirmar el valor programado, presionar la tecla<br />
antes de 30 segundos.<br />
P02acond - Configuración Set Point (acondicionamiento)<br />
Cuando aparezca el símbolo , el valor de temperatura<br />
empezará a parpadear. Regular el valor de<br />
(TPRECONFORT) con las teclas .<br />
Para confirmar el valor programado, presionar la tecla<br />
antes de 30 segundos.<br />
E<br />
S<br />
P<br />
A<br />
Ñ<br />
O<br />
L<br />
117
INSTRUCCIONES DE EMPLEO<br />
P03calef. - Configuración Set Point (calefacción)<br />
Cuando aparezca el símbolo , el valor de temperatura<br />
empezará a parpadear. Regular el valor de (TCONFORT)<br />
con las teclas .<br />
Para confirmar el valor programado, presionar la tecla<br />
antes de 30 segundos.<br />
P03acond - Configuración Set Point<br />
(acondicionamiento)<br />
Cuando aparezca el símbolo , el valor de temperatura<br />
empezará a parpadear. Regular el valor de<br />
(TECONÓMICO) con las teclas .<br />
Para confirmar el valor programado, presionar la tecla<br />
antes de 30 segundos.<br />
P04calef. - Configuración valor temperatura antihielo<br />
Cuando aparezca el símbolo , el valor de temperatura<br />
empezará a parpadear. Regular el valor de la temperatura<br />
antihielo con las teclas .<br />
Para confirmar el valor programado, presionar la tecla<br />
antes de 30 segundos.<br />
P04acond - Configuración valor protección altas<br />
temperaturas<br />
Cuando aparezca el símbolo , el valor de temperatura<br />
empezará a parpadear. Regular el valor de la temperatura<br />
protección altas temperaturas con las teclas .<br />
Para confirmar el valor programado, presionar la tecla<br />
antes de 30 segundos.<br />
¡ATENCIÓN!<br />
Entre los valores de set point existen los siguientes vínculos.<br />
- Calefacción<br />
TANTIHIELO<br />
- Acondicionamiento<br />
PROTECCIÓN ALTAS TEMPERATURAS<br />
118
INSTRUCCIONES DE EMPLEO<br />
P05 - Lógica de control<br />
Cuando aparece la nota P 05, programar la lógica de control<br />
de la instalación de termorregulación con las teclas .<br />
(00 = control de 2 puntos, 01 = control proporcional)<br />
Para confirmar el valor programado, presionar la tecla<br />
antes de 30 segundos.<br />
Se pueden programar lógicas de control diferentes para<br />
calefacción y acondicionamiento.<br />
Si se ha elegido el control de 2 puntos saltar al punto P09,<br />
para el control proporcional ir al punto P06.<br />
CONTROL DE 2 PUNTOS<br />
La instalación de termorregulación se desactiva cuando la<br />
temperatura ambiente es equivalente a set point y se<br />
reactiva cuando:<br />
- la temperatura es equivalente o inferior a set point -<br />
para la calefacción;<br />
- la temperatura es equivalente o superior a set point +<br />
para el acondicionamiento.<br />
Los gráficos que siguen muestran dos tipos de<br />
funcionamiento.<br />
CALEFACCIÓN<br />
ACONDICIONAMIENTO<br />
set point<br />
T<br />
E<br />
S<br />
P<br />
A<br />
Ñ<br />
O<br />
L<br />
set point<br />
T<br />
Si el formato de los mandos seleccionado mediante ETS es<br />
1 bit, el cronotermostato envía mandos ON/OFF; si el<br />
formato de los mandos seleccionado mediante ETS es 1<br />
byte, el cronotermostato envía los valores 0% o <strong>10</strong>0%.<br />
119
INSTRUCCIONES DE EMPLEO<br />
CONTROL PROPORCIONAL<br />
El cronotermostato controla, al final de ca<strong>da</strong> tiempo de<br />
ciclo, la temperatura ambiente y según la diferencia<br />
observa<strong>da</strong> con el set point programado, modula las<br />
activaciones y desactivaciones de la caldera (PWM) o<br />
envía un mando con un valor de 1 byte (control continuo)<br />
para el control del elemento calentador o de enfriado,<br />
según el mando seleccionado por ETS (1 bit o 1 byte).<br />
P06 - Configuración de tiempo de ciclo<br />
Cuando aparece la nota P06, programar la longitud del<br />
tiempo de ciclo con las teclas .<br />
Los posibles valores son: 5,<strong>10</strong>,20,30,40,50,60 minutos.<br />
Se pueden programar tiempos de ciclo diferentes para<br />
calefacción y acondicionamiento.<br />
Para confirmar el valor programado, presionar la tecla<br />
antes de 30 segundos.<br />
P07 - Configuración valor diferencial de regulación<br />
proporcional<br />
Cuando aparezca el símbolo P07, programar el valor del<br />
diferencial de regulación con las teclas .<br />
Posibles valores: de 0,4 °C a 3,2 °C, con paso de 0,4 °C.<br />
Se pueden programar valores diferenciales de regulación<br />
diferentes para calefacción y acondicionamiento. Para<br />
confirmar el valor programado, presionar la tecla<br />
antes de 30 segundos.<br />
Si durante la configuración con ETS se ha elegido como<br />
valor de control el valor de 1 bit saltar al punto P11, de lo<br />
contrario pasar al punto P08.<br />
P08 - Valor de porcentaje mínimo para envío mando<br />
Cuando aparezca la nota P08, programar la resolución de<br />
porcentaje de envío del mando al dispositivo de control de<br />
la termorregulación.<br />
Los posibles valores son: 5%, <strong>10</strong>%, 20%.<br />
Para confirmar el valor programado, presionar la tecla<br />
antes de 30 segundos.<br />
120
INSTRUCCIONES DE EMPLEO<br />
P09 - Configuración diferencial de regulación de 2 puntos<br />
Cuando aparezca el símbolo , programar el valor del<br />
diferencial de regulación con las teclas .<br />
Para confirmar el valor programado, presionar la tecla<br />
antes de 30 segundos.<br />
El diferencial de regulación es la desviación entre el set<br />
point programado y la temperatura efectiva de activación.<br />
Se pueden programar diferenciales de regulación<br />
diferentes para calefacción y acondicionamiento. Salvo<br />
situaciones particulares, se aconseja mantener los valores<br />
preprogramados.<br />
P<strong>10</strong> - Activación autoaprendizaje (solo calefacción)<br />
Cuando aparece el símbolo , activar (ON) o desactivar<br />
(OFF) la función con las teclas .<br />
Para confirmar el valor programado, presionar la tecla<br />
antes de 30 segundos.<br />
El autoaprendizaje permite optimizar el avance (máx. 2<br />
horas) en la activación de la calefacción.<br />
El cronotermostato efectúa automáticamente el avance,<br />
de manera que se garantice la temperatura programa<strong>da</strong><br />
al principio de ca<strong>da</strong> periodo del perfil programado.<br />
Esta función se activa solo en calefacción, en la<br />
mo<strong>da</strong>li<strong>da</strong>d de funcionamiento automático.<br />
Los parámetros siguientes son significativos solo si el cronotermostato se ha configurado,<br />
mediante ETS, para el funcionamiento master. En los demás casos se ignorarán.<br />
P11 - Activación/desactivación de la función master<br />
Cuando aparezca la nota P11, es posible desactivar<br />
momentáneamente el funcionamiento master y activar el<br />
funcionamiento stand alone (01 = funcionamiento<br />
master, 00 = funcionamiento stand alone).<br />
Para confirmar el valor programado, presionar la tecla<br />
antes de 30 segundos.<br />
Si se ha elegido la opción funcionamiento master pasar al<br />
punto P12, de lo contrario el procedimiento está terminado.<br />
E<br />
S<br />
P<br />
A<br />
Ñ<br />
O<br />
L<br />
121
INSTRUCCIONES DE EMPLEO<br />
P12 - Envío día/hora a los dispositivos slave<br />
Cuando aparece la nota P12, es posible definir cuando el<br />
cronotermostato envía fecha y hora para alinear estos<br />
parámetros en los dispositivos programados como slave.<br />
(00 = el mensaje no se envía nunca 01 = el mensaje<br />
se envía solo al retorno de la tensión de alimentación,<br />
02 = el mensaje se envía solo cuando cambia la hora<br />
programa<strong>da</strong>, 03 = el mensaje se envía al retorno de la<br />
tensión de alimentación o cuando cambia la hora<br />
programa<strong>da</strong>, 04 = el mensaje se envía al retorno de la<br />
tensión de alimentación, cuando cambia la hora<br />
programa<strong>da</strong> y con la frecuencia especifica<strong>da</strong> en P13).<br />
Para confirmar el valor programado, presionar la tecla<br />
antes de 30 segundos.<br />
Si se ha elegido la opción 04 pasar al punto P13, de lo<br />
contrario saltar al punto P<strong>14</strong><br />
P13 - Período de envío día/hora<br />
Cuando aparezca la nota P13, es posible programar el<br />
período de envío de fecha y hora para alinear estos<br />
parámetros en los dispositivos programados como slave etc.<br />
(00 = ca<strong>da</strong> 6 horas, 01 = ca<strong>da</strong> 12 horas, 02 = ca<strong>da</strong> 24<br />
horas, 03 = ca<strong>da</strong> semana).<br />
Para confirmar el valor programado, presionar la tecla<br />
antes de 30 segundos.<br />
P<strong>14</strong> - Envío mando PARTY a los dispositivos slave<br />
Cuando aparece la nota P<strong>14</strong>, es posible activar (ON) o<br />
desactivar (OFF), con las teclas , la extensión del<br />
mando PARTY a los dispositivos programados como slave<br />
del cronotermostato.<br />
Para confirmar el valor programado, presionar la tecla<br />
antes de 30 segundos.<br />
122
INSTRUCCIONES DE EMPLEO<br />
P15 - Envío mando HOLIDAY a los dispositivos slave<br />
Cuando aparece la nota P15, es posible activar (ON) o<br />
desactivar (OFF), con las teclas , la extensión del<br />
mando HOLIDAY a los dispositivos programados como<br />
slave del cronotermostato.<br />
Para confirmar el valor programado, presionar la tecla<br />
antes de 30 segundos.<br />
El procedimiento de configuración parámetros está<br />
terminado. Presionar la tecla para volver al<br />
funcionamiento normal.<br />
Personalización programa diario<br />
Para personalizar el programa diario preprogramado, o aportar modificaciones,<br />
presionar dos veces la tecla .<br />
En la pantalla aparece la nota PROG, mientras que la<br />
barra del primer día de la semana empieza a parpadear.<br />
Seleccionar el día deseado con las teclas .<br />
Para confirmar la selección, presionar la tecla antes<br />
de 30 segundos.<br />
Después de la confirmación en la pantalla se visualiza el<br />
perfil corriente, relativo al día elegido. El horario empieza<br />
a parpadear.<br />
Los pasos a seguir para la personalización son:<br />
1- selección del horario de inicio de la variación de<br />
temperatura<br />
2- configuración del nuevo set point de temperatura<br />
3- finalización de la personalización<br />
1- Selección del horario de inicio de la variación de<br />
temperatura<br />
Con las teclas modificar el horario hasta el<br />
momento en el que se desea cambiar el perfil propuesto;<br />
durante el aumento en el perfil horario parpadea la<br />
columna relativa al horario seleccionado. El horario<br />
disminuye/aumenta a pasos de 15 minutos cuando se<br />
presionan las teclas , es por esto posible definir<br />
hasta 4 periodos de programación ca<strong>da</strong> hora.<br />
123<br />
E<br />
S<br />
P<br />
A<br />
Ñ<br />
O<br />
L
INSTRUCCIONES DE EMPLEO<br />
2 - Configuración del nuevo set point de temperatura<br />
En la pantalla el valor correspondiente al set point<br />
actualmente programado está indicado por el símbolo<br />
, o . Con las teclas seleccionar el nuevo set<br />
point, que se aplicará al perfil horario hasta la sucesiva<br />
variación presente en el programa.<br />
3 - Finalización de la personalización<br />
Después de haber repetido los pasos 1 y 2 hasta haber<br />
obtenido el perfil horario de temperatura deseado, se puede:<br />
- copiar el programa en el día sucesivo y confirmar la<br />
programación efectua<strong>da</strong>, presionando la tecla<br />
antes de 30 segundos, o<br />
- confirmar la programación sin copiarla, presionando la<br />
tecla antes de 30 segundos (se pasa<br />
automáticamente a la programación del día sucesivo).<br />
Cuando termine la programación semanal presionar la tecla<br />
funcionamiento normal.<br />
para volver al<br />
Para activar el programa seleccionar la mo<strong>da</strong>li<strong>da</strong>d de funcionamiento AUTO presionando<br />
la tecla hasta que aparezca en la pantalla la nota AUTO.<br />
Forzado temporal de la temperatura<br />
En mo<strong>da</strong>li<strong>da</strong>d de funcionamiento AUTO Económico, Preconfort y Confort es posible<br />
forzar temporalmente el set point de temperatura activo, utilizando las teclas<br />
para programar el valor deseado. Confirmar el nuevo valor presionando la tecla<br />
o esperar 5 segundos.<br />
La activación del forzado se señala en la pantalla por el<br />
parpadeo de la nota AUTO o, en los demás casos, por el<br />
parpadeo de , o .<br />
El forzado en la mo<strong>da</strong>li<strong>da</strong>d de funcionamiento AUTO<br />
permanece activo hasta la sucesiva variación del perfil<br />
horario de temperatura.<br />
124
INSTRUCCIONES DE EMPLEO<br />
Función Party<br />
En AUTO, Económico, Preconfort y Confort la función Party permite excluir temporalmente<br />
la mo<strong>da</strong>li<strong>da</strong>d de funcionamiento programa<strong>da</strong> y activar la mo<strong>da</strong>li<strong>da</strong>d confort con un set<br />
point regulable, durante un período de tiempo comprendido entre 1 y 23 horas.<br />
Esta función puede usarse, por ejemplo, para programar una temperatura más<br />
confortable durante una cena, una fiesta, etc.<br />
Para activar la función presionar la tecla .<br />
En la pantalla aparece el símbolo , mientras parpadea<br />
el valor del set point .<br />
Con las teclas programar la temperatura desea<strong>da</strong>.<br />
Con las teclas programar el número de las horas<br />
de activación de la función Party, que se visualiza arriba<br />
a la izquier<strong>da</strong> en la pantalla.<br />
Presionar la tecla , o esperar 5 segundos, para<br />
confirmar la programación.<br />
Cuando la función está activa, se pueden modificar el valor del set point presionando las<br />
teclas y el del periodo de activación mediante las teclas .<br />
Durante el funcionamiento el recuento de las horas disminuye.<br />
La función Party permanece activa hasta que pase el periodo programado.<br />
Cuando pase el plazo del periodo programado, la función Party se desactiva<br />
automáticamente y el cronotermostato vuelve a la mo<strong>da</strong>li<strong>da</strong>d de funcionamiento de<br />
parti<strong>da</strong>.<br />
Para desactivar anticipa<strong>da</strong>mente la función Party presionar la tecla .<br />
E<br />
S<br />
P<br />
A<br />
Ñ<br />
O<br />
L<br />
125
INSTRUCCIONES DE EMPLEO<br />
Función Holi<strong>da</strong>y<br />
En AUTO, Económico, Preconfort y Confort la función Holi<strong>da</strong>y permite excluir<br />
temporalmente la mo<strong>da</strong>li<strong>da</strong>d de funcionamiento programa<strong>da</strong> y activar la mo<strong>da</strong>li<strong>da</strong>d<br />
Económico con un set point regulable, durante un período de tiempo comprendido entre<br />
1 y 99 días.<br />
Esta función puede ser usa<strong>da</strong>, por ejemplo, para programar un funcionamiento<br />
económico de la instalación de termorregulación durante unas vacaciones, o un largo<br />
periodo de ausencia, y volver a encontrar la temperatura desea<strong>da</strong> el día de vuelta.<br />
Para activar la función presionar la tecla .<br />
En la pantalla aparece el símbolo , mientras parpadea<br />
el valor del set point .<br />
Con las teclas programar la temperatura desea<strong>da</strong>.<br />
Con las teclas programar el número de los días<br />
de activación de la función Holi<strong>da</strong>y, que se visualiza arriba<br />
a la izquier<strong>da</strong> en la pantalla.<br />
Presionar la tecla , o esperar 5 segundos, para<br />
confirmar la programación.<br />
Cuando la función está activa, se pueden modificar el valor del set point presionando las<br />
teclas y el del periodo de activación mediante las teclas .<br />
Durante el funcionamiento el recuento de los días disminuye.<br />
La función Holi<strong>da</strong>y permanece activa hasta que pasa el periodo programado, que termina<br />
a las 24 horas en el cálculo de los días debe estar siempre incluido el día corriente.<br />
Por ejemplo, si el viernes por la tarde se quiere programar la función Holi<strong>da</strong>y de manera<br />
que termine a media noche del domingo es necesario programar 3 días (viernes, sábado<br />
y domingo).<br />
Cuando pase el plazo del periodo programado, la función Holi<strong>da</strong>y se desactiva<br />
automáticamente y el cronotermostato vuelve a la mo<strong>da</strong>li<strong>da</strong>d de funcionamiento de<br />
parti<strong>da</strong>.<br />
Para desactivar anticipa<strong>da</strong>mente la función Holi<strong>da</strong>y presionar la tecla .<br />
126
INSTRUCCIONES DE EMPLEO<br />
Copia del programa festivo<br />
En mo<strong>da</strong>li<strong>da</strong>d AUTO, es posible copiar el perfil del día festivo (7) en cualquier día de la<br />
semana.<br />
La función puede ser activa<strong>da</strong> hasta 6 días antes del día elegido.<br />
Esta función es especialmente útil cuando hay, por ejemplo, una festivi<strong>da</strong>d entre semana.<br />
Para copiar el perfil del día festivo presionar la tecla .<br />
En la pantalla parpadean el símbolo y la barra del día<br />
festivo.<br />
Mediante las teclas seleccionar el día de la<br />
semana en el cual copiar el perfil del día festivo.<br />
Presionar la tecla , o esperar 30 segundos, para<br />
confirmar la programación.<br />
Cuando la función es activa, presionando la tecla<br />
se visualiza el día en el cual se ha copiado el perfil del<br />
día festivo; en la pantalla la barra correspondiente<br />
parpadea.<br />
Si se desea desactivar la función, presionar nuevamente<br />
la tecla ; si se desea modificar el día de la semana,<br />
utilizar las teclas y presionar la tecla , o<br />
esperar 30 segundos, para confirmar la nueva<br />
programación.<br />
Durante el día el símbolo se enciende fijo.<br />
La validez de la copia del día festivo es temporal; al<br />
terminar el plazo de media noche del día seleccionado se<br />
vuelve al perfil semanal programado.<br />
E<br />
S<br />
P<br />
A<br />
Ñ<br />
O<br />
L<br />
127
INSTRUCCIONES DE EMPLEO<br />
Señalización pilas agota<strong>da</strong>s<br />
Cuando las pilas se están agotando y falta alimentación<br />
bus en la pantalla empieza a parpadear el símbolo .<br />
En la pantalla desaparece también la indicación de la<br />
temperatura y es necesario proceder cuanto antes a la<br />
sustitución de las pilas.<br />
Cuando el símbolo está encendido fijo las pilas<br />
deben ser sustitui<strong>da</strong>s absolutamente.<br />
Las pilas sirven solo para conservar las programaciones<br />
de fecha y hora en caso de caí<strong>da</strong> de tensión del bus<br />
KNX/<strong>EIB</strong> (las demás programaciones se mantienen en<br />
memoria no volátil).<br />
En presencia de la tensión bus el funcionamiento está<br />
garantizado también en ausencia de pilas.<br />
Reset y reajuste de los valores preprogramados<br />
Presionando contemporáneamente las teclas , y se efectúa un reajuste<br />
completo del cronotermostato.<br />
Atención: todos los parámetros programados y los programas personalizados se<br />
anulan.<br />
Cuando se vuelven a encender, el cronotermostato utiliza los parámetros y los programas<br />
preprogramados en fábrica. El cronotermostato se pone en calefacción, en la mo<strong>da</strong>li<strong>da</strong>d<br />
OFF y las funciones Party y Holi<strong>da</strong>y no son activas.<br />
128
INSTRUCCIONES DE EMPLEO<br />
El cronotermostato dispone de 2 programas preprogramados, uno para la calefacción<br />
y uno para el acondicionamiento.<br />
PROGRAMA CALEFACCIÓN<br />
Lunes - Viernes<br />
Programas preprogramados<br />
Sábado - Domingo<br />
PROGRAMA ACONDICIONAMIENTO<br />
Todos los días de la semana<br />
Estos programas preprogramados pueden modificarse y personalizarse según las propias<br />
exigencias. Para modificar los parámetros preprogramados, efectuar las indicaciones<br />
conteni<strong>da</strong>s en el parágrafo “Personalización programa diario".<br />
E<br />
S<br />
P<br />
A<br />
Ñ<br />
O<br />
L<br />
129
INSTRUCCIONES DE EMPLEO<br />
Día de la semana<br />
1: lunes<br />
Hora 00:00<br />
16 °C<br />
18 °C<br />
Set point temperatura de calefacción<br />
20 °C<br />
TANTICONGELANTE<br />
5 °C<br />
Set point temperatura de acondicionamiento<br />
Autoaprendizaje<br />
Parámetros preprogramados<br />
TPROTECCIÓN ALTAS TEMPERATURAS<br />
24 °C<br />
26 °C<br />
28 °C<br />
35 °C<br />
OFF<br />
Diferencial de regulación<br />
Calefacción<br />
Acondicionamiento<br />
0.2 °C<br />
0.5 °C<br />
Uni<strong>da</strong>d de medi<strong>da</strong> temperatura °C<br />
Comportamiento a la caí<strong>da</strong> y al reajuste<br />
de la alimentación bus<br />
Al caer la alimentación bus, el dispositivo no cumple ninguna acción. Hora y fecha están<br />
manteni<strong>da</strong>s por la alimentación tampón (pilas), mientras que to<strong>da</strong>s las demás<br />
programaciones están conserva<strong>da</strong>s en una memoria no volátil.<br />
El dispositivo es completamente operativo dentro máximo 5 segundos desde el reajuste<br />
de la alimentación bus.<br />
En ausencia de la alimentación tampón (pilas), al reajuste de la alimentación bus el<br />
cronotermostato se reactiva en mo<strong>da</strong>li<strong>da</strong>d OFF.<br />
130
INSTRUCCIONES DE EMPLEO<br />
Sustitución pilas<br />
Quitar el tornillos de fijación, que se<br />
encuentra debajo de la tapa frontal, y<br />
desenchufar el cronotermostato de la<br />
base de soporte, siguiendo la secuencia<br />
ilustra<strong>da</strong> en la figura.<br />
UP<br />
3<br />
2<br />
1<br />
Quitar la tapa de cierre del compartimento<br />
pilas y sustituir las agota<strong>da</strong>s con otras dos<br />
de 1,5 V (tipo AAA), respetando las<br />
polari<strong>da</strong>des indica<strong>da</strong>s.<br />
E<br />
S<br />
P<br />
A<br />
Ñ<br />
O<br />
L<br />
131
INSTRUCCIONES DE EMPLEO<br />
Volver a enganchar el cronotermostato en la base de<br />
soporte, siguiendo la secuencia ilustra<strong>da</strong> en la figura y<br />
fijarlo nuevamente con el tornillo frontal.<br />
1<br />
2<br />
ATENCIÓN<br />
- Si el cronotermostato no ha sido alimentado del bus durante la sustitución<br />
de las pilas, volver a actualizar fecha y hora.<br />
- Sustituir to<strong>da</strong>s las pilas contemporáneamente.<br />
- No utilice pilas viejas y nuevas a la misma vez<br />
- Utilizar pilas del mismo tipo (no mezcle pilas alcalinas con pilas de cinc<br />
carbón).<br />
- No tire las pilas al fuego.<br />
- Las pilas son desechos especiales, cuya eliminación está reglamenta<strong>da</strong><br />
por precisas disposiciones de ley, y deben ser conferi<strong>da</strong>s a los centros<br />
especiales de recogi<strong>da</strong>.<br />
Limpieza del cronotermostato<br />
Para limpiar el cronotermostato utilizar un paño seco.<br />
132
UP<br />
ISTRUCCIONES DE INSTALACIÓN<br />
ATENCIÓN: La instalación del dispositivo debe efectuarse<br />
exclusivamente por personal cualificado, siguiendo la normativa<br />
vigente y las líneas guía para las instalaciones KNX/<strong>EIB</strong>.<br />
Para la correcta detección de la<br />
temperatura del ambiente a controlar, el<br />
cronotermostato no debe ser instalado<br />
en recintos, cerca de puertas o<br />
ventanas, al lado de calefactores o<br />
acondicionadores y no debe ser<br />
golpeado por corrientes de aire y por la<br />
iluminación solar directa.<br />
Correcto posicionamiento<br />
Montaje de la base de soporte<br />
La base de soporte se coloca a una altura desde tierra de 160 cm aproxima<strong>da</strong>mente y<br />
puede fijarse directamente a la pared, con tacos o encima de una caja de 3 uni<strong>da</strong>des.<br />
ATENCIÓN Al fijar la base de soporte respete la dirección del montaje indicado desde la<br />
flecha .<br />
Montaje con tacos<br />
E<br />
S<br />
P<br />
A<br />
Ñ<br />
O<br />
L<br />
133
ISTRUCCIONES DE INSTALACIÓN<br />
Montaje en caja de 3 uni<strong>da</strong>des<br />
UP<br />
Advertencias para la instalación KNX/<strong>EIB</strong><br />
1. La longitud de la línea bus entre el cronotermostato <strong>EIB</strong> y el alimentador no debe<br />
superar los 350 metros.<br />
2. La longitud de la línea bus entre el cronotermostato <strong>EIB</strong> y el más lejano dispositivo<br />
KNX/<strong>EIB</strong> a dirigir no debe superar los 700 metros.<br />
3. Para evitar señales y sobretensiones no desea<strong>da</strong>s, si es posible no de vi<strong>da</strong> a circuitos<br />
de anillo.<br />
4. Mantener una distancia de al menos 4 mm entre los cables individualmente aislados<br />
de la línea bus y los de la línea eléctrica.<br />
230 V<br />
Bus<br />
≥ 4 mm<br />
5. No <strong>da</strong>ñe el conductor de continui<strong>da</strong>d eléctrica del blin<strong>da</strong>je.<br />
Cable bus<br />
Blin<strong>da</strong>je<br />
Conductor de continui<strong>da</strong>d<br />
eléctrica<br />
134
ISTRUCCIONES DE INSTALACIÓN<br />
ATENCIÓN: los cables de señal del bus no utilizados y el conductor de<br />
continui<strong>da</strong>d eléctrica no deben nunca tocar elementos bajo tensión o<br />
el conductor de tierra.<br />
Conexiones eléctricas<br />
+ -<br />
+ - bus<br />
Esquema de las conexiones eléctricas<br />
1. Antes de proceder a la conexión al bus KNX/<strong>EIB</strong>, introducir las pilas para la memoria<br />
tampón (ver parágrafo Sustitución pilas).<br />
2. Conectar el cable rojo del cable bus a la borna roja (+) del terminal y el cable negro<br />
a la borna negra (-). Al terminal bus se pueden conectar hasta 4 líneas bus (cables del<br />
mismo color en la misma borna).<br />
Conexión dispositivo bus<br />
Conexión cable bus<br />
E<br />
S<br />
P<br />
A<br />
Ñ<br />
O<br />
L<br />
3. Aislar la pantalla, el conductor de continui<strong>da</strong>d eléctrica y los cables blanco y amarillo<br />
del cable bus (en el caso de que se utilice un cable bus de 4 conductores), que no son<br />
necesarios.<br />
135
UP<br />
ISTRUCCIONES DE INSTALACIÓN<br />
4. Introducir la borna bus en los pies específicos del dispositivo. El sentido correcto de<br />
inserción está determinado por las guías de fijación.<br />
Finalización<br />
Volver a enganchar el cronotermostato en la<br />
base de soporte, siguiendo la secuencia<br />
ilustra<strong>da</strong> en la figura y fijarlo nuevamente con<br />
el tornillo suministrado.<br />
2<br />
3<br />
1<br />
136
DATOS TÉCNICOS<br />
Comunicación<br />
Alimentación<br />
Bus KNX/<strong>EIB</strong><br />
Mediante bus KNX/<strong>EIB</strong>, 29 V cc SELV<br />
+ 2 pilas alcalinas de 1,5 V AAA para la actualización<br />
fecha/hora en caso de ausencia tensión bus<br />
Absorción corriente desde el bus 5mA<br />
Cable bus<br />
KNX/<strong>EIB</strong> TP1<br />
Elementos de mando<br />
1 tecla de miniatura de programación dirección física<br />
<strong>10</strong> pulsadores de mando y configuración<br />
Elementos de visualización 1 pantalla LCD retroilumina<strong>da</strong> de LED (temporiza<strong>da</strong><br />
con la intervención del usuario)<br />
1 LED rojo de programación dirección física<br />
Intervalo de visualización<br />
temperatura 0 ÷ +45 °C<br />
Elementos de medi<strong>da</strong><br />
1 sensor NTC<br />
resolución de medi<strong>da</strong>: 0,1 °C<br />
exactitud de medi<strong>da</strong>: ± 0,5 °C de 20 °C<br />
intervalo entre medi<strong>da</strong>s sucesivas: 1 minuto<br />
Intervalos de regulación<br />
temperaturas TANTIHIELO: +2 ÷ +7 °C<br />
TPROTECCIÓN ALTAS TEMPERATURAS: +30 ÷ +40 °C<br />
Otros set point: +5 ÷ +40 °C<br />
Ambiente de uso<br />
Interno, lugares secos<br />
Temperatura de funcionamiento -5 ÷ +45 °C<br />
Temperatura de almacenaje -25 ÷ +70 °C<br />
Hume<strong>da</strong>d relativa<br />
Máx 93% (no condensante)<br />
Conexión al bus<br />
Borne de conexión, 2 pin Ø 1 mm<br />
Grado de protección<br />
IP20<br />
Dimensión (B x H x P)<br />
130 x 92 x 23 mm<br />
Referencias normativas Directiva baja tensión 2006/95/CE<br />
Directiva sobre compatibili<strong>da</strong>d electromagnética<br />
89/336/CEE<br />
EN50090-2-2;EN60730-1<br />
Certificaciones<br />
KNX/<strong>EIB</strong><br />
E<br />
S<br />
P<br />
A<br />
Ñ<br />
O<br />
L<br />
137
INHALTSVERZEICHNIS<br />
Seite<br />
ALLGEMEINE HINWEISE<br />
Packungsinhalt ............................................................................................... <strong>14</strong>0<br />
ALLGEMEINE BESCHR<strong>EIB</strong>UNG<br />
Kurzbeschreibung ............................................................................................ <strong>14</strong>1<br />
Position der hinteren Bedienelemente ............................................................ <strong>14</strong>3<br />
Position der Bedienelemente ............................................................................ <strong>14</strong>4<br />
Steuerungsbeschreibung ................................................................................. <strong>14</strong>5<br />
Betriebsart........................................................................................................ <strong>14</strong>6<br />
BEDIENUNGSANWEISUNG<br />
Auswahl Heizung / Klimatisierung ..................................................................... <strong>14</strong>8<br />
Parametereinstellung ....................................................................................... <strong>14</strong>8<br />
Anpassung des Tagesprogramms...................................................................... 157<br />
Kurzzeitiges Übersteuern der Temperatur ......................................................... 158<br />
Funktion Party................................................................................................... 159<br />
Funktion Holi<strong>da</strong>y .............................................................................................. 160<br />
Kopie des Feiertagsprogramm .......................................................................... 161<br />
Anzeige Batterie entladen ................................................................................. 162<br />
Rückstellung und Wiederherstellung der Werkseinstellung ................................ 162<br />
Voreingestellte Programme ............................................................................... 163<br />
Voreingestellte Parameter ................................................................................. 164<br />
Verhalten bei Ausfall und Wiederherstellung der Busversorgung ........................ 164<br />
Batteriewechsel ................................................................................................ 165<br />
Reinigung des Thermostattimers ..................................................................... 166<br />
INSTALLATIONSANWEISUNG<br />
Richtige Positionierung...................................................................................... 167<br />
Montage des Bediensockels.............................................................................. 167<br />
Hinweise zur Installation KNX/<strong>EIB</strong> ..................................................................... 168<br />
Elektrische Anschlüsse ..................................................................................... 169<br />
Vervollständigung ............................................................................................ 170<br />
TECHNISCHE DATEN ............................................................................................. 171<br />
D<br />
E<br />
U<br />
T<br />
S<br />
C<br />
H<br />
139
ALLGEMEINE HINWEISE<br />
Achtung! Die Gerätesicherheit ist nur <strong>da</strong>nn gegeben, wenn die nachfolgenden<br />
Anweisungen eingehalten werden. Daher sind diese zu lesen, und aufzubewahren. Die<br />
Produkte der Reihe Chorus müssen gemäß der Norm CEI 64-8 für Anwendung im<br />
Wohnbereich oder ähnlich, in staubarmer Umgebung, wo kein besonderer Schutz gegen<br />
Eindringen von Wasser erforderlich ist installiert werden.<br />
Die GEWISS Verkaufsabteilung steht für weitergehende Erläuterungen und technische<br />
Informationen gerne zur Verfügung.<br />
<strong>Gewiss</strong> S.p.A. behält sich <strong>da</strong>s Recht vor, <strong>da</strong>s in diesem Handbuch beschriebene Produkt<br />
jederzeit und ohne Vorankündigung zu ändern.<br />
Packungsinhalt<br />
1 St. <strong>EIB</strong> Thermostattimer für Wandmontage<br />
1 St. Haltesockel<br />
1 St. Busklemme<br />
1 St. Installations- und Bedienungshandbuch<br />
<strong>14</strong>0
ALLGEMEINE BESCHR<strong>EIB</strong>UNG<br />
Kurzbeschreibung<br />
Der <strong>EIB</strong> Thermostattimer für Wandmontage ermöglicht mit Hilfe eines Wochenprogramms<br />
die automatische Regelung der Temperatur in dem Raum, in dem er installiert ist. Die<br />
Temperaturregelung erfolgt durch Ansteuerung der KNX/<strong>EIB</strong>-Antriebe der Heizungs- oder<br />
Klimaanlage über den KNX/<strong>EIB</strong>-Bus des Building Automation Systems. Im Zusammenspiel<br />
mit <strong>EIB</strong> Thermostaten zur Wandmontage (<strong>GW</strong><strong>10</strong> 793 - <strong>GW</strong><strong>14</strong> 793), kann es mit Master-<br />
Funktion zur Zonenregelung der Temperatur verwendet werden.<br />
Die Temperaturprofile werden auf Wochenbasis definiert. Für jeden Wochentag kann ein<br />
individuelles Stundenprofil mit 15 Minuten Schritten und beliebig vielen täglichen<br />
Änderungen erstellt werden. Der Thermostattimer ermöglicht:<br />
• 2 Funktionsarten: Heizung und Klimatisierung;<br />
• 5 Betriebsarten: AUS, Absenkung, Prekomfort, Komfort und Automatik;<br />
• 4 Solltemperaturen für die Heizung (TABSENKUNG, TPREKOMFORT, TKOMFORT, TFROSTSCHUTZ);<br />
• 4 Solltemperaturen für die Klimatisierung (TABSENKUNG, TPREKOMFORT, TKOMFORT,<br />
TÜBERTEMPERATURSCHUTZ).<br />
Der Thermostattimer wird von der Buslinie versorgt und ist mit einem LCD-Display mit<br />
zeitgesteuerter Hintergrundbeleuchtung, <strong>10</strong> Bedientasten, einem integrierten Sensor für<br />
die Erfassung der Umgebungstemperatur (dessen Wert auf den Bus übertragen werden<br />
kann), Alkalibatterien (AAA, nicht enthalten) für die Speicherung des angezeigten Datums<br />
und Uhrzeit (für evtl. Ausfall der Busspannung).<br />
D<br />
E<br />
U<br />
T<br />
S<br />
C<br />
H<br />
<strong>14</strong>1
ALLGEMEINE BESCHR<strong>EIB</strong>UNG<br />
Das Gerät wird mit der ETS-Software konfiguriert, um die nachfolgend aufgeführten<br />
Funktionen zu realisieren:<br />
Temperaturüberwachung<br />
• über 2-Punkt Regelung mit Befehl AN/AUS oder Dauerregelung (0% - <strong>10</strong>0%)<br />
• über Proportionalregelung mit PWM-Befehlen oder Dauerregelung (0% - -<strong>10</strong>0%)<br />
Einstellung Betriebsart<br />
• über Bus mit eindeutigen Objekten mit 1 bit (AUS, ABSENKUNG, PREKOMFORT,<br />
KOMFORT, AUTO)<br />
• über Bus mit Objekt mit 1 byte<br />
Temperaturmessung<br />
• mit integriertem Sensor oder Temperaturfühler<br />
• gemischt mit Definition der jeweiligen Wichtung<br />
Zonentemperaturüberwachung<br />
• mit Übertragung der Betriebsart an die Slave-Thermostate<br />
• mit Übertragung des Sollwerts an die Slave-Thermostate<br />
Szenen<br />
• Speicherung und Aktivierung von 8 Szenen (Wert 0,63)<br />
Andere Funktionen<br />
• Einstellung des Sollwerts (AUS, ABSENKUNG, PREKOMFORT, KOMFORT) über den Bus<br />
• Einstellen der Funktionsart (Heizung / Klimatisierung) über den Bus<br />
• Einstellen des Tages und der Uhrzeit über den Bus<br />
• Übertragen des Tages und der Uhrzeit über den Bus an die Slave-Thermostate<br />
• Übertragen der Statusinformationen (Modus, Art) und der gemessenen Temperatur<br />
über den Bus<br />
• Verwalten der Statusinformationen vom angesteuerten Antrieb<br />
Das Gerät wird mit dem mitgelieferten Flansch an der Wand installiert, dieser kann direkt<br />
mit Dübeln an die Wand oder auf ein UP-Gehäuse (3 Module) geschraubt werden.<br />
<strong>14</strong>2
ALLGEMEINE BESCHR<strong>EIB</strong>UNG<br />
Position der hinteren Bedienelemente<br />
LED für Programmierung physikalische Adresse<br />
Taste für Programmierung physikalische Adresse<br />
D<br />
E<br />
U<br />
T<br />
S<br />
C<br />
H<br />
<strong>14</strong>3
ALLGEMEINE BESCHR<strong>EIB</strong>UNG<br />
Position der Bedienelemente<br />
Der Thermostattimer ist mit einem Display, 3 immer zugänglichen Bedientasten und 7 bei<br />
öffener Klappe zugänglichen Bedientasten ausgestattet.<br />
21<br />
22<br />
23<br />
24<br />
25<br />
26<br />
27<br />
28<br />
18<br />
17<br />
20<br />
16<br />
15<br />
<strong>14</strong><br />
19<br />
7<br />
8<br />
13<br />
9<br />
1<br />
2<br />
3<br />
4<br />
5<br />
6<br />
12<br />
11<br />
<strong>10</strong><br />
<strong>14</strong>4
ALLGEMEINE BESCHR<strong>EIB</strong>UNG<br />
Steuerungsbeschreibung<br />
1<br />
2<br />
3<br />
4<br />
5<br />
6<br />
7<br />
8<br />
9<br />
STEUERTASTEN Symbol Seite<br />
Programmierung / Einstellung<br />
Zeiteinstellung<br />
Party 159<br />
Holi<strong>da</strong>y 160<br />
Auswahl Heizung / Klimatisierung <strong>14</strong>8<br />
Kopieren 161<br />
Temperaturregelung (+) / Parameterauswahl<br />
Auswahl Funktionsmodus / Bestätigung<br />
Temperaturregelung (-) / Parameterauswahl<br />
<strong>10</strong><br />
11<br />
12<br />
13<br />
<strong>14</strong><br />
15<br />
16<br />
17<br />
18<br />
19<br />
20<br />
21<br />
22<br />
23<br />
24<br />
25<br />
26<br />
27<br />
28<br />
DISPLAYANZEIGEN<br />
Betriebsart<br />
Temperatureinheit<br />
Gemessene Raumtemperatur<br />
AUTO<br />
°C / °F<br />
<strong>14</strong>6<br />
150<br />
Profil des Tagesprogramms 157<br />
Aktivierung Klimatisierung <strong>14</strong>7<br />
Aktivierung Heizung <strong>14</strong>7<br />
Temperaturdifferenz 155<br />
Uhr 150<br />
Wochentag 150<br />
Aktivierung Selbstlernfunktion 155<br />
Temperatursollwert - Betriebsart 151<br />
Heizungsbetrieb <strong>14</strong>7<br />
Status Parametereinstellung<br />
Klimatisierungsbetrieb<br />
SET<br />
<strong>14</strong>8<br />
<strong>14</strong>8<br />
Status Programmierung PROG 155<br />
Funktion Holi<strong>da</strong>y 160<br />
Batterien entladen 162<br />
Funktion Kopie des Feiertagsprogramms 161<br />
Funktion Party 159<br />
D<br />
E<br />
U<br />
T<br />
S<br />
C<br />
H<br />
<strong>14</strong>5
ALLGEMEINE BESCHR<strong>EIB</strong>UNG<br />
Betriebsart<br />
Der Thermostattimer sieht 5 verschiedene Betriebsarten vor:<br />
• AUTOMATIK<br />
• ABSENKUNG<br />
• PREKOMFORT<br />
• KOMFORT<br />
• AUS - FROSTSCHUTZ / ÜBERTEMPERATURSCHUTZ<br />
Zum Schalten zwischen den Betriebsarten wird die Taste<br />
verwendet.<br />
Beim Automatikbetrieb verwendet der Thermostattimer<br />
ein Programm, <strong>da</strong>s für jeden Wochentag unterschiedlich<br />
sein kann.<br />
Auf dem Display erscheint die Anzeige AUTO, die<br />
gemessene Raumtemperatur, und <strong>da</strong>s Symbol des<br />
Sollwerts der aktuellen Viertelstunde.<br />
Im Stundenprofil blinkt die Spalte der aktuellen Uhrzeit<br />
mit der Darstellung des aktiven Sollwerts.<br />
Der Thermostattimer verwendet bei den Betriebsarten<br />
Absenkung, Prekomfort und Komfort ständig die<br />
entsprechenden Temperatursollwerte. Auf dem Display<br />
erscheint die gemessene Raumtemperatur und <strong>da</strong>s<br />
Symbol , oder .<br />
BEDEUTUNG VON<br />
Symbol<br />
Heizung<br />
Klimatisierung<br />
Sollwert Betriebsart Sollwert Betriebsart<br />
TABSENKUNG Absenkung TKOMFORT Komfort<br />
TPREKOMFORT Prekomfort TPREKOMFORT Prekomfort<br />
TKOMFORT Komfort TABSENKUNG Absenkung<br />
<strong>14</strong>6
ALLGEMEINE BESCHR<strong>EIB</strong>UNG<br />
Die Frostschutzfunktion ist nur in der Betriebsart Heizung<br />
mit ausgeschalteter Temperaturregelung (AUS) aktiv.<br />
In diesem Fall verwendet der Thermostattimer den<br />
eingestellten Temperatursollwert für Frostschutz und<br />
schaltet die Heizungsanlage nur ein, wenn die<br />
Raumtemperatur unter Tfrostschutz absinkt.<br />
Auf dem Display erscheint die Anzeige AUS und die<br />
gemessene Raumtemperatur.<br />
Die Übertemperaturschutzfunktion ist nur in der<br />
Betriebsart Klimatisierung mit ausgeschalteter<br />
Temperaturregelung (AUS) aktiv. In diesem Fall verwendet<br />
der Thermostattimer den eingestellten Temperatursollwert<br />
für Übertemperatur und schaltet die Klimaanlage nur ein,<br />
wenn die Raumtemperatur über Tübertemperaturschutz<br />
ansteigt. Auf dem Display erscheint die Anzeige AUS und<br />
die gemessene Raumtemperatur.<br />
Während des Betriebs wird <strong>da</strong>s Einschalten der Heizung oder der Klimatisierung auf die<br />
folgende Weise angezeigt:<br />
Heizung<br />
Das Symbol zeigt an, <strong>da</strong>ss der Einschaltbefehl vom<br />
Antrieb der Heizkesselsteuerung erfasst wurde. Wenn<br />
über ETS die Verbraucherbenachrichtigungen aktiviert<br />
wurden und der Thermostattimer vom Antrieb nicht die<br />
Bestätigung der erfolgten Einschaltung erhält, beginnt <strong>da</strong>s<br />
Symbol zu blinken. Anschließend sendet der<br />
Thermostattimer im Minutentakt den Einschaltbefehl, bis<br />
er eine positive Antwort erhält.<br />
Klimatisierung<br />
Das Symbol zeigt an, <strong>da</strong>ss der Einschaltbefehl vom<br />
Antrieb der Klimaanlagensteuerung erfasst wurde. Wenn<br />
über ETS die Verbraucherbenachrichtigungen aktiviert<br />
wurden und der Thermostattimer vom Antrieb nicht die<br />
Bestätigung der erfolgten Einschaltung erhält, beginnt <strong>da</strong>s<br />
Symbol zu blinken. Anschließend sendet der<br />
Thermostattimer im Minutentakt den Einschaltbefehl, bis<br />
er eine positive Antwort erhält.<br />
D<br />
E<br />
U<br />
T<br />
S<br />
C<br />
H<br />
<strong>14</strong>7
BEDIENUNGSANWEISUNG<br />
Auswahl Heizung / Klimatisierung<br />
Durch Drücken der Taste kann zwischen den Funktionsarten Heizung und<br />
Klimatisierung umgeschaltet werden.<br />
Heizung<br />
Das Symbol<br />
kennzeichnet die Heizung.<br />
Klimatisierung<br />
Das Symbol<br />
kennzeichnet die Klimatisierung.<br />
Parametereinstellung<br />
Zur Einstellung des Parameter des Thermostattimers:<br />
1. Mit der Taste die Funktionsart (Heizung / Klimatisierung) auswählen,<br />
2. Ein Mal die Taste drücken.<br />
Auf dem Display erscheint die Anzeige SET und die Uhr, der Balken des Wochentags<br />
beginnt zu blinken.<br />
Nun können, je nach Funktionsart nacheinander folgende Punkte geändert werden:<br />
<strong>14</strong>8
BEDIENUNGSANWEISUNG<br />
Heizung<br />
P01Heiz - Sollwert<br />
P02Heiz - Sollwert<br />
P03Heiz - Sollwert<br />
P04Heiz - Sollwert TFROSTSCHUTZ<br />
P05Heiz - Regellogik<br />
Wochentag<br />
Stunden<br />
Minuten<br />
Temperatureinheit<br />
Klimatisierung<br />
P01Klima - Sollwert<br />
P02Klima - Sollwert<br />
P03Klima - Sollwert<br />
P04Klima - Sollwert TÜBERTEMPERATURSCHUTZ<br />
P05Klima - Regellogik<br />
Wenn Regellogik = proportional<br />
P06Heiz - Taktzeit<br />
P06Klima - Taktzeit<br />
P07Heiz - Differenzwert der Regelung P07Klima - Differenzwert der Regelung<br />
proportional<br />
proportional<br />
P08 - minimaler Prozentwert für Befehlsübermittlung<br />
(sichtbar, wenn über ETS <strong>da</strong>s Befehlsformat mit 1 byte gewählt wurde)<br />
Wenn Regellogik = 2-Punkt<br />
P09Heiz - Differenzwert der Regelung<br />
mit 2-Punkt<br />
P<strong>10</strong>Heiz - Aktivierung Selbstlernfunktion<br />
P09Klima - Differenzwert der Regelung<br />
mit 2-Punkt<br />
P11 Aktivierung/Deaktivierung der Master-Funktion<br />
P12 Übermittlung Tag/Uhrzeit an Slave-Geräte<br />
P13 Übermittlungszeitraum Tag und Uhrzeit an Slave-Geräte<br />
P<strong>14</strong> Übermittlung Befehl PARTY an Slave-Geräte<br />
P<strong>14</strong> Übermittlung Befehl HOLIDAY an Slave-Geräte<br />
Die Taste zum Durchblättern der Sequenz und Bestätigung der angezeigten Werte<br />
drücken, bis der Parameter angezeigt wird, der geändert werden soll.<br />
Das Verlassen der Parametereinstellprozedur erfolgt durch erneutes Drücken der Taste<br />
, oder automatisch 30 Sekunden nach dem letzten Tastendruck.<br />
Zum Einstellen der Heizungs– und Klimatisierungsparameter müssen beiden Sequenzen<br />
ausgeführt werden (in der zweiten Sequenz können die gleichen Parameter bestätigt und<br />
nur die spezifischen geändert werden).<br />
D<br />
E<br />
U<br />
T<br />
S<br />
C<br />
H<br />
<strong>14</strong>9
BEDIENUNGSANWEISUNG<br />
Einstellung des Wochentags<br />
Wenn der Balken des Wochentags blinkt, den aktuellen<br />
Tag mit den Tasten wählen.<br />
Zur Bestätigung des eingestellten Werts die Taste<br />
innerhalb von 30 Sekunden drücken.<br />
Einstellung der Stunde<br />
Wenn die Stundenziffern blinken, diese mit den Tasten<br />
einstellen.<br />
Zur Bestätigung des eingestellten Werts die Taste<br />
innerhalb von 30 Sekunden drücken.<br />
Einstellung der Minuten<br />
Wenn die Minutenziffern blinken, diese mit den Tasten<br />
einstellen.<br />
Zur Bestätigung des eingestellten Werts die Taste<br />
innerhalb von 30 Sekunden drücken.<br />
Einstellung der Temperatureinheit<br />
Wenn <strong>da</strong>s Symbol °C oder °F der Temperatur anfängt zu<br />
blinken, kann die Temperatureinheit mit den Tasten<br />
gewählt werden.<br />
Zur Bestätigung des eingestellten Werts die Taste<br />
innerhalb von 30 Sekunden drücken.<br />
150
BEDIENUNGSANWEISUNG<br />
P01Heiz - Einstellung Sollwert (Heizung)<br />
Bei der Anzeige des Symbols beginnt der<br />
Temperaturwert zu blinken. Den Wert T (TABSENKUNG) mit<br />
den Tasten einstellen.<br />
Zur Bestätigung des eingestellten Werts die Taste<br />
innerhalb von 30 Sekunden drücken.<br />
P01Klima - Einstellung Sollwert (Klimatisierung)<br />
Bei der Anzeige des Symbols beginnt der<br />
Temperaturwert zu blinken. Den Wert (TKOMFORT) mit<br />
den Tasten einstellen<br />
Zur Bestätigung des eingestellten Werts die Taste<br />
innerhalb von 30 Sekunden drücken.<br />
P02Heiz - Einstellung Sollwert (Heizung)<br />
Bei der Anzeige des Symbols beginnt der<br />
Temperaturwert zu blinken. Den Wert (TPREKOMFORT)<br />
mit den Tasten einstellen.<br />
Zur Bestätigung des eingestellten Werts die Taste<br />
innerhalb von 30 Sekunden drücken.<br />
P02Klima - Einstellung Sollwert (Klimatisierung)<br />
Bei der Anzeige des Symbols beginnt der<br />
Temperaturwert zu blinken. Den Wert (TPREKOMFORT)<br />
mit den Tasten einstellen.<br />
Zur Bestätigung des eingestellten Werts die Taste<br />
innerhalb von 30 Sekunden drücken.<br />
D<br />
E<br />
U<br />
T<br />
S<br />
C<br />
H<br />
151
BEDIENUNGSANWEISUNG<br />
P03Heiz - Einstellung Sollwert T (Heizung)<br />
Bei der Anzeige des Symbols beginnt der<br />
Temperaturwert zu blinken. Den Wert T (TKOMFORT) mit den<br />
Tasten einstellen<br />
Zur Bestätigung des eingestellten Werts die Taste<br />
innerhalb von 30 Sekunden drücken.<br />
P03Klima - Einstellung Sollwert (Klimatisierung)<br />
Bei der Anzeige des Symbols beginnt der<br />
Temperaturwert zu blinken. Den Wert T (Tabsenkung) mit<br />
den Tasten einstellen<br />
Zur Bestätigung des eingestellten Werts die Taste<br />
innerhalb von 30 Sekunden drücken.<br />
P04Heiz - Einstellung Frostschutztemperaturwert<br />
Bei der Anzeige des Symbols beginnt der<br />
Temperaturwert zu blinken. Den Wert der<br />
Frostschutztemperatur mit den Tasten einstellen.<br />
Zur Bestätigung des eingestellten Werts die Taste<br />
innerhalb von 30 Sekunden drücken.<br />
P04Klima - Einstellung Übertemperaturschutzwert<br />
Bei der Anzeige des Symbols beginnt der<br />
Temperaturwert zu blinken. Den Wert des<br />
Übertemperaturschutzes mit den Tasten einstellen.<br />
Zur Bestätigung des eingestellten Werts die Taste<br />
innerhalb von 30 Sekunden drücken.<br />
ACHTUNG!<br />
Bei den Sollwerten gelten folgende Einschränkungen:<br />
- Heizung<br />
TFROSTSCHUTZ<br />
- Klimatisierung<br />
TÜBERTEMPERATURSCHUTZ<br />
152
BEDIENUNGSANWEISUNG<br />
P05 - Regellogik<br />
Bei der Anzeige von P05 die Regellogik der<br />
Temperaturregelung mit den Tasten einstellen (00<br />
= 2-Punkt Regelung, 01 = Proportionalregelung).<br />
Zur Bestätigung des eingestellten Werts die Taste<br />
innerhalb von 30 Sekunden drücken.<br />
Für Heizung und Klimatisierung können unterschiedliche<br />
Regellogiken eingestellt werden.<br />
Wenn die 2-Punkt Regelung gewählt wird, zum Punkt P09<br />
springen, bei Proportionalregelung zum Punkt P06 gehen.<br />
2-PUNKT REGELUNG<br />
Die Temperaturregelung wird deaktiviert, wenn die<br />
Raumtemperatur dem Sollwert entspricht und wird<br />
wieder aktiviert wenn:<br />
- die Temperatur für die Heizung gleich oder kleiner dem<br />
Sollwert - ist;<br />
- die Temperatur für die Klimatisierung gleich oder<br />
größer dem Sollwert + ist;<br />
Nachfolgende Grafiken zeigen die beiden Funktionsarten.<br />
HEIZUNG<br />
Sollwert<br />
T<br />
KLIMATISIERUNG<br />
Sollwert<br />
Wenn über ETS der Befehlsformat 1 bit gewählt wurde,<br />
übersendet der Thermostattimer Befehle AN/AUS; Wenn<br />
über ETS der Befehlsformat 1 byte gewählt wurde,<br />
übersendet der Thermostattimer die Werte 0% oder <strong>10</strong>0%.<br />
T<br />
D<br />
E<br />
U<br />
T<br />
S<br />
C<br />
H<br />
153
BEDIENUNGSANWEISUNG<br />
PROPORTIONALREGELUNG<br />
Der Thermostattimer prüft am Ende jeder Taktzeit die<br />
Raumtemperatur und moduliert je nach festgestellter<br />
Abweichung zum eingestellten Sollwert <strong>da</strong>s Ein- und<br />
Ausschalten des Heizkessels (PWM) oder sendet einen<br />
Befehl mit dem Wert 1 byte (<strong>da</strong>uernde Steuerung) für die<br />
Steuerung des Heiz- oder Kühlelements entsprechend der<br />
vom ETS gewählten Funktion (1 bit oder 1 byte).<br />
P06 - Einstellung Taktzeit<br />
Bei der Anzeige von P06 die Dauer der Taktzeit mit den<br />
Tasten einstellen.<br />
Die möglichen Werte sind: 5, <strong>10</strong>, 20, 30, 40, 50, 60<br />
Minuten. Für Heizung und Klimatisierung können<br />
unterschiedliche Taktzeiten eingestellt werden.<br />
Zur Bestätigung des eingestellten Werts die Taste<br />
innerhalb von 30 Sekunden drücken.<br />
P07 - Einstellung Differenzwert der Proportionalregelung<br />
Bei der Anzeige von P07 den Differenzwert der Regelung<br />
mit den Tasten einstellen.<br />
Mögliche Werte: Von 0,4 °C bis 3,2 °C, mit Schritten<br />
von 0,4 °C. Für Heizung und Klimatisierung können<br />
unterschiedliche Regeldifferenzwerte eingestellt<br />
werden. Zur Bestätigung des eingestellten Werts die<br />
Taste innerhalb von 30 Sekunden drücken.<br />
Wenn während der Konfiguration mit ETS als Kontrollwert<br />
der Wert 1 bit eingestellt wurde, zum Punkt P11<br />
springen, andernfalls mit Punkt P08 fortfahren.<br />
P08 - Minimaler Prozentwert für Befehlsübermittlung<br />
Bei der Anzeige von P08 die prozentuale Auflösung für die<br />
Übermittlung des Befehls an <strong>da</strong>s Steuergerät der<br />
Temperaturregelung einstellen. Die möglichen Werte sind:<br />
5%, <strong>10</strong>%, 20%.<br />
Zur Bestätigung des eingestellten Werts die Taste<br />
innerhalb von 30 Sekunden drücken.<br />
154
BEDIENUNGSANWEISUNG<br />
P09 - Einstellung Differenzwert der Regelung mit 2-Punkt<br />
Bei der Anzeige des Symbols den Differenzwert der<br />
Regelung mit den Tasten einstellen.<br />
Zur Bestätigung des eingestellten Werts die Taste<br />
innerhalb von 30 Sekunden drücken.<br />
Die Regeldifferenz ist die Abweichung zwischen dem<br />
eingestellten Sollwert und der tatsächlichen<br />
Einschalttemperatur. Für Heizung und Klimatisierung<br />
können unterschiedliche Regeldifferenzen eingestellt<br />
werden. Abgesehen von besonderen Situationen wird<br />
empfohlen, die voreingestellten Werte beizubehalten.<br />
P<strong>10</strong> - Aktivierung Selbstlernfunktion (nur Heizung).<br />
Bei der Anzeige des Symbols die Funktion mit den<br />
Tasten aktivieren (AN) oder deaktivieren (AUS).<br />
Zur Bestätigung des eingestellten Werts die Taste<br />
innerhalb von 30 Sekunden drücken.<br />
Die Selbstlernfunktion ermöglicht die Optimierung der<br />
vorzeitigen Einschaltung der Heizung (max. 2 Stunden).<br />
Der Raumtemperaturregler steuert die vorzeitige<br />
Einschaltung automatisch, um die eingestellte Temperatur<br />
zu Beginn jeder Periode des programmierten Zeitraums<br />
zu garantieren.Diese Funktion aktiviert sich ausschließlich<br />
in der Betriebsart Automatik des Heizbetriebs.<br />
Die folgenden Parameter sind nur wichtig, wenn der Thermostattimer über ETS für die<br />
Master-Funktion konfiguriert wurde, andernfalls werden sie ignoriert.<br />
P11 - Aktivierung/Deaktivierung der Master-Funktion<br />
Bei der Anzeige von P11 kann die Master-Funktion<br />
vorübergehend deaktiviert und die Stand Alone-Funktion<br />
aktiviert werden (01 = Master-Funktion, 00 = Stand<br />
Alone-Funktion).<br />
Zur Bestätigung des eingestellten Werts die Taste<br />
innerhalb von 30 Sekunden drücken.<br />
Wenn die Master-Funktion gewählt wurde zum Punkt P12<br />
wechseln, andernfalls ist die Prozedur abgeschlossen.<br />
D<br />
E<br />
U<br />
T<br />
S<br />
C<br />
H<br />
155
BEDIENUNGSANWEISUNG<br />
P12 - Übermittlung Tag/Uhrzeit an Slave-Geräte<br />
Bei der Anzeige von P12 kann definiert werden, wann der<br />
Thermostattimer Datum und Uhrzeit übermittelt, um diese<br />
Parameter bei den Slave-Geräten abzugleichen<br />
(00 = Nachricht wird nie übermittelt, 01 = Nachricht wird<br />
nur bei Wiederherstellung der Versorgungsspannung<br />
übermittelt, 02 = Nachricht wird nur bei Änderung der<br />
eingestellten Zeit übermittelt, 03 = Nachricht wird<br />
bei Wiederherstellung der Versorgungsspannung<br />
oder Änderung der eingestellten Zeit übermittelt,<br />
04 = Nachricht wird bei Wiederherstellung der<br />
Versorgungsspannung, Änderung der eingestellten Zeit<br />
und mit der in P13 angegebenen Häufigkeit übermittelt).<br />
Zur Bestätigung des eingestellten Werts die Taste<br />
innerhalb von 30 Sekunden drücken.<br />
Wenn die Option 04 gewählt wurde zum Punkt P13<br />
wechseln, andernfalls zum Punkt P<strong>14</strong> springen.<br />
P13 - Übermittlungszeitraum Tag und Uhrzeit<br />
Bei der Anzeige von P13 kann der Zeitraum für die<br />
Übermittlung von Datum und Uhrzeit eingestellt werden,<br />
um diese Parameter bei den Slave-Geräten, usw.<br />
abzugleichen (00 = alle 6 Stunden, 01 = alle 12<br />
Stunden, 02 = alle 24 Stunden, 03 = wöchentlich).<br />
Zur Bestätigung des eingestellten Werts die Taste<br />
innerhalb von 30 Sekunden drücken.<br />
P<strong>14</strong> - Übermittlung Befehl PARTY an Slave-Geräte<br />
Bei der Anzeige von P<strong>14</strong> kann mit den Tasten die<br />
Verlängerung des PARTY-Befehls für die Slave-Geräte<br />
des Thermostattimers aktiviert (AN) oder deaktiviert<br />
(AUS) werden.<br />
Zur Bestätigung des eingestellten Werts die Taste<br />
innerhalb von 30 Sekunden drücken.<br />
156
BEDIENUNGSANWEISUNG<br />
P15 - Übermittlung Befehl HOLIDAY an Slave-Geräte<br />
Bei der Anzeige von P15 kann mit den Tasten die<br />
Verlängerung des HOLIDAY-Befehls für die Slave-Geräte<br />
des Thermostattimers aktiviert (AN) oder deaktiviert<br />
(AUS) werden. Zur Bestätigung des eingestellten Werts<br />
die Taste innerhalb von 30 Sekunden drücken.<br />
Die Prozedur zur Parametereinstellung ist hiermit beendet.<br />
Die Taste drücken, um zum normalen Betrieb zurück<br />
zu kehren.<br />
Anpassung des Tagesprogramms<br />
Um die Anpassung des voreingestellten Tagesprogramms auszuführen, oder eine<br />
Änderung auszuführen muss die Taste zwei Mal gedrückt werden.<br />
Auf dem Display erscheint die Anzeige PROG, und der<br />
Balken des ersten Wochentags beginnt zu blinken.<br />
Den gewünschten Tag mit den Tasten wählen.<br />
Zur Bestätigung der Auswahl die Taste innerhalb von<br />
30 Sekunden drücken.<br />
Nach der Bestätigung des Tags wird auf dem Display <strong>da</strong>s<br />
aktuelle Profil des gewählten Tags angezeigt. Die Stunde<br />
beginnt zu blinken.<br />
Nachfolgend die Schritte, die für die Anpassung<br />
erforderlich sind:<br />
1- Auswahl des zeitlichen Beginns der Temperaturänderung<br />
2- Einstellung des neuen Temperatursollwerts<br />
3- Abschluss der Anpassung<br />
1 - Auswahl des zeitlichen Beginns<br />
der Temperaturänderung<br />
Mit den Tasten die Uhrzeit bis zu dem Punkt<br />
ändern, an dem <strong>da</strong>s vorgeschlagene Profil geändert<br />
werden soll; während der Zunahme blinkt im<br />
Stundenprofil die Spalte der gewählten Stunde. Bei jedem<br />
Drücken der Tasten wird die Uhrzeit in 15 Minuten<br />
Schritten vor oder zurück bewegt, <strong>da</strong>her können 4<br />
Programmierperioden für jede Stunde definiert werden.<br />
157<br />
D<br />
E<br />
U<br />
T<br />
S<br />
C<br />
H
BEDIENUNGSANWEISUNG<br />
2 - Einstellung des neuen Temperatursollwerts<br />
Auf dem Display wird der Wert entsprechend des aktuell<br />
eingestellten Sollwerts durch <strong>da</strong>s Symbol , oder<br />
angezeigt.<br />
Mit den Tasten den neuen Sollwert auswählen, der<br />
innerhalb des Stundenprofils bis zur nächsten Änderung<br />
innerhalb des Programms angewendet wird.<br />
3 - Abschluss der Anpassung<br />
Nach der Wiederholung der Schritte 1 und 2 und dem<br />
Einstellen des gewünschten Temperatur-Stundenprofils kann:<br />
- <strong>da</strong>s Programm auf den nächsten Tag kopiert werden<br />
und die ausgeführte Programmierung durch Drücken<br />
der Taste innerhalb von 30 Sekunden bestätigt<br />
werden, oder<br />
- die Programmierung ohne Kopieren bestätigt werden,<br />
indem die Taste innerhalb von 30 Sekunden<br />
gedrückt wird (der Wechsel zur Programmierung des<br />
nächsten Tages erfolgt automatisch).<br />
Am Ende der Wochenprogrammierung die Taste<br />
zurück zu kehren.<br />
drücken, um zum normalen Betrieb<br />
Zur Aktivierung des Programms die Betriebsart AUTO wählen, indem die Taste<br />
gedrückt wird, bis auf dem Display die Anzeige AUTO angezeigt wird.<br />
Kurzzeitiges Übersteuern der Temperatur<br />
In den Betriebsarten AUTO, Absenkung, Prekomfort und Komfort kann der aktive<br />
Temperatursollwert mit den Tasten vorübergehend übersteuert werden um den<br />
gewünschten Wert einzustellen. Den neuen Wert mit der Taste bestätigen oder 5<br />
Sekunden abwarten.<br />
Die Aktivierung der Übersteuerung wird im Display durch<br />
die blinkende Anzeige AUTO oder in anderen Fällen durch<br />
<strong>da</strong>s Blinken von , oder angezeigt. Die<br />
Übersteuerung in der Betriebsart AUTO bleibt bis zur<br />
nächsten Änderung des Temperatur-Stundenprofils aktiv.<br />
158
BEDIENUNGSANWEISUNG<br />
Funktion Party<br />
Die Funktion Party ermöglicht die vorübergehende Deaktivierung der eingestellten<br />
Betriebsart in den Modi AUTO, Absenkung, Prekomfort und Komfort und aktiviert für einen<br />
Zeitraum zwischen 1 und 23 Stunden den Modus Komfort mit einem wählbaren Sollwert.<br />
Diese Funktion kann beispielsweise verwendet werden, um während eines Abendessens,<br />
eines Fests, usw. eine angenehmere Temperatur zu haben.<br />
Zur Aktivierung der Funktion die Taste drücken. Auf<br />
dem Display erscheint <strong>da</strong>s Symbol , während der Wert<br />
des Sollwerts blinkt.<br />
Mit den Tasten die gewünschte Temperatur<br />
einstellen. Mit den Tasten <strong>da</strong>nn die Stundenanzahl<br />
der Aktivierung der Party-Funktion einstellen, die oben<br />
links im Display angezeigt wird.<br />
Die Taste drücken, oder 5 Sekunden warten, um die<br />
Einstellung zu bestätigen.<br />
Solange die Funktion aktiv ist, kann der Temperatursollwert mit den Tasten und<br />
der Aktivierungszeitraum mit den Tasten verändert werden.<br />
Während des Betriebs läuft die eingestellte Zeit rückwärts.<br />
Die Funktion Party bleibt bis zum Ablauf des eingestellten Zeitraums aktiv.<br />
Nach Ablauf der eingestellten Zeit wird die Funktion Party automatisch deaktiviert und der<br />
Thermostattimer kehrt in die ursprüngliche Betriebsart zurück.<br />
Zur vorzeitigen Deaktivierung der Funktion Party die Taste drücken.<br />
D<br />
E<br />
U<br />
T<br />
S<br />
C<br />
H<br />
159
BEDIENUNGSANWEISUNG<br />
Funktion Holi<strong>da</strong>y<br />
Die Funktion Holi<strong>da</strong>y ermöglicht die vorübergehende Deaktivierung der eingestellten<br />
Betriebsart in den Modi AUTO, Absenkung, Prekomfort und Komfort und aktiviert für einen<br />
Zeitraum zwischen 1 und 99 Tagen den Modus Absenkung mit einem wählbaren Sollwert.<br />
Diese Funktion kann beispielsweise verwendet werden, um einen Energiesparzeitraum<br />
der Heizung während eines Urlaubs oder einer längeren Abwesenheit einzustellen, und<br />
die gewünschte Temperatur am Ankunftstag vorzufinden.<br />
Zur Aktivierung der Funktion die Taste drücken.<br />
Auf dem Display erscheint <strong>da</strong>s Symbol , während der<br />
Wert des Sollwerts blinkt.<br />
Mit den Tasten die gewünschte Temperatur<br />
einstellen. Mit den Tasten <strong>da</strong>nn die Tagesanzahl<br />
der Aktivierung der Holi<strong>da</strong>y-Funktion einstellen, die oben<br />
links im Display angezeigt wird.<br />
Die Taste drücken, oder 5 Sekunden warten, um die<br />
Einstellung zu bestätigen.<br />
Solange die Funktion aktiv ist, kann der Temperatursollwert mit den Tasten und der<br />
Aktivierungszeitraum mit den Tasten verändert werden.<br />
Während des Betriebs läuft die eingestellte Tagesanzahl rückwärts.<br />
Die Funktion Holi<strong>da</strong>y bleibt bis zum Ablauf des eingestellten Zeitraums aktiv, der um 24<br />
Uhr endet. Bei der Berechnung der Tage muss immer der aktuelle Tag eingerechnet<br />
werden.<br />
Wenn beispielsweise Freitagabend die Funktion Holi<strong>da</strong>y eingestellt werden soll, die<br />
Sonntagabend um Mitternacht endet, müssen 3 Tage eingestellt werden (Freitag,<br />
Samstag, Sonntag).<br />
Nach Ablauf der eingestellten Zeit wird die Funktion Holi<strong>da</strong>y automatisch deaktiviert und<br />
der Thermostattimer kehrt in die ursprüngliche Betriebsart zurück.<br />
Zur vorzeitigen Deaktivierung der Funktion Holi<strong>da</strong>y die Taste drücken.<br />
160
BEDIENUNGSANWEISUNG<br />
Kopie des Feiertagsprogramm<br />
Im Modus AUTO kann <strong>da</strong>s Profil des Feiertags (7) auf einen beliebigen Wochentag kopiert<br />
werden.<br />
Die Funktion kann bis zu 6 Tage vor dem gewählten Tag aktiviert werden.<br />
Diese Funktion ist besonders nützlich, wenn beispielsweise ein Feiertag auf einen<br />
Werktag fällt.<br />
Zum Kopieren des Feiertagsprofils die Taste drücken.<br />
Auf dem Display blinkt <strong>da</strong>s Symbol und der Balken<br />
des Feiertags.<br />
Mit den Tasten den Werktag wählen, auf den <strong>da</strong>s<br />
Feiertagsprofil kopiert werden soll.<br />
Die Taste drücken, oder 30 Sekunden warten, um die<br />
Einstellung zu bestätigen.<br />
Solange die Funktion aktiv ist, kann durch Drücken der<br />
Taste der Tag angezeigt werden, auf den <strong>da</strong>s<br />
Feiertagsprofil kopiert wurde; der entsprechende Balken<br />
blinkt im Display.<br />
Wenn die Funktion deaktiviert werden soll, die Taste<br />
erneut drücken; wenn der Wochentag geändert werden<br />
soll, die Tasten verwenden und die Taste<br />
drücken oder 30 Sekunden abwarten um die neue<br />
Einstellung zu bestätigen.<br />
Tagsüber ist <strong>da</strong>s Symbol fest eingeschaltet. Das<br />
Kopieren des Feiertags gilt nur vorübergehend; nach<br />
Mitternacht des gewählten Tags wird zum<br />
programmierten Wochenprofil zurück gekehrt.<br />
D<br />
E<br />
U<br />
T<br />
S<br />
C<br />
H<br />
161
BEDIENUNGSANWEISUNG<br />
Anzeige Batterie entladen<br />
Wenn die Batterien nahezu entladen sind, und die<br />
Busversorgung fehlt, blinkt <strong>da</strong>s Symbol im<br />
Display. Aus dem Display verschwindet auch die<br />
Temperaturanzeige und die Batterien müssen so<br />
schnell wie möglich ersetzt werden.<br />
Wenn <strong>da</strong>s Symbol fest aufleuchtet müssen die<br />
Batterien unbedingt ersetzt werden.<br />
Die Batterien dienen nur zum Speichern des Datums und<br />
der Uhrzeit bei einem Spannungsausfall des KNX/<strong>EIB</strong>-<br />
Busses (alle anderen Einstellungen werden in nicht<br />
flüchtigen Speichern gesichert).<br />
Bei anliegender Busspannung ist die Funktion auch bei<br />
fehlenden Batterien gewährleistet.<br />
Rückstellung und Wiederherstellung der Werkseinstellung<br />
Für eine vollständige Rückstellung des Thermostattimers gleichzeitig die Tasten ,<br />
und drücken.<br />
Achtung: Alle eingestellten Parameter und angepasste Programme werden gelöscht.<br />
Beim erneuten Einschalten verwendet der Thermostattimer die werksseitig eingestellten<br />
Parameter und Programme. Der Thermostattimer schaltet in Heizbetrieb, den Modus OFF<br />
und die Funktionen Party und Holi<strong>da</strong>y sind deaktiviert.<br />
162
BEDIENUNGSANWEISUNG<br />
Der Thermostattimer verfügt über zwei voreingestellte Programme, eines für die Heizung<br />
und eines für die Klimatisierung.<br />
HEIZUNGSPROGRAMM<br />
Montag - Freitag<br />
Voreingestellte Programme<br />
Samstag - Sonntag<br />
KLIMATISIERUNGSPROGRAMM<br />
Alle Wochentage<br />
Diese voreingestellten Programme können entsprechend der persönlichen Anforderungen<br />
geändert und angepasst werden. Für die Änderung der voreingestellten Programme wird<br />
auf die Anweisungen des Abschnitts „Anpassung des Tagesprogramms“ verwiesen.<br />
D<br />
E<br />
U<br />
T<br />
S<br />
C<br />
H<br />
163
BEDIENUNGSANWEISUNG<br />
Wochentag<br />
1: Montag<br />
Uhrzeit 00:00<br />
16 °C<br />
18 °C<br />
Sollwert Heizungstemperatur<br />
20 °C<br />
TFROSTSCHUTZ<br />
5 °C<br />
Sollwert Klimatisierungstemperatur<br />
Selbstlernen<br />
Voreingestellte Parameter<br />
TÜBERTEMPERATURSCHUTZ<br />
24 °C<br />
26 °C<br />
28 °C<br />
35 °C<br />
OFF<br />
Differenzwert der Regelung<br />
Heizung<br />
Klimatisierung<br />
0.2 °C<br />
0.5 °C<br />
Temperatureinheit °C<br />
Verhalten bei Ausfall und Wiederherstellung<br />
der Busversorgung<br />
Bei Ausfall der Busversorgung führt <strong>da</strong>s Gerät keinerlei Aktion aus. Datum und Uhrzeit<br />
werden durch die Pufferbatterien gespeichert, alle anderen Einstellungen werden in<br />
einem nicht flüchtigen Speicher gesichert. Das Geräte ist max. 5 Sekunden nach<br />
Wiederherstellung der Busversorgung wieder voll funktionsfähig.<br />
Ohne Pufferbatterien wird der Thermostattimer bei Wiederherstellung der Busspannung<br />
im Modus AUS eingeschaltet.<br />
164
BEDIENUNGSANWEISUNG<br />
Batteriewechsel<br />
Die Befestigungsschraube unter dem<br />
Frontdeckel entfernen und den<br />
Thermostattimer gemäß folgender<br />
Abbildung vom Haltesockel entfernen.<br />
UP<br />
3<br />
2<br />
1<br />
Den Deckel des Batteriefachs entfernen<br />
und die entladenen Batterien durch zwei<br />
andere 1,5 V Batterien (Typ AAA) ersetzen,<br />
<strong>da</strong>bei auf die Polung achten.<br />
D<br />
E<br />
U<br />
T<br />
S<br />
C<br />
H<br />
165
BEDIENUNGSANWEISUNG<br />
Den Thermostattimer wieder gemäß der in der Abbildung<br />
<strong>da</strong>rgestellten Folge auf dem Haltesockel einrasten und<br />
wieder mit der Frontschraube befestigen.<br />
1<br />
2<br />
ACHTUNG<br />
- Wenn die Busversorgung des Thermostattimers während des<br />
Batteriewechsels unterbrochen wurde, müssen Datum und Uhrzeit wieder<br />
eingestellt werden.<br />
- Alle Batterien gleichzeitig austauschen.<br />
- Alte und neue Batterien dürfen nicht zusammen verwendet werden.<br />
- Nur gleichartige Batterien verwenden (keine Alkali-Batterien zusammen<br />
mit Zink-Kohle Batterien verwenden).<br />
- Keine Batterien ins Feuer werfen.<br />
- Die Batterien sind Sondermüll, ihre Entsorgung wird durch besondere<br />
gesetzliche Vorgaben geregelt, sie müssen besonderen Entsorgungsstellen<br />
zugeführt werden.<br />
Reinigung des Thermostattimers<br />
Der Thermostattimer muss mit einem trockenen Tuch gereinigt werden.<br />
166
UP<br />
INSTALLATIONSANWEISUNG<br />
ACHTUNG: Die Installation des Geräts <strong>da</strong>rf ausschließlich von<br />
qualifiziertem Personal gemäß der gültigen Richtlinie und den<br />
Installationsrichtlinien für KNX/<strong>EIB</strong> Installationen erfolgen.<br />
Um eine korrekte Erfassung der<br />
Raumtemperatur zu gewährleisten<br />
<strong>da</strong>rf der Thermostattimer nicht in<br />
Nischen, neben Türen oder Fenster,<br />
neben Heizkörpern oder Klimageräten<br />
montiert werden und er <strong>da</strong>rf keinem<br />
direkten Luftzug oder direkter<br />
Sonnenbestrahlung ausgesetzt werden.<br />
Richtige Positionierung<br />
Montage des Bediensockels<br />
Der Haltesockel wird in einer Höhe von 160 cm über Fußbodenhöhe montiert, und kann<br />
direkt mit Dübeln an die Wand oder auf ein UP-Gehäuse (3 Module) geschraubt werden.<br />
ACHTUNG Bei der Befestigung des Haltesockels muss die mit dem Pfeil<br />
angegebene Montagerichtung beachtet werden.<br />
Montage mit Dübeln<br />
D<br />
E<br />
U<br />
T<br />
S<br />
C<br />
H<br />
167
INSTALLATIONSANWEISUNG<br />
Montage auf Gehäuse (3 Module)<br />
UP<br />
Hinweise zur Installation KNX/<strong>EIB</strong><br />
1. Die Länge der Busleitung zwischen dem <strong>EIB</strong> Thermostattimer und dem Netzgerät <strong>da</strong>rf<br />
350 Meter nicht überschreiten.<br />
2. Die Länge der Busleitung zwischen dem <strong>EIB</strong> Thermostattimer und dem am weitesten<br />
entfernt liegenden, zu steuernden KNX/<strong>EIB</strong>-Gerät <strong>da</strong>rf 700 Meter nicht überschreiten.<br />
3. Um unerwünschte Signale und Überspannungen zu vermeiden sind Ringkreise so weit<br />
wie möglich zu vermeiden.<br />
4. Es muss ein Mindestabstand von 4 mm zwischen den einzeln isolierten Kabeln der<br />
Buslinie und den Kabeln der Stromleitung eingehalten werden.<br />
230 V<br />
Bus<br />
≥ 4 mm<br />
5. Der elektrische Durchgangsleiter der Abschirmung <strong>da</strong>rf nicht beschädigt werden.<br />
Buskabel<br />
Abschirmung<br />
Elektrischer<br />
Durchgangsleiter<br />
168
INSTALLATIONSANWEISUNG<br />
ACHTUNG: Die nicht verwendeten Bussignalkabel und der elektrische<br />
Durchgangsleiter dürfen nie spannungsführende Elemente oder den<br />
Erdungsleiter berühren.<br />
Elektrische Anschlüsse<br />
+ -<br />
+ - bus<br />
Elektroanschlussschema<br />
1. Vor dem Anschluss an den KNX/<strong>EIB</strong>-Bus müssen die Pufferbatterien eingesetzt werden<br />
(siehe Abschnitt Batteriewechsel).<br />
2. Die rote Ader des Buskabels an die rote Klemme (+) des Terminals und die schwarze<br />
Ader an die schwarze Klemme (-) anschließen. Es können bis zu 4 Buslinien an den<br />
Busterminal angeschlossen werden (Adern der gleichen Farbe in die gleiche Klemme).<br />
Verbindung Busgerät<br />
Verbindung Buskabel<br />
3. Die Abschirmung, den elektrische Durchgangsleiter und die verbleibenden weißen<br />
und gelben Adern des Buskabels (falls ein Buskabel mit 4 Leitern verwendet wird), die<br />
nicht benötigt werden, isolieren.<br />
D<br />
E<br />
U<br />
T<br />
S<br />
C<br />
H<br />
169
UP<br />
INSTALLATIONSANWEISUNG<br />
4. Die Busklemme in die entsprechenden Steckkontakte des Gerätes einsetzen. Die<br />
korrekte Montagerichtung wird durch die Befestigungsführungen vorgegeben.<br />
Vervollständigung<br />
Den Thermostattimer gemäß der in der Abbildung<br />
<strong>da</strong>rgestellten Folge auf dem Haltesockel<br />
einrasten und mit der mitgelieferten Schraube<br />
befestigen.<br />
2<br />
3<br />
1<br />
170
TECHNISCHE DATEN<br />
Kommunikation<br />
Bus KNX/<strong>EIB</strong><br />
Stromversorgung<br />
Über KNX/<strong>EIB</strong> Bus, 29 V dc SELV<br />
+ 2 Alkalibatterien 1,5 V AAA für die Aktualisierung<br />
Datum/Uhrzeit bei Ausfall der Busspannung<br />
Stromaufnahme des Bus 5mA<br />
Buskabel<br />
KNX/<strong>EIB</strong> TP1<br />
Bedienelemente<br />
1 Miniatur-Programmiertaste physikalische Adresse<br />
<strong>10</strong> Tasten für Bedienung und Konfiguration<br />
Anzeigeelemente<br />
1 LCD-Display mit LED-Hintergrundbeleuchtung<br />
(zeitgesteuert nach Eingriff des Anwenders)<br />
1 rote Programmier-LED für physikalische Adresse<br />
Bereich der Temperaturanzeige 0 ÷ +45 °C<br />
Messelemente<br />
1 NTC-Sensor,<br />
Auflösung: 0,1 °C,<br />
Messgenauigkeit: ±0,5 °C bei 20 °C<br />
Intervall zwischen zwei Messungen: 1 Minute<br />
Temperaturregelbereich TFROSTSCHUTZ: +2 ÷ +7 °C<br />
TÜBERTEMPERATURSCHUTz: +30 ÷ +40°C<br />
Andere Sollwerte: +5 ÷ +40 °C<br />
Funktionsumgebung<br />
Innen, trockene Standorte<br />
Betriebstemperatur -5 ÷ +45 °C<br />
Lagertemperatur -25 ÷ +70 °C<br />
Relative Luftfeuchtigkeit max. 93% (ohne Kondensation)<br />
Busanschluss<br />
Steckklemme 2 Pin Ø 1 mm<br />
Schutzgrad<br />
IP20<br />
Abmessungen (B x H x T) 130 x 92 x 23 mm<br />
Normverweise<br />
Niederspannungsrichtlinie 2006/95/EG<br />
EMV-Richtlinie 89/336/EWG<br />
EN50090-2-2, EN60730-1<br />
Zertifizierungen<br />
KNX/<strong>EIB</strong><br />
D<br />
E<br />
U<br />
T<br />
S<br />
C<br />
H<br />
171
cod. 7.01.5.<strong>10</strong>2.2<br />
Ai sensi dell’articolo 9 comma 2 della Direttiva Europea 2004/<strong>10</strong>8/CE si informa che responsabile dell’immissione del prodotto sul mercato Comunitario è:<br />
According to article 9 paragraph 2 of the European Directive 2004/<strong>10</strong>8/EC, the responsible for placing the apparatus on the Community market is:<br />
GEWISS S.p.A Via A. Volta, 1 - 24069 Cenate Sotto (BG) Italy Tel: +39 035 946 111 Fax: +39 035 945 270 E-mail: qualitymarks@gewiss.com<br />
+39 035 946 111<br />
8.30 - 12.30 / <strong>14</strong>.00 - 18.00<br />
lunedì ÷ venerdì - mon<strong>da</strong>y ÷ fri<strong>da</strong>y<br />
+39 035 946 260<br />
24h<br />
ULTIMA REVISIONE 02/2011<br />
sat@gewiss.com<br />
www.gewiss.com