3-VIEW
3-VIEW
3-VIEW

Create successful ePaper yourself
Turn your PDF publications into a flip-book with our unique Google optimized e-Paper software.
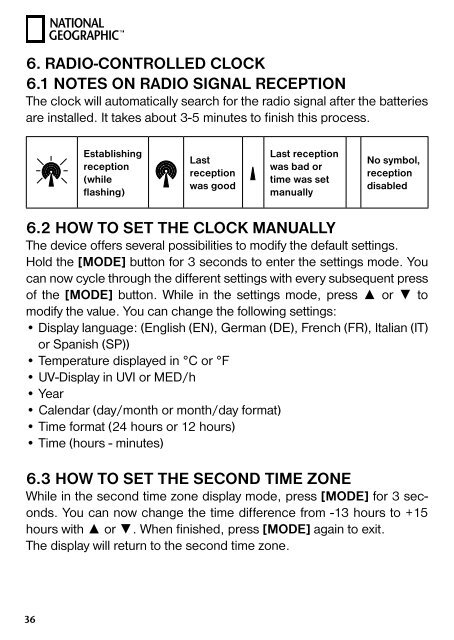
6. RADIO-CONTROLLED CLOCK<br />
6.1 NOTES ON RADIO SIGNAL RECEPTION<br />
The clock will automatically search for the radio signal after the batteries<br />
are installed. It takes about 3-5 minutes to fi nish this process.<br />
Establishing<br />
reception<br />
(while<br />
flashing)<br />
Last<br />
reception<br />
was good<br />
Last reception<br />
was bad or<br />
time was set<br />
manually<br />
No symbol,<br />
reception<br />
disabled<br />
6.2 HOW TO SET THE CLOCK MANUALLY<br />
The device offers several possibilities to modify the default settings.<br />
Hold the [MODE] button for 3 seconds to enter the settings mode. You<br />
can now cycle through the different settings with every subsequent press<br />
of the [MODE] button. While in the settings mode, press ▲ or ▼ to<br />
modify the value. You can change the following settings:<br />
• Display language: (English (EN), German (DE), French (FR), Italian (IT)<br />
or Spanish (SP))<br />
• Temperature displayed in °C or °F<br />
• UV-Display in UVI or MED/h<br />
• Year<br />
• Calendar (day/month or month/day format)<br />
• Time format (24 hours or 12 hours)<br />
• Time (hours - minutes)<br />
6.3 HOW TO SET THE SECOND TIME ZONE<br />
While in the second time zone display mode, press [MODE] for 3 seconds.<br />
You can now change the time difference from -13 hours to +15<br />
hours with ▲ or ▼. When fi nished, press [MODE] again to exit.<br />
The display will return to the second time zone.<br />
36