Fahrradergometer Sana Bike 120 ... - ergosana GmbH
Fahrradergometer Sana Bike 120 ... - ergosana GmbH
Fahrradergometer Sana Bike 120 ... - ergosana GmbH

You also want an ePaper? Increase the reach of your titles
YUMPU automatically turns print PDFs into web optimized ePapers that Google loves.
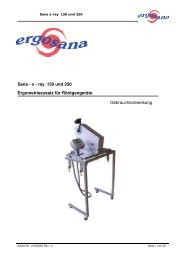
<strong>Sana</strong> <strong>Bike</strong> <strong>120</strong><br />
7 Maintenance and fault clearing<br />
7.1 Checking measuring technology<br />
The unit’s measuring technology should be checked every 24 months. The following checks<br />
should be performed in the process:<br />
1. Check of the overall mechanical condition of the ergometer<br />
2. Display check (contrast, lighting, etc.)<br />
3. Check of correct ergometer rotational speed display<br />
4. Check of the measurement sensor for brake performance<br />
5. Check of mechanical power loss of the ergometer’s drive system<br />
6. Electrical safety check<br />
7. Check of the safety symbols and markings on the casing<br />
8. Writing of a test protocol<br />
<br />
These checks and any recalibrating work necessary should only be performed by<br />
authorised and trained personnel with the special tools required for this purpose.<br />
7.2 Cleaning the device<br />
The surface of the casing can be cleaned with a soft cloth that is dry or moist. Commercially<br />
available cleaning agents for household appliances can be used. The saddle and the handlebar<br />
should be cleaned with a leatherette cleaner.<br />
<br />
It is imperative to make sure that no water penetrates the device.<br />
<br />
The device should never be cleaned with petrol, nitro cleaner or acetone.<br />
7.3 Checking and setting the supply voltage<br />
On delivery, the unit is set for the local supply voltage (110/115 ~ or 230/240 V ~). The<br />
current voltage setting is recorded on the mains module. The power unit covering lid on the<br />
bottom of the unit must be opened to convert the voltage. The voltage can then be changed<br />
on the power unit on-board with a special voltage selector switch.<br />
<br />
Voltage conversion should only be performed by authorised and trained personnel.<br />
7.4 Changing a mains fuse<br />
The fuse switch is located in the centre of the mains module. The lid can be pried out of its<br />
lock-in position with the help of a small screwdriver. It can then be pulled out of the fuse well.<br />
Two fuses are located in the fuse switch. After a continuity check, change the fuses if<br />
necessary. Return the fuse switch to the well and press it into the lock-in position. If the fuse<br />
won't stay in position, immediately inform the after-sales service.<br />
<br />
Replace fuses only with other fuses of the same type with the same electric data: 2 x<br />
1.25 AT for 230 V, or 2 x 2.5 AT for 110 V.<br />
Article no.: 2.520029 rev.: a Page 16 of 18