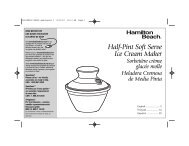
SOFT SERVE ICE CREAM MAKER - PickYourOwn.org
SOFT SERVE ICE CREAM MAKER - PickYourOwn.org
SOFT SERVE ICE CREAM MAKER - PickYourOwn.org

You also want an ePaper? Increase the reach of your titles
YUMPU automatically turns print PDFs into web optimized ePapers that Google loves.
GC8250-I/GC8250I04M1.qxd 6/16/04 11:28 Page 4<br />
HOW TO USE YOUR <strong>SOFT</strong> <strong>SERVE</strong> <strong>ICE</strong> <strong>CREAM</strong> <strong>MAKER</strong><br />
Freezing your Canister<br />
NOTE: The Canister must be kept in the freezer for a minimum of 24 hours<br />
before each use.<br />
1. Wash and dry Canister thoroughly prior to freezing.<br />
2. For best results, wrap the Canister in a plastic bag and place upright<br />
in the back of your freezer.<br />
Assembling the Soft Server<br />
1. Slide the Canister Collar upward onto the Canister until it locks. Make<br />
sure it is positioned correctly; follow the indentations on the<br />
Canister. (Figure 1)<br />
2. Fasten Rubber Sealing Ring securely on the underside of the Canister<br />
Lid. (Figure 2)<br />
3. Insert the Screw into the Canister Lid Tube. (Figure 2)<br />
Canister<br />
Rubber<br />
Sealing Ring<br />
4. Place the Dasher Assembly over the Canister Lid Tube. Turn it clock-wise<br />
to make sure it locks in place. (Figure 3)<br />
5. Place the Canister Lid with Dasher Assembly attached, inside the<br />
Canister. Make sure the top of the Canister Lid aligns with the half<br />
circle. It should fit in place when the half circle is aligned on the top.<br />
(Figure 4)<br />
NOTE: Make sure the Rubber Sealing Ring is assembled securely inside<br />
the Canister Lid. The Rubber Sealing Ring must be thoroughly dried to<br />
properly seal.<br />
6. Place the transparent Top Cover over the Canister.<br />
7. Gently lock the Motor Housing in place by pushing the Motor<br />
downward onto the transparent Top Cover.<br />
8. Securely lock down the 3 Locking Latches.<br />
9. Select your designer Dispensing Tip (4 different designs) and attach<br />
it over the Dispensing Opening.<br />
To operate, the assembled unit must be placed in the<br />
horizontal position when unit is first turned on and<br />
kept in this position at all times for churning, pouring in<br />
recipe and dispensing (as shown on the front cover of<br />
the manual).<br />
Figure 1<br />
Canister<br />
Collar<br />
Figure 2<br />
Dasher<br />
Assembly<br />
Screw<br />
Canister<br />
Lid<br />
Figure 3<br />
Figure 4<br />
4 5