Swan ice cream maker.. - PickYourOwn.org
Swan ice cream maker.. - PickYourOwn.org
Swan ice cream maker.. - PickYourOwn.org

Create successful ePaper yourself
Turn your PDF publications into a flip-book with our unique Google optimized e-Paper software.
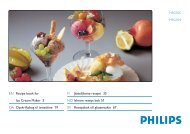
Ice Cream Maker<br />
V1.0<br />
For model: SF22010CDWMN<br />
<strong>Swan</strong> Products Limited, PO Box 3117, Stoke on Trent, Staffordshire, ST4 9GD
2 Year Guarantee<br />
This product is guaranteed for two years from the date of original purchase. If<br />
any defect arises due to faulty materials or workmanship faulty products must<br />
be returned to place of purchase. Refunds or replacement is at the discretion<br />
of the store.<br />
The following conditions apply:<br />
• The product must be returned to the retailer with original proof of<br />
purchases.<br />
• The product must be installed and used in accordance with the<br />
instruction contained in this instruction guide.<br />
• It must be used only for domestic purpose.<br />
• It does not cover wear and tear, damage, misuse or consumable<br />
parts.<br />
• <strong>Swan</strong> has no responsibility for incidental or consequential loss or<br />
damage.<br />
• Valid in the UK and Eire Only<br />
Important Safeguards<br />
When using any electrical appliance, basic safety precautions should<br />
always be followed including the following:<br />
1. Read all instructions carefully before using any appliance.<br />
2. Always ensure that the voltage on the rating label corresponds to the mains<br />
voltage in your home.<br />
3. Incorrect operation and improper use can damage the appliance and cause injury<br />
to the user.<br />
4. This appliance is not intended for use by persons (including children) with<br />
reduced physical, sensory or mental capabilities, or lack of experience and<br />
knowledge, unless they have been given supervision or instruction concerning
use of the appliances by a person responsible for their safety. Children should be<br />
supervised to ensure that they do not play with the appliance.<br />
5. Check the power cord and plug regularly for any damage. If the cord or the plug is<br />
damaged, it must be replaced by the manufacturer or qualified person in order to<br />
avoid an electrical hazard.<br />
6. Do not use the appliance if it has been dropped or damaged in any way. In case<br />
of damage, take the unit in for examination and/or repair by an authorised serv<strong>ice</strong><br />
agent.<br />
7. Never immerse the unit in water or any other liquid for cleaning purposes.<br />
8. Remove the plug from the socket by gripping the plug. Do not pull on the cord to<br />
disconnect the appliance from the mains. Always unplug the unit when not in use,<br />
before cleaning or when adding or removing parts.<br />
9. The use of accessory attachments that are not recommended or supplied by the<br />
manufacturer may result in injuries, fire or electric shock.<br />
10. A short cord is provided to reduce the hazards resulting from becoming entangled<br />
in or tripping over a longer cord.<br />
11. Do not let the cord hang over the edge of a table or counter. Ensure that the cord<br />
is not in a position where it can be pulled on inadvertently.<br />
12. Do not allow the cord to touch hot surfaces and do not place on or near a hot gas<br />
or electric burner or in a heated oven.<br />
13. Do not use the appliance on a gas or electric cooking top or over or near an open<br />
flame.<br />
14. Use of an extension cord with this appliance is not recommended. However, if it is<br />
necessary to use an extension lead, ensure that the lead is suited to the power<br />
consumption of the appliance to avoid overheating of extension cord, appliance or<br />
plug point. Do not place the extension cord in a position where it can be pulled on<br />
by children or animals or tripped over.<br />
15. This appliance is not suitable for outdoor use. Do not use the appliance for<br />
anything other than its intended use.<br />
16. Do not carry the appliance by the power cord.<br />
17. Do not leave the appliance unattended during use. Always unplug the unit when<br />
not in use or before cleaning.<br />
18. Always operate the appliance on a smooth, even, stable surface. Do not place the
unit on a hot surface.<br />
19. Ensure that the unit is switched off after use.<br />
20. The manufacture does not accept responsibility for any damage or injury caused<br />
by improper or incorrect use, or for repairs carried out by unauthorised personnel.<br />
21. In case of technical problems, switch off the appliance and do not attempt to<br />
repair it yourself. Return the appliance to an authorised serv<strong>ice</strong> facility for<br />
examination, adjustment or repair. Always insist on the use of original spare parts.<br />
Failure to comply with the above mentions precautions and instructions, could<br />
affect the safe operation of this product.<br />
22. DO NOT USE AUTOMATIC TIMERS IN CONJUNCTION WITH THIS PRODUCT<br />
U.K. Plug Wiring Instructions<br />
The wires in the mains lead are coloured in accordance with the following code:<br />
BLUE<br />
BROWN<br />
NEUTRAL<br />
LIVE<br />
As the colours of the wire in the mains lead of this appliance may not correspond<br />
with the colour markings identifying the terminals on your plug, proceed as<br />
follows: The wire which is coloured BLUE must be connected to the terminal<br />
which is marked with the letter N or coloured black. The wire which is coloured<br />
BROWN must be connected to the terminal which is marked with the letter L or<br />
coloured red.<br />
WARNING: DO NOT CONNECT EITHER THE LIVE (BROWN) OR NEUTRAL<br />
(BLUE) WIRE TO THE EARTH TERMINAL
PARTS:<br />
OPERATION GUIDELINES<br />
INTRODUCTION<br />
The Ice Cream Maker uses a special freezer bowl that is frozen over night (8<br />
hours) preferably in a 4 star freezer. Your freezer's star rating is usually<br />
printed on the front. The vast majority of freezers these days are 4 star (minus<br />
18 degrees C).<br />
HOW IT WORKS<br />
Making <strong>ice</strong> <strong>cream</strong> in this machine is incredibly easy. The trick is to keep all the<br />
ingredients chilled right until the last minute before adding to the bowl. When<br />
the <strong>cream</strong> etc comes into contact with the metal walls of the bowl, <strong>ice</strong> crystals<br />
are formed. The mixing arm gently scapes these crystals from the wall of the<br />
bowl. As the mixing process continues the <strong>ice</strong> crystals build up in the mixture,<br />
causing it to thicken into the familiar <strong>ice</strong> <strong>cream</strong> consistency.
BEFORE FIRST USE<br />
Unpack the product and remove all packaging materials. Wash the freezer<br />
bowl, lid and mixing arm in warm, soapy water. Rinse and dry thoroughly.<br />
At this stage it is a good idea to familiarise yourself with the assembly of the<br />
product. The freezer bowl goes in the base, the mixing arm goes in the<br />
freezer bowl and the lid goes on the top (as lids tend to do).<br />
You can turn the machine on while it's empty to see how it's going to work.<br />
The bowl rotates while the mixing arm stays still. The lid has a hole in it where<br />
the ingredients are added.<br />
Note: The bowl is 2 litres in volume but you should only ever put 1 litre of<br />
mixture in it. This is because the mixture will expand as the <strong>ice</strong> crystals build<br />
up.<br />
LET'S MAKE ICE CREAM!<br />
First thing to do is put the freezer bowl in the freezer. It will need a good 8<br />
hours in there for best results – preferably over night. Do not take the freezer<br />
bowl from the freezer until the last minute – just before you're ready to add<br />
your ingredients.<br />
The ingredients should also be chilled (preferably overnight) in the<br />
refrigerator. Let's start with the simplest recipe for vanilla <strong>ice</strong> <strong>cream</strong>:<br />
500ml Single <strong>cream</strong> (chilled)<br />
500ml Double <strong>cream</strong> (chilled)<br />
50g Caster sugar<br />
1 tsp Vanilla essence<br />
The <strong>cream</strong> can be substituted for the low fat equivelent if you wish.
• Put the ingredients in a good sized jug and whisk thoroughly.<br />
• Take the bowl from the freezer and put it in the base of the machine.<br />
Note: wear oven gloves to do this as the bowl will be extremely<br />
cold. Skin can stick to very cold metal!<br />
• Put the mixing arm into the bowl and put the lid on.<br />
• Switch on the machine<br />
• As the bowl rotates pour in the <strong>ice</strong> <strong>cream</strong> mixture<br />
Depending on ingredients and conditions, the process should take 20-30<br />
minutes. During the process you will not<strong>ice</strong> the mixure thicken and expand.<br />
Once you are happy with the consistency, stop the machine.<br />
Serve immediately<br />
Notes:<br />
• Resist the temptation to put your fingers in the bowl during the mixing<br />
process. Nursing trapped fingers diminishes the <strong>ice</strong> <strong>cream</strong> enjoyment<br />
experience.<br />
• The consistency of the <strong>ice</strong> <strong>cream</strong> will never be harder than soft scoop<br />
<strong>ice</strong> <strong>cream</strong>. Putting the finished <strong>ice</strong> <strong>cream</strong> in the freezer will yield a<br />
fairly solid lump because the <strong>ice</strong> crystals stick together. We don't<br />
recommend it but some people like their <strong>ice</strong> <strong>cream</strong> like that.<br />
• Try to serve straight from the freezer bowl if you can. In most cases<br />
the <strong>ice</strong> <strong>cream</strong> will maintain it's soft scoop consistency for over an hour<br />
if it's kept in the freezer bowl
RECIPES TO TRY<br />
Ice Cream Recipes by Shelagh Caudle<br />
http://www.<strong>ice</strong>-<strong>cream</strong>-recipes.com/<br />
Vanilla Ice Cream<br />
A rich, custard base <strong>ice</strong> <strong>cream</strong> using vanilla extract<br />
Ingredients:<br />
5 egg yolks (beaten)<br />
1 level teaspoon cornflour<br />
4oz (100g) caster sugar<br />
¾ pint (375ml) full <strong>cream</strong> milk<br />
¾ pint (375ml) double <strong>cream</strong><br />
3 teaspoons vanilla extract<br />
Method:<br />
Mix together the egg yolks, sugar and cornflour in a bowl, stirring well and<br />
beat until smooth.<br />
Pour the milk into a saucepan and heat gently on a medium heat until hot.<br />
Do NOT boil. Then stir the hot milk into the egg, sugar and cornflour mix.<br />
Mix well. Pour the mixture back into the saucepan and heat gently, stirring<br />
frequently. Do NOT bring to the boil. After several minutes it will start to<br />
thicken into a custard. At this point remove the pan from the heat and leave to<br />
cool.<br />
When the custard has cooled, transfer into a chilled bowl and refrigerate to<br />
chill further (overnight or for 3 hours minimum).<br />
When the custard is thoroughly chilled, pour the double <strong>cream</strong> into a separate<br />
mixing bowl and whip until slightly fluffy. Stir the whipped <strong>cream</strong> into the<br />
chilled custard mixture. Stir into this the vanilla extract.
The mixture is now ready to transfer to the <strong>ice</strong> <strong>cream</strong> <strong>maker</strong> and freeze<br />
according to the manufacturer’s instructions.<br />
Serves 8-10<br />
Mixing time in the <strong>ice</strong> <strong>cream</strong> <strong>maker</strong> 25-30 minutes<br />
Chocolate Ice Cream<br />
A delicious, custard base <strong>ice</strong> <strong>cream</strong> using cocoa powder.<br />
Ingredients:<br />
5 egg yolks (beaten)<br />
1 level teaspoon cornflour<br />
2oz (50g) sugar<br />
1 pint (500ml) full <strong>cream</strong> milk<br />
3 tablespoons cocoa powder<br />
½ pint (250ml) double <strong>cream</strong><br />
Method:<br />
Mix together the egg yolks, sugar and cornflour in a bowl, stirring well and<br />
beat until smooth.<br />
Pour the milk into a saucepan and heat gently on a medium heat until hot.<br />
Do NOT boil. Then stir the hot milk into the egg, sugar and cornflour mix.<br />
Mix well. Pour the mixture back into the saucepan and heat gently, stirring<br />
frequently. Do NOT bring to the boil. After several minutes it will start to<br />
thicken into a custard. At this point remove the pan from the heat, add the<br />
cocoa powder using a sift and mix well ensuring any lumps of cocoa powder<br />
have dissolved. Leave the mixture to cool.<br />
When the custard has cooled, transfer into a chilled bowl and refrigerate to<br />
chill further (overnight or for 3 hours minimum).<br />
When the custard is thoroughly chilled, pour the double <strong>cream</strong> into a separate<br />
mixing bowl and whip until slightly fluffy. Stir the whipped <strong>cream</strong> into the
chilled custard mixture.<br />
The mixture is now ready to transfer to the <strong>ice</strong> <strong>cream</strong> <strong>maker</strong> and freeze<br />
according to the manufacturer’s instructions.<br />
NOTE: To add a little extra chocolate to your <strong>ice</strong> <strong>cream</strong>, grate some of your<br />
favourite chocolate and drop into the <strong>ice</strong> <strong>cream</strong> mixture through the <strong>ice</strong> <strong>cream</strong><br />
<strong>maker</strong> opening in the top about 5 minutes from the end of the freezing cycle.<br />
Serves 8-10<br />
Mixing time in the <strong>ice</strong> <strong>cream</strong> <strong>maker</strong> 25-30 minutes<br />
Strawberry Ice Cream<br />
A sumptuous and <strong>cream</strong>y custard base <strong>ice</strong> <strong>cream</strong> using fresh strawberries<br />
Ingredients:<br />
2 cups fresh strawberries<br />
4oz (100g) sugar split into 2 equal halves<br />
3 egg yolks (beaten)<br />
1 teaspoon cornflour<br />
½ pint (250ml) full <strong>cream</strong> milk<br />
1 pint (500ml) double <strong>cream</strong><br />
1 teaspoon vanilla extract<br />
Method:<br />
De-stalk, wash and chop the strawberries into small pieces. Place in a mixing<br />
bowl and add 2oz (100g) sugar. Mash well until you have a smooth mixture.<br />
Chill the mixture in the refrigerator.<br />
Mix together the egg yolks, the remaining 2oz (100g) of sugar and cornflour.<br />
Beat until smooth.<br />
Pour the milk into a saucepan and heat gently on a medium heat until hot.<br />
Do NOT boil. Then stir the hot milk into the egg, sugar and cornflour mix.
Mix well. Pour the mixture back into the saucepan and heat gently, stirring<br />
frequently. Do NOT bring to the boil. After several minutes it will start to<br />
thicken into a custard. At this point remove the pan from the heat and leave<br />
the mixture to cool.<br />
When the custard has cooled, transfer into a chilled bowl and refrigerate to<br />
chill further (overnight or for 3 hours minimum).<br />
When the custard is thoroughly chilled, pour the double <strong>cream</strong> into a separate<br />
mixing bowl and whip until slightly fluffy. Stir the whipped <strong>cream</strong> into the<br />
chilled custard mixture. Stir into this the vanilla extract.<br />
The mixture is now ready to transfer to the <strong>ice</strong> <strong>cream</strong> <strong>maker</strong> and freeze<br />
according to the manufacturer’s instructions.<br />
Serves 8-10<br />
Mixing time in the <strong>ice</strong> <strong>cream</strong> <strong>maker</strong> 25-30 minutes<br />
Banana Ice Cream<br />
A <strong>cream</strong>y, easy <strong>ice</strong> <strong>cream</strong> recipe using fresh bananas. Ideal for when you<br />
don’t have time to make a custard base.<br />
Ingredients:<br />
3 ripe bananas<br />
¾ pint (375ml) double <strong>cream</strong><br />
3oz (75g) sugar<br />
Method:<br />
Peel and chop the bananas into chunks. Place in a mixing bowl and mash<br />
well. Stir in the <strong>cream</strong> and then the sugar. Mix well. Chill in the refrigerator for<br />
2-3 hours.<br />
Transfer the mixture to the <strong>ice</strong> <strong>cream</strong> <strong>maker</strong> and freeze according to the<br />
manufacturer’s instructions.
Serves 6-8<br />
Mixing time in the <strong>ice</strong> <strong>cream</strong> <strong>maker</strong> approx 25-30 minutes<br />
* * * * *<br />
Orange Sorbet<br />
A refreshing, citrus sorbet using fresh fruit<br />
Ingredients:<br />
10oz (250g)caster sugar<br />
¾ pint (375ml) water<br />
zest of 3 fresh oranges<br />
¾ pint (375ml) orange ju<strong>ice</strong> (from freshly squeezed oranges)<br />
ju<strong>ice</strong> of 1 lemon<br />
Method:<br />
In a saucepan mix together the sugar, water and orange zest. Place on a<br />
medium heat, stirring all the time until all the sugar has dissolved. Bring the<br />
mixture to the boil and simmer for 5-10 minutes until it is like a syrup.<br />
At this point remove the pan from the heat and leave the mixture to cool.<br />
When the syrup has cooled, transfer into a chilled bowl and refrigerate to chill<br />
further (overnight or for 3 hours minimum).<br />
When the syrup is thoroughly chilled, stir in the orange and lemon ju<strong>ice</strong>s.<br />
The mixture is now ready to transfer to the <strong>ice</strong> <strong>cream</strong> <strong>maker</strong> and freeze<br />
according to the manufacturer’s instructions.<br />
Serves 8-10<br />
Mixing time in the <strong>ice</strong> <strong>cream</strong> <strong>maker</strong> 25-30 minutes
Sweet White Wine Sorbet<br />
An alcoholic sorbet made with sweet white wine<br />
Ingredients:<br />
10oz (250g)caster sugar<br />
¾ pint (375ml) water<br />
½ pint (250ml) sweet white wine<br />
ju<strong>ice</strong> of 1 orange<br />
ju<strong>ice</strong> of 2 lemons<br />
Method:<br />
In a saucepan mix together the sugar, water and wine. Place on a medium<br />
heat, stirring all the time until all the sugar has dissolved. Bring the mixture to<br />
the boil and simmer for 5-10 minutes until it is like a syrup.<br />
At this point remove the pan from the heat and leave the mixture to cool.<br />
When the syrup has cooled, transfer into a chilled bowl and refrigerate to chill<br />
further (overnight or for 3 hours minimum).<br />
When the syrup is thoroughly chilled, stir in the orange and lemon ju<strong>ice</strong>s.<br />
The mixture is now ready to transfer to the <strong>ice</strong> <strong>cream</strong> <strong>maker</strong> and freeze<br />
according to the manufacturer’s instructions.<br />
Serves 8-10<br />
Mixing time in the <strong>ice</strong> <strong>cream</strong> <strong>maker</strong> 25-30 minutes<br />
Tips For Better Ice Cream Making<br />
• The colder your ingredients before use, the better the <strong>ice</strong> <strong>cream</strong>.<br />
So milk, <strong>cream</strong>, eggs and fresh fruit should all be well chilled in<br />
advance.<br />
.
• Once your <strong>ice</strong> <strong>cream</strong> mixture is prepared, make sure it is well chilled<br />
before transferring to the <strong>ice</strong> <strong>cream</strong> <strong>maker</strong>.<br />
• If you prefer a firmer texture of <strong>ice</strong> <strong>cream</strong>, then at the end of the<br />
freezing cycle in the machine, transfer the mixture to a clean, plastic,<br />
container, seal it and place in the freezer for 2-3 hours.<br />
• Homemade <strong>ice</strong> <strong>cream</strong> is always best eaten fresh, served straight from<br />
the <strong>ice</strong> <strong>cream</strong> <strong>maker</strong>. If you want to store any surplus <strong>ice</strong> <strong>cream</strong>,<br />
transfer it to a clean, sealed, plastic container and place in the freezer.<br />
However, it should be eaten within a week.<br />
• To serve any homemade <strong>ice</strong> <strong>cream</strong> that has been stored in the<br />
freezer, first let is stand at room temperature for about 10 minutes<br />
before serving. The texture should then be more easily ‘scoopable’.<br />
For more ideas on homemade <strong>ice</strong> <strong>cream</strong> visit<br />
http://www.<strong>ice</strong>-<strong>cream</strong>-recipes.com<br />
Follow Ice Cream Recipes on Facebook<br />
http://www.facebook.com/IceCreamRecipes
Disposal of Unit<br />
Disposal instructions for <strong>Swan</strong> items in accordance with the WEEE<br />
directive. Appliances bearing the symbol shown here may not be<br />
disposed of in domestic rubbish. You are required to dispose of old<br />
electrical and electronic appliances like this separately. Please visit<br />
www.recyclemore.co.uk, or www.recylcenow.co.uk for access to<br />
information about the recycling of electrical items. The WEEE directive, introduced in<br />
August 2006, states that all electrical items must be recycled, rather than taken to<br />
landfill. Please arrange to take this appliance to your local Civic Amenity site for<br />
recycling, once it has reached the end of its life.<br />
Helpline<br />
01733 404703<br />
Spares reference: SF22010CDWMN-001: Freezer bowl<br />
Visit www.swan-brand.co.uk for more great <strong>Swan</strong> products and history of<br />
the <strong>Swan</strong> Brand<br />
‘COME DINE WITH ME’ © Channel 4 2011. Marks used under<br />
l<strong>ice</strong>nce by ITV Studios Global Entertainment. All rights reserved.