to download the Mistral Igloo Ice cream maker ... - PickYourOwn.org
to download the Mistral Igloo Ice cream maker ... - PickYourOwn.org
to download the Mistral Igloo Ice cream maker ... - PickYourOwn.org

You also want an ePaper? Increase the reach of your titles
YUMPU automatically turns print PDFs into web optimized ePapers that Google loves.
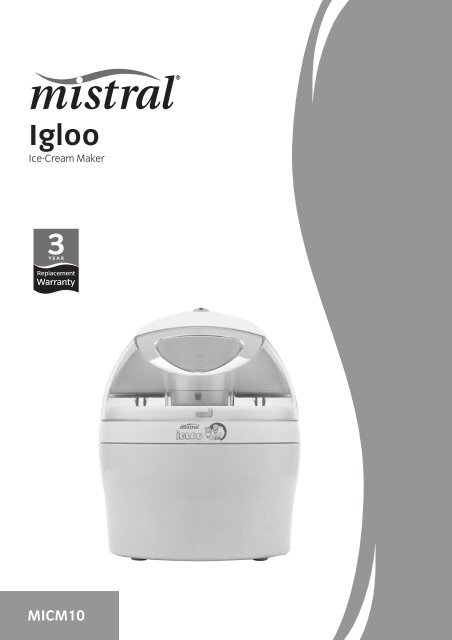
<strong>Igloo</strong><br />
<strong>Ice</strong>-Cream Maker<br />
MICM10
Important Safeguards<br />
When using electrical appliances, in order <strong>to</strong> reduce <strong>the</strong> risk of fire, electric shock and/or injury,<br />
<strong>the</strong>se basic safety precautions should always be followed:<br />
For Your Safety<br />
Read all instructions carefully, even if you feel<br />
that you are familiar with <strong>the</strong> appliance.<br />
• To protect against <strong>the</strong> risk of electric shock,<br />
DO NOT IMMERSE <strong>the</strong> appliance, cord set or<br />
plug in water or any o<strong>the</strong>r liquid.<br />
• This appliance is not intended for use by children<br />
or infirm persons without supervision. Never<br />
leave an appliance unattended when in use.<br />
• Children should be prevented from playing with<br />
<strong>the</strong> appliance.<br />
• Operate on a dry level surface. Operating on sinks,<br />
drainboards or uneven surfaces must be avoided.<br />
• Switch off <strong>the</strong> power outlet and remove <strong>the</strong> plug<br />
when <strong>the</strong> appliance is not in use; before assembling<br />
or disassembling parts; and before cleaning. To<br />
unplug, grasp <strong>the</strong> plug and pull from <strong>the</strong> power<br />
outlet. Never pull <strong>the</strong> cord.<br />
• Avoid contact with moving parts. Keep hands,<br />
hair and clothing, as well as spatulas and o<strong>the</strong>r<br />
utensils, away during operation <strong>to</strong> prevent injury<br />
and/or damage <strong>to</strong> <strong>the</strong> appliance.<br />
• Do not operate any appliance with a damaged<br />
cord or plug; after <strong>the</strong> appliance malfunctions;<br />
or if it has been dropped or damaged in any<br />
manner.<br />
• The use of attachments or accessories not<br />
recommended or sold by <strong>the</strong> manufacturer<br />
can cause fire, electric shock or injury.<br />
• Do not use outdoors.<br />
• S<strong>to</strong>re <strong>the</strong> unit indoors in a dry location.<br />
• Do not allow <strong>the</strong> cord <strong>to</strong> hang over <strong>the</strong> edge<br />
of a table or counter, or <strong>to</strong>uch hot surfaces.<br />
• Do not operate or place any part of this<br />
appliance on or near any hot surfaces (such as<br />
a gas or electric burner, or in a heated oven).<br />
• Do not misuse <strong>the</strong> cord. Never carry <strong>the</strong> appliance<br />
by <strong>the</strong> cord or pull <strong>to</strong> disconnect it from <strong>the</strong> outlet.<br />
Instead, grasp <strong>the</strong> plug and pull <strong>to</strong> disconnect.<br />
• This product is intended for household use only.<br />
• This appliance is intended <strong>to</strong> be plugged in a<br />
240v outlet only.<br />
• Do not attempt <strong>to</strong> repair, disassemble or modify<br />
<strong>the</strong> appliance. There are no user-serviceable parts.<br />
• Do not operate <strong>the</strong> appliance while it is empty.<br />
Always ensure ice-<strong>cream</strong> mixture is in <strong>the</strong> <strong>Ice</strong>-<br />
Cream Maker before plugging it in <strong>to</strong> a power<br />
outlet. Ensure <strong>the</strong> freezer canister and cover are<br />
fitted correctly before turning on <strong>the</strong> <strong>Ice</strong>-Cream<br />
Maker.<br />
• Switch off <strong>the</strong> power outlet, unplug <strong>the</strong> <strong>Ice</strong>-<br />
Cream Maker and ensure <strong>the</strong> stirring paddle has<br />
completely s<strong>to</strong>pped before removing <strong>the</strong> cover.<br />
COMPULSORY WARNING<br />
If <strong>the</strong> supply cord is damaged, it must be replaced by<br />
<strong>the</strong> manufacturer or its service agent, or a similarly<br />
qualified person, in order <strong>to</strong> avoid a hazard.<br />
This product has not been designed for any uses<br />
o<strong>the</strong>r than those specified in this booklet.<br />
Save These Instructions<br />
2
Features of your <strong>Igloo</strong> <strong>Ice</strong>-Cream Maker<br />
On/Off Switch<br />
Mo<strong>to</strong>r Unit<br />
Mixing Feeder<br />
Cover<br />
Paddle Extender<br />
Paddle<br />
Freezer Canister<br />
3
Getting <strong>to</strong> know your<br />
<strong>Igloo</strong> <strong>Ice</strong>-Cream Maker<br />
Congratulations on <strong>the</strong> purchase of your new <strong>Mistral</strong><br />
<strong>Igloo</strong> <strong>Ice</strong>-Cream Maker.<br />
Before first using your new <strong>Ice</strong>-Cream Maker, it is<br />
most important that you read and follow <strong>the</strong><br />
instructions in this use and care booklet, even if you<br />
feel you are familiar with this type of appliance.<br />
Your attention is drawn particularly <strong>to</strong> <strong>the</strong> section<br />
dealing with IMPORTANT SAFEGUARDS. Find a safe<br />
and convenient place <strong>to</strong> keep this booklet handy for<br />
future reference.<br />
This appliance has been designed <strong>to</strong> operate from a<br />
standard domestic power outlet. It is not intended<br />
for industrial or commercial use.<br />
Before first use<br />
Carefully unpack <strong>the</strong> <strong>Ice</strong>-Cream Maker and remove<br />
all packaging materials.<br />
Wash <strong>the</strong> freezer canister, cover and paddle in warm<br />
soapy water and dry thoroughly. These parts are not<br />
dishwasher safe.<br />
Use a damp cloth <strong>to</strong> clean <strong>the</strong> exterior of <strong>the</strong> mo<strong>to</strong>r<br />
unit. Do not immerse <strong>the</strong> mo<strong>to</strong>r unit in water.<br />
How <strong>to</strong> use your <strong>Igloo</strong><br />
<strong>Ice</strong>-Cream Maker<br />
Step 1 – preparing <strong>the</strong> ice-<strong>cream</strong><br />
mixture<br />
Refer <strong>to</strong> <strong>the</strong> recipes in <strong>the</strong> back of this booklet <strong>to</strong><br />
prepare ice-<strong>cream</strong> mixture.<br />
For best results, prepare <strong>the</strong> ice-<strong>cream</strong> mixture one<br />
day before making ice-<strong>cream</strong>. This adds volume and<br />
allows time for <strong>the</strong> mixture <strong>to</strong> cool sufficiently.<br />
Step 2 – freezing <strong>the</strong> freezer canister<br />
Note: It is essential that <strong>the</strong> freezer canister is<br />
frozen properly.<br />
To freeze <strong>the</strong> freezer canister, wrap it in a plastic bag<br />
and s<strong>to</strong>re it in <strong>the</strong> back section of your freezer,<br />
where <strong>the</strong> temperature is <strong>the</strong> coldest. The plastic<br />
bag will prevent freezer burn from occurring.<br />
Shake <strong>the</strong> freezer canister <strong>to</strong> check <strong>the</strong> progress of<br />
<strong>the</strong> freezing process. If you can hear liquid, replace<br />
<strong>the</strong> freezer canister back in<strong>to</strong> <strong>the</strong> freezer. When you<br />
can no longer hear <strong>the</strong> liquid when you shake <strong>the</strong><br />
freezer canister, <strong>the</strong> freezing process is complete.<br />
The table below indicates <strong>the</strong> amount of time<br />
required <strong>to</strong> freeze <strong>the</strong> freezer canister.<br />
freezer<br />
approx.<br />
temperature freezing time<br />
-30°C/-22°F<br />
8-9 Hours<br />
-25°C/-13°F<br />
12-13 Hours<br />
-18°C/0°F<br />
20-22 Hours<br />
-15°C/5°F<br />
24 hours or more<br />
Note: The canister must be used immediately<br />
after being withdrawn from <strong>the</strong> freezer. Do not<br />
allow it <strong>to</strong> thaw.<br />
Step 3 – ice-<strong>cream</strong> making process<br />
Note: During operation, <strong>the</strong> mo<strong>to</strong>r may be<br />
quite noisy. THIS IS NORMAL. It may appear <strong>to</strong><br />
struggle and make a loud grating noise, but<br />
continue with <strong>the</strong> operation as <strong>the</strong> unit will<br />
provide well frozen and churned ice-<strong>cream</strong>.<br />
4
Before commencing, ensure <strong>the</strong> power cord is<br />
unplugged and <strong>the</strong> control switch is in <strong>the</strong> (O)<br />
position.<br />
Slide <strong>the</strong> mo<strong>to</strong>r unit on<strong>to</strong> <strong>the</strong> cover until you hear a<br />
click (indicating<strong>the</strong> mo<strong>to</strong>r unit and cover are locked<br />
in<strong>to</strong> place. See Fig. 1).<br />
Fig. 1<br />
Tabs<br />
Insert <strong>the</strong> paddle extender in<strong>to</strong> <strong>the</strong> opening under<br />
<strong>the</strong> mo<strong>to</strong>r unit.<br />
Remove <strong>the</strong> freezer canister from <strong>the</strong> freezer once it<br />
is completely frozen.<br />
Insert <strong>the</strong> paddle in<strong>to</strong> <strong>the</strong> canister bowl (Fig. 2).<br />
Fig. 2<br />
Place <strong>the</strong> mo<strong>to</strong>r unit and cover <strong>to</strong>ge<strong>the</strong>r above <strong>the</strong><br />
freezer canister so that all <strong>the</strong> locking tabs are<br />
aligned and <strong>the</strong> paddle extender is inserted in<strong>to</strong> <strong>the</strong><br />
paddle.<br />
Turn <strong>the</strong> cover clockwise until you hear <strong>the</strong> tabs lock<br />
in<strong>to</strong> place (Fig. 3).<br />
Fig. 3<br />
Turn<br />
clockwise<br />
Plug <strong>the</strong> <strong>Ice</strong>-Cream Maker in<strong>to</strong> a standard domestic<br />
power outlet and switch <strong>the</strong> outlet on.<br />
Switch <strong>the</strong> on/off switch <strong>to</strong> <strong>the</strong> on position <strong>to</strong> prevent<br />
<strong>the</strong> paddle from freezing on<strong>to</strong> <strong>the</strong> freezer canister.<br />
Go <strong>to</strong> <strong>the</strong> next step immediately.<br />
Pour <strong>the</strong> prepared ice-<strong>cream</strong> mixture in<strong>to</strong> <strong>the</strong><br />
freezer canister via <strong>the</strong> mixing feeder.<br />
The ice-<strong>cream</strong> making process takes approximately<br />
20-40 minutes or until <strong>the</strong> desired consistency is<br />
reached.<br />
Note: Turning <strong>the</strong> <strong>Ice</strong>-Cream Maker off during<br />
operation may cause <strong>the</strong> mixture <strong>to</strong> freeze and<br />
restrict <strong>the</strong> movement of <strong>the</strong> paddle.<br />
This appliance should not be operated for any longer<br />
than 40 minutes at one time. Do not continue use if<br />
<strong>the</strong> ice-<strong>cream</strong> is not solid or is thawing out after 40<br />
minutes of mixing.<br />
This may occur if <strong>the</strong> freezer canister was not frozen<br />
properly, <strong>the</strong> mixture was <strong>to</strong>o warm or <strong>the</strong> proportion<br />
of ingredients was incorrect.<br />
The mixing feeder can be used <strong>to</strong> add ingredients<br />
once <strong>the</strong> ice-<strong>cream</strong> making process has begun. See<br />
<strong>the</strong> recipes in <strong>the</strong> back of this booklet for additional<br />
ingredients.<br />
The direction of rotation will change if <strong>the</strong> ice-<strong>cream</strong><br />
mixture becomes <strong>to</strong>o thick. This will prevent <strong>the</strong><br />
mo<strong>to</strong>r from overheating. The ice-<strong>cream</strong> mixture is<br />
ready if <strong>the</strong> direction of rotation continues <strong>to</strong> change.<br />
Once this occurs, turn <strong>the</strong> appliance off immediately.<br />
DO NOT use sharp objects or utensils inside <strong>the</strong><br />
freezer canister. Sharp objects will scratch and damage<br />
<strong>the</strong> inside of <strong>the</strong> freezer canister. A rubber scraper<br />
or wooden spoon may be used when <strong>the</strong> appliance<br />
is turned off.<br />
Note: The <strong>Ice</strong>-Cream Maker will switch off<br />
au<strong>to</strong>matically when <strong>the</strong> mixture gets <strong>to</strong>o thick.<br />
To avoid damage <strong>to</strong> <strong>the</strong> appliance or injury <strong>to</strong><br />
persons, ensure <strong>the</strong> appliance is switched off<br />
and unplugged from <strong>the</strong> power outlet if it<br />
au<strong>to</strong>matically s<strong>to</strong>ps or stalls.<br />
5
S<strong>to</strong>rage<br />
Care and Cleaning<br />
The ice-<strong>cream</strong> mixture can be frozen fur<strong>the</strong>r by<br />
placing <strong>the</strong> freezer canister in<strong>to</strong> <strong>the</strong> freezer for no<br />
more than thirty minutes.<br />
To s<strong>to</strong>re your ice-<strong>cream</strong> for long periods of time,<br />
place it in an air tight container in <strong>the</strong> freezer.<br />
Switch off and unplug <strong>the</strong> <strong>Ice</strong>-Cream Maker from <strong>the</strong><br />
power outlet.<br />
Disassemble and wash <strong>the</strong> freezer canister in warm<br />
water with mild detergent.<br />
Rinse well and dry thoroughly.<br />
Note: Do not place any part of <strong>the</strong> <strong>Ice</strong>-Cream<br />
Maker in <strong>the</strong> dishwasher.<br />
Wipe <strong>the</strong> exterior of <strong>the</strong> mo<strong>to</strong>r unit with a soft damp<br />
sponge or cloth. Dry thoroughly.<br />
Note: Sharp utensils, scouring pads or abrasive<br />
detergents may harm your appliance.<br />
6
<strong>Ice</strong>-Cream Recipes<br />
Easy vanilla ice-<strong>cream</strong><br />
300ml milk<br />
250ml <strong>cream</strong><br />
1<br />
⁄2 cup cas<strong>to</strong>r sugar<br />
pinch salt<br />
1<br />
⁄2 teaspoon vanilla essence<br />
Combine all ingredients and stir until sugar dissolves.<br />
Pour in<strong>to</strong> freezer canister and allow <strong>to</strong> churn and<br />
freeze.<br />
Old fashioned vanilla ice-<strong>cream</strong><br />
300ml milk<br />
pinch salt<br />
1<br />
⁄2 cup cas<strong>to</strong>r sugar<br />
5cm piece vanilla bean or 1 teaspoon vanilla<br />
essence<br />
1 egg, beaten<br />
250ml <strong>cream</strong><br />
Combine milk, salt, sugar and vanilla bean in a<br />
saucepan. Cook over medium heat, stirring frequently<br />
until mixture nearly boils. Reduce heat <strong>to</strong> low.<br />
Gradually stir about half of <strong>the</strong> milk in<strong>to</strong> <strong>the</strong> egg. Add<br />
egg mixture back in<strong>to</strong> remaining half of milk. Cook<br />
over low heat, stirring constantly until mixture<br />
slightly thickens.<br />
Remove from <strong>the</strong> heat and allow <strong>to</strong> cool. Refrigerate<br />
and chill thoroughly – preferably overnight.<br />
Remove vanilla bean and add <strong>cream</strong>, mixing with a<br />
wire whisk. Pour in<strong>to</strong> <strong>the</strong> freezer canister and allow<br />
<strong>to</strong> churn and freeze.<br />
Creamy chocolate ice-<strong>cream</strong><br />
120g chocolate bits<br />
1<br />
⁄2 cup cas<strong>to</strong>r sugar<br />
250ml milk<br />
2 egg yolks<br />
250ml <strong>cream</strong><br />
Place chocolate, sugar and half <strong>the</strong> milk in a<br />
saucepan and heat gently until chocolate melts.<br />
Combine remaining milk and eggs; add <strong>to</strong> chocolate<br />
mixture. Bring mixture gently <strong>to</strong> <strong>the</strong> boil, stirring<br />
constantly. Remove from <strong>the</strong> heat and allow <strong>to</strong> cool.<br />
Refrigerate and chill thoroughly – preferably<br />
overnight.<br />
Add <strong>cream</strong> and mix with a wire whisk.<br />
Pour in<strong>to</strong> <strong>the</strong> freezer canister and allow <strong>to</strong> churn and<br />
freeze.<br />
Strawberry ice-<strong>cream</strong><br />
250g fresh strawberries, washed and hulled<br />
3 egg yolks<br />
3<br />
⁄4 cup cas<strong>to</strong>r sugar<br />
350ml <strong>cream</strong><br />
200ml milk<br />
Place all ingredients in a blender or food processor<br />
and process until smooth.<br />
Pour in<strong>to</strong> <strong>the</strong> freezer canister and allow <strong>to</strong> churn and<br />
freeze.<br />
Note: Retain 3 – 4 strawberries from <strong>the</strong><br />
pureeing process, chop in<strong>to</strong> pieces and add at<br />
<strong>the</strong> final churning stage. This will give a<br />
chunkier ice-<strong>cream</strong>.<br />
7
Honey ice-<strong>cream</strong><br />
300ml milk<br />
200g honey<br />
2 egg yolks<br />
pinch salt<br />
200ml <strong>cream</strong><br />
Place milk and honey in a saucepan and heat gently.<br />
Whisk egg yolks and salt <strong>to</strong>ge<strong>the</strong>r and add <strong>to</strong> milk<br />
mixture. Stir continually over a medium heat until<br />
just boiling, remove immediately and allow <strong>to</strong> cool.<br />
Refrigerate and allow <strong>to</strong> chill – preferably overnight.<br />
Add <strong>cream</strong> and mix with a wire whisk.<br />
Pour in<strong>to</strong> <strong>the</strong> freezer canister and allow <strong>to</strong> churn and<br />
freeze.<br />
Chocolate chip ice-<strong>cream</strong><br />
3 egg yolks<br />
1<br />
⁄2 cup cas<strong>to</strong>r sugar<br />
200ml <strong>cream</strong><br />
350ml milk<br />
pinch salt<br />
100g chocolate bits<br />
Beat <strong>the</strong> egg yolk and sugar <strong>to</strong>ge<strong>the</strong>r until fluffy. Stir<br />
in <strong>the</strong> remaining ingredients.<br />
Pour in<strong>to</strong> <strong>the</strong> freezer canister and allow <strong>to</strong> churn and<br />
freeze.<br />
Note: Any variation of chocolate bar finely<br />
chopped can be used i.e. Cherry Ripe, Mars<br />
Bar, Violet Crumble or Peppermint Crisp.<br />
Banana ice-<strong>cream</strong><br />
1 egg white<br />
1<br />
⁄2 cup cas<strong>to</strong>r sugar<br />
100ml <strong>cream</strong><br />
150ml <strong>cream</strong><br />
pinch salt<br />
3 medium bananas, ripe and mashed<br />
1 teaspoon lemon juice<br />
Whisk egg white until light and fluffy, adding a small<br />
amount of sugar during <strong>the</strong> final whisking.<br />
Combine remaining ingredients and gently fold in<br />
<strong>the</strong> egg white.<br />
Pour in<strong>to</strong> <strong>the</strong> freezer canister and allow <strong>to</strong> churn and<br />
freeze.<br />
Easy apricot ice-<strong>cream</strong><br />
1 × 425g can apricots, undrained<br />
150ml <strong>cream</strong><br />
100ml milk<br />
1<br />
⁄4 cup cas<strong>to</strong>r sugar<br />
pinch salt<br />
2 egg yolks<br />
Place all of <strong>the</strong> ingredients in a blender or food<br />
processor and process until smooth.<br />
Pour in<strong>to</strong> <strong>the</strong> freezer canister and allow <strong>to</strong> churn and<br />
freeze.<br />
Note: Any variation of canned fruits can be used.<br />
8
Praline almond fudge ice-<strong>cream</strong><br />
1<br />
⁄2 cup brown sugar<br />
pinch salt<br />
350ml milk<br />
1 egg, beaten<br />
250ml <strong>cream</strong><br />
2 teaspoons vanilla essence<br />
1<br />
⁄2 cup slivered almonds<br />
1 tablespoon butter<br />
1<br />
⁄3 cup chocolate fudge <strong>to</strong>pping<br />
Combine sugar, salt and milk in a saucepan.<br />
Cook over medium heat until mixture begins <strong>to</strong> boil<br />
around <strong>the</strong> edges.<br />
Gradually add half <strong>the</strong> milk <strong>to</strong> <strong>the</strong> beaten egg,<br />
stirring constantly. Pour egg mixture back in<strong>to</strong><br />
remaining milk and continue <strong>to</strong> cook for 1 minute,<br />
stirring constantly. Allow <strong>to</strong> cool.<br />
Refrigerate and chill, preferably overnight.<br />
Add <strong>cream</strong> and vanilla <strong>to</strong> chilled mixture, stirring <strong>to</strong><br />
combine.<br />
Saute almonds in butter over a low heat for 5<br />
minutes, allow <strong>to</strong> cool completely before adding <strong>to</strong><br />
mixture.<br />
Pour in<strong>to</strong> <strong>the</strong> freezer canister and allow <strong>to</strong> churn and<br />
freeze. During final churning stage, pour chocolate<br />
fudge in<strong>to</strong> <strong>the</strong> canister and allow <strong>to</strong> combine with<br />
<strong>the</strong> ice-<strong>cream</strong>.<br />
Plum pudding ice-<strong>cream</strong><br />
1 cup dried mixed fruit<br />
1 tablespoon sherry or brandy<br />
2 egg yolks<br />
1<br />
⁄2 cup cas<strong>to</strong>r sugar<br />
150ml milk<br />
250ml <strong>cream</strong><br />
1 teaspoon mixed spice<br />
1<br />
⁄4 teaspoon cinnamon<br />
1<br />
⁄4 teaspoon nutmeg<br />
pinch salt<br />
Allow fruit <strong>to</strong> soak in sherry or brandy for 1 hour.<br />
Beat egg yolks and sugar <strong>to</strong>ge<strong>the</strong>r until fluffy. Stir in<br />
milk, <strong>cream</strong>, spices, salt and dried fruits.<br />
Pour in<strong>to</strong> <strong>the</strong> freezer canister and allow <strong>to</strong> churn and<br />
freeze.<br />
On completion serve on its own or spoon mixture<br />
in<strong>to</strong> a foil-lined bowl, cover and place in a freezer for<br />
4 hours before turning <strong>the</strong> ice-<strong>cream</strong> out on<strong>to</strong> a<br />
platter and serving sliced with fresh berries.<br />
9
Sorbet Recipes<br />
Yoghurt Recipes<br />
Lemon sorbet<br />
1 large lemon<br />
300ml boiling water<br />
1 cup sugar<br />
1 egg white, lightly whisked<br />
Using a vegetable peeler, remove a thin layer of rind<br />
from <strong>the</strong> lemon and add <strong>the</strong> rind <strong>to</strong> <strong>the</strong> boiling water.<br />
Allow <strong>to</strong> infuse for 30 – 40 minutes, strain.<br />
Add <strong>the</strong> sugar and egg white and stir <strong>to</strong> combine.<br />
Pour in<strong>to</strong> <strong>the</strong> freezer canister and allow <strong>to</strong> churn and<br />
freeze.<br />
Frozen yoghurt<br />
2 × 200g tubs yoghurt, plain or flavoured<br />
200ml milk<br />
1<br />
⁄4 cup cas<strong>to</strong>r sugar<br />
2 egg yolks<br />
pinch salt<br />
Thoroughly combine all ingredients. Pour in<strong>to</strong> <strong>the</strong><br />
freezer canister and allow <strong>to</strong> churn and freeze.<br />
Note: Up <strong>to</strong> 1 ⁄2 cup chopped fresh or canned<br />
fruit can also be added for a chunkier yoghurt.<br />
Strawberry sorbet<br />
1<br />
⁄2 cup sugar<br />
1 cup water<br />
2 1 ⁄2 cups fresh strawberries, pureed<br />
2 teaspoons lemon juice<br />
Combine sugar and water in a small saucepan.<br />
Heat <strong>to</strong> boiling point and allow <strong>to</strong> simmer until sugar<br />
dissolves. Remove from heat and allow <strong>to</strong> cool<br />
completely.<br />
Add strawberries and lemon juice.<br />
Pour in<strong>to</strong> <strong>the</strong> freezer canister and allow <strong>to</strong> churn and<br />
freeze.<br />
Citrus sorbet<br />
1 small orange<br />
1 small lemon<br />
1 lime<br />
400ml boiling water<br />
1 1 ⁄2 cups sugar<br />
2 egg whites, lightly whisked<br />
Using a vegetable peeler, remove a thin layer of rind<br />
from <strong>the</strong> orange, lemon and lime. Add rind <strong>to</strong> <strong>the</strong><br />
boiling water and allow <strong>to</strong> infuse for 30 minutes.<br />
Strain and add <strong>the</strong> sugar and egg whites.<br />
Pour in<strong>to</strong> <strong>the</strong> freezer canister and allow <strong>to</strong> churn and<br />
freeze.<br />
10
Notes<br />
11
Warranty<br />
The benefits conferred by this warranty are in<br />
addition <strong>to</strong> all implied warranties, o<strong>the</strong>r rights and<br />
remedies in respect of <strong>the</strong> product which <strong>the</strong><br />
consumer has under <strong>the</strong> Trade Practices Act and<br />
similar State and Terri<strong>to</strong>ry Laws.<br />
The original purchaser of this <strong>Mistral</strong> product<br />
is provided with <strong>the</strong> following warranty, subject <strong>to</strong><br />
<strong>the</strong> following conditions.<br />
<strong>Mistral</strong> International Pty Ltd warrant this product for<br />
a period of 3 years from <strong>the</strong> date of purchase for all<br />
parts defective in workmanship or materials. The<br />
product or defective parts will be replaced free of<br />
charge.<br />
WARRANTY CONDITIONS<br />
1. This warranty is only valid for appliances used<br />
according <strong>to</strong> <strong>the</strong> manufacturer’s instructions.<br />
2. This appliance must not be modified<br />
or changed in any way.<br />
3. Connection must be <strong>to</strong> <strong>the</strong> voltage requirements<br />
as specified in <strong>the</strong> ratings<br />
label located on <strong>the</strong> product.<br />
4. The manufacturer does not accept liability for<br />
any direct or consequential damage, loss or<br />
o<strong>the</strong>r expense arising from misuse or incorrect<br />
installation and operation of <strong>the</strong> appliance.<br />
5. Warranty will only be given where proof of<br />
purchase is provided, e.g. original invoice.<br />
6. Not designed or warranted for industrial<br />
or commercial use.<br />
DO NOT SEND IN THIS WARRANTY<br />
Fill out <strong>the</strong> following details and file with your<br />
purchase invoice.<br />
RETAIN & FILE WITH YOUR RECEIPT.<br />
Your Purchase Receipt/Invoice is proof of date of<br />
purchase. You must be able <strong>to</strong> present it at <strong>the</strong> place<br />
of purchase <strong>to</strong> obtain a replacement or service<br />
under warranty.<br />
<strong>Mistral</strong> International Pty Ltd reserves <strong>the</strong> right <strong>to</strong><br />
discontinue items, modify designs and change<br />
specifications without incurring obligation. Whilst<br />
every effort is made <strong>to</strong> ensure that descriptions,<br />
specifications and o<strong>the</strong>r information in this<br />
publication is correct, no warranty is given in<br />
respect <strong>the</strong>reof and <strong>the</strong> company shall not be liable<br />
for any errors <strong>the</strong>rein.<br />
Purchased from:<br />
Co. Name:<br />
Address:<br />
Date of Purchase:<br />
NOTE: Consistent with our continuing product<br />
development policy, improvements may have<br />
been made which render <strong>the</strong> contents of this<br />
package slightly different <strong>to</strong> that shown.<br />
Cat. No. MICM10<br />
July 2003<br />
Product of <strong>Mistral</strong> International Pty Ltd ABN 25 006 680 315<br />
324 Franks<strong>to</strong>n-Dandenong Road<br />
Dandenong South, Vic<strong>to</strong>ria, Australia 3175<br />
Telephone 03 9212 1333 Facsimile 03 9212 1340<br />
Cus<strong>to</strong>mer Service 1300 654 488<br />
Internet Address: www.mistral.com.au<br />
RINGGRIP (NZ) Pty Ltd ACN 006 771 922<br />
PO Box 51317, Pakuranga, Auckland NZ<br />
Telephone 0800 328 280 Facsimile 0800 328 238<br />
Manufactured by <strong>Mistral</strong> International Pty Ltd<br />
<strong>Mistral</strong> is a registered trademark of <strong>Mistral</strong> International Pty Ltd<br />
© 2003 <strong>Mistral</strong> International Pty Ltd<br />
12