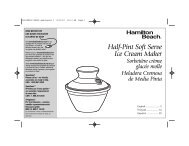
SOFT SERVE ICE CREAM MAKER - PickYourOwn.org
SOFT SERVE ICE CREAM MAKER - PickYourOwn.org
SOFT SERVE ICE CREAM MAKER - PickYourOwn.org

Create successful ePaper yourself
Turn your PDF publications into a flip-book with our unique Google optimized e-Paper software.
GC8250-I/GC8250I04M1.qxd 6/16/04 11:28 Page 2<br />
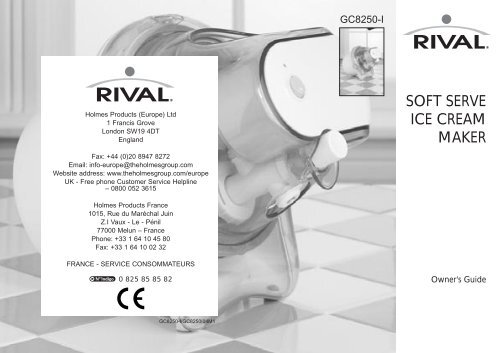
GC8250-I<br />
Holmes Products (Europe) Ltd<br />
1 Francis Grove<br />
London SW19 4DT<br />
England<br />
<strong>SOFT</strong> <strong>SERVE</strong><br />
<strong>ICE</strong> <strong>CREAM</strong><br />
<strong>MAKER</strong><br />
Fax: +44 (0)20 8947 8272<br />
Email: info-europe@theholmesgroup.com<br />
Website address: www.theholmesgroup.com/europe<br />
UK - Free phone Customer Service Helpline<br />
– 0800 052 3615<br />
Holmes Products France<br />
1015, Rue du Maréchal Juin<br />
Z.I Vaux - Le - Pénil<br />
77000 Melun – France<br />
Phone: +33 1 64 10 45 80<br />
Fax: +33 1 64 10 02 32<br />
FRANCE - SERV<strong>ICE</strong> CONSOMMATEURS<br />
0 825 85 85 82<br />
Owner's Guide<br />
GC8250-I/GC8250I04M1
GC8250-I/GC8250I04M1.qxd 6/16/04 11:28 Page 4<br />
ENGLISH<br />
Please read this manual carefully before using this appliance,<br />
as correct use will give the best possible performance.<br />
Retain these instructions for future reference.<br />
IMPORTANT SAFEGUARDS<br />
English 1<br />
Deutsch/German 14<br />
Français/French 26<br />
This appliance is for HOUSEHOLD USE ONLY. No user serviceable parts<br />
inside. The motor never needs lubrication. Do not attempt to service this<br />
product.<br />
Mains Connection<br />
• Read these instructions carefully, in conjunction with the illustrations, before<br />
using this appliance.<br />
• Before connecting this appliance, check that the voltage indicated on the<br />
rating plate (found on the underside of the appliance) corresponds to the<br />
mains voltage in your home.<br />
• Do not operate if the supply cord is damaged. It must be replaced by the<br />
manufacturer or its service agent.<br />
NOTE: During initial use of this appliance, some slight smoke and/or<br />
odour may be detected. This is normal with many appliances and<br />
will not recur after a few uses.<br />
Safe Positioning<br />
• DO NOT position where it can be touched by children, especially the very<br />
young. Close supervision is necessary when any appliance is used by or<br />
near children.<br />
• DO NOT position this appliance directly under an electrical socket.<br />
• DO NOT immerse the unit, cord or plug in water or other liquid.<br />
• DO NOT place the appliance on or near a hot gas or electric burner nor<br />
in a heated or microwave oven.<br />
• DO NOT allow the mains cord to overhang the edge of the counter or table.<br />
• DO NOT use harsh abrasives, caustic cleaners or oven cleaners when<br />
cleaning this appliance.<br />
• Always unplug the appliance from the electrical socket when not in use<br />
and before cleaning.<br />
• Do not use appliance for other than intended use.<br />
• Avoid contact with moving parts. Keep hands, hair, clothing, as well<br />
as spatulas and other utensils away during operation to reduce the<br />
1
GC8250-I/GC8250I04M1.qxd 6/16/04 11:28 Page 2<br />
risk of injury to persons and or damage to the unit.<br />
• Do not use sharp objects or utensils inside the Canister. Sharp<br />
objects will scratch and damage the inside of the Canister. A rubber<br />
spatula or wooden spoon may be used when the appliance is<br />
turned off.<br />
Servicing<br />
• Should the appliance stop working, first check the fuse in the plug (UK<br />
only) or fuse/circuit breaker at the distribution board to ensure it is<br />
operating, before contacting the manufacturer or service agent.<br />
• If the supply cord or plug is damaged, it must be replaced by the<br />
manufacturer or its service agent or a similarly qualified person in order to<br />
avoid hazard.<br />
THIS APPLIANCE IS FOR HOUSEHOLD USE ONLY.<br />
DO NOT USE THE APPLIANCE FOR OTHER THAN THE<br />
INTENDED USE.<br />
FITTING OF A PLUG - FOR U.K. AND IRELAND ONLY<br />
If the plug is not suitable for the socket outlets in your home, it can be removed<br />
and replaced by a plug of the correct type. Please refer to "Installation of a<br />
plug" below.<br />
Installation of a plug - Applicable to U.K. and Ireland<br />
The wires in the mains lead are coloured as such:<br />
BROWN - LIVE<br />
BLUE - NEUTRAL<br />
Please note that the colour of these mains wires may not correspond with the<br />
colour markings that identify the terminals in your plug. Please proceed as<br />
follows:<br />
The BROWN coloured wire must be connected to the terminal, which is marked<br />
with the letter "L" or is coloured RED.<br />
The BLUE coloured wire must be connected to the terminal, which is marked<br />
with the letter "N" or is coloured BLACK.<br />
DO NOT CONNECT either of these wires to the earth terminal in the plug.<br />
The earth terminal plug is marked with the letter "E",<br />
or with the earth symbol, or coloured GREEN,<br />
or GREEN and Yellow.<br />
NOTE: If the terminals in the plug are not marked or if you<br />
are unsure or in doubt about the installation of the plug<br />
please contact a qualified electrician.<br />
If a 13A 3-pin plug is fitted, it must be an ASTA approved<br />
plug, conforming to BS1363 standard. Replacement 3A<br />
fuses must be BSI or ASTA BS1362 approved.<br />
3 amp<br />
KNOW YOUR <strong>SOFT</strong> <strong>SERVE</strong> <strong>ICE</strong> <strong>CREAM</strong> <strong>MAKER</strong><br />
1. Locking Latch<br />
2. Motor Housing<br />
3. Indicator Light<br />
4. I (On)/0 (Off) Rocker Switch<br />
5. Top Cover<br />
6. Locking Latch<br />
7. Mouth<br />
8. Canister Lid<br />
9. Rubber Sealing Ring<br />
10. Dasher Assembly<br />
11. Screw<br />
12. Dispensing Button<br />
13. Dispensing Opening<br />
14. Dispensing Valve<br />
15. Canister Lid Tube<br />
16. Canister<br />
17. Canister Collar<br />
9<br />
7<br />
8<br />
11<br />
10<br />
Before Use<br />
1. Remove all packing materials and manual. Make sure to save manual.<br />
2. Wash the Soft Serve Ice Cream Maker, except for the motor housing,<br />
in warm soapy water (see p. 7 - How to clean your soft serve ice-cream<br />
maker). Rinse and dry all parts thoroughly. The Rubber Sealing Ring will<br />
need to be thoroughly dried before assembling.<br />
NOTE: Never immerse Motor Housing in water or any other liquids.<br />
Never wash the Canister in the dishwasher.<br />
3<br />
4<br />
5<br />
6<br />
2<br />
1<br />
12<br />
13<br />
14<br />
15<br />
16<br />
17<br />
2 3
GC8250-I/GC8250I04M1.qxd 6/16/04 11:28 Page 4<br />
HOW TO USE YOUR <strong>SOFT</strong> <strong>SERVE</strong> <strong>ICE</strong> <strong>CREAM</strong> <strong>MAKER</strong><br />
Freezing your Canister<br />
NOTE: The Canister must be kept in the freezer for a minimum of 24 hours<br />
before each use.<br />
1. Wash and dry Canister thoroughly prior to freezing.<br />
2. For best results, wrap the Canister in a plastic bag and place upright<br />
in the back of your freezer.<br />
Assembling the Soft Server<br />
1. Slide the Canister Collar upward onto the Canister until it locks. Make<br />
sure it is positioned correctly; follow the indentations on the<br />
Canister. (Figure 1)<br />
2. Fasten Rubber Sealing Ring securely on the underside of the Canister<br />
Lid. (Figure 2)<br />
3. Insert the Screw into the Canister Lid Tube. (Figure 2)<br />
Canister<br />
Rubber<br />
Sealing Ring<br />
4. Place the Dasher Assembly over the Canister Lid Tube. Turn it clock-wise<br />
to make sure it locks in place. (Figure 3)<br />
5. Place the Canister Lid with Dasher Assembly attached, inside the<br />
Canister. Make sure the top of the Canister Lid aligns with the half<br />
circle. It should fit in place when the half circle is aligned on the top.<br />
(Figure 4)<br />
NOTE: Make sure the Rubber Sealing Ring is assembled securely inside<br />
the Canister Lid. The Rubber Sealing Ring must be thoroughly dried to<br />
properly seal.<br />
6. Place the transparent Top Cover over the Canister.<br />
7. Gently lock the Motor Housing in place by pushing the Motor<br />
downward onto the transparent Top Cover.<br />
8. Securely lock down the 3 Locking Latches.<br />
9. Select your designer Dispensing Tip (4 different designs) and attach<br />
it over the Dispensing Opening.<br />
To operate, the assembled unit must be placed in the<br />
horizontal position when unit is first turned on and<br />
kept in this position at all times for churning, pouring in<br />
recipe and dispensing (as shown on the front cover of<br />
the manual).<br />
Figure 1<br />
Canister<br />
Collar<br />
Figure 2<br />
Dasher<br />
Assembly<br />
Screw<br />
Canister<br />
Lid<br />
Figure 3<br />
Figure 4<br />
4 5
GC8250-I/GC8250I04M1.qxd 6/16/04 11:28 Page 6<br />
Using the Soft Server<br />
NOTE: During operation it is normal for condensation to form on the<br />
outside of the canister. Therefore, do not use your Soft Serve Ice<br />
Cream Maker on a surface that could be damaged.<br />
1. Plug in unit.<br />
2. Press the Rocker Switch to the I (On) position.<br />
NOTE: The unit must be running when the chilled<br />
recipe is added. (See p. 10 for recipe ideas)<br />
CAUTION: Do not place hands or utensils into the Mouth of unit.<br />
3. Pour chilled recipe slowly into the Mouth of unit.<br />
NOTE: The volume of soft serve ice cream will increase during the<br />
freezing process. Do not fill the Soft Serve Ice Cream Maker all the<br />
way to the top.<br />
4. Churn the ice cream according to the recipe.<br />
Off<br />
NOTE: Variation in ingredients and environmental conditions will<br />
affect the freezing time of the mixture. The ice cream may be ready<br />
before or after the churning time stated in the recipe. When you see<br />
that the ice cream is starting to solidify, you can test it. Simply press<br />
the Dispensing Button and dispense some ice cream to test. Continue<br />
to run if you would like a firmer consistency.<br />
Personal preference for consistency will determine actual freezing<br />
time.<br />
5. Press and hold the Dispensing Button inward to dispense.<br />
6. Place towel underneath the Dispensing Button to catch any melting<br />
ice cream.<br />
Soft Serve or Hard Ice Cream?<br />
Making Soft Serve<br />
Simply follow the instructions above and recipes provided. See page 10.<br />
Making Hard Ice Cream<br />
NOTE: Do not use typical hard ice cream recipes. The specially<br />
formulated recipes provided in the manual can be used for both soft<br />
serve and hard ice cream.<br />
1. Using these recipes, follow steps 1 through 5 in the section titled -<br />
How To Use Your Soft Serve Ice Cream Maker.<br />
2. Remove the Top Cover, including Motor, Dasher Assembly, and<br />
Screw.<br />
3. Remove excess ice cream from dasher with spoon and place into<br />
airtight container.<br />
4. Place remaining ice cream from Canister in airtight container. Put<br />
closed container in freezer for 2-4 hours.<br />
Off<br />
On<br />
HOW TO CLEAN YOUR <strong>SOFT</strong> <strong>SERVE</strong> <strong>ICE</strong> <strong>CREAM</strong> <strong>MAKER</strong><br />
On<br />
1. Use a damp cloth to clean the Motor Housing. Never immerse the<br />
Motor Housing Unit, Plug or Cord in water or in any other liquids.<br />
2. Wash the Top Cover, Dasher, Screw, Canister Lid, and Collar in hot<br />
soapy water. These parts are also dishwasher safe.<br />
3. Wash the Canister with hot soapy water. NEVER place the Canister,<br />
or Rubber Sealing Ring in the dishwasher. These parts are NOT<br />
dishwasher safe.<br />
4. Make sure all parts are thoroughly dried.<br />
6 7
GC8250-I/GC8250I04M1.qxd 6/16/04 11:28 Page 8<br />
NOTE: Please use the provided Cleaning Brush for hard to reach<br />
areas, like the Canister Lid Tube.<br />
HELPFUL HINTS - Cleaning:<br />
• The cleaning brush included provides an excellent way to clean the<br />
hard to reach places in your ice cream maker.<br />
• Use a damp cloth to carefully wipe the outside of the Motor<br />
Housing after each usage.<br />
• To ensure a thorough cleaning, the Soft Serve Ice Cream Maker<br />
should be completely disassembled prior to cleaning.<br />
TROUBLESHOOTING<br />
Ice cream did not hold shape:<br />
• Was the Recipe made correctly?<br />
• Were the proper ingredients used?<br />
• Was the mixture chilled long enough?<br />
• Was the Canister left in the freezer for a full 24 hours?<br />
• Not all freezers are the same; some may require a longer freezing<br />
time for the canister.<br />
The Dasher is not turning / Unit stopped while dispensing:<br />
• The mixture became too thick. Try dispensing sooner when using<br />
that particular recipe.<br />
• Check that no frozen lumps are jamming the rotating plastic blade.<br />
• The motor over-heated – unplug the unit and let the unit cool down<br />
for approximately 4 hours.<br />
• Make sure the unit is attached to a power supply.<br />
• Make sure the unit is properly assembled.<br />
Ice Cream is leaking from unit:<br />
• Make sure Rubber Sealing Ring is securely attached.<br />
• Make sure there is no ice on the edge of the Canister underneath<br />
Rubber Sealing Ring.<br />
• Make sure all three Locking Latches on the Top Cover are secure.<br />
RECIPES<br />
Plan Ahead<br />
• The Canister must be kept in the freezer for a minimum of 24 hours<br />
before each use.<br />
• The prepared recipe mixture must be cooled in a refrigerator or<br />
chilled in a freezer (as detailed in the recipe) before it is poured<br />
before each use. . Plan this time into your preparation.<br />
• Each recipe makes about 6-8 servings.<br />
HELPFUL HINTS - Recipes:<br />
• Specially formulated recipes are provided in the manual. Please<br />
follow these recipes.<br />
• Before pouring the mixture into the Canister, please ensure there<br />
are no lumps.<br />
• Do not use cream labelled "extra thick" or UHT creams or milk, as<br />
the heat process alters their proteins and affects churning.<br />
• Do not use typical hard ice cream recipes as it may damage the unit.<br />
This includes any recipes that contain nuts, chocolate chips, fruit<br />
pieces, or any other solid chunks.<br />
• Most recipes require the mixture to be pre-cooked. For best<br />
results, make the recipe at least one day ahead. This will allow the<br />
mixture time to cool completely and provide the best results.<br />
• Eggs may be substituted with egg substitutes.<br />
• When using eggs in any recipes, heating or cooking the recipe<br />
mixture is necessary.<br />
• Ice cream should be stored in an air-tight container.<br />
• The volume of soft serve ice cream will increase during the<br />
freezing process. Do not fill the Soft Serve Ice Cream Maker all the<br />
way to the top.<br />
• The Soft Serve Ice Cream Maker has a 60 minute auto shut off<br />
device and will automatically stop churning after this time.<br />
• After each use you must wash and refreeze the Canister. If you<br />
have purchased a second Canister allow a 4 hour period for the<br />
motor to cool before using the Soft Serve Ice Cream Maker again.<br />
• If the Soft Serve Ice Ceam Maker stops while churning, check that<br />
no frozen lumps are jamming the rotating plastic blade - See<br />
Troubleshooting on page 8.<br />
8 9
GC8250-I/GC8250I04M1.qxd 6/16/04 11:28 Page 10<br />
STRAWBERRY AND VANILLA YOGHURT<br />
400g strawberries with a squeeze of lemon juice<br />
2 dessert spoons of honey<br />
2 150g cartons of rich thick Vanilla Yoghurt<br />
200ml full cream milk<br />
250mls single cream<br />
150g caster sugar<br />
Combine strawberries, lemon juice, honey, sugar and blend into a fruit<br />
puree. Add the milk, cream and yoghurt and blend until well combined.<br />
Allow the mixture to chill in the freezer for 45 mins or until the mixture has<br />
cooled down to 8˚C. Stir and pour immediately into the Soft Server machine<br />
and churn the mixture for approx. 20-30 mins.<br />
RASPBERRY <strong>SOFT</strong> <strong>SERVE</strong> <strong>ICE</strong>-<strong>CREAM</strong><br />
320g frozen raspberries<br />
Squeeze of lemon juice<br />
280ml full cream milk<br />
260mls whipping cream<br />
160g caster sugar<br />
In a blender or food processor combine the raspberries, lemon juice and milk .<br />
When completely blended, add the sugar and blend again on high speed<br />
until the mixture is completely smooth and all the sugar has dissolved. Add<br />
the double cream and blend until combined. Put the mixture through a fine<br />
sieve to remove the seeds and place in the freezer for 45 mins or until it has<br />
cooled down to 8˚C. Stir and pour immediately into the Soft Server machine<br />
and churn the mixture for approx. 20-30 mins.<br />
VANILLA <strong>SOFT</strong> <strong>SERVE</strong> <strong>ICE</strong> <strong>CREAM</strong><br />
360mls full cream milk<br />
160g caster sugar<br />
2 egg yolks<br />
360mls single cream<br />
2 teaspoons of vanilla extract<br />
Place the milk, cream and 140g sugar in a saucepan and cook over a<br />
medium heat until the sugar is completely dissolved. Whisk the egg yolk<br />
with the remaining 20g sugar until they appear almost white. Remove 100mls<br />
of the hot milk/cream mixture from the pan and slowly whisk into the beaten<br />
egg yolks. Gradually whisk the yolk mixture back into the saucepan and cook<br />
over a medium heat until the mixture thickens slightly and thinly coats the back<br />
of a wooden spoon (about 8-10 mins). Do not allow mixture to boil. Cool the<br />
mixture quickly (e.g.: in an ice bath) and place in the freezer for 1 hour or until<br />
the mixture has cooled down to 8˚C. Stir and pour immediately into the Soft<br />
Server machine and churn the mixture for approx. 20-30 mins.<br />
STRAWBERRY CRÈME FRAÎCHE <strong>SOFT</strong> <strong>SERVE</strong> <strong>ICE</strong>-<strong>CREAM</strong><br />
360g fresh strawberries<br />
Squeeze of lemon juice<br />
270mls full cream milk<br />
270mls crème fraîche<br />
150g caster sugar<br />
Combine the strawberries, lemon juice and sugar in a food processor or<br />
blender until the sugar has dissolved. Add the milk and crème fraîche and<br />
blend until combined. Chill in the freezer for 45 mins or until the mixture<br />
has cooled down to 8˚C. Stir and pour immediately into the Soft Server<br />
machine and churn the mixture for approx. 20-30 mins.<br />
LEMON <strong>SOFT</strong> <strong>SERVE</strong> <strong>ICE</strong>-<strong>CREAM</strong><br />
Zest of 4 Lemons<br />
6 tablespoons of Lemon Juice<br />
200g caster sugar<br />
300mls whipping cream<br />
300mls full cream milk<br />
Wash the lemons and with a zesting tool remove the zest from all four<br />
lemons. Place the zest, sugar and lemon juice in a food processor or a<br />
blender. Blend for 3 mins or until the sugar has dissolved. Stir the<br />
mixture slowly into a jug containing the cream and milk. Sieve and chill<br />
in the freezer for 45 mins or until the mixture has cooled down to 8˚C.<br />
Stir and pour immediately into the Soft Server machine and churn the<br />
mixture for approx. 20-30 mins.<br />
MARMALADE <strong>SOFT</strong> <strong>SERVE</strong> <strong>ICE</strong> <strong>CREAM</strong><br />
300g of good quality marmalade (orange tangerine)<br />
300mls whipping cream<br />
300mls full cream milk<br />
50g caster sugar<br />
2 tablespoons of orange juice<br />
In a blender of food processor combine the marmalade, sugar and milk.<br />
When the sugar has dissolved add the cream and blend briefly. Add the<br />
orange juice. Put the mixture through a fine sieve and place it in the<br />
freezer for 45 mins or until it has cooled to 8˚C. Stir and pour immediately<br />
into the Soft Server machine and churn the mixture for approx. 20-30 mins.<br />
10 11
GC8250-I/GC8250I04M1.qxd 6/16/04 11:28 Page 12<br />
BANOFFEE<br />
225mls semi-skimmed milk<br />
360mls double cream<br />
145g caster sugar<br />
140g banoffee toffee (e.g.: jar made by Merchant Gourmet)<br />
2 egg yolks<br />
2 medium bananas together with a squeeze of lemon juice<br />
Whisk the egg yolk with 10g of the sugar until almost white. Boil the milk<br />
and remaining sugar. Remove 100ml and slowly whisk into the beaten<br />
egg yolk. Gradually whisk the yolk mixture back into the saucepan. Cook<br />
the mixture over a medium heat, stirring constantly, until the mixture<br />
thickens slightly and coats the back of a spoon (about 8-10 minutes).<br />
Cool quickly (e.g.: in an ice bath). In a blender or food processor combine<br />
the bananas, lemon juice and banoffee until smooth. Add the double cream<br />
and cooled custard and blend just until combined. Allow the mixture to chill<br />
in the freezer for 45 mins or until the mixture has cooled down to 8˚C. Stir<br />
and pour immediately into the Soft Server machine and churn the mixture<br />
for approx. 20-30 mins.<br />
COFFEE <strong>SOFT</strong> <strong>SERVE</strong> <strong>ICE</strong> <strong>CREAM</strong><br />
250mls full cream milk<br />
200mls whipping cream<br />
175mls single ream<br />
4 egg yolks<br />
170g caster sugar<br />
4 level teaspoons of instant espresso coffee powder<br />
Place the milk, coffee powder, cream and 140g sugar in a saucepan.<br />
Cook over a medium heat stirring constantly until the sugar has completely<br />
dissolved. Whisk the egg yolks and the remaining 30g sugar until pale yellow<br />
and mixture forms a ribbon. Remove 100mls of the hot milk/cream mixture<br />
from the pan and slowly whisk into the beaten egg yolks. Gradually whisk the<br />
yolk mixture back into the saucepan and cook over a medium heat until the<br />
mixture thickens slightly and thinly coats the back of a wooden spoon (about<br />
8-10 mins.) Do not allow the mixture to boil. Cool the mixture quickly (e.g.: in<br />
an ice bath) and place in the freezer for 45 mins or until the mixture has cooled<br />
down to 8˚C. Stir and pour immediately into the Soft Server machine and churn<br />
the mixture for approx. 20-30 mins.<br />
THE RIVAL 2 YEAR GUARANTEE<br />
PLEASE KEEP YOUR RECEIPT AS THIS WILL BE REQUIRED FOR<br />
ANY CLAIMS UNDER THIS GUARANTEE<br />
• Your Rival ® Soft Serve Ice Cream Maker is guaranteed for two years<br />
• In the unlikely event of breakdown, please take your appliance back to<br />
the place of purchase, with your till receipt and a copy of this<br />
guarantee.<br />
• The rights and benefits under this guarantee are additional to your<br />
statutory rights which are not affected by this guarantee.<br />
• The Holmes Group undertakes within the specific period, to repair or<br />
replace free of charge, any part of the appliance found to be provided<br />
that:<br />
- We are promptly informed of the defect<br />
- The appliance has not been altered in any way or subjected to<br />
misuse or repair by a person other than a person authorised by<br />
The Holmes Group.<br />
• No rights are given under this guarantee to a person acquiring the<br />
appliance second hand.<br />
WE RECOMMEND THAT YOU SEND US THE ATTACHED GUARANTEE<br />
CARD IN ORDER TO REGISTER YOUR GUARANTEE WITH THE<br />
HOLMES GROUP.<br />
THIS PRODUCT IS MANUFACTURED TO COMPLY WITH THE E.E.C.<br />
DIRECTIVES<br />
73/23/EEC, 89/336/EEC AND 98/37/EEC.<br />
For UK only - Customer Service<br />
Helpline 0800 052 3615<br />
www.rivalproducts.co.uk<br />
12 13
GC8250-I/GC8250I04M1.qxd 6/16/04 11:28 Page 14<br />
DEUTSCH<br />
Dieses Handbuch ist vor der Verwendung des Gerätes<br />
s<strong>org</strong>fältig zu lesen, da sich das beste Ergebnis nur durch<br />
die richtige Anwendung erreichen lässt.<br />
Bewahren Sie diese Hinweise zum späteren Nachlesen gut<br />
auf.<br />
WICHTIGE SICHERHEITSMASSNAHMEN<br />
Dieses Gerät ist NUR FÜR DEN HAUSGEBRAUCH bestimmt. Es<br />
enthält keine vom Nutzer zu wartenden Teile. Der Motor braucht nicht<br />
geschmiert zu werden. Versuchen Sie nicht, dieses Gerät selbst zu warten.<br />
Hauptanschlüsse<br />
• Lesen Sie diese Hinweise zusammen mit den Illustrationen vor der<br />
Inbetriebnahme des Gerätes s<strong>org</strong>fältig durch.<br />
• Überprüfen Sie vor dem Anschließen des Gerätes, dass die auf dem<br />
Leistungsschild (auf der Unterseite des Gerätes) angegebene<br />
Spannung der in ihrem Haus vorhandenen Spannung entspricht.<br />
• Werden Stromkabel oder Stecker beschädigt, müssen diese durch den<br />
Hersteller oder seine Vertragswerkstatt bzw. von einer ähnlich<br />
qualifizierten Person ausgewechselt<br />
HINWEIS: Wenn das Gerät zum ersten Mal in Betrieb genommen wird,<br />
kann es zu leichter Rauch- und/oder Geruchsbildung kommen, was bei<br />
vielen Geräten normal ist und nach mehrfachem Gebrauch nicht mehr<br />
auftritt.<br />
Sichere Aufstellung<br />
• Stellen Sie das Gerät NICHT in der Nähe von Kindern auf,<br />
insbesondere nicht bei Kleinkindern. Wenn das Gerät von Kindern<br />
benutzt oder in deren Nähe aufgestellt wird, ist seine Bedienung<br />
s<strong>org</strong>fältig zu überwachen.<br />
• Stellen Sie dieses Gerät NICHT direkt unter eine Steckdose .<br />
• Tauchen Sie das Gerät, das Kabel oder den Stecker NICHT ins Wasser<br />
oder eine andere Flüssigkeit.<br />
• Stellen Sie das Gerät NICHT auf einen oder in die Nähe eines Gasoder<br />
Elektroherdes und NICHT in den warmen Ofen oder in die<br />
Mikrowelle.<br />
• Lassen Sie die Netzschnur NICHT über die Kante des Tresens oder<br />
Tisches hängen.<br />
• Verwenden Sie KEINE scharfen Scheuermittel, ätzenden<br />
Reinigungsmittel oder Ofenreiniger zum Reinigen des Gerätes.<br />
• Ziehen Sie vor der Reinigung des Gerätes oder wenn Sie es nicht<br />
benutzen immer den Netzstecker aus der Steckdose.<br />
• Verwenden Sie das Gerät nur für den angegebenen Verwendungszweck.<br />
• Berühren Sie keine beweglichen Teile. Wenn das Gerät in Betrieb ist,<br />
halten Sie Hände, Haare und Spateln bzw. anderes Zubehör davon<br />
fern, um die Gefahr einer möglichen Verletzung bzw. der Beschädigung<br />
des Geräts zu vermindern.<br />
• Halten Sie scharfe Gegenstände oder Utensilien vom Behälter fern.<br />
Scharfe Gegenstände zerkratzen und beschädigen das Behälterinnere.<br />
Nachdem Sie das Gerät abgeschaltet haben, können Sie eine<br />
Gummispatel oder einen Holzlöffel verwenden.<br />
DIESES GERÄT IST NUR FÜR DEN HAUSGEBRAUCH ZU VERWENDEN.<br />
VERWENDEN SIE ES NUR FÜR DEN ANGEGEBENEN ZWECK.<br />
LERNEN SIE IHRE „<strong>SOFT</strong> <strong>SERVE</strong>“ -<br />
EISCREMEMASCHINE KENNEN.<br />
Eine Abbildung mit der folgenden Beschriftung würde hier eingefügt:<br />
1. Sperrklinke<br />
2. Mot<strong>org</strong>ehäuse<br />
3. Anzeigelampe<br />
4. Ein/Aus Kippschalter<br />
5. Obere Abdeckung<br />
6. Sperrklinke<br />
7. Einfüllöffnung<br />
8. Behälterdeckel<br />
9. Gummidichtungsring<br />
10.Rührspatelantrieb<br />
11. Schnecke<br />
12.Ablaufknopf<br />
13.Ablauföffnung<br />
14.Ablaufventil<br />
15.Behälterdeckelröhre<br />
16.Behälter<br />
17.Behältermanschette<br />
14 15<br />
9<br />
7<br />
8<br />
11<br />
10<br />
3<br />
4<br />
5<br />
6<br />
2<br />
1<br />
12<br />
13<br />
14<br />
15<br />
16<br />
17
GC8250-I/GC8250I04M1.qxd 6/16/04 11:28 Page 16<br />
Vor Inbetriebnahme<br />
1. Gerät und Bedienungsanleitung aus der Verpackung nehmen. Heben<br />
Sie die Bedienungsanleitung s<strong>org</strong>fältig auf.<br />
2. Waschen Sie die Eiscrememaschine mit Ausnahme des<br />
Mot<strong>org</strong>ehäuses in warmem Seifenwasser (siehe Seite 19, Reinigung<br />
der Eiscrememaschine).<br />
Spülen und trocknen Sie alle Teile s<strong>org</strong>fältig. Speziell der<br />
Gummidichtungsring muss vor dem Zusammensetzen ganz trocken sein.<br />
HINWEIS: Das Mot<strong>org</strong>ehäuse nicht in Wasser oder andere Flüssigkeiten<br />
tauchen. Waschen Sie den Behälter nicht in der Spülmaschine.<br />
ANWENDUNG DER EISCREMEMASCHINE<br />
Einfrieren des Behälters<br />
HINWEIS: Der Behälter muss vor jeder Verwendung für mindestens 24<br />
Stunden in die Tiefkühltruhe gestellt werden.<br />
1. Waschen und trocknen Sie den Behälter vor dem Einfrieren s<strong>org</strong>fältig.<br />
2. Die besten Ergebnisse erhalten Sie, wenn Sie den Behälter in eine<br />
Plastiktüte einschlagen und aufrecht im hinteren Bereich Ihrer<br />
Gefriertruhe lagern.<br />
ZUSAMMENSETZEN DES „<strong>SOFT</strong> <strong>SERVE</strong>R“<br />
1. Schieben Sie die<br />
Behältermanschette am Behälter nach oben, bis sie einrastet. Stellen<br />
Sie sicher, dass sie korrekt positioniert ist; beachten Sie die<br />
Einkerbungen auf dem Behälter. (Abbildung 1)<br />
2. Befestigen Sie den<br />
Dichtungsring sicher an der Unterseite des Behälterdeckels. (Abbildung 2)<br />
3. Stecken Sie die<br />
Schnecke in die Behälterdeckelröhre. (Abbildung 2)<br />
4. Setzen Sie den<br />
Rührspatel auf die Behälterdeckelröhre. Im Uhrzeigersinn drehen, bis<br />
er einrastet. (Abbildung 3)<br />
5. Legen Sie den Behälterdeckel mit dem aufgesetzten Rührspatel in den<br />
Behälter. Der obere Teil des Behälterdeckels und der Halbkreis sollten<br />
aufeinander ausgerichtet sein. Der Deckel sollte einrasten, wer der<br />
Halbkreis oben richtig ausgerichtet ist. (Abbildung 4)<br />
HINWEIS: Der Gummidichtungsring muss sicher in den<br />
Behälterdeckel eingesetzt werden. Damit der Gummidichtungsring<br />
Abbildung 1<br />
Abbildung 3<br />
Behälter<br />
Behältermanschette<br />
Rührspatelantrieb<br />
Schnecke<br />
Gummidichtungsring<br />
Abbildung 2<br />
Abbildung 4<br />
Behälterdeckel<br />
richtig abdichten kann, muss er vollständig trocken sein.<br />
6. Legen Sie die durchsichtige obere Abdeckung auf den Behälter.<br />
7. Drücken Sie den Motor vorsichtig auf die durchsichtige obere<br />
Abdeckung, bis er einrastet.<br />
8. Verschließen Sie die 3 Verschlussriegel sicher.<br />
9. Wählen Sie einen Aufsatz für den Designerablauf und stecken Sie ihn<br />
auf die Ablauföffnung.<br />
Zur Inbetriebnahme muss das zusammengesetzte Gerät stets horizontal<br />
aufgestellt werden. Die Behälterhalterung dient als Stütze (wie auf der<br />
Titelseite dieser Beschreibung abgebildet). Das Einfüllen der Mischung in<br />
die Einfüllöffnung bzw. die Entnahme der Eiscreme muss in diesem Winkel<br />
erfolgen.<br />
Verwendung des „Soft Server“<br />
HINWEIS: Die Außenseite des Behälters kann sich während der<br />
Inbetriebnahme beschlagen. Verwenden Sie daher Ihre Eiscrememaschine<br />
auf keiner Oberfläche, die dadurch beschädigt werden könnte.<br />
1. Stecken Sie das Gerät ein.<br />
2. Stellen Sie den Kippschalter auf die „Ein“-Position.<br />
16 17
GC8250-I/GC8250I04M1.qxd 6/16/04 11:28 Page 18<br />
HINWEIS: Das Gerät muss sich in Betrieb befinden,<br />
wenn die Rezeptmischung eingefüllt wird (Siehe<br />
Seite 22 für Rezeptideen).<br />
WARNHINWEIS: Hände oder Zubehör dürfen nicht in die Öffnung<br />
des Geräts gesteckt werden.<br />
3. Füllen Sie die gekühlte Rezeptmischung langsam in die Einfüllöffnung.<br />
Off<br />
On<br />
HINWEIS: Die Eiscrememenge nimmt während des Gefrierv<strong>org</strong>angs<br />
zu. Füllen Sie die Eiscrememaschine daher nicht bis zum Rand.<br />
4. Rühren Sie die Eiscreme laut Angabe im Rezept.<br />
HINWEIS: Unterschiedliche Zutaten und Umweltbedingungen<br />
beeinflussen die Gefrierzeit der Mischung. Die Eiscreme kann vor oder<br />
nach der im Rezept angegebenen Gefrierzeit fertig werden. Wenn Sie<br />
merken, dass die Eiscreme fest wird, können Sie sie probieren.<br />
Drücken Sie einfach auf den Ablaufknopf, um etwas Eiscreme zum<br />
Probieren zu entnehmen. Fahren Sie mit dem Rühren fort, wenn Sie<br />
eine festere Konsistenz wünschen. Die von Ihnen bevorzugte<br />
Konsistenz bestimmt die tatsächliche Gefrierzeit.<br />
5. Drücken und halten Sie den Ablaufknopf zur Entnahme der Eiscreme.<br />
6. Legen Sie ein Handtuch unter den Ablaufknopf, um schmelzende<br />
Eiscreme aufzufangen.<br />
Off<br />
On<br />
Softeis oder Kompakteis<br />
Herstellung von Softeis<br />
Befolgen Sie einfach die angegebenen Arbeitsschritte und Rezepte. Siehe<br />
Seite<br />
Herstellung von Kompakteis<br />
HINWEIS: Verwenden Sie keine herkömmlichen Rezepte für Kompakteis.<br />
Die speziell erstellten Rezepte in dieser Anleitung können sowohl zur<br />
Herstellung von Softeis als auch Kompakteis verwendet werden.<br />
1. Befolgen Sie unter Verwendung dieser Rezepte die Arbeitsschritte 1 bis<br />
5 im Abschnitt „Verwendung Ihrer Soft Serve Eiscrememaschine“.<br />
2. Entfernen Sie Abdeckung und Motor, Rührspatel und Schnecke.<br />
3. Entfernen Sie mit einem Löffel alle Eiscremereste vom Rührspatel und<br />
füllen Sie diese in einen luftdichten Behälter.<br />
4. Füllen Sie die restliche Eiscreme in einen luftdichten Behälter. Frieren<br />
Sie den verschlossenen Behälter 2-4 Stunden lang ein.<br />
REINIGUNG IHRER EISCREMEMASCHINE<br />
1. Reinigen Sie das Mot<strong>org</strong>ehäuse mit einem feuchten Tuch. Tauchen Sie<br />
das Mot<strong>org</strong>ehäuse, den Stecker oder das Netzkabel nie in Wasser oder<br />
andere Flüssigkeiten.<br />
2. Waschen Sie Oberabdeckung, Rührspatel, Schnecke, Behälterdeckel<br />
und Manschette in heißem Seifenwasser. Diese Teile sind auch<br />
spülmaschinentauglich.<br />
3. Waschen Sie den Behälter in heißem Seifenwasser. NIEMALS den<br />
Behälter oder den Gummidichtungsring in der Geschirrspülmaschine<br />
waschen – diese Teile sind nicht spülmaschinentauglich.<br />
4. Trocknen Sie alle Teile s<strong>org</strong>fältig.<br />
HINWEIS: Bitte reinigen Sie schwierig zugängliche Teile wie die<br />
Behälterdeckelröhre mit der mitgelieferten Reinigungsbürste.<br />
PRAKTISCHE TIPPS.<br />
Vorausplanung: Der Behälter muss vor jeder Verwendung mindestens 24<br />
Stunden lang in der Gefriertruhe aufbewahrt werden.<br />
REZEPTE:<br />
• Sie finden in dieser Anleitung speziell erstellte Rezepte. Bitte befolgen<br />
Sie diese Rezepte.<br />
• Verwenden Sie keine „extra dicke“ Sahne oder ultrahocherhitzte Sahneoder<br />
Milchsorten, da die Hitzebehandlung deren Proteine ändert und<br />
18 19
GC8250-I/GC8250I04M1.qxd 6/16/04 11:28 Page 20<br />
den Rührv<strong>org</strong>ang beeinträchtigt.<br />
• Verwenden Sie keine herkömmlichen Rezepte zur Herstellung von<br />
Kompakteis, da Sie dadurch das Gerät beschädigen könnten. Dazu<br />
gehören Rezepte mit Nüssen, Schokoladesplittern, Fruchtstücken oder<br />
anderen festen Stücken.<br />
• Die meisten Mischungen müssen v<strong>org</strong>ekocht werden. Sie erzielen die<br />
besten Ergebnisse, wenn Sie die Mischung mindestens einen Tag im<br />
Voraus zubereiten. Dadurch kann die Mischung komplett abkühlen.<br />
• Statt Eiern können Sie auch Eiersatz verwenden.<br />
• Alle Mischungen, die Eier enthalten, müssen erhitzt oder abgekocht<br />
werden.<br />
• Eiscreme sollte in einem luftdichten Behälter aufbewahrt werden.<br />
• Die Eiscrememenge nimmt während des Gefrierv<strong>org</strong>angs zu. Füllen<br />
Sie daher die Eiscrememaschine nicht bis zum Rand.<br />
REINIGUNG:<br />
• Die mitgelieferte Reinigungsbürste ist ideal zur Reinigung der schwer<br />
zugänglichen Teile der Eiscrememaschine geeignet.<br />
• Wischen Sie das Äußere des Mot<strong>org</strong>ehäuses nach jeder Verwendung<br />
mit einem feuchten Tuch vorsichtig ab.<br />
• Nehmen Sie zur gründlichen Reinigung der Eiscrememaschine das<br />
Gerät vor der Reinigung auseinander.<br />
Der Rührspatel dreht sich nicht / Gerät hielt bei der<br />
Probeentnahme an:<br />
• Die Mischung wurde zu dick. Sie sollten bei der Verwendung dieses<br />
Rezepts die Probe früher entnehmen.<br />
• Der Motor hat sich überhitzt – stellen Sie das Gerät aus und lassen Sie<br />
es ca. 4 Stunden lang abkühlen.<br />
• Prüfen Sie, ob das Gerät angeschlossen ist.<br />
• Prüfen Sie, ob das Gerät korrekt zusammengesetzt ist.<br />
Eiscreme rinnt aus dem Gerät:<br />
• Prüfen Sie, ob der Gummidichtungsring sicher angebracht ist.<br />
• Stellen Sie sicher, dass sich unterhalb des Gummidichtungsrings am<br />
Behälterrand kein Eis befindet.<br />
• Prüfen Sie, ob alle drei Verschlussriegel gesichert sind.<br />
DIESES GERÄT ERFÜLLT DIE FORDERUNGEN DER EG-DIREKTIVES<br />
73/23/EEC, 89/336/EEC AND 98/37/EEC.<br />
TROUBLESHOOTING (CONTINUED<br />
Fehlerbehebung:<br />
Eiscreme behält die Form nicht bei:<br />
• Haben Sie die Mischung korrekt zubereitet?<br />
• Haben Sie die richtigen Zutaten verwendet?<br />
• Haben Sie die Mischung lange genug gekühlt?<br />
• War der Behälter vor der Verwendung 24 Stunden lang in der<br />
Gefriertruhe?<br />
• Nicht alle Gefriertruhen sind gleich; bei manchen ist eine längere<br />
Vorfrierdauer für den Behälter erforderlich.<br />
20<br />
21
GC8250-I/GC8250I04M1.qxd 6/16/04 11:28 Page 22<br />
BANOFFEE<br />
225 ml halbentrahmte Milch<br />
360 ml dicke Sahne<br />
145 g Kristallzucker<br />
140 g Banoffee Karamell (z.B. Produkt im Glas von Merchant Gourmet)<br />
2 Eigelb<br />
2 mittelgroße Bananen mit einigen Tropfen Zitronensaft<br />
Eigelb mit 10 g Zucker schlagen, bis die Mischung beinahe weiß ist. Milch<br />
und restlichen Zucker aufkochen lassen. 100 ml entnehmen und langsam<br />
in das geschlagene Eigelb einrühren. Allmählich die Eigelbmischung in die<br />
Kasserolle zurückleeren und umrühren. Mischung bei mittlerer Hitze und<br />
unter ständigem Rühren erhitzen, bis sie leicht eindickt und die Rückseite<br />
eines Kochlöffels überzieht (ca. 8-10 Minuten). Abschrecken (z.B. in einem<br />
Eisbad). Mit dem Handmixer oder in der Küchenmaschine Bananen,<br />
Zitronensaft und Banoffee glatt rühren. Dicke Sahne und abgekühlte<br />
Eiermischung einrühren, bis alles gut vermischt ist. Mischung in der<br />
Tiefkühltruhe 45 Minuten lang bzw. auf 8° C abkühlen lassen. Umrühren<br />
und sofort in die Soft Server Eiscrememaschine leeren. Mischung ca. 20-<br />
30 Minuten lang rühren.<br />
WEICHES KAFFEEEIS<br />
250 ml Vollmilch<br />
200 ml Schlagsahne<br />
175 ml Sahne<br />
4 Eigelb<br />
170 g Kristallzucker<br />
4 gestrichene Teelöffel Instant-Espressopulver<br />
Milch, Kaffeepulver, Sahne und 140 g Zucker in eine Kasserolle geben. Bei<br />
mittlerer Hitze unter ständigem Rühren erhitzen, bis sich der Zucker<br />
vollständig aufgelöst hat. Eigelb und die restlichen 30 g Zucker schlagen,<br />
bis eine hellgelbe Mischung entsteht, die ein „Band“ nachzieht. 100 ml der<br />
heißen Milch-Sahne-Mischung aus der Kasserolle entnehmen und<br />
langsam in das geschlagene Eigelb einrühren. Allmählich die<br />
Eigelbmischung in die Kasserolle zurückleeren, umrühren und bei mittlerer<br />
Hitze erwärmen, bis sich die Mischung leicht eindickt und die Rückseite<br />
eines Holzkochlöffels überzieht (ca. 8-10 Minuten). Mischung nicht<br />
aufkochen lassen. Abschrecken (z.B. im Eisbad) und in der Tiefkühltruhe<br />
45 Minuten lang bzw. auf 8° C abkühlen lassen. Umrühren und sofort in<br />
die Soft Server Eiscrememaschine leeren. Mischung ca. 20-30 Minuten<br />
lang rühren.<br />
22<br />
WEICHES ERDBEER-CRÈME-FRAICHE-EIS<br />
360 g frische Erdbeeren<br />
Einige Tropfen Zitronensaft<br />
270 ml Vollmilch<br />
270 ml Crème Fraîche<br />
150 g Kristallzucker<br />
Erdbeeren, Zitronensaft und Zucker in der Küchenmaschine oder mit dem<br />
Handmixer verrühren, bis sich der Zucker aufgelöst hat. Milch und Crème<br />
Fraîche hinzufügen und gut vermischen. Mischung in der Tiefkühltruhe 45<br />
Minuten lang bzw. auf 8° C abkühlen lassen. Umrühren und sofort in die<br />
Soft Server Eiscrememaschine leeren. Mischung ca. 20-30 Minuten lang<br />
rühren.<br />
WEICHES ZITRONENEIS<br />
Schale von 4 Zitronen<br />
6 Esslöffel Zitronensaft<br />
200 g Kristallzucker<br />
300 ml Schlagsahne<br />
300 ml Vollmilch<br />
Zitronen waschen und mit einem Zestenreißer die Schalen von allen vier<br />
Zitronen entfernen. Schale, Zucker und Zitronensaft in der<br />
Küchenmaschine oder mit dem Handmixer 3 Minuten lang verrühren bzw.<br />
bis der Zucker sich aufgelöst hat. Mischung langsam in einen Krug mit<br />
Milch und Sahne leeren und verrühren. Durch ein Sieb streichen und in<br />
der Tiefkühltruhe 45 Minuten lang bzw. auf 8° C abkühlen lassen.<br />
Umrühren und sofort in die Soft Server Eiscrememaschine leeren.<br />
Mischung ca. 20-30 Minuten lang rühren.<br />
WEICHES ORANGENMARMELADEEIS<br />
300 g qualitativ hochwertige Orangen- oder Mandarinenmarmelade<br />
300 ml Schlagsahne<br />
300 ml Vollmilch<br />
50 g Kristallzucker<br />
2 Esslöffel Orangensaft<br />
Marmelade, Zucker und Milch mit dem Handmixer oder in der<br />
Küchenmaschine verrühren. Wenn der Zucker sich aufgelöst hat, Sahne<br />
hinzufügen und kurz verrühren. Orangensaft hinzufügen. Mischung durch<br />
ein feines Sieb streichen und in der Tiefkühltruhe 45 Minuten lang bzw. auf<br />
8° C abkühlen lassen. Umrühren und sofort in die Soft Server<br />
Eiscrememaschine leeren. Mischung ca. 20-30 Minuten lang rühren.<br />
23
GC8250-I/GC8250I04M1.qxd 6/16/04 11:28 Page 24<br />
ERDBEER-VANILLE-JOGHURT<br />
400 g Erdbeeren mit einigen Tropfen Zitronensaft<br />
2 Dessertlöffel Honig<br />
2 x 150 g Becher dickes Vanillejoghurt<br />
200 ml Vollmilch<br />
250 ml Sahne<br />
150 g Kristallzucker<br />
Erdbeeren, Zitronensaft, Honig und Zucker vermischen und pürieren.<br />
Milch, Sahne und Joghurt dazumischen und gut verrühren. Mischung in<br />
der Tiefkühltruhe 45 Minuten lang bzw. auf 8° C abkühlen lassen.<br />
Umrühren und sofort in die Soft Server Eiscrememaschine einfüllen. Ca.<br />
20-30 Minuten lang rühren.<br />
WEICHES HIMBEEREIS<br />
320 g Tiefkühlhimbeeren<br />
Einige Tropfen Zitronensaft<br />
280 ml Vollmilch<br />
260 ml Schlagsahne<br />
160 g Kristallzucker<br />
Himbeeren, Zitronensaft und Milch mit dem Handmixer oder in der<br />
Küchenmaschine mixen. Wenn die Zutaten gut verrührt sind, Zucker<br />
hinzufügen und nochmals bei hoher Geschwindigkeit mixen, bis die<br />
Mischung glatt ist und sich der Zucker vollständig aufgelöst hat.<br />
Schlagsahne hinzufügen und gut einrühren. Mischung durch ein feines<br />
Sieb streichen, um die Samen zu entfernen, und danach in der<br />
Tiefkühltruhe 45 Minuten lang bzw. auf 8° C abkühlen lassen. Umrühren<br />
und sofort in die Soft Server Eiscrememaschine leeren. Mischung ca. 20-<br />
30 Minuten lang rühren.<br />
WEICHES VANILLEEIS<br />
360 ml Vollmilch<br />
160 g Kristallzucker<br />
2 Eigelb<br />
360 ml Sahne<br />
2 Teelöffel Vanilleextrakt<br />
Milch, Sahne, Vanille und 140 g Zucker in eine Kasserolle geben und bei<br />
mittlerer Hitze erwärmen, bis sich der Zucker vollständig aufgelöst hat.<br />
Eigelb mit den übrigen 20 g Zucker schlagen, bis die Mischung beinahe<br />
weiß ist. 100 ml der heißen Milch-Sahne-Mischung aus der Kasserolle<br />
nehmen und langsam in die geschlagene Eigelbmischung einrühren.<br />
Allmählich die Eigelbmischung in die Kasserolle zurückleeren, umrühren<br />
und bei mittlerer Hitze erwärmen, bis sich die Mischung leicht eindickt und<br />
die Rückseite eines Holzkochlöffels überzieht (ca. 8-10 Minuten). Mischung<br />
nicht aufkochen lassen. Abschrecken (z.B. im Eisbad) und in der<br />
Tiefkühltruhe 1 Stunde lang bzw. auf 8° C abkühlen lassen. Umrühren und<br />
sofort in die Soft Server Eiscrememaschine leeren. Mischung ca. 20-30<br />
Minuten lang rühren.<br />
24<br />
25
GC8250-I/GC8250I04M1.qxd 6/16/04 11:28 Page 26<br />
FRANÇAIS<br />
CONSIGNES IMPORTANTES<br />
L’emploi de tout appareil électroménager exige certaines précautions<br />
fondamentales suivantes:<br />
1. Lisez attentivement toutes les directives.<br />
2. Afin de ne pas vous électrocuter ou de vous blesser, n’immergez<br />
l’appareil, son cordon ou sa fiche dans aucun liquide.<br />
3. Redoublez de vigilance lorsqu’un appareil est utilisé en présence<br />
d'enfants.<br />
4. Débranchez l’appareil quand il ne sert pas, lors du montage ou du<br />
démontage et avant de le nettoyer.<br />
5. Ne vous servez jamais d’un appareil dont le cordon ou la fiche est<br />
abîmé lorsqu’il a mal fonctionné, lorsqu’il a subi un choc ou a été<br />
endommagé d'une manière ou d'une autre. Retournez-le au fabricant<br />
(voyez la garantie) pour le faire vérifier, réparer, ou lui faire subir les<br />
ajustements électriques ou mécaniques qui se révèlent nécessaires.<br />
6. L’utilisation d’accessoires non conseillés par le fabricant peut entraîner<br />
un incendie, des chocs électriques ou des blessures.<br />
7. Ne vous servez pas de cet appareil à l'extérieur.<br />
8. Veillez à ce que le cordon ne pende pas au bord de la table ou du plan<br />
de travail.<br />
9. Veillez à ce que le cordon ne soit pas en contact avec une surface<br />
chaude, y compris avec la cuisinière.<br />
10.Évitez tout contact avec les pièces mobiles. Éloignez vos doigts, vos<br />
cheveux, les vêtements ainsi que les ustensiles de cuisine de l’appareil<br />
au cours du fonctionnement.<br />
11. Durant l’utilisation ne pas mettre les mains ou des ustensiles dans le<br />
récipient congeleur afin de réduire les risques de blessures ou<br />
l’endommagement de l’appareil. Ne mettez jamais d’objets pointus<br />
dans le récipient congeleur, ils rayeraient et abîmeraient l’intérieur du<br />
récipient. Vous pouvez utiliser une spatule en caoutchouc ou une<br />
cuillère en bois, mais uniquement quand la sorbetière est débranchée.<br />
DÉCOUVREZ VOTRE DISTRIBUTEUR<br />
DE GLACE À L’ITALIENNE<br />
1. Patte de blocage<br />
2. Moteur<br />
3. Voyant lumineux<br />
4. Interrupteur marche-arrêt<br />
5. Couvercle transparent<br />
6. Patte de blocage<br />
7. Embouchure<br />
8. Couvercle du récipient<br />
9. Joint en caoutchouc<br />
10.Ensemble de la palette<br />
11.Vis sans fin<br />
12.Bouton de distribution<br />
13.Orifice de distribution<br />
14.Soupape de distribution<br />
15.Tube du couvercle du<br />
récipient<br />
16.Récipient congeleur<br />
17.Embase d’appui<br />
PRÉPARATION EN VUE DE L’UTILISATION<br />
1. Retirez tous les emballages ainsi que la notice d’utilisation. Gardez<br />
précieusement la notice d’utilisation.<br />
2. Lavez le distributeur de glace à l’eau savonneuse chaude. Rincez et<br />
essuyez toutes les pièces. Le joint de caoutchouc doit être absolument<br />
sec avant l’assemblage.<br />
REMARQUE : Ne plongez jamais le boîtier du moteur dans l’eau ou dans<br />
tout autre liquide. Ne lavez jamais le récipient congeleur au lave-vaisselle.<br />
9<br />
7<br />
8<br />
11<br />
10<br />
3<br />
4<br />
5<br />
6<br />
2<br />
1<br />
12<br />
13<br />
14<br />
15<br />
16<br />
17<br />
GARDEZ CES INSTRUCTIONS<br />
Cet appareil n’est destiné qu’à un USAGE DOMESTIQUE.<br />
Ne tentez sous aucun prétexte de réparer cet appareil.<br />
26<br />
27
GC8250-I/GC8250I04M1.qxd 6/16/04 11:28 Page 28<br />
MODE D’EMPLOI DU DISTRIBUTEUR<br />
DE GLACE À L’ITALIENNE<br />
Congélation du récipient congeleur<br />
1. Lavez et essuyez le récipient à fond avant de le congeler.<br />
2. Pour obtenir les meilleurs résultats possibles, placez-le dans une poche<br />
en plastique et posez-le d’aplomb dans votre congélateur.<br />
REMARQUE : Le récipient doit être congelé au moins 24 heures.<br />
Assemblage du distributeur de glace<br />
1. Faites glisser l’embase d’appui sur le récipient jusqu’à ce qu’elle se<br />
bloque. Placez-la en tenant compte des échancrures du récipient.<br />
(Figure 1)<br />
2. Fixez fermement le joint de caoutchouc sur la face intérieure du<br />
couvercle. (Figure 2)<br />
3. Introduisez la vis dans le tube du couvercle. (Figure 2)<br />
4. Placez l’ensemble de la palette sur le tube du couvercle. Tournez-le<br />
dans le sens des aiguilles d'une montre pour être sûr qu’il se bloque<br />
solidement. (Figure 3).<br />
5. Posez le couvercle – auquel est fixé la palette – dans le récipient. Veillez<br />
à ce que le haut du couvercle coïncide avec le demi-cercle. Il devrait<br />
s'emboîter quand le demi-cercle est proprement aligné. (Figure 4)<br />
REMARQUE : Veillez à ce que le joint de caoutchouc soit proprement<br />
placé dans le couvercle du récipient. Il est essentiel qu’il soit absolument<br />
sec pour fournir l’étanchéité requise.<br />
6. Placez le couvercle transparent sur le récipient congeleur.<br />
7. Bloquez délicatement le boîtier du moteur en place – pour cela,<br />
appuyez sur le moteur pour l'ajuster au couvercle transparent.<br />
8. Attachez solidement les 3 pattes de blocage.<br />
9. Choisissez l’embout de service que vous désirez utiliser et fixez-le sur<br />
l’orifice de service.<br />
Préparation de la glace à l’italienne<br />
1. Branchez l’appareil sur la prise de courant.<br />
2. Appuyez sur l’interrupteur marche-arrêt pour le régler sur la position<br />
«On» (marche).<br />
REMARQUE : L’appareil doit fonctionner lorsque<br />
vous ajoutez la préparation réfrigérée.<br />
ATTENTION : Ne mettez ni vos doigts ni d’ustensiles dans l’embouchure.<br />
3. Versez la préparation réfrigérée dans l’embouchure de l’appareil.<br />
4. Laissez la préparation dans l’appareil en marche en fonction du temps<br />
indiqué dans la recette.<br />
REMARQUE : La recette choisie et le milieu ambiant affectent le temps<br />
requis pour affiner la préparation. D’une façon générale, la crème glacée<br />
devrait être prête 10 minutes avant ou après le temps indiqué dans la<br />
recette. Goûtez la glace quand vous voyez qu’elle commence à se<br />
solidifier. Il vous suffit d'appuyer sur le bouton de distribution pour en<br />
Off<br />
Off<br />
On<br />
On<br />
28<br />
29
GC8250-I/GC8250I04M1.qxd 6/16/04 11:28 Page 30<br />
verser un peu. N’arrêtez pas le fonctionnement si vous aimez la glace plus<br />
ferme. Vos préférences dicteront le laps de temps à prévoir pour l'affermir.<br />
5. Enfoncez le bouton de distribution sans le relâcher pour servir.<br />
6. Placez un essuie-tout sous le bouton de service pour absorber le résidu<br />
de crème glacée qui pourrait fondre.<br />
Une glace à l’italienne ou un sorbet?<br />
Une glace à l’italienne<br />
1. Suivez les instructions ci-dessus et utilisez les recettes fournies.<br />
Un sorbet<br />
REMARQUE : N’utilisez pas de recettes classiques pour sorbet, vous<br />
risqueriez d’endommager l’appareil. Les recettes qui sont fournies dans<br />
cette notice d’utilisation conviennent aussi bien pour la glace à l’italienne<br />
que pour les sorbets.<br />
1. Pour utiliser les recettes fournies, suivez les étapes 1 à 5 de la section<br />
intitulée «Préparation de la glace à l’italienne».<br />
2. Enlevez le couvercle transparent avec le moteur, l’ensemble de la<br />
palette et la vis sans fin.<br />
3. À la cuillère, déposez la glace qui adhère à la palette dans un récipient<br />
hermétique.<br />
4. Transférez la glace du récipient congeleur dans le récipient puis mettez<br />
ce récipient hermétiquement fermé au congélateur, pendant 2 à 4<br />
heures.<br />
ENTRETIEN DU DISTRIBUTEUR DE<br />
GLACE A L’ITALIENNE<br />
1. Passez un linge humide sur le boîtier du moteur. N’immergez jamais le<br />
bloc-moteur, la fiche ou le cordon dans l'eau ou tout autre liquide.<br />
2. Lavez les couvercles, la palette, la vis sans fin et l’embase d’appui à<br />
l’eau savonneuse chaude. Vous pouvez également les laver au lavevaisselle.<br />
3. Lavez le récipient congeleur à l’eau savonneuse chaude. Ne lavez<br />
JAMAIS le récipient congeleur ou le joint de caoutchouc à la machine.<br />
Ils ne sont PAS lavables au lave-vaisselle.<br />
4. Essuyez parfaitement chacune des pièces.<br />
REMARQUE: Servez-vous de la brosse fournie pour nettoyer les endroits<br />
d’accès difficile – le tube du couvercle du récipient, par exemple.<br />
30<br />
CONSEILS PRATIQUES<br />
Recettes :<br />
• Des recettes spéciales et appropriées sont fournies dans la notice<br />
d’utilisation. Veuillez vous y référer.<br />
• N’employez pas de recettes pour sorbetière ; elles abîmeraient<br />
l’appareil. Cette catégorie comprend les recettes avec des noix, des<br />
pépites de chocolat, des morceaux de fruits ou tous autres morceaux<br />
solides.<br />
• La plupart des recettes précisent que le mélange doit être précuit.<br />
Quand c’est le cas, préparez la recette au moins 24 heures à l’avance ;<br />
elle aura ainsi le temps de refroidir complètement et vous obtiendrez<br />
les meilleurs résultats possibles.<br />
• Lorsque des oeufs entrent dans la composition d’une recette, il est<br />
indispensable de chauffer ou de cuire la préparation.<br />
• La crème glacée doit être placée dans des récipients hermétiques.<br />
• Le volume de la crème glacée augmente au cours de la préparation.<br />
Ne remplissez pas le distributeur de glace jusqu’au bord supérieur.<br />
Assemblage :<br />
• Vérifiez l’intérieur du récipient congeleur avant l’assemblage, pour vous<br />
assurer qu’il ne s’y soit pas formé de glace. Enlevez la glace, s’il y a<br />
lieu, afin de pouvoir convenablement assembler l’appareil.<br />
• Ne faites jamais fonctionner le distributeur de glace sans que le joint de<br />
caoutchouc ne soit proprement en place.<br />
• Assurez-vous que le couvercle transparent et l’embase d’appui soient<br />
impeccablement alignés.<br />
Nettoyage :<br />
• La brosse fournie se révèle très pratique pour nettoyer les endroits<br />
d’accès difficile. Utilisez-la pour simplifier le nettoyage.<br />
• Passez simplement un linge humide sur le boîtier du moteur pour le<br />
nettoyer après chaque utilisation.<br />
• Afin de nettoyer le distributeur de glace, il est impératif de le démonter.<br />
RÉSOLUTION DE PROBLÈMES<br />
La crème glacée ne garde pas sa forme :<br />
• Avez-vous suivi scrupuleusement les instructions de la recette ?<br />
• Avez-vous utilisé les ingrédients conseillés ?<br />
• Avez-vous réfrigéré la préparation assez longtemps ?<br />
• Aviez-vous préalablement congelé le récipient pendant 24 heures ?<br />
31
GC8250-I/GC8250I04M1.qxd 6/16/04 11:28 Page 32<br />
• Tous les congélateurs n’étant pas identiques, il faut peut-être que vous<br />
congeliez le récipient congeleur plus longtemps qu’indiqué.<br />
La palette ne tourne pas / L’appareil s’arrête pendant le<br />
service :<br />
• La crème est devenue trop épaisse. Essayez de servir plus tôt lorsque<br />
vous suivez cette recette.<br />
• Le moteur a surchauffé. Laissez refroidir l’appareil environ 30 minutes.<br />
• Assurez-vous que l’appareil soit convenablement branché.<br />
• Assurez-vous que la l’appareil soit correctement assemblée.<br />
De la glace s'écoule de l'appareil :<br />
• Assurez-vous que le joint en caoutchouc soit fermement fixé.<br />
• Assurez-vous qu’il n’y ait pas de glace au bord du récipient congeleur,<br />
sous le joint en caoutchouc.<br />
• Assurez-vous que les trois pattes de blocage du couvercle transparent<br />
soient impeccablement attachées.<br />
RECETTES<br />
BANOFFEE<br />
225 ml de lait demi-écrémé<br />
360 ml de crème épaisse<br />
145 g de sucre en poudre<br />
140 g de caramel Banoffee<br />
2 jaunes d'oeuf<br />
2 bananes moyennes et un jus de citron pressé<br />
Battre les jaunes d'œuf avec 10 g de sucre jusqu'à obtenir un aspect<br />
presque blanc. Faire bouillir le lait avec le reste du sucre. Retirer 100 ml et<br />
ajouter à la préparation des jaunes d'œuf en battant délicatement.<br />
Reverser graduellement le mélange dans la casserole tout en battant.<br />
Faire cuire la préparation sur feu doux, en mélangeant constamment<br />
jusqu'à ce que le mélange épaississe légèrement et attache au dos de la<br />
cuiller (environ 8-10 minutes). Faire refroidir rapidement (ex., dans un bain<br />
de glaçons). Dans un mixeur ou robot ménager, mixer les bananes, le jus<br />
de citron et le "Banoffee" pour obtenir une mixture lisse. Ajouter la crème<br />
épaisse et la crème refroidie et mixer juste un peu pour mélanger. Laisser<br />
réfrigérer la préparation dans le freezer pendant 45 min ou jusqu'à ce que<br />
la température du mélange ait atteint 8°C. Tourner et verser<br />
immédiatement dans la sorbetière et battre la préparation pendant environ<br />
20-30 min.<br />
32<br />
CRÈME GLACÉE AU CAFE<br />
250 ml de lait entier<br />
200 ml de crème fouettée<br />
175 ml de crème liquide<br />
4 jaunes d'oeuf<br />
170 g de sucre en poudre<br />
4 cuillerées à café de café soluble<br />
Verser le lait, le café soluble, la crème et 140 g de sucre dans une<br />
casserole. Faire cuire sur feu doux en mélangeant constamment jusqu'à<br />
ce que le sucre soit complètement dissout. Battre les jaunes d'œuf et les<br />
30 g du sucre restant jusqu'à obtenir un aspect jaune pâle et que la<br />
préparation devienne homogène. Retirer 100 ml du mélange chaud<br />
lait/crème de la casserole et ajouter aux jaunes d'œuf battus en battant<br />
délicatement. Reverser graduellement la mixture dans la casserole tout en<br />
battant et faire cuire sur feu doux jusqu'à ce que le mélange épaississe<br />
légèrement et attache au dos de la spatule en bois (environ 8-10 min).<br />
Eviter de faire bouillir la préparation. Faire refroidir rapidement la<br />
préparation (ex., dans un bain de glaçons) et la placer au freezer pendant<br />
45 min ou jusqu'à ce que la température de la préparation ait atteint 8°C.<br />
Tourner et verser immédiatement dans la sorbetière et battre la préparation<br />
pendant environ 20-30 min.<br />
CRÈME GLACÉE À LA FRAISE & CRÈME FRAÎCHE<br />
360 g de fraises fraîches<br />
1 jus de citron pressé<br />
270 ml de lait entier<br />
270 ml crème fraîche<br />
150 g de sucre en poudre<br />
Mélanger les fraises, le jus de citron et le sucre dans un robot ménager ou<br />
un mixeur jusqu'à ce que le sucre soit dissout. Ajouter le lait et la crème<br />
fraîche et mixer pour obtenir un mélange homogène. Placer au freezer<br />
pendant 45 min ou jusqu'à ce que la température de la préparation ait<br />
atteint 8°C. Tourner et verser immédiatement dans la sorbetière et battre la<br />
préparation pendant environ 20-30 min.<br />
CRÈME GLACÉE AU CITRON<br />
Le zeste de 4 citrons<br />
6 cuillerées à café de jus de citron<br />
200 g de sucre en poudre<br />
300 ml de crème fouettée<br />
300 ml de lait entier<br />
33
GC8250-I/GC8250I04M1.qxd 6/16/04 11:28 Page 34<br />
Laver les citrons et à l'aide d'une râpe enlever le zeste de tous les citrons.<br />
Mettre le zeste, le sucre et le jus de citron dans un robot ménager ou un<br />
mixeur. Mélanger pendant 3 min ou jusqu'à ce que le sucre soit dissout.<br />
Verser le mélange dans un bol contenant la crème et le lait tout en<br />
tournant doucement. Tamiser et mettre au freezer pendant 45 min ou<br />
jusqu'à ce que la température de la préparation ait atteint 8°C. Tourner et<br />
verser immédiatement dans la sorbetière et battre la préparation pendant<br />
environ 20-30 min.<br />
CRÈME GLACÉE À LA MARMELADE<br />
300 g de marmelade d'orange de bonne qualité<br />
300 ml de crème fouettée<br />
300 ml de lait entier<br />
50 g de sucre en poudre<br />
2 cuillerées à soupe de jus d'orange<br />
Dans un mixeur ou robot ménager, mixer la marmelade, le sucre et le lait.<br />
Lorsque le sucre est dissout, ajouter la crème et battre brièvement. Ajouter<br />
le jus d'orange. Passer la préparation au travers d'un fin tamis, puis la<br />
placer au freezer pendant 45 min ou jusqu'à ce que la température du<br />
mélange ait atteint 8°C. Tourner et verser immédiatement dans la<br />
sorbetière et battre le mélange pendant environ 20-30 min.<br />
YAOURT VANILLE/FRAISE<br />
400 g de fraises avec un jus de citron pressé<br />
2 cuillerées à café de miel<br />
2 150 g en pot de yaourt épais à la vanille<br />
200 ml de lait entier<br />
250 ml de crème liquide<br />
150 g de sucre en poudre<br />
Mélanger les fraises, le jus de citron, le miel et le sucre et mixer en une<br />
purée de fruits. Ajouter le lait, la crème et le yaourt et mixer pour obtenir un<br />
mélange bien homogène. Faire refroidir au freezer pendant 45 min ou<br />
jusqu'à ce que la température de la préparation ait atteint 8°C. Tourner et<br />
verser immédiatement dans la sorbetière et battre le mélange pendant<br />
environ 20-30 min.<br />
CRÈME GLACÉE À LA FRAMBOISE<br />
320 g de framboises surgelées<br />
1 jus de citron pressé<br />
280 ml de lait entier<br />
260 ml de crème fouettée<br />
160 g de sucre en poudre<br />
Dans un mixeur ou un robot ménager, mixer les framboises, le jus de<br />
citron et le lait. Lorsque tous les ingrédients sont bien mélangés, ajouter le<br />
sucre et mixer à nouveau à vitesse rapide jusqu'à ce que la préparation<br />
soit complètement homogène et tout le sucre dissout. Ajouter la crème<br />
fraîche et mixer jusqu'à obtenir un mélange bien lisse. Passer la<br />
préparation au travers d'un fin tamis pour enlever les grumeaux et placer<br />
au freezer pendant 45 min ou jusqu'à ce que la température de la<br />
préparation ait atteint 8°C. Tourner et verser immédiatement dans la<br />
sorbetière et battre le mélange pendant environ 20-30 min.<br />
CRÈME GLACÉE À LA VANILLE<br />
360 ml de lait entier<br />
160 g de sucre en poudre<br />
2 jaunes d'oeuf<br />
360 ml de crème liquide<br />
2 cuillerées à café d'extrait de vanille<br />
Verser le lait, la crème et 140 g de sucre dans une casserole et faire cuire<br />
à feu doux jusqu'à ce que le sucre soit complètement dissout. Battre les<br />
jaunes d'œuf avec les 20 g de sucre restant pour les faire blanchir. Retirer<br />
100 ml de la préparation chaude lait/crème de la casserole et verser sur<br />
les œufs battus tout en battant lentement. Reverser graduellement le<br />
mélange avec les œufs battus dans la casserole et faire cuire à feu doux<br />
jusqu'à ce que le mélange épaississe légèrement et attache sur le dos<br />
d'une cuiller en bois (environ 8-10 min). Eviter de faire bouillir la<br />
préparation. Faire refroidir rapidement le mélange (ex., dans un bain de<br />
glaçons) et placer au freezer pendant 1 heure ou jusqu'à ce que la<br />
température de la préparation ait atteint 8°C. Tourner et verser<br />
immédiatement dans la sorbetière et battre le mélanger pendant environ<br />
20-30 min.<br />
34<br />
35
GC8250-I/GC8250I04M1.qxd 6/16/04 11:28 Page 36<br />
NOTES<br />
NOTES<br />
36<br />
37