Installation Instructions
Installation Instructions
Installation Instructions
Create successful ePaper yourself
Turn your PDF publications into a flip-book with our unique Google optimized e-Paper software.
<strong>Installation</strong> <strong>Instructions</strong><br />
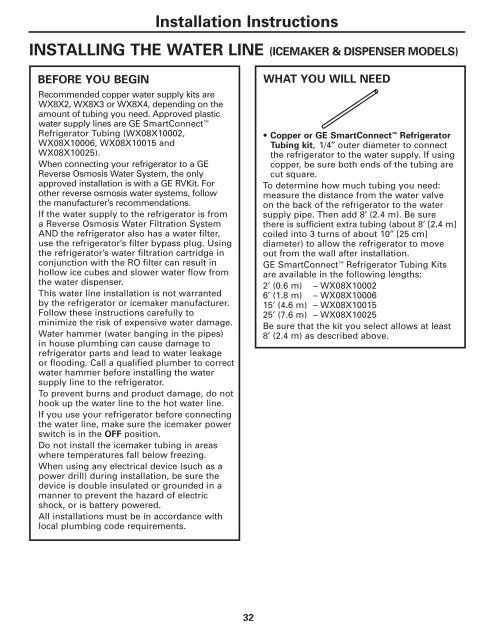
INSTALLING THE WATER LINE (ICEMAKER & DISPENSER MODELS)<br />
BEFORE YOU BEGIN<br />
Recommended copper water supply kits are<br />
WX8X2, WX8X3 or WX8X4, depending on the<br />
amount of tubing you need. Approved plastic<br />
water supply lines are GE SmartConnect <br />
Refrigerator Tubing (WX08X10002,<br />
WX08X10006, WX08X10015 and<br />
WX08X10025).<br />
When connecting your refrigerator to a GE<br />
Reverse Osmosis Water System, the only<br />
approved installation is with a GE RVKit. For<br />
other reverse osmosis water systems, follow<br />
the manufacturer’s recommendations.<br />
If the water supply to the refrigerator is from<br />
a Reverse Osmosis Water Filtration System<br />
AND the refrigerator also has a water filter,<br />
use the refrigerator’s filter bypass plug. Using<br />
the refrigerator’s water filtration cartridge in<br />
conjunction with the RO filter can result in<br />
hollow ice cubes and slower water flow from<br />
the water dispenser.<br />
This water line installation is not warranted<br />
by the refrigerator or icemaker manufacturer.<br />
Follow these instructions carefully to<br />
minimize the risk of expensive water damage.<br />
Water hammer (water banging in the pipes)<br />
in house plumbing can cause damage to<br />
refrigerator parts and lead to water leakage<br />
or flooding. Call a qualified plumber to correct<br />
water hammer before installing the water<br />
supply line to the refrigerator.<br />
To prevent burns and product damage, do not<br />
hook up the water line to the hot water line.<br />
If you use your refrigerator before connecting<br />
the water line, make sure the icemaker power<br />
switch is in the OFF position.<br />
Do not install the icemaker tubing in areas<br />
where temperatures fall below freezing.<br />
When using any electrical device (such as a<br />
power drill) during installation, be sure the<br />
device is double insulated or grounded in a<br />
manner to prevent the hazard of electric<br />
shock, or is battery powered.<br />
All installations must be in accordance with<br />
local plumbing code requirements.<br />
WHAT YOU WILL NEED<br />
• Copper or GE SmartConnect Refrigerator<br />
Tubing kit, 1/4″ outer diameter to connect<br />
the refrigerator to the water supply. If using<br />
copper, be sure both ends of the tubing are<br />
cut square.<br />
To determine how much tubing you need:<br />
measure the distance from the water valve<br />
on the back of the refrigerator to the water<br />
supply pipe. Then add 8′ (2.4 m). Be sure<br />
there is sufficient extra tubing (about 8′ [2.4 m]<br />
coiled into 3 turns of about 10″ [25 cm]<br />
diameter) to allow the refrigerator to move<br />
out from the wall after installation.<br />
GE SmartConnect Refrigerator Tubing Kits<br />
are available in the following lengths:<br />
2′ (0.6 m) – WX08X10002<br />
6′ (1.8 m) – WX08X10006<br />
15′ (4.6 m) – WX08X10015<br />
25′ (7.6 m) – WX08X10025<br />
Be sure that the kit you select allows at least<br />
8′ (2.4 m) as described above.<br />
32


