
Create successful ePaper yourself
Turn your PDF publications into a flip-book with our unique Google optimized e-Paper software.
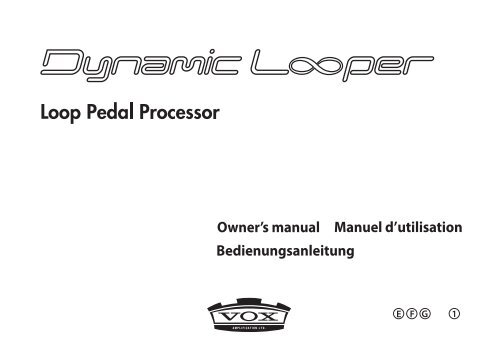
<strong>Dynamic</strong> <strong>Looper</strong> Owner’s <strong>manual</strong>
<strong>Dynamic</strong> <strong>Looper</strong> <strong>owner's</strong> <strong>manual</strong><br />
Precautions<br />
Location<br />
Using the unit in the following locations can result in a malfunction.<br />
• In direct sunlight<br />
• Locations of extreme temperature or humidity<br />
• Excessively dusty or dirty locations<br />
• Locations of excessive vibration<br />
• Close to magnetic fields<br />
Power supply<br />
Please connect the designated AC adapter to an AC outlet of the correct voltage.<br />
Do not connect it to an AC outlet of voltage other than that for which<br />
your unit is intended.<br />
Interference with other electrical devices<br />
Radios and televisions placed nearby may experience reception interference.<br />
Operate this unit at a suitable distance from radios and televisions.<br />
Handling<br />
To avoid breakage, do not apply excessive force to the switches or controls.<br />
Care<br />
If the exterior becomes dirty, wipe it with a clean, dry cloth. Do not use liquid<br />
cleaners such as benzene or thinner, or cleaning compounds or flammable<br />
polishes.<br />
Keep this <strong>manual</strong><br />
After reading this <strong>manual</strong>, please keep it for later reference.<br />
Keeping foreign matter out of your equipment<br />
Never set any container with liquid in it near this equipment. If liquid gets<br />
into the equipment, it could cause a breakdown, fire, or electrical shock.<br />
Be careful not to let metal objects get into the equipment. If something does slip<br />
into the equipment, unplug the AC adapter from the wall outlet. Then contact<br />
your nearest VOX dealer or the store where the equipment was purchased.<br />
THE FCC REGULATION WARNING (for USA)<br />
This equipment has been tested and found to comply with the limits<br />
for a Class B digital device, pursuant to Part 15 of the FCC Rules. These<br />
limits are designed to provide reasonable protection against harmful<br />
interference in a residential installation. This equipment generates, uses,<br />
and can radiate radio frequency energy and, if not installed and used in<br />
accordance with the instructions, may cause harmful interference to radio<br />
communications. However, there is no guarantee that interference will<br />
not occur in a particular installation. If this equipment does cause harmful<br />
interference to radio or television reception, which can be determined by<br />
turning the equipment off and on, the user is encouraged to try to correct<br />
the interference by one or more of the following measures:<br />
• Reorient or relocate the receiving antenna.<br />
• Increase the separation between the equipment and receiver.<br />
• Connect the equipment into an outlet on a circuit different from that to<br />
which the receiver is connected.<br />
• Consult the dealer or an experienced radio/TV technician for help.<br />
Unauthorized changes or modification to this system can void the user’s<br />
authority to operate this equipment.<br />
Notice regarding disposal (EU only)<br />
When this “crossed-out wheeled bin” symbol is displayed on the<br />
product, owner’s <strong>manual</strong>, battery, or battery package, it signifies<br />
that when you wish to dispose of this product, <strong>manual</strong>, package<br />
or battery you must do so in an approved manner. Do not discard<br />
this product, <strong>manual</strong>, package or battery along with ordinary<br />
household waste. Disposing in the correct manner will prevent<br />
harm to human health and potential damage to the environment.<br />
Since the correct method of disposal will depend on the applicable laws<br />
and regulations in your locality, please contact your local administrative<br />
body for details. If the battery contains heavy metals in excess of the<br />
regulated amount, a chemical symbol is displayed below the “crossed-out<br />
wheeled bin” symbol on the battery or battery package.<br />
4
<br />
IMPORTANT NOTICE TO CONSUMERS<br />
This product has been manufactured according to strict specifications<br />
and voltage requirements that are applicable in the country in which it<br />
is intended that this product should be used. If you have purchased this<br />
product via the internet, through mail order, and/or via a telephone sale,<br />
you must verify that this product is intended to be used in the country<br />
in which you reside.<br />
WARNING: Use of this product in any country other than that for which<br />
it is intended could be dangerous and could invalidate the manufacturer’s<br />
or distributor’s warranty.<br />
Please also retain your receipt as proof of purchase otherwise your product<br />
may be disqualified from the manufacturer’s or distributor’s warranty.<br />
* All product names and company names are the trademarks or registered<br />
trademarks of their respective owners.<br />
5
<strong>Dynamic</strong> <strong>Looper</strong> <strong>owner's</strong> <strong>manual</strong><br />
Table of contents<br />
Introduction.........................................8<br />
Main features............................................... 8<br />
How the <strong>Dynamic</strong> <strong>Looper</strong> is structured..... 9<br />
Panels.................................................10<br />
Top panel.................................................... 10<br />
Rear panel.................................................. 15<br />
Connect your instrument and turn on<br />
the power...........................................16<br />
Connections............................................... 17<br />
Turning the power on................................ 17<br />
Turning the power off............................... 17<br />
Playing programs..............................18<br />
Applying an effect to your guitar<br />
performance or mic audio........................ 18<br />
Creating phrases...............................19<br />
Recording on Loop 1................................. 19<br />
Using the metronome as a guide while you record............ 20<br />
Creating phrases of a precise length<br />
(Loop Quantize)......................................................................... 20<br />
Initiating recording when you start playing<br />
(Auto Recording Start).............................................................. 21<br />
Recording on Loop 2................................. 21<br />
About the recording time......................... 22<br />
After you record a Loop............................ 22<br />
Overdub sound onto a recorded phrase............................... 22<br />
Apply the Loop Effect to the playback of<br />
a loop-recorded phrase............................................................ 22<br />
Resample a phrase with the Loop Effect applied................ 23<br />
Overdubbing a performance by<br />
playing along with a recorded phrase<br />
............................................................23<br />
Undoing overdubbing.............................. 23<br />
Redoing overdubbing............................... 24<br />
6
Table of contents<br />
Applying the Loop Effect to a<br />
recorded phrase................................24<br />
Key Lock function...................................... 24<br />
Specifying how the loop will stop....25<br />
Resampling........................................25<br />
Applying the limiter to the recorded<br />
phrases...............................................26<br />
Erasing a loop-recorded phrase.......27<br />
Loop status........................................28<br />
While recording or overdubbing.............. 28<br />
While resampling...................................... 28<br />
About the Pre Effect and the Loop<br />
Effect..................................................29<br />
Effect parameters...................................... 29<br />
Pre Effects................................................................................... 29<br />
Loop Effects................................................................................ 33<br />
Editing a program..................................... 37<br />
Selecting a program.................................................................. 37<br />
Editing the effects..................................................................... 37<br />
Saving a program...................................................................... 38<br />
Control pedal settings......................39<br />
Assigning a function to the control pedal<br />
.................................................................... 39<br />
Calibrating the control pedal sensitivity.... 39<br />
Restoring the factory settings..........40<br />
Auto Power-Off function..................41<br />
Disabling the Auto Power-Off function.... 41<br />
Enabling the Auto Power-Off function.... 41<br />
Troubleshooting................................42<br />
Block diagram....................................43<br />
Main specifications...........................44<br />
7
VOX <strong>Dynamic</strong> <strong>Looper</strong> Owner's <strong>manual</strong><br />
Introduction<br />
Thank you for purchasing the VOX <strong>Dynamic</strong> <strong>Looper</strong> pedal.<br />
To take full advantage of this product and to ensure troublefree<br />
operation, please read this owner’s <strong>manual</strong> carefully<br />
and use the product as directed. After you’ve read the<br />
<strong>manual</strong>, keep it in a safe place for future reference.<br />
Main features<br />
• Two independent loops allow you to record a separate<br />
phrase on each loop, with a total recording time of up to<br />
90 seconds for the two loops. You can use the <strong>Dynamic</strong><br />
<strong>Looper</strong>’s foot switches to independently play back or<br />
process the phrases that were recorded.<br />
• The Loop Quantize function lets you create loops of a<br />
precise length.<br />
• Two built-in effect processors: the Pre Effect provides a<br />
diverse range of performance expression, and the Loop<br />
Effect lets you dramatically transform the recorded<br />
phrase.<br />
• You can use the control pedal to control the Pre Effect and<br />
Loop Effect, and even use the pedal to control the Pre<br />
Effect while you record. It’s also possible to modify the<br />
recorded phrase in real time by using the pedal to control<br />
the Loop Effect.<br />
• You can overdub additional playing onto a loop-recorded<br />
phrase. Undo/Redo functions are provided for<br />
overdubbing.<br />
• The mic input jack lets you use the <strong>Dynamic</strong> <strong>Looper</strong> with<br />
sources other than guitar, such as vocals or percussion<br />
instruments. You can also apply the Pre Effect to the mic<br />
input.<br />
• A phrase that’s processed by the Loop Effect can be rerecorded<br />
using the Resampling function.<br />
• A master limiter can be applied to the output. This allows<br />
you to reduce the discrepancy in volume that might occur<br />
between the loops after the first pass of recording and<br />
after numerous overdubs have been added.<br />
8
Introduction<br />
How the <strong>Dynamic</strong> <strong>Looper</strong> is structured<br />
The <strong>Dynamic</strong> <strong>Looper</strong> consists of the following blocks. (For a detailed block diagram, see page 43.)<br />
The signal received at the INPUT or MIC IN is processed by the Pre Effect (Pre FX), and then recorded in Loop 1 or Loop 2. Pre<br />
Effects are applied to the signal before the recorded loop.<br />
The Loop Effect (Loop FX) can be applied to the playback of the loop-recorded phrase during playback. You can modify the<br />
phrase by using the pedal to control the various effect parameters.<br />
Signal flow<br />
Record to a loop<br />
Program<br />
Play back loops<br />
Loop<br />
INPUT (Guitar)<br />
MIC IN<br />
MIC Trim<br />
Pre FX<br />
TARGET<br />
Pre FX<br />
Loop1<br />
Loop2<br />
Loop FX<br />
Master<br />
Limiter<br />
Output<br />
Control pedal<br />
Metronome<br />
Pre FX TARGET<br />
The Pre FX Target specifies whether the effect will be<br />
applied to the signal from the INPUT jack, to the signal from<br />
the MIC IN jack, or to both signals.<br />
Pre FX<br />
The Pre Effect is used to process the signal from the INPUT<br />
jack or the MIC IN jack.<br />
You can choose one of eleven effect types for the Pre Effect.<br />
Each effect lets you adjust up to two parameters. The<br />
adjustable parameters will differ depending on the effect<br />
that you select. You can use the control pedal to control<br />
effect parameters, allowing you to apply real time<br />
modifications to the phrase you’re performing.<br />
Loop<br />
Each loop records the signal from the Pre Effect.<br />
There are two loops: Loop 1 and Loop 2. You can record<br />
phrases totaling a recording time of 90 seconds for the two<br />
loops.<br />
9
VOX <strong>Dynamic</strong> <strong>Looper</strong> Owner's <strong>manual</strong><br />
Loop FX<br />
The Loop Effect processes the phrases that are recorded in<br />
the loops. If this effect is on, it will apply to the phrases as<br />
they play back.<br />
You can choose one of eleven effect types for the Loop Effect.<br />
Each effect has two adjustable parameters. The adjustable<br />
parameters will differ depending on the effect that you<br />
select. You can use the control pedal to modify effects<br />
applied to the phrase during playback.<br />
Panels<br />
Top panel<br />
Control pedal<br />
The control pedal controls the parameters of the Pre Effect<br />
or Loop Effect, or it can control the volume.<br />
7<br />
2 3<br />
8 4<br />
5<br />
Metronome<br />
You can use the metronome as a guide while recording a<br />
loop.<br />
If the metronome is on, the Loop Quantize function will also<br />
be on. This function automatically corrects the loop-end<br />
timing according to the specified tempo, letting you create<br />
phrases that are exactly the correct length.<br />
1<br />
6<br />
Master Limiter<br />
You can apply a limiter to the loops output. The limiter will<br />
reduce discrepancies in volume between the loops, or<br />
between the initially-recorded volume and the volume after<br />
overdubbing.<br />
10
Panels<br />
1. Program/loop control section<br />
This section controls the loops functions such as recording<br />
and playback for Loop 1 and Loop 2, and setting the tempo.<br />
e<br />
c<br />
a<br />
b<br />
d<br />
a. Current loop LEDs<br />
These LEDs indicate the loop that’s selected for control, such<br />
as recording or playback. The status of the STOP pedal and<br />
the REC/PLAY/OVERDUB pedal apply to the selected loop.<br />
To select a loop, press the STOP pedal and the PROGRAM<br />
UP pedal simultaneously. You’ll switch between Loop 1 and<br />
Loop 2 each time you do so.<br />
b. LOOP STATUS LEDs<br />
These LEDs indicate the status of Loop 1 and Loop 2.<br />
))<br />
p.28 “Loop status”<br />
c. REC/PLAY/OVERDUB pedal<br />
This pedal initiates recording, playback, overdubbing, or<br />
f<br />
g<br />
resampling for the loop that currently selected.<br />
If no phrase has been recorded on the loop that currently<br />
selected, the function will cycle between recording →<br />
playback → overdubbing each time you press the pedal.<br />
If a phrase has been recorded on the loop that currently<br />
selected, the function will cycle between playback →<br />
overdubbing each time you press the pedal.<br />
If the RESAMPLING STATUS LED is blinking, resampling<br />
will start when you press this pedal.<br />
d. RESAMPLING STATUS LED<br />
This LED indicates the resampling status. Use the REC/<br />
PLAY/OVERDUB pedal to start or end resampling.<br />
))<br />
p.25 “Resampling”<br />
e. STOP pedal<br />
This pedal stops recording, playback, overdubbing, or<br />
resampling. You’ll also use this pedal to erase a phrase<br />
recorded in a loop.<br />
By holding down this pedal and the PROGRAM UP pedal<br />
simultaneously for approximately two seconds, you can turn<br />
the Pre Effect on/off.<br />
f. PROGRAM UP pedal<br />
Use this pedal to select a program or loop. This pedal is also<br />
used to undo/redo overdubbing.<br />
g. TRIGGER/TAP pedal<br />
This pedal resets playback of the phrase that was recorded in<br />
the loop.<br />
11
VOX <strong>Dynamic</strong> <strong>Looper</strong> Owner's <strong>manual</strong><br />
You’ll also use this pedal to specify the tempo for the<br />
metronome or for BPM sync-type effects.<br />
This pedal also turns on/off the Loop Quantize function that<br />
adjusts the end of the loop according to the tempo when you<br />
stop recording, allowing you to create loops that are exactly<br />
the right length.<br />
))<br />
p.20 “Creating phrases of a precise length<br />
(Loop Quantize)”<br />
2. Pre Effect section<br />
Here you can control the Pre Effect. The Pre Effect will be<br />
applied to the signal from the INPUT jack and the MIC IN<br />
jack.<br />
The effect will be applied to the input that’s selected by the<br />
PRE FX TARGET button.<br />
))<br />
p.14 “d. PRE FX TARGET button”<br />
b. PRE FX button<br />
This turns the Pre Effect on/off.<br />
The button will light-up red when the effect is on, and it will<br />
blink while you’re editing the effect.<br />
Note: Turning the effect selector will also pedal the Pre<br />
Effect on.<br />
Hint: You can pedal the Pre Effect on/off by holding down<br />
the STOP pedal and the PROGRAM UP pedal<br />
simultaneously for approximately two seconds.<br />
3. Loop Effect section<br />
Here you can control the Loop Effect. The Loop Effect<br />
applies to the phrases recorded in Loop 1 and Loop 2. You<br />
can use this to change the phrase’s pitch (“PITCH” effect), or<br />
mix in a backward playback sound (“REVERSE” effect).<br />
Note: The Loop Effect is available when you’re playing back<br />
a phrase that’s been recorded in a loop; it will be applied to<br />
the recorded phrase. It will not be applied during recording<br />
or overdubbing.<br />
a<br />
b<br />
a. Pre Effect selector<br />
This selects the type of Pre Effect.<br />
a<br />
b<br />
12
Panels<br />
a. Loop Effect selector<br />
This selects the type of Loop Effect. The type of effect you<br />
select here will be applied.<br />
b. LOOP FX button<br />
This turns the Loop Effect on/off.<br />
The button will light-up green when the effect is on, and it<br />
will blink while you’re editing the effect.<br />
Note: Turning the effect selector will also pedal the Loop<br />
Effect on.<br />
4. Control pedal section<br />
You can use this pedal to control the parameters of the Pre<br />
Effect or Loop Effect, or to control the volume.<br />
a. Pedal LED<br />
This LED will be lit or unlit to<br />
indicate the state of the function<br />
that’s assigned to the control pedal.<br />
))<br />
p.39 “Control pedal settings”<br />
a<br />
that you can control, please refer to “About the Pre Effect<br />
and Loop Effect” on page 29.<br />
5. Metronome section<br />
Here you can specify the metronome setting and time<br />
signature.<br />
a. METRONOME button<br />
This button turns the metronome sound on/off.<br />
When you press the button, it will blink, and<br />
you’ll hear the metronome. The button will blink<br />
in synchronization with the tempo that you<br />
specified using the TRIGGER/TAP pedal.<br />
a<br />
To adjust the metronome volume, hold down<br />
this button and turn the EDIT knob.<br />
To set the time signature, hold down this button for<br />
approximately two seconds and then turn the EDIT knob.<br />
))<br />
p.20 “Using the metronome as a guide while you record”<br />
b. Control pedal<br />
This pedal controls the effect<br />
parameter that’s assigned to it, or<br />
controls the volume.<br />
For details on how to assign a<br />
function to the pedal, please refer to<br />
“Control pedal settings” on page 39.<br />
For details on the effect parameters<br />
b<br />
13
VOX <strong>Dynamic</strong> <strong>Looper</strong> Owner's <strong>manual</strong><br />
6. Global settings section<br />
Here is where you can adjust the settings for the Auto<br />
Recording Start function, specify what will happen when<br />
you stop a phrase, adjust settings for the Master Limiter, and<br />
select the input that will be processed by the Pre Effect.<br />
7. Edit/write/display section<br />
a<br />
b<br />
a b c d<br />
14<br />
a. AUTO REC button<br />
This button turns the Auto Recording Start function on.<br />
))<br />
p.21 “Initiating recording when you start playing (Auto<br />
Recording Start)”<br />
b. STOP MODE button<br />
This button specifies how the phrase will stop when you<br />
press the STOP button.<br />
))<br />
p.25 “Specifying how the loop will stop”<br />
c. MASTER LIMITER button<br />
This button lets you adjust settings for the master limiter<br />
that’s applied to the phrases recorded in Loop 1 and Loop 2.<br />
d. PRE FX TARGET button<br />
This button selects the input that will be processed by the<br />
Pre Effect.<br />
))<br />
p.18 “Applying an effect to your guitar performance or mic<br />
audio”<br />
c<br />
a. Program/value display<br />
Normally this shows the program number. When you’re<br />
editing an effect, the display will show the parameter value.<br />
b. EDIT knob<br />
Use this knob to edit effect parameters, or to select a<br />
destination program when writing a program.<br />
c. WRITE button<br />
Use this button to save the effect settings to a program.<br />
When the display shows a program number, you can pedal<br />
between user programs and preset programs by holding<br />
down this button for approximately two seconds.<br />
d
Panels<br />
d. CANCEL button<br />
Press this button when you want to cancel an operation such<br />
as saving a program.<br />
You can disable the operation of the top panel buttons,<br />
knobs and selectors by holding down this button for<br />
approximately two seconds (the Key Lock function). To<br />
cancel the Key Lock function, hold down this button once<br />
again for approximately two seconds.<br />
By pressing this button and the AUTO REC button<br />
simultaneously, you can step through the programs in units<br />
of ten.<br />
8. PEAK LED<br />
This LED will light-up when the signal being<br />
input from the INPUT jack or MIC IN jack is<br />
too loud. If this LED lights-up, adjust your<br />
guitar’s volume or the MIC TRIM knob.<br />
Rear panel<br />
1. Cable hook<br />
Wrap the AC adapter cable around this hook to prevent the<br />
AC adapter from being accidentally disconnected.<br />
2. DC 9V jack<br />
Connect the included AC adapter to this jack.<br />
15
VOX <strong>Dynamic</strong> <strong>Looper</strong> Owner's <strong>manual</strong><br />
3. MIC IN jack<br />
Connect a commercially available dynamic mic to this jack.<br />
You cannot use a condenser mic that requires phantom<br />
power.<br />
4. MIC TRIM knob<br />
This knob adjusts the mic’s input level.<br />
Connect your instrument and<br />
turn on the power<br />
Let’s connect your guitar and amp to the <strong>Dynamic</strong> <strong>Looper</strong>,<br />
and turn on the power.<br />
Minimize the volume of all your equipment before you<br />
turn on the power.<br />
5. STANDBY switch<br />
This switch turns the power on/off.<br />
Mic<br />
Guitar<br />
Guitar amp, mixer,<br />
recorder, etc.<br />
6. INPUT jack<br />
Connect your guitar to this jack.<br />
AC adapter<br />
7. OUTPUT jack<br />
Connect this jack to your guitar amp or mixer. The output<br />
will be monaural.<br />
16
Connections<br />
1. Make sure that the <strong>Dynamic</strong> <strong>Looper</strong>’s STANDBY switch<br />
is in the STANDBY position.<br />
2. Use a cable to connect the OUTPUT jack to your guitar<br />
amp or mixer.<br />
Note: The <strong>Dynamic</strong> <strong>Looper</strong>’s output is monaural.<br />
Do not connect headphones to the OUTPUT jack. Doing<br />
so may damage your headphones.<br />
3. Use a guitar cable to connect your guitar to the INPUT<br />
jack. Alternatively, use a cable to connect your mic to the<br />
MIC IN jack.<br />
Acoustic feedback might occur depending on where the<br />
connected mic is located in relation to the amp that’s<br />
connected to the OUTPUT jack. If feedback occurs, take<br />
the following steps.<br />
• Point the mic in a different direction.<br />
• Move the mic away from the speaker.<br />
• Adjust the rear panel MIC IN TRIM knob.<br />
Acoustic feedback may also occur when you apply an<br />
effect to the mic input. If so, take the same steps listed<br />
above.<br />
If the mic and amp are close together, the output sound of<br />
the amp can be picked up by the mic. If you record or<br />
overdub in this state, these sounds will also be recorded.<br />
Make sure that the mic and amp are sufficiently separated<br />
so that the sound from the amp is not picked up.<br />
Connect your instrument and turn on the power<br />
Turning the power on<br />
1. Make sure that the volume of your amp or mixer is<br />
sufficiently lowered, and then turn the <strong>Dynamic</strong><br />
<strong>Looper</strong>’s STANDBY switch to the ON position.<br />
The power will turn on, and the program/value display<br />
will indicate the current program number.<br />
2. Turn on the power of the connected amp or mixer, and<br />
raise the volume.<br />
3. Play your guitar, and adjust its volume without allowing<br />
the PEAK LED to light-up.<br />
4. Vocalize into your mic, and adjust the rear panel TRIM<br />
knob without allowing the PEAK LED to light-up.<br />
Note: The <strong>Dynamic</strong> <strong>Looper</strong> contains an auto power-off<br />
function. The power will automatically turn off<br />
approximately four hours after the last user input<br />
occurred (Fp.41 “Auto Power-Off function”).<br />
Turning the power off<br />
1. Lower the volume of your amp or mixer.<br />
2. Set the STANDBY switch to the STANDBY position.<br />
17
VOX <strong>Dynamic</strong> <strong>Looper</strong> Owner's <strong>manual</strong><br />
18<br />
Playing programs<br />
On the <strong>Dynamic</strong> <strong>Looper</strong>, settings for the Pre Effect and Loop<br />
Effect are collectively called a “program.” The internal<br />
memory contains 100 programs.<br />
Here’s how to select one of these programs, and then apply<br />
an effect to the sound from your guitar or mic, or apply an<br />
effect to the recorded phrases.<br />
Applying an effect to your guitar<br />
performance or mic audio<br />
Let’s select and try out some of the programs.<br />
1. Connect your guitar or mic and amp, and then turn on<br />
the power.<br />
))<br />
p.16 “Connect your instrument and turn on the power”<br />
2. Verify that the program/value display shows a program<br />
number.<br />
If the display shows a value other than a program number,<br />
or if the display is blinking, press the CANCEL button.<br />
The program number will appear.<br />
The <strong>Dynamic</strong> <strong>Looper</strong> contains two types of programs:<br />
preset programs and user programs.<br />
P01–P50: These are preset programs. You cannot save your<br />
own settings to a preset program.<br />
U01–U50: These are user programs. When the <strong>Dynamic</strong><br />
<strong>Looper</strong> is shipped, these have the same content as the<br />
preset programs, but you are free to modify the effect type<br />
and parameter values and save the result in one of these<br />
user programs.<br />
To switch between preset programs and user programs, hold<br />
down the WRITE button for approximately two seconds.<br />
3. Use the PROGRAM UP pedal to switch programs.<br />
When you press the PROGRAM UP pedal, the program<br />
number will change to the next program up.<br />
If you hold down the PROGRAM UP pedal and press the<br />
TRIGGER/TAP pedal, the program number will change to<br />
the next program down (PROGRAM DOWN).<br />
By pressing the AUTO REC button and the CANCEL<br />
button simultaneously, you can advance the program<br />
number in steps of 10.<br />
4. If you don’t hear the Pre Effect, press the PRE FX<br />
TARGET button to select the input that the Pre Effect<br />
will process.<br />
Each time you press the button, the setting will alternate<br />
between the following, and the button indicator will<br />
change color.<br />
Green: The Pre Effect will apply to the input from the<br />
INPUT jack.<br />
Hint: If both a guitar and a mic are connected, the signal<br />
from the mic will be output without change (i.e., without<br />
the pre-effect applied). If desired, you can disable (mute)<br />
the audio from the MIC IN jack at this time. Hold down<br />
the PRE FX TARGET button and turn the EDIT knob. The<br />
display will show the setting you’ve selected.<br />
CoF: Audio from the MIC IN jack is disabled (muted).<br />
Con: Audio from the MIC IN jack is enabled.
Creating phrases<br />
Red: The Pre Effect will apply to the input from the MIC<br />
IN jack.<br />
Orange: The Pre Effect will apply to the input from both<br />
the INPUT jack and the MIC IN jack.<br />
Go ahead and select various programs, and play them.<br />
For details on the effects that are assigned to the preset<br />
programs, please refer to the included “Program List.”<br />
For details on the parameters and how to edit them, please<br />
refer to “About the Pre Effect and the Loop Effect” on page 29.<br />
Creating phrases<br />
Let’s record phrases to Loop 1 and Loop 2.<br />
Recording on Loop 1<br />
1. Connect your guitar or mic and amp to the <strong>Dynamic</strong><br />
<strong>Looper</strong>, and turn on the power.<br />
Fp.16 “Connect your instrument and turn on the power”<br />
2. Select the program that provides the sound that you<br />
want.<br />
If you don’t hear the Pre Effect, check the setting of the<br />
PRE FX TARGET button.<br />
))<br />
p.18 “Applying an effect to your guitar performance or<br />
mic audio”<br />
3. Simultaneously press the STOP pedal and the<br />
PROGRAM UP pedal to select Loop 1. (The current loop<br />
indicator LED for Loop 1 will light-up.)<br />
Checking the status of each loop<br />
The LOOP STATUS LEDs for Loop 1 and Loop 2 indicate<br />
whether each loop contains a phrase.<br />
Note: If you haven’t recorded anything into the loops,<br />
there’s no need to check.<br />
If the LOOP STATUS LED is unlit, that loop does not<br />
contain a phrase.<br />
If the LOOP STATUS LED is blinking green, a phrase has<br />
been recorded in that loop, and the phrase is stopped.<br />
If the LOOP STATUS LED is lit-up green, a phrase has<br />
been recorded in that loop, and the phrase is playing.<br />
Press the STOP pedal to stop playback.<br />
If the LOOP STATUS LED is lit-up red or orange, the loop<br />
is being recorded or overdubbed; press the STOP pedal<br />
twice to stop.<br />
If you want to delete the recorded phrase, hold down the<br />
STOP pedal for two seconds while the loop is stopped.<br />
The phrase will be deleted from the selected loop, and the<br />
LOOP STATUS LED will go dark.<br />
If you also want to delete the phrase from the loop that’s<br />
not selected (i.e., the loop whose current loop LED is<br />
unlit), repeat this operation for the other loop.<br />
4. Press the REC/PLAY/OVERDUB pedal to begin<br />
recording, and then play your instrument.<br />
The LOOP STATUS LED for Loop 1 will light-up red, and<br />
recording will begin.<br />
You can also initiate recording when you start playing.<br />
))<br />
p.21 “Initiating recording when you start playing (Auto<br />
Recording Start)”<br />
19
VOX <strong>Dynamic</strong> <strong>Looper</strong> Owner's <strong>manual</strong><br />
If you want to listen to the metronome as a guide while<br />
you record, press the METRONOME button to turn on<br />
the metronome, and then press the TRIGGER/TAP pedal<br />
several times to set the tempo. If you’ve set the tempo,<br />
the length of the created phrase will be a precise<br />
multiple of the tempo.<br />
))<br />
p.20 “Using the metronome as a guide while you record”<br />
))<br />
p.20 “Creating phrases of a precise length<br />
(Loop Quantize)”<br />
5. When you’ve played to the spot where you want to loop<br />
the phrase, press the REC/PLAY/OVERDUB pedal to<br />
stop recording.<br />
Recording for Loop 1 will end, and will switch to loop<br />
playback.<br />
6. Press the STOP pedal to stop playback.<br />
This completes recording for Loop 1.<br />
Using the metronome as a guide while you<br />
record<br />
You can use the metronome as a guide while you record a<br />
loop. Adjust the following settings before you start<br />
recording.<br />
1. Press the TRIGGER/TAP pedal several times to specify<br />
the tempo.<br />
When you press the pedal several times, the tempo will be<br />
set to the interval between your presses.<br />
The METRONOME button will blink at the tempo you<br />
specified.<br />
2. Press the METRONOME button.<br />
The metronome will sound at the tempo you specified.<br />
Note: Pressing the METRONOME button will not cause<br />
the metronome to sound unless you have already used the<br />
TRIGGER/TAP pedal to specify the tempo.<br />
3. To adjust the volume of the metronome, hold down the<br />
METRONOME button and turn the EDIT knob.<br />
Specifying the metronome’s time signature<br />
Here’s how to change the metronome’s time signature. With<br />
the factory settings, this is set to 1 (1/4).<br />
1. Hold down the METRONOME button for approximately<br />
two seconds.<br />
The program/value display will indicate “bar,” and will<br />
then indicate the time signature setting.<br />
2. Use the EDIT knob to specify the time signature.<br />
The range of time signatures is from 1 (1/4) to 32 (32/4).<br />
You can’t change the denominator of the time signature.<br />
3. Press the CANCEL button.<br />
You can’t change the time signature or tempo after<br />
recording.<br />
Creating phrases of a precise length<br />
(Loop Quantize)<br />
If you use the TRIGGER/TAP pedal to specify the tempo<br />
before recording, the Loop Quantize function will be<br />
enabled.<br />
20
Creating phrases<br />
The recording length will automatically synchronize with<br />
the tempo and time signature. When you stop recording, the<br />
end of the recording will automatically be adjusted to an<br />
exact multiple of the specified tempo and time signature,<br />
allowing you to create phrases of a precise length.<br />
Start REC<br />
Phrase length<br />
End REC<br />
If you want to disable the Loop Quantize function, hold<br />
down the TRIGGER/TAP pedal for approximately two<br />
seconds before you record. The METRONOME button will<br />
go dark, and the Loop Quantize function will be disabled.<br />
Initiating recording when you start playing<br />
(Auto Recording Start)<br />
The Auto Recording Start function makes recording begin<br />
the moment you start playing.<br />
1. Press the AUTO REC button to make it light-up.<br />
2. Press the REC/PLAY/OVERDUB pedal.<br />
The LOOP STATUS LED will blink red.<br />
The Auto Recording Start function will turn on, and the<br />
<strong>Dynamic</strong> <strong>Looper</strong> will be in record-standby mode.<br />
3. Play your instrument, or vocalize (or play) into your mic.<br />
Recording will begin the moment you start playing.<br />
During recording, the LOOP STATUS LED will light-up<br />
red.<br />
Recording on Loop 2<br />
Now let’s record a phrase on Loop 2.<br />
Note: You can also record on Loop 2 while playing back a<br />
phrase on Loop 1.<br />
1. Select the program that provides the sound that you<br />
want. As desired, you can also adjust the effect<br />
parameters.<br />
))<br />
p.18 “Applying an effect to your guitar performance or<br />
mic audio”<br />
))<br />
p.37 “Editing a program”<br />
2. Press the STOP pedal and PROGRAM UP pedal<br />
simultaneously, making the Loop 2 current loop LED<br />
light-up.<br />
3. At the desired moment, press the PLAY/REC/OVERDUB<br />
pedal to start recording.<br />
4. When you’ve played as long as you want the loop to be,<br />
press the PLAY/REC/OVERDUB pedal.<br />
Recording will end, and the loop will switch to playback.<br />
Note: If you’re recording at a specified tempo, recording<br />
will end in synchronization with the tempo and the time<br />
signature (the Loop Quantize function).<br />
21
VOX <strong>Dynamic</strong> <strong>Looper</strong> Owner's <strong>manual</strong><br />
Note: If you’re recording without specifying a tempo, the<br />
end of recording will occur as follows.<br />
• If you’re recording while playing back the Loop 1<br />
phrase, the timing at which you stop recording will be<br />
automatically adjusted to an exact multiple of the Loop<br />
1 length.<br />
• If you’re recording without playing back the Loop 1<br />
phrase, recording will stop immediately.<br />
Hint: If you press the TRIGGER/TAP pedal, recording will<br />
end the moment you press the pedal; the loop length will<br />
not be adjusted.<br />
To stop the loop, press the STOP pedal. The Loop 2 LOOP<br />
STATUS LED will blink green.<br />
About the recording time<br />
The <strong>Dynamic</strong> <strong>Looper</strong> can record 90 seconds of phrases<br />
(total) for Loop 1 and Loop 2. A minimum of ten seconds of<br />
recording time is allocated to each loop.<br />
Loop1<br />
90 seconds<br />
Loop2<br />
For example, suppose that you start from a state in which<br />
neither Loop 1 or Loop 2 contains a phrase, and record first<br />
Loop 1 and then Loop 2.<br />
You’ll be able to record a maximum of 80 seconds on Loop 1;<br />
i.e., the total recording time of 90 seconds minus the<br />
minimum time for Loop 2, which is 90 - 10 = 80 seconds.<br />
Minimum time recordable on Loop 2: 10 seconds<br />
80 seconds<br />
Time recordable on Loop 1<br />
After recording on Loop 1, let’s suppose that you record on<br />
Loop 2.<br />
The available recording time for Loop 2 will be the total<br />
recording time minus the time you recorded on Loop 1.<br />
Loop 1 Time recordable on Loop 2<br />
Now let’s suppose that you subsequently erased the phrase<br />
from Loop 1, and then recorded again on Loop 1. The<br />
available recording time for Loop 1 will be the total<br />
recording time minus the time you recorded on Loop 2.<br />
90 seconds<br />
Time recordable on Loop 1<br />
Loop 2<br />
After you record a Loop<br />
Overdub sound onto a recorded phrase<br />
Please refer to “Overdubbing a performance by playing<br />
along with a recorded phrase” on page 23.<br />
Apply the Loop Effect to the playback of a<br />
loop-recorded phrase<br />
Please refer to “Applying the Loop Effect to a recorded<br />
phrase” on page 24.<br />
22
Overdubbing a performance by playing along with a recorded phrase<br />
Resample a phrase with the Loop Effect<br />
applied<br />
Please refer to “Resampling” on page 25.<br />
Overdubbing a performance<br />
by playing along with a<br />
recorded phrase<br />
Here we’ll explain how to overdub by playing along with<br />
the phrase you recorded on Loop 1.<br />
1. Select the program that provides the sound that you<br />
want. As desired, you can also adjust the effect<br />
parameters.<br />
))<br />
p.18 “Applying an effect to your guitar performance or<br />
mic audio”<br />
))<br />
p.37 “Editing a program”<br />
2. Press the STOP pedal and PROGRAM UP pedal<br />
simultaneously, making the Loop 1 current loop LED<br />
light-up.<br />
3. Press the REC/PLAY/OVERDUB pedal to play back Loop<br />
1.<br />
4. At the point where you want to start overdubbing, press<br />
the REC/PLAY/OVERDUB pedal, and play your<br />
instrument.<br />
The Loop 1 LOOP STATUS LED will light-up orange, and<br />
overdubbing will begin.<br />
Hint: If a parameter of the Pre Effect is assigned to the<br />
control pedal (the pedal LED will be lit-up red), you can<br />
use the pedal to control the Pre Effect while you overdub.<br />
5. Press the PLAY/REC/OVERDUB pedal at the point<br />
where you want to stop overdubbing.<br />
The Loop 1 LOOP STATUS LED will light-up green, and the<br />
<strong>Dynamic</strong> <strong>Looper</strong> will switch from overdubbing to playback.<br />
6. Press the STOP pedal to stop Loop 1 playback.<br />
Hint: The <strong>Dynamic</strong> <strong>Looper</strong> lets you specify what will<br />
occur when you stop playback.<br />
))<br />
p.25 “Specifying how the loop will stop”<br />
Undoing overdubbing<br />
If you want to cancel the last-performed overdub, proceed as<br />
follows from the overdubbed state.<br />
1. Hold down the PROGRAM UP pedal.<br />
2. When the program/value display blinks “Und,” release<br />
the PROGRAM UP pedal.<br />
The last-performed overdub will be undone.<br />
23
VOX <strong>Dynamic</strong> <strong>Looper</strong> Owner's <strong>manual</strong><br />
24<br />
Redoing overdubbing<br />
If you want to bring back the overdub that you previously<br />
cancelled, proceed as follows from the state following Undo.<br />
1. Hold down the PROGRAM UP pedal.<br />
2. When the program/value display blinks “rEd,” release<br />
the PROGRAM UP pedal.<br />
The cancelled overdub will be brought back.<br />
Applying the Loop Effect to a<br />
recorded phrase<br />
Here we’ll explain how you can apply the Loop Effect to<br />
modify the playback of a phrase that you’ve recorded on a<br />
loop. You can also use the control pedal to modify the<br />
phrase in real time.<br />
1. Simultaneously press the STOP pedal and the<br />
PROGRAM UP pedal to select the loop that you want to<br />
play back.<br />
The current loop LED of the selected loop will light-up.<br />
2. Press the REC/PLAY/OVERDUB pedal to play back the<br />
loop.<br />
Hint: If both Loop 1 and Loop 2 contain a phrase, you can<br />
play back both Loop 1 and Loop 2 simultaneously by<br />
holding down the STOP pedal and quickly pressing the<br />
REC/PLAY/OVERDUB pedal from the stopped condition.<br />
(This function is called Dual Playback.)<br />
Hint: If you hold down the STOP pedal for approximately<br />
two seconds, the recorded phrase will be erased.<br />
3. Verify that the LOOP FX button is lit-up, indicating that<br />
the Loop Effect is on. If it is off, press the LOOP FX<br />
button to turn the Loop Effect on.<br />
Note: If a parameter of the Pre Effect is assigned to the<br />
control pedal (the pedal LED will be lit red), you won’t be<br />
able to start the Loop Effect. Press down strongly on the<br />
toe end of the pedal to switch the pedal assignment to the<br />
Loop Effect (the pedal LED will be lit green).<br />
Hint: If a parameter of the Loop Effect is assigned to the<br />
control pedal (the pedal LED will be lit-up green), you can<br />
use the pedal to control the Loop Effect.<br />
Hint: If you press the TRIGGER/TAP pedal, the Loop<br />
Effect will be disabled, and you’ll return to the beginning<br />
of the phrase that’s currently playing. You can create<br />
interesting performances by pressing the pedal at the<br />
desired moment to change the length of the loop, or to<br />
repeat the phrase in synchronization with the tempo.<br />
4. Press the STOP pedal to stop playback.<br />
You can stop playback by pressing this pedal even if the<br />
selected loop is stopped and the other loop is playing<br />
back.<br />
Key Lock function<br />
If you hold down the Cancel button for approximately two<br />
seconds, the buttons, knobs, and selectors of the front panel<br />
will be disabled; only the program/loop control section’s<br />
pedals and the control pedal will be operable. (This function<br />
is called Key Lock.) This is a convenient way to prevent<br />
unintended operation during a performance.
Resampling<br />
Specifying how the loop will<br />
stop<br />
You can specify how the loop will stop when you press the<br />
STOP pedal during loop playback.<br />
1. Press the STOP MODE button.<br />
Each time you press the button, the setting will alternate<br />
as follows.<br />
Button unlit: When you press the STOP pedal, the phrase<br />
will stop immediately.<br />
Button lit-up red: When you press the STOP pedal, the<br />
phrase will stop and delay will be applied.<br />
Button lit-up orange: When you press the STOP pedal, the<br />
phrase volume will fade out, and the phrase will stop<br />
when the volume reaches zero.<br />
Button lit-up green: When you press the STOP pedal, the<br />
phrase will play to the end and then stop.<br />
Hint: When fading-out and then stopping, or when<br />
playing the phrase to the end and then stopping, the<br />
LOOP STATUS LED will rapidly blink green until the loop<br />
stops.<br />
You can’t record/overdub/resample until the loop stops.<br />
Resampling<br />
While a loop plays back, you can use the Loop Effect or the<br />
control pedal to modify the phrase while re-recording the<br />
result. This is called “resampling.”<br />
By using resampling, you can apply more than one Loop<br />
Effect, or create a loop of a different length than an alreadyrecorded<br />
loop.<br />
Resampling is possible when applying the Loop Effect to<br />
a loop-recorded phrase. You can’t resample unless a<br />
phrase has already been recorded in a loop.<br />
1. Simultaneously press the STOP pedal and the<br />
PROGRAM UP pedal to select a loop that has been<br />
recorded.<br />
2. Press the REC/PLAY/OVERDUB pedal to play back the<br />
loop, and use the PROGRAM UP pedal to select the<br />
program that gives you the sound that you want. As<br />
desired, you can edit the effect parameters or use the<br />
control pedal to apply the Loop Effect.<br />
))<br />
p.18 “Playing programs”<br />
When you play back a loop with the Loop Effect turned<br />
on, the RESAMPLING STATUS LED will blink, indicated<br />
that resampling is available.<br />
3. Press the REC/PLAY/OVERDUB pedal.<br />
The RESAMPLING STATUS LED will light-up, and<br />
resampling will start. The phrase with the Loop Effect<br />
applied will be resampled.<br />
25
VOX <strong>Dynamic</strong> <strong>Looper</strong> Owner's <strong>manual</strong><br />
Hint: If the Loop Effect is assigned to the control pedal,<br />
you can use the pedal to modify the sound while you<br />
resample.<br />
You can’t switch programs while resampling. Nor can<br />
you turn the Loop Effect on/off or change the effect type.<br />
4. Press the REC/PLAY/OVERDUB pedal to stop<br />
resampling.<br />
Note: If you started resampling with a specified tempo,<br />
resampling will end in synchronization with the tempo<br />
and the time signature (the Loop Quantize function).<br />
Note: If you started resampling without specifying a<br />
tempo, the timing at which resampling ends will<br />
automatically be adjusted to an exact multiple of the loop<br />
length prior to resampling.<br />
Hint: If you press the TRIGGER/TAP pedal, resampling<br />
will end the moment you press the pedal; the loop length<br />
will not be adjusted.<br />
The loop will change from resampling to playback. The<br />
Loop Effect will turn off. If you press the STOP pedal<br />
during resampling, resampling will stop and then loop<br />
playback will stop.<br />
Hint: If you’re playing back Loop 1 and Loop 2, and<br />
resampling while using the Loop Effect VOLUME or<br />
X-FADE, playback will stop for the loop that’s not the<br />
current loop when you stop resampling.<br />
Applying the limiter to the<br />
recorded phrases<br />
The <strong>Dynamic</strong> <strong>Looper</strong> provides a limiter that can make the<br />
volume more consistent between loops, or reduce<br />
discrepancies in volume between the initial recording and<br />
the volume after overdubbing.<br />
1. Press the MASTER LIMITER button to select the desired<br />
type of limiter.<br />
The setting will alternate each time you press the button.<br />
The type of limiter is indicated by the program/value<br />
display.<br />
OFF: Limiter off.<br />
SFt: Soft limiter. This will reduce the volume discrepancy<br />
between when Loop 1 or Loop 2 are played back<br />
individually or when the two loops are played back<br />
simultaneously.<br />
Hrd: Hard limiter. This will make the volume of the<br />
recorded phrase more consistent. It will reduce the<br />
difference in volume between the initially-recorded phrase<br />
and the phrase after it has been overdubbed repeatedly.<br />
26
Erasing a loop-recorded phrase<br />
Erasing a loop-recorded phrase<br />
Here’s how to erase a phrase that you’ve recorded on a loop.<br />
The erased phrase cannot be recovered. Use this<br />
operation with caution.<br />
1. If a phrase is playing, press the STOP pedal to stop<br />
playback.<br />
The LOOP STATUS LED will blink green.<br />
2. Simultaneously press the STOP pedal and the<br />
PROGRAM UP pedal to select the loop whose phrase<br />
you want to erase.<br />
Make the current loop LED light-up for the loop whose<br />
phrase you want to erase.<br />
3. Hold down the STOP pedal for approximately two<br />
seconds.<br />
The phrase of the selected loop will be erased, and the<br />
LOOP STATUS LED will go dark.<br />
If you once again hold down the STOP pedal for<br />
approximately two seconds, the phrase of the other loop<br />
will be erased, and the LOOP STATUS LED will go dark.<br />
27
VOX <strong>Dynamic</strong> <strong>Looper</strong> Owner's <strong>manual</strong><br />
Loop status<br />
The existence of a phrase in the currently selected loop and its operational status are indicated by the LOOP STATUS LED and<br />
the RESAMPLING STATUS LED. The operations that occur when you press the REC/PLAY/OVERDUB pedal or the STOP<br />
pedal will also differ.<br />
While recording or overdubbing<br />
LOOP STATUS LED<br />
Loop status<br />
Unlit Stopped (no phrase) ))<br />
p.19 “Checking the status of each loop”<br />
Blinking red<br />
Waiting for Auto Recording Start<br />
))<br />
p.21 “Initiating recording when you start playing<br />
(Auto Recording Start)”<br />
Lit-up red<br />
Recording<br />
Slowly blinking green<br />
Stopped (phrase exists)<br />
))<br />
p.19 “Checking the status of each loop”<br />
Rapidly blinking green<br />
Lit-up green<br />
Lit-up orange<br />
Waiting to stop<br />
(fade-out, or play to end of loop)<br />
Playing<br />
Overdubbing<br />
))<br />
p.25 “Specifying how the loop will stop”<br />
))<br />
p.19 “Checking the status of each loop”<br />
While resampling<br />
If you apply the Loop Effect to the currently-playing phrase, the <strong>Dynamic</strong> <strong>Looper</strong> will be in resampling-ready mode.<br />
LOOP STATUS LED RESAMPLING STATUS LED Loop status<br />
Lit-up green Blinking red Ready to resample<br />
))<br />
p.25 “Resampling”<br />
Lit-up red Lit red Resampling<br />
28
About the Pre Effect and the Loop Effect<br />
About the Pre Effect and the<br />
Loop Effect<br />
This section explains the effect types that are available for<br />
the Pre Effect and Loop Effect, and the parameters that can<br />
be edited for these effects. Please refer to page 9 for details on<br />
the signal flow.<br />
Effect parameters<br />
EDIT knob: This is the parameter that you can edit by<br />
turning the EDIT knob.<br />
PRE FX button + EDIT knob: This is the parameter that you<br />
can edit by turning the EDIT knob while holding down the<br />
PRE FX button.<br />
Depending on the effect that you’ve selected, there might<br />
not be a parameter that can be edited using the PRE FX<br />
button + EDIT knob.<br />
Control pedal: This is the parameter that can be assigned to<br />
the control pedal. For details on how to make the<br />
assignment, please refer to “Assigning a function to the<br />
control pedal” on page 39.<br />
Pre Effects<br />
PdL: PEDAL FX<br />
This models a stomp-box type effect.<br />
• EDIT knob: Selects the effect type.<br />
Cln: A clean tone that lets the tonal character of your<br />
guitar come through.<br />
Co: This models a compressor pedal that is popular for its<br />
percussive clean sound. It’s perfect for the pop or funk<br />
music of the 80’s and 90’s. It can also produce a singing,<br />
mellow sustain.<br />
Crn: This models an overdrive unit named after a halfhuman<br />
half-horse being from Greek myth. When the gain<br />
is lowered, this acts as a booster that preserves the original<br />
sound of the guitar. Raising the gain makes this act as an<br />
overdrive with a rich mid-range.<br />
Od: This models a well-known overdrive pedal with a<br />
green box; the inexpressible warmth of its sound has made<br />
it a classic effect.<br />
dst: This is a distortion unit that’s ideal for metal.<br />
• PRE FX button + EDIT knob: Adjusts the gain.<br />
• Control pedal: Controls the output level.<br />
: WAH<br />
This models a <strong>Vox</strong> V847 wah pedal.<br />
• EDIT knob: Selects the sound (effect type). The available<br />
sounds are the same as for the PEDAL FX effect type.<br />
(F“PEDAL FX”)<br />
• PRE FX button + EDIT button: Adjusts the gain.<br />
• Control pedal: Controls wah.<br />
29
VOX <strong>Dynamic</strong> <strong>Looper</strong> Owner's <strong>manual</strong><br />
Πod: MODULATION<br />
This models a modulation effect.<br />
• EDIT knob: Selects the effect type.<br />
Ch1: Models an analog chorus.<br />
Ch2: This contains two chorus units, producing a complex<br />
modulation effect.<br />
FLA: This models an analog flanger.<br />
PHA: This models an analog phaser.<br />
trE: This models the tremolo circuit built into a guitar<br />
amp.<br />
• PRE FX button + EDIT button: Adjusts the modulation<br />
speed.<br />
• Control pedal: Controls the depth of the effect.<br />
bAS: BASS<br />
This simulates a bass guitar.<br />
• EDIT knob: Selects the type of sound.<br />
Eb1: A standard electric bass.<br />
Eb2: An electric bass with a compressor applied.<br />
Eb3: An electric bass with overdrive applied.<br />
Eb4: An electric bass with distortion applied.<br />
Sb1: A synth bass.<br />
Sb2: A variation of the synth bass.<br />
• Control pedal: Controls the output level.<br />
Aco: ACOUSTIC<br />
This simulates an acoustic guitar.<br />
• EDIT knob: Selects the type of sound.<br />
S-1: An old, small-bodied acoustic guitar, suitable for<br />
delicate arpeggios.<br />
S-2: A small-bodied acoustic guitar with a distinctive<br />
mid-range, loved by country bluesmen.<br />
Lrg: A large-bodied acoustic guitar with a distinctively<br />
refined sound that’s suitable for pop.<br />
rES: A resonator guitar suitable for playing with a slide.<br />
• PRE FX button + EDIT button: Adjusts the depth of the<br />
effect.<br />
• Control pedal: Controls the output level.<br />
Ptc: PITCH<br />
This is a pitch shifter that lets you use the control pedal to<br />
control the pitch.<br />
• EDIT knob: Adjusts the amount of pitch in semitone steps.<br />
-12–0, dtn: Detune, 1–12<br />
• PRE FX button + Adjusts the mix balance between the<br />
direct sound and effect sound.<br />
• Control pedal: Controls the pitch.<br />
30
About the Pre Effect and the Loop Effect<br />
Stt: STUTTER<br />
This effect produces a tremolo-like impression by applying a<br />
tempo-synchronized gate to the input sound. You can create<br />
rhythmic phrases by using the control pedal to control the<br />
gate’s duty cycle (the duration that the gate is open, relative<br />
to one complete cycle of the gate opening and closing).<br />
This is effective when applied to input sounds that have a<br />
consistent loudness, such as sounds processed by<br />
compression or distortion.<br />
• EDIT knob: Specifies the time signature. The gate will<br />
open and close in synchronization with the tempo and the<br />
time signature you specify here.<br />
1-2: (two beats = half note) 1-8: (eighth notes)<br />
3-8: (one and a half beats) 1-12: 3 (eighth note triplets)<br />
1-3: 3 (half note triplets) 1-16: (16th notes)<br />
1-4: (1 beat = quarter note) 1-24: 3 (16th note triplets)<br />
3-16: (dotted eighth notes) 1-32: (32nd notes)<br />
1-6: 3 (quarter note triplets) 1-64: (64th notes)<br />
• Control pedal: Controls the duty cycle that opens and<br />
closes the gate. Advancing the pedal will shorten the<br />
duration that the sound is heard.<br />
Eq: EQ<br />
This models a four-band equalizer.<br />
• EDIT knob: Selects the equalizer type.<br />
LC: Cuts the low-frequency range.<br />
LF: Boosts/cuts the low-frequency range.<br />
CF: Boosts/cuts the mid-frequency range.<br />
CF2: Boosts/cuts the mid-frequency range, and cuts other<br />
ranges.<br />
HF: Boosts/cuts the high-frequency range.<br />
HC: Cuts the high-frequency range.<br />
• PRE FX button + EDIT knob: Adjusts the gain.<br />
• Control pedal: Controls the output level.<br />
dLy: DELAY<br />
This models a delay effect.<br />
• EDIT knob: Selects the delay type.<br />
Sho: Models a short (slap) delay.<br />
dL1: Models a clean-sounding delay.<br />
dL2: Models a tempo-synchronized delay.<br />
An1: Models an analog delay using BBD, distinctive for its<br />
warm distortion.<br />
An2: Models a tempo-synchronized analog delay.<br />
tP1: Models a delay that includes wow, flutter, and<br />
distortion reminiscent of a classic tape echo unit.<br />
tP2: Models a tempo-synchronized tape echo.<br />
• PRE FX button + EDIT knob: Adjusts the delay time.<br />
If you’ve selected the short delay or a delay type that is<br />
not tempo-synchronized, use this parameter to specify the<br />
delay time as a value in the range of 0–10.<br />
31
VOX <strong>Dynamic</strong> <strong>Looper</strong> Owner's <strong>manual</strong><br />
If you’ve selected a tempo-synchronized delay or a tape<br />
echo, use this parameter to select one of the following<br />
values.<br />
1-64: (64th notes) 1-6: 3 (quarter note triplets)<br />
1-32: (32nd notes) 3-16: (dotted eighth notes)<br />
1-24: 3 (16th note triplets) 1-4: (1 beat = quarter note)<br />
1-16: (16th notes) 1-3: 3 (half note triplets)<br />
1-12: 3 (eighth note triplets) 3-8: (one and a half beats)<br />
1-8: (eighth notes) 1-2: (two beats = half note)<br />
• Control pedal: Controls the depth of the effect.<br />
Note: When using a delay effect with the Pre Effect and<br />
Loop Effect, the maximum delay time for each will be 2.22<br />
seconds. If you’re using a tempo-synchronized delay effect,<br />
and the tempo together with the effect parameter setting<br />
would cause the delay time to exceed 2.22 seconds, the delay<br />
time will automatically be reduced to 1/2 the setting.<br />
rVb: REVERB<br />
This is a reverb effect that lets you use the control pedal to<br />
control the reverb depth and volume balance. It is effective<br />
on either guitar or mic input.<br />
• EDIT knob: Selects the type of reverb.<br />
SPr: Models the spring reverb built into a guitar amp.<br />
roo: Models the reverberation of a typical room containing<br />
numerous early reflections.<br />
HAL: Models the reverberation of a concert hall<br />
containing numerous echo components.<br />
• Control pedal: Controls the reverb depth and volume<br />
balance.<br />
S-F: SCI-FI<br />
This transforms the sound of an electric guitar in a variety of<br />
ways.<br />
• EDIT knob: Selects the type of sound.<br />
dr1, dr2, dr3: These are drone effects that add a continuous<br />
drone pitch like the Tambura, an instrument of India.<br />
Sy1, Sy2, Sy3: These model a chromatic synth. There are<br />
three synth types, each with a different tonal character<br />
(Sy3: Drum simulation). They are effective when played<br />
with single notes.<br />
SLo: This produces a violin-like effect with a slower attack.<br />
• PRE FX button + EDIT knob: What this adjusts will<br />
depend on the sound you’ve selected.<br />
dr1, dr2: Specifies the key.<br />
dr3, Sy1, Sy2: Specifies the depth of the effect.<br />
Sy3: Specifies the output level.<br />
SLo: Specifies the speed of the attack.<br />
• Control pedal: What this controls will depend on the<br />
sound you’ve selected.<br />
dr1, dr2: Controls the depth of the effect.<br />
dr3: Controls the key.<br />
Sy1, Sy2, SLo: Controls the output level.<br />
Sy3: Controls the tonal character.<br />
32
About the Pre Effect and the Loop Effect<br />
Loop Effects<br />
When using a loop effect, it is particularly useful to assign a<br />
loop effect parameter to the control pedal.<br />
Vol: VOLUME<br />
This effect lets you use the control pedal to control the<br />
volume.<br />
If you start resampling with this effect selected, the output<br />
whose volume is controlled by this effect will be recorded on<br />
the currently selected loop. You can also use this to combine<br />
the outputs of the two loops into a single loop.<br />
• EDIT knob: Specifies the sound(s) whose volume will be<br />
controlled.<br />
Cur: The volume of the loop that’s currently selected will<br />
be controlled.<br />
L1.2: The volume of Loop 1 and Loop 2 will be controlled.<br />
ALL: The volume of the input sound, Loop 1, and Loop 2<br />
will be controlled.<br />
• Control pedal: Controls the volume of the sound(s)<br />
specified by the EDIT knob.<br />
FAd: X-FADE<br />
This effect uses the control pedal to control the mix balance.<br />
If you execute resampling with this effect selected, the mix<br />
output controlled by the Loop Effect will be recorded into<br />
the currently selected loop.<br />
• EDIT knob: Specifies the sounds whose mix balance will<br />
be controlled.<br />
In.L: The pedal will control the mix balance between the<br />
input and the loop that’s currently selected.<br />
L1.2: The pedal will control the mix balance between Loop<br />
1 and Loop 2.<br />
• Control pedal: Controls the mix balance specified by the<br />
EDIT knob.<br />
rEV: REVERSE<br />
This effect reverses the playback. Advancing the control<br />
pedal will increase the mix amount of reverse playback. This<br />
is particularly effective when used on audio that contains<br />
continuous change, such as a guitar solo or vocal.<br />
• EDIT knob: Selects what will happen when you switch<br />
between forward and reverse playback.<br />
FAd: Crossfade between forward playback and reverse<br />
playback.<br />
ALt: Switch alternately between forward playback and<br />
reverse playback.<br />
• Control pedal: Switches between forward playback and<br />
reverse playback.<br />
LIL: LOOP IN LOOP<br />
When you advance the control pedal, this effect instantly<br />
creates an even shorter phrase from the phrase that’s<br />
currently playing. By controlling the length of the phrase,<br />
you can also produce roll-like effects.<br />
• EDIT knob: Specifies the time signature used when you<br />
advance the control pedal while a phrase is playing back.<br />
33
VOX <strong>Dynamic</strong> <strong>Looper</strong> Owner's <strong>manual</strong><br />
34<br />
If you choose bAr, the previously specified time signature<br />
and tempo will be used. With other settings, the tempo<br />
will be used.<br />
bAr: 1 measure<br />
1-8: (eighth notes)<br />
1-2: (two beats = half note) 1-12: 3 (eighth note triplets)<br />
3-8: (one and a half beats) 1-16: (16th notes)<br />
1-3: 3 (half note triplets) 1-24: 3 (16th note triplets)<br />
1-4: (1 beat = quarter note) 1-32: (32nd notes)<br />
3-16: (dotted eighth notes) 1-64: (64th notes)<br />
1-6: 3 (quarter note triplets)<br />
• Control pedal: Plays back a short phrase in synchronization<br />
with the tempo. As you advance the pedal, the length of the<br />
phrase will again be reduced by 1/2.<br />
Ptc: PITCH<br />
This is a pitch shifter that uses the control pedal to control<br />
the pitch.<br />
• EDIT knob: Specifies the range over which the pitch can<br />
be controlled.<br />
u57: As you advance the pedal, the pitch will change from<br />
the original pitch → 5 semitones up → 7 semitones up.<br />
u12: As you advance the pedal, the pitch will change from<br />
the original pitch → 1 semitone up → 2 semitones up.<br />
u13: As you advance the pedal, the pitch will change from<br />
the original pitch → 1 semitone up → 3 semitones up.<br />
u35: As you advance the pedal, the pitch will change from<br />
the original pitch → 3 semitones up → 5 semitones up.<br />
u47: As you advance the pedal, the pitch will change from<br />
the original pitch → 4 semitones up → 7 semitones up.<br />
u24: As you advance the pedal, the pitch will change from<br />
the original pitch → 2 semitones up → 4 semitones up.<br />
u5t: As you advance the pedal, the pitch will change from<br />
the original pitch → 5 semitones up → 10 semitones up.<br />
ubn: As you advance the pedal, the pitch will rise<br />
smoothly by a maximum of one octave.<br />
uch: As you advance the pedal, the pitch will rise in<br />
semitone steps by a maximum of one octave.<br />
d57: As you advance the pedal, the pitch will change from<br />
the original pitch → 5 semitones down → 7 semitones down.<br />
d12: As you advance the pedal, the pitch will change from<br />
the original pitch →1 semitone down → 2 semitones down.<br />
d35: As you advance the pedal, the pitch will change from<br />
the original pitch → 3 semitones down → 5 semitones down.<br />
d47: As you advance the pedal, the pitch will change from<br />
the original pitch → 4 semitones down → 7 semitones down.<br />
d24: As you advance the pedal, the pitch will change from the<br />
original pitch → 2 semitones down → 4 semitones down.<br />
dbn: As you advance the pedal, the pitch will fall<br />
smoothly by a maximum of one octave.<br />
dch: As you advance the pedal, the pitch will fall in<br />
semitone steps by a maximum of one octave.<br />
• Control pedal: Controls the pitch of the loop.
About the Pre Effect and the Loop Effect<br />
SPd: SPEED<br />
This effect lets you use the control pedal to change the loop<br />
playback speed.<br />
• EDIT knob: Specifies how the playback speed will change<br />
when you operate the control pedal.<br />
SL1: When you advance the pedal, the playback will slow<br />
down. The phrase’s pitch will not change.<br />
SL2: When you advance the pedal, the playback will slow<br />
down. The phrase’s pitch will change in proportion to the<br />
playback speed.<br />
FA1: When you advance the pedal, the playback will<br />
speed up. The phrase’s pitch will not change.<br />
FA2: When you advance the pedal, the playback will<br />
speed up. The phrase’s pitch will change in proportion to<br />
the playback speed.<br />
SF1: The playback will speed up when you advance the<br />
pedal beyond the mid-point of its operating range, and will<br />
slow down when you return the pedal toward yourself<br />
from the mid-point. The phrase’s pitch will not change.<br />
SF2: The playback will speed up when you advance the<br />
pedal beyond the mid-point of its operating range, and<br />
will slow down when you return the pedal toward<br />
yourself from the mid-point. The phrase’s pitch will<br />
change in proportion to the playback speed.<br />
• Control pedal: Controls the playback speed of the<br />
recorded loop. Depending on the setting of the EDIT<br />
knob, the pitch will change together with the playback<br />
speed. The result is similar to changing the rotational<br />
speed of a record.<br />
Scr: SCRUB<br />
This effect divides the loop-recorded phrase into grains<br />
(short fragments of sound), and lets you use the control<br />
pedal to freely change the playback position; i.e., to “scrub”<br />
through the phrase. This is particularly effective when used<br />
on guitar solos or arpeggios.<br />
• EDIT knob: Adjusts the length of the grains (short<br />
fragments of sound).<br />
• Control pedal: Controls the playback position within the<br />
loop.<br />
Starting from the pedal in the fully-returned position,<br />
advancing the pedal will scrub through one cycle of the loop.<br />
Advancing the pedal will play forward, and returning the<br />
pedal will play backward. The speed at which you operate<br />
the pedal will control the playback speed.<br />
When you’re not operating the pedal, playback will occur<br />
slowly.<br />
Stt: STUTTER<br />
This effect lets you use the control pedal to control the duty<br />
cycle, allowing you to create rhythmical loops. It is effective<br />
when used on sounds that have a stable loudness, such as<br />
sound processed by compression or distortion. The content<br />
of the effect is the same as the Pre Effect “STUTTER.”<br />
))<br />
p.31 “Stt: STUTTER”<br />
35
VOX <strong>Dynamic</strong> <strong>Looper</strong> Owner's <strong>manual</strong><br />
36<br />
Πod: MODULATION<br />
This effect lets you use the control pedal to vary the sound<br />
from a subtle chorus effect through deep flanging.<br />
• EDIT knob: Specifies the LFO rate. The LFO will<br />
synchronize with the tempo.<br />
8-1: x8 (8 measures) 3-16: (dotted eighth notes)<br />
4-1: x4 (4 measures) 1-6: 3 (quarter note triplets)<br />
2-1: x2 (2 measures) 1-8: (eighth notes)<br />
1-1: (1 measure = whole note) 1-12: 3 (eighth note triplets)<br />
3-4: . (three beats = dotted half note) 1-16: (16th notes)<br />
1-2: (two beats = half note) 1-24: 3 (16th note triplets)<br />
3-8: (one and a half beats) 1-32: (32nd notes)<br />
1-3: 3 (half note triplets) 1-64: (64th notes)<br />
1-4: (1 beat = quarter note)<br />
• Control pedal: Controls the depth of the effect. Advancing<br />
the pedal (increasing the value) produces a flanger effect;<br />
returning the pedal (decreasing the value) produces a<br />
chorus effect.<br />
FLt: FILTER<br />
This is a filter effect that lets you use the control pedal to<br />
control the cutoff frequency.<br />
• EDIT knob: Selects the filter type.<br />
HPF: High pass filter<br />
bPF: Band pass filter<br />
LP1: Low pass filter 1<br />
LP2: Low pass filter 2 (a steeper low pass filter)<br />
• LOOP FX button + EDIT knob: Adjusts the resonance.<br />
• Control pedal: Controls the filter’s cutoff frequency.<br />
dLy: DELAY<br />
This is a tempo-synchronized delay. Advancing the control<br />
pedal to increase the feedback will produce oscillation as can<br />
occur on an analog delay unit.<br />
• EDIT knob: Switches the delay time. Settings other than<br />
short delay will synchronize to the tempo.<br />
Sho: short delay<br />
1-6: 3 (quarter note triplets)<br />
1-64: (64th notes) 3-16: (dotted eighth notes)<br />
1-32: (32nd notes) 1-4: (1 beat = quarter note)<br />
1-24: 3 (16th note triplets) 1-3: 3 (half note triplets)<br />
1-16: (16th notes) 3-8: (one and a half beats)<br />
1-12: 3 (eighth note triplets) 1-2: (two beats = half note)<br />
1-8: (eighth notes)<br />
• Control pedal: Controls the feedback amount and the<br />
overall volume balance.
About the Pre Effect and the Loop Effect<br />
Editing a program<br />
Selecting a program<br />
1. Hold down the WRITE button for approximately two<br />
seconds to select either Preset Programs or User Programs.<br />
The program/value display will indicate the program<br />
number.<br />
P01–P50: Preset programs.<br />
U01–U50: User programs.<br />
If the display shows anything other than a program<br />
number, or if it is blinking, press the CANCEL button. The<br />
program number will appear.<br />
2. Use the PROGRAM UP pedal to select a program.<br />
If you hold down the PROGRAM UP pedal and press the<br />
TRIGGER/TAP pedal, the program number will<br />
decrement in steps of 1 (PROGRAM DOWN).<br />
Editing the effects<br />
The Pre Effect and the Loop Effect each provide a choice of<br />
eleven effect types. You can choose one of these types for<br />
each of the two effects.<br />
Each effect also allows you to edit one or two parameters.<br />
The parameters that can be edited will differ depending on<br />
the effect you’ve selected.<br />
The edited Pre Effect and Loop Effect settings can be saved<br />
as a program.<br />
1. Turn the Pre Effect section’s effect selector to select the<br />
desired Pre Effect.<br />
Even if the Pre Effect is turned off, it will turn on when<br />
you turn the Pre Effect selector.<br />
The PRE FX button will blink while you’re editing the Pre<br />
Effect.<br />
2. Turn the EDIT knob to edit the Pre Effect’s parameters.<br />
Depending on the effect you’ve selected, there may be up<br />
to two editable parameters. To edit the second parameter,<br />
hold down the PRE FX button and turn the EDIT knob.<br />
))<br />
p.29 “Pre Effects”<br />
Original parameter value indication<br />
You can verify the parameter value that’s saved in the<br />
Preset Program or User Program (i.e., the “original value”).<br />
As you turn the knob to edit the parameter value, the<br />
decimal point in the lower right of the program/value<br />
display will light for an instant when the edited value<br />
matches the original value.<br />
This is useful when you’ve found a program that you like,<br />
and want to know what its settings are.<br />
3. Turn the Loop Effect section’s effect selector to select the<br />
desired Loop Effect.<br />
Even if the Loop Effect is turned off, it will turn on when<br />
you turn the Loop Effect selector.<br />
The LOOP FX button will blink while you’re editing the<br />
Loop Effect.<br />
4. Turn the EDIT knob to edit the Loop Effect’s parameters.<br />
Depending on the effect you’ve selected, there may be up<br />
to two editable parameters. To edit the second parameter,<br />
hold down the LOOP FX button and turn the EDIT knob.<br />
))<br />
p.33 “Loop Effects”<br />
37
VOX <strong>Dynamic</strong> <strong>Looper</strong> Owner's <strong>manual</strong><br />
Saving a program<br />
The PRE FX TARGET setting (the choice of input to which<br />
the Pre Effect will apply), the Pre Effect that modifies the<br />
sound of your guitar, the Loop Effect that modifies the loop<br />
phrase(s) being played back, and the control pedal<br />
assignment are saved together as a program.<br />
Note: When you write a program, the <strong>Dynamic</strong> <strong>Looper</strong><br />
will be in the same state as immediately after you selected<br />
the writing-destination program. If you wrote the<br />
program while using the control pedal to control the Loop<br />
Effect, the Loop Effect will be temporarily disabled.<br />
If you’ve edited the contents of a program, and then<br />
selected another program or turned off the power before<br />
saving the modified program, the settings that you<br />
edited will return to their original state. If you want to<br />
keep the changes that you made, you must save the<br />
program as follows.<br />
1. Press the WRITE button.<br />
The indication in the program/value display will blink. If<br />
you were editing a preset program, a user program<br />
number will appear.<br />
2. Use the EDIT knob to specify the writing-destination<br />
user program.<br />
Your program will be saved by overwriting the<br />
destination program that you specified. Take care not to<br />
overwrite an important program that you want to keep.<br />
It’s not possible to save your program to a preset program.<br />
3. Press the WRITE button once again.<br />
Your new program will overwrite the user program you<br />
specified in step 2, and the program/value display will<br />
change back from blinking to steadily lit.<br />
38
Control pedal settings<br />
Control pedal settings<br />
You can use the control pedal to control the parameters of<br />
the Pre Effect or Loop Effect, or to control the volume.<br />
Assigning a function to the control<br />
pedal<br />
The pedal LED located to the upper left of the pedal<br />
indicates the function that can currently be controlled by the<br />
pedal.<br />
Lit red: The pedal can control a Pre Effect parameter.<br />
Unlit: A Loop Effect parameter is assigned but the Loop Effect<br />
is not operating. In this state, moving the pedal will activate<br />
the Loop Effect, causing the pedal LED to light-up green.<br />
Lit green: This indicates that the pedal is controlling a Loop<br />
Effect parameter.<br />
Lit orange: The LED will light-up orange if the effect that’s<br />
being controlled is turned off; you can use the pedal to<br />
control the input volume.<br />
If the “PRE FX TARGET” setting is INPUT (green) or MIC<br />
(red), the pedal will control the volume of the INPUT jack.<br />
If the “PRE FX TARGET” setting is INPUT&MIC (orange),<br />
the pedal will control the volume of the INPUT jack and the<br />
MIC jack.<br />
To switch between assigning the pedal to the Pre Effect or<br />
to the Loop Effect, press down strongly on the toe end of<br />
the pedal.<br />
The control pedal setting can be saved individually for each<br />
program.<br />
Calibrating the control pedal<br />
sensitivity<br />
If the effect or volume does not reach the maximum level<br />
when you fully advance the control pedal, or does not reach<br />
the minimum level when you fully return the control pedal,<br />
proceed as follows to calibrate the control pedal so that it<br />
operates optimally.<br />
When performing the calibration, you must use your foot to<br />
operate the control pedal. If you use your hand to move the<br />
pedal, the calibration might not occur correctly.<br />
1. Turn the power off.<br />
2. While holding down the CANCEL button and the LOOP<br />
FX button, turn the power on.<br />
3. When the program/value display indicates “PdL,”<br />
release the buttons.<br />
4. Advance the control pedal all the way, as if you were<br />
switching the function assignment.<br />
This position will be assigned as the weight at which the<br />
function assigned to the control pedal will be switched on/<br />
off.<br />
39
VOX <strong>Dynamic</strong> <strong>Looper</strong> Owner's <strong>manual</strong><br />
5. Use your foot to slowly return the control pedal toward<br />
yourself; when the pedal stops, take your foot off the<br />
pedal.<br />
6. Gently advance the control pedal, and take your foot off<br />
the pedal when it stops.<br />
If you decide to cancel the calibration operation, press the<br />
CANCEL button.<br />
7. Press the WRITE button.<br />
The program/value display will indicate “CPL” for one<br />
second, and then the program number will appear.<br />
If the calibration did not occur correctly, the program/<br />
value display will indicate “Err.” In this case, try the<br />
procedure again from step 4.<br />
If you are unable to perform the calibration successfully<br />
after several attempts, it may be that the <strong>Dynamic</strong> <strong>Looper</strong><br />
has malfunctioned. Please contact your nearby VOX<br />
dealer.<br />
Restoring the factory settings<br />
Here’s how to restore the <strong>Dynamic</strong> <strong>Looper</strong> to its factory-set<br />
state.<br />
Note: This operation will initialize any programs that you’ve<br />
saved, returning all of them to the factory-set programs.<br />
1. Turn the power off.<br />
2. While holding down the CANCEL button and the PRE<br />
FX TARGET button, turn the power on.<br />
3. When the program/value display blinks “Int,” release<br />
the buttons.<br />
If you decide not to execute the factory reset, press the<br />
CANCEL button.<br />
4. Press the WRITE button.<br />
When the programs have been initialized successfully, the<br />
program/value display will indicate “CP,” and then the<br />
<strong>Dynamic</strong> <strong>Looper</strong> will start up in the normal way.<br />
Never turn off the power while initialization is being<br />
executed.<br />
40
Auto Power-Off function<br />
Auto Power-Off function<br />
The <strong>Dynamic</strong> <strong>Looper</strong> has an Auto Power-Off function that<br />
automatically turns off the power when four hours have<br />
elapsed since the most recent or user input.<br />
Note: Even if an there hasn’t been any user input, the Auto<br />
Power-Off function will not engage if there is audio input<br />
present at the input jack.<br />
Note: When the <strong>Dynamic</strong> <strong>Looper</strong> is shipped from the<br />
factory, the Auto Power-Off function is enabled.<br />
the <strong>Dynamic</strong> <strong>Looper</strong> will start up in the normal way.<br />
Note: The enabled/disabled state of the Auto Power-Off<br />
function is remembered even when you turn off the<br />
power.<br />
Disabling the Auto Power-Off<br />
function<br />
Here’s how to disable the Auto Power-Off function.<br />
1. Turn the <strong>Dynamic</strong> <strong>Looper</strong>’s power off.<br />
2. While holding down the STOP MODE button and the<br />
CANCEL button, turn the power on.<br />
The program/value display will indicate “diS,” and then<br />
the <strong>Dynamic</strong> <strong>Looper</strong> will start up in the normal way.<br />
Enabling the Auto Power-Off function<br />
Here’s how to re-enable the Auto Power-Off function after<br />
you’ve disabled it.<br />
1. Turn the <strong>Dynamic</strong> <strong>Looper</strong>’s power off.<br />
2. While holding down the STOP MODE button and the<br />
WRITE button, turn the power on.<br />
The program/value display will indicate “EnA,” and then<br />
41
VOX <strong>Dynamic</strong> <strong>Looper</strong> Owner's <strong>manual</strong><br />
Troubleshooting<br />
Power won’t turn on<br />
• Is the included AC adapter connected to the rear panel<br />
DC9V jack?<br />
• Is the AC adapter connected to an AC outlet?<br />
• Could the AC outlet be faulty?<br />
• Could the AC adapter be malfunctioning?<br />
• Is the STANDBY switch in the ON position?<br />
No sound<br />
• Is your instrument correctly connected to the <strong>Dynamic</strong><br />
<strong>Looper</strong>’s INPUT jack?<br />
• Could the cable be broken?<br />
• Could the volume be turned down on the instrument<br />
that’s connected to the INPUT jack?<br />
• If you’re using a mic, is the MIC TRIM knob set correctly?<br />
• Could the volume be assigned to the foot control pedal,<br />
and the pedal be in the fully returned position?<br />
Effect won’t apply<br />
• Is the effect turned on?<br />
• The Loop Effect will apply only if something is recorded<br />
on Loop 1 or Loop 2.<br />
• Could the control pedal be assigned to volume?<br />
• Check the Loop Effect settings.<br />
Something is wrong with the sound<br />
• Check the Loop Effect settings.<br />
Operating the pedals, buttons, selectors, or knobs<br />
does not change the sound<br />
• Could the effect be turned off?<br />
• Could the Key Lock function be enabled?<br />
Power turns off unexpectedly<br />
• The <strong>Dynamic</strong> <strong>Looper</strong> has an Auto Power-Off function that<br />
automatically turns off the power when four hours have<br />
elapsed since the most recent user input. If you want to<br />
disable the Auto Power-Off function, please refer to<br />
“Disabling the Auto Power-Off function” on page 41.<br />
Loop won’t play back<br />
• Have you selected a loop that contains a recorded phrase?<br />
42
Block diagram<br />
Block diagram<br />
Edit<br />
Edit<br />
INPUT (Guitar)<br />
MIC IN<br />
MIC Trim<br />
Pre FX<br />
*1<br />
*1<br />
Loop1<br />
Loop FX<br />
*1<br />
Master<br />
Limiter<br />
OUTPUT<br />
Loop2<br />
*1<br />
*1<br />
Pre FX TARGET<br />
Metronome<br />
*1<br />
Control pedal<br />
*1: The control pedal can control this parameter if it’s assigned to the pedal.<br />
43
VOX <strong>Dynamic</strong> <strong>Looper</strong> Owner's <strong>manual</strong><br />
Main specifications<br />
Effects<br />
Pre Effect: 11 categories (27 variations)<br />
Loop Effect: 11 categories<br />
Master limiter: 2 types<br />
Stop modes: 3 types<br />
Number of programs: 100 (50 preset, 50 user)<br />
Recording time<br />
Maximum recording time: total of 90 seconds<br />
Number of loops: 2<br />
Audio inputs<br />
INPUT jack (monaural)<br />
MIC IN jack (balanced XLR, phantom power not<br />
supported)<br />
MIC IN TRIM knob (for mic)<br />
Maximum input level<br />
+7 dBu (typ.)<br />
Power supply<br />
AC adapter (DC 9V jack )<br />
STANDBY switch<br />
Current consumption<br />
140 mA<br />
Dimensions (W x D x H)<br />
264 x 245 x 76 (mm)/10.39" x 9.65" x 2.99"<br />
Weight<br />
2.2 kg/4.85 lbs.<br />
Included items<br />
AC adapter, owner’s <strong>manual</strong>, program list<br />
44<br />
Audio output<br />
OUTPUT jack (monaural)<br />
Signal processing<br />
A/D conversion: 24-bit<br />
D/A conversion: 24-bit<br />
Sampling frequency<br />
44.1 kHz<br />
<strong>Dynamic</strong> range<br />
94 dB or better<br />
* 0 dBu = 0.775V RMS<br />
* Specifications and appearance are subject to change<br />
without notice for improvement.
<strong>Dynamic</strong> <strong>Looper</strong> Manuel d’utilisation
<strong>Dynamic</strong> <strong>Looper</strong> Manuel d’utilisation<br />
Précautions<br />
Emplacement<br />
L’utilisation de cet instrument dans les endroits suivants peut en entraîner<br />
le mauvais fonctionnement.<br />
• En plein soleil<br />
• Endroits très chauds ou très humides<br />
• Endroits sales ou fort poussiéreux<br />
• Endroits soumis à de fortes vibrations<br />
• A proximité de champs magnétiques<br />
Alimentation<br />
Branchez l’adaptateur secteur mentionné à une prise secteur de tension appropriée.<br />
Evitez de brancher l’adaptateur à une prise de courant dont la tension<br />
ne correspond pas à celle pour laquelle l’appareil est conçu.<br />
Interférences avec d’autres appareils électriques<br />
Les postes de radio et de télévision situés à proximité peuvent par conséquent<br />
souffrir d’interférences à la réception. Veuillez dès lors faire fonctionner cet<br />
appareil à une distance raisonnable de postes de radio et de télévision.<br />
Maniement<br />
Pour éviter de les endommager, manipulez les commandes et les boutons de<br />
cet instrument avec soin.<br />
Entretien<br />
Lorsque l’instrument se salit, nettoyez-le avec un chiffon propre et sec. Ne<br />
vous servez pas d’agents de nettoyage liquides tels que du benzène ou du<br />
diluant, voire des produits inflammables.<br />
Conservez ce manuel<br />
Après avoir lu ce manuel, veuillez le conserver soigneusement pour toute<br />
référence ultérieure.<br />
Evitez toute intrusion d’objets ou de liquide<br />
Ne placez jamais de récipient contenant du liquide près de l’instrument. Si<br />
le liquide se renverse ou coule, il risque de provoquer des dommages, un<br />
court-circuit ou une électrocution.<br />
Veillez à ne pas laisser tomber des objets métalliques dans le boîtier (trombones,<br />
par ex.). Si cela se produit, débranchez l’alimentation de la prise de<br />
courant et contactez votre revendeur VOX le plus proche ou la surface où<br />
vous avez acheté l’instrument.<br />
Note concernant les dispositions (Seulement EU)<br />
Quand un symbole avec une poubelle barrée d’une croix apparait<br />
sur le produit, le mode d’emploi, les piles ou le pack de piles, cela<br />
signifie que ce produit, manuel ou piles doit être déposé chez un<br />
représentant compétent, et non pas dans une poubelle ou toute<br />
autre déchetterie conventionnelle.<br />
Disposer de cette manière, de prévenir les dommages pour la santé<br />
humaine et les dommages potentiels pour l’environnement. La<br />
bonne méthode d’élimination dépendra des lois et règlements applicables<br />
dans votre localité, s’il vous plaît, contactez votre organisme administratif<br />
pour plus de détails. Si la pile contient des métaux lourds au-delà du seuil<br />
réglementé, un symbole chimique est affiché en dessous du symbole de<br />
la poubelle barrée d’une croix sur la pile ou le pack de piles.<br />
REMARQUE IMPORTANTE POUR LES CLIENTS<br />
Ce produit a été fabriqué suivant des spécifications sévères et des besoins<br />
en tension applicables dans le pays où ce produit doit être utilisé. Si vous<br />
avez acheté ce produit via l’internet, par vente par correspondance ou/et<br />
vente par téléphone, vous devez vérifier que ce produit est bien utilisable<br />
dans le pays où vous résidez.<br />
ATTENTION: L’utilisation de ce produit dans un pays autre que celui<br />
pour lequel il a été conçu peut être dangereuse et annulera la garantie<br />
du fabricant ou du distributeur. Conservez bien votre récépissé qui est la<br />
preuve de votre achat, faute de quoi votre produit ne risque de ne plus<br />
être couvert par la garantie du fabricant ou du distributeur.<br />
* Tous les noms de produits et de sociétés sont des marques commerciales<br />
ou déposées de leur détenteur respectif.<br />
46
<br />
47
<strong>Dynamic</strong> <strong>Looper</strong> Manuel d’utilisation<br />
Sommaire<br />
Introduction...................................... 50<br />
Caractéristiques principales.....................50<br />
Structure du <strong>Dynamic</strong> <strong>Looper</strong>..................51<br />
Panneaux.......................................... 52<br />
Panneau supérieur....................................52<br />
Panneau arrière.........................................57<br />
Connexion de l’instrument et mise<br />
sous tension...................................... 58<br />
Connexions................................................59<br />
Mise sous tension......................................59<br />
Mise hors tension......................................59<br />
Jouer avec des programmes............ 60<br />
Ajouter un effet au signal de guitare ou du<br />
micro...........................................................60<br />
Créer des phrases............................. 61<br />
Enregistrement de la boucle 1..................61<br />
Utiliser le métronome comme guide durant<br />
l’enregistrement .................................................................... 62<br />
Créer des phrases d’une longueur exacte<br />
(Loop Quantize)..................................................................... 62<br />
Lancer l’enregistrement en jouant (Auto Rec) ................. 63<br />
Enregistrement de la boucle 2..................63<br />
Durée d’enregistrement............................64<br />
Après l’enregistrement d’une boucle......65<br />
Ajout d’un enregistrement à la phrase.............................. 65<br />
Traiter une phrase reproduite en boucle<br />
avec un effet de boucle......................................................... 65<br />
Rééchantillonner une phrase avec effet de boucle......... 65<br />
Ajout d’un nouvel enregistrement à<br />
une phrase........................................ 65<br />
Annuler l’ajout...........................................65<br />
Rétablir l’ajout...........................................66<br />
48
Sommaire<br />
Traiter une phrase enregistrée avec<br />
un effet de boucle............................ 66<br />
Fonction ‘Key Lock’....................................66<br />
Mode d’arrêt de la boucle................ 67<br />
Rééchantillonnage (Resampling).... 67<br />
Traiter les phrases enregistrées avec<br />
le limiteur.......................................... 68<br />
Effacer la phrase d’une boucle........ 69<br />
Etat de la boucle (Loop Status)........ 70<br />
Durant l’enregistrement ou l’ajout..........70<br />
Durant le rééchantillonnage....................70<br />
Pré-effets et effets de boucle.......... 71<br />
Paramètres d’effet.....................................71<br />
Pré-effets (PRE-FX)................................................................. 71<br />
Effets de boucle ..................................................................... 75<br />
Editer un programme................................79<br />
Choisir un programme.......................................................... 79<br />
Editer les effets....................................................................... 79<br />
Sauvegarder un programme............................................... 80<br />
Réglages de la pédale d’expression.81<br />
Assigner une fonction à la pédale<br />
d’expression...............................................81<br />
Calibrer la pédale d’expression................81<br />
Rétablir les réglages d’usine........... 82<br />
Coupure automatique d’alimentation<br />
........................................................... 83<br />
Désactiver la coupure automatique<br />
d’alimentation...........................................83<br />
Activer la coupure automatique<br />
d’alimentation...........................................83<br />
Dépannage....................................... 84<br />
Schéma de principe.......................... 85<br />
Fiche technique................................ 86<br />
49
<strong>Dynamic</strong> <strong>Looper</strong> Manuel d’utilisation<br />
Introduction<br />
Merci d’avoir choisi le <strong>Dynamic</strong> <strong>Looper</strong> de VOX.<br />
Afin de profiter au mieux de ce produit et d’éviter tout<br />
problème, veuillez lire attentivement ce mode d’emploi et<br />
suivre chacune de ses consignes. Après l’avoir lu, veuillez le<br />
conserver soigneusement pour toute référence ultérieure.<br />
Caractéristiques principales<br />
• Deux boucles indépendantes vous permettent d’enregistrer<br />
des phrases distinctes. Vous disposez d’une durée<br />
d’enregistrement totale de 90 secondes pour les deux boucles.<br />
Vous pouvez utiliser les pédales commutateurs du <strong>Dynamic</strong><br />
<strong>Looper</strong> pour reproduire ou traiter indépendamment les<br />
phrases enregistrées.<br />
• La fonction “Loop Quantize” vous permet de créer des<br />
boucles d’une longueur précise.<br />
• Deux processeurs intégrés: le pré-effet propose divers effets<br />
renforçant l’expressivité de votre jeu tandis que le l’effet de<br />
boucle permet des transformations parfois radicales de la<br />
phrase enregistrée.<br />
• Vous pouvez utiliser la pédale d’expression pour piloter le<br />
pré-effet et l’effet de boucle. Cette pédale peut même être<br />
utilisée pour piloter le pré-effet durant l’enregistrement.<br />
Cette pédale permet également de modifier la phrase<br />
enregistrée en temps réel en pilotant l’effet de boucle.<br />
• Vous pouvez ajouter de nouvelles parties à une phrase<br />
enregistrée en boucle. Les fonctions “Undo/Redo”<br />
permettent d’annuler/de rétablir un ajout.<br />
• L’entrée de micro vous permet d’utiliser le <strong>Dynamic</strong> <strong>Looper</strong><br />
avec d’autres sources que la guitare, comme le chant ou<br />
des instruments de percussion. Il est également possible de<br />
traiter le signal d’entrée du micro avec le pré-effet.<br />
• Quand vous avez traité une phrase avec l’effet de boucle,<br />
vous pouvez la réenregistrer avec la fonction “Resampling”.<br />
• De plus, le signal de sortie peut être traité avec un limiteur<br />
global. Cela permet de réduire les disparités de volume<br />
pouvant se produire entre les boucles après le premier<br />
enregistrement et après de nombreux ajouts.<br />
50
Structure du <strong>Dynamic</strong> <strong>Looper</strong><br />
Le <strong>Dynamic</strong> <strong>Looper</strong> est constitué des blocs suivants (vous trouverez un schéma de principe détaillé à la page 85).<br />
Introduction<br />
Le signal d’entrée INPUT ou MIC IN est traité par le pré-effet (PRE FX) puis enregistré sous forme de boucle (Loop) 1 ou boucle 2.<br />
Les pré-effets traitent le signal avant l’enregistrement de la boucle.<br />
Le processeur LOOP FX (effet de boucle) traite le signal de la boucle enregistrée durant la reproduction. En utilisant la pédale pour<br />
piloter divers paramètres d’effet, vous pouvez modifier la phrase reproduite.<br />
Flux du signal<br />
Enregistrement de boucle<br />
INPUT (Guitare)<br />
MIC IN<br />
MIC TRIM<br />
Programme<br />
PRE FX<br />
TARGET<br />
Pédale d’<br />
expression<br />
PRE FX<br />
Reproduction des boucles<br />
Boucle<br />
Loop1<br />
Loop2<br />
Loop FX<br />
Limiteur<br />
global<br />
Métronome<br />
Sortie<br />
Pre FX TARGET<br />
Le bouton PRE FX TARGET détermine si l’effet traite le signal<br />
de la prise INPUT, le signal de la prise MIC IN ou ces deux<br />
signaux.<br />
Pre FX<br />
Le pré-effet traite le signal de la prise INPUT ou de la prise<br />
MIC IN.<br />
Ce processeur vous laisse le choix parmi onze types d’effet.<br />
Pour chaque effet, vous pouvez régler un ou deux paramètres.<br />
Les paramètres réglables dépendent de l’effet sélectionné. Vous<br />
pouvez utiliser la pédale d’expression pour changer le réglage<br />
des paramètres d’effet et modifier la phrase jouée en temps réel.<br />
Boucle<br />
Chaque boucle enregistre le signal du pré-effet.<br />
Il y a deux boucles: la boucle 1 et la boucle 2. Vous pouvez<br />
enregistrer des phrases dont la durée totale pour les deux<br />
boucles peut atteindre 90 secondes.<br />
51
<strong>Dynamic</strong> <strong>Looper</strong> Manuel d’utilisation<br />
Loop FX<br />
Le processeur LOOP FX traite les boucles enregistrées. Cet effet<br />
de boucle traite les phrases durant la reproduction.<br />
Ce processeur vous laisse le choix parmi onze types d’effet.<br />
Chaque effet dispose de deux paramètres réglables. Les<br />
paramètres réglables dépendent de l’effet sélectionné. Vous<br />
pouvez utiliser la pédale d’expression pour modifier les effets<br />
appliqués à la phrase durant la reproduction.<br />
Pédale d’expression<br />
Vous pouvez utiliser la pédale d’expression pour piloter le<br />
pré-effet ou l’effet de boucle. Cette pédale peut aussi servir de<br />
pédale de volume.<br />
Métronome<br />
Vous pouvez utiliser le métronome comme guide durant<br />
l’enregistrement d’une boucle.<br />
Quand vous activez le métronome, la fonction “Loop<br />
Quantize” est également activée. Cette fonction corrige<br />
automatiquement le timing de fin de boucle en fonction du<br />
tempo spécifié: cela vous permet de créer des phrases ayant<br />
exactement la longueur voulue.<br />
Limiteur global<br />
Vous pouvez traiter le signal de sortie des boucles avec un<br />
limiteur. Il réduit les disparités de volume entre les boucles ou<br />
entre le volume de l’enregistrement initial et le volume après<br />
les ajouts.<br />
Panneaux<br />
Panneau supérieur<br />
2 3<br />
7<br />
1<br />
8 4<br />
5<br />
6<br />
52
Panneaux<br />
1. Section de pilotage du programme/de<br />
boucle<br />
Cette section permet de piloter les fonctions de boucle comme<br />
l’enregistrement et la reproduction des boucles 1 et 2 ainsi que<br />
le réglage du tempo.<br />
e<br />
c<br />
a<br />
b<br />
d<br />
a. Témoins de la boucle en cours<br />
Ces témoins indiquent la boucle sélectionnée pour<br />
l’enregistrement ou la reproduction. Les pédales STOP et REC/<br />
PLAY/OVERDUB concernent la boucle sélectionnée.<br />
Pour sélectionner une boucle, appuyez simultanément sur les<br />
pédales STOP et PROGRAM UP. Chaque pression sélectionne<br />
alternativement la boucle 1 et la boucle 2.<br />
b. Témoins LOOP STATUS<br />
Ces témoins indiquent l’état des boucles 1 et 2.<br />
))<br />
p.70 “Etat de la boucle (Loop Status)”<br />
f<br />
g<br />
c. Pédale REC/PLAY/OVERDUB<br />
Cette pédale lance l’enregistrement, la reproduction, l’ajout ou<br />
le rééchantillonnage pour la boucle sélectionnée.<br />
Si aucune phrase n’est enregistrée pour la boucle sélectionnée,<br />
chaque pression sur la pédale sélectionne alternativement<br />
l’enregistrement → la reproduction → l’ajout.<br />
Si une phrase est enregistrée pour la boucle sélectionnée,<br />
chaque pression sur la pédale sélectionne alternativement la<br />
reproduction → l’ajout.<br />
Si le témoin RESAMPLING clignote, le rééchantillonnage<br />
démarre quand vous actionnez cette pédale.<br />
d. Témoin RESAMPLING<br />
Ce témoin indique le niveau du rééchantillonnage. Utilisez la<br />
pédale REC/PLAY/OVERDUB pour lancer ou arrêter le<br />
rééchantillonnage.<br />
))<br />
p.67 “Rééchantillonnage (Resampling)”<br />
e. Pédale STOP<br />
Cette pédale arrête l’enregistrement, la lecture, l’ajout ou le<br />
rééchantillonnage. Vous pouvez aussi utiliser cette pédale pour<br />
effacer une phrase enregistrée dans une boucle.<br />
Vous pouvez activer/couper le pré-effet en maintenant cette<br />
pédale et la pédale PROGRAM UP enfoncées simultanément<br />
durant environ 2 secondes.<br />
f. Pédale PROGRAM UP<br />
Utilisez cette pédale pour sélectionner un programme ou une<br />
boucle. Cette pédale permet aussi d’annuler et de rétablir un ajout.<br />
g. Pédale TRIGGER/TAP<br />
Cette pédale relance la reproduction de la boucle au début de la<br />
phrase.<br />
53
<strong>Dynamic</strong> <strong>Looper</strong> Manuel d’utilisation<br />
Vous pouvez aussi utiliser cette pédale pour entrer le tempo du<br />
métronome ou pour les effets à synchronisation BPM.<br />
Cette pédale permet aussi d’activer/de couper la fonction “Loop<br />
Quantize” qui ajuste la fin de la boucle en fonction du tempo<br />
quand vous cessez l’enregistrement. Cela vous permet d’obtenir<br />
une boucle d’une longueur parfaite.<br />
))<br />
p.62 “Créer des phrases d’une longueur exacte (Loop<br />
Quantize)”<br />
2. Section PRE FX<br />
Cette section permet de piloter le pré-effet. Le pré-effet traite le<br />
signal de la prise INPUT et de la prise MIC IN.<br />
Le signal traité par le pré-effet est déterminé par le bouton PRE<br />
FX TARGET.<br />
))<br />
p.56 “d. Bouton PRE FX TARGET”<br />
Le bouton s’allume en rouge quand l’effet est activé et clignote<br />
quand vous modifiez l’effet.<br />
Remarque: Le fait de tourner le sélecteur d’effet active<br />
également le pré-effet.<br />
Astuce: Vous pouvez activer/couper le pré-effet en maintenant<br />
les pédales STOP et PROGRAM UP enfoncées simultanément<br />
durant environ 2 secondes.<br />
3. Section LOOP FX<br />
Cette section permet de piloter l’effet de boucle. L’effet de<br />
boucle traite les phrase enregistrées pour les boucles 1 et 2.<br />
Vous pouvez utiliser cet effet pour changer la hauteur de la<br />
phrase (effet “PITCH”) ou y ajouter un signal lu à l’envers (effet<br />
“REVERSE”).<br />
Remarque: L’effet de boucle est disponible durant la<br />
reproduction d’une phrase enregistrée et traite la phrase<br />
reproduite. Il n’est pas appliqué durant l’enregistrement ou<br />
l’ajout.<br />
a<br />
b<br />
a. Sélecteur de pré-effet<br />
Ce sélecteur permet de choisir le type de pré-effet.<br />
a<br />
b<br />
54<br />
b. Bouton PRE FX<br />
Ce bouton active/coupe le pré-effet.<br />
a. Sélecteur d’effet de boucle<br />
Ce sélecteur permet de choisir le type d’effet de boucle. Le type<br />
d’effet sélectionné ici traite le signal.
Panneaux<br />
b. Bouton LOOP FX<br />
Ce bouton active/coupe l’effet de boucle.<br />
Le bouton s’allume en vert quand l’effet est activé et clignote<br />
quand vous modifiez l’effet.<br />
Remarque: Le fait de tourner le sélecteur d’effet active<br />
également l’effet de boucle.<br />
4. Section de la pédale d’expression<br />
Vous pouvez utiliser la pédale d’expression pour piloter le<br />
pré-effet ou l’effet de boucle. Cette pédale peut aussi servir de<br />
pédale de volume.<br />
a. Témoin de la pédale<br />
Ce témoin s’allume ou s’éteint selon<br />
l’état de la fonction assignée à la pédale<br />
d’expression.<br />
))<br />
p.81 “Réglages de la pédale<br />
d’expression”<br />
a<br />
5. Section METRONOME<br />
Cette section permet de régler le métronome et de choisir la<br />
métrique.<br />
a. Bouton METRONOME<br />
Ce bouton active/coupe le métronome.<br />
Quand vous appuyez sur ce bouton, il clignote et<br />
vous entendez le métronome. Il clignote selon le<br />
tempo entré avec la pédale TRIGGER/TAP.<br />
Pour régler le volume du métronome, maintenez ce a<br />
bouton enfoncé et actionnez la commande EDIT.<br />
Pour régler la métrique, maintenez ce bouton<br />
enfoncé environ 2 secondes puis actionnez la commande EDIT.<br />
))<br />
p.62 “Utiliser le métronome comme guide durant<br />
l’enregistrement”<br />
b. Pédale d’expression<br />
Cette commande pilote le paramètre<br />
d’effet qui lui est assigné ou le volume.<br />
Pour savoir comment assigner une<br />
fonction à la pédale, voyez “Réglages<br />
de la pédale d’expression” à la page 81.<br />
Pour savoir quels paramètres d’effet<br />
peuvent être pilotés, veuillez lire la<br />
section “Pré-effets et effets de boucle”<br />
à la page 71.<br />
b<br />
55
<strong>Dynamic</strong> <strong>Looper</strong> Manuel d’utilisation<br />
6. Section des réglages globaux<br />
Cette section permet d’effectuer des réglages globaux pour la<br />
fonction “Auto Rec”, de spécifier que ce qui se passe quand<br />
vous arrêtez une phrase, d’effectuer les réglages du limiteur<br />
global et de sélectionner le signal d’entrée traité par le pré-effet.<br />
7. Section EDIT/WRITE/écran<br />
a<br />
b<br />
56<br />
a b c d<br />
a. Bouton AUTO REC<br />
Ce bouton active/coupe la fonction “Auto Rec”.<br />
))<br />
p.63 “Lancer l’enregistrement en jouant (Auto Rec)”<br />
b. Bouton STOP MODE<br />
Ce bouton détermine comment la phrase s’arrête quand vous<br />
appuyez sur le bouton STOP.<br />
))<br />
p.67 “Mode d’arrêt de la boucle”<br />
c. Bouton MASTER LIMITER<br />
Ce bouton permet de régler le limiteur appliqué aux phrases<br />
enregistrées pour les boucles 1 et 2.<br />
d. Bouton PRE FX TARGET<br />
Ce bouton sélectionne le signal d’entrée traité par le pré-effet.<br />
))<br />
p.60 “Ajouter un effet au signal de guitare ou du micro”<br />
c<br />
a. Affichage du programme/de la valeur<br />
L’affichage indique généralement le numéro de programme.<br />
Quand vous modifiez un effet, l’affichage indique la valeur du<br />
paramètre.<br />
b. Commande EDIT<br />
Utilisez cette commande pour éditer des paramètres d’effet ou<br />
pour sélectionner une mémoire lors de la sauvegarde d’un<br />
programme.<br />
c. Bouton WRITE<br />
Appuyez sur ce bouton pour sauvegarder les réglages d’effet<br />
dans un programme.<br />
Quand l’affichage indique un numéro de programme, vous<br />
pouvez alterner entre les programmes utilisateur et les<br />
programmes d’usine (preset) en maintenant ce bouton enfoncé<br />
environ 2 secondes.<br />
d
Panneaux<br />
d. Bouton CANCEL<br />
Appuyez sur ce bouton pour annuler une opération (comme la<br />
sauvegarde d’un programme).<br />
Vous pouvez désactiver le fonctionnement des boutons,<br />
commandes et sélecteurs en maintenant ce bouton enfoncé<br />
durant environ 2 secondes (fonction “Key Lock”). Pour annuler<br />
la fonction “Key Lock”, maintenez à nouveau ce bouton<br />
enfoncé durant environ 2 secondes.<br />
En appuyant simultanément sur ce bouton et sur le bouton<br />
AUTO REC, vous pouvez faire défiler les numéros programmes<br />
par dizaines.<br />
8. Témoin PEAK<br />
Ce témoin s’allume quand le signal d’entrée<br />
INPUT ou MIC IN est trop fort. Si ce témoin<br />
s’allume, réglez le volume de votre guitare ou la<br />
commande MIC TRIM.<br />
Panneau arrière<br />
1. Crochet pour câble<br />
Enroulez le câble de l’adaptateur secteur autour de ce crochet<br />
pour éviter toute déconnexion accidentelle.<br />
2. Prise DC 9V<br />
Branchez l’adaptateur fourni à cette prise.<br />
57
<strong>Dynamic</strong> <strong>Looper</strong> Manuel d’utilisation<br />
3. Prise MIC IN<br />
Branchez ici un microphone dynamique disponible dans le<br />
commerce.<br />
Vous ne pouvez pas utiliser un micro à condensateur qui<br />
nécessite une alimentation fantôme.<br />
4. Commande MIC TRIM<br />
Cette commande règle le niveau d’entrée du micro.<br />
5. Commutateur STANDBY<br />
Cet interrupteur met l’appareil sous/hors tension.<br />
Connexion de l’instrument et<br />
mise sous tension<br />
Cette section explique comment brancher votre guitare et votre<br />
ampli au <strong>Dynamic</strong> <strong>Looper</strong> avant la mise sous tension.<br />
Réglez le volume de tous les appareils au minimum avant<br />
la mise sous tension.<br />
Micro<br />
Adaptateur secteur<br />
Guitare<br />
Ampli de guitare, console de<br />
mixage, enregistreur etc.<br />
6. Prise INPUT<br />
Branchez ici votre guitare.<br />
7. Prise OUTPUT<br />
Branchez votre ampli de guitare ou console de mixage ici. Le<br />
signal de sortie est mono.<br />
58
Connexion de l’instrument et mise sous tension<br />
Connexions<br />
1. Vérifiez que l’interrupteur STANDBY du <strong>Dynamic</strong> <strong>Looper</strong><br />
est en position “STANDBY”.<br />
2. Branchez votre ampli de guitare ou console de mixage à la<br />
prise OUTPUT.<br />
Remarque: Le signal de sortie du <strong>Dynamic</strong> <strong>Looper</strong> est mono.<br />
Ne branchez pas de casque à la prise OUTPUT. Cela risque<br />
d’endommager le casque.<br />
3. Utilisez un câble de guitare pour brancher la guitare à la<br />
prise INPUT. Vous pouvez aussi brancher un micro à la<br />
prise MIC IN.<br />
Selon l’emplacement du micro par rapport à l’ampli<br />
branché à la prise OUTPUT, un effet larsen (feedback) peut<br />
se produire. Si cet effet larsen se produit, prenez les<br />
mesures suivantes.<br />
• Pointez le micro dans une autre direction.<br />
• Eloignez le micro du haut-parleur.<br />
• Ajustez la commande MIC IN TRIM sur le panneau<br />
arrière.<br />
Il peut aussi y avoir un effet larsen quand vous ajoutez un<br />
effet au signal d’entrée du micro. Dans ce cas, prenez les<br />
mêmes mesures que celles décrites ci-dessus.<br />
Mise sous tension<br />
1. Vérifiez que le volume de l’ampli ou de la console de<br />
mixage est au minimum et réglez le commutateur<br />
STANDBY du <strong>Dynamic</strong> <strong>Looper</strong> en position “ON”.<br />
L’appareil est mis sous tension et l’affichage de programme/<br />
valeur affiche le numéro du programme sélectionné.<br />
2. Mettez l’ampli ou la console de mixage sous tension et<br />
réglez le volume.<br />
3. Jouez de la guitare et réglez son volume en évitant que le<br />
témoin PEAK ne s’allume.<br />
4. Chantez dans le micro et réglez la commande TRIM sur le<br />
panneau arrière de sorte à éviter que le témoin PEAK ne<br />
s’allume.<br />
Remarque: Le <strong>Dynamic</strong> <strong>Looper</strong> propose une fonction<br />
de coupure d’alimentation automatique. L’alimentation<br />
est automatiquement coupée si l’appareil reste inutilisé<br />
durant environ 4 heures (Fp.83 “Coupure automatique<br />
d’alimentation”).<br />
Mise hors tension<br />
1. Diminuez le volume de l’ampli de guitare ou de la console<br />
de mixage.<br />
2. Réglez le sélecteur STANDBY en position “STANDBY”.<br />
Si le micro et l’ampli sont trop proches, le signal de sortie de<br />
l’ampli peut être capté par la micro. Si vous enregistrez (ou<br />
ajoutez des données), ces sons sont également enregistrés.<br />
Veillez à séparer suffisamment le micro de l’ampli pour éviter<br />
que le son de l’ampli ne soit capté par le micro.<br />
59
60<br />
<strong>Dynamic</strong> <strong>Looper</strong> Manuel d’utilisation<br />
Jouer avec des programmes<br />
Sur le <strong>Dynamic</strong> <strong>Looper</strong>, les réglages de pré-effet et d’effet de<br />
boucle constituent un “programme”. La mémoire interne peut<br />
contenir 100 programmes.<br />
La section suivante explique comment sélectionner un de ces<br />
programmes puis comment ajouter un effet au signal de la<br />
guitare ou du micro, ou comment traiter les phrases enregistrées.<br />
Ajouter un effet au signal de guitare<br />
ou du micro<br />
Commençons par sélectionner et essayer quelques programmes.<br />
1. Branchez votre guitare ou un micro et votre ampli puis<br />
mettez ce produit sous tension.<br />
Fp.58 “Connexion de l’instrument et mise sous tension”<br />
2. Vérifiez que l’affichage de programme/valeur indique un<br />
numéro de programme.<br />
Si l’affichage indique autre chose qu’un numéro de programme<br />
ou s’il clignote, appuyez sur le bouton CANCEL.<br />
Le numéro de programme apparaît.<br />
Le <strong>Dynamic</strong> <strong>Looper</strong> dispose de deux types de programmes:<br />
les programmes d’usine (preset) et les programmes<br />
utilisateur.<br />
P01~P50: Programmes preset. Vous ne pouvez pas<br />
sauvegarder vos propres réglages dans un programme preset.<br />
U01~U50: Programmes utilisateur. A la sortie d’usine du<br />
<strong>Dynamic</strong> <strong>Looper</strong>, ces programmes contiennent les mêmes<br />
données que les programmes preset mais vous pouvez<br />
changer de type d’effet et modifier les réglages de paramètres<br />
puis sauvegarder vos réglages dans une de ces mémoires<br />
pour programmes utilisateur.<br />
Pour sélectionner alternativement les programmes preset et<br />
utilisateur, maintenez le bouton WRITE enfoncé environ 2<br />
secondes.<br />
3. Utilisez la pédale PROGRAM UP pour changer de programme.<br />
Chaque pression sur la pédale PROGRAM UP sélectionne le<br />
numéro de programme suivant.<br />
Si vous maintenez la pédale PROGRAM UP enfoncée et<br />
appuyez sur la pédale TRIGGER/TAP, vous sélectionnez le<br />
numéro de programme précédent (PROGRAM DOWN).<br />
En appuyant simultanément sur les boutons AUTO REC et<br />
CANCEL, vous faites défiler les numéros de programmes<br />
par dizaines.<br />
4. Si vous n’entendez pas le pré-effet, appuyez sur le bouton<br />
PRE FX TARGET pour sélectionner le signal d’entrée traité<br />
par le pré-effet.<br />
Chaque pression sur le bouton change la couleur de son<br />
témoin et sélectionne les signaux suivants:<br />
Vert: Le pré-effet traite le signal de la prise INPUT.<br />
Astuce: Si vous branchez une guitare et un micro, le signal<br />
du micro n’est pas traité par le pré-effet. Si vous le voulez,<br />
vous pouvez couper le signal audio de la prise MIC IN.<br />
Maintenez le bouton PRE FX TARGET enfoncé et tournez la<br />
commande EDIT. L’écran affiche le réglage sélectionné.<br />
CoF: Le signal audio de la prise MIC IN est coupé.<br />
Con: Le signal audio de la prise MIC IN n’est pas coupé.<br />
Rouge: Le pré-effet traite le signal de la prise MIC IN.
Créer des phrases<br />
Orange: Le pré-effet traite les signaux de la prise INPUT et<br />
de la prise MIC IN.<br />
Choisissez différents programmes et essayez-les.<br />
Pour savoir quelles sont les assignations d’effets aux<br />
programmes, voyez le document joint “Program List”.<br />
Pour savoir quels paramètres d’effet peuvent être pilotés et<br />
comment, veuillez voir la section “Pré-effets et effets de boucle”<br />
à la page 71.<br />
Créer des phrases<br />
Cette section explique comment enregistrer des phrases pour<br />
les boucles 1 et 2.<br />
Enregistrement de la boucle 1<br />
1. Branchez votre guitare ou un micro et votre ampli au<br />
<strong>Dynamic</strong> <strong>Looper</strong> puis mettez-le sous tension.<br />
))<br />
p.58 “Connexion de l’instrument et mise sous tension”<br />
2. Sélectionnez un programme.<br />
Si vous n’entendez pas le pré-effet, vérifiez le réglage du<br />
bouton PRE FX TARGET.<br />
))<br />
p.60 “Ajouter un effet au signal de guitare ou du micro”<br />
3. Appuyez simultanément sur les pédales STOP et<br />
PROGRAM UP pour choisir la boucle 1. (Le témoin LOOP<br />
1 s’allume pour indiquer la boucle sélectionnée.)<br />
Vérifier l’état de chaque boucle<br />
Les témoins LOOP STATUS des boucles 1 et 2 indiquent si les<br />
boucles contiennent une phrase.<br />
Remarque: Si vous n’avez encore rien enregistré pour les<br />
boucles, ce n’est pas la peine de vérifier.<br />
Si le témoin LOOP STATUS est éteint, la boucle ne contient<br />
pas de phrase.<br />
Si le témoin LOOP STATUS clignote en vert, une phrase a été<br />
enregistrée dans cette boucle et la reproduction de la phrase<br />
est arrêtée.<br />
Si le témoin LOOP STATUS est allumé en vert, une phrase<br />
a été enregistrée dans cette boucle et la reproduction de<br />
la phrase est en cours. Appuyez sur la pédale STOP pour<br />
arrêter la reproduction.<br />
Si le témoin LOOP STATUS est allumé en rouge ou en<br />
orange, la boucle est en cours d’enregistrement ou d’ajout.<br />
Appuyez deux fois sur la pédale STOP pour arrêter<br />
l’opération.<br />
Pour effacer la phrase enregistrée, maintenez la pédale STOP<br />
enfoncée 2 secondes quand la boucle est à l’arrêt. La phrase<br />
est supprimée de la boucle sélectionnée et le témoin LOOP<br />
STATUS s’éteint.<br />
Si vous voulez aussi effacer la phrase de la boucle non<br />
sélectionnée (dont le témoin LOOP est éteint), recommencez<br />
cette opération pour l’autre boucle.<br />
4. Appuyez sur la pédale REC/PLAY/OVERDUB pour lancer<br />
l’enregistrement puis jouez sur votre instrument.<br />
Le témoin LOOP STATUS de la boucle 1 s’allume en rouge et<br />
l’enregistrement démarre.<br />
Vous pouvez aussi lancer l’enregistrement en vous mettant à<br />
jouer.<br />
))<br />
p.63 “Lancer l’enregistrement en jouant (Auto Rec)”<br />
61
<strong>Dynamic</strong> <strong>Looper</strong> Manuel d’utilisation<br />
62<br />
Si vous voulez utiliser le métronome durant<br />
l’enregistrement, appuyez sur le bouton METRONOME<br />
pour activer le métronome puis tapez plusieurs fois sur la<br />
pédale TRIGGER/TAP pour entrer le tempo. Quand vous<br />
avez entré le tempo, la longueur de la phrase enregistrée<br />
sera un multiple précis du tempo.<br />
))<br />
p.62 “Utiliser le métronome comme guide durant<br />
l’enregistrement”<br />
))<br />
p.62 “Créer des phrases d’une longueur exacte (Loop<br />
Quantize)”<br />
5. Quand vous avez fini de jouer la phrase, appuyez sur la<br />
pédale REC/PLAY/OVERDUB pour arrêter<br />
l’enregistrement.<br />
L’enregistrement de la boucle 1 est terminé et est remplacé<br />
par la reproduction en boucle de la phrase.<br />
6. Appuyez sur la pédale STOP pour arrêter la reproduction.<br />
Vous clôturez ainsi l’enregistrement de la boucle 1.<br />
Utiliser le métronome comme guide durant<br />
l’enregistrement<br />
Vous pouvez utiliser le métronome comme guide durant<br />
l’enregistrement d’une boucle. Effectuez les réglages suivants<br />
avant l’enregistrement.<br />
1. Tapez à plusieurs reprises sur la pédale TRIGGER/TAP<br />
selon le tempo voulu.<br />
Le tempo programmé correspond aux intervalles entre les<br />
pressions sur la pédale.<br />
Le bouton METRONOME clignote selon le tempo que vous<br />
avez défini.<br />
2. Appuyez sur le bouton METRONOME.<br />
Les battements du métronome suivent le tempo entré.<br />
Remarque: Une pression sur le bouton METRONOME ne<br />
suffit pas pour entendre le métronome sauf si vous avez<br />
spécifié le tempo au préalable avec la pédale TRIGGER/TAP.<br />
3. Pour régler le volume du métronome, maintenez le bouton<br />
METRONOME enfoncé et actionnez la commande EDIT.<br />
Régler la métrique du métronome<br />
Vous pouvez régler la métrique du métronome. Par défaut, le<br />
réglage d’usine sélectionne “1 (1/4)”.<br />
1. Maintenez le bouton METRONOME enfoncé environ 2<br />
secondes.<br />
L’affichage de programme/valeur indique “bar” puis le<br />
réglage de métrique.<br />
2. Utilisez la commande EDIT pour régler la métrique.<br />
La plage de réglage de la métrique va de 1 (1/4) à 32 (32/4).<br />
Il est impossible de changer le dénominateur de la<br />
métrique.<br />
3. Appuyez sur le bouton CANCEL.<br />
Il est impossible de changer la métrique ou le tempo après<br />
l’enregistrement.<br />
Créer des phrases d’une longueur exacte<br />
(Loop Quantize)<br />
Si vous entrez le tempo avec la pédale TRIGGER/TAP avant un<br />
enregistrement, la fonction “Loop Quantize” est activée.<br />
La durée de l’enregistrement est automatiquement réglée en
Créer des phrases<br />
fonction du tempo et de la métrique. Quand vous arrêtez<br />
l’enregistrement, la fin de l’enregistrement est<br />
automatiquement ajustée pour que l’ensemble constitue un<br />
multiple exact du tempo et de la métrique, ce qui vous permet<br />
d’obtenir des phrases d’une longueur extrêmement précise.<br />
Début de l’ enregistrement<br />
Longueur de la phrase<br />
Fin de l’ enregistrement<br />
Pour désactiver la fonction “Loop Quantize”, maintenez la<br />
pédale TRIGGER/TAP enfoncée environ 2 secondes avant<br />
d’enregistrer. Le bouton METRONOME s’éteint et la fonction<br />
“Loop Quantize” est désactivée.<br />
Lancer l’enregistrement en jouant (Auto Rec)<br />
La fonction “Auto Rec” fait démarrer l’enregistrement dès que<br />
vous commencez à jouer.<br />
1. Appuyez sur le bouton AUTO REC pour l’allumer.<br />
2. Appuyez sur la pédale REC/PLAY/OVERDUB.<br />
Le témoin LOOP STATUS clignote en rouge.<br />
La fonction “Auto Rec” est activée et le <strong>Dynamic</strong> <strong>Looper</strong><br />
passe en attente d’enregistrement.<br />
3. Jouez sur votre instrument ou chantez/jouez devant le<br />
micro.<br />
L’enregistrement démarre dès que vous commencez à jouer.<br />
Durant l’enregistrement, le témoin LOOP STATUS est allumé<br />
en rouge.<br />
Enregistrement de la boucle 2<br />
Enregistrez ensuite une phrase pour la boucle 2.<br />
Remarque: Vous pouvez aussi enregistrer une phrase pour la<br />
boucle 2 tout en écoutant la boucle 1.<br />
1. Sélectionnez un programme. Vous pouvez modifier les<br />
réglages des paramètres d’effet.<br />
))<br />
p.60 “Ajouter un effet au signal de guitare ou du micro”<br />
))<br />
p.79 “Editer un programme”<br />
2. Appuyez simultanément sur les pédales STOP et<br />
PROGRAM UP pour sélectionner la boucle 2 (son témoin<br />
LOOP s’allume).<br />
3. A l’endroit voulu, actionnez la pédale PLAY/REC/<br />
OVERDUB pour lancer l’enregistrement.<br />
4. Quand vous arrivez à la fin de la phrase, appuyez sur la<br />
pédale PLAY/REC/OVERDUB.<br />
L’enregistrement s’arrête et est remplacé par la reproduction<br />
en boucle de la phrase.<br />
Remarque: Si vous enregistrez avec un tempo déterminé, la<br />
fin de l’enregistrement est synchronisée avec le tempo et la<br />
métrique (fonction “Loop Quantize”).<br />
Remarque: Si vous enregistrez sans spécifier de tempo,<br />
l’enregistrement s’arrête de la façon suivante.<br />
• Si vous enregistrez durant la reproduction de la boucle<br />
1, la fin de l’enregistrement est automatiquement ajustée<br />
63
<strong>Dynamic</strong> <strong>Looper</strong> Manuel d’utilisation<br />
pour que l’ensemble constitue un multiple exact de la<br />
durée de la boucle 1.<br />
• Si vous enregistrez sans reproduire la boucle 1,<br />
l’enregistrement s’arrête immédiatement.<br />
Astuce: Si vous actionnez la pédale TRIGGER/TAP,<br />
l’enregistrement se termine au moment où vous enfoncez la<br />
pédale: la longueur de la boucle n’est pas ajustée.<br />
Pour arrêter la boucle, appuyez sur la pédale STOP. Le<br />
témoin LOOP STATUS de la boucle 2 clignote en vert.<br />
Durée d’enregistrement<br />
Le <strong>Dynamic</strong> <strong>Looper</strong> peut enregistrer 90 secondes de phrases<br />
(au total) pour les boucles 1 et 2. Un minimum de 10 secondes<br />
d’enregistrement est alloué à chaque boucle.<br />
Après avoir enregistré la boucle 1, imaginons que vous<br />
enregistriez la boucle 2.<br />
La durée d’enregistrement disponible pour la boucle 2<br />
correspond à la durée totale moins la durée de l’enregistrement<br />
de la boucle 1.<br />
Boucle 1 Durée enregistrable pour la boucle 2<br />
Imaginons maintenant que vous ayez effacé la phrase de la<br />
boucle 1 et que vous décidiez de la remplacer par une nouvelle<br />
phrase. La durée d’enregistrement disponible pour la boucle 1<br />
correspond à la durée totale moins la durée de l’enregistrement<br />
de la boucle 2.<br />
90 secondes<br />
Durée enregistrable pour la boucle 1<br />
Boucle 2<br />
90 secondes<br />
Boucle 1 Boucle 2<br />
Imaginons que les boucles 1 et 2 sont vides et que vous<br />
enregistriez d’abord une phrase pour la boucle 1 puis pour la<br />
boucle 2.<br />
Vous pouvez enregistrer maximum 80 secondes pour la boucle<br />
1, soit la durée d’enregistrement totale de 90 secondes moins la<br />
durée minimum pour la boucle 2 (90 – 10= 80 secondes).<br />
Durée minimum d’ enregistrement de la boucle 2: 10 secondes<br />
80 secondes<br />
Durée enregistrable pour la boucle 1<br />
64
Ajout d’un nouvel enregistrement à une phrase<br />
Après l’enregistrement d’une boucle<br />
Ajout d’un enregistrement à la phrase<br />
Voyez la section “Ajout d’un nouvel enregistrement à une<br />
phrase” à la page 65.<br />
Traiter une phrase reproduite en boucle<br />
avec un effet de boucle<br />
Voyez la section “Traiter une phrase enregistrée avec un effet<br />
de boucle” à la page 66.<br />
Rééchantillonner une phrase avec effet de<br />
boucle<br />
Voyez la section “Rééchantillonnage” page 67.<br />
Ajout d’un nouvel<br />
enregistrement à une phrase<br />
Cette section explique comment ajouter un nouvel<br />
enregistrement à la phrase de la boucle 1.<br />
1. Sélectionnez un programme. Vous pouvez aussi modifier<br />
les réglages des paramètres d’effet.<br />
Fp.60 “Ajouter un effet au signal de guitare ou du micro”<br />
Fp.79 “Editer un programme”<br />
2. Appuyez simultanément sur les pédales STOP et<br />
PROGRAM UP pour sélectionner la boucle 1 (son témoin<br />
LOOP s’allume).<br />
3. Appuyez sur la pédale REC/PLAY/OVERDUB pour<br />
reproduire la boucle 1.<br />
4. A l’endroit voulu pour le début de l’ajout, appuyez sur la<br />
pédale REC/PLAY/OVERDUB et jouez sur votre<br />
instrument.<br />
Le témoin LOOP STATUS de la boucle 1 s’allume en orange<br />
et l’ajout démarre.<br />
Astuce: Si un paramètre du pré-effet est assigné à la pédale<br />
d’expression (le témoin de la pédale est allumé en rouge),<br />
vous pouvez utiliser la pédale pour piloter le pré-effet durant<br />
l’enregistrement de l’ajout.<br />
5. A l’endroit où vous voulez arrêter l’ajout, appuyez sur la<br />
pédale PLAY/REC/OVERDUB.<br />
Le témoin LOOP STATUS de la boucle 1 s’allume en vert et<br />
le <strong>Dynamic</strong> <strong>Looper</strong> passe de l’enregistrement de l’ajout à la<br />
reproduction.<br />
6. Appuyez sur la pédale STOP pour arrêter la reproduction<br />
de la boucle 1.<br />
Astuce: Le <strong>Dynamic</strong> <strong>Looper</strong> vous permet de déterminer ce<br />
qui se passe quand vous arrêtez la reproduction.<br />
))<br />
p.67 “Mode d’arrêt de la boucle”<br />
Annuler l’ajout<br />
Si vous voulez annuler le dernier ajout enregistré, effectuez les<br />
opérations suivantes immédiatement après l’ajout.<br />
1. Maintenez la pédale PROGRAM UP enfoncée.<br />
2. Quand la mention “Und” clignote à l’affichage de<br />
programme/valeur, relâchez la pédale PROGRAM UP.<br />
Le dernier ajout est annulé.<br />
65
<strong>Dynamic</strong> <strong>Looper</strong> Manuel d’utilisation<br />
Rétablir l’ajout<br />
Si vous voulez récupérer l’ajout que vous avez annulé, effectuez<br />
les opérations suivantes immédiatement après l’annulation.<br />
1. Maintenez la pédale PROGRAM UP enfoncée.<br />
2. Quand la mention “rEd” clignote à l’affichage de<br />
programme/valeur, relâchez la pédale PROGRAM UP.<br />
Le dernier ajout est rétabli.<br />
Traiter une phrase enregistrée<br />
avec un effet de boucle<br />
Cette section explique comment modifier la reproduction d’une<br />
phrase enregistrée avec un effet de boucle. Vous pouvez aussi<br />
utiliser la pédale d’expression pour modifier la phrase en temps réel.<br />
1. Appuyez simultanément sur les pédales STOP et<br />
PROGRAM UP pour choisir la boucle à reproduire.<br />
Le témoin de la boucle sélectionnée s’allume.<br />
2. Appuyez sur la pédale REC/PLAY/OVERDUB pour<br />
reproduire la boucle.<br />
Astuce: Si les boucles 1 et 2 contiennent une phrase, vous<br />
pouvez les reproduire simultanément en maintenant la<br />
pédale STOP enfoncée et en appuyant rapidement sur la<br />
pédale REC/PLAY/OVERDUB dès que la machine est à<br />
l’arrêt. (Cette fonction est appelée “double reproduction”.)<br />
Attention: Si vous maintenez la pédale STOP durant environ<br />
deux secondes, la phrase enregistrée est effacée.<br />
3. Vérifiez que le bouton LOOP FX est allumé pour vous<br />
assurer que l’effet de boucle est activé. S’il est éteint,<br />
appuyez sur le bouton LOOP FX pour activer l’effet.<br />
Remarque: Si un paramètre de pré-effet est assigné à la<br />
pédale d’expression (le témoin de la pédale est allumé en<br />
rouge), vous ne pouvez pas activer l’effet de boucle. Appuyez<br />
avec force sur l’avant de la pédale pour changer son<br />
assignation et piloter l’effet de boucle (le témoin de la pédale<br />
s’allume en vert).<br />
Astuce: Si un paramètre de l’effet de boucle est assigné à la<br />
pédale d’expression (le témoin de la pédale est allumé en<br />
vert), vous pouvez utiliser la pédale pour piloter l’effet.<br />
Astuce: Si vous appuyez sur la pédale TRIGGER/TAP, l’effet<br />
de boucle est désactivé et vous retournez au début de la<br />
phrase en cours de reproduction. Vous pouvez créer des<br />
effets intéressants en appuyant sur la pédale au moment<br />
voulu pour changer la longueur de la boucle ou pour<br />
synchroniser la phrase avec le tempo.<br />
4. Appuyez sur la pédale STOP pour arrêter la reproduction.<br />
Vous pouvez arrêter la reproduction d’une pression sur cette<br />
pédale même si la boucle sélectionnée est arrêtée et si l’autre<br />
boucle est en cours de reproduction.<br />
Fonction ‘Key Lock’<br />
Si vous maintenez le bouton CANCEL enfoncé environ 2<br />
secondes, les boutons, les commandes et les sélecteurs en façade<br />
sont désactivés: seules les pédales de la section de pilotage de<br />
programme/boucle et la pédale d’expression sont opérationnelles.<br />
(Cette fonction est appelée “Key Lock”.) C’est une façon simple<br />
d’éviter tout maniement accidentel durant le jeu.<br />
66
Mode d’arrêt de la boucle<br />
Vous pouvez choisir la façon dont la boucle s’arrête quand vous<br />
appuyez sur la pédale STOP durant la reproduction de la<br />
boucle.<br />
1. Appuyez sur le bouton STOP MODE.<br />
Chaque pression sur le bouton change le réglage en vigueur.<br />
Bouton éteint: Quand vous appuyez sur la pédale STOP, la<br />
phrase s’arrête immédiatement.<br />
Bouton allumé en rouge: Quand vous appuyez sur la pédale<br />
STOP, la phrase s’arrête et un effet delay est appliqué.<br />
Bouton allumé en orange: Quand vous appuyez<br />
sur la pédale STOP, le volume de la phrase diminue<br />
progressivement et la phrase s’arrête quand le volume est nul<br />
(“fade out”).<br />
Bouton allumé en vert: Quand vous appuyez sur la pédale<br />
STOP, la phrase est reproduite jusqu’à la fin puis s’arrête.<br />
Astuce: Durant le fade out jusqu’à l’arrêt ou lorsque la phrase<br />
touche à sa fin, le témoin LOOP STATUS clignote rapidement<br />
en vert jusqu’à l’arrêt de la boucle.<br />
Il est impossible d’enregistrer, d’ajouter des données ou de<br />
rééchantillonner tant que la boucle n’est pas arrêtée.<br />
Rééchantillonnage (Resampling)<br />
Rééchantillonnage<br />
(Resampling)<br />
Durant la reproduction d’une boucle, vous pouvez traiter la<br />
phrase avec l’effet de boucle et réenregistrer la phrase<br />
résultante. Cette fonction est appelée rééchantillonnage<br />
(“Resampling”).<br />
En exploitant le rééchantillonnage, vous pouvez appliquer<br />
plusieurs effets de boucle ou créer une boucle d’une longueur<br />
différente de la boucle déjà enregistrée.<br />
Le rééchantillonnage est disponible quand vous traitez une<br />
phrase reproduite en boucle avec un effet LOOP FX. Il est<br />
impossible de rééchantillonner si vous n’avez pas encore<br />
enregistré de phrase à mettre en boucle.<br />
1. Appuyez simultanément sur les pédales STOP et PROGRAM<br />
UP pour choisir une boucle contenant une phrase.<br />
2. Appuyez sur la pédale REC/PLAY/OVERDUB pour<br />
reproduire la boucle et utilisez la pédale PROGRAM UP<br />
pour sélectionner un programme. Vous pouvez modifier les<br />
paramètres d’effet ou utiliser la pédale d’expression pour<br />
appliquer l’effet de boucle.<br />
))<br />
p.60 “Jouer avec des programmes”<br />
Quand vous reproduisez une boucle avec le processeur<br />
LOOP FX activé, le témoin RESAMPLING clignote pour<br />
indiquer qu’il est possible de rééchantillonner la phrase.<br />
3. Appuyez sur la pédale REC/PLAY/OVERDUB.<br />
Le témoin RESAMPLING s’allume et le rééchantillonnage<br />
démarre. La phrase est rééchantillonnée avec l’effet de<br />
boucle.<br />
67
<strong>Dynamic</strong> <strong>Looper</strong> Manuel d’utilisation<br />
Astuce: Si l’effet de boucle est assigné à la pédale<br />
d’expression, vous pouvez utiliser la pédale pour modifier le<br />
son durant le rééchantillonnage.<br />
Vous ne pouvez pas changer de programme durant le<br />
rééchantillonnage. Vous ne pouvez pas non plus activer/<br />
couper l’effet de boucle ou changer de type d’effet.<br />
4. Appuyez sur la pédale REC/PLAY/OVERDUB pour arrêter<br />
le rééchantillonnage.<br />
Remarque: Si vous rééchantillonnez avec un tempo<br />
déterminé, la fin du rééchantillonnage est synchronisée avec<br />
le tempo et la métrique (fonction “Loop Quantize”).<br />
Remarque: Si vous avez entamé le rééchantillonnage<br />
sans spécifier de tempo, la fin du rééchantillonnage est<br />
automatiquement ajustée pour que l’ensemble constitue<br />
un multiple exact de la durée de la boucle avant le<br />
rééchantillonnage.<br />
Astuce: Si vous actionnez la pédale TRIGGER/TAP, le<br />
rééchantillonnage se termine au moment où vous enfoncez la<br />
pédale: la longueur de la boucle n’est pas ajustée.<br />
Le rééchantillonnage de la boucle s’arrête et est remplacé<br />
par la reproduction en boucle. L’effet de boucle est<br />
désactivé. Si vous appuyez sur la pédale STOP durant le<br />
rééchantillonnage, ce dernier cesse puis la reproduction de la<br />
boucle s’arrête.<br />
Astuce: Si vous reproduisez et rééchantillonnez les boucles<br />
1 et 2 en utilisant l’effet de boucle VOLUME ou X-FADE, la<br />
reproduction de la boucle non sélectionnée s’arrête quand<br />
vous arrêtez le rééchantillonnage.<br />
Traiter les phrases enregistrées<br />
avec le limiteur<br />
Le <strong>Dynamic</strong> <strong>Looper</strong> dispose d’un limiteur qui réduit les<br />
disparités de volume entre les boucles ou entre le volume de<br />
l’enregistrement initial et le volume après les ajouts.<br />
1. Appuyez sur le bouton MASTER LIMITER pour<br />
sélectionner un type de limiteur.<br />
Chaque pression sur le bouton change le réglage. Le type de<br />
limiteur est indiqué par l’affichage de programme/valeur.<br />
OFF: Limiteur coupé.<br />
SFt: Limiteur doux. Il réduit les disparités de volume<br />
des boucles 1 et 2 selon qu’elles soient reproduites<br />
individuellement ou simultanément.<br />
Hrd: Limiteur dur. Ce limiteur rend le volume de la phrase<br />
enregistrée plus cohérent. Il réduit les disparités de volume<br />
entre la phrase initialement enregistrée et la phrase comptant<br />
plusieurs ajouts.<br />
68
Effacer la phrase d’une boucle<br />
Effacer la phrase d’une boucle<br />
Vous pouvez effacer la phrase d’une boucle.<br />
Il est impossible de récupérer une phrase qui a été effacée.<br />
Soyez donc prudent lorsque vous utilisez cette fonction.<br />
1. Si la phrase est en cours de reproduction, appuyez sur la<br />
pédale STOP pour l’arrêter.<br />
Le témoin LOOP STATUS clignote en vert.<br />
2. Appuyez simultanément sur les pédales STOP et<br />
PROGRAM UP pour choisir la boucle dont vous voulez<br />
effacer la phrase.<br />
Allumez le témoin LOOP de la boucle dont vous voulez<br />
effacer la phrase.<br />
3. Maintenez la pédale STOP enfoncée durant environ 2<br />
secondes.<br />
La phrase de la boucle sélectionnée est effacée et le témoin<br />
LOOP STATUS s’éteint.<br />
Si vous maintenez à nouveau la pédale STOP enfoncée<br />
durant environ 2 secondes, la phrase de l’autre boucle est<br />
effacée et son témoin LOOP STATUS s’éteint.<br />
69
<strong>Dynamic</strong> <strong>Looper</strong> Manuel d’utilisation<br />
Etat de la boucle (Loop Status)<br />
La présence d’une phrase pour la boucle sélectionnée et son mode de fonctionnement sont indiqués par les témoins LOOP STATUS et<br />
RESAMPLING. Les opérations produites par la pédale REC/PLAY/OVERDUB ou la pédale STOP varient également selon le contexte.<br />
Durant l’enregistrement ou l’ajout<br />
Témoin LOOP STATUS<br />
Etat de la boucle<br />
Eteint A l’arrêt (pas de phrase) ))<br />
p.61 “Vérifier l’état de chaque boucle”<br />
Rouge clignotant<br />
En attente pour le démarrage<br />
automatique de l’enregistrement<br />
))<br />
p.63 “Lancer l’enregistrement en jouant (Auto Rec)”<br />
Allumé en rouge Enregistrement ))<br />
p.61 “Vérifier l’état de chaque boucle”<br />
Clignote lentement en vert<br />
Clignote rapidement en vert<br />
Allumé en vert<br />
Allumé en orange<br />
A l’arrêt (une phrase existe)<br />
Arrêt imminent<br />
(fade out ou fin de la boucle)<br />
Reproduction<br />
Ajout<br />
))<br />
p.67 “Mode d’arrêt de la boucle”<br />
))<br />
p.61 “Vérifier l’état de chaque boucle”<br />
Durant le rééchantillonnage<br />
Si vous appliquez un effet de boucle à la phrase en cours de reproduction, le <strong>Dynamic</strong> <strong>Looper</strong> passe en attente de rééchantillonnage.<br />
Témoin LOOP STATUS Témoin RESAMPLING Etat de la boucle<br />
Allumé en vert Rouge clignotant Prête pour le rééchantillonnage ))<br />
p.67 “Rééchantillonnage<br />
Allumé en rouge Allumé en rouge Rééchantillonnage (Resampling)”<br />
70
Pré-effets et effets de boucle<br />
Cette section décrit les différents types d’effets disponibles<br />
pour les processeurs PRE-FX et LOOP FX ainsi que les<br />
paramètres pouvant être réglés pour ces effets. Pour en savoir<br />
plus, voyez la description du flux du signal à la page 51.<br />
Paramètres d’effet<br />
Commande EDIT: Paramètre d’effet éditable en tournant la<br />
commande EDIT.<br />
Bouton PRE FX + commande EDIT: Paramètre d’effet éditable<br />
en tournant la commande EDIT tout en maintenant le bouton<br />
PRE FX enfoncé.<br />
Certains effets ne disposent pas d’un paramètre réglable<br />
avec le bouton PRE FX + la commande EDIT.<br />
Pédale d’expression: Paramètre modifiable avec la pédale<br />
d’expression. Pour savoir comment effectuer cette assignation,<br />
voyez la section “Assigner une fonction à la pédale<br />
d’expression” à la page 81.<br />
Pré-effets (PRE-FX)<br />
PdL: PEDAL FX<br />
Modélisation d’une pédale d’effet.<br />
• Commande EDIT: Sélectionne le type d’effet.<br />
Cln: Son clair mettant en valeur le timbre de votre guitare.<br />
Co: Modélisation d’une pédale compresseur appréciée pour<br />
un son percutant et clean. Elle est idéale pour la musique pop<br />
ou funk des années ‘80 et ‘90. Cet effet permet aussi d’ajouter<br />
un sustain chantant et doux.<br />
Pré-effets et effets de boucle<br />
Crn: Ce modèle repose sur une pédale overdrive nommée<br />
d’après une créature mi-homme, mi-cheval de la mythologie<br />
grecque. Avec une faible valeur de gain, l’effet fait office<br />
de booster qui ne change pas le timbre de la guitare. En<br />
augmentant le gain, vous obtenez un overdrive délivrant un<br />
médium particulièrement riche.<br />
Od: Modélisation d’une pédale overdrive bien connue dans<br />
un boîtier vert. L’indicible chaleur de ses sonorités en ont fait<br />
un classique.<br />
dst: Pédale de distorsion idéale pour le metal.<br />
• Bouton PRE FX + commande EDIT: Règle le gain.<br />
• Pédale d’expression: Détermine le niveau de sortie.<br />
: WAH<br />
Modèle basé sur une pédale wah <strong>Vox</strong> V847.<br />
• Commande EDIT: Sélectionne le type d’effet. Les types d’effet<br />
sont identiques à ceux de l’effet “PEDAL FX”.<br />
(F“ PEDAL FX ” )<br />
• Bouton PRE FX + commande EDIT: Règle le gain.<br />
• Pédale d’expression: Pilote l’effet wah.<br />
71
<strong>Dynamic</strong> <strong>Looper</strong> Manuel d’utilisation<br />
Πod: MODULATION<br />
Modélisation d’un effet de modulation.<br />
• Commande EDIT: Sélectionne le type d’effet.<br />
Ch1: Modélisation d’un chorus analogique.<br />
Ch2: Ce modèle utilise deux effets chorus et permet de<br />
produire un effet de modulation complexe.<br />
FLA: Modélisation de flanger analogique.<br />
PHA: Modélisation de phaser analogique.<br />
trE: Modélisation du circuit de trémolo d’un ampli de<br />
guitare.<br />
• Bouton PRE FX + commande EDIT: Règle la vitesse de<br />
modulation.<br />
• Pédale d’expression: Règle l’intensité de l’effet.<br />
bAS: BASS<br />
Simulation d’une guitare basse.<br />
• Commande EDIT: Sélection du type de son.<br />
Eb1: Basse électrique standard.<br />
Eb2: Basse électrique avec compresseur.<br />
Eb3: Basse électrique avec overdrive.<br />
Eb4: Basse électrique avec distorsion.<br />
Sb1: Basse synthé.<br />
Sb2: Variation de basse synthé.<br />
• Pédale d’expression: Détermine le niveau de sortie.<br />
Aco: ACOUSTIC<br />
Simulation d’une guitare acoustique.<br />
• Commande EDIT: Sélection du type de son.<br />
S-1: Ancienne guitare acoustique à petite caisse, idéale pour<br />
arpèges délicats.<br />
S-2: Guitare acoustique à petite caisse délivrant un médium<br />
caractéristique, très prisée par les musiciens blues et country.<br />
Lrg: Guitare acoustique à grande caisse délivrant un son<br />
raffiné caractéristique, idéale pour la musique pop.<br />
rES: Guitare à résonateur convenant pour des parties slide.<br />
• Bouton PRE FX + commande EDIT: Règle l’intensité de l’effet.<br />
• Pédale d’expression: Détermine le niveau de sortie.<br />
Ptc: PITCH<br />
Effet Pitch Shift permettant de varier la hauteur avec la pédale<br />
d’expression.<br />
• Commande EDIT: Règle le décalage de hauteur par demitons.<br />
-12~0 , dtn: désaccord, 1~12<br />
• Bouton PRE FX + commande EDIT: Détermine la balance<br />
entre le signal d’effet et le signal original.<br />
• Pédale d’expression: Détermine la hauteur.<br />
72
Pré-effets et effets de boucle<br />
Stt: STUTTER<br />
Cet effet produit un effet de type trémolo en appliquant un gate<br />
synchronisé avec le tempo au signal d’entrée. Vous pouvez créer<br />
des phrases rythmiques en utilisant la pédale d’expression pour<br />
piloter le cycle du gate (la durée d’ouverture du gate par rapport à<br />
un cycle complet d’ouverture et de fermeture du gate). Cet effet<br />
convient particulièrement à des signaux d’un niveau relativement<br />
constant comme les sons traités par un effet de compression ou de<br />
distorsion.<br />
• Commande EDIT: Détermine la métrique. Le gate s’ouvre<br />
et se ferme en se synchronisant avec le tempo et la métrique<br />
spécifiée ici.<br />
1-2: (deux temps= blanche) 1-8: (croche)<br />
3-8: (noire pointées) 1-12: 3 (triolet de croches)<br />
1-3: 3 (triolet de blanches) 1-16: (double croche)<br />
1-4: (1 temps= noire) 1-24: 3 (triolet de doubles croches)<br />
3-16: (croche pointée) 1-32: (triple croche)<br />
1-6: 3 (triolet de noires) 1-64: (triple croche)<br />
• Pédale d’expression: Pilote le cycle ouvrant et fermant le gate.<br />
Plus vous enfoncez la pédale à l’avant, plus le son est bref.<br />
Eq: Egaliseur<br />
Modélisation d’un égaliseur à 4 bandes.<br />
• Commande EDIT: Sélectionne le type d’égaliseur.<br />
LC: Coupe les basses fréquences.<br />
LF: Règle le niveau des basses fréquences.<br />
CF: Règle le niveau des fréquences moyennes.<br />
CF2: Règle le niveau des fréquences moyennes et coupe les<br />
autres bandes de fréquences.<br />
HF: Règle le niveau des hautes fréquences.<br />
HC: Coupe les hautes fréquences.<br />
• Bouton PRE FX + commande EDIT: Règle le gain.<br />
• Pédale d’expression: Détermine le niveau de sortie.<br />
dLy: DELAY<br />
Modélisation d’un effet de delay.<br />
• Commande EDIT: Sélectionne le type de delay.<br />
Sho: Modélisation d’un bref delay (slap).<br />
dL1: Modélisation d’un delay au son clair.<br />
dL2: Modélisation d’un delay synchronisé avec le tempo.<br />
An1: Modélisation d’un delay analogique utilisant une<br />
technologie en cascade, caractéristique pour sa chaude<br />
distorsion.<br />
An2: Modélisation d’un delay analogique synchronisé avec<br />
le tempo.<br />
tP1: Modélisation d’un delay avec pleurage, scintillement et<br />
distorsion évoquant un effet classique d’écho à bande.<br />
tP2: Modélisation d’un écho à bande synchronisé avec le<br />
tempo.<br />
• Bouton PRE FX + commande EDIT: Règle le temps de retard.<br />
Si vous avez sélectionné un delay bref ou un type de delay<br />
non synchronisé avec le tempo, utilisez ce paramètre pour<br />
spécifier le temps de retard sous forme de valeur comprise<br />
dans la plage 0~10.<br />
73
<strong>Dynamic</strong> <strong>Looper</strong> Manuel d’utilisation<br />
74<br />
Si vous utilisez un delay synchronisé avec le tempo ou un<br />
écho à bande, utilisez ce paramètre pour sélectionner un des<br />
réglages suivants.<br />
1-64: (quadruple croche) 1-6: 3 (triolet de noires)<br />
1-32: (triple croche) 3-16: (croche pointée)<br />
1-24: 3 (triolet de doubles croches) 1-4: (1 temps= noire)<br />
1-16: (double croche) 1-3: 3 (triolet de blanches)<br />
1-12: 3 (triolet de croches) 3-8: (noire pointée)<br />
1-8: (croche) 1-2: (deux temps= blanche)<br />
• Pédale d’expression: Détermine l’intensité de l’effet.<br />
Remarque: Si vous sélectionnez un effet delay pour le pré-effet<br />
ou l’effet de boucle, le temps de retard maximum est de 2,22<br />
secondes. Si vous utilisez un effet delay synchronisé avec le<br />
tempo et si les réglages de tempo et du paramètre d’effet<br />
entraînent un temps de retard excédant 2,22 secondes, le temps<br />
de retard est automatiquement réduit de moitié.<br />
rVb: REVERB<br />
Cet effet de réverbération vous permet d’utiliser la pédale<br />
d’expression pour déterminer la profondeur de réverbération et<br />
la balance de volume. Il convient bien pour traiter le signal de<br />
la guitare ou du micro.<br />
• Commande EDIT: Sélectionne le type de réverbération.<br />
SPr: Modélisation de la réverbération à ressort d’un ampli de<br />
guitare.<br />
roo: Modélisation d’une réverbération de pièce typique avec<br />
de nombreuses réflexions primaires.<br />
HAL: Modélisation de la réverbération d’une vaste salle de<br />
concert contenant de nombreuses composantes d’écho.<br />
• Pédale d’expression: Détermine la profondeur de la<br />
réverbération et la balance de volume.<br />
S-F: SCI-FI<br />
Transforme le son d’une guitare électrique de nombreuses<br />
façons.<br />
• Commande EDIT: Sélection du type de son.<br />
dr1, dr2, dr3: Effets de bourdon ajoutant un bourdon continu,<br />
comme sur un tamboura (instrument d’Inde).<br />
Sy1, Sy2, Sy3: Modélisation d’un synthé chromatique. Il y a<br />
trois types de synthé ayant chacun un timbre différent (Sy3:<br />
simulation de batterie). Ces effets conviennent pour des<br />
notes seules.<br />
SLo: Effet de type violon avec une attaque plus lente.<br />
• Bouton PRE FX + commande EDIT: Le paramètre piloté<br />
dépend du son sélectionné.<br />
dr1, dr2: Détermine la tonalité.<br />
dr3, Sy1, Sy2: Règle l’intensité de l’effet.<br />
Sy3: Détermine le niveau de sortie.<br />
SLo: Détermine la vitesse de l’attaque.<br />
• Pédale d’expression: Le paramètre piloté dépend du son<br />
sélectionné.<br />
dr1, dr2: Détermine l’intensité de l’effet .<br />
dr3: Détermine la tonalité.<br />
Sy1, Sy2, SLo: Détermine le niveau de sortie.<br />
Sy3: Détermine le timbre.
Pré-effets et effets de boucle<br />
Effets de boucle<br />
Quand vous utilisez un effet de boucle, il est particulièrement<br />
intéressant d’assigner un paramètre de l’effet de boucle à la<br />
pédale d’expression.<br />
Vol: VOLUME<br />
Cet effet permet de piloter le volume avec la pédale.<br />
Si vous rééchantillonnez la phrase avec cet effet, le signal dont<br />
le volume est piloté par cet effet est enregistré dans la boucle<br />
sélectionnée. Vous pouvez utiliser cette fonction pour combiner<br />
les signaux de sortie des deux boucles et créer une nouvelle<br />
phrase.<br />
• Commande EDIT: Sélectionne le signal ou les signaux dont le<br />
volume est piloté.<br />
Cur: Le volume de la boucle sélectionnée est piloté.<br />
L1.2: Le volume des boucles 1 et 2 est piloté.<br />
ALL: Le volume du signal d’entrée ainsi que des boucles 1 et<br />
2 est piloté.<br />
• Pédale d’expression: Détermine le volume du signal ou des<br />
signaux choisis avec la commande EDIT.<br />
FAd: X-FADE<br />
Avec cet effet, la pédale d’expression sert à réaliser la balance.<br />
Si vous rééchantillonnez la phrase avec cet effet, le signal dont<br />
la balance est pilotée par cet effet est enregistré dans la boucle<br />
sélectionnée.<br />
• Commande EDIT: Sélectionne le signal ou les signaux dont la<br />
balance est pilotée.<br />
In.L: La pédale détermine la balance entre le signal d’entrée<br />
et le signal de la boucle sélectionnée.<br />
L1.2: La pédale détermine la balance entre les signaux des<br />
boucles 1 et 2.<br />
• Pédale d’expression: Détermine la balance entre les signaux<br />
sélectionnés avec la commande EDIT.<br />
rEV: REVERSE<br />
Cet effet inverse la reproduction. Plus vous enfoncez la pédale,<br />
plus vous augmentez le signal de reproduction inversée dans le<br />
mixage. Cet effet convient particulièrement à des parties contenant<br />
des notes longues comme un solo de guitare ou le chant.<br />
• Commande EDIT: Cette commande détermine ce qui se<br />
passe quand vous passez de la reproduction normale à la<br />
reproduction inversée.<br />
FAd: Chassé-croisé entre reproduction normale et inversée.<br />
ALt: Alternance de reproduction normale et inversée.<br />
• Pédale d’expression: Alterne la reproduction normale et<br />
inversée.<br />
LIL: LOOP IN LOOP<br />
Quand vous enfoncez la pédale d’expression, cet effet ne<br />
reproduit qu’un bref passage de la boucle sélectionnée. En<br />
jouant sur la durée du passage, vous pouvez créer des effets de<br />
roulements.<br />
• Commande EDIT: Sélectionne la métrique utilisée pour la<br />
reproduction de la phrase quand vous enfoncez la pédale. Si vous<br />
sélectionnez “bAr”, la métrique et le tempo spécifiés au préalable<br />
sont utilisés. Avec d’autres réglages, le tempo est utilisé.<br />
75
<strong>Dynamic</strong> <strong>Looper</strong> Manuel d’utilisation<br />
76<br />
bAr: 1 mesure<br />
1-8: (croche)<br />
1-2: (deux temps= blanche) 1-12: 3 (triolet de croches)<br />
3-8: (noire pointée) 1-16: (double croche)<br />
1-3: 3 (triolet de blanches) 1-24: 3 (triolet de doubles croches)<br />
1-4: (1 temps= noire) 1-32: (triples croche)<br />
3-16: (croche pointée) 1-64: (quadruple croche)<br />
1-6: 3 (triolet de noires)<br />
• Pédale d’expression: Reproduit une brève phrase<br />
synchronisée avec le tempo. Quand vous enfoncez la pédale,<br />
la longueur de la phrase est réduite de moitié.<br />
Ptc: PITCH<br />
Effet Pitch Shift permettant de varier la hauteur avec la pédale<br />
d’expression.<br />
• Commande EDIT: Détermine la plage de changement de<br />
hauteur.<br />
u57: Quand vous enfoncez la pédale, la hauteur change ainsi:<br />
hauteur originale → 5 demi-tons vers le haut → 7 demi-tons<br />
vers le haut.<br />
u12: Quand vous enfoncez la pédale, la hauteur change ainsi:<br />
hauteur originale → 1 demi-ton vers le haut → 2 demi-tons<br />
vers le haut.<br />
u13: Quand vous enfoncez la pédale, la hauteur change ainsi:<br />
hauteur originale → 1 demi-ton vers le haut → 3 demi-tons<br />
vers le haut.<br />
u35: Quand vous enfoncez la pédale, la hauteur change ainsi:<br />
hauteur originale → 3 demi-tons vers le haut → 5 demi-tons<br />
vers le haut.<br />
u47: Quand vous enfoncez la pédale, la hauteur change ainsi:<br />
hauteur originale → 4 demi-tons vers le haut → 7 demi-tons<br />
vers le haut.<br />
u24: Quand vous enfoncez la pédale, la hauteur change ainsi:<br />
hauteur originale → 2 demi-tons vers le haut → 4 demi-tons<br />
vers le haut.<br />
u5t: Quand vous enfoncez la pédale, la hauteur change ainsi:<br />
hauteur originale → 5 demi-tons vers le haut → 10 demi-tons<br />
vers le haut.<br />
ubn: Quand vous enfoncez la pédale, la hauteur monte<br />
progressivement jusqu’à une octave maximum.<br />
uch: Quand vous enfoncez la pédale, la hauteur monte par<br />
demi-tons jusqu’à une octave maximum.<br />
d57: Quand vous enfoncez la pédale, la hauteur change ainsi:<br />
hauteur originale → 5 demi-tons vers le bas → 7 demi-tons<br />
vers le bas.<br />
d12: Quand vous enfoncez la pédale, la hauteur change ainsi:<br />
hauteur originale → 1 demi-ton vers le bas → 2 demi-tons<br />
vers le bas.<br />
d35: Quand vous enfoncez la pédale, la hauteur change ainsi:<br />
hauteur originale → 3 demi-tons vers le bas → 5 demi-tons<br />
vers le bas.<br />
d47: Quand vous enfoncez la pédale, la hauteur change ainsi:<br />
hauteur originale → 4 demi-tons vers le bas → 7 demi-tons<br />
vers le bas.<br />
d24: Quand vous enfoncez la pédale, la hauteur change ainsi:<br />
hauteur originale → 2 demi-tons vers le bas → 4 demi-tons<br />
vers le bas.<br />
dbn: Quand vous enfoncez la pédale, la hauteur baisse<br />
progressivement jusqu’à une octave maximum.
Pré-effets et effets de boucle<br />
dch: Quand vous enfoncez la pédale, la hauteur baisse par<br />
demi-tons jusqu’à une octave maximum.<br />
• Pédale d’expression: Détermine la hauteur de la boucle.<br />
SPd: SPEED<br />
Avec cet effet, la pédale d’expression modifie la vitesse de<br />
reproduction.<br />
• Commande EDIT: Détermine la façon dont la vitesse de<br />
reproduction change quand vous actionnez la pédale<br />
d’expression.<br />
SL1: Quand vous enfoncez la pédale, la reproduction ralentit.<br />
La hauteur de la phrase ne change pas.<br />
SL2: Quand vous enfoncez la pédale, la reproduction ralentit.<br />
La hauteur de la phrase change proportionnellement à la<br />
vitesse de reproduction.<br />
FA1: Quand vous enfoncez la pédale, la reproduction<br />
accélère. La hauteur de la phrase ne change pas.<br />
FA2: Quand vous enfoncez la pédale, la reproduction<br />
accélère. La hauteur de la phrase change<br />
proportionnellement à la vitesse de reproduction.<br />
SF1: La reproduction accélère quand vous enfoncez la<br />
pédale au-delà de la moitié de sa course et ralentit quand<br />
vous relevez la pédale vers vous à partir de la mi-course. La<br />
hauteur de la phrase ne change pas.<br />
SF2: La reproduction accélère quand vous enfoncez la<br />
pédale au-delà de la moitié de sa course et ralentit quand<br />
vous relevez la pédale vers vous à partir de la mi-course. La<br />
hauteur de la phrase change proportionnellement à la vitesse<br />
de reproduction.<br />
• Pédale d’expression: Pilote la vitesse de reproduction de la<br />
boucle. Selon le réglage de la commande EDIT, la hauteur<br />
de la phrase change proportionnellement à la vitesse de<br />
reproduction. L’effet est semblable à l’effet obtenu quand<br />
vous changez la vitesse de rotation d’un disque.<br />
Scr: SCRUB<br />
Cet effet divise la phrase en “grains” (brefs fragments de son)<br />
et vous permet de changer la position de reproduction avec la<br />
pédale d’expression afin d’obtenir un effet “scrub”. Cet effet<br />
convient fort bien pour les solos de guitare ou les arpèges.<br />
• Commande EDIT: Détermine la longueur des grains (brefs<br />
fragments de son).<br />
• Pédale d’expression: Pilote la position de reproduction dans<br />
la boucle.<br />
Si vous relevez d’abord complètement la pédale avant<br />
de l’enfoncer doucement, vous reproduisez les grains<br />
successivement.<br />
Quand vous enfoncez la pédale, les grains sont reproduits<br />
de façon normale. Quand vous relevez la pédale, la<br />
reproduction est inversée. La vitesse à laquelle vous<br />
actionnez la pédale détermine la vitesse de reproduction.<br />
Si vous n’actionnez pas la pédale, la reproduction est<br />
relativement lente.<br />
Stt: STUTTER<br />
Cet effet permet de déterminer la durée des brefs passages avec<br />
la pédale d’expression afin de créer des boucles rythmiques.<br />
Cet effet convient particulièrement à des signaux d’un niveau<br />
relativement constant comme les sons traités par un effet de<br />
77
<strong>Dynamic</strong> <strong>Looper</strong> Manuel d’utilisation<br />
compression ou de distorsion. Cet effet fonctionne de la même<br />
façon que le pré-effet “STUTTER”.<br />
))<br />
p.73 “Stt: STUTTER”<br />
Πod: MODULATION<br />
Cet effet vous permet d’utiliser la pédale d’expression pour<br />
modifier le son avec un effet allant d’un chorus subtil à un<br />
flanger impressionnant.<br />
• Commande EDIT: Détermine la vitesse du LFO. Le LFO est<br />
synchronisé avec le tempo.<br />
8-1: x8 (8 mesures) 3-16: (croche pointée)<br />
4-1: x4 (4 mesures) 1-6: 3 (triolet de noires)<br />
2-1: x2 (2 mesures) 1-8: (croche)<br />
1-1: (1 mesure= ronde) 1-12: 3 (triolet de croches)<br />
3-4: . (trois temps= blanche pointée) 1-16: (double croche)<br />
1-2: (deux temps= blanche) 1-24: 3 (triolet de doubles croches)<br />
3-8: (noire pointée) 1-32: (triple croche)<br />
1-3: 3 (triolet de blanches) 1-64: (quadruple croche)<br />
1-4: (1 temps= noire)<br />
• Pédale d’expression: Détermine l’intensité de l’effet .<br />
Enfoncez la pédale (augmentez la valeur) pour produire un<br />
effet flanger et relevez la pédale (diminuez la valeur) pour<br />
produire un effet chorus.<br />
FLt: FILTER<br />
Cet effet de filtre permet d’utiliser la pédale d’expression pour<br />
changer la fréquence du filtre.<br />
• Commande EDIT: Sélectionne le type de filtre.<br />
HPF: Filtre passe-haut<br />
bPF: Filtre passe-bande<br />
LP1: Filtre passe-bas 1<br />
LP2: Filtre passe-bas 2 (un filtre passe-bas plus abrupt)<br />
• Bouton LOOP FX + commande EDIT: Règle la résonance.<br />
• Pédale d’expression: Détermine la fréquence (de coupure ou<br />
centrale) du filtre.<br />
dLy: DELAY<br />
Delay synchronisé avec le tempo. Appuyez sur la pédale<br />
d’expression pour augmenter le niveau de réinjection (feedback).<br />
Cela produit une oscillation comme sur un delay analogique.<br />
• Commande EDIT: Détermine le temps de retard. Avec<br />
les réglages autres que le bref retard (“Sho”), l’effet est<br />
synchronisé avec le tempo.<br />
Sho: bref retard<br />
1-6: 3 (triolet de noires)<br />
1-64: (quadruple croche) 3-16: (croche pointée)<br />
1-32: (triple croche) 1-4: (1 temps= noire)<br />
1-24: 3 (triolet de doubles croches) 1-3: 3 (triolet de blanches)<br />
1-16: (double croche) 3-8: (noire pointée)<br />
1-12: 3 (triolet de croches) 1-2: (deux temps= blanche)<br />
1-8: (croche)<br />
• Pédale d’expression: Détermine le taux de réinjection<br />
(feedback) et le volume global.<br />
78
Pré-effets et effets de boucle<br />
Editer un programme<br />
Choisir un programme<br />
1. Maintenez le bouton WRITE enfoncé environ 2 secondes<br />
pour sélectionner alternativement les programmes preset et<br />
utilisateur.<br />
L’affichage affiche le numéro de programme.<br />
P01~P50: programmes d’usine (preset).<br />
U01~U50: programmes utilisateur.<br />
Si l’affichage indique autre chose qu’un numéro de<br />
programme ou s’il clignote, appuyez sur le bouton CANCEL.<br />
Le numéro de programme apparaît.<br />
2. Utilisez la pédale PROGRAM UP pour choisir un<br />
programme.<br />
Si vous maintenez la pédale PROGRAM UP enfoncée et<br />
appuyez sur la pédale TRIGGER/TAP, vous sélectionnez le<br />
numéro de programme précédent (PROGRAM DOWN).<br />
Editer les effets<br />
Les processeurs PRE FX et LOOP FX proposent chacun onze<br />
types d’effet. Vous pouvez sélectionner un type d’effet pour<br />
chaque processeur.<br />
Chaque effet vous permet de régler un ou deux paramètres. Les<br />
paramètres réglables varient selon l’effet sélectionné.<br />
Les réglages du pré-effet et de l’effet de boucle peuvent être<br />
sauvegardés dans un programme.<br />
1. Actionnez le sélecteur d’effet PRE FX pour sélectionner un<br />
pré-effet.<br />
Si le processeur PRE FX est coupé, il s’active dès que vous<br />
actionnez le sélecteur de pré-effet.<br />
Le bouton PRE FX clignote quand vous éditez le pré-effet.<br />
2. Tournez la commande EDIT pour modifier le réglage des<br />
paramètres du pré-effet.<br />
Selon l’effet sélectionné, il dispose d’un ou de deux paramètres<br />
réglables. Pour éditer le deuxième paramètre, maintenez le<br />
bouton PRE FX enfoncé et actionnez la commande EDIT.<br />
))<br />
p.71 “Pré-effets (PRE-FX)”<br />
Indication de la valeur originale<br />
Vous pouvez vérifier le réglage original d’un paramètre<br />
(le réglage sauvegardé dans le programme d’usine ou<br />
utilisateur). Quand vous tournez la commande pour éditer le<br />
paramètre, un point décimal apparaît dans le coin inférieur<br />
droit de l’affichage quand la valeur sélectionnée correspond à<br />
la valeur originale du paramètre.<br />
Vous pouvez utiliser cette caractéristique pour vérifier les<br />
réglages de paramètres d’un programme qui vous plaît.<br />
3. Actionnez le sélecteur d’effet LOOP FX pour sélectionner<br />
un effet de boucle.<br />
Si le processeur LOOP FX est coupé, il s’active dès que vous<br />
actionnez le sélecteur d’effet de boucle.<br />
Le bouton LOOP FX clignote quand vous éditez l’effet de<br />
boucle.<br />
4. Tournez la commande EDIT pour modifier le réglage des<br />
paramètres de l’effet de boucle.<br />
Selon l’effet sélectionné, il dispose d’un ou de deux<br />
paramètres réglables. Pour éditer le deuxième paramètre,<br />
maintenez le bouton LOOP FX enfoncé et actionnez la<br />
commande EDIT.<br />
))<br />
p.75 “Effets de boucle”<br />
79
<strong>Dynamic</strong> <strong>Looper</strong> Manuel d’utilisation<br />
Sauvegarder un programme<br />
Le réglage PRE FX TARGET (la sélection du signal d’entrée<br />
traité par le pré-effet), le pré-effet modifiant le son de la guitare,<br />
l’effet de boucle modifiant la ou les phrases reproduites en<br />
boucle et le paramètre assigné à la pédale d’expression sont<br />
sauvegardés dans un programme.<br />
Si vous avez modifié le contenu d’un programme puis<br />
sélectionné un autre programme ou coupé l’alimentation<br />
avant de sauvegarder le programme modifié, vous perdez<br />
les réglages que vous avez effectués. Pour conserver vos<br />
changements, sauvegardez le programme de la façon<br />
suivante.<br />
3. Appuyez à nouveau sur le bouton WRITE.<br />
Votre programme remplace le programme utilisateur choisi<br />
à l’étape 2 et l’affichage de programme/valeur cesse de<br />
clignoter et reste allumé.<br />
Remarque: Quand vous sauvegardez un programme,<br />
le <strong>Dynamic</strong> <strong>Looper</strong> se trouve dans le même état<br />
qu’immédiatement après la sélection du programme de<br />
destination. Si, lors de la sauvegarde, vous avez assigné un<br />
paramètre d’effet de boucle à la pédale d’expression, l’effet de<br />
boucle est momentanément désactivé.<br />
1. Appuyez sur le bouton WRITE.<br />
L’indication de l’affichage de programme/valeur clignote.<br />
Si vous avez modifié un programme d’usine (preset), un<br />
numéro de programme utilisateur apparaît.<br />
2. Sélectionnez le programme dans lequel vous voulez<br />
sauvegarder vos réglages avec la commande EDIT.<br />
Votre programme est sauvegardé sous le numéro choisi et<br />
remplace l’ancien programme. Veillez à ne pas écraser un<br />
programme auquel vous tenez.<br />
Il est impossible de sauvegarder vos réglages dans un<br />
programme preset.<br />
80
Réglages de la pédale<br />
d’expression<br />
Vous pouvez utiliser la pédale d’expression pour piloter le<br />
pré-effet ou l’effet de boucle. Cette pédale peut aussi servir de<br />
pédale de volume.<br />
Assigner une fonction à la pédale<br />
d’expression<br />
Le témoin situé en haut à gauche de la pédale indique le<br />
paramètre piloté par la pédale.<br />
Allumé en rouge: La pédale pilote un paramètre de pré-effet.<br />
Eteint: Un paramètre d’effet de boucle est assigné à la pédale<br />
mais l’effet de boucle n’est pas actif. Si vous actionnez la pédale,<br />
vous activez l’effet de boucle et le témoin de la pédale s’allume<br />
en vert.<br />
Allumé en vert: La pédale pilote un paramètre d’effet de<br />
boucle.<br />
Allumé en orange: Le témoin s’allume en orange si l’effet piloté<br />
est coupé. Vous pouvez utiliser la pédale pour piloter le volume<br />
d’entrée.<br />
Si “PRE FX TARGET” est réglé sur “INPUT” (vert) ou sur “MIC”<br />
(rouge), la pédale pilote le volume du signal de la prise INPUT.<br />
Si “PRE FX TARGET” est réglé sur “INPUT&MIC” (orange), la<br />
pédale pilote le volume du signal des prises INPUT et MIC.<br />
Pour assigner la pédale alternativement à un paramètre de<br />
pré-effet et d’effet de boucle, enfoncez avec force l’avant de la<br />
pédale.<br />
Réglages de la pédale d’expression<br />
Le réglage de la pédale d’expression peut être sauvegardé<br />
individuellement pour chaque programme.<br />
Calibrer la pédale d’expression<br />
Si l’effet ou le volume n’atteint pas son niveau maximum quand<br />
vous enfoncez complètement la pédale d’expression ou n’atteint<br />
pas son niveau minimum quand vous la relevez complètement,<br />
calibrez-la en effectuant les opérations suivantes.<br />
Pour le calibrage, actionnez la pédale d’expression avec le pied.<br />
Si vous actionnez la pédale avec la main, le calibrage risque ne<br />
pas être correct.<br />
1. Mettez l’appareil hors tension.<br />
2. Maintenez les boutons CANCEL et LOOP FX enfoncés puis<br />
mettez l’appareil sous tension.<br />
3. Quand l’affichage de programme/valeur indique “PdL”,<br />
relâchez les boutons.<br />
4. Enfoncez la pédale d’expression à fond, comme si vous<br />
vouliez changer son assignation.<br />
Cette position représente la force devant être exercée pour<br />
changer l’assignation de la pédale.<br />
81
<strong>Dynamic</strong> <strong>Looper</strong> Manuel d’utilisation<br />
5. Relevez doucement la pédale d’expression vers vous et<br />
lâchez-la lorsqu’elle est à bout de course.<br />
6. Enfoncez doucement la pédale d’expression et lâchez-la<br />
lorsqu’elle s’arrête.<br />
Pour annuler le calibrage, appuyez sur le bouton CANCEL.<br />
7. Appuyez sur le bouton WRITE.<br />
L’affichage de programme/valeur indique “CPL” durant une<br />
seconde puis le numéro de programme réapparaît.<br />
Si le calibrage n’a pas eu lieu correctement, l’affichage de<br />
programme/valeur indique “Err”. Dans ce cas, recommencez<br />
la procédure à partir de l’étape 4.<br />
S’il est impossible de calibrer la pédale correctement après<br />
plusieurs tentatives, il est possible que le <strong>Dynamic</strong> <strong>Looper</strong> ait<br />
un problème. Veuillez contacter votre revendeur VOX.<br />
Rétablir les réglages d’usine<br />
Vous pouvez rétablir les réglages d’usine du <strong>Dynamic</strong> <strong>Looper</strong>.<br />
Remarque: Cette opération efface tous les programmes que<br />
vous avez créés et les remplace par des programmes d’usine.<br />
1. Mettez l’appareil hors tension.<br />
2. En maintenant les boutons CANCEL et PRE FX TARGET<br />
enfoncés, mettez l’appareil sous tension.<br />
3. Quand la mention “Int” clignote à l’affichage de<br />
programme/valeur, relâchez les boutons.<br />
Pour renoncer au rétablissement des réglages d’usine,<br />
appuyez sur le bouton CANCEL.<br />
4. Appuyez sur le bouton WRITE.<br />
Si les programmes ont été correctement initialisés, l’affichage<br />
de programme/valeur indique “CP” puis le <strong>Dynamic</strong> <strong>Looper</strong><br />
démarre de la façon habituelle.<br />
Ne mettez jamais l’appareil hors tension durant<br />
l’initialisation des réglages.<br />
82
Coupure automatique d’alimentation<br />
Coupure automatique<br />
d’alimentation<br />
Le <strong>Dynamic</strong> <strong>Looper</strong> est doté d’une fonction de coupure<br />
automatique de l’alimentation après quatre heures d’inactivité.<br />
Remarque: La fonction de coupure automatique d’alimentation<br />
ne s’active pas même en cas d’inactivité si un signal audio est<br />
présent à l’entrée.<br />
Remarque: A la sortie d’usine du <strong>Dynamic</strong> <strong>Looper</strong>, cette<br />
fonction de coupure automatique d’alimentation est activée.<br />
2. Maintenez les boutons STOP MODE et WRITE enfoncés<br />
puis mettez l’appareil sous tension.<br />
L’affichage de programme/valeur indique “EnA” puis le<br />
<strong>Dynamic</strong> <strong>Looper</strong> démarre normalement.<br />
Remarque: L’état activé/désactivé de la fonction de coupure<br />
automatique d’alimentation est mémorisé après la mise hors<br />
tension.<br />
Désactiver la coupure automatique<br />
d’alimentation<br />
Vous pouvez désactiver cette fonction de coupure automatique<br />
d’alimentation.<br />
1. Mettez le <strong>Dynamic</strong> <strong>Looper</strong> hors tension.<br />
2. Maintenez les boutons STOP MODE et CANCEL enfoncés<br />
puis mettez l’appareil sous tension.<br />
L’affichage de programme/valeur indique “diS” puis le<br />
<strong>Dynamic</strong> <strong>Looper</strong> démarre normalement.<br />
Activer la coupure automatique<br />
d’alimentation<br />
Pour réactiver la coupure automatique d’alimentation après<br />
l’avoir désactivée, procédez comme suit.<br />
1. Mettez le <strong>Dynamic</strong> <strong>Looper</strong> hors tension.<br />
83
<strong>Dynamic</strong> <strong>Looper</strong> Manuel d’utilisation<br />
Dépannage<br />
L’appareil ne s’allume pas<br />
• Avez-vous branché l’adaptateur secteur fourni à la prise<br />
DC9V sur le panneau arrière?<br />
• Le câble de l’adaptateur secteur est-il branché à une prise<br />
secteur?<br />
• La prise secteur n’est-elle pas défectueuse?<br />
• L’adaptateur est-il endommagé?<br />
• Le commutateur STANDBY est-il en position “ON”?<br />
Pas de son<br />
• Votre instrument est-il bien branché à la prise INPUT du<br />
<strong>Dynamic</strong> <strong>Looper</strong>?<br />
• Le câble est-il endommagé?<br />
• Le volume du dispositif branché à la prise INPUT est-il réglé<br />
au minimum?<br />
• Si vous utilisez un micro, la commande MIC TRIM est-elle<br />
réglée correctement?<br />
• Avez-vous assigné le volume à la pédale d’expression et la<br />
pédale se est-elle complètement relevée?<br />
Pas d’effet<br />
• Le processeur est-il activé?<br />
• L’effet de boucle ne fonctionne que si vous avez enregistré<br />
une phrase pour la boucle 1 ou 2.<br />
• Avez-vous assigné le volume à la pédale d’expression?<br />
• Vérifiez les réglages d’effet de boucle.<br />
Le son n’est pas bon<br />
• Vérifiez les réglages d’effet de boucle.<br />
Le son ne change pas quand vous actionnez les<br />
pédales, boutons, sélecteurs ou commandes<br />
• L’effet est-il coupé?<br />
• La fonction “Key Lock” est-elle activée?<br />
L’appareil s’éteint de façon inattendue.<br />
• Le <strong>Dynamic</strong> <strong>Looper</strong> est doté d’une fonction de coupure<br />
automatique de l’alimentation après quatre heures d’inactivité.<br />
Pour désactiver cette fonction, voyez “Désactiver la coupure<br />
automatique de l’alimentation” à la page 83.<br />
Pas de reproduction de la boucle<br />
• Avez-vous choisi une boucle contenant une phrase?<br />
84
Schéma de principe<br />
Schéma de principe<br />
Edition<br />
Edition<br />
INPUT (Guitare)<br />
MIC IN<br />
MIC TRIM<br />
Pre FX<br />
*1<br />
*1<br />
Boucle 1<br />
Loop FX<br />
*1<br />
Limiteur<br />
global<br />
OUTPUT<br />
Boucle 2<br />
*1<br />
*1<br />
Pre FX TARGET<br />
Métronome<br />
*1<br />
Pédale d’expression<br />
*1: La pédale d’expression peut piloter ce paramètre s’il lui est assigné.<br />
85
<strong>Dynamic</strong> <strong>Looper</strong> Manuel d’utilisation<br />
Fiche technique<br />
Effets<br />
Pré-effets: 11 catégories (27 variations)<br />
Effets de boucle: 11 catégories<br />
Limiteur global: 2 types<br />
Modes d’arrêt: 3 types<br />
Nombre de programmes: 100 (50 prog. preset, 50 prog.<br />
utilisateur)<br />
Durée d’enregistrement<br />
Durée maximum d’enregistrement: 90 secondes au total<br />
Nombre de boucles: 2<br />
Entrées audio<br />
Prise INPUT (mono)<br />
Prise MIC IN (XLR symétrique, sans alimentation fantôme)<br />
Commande MIC IN TRIM (pour micro)<br />
Sortie audio<br />
Prise OUTPUT (mono)<br />
Traitement des signaux<br />
Conversion A/N: 24 bits<br />
Conversion N/A: 24 bits<br />
Fréquence d’échantillonnage<br />
44,1kHz<br />
Plage dynamique<br />
94dB ou mieux<br />
Niveau d’entrée maximum<br />
+7dBu (typ.)<br />
Alimentation<br />
Adaptateur secteur (Prise DC 9V [<br />
STANDBY<br />
Consommation électrique<br />
140mA<br />
Dimensions (L x P x H)<br />
264 x 245 x 76 (mm)<br />
Poids<br />
2,2 kg<br />
] ), Commutateur<br />
Accessoires fournis<br />
Adaptateur secteur, Manuel d’utilisation, Liste de<br />
programmes<br />
* 0dBu= 0,775V RMS<br />
* Les caractéristiques et l’aspect du produit sont susceptibles<br />
d’être modifiés sans avis préalable pour y apporter des<br />
améliorations.<br />
86
<strong>Dynamic</strong> <strong>Looper</strong> Bedienungsanleitung
<strong>Dynamic</strong> <strong>Looper</strong> Bedienungsanleitung<br />
Vorsichtsmaßnahmen<br />
Aufstellungsort<br />
Vermeiden Sie das Aufstellen des Geräts an Orten, an denen<br />
• es direkter Sonneneinstrahlung ausgesetzt ist;<br />
• hohe Feuchtigkeit oder Extremtemperaturen auftreten können;<br />
• Staub oder Schmutz in großen Mengen vorhanden sind;<br />
• das Gerät Erschütterungen ausgesetzt sein kann.<br />
• in der Nähe eines Magnetfeldes.<br />
Stromversorgung<br />
Schließen Sie das optionale Netzteil nur an eine geeignete Steckdose an. Verbinden<br />
Sie es niemals mit einer Steckdose einer anderen Spannung.<br />
Störeinflüsse auf andere Elektrogeräte<br />
Dieser kann bei in der Nähe aufgestellten Rund-funkempfängern oder Fernsehgeräten<br />
Empfangsstörungen hervorrufen. Betreiben Sie solche Geräte nur<br />
in einem geeigneten Abstand von diesem Erzeugnis.<br />
Bedienung<br />
Vermeiden Sie bei der Bedienung von Schaltern und Reglern unangemessenen<br />
Kraftaufwand.<br />
Reinigung<br />
Bei auftretender Verschmutzung können Sie das Gehäuse mit einem trockenen,<br />
sauberen Tuch abwischen. Verwenden Sie keinerlei Flüssigreiniger wie<br />
beispielsweise Reinigungsbenzin, Verdünnungs- oder Spülmittel. Verwenden<br />
Sie niemals brennbare Reiniger.<br />
Bedienungsanleitung<br />
Bewahren Sie diese Bedienungsanleitung gut auf, falls Sie sie später noch<br />
einmal benötigen.<br />
Feuer oder ein elek-trischer Schlag die Folge sein.<br />
Beachten Sie, daß keinerlei Fremdkörper in das Gerät gelangen. Sollte ein<br />
Fremdkörper in das Gerät gelangt sein, so trennen Sie es sofort vom Netz.<br />
Wenden Sie sich dann an Ihren VOX-Fachhändler<br />
Hinweis zur Entsorgung (Nur EU)<br />
Wenn Sie das Symbol mit der „durchgekreuzten Mülltonne“ auf<br />
Ihrem Produkt, der dazugehörigen Bedienungsanleitung, der<br />
Batterie oder dem Batteriefach sehen, müssen Sie das Produkt in<br />
der vorgeschriebenen Art und Weise entsorgen. Dies bedeutet,<br />
dass dieses Produkt mit elektrischen und elektronischen Komponenten<br />
nicht mit dem normalen Hausmüll entsorgt werden<br />
darf. Für Produkte dieser Art existiert ein separates, gesetzlich<br />
festgelegtes Entsorgungssystem. Gebrauchte elektrische und elektronische<br />
Geräte müssen separat entsorgt werden, um ein umweltgerechtes Recycling<br />
sicherzustellen. Diese Produkte müssen bei benannten Sammelstellen<br />
abgegeben werden. Die Entsorgung ist für den Endverbraucher<br />
kostenfrei! Bitte erkundigen sie sich bei ihrer zuständigen Behörde, wo<br />
sie diese Produkte zur fachgerechten Entsorgung abgeben können.<br />
Falls ihr Produkt mit Batterien oder Akkumulatoren ausgerüstet ist, müssen<br />
sie diese vor Abgabe des Produktes entfernen und separat entsorgen<br />
(siehe oben). Die Abgabe dieses Produktes bei einer zuständigen Stelle<br />
hilft ihnen, dass das Produkt umweltgerecht entsorgt wird. Damit leisten<br />
sie persönlich einen nicht unerheblichen Beitrag zum Schutz der Umwelt<br />
und der menschlichen Gesundheit vor möglichen negativen Effekten<br />
durch unsachgemäße Entsorgung von Müll. Batterien oder Akkus, die<br />
Schadstoffe enthalten, sind auch mit dem Symbol einer durchgekreuzten<br />
Mülltonne gekennzeichnet. In der Nähe zum Mülltonnensymbol befindet<br />
sich die chemische Bezeichnung des Schadstoffes.<br />
Cd oder NiCd steht für Cadmium, Pb für Blei und Hg für Quecksilber.<br />
88<br />
Flüssigkeiten und Fremdkörper<br />
Stellen Sie niemals Behältnisse mit Flüssigkeiten in der Nähe des Geräts auf.<br />
Wenn Flüssigkeit in das Gerät gelangt, können Beschädigung des Geräts,
<br />
WICHTIGER HINWEIS FÜR KUNDEN<br />
Dieses Produkt wurde unter strenger Beachtung von Spezifikationen und<br />
Spannungsanforderungen hergestellt, die im Bestimmungsland gelten.<br />
Wenn Sie dieses Produkt über das Internet, per Postversand und/oder<br />
mit telefonischer Bestellung gekauft haben, müssen Sie bestätigen, dass<br />
dieses Produkt für Ihr Wohngebiet ausgelegt ist.<br />
WARNUNG: Verwendung dieses Produkts in einem anderen Land als<br />
dem, für das es bestimmt ist, verwendet wird, kann gefährlich sein und<br />
die Garantie des Herstellers oder Importeurs hinfällig lassen werden.<br />
Bitte bewahren Sie diese Quittung als Kaufbeleg auf, da andernfalls das<br />
Produkt von der Garantie des Herstellers oder Importeurs ausgeschlossen<br />
werden kann.<br />
* Alle Produkt- und Firmennamen sind Warenzeichen oder eingetragene<br />
Warenzeichen der betreffenden Eigentümer.<br />
89
<strong>Dynamic</strong> <strong>Looper</strong> Bedienungsanleitung<br />
Inhaltsübersicht<br />
Vorweg.............................................. 92<br />
Die wichtigsten Funktionen.....................92<br />
Aufbau des <strong>Dynamic</strong> <strong>Looper</strong>....................93<br />
Bedienelemente............................... 94<br />
Oberseite....................................................94<br />
Rückseite....................................................99<br />
Anschließen des Instruments und<br />
einschalten..................................... 100<br />
Anschlüsse...............................................101<br />
Einschalten...............................................101<br />
Ausschalten..............................................101<br />
Spielen von Programmen.............. 102<br />
Das Gitarren- oder Mikrofonsignal mit<br />
einem Effekt bearbeiten.........................102<br />
Aufzeichnen von Phrasen.............. 103<br />
Aufnahme von ‘Loop 1’...........................103<br />
Verwendung des Metronoms während der Aufnahme...104<br />
Exakte Länge der Schleifen festlegen<br />
(Loop Quantize) ......................................................................105<br />
Starten der Aufnahme durch das Spielen der ersten Noten<br />
(Auto Rec)..................................................................................105<br />
Aufnahme von ‘Loop 2’...........................105<br />
Über die Aufnahmedauer.......................106<br />
Nach der Aufnahme einer Phrase..........107<br />
Hinzufügen weiterer Parts zu einer aufgezeichneten<br />
Phrase........................................................................................107<br />
Bearbeiten aufgezeichneter Phrasen mit dem<br />
Loop-Effekt...............................................................................107<br />
Erneute Aufnahme einer Phrase mit dem Loop-Effekt....107<br />
Ergänzen einer Phrase um<br />
weitere Parts................................... 107<br />
Rückgängig machen des<br />
Overdub-Vorgangs..................................108<br />
Wiederherstellen der<br />
Overdub-Aufnahme................................108<br />
90
Inhaltsübersicht<br />
Bearbeiten aufgezeichneter Phrasen<br />
mit dem Loop-Effekt...................... 108<br />
‘Key Lock’-Funktion.................................109<br />
Festlegen, wie die Schleife endet.... 109<br />
Resampling..................................... 110<br />
Bearbeiten aufgezeichneter Phrasen<br />
mit dem Limiter.............................. 111<br />
Löschen einer Loop-Phrase........... 111<br />
Loop-Status.................................... 112<br />
Bei laufender Aufnahme/<br />
Overdub-Ergänzung...............................112<br />
Während des ‘Resampling’-Vorgangs....112<br />
Über den Pre- und Loop-Effekt..... 113<br />
Effektparameter......................................113<br />
Pre-Effekte................................................................................113<br />
Loop-Effekte.............................................................................117<br />
Editieren eines Programms....................121<br />
Anwahl eines Programms......................................................121<br />
Editieren der Effekte...............................................................121<br />
Speichern der Einstellungen.................................................122<br />
Einstellungen für das<br />
Expression-Pedal............................ 123<br />
Wahl der Pedalfunktion..........................123<br />
Kalibrieren des Expression-Pedals.........123<br />
Laden der Werkseinstellungen..... 124<br />
Energiesparfunktion...................... 125<br />
Deaktivieren der Energiesparfunktion...125<br />
Aktivieren der Energiesparfunktion......125<br />
Fehlersuche.................................... 126<br />
Blockschaltbild............................... 127<br />
Wichtigste technische Daten......... 128<br />
91
<strong>Dynamic</strong> <strong>Looper</strong> Bedienungsanleitung<br />
Vorweg<br />
Vielen Dank für Ihre Entscheidung zu einem VOX <strong>Dynamic</strong><br />
<strong>Looper</strong> Pedal.<br />
Um alle Funktionen dieses Geräts kennen zu lernen und ohne<br />
nennenswerte Probleme zu nutzen, sollten Sie sich diese<br />
Bedienungsanleitung vollständig durchlesen. Legen Sie sie<br />
danach an einen Ort, wo Sie sie bei Bedarf auch wiederfinden.<br />
Die wichtigsten Funktionen<br />
• Zwei separate Schleifen („Loops“) erlauben die Aufnahme<br />
zweier Phrasen mit einer Aufnahmedauer von insgesamt 90<br />
Sekunden (für beide Loops). Mit den Fußtastern des<br />
<strong>Dynamic</strong> <strong>Looper</strong> können Sie die aufgezeichneten Phrasen<br />
separat abspielen und bearbeiten.<br />
• Die „Loop Quantize“-Funktion erlaubt die Erstellung von<br />
Schleifen mit exakt der gewünschten Länge.<br />
• Zwei interne Multi-Effektprozessoren: Mit dem „Pre-Effekt“<br />
können die live gespielten Parts bearbeitet werden. Der<br />
„Loop-Effekt“ dagegen erlaubt die Bearbeitung der zuvor<br />
aufgezeichneten Phrasen.<br />
• Mit dem Expression-Pedal können Sie den Pre- oder Loop-<br />
Effekt beeinflussen, was im Falle des Pre-Effekts auch bei<br />
laufender Aufnahme möglich ist. Die Wiedergabe einer<br />
aufgezeichneten Phrase kann ebenfalls mit dem Expression-<br />
Pedal beeinflusst werden, das dann den Loop-Effekt<br />
ansteuert.<br />
• Eine Schleife kann im Overdub-Verfahren um weitere Parts<br />
ergänzt werden. Für diese Overdubs steht sogar eine „Undo/<br />
Redo“-Funktion zur Verfügung.<br />
• An den Mikrofoneingang des <strong>Dynamic</strong> <strong>Looper</strong> können auch<br />
andere Signalquellen als eine Gitarre angeschlossen werden,<br />
so z.B. ein Mikrofon, ein Percussion-Instrument usw. Das<br />
Signal des Mikrofoneingangs kann ebenfalls mit dem Pre-<br />
Effekt bearbeitet werden.<br />
• Phrasen, die Sie mit dem Loop-Effekt bearbeiten, können in<br />
dieser Form erneut mit der „Resampling“-Funktion<br />
aufgenommen werden.<br />
• Das Ausgangssignal kann mit einem Master-Limiter<br />
bearbeitet werden. Damit lassen sich Pegelunterschiede<br />
kompensieren, die beim Ergänzen einer Schleife um<br />
zahlreiche weitere Parts unweigerlich sind.<br />
92
Vorweg<br />
Aufbau des <strong>Dynamic</strong> <strong>Looper</strong><br />
Der <strong>Dynamic</strong> <strong>Looper</strong> umfasst folgende Blöcke. (Siehe auch das Blockschaltbild auf S. 127.)<br />
Das über die INPUT- oder MIC IN-Buchse empfangene Signal kann mit dem Pre-Effekt (PRE FX) bearbeitet und im „Loop 1“- oder<br />
„Loop 2“-Puffer aufgezeichnet werden. Pre-Effekte bearbeiten das Signal vor dem <strong>Looper</strong> und werden also ebenfalls aufgezeichnet.<br />
Der Loop-Effekt (LOOP FX) dagegen dient zum Bearbeiten einer Schleife während der Wiedergabe. Mit dem Expression-Pedal<br />
können die Parameter dieses Effekts in Echtzeit beeinflusst werden.<br />
Signalfluss<br />
Aufnahme einer Loop<br />
INPUT (Gitarre)<br />
MIC IN<br />
MIC TRIM<br />
Programm<br />
PRE FX<br />
TARGET<br />
Expression<br />
-Pedal<br />
PRE FX<br />
Schleifenwiedergabe<br />
Schleife<br />
Loop1<br />
Loop2<br />
LOOP FX<br />
Master-<br />
Limiter<br />
Metronom<br />
Ausgang<br />
PRE FX TARGET<br />
Mit „PRE FX TARGET“ legen Sie fest, welches Signal vom<br />
Pre-Effekt bearbeitet wird: INPUT-Buchse, MIC IN-Buchse<br />
oder beide.<br />
PRE FX<br />
Mit dem Pre-Effekt können die Signale der INPUT- oder MIC<br />
IN-Buchse bearbeitet werden.<br />
Es stehen 11 verschiedene Typen für den Pre-Effekt zur Wahl.<br />
Jeder Effekt bietet zwei einstellbare Parameter, die sich nach<br />
dem jeweils gewählten Effekttyp richten. Außerdem können<br />
die Effektparameter mit dem Expression-Pedal bearbeitet<br />
werden, was Ihre Parts oftmals interessanter macht.<br />
Schleife<br />
Die „Loops“ (Schleifen) zeichnen die Signale mit Pre-<br />
Effektbearbeitung auf.<br />
Es gibt zwei Schleifen: „Loop 1“ und „Loop 2“. Die maximale<br />
kombinierte Aufnahmedauer der beiden Schleifen beträgt 90<br />
Sekunden.<br />
93
<strong>Dynamic</strong> <strong>Looper</strong> Bedienungsanleitung<br />
LOOP FX<br />
Auch nach der Aufnahme kann man eine Schleife noch mit<br />
Effekt bearbeiten – und zwar mit dem Loop-Effekt. Wenn Sie<br />
diesen Effekt aktivieren, werden die Loop-Phrasen während<br />
der Wiedergabe bearbeitet.<br />
Es stehen 11 verschiedene Typen für den Loop-Effekt zur Wahl.<br />
Jeder Effekt bietet zwei einstellbare Parameter, die sich nach<br />
dem jeweils gewählten Effekttyp richten. Bei Bedarf können Sie<br />
den gewählten Effekt während der Wiedergabe mit dem<br />
Expression-Pedal beeinflussen.<br />
Bedienelemente<br />
Oberseite<br />
Expression-Pedal<br />
Mit dem Expression-Pedal können Sie den Pre- oder Loop-<br />
Effekt beeinflussen oder aber die Lautstärke einstellen.<br />
2 3<br />
7<br />
8 4<br />
5<br />
Metronom<br />
Sie können während der Aufnahme das interne Metronom<br />
nutzen.<br />
Wenn Sie das Metronom aktivieren, wird auch die „Loop<br />
Quantize“-Funktion aktiviert. Diese Funktion legt anhand des<br />
gewählten Tempos automatisch die Loop-Länge fest, so dass<br />
Ihre Schleifen aus dem Stand „schön rund“ laufen.<br />
1<br />
6<br />
Master-Limiter<br />
Das Loop-Ausgangssignal kann mit dem Master-Limiter<br />
bearbeitet werden. Der Limiter eignet sich einerseits für die<br />
Pegelangleichung der beiden Schleifen und andererseits für die<br />
Einstellung einer automatischen Balance zwischen den bereits<br />
aufgezeichneten und neu hinzugefügten Signalen.<br />
94
Bedienelemente<br />
1. Steuerung der Programme/Loops<br />
Hier können Schleifenfunktionen wie die Aufnahme und<br />
Wiedergabe und das Tempo für „Loop 1“ und „Loop 2“<br />
eingestellt werden.<br />
e<br />
c<br />
a<br />
b<br />
d<br />
a. Dioden der aktuellen Loop<br />
Diese Dioden zeigen an, welche Schleife momentan bedient<br />
werden kann (Aufnahme und Wiedergabe). Auch das STOPund<br />
REC/PLAY/OVERDUB-Pedal sind jeweils der gewählten<br />
Schleife zugeordnet.<br />
Um einen Loop-Puffer zu wählen, müssen Sie das STOP- und<br />
PROGRAM UP-Pedal gleichzeitig betätigen. Damit wählen Sie<br />
abwechselnd „Loop 1“ und „Loop 2“.<br />
b. LOOP STATUS-Dioden<br />
Diese Dioden zeigen den Status von „Loop 1“ und „Loop 2“ an.<br />
))<br />
„Loop-Status“, S.112<br />
f<br />
g<br />
c. REC/PLAY/OVERDUB-Pedal<br />
Mit diesem Pedal kann die Aufnahme, Wiedergabe, der<br />
Overdub- oder Resampling-Vorgang für die aktuell gewählte<br />
Schleife gestartet werden.<br />
Wenn der betreffende Loop-Speicher noch keine Aufnahme<br />
enthält, wechselt man bei wiederholter Betätigung des Pedals<br />
von Aufnahme→ Wiedergabe→ Overdub.<br />
Wenn der betreffende Loop-Speicher bereits eine Aufnahme<br />
enthält, wechselt man bei wiederholter Betätigung des Pedals<br />
von Wiedergabe→ Overdub.<br />
Wenn die RESAMPLING-Diode blinkt, dient das Pedal zum<br />
Starten des Resampling-Vorgangs.<br />
d. RESAMPLING-Diode<br />
Diese Diode zeigt an, dass die „Resampling“-Funktion aktiv ist.<br />
Mit dem REC/PLAY/OVERDUB-Pedal kann der Resampling-<br />
Vorgang dann gestartet und angehalten werden.<br />
))<br />
„Resampling“, S.110<br />
e. STOP-Pedal<br />
Mit diesem Pedal kann die Aufnahme, Wiedergabe bzw. der<br />
Overdub- oder Resampling-Vorgang angehalten werden.<br />
Außerdem erlaubt dieses Pedal das Löschen einer<br />
aufgezeichneten Loop-Phrase.<br />
Den Pre-Effektblock kann man deaktivieren, indem man dieses<br />
Pedal und das PROGRAM UP-Pedal gleichzeitig ±2 Sekunden<br />
lang gedrückt hält.<br />
f. PROGRAM UP-Pedal<br />
Mit diesem Pedal können Sie Programme und Loops wählen.<br />
Außerdem kann man hiermit einen Overdub-Vorgang<br />
rückgängig machen und danach wiederherstellen.<br />
95
<strong>Dynamic</strong> <strong>Looper</strong> Bedienungsanleitung<br />
g. TRIGGER/TAP-Pedal<br />
Mit diesem Pedal starten Sie die aufgezeichnete Loop-Phrase<br />
wieder ab dem Beginn.<br />
Außerdem dient dieses Pedal zum Festlegen des<br />
Metronomtempos und für die BPM-Synchronisation<br />
bestimmter Effekte.<br />
Mit diesem Pedal kann die „Loop Quantize“-Funktion ein- und<br />
ausgeschaltet werden. Diese Funktion legt das Ende einer Schleife<br />
bei der ersten Aufnahme immer an eine Stelle, die rhythmisch<br />
Sinn macht. Somit läuft die Schleife hinterher schön rund.<br />
))<br />
„Exakte Länge der Schleifen festlegen<br />
(Loop Quantize)“, S.105<br />
2. PRE FX-Sektion<br />
Hier kann der Pre-Effekt eingestellt werden. Mit dem Pre-<br />
Effekt können die Signale der INPUT- und MIC IN-Buchse<br />
bearbeitet werden.<br />
Mit dem PRE FX TARGET-Taster bestimmen Sie, welches<br />
Eingangssignal genau bearbeitet wird.<br />
))<br />
„d. PRE FX TARGET-Taster“, S.98<br />
a. Wahlregler<br />
Hiermit wählen Sie einen Pre-Effekttyp.<br />
b. PRE FX-Taster<br />
Hiermit schalten Sie den Pre-Effekt ein und aus.<br />
Wenn der Effekt aktiv ist, leuchtet der Taster rot. Beim<br />
Editieren des Effekts blinkt der Taster.<br />
Anmerkung: Beim Drehen am Wahlregler wird der Pre-Effekt<br />
eingeschaltet.<br />
Tipp: Den Pre-Effektblock kann man deaktivieren, indem man<br />
das STOP- und PROGRAM UP-Pedal simultan ±2 Sekunden<br />
lang gedrückt hält.<br />
3. LOOP FX-Sektion<br />
Hier kann der Loop-Effekt eingestellt werden. Der Loop-Effekt<br />
beeinflusst die Wiedergabe der „Loop 1“- und „Loop<br />
2“-Phrasen. Mit diesem Effekt kann man die Tonhöhe der<br />
Phrase („PITCH“-Effekt) ändern oder eine umgekehrte Fassung<br />
des Wiedergabesignals hinzufügen („REVERSE“-Effekt).<br />
Anmerkung: Der Loop-Effekt beeinflusst nur die<br />
Phrasenwiedergabe der beiden „Loop“-Puffer und steht während<br />
der Aufnahme oder eines Overdub-Vorgangs nicht zur Verfügung.<br />
a<br />
b<br />
96<br />
a<br />
b
Bedienelemente<br />
a. Wahlregler<br />
Hiermit wählen Sie einen Loop-Effekttyp. Es wird nur jeweils<br />
der hier gewählte Typ verwendet.<br />
b. LOOP FX-Taster<br />
Hiermit wird der Loop-Effekt ein- und ausgeschaltet.<br />
Wenn der Effekt aktiv ist, leuchtet der Taster grün. Beim<br />
Editieren des Effekts blinkt der Taster.<br />
Anmerkung: Beim Drehen am Wahlregler wird der Loop-<br />
Effekt eingeschaltet.<br />
4. Expression-Pedal<br />
Mit dem Expression-Pedal können Sie den Pre- oder Loop-<br />
Effekt beeinflussen oder aber die Lautstärke einstellen.<br />
a. Pedaldiode<br />
Diese Diode zeigt an, welche Funktion<br />
das Expression-Pedal momentan hat.<br />
))<br />
„Einstellungen für das Expression-<br />
Pedal“, S.123<br />
a<br />
Welche Parameter angesteuert werden können, erfahren Sie<br />
unter „Über den Pre- und Loop-Effekt“ auf S. 113.<br />
5. METRONOME-Sektion<br />
Hier können Sie das Metronom einstellen und die Taktart<br />
wählen.<br />
a. METRONOME-Taster<br />
Mit diesem Taster schalten Sie das Metronom ein/<br />
aus.<br />
Wenn Sie den Taster drücken, beginnt er zu<br />
blinken und das Metronom beginnt zu zählen. Der<br />
Taster blinkt immer im Tempo, das Sie zuletzt mit<br />
a<br />
dem TRIGGER/TAP-Pedal eingestellt haben.<br />
Wenn Sie die Metronomeinstellungen ändern<br />
möchten, müssen Sie diesen Taster gedrückt halten, während<br />
Sie am EDIT-Regler drehen.<br />
Um die Taktart zu ändern, müssen Sie diesen Taster ±2<br />
Sekunden gedrückt halten und anschließend am EDIT-Regler<br />
drehen.<br />
))<br />
„Verwendung des Metronoms während der Aufnahme“, S.104<br />
b. Expression-Pedal<br />
Mit diesem Pedal können Sie den<br />
zugeordneten Effektparameter<br />
beeinflussen oder die Lautstärke<br />
regeln.<br />
Alles Weitere zur<br />
Funktionszuordnung des Pedals<br />
finden Sie unter „Einstellungen für<br />
das Expression-Pedal“ auf S. 123.<br />
b<br />
97
<strong>Dynamic</strong> <strong>Looper</strong> Bedienungsanleitung<br />
6. Allgemeine Einstellungen<br />
Hier können Sie die „Auto Rec“-Funktion einstellen, festlegen,<br />
was beim Anhalten einer Phrase passiert, den Master-Limiter<br />
einstellen und den Eingang wählen, dessen Signal mit dem<br />
Pre-Effekt bearbeitet werden soll.<br />
7. EDIT/WRITE/Display-Sektion<br />
a<br />
b<br />
98<br />
a b c d<br />
a. AUTO REC-Taster<br />
Hiermit schalten Sie die „Auto Rec“-Funktion ein und aus.<br />
))<br />
„Starten der Aufnahme durch das Spielen der ersten Noten<br />
(Auto Rec)“, S.105<br />
b. STOP MODE-Taster<br />
Mit diesem Taster bestimmen Sie, wie die Phrasenwiedergabe<br />
anhält, wenn Sie den STOP-Taster drücken.<br />
))<br />
„Festlegen, wie die Schleife endet“, S.109<br />
c. MASTER LIMITER-Taster<br />
Mit diesem Taster haben Sie Zugriff auf die Parameter des<br />
Master-Limiters, mit dem die Phrasen des „Loop 1“- und<br />
„Loop 2“-Puffers bearbeitet werden können.<br />
d. PRE FX TARGET-Taster<br />
Mit diesem Taster wählen Sie den Eingang, dessen Signal mit<br />
dem Pre-Effekt bearbeitet werden soll.<br />
))<br />
„Das Gitarren- oder Mikrofonsignal mit einem Effekt<br />
bearbeiten“, S.102<br />
c<br />
a. Programm-/Werte-Display<br />
Normalerweise wird hier die Programmnummer angezeigt.<br />
Wenn Sie einen Effekt editieren, zeigt das Display den<br />
Parameterwert an.<br />
b. EDIT-Regler<br />
Mit diesem Regler können Sie Parameterwerte einstellen oder<br />
den Zielspeicher für ein neues Programm wählen.<br />
c. WRITE-Taster<br />
Drücken Sie diesen Taster, um die aktuellen Effekteinstellungen<br />
zu speichern.<br />
Wenn das Display eine Programmnummer anzeigt können Sie<br />
zwischen dem User- und Preset-Bereich hin und her wechseln,<br />
indem Sie diesen Taster ±2 Sekunden lang gedrückt halten.<br />
d
Bedienelemente<br />
d. CANCEL-Taster<br />
Drücken Sie diesen Taster, um den gewählten Befehl (z.B. die<br />
Speicherung eines Programms) abzubrechen.<br />
Um die Taster, Regler und Wahlschalter des Bedienfeldes zu<br />
sperren („Key Lock“-Funktion), müssen Sie diesen Taster ±2<br />
Sekunden lang gedrückt halten. Um die „Key Lock“-Funktion<br />
danach wieder zu deaktivieren, müssen Sie den Taster erneut<br />
±2 Sekunden lang gedrückt halten.<br />
Wenn Sie diesen Taster gemeinsam mit dem AUTO REC-Taster<br />
betätigen, springen Sie in Zehnerschritten durch die<br />
Programme.<br />
8. PEAK-Diode<br />
Diese Diode leuchtet, wenn der an der INPUToder<br />
MIC IN-Buchse anliegende Signalpegel zu<br />
hoch ist. Wenn die Diode leuchtet, müssen Sie<br />
die Lautstärke der Gitarre bzw. die Einstellung<br />
des MIC TRIM-Reglers verringern.<br />
Rückseite<br />
1. Kabelhaken<br />
Wickeln Sie das Netzteilkabel um diesen Haken, um zu<br />
verhindern, dass sich die Verbindung während des Betriebs<br />
löst.<br />
2. DC 9V-Buchse<br />
Schließen Sie hier das beiliegende AC-Netzteil an.<br />
99
<strong>Dynamic</strong> <strong>Looper</strong> Bedienungsanleitung<br />
3. MIC IN-Buchse<br />
Hier kann ein handelsübliches dynamisches Mikrofon<br />
angeschlossen werden.<br />
Kondensatormikrofone, die Phantomspeisung erfordern,<br />
können nicht verwendet werden.<br />
4. MIC TRIM-Regler<br />
Hiermit stellen Sie den Eingangspegel des Mikrofons ein.<br />
5. STANDBY-Schalter<br />
Hiermit schalten Sie das Gerät ein und aus.<br />
6. INPUT-Buchse<br />
Hier müssen Sie Ihre Gitarre anschließen.<br />
Anschließen des Instruments<br />
und einschalten<br />
Jetzt wird es Zeit, dass Sie Ihre Gitarre an den <strong>Dynamic</strong> <strong>Looper</strong><br />
anschließen und letzteren mit Ihrem Verstärker verbinden.<br />
Vor dem Einschalten müssen Sie die Lautstärke aller<br />
verwendeten Geräte auf den Mindestwert stellen.<br />
AC-Netzteil<br />
Mikrofon<br />
Gitarre<br />
Gitarrenverstärker,<br />
Recorder usw.<br />
Mischpult,<br />
7. OUTPUT-Buchse<br />
Verbinden Sie diese Buchse mit Ihrem Gitarrenverstärker oder<br />
einem Mischpult. Das Ausgangssignal ist mono.<br />
100
Anschlüsse<br />
1. Stellen Sie den STANDBY-Schalter des <strong>Dynamic</strong> <strong>Looper</strong><br />
bei Bedarf auf „STANDBY“.<br />
2. Verbinden Sie die OUTPUT-Buchse über ein geeignetes<br />
Kabel mit Ihrem Gitarrenverstärker oder einem Mischpult.<br />
Anmerkung: Das Ausgangssignal des <strong>Dynamic</strong> <strong>Looper</strong> ist<br />
mono.<br />
Schließen Sie niemals einen Kopfhörer an die OUTPUT-<br />
Buchse an. Dabei könnte der Kopfhörer schwer beschädigt<br />
werden.<br />
3. Verbinden Sie Ihre Gitarre über ein geeignetes Kabel mit<br />
der INPUT-Buchse. Alternativ können Sie ein Mikrofon an<br />
die MIC IN-Buchse anschließen.<br />
Je nach dem Aufstellungsort des Verstärkers, den Sie an die<br />
OUTPUT-Buchse angeschlossen haben, kann es zu<br />
Rückkopplung kommen. Wenn tatsächlich Rückkopplung<br />
auftritt, müssen Sie folgende Maßnahmen treffen.<br />
• Drehen Sie das Mikrofon in eine andere Richtung.<br />
• Entfernen Sie das Mikrofon vom Lautsprecher.<br />
• Ändern Sie die Einstellung des rückseitigen MIC IN<br />
TRIM-Reglers.<br />
Bei Verwendung bestimmter Effekte für das Mikrofonsignal<br />
kann es ebenfalls zu Rückkopplung kommen. Auch die<br />
lässt sich mit den oben beschriebenen Maßnahmen<br />
beheben.<br />
Wenn sich das Mikrofon in der Nähe des Verstärkers<br />
befindet, wird dessen Ausgangssignal eventuell erneut vom<br />
Anschließen des Instruments und einschalten<br />
Mikrofon abgegriffen. Wenn Sie in einem solchen Fall<br />
aufnehmen oder im Overdub-Verfahren weitere Parts<br />
hinzufügen, werden jene Signale ebenfalls aufgezeichnet.<br />
Am besten stellen Sie das Mikrofon niemals in die Nähe<br />
des Verstärkers.<br />
Einschalten<br />
1. Stellen Sie die Lautstärke des Verstärkers, Mischpultkanals<br />
usw. auf den Mindestwert und den STANDBY-Schalter des<br />
<strong>Dynamic</strong> <strong>Looper</strong> auf „ON“.<br />
Das Gerät wird eingeschaltet und das Programm-/Werte-<br />
Display zeigt die Programmnummer an.<br />
2. Schalten Sie den Verstärker oder das Mischpult ein und<br />
erhöhen Sie dessen Lautstärke.<br />
3. Spielen Sie auf der Gitarre und stellen Sie die Lautstärke<br />
so ein, dass die PEAK-Diode niemals leuchtet.<br />
4. Singen Sie in das Mikrofon und stellen Sie den<br />
rückseitigen TRIM-Regler so ein, dass die PEAK-Diode<br />
niemals leuchtet.<br />
Anmerkung: Der <strong>Dynamic</strong> <strong>Looper</strong> enthält eine<br />
Energiesparfunktion. Ungefähr 4 Stunden nach Empfang<br />
dem letzten Bedienvorgang schaltet sich dieses Gerät aus.<br />
(F„Energiesparfunktion“, S.125).<br />
Ausschalten<br />
1. Stellen Sie die Lautstärke des Verstärkers oder Mischpults<br />
auf den Mindestwert.<br />
2. Stellen Sie den STANDBY-Schalter auf „STANDBY“.<br />
101
102<br />
<strong>Dynamic</strong> <strong>Looper</strong> Bedienungsanleitung<br />
Spielen von Programmen<br />
Auf dem <strong>Dynamic</strong> <strong>Looper</strong> heißen die Einstellungen des Preund<br />
Loop-Effekts „Programme“. Der interne Speicher enthält<br />
100 Programme.<br />
Um das am Gitarren- oder Mikrofoneingang anliegende Signal<br />
bzw. die Loop-Wiedergabe mit einem Effekt zu bearbeiten,<br />
müssen Sie das gewünschte Programm wählen.<br />
Das Gitarren- oder Mikrofonsignal mit<br />
einem Effekt bearbeiten<br />
Hören wir uns doch einfach mal ein paar Programme an.<br />
1. Schließen Sie Ihre Gitarre oder ein Mikrofon sowie den<br />
Verstärker an und schalten Sie alle notwendigen Geräte ein.<br />
))<br />
„Anschließen des Instruments und einschalten“, S.100<br />
2. Schauen Sie nach, ob das Display eine Programmnummer<br />
anzeigt.<br />
Wenn das Display einen Parameterwert oder etwas anderes<br />
anzeigt, müssen Sie den CANCEL-Taster drücken. Jetzt<br />
erscheint die Programmnummer.<br />
Der <strong>Dynamic</strong> <strong>Looper</strong> enthält zwei Programmtypen: Presetund<br />
User-Programme.<br />
P01–P50: Hierbei handelt es sich um Werksprogramme<br />
(„Presets“). Diese Speicher können nicht überschrieben werden.<br />
U01–U50: Hierbei handelt es sich um Anwenderprogramme<br />
(„User“). Bei Lieferung des <strong>Dynamic</strong> <strong>Looper</strong> enthalten diese<br />
Speicher dieselben Einstellungen wie die Preset-Programme.<br />
Ihr Inhalt kann aber jederzeit durch Ihre eigenen<br />
Einstellungen ersetzt werden.<br />
Um von der Preset- zur User-Gruppe und umgekehrt zu<br />
wechseln, müssen Sie den WRITE-Taster ±2 Sekunden lang<br />
gedrückt halten.<br />
3. Wählen Sie mit dem PROGRAM UP-Pedal ein anderes<br />
Programm.<br />
Bei Betätigen des PROGRAM UP-Pedals wird das jeweils<br />
nächste Programm gewählt.<br />
Wenn Sie das PROGRAM UP-Pedal gedrückt halten, während<br />
Sie das TRIGGER/TAP-Pedal betätigen, wird der vorangehende<br />
Programmspeicher gewählt (PROGRAM DOWN).<br />
Wenn Sie den AUTO REC- und CANCEL-Taster gleichzeitig<br />
drücken, ändert sich die Programmnummer in 10er-Schritten.<br />
4. Wenn der Pre-Effekt unhörbar ist, müssen Sie den PRE FX<br />
TARGET-Taster drücken, um die Zuordnung des Effekts zu<br />
ändern.<br />
Bei wiederholtem Drücken des Tasters ändert sich die<br />
Zuordnung nach folgendem Muster. Gleichzeitig ändert sich<br />
die Farbe der Diode.<br />
Grün: Der Pre-Effekt bearbeitet das an der INPUT-Buchse<br />
anliegende Signal.<br />
Tipp: Wenn Sie sowohl eine Gitarre als auch ein Mikrofon<br />
anschließen, wird das Mikrofonsignal nicht bearbeitet (d.h.<br />
ohne Pre-Effekt ausgegeben). Bei Bedarf können Sie das<br />
Eingangssignal der MIC IN-Buchse dann stummschalten<br />
(deaktivieren). Halten Sie den PRE FX TARGET-Taster<br />
gedrückt, während Sie am EDIT-Regler drehen. Das Display<br />
zeigt jetzt die momentan gewählte Einstellung an.<br />
CoF: Das an der MIC IN-Buchse anliegende Signal wird nicht<br />
empfangen (Stummschaltung).<br />
Con: Das an der MIC IN-Buchse anliegende Signal wird<br />
empfangen.
Aufzeichnen von Phrasen<br />
Rot: Der Pre-Effekt bearbeitet das an der MIC IN-Buchse<br />
anliegende Signal.<br />
Orange: Der Pre-Effekt bearbeitet das an der INPUT- und<br />
der MIC IN-Buchse anliegende Signal.<br />
Probieren Sie jetzt noch weitere Programme aus.<br />
In der beiliegenden „Program List“ finden Sie eine Übersicht<br />
der Preset-Programme.<br />
Welche Parameter angesteuert werden können, erfahren Sie<br />
unter „Über den Pre- und Loop-Effekt“ auf S. 113.<br />
Aufzeichnen von Phrasen<br />
Jetzt wollen wir Ihnen zeigen, wie man im „Loop 1“- und<br />
„Loop 2“-Puffer Phrasen aufnimmt.<br />
Aufnahme von ‘Loop 1’<br />
1. Schließen Sie Ihre Gitarre oder ein Mikrofon an den<br />
<strong>Dynamic</strong> <strong>Looper</strong> an und schalten Sie ihn ein.<br />
))<br />
„Anschließen des Instruments und einschalten“, S.100<br />
2. Wählen Sie das Programm mit dem gewünschten Sound.<br />
Wenn Sie den Pre-Effekt nicht hören, müssen Sie die<br />
Einstellung des PRE FX TARGET-Tasters ändern.<br />
))<br />
„Das Gitarren- oder Mikrofonsignal mit einem Effekt<br />
bearbeiten“, S.102<br />
3. Wählen Sie „Loop 1“, indem Sie das STOP- und<br />
PROGRAM UP-Pedal gleichzeitig betätigen. (Die LOOP<br />
1-Diode muss leuchten.)<br />
Statuskontrolle der ‘Loop’-Puffer<br />
Die LOOP STATUS-Dioden von „Loop 1“ und „Loop 2“<br />
zeigen an, welcher Puffer bereits eine Phrase enthält.<br />
Anmerkung: Wenn Sie noch nichts aufgenommen haben,<br />
erübrigt sich diese Kontrolle.<br />
Wenn eine LOOP STATUS-Diode nicht leuchtet, enthält der<br />
betreffende Puffer keine Phrase.<br />
Wenn eine LOOP STATUS-Diode grün blinkt, enthält der<br />
betreffende Puffer eine Phrase, die aber momentan nicht<br />
abgespielt wird.<br />
Wenn eine LOOP STATUS-Diode grün leuchtet, enthält der<br />
betreffende Puffer eine Phrase, die gerade abgespielt wird.<br />
Drücken Sie das STOP-Pedal, um die Wiedergabe<br />
anzuhalten.<br />
Wenn eine LOOP STATUS-Diode rot oder orange leuchtet,<br />
zeichnet der betreffende Puffer gerade eine Phrase auf bzw.<br />
fügt er eine hinzu (Overdub). Drücken Sie das STOP-Pedal<br />
dann zwei Mal, um den Vorgang anzuhalten.<br />
Um eine bereits vorhandene Phrase zu löschen, müssen Sie die<br />
Wiedergabe anhalten und dann ±2 Sekunden lang das STOP-<br />
Pedal gedrückt halten. Die Phrase des betreffenden Puffers<br />
wird dann gelöscht und die LOOP STATUS-Diode erlischt.<br />
Wenn Sie auch die Phrase des momentan nicht gewählten<br />
Puffers (dessen Diode nicht leuchtet) löschen möchten, müssen<br />
Sie diesen Vorgang für den anderen Puffer wiederholen.<br />
4. Drücken Sie das REC/PLAY/OVERDUB-Pedal, um die<br />
Aufnahme zu starten und spielen Sie auf Ihrem<br />
Instrument.<br />
Die LOOP STATUS-Diode von „Loop 1“ leuchtet rot und die<br />
Aufnahme beginnt.<br />
103
<strong>Dynamic</strong> <strong>Looper</strong> Bedienungsanleitung<br />
Die Aufnahme kann auch durch das Eingangssignal<br />
ausgelöst werden.<br />
))<br />
„Starten der Aufnahme durch das Spielen der ersten<br />
Noten (Auto Rec)“, S.105<br />
Wenn Sie während der Aufnahme das Metronom hören<br />
möchten, müssen Sie es durch Drücken des<br />
METRONOME-Tasters aktivieren. Drücken Sie das<br />
TRIGGER/TAP-Pedal anschließend mehrmals im<br />
gewünschten Tempo. Wenn Sie das Tempo einstellen,<br />
entspricht die Länge einer neuen Phrase immer einem<br />
Vielfachen des Tempos.<br />
))<br />
„Verwendung des Metronoms während der Aufnahme“, S.104<br />
))<br />
„Exakte Länge der Schleifen festlegen<br />
(Loop Quantize)“, S.105<br />
5. Betätigen Sie am Ende Ihrer Phrase das REC/PLAY/<br />
OVERDUB-Pedal, um die Aufnahme anzuhalten.<br />
Die Aufnahme von „Loop 1“ wird deaktiviert und die Phrase<br />
wird in einer Schleife abgespielt.<br />
6. Drücken Sie das STOP-Pedal, um die Wiedergabe<br />
anzuhalten.<br />
Damit wäre die „Loop 1“-Phrase im Kasten.<br />
Verwendung des Metronoms während der<br />
Aufnahme<br />
Sie können während der Aufnahme das Metronom nutzen.<br />
Dann müssen Sie vor Starten der Aufnahme folgende Dinge<br />
einstellen.<br />
1. Drücken Sie das TRIGGER/TAP-Pedal mehrmals im<br />
gewünschten Tempo.<br />
Wenn Sie das Pedal mehrmals drücken, ermittelt das Gerät<br />
das durchschnittliche Intervall und leitet daraus den<br />
Tempowert ab.<br />
Damit Sie auch wissen, um welches Tempo es sich handelt,<br />
blinkt der METRONOME-Taster.<br />
2. Drücken Sie den METRONOME-Taster.<br />
Das Metronom beginnt im festgelegten Tempo zu zählen.<br />
Anmerkung: Wenn Sie das Tempo noch nicht mit dem<br />
TRIGGER/TAP-Pedal festgelegt haben, wird das Metronom<br />
bei Aktivieren des METRONOME-Tasters nicht gestartet.<br />
3. Um die Lautstärke des Metronoms zu ändern, müssen Sie<br />
den METRONOME-Taster gedrückt halten, während Sie<br />
am EDIT-Regler drehen.<br />
Einstellen der Metronomtaktart<br />
Zur Wahl der Metronomtaktart müssen Sie folgendermaßen<br />
verfahren. Laut Vorgabe wird die „1“-Einstellung (1/4) verwendet.<br />
1. Halten Sie den METRONOME-Taster ±2 Sekunden lang<br />
gedrückt.<br />
Im Display wird zunächst „bar“ und danach die aktuell<br />
gewählte Taktart angezeigt.<br />
2. Wählen Sie mit dem EDIT-Regler die gewünschte Taktart.<br />
Der Einstellbereich der Taktart lautet „1“ (1/4) bis „32“ (32/4).<br />
Der Nenner der Taktart kann nicht geändert werden.<br />
3. Drücken Sie den CANCEL-Taster.<br />
Nach der ersten Aufnahme kann man die Taktart und das<br />
Tempo nicht mehr ändern.<br />
104
Aufzeichnen von Phrasen<br />
Exakte Länge der Schleifen festlegen<br />
(Loop Quantize)<br />
Wenn Sie vor Starten der Aufnahme mit dem TRIGGER/<br />
TAP-Pedal das Tempo festlegen, wird die „Loop Quantize“-<br />
Funktion aktiviert.<br />
In dem Fall wird die Aufnahmedauer automatisch dem<br />
aktuellen Tempo und der Taktart entsprechend eingestellt.<br />
Wenn Sie die Aufnahme anhalten, wird die Phrasenlänge<br />
automatisch auf ein exaktes Vielfaches des gewählten Tempos<br />
und der Taktart gestellt, so dass Ihre Schleifen im Prinzip<br />
„rund“ laufen.<br />
Aufnahmestart<br />
Beenden der Aufnahme<br />
Starten der Aufnahme durch das Spielen der<br />
ersten Noten (Auto Rec)<br />
Die „Auto Rec“-Funktion sorgt dafür, dass die Aufnahme beim<br />
Spielen der ersten Noten automatisch beginnt.<br />
1. Drücken Sie den AUTO REC-Taster (er muss leuchten).<br />
2. Betätigen Sie das REC/PLAY/OVERDUB-Pedal.<br />
Die LOOP STATUS-Diode blinkt rot.<br />
Die „Auto Rec“-Funktion wird aktiviert und der <strong>Dynamic</strong><br />
<strong>Looper</strong> ist aufnahmebereit.<br />
3. Spielen Sie auf dem Instrument oder singen (bzw. spielen)<br />
Sie in das Mikrofon.<br />
Die Aufnahme beginnt bei Ihrer ersten Note.<br />
Während der Aufnahme leuchtet die LOOP STATUS-Diode rot.<br />
Phrasenlänge<br />
Wenn Sie die „Loop Quantize“-Funktion nicht benötigen,<br />
müssen Sie das TRIGGER/TAP-Pedal vor Starten der<br />
Aufnahme ±2 Sekunden lang gedrückt halten. Der<br />
METRONOME-Taster erlischt und die „Loop Quantize“-<br />
Funktion wird ausgeschaltet.<br />
Aufnahme von ‘Loop 2’<br />
Schauen wir uns jetzt an, wie man eine Phrase für „Loop 2“<br />
aufnimmt.<br />
Anmerkung: Die „Loop 2“-Phrase kann sogar bei laufender<br />
„Loop 1“-Wiedergabe aufgenommen werden.<br />
1. Wählen Sie das Programm mit dem gewünschten Sound.<br />
Bei Bedarf können Sie auch die Effekteinstellungen<br />
ändern.<br />
))<br />
„Das Gitarren- oder Mikrofonsignal mit einem Effekt<br />
bearbeiten“, S.102<br />
))<br />
„Editieren eines Programms“, S.121<br />
2. Drücken Sie das STOP- und PROGRAM UP-Pedal<br />
gleichzeitig, damit die LOOP 2-Diode leuchtet.<br />
105
<strong>Dynamic</strong> <strong>Looper</strong> Bedienungsanleitung<br />
3. Drücken Sie im gewünschten Moment den PLAY/REC/<br />
OVERDUB-Taster, um die Aufnahme zu starten.<br />
4. Drücken Sie am Ende der Phrase das PLAY/REC/<br />
OVERDUB-Pedal.<br />
Die Aufnahme wird deaktiviert und die Phrase wird in einer<br />
Schleife abgespielt.<br />
Anmerkung: Wenn Sie ein Tempo für die Aufnahme<br />
eingestellt haben, endet die Aufnahme synchron zum Tempo<br />
und der Taktart („Loop Quantize“-Funktion).<br />
Anmerkung: Wenn Sie vor der Aufnahme kein Tempo<br />
eingestellt haben, wird sie folgendermaßen beendet.<br />
• Wenn während der Aufnahme die „Loop 1“-Phrase läuft,<br />
endet die Aufnahme jeweils an einer Stelle, die einem<br />
Vielfachen der „Loop 1“-Länge entspricht.<br />
• Wenn die „Loop 1“-Phrase während der Aufnahme nicht<br />
läuft, hält die Aufnahme sofort an.<br />
Tipp: Wenn Sie den TRIGGER/TAP-Fußtaster betätigen, hält<br />
die Aufnahme sofort und ohne Anpassung der<br />
Schleifenlänge an.<br />
Drücken Sie das STOP-Pedal, um die Wiedergabe<br />
anzuhalten. Die LOOP STATUS LOOP 2-Diode blinkt grün.<br />
Über die Aufnahmedauer<br />
Der <strong>Dynamic</strong> <strong>Looper</strong> bietet eine Aufnahmedauer von 90<br />
Sekunden, die über den „Loop 1“- und „Loop 2“-Puffer verteilt<br />
werden. Dabei verfügt jeder Puffer über minimal 10 Sekunden.<br />
Loop1<br />
90 Sekunden<br />
Loop2<br />
Beispiel: Sagen wir, weder „Loop 1“, noch „Loop 2“ enthalten<br />
bis jetzt eine Phrase und sie beginnen mit der Aufnahme von<br />
„Loop 1“ (um danach „Loop 2“ einzuspielen).<br />
Die „Loop 1“-Phrase kann maximal 80 Sekunden lang sein,<br />
weil die maximale Aufnahmedauer 90 Sekunden beträgt,<br />
während „Loop 2“ ja eine festgelegte Mindestlänge hat. Die<br />
Berechnung lautet daher: 90 – 10= 80 Sekunden.<br />
Minimale Aufnahmedauer von „Loop 2“: 10 Sekunden<br />
80 Sekunden<br />
Aufnahmedauer von „Loop 1“<br />
Wenn Sie nach der Aufnahme der „Loop 1“-Phrase „Loop 2“<br />
einspielen, geschieht folgendes.<br />
Die für „Loop 2“ verfügbare Aufnahmedauer entspricht der<br />
Gesamtdauer minus der Dauer von „Loop 1“.<br />
Loop 1 Aufnahmedauer von „Loop 2“<br />
Sagen wir, Sie löschen „Loop 1“ jetzt und nehmen für diesen<br />
Puffer eine neue Phrase auf. Die für „Loop 1“ verfügbare<br />
Aufnahmedauer entspricht der Gesamtdauer minus der Dauer<br />
von „Loop 2“.<br />
106
Ergänzen einer Phrase um weitere Parts<br />
90 Sekunden<br />
Aufnahmedauer für „Loop 1“<br />
Loop 2<br />
Nach der Aufnahme einer Phrase<br />
Hinzufügen weiterer Parts zu einer<br />
aufgezeichneten Phrase<br />
Siehe hierfür „Ergänzen einer Phrase um weitere Parts“ auf S. 107.<br />
Bearbeiten aufgezeichneter Phrasen mit<br />
dem Loop-Effekt<br />
Siehe hierfür „Bearbeiten aufgezeichneter Phrasen mit dem<br />
Loop-Effekt“ auf S. 108.<br />
Erneute Aufnahme einer Phrase mit dem<br />
Loop-Effekt<br />
Siehe „Resampling“ auf Seite 110.<br />
Ergänzen einer Phrase um<br />
weitere Parts<br />
Hier wollen wir Ihnen zeigen, wie man die Aufnahme von<br />
„Loop 1“ um weitere Parts ergänzt.<br />
1. Wählen Sie das Programm mit dem gewünschten Sound.<br />
Bei Bedarf können Sie auch die Effekteinstellungen<br />
ändern.<br />
))<br />
„Das Gitarren- oder Mikrofonsignal mit einem Effekt<br />
bearbeiten“, S.102<br />
))<br />
„Editieren eines Programms“, S.121<br />
2. Drücken Sie das STOP- und PROGRAM UP-Pedal<br />
gleichzeitig, damit die LOOP 1-Diode leuchtet.<br />
3. Drücken Sie das REC/PLAY/OVERDUB-Pedal, um die<br />
Wiedergabe von „Loop 1“ zu starten.<br />
4. Drücken Sie an der Stelle, wo Sie etwas hinzufügen<br />
möchten, das REC/PLAY/OVERDUB-Pedal und spielen Sie<br />
auf Ihrem Instrument.<br />
Die LOOP STATUS LOOP 1-Diode leuchtet orange und der<br />
Overdub-Vorgang beginnt.<br />
Tipp: Wenn dem Expression-Pedal ein Pre-Effektparameter<br />
zugeordnet ist (die Pedaldiode leuchtet dann rot), können Sie<br />
den betreffenden Effekt während der Aufnahme<br />
beeinflussen.<br />
5. Betätigen Sie an der Stelle, wo Sie aus der Aufnahme<br />
aussteigen möchten, das PLAY/REC/OVERDUB-Pedal.<br />
Die LOOP STATUS LOOP 1-Diode leuchtet grün und der<br />
<strong>Dynamic</strong> <strong>Looper</strong> wechselt vom Overdub-Modus in den<br />
Wiedergabebetrieb.<br />
107
108<br />
<strong>Dynamic</strong> <strong>Looper</strong> Bedienungsanleitung<br />
6. Drücken Sie das STOP-Pedal, um die Wiedergabe von<br />
„Loop 1“ anzuhalten.<br />
Tipp: Auf dem <strong>Dynamic</strong> <strong>Looper</strong> können Sie auch einstellen,<br />
was geschehen soll, wenn Sie die Wiedergabe anhalten.<br />
))<br />
„Festlegen, wie die Schleife endet“, S.109<br />
Rückgängig machen des Overdub-<br />
Vorgangs<br />
Wenn Sie den letzten Overdub-Vorgang rückgängig machen<br />
möchten, müssen Sie unmittelbar danach folgendermaßen<br />
vorgehen.<br />
1. Halten Sie das PROGRAM UP-Pedal gedrückt.<br />
2. Warten Sie, bis im Display „Und“ blinkt und geben Sie das<br />
PROGRAM UP-Pedal frei.<br />
Die letzte Overdub-Aufnahme wird wieder entfernt.<br />
Wiederherstellen der Overdub-<br />
Aufnahme<br />
Wenn die letzte Overdub-Ergänzung doch nicht so schlecht<br />
war, können Sie sie wiederherstellen.<br />
1. Halten Sie das PROGRAM UP-Pedal gedrückt.<br />
2. Warten Sie, bis im Display „rEd“ blinkt und geben Sie das<br />
PROGRAM UP-Pedal frei.<br />
Die letzte Overdub-Aufnahme wird wiederhergestellt.<br />
Bearbeiten aufgezeichneter<br />
Phrasen mit dem Loop-Effekt<br />
Hier wollen wir Ihnen zeigen, wie man eine aufgezeichnete<br />
Schleife während der Wiedergabe mit einem Loop-Effekt<br />
anhübscht bzw. entstellt. Bei Bedarf kann diese Bearbeitung mit<br />
dem Expression-Pedal in Echtzeit beeinflusst werden.<br />
1. Drücken Sie das STOP- und PROGRAM UP-Pedal<br />
gleichzeitig, um den Loop-Puffer zu wählen, dessen<br />
Aufnahme Sie abspielen möchten.<br />
Die Diode des gewählten Loop-Puffers leuchtet.<br />
2. Drücken Sie das REC/PLAY/OVERDUB-Pedal, um die<br />
Wiedergabe zu starten.<br />
Tipp: Wenn sowohl „Loop 1“ als auch „Loop 2“ eine Phrase<br />
enthalten, können Sie beide gleichzeitig abspielen, indem Sie<br />
die Wiedergabe anhalten und das STOP-Pedal gedrückt<br />
halten, während Sie kurz das REC/PLAY/OVERDUB-Pedal<br />
betätigen. (Diese Funktion nennen wir die „Dual-<br />
Wiedergabe“.)<br />
Tipp: Wenn Sie das STOP-Pedal ±2 Sekunden gedrückt<br />
halten, wird die Phrase wieder gelöscht.<br />
3. Überprüfen Sie, ob der LOOP FX-Taster leuchtet. Das<br />
bedeutet nämlich, dass der Loop-Effekt aktiv ist. Wenn er<br />
nicht leuchtet, müssen Sie den LOOP FX-Taster drücken.<br />
Anmerkung: Wenn dem Expression-Pedal ein Pre-<br />
Effektparameter zugeordnet ist (die Pedaldiode leuchtet<br />
dann rot), kann der Loop-Effekt nicht gesteuert werden.<br />
Drücken Sie das Expression-Pedal dann bei Bedarf so weit<br />
hinunter, bis der Zehenschalter den Loop-Effekt aktiviert (die<br />
Pedaldiode leuchtet dann grün).
Festlegen, wie die Schleife endet<br />
Tipp: Wenn dem Expression-Pedal ein Loop-Effektparameter<br />
zugeordnet ist (die Pedaldiode leuchtet dann grün), können<br />
Sie den betreffenden Effekt während der Aufnahme<br />
beeinflussen.<br />
Tipp: Wenn Sie das TRIGGER/TAP-Pedal drücken, wird der<br />
Loop-Effekt deaktiviert. Außerdem kehren Sie zurück zum<br />
Beginn der Phrase, die gerade abgespielt wird. Bisweilen<br />
kann man die Schleife interessanter gestalten, indem man<br />
das Pedal zu bestimmten Zeitpunkten betätigt. Außerdem<br />
eignet sich dieses Verfahren für eine erneute Synchronisation<br />
mit dem vorherrschenden Tempo.<br />
4. Drücken Sie das STOP-Pedal, um die Wiedergabe<br />
anzuhalten.<br />
Die Wiedergabe kann selbst angehalten werden, während die<br />
gewählte Loop-Phrase nicht abgespielt wird, sofern die<br />
andere Phrase wohl läuft.<br />
‘Key Lock’-Funktion<br />
Wenn Sie den CANCEL-Taster ±2 Sekunden lang gedrückt<br />
halten, werden alle Taster, Regler und Wahlschalter im<br />
Bedienfeld gesperrt. Nur die Pedale der Programm/Loop-<br />
Sektion und das Expression-Pedal sind dann noch belegt.<br />
(Diese Funktion heißt „Key Lock“.) Damit kann man z.B.<br />
peinliche Fehlhandlungen während eines Konzert vermeiden.<br />
Festlegen, wie die Schleife<br />
endet<br />
Sie können auch bestimmen, wie die Loop-Wiedergabe anhält,<br />
wenn Sie das STOP-Pedal drücken.<br />
1. Drücken Sie den STOP MODE-Taster.<br />
Bei jedem Drücken ändert sich die Einstellung nach<br />
folgendem Schema.<br />
Taster aus: Bei Drücken des STOP-Pedals hält die<br />
Phrasenwiedergabe sofort an.<br />
Taster leuchtet rot: Wenn Sie das STOP-Pedal drücken, hält<br />
die Phrase an und wird mit Delay versehen.<br />
Taster leuchtet orange: Wenn Sie das STOP-Pedal drücken,<br />
wird die Phrase allmählich ausgeblendet. Sobald die<br />
Lautstärke den Mindestwert erreicht, hält die Wiedergabe<br />
an.<br />
Taster leuchtet grün: Wenn Sie das STOP-Pedal betätigen,<br />
wird die Phrase noch bis zum Ende abgespielt und hält dann<br />
aber an.<br />
Tipp: Während des Fade-Outs oder der Wiedergabe der<br />
gesamten Phrase vor dem Anhalten blinkt die LOOP<br />
STATUS-Diode so lange schnell grün, bis die Schleife anhält.<br />
In dieser Auslaufphase (d.h. bis zum Anhalten) können Sie<br />
nichts aufnehmen, hinzufügen oder neu sampeln.<br />
109
<strong>Dynamic</strong> <strong>Looper</strong> Bedienungsanleitung<br />
Resampling<br />
Während der Wiedergabe einer Schleife können Sie die Phrase<br />
mit dem Loop-Effekt und dem Expression-Pedal bearbeiten<br />
bzw. beeinflussen und das Ergebnis erneut aufnehmen. Das<br />
nennen wir „Resampling“.<br />
Mit dieser Funktion können Sie eine Phrase z.B. mit mehreren<br />
Loop-Effekten bearbeiten oder ihr eine andere Länge<br />
verpassen.<br />
Der „Resampling“-Vorgang funktioniert auch, wenn die<br />
Schleife während der Wiedergabe mit dem Loop-Effekt<br />
bearbeitet wird. Das Resampling ist nur möglich, wenn der<br />
gewählte Puffer bereits eine Phrase enthält.<br />
1. Wählen Sie den gewünschten Loop-Puffer, indem Sie das<br />
STOP- und PROGRAM UP-Pedal gleichzeitig betätigen.<br />
2. Drücken Sie das REC/PLAY/OVERDUB-Pedal, um die<br />
Schleifenwiedergabe zu starten und wählen Sie mit dem<br />
PROGRAM UP-Pedal das Programm, mit dem Sie den<br />
gewünschten Sound erzielen. Bei Bedarf können Sie die<br />
Effektparameter live editieren oder mit dem Expression-<br />
Pedal bearbeiten.<br />
))<br />
„Spielen von Programmen“, S.102<br />
Wenn der Loop-Effekt während der Phrasenwiedergabe<br />
aktiv ist, blinkt die RESAMPLING-Diode, um anzuzeigen,<br />
dass die „Resampling“-Funktion zur Verfügung steht.<br />
3. Betätigen Sie das REC/PLAY/OVERDUB-Pedal.<br />
Die RESAMPLING-Diode leuchtet und der „Resampling“-<br />
Vorgang beginnt. Jetzt wird die Phrase mitsamt der Loop-<br />
Effektbearbeitung aufgenommen.<br />
Tipp: Wenn der Loop-Effekt dem Expression-Pedal<br />
zugeordnet ist, können Sie die Effektbearbeitung während<br />
der „Resample“-Aufnahme beeinflussen.<br />
Während des „Resampling“-Vorgangs können keine<br />
anderen Programms gewählt werden. Außerdem kann man<br />
den Loop-Effekt dann weder ein-/ausschalten, noch einen<br />
anderen Effekttyp wählen.<br />
4. Drücken Sie das REC/PLAY/OVERDUB-Pedal, um den<br />
„Resampling“-Vorgang anzuhalten.<br />
Anmerkung: Wenn Sie ein Tempo für den „Resampling“-<br />
Vorgang eingestellt haben, endet der Vorgang synchron zum<br />
Tempo und der Taktart („Loop Quantize“-Funktion).<br />
Anmerkung: Wenn Sie den „Resampling“-Vorgang starten,<br />
ohne vorher ein Tempo festzulegen, endet er automatisch an<br />
einer Stelle, die einem Vielfachen der zu Grunde liegenden<br />
Phrase entspricht.<br />
Tipp: Wenn Sie den TRIGGER/TAP-Fußtaster betätigen, hält<br />
der „Resampling“-Vorgang sofort und ohne Anpassung an<br />
die Schleifenlänge an.<br />
Die Phrase wird jetzt abgespielt. Der Loop-Effekt wird<br />
ausgeschaltet. Wenn Sie während des „Resampling“-<br />
Vorgangs das STOP-Pedal drücken, wird der Vorgang<br />
beendet und die Wiedergabe hält an.<br />
Tipp: Wenn Sie „Loop 1“ und „Loop 2“ abspielen und mit<br />
dem Loop-Effekt „VOLUME“ oder „X-FADE“ eine<br />
„Resampling“-Aufnahme starten, hält die momentan nicht<br />
gewählte Phrase an, sobald Sie den „Resampling“-Vorgang<br />
beenden.<br />
110
Löschen einer Loop-Phrase<br />
Bearbeiten aufgezeichneter<br />
Phrasen mit dem Limiter<br />
Der Limiter des <strong>Dynamic</strong> <strong>Looper</strong> eignet sich einerseits für die<br />
Pegelangleichung der beiden Schleifen und andererseits für die<br />
Einstellung einer automatischen Balance zwischen den bereits<br />
aufgezeichneten und neu hinzugefügten Signalen.<br />
1. Drücken Sie den MASTER LIMITER-Taster, um den<br />
gewünschten Limiter-Typ zu wählen.<br />
Bei wiederholtem Drücken des Tasters ändert sich die<br />
Einstellung. Die Anzeige im Display informieren Sie über<br />
den gewählten Typ.<br />
OFF: Limiter aus.<br />
SFt: Sanfter Limiter. Hiermit werden Pegelunterschiede<br />
zwischen „Loop 1“ und „Loop 2“ bei separater oder<br />
simultaner Wiedergabe ausgebügelt.<br />
Hrd: Harter Limiter. Hiermit wird die Dynamik der<br />
aufgezeichneten Phrasen ziemlich stark reduziert. Damit<br />
vermeiden Sie Pegelunterschiede zwischen der anfangs<br />
aufgezeichneten Phrase und den später hinzugefügten Parts<br />
(Overdub).<br />
Löschen einer Loop-Phrase<br />
Zum Löschen einer Loop-Phrase müssen Sie folgendermaßen<br />
vorgehen.<br />
Eine gelöschte Phrase kann man nicht wiederherstellen.<br />
Verwenden Sie diese Funktion also mit Zurückhaltung.<br />
1. Wenn momentan eine Phrase abgespielt wird, müssen Sie<br />
das STOP-Pedal drücken, um sie anzuhalten.<br />
Die LOOP STATUS-Diode blinkt grün.<br />
2. Wählen Sie die überflüssige Loop, indem Sie das STOPund<br />
PROGRAM UP-Pedal gleichzeitig betätigen.<br />
Sorgen Sie dafür, dass die LOOP-Diode der Phrase leuchtet,<br />
die Sie löschen möchten.<br />
3. Halten Sie das STOP-Pedal ±2 Sekunden lang gedrückt.<br />
Die Phrase des gewählten Loop-Puffers wird gelöscht und<br />
die LOOP STATUS-Diode erlischt.<br />
Wenn Sie das STOP-Pedal erneut ±2 Sekunden gedrückt<br />
halten, wird die Phrase des anderen Loop-Puffers gelöscht<br />
und jene LOOP STATUS-Diode erlischt ebenfalls.<br />
111
<strong>Dynamic</strong> <strong>Looper</strong> Bedienungsanleitung<br />
Loop-Status<br />
Die LOOP STATUS- und RESAMPLING-Dioden zeigen an, ob der aktuelle Loop-Puffer eine Phrase enthält und was sein aktueller<br />
Status ist. Was beim Betätigen des REC/PLAY/OVERDUB- oder STOP-Pedals geschieht, richtet sich ebenfalls nach diesem Status.<br />
Bei laufender Aufnahme/Overdub-Ergänzung<br />
LOOP STATUS-Diode<br />
Loop-Status<br />
Aus Angehalten (keine Phrase) ))<br />
„Statuskontrolle der ‘Loop’-Puffer“, S.103<br />
Blinkt rot<br />
Die Aufnahme kann automatisch<br />
ausgelöst werden<br />
))<br />
„Starten der Aufnahme durch das Spielen der ersten<br />
Noten (Auto Rec)“, S.105<br />
Leuchtet rot Aufnahme ))<br />
„Statuskontrolle der ‘Loop’-Puffer“, S.103<br />
Blinkt langsam grün<br />
Blinkt schnell grün<br />
Leuchtet grün<br />
Leuchtet orange<br />
Angehalten (enthält eine Phrase)<br />
Hält demnächst an (Fade-Out oder ))<br />
„Festlegen, wie die Schleife endet“, S.109<br />
Wiedergabe bis zum Ende der Schleife)<br />
Wiedergabe<br />
Overdub<br />
))<br />
„Statuskontrolle der ‘Loop’-Puffer“, S.103<br />
Während des ‘Resampling’-Vorgangs<br />
Wenn Sie für die aktuell laufende Phrase einen Loop-Effekt wählen, aktiviert der <strong>Dynamic</strong> <strong>Looper</strong> die Aufnahmebereitschaft für den<br />
„Resampling“-Vorgang.<br />
LOOP STATUS-Diode RESAMPLING-Diode Loop-Status<br />
Leuchtet grün Blinkt rot Bereit für das „Resampling“<br />
Lit red Leuchtet rot Resampling<br />
))<br />
„Resampling“, S.110<br />
112
Über den Pre- und Loop-Effekt<br />
In diesem Kapitel werden die Effekttypen des Pre- und Loop-<br />
Effekts und ihre editierbaren Parameter vorgestellt. Nähere<br />
Einzelheiten zum Signalfluss finden Sie auf Seite 93.<br />
Effektparameter<br />
EDIT-Regler: Dieser Parameter kann mit dem EDIT-Regler<br />
editiert werden.<br />
PRE FX-Taster + EDIT-Regler: Diesen Parameter können Sie<br />
editieren, indem Sie den PRE FX-Taster gedrückt halten,<br />
während Sie am EDIT-Regler drehen.<br />
Bestimmte Effekte bieten keinen Parameter, der mit dem<br />
PRE FX-Taster + EDIT-Regler editiert werden kann.<br />
Expression-Pedal: Diese Parameter können dem Expression-<br />
Pedal zugeordnet werden. Alles Weitere zur<br />
Parameterzuordnung finden Sie unter „Wahl der<br />
Pedalfunktion“ auf Seite 123.<br />
Pre-Effekte<br />
PdL: PEDAL FX<br />
Modell eines Effektpedals.<br />
• EDIT-Regler: Anwahl des Effekttyps.<br />
Cln: Ein „Clean“-Sound, der dem Charakter Ihrer Gitarre<br />
alle Ehre macht.<br />
Co: Dieses Modell beruht auf einem Kompressorpedal, das<br />
wegen seines perkussiven und lupenreinen Sounds geliebt<br />
wird. Es eignet sich perfekt für Pop- und Funk-Musik der<br />
Über den Pre- und Loop-Effekt<br />
1980er und ‘90er. Außerdem kann dieser Effekt ein langes,<br />
rundes Sustain erzeugen<br />
Crn: Dies ist ein Modell eines Overdrive-Pedals, das nach<br />
dem Halb-Mensch/Halb-Pferd-Geschöpf der griechischen<br />
Sagen benannt ist. Wenn Sie den Pegel herunterfahren,<br />
fungiert der Effekt als Booster, der das Original-Signal Ihrer<br />
Gitarre aber intakt lässt. Wenn Sie GAIN aufdrehen, wandelt<br />
er sich zu einem Overdrive mit fülligem Mittenbereich.<br />
Od: Modell eines beliebten grünen Overdrive-Pedals mit<br />
einer sensationellen Wärme. Zurecht ein Klassiker.<br />
dst: Diese Verzerrung ist Vorschrift für Metal-Helden.<br />
• PRE FX-Taster + EDIT-Regler: Bestimmt die Pegelanhebung.<br />
• Expression-Pedal: Steuerung des Ausgangspegels.<br />
: WAH<br />
Modell eines <strong>Vox</strong> V847 Wah-Pedals.<br />
• EDIT-Regler: Anwahl des Sounds (Effekttyps). Die<br />
verfügbaren Sounds sind die gleichen wie für den PEDAL<br />
FX-Typ. (F„ PEDAL FX “ )<br />
• PRE FX-Taster + EDIT-Regler: Bestimmt die Pegelanhebung.<br />
• Expression-Pedal: Steuert den Wah-Effekt.<br />
113
<strong>Dynamic</strong> <strong>Looper</strong> Bedienungsanleitung<br />
Πod: MODULATION<br />
Modell eines Modulationseffekts.<br />
• EDIT-Regler: Anwahl des Effekttyps.<br />
Ch1: Modell eines analogen Chorus-Effekts.<br />
Ch2: Dieser Typ enthält zwei Chorus-Blöcke und kann daher<br />
eine komplexe Modulation erzeugen.<br />
FLA: Modell eines analogen Flanger-Effekts.<br />
PHA: Modell eines analogen Phaser-Effekts.<br />
trE: Modell einer Tremolo-Schaltung, die es auf manchen<br />
Gitarrenverstärkern gibt.<br />
• PRE FX-Taster + EDIT-Regler: Regelt die<br />
Modulationsgeschwindigkeit.<br />
• Expression-Pedal: Hiermit bestimmen Sie die Intensität des<br />
Effekts.<br />
bAS: BASS<br />
Simuliert eine Bassgitarre.<br />
• EDIT-Regler: Anwahl des gewünschten Sounds.<br />
Eb1: Herkömmlicher E-Bass.<br />
Eb2: E-Bass, der mit einem Kompressor bearbeitet wird.<br />
Eb3: E-Bass, der mit einem Overdrive-Effekt bearbeitet wird.<br />
Eb4: E-Bass, der mit einem Verzerrungseffekt bearbeitet<br />
wird.<br />
Sb1: Ein Synthesizer-Bass.<br />
Sb2: Andere Fassung des Synthesizer-Basses.<br />
• Expression-Pedal: Steuerung des Ausgangspegels.<br />
Aco: ACOUSTIC<br />
Simuliert eine akustische Gitarre.<br />
• EDIT-Regler: Anwahl des gewünschten Sounds.<br />
S-1: Alte akustische Gitarre mit kleinem Korpus. Eignet sich<br />
besonders für dezente Arpeggien.<br />
S-2: Akustische Gitarre mit normalem Korpus und betonten<br />
Mittenfrequenzen, wie man sie im Country Blues mag.<br />
Lrg: Akustische Gitarre mit großen Korpus und einem für<br />
Pop-Anwendungen geeigneten Sound.<br />
rES: Resonator-Gitarre für Slide-Einlagen.<br />
• PRE FX-Taster + EDIT-Regler: Regelt die Effektintensität.<br />
• Expression-Pedal: Steuerung des Ausgangspegels.<br />
Ptc: PITCH<br />
Ein Pitch-Shifter, den man mit dem Expression-Pedal ansteuern<br />
kann. Damit ändert man die Tonhöhe.<br />
• EDIT-Regler: Anwahl des Tonhöhenversatzes in<br />
Halbtonschritten. -12 – 0 , dtn: Verstimmung, 1 – 12<br />
• PRE FX-Taster + EDIT-Regler:Hiermit regeln Sie die Balance<br />
zwischen dem Effekt- und Original-Signal.<br />
• Expression-Pedal: Hiermit kann die Tonhöhe beeinflusst<br />
werden.<br />
114
Über den Pre- und Loop-Effekt<br />
Stt: STUTTER<br />
Dieser Effekt ähnelt einem Tremolo, ist aber eigentlich ein Gate,<br />
das zum aktuellen Tempo synchron läuft. Mit dem Expression-<br />
Pedal können rhythmische Phrasen erzeugt werden, weil Sie<br />
damit bestimmen, wie lange das Gate pro Zyklus geöffnet<br />
bleibt. Das eignet sich vor allem für Eingangssignale mit relativ<br />
konstantem Pegel. Letzteren kann man durch Verwendung<br />
eines Kompressor- oder Verzerrungseffekts erzielen.<br />
• EDIT-Regler: Hiermit wählen Sie die Taktart. Das Gate öffnet<br />
sich automatisch im Rhythmus der gewählten Taktart und<br />
des aktuellen Tempos.<br />
1-2: (zwei Taktschläge= halbe Note) 1-8: (Achtelnoten)<br />
3-8: (anderthalb Taktschläge) 1-12: 3 (Achteltriolen)<br />
1-3: 3 (halbe Triolen) 1-16: (Sechzehntelnoten)<br />
1-4: (1 Taktschlag= Viertelnote) 1-24: 3 (Sechzehnteltriolen)<br />
3-16: (punktierte Achtelnoten) 1-32: (1/32.-Noten)<br />
1-6: 3 (Vierteltriolen) 1-64: (1/64.-Noten)<br />
• Expression-Pedal: Bestimmt, wie lange das Gate jeweils<br />
geöffnet bleibt. Je weiter Sie das Expression-Pedal<br />
hinunterdrücken, desto kürzer werden die Noten.<br />
Eq: EQ<br />
Modell eines 4-Band Equalizers.<br />
• EDIT-Regler: Hiermit wählen Sie den Equalizer-Typ.<br />
LC: Hochpassfilter.<br />
LF: Pegel der Bassfrequenzen.<br />
CF: Pegel der Mittenfrequenzen.<br />
CF2: Pegel der Mittenfrequenzen und anderer Frequenzbereiche.<br />
HF: Pegel der hohen Frequenzen.<br />
HC: Tiefpassfilter.<br />
• PRE FX-Taster + EDIT-Regler: Bestimmt die Pegelanhebung.<br />
• Expression-Pedal: Steuerung des Ausgangspegels.<br />
dLy: DELAY<br />
Modell eines Delay-Effekts.<br />
• EDIT-Regler: Hiermit wählen Sie den Delay-Typ.<br />
Sho: Modell eines kurzen Delays („Slap“).<br />
dL1: Modell eines Delays ohne nennenswerte Klangfärbung.<br />
dL2: Modell eines synchronisierbaren Delay-Effekts.<br />
An1: Modell eines Analog-Delays mit Eimerkettenschaltung.<br />
Dies ist ein sehr warmer Effekt.<br />
An2: Modell eines synchronisierbaren Analog-Delays.<br />
tP1: Modell eines Bandechos mit den typischen<br />
Gleichlaufschwankungen.<br />
tP2: Modell eines synchronisierbaren Bandechos.<br />
• PRE FX-Taster + EDIT-Regler: Hiermit regeln Sie die<br />
Verzögerungszeit. Wenn Sie einen kurzen oder nicht<br />
synchronisierbaren Delay-Effekt gewählt haben, können Sie<br />
mit diesem Parameter die Verzögerungszeit im Bereich 0 – 10<br />
einstellen.<br />
Nach Anwahl eines synchronisierbaren Delay- oder<br />
Bandechoeffekts können Sie einen der folgenden Werte<br />
einstellen.<br />
115
<strong>Dynamic</strong> <strong>Looper</strong> Bedienungsanleitung<br />
1-64: (1/64.-Noten) 1-6: 3 (Vierteltriolen)<br />
1-32: (1/32.-Noten) 3-16: (punktierte Achtelnoten)<br />
1-24: 3 (Sechzehnteltriolen) 1-4: (1 Taktschlag= Viertelnote)<br />
1-16: (Sechzehntelnoten) 1-3: 3 (halbe Triolen)<br />
1-12: 3 (Achteltriolen) 3-8: (anderthalb Taktschläge)<br />
1-8: (Achtelnoten) 1-2: (zwei Taktschläge= halbe Note)<br />
• Expression-Pedal: Hiermit bestimmen Sie den Effektanteil.<br />
Anmerkung: Bei Anwahl eines Delay-Effekts für den Pre- oder<br />
Loop-Block beträgt die maximale Verzögerungszeit 2,22<br />
Sekunden. Wenn Sie einen synchronisierbaren Delay-Typ<br />
wählen und ein Tempo einstellen, bei dem die<br />
Verzögerungszeit mehr als 2,22 Sekunden betragen müsste,<br />
wird der eigentlich richtige Wert halbiert.<br />
rVb: REVERB<br />
Bei diesem Halleffekt können Sie mit dem Expression-Anteil<br />
die Hallintensität und die Lautstärkebalance einstellen. Dieser<br />
Effekt eignet sich sowohl für Gitarre als auch für Gesang.<br />
• EDIT-Regler: Hier kann der Halltyp gewählt werden.<br />
SPr: Modell des für einen Gitarrenverstärker typischen<br />
Federhalls.<br />
roo: Dieses Modell simuliert den Hall eines Zimmers und<br />
enthält entsprechend viele Erstreflexionen.<br />
HAL: Dieses Modell simuliert den Hall eines Konzertsaals<br />
mit zahlreichen Echos in der Hallfahne.<br />
• Expression-Pedal: Steuert die Hallintensität und die<br />
Lautstärkebalance.<br />
S-F: SCI-FI<br />
Verbiegt das Signal einer elektrischen Gitarre auf<br />
unterschiedliche Arten.<br />
• EDIT-Regler: Anwahl des gewünschten Sounds.<br />
dr1, dr2, dr3: Dies sind Borduneffekte, die man z.B. von der<br />
indischen Tambura kennt.<br />
Sy1, Sy2, Sy3: Modelle eines chromatischen Synthesizers. Es<br />
gibt drei Synthesizertypen mit völlig unterschiedlichen<br />
Klangfarben (Sy3: Schlagzeugsimulation). Diese Effekte<br />
„funktionieren“ nur, wenn Sie Einzelnoten spielen.<br />
SLo: Erzeugt einen Streicheffekt ähnlich wie bei einer Geige.<br />
• PRE FX-Taster + EDIT-Regler: Die Funktion richtet sich nach<br />
dem gewählten Sound.<br />
dr1, dr2: Hiermit wählen Sie die Tonart.<br />
dr3, Sy1, Sy2: Einstellen des Effektanteils.<br />
Sy3: Bestimmt den Ausgangspegel.<br />
SLo: Regelt die Einsatzgeschwindigkeit.<br />
• Expression-Pedal: Die Funktion richtet sich nach dem<br />
gewählten Sound.<br />
dr1, dr2: Hiermit bestimmen Sie den Effektanteil.<br />
dr3: Hiermit kann die Tonart geändert werden.<br />
Sy1, Sy2, SLo: Steuerung des Ausgangspegels.<br />
Sy3: Beeinflussen der Klangfarbe.<br />
116
Über den Pre- und Loop-Effekt<br />
Loop-Effekte<br />
Vor allem bei den Loop-Effekten lohnt es sich, dem Expression-<br />
Pedal einen Parameter zuzuordnen.<br />
Vol: VOLUME<br />
Bei diesem Effekt kann man mit dem Expression-Pedal die<br />
Lautstärke einstellen.<br />
Wenn Sie diesen Effekt wählen können Sie einstellen, welche<br />
Signalquelle von der Lautstärkeeinstellung beeinflusst wird,<br />
was z.B. beim „Resampling“ praktisch sein kann. Diese<br />
Einstellung erlaubt bei Bedarf die Kombination der beiden<br />
Loops zu einer neuen Phrase.<br />
• EDIT-Regler: Wählen Sie hier die Signalquelle, deren<br />
Lautstärke beeinflusst werden kann.<br />
Cur: Nur die Lautstärke der aktuell gewählten Phrase wird<br />
beeinflusst.<br />
L1.2: Die Lautstärke von „Loop 1“ und „Loop 2“ wird<br />
beeinflusst.<br />
ALL: Die Lautstärke des Eingangssignal sowie von „Loop 1“<br />
und „Loop 2“ wird beeinflusst.<br />
• Expression-Pedal: Hiermit stellen Sie die Lautstärke der<br />
gewählten Signalquelle ein (siehe den EDIT-Regler).<br />
FAd: X-FADE<br />
Bei diesem Effekt dient das Expression-Pedal zum Einstellen<br />
der Mischung.<br />
Wenn Sie diesen Effekt für den „Resampling“-Vorgang wählen,<br />
können Sie die Signalquelle wählen, deren Mischbalance<br />
während der Neuaufnahme beeinflusst wird.<br />
• EDIT-Regler: Hiermit wählen Sie die Signalquelle, deren<br />
Mischbalance beeinflusst werden kann.<br />
In.L: Das Expression-Pedal beeinflusst die Mischbalance<br />
zwischen dem Eingangssignal und dem momentan<br />
gewählten Loop-Puffer.<br />
L1.2: Das Pedal beeinflusst die Mischbalance zwischen „Loop<br />
1“ und „Loop 2“.<br />
• Expression-Pedal: Hiermit stellen Sie die Mischbalance zwischen<br />
den mit dem EDIT-Regler gewählten Signalquellen ein.<br />
rEV: REVERSE<br />
Dieser Effekt kehrt die Wiedergabe um. Je weiter Sie das<br />
Expression-Pedal hinunterdrücken, desto lauter wird das<br />
umgekehrt abgespielte Signal. Dieser Effekt eignet sich vor<br />
allem für Parts mit langen Noten wie z.B. Gitarrensoli und<br />
Gesangsparts.<br />
• EDIT-Regler: Hiermit bestimmen Sie, was passiert, wenn Sie<br />
von der normalen Wiedergabe zur umgekehrten wechseln.<br />
FAd: Überblendung zwischen der normalen und der<br />
umgekehrten Wiedergabe.<br />
ALt: Abwechselnde Umschaltung zwischen der normalen<br />
und der umgekehrten Wiedergabe.<br />
• Expression-Pedal: Anwahl der normalen und umgekehrten<br />
Wiedergabe.<br />
LIL: LOOP IN LOOP<br />
Wenn Sie das Expression-Pedal drücken, wird nur noch eine<br />
kurze Passage der momentan gewählten Schleife abgespielt.<br />
Mit dieser Änderung der Phrasenlänge lassen sich bei Bedarf<br />
sogar Trommelwirbeleffekte erzielen.<br />
117
<strong>Dynamic</strong> <strong>Looper</strong> Bedienungsanleitung<br />
• EDIT-Regler: Wählen Sie hier die Taktart, die bei Drücken<br />
des Expression-Pedals für die Phrasenwiedergabe verwendet<br />
wird. Wenn Sie „bAr“ wählen, werden die zuvor gewählte<br />
Taktart sowie das Tempo verwendet. Bei allen anderen<br />
Einstellungen ändert sich nur das Tempo.<br />
bAr: 1 Takt<br />
1-8: (Achtelnoten)<br />
1-2: (zwei Taktschläge= halbe Note) 1-12: 3 (Achteltriolen)<br />
3-8: (anderthalb Taktschläge) 1-16: (Sechzehntelnoten)<br />
1-3: 3 (halbe Triolen) 1-24: 3 (Sechzehnteltriolen)<br />
1-4: (1 Taktschlag= Viertelnote) 1-32: (1/32.-Noten)<br />
3-16: (punktierte Achtelnoten) 1-64: (1/64.-Noten)<br />
1-6: 3 (Vierteltriolen)<br />
• Expression-Pedal: Startet die Wiedergabe einer kurzen<br />
Phrase, die zum Tempo synchron läuft. Wenn Sie das Pedal<br />
noch weiter hinunterdrücken, wird die Länge erneut<br />
halbiert.<br />
Ptc: PITCH<br />
Ein Pitch-Shifter, den man mit dem Expression-Pedal ansteuern<br />
kann. Damit ändert man die Tonhöhe.<br />
• EDIT-Regler: Hiermit wählen Sie das Intervall, innerhalb<br />
dessen die Tonhöhe geändert werden kann.<br />
u57: Wenn Sie das Pedal drücken, ändert sich die Tonhöhe<br />
vom Originalwert → 5 Halbtöne höher → 7 Halbtöne höher.<br />
u12: Wenn Sie das Pedal drücken, ändert sich die Tonhöhe<br />
vom Originalwert → 1 Halbton höher → 2 Halbtöne höher.<br />
u13: Wenn Sie das Pedal drücken, ändert sich die Tonhöhe<br />
vom Originalwert → 1 Halbton höher → 3 Halbtöne höher.<br />
u35: Wenn Sie das Pedal drücken, ändert sich die Tonhöhe<br />
vom Originalwert → 3 Halbtöne höher → 5 Halbtöne höher.<br />
u47: Wenn Sie das Pedal drücken, ändert sich die Tonhöhe<br />
vom Originalwert → 4 Halbtöne höher → 7 Halbtöne höher.<br />
u24: Wenn Sie das Pedal drücken, ändert sich die Tonhöhe<br />
vom Originalwert → 2 Halbtöne höher → 4 Halbtöne höher.<br />
u5t: Wenn Sie das Pedal drücken, ändert sich die Tonhöhe<br />
vom Originalwert → 5 Halbtöne höher → 10 Halbtöne höher.<br />
ubn: Wenn Sie das Pedal betätigen, ändert sich die Tonhöhe<br />
stufenlos um maximal eine Oktave.<br />
uch: Wenn Sie das Pedal betätigen, ändert sich die Tonhöhe<br />
in Halbtonschritten um maximal eine Oktave.<br />
d57: Wenn Sie das Pedal drücken, ändert sich die Tonhöhe<br />
vom Originalwert → 5 Halbtöne tiefer → 7 Halbtöne tiefer.<br />
d12: Wenn Sie das Pedal drücken, ändert sich die Tonhöhe<br />
vom Originalwert → 1 Halbton tiefer → 2 Halbtöne tiefer.<br />
d35: Wenn Sie das Pedal drücken, ändert sich die Tonhöhe<br />
vom Originalwert → 3 Halbtöne tiefer → 5 Halbtöne tiefer.<br />
d47: Wenn Sie das Pedal drücken, ändert sich die Tonhöhe<br />
vom Originalwert → 4 Halbtöne tiefer → 7 Halbtöne tiefer.<br />
d24: Wenn Sie das Pedal drücken, ändert sich die Tonhöhe<br />
vom Originalwert → 2 Halbtöne tiefer → 4 Halbtöne tiefer.<br />
dbn: Wenn Sie das Pedal betätigen, ändert sich die Tonhöhe<br />
stufenlos um maximal eine Oktave abwärts.<br />
dch: Wenn Sie das Pedal betätigen, ändert sich die Tonhöhe<br />
in Halbtonschritten um maximal eine Oktave abwärts.<br />
• Expression-Pedal: Steuert die Tonhöhe der Schleife.<br />
118
Über den Pre- und Loop-Effekt<br />
SPd: SPEED<br />
Bei diesem Effekt kann man mit dem Expression-Pedal die<br />
Wiedergabegeschwindigkeit einstellen.<br />
• EDIT-Regler: Hiermit bestimmen Sie, wie sich die<br />
Wiedergabegeschwindigkeit bei Betätigung des Expression-<br />
Pedals ändert.<br />
SL1: Bei Drücken des Pedals sinkt die<br />
Wiedergabegeschwindigkeit. Die Tonhöhe bleibt jedoch<br />
konstant.<br />
SL2: Bei Drücken des Pedals sinkt die<br />
Wiedergabegeschwindigkeit. Auch die Tonhöhe sinkt der<br />
gewählten Geschwindigkeit entsprechend.<br />
FA1: Bei Drücken des Pedals steigt die<br />
Wiedergabegeschwindigkeit. Die Tonhöhe bleibt jedoch<br />
konstant.<br />
FA2: Bei Drücken des Pedals steigt die<br />
Wiedergabegeschwindigkeit. Auch die Tonhöhe ändert sich<br />
der gewählten Geschwindigkeit entsprechend.<br />
SF1: Wenn Sie das Pedal von der Mitte aus weiter<br />
hinunterdrücken, steigt die Wiedergabegeschwindigkeit.<br />
Wenn sich das Pedal unterhalb der Mitte befindet, sinkt die<br />
Geschwindigkeit dagegen. Die Tonhöhe bleibt jedoch<br />
konstant.<br />
SF2: Wenn Sie das Pedal von der Mitte aus weiter<br />
hinunterdrücken, steigt die Wiedergabegeschwindigkeit.<br />
Wenn sich das Pedal unterhalb der Mitte befindet, sinkt die<br />
Geschwindigkeit dagegen. Auch die Tonhöhe ändert sich der<br />
gewählten Geschwindigkeit entsprechend.<br />
• Expression-Pedal: Steuert das Tempo der Loop-Phrase. Je<br />
nach der Einstellung des EDIT-Reglers ändert sich außer der<br />
Geschwindigkeit auch die Tonhöhe. Das Klangergebnis ist<br />
mit dem Ändern der Drehgeschwindigkeit einer Vinylplatte<br />
identisch.<br />
Scr: SCRUB<br />
Dieser Effekt unterteilt die Phrase in so genannte „Grains“<br />
(kurze Audiopassagen), deren Wiedergabe über die Position<br />
des Expression-Pedals gesteuert werden kann (damit lassen<br />
sich „Scrub“-Effekte erzielen). Das eignet sich besonders für<br />
Gitarrensoli und -arpeggien.<br />
• EDIT-Regler: Hiermit stellen Sie die Länge der „Grains“ ein<br />
(wie bei der Granularsynthese).<br />
• Expression-Pedal: Wählt die Wiedergabeposition innerhalb<br />
der Schleife.<br />
Wenn Sie das Pedal zuerst ganz hochklappen und danach<br />
langsam drücken, werden die einzelnen „Grains“ der Reihe<br />
nach abgespielt.<br />
Wenn Sie das Pedal hinunterdrücken, werden die „Grains“<br />
normal abgespielt. Klappen Sie das Pedal wieder hoch, so<br />
wird die Wiedergabe umgekehrt. Die Geschwindigkeit, mit<br />
der Sie das Pedal betätigen, bestimmt auch die<br />
Wiedergabegeschwindigkeit.<br />
Wenn Sie das Pedal nicht betätigen, ist die Wiedergabe<br />
relativ langsam.<br />
Stt: STUTTER<br />
Bei diesem Effekt bestimmt man mit dem Expression-Pedal die<br />
Länge der kurzen Passagen. Damit lassen sich rhythmische<br />
Figuren erzielen. Das eignet sich vor allem für Signale mit<br />
119
<strong>Dynamic</strong> <strong>Looper</strong> Bedienungsanleitung<br />
120<br />
relativ konstantem Pegel. Letzteren kann man durch<br />
Verwendung eines Kompressor- oder Verzerrungseffekts<br />
erzielen. Dieser Effekt funktioniert genau wie der „STUTTER“-<br />
Effekt der PRE FX-Sektion.<br />
))<br />
„Stt: STUTTER“, S.115<br />
Πod: MODULATION<br />
Bei diesem Effekt können Sie mit dem Expression-Pedal einen<br />
Effekt zwischen leichtem Chorus und intensivem Flanging<br />
erzielen.<br />
• EDIT-Regler: Wählen Sie hier die LFO-Geschwindigkeit. Der<br />
LFO läuft synchron zum Tempo.<br />
8-1: x8 (8 Takte) 3-16: (punktierte Achtelnoten)<br />
4-1: x4 (4 Takte) 1-6: 3 (Vierteltriolen)<br />
2-1: x2 (2 Takte) 1-8: (Achtelnoten)<br />
1-1: (1 Takt= ganze Note) 1-12: 3 (Achteltriolen)<br />
3-4: . (drei Taktschläge= punktierte halbe Note) 1-16: (Sechzehntelnoten)<br />
1-2: (zwei Taktschläge= halbe Note) 1-24: 3 (Sechzehnteltriolen)<br />
3-8: (anderthalb Taktschläge) 1-32: (1/32.-Noten)<br />
1-3: 3 (halbe Triolen) 1-64: (1/64.-Noten)<br />
1-4: (1 Taktschlag= Viertelnote)<br />
• Expression-Pedal: Hiermit bestimmen Sie die<br />
Effektintensität. Wenn Sie das Pedal hinunterdrücken,<br />
entwickelt sich der Effekt zu einem Flanger. Je weiter Sie das<br />
Pedal hochklappen, desto stärker ähnelt der Effekt einem<br />
Chorus.<br />
FLt: FILTER<br />
Bei diesem Filtereffekt kann die Frequenz mit dem Expression-<br />
Pedal geändert werden.<br />
• EDIT-Regler: Wählen Sie hier die Filtercharakteristik.<br />
HPF: Hochpassfilter<br />
bPF: Bandpassfilter<br />
LP1: Tiefpassfilter 1<br />
LP2: Tiefpassfilter 2 (größere Flankensteilheit)<br />
• LOOP FX-Taster + EDIT-Regler: Hiermit kann die Resonanz<br />
eingestellt werden.<br />
• Expression-Pedal: Steuert die Filterfrequenz.<br />
dLy: DELAY<br />
Dieser Delay-Effekt kann mit dem Tempo synchronisiert<br />
werden. Wenn Sie das Expression-Pedal hinunterdrücken,<br />
entsteht eine Oszillation wie bei einem analogen Delay-Effekt.<br />
• EDIT-Regler: Regelt die Verzögerungszeit. Mit Ausnahme<br />
des kurzen Delays laufen alle Einstellungen zum Tempo<br />
synchron.<br />
Sho: kurzes Delay<br />
1-6: 3 (Vierteltriolen)<br />
1-64: (1/64.-Noten) 3-16: (punktierte Achtelnoten)<br />
1-32: (1/32.-Noten) 1-4: (1 Taktschlag= Viertelnote)<br />
1-24: 3 (Sechzehnteltriolen) 1-3: 3 (halbe Triolen)<br />
1-16: (Sechzehntelnoten) 3-8: (anderthalb Taktschläge)<br />
1-12: 3 (Achteltriolen) 1-2: (zwei Taktschläge= halbe Note)<br />
1-8: (Achtelnoten)<br />
• Expression-Pedal: Steuert die Rückkopplungsintensität und<br />
die allgemeine Lautstärkebalance.
Über den Pre- und Loop-Effekt<br />
Editieren eines Programms<br />
Anwahl eines Programms<br />
1. Halten Sie den WRITE-Taster ±2 Sekunden lang gedrückt,<br />
um abwechselnd den Preset- und User-Bereich zu wählen.<br />
Das Display zeigt jetzt die Programmnummer an.<br />
P01–P50: Preset-Programme.<br />
U01–U50: User-Programme.<br />
Wenn das Display etwas anderes anzeigt bzw. blinkt, müssen<br />
Sie den CANCEL-Taster drücken. Jetzt erscheint die<br />
Programmnummer.<br />
2. Wählen Sie mit dem PROGRAM UP-Pedal das gewünschte<br />
Programm.<br />
Wenn Sie das PROGRAM UP-Pedal gedrückt halten, während<br />
Sie das TRIGGER/TAP-Pedal betätigen, wird der vorangehende<br />
Programmspeicher gewählt (PROGRAM DOWN).<br />
Editieren der Effekte<br />
Der Pre- und Loop-Effekt enthalten 11 verschiedene<br />
Effekttypen. Jedem Block kann jeweils einer der betreffenden<br />
Typen zugeordnet werden.<br />
Außerdem enthält jeder Effekt einen oder zwei editierbare<br />
Parameter. Diese Parameter sind je nach Effekttyp verschieden.<br />
Die editierten Pre- und Loop-Effekteinstellungen können als<br />
„Programm“ gespeichert werden.<br />
1. Wählen Sie mit dem PRE-Wahlregler den gewünschten<br />
Pre-Effekt.<br />
Wenn der Pre-Effekt momentan ausgeschaltet ist, wird er<br />
beim Drehen am Wahlregler automatisch aktiviert.<br />
Wenn Sie den Pre-Effekt editieren, blinkt der PRE FX-Taster.<br />
2. Stellen Sie mit dem EDIT-Regler den Wert des gewählten<br />
Pre-Parameters ein.<br />
Manche Effekttypen bieten zwei editierbare Parameter. Um den<br />
zweiten Parameter zu editieren, müssen Sie den PRE FX-Taster<br />
gedrückt halten, während Sie am EDIT-Regler drehen.<br />
))<br />
„Pre-Effekte“, S.113<br />
Anzeige des gespeicherten Werts<br />
Nach einer Wertänderung können Sie überprüfen, wie der<br />
betreffende Parameter im als Ausgangspunkt fungierenden<br />
Preset- oder User-Programm eingestellt war („gespeicherter<br />
Wert“). Wenn der eingestellte Parameterwert beim Drehen<br />
am Regler mit dem gespeicherten Wert übereinstimmt,<br />
leuchtet unten rechts im Display kurz ein Punkt.<br />
Das kann praktisch sein, wenn Ihnen eine Einstellung eines<br />
anderen Speichers so gut gefällt, dass Sie sie übernehmen<br />
möchten.<br />
3. Wählen Sie mit dem LOOP-Wahlregler den gewünschten<br />
Loop-Effekt.<br />
Wenn der Loop-Effekt momentan ausgeschaltet ist, wird er<br />
beim Drehen am Wahlregler automatisch aktiviert.<br />
Wenn Sie den Loop-Effekt editieren, blinkt der LOOP FX-<br />
Taster.<br />
4. Stellen Sie mit dem EDIT-Regler den Wert des gewählten<br />
Loop-Parameters ein.<br />
Manche Effekttypen bieten zwei editierbare Parameter. Um<br />
den zweiten Parameter zu editieren, müssen Sie den LOOP<br />
FX-Taster gedrückt halten, während Sie am EDIT-Regler<br />
drehen.<br />
))<br />
„Loop-Effekte“, S.117<br />
121
<strong>Dynamic</strong> <strong>Looper</strong> Bedienungsanleitung<br />
Speichern der Einstellungen<br />
Die PRE FX TARGET-Einstellung (d.h. die Wahl des<br />
Eingangssignals, das mit dem Pre-Effekt bearbeitet wird), der<br />
Pre-Effekt (der z.B. das Gitarrensignal bearbeitet) und der Loop-<br />
Effekt (der eine oder beide Loop-Phrasen bearbeitet) können<br />
gemeinsam als so genanntes Programm gespeichert werden.<br />
dem Pedal einen Loop-Effektparameter zuordnen, ist der<br />
Loop-Effekt daher vorerst nicht aktiv.<br />
Wenn Sie die Änderungen nicht speichern, gehen sie<br />
verloren, sobald Sie einen anderen Speicher wählen oder<br />
das Gerät ausschalten. Änderungen, die Sie behalten<br />
möchten, müssen Sie speichern.<br />
1. Drücken Sie den WRITE-Taster.<br />
Die Anzeige des Programm-/Werte-Displays blinkt. Wenn Sie<br />
bis jetzt ein Preset-Programm editiert haben, wird trotzdem<br />
eine User-Programmnummer angezeigt.<br />
2. Geben Sie mit dem EDIT-Regler an, wo das Programm<br />
gespeichert werden soll.<br />
Beim Speichern überschreiben Ihre neuen Einstellungen den<br />
Inhalt des gewählten Zielprogramms. Bitte überzeugen Sie<br />
sich vorher davon, dass die betreffenden Einstellungen<br />
tatsächlich entsorgt werden dürfen.<br />
In den Preset-Speichern kann man keine Programme sichern.<br />
3. Drücken Sie den WRITE-Taster noch einmal.<br />
Ihre Einstellungen überschreiben das in Schritt 2 gewählte<br />
User-Programm und die Display-Anzeige hört auf zu<br />
blinken.<br />
Anmerkung: Wenn Sie ein Programm speichern, wechselt<br />
der <strong>Dynamic</strong> <strong>Looper</strong> in denselben Zustand wie nach<br />
Aufrufen des soeben gespeicherten Programms. Wenn Sie<br />
122
Einstellungen für das<br />
Expression-Pedal<br />
Mit dem Expression-Pedal können Sie den Pre- oder Loop-<br />
Effekt beeinflussen oder aber die Lautstärke einstellen.<br />
Wahl der Pedalfunktion<br />
Die Diode oben links neben dem Expression-Pedal zeigt die<br />
aktuelle Funktion des Pedals an.<br />
Leuchtet rot: Das Pedal beeinflusst einen Pre-Effektparameter.<br />
Aus: Das Pedal steuert einen Loop-Parameter an, aber der<br />
Loop-Effekt ist momentan ausgeschaltet. Bewegen Sie das<br />
Pedal, um den Loop-Effekt zu aktivieren. Dann leuchtet die<br />
Diode grün.<br />
Leuchtet grün: Das Pedal steuert einen Loop-Effektparameter an.<br />
Leuchtet orange: Wenn der Effektblock des zugeordneten<br />
Parameters ausgeschaltet ist, leuchtet die Diode orange. Das<br />
bedeutet, dass man mit dem Pedal die Lautstärke regeln kann.<br />
Wenn Sie „PRE FX TARGET“ auf „INPUT“ (grün) oder „MIC“<br />
(rot) stellen, steuert das Pedal die Lautstärke der INPUT-Buchse.<br />
Wenn Sie „PRE FX TARGET“ auf „INPUT&MIC“ (orange)<br />
stellen, steuert das Pedal die Lautstärke der INPUT- und<br />
MIC-Buchse.<br />
Um das Pedal dem Pre- oder Loop-Effekt zuzuordnen,<br />
müssen Sie es komplett hinunterklappen und dann noch<br />
etwas weiter drücken (Zehenschalter).<br />
Die Pedalfunktion wird gemeinsam mit den übrigen<br />
Programmparametern gespeichert.<br />
Einstellungen für das Expression-Pedal<br />
Kalibrieren des Expression-Pedals<br />
Wenn die Lautstärke oder der zugeordnete Parameter nicht<br />
mehr auf den Höchstwert (Vollgas) bzw. Mindestwert (Pedal<br />
hochgeklappt) gestellt werden kann, müssen Sie das<br />
Expression-Pedal mit folgendem Verfahren kalibrieren.<br />
Bitte bewegen Sie das Expression-Pedal beim Kalibrieren mit<br />
dem Fuß. Wenn Sie es nämlich mit der Hand bewegen, schlägt<br />
die Kalibrierung eventuell fehl.<br />
1. Schalten Sie das Gerät aus.<br />
2. Halten Sie den CANCEL- und LOOP FX-Taster gedrückt,<br />
während Sie das Gerät wieder einschalten.<br />
3. Warten Sie, bis das Display „PdL“ anzeigt und geben Sie<br />
dann beide Taster frei.<br />
4. Drücken Sie das Pedal komplett hinunter, gerade so, als<br />
wollten Sie ihm eine andere Funktion zuordnen.<br />
Diese Position wird als Gewichtangabe für das Umschalten<br />
der Expression-Pedalfunktion verwendet.<br />
123
<strong>Dynamic</strong> <strong>Looper</strong> Bedienungsanleitung<br />
5. Klappen Sie das Expression-Pedal langsam hoch (zu sich<br />
hin) und nehmen Sie den Fuß vom Pedal, wenn es nicht<br />
mehr weiter bewegt werden kann.<br />
6. Drücken Sie das Pedal allmählich hinunter und nehmen<br />
Sie den Fuß vom Pedal, wenn es sich nicht mehr bewegen<br />
lässt.<br />
Drücken Sie den CANCEL-Taster, wenn Sie die Kalibrierung<br />
abbrechen möchten.<br />
7. Drücken Sie den WRITE-Taster.<br />
Im Display wird zunächst eine Sekunde lang „CPL“ und<br />
danach die Programmnummer angezeigt.<br />
Wenn die Kalibrierung fehlschlägt, erscheint die Meldung<br />
„Err“ im Display. Wiederholen Sie den Vorgang dann noch<br />
einmal ab Schritt 4.<br />
Wenn die Kalibrierung mehrere Male in Folge fehlschlägt,<br />
stimmt eventuell etwas nicht mit dem <strong>Dynamic</strong> <strong>Looper</strong>.<br />
Wenden Sie sich dann an Ihren VOX-Händler.<br />
Laden der Werkseinstellungen<br />
Zum Laden aller Werksvorgaben für den <strong>Dynamic</strong> <strong>Looper</strong><br />
müssen Sie folgendermaßen vorgehen.<br />
Anmerkung: Dabei werden alle im User-Bereich gespeicherten<br />
Einstellungen durch die Werksvorgaben ersetzt.<br />
1. Schalten Sie das Gerät aus.<br />
2. Halten Sie den CANCEL- und PRE FX TARGET-Taster<br />
gedrückt, während Sie das Gerät wieder einschalten.<br />
3. Warten Sie, bis im Display „Int“ blinkt und geben Sie die<br />
Taster wieder frei.<br />
Wenn Sie die Werksvorgaben doch lieber nicht laden, müssen<br />
Sie den CANCEL-Taster drücken.<br />
4. Drücken Sie den WRITE-Taster.<br />
Wenn alle Programme initialisiert sind, erscheint die „CP“-<br />
Meldung im Display. Danach wird der <strong>Dynamic</strong> <strong>Looper</strong><br />
normal hochgefahren.<br />
Schalten Sie das Gerät niemals aus, solange die<br />
Initialisierung nicht beendet ist.<br />
124
Energiesparfunktion<br />
Energiesparfunktion<br />
Der <strong>Dynamic</strong> <strong>Looper</strong> enthält eine Energiesparfunktion, die das<br />
Gerät ausschaltet, wenn Sie es länger als vier Stunden nicht<br />
bedienen.<br />
Anmerkung: Solange an den Eingängen des Geräts ein Signal<br />
anliegt, wird die Energiesparfunktion nicht aktiviert, ganz<br />
gleich, ob Sie das Gerät bedienen oder nicht.<br />
Anmerkung: Ab Werk ist die Energiesparfunktion des<br />
<strong>Dynamic</strong> <strong>Looper</strong> aktiv.<br />
Anmerkung: Der Status der Energiesparfunktion (an oder<br />
aus) wird beim Ausschalten des Geräts automatisch<br />
gespeichert.<br />
Deaktivieren der Energiesparfunktion<br />
Zum Ausschalten der Energiesparfunktion verfahren Sie bitte<br />
folgendermaßen.<br />
1. Schalten Sie den <strong>Dynamic</strong> <strong>Looper</strong> aus.<br />
2. Halten Sie den STOP MODE- und CANCEL-Taster<br />
gedrückt, während Sie das Gerät wieder einschalten.<br />
Im Display wird zunächst „diS“ angezeigt und danach wird<br />
der <strong>Dynamic</strong> <strong>Looper</strong> normal hochgefahren.<br />
Aktivieren der Energiesparfunktion<br />
Um die Energiesparfunktion zu einem späteren Zeitpunkt<br />
wieder zu aktivieren, verfahren Sie bitte folgendermaßen.<br />
1. Schalten Sie den <strong>Dynamic</strong> <strong>Looper</strong> aus.<br />
2. Halten Sie den STOP MODE- und WRITE-Taster gedrückt,<br />
während Sie das Gerät wieder einschalten.<br />
Im Display wird zunächst „EnA“ angezeigt und danach wird<br />
der <strong>Dynamic</strong> <strong>Looper</strong> normal hochgefahren.<br />
125
<strong>Dynamic</strong> <strong>Looper</strong> Bedienungsanleitung<br />
Fehlersuche<br />
Das Gerät kann nicht eingeschaltet werden<br />
• Haben Sie das beiliegende Netzteil an die DC9V-Buchse auf<br />
der Rückseite angeschlossen?<br />
• Haben Sie das Netzteil an eine Steckdose angeschlossen?<br />
• Führt die gewählte Steckdose denn auch Strom?<br />
• Ist das Netzteil eventuell defekt?<br />
• Haben Sie den STANDBY-Schalter auf „ON“ gestellt?<br />
Sie hören nichts<br />
• Haben Sie Ihr Instrument ordnungsgemäß an die INPUT-<br />
Buchse des <strong>Dynamic</strong> <strong>Looper</strong> angeschlossen?<br />
• Ist das Kabel eventuell beschädigt?<br />
• Haben Sie die Lautstärke des an INPUT angeschlossenen<br />
Geräts auf den Mindestwert gestellt?<br />
• Falls Sie ein Mikrofon verwenden: Haben Sie den MIC TRIM-<br />
Regler auf einen geeigneten Wert gestellt?<br />
• Steuert das Expression-Pedal momentan die Lautstärke und<br />
ist es komplett hochgeklappt?<br />
Schleifenwiedergabe unmöglich<br />
• Enthält der betreffende Loop-Puffer denn auch eine Phrase?<br />
Der Effekt funktioniert nicht<br />
• Haben Sie den Effekt eingeschaltet?<br />
• Der Loop-Effekt ist nur verfügbar, wenn „Loop 1“ oder<br />
„Loop 2“ eine Phrase enthält.<br />
• Steuert das Expression-Pedal momentan die Lautstärke?<br />
• Überprüfen Sie die Einstellungen des Loop-Effekts.<br />
Der Klang ist etwas befremdlich<br />
• Überprüfen Sie die Einstellungen des Loop-Effekts.<br />
Bei der Verwendung eines Pedals, Tasters, Reglers<br />
oder Wahlreglers ändert sich nichts am Klang<br />
• Haben Sie den betreffenden Effektblock deaktiviert?<br />
• Haben Sie die „Key Lock“-Funktion aktiviert?<br />
Das Gerät geht plötzlich aus<br />
• Der <strong>Dynamic</strong> <strong>Looper</strong> enthält eine Energiesparfunktion, die<br />
das Gerät ausschaltet, wenn Sie es länger als vier Stunden<br />
nicht bedienen. Diese Funktion kann bei Bedarf ausgeschaltet<br />
werden. Siehe „Deaktivieren der Energiesparfunktion“ auf<br />
Seite 125.<br />
126
Blockschaltbild<br />
Blockschaltbild<br />
Editieren<br />
Editieren<br />
INPUT (Gitarre)<br />
MIC IN<br />
MIC TRIM<br />
PRE FX<br />
*1<br />
*1<br />
Loop1<br />
Loop FX<br />
*1<br />
Master-<br />
Limiter<br />
OUTPUT<br />
Loop2<br />
*1<br />
*1<br />
Pre FX TARGET<br />
Metronom<br />
*1<br />
Expression-Pedal<br />
*1: Dieser Parameter kann bei Bedarf mit dem Expression-Pedal beeinflusst werden.<br />
127
<strong>Dynamic</strong> <strong>Looper</strong> Bedienungsanleitung<br />
Wichtigste technische Daten<br />
Effekte<br />
Pre-Effekt: 11 Kategorien (27 Variationen)<br />
Loop-Effekt: 11 Kategorien<br />
Master-Limiter: 2 Typen<br />
Stoppmodi: 3 Typen<br />
Anzahl der Programme: 100 (50x Preset, 50x User)<br />
Aufnahmezeit<br />
Maximale Aufnahmedauer: Insgesamt 90 Sekunden<br />
Anzahl der Schleifen: 2<br />
Audio-Eingänge<br />
INPUT-Buchse (mono)<br />
MIC IN-Buchse (XLR, symmetrisch, ohne Phantomspeisung)<br />
MIC IN TRIM-Regler (für Mikrofon)<br />
Maximaler Eingangspegel<br />
+7dBu (typisch)<br />
Stromversorgung<br />
AC-Netzteil (DC 9V-Buchse [<br />
Stromverbrauch<br />
140mA<br />
Abmessungen (B x T x H)<br />
264 x 245 x 76 (mm)<br />
Gewicht<br />
2,2 kg<br />
] ), STANDBY-Schalter<br />
Lieferumfang<br />
AC-Netzteil, Bedienungsanleitung, Programmübersicht<br />
Audio-Ausgabe<br />
OUTPUT-Buchse (mono)<br />
Signalverarbeitung<br />
A/D-Wandlung: 24 Bit<br />
D/A-Wandlung: 24 Bit<br />
Sampling-Frequenz<br />
44,1kHz<br />
Dynamikumfang<br />
94dB oder mehr<br />
* 0dBu= 0,775V RMS<br />
* Änderungen der technischen Daten und des Designs ohne<br />
vorherige Ankündigung vorbehalten.<br />
128