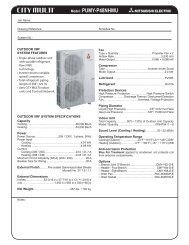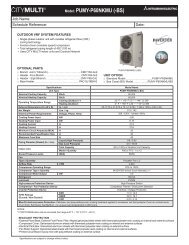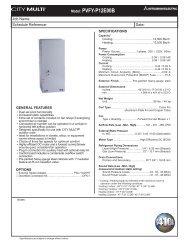
69-2404EFS-01 - Mitsubishi Electric Sales Canada Inc.
69-2404EFS-01 - Mitsubishi Electric Sales Canada Inc.
69-2404EFS-01 - Mitsubishi Electric Sales Canada Inc.

Create successful ePaper yourself
Turn your PDF publications into a flip-book with our unique Google optimized e-Paper software.
BE CAREFUL! Never use sharp instruments, such as a pencil<br />
or pen, to press touchscreen keys. To prevent damage to the<br />
thermostat, always press keys with your fingertip.<br />
This thermostat contains a Lithium battery which may contain<br />
Perchlorate material.<br />
Perchlorate Material—special handling may apply,<br />
See www.dtsc.ca.gov/hazardouswaste/perchlorate.<br />
Need Help<br />
For assistance with this product please call Customer Care toll-free at 1-800-468-1502<br />
Read and save these instructions.<br />
® U.S. Registered Trademark.<br />
US Patent No. 6,208,263; 6,373,376; 6,448,9<strong>01</strong>; 6,595,430;<br />
7,<strong>01</strong>2,927; 7,044,397; D509151 and other patents pending.<br />
Copyright © 2<strong>01</strong>0 Honeywell International <strong>Inc</strong>. All rights reserved.
Table of contents<br />
About your new thermostat<br />
Programming at a glance...................... 2<br />
Quick reference to controls................... 3<br />
Quick reference to status display......... 4<br />
Programming & Operation<br />
Clock setting.......................................... 5<br />
Fan setting............................................. 6<br />
System setting....................................... 7<br />
Energy saving default schedule............ 8<br />
Using program schedules..................... 9<br />
Program schedule overrides............... 10<br />
Vacation hold....................................... 12<br />
Special features................................... 13<br />
Screen lock.......................................... 14<br />
Screen cleaning................................... 15<br />
Optional remote sensors..................... 16<br />
Humidity control................................... 17<br />
Ventilation control................................ 19<br />
TH9000 Series<br />
Appendices<br />
Advanced functions............................. 20<br />
In case of difficulty.............................. 27<br />
This thermostat is ready to go!<br />
Your new thermostat is preprogrammed<br />
and ready to go.<br />
See page 2 to check settings.<br />
CAUTION: EQUIPMENT DAMAGE<br />
HAZARD. To prevent possible<br />
compressor damage, do not operate<br />
cooling system when outdoor<br />
temperature is below 50˚F (10˚C).<br />
1 <strong>69</strong>-<strong>2404EFS</strong>—<strong>01</strong>
Operating Manual<br />
About your new thermostat<br />
Your new thermostat is pre-programmed and ready to go. Just set the time and day.<br />
Then check the settings below and change if needed:<br />
1. Set clock........................................................................................................See page 5<br />
2. Select fan setting: Preset to Auto..............................................................See page 6<br />
3. Select system setting: Preset to Heat.......................................................See page 7<br />
4. Program schedules: Preset to energy-saving levels<br />
while you’re at work or asleep (assumes you<br />
wake at 6 am, leave at 8 am, return at 6 pm<br />
and go to bed at 10 pm)......................................................................... See pages 8-11<br />
5. Set humification, dehumidification<br />
& ventilation controls, if applicable............................................... See pages 17-19<br />
ONE-TOUCH TEMP CONTROL: You can override the program schedule at any time,<br />
and manually adjust the temperature (see pages 10-11).<br />
<strong>69</strong>-<strong>2404EFS</strong>—<strong>01</strong> 2
Quick reference to controls<br />
TH9000 Series<br />
Press day(s) to set program schedule (see page 9)<br />
Press to select fan<br />
operation (see page 6)<br />
Press to select system<br />
type (see page 7)<br />
Press to set program<br />
schedule (see page 9)<br />
MON TUE WED THU FRI SAT SUN<br />
FAN<br />
AUTO<br />
SYSTEM<br />
HEAT<br />
Inside<br />
70<br />
OK TO PICK MULTIPLE DAYS<br />
6:<strong>01</strong><br />
AM<br />
Set To<br />
70<br />
Following<br />
Schedule<br />
SCHED HOLD CLOCK SCREEN MORE<br />
Press to adjust<br />
temperature settings<br />
(see pages 9-11)<br />
Press for more options<br />
M29830<br />
Press to override<br />
program schedule<br />
(see pages 10-11)<br />
Press to set clock<br />
(see page 5)<br />
Press to lock keypad for 30<br />
seconds to clean screen<br />
(see page 14)<br />
3 <strong>69</strong>-<strong>2404EFS</strong>—<strong>01</strong>
Operating Manual<br />
Quick reference to status display<br />
Current inside temperature Current day of week Temperature setting<br />
Fan setting<br />
System setting<br />
Current time<br />
Other display messages:<br />
SCHED HOLD CLOCK SCREEN MORE<br />
• Cool On: Cooling system is activated<br />
• Heat On: Heating system is activated<br />
• Aux Heat On: Auxiliary heating system is activated<br />
• Wait: Compressor protection activated (see page 13)<br />
• Screen Locked: See page 26 to unlock<br />
FAN<br />
AUTO<br />
SYSTEM<br />
HEAT<br />
Inside<br />
WED<br />
70<br />
6:<strong>01</strong><br />
AM<br />
Set To<br />
70<br />
Following<br />
Schedule<br />
Recovery<br />
55<br />
Humidity<br />
M29829<br />
Program schedule on<br />
(does not display<br />
when off)<br />
Adaptive Intelligent<br />
Recovery in effect<br />
(see page 13)<br />
Inside humidity (If<br />
an outdoor sensor is<br />
installed, the outdoor<br />
temperature is shown<br />
instead of the humidity<br />
level. Press MORE to display<br />
the humidity level.)<br />
<strong>69</strong>-<strong>2404EFS</strong>—<strong>01</strong> 4
Press CLOCK<br />
WED<br />
Clock setting<br />
FAN<br />
AUTO<br />
FAN<br />
AUTO<br />
Inside<br />
6:<strong>01</strong><br />
SCHED HOLD WED CLOCK SCREEN MORE<br />
Inside<br />
70<br />
Adjust time, then press DONE<br />
AM<br />
70<br />
6:02<br />
AM<br />
Set To70<br />
Set To70<br />
M29828<br />
TH9000 Series<br />
To set the current time display, press CLOCK,<br />
then press s or t to adjust the time. Press<br />
and hold s or t to advance the time more<br />
quickly.<br />
Press DONE to save & exit (or press CANCEL to<br />
exit without changing the time).<br />
Note: The real-time clock should never require<br />
adjustment since it automatically updates for<br />
daylight savings time, and stores all date/time<br />
information.<br />
Note: To change the current week day display, see<br />
page 21.<br />
DONE<br />
CANCEL<br />
M29831<br />
5 <strong>69</strong>-<strong>2404EFS</strong>—<strong>01</strong>
Operating Manual<br />
Fan setting<br />
FAN<br />
AUTO<br />
SYSTEM<br />
HEAT<br />
Inside<br />
WED<br />
70<br />
6:<strong>01</strong><br />
AM<br />
Set To70<br />
SCHED HOLD CLOCK SCREEN MORE<br />
Press FAN<br />
Following<br />
Schedule<br />
M29827<br />
Note: If a fan schedule is programmed,<br />
“Auto” will run the fan schedule.<br />
Press FAN to select fan operation, then press<br />
DONE:<br />
• On: Fan is always on.<br />
• Auto: Fan runs only when the heating or<br />
cooling system is on.<br />
• Circ: Fan runs randomly, about 35% of the<br />
time, not counting any run time with the<br />
heating or cooling system.<br />
You can press FAN to override the fan settings<br />
you’ve programmed for different time periods<br />
(see page 9). If you select On or Circ, the<br />
setting you select will remain active until you<br />
press FAN again to select Auto, and return<br />
to the fan schedule (see page 28 for more<br />
information).<br />
<strong>69</strong>-<strong>2404EFS</strong>—<strong>01</strong> 6
System setting<br />
TH9000 Series<br />
FAN<br />
AUTO<br />
SYSTEM<br />
HEAT<br />
Inside<br />
WED<br />
70<br />
6:<strong>01</strong><br />
AM<br />
SCHED HOLD CLOCK SCREEN MORE<br />
Press SYSTEM<br />
Set To70<br />
Following<br />
Schedule<br />
M29826<br />
Press the SYSTEM button to select, then press<br />
DONE:<br />
• Heat: Thermostat controls only the<br />
heating system.<br />
• Cool: Thermostat controls only the<br />
cooling system.<br />
• Off: Heating and cooling systems are off.<br />
• Auto: Thermostat automatically selects<br />
heating or cooling depending on the<br />
indoor temperature.<br />
• Em Heat (only for heat pumps with<br />
auxiliary heat): Thermostat controls<br />
Auxiliary Heat. Compressor is not used.<br />
7 <strong>69</strong>-<strong>2404EFS</strong>—<strong>01</strong>
Operating Manual<br />
Energy saving settings for maximum cost savings<br />
It’s easy to program your system for maximum energy savings. You can program four<br />
time periods each day, with different settings for each day.<br />
This thermostat is pre-set with energy saving program settings. We recommend these<br />
settings, since they can reduce your heating/cooling expenses by as much as 33%.<br />
(See next page to adjust times and temperatures of each time period.)<br />
Wake<br />
(6:00 am)<br />
Leave<br />
(8:00 am)<br />
Return<br />
(6:00 pm)<br />
Sleep<br />
(10:00 pm)<br />
Heat (Mon-Fri) Cool (Mon-Fri) Heat (Sat-Sun) Cool (Sat-Sun)<br />
70 ° 78 ° 70 ° 78 °<br />
62 ° 85 ° 62 °<br />
[Or cancel period]<br />
85 °<br />
[Or cancel period]<br />
70 ° 78 ° 70 ° 78 °<br />
[Or cancel period]<br />
62 ° 82 ° 62 ° 82 °<br />
[Or cancel period]<br />
<strong>69</strong>-<strong>2404EFS</strong>—<strong>01</strong> 8
FAN<br />
AUTO<br />
Inside<br />
Following<br />
To adjust WED program schedules<br />
Schedule<br />
Press EDIT<br />
70<br />
Select day(s)<br />
AM<br />
Set To70<br />
Inside<br />
AM Set<br />
6:00 70<br />
FAN<br />
Press AUTO SCHED<br />
To70<br />
Following<br />
SCHED HOLD CLOCK SCREEN Schedule MORE<br />
6:00<br />
DONE EDIT WAKE LEAVE RETURN SLEEP<br />
M29825<br />
CANCEL<br />
M29824<br />
Set heat/cool levels<br />
MON TUE WED THU FRI SAT SUN<br />
OK TO PICK MULTIPLE DAYS<br />
FAN<br />
AUTO<br />
70<br />
HEAT<br />
TH9000 Series<br />
1. Press SCHED, then EDIT.<br />
2. Press day buttons (MON-SUN) to select<br />
day(s).<br />
3. Press s or t to set your Wake time for<br />
selected day(s).<br />
4. Press s or t to set Heat and Cool<br />
temperature for this time period.<br />
5. Press other time periods (LEAVE, RETURN,<br />
SLEEP) to set time and temperatures for<br />
each.<br />
6. Press DONE to save & exit (or press CANCEL<br />
to exit without saving changes).<br />
CANCEL<br />
PERIOD<br />
AM<br />
PM<br />
6:00 78<br />
DONE WAKE LEAVE RETURN SLEEP CANCEL<br />
M29823<br />
Set time for program<br />
period to start<br />
COOL<br />
Note: You can press CANCEL PERIOD to eliminate any<br />
unwanted time period.<br />
Note: Press FAN to customize fan settings for any<br />
time period (see page 6).<br />
9 <strong>69</strong>-<strong>2404EFS</strong>—<strong>01</strong>
Operating Manual<br />
Program schedule override (temporary)<br />
FAN<br />
AUTO<br />
SYSTEM<br />
HEAT<br />
Inside<br />
WED<br />
70<br />
Hold Temperature<br />
Until<br />
8:00<br />
AM<br />
PM<br />
Press to set timer<br />
Adjust temperature<br />
Set To73<br />
Heat On<br />
78<br />
SCHED HOLD CLOCK SCREEN MORE<br />
HEAT<br />
COOL<br />
CANCEL<br />
M29832<br />
Press s or t to immediately adjust the<br />
temperature. This will temporarily override the<br />
temperature setting for the current time period.<br />
The new temperature will be maintained only<br />
until the time you set. When the timer expires,<br />
the program schedule will resume and set the<br />
temperature to the level you’ve programmed for<br />
the current time period.<br />
To cancel the temporary setting at any time,<br />
press CANCEL (or SCHED). The program schedule<br />
will resume.<br />
Press CANCEL (or SCHED) to<br />
resume program schedule<br />
<strong>69</strong>-<strong>2404EFS</strong>—<strong>01</strong> 10
Program schedule override (permanent)<br />
TH9000 Series<br />
Press HOLD Adjust temperature Press HOLD to permanently adjust the<br />
temperature. This will turn off the program<br />
WED<br />
schedule.<br />
FAN<br />
AUTO<br />
SYSTEM<br />
HEAT<br />
Inside<br />
70<br />
8:00<br />
Permanent<br />
Hold<br />
AM<br />
Set To<br />
73<br />
Heat On<br />
SCHED HOLD CLOCK SCREEN MORE<br />
CANCEL<br />
M29821<br />
Whatever temperature you set will be<br />
maintained 24 hours a day until you manually<br />
change it or press CANCEL (or SCHED) to cancel<br />
“Hold” and resume the program schedule.<br />
Press CANCEL (or SCHED) to<br />
resume program schedule<br />
11 <strong>69</strong>-<strong>2404EFS</strong>—<strong>01</strong>
Operating Manual<br />
Vacation hold<br />
FAN<br />
AUTO<br />
SYSTEM<br />
HEAT<br />
Inside<br />
1 Set temperature<br />
WED<br />
70<br />
Hold Temperature<br />
Until<br />
6:00<br />
AM<br />
PM<br />
Set To55<br />
SCHED HOLD CLOCK SCREEN MORE<br />
CANCEL<br />
FAN<br />
Inside<br />
2 Press to set time for<br />
schedule to resume<br />
AUTO<br />
3 Press HOLD twice<br />
SYSTEM<br />
HEAT<br />
WED<br />
70<br />
Hold Temperature<br />
Until<br />
14<br />
DAYS<br />
Set To55<br />
M29820<br />
This feature can suspend the program schedule<br />
for extended periods of time.<br />
Press s or t to set the temperature you want,<br />
then press s or t to set the time of day you<br />
want the schedule to resume when you return.<br />
Press HOLD twice, then press s or t to select<br />
the number of days.<br />
Whatever temperature you set will be maintained<br />
24 hours a day for the number of days<br />
you select. After this number of days have<br />
elapsed, the previously programmed schedule<br />
will resume at the time you set.<br />
If you return earlier than expected, press<br />
CANCEL (or SCHED) to cancel “Hold” and resume<br />
the program schedule.<br />
SCHED HOLD CLOCK SCREEN MORE<br />
CANCEL<br />
4 Press to select number of days<br />
M29819<br />
<strong>69</strong>-<strong>2404EFS</strong>—<strong>01</strong> 12
Special features<br />
TH9000 Series<br />
Auto Changeover: When set to Auto, the thermostat automatically selects heating or<br />
cooling depending on the indoor temperature.<br />
Adaptive Intelligent Recovery: This feature allows the thermostat to “learn” how<br />
long the furnace and air conditioner take to reach programmed temperature settings,<br />
so the temperature is reached at the time you set.<br />
Compressor Protection: This feature forces the compressor to wait a few minutes<br />
before restarting, to prevent equipment damage. During the wait time, the message<br />
“Wait” is displayed on screen.<br />
Flashing message: Reminder to replace filter or UV lamp. After replacement, press<br />
RESET to reactivate the alert timer.<br />
Southern Away Dehumidification: Your system may be programmed to control<br />
humidity while your house is vacant during the humid season. Before you leave the<br />
house, press the HOLD button three times to activate this feature. This will control<br />
temperature and humidity to help protect your house and possessions while you are<br />
away. (If this feature does not work, contact your installer.)<br />
13 <strong>69</strong>-<strong>2404EFS</strong>—<strong>01</strong>
Operating Manual<br />
Screen lock<br />
FAN<br />
AUTO<br />
SYSTEM<br />
HEAT<br />
Inside<br />
WED<br />
70<br />
6:00<br />
PM<br />
SCREEN LOCKED<br />
Set To<br />
70<br />
Following<br />
Schedule<br />
43<br />
SCHED HOLD CLOCK SCREEN MORE<br />
To prevent tampering, the screen can be partially<br />
or fully locked.<br />
When partially locked, the screen displays<br />
SCREEN LOCKED for several seconds if a locked<br />
key is pressed.<br />
When the screen is fully locked, no keys<br />
function. To lock or unlock the screen, see<br />
advanced function 0670 on page 26.<br />
M29818<br />
See advanced function<br />
0670 (page 26) for<br />
screen lock options<br />
<strong>69</strong>-<strong>2404EFS</strong>—<strong>01</strong> 14
Screen FAN cleaning<br />
AUTO<br />
Inside<br />
Press SCREEN<br />
WED<br />
70<br />
6:00<br />
PM<br />
Following<br />
Schedule<br />
SCHED HOLD CLOCK SCREEN MORE<br />
Screen lock timer (30 seconds)<br />
30<br />
SCREEN LOCKED<br />
Set To<br />
OK TO<br />
CLEAN<br />
SCREEN<br />
70<br />
M29817<br />
TH9000 Series<br />
Press SCREEN to lock the screen for cleaning.<br />
The screen will remain locked for 30 seconds<br />
so you can clean the screen without changing<br />
any settings.<br />
After 30 seconds, press DONE to resume normal<br />
operation, or press SCREEN again if you require<br />
more time for cleaning.<br />
Note: Do not spray any liquid directly on the<br />
thermostat. Spray liquids onto a cloth, then use<br />
the damp cloth to clean the screen. Use water or<br />
household glass cleaner. Avoid abrasive cleansers.<br />
SCHED HOLD CLOCK SCREEN MORE<br />
M29816<br />
15 <strong>69</strong>-<strong>2404EFS</strong>—<strong>01</strong>
Operating Manual<br />
Optional remote sensors<br />
FAN<br />
AUTO<br />
SYSTEM<br />
HEAT<br />
Inside<br />
WED<br />
70<br />
6:<strong>01</strong><br />
AM<br />
Set To70<br />
Following<br />
Schedule<br />
43<br />
Outside<br />
SCHED HOLD CLOCK SCREEN MORE<br />
If an outdoor sensor is installed, the current<br />
outdoor temperature is displayed.<br />
If an indoor remote sensor is installed, the display<br />
shows the indoor temperature at the location<br />
of the sensor.<br />
If more than one indoor sensor is installed, the<br />
display shows an average of temperature readings<br />
from all sensors or an average between<br />
the thermostat and the sensor(s).<br />
Inside<br />
temperature<br />
Outside<br />
temperature<br />
M29815<br />
<strong>69</strong>-<strong>2404EFS</strong>—<strong>01</strong> 16
Humidification control<br />
Set Frost Control & humidity level<br />
Inside<br />
32<br />
Press to save & exit<br />
5<br />
55<br />
FROST<br />
DEHUMIDIFIER<br />
DONE<br />
CANCEL<br />
M29814<br />
TH9000 Series<br />
Press MORE until the humidifier screen is displayed,<br />
then press s or t to set the humidity<br />
and Frost Control level.<br />
When using Frost Protection, if frost/condensation<br />
appears on windows, lower the frost<br />
setting. Wait at least 1 day before adjusting the<br />
frost level again. Once frost no longer appears,<br />
the thermostat will control humidity to the<br />
maximum level without frosting or fogging windows<br />
and without further adjustment.<br />
Press DONE to save and exit, or press CANCEL to<br />
exit without saving changes.<br />
Note: If you do not have an outdoor temperature<br />
sensor, the Frost Control level will not be displayed.<br />
17 <strong>69</strong>-<strong>2404EFS</strong>—<strong>01</strong>
Operating Manual<br />
Dehumidification control<br />
Press to select<br />
Auto or Off<br />
DONE<br />
Inside<br />
73<br />
AUTO<br />
Press to save & exit<br />
Press to set<br />
desired humidity<br />
55<br />
DEHUMIDIFIER<br />
CANCEL<br />
M29813<br />
Press MORE until the dehumidifier screen is displayed,<br />
then press s or t to set the desired<br />
humidity level and operation (Auto or Off).<br />
If installed to control a dehumidifier, the thermostat<br />
can activate it as needed to reduce<br />
humidity.<br />
If you don’t have a dehumidifier, the thermostat<br />
activates the air conditioner to reduce humidity<br />
(may cool as much as 3°F lower than your temperature<br />
setting).<br />
Press DONE to save and exit, or press CANCEL to<br />
exit without saving changes.<br />
Note: Auto/Off only present<br />
when using a whole house<br />
dehumidifier (not present when<br />
dehumidifying with A/C).<br />
<strong>69</strong>-<strong>2404EFS</strong>—<strong>01</strong> 18
Ventilation control<br />
Press to set ventilation timer<br />
VENT<br />
AUTO 40<br />
Minutes<br />
DONE<br />
Press to save & exit<br />
CANCEL<br />
M29812<br />
TH9000 Series<br />
You can ventilate your home at any time:<br />
Press MORE until the ventilation screen is displayed,<br />
then press s or t to set the ventilation<br />
timer. You can set the timer to ventilate<br />
from 20 to 180 minutes, in 20-minute increments.<br />
To turn off the ventilator, select 0.<br />
Press DONE to save and exit, or press CANCEL to<br />
exit without saving changes.<br />
If programmed for auto-ventilation by the<br />
installer, the thermostat will ventilate your<br />
home as needed.<br />
Auto/Off will turn off/on the automatic ventilation<br />
only. Ventilation can still be requested by<br />
using the timer when set to Off.<br />
19 <strong>69</strong>-<strong>2404EFS</strong>—<strong>01</strong>
Operating Manual<br />
Advanced functions<br />
1 Press SYSTEM.<br />
FAN<br />
AUTO<br />
SYSTEM<br />
HEAT<br />
TUE<br />
Inside<br />
70<br />
6:<strong>01</strong><br />
AM<br />
Set To<br />
SCHED HOLD SCREEN MORE<br />
2 Press and hold<br />
blank center key<br />
until the display<br />
changes.<br />
70<br />
Following<br />
Schedule<br />
Recovery<br />
Outside<br />
43<br />
3 Change settings as<br />
required (see pages<br />
21-26).<br />
M29811<br />
DONE<br />
TUE<br />
FAN<br />
TUE<br />
FAN<br />
Inside<br />
AUTO<br />
SYSTEM<br />
HEAT<br />
Inside<br />
Function<br />
AUTO<br />
70<br />
6:<strong>01</strong><br />
70<br />
<strong>01</strong>20<br />
AM<br />
Set To70<br />
Set To70<br />
Setting<br />
20<br />
CANCEL<br />
M29810<br />
DONE<br />
M29809<br />
4 Press DONE to exit &<br />
save changes.<br />
Press s/t to<br />
select function<br />
Press s/t to<br />
change setting<br />
<strong>69</strong>-<strong>2404EFS</strong>—<strong>01</strong> 20
Advanced functions<br />
TH9000 Series<br />
Year setting (first two digits)<br />
Function Press s/t to change the first two digits of the year:<br />
<strong>01</strong>20<br />
Options: 20 = Year 20xx<br />
21 = Year 21xx<br />
Year setting (second two digits)<br />
Function Press s/t to change the last two digits of the year:<br />
<strong>01</strong>30<br />
Options: <strong>01</strong> - 99 (i.e., 20<strong>01</strong> - 2099)<br />
Month setting<br />
Function Press s/t to change the current month:<br />
<strong>01</strong>40<br />
Options: <strong>01</strong> - 12 (i.e., January - December)<br />
Date setting<br />
Function Press s/t to change the current date:<br />
<strong>01</strong>50<br />
Options: <strong>01</strong> - 31<br />
21 <strong>69</strong>-<strong>2404EFS</strong>—<strong>01</strong>
Operating Manual<br />
Advanced functions<br />
Program schedule on/off<br />
Function Press s/t to turn the program schedule on or off:<br />
<strong>01</strong>60<br />
Options: 0 Program schedule is off. Thermostat is non-programmable.<br />
4 Program schedule is on (7-day programmable).<br />
Restore energy saving default schedule<br />
Function Press s/t to restore default settings:<br />
<strong>01</strong>65<br />
Options: 0 No change<br />
1 Restore factory default settings<br />
Backlight<br />
Function<br />
0280<br />
Options:<br />
Press s/t to select how the screen is lighted:<br />
0 Light on for approx. 45 seconds after keypress<br />
1 Light always on low intensity, full bright after keypress<br />
<strong>69</strong>-<strong>2404EFS</strong>—<strong>01</strong> 22
Advanced functions<br />
TH9000 Series<br />
Temperature format (°F/°C)<br />
Function Press s/t to set the temperature display format:<br />
0320<br />
Options: 0 Fahrenheit<br />
1 Celsius<br />
Daylight savings time on/off<br />
Function The thermostat is pre-programmed to automatically adjust to daylight savings time.<br />
0330 Press s/t to select an option:<br />
Options: 0 Off: No adjustment for daylight savings time<br />
1 On: Auto-change to daylight savings time (through 2006, and for areas that do<br />
not use the new 2007 DST calendar)<br />
2 On: Auto-change to daylight savings time (2007 and beyond, for areas that use<br />
the new 2007 DST calendar)<br />
23 <strong>69</strong>-<strong>2404EFS</strong>—<strong>01</strong>
Operating Manual<br />
Advanced functions<br />
Furnace filter change reminder<br />
Function This feature displays an alert to remind you to change the furnace filter.<br />
0500 Press s/t to set the desired reminder interval:<br />
Options:<br />
0 Off<br />
1 10-day run time<br />
2 30-day run time<br />
3 60-day run time<br />
4 90-day run time<br />
5 120-day run time<br />
6 180-day run time<br />
7 270-day run time<br />
8 365-day run time<br />
9 30 calender days<br />
10 60 calender days<br />
11 90 calender days<br />
12 120 calender days<br />
13 180 calender days<br />
14 365 calender days<br />
E Auto Alert (requires optional equipment)<br />
Note: Press RESET<br />
to cancel the alert<br />
<strong>69</strong>-<strong>2404EFS</strong>—<strong>01</strong> 24
Advanced functions<br />
TH9000 Series<br />
Humidifier pad change reminder<br />
Function This feature displays an alert to remind you to change the humidifier pad.<br />
0510 Press s/t to set the desired interval:<br />
Options:<br />
0 Off (no reminder to change humidifier pad)<br />
1 30-day run time, 90 calendar days **<br />
2 60-day run time, 180 calendar days **<br />
3 90-day run time, 365 calendar days ** **interval depends on humidifier<br />
E Auto Alert (requires optional equipment)<br />
UV lamp change reminder<br />
Function This feature displays an alert to remind you to change the ultraviolet lamp.<br />
0520 Press s/t to set the desired interval:<br />
Options:<br />
0 Off (no reminder to change UV lamp)<br />
1 Reminder after 1 year<br />
2 Reminder after 2 years<br />
E Auto Alert (requires optional equipment)<br />
Adaptive Intelligent Recovery<br />
Function Press s/t to turn this feature on or off (see page 13):<br />
0530<br />
Options: 0 Off<br />
1 On<br />
Note: Press RESET<br />
to cancel the alert<br />
Note: Press RESET<br />
to cancel the alert<br />
25 <strong>69</strong>-<strong>2404EFS</strong>—<strong>01</strong>
Operating Manual<br />
Advanced functions<br />
Program schedule periods<br />
Function Press s/t to set the number of program periods:<br />
0540<br />
Options:<br />
2 Two program periods (Wake, Sleep)<br />
4 Four program periods (Wake, Leave, Return, Sleep)<br />
Clock format<br />
Function Press s/t to set the clock display format:<br />
0640<br />
Options: 12 12-hour clock (i.e., “3:30 pm”)<br />
24 24-hour clock (i.e., “15:30”)<br />
Screen lock<br />
Function Press s/t to choose a screen lock setting (see page 14):<br />
0670<br />
Options: 0 Screen is unlocked (fully functional)<br />
1 All functions locked except temperature controls and CANCEL key<br />
2 Screen is fully locked<br />
<strong>69</strong>-<strong>2404EFS</strong>—<strong>01</strong> 26
In case of difficulty<br />
TH9000 Series<br />
If you have difficulty with your thermostat, please try the following suggestions.<br />
Most problems can be corrected quickly and easily.<br />
Display is blank<br />
No response to<br />
key presses (or<br />
temperature will<br />
not change)<br />
• Check circuit breaker and reset if necessary.<br />
• Make sure power switch at heating & cooling system is on.<br />
• Make sure furnace door is closed securely.<br />
• Check to make sure the thermostat is not locked (see page 26).<br />
Make sure heating and cooling temperatures are set to acceptable ranges:<br />
• Heat: 40° to 90°F (4.5° to 32°C)<br />
• Cool: 50° to 99°F (10° to 37°C)<br />
Backlight is dim<br />
“Err” appears<br />
on screen<br />
• A dim display is normal. See Advanced function 0280 on page 22 for<br />
backlight options.<br />
• Contact your contractor. Your equipment may need service or repair.<br />
27 <strong>69</strong>-<strong>2404EFS</strong>—<strong>01</strong>
Operating Manual<br />
In case of difficulty<br />
Heating or<br />
cooling system<br />
does not respond<br />
Display shows<br />
Fan Auto and On<br />
or Auto and Circ<br />
at the same time<br />
• Press SYSTEM to set system to Heat. Make sure the temperature is set<br />
higher than the Inside temperature.<br />
• Press SYSTEM to set system to Cool. Make sure the temperature is set<br />
lower than the Inside temperature.<br />
• Check circuit breaker and reset if necessary.<br />
• Make sure power switch at heating & cooling system is on.<br />
• Make sure furnace door is closed securely.<br />
• If “Wait” is displayed, the compressor protection timer is on. Wait<br />
5 minutes for the system to restart safely, without damaging the<br />
compressor (see page 13).<br />
• This is normal operation. Auto indicates the thermostat is following the<br />
programmed fan setting. If Auto and On is shown, the fan is scheduled<br />
for “On” during this period (see page 6).<br />
<strong>69</strong>-<strong>2404EFS</strong>—<strong>01</strong> 28
TH9000 Series<br />
29 <strong>69</strong>-<strong>2404EFS</strong>—<strong>01</strong>
® U.S. Registered Trademark.<br />
© 2<strong>01</strong>0 Honeywell International <strong>Inc</strong>.<br />
US Patent No. 6,208,263; 6,373,376; 6,448,9<strong>01</strong>; 6,926,076;<br />
7,044,397; D509151; H25192; H25193 and other patents pending<br />
<strong>69</strong>-<strong>2404EFS</strong>—<strong>01</strong> M.S. <strong>01</strong>-10<br />
Printed in U.S.A.
ATTENTION ! N’appuyez jamais sur les touches d’un écran<br />
tactile avec un instrument pointu tel qu’un stylo ou un crayon.<br />
Pour empêcher tout dommage au thermostat, appuyez<br />
toujours sur les touches du bout du doigt.<br />
Ce thermostat contient une pile au lithium qui pourrait<br />
contenir du perchlorate.<br />
Matériau contenant du perchlorate — des consignes de<br />
manipulation spéciales pourraient s'appliquer, prière de<br />
consulter www.dtsc.ca.gov/hazardouswaste/perchlorate.<br />
Vous faut-il de l’aide <br />
Pour obtenir de l’assistance concernant ce produit, appelez gratuitement l’assistance client au<br />
1-800-468-1502<br />
Lisez et sauvez ces instructions.<br />
® U.S. Marque déposée<br />
Brevets US N 0 . 6,208,263; 6,373,376; 6,448,9<strong>01</strong>; 6,595,430;<br />
7,<strong>01</strong>2,927; 7,044,397; D509151 et autres brevets en instance.<br />
Copyright © 2<strong>01</strong>0 Honeywell International <strong>Inc</strong>. Tous droits réservés
Table des matières<br />
À propos de votre nouveau thermostat<br />
La programmation en bref.......................34<br />
Aide-mémoire sur les commandes..........35<br />
Aide-mémoire sur l’affichage...................36<br />
Programmation et fonctionnement<br />
Réglage de l’horloge................................37<br />
Fonctionnement de la ventilation............38<br />
Mode de fonctionnement.........................39<br />
Programme d’économie<br />
d’énergie par défaut.................................40<br />
Utilisation de la programmation..............41<br />
Annulation de la programmation.............42<br />
Suspension vacances..............................44<br />
Fonctions spéciales.................................45<br />
Verrouillage de l’écran..............................46<br />
Nettoyage de l’écran................................47<br />
Capteurs à distance en option................48<br />
Commande d’humidité.............................49<br />
Commande de ventilation........................51<br />
TH9000 Série<br />
Annexes<br />
Fonctions évoluées..................................52<br />
En cas de difficultés.................................59<br />
Ce thermostat est prêt à<br />
fonctionner<br />
Votre nouveau thermostat est<br />
préprogrammé et prêt à fonctionner. La<br />
configuration se trouve à la page 34.<br />
ATTENTION : RISQUE D’ENDOM-<br />
MAGER L’ÉQUIPEMENT. Pour éviter<br />
tout risque de dommage au compresseur,<br />
ne pas faire fonctionner la climatisation<br />
lorsque la température extérieure<br />
est inférieure à 10° C (50° F).<br />
33 <strong>69</strong>-<strong>2404EFS</strong>—<strong>01</strong>
Mode d’emploi<br />
À propos de votre nouveau thermostat<br />
Votre nouveau thermostat est pré-programmé et prêt à fonctionner. Il suffit de régler<br />
l’heure et le jour. Vérifiez ensuite les réglages ci-dessous et modifiez-les si besoin est :<br />
1. Réglage de l’horloge..................................................................................Voir page 37<br />
2. Sélection de la configuration du ventilateur : Pré-réglé sur Auto.....Voir page 38<br />
3. Sélection du mode de fonctionnement : Pré-réglé sur Chauffage.....Voir page 39<br />
4. Programme de régulation : Pré-réglages aux niveaux économie<br />
d’énergie pendant vos heures de travail ou de sommeil (présumez<br />
que vous vous levez à 6 h, partez à 8 h, rentrez à 18 h et vous<br />
couchez à 22 h)................................................................................Voir les pages 40-43<br />
5. Placez les commandes de humification, de<br />
déshumidification et de ventilation, si c’est approprié........Voir les pages 49-51<br />
COMMANDE DE TEMPÉRATURE PAR TOUCHE UNIQUE : Vous pouvez annuler le<br />
programme à n’importe quel moment et régler manuellement la température<br />
(voir pages 42-43)<br />
<strong>69</strong>-<strong>2404EFS</strong>—<strong>01</strong> 34
Aide-mémoire des commandes<br />
TH9000 Série<br />
Appuyez sur day (s) pour paramétrer le programme (voir page 41)<br />
Appuyez sur day (s)<br />
pour paramétrer le<br />
programme (voir page 38)<br />
Appuyez pour<br />
sélectionner le type<br />
de fonctionnement<br />
(voir page 39)<br />
MON TUE WED THU FRI SAT SUN<br />
FAN<br />
AUTO<br />
SYSTEM<br />
HEAT<br />
Inside<br />
70<br />
OK TO PICK MULTIPLE DAYS<br />
6:<strong>01</strong><br />
AM<br />
Set To<br />
70<br />
Following<br />
Schedule<br />
Appuyez pour modifier<br />
le réglage de la température<br />
(voir pages<br />
41-43)<br />
Appuyez pour avoir<br />
d’autres possibilités<br />
Appuyez pour<br />
paramétrer le programme<br />
(voir page 41)<br />
Appuyez pour<br />
annuler le programme<br />
(voir<br />
pages 42-43)<br />
SCHED HOLD CLOCK SCREEN MORE<br />
Appuyez pour<br />
régler l’horloge<br />
(voir page 37)<br />
M29830<br />
Appuyez pour verrouiller le<br />
pavé numérique pendant 30<br />
secondes afin de nettoyer<br />
l’écran (voir page 46).<br />
35 <strong>69</strong>-<strong>2404EFS</strong>—<strong>01</strong>
Mode d’emploi<br />
Aide-mémoire de l’affichage d’état<br />
Température intérieure actuelle Jour actuel de la semaine Réglage de la température<br />
Réglage ventilation<br />
Réglage système<br />
Heure actuelle<br />
Autres messages affichés :<br />
• Cool On : l’installation de climatisation est en marche<br />
• Heat On : l’installation de chauffage est en marche<br />
• Aux Heat On : Le système de chauffage auxiliaire est activé<br />
• Wait : La protection de compresseur a activé (voir page 45)<br />
• Screen Locked : Voir la page 58 pour ouvrir<br />
FAN<br />
AUTO<br />
SYSTEM<br />
HEAT<br />
Inside<br />
WED<br />
70<br />
6:<strong>01</strong><br />
AM<br />
Set To<br />
70<br />
Following<br />
Schedule<br />
Recovery<br />
55<br />
Humidity<br />
SCHED HOLD CLOCK SCREEN MORE<br />
M29829<br />
Programme en fonctionnement<br />
(ne s’affiche<br />
pas lorsqu’il n’est pas<br />
en fonctionnement)<br />
Adaptive Intelligent<br />
Recovery (voir page 45)<br />
Humidité (Si l’on monte<br />
un capteur extérieur,<br />
la température extérieure<br />
apparaît au lieu<br />
du degré d’humidité.<br />
Appuyez sur MORE<br />
pour afficher le degré<br />
d’humidité.)<br />
<strong>69</strong>-<strong>2404EFS</strong>—<strong>01</strong> 36
Réglage de l’horloge<br />
FAN<br />
AUTO<br />
Appuyez sur CLOCK<br />
FAN<br />
AUTO<br />
Inside<br />
6:<strong>01</strong><br />
WED<br />
AM<br />
SCHED HOLD WED CLOCK SCREEN MORE<br />
Inside<br />
70<br />
70<br />
Set To70<br />
M29828<br />
Modifiez l’heure et appuyez sur DONE<br />
6:02<br />
AM<br />
Set To70<br />
DONE<br />
CANCEL<br />
M29831<br />
TH9000 Série<br />
Pour régler l’affichage de l’heure actuelle,<br />
appuyez sur CLOCK, puis sur s ou t pour<br />
modifier l’heure. Appuyez sur s ou t maintenant<br />
la pression pour avancer l’heure plus<br />
rapidement.<br />
Appuyez sur DONE pour sauvegarder et quitter<br />
(ou appuyez sur CANCEL pour quitter sans<br />
modifier l’heure).<br />
Remarque : l’horloge temps réel ne devrait<br />
jamais nécessiter de réglage puisqu’elle est<br />
automatiquement mise à jour lors des changements<br />
entre heure d’été et heure d’hiver et met en<br />
mémoire tous les renseignements concernant la<br />
date et l’heure.<br />
Remarque : Pour modifier l’affichage du jour de la<br />
semaine actuel, voir la page 53.<br />
37 <strong>69</strong>-<strong>2404EFS</strong>—<strong>01</strong>
Mode d’emploi<br />
Réglage du fonctionnement de la ventilation<br />
FAN<br />
AUTO<br />
SYSTEM<br />
HEAT<br />
Inside<br />
WED<br />
70<br />
6:<strong>01</strong><br />
AM<br />
Set To70<br />
Following<br />
Schedule<br />
SCHED HOLD CLOCK SCREEN MORE<br />
Appuyez sur FAN<br />
REMARQUE : Si un horaire est<br />
programmé pour le ventilateur,<br />
le ventilateur fonctionnera selon<br />
cet horaire lorsqu’il est en mode<br />
« Auto ».<br />
M29827<br />
Appuyer sur le bouton FAN pour sélectionner le<br />
mode de fonctionnement du ventilateur, puis<br />
appuyer sur DONE :<br />
• On : Le ventilateur est constamment en<br />
marche.<br />
• Auto : Le ventilateur ne fonctionne que lorsque<br />
la chauffage ou la climatisation fonctionne.<br />
• Circ : Le ventilateur fonctionnera de façon<br />
aléatoire, environ 35 % du temps, sans compter<br />
le temps où il fonctionne en même temps que<br />
le système de chauffage ou de refroidissement.<br />
Pour déroger aux réglages programmés pour le<br />
ventilateur en fonction de chacune des périodes,<br />
appuyer sur FAN (voir la page 41). Si le ventilateur<br />
est réglé à On ou Circ, le réglage sélectionné<br />
restera en vigueur jusqu’à ce que l’utilisateur<br />
appuie de nouveau sur FAN pour sélectionner le<br />
mode de fonctionnement Auto, et revenir à l’horaire<br />
programmé pour le ventilateur (pour obtenir<br />
d’autres renseignements, aller à la page 60).<br />
<strong>69</strong>-<strong>2404EFS</strong>—<strong>01</strong> 38
Sélection du mode de fonctionnement<br />
TH9000 Série<br />
FAN<br />
AUTO<br />
SYSTEM<br />
HEAT<br />
Inside<br />
WED<br />
70<br />
6:<strong>01</strong><br />
AM<br />
Set To70<br />
Following<br />
Schedule<br />
SCHED HOLD CLOCK SCREEN MORE<br />
Appuyez sur SYSTEM<br />
M29826<br />
Appuyer sur la touche SYSTEM pour<br />
sélectionner, puis appuyer sur DONE :<br />
• Heat : Le thermostat ne commande que<br />
l’installation de chauffage.<br />
• Cool : Le thermostat ne commande que<br />
l’installation de climatisation.<br />
• Off : Arrêt des installations de chauffage<br />
et de climatisation.<br />
• Auto : Le thermostat sélectionne<br />
automatiquement le chauffage ou<br />
la climatisation en fonction de la<br />
température intérieure.<br />
• Em Heat (uniquement pour les pompes<br />
à chaleur à chauffage auxiliaire) : Le<br />
thermostat commande le chauffage<br />
auxiliaire. Le compresseur n’est pas<br />
utilisé.<br />
39 <strong>69</strong>-<strong>2404EFS</strong>—<strong>01</strong>
Mode d’emploi<br />
Réglages d’économie d’énergie pour des économies d’énergie maximales<br />
Il est facile de programmer votre système afin de réaliser un maximum d’économies<br />
d’énergie. Vous pouvez programmer quatre plages horaires chaque jour, avec<br />
différents arrangements pour chaque jour.<br />
Ce thermostat est préréglé sur un programme d’économie d’énergie. Nous<br />
conseillons ces réglages car ils peuvent réduire vos dépenses de chauffage/<br />
climatisation de jusqu’à 33%. (Voir la page suivante pour horaires et températures de<br />
chaque plage.)<br />
Lever (Wake)<br />
(6:00)<br />
Départ (Leave)<br />
(8:00)<br />
Retour (Return)<br />
(18:00)<br />
Sommeil (Sleep)<br />
(22:00)<br />
Chauffage<br />
(Lun-Ven)<br />
Refroidissement<br />
(Lun-Ven)<br />
Chauffage<br />
(Sam-Dim)<br />
Refroidissement<br />
(Sam-Dim)<br />
70 ° 78 ° 70 ° 78 °<br />
62 ° 85 ° 62 ° 85 °<br />
[ou annuler la période] [ou annuler la période]<br />
70 ° 78 ° 70 ° 78 °<br />
[ou annuler la période] [ou annuler la période]<br />
62 ° 82 ° 62 ° 82 °<br />
<strong>69</strong>-<strong>2404EFS</strong>—<strong>01</strong> 40
FAN<br />
AUTO<br />
Inside<br />
Following<br />
Pour modifier WED le programme<br />
Schedule<br />
AM<br />
Appuyez sur EDIT<br />
Sélectionnez<br />
jour(s)<br />
70<br />
6:00<br />
Fixez l’heure du début de<br />
la plage du programme<br />
Set To70<br />
Inside<br />
AM<br />
6:00 70<br />
FAN<br />
AUTO<br />
Appuyez sur SCHED<br />
Set To70<br />
Following<br />
SCHED HOLD CLOCK SCREEN Schedule MORE<br />
DONE EDIT WAKE LEAVE RETURN SLEEP<br />
M29825<br />
CANCEL<br />
M29824<br />
MON TUE WED THU FRI SAT SUN<br />
OK TO PICK MULTIPLE DAYS<br />
FAN<br />
AUTO<br />
Sélectionnez les niveaux de<br />
chauffage/de climatisation<br />
CANCEL<br />
PERIOD<br />
70<br />
AM<br />
PM<br />
6:00 78<br />
HEAT<br />
COOL<br />
DONE WAKE LEAVE RETURN SLEEP CANCEL<br />
M29823<br />
TH9000 Série<br />
1. Appuyez sur SCHED, puis sur EDIT.<br />
2. Appuyez sur les touches des jours (MON-<br />
SUN) pour sélectionner les jours.<br />
3. Appuyez sur s ou t pour programmer<br />
l’heure du lever pour le ou les jours<br />
sélectionnés.<br />
4. Appuyez sur s ou t pour programmer<br />
la température de chauffage ou de<br />
climatisation pour cette plage horaire.<br />
5. Appuyez sur les autres plages horaires<br />
(LEAVE, RETURN, SLEEP) pour programmer<br />
l’heure et la température de chacune.<br />
6. Appuyez sur DONE pour sauvegarder et<br />
quitter (ou appuyez sur CANCEL pour quitter<br />
sans sauvegarder les modifications).<br />
Remarque : Vous pouvez appuyer sur CANCEL PERIOD<br />
pour éliminer toute plage horaire inutile.<br />
Remarque : Appuyez sur FAN pour adapter les<br />
réglages du ventilateur pour n’importe quelle plage<br />
horaire (voir page 38).<br />
41 <strong>69</strong>-<strong>2404EFS</strong>—<strong>01</strong>
Mode d’emploi<br />
Annulation de la programmation (momentanée)<br />
FAN<br />
AUTO<br />
SYSTEM<br />
HEAT<br />
Inside<br />
WED<br />
70<br />
Hold Temperature<br />
Until<br />
8:00<br />
Réglez la température<br />
Heat On<br />
SCHED HOLD CLOCK SCREEN MORE<br />
Appuyez pour régler le minuteur<br />
AM<br />
PM<br />
Set To73<br />
78<br />
HEAT<br />
COOL<br />
CANCEL<br />
M29832<br />
Appuyez sur s ou t modifier immédiatement<br />
la température. Cela annule momentanément le<br />
réglage de température pour la plage actuelle.<br />
La nouvelle température sera maintenue<br />
jusqu’à l’heure fixée. Une fois le temps affiché<br />
au minuteur écoulé, le programme reprend et<br />
fixe la température au niveauprogrammé pour<br />
la période actuelle.<br />
Pour annuler le réglage temporaire à un<br />
moment quelconque, appuyez sur CANCEL (ou<br />
sur SCHED). Le programme reprendra.<br />
Appuyez pour reprendre<br />
l’e programme<br />
<strong>69</strong>-<strong>2404EFS</strong>—<strong>01</strong> 42
Annulation du programme (permanente)<br />
TH9000 Série<br />
Appuyez HOLD Modifiez la température Appuyez sur HOLD pour modifier la température<br />
de manière permanente. Cela arrêtera le<br />
WED<br />
programme.<br />
FAN<br />
AUTO<br />
SYSTEM<br />
HEAT<br />
Inside<br />
70<br />
8:00<br />
Permanent<br />
Hold<br />
AM<br />
Set To<br />
73<br />
Heat On<br />
SCHED HOLD CLOCK SCREEN MORE<br />
CANCEL<br />
M29821<br />
Quelle que soit la température fixée, elle sera<br />
conservée 24 heures sur 24 jusqu’à ce que<br />
vous la modifiez à la main, ou appuyez sur<br />
CANCEL (ou SCHED) pour annuler « Hold » et<br />
reprendre le programme.<br />
Appuyez pour reprendre<br />
le programme<br />
43 <strong>69</strong>-<strong>2404EFS</strong>—<strong>01</strong>
Mode d’emploi<br />
Suspension vacances<br />
FAN<br />
AUTO<br />
SYSTEM<br />
HEAT<br />
Inside<br />
1 Programmez la température<br />
WED<br />
70<br />
Hold Temperature<br />
Until<br />
6:00<br />
SCHED HOLD CLOCK SCREEN MORE<br />
2 Appuyez pour régler l’heure à<br />
FAN<br />
laquelle le programme sera annulé<br />
AUTO<br />
3 Appuyez 2 fois sur HOLD<br />
SYSTEM<br />
HEAT<br />
Inside<br />
WED<br />
AM<br />
PM<br />
70<br />
Hold Temperature<br />
Until<br />
14<br />
DAYS<br />
Set To55<br />
Set To55<br />
CANCEL<br />
M29820<br />
Cette fonction peut suspendre le programme<br />
pour une période prolongée.<br />
Appuyez sur s ou t pour regler a la temperature<br />
desiree et appuyez ensuite sur s ou<br />
t pour programmer l’heure du jour où vous<br />
voulez que le programme reprenne à votre<br />
retour. Appuyez deux fois sur HOLD, et appuyez<br />
ensuite sur s ou t pour sélectionner le nombre<br />
de jours.<br />
La température programmée sera conservée<br />
24 heures sur 24 pendant le nombre de jours<br />
choisis. Une fois ce nombre de jours écoulé, le<br />
programme précédemment établi reprendra à<br />
l’heure fixée.<br />
En cas de retour plus tôt que prévu, appuyezsur<br />
SCHED HOLD CLOCK SCREEN MORE<br />
CANCEL (ou sur SCHED) pour annuler « Hold » et<br />
CANCEL<br />
reprendre la programmation.<br />
M29819<br />
4 Appuyez pour sélectionner le<br />
nombre de jours<br />
<strong>69</strong>-<strong>2404EFS</strong>—<strong>01</strong> 44
Fonctions spéciales<br />
TH9000 Série<br />
Commutation automatique : Lorsqu’il est réglé sur Auto, le thermostat sélectionne<br />
automatiquement chauffage ou climatisation en fonction de la température intérieure.<br />
Adaptive Intelligent Recovery : Cette fonction permet au thermostat « d’apprendre »<br />
combien de temps il faut à la chaudière et au climatiseur pour atteindre la température<br />
demandée de manière à ce que cette température soit atteinte à l’heure fixée.<br />
Protection du compresseur : Cette fonction force le compresseur à attendre<br />
quelques minutes avant de redémarrer pour empêcher d’endommager le matériel.<br />
Pendant la période d’attente, le message « Wait » est affiché sur l’écran.<br />
Message de clignotant : Rappel pour remplacer le filtre ou la lampe UV. Après remplacement,<br />
serrez la remise pour réactiver le temporisateur alerte.<br />
Déshumidification Méridionale : Votre système peut être programmé pour commander<br />
l’humidité tandis que votre maison est vide pendant la saison humide.<br />
Appuyez sur le bouton HOLD trois fois d’activer ce dispositif. Ceci commandera la<br />
température et l’humidité pour aider à protéger votre maison et possesions tandis<br />
que vous êtes parti. (Entrez en contact avec votre installateur si ce dispositif ne fonctionne<br />
pas correctement.)<br />
45 <strong>69</strong>-<strong>2404EFS</strong>—<strong>01</strong>
Mode d’emploi<br />
Verrouillage de l’écran<br />
FAN<br />
AUTO<br />
SYSTEM<br />
HEAT<br />
Inside<br />
WED<br />
70<br />
6:00<br />
SCHED HOLD CLOCK SCREEN MORE<br />
Voir Fonction évoluée<br />
0670 (page 58) où figurent<br />
les choix screen lock<br />
PM<br />
SCREEN LOCKED<br />
Set To<br />
70<br />
Following<br />
Schedule<br />
43<br />
M29818<br />
Pour empêcher toute modification intempestive,<br />
il est possible de verrouiller totalement ou<br />
partiellement l’écran.<br />
Lorsqu’il est partiellement verrouillé, l’écran<br />
affiche SCREEN LOCKED pendant plusieurs secondes<br />
si l’on appuie sur une touche verrouillée.<br />
Pour déverrouiller l’écran, appuyez sur<br />
n’importe quelle touche non verrouillée pendant<br />
que SCREEN LOCKED apparaît sur l’écran.<br />
Lorsque l’écran est entièrement verrouillé,<br />
aucune touche ne fonctionne. Pour verrouiller<br />
ou déverrouiller l’écran, voir fonction évoluée<br />
0670 à la page 58.<br />
<strong>69</strong>-<strong>2404EFS</strong>—<strong>01</strong> 46
SCREEN LOCKED<br />
Nettoyage FAN de l’écran<br />
AUTO<br />
Inside<br />
WED<br />
70<br />
Appuyez sur SCREEN<br />
6:00<br />
PM<br />
Set To<br />
Following<br />
Schedule<br />
SCHED HOLD CLOCK SCREEN MORE<br />
Minuteur de verrouillage d’écran<br />
(30 secondes)<br />
30<br />
OK TO<br />
CLEAN<br />
SCREEN<br />
70<br />
M29817<br />
TH9000 Série<br />
Appuyez sur SCREEN pour verrouiller l’écran<br />
afin de le nettoyer. L’écran restera verrouillé<br />
pendant 30 secondes pour permettre de le nettoyer<br />
sans modifier les réglages.<br />
Au bout de 30 secondes, appuyez sur DONE<br />
pour reprendre le fonctionnement normal ou<br />
appuyez sur SCREEN s’il faut davantage de<br />
temps pour nettoyer.<br />
Remarque : Ne jamais pulvériser aucun liquide<br />
directement sur le thermostat. Pulvériser le liquide<br />
sur un torchon, puis utiliser ce torchon pour nettoyer<br />
l’écran. Utiliser de l’eau ou un produit de nettoyage<br />
pour du verre. Ne pas utiliser de produits abrasifs.<br />
SCHED HOLD CLOCK SCREEN MORE<br />
M29816<br />
47 <strong>69</strong>-<strong>2404EFS</strong>—<strong>01</strong>
Mode d’emploi<br />
Capteurs à distance en option<br />
FAN<br />
AUTO<br />
SYSTEM<br />
HEAT<br />
Inside<br />
Température<br />
Intérieure<br />
WED<br />
70<br />
6:<strong>01</strong><br />
AM<br />
Set To70<br />
Following<br />
Schedule<br />
43<br />
Outside<br />
SCHED HOLD CLOCK SCREEN MORE<br />
Température<br />
Extérieure<br />
M29815<br />
Si un capteur extérieur est installé, la température<br />
extérieure s’affiche.<br />
Si un capteur intérieur est installé, l’affichage<br />
indique la température intérieure à<br />
l’emplacement où se trouve le capteur.<br />
Si l’installation comporte plus d’un capteur<br />
de température ambiante, l’écran affiche une<br />
moyenne des températures relevées par tous<br />
les capteurs ou une moyenne entre la température<br />
affichée par le thermostat et par les<br />
capteurs.<br />
<strong>69</strong>-<strong>2404EFS</strong>—<strong>01</strong> 48
Contrôle de humidification<br />
TH9000 Série<br />
Placez la commande de gel<br />
et le niveau d’humidité<br />
DONE<br />
Inside<br />
32<br />
5<br />
55<br />
Appuyez pour sauvegarder et quitter<br />
FROST<br />
DEHUMIDIFIER<br />
CANCEL<br />
Remarque : Si vous n’avez pas une<br />
sonde de température extérieure, le<br />
niveau de commande de gel ne sera<br />
pas montré.<br />
M29814<br />
Appuyez sur MORE ce que l’écran humidité<br />
s’affiche et appuyez ensuite sur s ou t<br />
pour programmer le niveau de commande<br />
d’humidité et de gel.<br />
Lorsque la fonction de protection contre le gel<br />
est employée, réduire le point de consigne de<br />
cette fonction s’il a du givre ou de la condensation<br />
sur les fenêtres. Attendre une journée<br />
avant d’ajuster de nouveau la fonction de<br />
protection contre le gel. Lorsqu’il n’y a plus de<br />
givre ou de condensation, le thermostat réglera<br />
le taux d’humidité au taux maximum sans qu’il<br />
n’y ait de condensation ou de givre et sans<br />
qu’il ne soit nécessaire d’apporter d’autres<br />
ajustements.<br />
Appuyez sur DONE pour sauvegarder et quitter<br />
ou appuyez sur CANCEL pour quitter sans sauvegarder<br />
les modifications.<br />
49 <strong>69</strong>-<strong>2404EFS</strong>—<strong>01</strong>
Mode d’emploi<br />
Contrôle de déshumidification<br />
Choisissez Auto<br />
ou Off<br />
DONE<br />
Inside<br />
73<br />
AUTO<br />
Placez l’humidité<br />
de niveau<br />
55<br />
DEHUMIDIFIER<br />
CANCEL<br />
Appuyez pour sauvegarder et quitter<br />
M29813<br />
Remarque : La commande Auto/Off<br />
n’existe qu’en présence d’un<br />
déshumidificateur pour toute la maison<br />
(ce qui n’est pas le cas lorsque la<br />
déshumidification est faite au moyen du<br />
système de refroidissement).<br />
Appuyez sur MORE ce que l’écran humidité<br />
s’affiche et appuyez ensuite sur s ou t pour<br />
programmer le niveau et l’opération désirés<br />
d’humidité (Auto ou Off).<br />
S’installé pour commander un déshumidificateur,<br />
le thermostat peut l’activer comme nécessaire<br />
pour réduire l’humidité.<br />
Si vous n’avez pas un déshumidificateur, le<br />
thermostat fait fonctionner le climatiseur pour<br />
diminuer l’humidité (jusqu’à 3° F au-dessous<br />
de votre réglage de climatisation).<br />
Appuyez sur DONE pour sauvegarder et quitter<br />
ou appuyez sur CANCEL pour quitter sans sauvegarder<br />
les modifications.<br />
<strong>69</strong>-<strong>2404EFS</strong>—<strong>01</strong> 50
Contrôle de ventilation<br />
Appuyez pour placer le<br />
temporisateur de ventilation<br />
DONE<br />
VENT<br />
AUTO 40<br />
Minutes<br />
Appuyez pour sauvegarder et quitter<br />
CANCEL<br />
M29812<br />
Vous pouvez aérer votre maison à tout<br />
moment :<br />
TH9000 Série<br />
Appuyez sur MORE jusqu’à ce que l’écran de<br />
ventilation soit montré, puis appuyez s ou t<br />
pour placer le temporisateur de ventilation. Vous<br />
pouvez placer le temporisateur pour aérer de 20<br />
à 180 minutes, dans des incréments de 20-minute.<br />
Pour arrêter le ventilateur, choisissez 0.<br />
Appuyez sur DONE pour sauvegarder et quitter<br />
ou appuyez sur CANCEL pour quitter sans sauvegarder<br />
les modifications.<br />
Si l’installateur programmait votre thermostat<br />
pour l’automobile-ventilation, le thermostat<br />
aérera votre maison comme nécessaire.<br />
La commande Auto/Off ne sert qu’à mettre en<br />
marche ou à l’arrêt la ventilation automatique<br />
seulement. Si la fonction est à Off, il reste possible<br />
de demander de la ventilation à partir de la<br />
minuterie.<br />
51 <strong>69</strong>-<strong>2404EFS</strong>—<strong>01</strong>
Mode d’emploi<br />
Fonctions évoluées<br />
1 Appuyez sur SYSTEM.<br />
FAN<br />
AUTO<br />
SYSTEM<br />
HEAT<br />
TUE<br />
Inside<br />
70<br />
6:<strong>01</strong><br />
AM<br />
Set To<br />
SCHED HOLD SCREEN MORE<br />
2 Appuyez sur la touche<br />
centrale vide<br />
et continuez à le<br />
faire jusqu’à ce que<br />
l’affichage change.<br />
70<br />
Following<br />
Schedule<br />
Recovery<br />
Outside<br />
43<br />
3 Modifiez les<br />
paramètres selon<br />
les besoins (voir<br />
pages 53 à 57).<br />
M29811<br />
4 Appuyez sur DONE<br />
pour quitter et sauvegarder<br />
les modifications.<br />
FAN<br />
AUTO<br />
SYSTEM<br />
HEAT<br />
DONE<br />
FAN<br />
Fonction<br />
AUTO<br />
DONE<br />
TUE<br />
Inside<br />
TUE<br />
Inside<br />
70<br />
6:<strong>01</strong><br />
70<br />
<strong>01</strong>20<br />
AM<br />
Appuyez sur<br />
st pour<br />
sélectionner<br />
fonction<br />
Set To70<br />
Set To70<br />
Réglage<br />
20<br />
CANCEL<br />
M29810<br />
M29809<br />
Appuyez sur<br />
st pour<br />
modifier le<br />
réglage<br />
<strong>69</strong>-<strong>2404EFS</strong>—<strong>01</strong> 52
Fonctions évoluées<br />
TH9000 Série<br />
Programmation de l’année (deux premiers chiffres)<br />
Fonction Appuyez s/t pour modifier les deux premiers chiffres de l’année.<br />
<strong>01</strong>20<br />
Choix : 20 = Année 20xx<br />
21 = Année 21xx<br />
Programmation de l’année (deux derniers chiffres)<br />
Fonction Appuyez s/t pour modifier les deux derniers chiffres de l’année.<br />
<strong>01</strong>30<br />
Choix : <strong>01</strong> - 99 (c-à-d. 20<strong>01</strong> - 2099)<br />
Programmation du mois<br />
Fonction Appuyez s/t pour modifier le mois actuellement affiché.<br />
<strong>01</strong>40<br />
Choix : <strong>01</strong> - 12 (c-à-d. Janvier-Décembre)<br />
Programmation de la date<br />
Fonction Appuyez s/t pour modifier le date.<br />
<strong>01</strong>50<br />
Choix : <strong>01</strong> - 31<br />
53 <strong>69</strong>-<strong>2404EFS</strong>—<strong>01</strong>
Mode d’emploi<br />
Fonctions évoluées<br />
Programmation marche/arrêt<br />
Fonction Appuyez s/t pour mettre la programmation en marche ou à l’arrêt.<br />
<strong>01</strong>60<br />
Choix : 0 La programmation est à l’arrêt. Le thermostat n’est pas programmable.<br />
4 La programmation est en marche (7 jours programmable).<br />
Restaurer le programme d’économie d’énergie par défaut<br />
Fonction Appuyez s/t pour reconstituer des arrangements du défaut :<br />
<strong>01</strong>65<br />
Choix : 0 Aucun changement<br />
1 Reconstituer des arrangements du défaut<br />
Illumination d’écran<br />
Fonction Appuyez s/t pour choisir l’illumination d’écran :<br />
0280<br />
Choix : 0 La lumière dessus pendant 45 secondes après écran est touchée<br />
1 Allumez toujours sur la basse intensité, complètement lumineuse après<br />
que l’écran soit touché<br />
<strong>69</strong>-<strong>2404EFS</strong>—<strong>01</strong> 54
Fonctions évoluées<br />
TH9000 Série<br />
Format de température (°F/°C)<br />
Fonction Appuyez s/t pour programmer le format de l’affichage :<br />
0320<br />
Choix : 0 Fahrenheit<br />
1 Celsius<br />
Changement horaire été/hiver<br />
Fonction Le thermostat est preprogramme pour effectuer automatiquement le changement<br />
0330 heure d’été. Appuyez sur s/t pour selectionner :<br />
Choix : 0 Arrêt : pas de réglage pour changement heure d’été.<br />
1 Marche : Changement automatique à l’heure d’été (jusqu’en 2006 et dans les<br />
lieux qui n’utilisent pas le nouveau calendrier heure d’été 2007.<br />
2 Marche : Changement automatique à l’heure d’été (2007 et au-delà pour les<br />
zones qui utilisent le nouveau calendrier heure d’été 2007).<br />
55 <strong>69</strong>-<strong>2404EFS</strong>—<strong>01</strong>
Mode d’emploi<br />
Fonctions évoluées<br />
Rappel de changement du filtre de la chaudière<br />
Fonction Cette fonction affiche une alerte pour vous rappeler de changer le filtrede la<br />
0500 chaudière. Appuyez s/t pour programmer la fréquence désirée :<br />
Choix :<br />
0 Arrêt<br />
1 10 jours de fonctionnement<br />
2 30 jours de fonctionnement<br />
3 60 jours de fonctionnement<br />
4 90 jours de fonctionnement<br />
5 120 jours de fonctionnement<br />
6 180 jours de fonctionnement<br />
7 270 jours de fonctionnement<br />
8 365 jours de fonctionnement<br />
9 30 jours de calendrier<br />
10 60 jours de calendrier<br />
11 90 jours de calendrier<br />
12 120 jours de calendrier<br />
13 180 jours de calendrier<br />
14 365 jours de calendrier<br />
E Alerte automatique (exige l’équipement facultatif)<br />
Remarque : Appuyez<br />
sur RESET pour annuler<br />
l’alerte<br />
<strong>69</strong>-<strong>2404EFS</strong>—<strong>01</strong> 56
Fonctions évoluées<br />
TH9000 Série<br />
Rappel de changement du tampon de l’humidificateur<br />
Fonction Cette fonction affiche une alerte pour vous rappeler de changer le tampon de<br />
0510 l’humidificateur. Appuyez s/t pour programmer la fréquence souhaitée.<br />
Choix :<br />
Remarque : Appuyez sur<br />
RESET pour annuler l’alerte<br />
0 Arrêt (pas de rappel de changer le tampon)<br />
1 30 jours de fonctionnement, 90 jours consécutifs **<br />
2 60 jours de fonctionnement, 180 jours consécutifs **<br />
3 90 jours de fonctionnement, 365 jours consécutifs ** **l’intervalle dépend<br />
E Alerte automatique (exige l’équipement facultatif)<br />
de l’humidificateur<br />
Rappel de changement de la lampe UV<br />
Fonction Cette fonction affiche une alerte pour vous rappeler de changer la lampe UV.<br />
0520 Appuyez s/t pour programmer la fréquence souhaitée.<br />
Choix :<br />
0 Arrêt (pas de rappel de changer la lampe UV)<br />
1 1 an<br />
2 2 ans<br />
E Alerte automatique (exige l’équipement facultatif)<br />
Adaptive Intelligent Recovery<br />
Fonction Appuyez s/t pour activer ou mettre ce dispositif (voir le page 45) :<br />
0530<br />
Choix : 0 Arrêt<br />
1 Marche<br />
Remarque : Appuyez<br />
sur RESET pour annuler<br />
l’alerte<br />
57 <strong>69</strong>-<strong>2404EFS</strong>—<strong>01</strong>
Mode d’emploi<br />
Fonctions évoluées<br />
Plages du programme<br />
Fonction Appuyez s/t pour programmer le nombre de plages de programme.<br />
0540<br />
Choix :<br />
2 Deux plages de programme (Wake, Sleep)<br />
4 Quatre plages de programme (Wake, Leave, Return, Sleep)<br />
Format de l’horloge<br />
Fonction Appuyez s/t pour programmer le format d’affichage de l’horloge.<br />
0640<br />
Choix : 12 Horloge 12 heures (c.-à-d. 3:30 p.m.)<br />
24 Horloge 24 heures (c.-à-d. 15:30 p.m.)<br />
Verrouillage de l’écran<br />
Fonction Appuyez s/t pour choisir un paramètre de verrouillage de l’écran (voir le page 46).<br />
0670<br />
Choix : 0 L’écran est non verrouillé (entièrement fonctionnel)<br />
1 Toutes les fonctions sont verrouillées sauf la commande de température et la<br />
touche CANCEL<br />
2 L’écran est totalement verrouillé<br />
<strong>69</strong>-<strong>2404EFS</strong>—<strong>01</strong> 58
En cas de difficultés<br />
TH9000 Série<br />
Si vous rencontrez des difficultés avec votre thermostat, veuillez essayer les suggestions<br />
ci-dessous. La plupart des problèmes se corrigent rapidement et facilement.<br />
L’affichage<br />
est vide<br />
Rien ne se<br />
produit lorsqu’on<br />
appuie sur les<br />
touches ou la<br />
température ne<br />
change pas)<br />
Le rétroéclairage<br />
est sombre<br />
“Err” apparaît<br />
sur l’écran<br />
• Vérifiez le disjoncteur et réenclenchez-le.<br />
• Vérifiez que le commutateur d’alimentation de l’installation de<br />
chauffage ou de la climatisation est sur marche.<br />
• Vérifiez que la porte de la chaudière est bien fermée.<br />
• Vérifiez que le thermostat n’est pas verrouillé (voir page 58).<br />
Vérifiez que les températures de chauffage et de climatisation sont dans<br />
des fourchettes acceptables :<br />
• Heat: 4,5° à 32° C (40° à 90° F).<br />
• Cool: 10° à 37° C (50° à 99° F).<br />
• Un faible éclairage est normal. Voir la fonction avancée 0280 à la<br />
page 54 sur les options de rétroéclairage.<br />
• Entrez en contact avec votre entrepreneur. Votre équipement peut a<br />
besoin de service ou le répare.<br />
59 <strong>69</strong>-<strong>2404EFS</strong>—<strong>01</strong>
Mode d’emploi<br />
En cas de difficultés<br />
Le chauffage ou<br />
la climatisation<br />
ne réagit pas.<br />
Les mots Fan<br />
Auto et On ou<br />
Auto et Circ sont<br />
affichés à l’écran<br />
en même temps<br />
• Appuyez sur la touche SYSTEM pour mettre le système sur Chauffage.<br />
Vérifiez que le réglage de température est supérieur à la température<br />
intérieure.<br />
• Appuyez sur la touche SYSTEM pour mettre le système sur Climatisation.<br />
Vérifiez que le réglage de température est inférieur à la température<br />
intérieure.<br />
• Vérifiez le disjoncteur et le réenclencher si nécessaire.<br />
• Vérifiez que le commutateur d’alimentation du système de chauffage et<br />
de climatisation est en marche.<br />
• Vérifiez que la porte de la chaudière est bien fermée.<br />
• Si « Wait » est affiché, le minuteur de protection du compresseur est en<br />
marche. Attendez 5 minutes pour que le système redémarre en toute<br />
sécurité sans endommager le compresseur (voir page 45).<br />
• Il s’agit là du mode de fonctionnement normal. Le mot AUTO signifie<br />
que le thermostat respecte le réglage programmé pour le ventilateur.<br />
Si les mots Auto et On sont affichés, le ventilateur est normalement en<br />
marche au cours de cette période (voir la page 38).<br />
<strong>69</strong>-<strong>2404EFS</strong>—<strong>01</strong> 60
TH9000 Série<br />
61 <strong>69</strong>-<strong>2404EFS</strong>—<strong>01</strong>
® Marque déposée aux É.-U.<br />
© 2<strong>01</strong>0 Honeywell International <strong>Inc</strong>.<br />
Brevet américain n o s 6 208 263; 6 373 376; 6 448 9<strong>01</strong>; 6 926 076;<br />
7 044 397; D509151; H25192; H25193 et autres brevets en instance<br />
<strong>69</strong>-<strong>2404EFS</strong>—<strong>01</strong> M.S. <strong>01</strong>-10<br />
Imprimé aux É.-U.