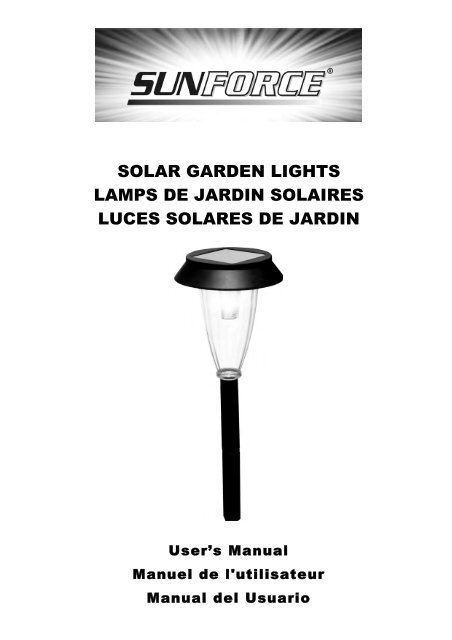
solar garden lights lamps de jardin solaires luces ... - Home Depot
solar garden lights lamps de jardin solaires luces ... - Home Depot
solar garden lights lamps de jardin solaires luces ... - Home Depot

Create successful ePaper yourself
Turn your PDF publications into a flip-book with our unique Google optimized e-Paper software.
SOLAR GARDEN LIGHTS<br />
LAMPS DE JARDIN SOLAIRES<br />
LUCES SOLARES DE JARDIN<br />
User’s Manual<br />
Manuel <strong>de</strong> l'utilisateur<br />
Manual <strong>de</strong>l Usuario
Congratulations on your Sunforce Purchase. This product is <strong>de</strong>signed to the highest technical specifications<br />
and standards. It will supply years of maintenance free use. Please read these instructions thoroughly prior<br />
to installation, then store in a safe place for future reference. If at any time you are unclear about this product,<br />
or require further assistance please do not hesitate to contact our trained professionals operating the<br />
customer support line 1-888-478-6435 or email to info@sunforceproducts.com<br />
The Solar Gar<strong>de</strong>n Light is a green energy, environmentally friendly and energy-saving <strong>solar</strong> product. It is<br />
powered by its built-in <strong>solar</strong> cell, which transfers natural sunlight into electricity. The Solar Gar<strong>de</strong>n Light<br />
looks great and can be used to <strong>de</strong>corate and light your <strong>gar<strong>de</strong>n</strong>, park and pathway.<br />
How does it work<br />
The Solar Gar<strong>de</strong>n Light is a maintenance free product. No wiring is nee<strong>de</strong>d for installation. It uses a <strong>solar</strong><br />
cell on top of the unit to charge 1 built-in 1.2V 600mAh rechargeable battery, which supplies power to a<br />
super bright LED. This Solar Gar<strong>de</strong>n Light turns on at night and off during the daytime according to the<br />
natural light outsi<strong>de</strong>.<br />
Before installation, please check the package; make sure that all parts are present. The package contains:<br />
(Sea Fig. A)<br />
1. 6 head caps 3. 12 columned mounting stakes<br />
2. 6 light covers 4. 6 spikes<br />
Installation Instruction<br />
1. Connect mounting stakes and insert the spike into the ground <strong>de</strong>ep enough to fix the Solar Gar<strong>de</strong>n Light<br />
firmly. (See Fig. B1)<br />
2. Twist the light cover counter clockwise and remove it from the head cap. (See Fig. B2)<br />
3. Push the switch into the ON position. (See Fig. B3)<br />
4. Retighten the light cover to the head cap. (See Fig. B4)<br />
5. Place the whole main body onto the mounting stake.<br />
6. Adjust direction to ensure maximum sun exposure.<br />
2
Caution<br />
1. Install the Solar Gar<strong>de</strong>n Light in a position that will expose it to direct sunlight to ensure proper charging.<br />
2. The Solar Gar<strong>de</strong>n Light is <strong>de</strong>signed to turn on when it is dark. Do not place it near a strong night time<br />
light source.<br />
3. Keep the <strong>solar</strong> cell on the head cap clean to ensure maximum performance.<br />
Warranty:<br />
This product is covered un<strong>de</strong>r a one year limited warranty. Sunforce Products Inc. Warrants to the original purchaser that this<br />
product is free from <strong>de</strong>fects in materieals and workmanship for the period of one year warranty from date of purchase.<br />
To obtain warranty service please contact Sunforve Products for further instructions, at 1 888 478-6435 or email<br />
info@sunforceproducts.com proof of purchase including dare, and expiration of compmaint is required for warranty service.<br />
3
Félicitations pour avoir choisi un produit Sunforce. Ce produit est conçu selon les spécifications et les<br />
normes les plus sévères. Ce produit vous fournira <strong>de</strong>s années d'usage sans entretien. Veuillez lire<br />
soigneusement ces instructions avant <strong>de</strong> commencer l'installation et conservez-les dans un endroit sûr<br />
pour référence ultérieure. En tout temps, si vous avez <strong>de</strong>s questions au sujet <strong>de</strong> ce produit ou avez besoin<br />
d'ai<strong>de</strong>, n'hésitez pas à contacter nos professionnels dûment formés à notre système d'assistance<br />
téléphonique au 1-888-478-6435 ou par courrier électronique à info@sunforceproducts.com<br />
Les lampes <strong>de</strong> <strong>jardin</strong> <strong>solaires</strong> sont <strong>de</strong>s produits écologiques qui économisent l’énergie. Elles sont<br />
alimentées par <strong>de</strong>s panneaux <strong>solaires</strong> intégrés qui convertissent la lumière solaire naturelle en<br />
électricité. Les lumières <strong>de</strong> <strong>jardin</strong> <strong>solaires</strong> sont jolies et peuvent être utilisées pour décorer et<br />
éclairer le <strong>jardin</strong>, le parc et les allées.<br />
Comment fonctionnent-elles<br />
La lampe <strong>de</strong> <strong>jardin</strong> solaire est un produit sans entretien. Aucun câblage n’est requis pour<br />
l’installation. Elle utilise un panneau solaire pour charger une pile rechargeable intégrées <strong>de</strong> 1,2 volt, 600<br />
mAh, qui alimentent une dio<strong>de</strong> DEL très brillante. Cette lampe <strong>de</strong> <strong>jardin</strong> solaire s’allume le soir et<br />
s’éteint le jour en fonction <strong>de</strong> la lumière naturelle extérieure.<br />
Avant l’installation, vérifier l’emballage et s’assurer que toutes les pièces sont incluses. L’emballage<br />
contient : (Voir fig. A)<br />
1. 6 chapeaux 3. 12 colonnes pour le montage<br />
2. 6 globes <strong>de</strong> lampe 4. 6 piquets<br />
Instructions pour l’installation :<br />
1. Assembler les colonnes et planter le piquet dans le sol pour y fixer fermement la lampe. (Voir la figure<br />
B1.)<br />
2. Tourner le globe <strong>de</strong> la lampe dans le sens inverse <strong>de</strong>s aiguilles d’une montre et le retirer du chapeau.<br />
(Voir la figure B2.)<br />
3. Placer l’interrupteur à la position « ON » (MARCHE). (Voir la figure B3.)<br />
4. Remonter le globe <strong>de</strong> la lampe sur le chapeau. (Voir la figure B4.)<br />
4
5. Monter l’ensemble sur les colonnes <strong>de</strong> montage.<br />
6. Positionner pour assurer une exposition maximale au soleil.<br />
Avertissements :<br />
1. Installer la lampe <strong>de</strong> <strong>jardin</strong> solaire à un endroit où elle sera exposée au grand soleil pour assurer qu’elle<br />
se charge correctement.<br />
2. La lampe <strong>de</strong> <strong>jardin</strong> solaire est conçue pour s’allumer dans l’obscurité. Ne pas la monter près d’une<br />
source lumineuse puissante.<br />
3. Maintenir le panneau solaire propre pour obtenir une performance maximale.<br />
Garantie :<br />
Ce produit est couvert par une garantie limitée d'un (1) an. Sunforce Products Inc. garantit à l'acheteur initial que ce produit sera<br />
libre <strong>de</strong> tout vice <strong>de</strong> matériaux ou <strong>de</strong> main-d'œuvre pendant une pério<strong>de</strong> d'un (1) an débutant à la date d'achat.<br />
Pour obtenir les services <strong>de</strong> garantie, veuillez contacter Sunforce Products pour <strong>de</strong>s renseignements supplémentaires au<br />
1-888-478-6435 ou par courrier électronique à info@sunforceproducts.com. Une preuve d'achat incluant les dates d'achat et<br />
d'expiration ainsi que la <strong>de</strong>scription <strong>de</strong> la défectuosité sont requises pour obtenir les services <strong>de</strong> garantie.<br />
5
Felicitaciones por su compra Sunforce. Este producto esté diseñado con los más altos estándares y<br />
especificaciones técnicas. Proveerá <strong>de</strong> años <strong>de</strong> uso libres <strong>de</strong> mantenimiento. Por favor, lea estas<br />
instrucciones cuidadosamente antes <strong>de</strong> instalar, luego guár<strong>de</strong>las en un lugar seguro para sus referencias<br />
futuras. Si en cualquier momento tiene dudas sobre este producto, o requiere <strong>de</strong> asistencia, por favor, no<br />
du<strong>de</strong> en ponerse en contacto con nuestros profesionales capacitados que lo aten<strong>de</strong>rán en la línea <strong>de</strong><br />
soporte al cliente, al número 1-888-478-6435, o escríbanos a info@sunforceproducts.com.<br />
Las Luces Solares <strong>de</strong> Jardín son un producto <strong>solar</strong> <strong>de</strong> energía renovable, favorable al medio ambiente y<br />
fuente <strong>de</strong> ahorros energéticos. Son alimentadas por su célula <strong>solar</strong> integrada que convierte la luz natural<br />
<strong>de</strong>l sol en electricidad. Las Luces Solares <strong>de</strong> Jardín lucen bien en la <strong>de</strong>coración e iluminación <strong>de</strong> su jardín,<br />
parque o vereda.<br />
¿Cómo funcionan<br />
Las <strong>luces</strong> <strong>solar</strong>es <strong>de</strong> jardín no requieren mantenimiento. Ningún cableado es necesario para la instalación.<br />
Utilizan una célula <strong>solar</strong> en la parte superior <strong>de</strong> la unidad. Ésta carga una batería recargable integrada <strong>de</strong><br />
1.2V 600 mAh, la cual a su vez alimenta una luz LED súper brillante. Las <strong>luces</strong> se encien<strong>de</strong>n durante la<br />
noche y se apagan durante el día <strong>de</strong> acuerdo a la iluminación natural exterior.<br />
Antes <strong>de</strong> instalar, por favor verifique la caja y asegúrese que todas las partes estén presentes. Ésta <strong>de</strong>be<br />
contener:<br />
(Ver Fig. A)<br />
1. 6 tapas 3. 12 estacas ensamblables<br />
2. 6 cubiertas 4. 6 estaquillas<br />
Instrucciones <strong>de</strong> instalación<br />
1. Ensamble las estacas y entierre las estaquillas lo suficientemente profundo para fijar firmemente las<br />
Luces Solares <strong>de</strong> Jardín. (Ver Fig. B1)<br />
2. Gire la cubierta hacia la izquierda y retire la tapa (Ver Fig. B2)<br />
3. Ponga el interruptor en la posición ON. (Ver Fig. B3)<br />
4. Enrosque nuevamente la cubierta y la tapa (Ver Fig. B4)<br />
5. Monte la lámpara en la estaca ensamblada.<br />
6
6. Ajuste la orientación para garantizar exposición máxima al sol.<br />
Advertencia<br />
1. Instale las Luces Solares <strong>de</strong> Jardín en una posición dón<strong>de</strong> reciban exposición directa al sol para<br />
garantizar su carga a<strong>de</strong>cuada.<br />
2. Las Luces Solares <strong>de</strong> Jardín están diseñadas para encen<strong>de</strong>rse cuando esté oscuro. No las coloque<br />
cerca <strong>de</strong> una fuente <strong>de</strong> luz fuerte durante la noche.<br />
3. Mantenga limpia la célula <strong>solar</strong> en la tapa para garantizar su máximo rendimiento.<br />
Garantía:<br />
Este producto está cubierto por una garantía limitada <strong>de</strong> un año. Sunforce Products Inc. garantiza al comprador original que este<br />
producto está libre <strong>de</strong> <strong>de</strong>fectos en sus materiales y su fabricación por el periodo <strong>de</strong> un año <strong>de</strong> garantía <strong>de</strong>s<strong>de</strong> la fecha <strong>de</strong> compra.<br />
Para obtener servicios <strong>de</strong> garantía, por favor pongase en contacto con Sunforce Products para más instrucciones al número 1 888<br />
478-6435 o escriba a info@sunforceproducts.com. Se requiere prueba <strong>de</strong> compra incluyendo la fecha y la fecha <strong>de</strong> expiración <strong>de</strong><br />
la garantía para recibir servicios <strong>de</strong> garantía.<br />
For more information or technical support<br />
Pour plus d’information ou support technique<br />
Para más información o soporte técnico<br />
1-888-478-6435<br />
www.sunforceproducts.com<br />
info@sunforceproducts.com<br />
6SGL060311<br />
7