1000 1000i 1800 1800i Owner's Manual Xantrex Sine W ave ...
1000 1000i 1800 1800i Owner's Manual Xantrex Sine W ave ...
1000 1000i 1800 1800i Owner's Manual Xantrex Sine W ave ...

You also want an ePaper? Increase the reach of your titles
YUMPU automatically turns print PDFs into web optimized ePapers that Google loves.
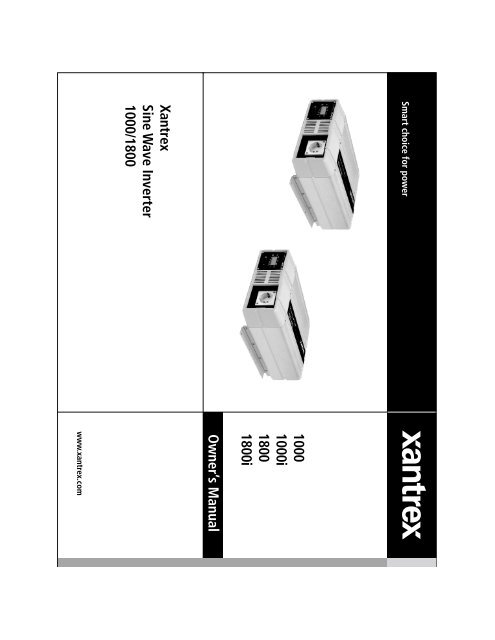
<strong>Xantrex</strong><br />
<strong>Sine</strong> W<strong>ave</strong> Inverter<br />
<strong>1000</strong>/<strong>1800</strong><br />
<strong>1000</strong><br />
<strong>1000</strong>i<br />
<strong>1800</strong><br />
<strong>1800</strong>i<br />
Owner’s <strong>Manual</strong>
Table of Contents<br />
Important Safety Instructions .............................................................................................................................................................................................1<br />
1. Introduction ..................................................................................................................................................................................................................3<br />
1.1 <strong>Sine</strong> W<strong>ave</strong> Inverter Key Features ........................................................................................................................................................................3<br />
2. Installation ...................................................................................................................................................................................................................4<br />
2.1 Requirements for Installation ...............................................................................................................................................................................4<br />
2.2 Locating the <strong>Sine</strong> W<strong>ave</strong> Inverter ..........................................................................................................................................................................4<br />
2.3 Mounting the <strong>Sine</strong> W<strong>ave</strong> Inverter .........................................................................................................................................................................4<br />
2.4 Wiring the <strong>Sine</strong> W<strong>ave</strong> Inverter..............................................................................................................................................................................5<br />
2.4.1 Input and Output Protection ............................................................................................................................................................................................... 5<br />
2.4.2 Making AC Wiring Connections ........................................................................................................................................................................................ 6<br />
2.4.3 Ground Fault Circuit Interrupters (GFCIs) ......................................................................................................................................................................... 7<br />
2.4.4 Making DC Wiring Connections ........................................................................................................................................................................................ 7<br />
3. <strong>Sine</strong> W<strong>ave</strong> Inverter Operation .......................................................................................................................................................................................9<br />
3.1 Principles of Operation ........................................................................................................................................................................................9<br />
3.2 Output W<strong>ave</strong>form ................................................................................................................................................................................................9<br />
3.3 Control Panel .................................................................................................................................................................................................... 10<br />
3.4 <strong>Sine</strong> W<strong>ave</strong> POWERSAVE Mode ....................................................................................................................................................................... 10<br />
3.5 Inverter Operating Limits and Protection Features ............................................................................................................................................. 11<br />
4. Testing ........................................................................................................................................................................................................................ 11<br />
5. Troubleshooting Guide ............................................................................................................................................................................................... 12<br />
5.1 Fault Conditions and Indicators ......................................................................................................................................................................... 12<br />
6. Warranty .................................................................................................................................................................................................................... 13<br />
7. Appendices ................................................................................................................................................................................................................ 14<br />
7.1 Battery Type....................................................................................................................................................................................................... 14<br />
7.2 Battery Size ...................................................................................................................................................................................................... 15<br />
8. Performance Graphs .................................................................................................................................................................................................. 16<br />
8.1 Power Derating Curve ......................................................................................................................................................................................... 16<br />
8.2 Efficiency Curve ................................................................................................................................................................................................ 17<br />
9. Specifications ............................................................................................................................................................................................................ 18<br />
<strong>Xantrex</strong> <strong>Sine</strong> W<strong>ave</strong> Inverter Owner’s <strong>Manual</strong><br />
English
English<br />
Notice of Copyright<br />
<strong>Xantrex</strong> <strong>Sine</strong> W<strong>ave</strong> Inverter <strong>1000</strong>, <strong>1000</strong>i/<strong>1800</strong>, <strong>1800</strong>i Owner’s <strong>Manual</strong> © June 2005<br />
<strong>Xantrex</strong> International. All rights reserved.<br />
<strong>Xantrex</strong> is a registered trademark of <strong>Xantrex</strong> International.<br />
Disclaimer<br />
UNLESS SPECIFICALLY AGREED TO IN WRITING, XANTREX TECHNOLOGY INC.<br />
(“XANTREX”)<br />
(a) MAKES NO WARRANTY AS TO THE ACCURACY, SUFFICIENCY OR<br />
SUITABILITY OF ANY TECHNICAL OR OTHER INFORMATION PROVIDED IN ITS<br />
MANUALS OR OTHER DOCUMENTATION.<br />
(b) ASSUMES NO RESPONSIBILITY OR LIABILITY FOR LOSS OR DAMAGE,<br />
WHETHER DIRECT, INDIRECT, CONSEQUENTIAL OR INCIDENTAL, WHICH<br />
MIGHT ARISE OUT OF THE USE OF SUCH INFORMATION. THE USE OF ANY<br />
SUCH INFORMATION WILL BE ENTIRELY AT THE USER’S RISK.<br />
Date and Revision<br />
June 2005, Revision A<br />
Part Number<br />
445-0049-01-01<br />
Contact Information<br />
Web: www.xantrex.com<br />
Email: CustomerService@xantrex.com<br />
Phone: 1-800-670-0707 (in North America) 1-360-925-5097 (outside North America)<br />
Fax: 1-360-925-5143<br />
SUPERIOR, PACER are registered trademarks of TROJAN BATTERY Company<br />
SEAVOLT, SEAGEL are registered trademarks of WEST MARINE PRODUCTS<br />
VOYAGER is a registered trademark of DELCO-REMY<br />
GENESIS is a registered trademark of GATES ENERGY PRODUCTS (HAWKER ENERGY)<br />
EVOLYTE is a registered trademark of GNB INDUSTRIAL BATTERY CO.<br />
PREVAILER is a registered trademark of SONNENSCHEIN<br />
<strong>Xantrex</strong> <strong>Sine</strong> W<strong>ave</strong> Inverter Owner’s <strong>Manual</strong>
Important Safety Instructions<br />
WARNING<br />
Before you install and use your <strong>Sine</strong> W<strong>ave</strong><br />
Inverter, be sure to read and s<strong>ave</strong> these<br />
safety instructions.<br />
General Safety Precautions<br />
1. SAVE THESE INSTRUCTIONS. This OWNER’S<br />
MANUAL contains important safety and operating<br />
information for the <strong>Sine</strong> W<strong>ave</strong> Inverter.<br />
2. Do not expose the <strong>Sine</strong> W<strong>ave</strong> Inverter to rain, snow,<br />
spray, bilge or dust. To reduce risk of fire hazard, do<br />
not cover or obstruct the ventilation openings. Do<br />
not install the <strong>Sine</strong> W<strong>ave</strong> Inverter in a zero-clearance<br />
compartment. Overheating may result.<br />
3. Do not use attachments not recommended or sold<br />
by <strong>Xantrex</strong>. Doing so may result in a risk of fire,<br />
electric shock, or injury to persons.<br />
4. The <strong>Sine</strong> W<strong>ave</strong> Inverter is designed to be permanently<br />
connected to your DC electrical systems (and for<br />
hardwire versions, permanently connected to your<br />
AC electrical system). To ensure adherence to proper<br />
electrical wiring regulations all wiring must be done<br />
by a certified technician or electrician.<br />
5. To avoid a risk of fire and electric shock, make sure<br />
that existing wiring is in good electrical condition;<br />
and that wire size is not undersized. Do not operate<br />
the <strong>Sine</strong> W<strong>ave</strong> Inverter with damaged or substandard<br />
wiring.<br />
6. Do not operate the <strong>Sine</strong> W<strong>ave</strong> Inverter if it has<br />
received a sharp blow, been dropped, or otherwise<br />
damaged in any way. If the <strong>Sine</strong> W<strong>ave</strong> Inverter has<br />
been damaged, refer to Section 6 of this manual.<br />
7. Do not disassemble the <strong>Sine</strong> W<strong>ave</strong> Inverter; refer to<br />
Section 6 of this manual for instructions on obtaining<br />
service for the <strong>Sine</strong> W<strong>ave</strong> Inverter. Attempting to<br />
service the unit yourself may result in a risk of<br />
electrical shock or fire.<br />
<strong>Xantrex</strong> <strong>Sine</strong> W<strong>ave</strong> Inverter Owner’s <strong>Manual</strong><br />
8. To reduce risk of electrical shock, disconnect the<br />
DC power (and AC power if applicable on hardwire<br />
versions) from the <strong>Sine</strong> W<strong>ave</strong> Inverter before<br />
attempting any maintenance or cleaning or working<br />
on any equipment and circuits connected to the <strong>Sine</strong><br />
W<strong>ave</strong> Inverter. Turning off controls will not reduce<br />
this risk.<br />
9. Grounding: The <strong>Sine</strong> W<strong>ave</strong> Inverter must be provided<br />
with an equipment-grounding conductor connected<br />
to the AC input ground terminal. Grounding and all<br />
other wiring must comply with local codes and<br />
ordinances.<br />
10. For marine applications, special installation codes<br />
may apply. For example, in the U.S., the installation<br />
shall comply with the United States Coast Guard<br />
Electrical Regulations (33CFR183, Sub part 1).<br />
Explosive Gas Precautions<br />
1. This equipment contains components which can<br />
produce arcs or sparks. To prevent fire or explosion<br />
do not install in compartments containing batteries<br />
or flammable materials or in locations which require<br />
ignition protected equipment.This includes any<br />
space containing gasoline-powered machinery, fuel<br />
tanks, or joints, fittings, or other connection between<br />
components of the fuel system.<br />
2. Working in the vicinity of a lead-acid battery is<br />
dangerous. Batteries generate explosive gases during<br />
normal battery operation.<br />
3. To reduce the risk of battery explosion, follow these<br />
instructions and those published by the battery<br />
manufacturer and the manufacturer of the equipment<br />
in which the battery is installed.<br />
Precautions When Working With<br />
Batteries<br />
1. Someone should be within range of your voice or<br />
close enough to come to your aid when you work<br />
near a lead-acid battery.<br />
2. H<strong>ave</strong> plenty of fresh water and soap nearby in case<br />
battery acid contacts skin, clothing, or eyes.<br />
3. Wear complete eye protection and clothing<br />
protection. Avoid touching eyes while working near<br />
batteries.<br />
4. Clean battery terminals before making connections.<br />
Wear eye protection to keep corrosion from coming<br />
in contact with eyes.<br />
5. If battery acid contacts skin or clothing, wash<br />
immediately with soap and water. If acid enters eye,<br />
immediately flood eye with running cold water for<br />
at least 20 minutes and get medical attention<br />
immediately.<br />
6. NEVER smoke or allow a spark or flame in vicinity<br />
of battery or engine.<br />
7. Do not drop a metal tool on the battery. The resulting<br />
spark or short-circuit on the battery or other electrical<br />
part may cause an explosion.<br />
8. Remove personal metal items such as rings,<br />
bracelets, necklaces, and watches when working<br />
with a lead-acid battery. A lead-acid battery produces<br />
a short-circuit current high enough to weld a ring or<br />
the like to metal, causing a severe burn.<br />
English 1
2 English<br />
<strong>Xantrex</strong> <strong>Sine</strong> W<strong>ave</strong> Inverter Owner’s <strong>Manual</strong>
1. Introduction<br />
Thank you for your purchase of this <strong>Xantrex</strong> <strong>Sine</strong><br />
W<strong>ave</strong> Inverter. As a high quality, true sine w<strong>ave</strong> output<br />
inverter, you can expect exceptional performance and<br />
years of dependable operation. The true sine w<strong>ave</strong> AC<br />
output from the inverter ensures all AC loads operating<br />
from the unit perform efficiently and correctly. Since these<br />
loads were designed to operate from true sine w<strong>ave</strong> voltage,<br />
you can expect these loads to operate the same as if<br />
operating from grid/utility supplied power. In some cases,<br />
the true sine w<strong>ave</strong> output from the <strong>Xantrex</strong> inverter is<br />
even superior to the power supplied by your utility<br />
company.<br />
To get the most out of your <strong>Sine</strong> W<strong>ave</strong> Inverter, carefully<br />
read and follow the instructions in this guide. Pay special<br />
attention to the Important Safety Instructions and to the<br />
CAUTION and WARNING statements found throughout<br />
the manual and on the product. Please retain all packaging.<br />
Should you h<strong>ave</strong> any questions before, during, or after<br />
installation, please contact <strong>Xantrex</strong>.<br />
Phone:1-800-670-0707, 1-360-925-5097 (direct)<br />
Fax:1-360-925-5143<br />
Email: CustomerService@xantrex.com<br />
Web: www.xantrex.com<br />
Please record the following information if you need<br />
to contact <strong>Xantrex</strong> for servicing of the unit.<br />
Serial No.: ___________________________<br />
Place of purchase: ___________________________<br />
Date of purchase: ___________________________<br />
1.1 <strong>Sine</strong> W<strong>ave</strong> Inverter Key Features<br />
The <strong>Sine</strong> W<strong>ave</strong> Inverter utilizes advanced high frequency<br />
switching technology in the power conversion process.<br />
The circuits are similar to those used in power supplies<br />
for computers and other electronic equipment. This<br />
technology offers several benefits:<br />
<strong>Xantrex</strong> <strong>Sine</strong> W<strong>ave</strong> Inverter Owner’s <strong>Manual</strong><br />
• Light weight: for easy installation<br />
• Totally silent: for quiet operation<br />
• High surge capability: for “hard-to-start” AC loads<br />
See Section 10 (Specifications) for complete product<br />
specifications.<br />
1.1.1 Inverter Function<br />
When connected properly and the power switch is turned<br />
to the (I) position, the inverter draws power from a battery<br />
and delivers a true sine w<strong>ave</strong> AC output voltage. If the<br />
battery voltage is within the operating range of the unit,<br />
the inverter will continue to deliver AC power to the<br />
loads connected. High and low battery shutdowns will<br />
engage if the battery voltage falls out of the specified<br />
range of operation (10–16 VDC on 12 V models, 20–32<br />
VDC on 24 V models).<br />
1.1.2 Control Panel<br />
The Control Panel displays operating information so you<br />
can monitor the status of the Inverter and your batteries.<br />
WARNING<br />
Note that in () (Bypass) position the front<br />
panel switch does NOT turn off all voltages<br />
inside the unit. This control only deactivates<br />
the AC conversion circuitry. On AC hardwire/<br />
transfer relay versions any utility voltage<br />
present on the AC input terminals will be<br />
present on the AC output terminals.<br />
This panel can be removed and re-attached in different<br />
orientations so the information is directed at you in the<br />
most convenient fashion, for all recommended mounting<br />
configurations. With the optional Interface Panel, the<br />
display can be fully removed from the base chassis and<br />
remotely located in the place of your choice (e.g. on the<br />
dash of your vehicle).<br />
1.1.3 Automatic Transfer Switch<br />
Your <strong>Sine</strong> W<strong>ave</strong> Inverter may be equipped with a transfer<br />
relay if specified prior to purchase. The transfer relay serves<br />
two purposes: 1) allows the AC output of the inverter to<br />
be wired into an existing AC system as a source of power<br />
and 2) allows the <strong>Sine</strong> W<strong>ave</strong> Inverter to automatically<br />
become the source of power should your utility source<br />
fail.<br />
When utility AC power fails, the transfer relay is deenergized<br />
and the load is automatically transferred to the<br />
inverter output within 20–30 milliseconds. With the<br />
POWERSAVE feature enabled (recommended for reducing<br />
standby power consumption), AC output from the inverter<br />
may be delayed for up to 2½ seconds. Once AC utility is<br />
restored, the relay energizes and the load is automatically<br />
reconnected to AC utility.<br />
Identifying Models With Transfer Switches<br />
1) Check the UPC code on the product box. Units with<br />
transfer switches h<strong>ave</strong> UPC codes that end with these five<br />
digits:<br />
Model<br />
<strong>1000</strong>/<strong>1000</strong>i Model <strong>1800</strong>/<strong>1800</strong> i<br />
61084<br />
6188 4<br />
61074<br />
6187 4<br />
61052<br />
6185 2<br />
61008<br />
6180 8<br />
61002<br />
6180 2<br />
2) If there is an AC outlet on the front of the unit, it is<br />
not equipped with an internal transfer switch.<br />
3) For <strong>Sine</strong> W<strong>ave</strong> Inverters with hardwire connections, you<br />
can identify whether your unit has an internal transfer<br />
switch by removing the cover on the AC wiring<br />
compartment and checking the label above the terminal<br />
block inside.<br />
If your unit has a label similar to one of these two labels,<br />
it has an internal transfer switch:<br />
Units with this label do not h<strong>ave</strong> an internal transfer<br />
switch:<br />
English 3
2. Installation<br />
WARNING<br />
Review the Important Safety Instructions found<br />
at the beginning of this manual and read this<br />
entire section, paying particular attention to the<br />
CAUTION and WARNING statements, before<br />
proceeding with the installation.<br />
This section contains instructions for installing the <strong>Xantrex</strong><br />
<strong>Sine</strong> W<strong>ave</strong> Inverter. After securing the unit and making<br />
wiring connections, do not turn the unit on. Proceed to<br />
the next section of the manual which provides operating<br />
instructions.<br />
2.1 Requirements for Installation<br />
CAUTION<br />
The <strong>Sine</strong> W<strong>ave</strong> Inverter is designed to be<br />
permanently connected to your DC electrical<br />
system. When Configured as an AC hardwire<br />
version, the inverter is also designed to be<br />
permanently connected to your AC electrical<br />
system. To ensure adherence to proper<br />
electrical wiring regulations, all wiring must be<br />
done by a certified technician or electrician.<br />
Installation Regulations: Depending on the type of<br />
location in which you are installing the <strong>Sine</strong> W<strong>ave</strong> Inverter,<br />
there are different codes and regulations that the<br />
installation must meet such as your national and local<br />
electrical codes for residential installations. Other examples<br />
of codes and regulations for North American installations<br />
include:<br />
• US Coast Guard and ABYC requirements for<br />
installations on marine vessels<br />
• RV Industry Association (RVIA), CSA, and UL<br />
requirements for installations in recreational vehicles.<br />
It is the installer´s responsibility to ensure that all<br />
applicable installation requirements are met.<br />
What You Need to Install the <strong>Sine</strong> W<strong>ave</strong> Inverter<br />
You need the following tools and hardware to properly<br />
install the inverter:<br />
• wire stripper<br />
• mounting screws/bolts (¼” or 6mm diameter screws)<br />
• small flat blade screwdriver (for hardwire versions)<br />
• small Phillips screwdriver<br />
• wrench for DC terminals (½” or 13mm)<br />
• AC wiring for hardwire configured models (see AC<br />
wiring section for details)<br />
• DC cables (see DC wiring section for details)<br />
• Wire connectors and crimp tool for your DC cables<br />
• AC and DC disconnects and over-current protective<br />
devices (see section 2.4.1 for details)<br />
2.2 Locating the <strong>Sine</strong> W<strong>ave</strong> Inverter<br />
The inverter utilizes complex electronic circuits, and<br />
although design precautions h<strong>ave</strong> been made for protection<br />
of these circuits, they can be susceptible to damage from<br />
use in extreme environments. The <strong>Sine</strong> W<strong>ave</strong> Inverter<br />
should only be installed in a location that meets the<br />
following requirements:<br />
• Dry: do not allow water or other fluids to drip or splash<br />
on the <strong>Sine</strong> W<strong>ave</strong> Inverter. Do not mount the inverter in<br />
an area subject to splashing or dripping water or bilge.<br />
• Cool: normal ambient air temperature should be between<br />
0°C (32°F) and 25°C (77°F)—the cooler the better within<br />
this range. Refer to the operating temperature information<br />
in section 9 (specifications) for more details.<br />
• Ventilated: allow at least 5 inches (13 cm) of clearance<br />
all around the unit. Ensure the ventilation openings on the<br />
unit are not obstructed. If mounting in a compartment,<br />
ventilate with louvers or cut-outs.<br />
• Safe: do not install the <strong>Sine</strong> W<strong>ave</strong> Inverter in the same<br />
compartment as batteries or in any compartment capable<br />
of storing flammable liquids such as gasoline. Do not<br />
install the inverter in an engine compartment or other<br />
location where ignition protected equipment is required.<br />
• Dust-free: do not install the <strong>Sine</strong> W<strong>ave</strong> Inverter in a<br />
dusty environment where either dust, wood particles or<br />
other filings/shavings are present. These can be pulled<br />
into the unit when the cooling fan is operating.<br />
• Close to AC junction box: avoid the use of extended<br />
wire lengths if possible.<br />
• Close to battery/batteries: Avoid excessive cable<br />
lengths but do not install the <strong>Sine</strong> W<strong>ave</strong> Inverter in the<br />
same compartment as batteries. Use the recommended<br />
wire lengths and sizes (see section 2.4.4). Also do not<br />
mount the inverter where it will be exposed to the gases<br />
produced by the battery. These gases are very corrosive<br />
and prolonged exposure will damage the inverter.<br />
• Protected from battery acid: never allow battery acid<br />
to drip on the <strong>Sine</strong> W<strong>ave</strong> Inverter or its wiring when<br />
reading specific gravity or filling the battery.<br />
2.3 Mounting the <strong>Sine</strong> W<strong>ave</strong> Inverter<br />
Before mounting the <strong>Sine</strong> W<strong>ave</strong> Inverter, test the chosen<br />
location for adequate space around the unit to allow for<br />
connections and ventilation. Mounting hardware should<br />
be corrosion resistant and ¼” or 6mm diameter screws.<br />
Your mounting system should be able to support three<br />
times the weight of the inverter, which weighs<br />
approximately 16 lbs (7.3Kg). The more clearance for<br />
ventilation around the unit, the better the performance.<br />
At a minimum, h<strong>ave</strong> 5” of free space on all sides of the<br />
inverter.<br />
To mount the <strong>Sine</strong> W<strong>ave</strong> Inverter<br />
1. Mount the <strong>Sine</strong> W<strong>ave</strong> Inverter on either a horizontal<br />
or vertical surface (such as a bulkhead) using the<br />
mounting holes provided. For secure, permanent<br />
Figure 1. Approved orientations for<br />
inverter mounting<br />
4 English<br />
<strong>Xantrex</strong> <strong>Sine</strong> W<strong>ave</strong> Inverter Owner’s <strong>Manual</strong>
mounting, use all eight mounting holes. To meet<br />
regulatory requirements, the inverter must be<br />
mounted in one of the three orientations shown below.<br />
2. Remove and re-attach the front panel depending on<br />
the orientation of the base unit itself. For example, if<br />
the unit is mounted on a vertical surface, you may<br />
want to remove the panel and attach it so it is again<br />
readable horizontally. This can be done by removing<br />
the four screws, taking the panel out of the housing,<br />
rotating the panel and reattaching the panel to the<br />
base unit. Be sure to re-install all four screws.<br />
Figure 2. Control panel attachment<br />
3. The front panel can also be remotely located away<br />
from the base chassis. Simply remove the panel from<br />
the face of the unit, install the interface panel option<br />
(purchased separately) and connect the 30 ft. (9 m)<br />
extension cord. The cord can then be run to the<br />
location where the panel is to be mounted, and<br />
attached to the panel. The unit can now be controlled<br />
and monitored from the location of your choice. Do<br />
not remotely mount the display panel without<br />
purchasing the Interface Panel option and properly<br />
installing this panel on the inverter. The Interface<br />
Panel significantly reduces radiated interference<br />
generated along the length of the cable, decreasing<br />
the chance of resulting interference with other<br />
equipment.<br />
<strong>Xantrex</strong> <strong>Sine</strong> W<strong>ave</strong> Inverter Owner’s <strong>Manual</strong><br />
2.4 Wiring the <strong>Sine</strong> W<strong>ave</strong> Inverter<br />
WARNING<br />
Fire and shock hazard. Make sure wiring is<br />
disconnected from all electrical sources<br />
before handling. All wiring must be done in<br />
accordance with local and national electrical<br />
wiring regulations by a certified electrician<br />
or technician.<br />
For units equipped with an AC outlet:<br />
If your <strong>Sine</strong> W<strong>ave</strong> Inverter is equipped with an AC<br />
outlet on the front, then you will be mainly interested in<br />
the DC wiring instructions that follow (section 2.4.4).<br />
Once your DC connections and ground wiring connection<br />
are complete, the unit is ready to deliver AC power.<br />
For AC hardwire versions:<br />
If your unit is equipped with an AC hardwire terminal<br />
strip, (with or without transfer relay) then the following<br />
AC wiring instructions are important for you to read<br />
through. When hardwire configured, the inverter manages<br />
all AC power and therefore must be wired in between<br />
any utility connection and distribution panel.<br />
As a starting point for the wiring instructions, here is a<br />
brief summary of the wiring sequence for hardwire<br />
configured inverters. Please thoroughly read the remainder<br />
of the wiring instructions (section 2.4.2) which details<br />
each wiring step and follows the Input and Output<br />
Protection section:<br />
1. Ensure the (/I) control panel switch is in the ()<br />
position. For those hardwire equipped models with<br />
a transfer relay, connected AC source (INPUT)<br />
power will be passed through the inverter making<br />
the output terminal and connected wiring live. This<br />
is the case even with the control panel switch in the<br />
() position so ensure all power is disconnected at<br />
its source.<br />
2. Connect AC input wiring, AC output wiring, Chassis<br />
Ground, DC positive cable and finally, DC negative<br />
cable in that order.<br />
3. Connect each circuit to its source.<br />
2.4.1 Input and Output Protection<br />
In order to meet CSA, UL, and electrical code<br />
requirements, the AC and DC inputs and outputs of the<br />
<strong>Sine</strong> W<strong>ave</strong> Inverter must be provided with overcurrent<br />
protection such as a circuit breaker or fuse, and with a<br />
disconnect device, as follows: (note the “AC Input” and<br />
“AC Output” information below only applies to units<br />
equipped with AC hardwire terminal strips, not AC<br />
output receptacle equipped versions).<br />
DC Input: Protection for the DC wiring (an inline fuse<br />
/circuit breaker) is needed as close as possible to the<br />
battery to protect the wiring from your batteries to the<br />
<strong>Sine</strong> W<strong>ave</strong> Inverter. The current rating of this DC fuse or<br />
circuit breaker must be large enough to allow the inverter<br />
to operate your loads, but if the rating is too high,<br />
electrical codes will require you to use larger DC cables<br />
than you would otherwise h<strong>ave</strong> to. The fuse or circuit<br />
breaker must be rated and approved for use on minimum<br />
12V or 24V DC circuits as applicable by the model of<br />
your inverter. Fuses or circuit breakers rated only for<br />
AC service are not suitable for use on DC circuits and<br />
may pose a hazard. The wire size used between the <strong>Sine</strong><br />
W<strong>ave</strong> Inverter and the fuse or circuit breaker must be<br />
sized to match the fuse or circuit breaker´s current rating,<br />
in accordance with the electrical codes or regulations<br />
applicable to your installation (see Table 4).<br />
AC Input: The installation must provide over-current<br />
protection for the AC input circuit. The circuit breaker<br />
or fuse used must be rated and approved for use on<br />
120VAC branch circuits for 120V models and for<br />
230VAC branch circuits for 230V models. The wire size<br />
used between the breaker and the <strong>Sine</strong> W<strong>ave</strong> Inverter<br />
input must be sized to match the circuit breaker, in<br />
accordance with the electrical codes or regulations<br />
applicable to your installation. Refer to Table 1 for sizing<br />
information.<br />
English 5
AC Output: The circuit breaker or fuse used must be<br />
rated and approved for use on 120V AC branch circuits<br />
for 120V models and for 230VAC branch circuits for<br />
230V models. The wire size used between the <strong>Sine</strong> W<strong>ave</strong><br />
Inverter output and the breaker, and between the breaker<br />
and your loads, must be sized to match the circuit<br />
breaker’s rating, in accordance with the electrical codes<br />
or regulations applicable to your installation. Refer to<br />
Table 1 for sizing information.<br />
Disconnect devices: Since circuit breakers can be turned<br />
off and fuses can be removed from the circuit, either<br />
type of device will also meet the requirement for a<br />
disconnect device in each of the above circuits. Note<br />
that the required disconnect device is not intended for<br />
disconnection under load, it is only meant to be a way<br />
to isolate the <strong>Sine</strong> W<strong>ave</strong> Inverter from the input and<br />
output power sources.<br />
2.4.2 Making AC Wiring Connections<br />
Again, this section applies to those models configured<br />
with an AC hardwire terminal strip. As mentioned<br />
previously, your AC wiring must be sized to match the<br />
current rating of the AC breakers you provide on the<br />
input and output AC circuits in accordance with the<br />
electrical codes or regulations applicable to your<br />
installation. Table 1 is based on the U.S. National Electrical<br />
Code (1999), the Canadian Electrical Code (1998), and<br />
European wiring practices (for 230V models). There may<br />
be other codes and regulations applicable to your<br />
installation.<br />
MODEL<br />
AC INPUT and AC OUTPUT<br />
Required<br />
Breaker Rating<br />
Required<br />
Wire Size<br />
<strong>1000</strong> - 12/24 V<br />
<strong>1800</strong> - 12/24 V<br />
20<br />
A max. 12 AW G<br />
<strong>1000</strong>i - 12/24 V<br />
<strong>1800</strong>i - 12/24 V<br />
2<br />
10<br />
A max. 1 .0 - 2.5m m<br />
Table 1. Circuit Breakers and Wire Sizing<br />
6 English<br />
Note that there is no difference between the<br />
recommendations for the <strong>1000</strong> and <strong>1800</strong> models. This is<br />
because the bypass rating of these products is the same<br />
(i.e. 15A for <strong>1000</strong> and <strong>1800</strong> and 10A for <strong>1000</strong>i and<br />
<strong>1800</strong>i).<br />
Figure 3 may be a useful reference as it illustrates the<br />
AC wiring connection terminals for <strong>Sine</strong> W<strong>ave</strong> Inverter<br />
models that are AC hardwire configured.<br />
Figure 3. AC wiring terminals (hardwire versions only)<br />
WARNING<br />
Shock Hazard. Before proceeding further,<br />
ensure that the <strong>Sine</strong> W<strong>ave</strong> Inverter is NOT<br />
connected to any batteries, and that all<br />
wiring is disconnected from any electrical<br />
sources. Do not connect the output<br />
terminals of the inverter to an incoming AC<br />
source.<br />
AC Wiring should be connected in the following order:<br />
1. AC INPUT (source)<br />
2. AC OUTPUT (load)<br />
To make AC wiring connections:<br />
1. The AC wiring compartment is located on the righthand<br />
side of the <strong>Sine</strong> W<strong>ave</strong> Inverter when looking at<br />
the front of the unit. Remove the AC wiring<br />
compartment cover to gain access to the AC terminal<br />
strip inside.<br />
2. Remove the knockouts from the cover of the wiring<br />
compartment to create holes for your cable clamps<br />
(see Figure 3).<br />
3. Run the three conductor AC INPUT (source) wiring<br />
through a cable clamp and into the wiring<br />
compartment, via the knockout on the right side of<br />
the front panel. Connect the AC INPUT ground<br />
wire first to the ground terminal (ground symbol<br />
with circle around it), and then connect the AC<br />
INPUT line and neutral wires to the corresponding<br />
<strong>Sine</strong> W<strong>ave</strong> Inverter AC input terminals. Refer to<br />
Table 2 for typical colour coding and terminal<br />
identification.<br />
4. In a similar manner, connect the AC OUTPUT (load)<br />
wiring to the <strong>Sine</strong> W<strong>ave</strong> Inverter AC output terminals<br />
(connect the output ground to the ground terminal<br />
identified by the symbol with no circle around it).<br />
Terminal to wiring connections should be done as<br />
shown in Table 2.<br />
TERMINAL<br />
AC WIRE COLOR<br />
120 VAC<br />
(N. American)<br />
230 VAC<br />
(European)<br />
LINE (L) Blac<br />
k Brow n<br />
NEUTRAL<br />
(N) Whit<br />
e Blu e<br />
GROUND<br />
Green or Green/Yellow or<br />
bare copper bare copper<br />
Table 2. AC Terminal and Wiring<br />
Identification<br />
5. After wiring, double check and review all connections<br />
to make sure the wires are in the correct terminals<br />
and the terminals are tight (the recommended torque<br />
is 7.5 in-lbs., 9.8 Nm).<br />
<strong>Xantrex</strong> <strong>Sine</strong> W<strong>ave</strong> Inverter Owner’s <strong>Manual</strong>
AC Safety Grounding: During the AC wiring<br />
installation, AC input and output ground wires are<br />
connected to the inverter. The AC input ground wire<br />
must connect to the incoming ground from your AC<br />
utility source. The AC output ground wire should go to<br />
the grounding point for your loads (e.g. a distribution<br />
panel ground bus).<br />
Neutral Grounding:<br />
a) 120V models: The neutral conductor of the AC<br />
output circuit of the <strong>Sine</strong> W<strong>ave</strong> Inverter is<br />
automatically connected to the safety ground during<br />
inverter operation. This conforms to National<br />
Electrical Code requirements that separately derived<br />
AC sources (such as inverters and generators) h<strong>ave</strong><br />
their neutral conductors tied to ground in the same<br />
way that the neutral conductor from the utility is<br />
tied to ground at the AC breaker panel. For models<br />
configured with a transfer relay, when AC utility<br />
power is present and the <strong>Sine</strong> W<strong>ave</strong> Inverter is in<br />
bypass mode, this connection (neutral of the<br />
inverter‘s AC output to input safety ground) is not<br />
present so that the utility neutral is only connected<br />
to ground at your breaker panel, as required.<br />
b) 230V models: There is no connection made inside<br />
the <strong>Sine</strong> W<strong>ave</strong> Inverter from either of the line<br />
conductors (line or neutral) to the safety ground.<br />
2.4.3 Ground Fault Circuit Interrupters (GFCIs)<br />
Installations in Recreational Vehicles (for North<br />
American approvals) will require GFCI protection of<br />
all branch circuits connected to the AC output of the<br />
hardwire terminal equipped <strong>Sine</strong> W<strong>ave</strong> Inverters. In<br />
addition, electrical codes require GFCI protection of<br />
certain receptacles in residential installations. While the<br />
true sine w<strong>ave</strong> output of the <strong>Sine</strong> W<strong>ave</strong> Inverter is<br />
equivalent to the w<strong>ave</strong>form provided by utilities,<br />
compliance with UL standards requires us to test and<br />
recommend specific GFCIs.<br />
<strong>Xantrex</strong> has tested the following GFCI-protected 15 A<br />
receptacles and found that they functioned properly<br />
when connected to the AC output of the inverter:<br />
<strong>Xantrex</strong> <strong>Sine</strong> W<strong>ave</strong> Inverter Owner’s <strong>Manual</strong><br />
2.4.4 Making DC Wiring Connections<br />
Follow this procedure to connect the battery cables to<br />
the DC input terminals on the <strong>Sine</strong> W<strong>ave</strong> Inverter. Your<br />
Manufacturer<br />
Mode l<br />
LEVITON<br />
6599/70 1<br />
L EVITON<br />
6598/722 *<br />
EAGLE<br />
Shock Sentr y<br />
PASS & SEYMOUR 1591-WC N<br />
HUBBELL<br />
GF252GY A<br />
BRYANT<br />
GFR52FT I<br />
B RYANT<br />
GFR82FTI* *<br />
* With Line/Load inversion check & indicator light<br />
** Hospital Grade<br />
cables should be as short as possible (ideally, less than<br />
10 ft./3 m) and large enough to handle the required current,<br />
in accordance with the electrical codes or regulations<br />
applicable to your installation. Cables that are not an<br />
adequate gauge (too narrow) or are too long will cause<br />
decreased inverter performance such as poor surge<br />
capability and frequent low input voltage warnings and<br />
shutdowns.<br />
V = I x R<br />
Voltage = Current x Resistance<br />
Inverter<br />
Output (W)<br />
500<br />
100<br />
0 150<br />
0 200<br />
0 250<br />
0 300 0<br />
Current<br />
(A) 50<br />
10<br />
0 15<br />
0 20<br />
0 25<br />
0 30 0<br />
Wire<br />
Gauge<br />
(AWG)<br />
Resistance<br />
(ohms/ft)<br />
@ 25°C<br />
Voltage<br />
Drop<br />
per ft.<br />
Voltage<br />
Drop<br />
per ft.<br />
Voltage<br />
Drop<br />
per ft.<br />
Voltage<br />
Drop<br />
per ft.<br />
Voltage<br />
Drop<br />
per ft.<br />
Voltage<br />
Drop<br />
per ft.<br />
4/0<br />
0.00005<br />
0 0.002<br />
5 0.005<br />
0 0.007<br />
5 0.010<br />
0 0.012<br />
5 0.015 0<br />
3/0<br />
0.00006<br />
3 0.003<br />
2 0.006<br />
3 0.009<br />
5 0.012<br />
6 0.015<br />
8 0.018 9<br />
2/0<br />
0.00007<br />
9 0.004<br />
0 0.007<br />
9 0.011<br />
9 0.015<br />
8 0.019<br />
8 0.023 7<br />
0 0.00010<br />
0 0.005<br />
0 0.010<br />
0 0.015<br />
0 0.020<br />
0 0.025<br />
0 0.030 0<br />
1 0.00012<br />
6 0.006<br />
3 0.012<br />
6 0.018<br />
9 0.025<br />
2 0.031<br />
5 0.037 8<br />
2 0.00015<br />
9 0.008<br />
0 0.015<br />
9 0.023<br />
9 0.031<br />
8 0.039<br />
8 0.047 7<br />
3 0.00020<br />
1 0.010<br />
1 0.020<br />
1 0.030<br />
2 0.040<br />
2 0.050<br />
3 0.060 3<br />
4 0.00025<br />
3 0.012<br />
7 0.025<br />
3 0.038<br />
0 0.050<br />
6 0.063<br />
3 0.075 9<br />
Table 3. Voltage drop per ft of DC cable<br />
These low input voltage warnings are due to DC voltage<br />
drop across the cables from the inverter to the batteries.<br />
The longer and narrower these cables, the greater the<br />
voltage drop. Table 3 shows voltage drop per foot of<br />
cable, at various power output levels.<br />
For example, if the <strong>1800</strong> Inverter is 10 ft. from your<br />
battery, is operating at 2000 watts, and is improperly<br />
connected with #4AWG wire, then you can expect a<br />
voltage drop per foot of 0.0506 V. Total cable length is<br />
actually 20 ft., not 10 ft., since the cable length is<br />
measured from the battery to the inverter and back.<br />
Therefore, multiply 0.0506 V by 20 to get a total voltage<br />
drop of 1.012 V. If your battery voltage is only 11.2 VDC,<br />
then the actual voltage at the inverter is 10.188 (11.2 V–<br />
1.012 V) because of this significant voltage drop. The<br />
<strong>Sine</strong> W<strong>ave</strong> Inverter will either be in low input voltage<br />
warning or shutdown in such a condition. In high current<br />
draw and surge situations, the unit may go into low<br />
input voltage shutdown if the cables are too small and<br />
too long.<br />
Increasing your DC cable size will help improve the<br />
situation. With cables sized correctly, and using a #0<br />
AWG cable, your voltage drop will be 0.02 VDC<br />
(multiplied by 20, you get a total voltage drop of 0.4 VDC).<br />
This illustrates that at 10 ft. away from the battery and<br />
with large cables, you can expect voltage drop. Again,<br />
try to keep cable length to a minimum and use the<br />
maximum gauge cable possible. <strong>Xantrex</strong> recommends<br />
the following cables for optimum inverter performance<br />
(apply to both 120 V and 230 V versions).<br />
<strong>1000</strong>/12: #0 AWG or 55 mm 2<br />
<strong>1000</strong>/24: #6 AWG or 13 mm 2<br />
<strong>1800</strong>/12: #4/0 AWG or 110 mm 2<br />
<strong>1800</strong>/24: #2 AWG or 34 mm 2<br />
Also, use only high quality copper wiring and keep cable<br />
length short, a maximum of 3–6 ft.<br />
<strong>Xantrex</strong>, in researching the requirements for inverter use<br />
in different markets, provides the following table that<br />
outlines the minimum DC cable size and maximum fuse/<br />
breaker size allowed by different regulatory bodies<br />
English 7
in the U.S. There may be other codes and regulations<br />
applicable to your installation:<br />
Marine<br />
Installation<br />
(1)<br />
RV<br />
Installation<br />
(2)<br />
Residential<br />
Installation<br />
(3)<br />
Model<br />
Wire<br />
AWG<br />
Fuse<br />
(A)<br />
Wire<br />
AWG<br />
Fuse<br />
(A)<br />
Wire<br />
AWG<br />
Fuse<br />
(A)<br />
<strong>1000</strong> 12 V<br />
<strong>1000</strong>i<br />
12 V<br />
# 4 17<br />
5 # 4 15<br />
0 # 1 15 0<br />
<strong>1000</strong> 24 V<br />
<strong>1000</strong>i<br />
24 V<br />
# 8 90<br />
# 8 90<br />
# 6 7 0<br />
<strong>1800</strong> 12 V<br />
<strong>1800</strong>i<br />
12 V<br />
# 1 30<br />
0 # 1 22<br />
5 4/<br />
0 25 0<br />
<strong>1800</strong> 24 V<br />
<strong>1800</strong>i<br />
24 V<br />
# 6 10<br />
0 # 4 15<br />
0 # 2 12 5<br />
1 Based on ABYC Recommended Practice E-9, 75°C wire<br />
2 Based on NFPA 70, Article 551, 90°C wire<br />
3 Based on NFPA 70, Article 240 and 310, 75°C wire<br />
Table 4. DC wire sizes and inline fuse requirements<br />
CAUTION<br />
Clean battery terminals before making<br />
connections. Wear eye protection to keep<br />
corrosion from coming in contact with eyes.<br />
To make DC wiring connections:<br />
1. Before making any connections, route the positive<br />
and negative battery cables directly to the DC<br />
connection terminals on the <strong>Sine</strong> W<strong>ave</strong> Inverter. Slide<br />
the plastic terminal connector covers (boots) over<br />
the positive and negative cables (the red boot slides<br />
on the positive cable and the black boot slides on the<br />
negative cable). Do not route the cables through an<br />
electrical distribution panel, battery isolator, or other<br />
device that will add additional voltage drops except<br />
for the required fuse or breaker on the positive<br />
battery terminal. Install the inverter so that the<br />
battery wire length is as short as possible. The<br />
connectors on the <strong>Sine</strong> W<strong>ave</strong> Inverter are designed<br />
8 English<br />
to fit up to 250 MCM crimp-on ring terminals (either<br />
AMP or ILSCO) or box connectors (these tighten<br />
on connected cable using a set screw). Note, the<br />
coloured terminal covers (boots) fit much better with<br />
crimp-on ring terminals, and these are recommended<br />
over the box connectors.<br />
2. Neatly cut the cables to the correct length and strip<br />
enough insulation to properly install the ring<br />
terminals or connectors. Attach the terminals to both<br />
cables using the crimp tool recommended by the<br />
manufacturer of the ring terminals. There must be<br />
no stray wire strands protruding from the terminal.<br />
Connect the terminal on the positive cable to the<br />
positive battery connector (stud) on the inverter<br />
and tighten with a wrench to a torque of 9–10 ft-lbs<br />
(11.7–13 Nm). Test that the cable is secure and is<br />
connected to the correct positive terminal.<br />
3. An inline fuse between the <strong>Sine</strong> W<strong>ave</strong> Inverter and<br />
the battery is required by regulations for all<br />
installations. Again, refer to Table 4 for examples of<br />
correct fuse sizing for some regulations. This fuse<br />
protects your battery and wiring in case of an<br />
accidental short circuit during installation of the<br />
inverter or later damage to the wiring. The fuse and<br />
fuse holder need to be installed in the positive side<br />
of the DC circuit, as close as possible to the batteries<br />
and within the distance specified by the applicable<br />
installation code. Ensure all other power and ground<br />
connections h<strong>ave</strong> been made to the <strong>Sine</strong> W<strong>ave</strong><br />
Inverter before connecting the DC cables to the<br />
batteries.<br />
4. Connect the cable from the POSITIVE connector on<br />
the <strong>Sine</strong> W<strong>ave</strong> Inverter to the POSITIVE (POS +)<br />
terminal on the fuseholder. Observe the polarities<br />
carefully while performing the installation and do<br />
not reverse the polarities. Route both cables before<br />
making any connections.<br />
Figure 4. Battery Connections<br />
CAUTION<br />
An inadvertent reverse polarity connection<br />
may cause damage to the <strong>Sine</strong> W<strong>ave</strong><br />
Inverter and it will require servicing (internal<br />
fuse will open). Before making the final DC<br />
connection, observe polarities to ensure<br />
that the wiring is correct.<br />
5. Connect the DC NEGATIVE cable to the<br />
NEGATIVE (NEG -) terminal on the battery. Next,<br />
connect the cable to the negative terminal on the<br />
inverter. The connection to the negative terminal of<br />
the <strong>Sine</strong> W<strong>ave</strong> Inverter should be the last connection<br />
made. A spark when making this final connection<br />
is normal.<br />
WARNING<br />
Make sure all the DC connections are tight<br />
(torque to 9–10 ft-lbs, 11.7–13Nm). Loose<br />
connections will overheat and could result<br />
in a potential fire hazard.<br />
6. For residential installations, a DC wiring enclosure<br />
is required to cover the DC connections. Contact<br />
<strong>Xantrex</strong> or your distributor for this part. For nonresidential<br />
installations, slide the rubber terminal<br />
boot covers up the cable and over the terminal<br />
connections.<br />
<strong>Xantrex</strong> <strong>Sine</strong> W<strong>ave</strong> Inverter Owner’s <strong>Manual</strong>
DC Grounding:<br />
The <strong>Sine</strong> W<strong>ave</strong> Inverter has a lug on the rear panel labeled<br />
Chassis Ground. This lug is used to connect the chassis<br />
of the inverter to your DC ground as is required by<br />
regulations for some installations. Depending on where<br />
the <strong>Sine</strong> W<strong>ave</strong> Inverter is installed, follow the<br />
instructions below that correspond to your installation<br />
location.<br />
Recreational<br />
Vehicle<br />
Installations<br />
Use #8 AWG or larger copper wire (green if<br />
insulated) and secure it to the chassis<br />
ground lug as well as the grounding point in<br />
your vehicle (usually the chassis).*<br />
Marine<br />
Vessel<br />
Installations<br />
ABYC's recommended practices require<br />
that the chassis ground wire h<strong>ave</strong> the same<br />
current carrying capacity (ampacity) as the<br />
DC input cables. Using 90°C wire, the<br />
following wire sizes meet this requirement.**<br />
M odel Wire Size (AWG )<br />
<strong>1000</strong>/12<br />
V<br />
# 6<br />
<strong>1000</strong>/24<br />
V<br />
#1 0<br />
<strong>1800</strong>/12<br />
V<br />
# 2<br />
<strong>1800</strong>/24<br />
V<br />
# 6<br />
Residential<br />
Installations<br />
The chassis of the <strong>Sine</strong> W<strong>ave</strong><br />
Inverter must<br />
be connected to the system's DC grounding<br />
point. Use copper wire and secure it to the<br />
chassis ground lug and your DC ground<br />
point.***<br />
M odel Wire Size (AWG )<br />
<strong>1000</strong>/12<br />
V<br />
# 6<br />
<strong>1000</strong>/24<br />
V<br />
# 8<br />
<strong>1800</strong>/12<br />
V<br />
# 4<br />
<strong>1800</strong>/24<br />
V<br />
# 6<br />
*<br />
Based on NFPA 70, article 551-20(c)<br />
** Based on ABYC A-25 and E-9<br />
*** Based on NFPA 70, article 250-122 and 690-45<br />
<strong>Xantrex</strong> <strong>Sine</strong> W<strong>ave</strong> Inverter Owner’s <strong>Manual</strong><br />
3. <strong>Sine</strong> W<strong>ave</strong> Inverter Operation<br />
This section details how the unit functions as an inverter,<br />
provides information on the control panel, and describes<br />
operating limits for inverter operation.<br />
3.1 Principles of Operation<br />
The <strong>Sine</strong> W<strong>ave</strong> Inverter converts power from the batteries<br />
in two stages. The first stage is a DC-to-DC converter,<br />
used to raise the low voltage DC input to high voltage<br />
DC. The second stage is the actual inverter stage, taking<br />
the high voltage DC and converting it to a precise, true<br />
sine w<strong>ave</strong> AC output.<br />
The DC-to-DC converter stage uses modern high<br />
frequency power conversion technology that eliminates<br />
the bulky, low frequency (50/60 Hz) based transformers<br />
found in inverters using older technology. The inverter<br />
stage uses advanced power semiconductors that provide<br />
excellent overload capabilities.<br />
Figure 5. Principles of Operation<br />
3.2 Output W<strong>ave</strong>form<br />
The AC output w<strong>ave</strong>form of the <strong>Sine</strong> W<strong>ave</strong> Inverter is a<br />
“true sine w<strong>ave</strong>” with typically 1% Total Harmonic<br />
Distortion (THD). Figure 6 illustrates the output<br />
w<strong>ave</strong>form from the inverter. This w<strong>ave</strong>form is nearly<br />
identical to your utility-supplied power and in some<br />
cases where utility power is poor, the <strong>Sine</strong> W<strong>ave</strong> Inverter<br />
delivers cleaner, more precise AC power.<br />
Figure 6. True sine w<strong>ave</strong> output<br />
(120 V AC Model)<br />
There are many advantages of true sine w<strong>ave</strong> over other<br />
w<strong>ave</strong> forms delivered by other inverters:<br />
• AC powered equipment is designed to operate with<br />
true sine w<strong>ave</strong>. Many loads will perform better when<br />
connected to the <strong>Sine</strong> W<strong>ave</strong> Inverter.<br />
• motor loads start easier<br />
• reduced stress on surge protection circuitry within<br />
the equipment means potentially longer equipment life<br />
Many advantages of true sine w<strong>ave</strong> are also due to the<br />
absence of the sharp-rising edges of w<strong>ave</strong>forms prevalent<br />
in either modified sine w<strong>ave</strong> or square w<strong>ave</strong> inverters.<br />
Some of these advantages are:<br />
• reduced interference in audio or electronic<br />
equipment, especially those that use less complex<br />
internal power supplies<br />
• significantly reduced in-rush current into capacitive<br />
loads and reduced stress on the output devices of<br />
the inverter, potentially lengthening equipment life<br />
• motor loads generally operate cooler and quieter<br />
without the extra harmonic distortion generated by<br />
a modified sine w<strong>ave</strong>.<br />
English 9
3.3 Control Panel<br />
WARNING<br />
Review the Important Safety Instructions<br />
found at the beginning of this guide before<br />
operating the <strong>Sine</strong> W<strong>ave</strong> Inverter.<br />
Once the <strong>Xantrex</strong> <strong>Sine</strong> W<strong>ave</strong> Inverter is properly installed<br />
and connected to batteries, it is ready to begin delivering<br />
AC power to your loads. The control panel is the<br />
interface between you and the inverter. This section<br />
describes the features of this panel and is followed by<br />
other sections that contain inverter operating<br />
information.<br />
Figure 7. Control Panel<br />
1. INVERTER /I: this switch turns the <strong>Sine</strong> W<strong>ave</strong><br />
Inverter either ON (I) or to BYPASS-state (). It is also<br />
used to enable or disable POWERSAVE mode during the<br />
power-up sequence. When in the () position, models<br />
equipped with a transfer relay will be in the BYPASS<br />
mode, where incoming AC power is passed through to<br />
the load. The switch controls the output of the inverter<br />
with models equipped with AC outlets and does not<br />
control the output on hardwire units equipped with the<br />
transfer relay option.<br />
10 English<br />
2. LIQUID CRYSTAL DISPLAY (LCD): displays<br />
input current from the battery and battery voltage<br />
numerically. A multi-segment bar graph displays actual<br />
output power in watts from the inverter when a load is<br />
being operated.<br />
3. MULTI-POSITION MOUNT: the control panel is<br />
designed so it can be removed and re-attached to the<br />
chassis in 90° increments depending on the mounting<br />
orientation of the inverter itself. The panel can also<br />
be removed entirely from the unit and mounted remotely,<br />
with the purchase of the optional Interface Panel.<br />
4. FAULT CONDITION DISPLAY: should a fault<br />
occur, the error will immediately be displayed. An audible<br />
alarm sounds and the back-lighting of the display<br />
will flash to draw attention to the fault condition (see<br />
Section 5.1).<br />
To operate the <strong>Sine</strong> W<strong>ave</strong> Inverter:<br />
1. Turn the unit ON by moving the rocker switch on the<br />
control panel to (I) position. The following information<br />
will be displayed (upon each power-up), identifying the<br />
type and configuration of your <strong>Sine</strong> W<strong>ave</strong> Inverter:<br />
• Model number (<strong>1000</strong> or <strong>1800</strong> watt)<br />
• Input Voltage, Output Voltage and Frequency<br />
configuration<br />
• POWERSAVE mode OFF (factory set default)<br />
Following the display of this information, the control<br />
panel then defaults to the standard display information<br />
of input voltage, input current and output power. When<br />
a load is connected, the output power (watts) is displayed<br />
in bar-graph form.<br />
Figure 8. Control Panel Screen Sequence<br />
Once the standard display screen is shown, the <strong>Sine</strong><br />
W<strong>ave</strong> Inverter is ready to deliver AC power to your<br />
loads. You can now plug in a load to the front outlet of<br />
the unit, or, for those hardwire versions, into an outlet<br />
connected to the AC output of the inverter. The loads<br />
should operate from the inverter as they would from<br />
utility power. Section 3.5 explains the operating limits<br />
for the <strong>Sine</strong> W<strong>ave</strong> Inverter.<br />
3.4 <strong>Sine</strong> W<strong>ave</strong> POWERSAVE Mode<br />
Your <strong>Xantrex</strong> <strong>Sine</strong> W<strong>ave</strong> Inverter has a function mode<br />
called POWERSAVE. This “sleep” mode shuts off much<br />
of the power control circuitry of the inverter as well as<br />
the display back-lighting, reducing the stand-by current<br />
draw considerably. With this mode enabled, the unit<br />
draws approx. 1.5 W while powered up but with no<br />
load on the inverter. The <strong>Sine</strong> W<strong>ave</strong> Inverter detects the<br />
presence of a load by sending out pulses approximately<br />
once every 2.5 seconds. Full output power is available<br />
with the detection of a load. The unit will remain in<br />
POWERSAVE mode if the load it detects is less than<br />
10 W for the <strong>1000</strong> model and less than 20 W for the<br />
<strong>1800</strong> model. This is a factory set search mode setting<br />
and cannot be changed.<br />
You would want to enable POWERSAVE mode if the<br />
inverter is only being used periodically to power loads.<br />
This allows the inverter to draw less power from the<br />
batteries during non-use periods. If the inverter is being<br />
used frequently and your batteries are being recharged<br />
during inverter use (e.g. vehicle alternator), or soon after<br />
inverter use, you can le<strong>ave</strong> POWERSAVE disabled.<br />
Your inverter is factory default set to POWERSAVE<br />
OFF. To enable the POWERSAVE mode, follow these<br />
steps:<br />
1. Turn the Control Panel switch to () position<br />
2. Switch the unit back to (I) position. You will see the<br />
power-up information sequence being displayed as<br />
described previously.<br />
3. When the Control Panel displays “POWERSAVE<br />
OFF” turn the switch to () position, wait for<br />
<strong>Xantrex</strong> <strong>Sine</strong> W<strong>ave</strong> Inverter Owner’s <strong>Manual</strong>
approximately three seconds, and then turn the<br />
switch back to (I) position. “POWERSAVE ON”<br />
will now be displayed during the start-up sequence<br />
and when the normal state display appears, a small<br />
pointer will be visible, indicating POWERSAVE mode<br />
is enabled. Repeat the same procedure for disabling<br />
POWERSAVE mode.<br />
3.5 Inverter Operating Limits and<br />
Protection Features<br />
Power Output: The <strong>Sine</strong> W<strong>ave</strong> <strong>1000</strong> Inverter will<br />
continuously deliver <strong>1000</strong> watts and the <strong>Sine</strong> W<strong>ave</strong> <strong>1800</strong><br />
delivers <strong>1800</strong> watts continuously. The following table<br />
displays the continuous and peak current ratings as well<br />
as surge rating, depending on the model:<br />
Surge Rating<br />
Continuous AC Peak AC<br />
(max. watts<br />
Output Current Output Current<br />
delivered for 5<br />
Rating Rating<br />
Model<br />
seconds)<br />
1 000 8.3<br />
A 25<br />
A<br />
150 0<br />
1 800 15<br />
A<br />
45<br />
A<br />
290 0<br />
1 000i 4.3<br />
A<br />
11<br />
A<br />
150 0<br />
1 800i 7.8<br />
A 20<br />
A<br />
290 0<br />
Each unit above will be able to operate all AC loads<br />
rated at or below these power ratings. Some highhorsepower<br />
induction motors used in pumps and other<br />
motor-operated equipment require very high surge<br />
currents to start and the <strong>Sine</strong> W<strong>ave</strong> Inverter/battery<br />
combination may h<strong>ave</strong> difficulty starting these loads. If<br />
you h<strong>ave</strong> problems with certain loads, ensure that battery<br />
connections are solid, your DC cables are appropriately<br />
sized, and that the battery is of sufficient capacity and<br />
fully charged.<br />
Input Voltage: The <strong>Sine</strong> W<strong>ave</strong> Inverter operates from<br />
an input voltage ranging from:<br />
10 to 16 VDC for 12 V models<br />
20 to 32 VDC for 24 V models<br />
<strong>Xantrex</strong> <strong>Sine</strong> W<strong>ave</strong> Inverter Owner’s <strong>Manual</strong><br />
Peak performance for these inverters occurs when DC<br />
input voltage is in the range of 12 volts to 15 volts for<br />
12 V models and 24 volts to 30 volts for 24 V models.<br />
The <strong>Sine</strong> W<strong>ave</strong> Inverter will indicate high and low DC<br />
voltage conditions as follows:<br />
Model<br />
DC Input DC Input DC Input DC Input<br />
over over under under<br />
voltage voltage voltage voltage<br />
alarm shut down alarm shut down<br />
12 V<br />
15.8<br />
VDC 16.0<br />
VD C 10.5<br />
VD C 10.0 VD C<br />
models<br />
24 V<br />
31.6<br />
VDC 32.0<br />
VD C 21.0<br />
VD C 20.0 VD C<br />
models<br />
The over-voltage protection and shutdown protects the<br />
inverter against excessive input voltage, should the unit<br />
be connected to a higher voltage than it is designed for<br />
(up to 35VDC—higher voltages may cause damage).<br />
Low input voltage shutdown protects your battery from<br />
being over-discharged. The inverter requires a manual<br />
reset to re-start after shutdown from either high or low<br />
input voltage. Turn the power switch to () and then<br />
back to (I) to re-start the unit.<br />
Output Overload Protection: A short circuit may be<br />
applied to the output continuously without damage to<br />
any internal components. The <strong>Sine</strong> W<strong>ave</strong> Inverter will<br />
shut down in less than five seconds when the output<br />
falls 10% below the nominal voltage as a result of current<br />
limiting.<br />
AC Backfeed Protection: Although the <strong>Sine</strong> W<strong>ave</strong><br />
Inverter has been designed to withstand incoming AC at<br />
the AC output, this is only a safeguard and continuous<br />
AC backfeed could lead to inverter damage. Avoid inverter<br />
damage by double checking the AC input and output<br />
wiring on hardwire configured models before applying<br />
power and by understanding your source of AC and<br />
where power from the source leads to (e.g. do not plug a<br />
live extension cord into the AC outlet of the inverter).<br />
Input Reverse Polarity Protection: The internal<br />
circuitry of the <strong>Sine</strong> W<strong>ave</strong> Inverter is protected by an<br />
internal, 32 V, fast-blow fuse as follows:<br />
Model<br />
Mfg & Mode l<br />
<strong>1000</strong> - 24 V<br />
<strong>1000</strong>i - 24 V<br />
Littelfuse/Gould CNN80 or<br />
Bussmann ANN80 rated 80 A<br />
<strong>1800</strong> - 12 V<br />
<strong>1800</strong>i - 12 V<br />
Littelfuse Mega 225 A<br />
All<br />
others Littelfuse Mega 125 A<br />
This fuse is only replaceable by qualified service<br />
personnel. In many reverse polarity conditions, this fuse<br />
will protect internal circuits, however, certain high<br />
voltage/current situations may cause internal damage.<br />
4. Testing<br />
The following simple test procedure should ensure that<br />
the inverter is connected and installed properly.<br />
To test the <strong>Sine</strong> W<strong>ave</strong> Inverter:<br />
1. Double check all wiring terminals on the inverter to<br />
observe correct polarity and secure connections.<br />
2. Turn rocker switch to (I) position.<br />
3. Observe the power-up sequence on the display. The<br />
normal-state inverter display of input current and<br />
input voltage should come up.<br />
4. Plug a test load (e.g. a light bulb) into the outlet of<br />
the <strong>Sine</strong> W<strong>ave</strong> Inverter. The load should function<br />
normally. Observe the output power bar graph—it<br />
should increase with load demand.<br />
5. For hardwire and transfer relay-equipped versions,<br />
plug a load into the AC output leg of the inverter<br />
while input AC is available. Remove input AC. The<br />
load should still operate normally. Replace the source<br />
AC input power and again, the load should operate<br />
normally, indicating proper installation and function<br />
of the transfer relay.<br />
6. Repeat test 4 or 5 with the inverter in<br />
“POWERSAVE” mode.<br />
7. The <strong>Sine</strong> W<strong>ave</strong> Inverter is now ready for operation.<br />
English 11
5. Troubleshooting Guide<br />
WARNING<br />
Do not open or disassemble the <strong>Sine</strong> W<strong>ave</strong> Inverter. See Section 6 for instructions on obtaining service for the inverter. Attempting to service the unit yourself may result<br />
in a risk of electrical shock or fire.<br />
This section describes potential installation and configuration problems and solutions, including fault conditions and indicators.<br />
5.1 Fault Conditions and Indicators<br />
The following fault conditions are displayed on the control panel along with an alarm sound and blinking LCD back-light.<br />
Control<br />
Panel Indication<br />
F ault Conditio n<br />
Solutio n<br />
HIGH BATT SHUTDOWN B attery voltage too hig h<br />
C heck for fault with battery charging system. <strong>Manual</strong>ly reset inverter by turning switch t o ( ) then to ( I ) again .<br />
LOW BATT SHUTDOWN B attery voltage too lo w<br />
C harge battery. <strong>Manual</strong>ly reset inverter by turning switch to ( ) then to ( I ) again .<br />
OVERLOAD SHUTDOWN Battery current too high, probable A C<br />
overload<br />
Reduce load on inverter.<br />
OVERTEMP SHUTDOWN S ystem over-temperatur e<br />
Improve ventilation and cooling and/or reduce load on inverter .<br />
SYSTEM SHUTDOWN<br />
PS_FAULT SHUTDOWN<br />
DC-DC SHUTDOWN<br />
O verload or system hardware fault E nsure all loads are disconnected Try to reset inverter by switching t o ( ) and then to ( I ). If unit still does no t<br />
operate contact your distributor/merchant/retailer or <strong>Xantrex</strong> for service/warranty replacement.<br />
The table below provides some troubleshooting tips:<br />
P roblems and Symptoms<br />
Possible<br />
Caus e<br />
Solutio n<br />
No output voltage and control panel reading 10.0 VDC or lower<br />
(20.4 VDC on 24 V models).<br />
L ow input voltage shutdown.<br />
Recharge battery, check connections and cable .<br />
N o output voltage, no voltage indication.<br />
I nverter switched to ( ) .<br />
T urn Inverter power switch to ( I ) .<br />
No battery power to inverter.<br />
Check wiring to Inverter. Check battery fuse.<br />
Reverse DC polarity connection<br />
—internal fuse open.<br />
H<strong>ave</strong> qualified service technician check and<br />
replace fuse (correct<br />
replacement fuse noted on inside of unit). Observe correct polarity.<br />
No output voltage and control panel reading 16.0 VDC or higher<br />
(32.0 VDC on 24 V models).<br />
H igh input voltage shutdown.<br />
Make sure the Inverter is connected to correct battery voltag e<br />
Check regulation of charging system.<br />
Low battery warning on all the time. Voltage indicator below<br />
11.0 VDC (22.0 VDC on 24 V models).<br />
Poor DC wiring.<br />
Poor battery condition.<br />
Use proper cable and make solid connections.<br />
Charge battery or use new battery.<br />
12 English<br />
<strong>Xantrex</strong> <strong>Sine</strong> W<strong>ave</strong> Inverter Owner’s <strong>Manual</strong>
6. Warranty<br />
What does this warranty cover? This Limited Warranty is provided by <strong>Xantrex</strong><br />
Technology, Inc. (“<strong>Xantrex</strong>”) and covers defects in workmanship and materials<br />
in your <strong>Xantrex</strong> <strong>Sine</strong> W<strong>ave</strong> Inverter <strong>1000</strong>/<strong>1800</strong>. This warranty lasts for a Warranty<br />
Period of 24 months from the date of purchase at point of sale to you, the original<br />
end user customer.<br />
What will <strong>Xantrex</strong> do? <strong>Xantrex</strong> will, at its option, repair or replace the defective<br />
product free of charge, provided that you notify <strong>Xantrex</strong> of the product defect<br />
within the Warranty Period, and provided that <strong>Xantrex</strong> through inspection establishes<br />
the existence of such a defect and that it is covered by this Limited Warranty.<br />
<strong>Xantrex</strong> will, at its option, use new and/or reconditioned parts in performing warranty<br />
repair and building replacement products. <strong>Xantrex</strong> reserves the right to use parts<br />
or products of original or improved design in the repair or replacement. If <strong>Xantrex</strong><br />
repairs or replaces a product, its warranty continues for the remaining portion of<br />
the original Warranty Period or 90 days from the date of the return shipment to the<br />
customer, whichever is greater. All replaced products and all parts removed from<br />
repaired products become the property of <strong>Xantrex</strong>.<br />
<strong>Xantrex</strong> covers both parts and labor necessary to repair the product, and return<br />
shipment to the customer via a <strong>Xantrex</strong>-selected non-expedited surface freight<br />
within the contiguous United States and Canada. Alaska and Hawaii are excluded.<br />
Contact <strong>Xantrex</strong> Customer Service for details on freight policy for return shipments<br />
outside of the contiguous United States and Canada.<br />
How do you get service? If your product requires troubleshooting or warranty<br />
service, contact your merchant. If you are unable to contact your merchant, or<br />
the merchant is unable to provide service, contact <strong>Xantrex</strong> directly at:<br />
Phone: 1-800-670-0707 (toll-free in North America), 1-360-925-5097 (direct)<br />
Fax: 1-360-925-5143<br />
Email: CustomerService@xantrex.com<br />
Direct returns may be performed according to the <strong>Xantrex</strong> Return Material<br />
Authorization Policy described in your product manual. For some products, <strong>Xantrex</strong><br />
maintains a network of regional Authorized Service Centers. Call <strong>Xantrex</strong> or check<br />
our website to see if your product can be repaired at one of these facilities.<br />
In any warranty claim, dated proof of purchase must accompany the product and<br />
the product must not h<strong>ave</strong> been disassembled or modified without prior written<br />
authorization by <strong>Xantrex</strong>.<br />
Proof of purchase may be in any one of the following forms:<br />
• The dated purchase receipt from the original purchase of the product at<br />
point of sale to the end user, or<br />
• The dated dealer invoice or purchase receipt showing original equipment<br />
manufacturer (OEM) status, or<br />
• The dated invoice or purchase receipt showing the product exchanged<br />
under warranty<br />
What does this warranty not cover? This Limited Warranty does not cover normal<br />
wear and tear of the product or costs related to the removal, installation, or<br />
troubleshooting of the customer’s electrical systems. This warranty does not apply<br />
to and <strong>Xantrex</strong> will not be responsible for any defect in or damage to:<br />
a) the product if it has been misused, neglected, improperly installed, physically<br />
damaged or altered, either internally or externally, or damaged from improper<br />
use or use in an unsuitable environment;<br />
<strong>Xantrex</strong> <strong>Sine</strong> W<strong>ave</strong> Inverter Owner’s <strong>Manual</strong><br />
b) the product if it has been subjected to fire, water, generalized corrosion,<br />
biological infestations, or input voltage that creates operating conditions<br />
beyond the maximum or minimum limits listed in the <strong>Xantrex</strong> product<br />
specifications including high input voltage from generators and lightning<br />
strikes;<br />
c) the product if repairs h<strong>ave</strong> been done to it other than by <strong>Xantrex</strong> or its<br />
authorized service centers (hereafter “ASCs”);<br />
d) the product if it is used as a component part of a product expressly warranted<br />
by another manufacturer;<br />
e) the product if its original identification (trade-mark, serial number) markings<br />
h<strong>ave</strong> been defaced, altered, or removed.<br />
Disclaimer<br />
Product<br />
THIS LIMITED WARRANTY IS THE SOLE AND EXCLUSIVE<br />
WARRANTY PROVIDED BY XANTREX IN CONNECTION WITH YOUR<br />
XANTREX PRODUCT AND IS, WHERE PERMITTED BY LAW, IN LIEU<br />
OF ALL OTHER WARRANTIES, CONDITIONS, GUARANTEES,<br />
REPRESENTATIONS, OBLIGATIONS AND LIABILITIES, EXPRESS OR<br />
IMPLIED, STATUTORY OR OTHERWISE IN CONNECTION WITH THE<br />
PRODUCT, HOWEVER ARISING (WHETHER BY CONTRACT, TORT,<br />
NEGLIGENCE, PRINCIPLES OF MANUFACTURER’S LIABILITY,<br />
OPERATION OF LAW, CONDUCT, STATEMENT OR OTHERWISE),<br />
INCLUDING WITHOUT RESTRICTION ANY IMPLIED WARRANTY OR<br />
CONDITION OF QUALITY, MERCHANTABILITY OR FITNESS FOR A<br />
PARTICULAR PURPOSE. ANY IMPLIED WARRANTY OF<br />
MERCHANTABILITY OR FITNESS FOR A PARTICULAR PURPOSE TO<br />
THE EXTENT REQUIRED UNDER APPLICABLE LAW TO APPLY TO<br />
THE PRODUCT SHALL BE LIMITED IN DURATION TO THE PERIOD<br />
STIPULATED UNDER THIS LIMITED WARRANTY.<br />
IN NO EVENT WILL XANTREX BE LIABLE FOR ANY SPECIAL,<br />
DIRECT, INDIRECT, INCIDENTAL OR CONSEQUENTIAL DAMAGES,<br />
LOSSES, COSTS OR EXPENSES HOWEVER ARISING WHETHER IN<br />
CONTRACT OR TORT INCLUDING WITHOUT RESTRICTION ANY<br />
ECONOMIC LOSSES OF ANY KIND, ANY LOSS OR DAMAGE TO<br />
PROPERTY, ANY PERSONAL INJURY, ANY DAMAGE OR INJURY<br />
ARISING FROM OR AS A RESULT OF MISUSE OR ABUSE, OR THE<br />
INCORRECT INSTALLATION, INTEGRATION OR OPERATION OF THE<br />
PRODUCT.<br />
Exclusions<br />
If this product is a consumer product, federal law does not allow an exclusion<br />
of implied warranties. To the extent you are entitled to implied warranties under<br />
federal law, to the extent permitted by applicable law they are limited to the<br />
duration of this Limited Warranty. Some states and provinces do not allow<br />
limitations or exclusions on implied warranties or on the duration of an implied<br />
warranty or on the limitation or exclusion of incidental or consequential<br />
damages, so the above limitation(s) or exclusion(s) may not apply to you. This<br />
Limited Warranty gives you specific legal rights. You may h<strong>ave</strong> other rights<br />
which may vary from state to state or province to province.<br />
Warning: Limitations On Use<br />
Please refer to your product user manual for limitations on uses of the product.<br />
Specifically, please note that the <strong>Xantrex</strong> <strong>Sine</strong> W<strong>ave</strong> Inverter <strong>1000</strong>/<strong>1800</strong> is not<br />
intended for use in connection with life support systems and <strong>Xantrex</strong> makes no<br />
warranty or representation in connection with any use of the product for such<br />
purposes.<br />
Please note that the <strong>Xantrex</strong> <strong>Sine</strong> W<strong>ave</strong> Inverter <strong>1000</strong>/<strong>1800</strong> is not intended for use<br />
as an uninterruptible power supply and <strong>Xantrex</strong> makes no warranty or representation<br />
in connection with any use of the product for such purposes.<br />
Return Material Authorization Policy<br />
Before returning a product directly to <strong>Xantrex</strong> you must obtain a Return<br />
Material Authorization (RMA) number and the correct factory “Ship To”<br />
address. Products must also be shipped prepaid. Product shipments will be<br />
refused and returned at your expense if they are unauthorized, returned without<br />
an RMA number clearly marked on the outside of the shipping box, if they are<br />
shipped collect, or if they are shipped to the wrong location.<br />
When you contact <strong>Xantrex</strong> to obtain service, please h<strong>ave</strong> your instruction manual<br />
ready for reference and be prepared to supply:<br />
• The serial number of your product<br />
• Information about the installation and use of the unit<br />
• Information about the failure and/or reason for the return<br />
• A copy of your dated proof of purchase<br />
Return Procedure<br />
1. Package the unit safely, preferably using the original box and packing<br />
materials. Please ensure that your product is shipped fully insured in the<br />
original packaging or equivalent. This warranty will not apply where the<br />
product is damaged due to improper packaging.<br />
2. Include the following:<br />
• The RMA number supplied by <strong>Xantrex</strong> Technology Inc clearly marked on<br />
the outside of the box.<br />
• A return address where the unit can be shipped. Post office boxes are not<br />
acceptable.<br />
• A contact telephone number where you can be reached during work hours<br />
• A brief description of the problem<br />
3. Ship the unit prepaid to the address provided by your <strong>Xantrex</strong> customer<br />
service representative.<br />
If you are returning a product from outside of the USA or Canada In addition<br />
to the above, you MUST include return freight funds and are fully responsible for<br />
all documents, duties, tariffs, and deposits.<br />
If you are returning a product to a <strong>Xantrex</strong> Authorized Service Center (ASC)<br />
A <strong>Xantrex</strong> return material authorization (RMA) number is not required. However,<br />
you must contact the ASC prior to returning the product or presenting the unit to<br />
verify any return procedures that may apply to that particular facility.<br />
English 13
7. Appendices<br />
7.1 Battery Type<br />
This appendix explains some of the differences between the<br />
different lead acid batteries to help you choose a battery<br />
which best suits your needs.<br />
The lead-acid battery which is probably most common is<br />
the starting battery in your automobile. An automotive<br />
starting battery is designed to deliver a large amount of current<br />
for a short period of time (so it can start your engine). Only<br />
a small portion of the battery´s capacity is used when starting<br />
the engine and it is quickly recharged by the running engine.<br />
It is not designed for repeated charge-discharge cycles where<br />
the battery is almost completely discharged and then<br />
recharged. Starting batteries used in this kind of deep discharge<br />
service will wear out rapidly.<br />
Your <strong>Xantrex</strong> <strong>Sine</strong> W<strong>ave</strong> Inverter is designed to be used with<br />
deep-cycle lead acid batteries. These batteries are designed<br />
for deep discharge service where they will be repeatedly<br />
charged and discharged. This type of battery is often labeled<br />
as a marine, recreational vehicle, or golf cart battery. <strong>Xantrex</strong><br />
recommends you use one or more of these batteries separated<br />
from the starting battery of your vehicle or boat with a<br />
battery isolator.<br />
The many different types of deep-cycle lead acid batteries<br />
can be grouped into four categories: flooded (or wet), sealed<br />
flooded (“maintenance free”), recombinant flooded (often<br />
“starved electrolyte”), and gel batteries. The table that follows<br />
summarizes these battery types, identifying features,<br />
advantages and disadvantages.<br />
FLOODED BATTERIES:<br />
TROJAN: Golf Cart, Superior, Pacer<br />
WEST MARINE: Sea Volt<br />
MOTOMASTER: Nautilus<br />
IDENTIFYING FEATURES:<br />
Vents which can be removed to fill the battery with water.<br />
Low price and higher maintenance.<br />
ADVANTAGES:<br />
More resistant to over-charging since they can be filled with<br />
water. Cheaper than other batteries.<br />
DISADVANTAGES:<br />
Must be filled with DISTILLED water and usually require<br />
equalization. Maintenance required.<br />
SEALED FLOODED BATTERIES:<br />
DELCO: Voyager<br />
IDENTIFYING FEATURES:<br />
Vents which look like they are removable but are not. Sold<br />
as “Maintenance Free” at attractive prices.<br />
ADVANTAGES:<br />
Less maintenance required than Flooded. No need to fill<br />
with water. Less expensive.<br />
DISADVANTAGES:<br />
Less resistant to over-charging because they consume water<br />
but cannot be refilled.<br />
RECOMBINANT FLOODED (SEALED)<br />
BATTERIES:<br />
HAWKER ENERGY: Genesis<br />
OPTIMA: Yellow Top<br />
GNB INDUSTRIAL: Evolyte<br />
IDENTIFYING FEATURES:<br />
Vents are often concealed. Sold using the following phrases:<br />
Recombinant, Valve Regulated, Maintenance Free, Starved<br />
Electrolyte.<br />
ADVANTAGES:<br />
Require no maintenance. Non-spillable<br />
DISADVANTAGES:<br />
Can be damaged by equalization. Generally more expensive.<br />
GEL SEALED BATTERIES:<br />
SONNENSCHEIN: Prevailer<br />
WEST MARINE: SeaGel<br />
IDENTIFYING FEATURES:<br />
Sold as either “Gel” or “Gelled Electrolyte” batteries.<br />
ADVANTAGES:<br />
Require no maintenance. Often can be used on their side.<br />
Non-spillable. Low self-discharge. Less damage from being<br />
left discharged.<br />
DISADVANTAGES:<br />
Damaged by equalization. Generally more expensive.<br />
14 English <strong>Xantrex</strong> <strong>Sine</strong> W<strong>ave</strong> Inverter Owner’s <strong>Manual</strong>
7.2 Battery Size<br />
Just as important as the type of battery selected for use<br />
with your <strong>Xantrex</strong> <strong>Sine</strong> W<strong>ave</strong> Inverter is the subject of<br />
battery size (capacity). There are a number of different<br />
standards for rating battery capacity. Automotive<br />
starting batteries are normally rated by cranking amps.<br />
This is not a relevant rating for continuous use. Deep<br />
cycle batteries are rated either by reserve capacity in<br />
minutes or by amp-hours.<br />
Battery reserve capacity is a measure of how long a<br />
battery can deliver a certain amount of current—usually<br />
25 amps. For example, a battery with a reserve capacity<br />
of 180 minutes can deliver 25 amps for 180 minutes<br />
before it is completely discharged.<br />
Amp-hour capacity is a measure of how many amps a<br />
battery can deliver for a specified length of time—usually<br />
20 hours. For example, a typical marine or RV battery<br />
rated for 100 amp hours can deliver 5 amps for 20 hours.<br />
(5 amps x 20 hours = 100 amp hours)<br />
You can expect performance from the inverter to suffer<br />
with the use of a small, low amp-hour rated battery (for<br />
example, 50 Ah). Even if your battery is in excellent<br />
shape and fully charged you will likely experience<br />
poor surge power performance and unsatisfactory<br />
operating time with anything but a small AC load.<br />
<strong>Xantrex</strong> recommends a minimum battery size of 200 Ah<br />
for moderate loads (less than <strong>1000</strong> W) and greater than<br />
400 Ah for heavy loads.<br />
To determine how large a battery or battery bank you<br />
require for equipment running from the inverter, simply<br />
add together the power requirements for all electrical<br />
devices that you will be running multiplied by their<br />
approximate running times in hours between battery<br />
recharges. Each device will be rated in either watts, volts<br />
and amps, or VA. For this calculation, all three of these<br />
ratings are equivalent (i.e. volts x amps = watts = VA).<br />
The following example, based on battery recharging<br />
every three days, illustrates the calculation:<br />
<strong>Xantrex</strong> <strong>Sine</strong> W<strong>ave</strong> Inverter Owner’s <strong>Manual</strong><br />
Load<br />
Power<br />
Consumption<br />
O perating Time att hour s<br />
W<br />
1<br />
TV & VCR 15 W<br />
1 3 hr s<br />
(1 hr per day)<br />
345<br />
Coffee<br />
Maker<br />
750<br />
W<br />
1 h r<br />
(20 min. per day)<br />
750<br />
Microw<strong>ave</strong><br />
Oven<br />
800<br />
W 0.5 hr s<br />
(10 min. per day)<br />
400<br />
TOTAL<br />
149 5<br />
English 15
8. Performance Graphs<br />
8.1 Power Derating Curve<br />
As with all inverters, the amount of continuous power<br />
that the <strong>Xantrex</strong> <strong>Sine</strong> W<strong>ave</strong> Inverters can deliver without<br />
overheating is limited by ambient (surrounding air)<br />
temperature. The following “Power Derating Curve vs.<br />
Temperature” illustrates the relationship between power<br />
output and ambient temperature.<br />
Operating the unit above this temperature will result in<br />
thermal shutdown or decreased performance. At input<br />
voltages less than 12 V or 24 V, the unit runs warmer<br />
which will cause thermal shutdowns at temperatures<br />
below these ambient temperature guidelines.<br />
Operating the unit in conditions outside the power and<br />
temperature limits (above and to the right of the derating<br />
curves) will result in thermal shutdown and/or<br />
significantly decreased performance. In addition,<br />
operation in this range is outside of the ratings covered<br />
by the product’s regulatory approvals.<br />
16 English <strong>Xantrex</strong> <strong>Sine</strong> W<strong>ave</strong> Inverter Owner’s <strong>Manual</strong>
8.2 Efficiency Curve<br />
The efficiency rating of the <strong>Xantrex</strong> <strong>Sine</strong> W<strong>ave</strong> Inverter<br />
indicates what percentage of DC power is converted to<br />
usable AC power at given power output levels. The<br />
higher the rating, the less power is lost in the way of<br />
heat from the inverting process. <strong>Xantrex</strong> <strong>Sine</strong> W<strong>ave</strong><br />
Inverters h<strong>ave</strong> an extremely flat efficiency curve over<br />
much of their operating range so less battery power is<br />
wasted, whether operating at low power levels or higher<br />
power levels. The following measurements were<br />
conducted at 12 V and 24 VDC input voltage on 120 V,<br />
60 Hz and 230 V, 50 Hz inverters.<br />
<strong>Xantrex</strong> <strong>Sine</strong> W<strong>ave</strong> Inverter Owner’s <strong>Manual</strong><br />
English 17
/<br />
9. Specifications<br />
<strong>1000</strong><br />
180<br />
0<br />
<strong>1000</strong><br />
i<br />
<strong>1800</strong> i<br />
Continuous<br />
output power<br />
<strong>1000</strong><br />
W<br />
<strong>1800</strong><br />
W<br />
<strong>1000</strong><br />
W<br />
<strong>1800</strong> W<br />
Surge<br />
rating (5 seconds)<br />
1500<br />
W<br />
2900<br />
W<br />
1500<br />
W<br />
2900 W<br />
Peak<br />
output current<br />
25<br />
A<br />
45<br />
A<br />
11<br />
A<br />
20 A<br />
P eak Efficiency<br />
89<br />
%<br />
90<br />
%<br />
90 %<br />
N o load draw, search mode<br />
< 1.5 W<br />
<strong>Xantrex</strong> <strong>Sine</strong> W<strong>ave</strong> Inverter Owner’s <strong>Manual</strong><br />
NOTES<br />
English 19
NOTES<br />
20 English <strong>Xantrex</strong> <strong>Sine</strong> W<strong>ave</strong> Inverter Owner’s <strong>Manual</strong>
Table des matières<br />
Consignes de sécurité importantes ...................................................................................................................................................................................1<br />
1. Introduction ..................................................................................................................................................................................................................2<br />
1.1 Caractéristiques du convertisseur <strong>Sine</strong> W<strong>ave</strong> ......................................................................................................................................................2<br />
2. Installation ...................................................................................................................................................................................................................3<br />
2.1 Exigences pour l’installation ................................................................................................................................................................................3<br />
2.2 Où placer le convertisseur <strong>Sine</strong> W<strong>ave</strong>? ...............................................................................................................................................................3<br />
2.3 Montage du convertisseur ...................................................................................................................................................................................3<br />
2.4 Branchement du convertisseur ............................................................................................................................................................................4<br />
2.4.1 Protection en entrée et sortie ........................................................................................................................................................................................... 4<br />
2.4.2 Branchement en alternatif AC .......................................................................................................................................................................................... 5<br />
2.4.3 Interrupteurs de Circuit pour panne liée à la terre (GFCIs): ............................................................................................................................................ 6<br />
2.4.4. Branchement du courant continu .................................................................................................................................................................................... 6<br />
3. Fonctionnement du convertisseur <strong>Sine</strong> W<strong>ave</strong> ...............................................................................................................................................................8<br />
3.1 Principes de fonctionnement ...............................................................................................................................................................................8<br />
3.2 Sortie sinusoïdale ...............................................................................................................................................................................................8<br />
3.3 Panneau de contrôle ...........................................................................................................................................................................................8<br />
3.4 Fonction POWERSAVE ......................................................................................................................................................................................9<br />
3.5 Limites de fonctionnement et caractéristiques des protections ............................................................................................................................9<br />
4. Test ............................................................................................................................................................................................................................ 10<br />
5. Guide de dépannage .................................................................................................................................................................................................. 11<br />
5.1 Défauts et indicateurs ....................................................................................................................................................................................... 11<br />
6. Garantie ..................................................................................................................................................................................................................... 12<br />
7. Politique d’authorisation de retour .............................................................................................................................................................................. 12<br />
8. Annexe ...................................................................................................................................................................................................................... 13<br />
8.1 Type de batterie ................................................................................................................................................................................................ 13<br />
8.2 Taille de la batterie ............................................................................................................................................................................................ 14<br />
9. Graphiques des performances .................................................................................................................................................................................... 15<br />
9.1 Courbe de perte de puissance en fonction de la température ............................................................................................................................. 15<br />
9.2 Courbe de rendement ....................................................................................................................................................................................... 16<br />
10. Spécifications et performances ............................................................................................................................................................................... 17<br />
Manuel d’instruction du convertisseur <strong>Sine</strong> W<strong>ave</strong><br />
Français
SUPERIOR, PACER sont des marques de TROJAN BATTERY COMPANY<br />
SEAVOLT, SEAGEL sont des marques de WEST MARINE PRODUCTS<br />
VOYAGER est une marque de DELCO-REMY<br />
GENESIS est une marque de GATES ENERGY PRODUCTS (HAWKER ENERGY)<br />
EVOLYTE est une marque de GNB INDUSTRIAL BATTERY CO.<br />
PREVAILER est une marque de SONNENSCHEIN<br />
Français Manuel d’instruction du convertisseur <strong>Sine</strong> W<strong>ave</strong>
Consignes de sécurité importantes<br />
ATTENTION<br />
Avant d’installer et d’utiliser le convertisseur<br />
<strong>Sine</strong> W<strong>ave</strong>, lisez attentivement ces<br />
instructions.<br />
Précautions générales de sécurité :<br />
1. Conservez bien ces instructions. Ce mode d’emploi<br />
contient des informations importantes sur la sécurité<br />
et le fonctionnement du convertisseur <strong>Sine</strong> W<strong>ave</strong>.<br />
2. Ne pas exposer le convertisseur <strong>Sine</strong> W<strong>ave</strong> à la pluie,<br />
la neige, la vapeur, l’eau de la cale ou la poussière.<br />
Pour réduire le risque d’incendie, ne pas couvrir ou<br />
obstruer les bouches de ventilation. Ne pas installer<br />
le convertisseur <strong>Sine</strong> W<strong>ave</strong> dans un lieu confiné. Cela<br />
provoquerait une surchauffe.<br />
3. Ne pas utiliser d’accessoires non recommandés ou<br />
non vendus par <strong>Xantrex</strong>. Cela pourrait provoquer<br />
un incendie, un choc électrique ou blesser quelqu’un.<br />
4. Le convertisseur <strong>Sine</strong> W<strong>ave</strong> a été étudié pour être<br />
connecté en permanence à votre système électrique<br />
continu (et pour les versions bornier à vis, en<br />
permanence à votre système électrique alternatif).<br />
Pour assurer une bonne réalisation du câblage, il<br />
doit être effectué par un technicien agréé ou un<br />
électricien.<br />
5. Pour éviter les risques de chocs électriques, vérifiez<br />
que le câblage électrique existant est en bon état et<br />
que la taille des câbles n’est pas sous-dimensionnée.<br />
Ne pas faire fonctionner le convertisseur <strong>ave</strong>c un<br />
câblage endommagé ou de taille inférieure à celle<br />
recommandée.<br />
6. Ne pas faire fonctionner le convertisseur s’il a reçu<br />
un coup, s’il est tombé ou endommagé. Si le<br />
convertisseur a été endommagé, reportez vous au<br />
Chapitre 7: Service Après Vente de ce manuel.<br />
Manuel d’instruction du convertisseur <strong>Sine</strong> W<strong>ave</strong><br />
7. Ne pas démonter le convertisseur. Pour obtenir des<br />
informations sur le SAV du convertisseur, reportezvous<br />
au Chapitre 7: Service Après Vente de ce<br />
manuel. Essayer de réparer le produit vous-même<br />
pourrait provoquer une électrocution, un incendie et<br />
la perte de la garantie.<br />
8. Pour réduire le risque d’électrocution, déconnectez<br />
la source de courant continu CC (et alternatif AC<br />
pour les versions bornier à vis) du convertisseur<br />
avant de tenter de réparer, nettoyer ou travailler sur<br />
les appareils connectés au convertisseur. L’éteindre<br />
uniquement ne réduira pas le risque.<br />
9. Mise à la terre : le convertisseur <strong>Sine</strong> W<strong>ave</strong> doit être<br />
muni d’un câble conducteur relié à la masse du<br />
véhicule. La mise à la terre et tout le câblage doivent<br />
être en conformité.<br />
10. Pour la marine, des règles spéciales d’installation<br />
peuvent être applicables. Par exemple, aux Etats-<br />
Unis, l’installation doit être conforme aux<br />
stipulations des réglementations des gardes-côtes<br />
américains (33CFR183, parag. 1).<br />
Précautions contre les explosions de gaz<br />
1. Cet appareil contient des composants pouvant<br />
provoquer des étincelles et des arcs électriques. Pour<br />
éviter tout risque d’incendie ou d’explosion, ne pas<br />
l’installer dans un compartiment contenant des<br />
batteries, du matériel inflammable ou un local<br />
nécessitant une protection contre le feu. Y compris<br />
les endroits où l’on trouve des moteurs à essence,<br />
des réservoirs de carburant…<br />
2. Travailler à proximité d’une batterie plomb-acide<br />
est dangereux. Les batteries génèrent des gaz<br />
explosifs pendant leur utilisation.<br />
3. Pour réduire le risque d’explosion des batteries,<br />
suivez les instructions ci-dessous, ainsi que celles<br />
données par le fabricant des batteries.<br />
Précautions à prendre <strong>ave</strong>c des batteries<br />
1. Assurez-vous que quelqu’un se trouve à proximité<br />
pour vous venir en aide lorsque vous travaillez près<br />
d’une batterie plomb-acide.<br />
2. Ayez à proximité de l’eau et du savon en cas de<br />
contact de l’acide de la batterie <strong>ave</strong>c la peau, les<br />
vêtements ou les yeux.<br />
3. Portez des lunettes et des vêtements de protection.<br />
Evitez de vous toucher les yeux pendant que vous<br />
travaillez près des batteries.<br />
4. Nettoyez les sorties de la batterie avant de la<br />
connecter. Portez des lunettes de protection pour<br />
empêcher l’acide d’entrer en contact <strong>ave</strong>c vos yeux.<br />
5. Si vos yeux ou vos vêtements ont été en contact<br />
<strong>ave</strong>c l’acide de la batterie, l<strong>ave</strong>z-les immédiatement<br />
<strong>ave</strong>c du savon et de l’eau. Si de l’acide entre dans<br />
l’œil, aspergez d’eau froide pendant au moins 20<br />
minutes et consultez un médecin.<br />
6. Ne jamais fumer ou provoquer une étincelle ou une<br />
flamme à proximité d’une batterie ou d’un moteur.<br />
7. Ne pas faire tomber d’outils métalliques sur la<br />
batterie. Cela provoquerait une étincelle ou un courtcircuit<br />
de la batterie qui pourait provoquer une<br />
explosion.<br />
8. Enlevez tout objet métallique tel que bague, bracelet,<br />
collier et montre lorsque vous travaillez <strong>ave</strong>c une<br />
batterie. Un court-circuit peut souder ou faire fondre<br />
tout objet en métal, causant une brûlure sérieuse.<br />
Français 1
1. Introduction<br />
Merci d’avoir acheté ce convertisseur <strong>Sine</strong> W<strong>ave</strong>. En<br />
tant que convertisseur sinusoïdal de haute qualité, vous<br />
pouvez attendre de votre convertisseur des performances<br />
exceptionnelles pendant des années d’utilisation. L’onde<br />
sinusoïdale (de la sortie AC) du convertisseur <strong>Sine</strong> W<strong>ave</strong><br />
permet de faire fonctionner efficacement et correctement<br />
tous les appareils en courant alternatif. Le courant en<br />
sortie du convertisseur sinusoïdal fait fonctionner de la<br />
même façon que le courant domestique. Dans certains<br />
cas, l’onde sinusoïdale du convertisseur est de meilleure<br />
qualité que le courant domestique.<br />
Pour optimiser l’utilisation de votre convertisseur, lisez<br />
et suivez <strong>ave</strong>c attention les instructions contenues dans<br />
ce mode d’emploi. Faites plus particulièrement attention<br />
au Chapitre 1 Consignes de sécurité et aux MISE EN<br />
GARDE et ATTENTION que vous trouverez tout au<br />
long de ce mode d’emploi ainsi que sur le produit luimême.<br />
Conservez son emballage.<br />
Si vous <strong>ave</strong>z des questions avant, pendant ou après<br />
l’installation, contactez le Service Clientèle de <strong>Xantrex</strong> :<br />
Téléphone :1-800-670-0707, 1-360-925-5097<br />
Fax :1-360-925-5143<br />
Email: CustomerService@xantrex.com<br />
Notez ci-dessous les renseignements à fournir si vous<br />
devez contacter <strong>Xantrex</strong> pour le SAV.<br />
Numéro de série du convertisseur.:_____________________<br />
Date d’achat: ___________________________<br />
Lieu d’achat: ___________________________<br />
1.1 Caractéristiques du convertisseur<br />
<strong>Sine</strong> W<strong>ave</strong><br />
Le convertisseur <strong>Sine</strong> W<strong>ave</strong> utilise une technologie à<br />
découpage dans le processus de conversion de courant.<br />
Les circuits sont similaires à ceux utilisés pour les<br />
onduleurs informatiques et d’autres équipements<br />
électroniques. Cette technologie offre plusieurs<br />
avantages :<br />
• léger : plus facile à installer<br />
• totalement silencieux : pour un fonctionnement sans<br />
bruit<br />
• courant de pointe au démarrage, voir Chapitre 10<br />
Spécifications pour des informations plus complètes.<br />
1.1.1 Fonctionnement<br />
Le convertisseur <strong>Sine</strong> W<strong>ave</strong>, connecté correctement et<br />
allumé, tire du courant d’une batterie et produit un courant<br />
<strong>ave</strong>c une onde sinusoïdale identique à celle du courant<br />
domestique. Le convertisseur fournit du courant alternatif<br />
aux appareils connectés tant que votre batterie sera<br />
chargée, selon les limites acceptées par le convertisseur.<br />
Des coupures de courant s’enclencheront en cas de tension<br />
en dehors des limites spécifiées (10–16 VCC sur les<br />
modèles 12 V et 20–32 VCC sur les modèles 24 V).<br />
1.1.2 Panneau de contrôle<br />
Le panneau de contrôle permet de contrôler le ‘Bypass’/<br />
la mise en marche du convertisseur (position Bypass/<br />
ON) (/I) et affiche des informations sur son état de<br />
fonctionnement ainsi que celui des batteries. Ce panneau<br />
peut être installé de différentes manières pour vous<br />
permettre de lire les informations dans le sens qui vous<br />
convient. Avec l’option commande à distance, l’affichage<br />
peut être complètement déplacé et installé à l’endroit de<br />
votre choix (tableau de bord de votre véhicule par exemple).<br />
1.1.3 Basculement automatique (option)<br />
Le convertisseur <strong>Sine</strong> W<strong>ave</strong> peut être équipé d’un relais<br />
de transfert, option à spécifier lors de l’achat. Le relais de<br />
transfert sert dans 2 cas: 1) il permet à la sortie alternative<br />
AC du convertisseur d’être branchée à un réseau électrique.<br />
2) il permet de basculer automatiquement sur le courant<br />
du convertisseur en cas de rupture de courant. Lorsqu’il y<br />
a rupture de la source de courant domestique, le transfert<br />
est amorcé et le courant est transféré à la sortie du<br />
convertisseur dans les 20 à 30 millisecondes. A cause de la<br />
fonction « POWERSAVE » (recommandée pour réduire<br />
la consommation à vide), la sortie en alternatif du<br />
convertisseur peut être retardée de 2.5 secondes. Dès que<br />
le courant domestique est à nouveau accessible, le relais<br />
est amorcé et la charge reconnectée au courant domestique.<br />
ATTENTION<br />
Notez que, en position ‘Bypass’ () (position “OFF”<br />
des versions bornier à vis <strong>ave</strong>c relais de transfert),<br />
l’interrupteur du panneau d’affichage ne permet<br />
PAS d’arréter COMPLETEMENT le courant alternatif.<br />
Celui-ci désactive uniquement le circuit du<br />
convertisseur. Sur ces versions tout courant<br />
domestique présent à l’entrée du convertisseur<br />
sera présent en sortie. La position ‘Bypass’ n’offre<br />
pas la sécurité totale de la position OFF.<br />
Identification des modèles <strong>ave</strong>c commutateurs<br />
de transfert<br />
1) Vérifiez le code CUP sur la boîte du produit. Les<br />
appareils <strong>ave</strong>c commutateurs de transfert disposent de<br />
codes CUP se terminant par ces cinq chiffres :<br />
Model<br />
<strong>1000</strong>/<strong>1000</strong>i Model <strong>1800</strong>/<strong>1800</strong> i<br />
61084<br />
6188 4<br />
61074<br />
6187 4<br />
61052<br />
6185 2<br />
61008<br />
6180 8<br />
61002<br />
6180 2<br />
2) S’il y a une prise CA sur la partie frontale de l’appareil,<br />
il n’est pas équipé de commutateur de transfert interne.<br />
3) Pour les onduleurs à onde sinusoïdale disposant de<br />
connexions câblées, vous pouvez établir si votre appareil a<br />
un commutateur de transfert interne en retirant le couvercle<br />
du compartiment de câblage CA et en vérifiant l’étiquette<br />
apposée au-dessus de la borne serre-fils à l’intérieur.<br />
Si votre appareil a une étiquette similaire à l’une de ces<br />
deux étiquettes, il dispose d’un commutateur de transfert<br />
interne :<br />
Les appareils ayant cette étiquette n’ont pas de<br />
commutateur de transfert interne :<br />
2 Français Manuel d’instruction du convertisseur <strong>Sine</strong> W<strong>ave</strong>
2. Installation<br />
ATTENTION<br />
Relisez les consignes de sécurité que vous<br />
<strong>ave</strong>z trouvées au début de ce manuel, lisez<br />
ce chapitre entièrement en faisant tout<br />
particulièrement attention aux ATTENTION<br />
et MISE EN GARDE, avant de procéder à<br />
l’installation.<br />
Ce chapitre donne des informations pour l’installation<br />
du convertisseur <strong>Sine</strong> W<strong>ave</strong>. Ne mettez pas en marche le<br />
convertisseur avant la lecture de ce chapitre.<br />
2.1 Exigences pour l’installation<br />
MISE EN GARDE<br />
Le convertisseur <strong>Sine</strong> W<strong>ave</strong> a été étudié<br />
pour être connecté en permanence à votre<br />
système électrique continu CC. Pour les<br />
versions bornier à vis, le convertisseur<br />
est également conçu pour être connecté<br />
en permanence au système électrique<br />
alternatif AC. Pour vous assurer d’une<br />
totale conformité du branchement, celuici<br />
doit être effectué par un technicien agréé<br />
ou un électricien.<br />
Règles d’installation : en fonction du lieu où vous<br />
installez votre convertisseur, il y a différentes règles à<br />
respecter, comme pour toute installation électrique d’une<br />
maison.<br />
Il existe des règles particulières pour l’Amérique du Nord<br />
dans certains domaines (RVIA, CSA, et UL) ainsi que<br />
pour l’Europe (CE, CEM).<br />
• US Coast Guard et ABYC pour des installations à<br />
bord de bateaux<br />
• RV Industry Association (RVIA), CSA, and UL pour<br />
des installations à bord de camping-car et mobil<br />
home.<br />
Manuel d’instruction du convertisseur <strong>Sine</strong> W<strong>ave</strong><br />
Il est de la responsabilité de l’installateur de s’assurer<br />
que toutes les règles applicables ont été respectées.<br />
Tout ce dont vous <strong>ave</strong>z besoin pour installer le<br />
convertisseur<br />
Vous <strong>ave</strong>z besoin du matériel et des outils suivants pour<br />
installer correctement le convertisseur :<br />
• câble<br />
• vis et boulons de 6 mm<br />
• tournevis à tête plate (pour les versions bornier à<br />
vis)<br />
• petit tournevis cruciforme<br />
• clef universelle de 13<br />
• câblage alternatif pour les modèles bornier à vis (voir<br />
chapitre sur le cablage alternatif pour plus de détails)<br />
• câblage continu (voir chapitre sur le câblage continu<br />
pour plus de détails)<br />
• cosses et clef plate pour les câbles CC<br />
• protections AC et CC (voir chapitre sur les<br />
protections)<br />
2.2 Où placer le convertisseur <strong>Sine</strong><br />
W<strong>ave</strong>?<br />
Le convertisseur <strong>Sine</strong> W<strong>ave</strong> utilise des circuits<br />
électroniques complexes et, bien que des protections de<br />
ces circuits aient été prévues, ils peuvent être<br />
endommagés lors d’une utilisation dans un environnement<br />
extrême. C’est pourquoi le convertisseur doit être installé<br />
dans un lieu qui respecte les exigences suivantes :<br />
• Sec : ne pas laisser couler d’eau ou éclabousser le<br />
convertisseur<br />
• Frais : la température de l’air ambiant doit être<br />
comprise entre 0°C et 25°C, le plus frais sera le<br />
mieux. Reportez-vous aux informations concernant<br />
la température lors du fonctionnement dans le<br />
chapitre Spécifications.<br />
• Ventilé : laissez au moins 13cm de vide autour du<br />
convertisseur. Vérifiez que le ventilateur du<br />
convertisseur n’est pas obstrué. Si vous le montez<br />
dans une armoire, veillez à ce qu’il y ait des ouvertures<br />
pour la ventilation.<br />
• Sûr : ne pas installer le convertisseur dans un<br />
compartiment contenant des batteries ou des liquides<br />
inflammables tels que de l’essence. Ne pas l’installer<br />
dans le compartiment moteur, ni <strong>ave</strong>c toute sorte de<br />
matériel inflammable.<br />
• Non poussiéreux : ne pas installer le convertisseur<br />
dans un local sujet à la poussière, aux copeaux de<br />
bois ou d’autres poussières issues d’un ponçage.<br />
Celles-ci pourraient être entrainées à l’intérieur du<br />
convertisseur lorsque le ventilateur de<br />
refroidissement est en route.<br />
• Proche de la boîte de dérivation : évitez d’utiliser<br />
une grande longueur de câble.<br />
• Près des batteries : évitez une longueur de câble<br />
excessive mais n’installez pas votre convertisseur<br />
dans le même compartiment que les batteries. Utilisez<br />
la longueur et la taille de câble recommandées au<br />
chapitre 2.4.4 Ne montez pas, non plus, le<br />
convertisseur dans un endroit où il sera exposé aux<br />
gaz produits par les batteries. Ces gaz sont<br />
extrêmement corrosifs et une exposition prolongée<br />
endommagerait le convertisseur.<br />
• Protégé contre l’acide de la batterie : ne jamais<br />
laisser tomber une goutte d’acide de la batterie sur<br />
le convertisseur ou son câblage.<br />
2.3 Montage du convertisseur<br />
Avant de monter le convertisseur, testez l’endroit pour<br />
vous assurer qu’il y ait suffisamment d’espace autour<br />
pour sa connection et sa ventilation. Le support<br />
d’installation doit être traité anti-corrosion ou faire au<br />
moins 6 mm d’épaisseur. Il doit être capable de porter<br />
trois fois le poids du convertisseur, qui pèse lui-même<br />
7,3 Kg. Plus vous <strong>ave</strong>z d’espace pour la ventilation<br />
autour du convertisseur, meilleure sera la performance.<br />
Au minimum, conservez 13cm d’espace tout autour de<br />
l’appareil.<br />
Pour monter le convertisseur<br />
1. Montez le convertisseur horizontalement ou<br />
verticalement (adossé à une cloison par exemple) en<br />
utilisant les trous de fixation prévus à cet effet. Pour<br />
un montage permanent et plus sûr, utilisez les<br />
Français 3
8 trous de fixation. Pour répondre aux exigences<br />
réglementaires, le convertisseur doit être installé dans<br />
l’une des 3 orientations présentées ci-dessous.<br />
donc diminue les risques d’interférences <strong>ave</strong>c d’autres<br />
équipements.<br />
version bornier à vis, le convertisseur doit fonctionner<br />
sur tout type de courant alternatif, et par conséquent est<br />
susceptible d’être branché à toute forme de courant.<br />
Comme point de départ des instructions sur le<br />
branchement, voici un bref résumé chronologique du<br />
branchement pour les convertisseurs en version bornier<br />
à vis. Veuillez lire le reste des instructions sur le<br />
branchement, Paragraphe 2.4.2, qui détaille chaque étape<br />
du branchement et suit le chapitre sur les protections en<br />
entrée et en sortie :<br />
Figure 1. Orientations conseillées pour le<br />
montage du convertisseur<br />
2. Démontez et replacez correctement le panneau<br />
d’affichage suivant l’orientation que vous <strong>ave</strong>z<br />
choisie pour l’appareil. Par exemple, si l’appareil<br />
est monté verticalement, vous pouvez démonter<br />
l’affichage et le placer de telle façon que la lecture<br />
soit toujours horizontale. Pour ceci, dévissez les 4<br />
vis, sortez le panneau de son logement, faites lui<br />
faire une rotation et fixez le à nouveau sur le<br />
convertisseur. Soyez sûr d’avoir remis les 4 vis.<br />
3. L’affichage frontal peut aussi être déporté du<br />
convertisseur. Pour ceci, il faut simplement enlever<br />
le panneau d’affichage du convertisseur, installer la<br />
commande à distance (achetée en option<br />
séparement) et connecter les 9 m du câble<br />
d’extension. Le câble est alors tiré jusqu’à l’endroit<br />
où vous désirez avoir l’affichage. Le panneau doit<br />
être fixé. Le convertisseur est ainsi contrôlé et<br />
commandé de l’endroit de votre choix . Ne déportez<br />
pas le panneau d’affichage sans avoir acheté l’option<br />
« Commande à distance » et l’avoir correctement<br />
installée sur le convertisseur. La commande à<br />
distance réduit de façon significative les<br />
interférences générées par la longueur du câble, et<br />
Figure 2. Fixation du panneau de<br />
contrôle<br />
2.4 Branchement du convertisseur<br />
ATTENTION<br />
Risque d’incendie et d’électrocution.<br />
Vérifiez que le câblage a bien été<br />
déconnecté de toute source électrique<br />
avant de le manipuler. Tout le câblage doit<br />
être en conformité, certifié par un<br />
technicien agréé ou un électricien.<br />
Pour les versions <strong>ave</strong>c prise :<br />
Si le convertisseur <strong>Sine</strong> W<strong>ave</strong> est équipé d’une prise à<br />
l’avant, reportez-vous aux instructions qui vont suivre<br />
sur le câblage continu CC. Paragraphe 3.4.4. Une fois<br />
que les connections au courant continu et que la mise à la<br />
terre auront été effectuées, votre appareil sera prêt à<br />
délivrer du courant alternatif AC à partir de la prise<br />
avant.<br />
Pour les versions bornier à vis :<br />
Si le convertisseur est équipé d’un bornier à vis (<strong>ave</strong>c ou<br />
sans relais de transfert), lisez attentivement les<br />
instructions qui suivent sur le câblage alternatif. En<br />
1. Assurez-vous que l’interrupteur est en position<br />
‘Bypass’ (). Pour les modèles bornier à vis <strong>ave</strong>c<br />
un relais de transfert, le courant alternatif AC<br />
d’entrée doit passer à tr<strong>ave</strong>rs le convertisseur. C’est<br />
le cas même si l’interrupteur est sur ‘Bypass’ (),<br />
donc soyez sûr que tout courant est bien déconnecté<br />
de sa source.<br />
2. Connectez le câblage alternatif en entrée, le câblage<br />
alternatif en sortie, la terre, le câble continu positif<br />
et ensuite seulement le câble continu négatif.<br />
3. Connectez chaque circuit à sa source.<br />
2.4.1 Protection en entrée et sortie<br />
Pour respecter les exigences règlementaires (CSA et UL<br />
entre autres), les entrées et sorties en alternatif et continu<br />
du convertisseur doivent être protégées contre les<br />
surtensions par des coupe-circuits ou des fusibles et un<br />
disjoncteur, comme suit : notez que les informations<br />
suivantes sur l’entrée et la sortie en alternatif ne<br />
concernent que les produits équipés d’un bornier à vis,<br />
et non pas les versions équipées <strong>ave</strong>c une prise pour la<br />
sortie en alternatif.<br />
Entrée en continu CC : Installez une protection pour<br />
le câblage continu (fusible ou coupe-circuit) aussi près<br />
que possible de la batterie pour protéger le branchement<br />
des batteries au convertisseur. L’ampérage de ce fusible<br />
ou coupe-circuit doit être suffisamment important pour<br />
permettre au convertisseur de fournir la charge demandée,<br />
mais si l’ampérage est trop élevé, utilisez des câbles<br />
plus gros. Le fusible ou coupe-circuit utilisé doit être<br />
recommandé pour des circuits d’un minimum de 12 ou<br />
24 V continu suivant le modèle du <strong>Sine</strong> W<strong>ave</strong>. Les fusibles<br />
4 Français Manuel d’instruction du convertisseur <strong>Sine</strong> W<strong>ave</strong>
et coupe-circuits pour un courant alternatif ne conviennent<br />
pas pour les circuits en continu, cela peut être dangereux.<br />
La taille du câble utilisé entre le convertisseur et les fusibles<br />
ou coupe-circuits doit correspondre à l’ampérage du fusible<br />
ou coupe-circuit, en conformité <strong>ave</strong>c les règles électriques<br />
applicables à votre installation (référez-vous au tableau<br />
4).<br />
Entrée en alternatif AC: L’installation doit avoir une<br />
protection contre les surtensions pour le circuit alternatif<br />
de sortie. Le fusible ou coupe-circuit utilisé doit être<br />
recommandé pour l’utilisation sur des circuits en 120 VAC<br />
pour les modeles en 120 V et en 230 VAC pour les<br />
modeles en 230 V. La taille du câble utilisé entre le<br />
convertisseur et le coupe-circuit doit correspondre au<br />
coupe-circuit, en conformité <strong>ave</strong>c les règles électriques<br />
applicables à votre installation (référez vous au tableau<br />
1).<br />
Sortie en alternatif AC : Le fusible ou coupe-circuit<br />
utilisé doit être dimensionné pour votre installation en<br />
120 V ou en 230 V alternatif suivant le modèle de votre<br />
convertisseur. La taille du câble utilisé entre la sortie du<br />
convertisseur et le coupe-circuit, ainsi qu’entre le coupe<br />
circuit et vos applications, doit correspondre au coupecircuit,<br />
en conformité <strong>ave</strong>c les règles électriques applicables<br />
(reférez-vous au tableau 1 pour la taille des câbles).<br />
Disjoncteur : Puisque le coupe-circuit peut être arrêté et<br />
le fusible enlevé, quel que soit le type d’appreil, vous<br />
devrez installer un disjoncteur. Notez que le disjoncteur<br />
n’est pas utilisé pour arrêter le convertisseur en cas de<br />
tension basse, mais uniquement pour isoler le convertisseur<br />
des sources de courant en entrée et sortie.<br />
2.4.2 Branchement en alternatif AC<br />
Ce chapitre s’applique aux modèles versions bornier à<br />
vis. Comme il est indiqué plus haut, la taille du câble<br />
alternatif utilisé doit correspondre à l’ampérage des coupecircuits<br />
que vous <strong>ave</strong>z installés en entrée et sortie du<br />
circuit alternatif, en conformité <strong>ave</strong>c les règles électriques<br />
applicables à votre installation. Reportez-vous au tableau<br />
1 basé sur le « U.S. National Electrical Code (1999), the<br />
Canadian Electrical Code (1998), and European wiring<br />
practices (pour les modèles en 230 V) » : taille des câbles<br />
Manuel d’instruction du convertisseur <strong>Sine</strong> W<strong>ave</strong><br />
et des coupe-circuits. Il peut exister d’autres règles<br />
d’installation.<br />
Modèle<br />
ENTREE et SORTIE A C<br />
Ampérage du Taille du câble<br />
coupe circuit<br />
<strong>1000</strong> - 12/24V<br />
<strong>1800</strong> - 12/24V<br />
20A max. 12 AW G<br />
<strong>1000</strong>i - 12/24V<br />
<strong>1800</strong>i - 12/24V<br />
10A max. .0 - 2.5m m<br />
1<br />
2<br />
Tableau 1. Taille des câbles et coupe-circuits<br />
Notez qu’il n’y a pas de différence entre les<br />
recommandations pour le <strong>Sine</strong> W<strong>ave</strong> <strong>1000</strong> et le <strong>Sine</strong><br />
W<strong>ave</strong> <strong>1800</strong>, car le relais est le même (15A pour <strong>Sine</strong><br />
W<strong>ave</strong> <strong>1000</strong> et <strong>Sine</strong> W<strong>ave</strong> <strong>1800</strong> (version 120 VAC), 10A<br />
pour <strong>Sine</strong> W<strong>ave</strong> <strong>1000</strong>i et <strong>Sine</strong> W<strong>ave</strong> <strong>1800</strong>i). Figure 3 :<br />
Figure 3. Branchement de l’alternatif sur le<br />
convertisseur version bornier à vis<br />
ATTENTION<br />
Risque d’électrocution. Avant de poursuivre<br />
l’installation, vérifiez que le convertisseur ne<br />
soit pas connecté aux batteries et que tous<br />
les câbles ont bien été débranchés de toute<br />
source électrique. Ne connectez pas les<br />
sorties de votre convertisseur <strong>Sine</strong> W<strong>ave</strong> à<br />
une source de courant alternatif.<br />
câblage de l’alternatif sur le <strong>Sine</strong> W<strong>ave</strong> pour les modèles<br />
bornier à vis.<br />
Le câblage alternatif AC doit être connecté dans<br />
l’ordre suivant :<br />
1. entrée AC (source)<br />
2. sortie AC (charge)<br />
Pour connecter l’alternatif :<br />
1. Le compartiment du câblage alternatif est situé sur le<br />
côté droit du convertisseur lorsqu’on le regarde de<br />
face. Enlevez la trappe du compartiment pour avoir<br />
accès aux connecteurs alternatifs à l’intérieur.<br />
2. Enlevez les passe fils de la trappe du compartiment<br />
afin de créer des trous pour passer vos câbles. Le<br />
passe fil est prévu pour la fixation d’un câble en 230<br />
V de 16mm de diamètre. Pour la version 120 V, enlever<br />
la seconde bague du passe fil, elle est prévue pour un<br />
câble de ½”.<br />
3. Faites passer les 3 conducteurs de l’arrivée AC (source)<br />
à tr<strong>ave</strong>rs la fixation de câble et le compartiment de<br />
câblage, par le passe fil sur le coté droit du panneau<br />
frontal. Connectez d’abord le câble alternatif allant à<br />
la terre (symbole de la terre entouré d’un rond), et<br />
ensuite connectez la phase et le neutre à l’entrée AC<br />
du convertisseur. Referez-vous au Tableau 2 pour la<br />
couleur et l’identification des phases.<br />
4. De la même façon, connectez les conducteurs de la<br />
sortie alternative (charge) à la sortie alternative du<br />
convertisseur (connectez la sortie terre identifiée par<br />
le symbole entouré d’un cercle). Les connections aux<br />
phases doivent être effectuées comme suit :<br />
C ÂBLE COULEUR DU CÂBL E<br />
AC<br />
120V<br />
(Amérique du<br />
Nord)<br />
230V<br />
(Europe)<br />
PHASE (L) Noi<br />
r Marro n<br />
NEUTRE (N) Blan<br />
c Ble u<br />
TERRE<br />
Vert ou cuivr e Vert/jaune ou<br />
dénudé cuivre dénudé<br />
Tableau 2. Indentification des pôles et<br />
des câbles<br />
Français 5
5. Après le branchement, vérifiez bien toutes les<br />
connections pour être sûr que tous les câbles sont<br />
reliés aux bornes appropriées et que celles-ci sont<br />
serrées (la clé recommandée est 7.5 inch-lbs., 9.8<br />
Nm).<br />
Mise à la terre de sécurité: Pendant l’installation du<br />
câblage alternatif, les entrées et sorties à la terre sont<br />
connectées au convertisseur. Le câble de terre en entrée<br />
AC doit être relié à la terre de votre source électrique.<br />
Le câble de terre en sortie AC doit être relié à la terre de<br />
la charge connectée (par exemple, au bus de terre sur le<br />
panneau de distribution).<br />
Branchement du neutre :<br />
a) Modèles en 120 V: Le conducteur neutre de la sortie<br />
AC du convertisseur est automatiquement connecté<br />
à la terre pendant le fonctionnement du convertisseur.<br />
Il est demandé par les reglementations nationales en<br />
matière d’électricité que les sources de courant<br />
alternatif dérivées (telles que les convertisseurs et<br />
générateurs) aient leurs conducteurs neutres liés <strong>ave</strong>c<br />
la terre de même que le neutre du courant domestique<br />
est lié à la terre du coupe circuit. Pour les modèles<br />
<strong>ave</strong>c relais de transfert, lorsque le courant<br />
domestique est présent et que le convertisseur est<br />
en mode « bypass », cette connection (neutre de la<br />
sortie AC du convertisseur à la terre) n’existe pas, si<br />
bien que le neutre du courant domestique est<br />
seulement connecté à la terre de votre coupe-circuit,<br />
comme il est recommandé.<br />
b) Modèles en 230 V: Il n’y a aucune connection à<br />
l’intérieur du convertisseur entre les câbles<br />
conducteurs (phase ou neutre) et la terre.<br />
2.4.3 Interrupteurs de Circuit pour panne liée<br />
à la terre (GFCIs):<br />
Les installations dans les véhicules de loisirs (en<br />
Amérique du Nord) doivent être équipées de protections<br />
GFCI pour tous les branchements connectés à la sortie<br />
AC d’un convertisseur <strong>Sine</strong> W<strong>ave</strong> <strong>ave</strong>c bornier à vis. De<br />
plus, les règles électriques exigent des protections GFCI<br />
pour certaines prises dans les installations résidentielles.<br />
Puisque le signal sinusoïdal du convertisseur est<br />
équivalent à celui fourni par le courant domestique, pour<br />
être en conformité <strong>ave</strong>c les standards UL, nous devons<br />
faire des tests et recommander GFCI.<br />
<strong>Xantrex</strong> a testé les sorties 15 A munies des protections<br />
GFCI suivantes et a trouvé qu’elles fonctionnaient<br />
correctement à la sortie AC du convertisseur.<br />
Fabricant<br />
numéro d u<br />
modèle<br />
LEVITON<br />
6599/70 1<br />
L EVITON<br />
6598/722 *<br />
EAGLE<br />
Shock Sentr y<br />
PASS & SEYMOUR 1591-WC N<br />
HUBBELL<br />
GF252GY A<br />
BRYANT<br />
GFR52FT I<br />
B RYANT<br />
GFR82FTI* *<br />
* With Line/Load inversion check & indicator light<br />
** Hospital Grade<br />
2.4.4. Branchement du courant continu<br />
Suivez cette procédure pour connecter les câbles de la<br />
batterie à l’entrée CC du convertisseur <strong>Sine</strong> W<strong>ave</strong>. Vos<br />
câbles doivent être aussi courts que possible (idéalement,<br />
moins de 3 m) et suffisament gros pour supporter le<br />
courant nécessaire, en conformité <strong>ave</strong>c les règles<br />
électriques applicables à votre installation. Des câbles<br />
d’un calibre insuffisant ou trop longs diminueraient les<br />
performances du convertisseur et entraineraient une<br />
diminution de la capacité en pointe et de fréquentes<br />
alarmes de tension basse et des coupures.<br />
Ces alarmes de basse tension sont dues à la baisse du<br />
voltage continu dans les câbles reliant la batterie au<br />
convertisseur. Plus les câbles sont longs et fins, plus la<br />
tension chute. Le tableau 3 donne des informations sur<br />
la chute de tension par rapport à la longueur du câble<br />
suivant la puissance.<br />
Par exemple, si le <strong>Sine</strong> W<strong>ave</strong> <strong>1800</strong> est à une distance de<br />
10 pieds de la batterie et qu’il fonctionne à 2 000 W, et<br />
qu’il est incorrectement connecté <strong>ave</strong>c un câble #4AWG,<br />
vous aurez une chute de tension de 0.0506V par pied. La<br />
Calibre<br />
du Câble<br />
(AWG)<br />
V = I x R<br />
Tension = Intensité x Résistance<br />
Puissance<br />
en sortie du<br />
convertisseur<br />
500<br />
100<br />
0 150<br />
0 200<br />
0 250<br />
0 300 0<br />
Intensité<br />
(A) 50<br />
10<br />
0 15<br />
0 20<br />
0 25<br />
0 30 0<br />
Résistance<br />
(ohms por<br />
pied)<br />
@ 25°C<br />
Chute<br />
de<br />
Tension<br />
por pied<br />
Chute<br />
de<br />
Tension<br />
por pied<br />
Chute<br />
de<br />
Tension<br />
por pied<br />
Chute<br />
de<br />
Tension<br />
por pied<br />
longueur totale de câble est en fait de 20 pieds, et non<br />
pas de 10 pieds, puisque la longueur de câble est mesurée<br />
entre le convertisseur et la batterie, aller et retour.<br />
Multipliez 0.0506V par 20, vous obtenez une chute de<br />
tension de 1.012V. Par conséquent, si la tension de votre<br />
batterie est seulement de 11.2VCC, en réalité, elle sera<br />
de<br />
10.188VCC à l’entrée du convertisseur. Dans un tel cas,<br />
le convertisseur signalera une alarme de basse tension ou<br />
se coupera. En pointe et en cas de puissance importante,<br />
le convertisseur se coupera si les câbles sont trop fins ou<br />
trop longs.<br />
Augmenter la taille de vos câbles CC améliorera la<br />
situation. Avec des câbles de section correcte de type<br />
#0 AWG la chute de tension sera de 0.02VCC (multiplié<br />
par 20 égale 0.4VCC). Ceci illustre le fait que même à<br />
10 pieds de la batterie <strong>ave</strong>c de gros câbles, vous aurez<br />
une chute de tension. Une fois encore, utilisez des câbles<br />
d’une longueur minimum et de calibre maximum si<br />
possible.<br />
<strong>Xantrex</strong> recommande les câbles suivants pour une<br />
performance optimum (pour les versions 120V et 230V):<br />
<strong>Sine</strong> W<strong>ave</strong> <strong>1000</strong>/12: #0 AWG ou 55 mm 2<br />
<strong>Sine</strong> W<strong>ave</strong> <strong>1000</strong>/24: #6 AWG ou 13 mm 2<br />
<strong>Sine</strong> W<strong>ave</strong> <strong>1800</strong>/12: #4/0 AWG ou 110 mm 2<br />
<strong>Sine</strong> W<strong>ave</strong> <strong>1800</strong>/24: #2 AWG ou 34 mm 2<br />
Chute<br />
de<br />
Tension<br />
por pied<br />
Chute<br />
de<br />
Tension<br />
por pied<br />
4/0<br />
0.00005<br />
0 0.002<br />
5 0.005<br />
0 0.007<br />
5 0.010<br />
0 0.012<br />
5 0.015 0<br />
3/0<br />
0.00006<br />
3 0.003<br />
2 0.006<br />
3 0.009<br />
5 0.012<br />
6 0.015<br />
8 0.018 9<br />
2/0<br />
0.00007<br />
9 0.004<br />
0 0.007<br />
9 0.011<br />
9 0.015<br />
8 0.019<br />
8 0.023 7<br />
0 0.00010<br />
0 0.005<br />
0 0.010<br />
0 0.015<br />
0 0.020<br />
0 0.025<br />
0 0.030 0<br />
1 0.00012<br />
6 0.006<br />
3 0.012<br />
6 0.018<br />
9 0.025<br />
2 0.031<br />
5 0.037 8<br />
2 0.00015<br />
9 0.008<br />
0 0.015<br />
9 0.023<br />
9 0.031<br />
8 0.039<br />
8 0.047 7<br />
3 0.00020<br />
1 0.010<br />
1 0.020<br />
1 0.030<br />
2 0.040<br />
2 0.050<br />
3 0.060 3<br />
4 0.00025<br />
3 0.012<br />
7 0.025<br />
3 0.038<br />
0 0.050<br />
6 0.063<br />
3 0.075 9<br />
Tableau 3. Chute de tension par rapport à la longueur de<br />
câble<br />
6 Français Manuel d’instruction du convertisseur <strong>Sine</strong> W<strong>ave</strong>
Utilisez uniquement des câbles de cuivre de haute qualité<br />
et respectez une faible longueur de câble, 3-6 pieds<br />
maximum.<br />
<strong>Xantrex</strong> donne dans le tableau suivant la taille minimum<br />
de câble CC et la taille maximum de fusible/coupe-circuit<br />
autorisées par différentes réglementations aux USA.<br />
Suivant les marchés il peut y avoir d’autres règles<br />
applicables à votre installation :<br />
Bateaux<br />
(1)<br />
Véhicules de<br />
loisirs<br />
(2)<br />
Maison<br />
(3)<br />
Modéle<br />
Câble<br />
AWG<br />
Fusible<br />
(A)<br />
Wire<br />
AWG<br />
Fusible<br />
(A)<br />
Wire<br />
AWG<br />
Fusible<br />
(A)<br />
<strong>1000</strong> 12V<br />
<strong>1000</strong>i 12V<br />
# 4 17<br />
5 # 4 15<br />
0 # 1 15 0<br />
<strong>1000</strong> 24V<br />
<strong>1000</strong>i 24V<br />
# 8 90<br />
# 8 90<br />
# 6 7 0<br />
<strong>1800</strong> 12V<br />
<strong>1800</strong>i 12V<br />
# 1 30<br />
0 # 1 22<br />
5 4/<br />
0 25 0<br />
<strong>1800</strong> 24V<br />
<strong>1800</strong>i 24V<br />
# 6 10<br />
0 # 4 15<br />
0 # 2 12 5<br />
1 Basé sur les recommandations ABYC E-9, câble à 75°C<br />
2 Basé sur la NFPA 70, article 551, câble à 90°C<br />
3 Basé sur la NFPA 70, Article 240 and 310, câble à 75°C<br />
Tableau 4. Taille recommandée des câbles et des fusibles<br />
MISE EN GARDE<br />
Nettoyez les sorties de la batterie avant<br />
de faire les connections. Portez des<br />
lunettes de protection pour éviter tout<br />
contact de l’acide <strong>ave</strong>c les yeux.<br />
Pour connecter le continu :<br />
1. Avant d’effectuer toutes connections, amenez les<br />
câbles positif et négatif de la batterie directement<br />
au pôle continu CC du convertisseur. Otez les<br />
embouts en plastique des câbles positif et négatif<br />
(embout rouge pour le câble positif et embout noir<br />
pour le câble négatif). Ne faites pas passer les câbles<br />
par un panneau de distribution électrique, un isolateur<br />
de batterie, ou tout autre appareil qui additionne les<br />
Manuel d’instruction du convertisseur <strong>Sine</strong> W<strong>ave</strong><br />
chutes de tension, excepté pour les fusibles ou coupecircuit<br />
sur le pôle positif de la batterie. Installer le<br />
convertisseur de façon que la longueur de câbles de<br />
la batterie soit aussi courte que possible. Les<br />
connecteurs du convertisseur sont conçus pour aller<br />
<strong>ave</strong>c des cosses 250 MCM (en AMP ou ILSCO) ou<br />
une boite de connecteurs (pour serrer les câbles<br />
connectés utiliser un tournevis). Notez que les câbles<br />
sont mieux fixés <strong>ave</strong>c des cosses et ceux-ci sont<br />
recommandés par rapport aux boites de connecteurs.<br />
2. Coupez soigneusement les câbles à la longueur<br />
correcte et dénudez les suffisamment pour sertir les<br />
cosses ou connecteurs. Attachez les sorties à chacun<br />
des câbles en utilisant l’outil recommandé par le<br />
fabricant des cosses. Il ne doit pas y avoir de fil<br />
isolé dépassant de la cosse. Connectez le câble<br />
positif allant du connecteur positif de la batterie (+)<br />
au convertisseur et serrez <strong>ave</strong>c une clé de 9-10 ftlbs<br />
(11.7 - 13 Nm). Vérifiez la bonne connection du<br />
câble à la sortie positive du convertisseur.<br />
3. Dans toutes les installations, un fusible est nécessaire<br />
entre le convertisseur et la batterie. Référez-vous au<br />
tableau 4 pour la taille des fusibles à respecter. Ce<br />
fusible protège votre batterie et le câblage en cas de<br />
court-circuit accidentel pendant l’installation du<br />
convertisseur ou lors d’une détérioration ultérieure<br />
du câblage.Le fusible et le porte-fusible doivent être<br />
installés du coté positif du circuit continu CC, aussi<br />
près que possible des batteries, à la distance<br />
recommandée par les règles d’installation applicables.<br />
Assurez-vous que toutes les connections aux autres<br />
sources de courant et à la terre ont été reliées au<br />
convertisseur avant de connecter les câbles de<br />
courant continu aux batteries.<br />
4. Connectez le câble du pôle POSITIF du convertisseur<br />
au pôle POSITIF (POS +) du porte-fusible. Faites<br />
attention à ne pas faire d’inversion de polarité. Placer<br />
chacun des câbles avant de faire toute connection.<br />
Figure 4. Connections de la batterie<br />
MISE EN GARDE<br />
Une inversion de polarité peut<br />
endommager votre convertisseur <strong>Sine</strong><br />
W<strong>ave</strong> et nécessitera une réparation (le<br />
fusible interne aura sauté). Avant<br />
d’effectuer la connection au courant<br />
continu, observez bien les polarités pour<br />
vous assurer que les branchements sont<br />
corrects.<br />
5. Connectez le câble NEGATIF CC à la sortie<br />
NEGATIVE (NEG -) de la batterie. Ensuite,<br />
connectez le câble au pôle négatif du convertisseur.<br />
La connection au pôle négatif du convertisseur doit<br />
être effectuée en dernier. Il est normal qu’une étincelle<br />
se produise au moment de cette connection.<br />
ATTENTION<br />
Vérifiez que toutes les connections du<br />
circuit continu sont bien serrées (rotation<br />
de 9-10 ft-lbs, 11.7-13Nm). Les<br />
connections mal serrées risquent de<br />
surchauffer et de provoquer un incendie.<br />
6. Pour des installations domestiques, une enceinte du<br />
cablage de courant continu est demandée pour<br />
couvrir les connections en continu. Contactez<br />
<strong>Xantrex</strong> ou votre distributeur pour ceci. Pour des<br />
installations non-domestiques, faites glisser le<br />
capuchon en plastique sur le câble et par dessus les<br />
connections des pôles.<br />
Français 7
Branchement à la terre du courant continu:<br />
Le convertisseur <strong>Sine</strong> W<strong>ave</strong> a un sucre de connection sur<br />
le panneau arrière marqué « Chassis Ground ». Ce sucre<br />
est utilisé pour connecter le chassis du convertisseur <strong>Sine</strong><br />
W<strong>ave</strong> à la terre, comme il est recommandé dans certaines<br />
installations suivant l’endroit où est installé votre<br />
convertisseur.<br />
3. Fonctionnement du convertisseur<br />
<strong>Sine</strong> W<strong>ave</strong><br />
3.2 Sortie sinusoïdale<br />
La forme de l’onde à la sortie alternative du convertisseur<br />
<strong>Sine</strong> W<strong>ave</strong> est une véritable onde sinusoïdale <strong>ave</strong>c un<br />
taux de distorsion (THD) de 1%. La figure 6. illustre la<br />
forme de l’onde en sortie du convertisseur <strong>Sine</strong> W<strong>ave</strong>. La<br />
forme de l’onde est identique à celle du courant<br />
domestique et même dans certains cas, le convertisseur<br />
délivre un courant de meilleure qualité.<br />
qui utilisent des alimentations internes moins<br />
complexes.<br />
• une baisse significative de la chute de courant dans<br />
les charges capacitives et donc une sollicitation<br />
moins importante de la sortie du convertisseur qui<br />
prolonge la durée de vie de votre équipement.<br />
• les moteurs fonctionnent plus silencieusement et<br />
chauffent moins qu’<strong>ave</strong>c la distorsion générée par<br />
une onde quasi-sinusoïdale.<br />
3.3 Panneau de contrôle<br />
Ce chapitre détaille le fonctionnement du <strong>Sine</strong> W<strong>ave</strong> en<br />
tant que convertisseur, il fournit des informations sur le<br />
panneau d’affichage et décrit les limites de fonctionnement<br />
du convertisseur.<br />
3.1 Principes de fonctionnement<br />
Le convertisseur <strong>Sine</strong> W<strong>ave</strong> convertit le courant provenant<br />
des batteries en 2 étapes. La première étape est accomplie<br />
par un convertisseur CC à CC qui élève la basse tension<br />
continue de l’entrée en haute tension continue. La seconde<br />
étape est celle de l’onduleur lui-même, il convertit la haute<br />
tension en une véritable et précise courbe sinusoïdale de<br />
courant alternatif en sortie.<br />
La conversion CC à CC utilise les techniques modernes de<br />
haute fréquence qui éliminent les anciens transformateurs<br />
volumineux de la basse fréquence (50/60Hz). La seconde<br />
étape utilise des semi-conducteurs puissants qui donnent<br />
une excellente capacité de surcharge.<br />
Figure 6. Onde sinusoïdale en sortie<br />
du convertisseur <strong>Sine</strong> W<strong>ave</strong> (modèle<br />
120V AC)<br />
Le signal sinusoïdal a plusieurs avantages par rapport<br />
aux autres formes de signal délivrées par d’autres<br />
convertisseurs :<br />
• un équipement fonctionnant sur le courant alternatif<br />
est conçu pour fonctionner <strong>ave</strong>c une véritable onde<br />
sinusoïdale. Beaucoup de vos appareils<br />
fonctionneront mieux s’ils sont connectés sur le<br />
convertisseur.<br />
• les moteurs démarrent mieux.<br />
• la réduction des courants de pointe implique une<br />
augmentation de la durée de vie du convertisseur.<br />
ATTENTION<br />
Relisez les importantes mesures de<br />
sécurité que vous <strong>ave</strong>z trouvées au début<br />
de ce manuel avant de faire fonctionner le<br />
convertisseur <strong>Sine</strong> W<strong>ave</strong>.<br />
Une fois que le convertisseur est correctement installé et<br />
connecté aux batteries, il est prêt à délivrer du courant<br />
alternatif pour vos applications. Le panneau de contrôle<br />
est l’interface entre vous et le convertisseur. Ce chapitre<br />
décrit les informations données par l’affichage.<br />
1. Interrupteur ‘bypass’/marche ( /I) : cet<br />
interrupteur sert à mettre en ou hors service le<br />
convertisseur. Il sert également à enclencher ou<br />
désenclencher le mode POWERSAVE pendant la<br />
Plusieurs avantages du signal sinusoïdal pur sont dûs à<br />
l’absence de pics qui apparaissent dans les convertisseurs<br />
au signal quasi-sinusoïdal ou carré. Parmi eux :<br />
Figure 5. Principe de fonctionnement<br />
• moins d’interférences <strong>ave</strong>c les équipements<br />
électroniques ou audio, plus particulièrement ceux<br />
Figure 7. Panneau de contrôle du <strong>Sine</strong> W<strong>ave</strong><br />
8 Français Manuel d’instruction du convertisseur <strong>Sine</strong> W<strong>ave</strong>
mise sous-tension. En position () (‘bypass’), les<br />
modèles équipés <strong>ave</strong>c un relais de transfert passent<br />
en mode BYPASS, c’est à dire que le courant<br />
alternatif d’entrée tr<strong>ave</strong>rse le convertisseur et<br />
alimente directement la charge. L’interrupteur<br />
contrôle uniquement la sortie du convertisseur et<br />
non pas la sortie alternative des convertisseurs<br />
équipés d’un relais de transfert en option.<br />
2. Affichage à cristaux liquides LCD: l’affichage<br />
numérique donne le courant d’entrée venant de la<br />
batterie et la tension de la batterie. Un graphique<br />
indique en watts la puissance en sortie produite par<br />
le convertisseur quand la charge fonctionne.<br />
3. Montage multi-position: le panneau de contrôle a<br />
été conçu pour être déplacé de 90° suivant<br />
l’orientation du convertisseur lui-même. Le panneau<br />
peut également être complétement déporté du<br />
convertisseur <strong>ave</strong>c l’option commande à distance.<br />
4. Affichage des défauts: s’il y avait un défaut, l’erreur<br />
apparaitrait immédiatement à l’affichage. Vous aurez<br />
alors une alarme sonore et lumineuse pour attirer<br />
votre attention sur le défaut décelé (voir paragraphe<br />
5.1).<br />
Pour faire fonctionner le convertisseur <strong>Sine</strong> W<strong>ave</strong>:<br />
1. Mettez votre appareil en service, position ON (I) sur<br />
le panneau de contrôle. Les informations suivantes vont<br />
s’afficher (à chaque mise en service), identifiant le type<br />
et la configuration de votre convertisseur <strong>Sine</strong> W<strong>ave</strong>:<br />
• modèle du <strong>Sine</strong> W<strong>ave</strong> (<strong>1000</strong> ou <strong>1800</strong> watts)<br />
• tension d’entrée, tension de sortie et fréquence de<br />
la configuration<br />
• POWERSAVE en mode OFF (seuil par défaut)<br />
Après l’affichage de ces informations, le panneau de<br />
contrôle affiche les informations standard: tension<br />
d’entrée, courant en entrée et puissance en sortie. Quand<br />
une charge est connectée, un graphique donne la<br />
puissance de sortie (watts).<br />
Manuel d’instruction du convertisseur <strong>Sine</strong> W<strong>ave</strong><br />
Figure 8. Affichage du panneau de contrôle<br />
Une fois que l’affichage standard apparait sur l’écran, le<br />
convertisseur est prêt à délivrer du courant alternatif à<br />
vos charges. Vous pouvez maintenant brancher une charge<br />
dans la prise à l’avant de votre convertisseur ou, pour<br />
les versions bornier à vis, dans une prise connectée à la<br />
sortie alternative de votre convertisseur. Les charges<br />
doivent fonctionner à partir du convertisseur de la même<br />
manière qu’à partir du courant domestique. Le<br />
paragraphe 3.5. donne les limites de fonctionnement du<br />
convertisseur <strong>Sine</strong> W<strong>ave</strong>.<br />
3.4 Fonction POWERSAVE<br />
Votre convertisseur a une fonction appelée<br />
POWERSAVE. Cette fonction « mise en veille » ferme<br />
la plupart des circuits de contrôle du convertisseur et<br />
l’éclairage du panneau de contrôle, réduisant ainsi<br />
considérablement la consommation à vide. Grâce à cette<br />
fonction, le convertisseur tire approximativement 1,5 W<br />
pendant sa mise sous tension sans charge sur le<br />
convertisseur. Le convertisseur détecte la présence de<br />
charges en émettant des impulsions environ toutes les<br />
2,5 secondes. Vous obtiendrez la puissance nécessaire<br />
en cas de détection d’une charge. Le convertisseur restera<br />
en mode POWERSAVE si la charge détectée est de moins<br />
de 10 W pour les <strong>Sine</strong> W<strong>ave</strong> <strong>1000</strong> et moins de 20W pour<br />
les <strong>Sine</strong> W<strong>ave</strong> <strong>1800</strong>. Ceci est un seuil défini en usine qui<br />
ne peut être changé.<br />
Il est recommandé d’enclencher le mode mise en veille<br />
lorsque le convertisseur est utilisé périodiquement <strong>ave</strong>c<br />
des charges puissantes. Ceci permet au convertisseur<br />
de tirer moins de courant des batteries pendant les<br />
périodes de non-utilisation. Si le convertisseur est utilisé<br />
fréquemment et que vos batteries sont rechargées<br />
pendant l’utilisation du convertisseur (par exemple par<br />
l’alternateur du véhicule), vous pouvez désactiver le mode<br />
mise en veille.<br />
Votre convertisseur est configuré en usine<br />
« POWERSAVE OFF ». Pour enclencher la fonction<br />
mise en veille, suivez les étapes suivantes:<br />
1. Mettez le panneau de contrôle sur la position ().<br />
2. Remettez l’interrupteur sur la position (I). Vous<br />
verrez s’afficher les informations de la mise sous<br />
tension comme il a été décrit préalablement (modèle<br />
et tension/fréquence de la configuration).<br />
3. Quand le panneau de contrôle affiche<br />
« POWERSAVE OFF », mettez l’interrupteur en<br />
position ( ), attendez environ 3 secondes, et<br />
remettez le à nouveau en position (I). Vous verrez<br />
s’afficher « POWERSAVE ON » pendant la phase<br />
de démarrage. Lorsque l’affichage standard<br />
réapparait, vous pourrez observer une petite flèche<br />
indiquant que le mode mise en veille est enclenché.<br />
Suivez la même procédure pour désenclencher le<br />
mode mise en veille.<br />
3.5 Limites de fonctionnement et<br />
caractéristiques des protections<br />
Puissance en sortie: Le <strong>Sine</strong> W<strong>ave</strong> <strong>1000</strong> délivre 1 000<br />
W en continu et le <strong>Sine</strong> W<strong>ave</strong> <strong>1800</strong>, 1 800 W en continu.<br />
Le tableau suivant donne la puissance délivrée en continu,<br />
en pics et en pointe en fonction du modèle:<br />
Modéle<br />
Intensité AC<br />
en sortie<br />
continu<br />
Pics du<br />
courant de<br />
sortie AC<br />
Puissance en<br />
pointe (max.<br />
watts délivré en<br />
5 secondes)<br />
1 000 8.3<br />
A<br />
25<br />
A<br />
150 0<br />
1 800 15<br />
A<br />
45<br />
A<br />
290 0<br />
1 000i 4.3<br />
A<br />
11<br />
A<br />
150 0<br />
1 800i 7.8<br />
A<br />
20<br />
A<br />
290 0<br />
Chacun des produits présentés ci-dessus est capable de<br />
faire fonctionner toutes charges inférieures ou égales à<br />
ces indices. Certains moteurs à induction de plusieurs<br />
chevaux utilisés pour les pompes ou d’autres<br />
équipements à moteur demandent une très grande<br />
Français 9
puissance au démarrage. La combinaison convertisseur /<br />
batterie peut avoir des difficultés à faire démarrer ces<br />
charges. Si vous <strong>ave</strong>z des problèmes <strong>ave</strong>c certaines<br />
charges, assurez-vous que : 1) les branchements de la<br />
batterie sont solides, 2) la taille des câbles de courant<br />
continu est suffisante et 3) la batterie est complètement<br />
chargée et de capacité suffisante.<br />
Tension d’entrée: Le convertisseur <strong>Sine</strong> W<strong>ave</strong><br />
fonctionne à partir d’une tension d’entrée comprise entre :<br />
10 à 16 V DC pour les modèles 12 V<br />
20 à 32 V DC pour les modèles 24 V<br />
Pour obtenir une performance optimum, la tension<br />
d’entrée doit être comprise entre 12 V et 15 V pour les<br />
modèles 12 V et 24 V à 30 V pour les modèles 24 V. Le<br />
convertisseur <strong>Sine</strong> W<strong>ave</strong> indique les basses et hautes<br />
tensions comme suit :<br />
Entrée Entrée Entrée Entrée<br />
CC CC CC CC<br />
Alarme Coupure Alarme Coupure<br />
surtensioon<br />
tension<br />
surtensi-<br />
basse basse<br />
Modéle<br />
tension<br />
12V<br />
15.8Vdc<br />
16.0Vd<br />
c 10.5Vd<br />
c 10.0Vd c<br />
modéles<br />
24V<br />
31.6Vdc<br />
32.0Vd<br />
c 21.0Vd<br />
c 20.0Vd c<br />
modéles<br />
La protection et la coupure en cas de surtension protègent<br />
le convertisseur au cas où l’appareil serait connecté à<br />
un équipement de tension plus importante que celle pour<br />
laquelle il a été conçu ( jusqu’à 35 V CC, des tensions<br />
plus fortes endommageraient le convertisseur). La<br />
coupure en cas de tension basse évite à votre batterie<br />
d’être trop déchargée. Après une coupure pour haute ou<br />
basse tension, le convertisseur doit être remis à zéro<br />
manuellement pour redémarrer. Mettez le convertisseur<br />
en position () (‘Bypass’), puis à nouveau en position<br />
(I) (ON) pour redémarrer.<br />
Protection contre les surcharges en sortie: il peut y<br />
avoir continuellement un court-circuit à la sortie du<br />
convertisseur sans endommager les composants internes.<br />
10 Français<br />
Le convertisseur s’arrête en moins de 5 secondes lorsque<br />
la tension à sa sortie tombe 10% en dessous de la tension<br />
nominale.<br />
Protection contre le retour de l’alternatif: Bien que<br />
le convertisseur ait été conçu pour résister au courant<br />
alternatif à sa sortie AC, il s’agit seulement d’une sécurité<br />
et un retour permanent pourrait l’endommager. Vérifiez<br />
bien votre câblage de courant alternatif en entrée, et en<br />
sortie sur les modèles bornier à vis, avant de mettre sous<br />
tension. Essayez de bien comprendre quelle est la source<br />
de courant alternatif et où elle conduit (exemple, ne<br />
branchez pas un cordon d’extension dans la prise sortie<br />
AC du convertisseur).<br />
Protection contre l’inversion de polarité : Le circuit<br />
interne du convertisseur est protégé par un fusible (32V,<br />
fast-blow) de :<br />
Modéle<br />
Fabricant et Modél e<br />
<strong>1000</strong> - 24V<br />
<strong>1000</strong>i - 24V<br />
Littelfuse/Gould CNN80 (80A)<br />
ou Bussmann ANN80 (80A)<br />
<strong>1800</strong> - 12V<br />
<strong>1800</strong>i - 12V<br />
Littelfuse Mega 225A<br />
Tous les<br />
autres<br />
Littelfuse Mega 125A<br />
Ce fusible ne peut être remplacé que par un électricien<br />
qualifié. Dans la plupart des cas d’inversion de polarité,<br />
ce fusible suffit à protéger les circuits internes. Mais, en<br />
cas de hautes tensions, le convertisseur.pourrait être<br />
endommagé.<br />
4. Test<br />
La procédure de test qui suit devrait vous assurer que le<br />
convertisseur est correctement connecté et installé.<br />
Pour tester le convertisseur:<br />
1. Vérifiez attentivement que tous les branchements<br />
en sortie du convertisseur sont bien fixés et ont bien<br />
respecté les polarités.<br />
2. Mettez l’interrupteur sur ON (I).<br />
3. Vous voyez s’afficher sur l’écran les informations<br />
suivantes à la mise sous-tension: courant d’entrée<br />
et tension d’entrée.<br />
4. Pour tester, branchez une charge dans la prise du<br />
convertisseur (par exemple une ampoule). Elle doit<br />
fonctionner normalement. Observez le graphique de<br />
puissance, en sortie du convertisseur, il doit grandir<br />
<strong>ave</strong>c la charge.<br />
5. Pour les versions bornier à vis et celles équipées<br />
<strong>ave</strong>c un relais de transfert, branchez une charge à la<br />
sortie alternative AC du convertisseur lorsque le<br />
courant alternatif domestique est disponible. Arrêtez<br />
le courant domestique. La charge doit fonctionner<br />
normalement. Reconnectez au courant domestique<br />
et la charge doit fonctionner à nouveau correctement.<br />
Ceci indique une installation et un fonctionnement<br />
corrects du relais de transfert.<br />
6. Répétez les tests 4 et 5 en mode POWERSAVE.<br />
7. Le convertisseur est prêt à fonctionner.<br />
Manuel d’instruction du convertisseur <strong>Sine</strong> W<strong>ave</strong>
l<br />
5. Guide de dépannage<br />
ATTENTION<br />
Vous ne devez ouvrir ou démonter le convertisseur <strong>Sine</strong> W<strong>ave</strong> en aucun cas. Reportez-vous au chapitre 7, Service-Après-Vente, pour obtenir des informations sur la<br />
réparation du convertisseur. Si vous essayer de réparer le convertisseur vous-même, vous risquez de causer une électrocution ou un incendie.<br />
Ce chapitre décrit un exemple d’installation, les problèmes et les solutions de la configuration, les défauts et indicateurs.<br />
5.1 Défauts et indicateurs<br />
Indications<br />
du panneau d'affichage<br />
D éfau t<br />
Solutio n<br />
HIGH BATT SHUTDOWN<br />
T ension de la batterie trop haut e Vérifiez le bon fonctionnement du système de chargement de la batterie. Remettez manuellement e<br />
c onvertisseur en route en mettant l'interrupteur en position ( ) puis ( I ) .<br />
LOW BATT SHUTDOWN<br />
T ension de la batterie trop faibl e C hargez la batterie. Remettez manuellement le convertisseur en route en mettant l'interrupteur en position ( )<br />
p uis ( I ) .<br />
O VERLOAD SHUTDOWN<br />
Courant de la batterie trop fort ,<br />
probablement surcharge<br />
Réduisez la charge.<br />
OVERTEMP SHUTDOWN<br />
T empérature trop élevé e Ventilez et rafraîchissez le convertisseur et/ou réduisez la charge .<br />
SYSTEM SHUTDOWN<br />
PS_FAULT SHUTDOWN<br />
DC-DC SHUTDOWN<br />
Surcharge ou défaut du système<br />
hardware<br />
Assurez-vous que toutes les charges ont été déconnectées.<br />
Essayez de remettre en route le convertisseur en<br />
m ettant l'interrupteur en position ( ) puis ( I ). Si le convertisseur ne fonctionne toujours pas, contactez le SA V<br />
de <strong>Xantrex</strong>.<br />
Les défauts suivants s’affichent sur le panneau de contrôle accompagnés d’une alarme sonore et lumineuse.<br />
P roblème et symptômes<br />
Cause<br />
Possibl e<br />
Solutio n<br />
Pas de tension en sortie et l'afficheur est à 10,2 V CC ou moins.<br />
(20,4VCC sur les modèles 24V).<br />
C oupure basse tension.<br />
Rechargez la batterie, vérifiez les câbles et les branchements .<br />
P as de tension en sortie, aucune indication de tension.<br />
Convertisse ur éteint .<br />
Allumez le convertisseur.<br />
Pas d'alimentation de la batterie sur le<br />
convertisseur.<br />
Inversion de polarité - fusible interne ouvert.<br />
Vérifiez le câblage et le fusible de la batterie.<br />
Montrez le convertisseur à un électricien qualifié et remplacez le<br />
fusible. FAITES ATTENTION A LA POLARITE.<br />
Pas de tension en sortie et l'afficheur est à 16,0 V CC ou plus.<br />
(32,0 V CC sur les modèles 24 V).<br />
C oupure haute tension.<br />
Vérifiez que le convertisseur est connecté à une batterie de tensio n<br />
correspondante.<br />
Vérifiez le réglage du chargeur.<br />
Alarme batterie basse permanente, indicateur de tension en<br />
dessous de 11 V CC (22,0 V CC sur les modèles 24 V).<br />
Mauvais branchement continu.<br />
Batterie faible.<br />
Utilisez le câble recommandé et faites des branchements solides.<br />
Rechargez la batterie ou utilisez en une nouvelle.<br />
Manuel d’instruction du convertisseur <strong>Sine</strong> W<strong>ave</strong><br />
Français 11
6 Garantie limitée<br />
Que couvre cette garantie et combien de temps dure-t-elle ?<br />
Cette garantie limitée prévue par <strong>Xantrex</strong> Technology, Inc. (« <strong>Xantrex</strong> ») couvre les<br />
pièces défectueuses et les défauts de fabrication de votre <strong>Xantrex</strong> <strong>Sine</strong> W<strong>ave</strong> Inverter<br />
<strong>1000</strong>i/<strong>1800</strong>i pour une durée de 24 mois à compter de la date à laquelle vous, client<br />
utilisateur final initial, <strong>ave</strong>z acheté le produit au point de vente.<br />
Cette garantie limitée est transférable aux propriétaires ultérieurs, mais uniquement<br />
pour la période de la garantie d’origine restant à courir.<br />
Que fera <strong>Xantrex</strong> ?<br />
<strong>Xantrex</strong> décidera au choix de réparer ou de remplacer le produit défectueux, et ce<br />
gratuitement, sous réserve que vous avisiez <strong>Xantrex</strong> de la défaillance du produit dans<br />
les délais stipulés par la garantie, qu’il y ait confirmation de la part de <strong>Xantrex</strong> du défaut<br />
constaté lors d’un examen et que le défaut soit couvert par la présente garantie limitée.<br />
<strong>Xantrex</strong> pourra, à son gré, utiliser des pièces neuves et/ou remises à neuf dans l’exécution<br />
des travaux de garantie ou dans la fabrication de produits de remplacement. <strong>Xantrex</strong> se<br />
réserve le droit d’avoir recours à des pièces ou produits de conception d’origine ou<br />
améliorée lors des tâches de réparation ou de remplacement. Tout produit réparé ou<br />
remplacé par <strong>Xantrex</strong> sera garanti pour la période de la garantie d’origine restant à<br />
courir, ou pendant 90 jours à compter de la date du retour chez le client au cas où cette<br />
dernière période serait plus longue. Tous les produits remplacés et toutes les pièces<br />
retirées des produits réparés deviennent la propriété de <strong>Xantrex</strong>.<br />
<strong>Xantrex</strong> couvre à la fois les pièces et la main-d’œuvre nécessaires pour réparer le<br />
produit, ainsi que le retour de ce dernier chez le client acheminé par voie de surface en<br />
transport non rapide sélectionné par <strong>Xantrex</strong> dans les limites des États-Unis et du<br />
Canada, à l’exclusion de l’Alaska et de Hawaii. Veuillez contacter le service clientèle de<br />
<strong>Xantrex</strong> pour plus de détails sur la politique de transport pour les expéditions en retour<br />
en dehors des États-Unis et du Canada.<br />
Comment obtient-on le service ?<br />
Si votre produit nécessite un dépannage ou un entretien en vertu de la garantie,<br />
veuillez contacter votre revendeur. Si vous êtes incapable de contacter votre<br />
revendeur ou que celui-ci ne peut offrir le service d’entretien, contactez directement<br />
<strong>Xantrex</strong> :<br />
Téléphone :1-800-670-0707, 1-360-925-5097<br />
Télécopie :1-360-925-5143<br />
E-mail : CustomerService@xantrex.com<br />
Les retours directs sont permis conformément à la politique d’autorisation de retour de<br />
<strong>Xantrex</strong> décrite dans le manuel de votre produit. Concernant certains produits, <strong>Xantrex</strong><br />
maintient un réseau de centres de services autorisés régionaux. Appelez <strong>Xantrex</strong> ou<br />
consultez notre site Web pour voir si vous pouvez porter votre produit à faire réparer dans<br />
l’un de ces lieux.<br />
Pour toute réclamation sous couvert de la garantie, il convient de fournir un justificatif<br />
d’achat daté et de ne pas avoir démonté ni modifié le produit sans la permission préalable<br />
de <strong>Xantrex</strong>.<br />
Les diverses formes de justificatif d’achat sont comme suit :<br />
• Ticket de caisse daté obtenu lors de l’achat initial du produit au<br />
point de vente par l’utilisateur final<br />
• Facture datée du revendeur ou ticket de caisse indiquant l’état du<br />
constructeur OEM<br />
• Facture datée ou ticket de caisse indiquant le produit échangé en<br />
vertu de la garantie<br />
Qu’est-ce que cette garantie ne couvre pas ?<br />
Cette garantie limitée ne couvre pas les cas d’usure normale du produit ni les coûts<br />
relevant du déplacement, de l’installation ou du dépannage du système électrique du<br />
client. Cette garantie ne s’appliquera pas et <strong>Xantrex</strong> ne sera nullement tenu<br />
responsable dans les cas de défaillance ou d’endommagement suivants :<br />
a) Le produit a été employé à mauvais escient, négligé, mal installé,<br />
endommagé physiquement ou modifié, de façon interne ou externe, ou<br />
endommagé par suite d’avoir été mal employé ou de l’avoir été dans un<br />
endroit pour lequel il n’est pas fait.<br />
b) Le produit a été l’objet d’un incendie, de dégâts des eaux, d’une corrosion<br />
généralisée, d’infestations biologiques ou d’une tension d’entrée à<br />
l’origine de conditions de fonctionnement dépassant les limites maximale<br />
ou minimale répertoriées dans la liste des caractéristiques techniques<br />
du produit <strong>Xantrex</strong>, y compris la tension d’entrée élevée provoquée par<br />
des générateurs et la foudre.<br />
c) Le produit a subi des réparations effectuées par quelqu’un d’autre que<br />
<strong>Xantrex</strong> ou ses antennes après-vente (ci-après « ASC »).<br />
d) Le produit fait partie intégrante d’un produit expressément garanti par un<br />
autre fabricant.<br />
e) Les marquages d’identification d’origine du produit (marque déposée,<br />
numéro de série) ont été effacés, altérés ou supprimés.<br />
STIPULATION D’EXONÉRATION<br />
Produit<br />
CETTE GARANTIE LIMITÉE EST LA SEULE ET UNIQUE GARANTIE RELATIVE<br />
À VOTRE PRODUIT PRÉVUE PAR XANTREX QUI EXCLUT, DANS LA MESURE<br />
AUTORISÉE PAR LA LOI, TOUTE AUTRE GARANTIE, CONDITION, CAUTION,<br />
REPRÉSENTATION, OBLIGATION ET RESPONSABILITÉ, EXPRESSE OU<br />
IMPLICITE, RÉGLEMENTAIRE OU AUTRE EN RESPECT DU PRODUIT,<br />
POUVANT TOUTEFOIS ÉMANER (D’UN CONTRAT, D’UN ACTE DÉLICTUEL,<br />
D’UNE NÉGLIGENCE, DES PRINCIPES DE RESPONSABILITÉ DU FABRICANT,<br />
D’UNE LOI, D’UNE CONDUITE, D’UNE DÉCLARATION OU AUTRE), Y COMPRIS<br />
MAIS DE FAÇON NON RESTRICTIVE TOUTE GARANTIE OU CONDITION<br />
IMPLICITE CONCERNANT SA QUALITÉ, SON CARACTÈRE PROPRE À LA<br />
COMMERCIALISATION OU SON ADÉQUATION À UN USAGE PARTICULIER.<br />
TOUTE GARANTIE IMPLICITE RELATIVE À LA QUALITÉ MARCHANDE OU À<br />
L’ADÉQUATION À UN USAGE PARTICULIER DU PRODUIT DANS LA MESURE<br />
REQUISE PAR LA LOI EN VIGUEUR SERA LIMITÉE EN DURÉE À LA PÉRIODE<br />
STIPULÉE PAR LA PRÉSENTE GARANTIE LIMITÉE.<br />
EN AUCUN CAS, XANTREX NE POURRA ÊTRE TENU RESPONSABLE DE TOUT<br />
DOMMAGE SPÉCIAL, DIRECT, INDIRECT OU CONSÉCUTIF, OU ENCORE DE<br />
PERTES, DE COÛTS OU DE DÉPENSES POUVANT ÉMANER D’UN CONTRAT<br />
OU D’UN ACTE DÉLICTUEL, Y COMPRIS MAIS DE FAÇON NON RESTRICTIVE<br />
TOUTE PERTE DE PROFIT DE QUELQUE NATURE QUE CE SOIT, TOUTE PERTE<br />
OU TOUT DOMMAGE À LA PROPRIÉTÉ, TOUTE BLESSURE CORPORELLE,<br />
TOUT DOMMAGE OU TOUTE BLESSURE RÉSULTANT D’UNE UTILISATION<br />
INCORRECTE OU ABUSIVE, OU D’UN DÉFAUT D’INSTALLATION,<br />
D’INTÉGRATION OU DE FONCTIONNEMENT DU PRODUIT.<br />
Exclusions :<br />
Les droits octroyés par cette garantie sont en sus des droits juridiquement<br />
prévus et reconnus, accordés en vertu des lois du pays ou de l’état où le produit<br />
<strong>Xantrex</strong> a été acheté, et ces droits ne sont nullement altérés par la présente<br />
garantie.<br />
Information<br />
SANS LIMITER LES GÉNÉRALITÉS DE CE QUI PRÉCÈDE ET SAUF ACCORD<br />
SPÉCIFIQUE PAR ÉCRIT, XANTREX<br />
(a) NE SAURAIT NULLEMENT GARANTIR L’EXACTITUDE, LA SUFFISANCE<br />
OU LA PERTINENCE DES INFORMATIONS TECHNIQUES OU AUTRES<br />
FIGURANT DANS LES MANUELS OU AUTRES DOCUMENTS FOURNIS<br />
RELATIVEMENT AU PRODUIT ; ET<br />
(b) NE SAURAIT ÊTRE TENU RESPONSABLE DE PERTES, DOMMAGES,<br />
COÛTS OU DÉPENSES DE QUELQUE NATURE QUE CE SOIT (SPÉCIAUX,<br />
DIRECTS, INDIRECTS, CONSÉCUTIFS OU ACCIDENTELS), QUI POURRAIENT<br />
DÉCOULER DE L’UTILISATION DE CES INFORMATIONS.<br />
L’UTILISATION DE TOUTE INFORMATION SE FAIT AUX RISQUES ET PÉRILS<br />
DE L’UTILISATEUR.<br />
AVERTISSEMENT : UTILISATION LIMITÉE<br />
Veuillez consulter le manuel de l’utilisateur de votre produit pour de plus amples détails<br />
sur l’utilisation limitée du produit. Veuillez notamment noter que l’usage du <strong>Xantrex</strong><br />
<strong>Sine</strong> W<strong>ave</strong> Inverter <strong>1000</strong>i/<strong>1800</strong>i est déconseillé pour les systèmes de maintien des<br />
fonctions vitales, et <strong>Xantrex</strong> ne saurait faire aucune garantie ni aucune démarche en<br />
f<strong>ave</strong>ur d’un usage de ce produit à de telles fins.<br />
Veuillez noter que l’usage du <strong>Xantrex</strong> <strong>Sine</strong> W<strong>ave</strong> Inverter <strong>1000</strong>i/<strong>1800</strong>i comme<br />
alimentation permanente est déconseillé, et <strong>Xantrex</strong> ne saurait faire aucune garantie ni<br />
aucune démarche en f<strong>ave</strong>ur d’un usage de ce produit à de telles fins.<br />
7 Politique d’autorisation de retour<br />
Avant de retourner le produit directement à <strong>Xantrex</strong>, vous devez obtenir un numéro<br />
d’autorisation de retour (RMA) et l’adresse de l’usine où expédier le produit. Le<br />
produit doit être expédié, port payé. Tout produit sera refusé et renvoyé à vos frais s’il<br />
n’a pas été autorisé, si son numéro RMA n’est pas clairement visible sur<br />
l’emballage, s’il a été expédié en port dû ou s’il a été envoyé à la mauvaise adresse.<br />
Lorsque vous contactez <strong>Xantrex</strong> pour obtenir un service, veillez à avoir votre manuel<br />
d’instructions à portée de main et soyez prêt à donner :<br />
• Le numéro de série de votre produit<br />
• Des informations sur l’installation et l’utilisation de l’unité<br />
• Des informations sur la panne et/ou la raison du retour<br />
• Une copie du justificatif d’achat daté<br />
Lorsque vous expédiez le produit :<br />
1. Emballez l’unité <strong>ave</strong>c soin, utilisant de préférence la boîte et les matériaux<br />
d’emballage originaux. Vérifiez que votre produit est renvoyé entièrement<br />
assuré, de préférence dans son emballage d’origine ou un colis équivalent.<br />
La présente garantie ne pourra s’appliquer si les dégâts causés au<br />
produit sont dus à un emballage inapproprié.<br />
2. Joignez ce qui suit :<br />
• Le numéro RMA fourni par <strong>Xantrex</strong> Technology Inc<br />
clairement visible à l’extérieur du colis.<br />
• Une adresse de retour où l’unité peut être expédiée. Les<br />
boîtes postales ne peuvent être acceptées.<br />
• Un numéro de téléphone où l’on peut vous joindre durant<br />
la journée.<br />
• Un courrier explicatif du problème.<br />
Expédiez l’unité, port payé, à l’adresse fournie par le représentant du<br />
service clientèle de <strong>Xantrex</strong>.<br />
Si vous retournez un produit d’un pays autre que les États-Unis ou le Canada :<br />
Outre ce qui est énoncé ci-dessus, vous DEVEZ joindre la somme du port de retour et<br />
vous êtes entièrement responsable de tous les documents, droits de douane, tarifs<br />
d’importation et arrhes.<br />
Si vous retournez un produit à une antenne après-vente (ASC) <strong>Xantrex</strong> : Aucun<br />
numéro d’autorisation de retour (RMA) <strong>Xantrex</strong> n’est requis. Vous devez toutefois<br />
contacter l’antenne après-vente avant de retourner le produit ou de présenter l’unité pour<br />
vérifier les procédures de retour applicables.<br />
12 Français Manuel d’instruction du convertisseur <strong>Sine</strong> W<strong>ave</strong>
Manuel d’instruction du convertisseur <strong>Sine</strong> W<strong>ave</strong><br />
8. Annexe<br />
8.1 Type de batterie<br />
Cette annexe explique quelques unes des différences<br />
entre les différentes batteries pour vous aider à choisir<br />
la batterie qui correspond le mieux à vos besoins.<br />
La batterie qui est probablement la plus courante est la<br />
batterie de votre automobile. Une batterie automobile<br />
est conçue pour fournir un courant fort en un temps court<br />
(pour faire démarrer votre moteur). Seule une partie de<br />
la capacité de la batterie est utilisée au démarrage du<br />
moteur et elle est rapidement rechargée dès que le moteur<br />
tourne .Elle n’est pas concue pour des cycles répétés de<br />
charge-décharge dans lesquels elle est presque<br />
totalement déchargée puis rechargée. Les batteries de<br />
démarrage utilisées dans ce type de décharge profonde<br />
seront épuisées rapidement.<br />
Votre convertisseur <strong>Sine</strong> W<strong>ave</strong> est conçu pour être utilisé<br />
<strong>ave</strong>c des batteries à décharge profonde. Ces batteries<br />
sont étudiées pour des opérations de décharge profonde<br />
dans lesquelles elles seront répétivement déchargées et<br />
rechargées. Ce type de batterie est souvent recommandé<br />
pour les bateaux, camping-car ou voiturettes de golf.<br />
<strong>Xantrex</strong> recommande l’usage d’une ou plusieurs de ces<br />
batteries séparées de la batterie moteur de votre véhicule<br />
<strong>ave</strong>c un répartiteur de charge.<br />
Les différents types de batteries à décharge profonde<br />
peuvent être regroupés en 4 catégories : flooded<br />
(noyées), sealed flooded (noyées plombées) « sans<br />
maintenance », recombinant flooded (souvent<br />
“éléctrolyse affamée”) et les batteries au gel. Le tableau<br />
qui suit résume les caractéristiques, avantages et<br />
inconvénients de ces différents types de batteries.<br />
BATTERIES ACIDE:<br />
TROJAN: Golf Cart, Superior, Pacer<br />
WEST MARINE: Sea Volt<br />
MOTOMASTER: Nautilus<br />
CARACTERISTIQUES :<br />
Français 13
Les bouchons peuvent être retirées pour remplir la<br />
batterie <strong>ave</strong>c de l’eau. économique mais beaucoup<br />
d’entretient.<br />
AVANTAGES:<br />
Plus résistantes à la surcharge puisqu’elle peuvent être<br />
remplies <strong>ave</strong>c de l’eau. Moins cher que les autres.<br />
INCONVENIENTS:<br />
Doit être remplie <strong>ave</strong>c de l’eau distillée et demande une<br />
« équalization » réguliérement. Exige de l’entretient.<br />
BATTERIES PLOMB ACIDE:<br />
DELCO: Voyager<br />
CARACTERISTIQUES:<br />
Les bouchons ont l’air d’être visables mais elles ne le<br />
sont pas. Vendues comme étant « sans entretient » à<br />
des prix attractifs.<br />
AVANTAGES:<br />
Moins de maintenance qu’<strong>ave</strong>c les batteries Acide. Pas<br />
besoin de remplir <strong>ave</strong>c de l’eau. Moins cher.<br />
INCONVENIENTS:<br />
Moins résistantes aux surcharges parce qu’elles<br />
consomment de l’eau mais ne peuvent être remplies une<br />
fois déchargées.<br />
BATTERIES A RECOMBINAISON DES GAZ :<br />
HAWKER ENERGY: Genesis<br />
OPTIMA: Yellow Top<br />
GNB INDUSTRIAL: Evolyte<br />
CARACTERISTIQUES:<br />
Les bouchons sont souvent cachés. Vendues comme<br />
étant : recombinaison, à valve régulées, sans entretient.<br />
AVANTAGES:<br />
Ne demande aucun entretient. Non renversable.<br />
INCONVENIENTS:<br />
Peut être endommagée par l’équalization. Générallement<br />
plus chère.<br />
BATTERIES PLOMB/GEL:<br />
SONNENSCHEIN: DRYFIT<br />
WEST MARINE: SeaGel<br />
CARACTERISTIQUES:<br />
Vendues comme batteries au « Gel »<br />
AVANTAGES:<br />
Ne demande aucun entretient. Peut être utilisée sur le<br />
coté. renversable. Faible décharge. S’abime moins lors<br />
d’une longue période de décharge.<br />
INCONVENIENTS:<br />
Peut être endommagée par l’équalization. Générallement<br />
plus chère.<br />
8.2 Taille de la batterie<br />
La taille ou capacité de la batterie utilisée pour votre<br />
convertisseur <strong>Sine</strong> W<strong>ave</strong> est aussi importante que le type<br />
de batterie choisi. Il y a, malheureusement, un certain<br />
nombre de standards pour classer les batteries selon leur<br />
capacité de stockage de courant. Les batteries<br />
automobiles sont normalement classées par ampères au<br />
démarrage. Ceci n’est pas un classement significatif pour<br />
un usage en continu. Les batteries à décharge profonde<br />
sont classées selon leur capacité de stockage soit en<br />
minutes, soit en ampères-heures. La capacité de stockage<br />
d’une batterie permet de déterminer pendant combien<br />
de temps la batterie peut fournir une certaine quantité<br />
de courant, habituellement 25A. Par exemple, une<br />
batterie <strong>ave</strong>c capacité de stockage de 180 mn peut fournir<br />
25 A pendant 180 mn avant d’être complètement<br />
déchargée. La capacité en Ah mesure combien d’ampères<br />
peut fournir une batterie pendant un temps donné,<br />
généralement 20 heures. Par exemple, une batterie de<br />
bateau ou de véhicule, classée à 100 Ah peut fournir 5 A<br />
pendant 20 heures (5 A x 20 h = 100 Ah).<br />
Les batteries sont une partie très importante du système,<br />
aussi nous vous recommandons d’installer le maximum<br />
de capacité de batteries. Une grosse batterie augmentera<br />
l’autonomie et permettra à votre convertisseur de fournir<br />
un maximum de puissance en pointe.<br />
Pour déterminer la capacité de la batterie ou du parc<br />
batteries dont vous <strong>ave</strong>z besoin, additionnez la<br />
consommation de tous les appareils fonctionnant sur le<br />
convertisseur et multipliez la par les temps estimés<br />
d’utilisation en heures entre les cycles de chargement<br />
de la batterie. La consommation de chaque appareil sera<br />
mesurée en watts, volts et ampères ou VA. Pour ce calcul,<br />
les trois unités sont équivalentes : volts x ampères =<br />
watts = VA. L’exemple suivant, basé sur une batterie<br />
rechargée tous les 3 jours, illustre ce calcul:<br />
Charge<br />
TV et<br />
magnétosco<br />
Machine à<br />
café<br />
Four à<br />
micro-onde<br />
Consommation<br />
1 consommation x temps de fonctionnement<br />
En utilisant des batteries de faible capacité (par ex. 50<br />
Ah), les performances du convertisseur seront<br />
diminuées. Même si votre batterie est en excellant état<br />
et complètement chargée, vous obtiendrez un faible<br />
courant de pointe et un temps de fonctionnement non<br />
satisfaisant même <strong>ave</strong>c une petite charge. <strong>Xantrex</strong><br />
recommande la capacité minimum de batterie de 200 Ah<br />
pour des charges moyennes (
vous <strong>ave</strong>z une plus grande capacité et la batterie ne se<br />
déchargera pas complètement. La durée de vie de la<br />
batterie est directement liée à la décharge de la batterie.<br />
Plus la décharge est profonde, plus courte est sa durée<br />
de vie.<br />
Si la puissance de courant demandée augmente, pour<br />
obtenir une capacité de batterie suffisante, vous pouvez<br />
avoir besoin d’utiliser plusieurs batterie. Deux batteries<br />
identiques peuvent être connectées en parallèle (+ à + et<br />
– à -), ce qui permet de doubler la capacité en maintenant<br />
la tension. Il n’est pas recommandé de brancher<br />
ensemble des batteries de fabrications différentes, de<br />
taux d’ampères/heure différents ou d’electrolytes<br />
different en parallèle. La durée de vie des batteries en<br />
serait réduite.<br />
9. Graphiques des performances<br />
9.1 Courbe de perte de puissance en<br />
fonction de la température<br />
Comme tous les convertisseurs, la puissance délivrée<br />
en continu par les convertisseur <strong>Sine</strong> W<strong>ave</strong> sans<br />
surchauffe, est limitée par la température ambiante. La<br />
courbe ci-dessous illustre la relation entre puissance de<br />
sortie et température ambiante.<br />
Avec une tension d’entrée adéquate (12 V ou 24 V CC),<br />
les convertisseurs délivrent leur puissance normale<br />
jusqu’à 50°C. Faire fonctionner le convertisseur à une<br />
température plus élevée peut provoquer une coupure<br />
thermique ou diminuer ses performances. Avec des<br />
tensions d’entrée inférieures à 12 V (ou 24 V), le<br />
convertisseur chauffera plus, ce qui provoquera une<br />
coupure thermique en cas de température ambiante en<br />
dessus de 50°C, comme il est montré sur le graphique.<br />
Manuel d’instruction du convertisseur <strong>Sine</strong> W<strong>ave</strong><br />
Si vous faites fonctionner le convertisseur au-delà des<br />
limites de puissance ou de température (au-dessus et à<br />
droite de la courbe), vous aurez une coupure thermique<br />
et/ou une diminution significative des performances. De<br />
plus, le fonctionnement dans ces conditions est en dehors<br />
des capacités du produit.<br />
Français 15
9.2 Courbe de rendement<br />
Le taux de rendement du convertisseur indique le<br />
pourcentage de courant CC converti en courant AC<br />
suivant la puissance. Plus ce taux est élevé, moins la<br />
perte sous forme de dégagement de chaleur est importante.<br />
Les convertisseurs <strong>Sine</strong> W<strong>ave</strong> ont un excellent rendement,<br />
meilleure que la plupart des convertisseurs. La puissance<br />
de la batterie est moins gaspillée, aussi bien <strong>ave</strong>c des<br />
charges faibles qu’<strong>ave</strong>c des charges importantes.<br />
Les mesures suivantes ont été prises sur des<br />
convertisseurs 12 V CC en entrée, 230 V en sortie,<br />
fréquence 50Hz et 120 V en sortie, fréquence 60Hz.<br />
Des taux de rendement encore meilleurs sont atteints<br />
<strong>ave</strong>c des tensions d’entrée plus élevées.<br />
Les taux de rendement sont légèrement inférieurs sur<br />
les modèles 120 V AC, 60Hz.<br />
Les mesures suivantes ont été prises sur des<br />
convertisseurs 24 V CC en entrée, 120 V en sortie,<br />
fréquence 60Hz et 230 V en sortie, fréquence 50Hz.<br />
16 Français Manuel d’instruction du convertisseur <strong>Sine</strong> W<strong>ave</strong>
/<br />
10. Spécifications et performances<br />
<strong>1000</strong><br />
180<br />
0<br />
<strong>1000</strong><br />
i<br />
<strong>1800</strong> i<br />
Puissance<br />
de sortie en continu<br />
<strong>1000</strong><br />
W<br />
<strong>1800</strong><br />
W<br />
<strong>1000</strong><br />
W<br />
<strong>1800</strong> W<br />
Puissance<br />
de sortie en pointe (5 secondes)<br />
1500<br />
W<br />
2900<br />
W<br />
1500<br />
W<br />
2900 W<br />
Pics<br />
du courant de sortie<br />
25<br />
A<br />
45<br />
A<br />
11<br />
A<br />
20 A<br />
E fficacité<br />
89<br />
%<br />
90<br />
%<br />
90 %<br />
Consommation à vide, en mode veille<br />
<br />
< 1.5W<br />
18 Français Manuel d’instruction du convertisseur <strong>Sine</strong> W<strong>ave</strong>
Índice<br />
Instrucciones Importantes de Seguridad ......................................................................................................................................................................... 1<br />
1. Introducción .................................................................................................................................................................................................................2<br />
1.1 Características principales del Inversor <strong>Sine</strong> W<strong>ave</strong> ..............................................................................................................................................2<br />
2. Instalación ...................................................................................................................................................................................................................3<br />
2.1. Requisitos para la Instalación ............................................................................................................................................................................3<br />
2.2 Ubicando su Inversor <strong>Sine</strong> W<strong>ave</strong> .........................................................................................................................................................................3<br />
2.3 Montaje del Inversor <strong>Sine</strong> W<strong>ave</strong>...........................................................................................................................................................................3<br />
2.4 Cable del Inversor <strong>Sine</strong> W<strong>ave</strong> ..............................................................................................................................................................................4<br />
2.4.1 Protección de Entrada y de Salida ................................................................................................................................................................................... 5<br />
2.4.2 Haciendo las Conexiones del Cable de CA .................................................................................................................................................................... 5<br />
2.4.3 Interruptor de Tierra del Circuito Defectuoso (GFCI) ....................................................................................................................................................... 6<br />
2.4.4 Haciendo las conexiones del cable de CC ..................................................................................................................................................................... 6<br />
3. Funcionamiento del Inversor <strong>Sine</strong> W<strong>ave</strong> .......................................................................................................................................................................8<br />
3.1 Principios sobre el Funcionamiento .....................................................................................................................................................................8<br />
3.2 Forma de Onda de Salida ...................................................................................................................................................................................8<br />
3.3 Tablero de Control ...............................................................................................................................................................................................9<br />
3.4 Modalidad POWERSAVE del <strong>Sine</strong> W<strong>ave</strong> .......................................................................................................................................................... 10<br />
3.5 Limites de Funcionamiento y Características de Protección ............................................................................................................................. 10<br />
4. Probando ................................................................................................................................................................................................................... 11<br />
5. Guía de verificación y corrección de problemas .......................................................................................................................................................... 12<br />
5.1 Condiciones de falla e indicadores .................................................................................................................................................................... 12<br />
6. Garantía ..................................................................................................................................................................................................................... 13<br />
7. Politica de autorización para la devolución de materiales (RMA) ................................................................................................................................ 13<br />
8. Apéndices .................................................................................................................................................................................................................. 14<br />
8.1 Tipo de Batería .................................................................................................................................................................................................. 14<br />
8.2 Tamaño de la Batería ........................................................................................................................................................................................ 15<br />
9. Gráficos de Performance ............................................................................................................................................................................................ 16<br />
9.1 Curva de Reducción de Potencia ....................................................................................................................................................................... 16<br />
9.2 Curva de Eficiencia ............................................................................................................................................................................................ 17<br />
10. Especificaciones de Performance ............................................................................................................................................................................ 18<br />
Manuel del Usuario del Inversor <strong>Sine</strong> W<strong>ave</strong><br />
Español
SUPERIOR, PACER SON MARCAS REGISTRADAS DE LA COMPAÑIA “TROJAN BATTERTY”<br />
SEAVOLT, SEAGEL SON MARCAS REGISTRADAS DE “WEST MARINE PRODUCTS”<br />
VOYAGER ES UNA MARCA REGISTRADA DE “DELCO-REMY”<br />
GENESIS ES UNA MARCA REGISTRADA DE “GATES ENERGY PRODUCTS - HAWKER ENERGY”<br />
EVOLYTE ES UNA MARCA REGISTRADAS DE “GNB INDUSTRIAL BATTERY CO.”<br />
PREVAILER ES UNA MARCA REGISTRADA DE “SONNENSCHEIN”<br />
Español Manuel del Usuario del Inversor <strong>Sine</strong> W<strong>ave</strong>
Instrucciones Importantes de<br />
Seguridad<br />
ADVERTENCIA<br />
Antes de la instalación y funcionamiento<br />
de su Inversor <strong>Sine</strong> W<strong>ave</strong>, asegúrese de<br />
leer y guardar estas instrucciones de<br />
seguridad.<br />
Precauciones Generales de Seguridad<br />
1. GUARDE ESTAS INSTRUCCIONES. Este<br />
<strong>Manual</strong> del Usuario contiene información<br />
importante sobre la seguridad y el funcionamiento<br />
de su Inversor <strong>Sine</strong> W<strong>ave</strong>.<br />
2. No exponga su Inversor <strong>Sine</strong> W<strong>ave</strong> a la lluvia, nieve,<br />
rociado, salpicaduras o polvo. Para reducir el riesgo<br />
de incendio, no cubra ni obstruya las aberturas de<br />
ventilación. No instale su Inversor <strong>Sine</strong> W<strong>ave</strong> en un<br />
compartimiento sin espacio alrededor ya que puede<br />
recalentarse.<br />
3. No use accesorios que <strong>Xantrex</strong> no recomiende o<br />
venda. Esto puede ocasionar incendio, descarga<br />
eléctrica o daño personal.<br />
4. El Inversor <strong>Sine</strong> W<strong>ave</strong> está diseñado para estar<br />
permanentemente conectado a su sistema de<br />
corriente continua (“CC”) (las versiones de cableado<br />
permanente, deben de estar siempre conectadas al<br />
sistema eléctrico de corriente alterna - “CA”). Para<br />
asegurar el cumplimiento con las regulaciones sobre<br />
cableado, todos los cables deben de ser instalados<br />
por un electricista o técnico calificado.<br />
5. Para evitar el riesgo de incendio o descarga eléctrica,<br />
asegúrese que el cableado existente se encuentre en<br />
buena condición y que el tamaño de los cables sea<br />
el adecuado. No use el Inversor <strong>Sine</strong> W<strong>ave</strong> si el cable<br />
está defectuoso o no cumple con los estándares.<br />
Manuel del Usuario del Inversor <strong>Sine</strong> W<strong>ave</strong><br />
6. No utilice su Inversor <strong>Sine</strong> W<strong>ave</strong> si este ha recibido<br />
un golpe fuerte, una caída, o haya sido dañado. Si el<br />
Inversor <strong>Sine</strong> W<strong>ave</strong> tiene algún defecto, por favor lea<br />
la sección 7 de este manual: Servicio de Garantía.<br />
7. No desarme el Inversor <strong>Sine</strong> W<strong>ave</strong>, vea la sección<br />
referente al Servicio en este manual para las<br />
instrucciones de como obtener servicio para su<br />
Inversor <strong>Sine</strong> W<strong>ave</strong>. Si Ud. mismo intenta darle<br />
servicio a la unidad, puede causar una descarga<br />
eléctrica o un incendio.<br />
8. Para reducir el riesgo de un descarga eléctrica,<br />
desconecte la salida de CC (y la salida de CA en las<br />
versiones de cableado permanente cuando así se<br />
requiera) del Inversor <strong>Sine</strong> W<strong>ave</strong> antes de intentar<br />
cualquier mantenimiento, limpieza o trabajo en la<br />
unidad o en los circuitos conectados al Inversor <strong>Sine</strong><br />
W<strong>ave</strong>. El apagar los controles no reducirá el riesgo.<br />
9. Conexión a Tierra: El Inversor <strong>Sine</strong> W<strong>ave</strong> debe de<br />
tener un conector de tierra conectado a la terminal de<br />
entrada CA. Tanto la conexión a tierra como el resto<br />
del cableado deben de cumplir con los códigos y<br />
ordenanzas locales.<br />
10. En embarcaciones marinas, puede que se necesiten<br />
códigos especiales de instalación. Por ejemplo, en<br />
los Estados Unidos la instalación debe de cumplir<br />
con las Regulaciones Eléctricas de los Guarda Costas<br />
de los Estados Unidos (33CFR183, Sub-part 1).<br />
Precauciones para Explosiones de Gas<br />
1. Este equipo contiene componentes que pueden<br />
producir arcos o llamas. Para prevenir un incendio<br />
o explosión, no lo instale en un compartimiento junto<br />
a baterías o materiales inflamables o donde se requira<br />
equipo con protección contra ignición. Esto incluye<br />
cualquier lugar donde haya maquinaria que opera a<br />
gasolina, tanques de combustible o accesorios de<br />
conexión u otras conexiones entre los componentes<br />
del sistema de combustible.<br />
2. Es peligroso trabajar cerca de baterías de ácido-plomo.<br />
Las baterías generan gases explosivos durante su<br />
funcionamiento normal.<br />
3. Para reducir el peligro de una explosión de baterías,<br />
siga estas instrucciones y las que haya publicado el<br />
fabricante de las baterías y el fabricante del equipo<br />
donde la batería esté instalada.<br />
Precauciones cuando trabaje con<br />
Baterías<br />
1. Alguien debe de estar cerca de usted para ayudarlo,<br />
en caso sea necesario, cuando esté trabajando cerca<br />
a baterías de ácido-plomo.<br />
2. Tenga mucha agua fresca y jabón cerca de usted en<br />
caso la batería de ácido toque su piel, ropa u ojos.<br />
3. Use protección total de ojos y ropa protectora. Evite<br />
tocarse los ojos cuando trabaje cerca de baterías.<br />
4. L<strong>ave</strong> las terminales de la batería antes de hacer las<br />
conexiones. Protéjase los ojos para que la corrosión<br />
no entre en contacto con ellos.<br />
5. Si el ácido de la batería toca su piel o su ropa, lávese<br />
inmediatamente con agua y jabón. Si el ácido entra<br />
en su ojos, inmediatamente deje correr agua fría<br />
sobre sus ojos por un mínimo de 20 minutos y reciba<br />
atención médica lo antes posible.<br />
6. NUNCA fume o deje que una llama o chispa estén<br />
cerca de una batería o motor.<br />
7. No deje caer una herramienta de metal en la batería.<br />
La chispa resultante o el corto circuito en la batería<br />
u otra parte eléctrica puede causar una explosión.<br />
8. Quítese cualquier artículo de metal como anillos,<br />
pulseras, collares o relojes cuando trabaje con una<br />
batería de ácido-plomo. La batería de ácido-plomo<br />
produce un corto circuito de una corriente tan alta<br />
que puede soldar un anillo u otro metal parecido<br />
causando una quemadura gr<strong>ave</strong>.<br />
Español 1
1. Introducción<br />
Le agradecemos su compra de este Inversor <strong>Sine</strong> W<strong>ave</strong>. Este<br />
inversor de potencia sinusoidal real de salida de CA de alta<br />
calidad, le brindará muchos años de performance excepcional.<br />
La potencia sinusoidal real de salida de CA del Inversor <strong>Sine</strong><br />
W<strong>ave</strong>, asegura que todas las cargas de CA de la unidad funcionen<br />
eficiente y correctamente. Debido a que estas cargas han sido<br />
diseñadas para funcionar con voltaje de potencia sinusoidal<br />
real, encontrará que estas cargas operan como si fueran<br />
suministradas por una red de servicios eléctricos. En algunos<br />
casos, la potencia sinusoidal real de salida del Inversor <strong>Sine</strong><br />
W<strong>ave</strong> es inclusive superior a las suministradas por la compañia<br />
de servicios eléctricos de su localidad.<br />
Para aprovechar al máximo su Inversor <strong>Sine</strong> W<strong>ave</strong>, por<br />
favor lea y siga cuidadosamente las instrucciones de este<br />
manual. Ponga especial atención a las Instrucciones<br />
Importantes de Seguridad en este manual y a los párrafos<br />
que indican CUIDADO y ADVERTENCIA que encontrará a<br />
lo largo de este manual y en el producto. Por favor, guarde<br />
todo el embalaje del equipo.<br />
Si tuviera cualquier pregunta o necesita ayuda antes, durante<br />
o después de la instalación, por favor contacte al<br />
Departamento de Servicios al Consumidor de <strong>Xantrex</strong>.<br />
Teléfono:1-800-670-0707, 1-360-925-5097<br />
Fax:1-360-925-5143<br />
E-mail: CustomerService@xantrex.com<br />
Por favor, tenga a la mano la siguiente información cuando<br />
necesite contactar a <strong>Xantrex</strong> para el mantenimiento<br />
de esta unidad.<br />
Número de Serie: ________________________________<br />
Lugar de compra: ________________________________<br />
Fecha de compra: ______________________________<br />
1.1 Características principales del<br />
Inversor <strong>Sine</strong> W<strong>ave</strong><br />
El Inversor <strong>Sine</strong> W<strong>ave</strong> utiliza una tecnología avanzada de<br />
commutación de alta frecuencia en el proceso de conversión<br />
eléctrica. Los circuitos son similares a los usados en<br />
computadoras y otros equipos electrónicos. Esta tecnología<br />
ofrece muchos beneficios:<br />
• peso liviano: para una instalación fácil<br />
• operación silenciosa<br />
• gran capacidad de sobre tensión para cargas de CA<br />
difíciles de empezar.<br />
Refiérase a la sección 10: Especificaciones, para las<br />
especificaciones completas del producto.<br />
1.1.1 Función del Inversor<br />
Cuando el inversor ha sido conectado correctamente y el<br />
interruptor está prendido (I), el Inversor <strong>Sine</strong> W<strong>ave</strong> usa la<br />
electricidad de una batería y brinda una potencia sinusoidal<br />
real de salida de voltaje de CA que es similar al voltaje<br />
suministrado por su compañía de servicios eléctricos.<br />
Mientras el voltaje de la batería esté dentro del margen de<br />
funcionamiento de la unidad, el <strong>Sine</strong> W<strong>ave</strong> continuará<br />
suministrando electricidad CA a las cargas conectadas. Se<br />
realizarán cierres por bajadas o subidas en la baterías cuando<br />
el voltaje de la batería se sale fuera del rango específico de<br />
funcionamiento (10 - 16VCC en modelos de 12V, 20-<br />
32VCC en modelos de 24V).<br />
1.1.2 Tablero de Control<br />
El Tablero de Control ofrece control (/I) (Bypass/Encendido;<br />
Bypass=Conexión Directa) y una muestra en la pantalla<br />
información sobre el funcionamiento para poder verificar las<br />
condiciones de su Inversor <strong>Sine</strong> W<strong>ave</strong> y de sus baterías.<br />
Este tablero puede ser removido y reinstalado en diferentes<br />
posiciones para que la información de la pantalla esté dirigida<br />
hacia usted de la manera más conveniente, en cualquiera de<br />
las configuraciones recomendadas para el montaje. Con el<br />
Módulo opcional de Interfaz Remoto de <strong>Sine</strong> W<strong>ave</strong>, la<br />
pantalla digital puede ser completamente removida de la<br />
base de la unidad y ubicada en el lugar de su preferencia (por<br />
ejemplo el tablero de su vehículo).<br />
1.1.3 Interruptor de Transferencia<br />
Automática<br />
Su Inversor <strong>Sine</strong> W<strong>ave</strong> puede estar equipado con un relé de<br />
transferencia si lo especifica antes de su compra. El relé de<br />
transferencia cumple dos propósitos: 1) Permite que la salida de<br />
CA del Inversor <strong>Sine</strong> W<strong>ave</strong> pueda ser conectada a un sistema ya<br />
existente de CA como una fuente de electricidad y 2) permite<br />
que el Inversor <strong>Sine</strong> W<strong>ave</strong> se convierta en una fuente de<br />
electricidad si otra fuente alterna fallara.<br />
Cuando la electricidad CA de la compañía de servicios eléctricos<br />
falla, el relé de transferencia se desactiva y la carga se transfiere<br />
automáticamente a la salida del Inversor <strong>Sine</strong> W<strong>ave</strong> en 20–30<br />
milésimas de segundo. Cuando la modalidad “POWERSAVE”<br />
está encendida (recomendada para reducir el consumo de la<br />
electricidad de reserva), la salida de CA del inversor puede ser<br />
ADVERTENCIA<br />
Note que en la posición ‘’ (Conexión Directa) el<br />
interruptor del panel frontal NO apaga todos los<br />
voltajes dentro de la unidad. Este control sólo<br />
desactiva el circuito de conversión de AC. En<br />
versiones de cableado permanente/relé de<br />
transferencia de AC, cualquier voltaje de utilidad<br />
presente en las terminales de entradas de AC estará<br />
presente en las terminales de salida de AC.<br />
retardada hasta por un segundo. Una vez que la electricidad de<br />
CA de los servicios eléctricos vuelve a funcionar, el relé se<br />
activa y la carga se vuelve a conectar automáticamente a la<br />
electricidad de CA de los servicios eléctricos.<br />
Cómo identificar los modelos con interruptores de<br />
transferencia<br />
1) Compruebe el código de barras universal del producto<br />
(UPC) en su embalaje. Las unidades con interruptores de<br />
transferencia tienen códigos UPC que finalizan en estos<br />
últimos cinco dígitos:<br />
Model<br />
<strong>1000</strong>/<strong>1000</strong>i Model <strong>1800</strong>/<strong>1800</strong> i<br />
61084<br />
6188 4<br />
61074<br />
6187 4<br />
61052<br />
6185 2<br />
61008<br />
6180 8<br />
61002<br />
6180 2<br />
2) Si hay una toma de CA en la parte frontal de la unidad, no<br />
está equipada con un interruptor de transferencia interno.<br />
3) En los inversores de onda sinusoidal con cableado de<br />
conexión, para saber si la unidad dispone de un interruptor<br />
de transferencia interno abra la cubierta del compartimiento<br />
de cableado de CA y compruebe la etiqueta que se encuentra<br />
sobre el bloque de terminales del interior.<br />
Si la unidad tiene una etiqueta similar a una de estas dos,<br />
tiene un interruptor de transferencia interno:<br />
Las unidades con esta etiqueta no tienen un interruptor de<br />
transferencia interno:<br />
2 Español Manuel del Usuario del Inversor <strong>Sine</strong> W<strong>ave</strong>
2. Instalación<br />
Esta sección contiene instrucciones para la instalación<br />
del Inversor <strong>Sine</strong> W<strong>ave</strong>. Luego de asegurar su unidad y la<br />
conexión de los cables, no encienda la unidad. Proceda a<br />
leer la siguiente sección del manual referente a las<br />
instrucciones para el funcionamiento.<br />
ADVERTENCIA<br />
Revise las Instrucciones Importantes de<br />
Seguridad que se encuentran al comienzo<br />
de este manual y lea toda la sección,<br />
poniendo particular atención a los párrafos<br />
que indican CUIDADO y ADVERTENCIA<br />
antes de proceder con la instalación.<br />
2.1. Requisitos para la Instalación<br />
CUIDADO<br />
El Inversor <strong>Sine</strong> W<strong>ave</strong> está diseñado para<br />
estar permanentemente conectado a su<br />
sistema eléctrico de CC. Configurado como<br />
la versión de cableado permanente de CA,<br />
el Inversor <strong>Sine</strong> W<strong>ave</strong> está también<br />
diseñado para estar permanentemente<br />
conectado a su sistema eléctrico de CA.<br />
Para asegurar que cumpla con las<br />
regulaciones apropiadas de electricidad,<br />
todo el cableado debe realizarse por un<br />
técnico o electricista calificado.<br />
Regulaciones para la Instalación: Existen diferentes<br />
códigos y regulaciones que la instalación debe de<br />
cumplir, dependiendo del lugar donde instale el Inversor<br />
<strong>Sine</strong> W<strong>ave</strong> como, por ejemplo, sus códigos locales y<br />
nacionales de electricidad para instalaciones<br />
residenciales. Otros ejemplos de códigos y regulaciones<br />
para las instalaciones en Norteamérica incluyen:<br />
• Requisitos para la instalación en embarcaciones de<br />
los Guarda Costas de los Estados Unidos y ABYC.<br />
Manuel del Usuario del Inversor <strong>Sine</strong> W<strong>ave</strong><br />
• Requisitos para la instalación en vehículos recreativos<br />
de la Asociación de la Industria de Vehículos<br />
Recreativos, CSA y UL.<br />
Es la responsabilidad de quien instala la unidad de cumplir<br />
con los requisitos necesarios.<br />
Artículos que Necesitara para la Instalación del<br />
Inversor <strong>Sine</strong> W<strong>ave</strong><br />
Necesitará las siguientes herramientas y materiales para<br />
instalar apropiadamente el Inversor <strong>Sine</strong> W<strong>ave</strong>:<br />
• alicate<br />
• tornillos/pernos (tornillos de ¼” ó 6 mm de diámetro)<br />
• destornillador plano (para las versiones de cableado<br />
permanente)<br />
• destornillador Phillips pequeño<br />
• ll<strong>ave</strong> inglesa para terminales de CC (½” ó 13 mm)<br />
• Cable de CA para modelos de cableado permanente<br />
(vea los detalles en la sección sobre el cableado de<br />
CA)<br />
• Cables de CC (vea los detalles en la sección sobre<br />
el cableado de CC)<br />
• Conectores de cables y plegadores para sus cables<br />
de CC<br />
• Dispositivos protectores para la desconexión de CA<br />
y CC y de sobre corrientes (vea los detalles en la<br />
sección sobre Protección de Entrada y de Salida).<br />
2.2 Ubicando su Inversor <strong>Sine</strong> W<strong>ave</strong><br />
El Inversor <strong>Sine</strong> W<strong>ave</strong> utiliza circuitos electrónicos<br />
complejos y, a pesar que se han planeado precauciones<br />
en el diseño para la protección de los circuitos, estos<br />
pueden ser susceptibles a desperfectos causados por el<br />
uso en ambientes extremos. El Inversor <strong>Sine</strong> W<strong>ave</strong> solo<br />
debe de ser instalado en lugares que cumplan con los<br />
siguientes requisitos:<br />
• Seco: no permita que agua o cualquier otro fluido<br />
gotee o moje el Inversor <strong>Sine</strong> W<strong>ave</strong>. No coloque el<br />
Inversor <strong>Sine</strong> W<strong>ave</strong> en un área donde pueda haber<br />
peligro de salpicaduras o goteo de agua.<br />
• Fresco: la temperatura ambiental debe de ser entre<br />
0º Centígrados (32ºF) y 25º Centígrados (77ºF) - es<br />
mejor si se mantiene lo más frío posible dentro de<br />
este margen. Vea la temperatura de funcionamiento<br />
en la sección de especificaciones de este manual.<br />
• Ventilación: deje por lo menos 5 pulgadas (13 cm)<br />
de espacio libre alrededor de la unidad. Asegúrese<br />
que las aberturas de ventilación de la unidad no estén<br />
obstruidas. Si coloca la unidad en un compartimiento,<br />
ventílelo con persianas o aberturas.<br />
• Seguridad: no instale el Inversor <strong>Sine</strong> W<strong>ave</strong> en el<br />
mismo compartimiento que las baterías, o en<br />
cualquier compartimiento que contenga líquidos<br />
inflamables tales como gasolina. No instale el Inversor<br />
<strong>Sine</strong> W<strong>ave</strong> en el compartimiento donde guarde un<br />
motor o en algún lugar donde se encuentren equipos<br />
con protección contra ignición.<br />
• Lugar libre de polvo: no instale el Inversor <strong>Sine</strong><br />
W<strong>ave</strong> en un lugar donde haya mucho polvo, partículas<br />
de madera u otras virutas. Estas pueden entrar en la<br />
unidad cuando el ventilador de enfriamiento está en<br />
funcionamiento.<br />
• Cercanía a la caja de CA: evite en lo posible el<br />
uso de cables largos.<br />
• Cercanía a otra(s) batería(s): evite cables<br />
excesivamente largos pero no instale el Inversor <strong>Sine</strong><br />
W<strong>ave</strong> en el mismo compartimiento que la batería.<br />
Use el largo y tamaño recomendados de los cables<br />
(vea la sección 2.4.4). Igualmente, no monte el<br />
Inversor <strong>Sine</strong> W<strong>ave</strong> donde pueda estar expuesto a<br />
los gases producidos por la batería. Estos gases son<br />
sumamente corrosivos y la exposición prolongada<br />
puede malograr el Inversor <strong>Sine</strong> W<strong>ave</strong>.<br />
• Protección de la Batería ácida: nunca permita que<br />
la batería ácida gotee en el Inversor <strong>Sine</strong> W<strong>ave</strong> o en<br />
sus cables cuando mida la gr<strong>ave</strong>dad específica o<br />
cuando rellene la batería.<br />
2.3 Montaje del Inversor <strong>Sine</strong> W<strong>ave</strong><br />
Antes de montar el Inversor <strong>Sine</strong> W<strong>ave</strong>, pruebe que el<br />
lugar seleccionado tenga un espacio adecuado alrededor<br />
de la unidad para permitir las conexiones y ventilación.<br />
El soporte del montaje debe de ser resistente a la<br />
Español 3
corrosión y tener tornillos de ¼” ó 6mm de diámetro. El<br />
sistema de montaje debe de poder sostener tres veces el<br />
peso del Inversor <strong>Sine</strong> W<strong>ave</strong>, el cual pesa<br />
aproximadamente 16 libras (7.3 Kg.). Mientras mayor<br />
sea el espacio de ventilación alrededor de la unidad, mejor<br />
será su funcionamiento. Como mínimo, mantenga 5<br />
pulgadas de espacio libre alrededor del inversor.<br />
Como montar el Inversor <strong>Sine</strong> W<strong>ave</strong><br />
1. Monte el Inversor <strong>Sine</strong> W<strong>ave</strong> sobre una superficie<br />
horizontal o vertical (así como un soporte) usando<br />
los orificios provistos para el montaje. Para un<br />
montaje seguro y permanente, utilice los ocho<br />
orificios para el montaje. Para cumplir con las<br />
regulaciones, el Inversor <strong>Sine</strong> W<strong>ave</strong> debe de estar<br />
montado en una de las tres posiciones que<br />
mostramos a continuación:<br />
Figura 1: Posiciones aprobadas para<br />
montar el inversor.<br />
2. Remueva y reajuste el tablero delantero según la<br />
posición de la base de la misma unidad. Por ejemplo,<br />
si la unidad está montada sobre una superficie<br />
vertical, puede remover el tablero delantero y<br />
colocarlo de manera que nuevamente se pueda leer<br />
horizontalmente. Esto lo puede hacer quitando los<br />
4 tornillos, sacando el tablero, girando el tablero y<br />
reajustando el tablero a la base de la unidad.<br />
Asegúrese de volver a poner los cuatro tornillos.<br />
Figura 2: Accesorios del Tablero de<br />
Control<br />
3. El tablero frontal puede ser colocado separadamente<br />
de la base de la unidad. Solo remueva el tablero de la<br />
parte delantera de la unidad, instale el Módulo<br />
opcional de Interfaz Remoto(comprado por<br />
separado) y conéctelo al cable de extensión de 30’<br />
(9 metros). El cable puede ser extendido al lugar<br />
donde el tablero será montado y conectado. Así la<br />
unidad puede ser controlada e inspeccionada desde<br />
donde Ud. lo desee. No monte el tablero<br />
separadamente sin haber comprado e instalado<br />
apropiadamente el Módulo opcional de Interfaz<br />
Remoto. El Módulo de Interfaz Remoto reduce en<br />
gran medida la interferencia generada a lo largo del<br />
cable, reduciendo las posibilidades de interferencia<br />
con otros equipos.<br />
2.4 Cable del Inversor <strong>Sine</strong> W<strong>ave</strong><br />
ADVERTENCIA<br />
Peligro de incendio y descarga eléctrica.<br />
Antes de empezar, asegúrese que los<br />
cables estén desconectados de todas las<br />
fuentes de electricidad. Todo el cableado<br />
debe de ser instaladas por un técnico o<br />
electricista calificado, siguiendo las<br />
regulaciones eléctricas locales y<br />
nacionales.<br />
Para las unidades equipadas con un tomacorrientes<br />
de CA:<br />
Si su Inversor <strong>Sine</strong> W<strong>ave</strong> está equipado con un<br />
tomacorrientes de CA en la parte delantera, siga las Cable<br />
del Inversor <strong>Sine</strong> W<strong>ave</strong> instrucciones para la instalación<br />
de cables de CC (Sección 2.4.4). Una vez que complete<br />
sus conexiones de CC y del cable a tierra, la unidad<br />
estará lista para ser usada y proporcionará electricidad<br />
de CA por el tomacorrientes delantero.<br />
Para las versiones de cableado permanente de CA:<br />
Si su unidad de cableado permanente de CA está equipada<br />
con una regleta de terminales (con o sin el relé de<br />
transferencia), es importante que lea la siguiente<br />
información sobre la instalación de cables de CA. El<br />
Inversor <strong>Sine</strong> W<strong>ave</strong> configurado con cableado<br />
permanente, maneja TODA la electricidad de CA y debe<br />
de estar instalado entre las conexiones de los servicios<br />
eléctricos y el tablero de distribución.<br />
La primera parte de las instrucciones para la instalación<br />
de cables, resume brevemente la secuencia para la<br />
instalación de los inversores configurados con cableado<br />
permanente. Por favor, lea cuidadosamente el resto de<br />
las instrucciones sobre el cableado, Sección 3.4.2, la<br />
cual detalla cada paso de la instalación de los cables<br />
luego de la sección sobre Protección de Salida y Entrada:<br />
1. Asegúrese que el interruptor (I/) esté en la posición<br />
(). Para los modelos configurados con cableado<br />
permanente equipados con el relé de transferencia,<br />
la fuente conectada de electricidad de CA<br />
(ENTRADA) pasará al inversor, haciendo que el<br />
terminal de salida y el cableado tenga corriente.<br />
Esto también sucede cuando el interruptor está en<br />
la posición de (), por lo tanto asegúrese que haya<br />
desconectado la fuente de electricidad.<br />
2. Conecte en el siguiente orden: el cable de entrada<br />
de CC, el Chasis de Tierra, el cable positivo de CC<br />
y ,finalmente, el cable negativo de CC.<br />
3. Conecte cada circuito a su fuente.<br />
4 Español Manuel del Usuario del Inversor <strong>Sine</strong> W<strong>ave</strong>
2.4.1 Protección de Entrada y de Salida<br />
Para poder cumplir con el CSA, UL y los códigos de<br />
electricidad, las salidas y entradas de CC y CA del<br />
Inversor <strong>Sine</strong> W<strong>ave</strong> deben de contar con una protección<br />
para la sobrecorriente como un cortacircuitos o un<br />
fusible, y con un dispositivo desconector como se indica<br />
a continuación (nota: la información a continuación<br />
sobre la “Entrada de CA” y la “Salida de CA” sirve<br />
únicamente para las unidades de cableado permanente<br />
de CA con regleta de terminales, y no para las versiones<br />
equipadas con el receptáculo de salida de CA).<br />
Entrada de CC: Se necesita proteger el cable de CC (con<br />
un fusible en en el circuito o con un cortacircuitos) lo<br />
más cerca posible a la batería para proteger al cable que<br />
va de la batería al Inversor <strong>Sine</strong> W<strong>ave</strong>. El régimen de<br />
corriente de este fusible o cortacircuitos de CC debe ser<br />
de capacidad suficiente para permitir el funcionamiento<br />
del Inversor <strong>Sine</strong> W<strong>ave</strong>, pero si la capacidad de corriente<br />
es muy alta, los códigos eléctricos requerirán que use<br />
cables de CC más grandes de lo que normalmente usaría.<br />
El fusible debe estar aprobado y tener un régimen que<br />
permita el uso en circuitos de CC de mínimo 12V ó 24V<br />
según el modelo de <strong>Sine</strong> W<strong>ave</strong> que tenga. Los fusibles o<br />
cortacircuitos clasificados solo para el servicio de CA no<br />
son los adecuados para usar en los circuitos de CC y<br />
pueden ser un peligro. El tamaño del cable usado entre el<br />
Inversor <strong>Sine</strong> W<strong>ave</strong> y el fusible o cortacircuitos debe de<br />
ser del tamaño adecuado para que corresponda con el<br />
tipo de corriente del fusible o del cortacircuitos<br />
cumpliendo así con los códigos o regulaciones de<br />
electricidad que requiera su instalación (refiérase a la<br />
Tabla 4).<br />
Entrada de CA: Esta instalación debe de ofrecer<br />
protección para la sobre-corriente del circuito de entrada<br />
de CA. El cortacircuitos o fusible debe de estar aprobado<br />
y tener un régimen que permita el uso en circuitos de<br />
120VCA para los modelos 120V y 230VCA para los<br />
modelos 230V. El tamaño del cable usado entre el<br />
cortacircuitos y la entrada del Inversor <strong>Sine</strong> W<strong>ave</strong> debe<br />
de ser del tamaño adecuado para el cortacircuitos,<br />
cumpliendo con los códigos y regulaciones que requiera<br />
su instalación. Para información sobre los tamaños, sirva<br />
referirse a la Tabla 1.<br />
Manuel del Usuario del Inversor <strong>Sine</strong> W<strong>ave</strong><br />
Dispositivo Desconector: Dado que los cortacircuitos y<br />
los fusibles pueden ser desconectados y removidos del<br />
circuito, estos pueden ser utilizados como dispositivos<br />
desconectores en cada uno de los circuitos arriba<br />
mencionados. Note que la función del dispositivo<br />
desconector no es desconectarse cuando esté cargando,<br />
sino sirve para aislar al Inversor <strong>Sine</strong> W<strong>ave</strong> de las fuentes<br />
de electricidad de entrada y de salida.<br />
2.4.2 Haciendo las Conexiones del Cable de<br />
CA<br />
Nuevamente, esta sección es para los modelos<br />
configurados con cableado permanente de CA con una<br />
regleta de terminales. Como mencionamos anteriormente,<br />
el cable de CA debe de corresponder con el régimen de<br />
corriente de los cortacircuitos de CA suministrados por<br />
los circuitos de CA de entrada y salida, cumpliendo con<br />
los códigos y regulaciones eléctricas que requiere su<br />
instalación. La Tabla 1 se basa en el Código de Electricidad<br />
Nacional de los Estados Unidos (1999), el Código de<br />
Electricidad de Canadá (1998), y las prácticas de cableado<br />
europeos (para los modelos 230V). Es posible que existan<br />
otros códigos y regulaciones que sean necesarios para su<br />
instalación.<br />
Modelo<br />
ENTRADA Y SALIDA D E<br />
CORRIENTE ALTERNA (CA)<br />
Corriente Tamaño<br />
Necesaria del necesario del<br />
cortacircuitos cable<br />
<strong>1000</strong> - 12/24V<br />
<strong>1800</strong> - 12/24V<br />
20A max. 12 AW G<br />
<strong>1000</strong>i - 12/24V<br />
<strong>1800</strong>i - 12/24V<br />
10A max. .0 - 2.5m m<br />
1<br />
2<br />
Tabla 1. Cortacircuitos y Tamaño de los Cables<br />
Note que no hay diferencias entre las recomendaciones<br />
para lo modelos <strong>Sine</strong> W<strong>ave</strong> <strong>1000</strong> y <strong>Sine</strong> W<strong>ave</strong> <strong>1800</strong>. Esto<br />
se debe a que el régimen de derivación de estos productos<br />
es el mismo (por ejemplo 15A para el <strong>Sine</strong> W<strong>ave</strong> <strong>1000</strong> y<br />
<strong>Sine</strong> W<strong>ave</strong> <strong>1800</strong> y 10A para el <strong>Sine</strong> W<strong>ave</strong> <strong>1000</strong>i y <strong>Sine</strong><br />
W<strong>ave</strong> <strong>1800</strong>i).<br />
La Figura 3 resulta útil ya que muestra los terminales de<br />
conexión del cable de CA para los modelos de <strong>Sine</strong> W<strong>ave</strong><br />
que están configurados con cableado permanente.<br />
Figura 3. Terminales del Cable de CA del Inversor<br />
<strong>Sine</strong> W<strong>ave</strong> (solo para la versión de cableado<br />
permanente)<br />
ADVERTENCIA<br />
Peligro de descarga. Antes de continuar,<br />
asegúrese que el Inversor <strong>Sine</strong> W<strong>ave</strong> NO<br />
esté conectado a ninguna batería y que<br />
todos los cables estén desconectados de<br />
todas las fuentes de electricidad. No<br />
conecte los terminales de salida del<br />
Inversor <strong>Sine</strong> W<strong>ave</strong> a ninguna fuente de<br />
entrada de CA.<br />
El cable de CA debe de ser conectado en el siguiente<br />
orden:<br />
1. Entrada de CA (fuente)<br />
2. Salida de CA (carga)<br />
Para hacer las conexiones del cable de CA:<br />
1. El compartimiento de cable de CA está ubicado en<br />
el lado derecho de la parte delantera del Inversor<br />
<strong>Sine</strong> W<strong>ave</strong>. Quite la tapa del compartimiento del<br />
cable de CA para poder llegar a la regleta de<br />
terminales de CA que está adentro.<br />
Español 5
2. Quite las placas descartables de los agujeros de la<br />
cubierta del compartimiento de los cables para crear<br />
los agujeros para las abrazaderas del cable. La placa<br />
descartable interior está diseñada para una<br />
abrazadera de 16 mm de diámetro para el cable de<br />
230V. Para el cable de 120V, quite el segundo anillo<br />
descartable que agranda el agujero para permitir<br />
que entre la abrazadera del cable o el cubo de<br />
conducto de ½”.<br />
3. Corra el conductor triple de la Entrada de CA<br />
(fuente) por la abrazadera del cable y dentro del<br />
compartimiento de los cables a través de la placa<br />
descartable del lado derecho de la parte delantera<br />
del tablero. Conecte el cable de tierra de la<br />
ENTRADA DE CA primero al terminal de tierra (el<br />
símbolo de tierra con un círculo alrededor), y luego<br />
conecte la línea de Entrada de CA y los cables<br />
neutrales correspondientes al terminal de entrada de<br />
CA del Inversor <strong>Sine</strong> W<strong>ave</strong>. Sirva referirse a la Tabla<br />
2 para la codificación de los colores típicos y la<br />
identificación del terminal.<br />
4. De manera parecida, conecte el cable de SALIDA<br />
de CA (carga) al terminal de salida de CA del<br />
Inversor <strong>Sine</strong> W<strong>ave</strong> (conecte la salida de tierra al<br />
terminal de tierra identificado con el símbolo de tierra<br />
sin círculo alrededor). Las conexiones del cable al<br />
terminal se deben hacer de la siguiente manera:<br />
T ERMINAL COLOR DEL CABLE C A<br />
120Vac<br />
(Norteamérica)<br />
230Vac<br />
(Europa)<br />
LINEA (L) Negr<br />
o<br />
Arró n<br />
NEUTRAL<br />
(N) Blanc<br />
o<br />
Azu l<br />
TIERRA<br />
Verde o alambr e<br />
de cobre<br />
Verde/amarillo o<br />
alambre de cobre<br />
Tabla 2. Identificación del Terminal y del Cable.<br />
5. Luego de instalar los cables, vuelva a revisar todas<br />
las conexiones para asegurarse que los cables estén<br />
en los terminales correctos y que todos los terminales<br />
estén ajustados (el par de torsión recomendado es<br />
7.5 pulgadas/libra, 9.8 Nm).<br />
Puesta a Tierra de CA para Seguridad : Durante la<br />
instalación del cable de CA, los cables de tierra de la<br />
salida y entrada de CA están conectados al inversor. El<br />
cable de tierra de la entrada de CA debe de conectarse<br />
al cable de tierra proveniente de la fuente de los servicios<br />
eléctricos de CA. El cable de tierra de la entrada de CA<br />
debe de llegar al punto de tierra de sus cargas (por<br />
ejemplo, conexión a tierra del tablero de distribución ).<br />
Puesta a Tierra del Conductor Neutral:<br />
a) Modelos de 120V: el conductor neutral del circuito<br />
de salida de CA del Inversor <strong>Sine</strong> W<strong>ave</strong> se conecta<br />
automáticamente a tierra para seguridad mientras el<br />
inversor está en funcionamiento. Esto cumple con<br />
el Código Eléctrico Nacional que requiere que<br />
fuentes de CA derivadas separadamente (tales como<br />
los inversores y generadores) tengan sus conductores<br />
neutrales conectados a tierra de la misma manera<br />
que lo hace el conductor neutral de los servicios<br />
eléctricos al tablero del cortacircuitos de CA. Para<br />
los modelos configurados con el relé de<br />
transferencia, cuando se cuenta con electricidad de<br />
CA de los servicios eléctricos y el Inversor <strong>Sine</strong><br />
W<strong>ave</strong> está en el modo de derivación, esta conexión<br />
(conexión neutral del Inversor <strong>Sine</strong> W<strong>ave</strong> de la salida<br />
de CA a la entrada de la conexión a tierra para<br />
seguridad) no funciona, para que los servicios<br />
eléctricos neutrales estén únicamente conectados a<br />
la tierra del cortacircuitos del tablero, cuando así se<br />
requiera.<br />
b) Modelos de 230V: No se hacen conexiones dentro<br />
del Inversor <strong>Sine</strong> W<strong>ave</strong> de ninguno de los conductores<br />
de línea (línea o neutral) a la conexión a tierra para<br />
seguridad.<br />
2.4.3 Interruptor de Tierra del Circuito<br />
Defectuoso (GFCI)<br />
Las instalaciones en los Vehículos Recreativos (para<br />
aprobación en Norteamérica) requieren de protección<br />
GFCI en todas los circuitos conectados a la salida de<br />
CA de los Inversores <strong>Sine</strong> W<strong>ave</strong> equipados con cableado<br />
permanente. Además, los códigos de electricidad<br />
requieren protección GFCI en ciertos receptáculos en<br />
instalaciones residenciales. A pesar que la potencia<br />
sinusoidal real del Inversor <strong>Sine</strong> W<strong>ave</strong> es equivalente a<br />
las formas de ondas provenientes de los servicios<br />
eléctricos, para el cumplimiento con los estándares<br />
requeridos por UL, hemos realizando pruebas para hacer<br />
recomendaciones específicas sobre el GFCI.<br />
<strong>Xantrex</strong> ha probado los siguientes receptáculos de 15A<br />
protegidos con GFCI y ha encontrado que funcionan<br />
adecuadamente cuando están conectados a la salida de<br />
CA del Inversor <strong>Sine</strong> W<strong>ave</strong>:<br />
Fabricante<br />
número d e<br />
modelo<br />
LEVITON<br />
6599/70 1<br />
L EVITON<br />
6598/722 *<br />
EAGLE<br />
Shock Sentr y<br />
PASS & SEYMOUR 1591-WC N<br />
HUBBELL<br />
GF252GY A<br />
BRYANT<br />
GFR52FT I<br />
B RYANT<br />
GFR82FTI* *<br />
* Con indicador de luz y chequeo de la inversión<br />
de Línea/Carga<br />
** Grado para Hospitales<br />
2.4.4 Haciendo las conexiones del cable de<br />
CC<br />
Siga este procedimiento para conectar los cables de la<br />
batería al terminal de entrada de CC del Inversor <strong>Sine</strong><br />
W<strong>ave</strong>. Sus cables deben de ser lo más cortos posibles<br />
(menos de 10 pies/3 metros si fuera posible) y lo<br />
suficientemente largos como para mantener la corriente<br />
requerida, cumpliendo con los códigos y regulaciones<br />
eléctricos que requiera su instalación. Los cables que no<br />
se adecuan a la medida (muy angostos) o son muy largos,<br />
causarán una reducción en la performance del inversor<br />
resultando en poca capacidad de sobre tensión,<br />
advertencias frecuentes sobre bajo voltaje de entrada y<br />
cierres.<br />
Estas advertencias de bajo voltaje de entrada se deben a<br />
la caída de voltaje de CC de los cables del inversor a las<br />
baterías. Mientras más largos y delgados sean los cables,<br />
mayor será la caída del voltaje. La Tabla 3 presenta<br />
6 Español Manuel del Usuario del Inversor <strong>Sine</strong> W<strong>ave</strong>
información sobre la caída del voltaje por pie de cable, a<br />
diferentes niveles de potencia de salida.<br />
V = I x R<br />
Voltaje = Corriente x Resistencia<br />
Salida del<br />
Inversor (W)<br />
500<br />
100<br />
0 150<br />
0 200<br />
0 250<br />
0 300 0<br />
Corriente<br />
(A) 50<br />
10<br />
0 15<br />
0 20<br />
0 25<br />
0 30 0<br />
Wire<br />
Gauge<br />
(AWG)<br />
Resistencia<br />
(ohms per pie)<br />
@ 25°C<br />
Caida de<br />
Voltaje<br />
por pie<br />
Caida de<br />
Voltaje<br />
por pie<br />
Caida de<br />
Voltaje<br />
por pie<br />
Caida de<br />
Voltaje<br />
por pie<br />
Caida de<br />
Voltaje<br />
por pie<br />
Caida de<br />
Voltaje<br />
por pie<br />
4/0<br />
0.00005<br />
0 0.002<br />
5 0.005<br />
0 0.007<br />
5 0.010<br />
0 0.012<br />
5 0.015 0<br />
3/0<br />
0.00006<br />
3 0.003<br />
2 0.006<br />
3 0.009<br />
5 0.012<br />
6 0.015<br />
8 0.018 9<br />
2/0<br />
0.00007<br />
9 0.004<br />
0 0.007<br />
9 0.011<br />
9 0.015<br />
8 0.019<br />
8 0.023 7<br />
0 0.00010<br />
0 0.005<br />
0 0.010<br />
0 0.015<br />
0 0.020<br />
0 0.025<br />
0 0.030 0<br />
1 0.00012<br />
6 0.006<br />
3 0.012<br />
6 0.018<br />
9 0.025<br />
2 0.031<br />
5 0.037 8<br />
2 0.00015<br />
9 0.008<br />
0 0.015<br />
9 0.023<br />
9 0.031<br />
8 0.039<br />
8 0.047 7<br />
3 0.00020<br />
1 0.010<br />
1 0.020<br />
1 0.030<br />
2 0.040<br />
2 0.050<br />
3 0.060 3<br />
4 0.00025<br />
3 0.012<br />
7 0.025<br />
3 0.038<br />
0 0.050<br />
6 0.063<br />
3 0.075 9<br />
Tabla 3. Caída de Voltaje por pie de cable de CC<br />
Por ejemplo, si el Inversor <strong>Sine</strong> W<strong>ave</strong> <strong>1800</strong> está a diez<br />
pies de su batería, está funcionando a 2000 vatios, y está<br />
mal conectado con un cable #4AWG , entonces observará<br />
una caída de voltaje por pie de 0.0506V. El largo total del<br />
cable es de 20 pies, no 10 pies, ya que el largo del cable<br />
se mide desde la batería al inversor y de regreso a la<br />
batería. Por lo tanto, multiplique 0.0506V por 20 para<br />
llegar a la caída total del voltaje de 1.012V. Si el voltaje<br />
de su batería es solo 11.2VCC, entonces el voltaje real<br />
del inversor es 10.188 (11.2V - 1.012V) debido a esta<br />
gran caída del voltaje. En estas condiciones, el Inversor<br />
<strong>Sine</strong> W<strong>ave</strong> se cerrará o le advertirá sobre el bajo voltaje<br />
de entrada. En situaciones de jale de corriente alta o<br />
sobrevoltage , la unidad puede apagarse por el bajo<br />
voltaje de entrada si los cables son muy cortos o muy<br />
largos.<br />
El aumentar el callibre del cable de CC lo ayudará a<br />
mejorar esta situación. Con los cables del tamaño<br />
correcto, y utilizando el cable #0AWG, la caída<br />
del voltaje será de 0.02VCC (multiplicado por 20,<br />
llega a un total de 0.4VCC de caída de voltaje). Esto<br />
demuestra que inclusive a 10 pies de distancia de la<br />
batería y con cables largos, puede observar una caída<br />
en el voltaje. Trate de mantener el largo del cable al<br />
mínimo y use el cable de la máximo calibre posible.<br />
<strong>Xantrex</strong> recomienda los siguientes cables para una<br />
Manuel del Usuario del Inversor <strong>Sine</strong> W<strong>ave</strong><br />
óptima performance del inversor (tanto para las versiones<br />
120V como 230V):<br />
<strong>Sine</strong> W<strong>ave</strong> <strong>1000</strong>/12: #0 AWG ó 55 mm²<br />
<strong>Sine</strong> W<strong>ave</strong> <strong>1000</strong>/24: #6 AWG ó 13 mm²<br />
<strong>Sine</strong> W<strong>ave</strong> <strong>1800</strong>/12: #4 AWG ó 110 mm²<br />
<strong>Sine</strong> W<strong>ave</strong> <strong>1800</strong>/24: #2 AWG ó 34 mm²<br />
También sugerimos que use cables de cobre de buena<br />
calidad y mantenga la longitud del cable lo más corto<br />
posible (máximo de 3 a 6 pies).<br />
<strong>Xantrex</strong> ha preparado la siguiente tabla, basada en una<br />
investigación sobre los requisitos para el uso de los<br />
inversores en otros mercados, que señala el tamaño<br />
MINIMO del cable de CC y el tamaño máximo permitido<br />
del fusible/cortacircuitos aceptadas por las diferentes<br />
agencias reguladoras en los Estados Unidos. Es posible<br />
que existan otros códigos y regulaciones que sean<br />
necesarios para su instalación.<br />
Instalaciones en Instalaciones Instalaciones<br />
embarcaciones en Vehículos Residenciales<br />
marinas Recreativos<br />
(1)<br />
(2)<br />
(3)<br />
Modelo<br />
Cable<br />
AWG<br />
Fusible<br />
(A)<br />
Cable<br />
AWG<br />
Fusible<br />
(A)<br />
Cable<br />
AWG<br />
Fusible<br />
(A)<br />
<strong>1000</strong> 12V<br />
<strong>1000</strong>i 12V<br />
# 4 17<br />
5 # 4 15<br />
0 # 1 15 0<br />
<strong>1000</strong> 24V<br />
<strong>1000</strong>i 24V<br />
# 8 90<br />
# 8 90<br />
# 6 7 0<br />
<strong>1800</strong> 12V<br />
<strong>1800</strong>i 12V<br />
# 1 30<br />
0 # 1 22<br />
5 4/<br />
0 25 0<br />
<strong>1800</strong> 24V<br />
<strong>1800</strong>i 24V<br />
# 6 10<br />
0 # 4 15<br />
0 # 2 12 5<br />
1 Basado en las Prácticas E-9 Recomendadas por le ABYC, cable de 75°C<br />
2 Basado en el NFPA 70, Artículo 551, cable de 90°C<br />
3 Basado en el NFPA 70, Artículo 240 y 310, cable de 75°C<br />
Tabla 4. Tamaño de los cables de CC y requisitos<br />
del fusible interno<br />
CUIDADO<br />
Limpie los terminales de la batería antes<br />
de hacer las conexiones. Use protección<br />
en los ojos para evitar que la corrosión entre<br />
en contacto con sus ojos.<br />
Para conectar los cables de CC:<br />
1. Antes de realizar las conexiones, dirija los cables<br />
positivo y negativo de la batería directamente a los<br />
terminales de conexión de CC del Inversor <strong>Sine</strong> W<strong>ave</strong>.<br />
Deslice las fundas del conector plástico del terminal<br />
(capuchó) sobre los cables positivo y negativo (el<br />
capuchón rojo sobre el cable positivo y el capuchón<br />
negro sobre el cable negativo). No dirija los cables<br />
a través de un tablero eléctrico de distribución,<br />
aislante de batería u otros dispositivos que añadan<br />
caídas de voltaje, con excepción de los fusibles o<br />
cortacircuitos requeridos en el terminal positivo de<br />
la batería. Instale el Inversor <strong>Sine</strong> W<strong>ave</strong> de manera<br />
que la longitud del cable de la batería sea lo más corta<br />
posible. Los conectores del Inversor <strong>Sine</strong> W<strong>ave</strong> han<br />
sido diseñados para adecuarse a los terminales de<br />
anillo con plegador de 250 MCM (ya sea AMP o<br />
ILSCO) o a los conectores de caja (estos se ajustan<br />
al cable conectado usando un destornillador ). Note<br />
que las fundas de color de los terminales<br />
(capuchónes) quedan mucho mejor con los<br />
terminales de anillo con plegador y estos son<br />
preferibles a los conectores de caja.<br />
2. Corte cuidadosamente el largo correcto de los<br />
cables y corte la cantidad necesaria del material<br />
aislante para instalar debidamente los terminales<br />
de anillo o los conectores. Sujete los terminales en<br />
ambos cables usando la herramienta plegadora<br />
recomendada por el fabricante del terminal de<br />
anillo. No debe de sobresalir ningún alambre del<br />
terminal. Conecte el terminal en el cable positivo al<br />
conector (borne) positivo de la batería en el Inversor<br />
<strong>Sine</strong> W<strong>ave</strong> y ajuste con un par de torsión de 9–10<br />
pies/libras (11.7–13 Nm) con una ll<strong>ave</strong> inglesa.<br />
Pruebe que el cable esté seguro y que esté conectado<br />
al terminal positivo correcto.<br />
3. Las regulaciones indican que todas las instalaciones<br />
requieren de un fusible en línea entre el Inversor <strong>Sine</strong><br />
W<strong>ave</strong> y la batería. Nuevamente, refiérase a los<br />
ejemplos de la Tabla 4 para el tamaño correcto de<br />
los fusibles según las regulaciones. Este fusible<br />
protege a la batería y al cable en caso de un corto<br />
circuito accidental durante la instalación del Inversor<br />
Español 7
<strong>Sine</strong> W<strong>ave</strong> o de futuras fallas en los cables. El fusible<br />
y el sujetador del fusible deben de ser instalados en<br />
el lado positivo del circuito de CC, lo más cerca<br />
posible a las baterías y dentro de la distancia<br />
especificada por los códigos de instalación<br />
apropiados. Asegúrese que todas las demás<br />
conexiones de electricidad y de tierra hayan sido<br />
conectadas al Inversor <strong>Sine</strong> W<strong>ave</strong> antes de conectar<br />
los cables de CC a las baterías.<br />
4. Conecte el cable del conector POSITIVO del Inversor<br />
<strong>Sine</strong> W<strong>ave</strong> al terminal POSITIVO del sujetador del<br />
fusible (POS +). Observe cuidadosamente las<br />
polaridades mientras realice las instalaciones y no<br />
invierta las polaridades. Dirija los dos cables antes<br />
de hacer cualquier conexión.<br />
ADVERTENCIA<br />
Asegúrese que todas las conexiones de<br />
CC estén ajustadas (par de torsión de<br />
9–10 pies/libras, 11.7–13 Nm). Las<br />
conexiones que no estén bien ajustadas<br />
pueden causar un recalentamiento<br />
resultando en peligro de incendio.<br />
6. Para las instalaciones residenciales, se requiere de un<br />
recinto para el cableado de CC para cubrir las<br />
conexiones de CC. Contacte a Statpower o a su<br />
distribuidor si necesita esta pieza. Para las<br />
instalaciones no residenciales, cubra el cable y el<br />
terminal de conexiones con los capuchones<br />
plásticos.<br />
La etapa de conversión de CC a CC usa tecnología<br />
moderna de alto poder de conversión, la cual elimina el<br />
uso de los transformadores grandes y de frecuencia baja<br />
(50/60 Hz) utilizados en los antiguos inversores. La etapa<br />
de inversión utiliza semi-conductores de alta potencia<br />
que permiten una excelente capacidad de sobre carga.<br />
Conexión a Tierra de CC:<br />
El Inversor <strong>Sine</strong> W<strong>ave</strong> tiene una oreja en el panel trasero<br />
etiquetado “Chasis de Tierra”. Esta oreja sirve para<br />
conectar el chasis del Inversor <strong>Sine</strong> W<strong>ave</strong> a la tierra de<br />
CC cumpliendo con los requerimientos de las<br />
regulaciones de algunas de las instalaciones.<br />
Figura 5. Principios para el Funcionamiento<br />
3.2 Forma de Onda de Salida<br />
Figura 4. Conexión de Baterías<br />
CUIDADO<br />
El invertir accidentalmente las polaridades<br />
puede malograr su Inversor <strong>Sine</strong> W<strong>ave</strong> y<br />
puede necesitar mantenimiento (el fusible<br />
en línea se abrirá). Antes de realizar la<br />
última conexión de CC, observe las<br />
polaridades para asegurar que el cable sea<br />
el correcto.<br />
5. Conecte el cable de CC NEGATIVO al terminal<br />
NEGATIVO (NEG -) de la batería. Luego conecte<br />
el cable al terminal negativo del inversor. La conexión<br />
al terminal negativo del Inversor <strong>Sine</strong> W<strong>ave</strong> debe de<br />
ser la conexión final. Es normal que vea una chispa<br />
cuando realice esta última conexión.<br />
3. Funcionamiento del Inversor<br />
<strong>Sine</strong> W<strong>ave</strong><br />
Esta sección muestra en detalle el funcionamiento de la<br />
unidad como inversor, provee información sobre el<br />
tablero de control y describe los rangos de<br />
funcionamiento del inversor.<br />
3.1 Principios sobre el Funcionamiento<br />
En Inversor <strong>Sine</strong> W<strong>ave</strong> convierte la electricidad de las<br />
baterías en dos etapas. La primera etapa es la conversión<br />
de CC a CC, usada para aumentar el bajo voltaje de<br />
entrada de CC a uno de alto voltaje de CC. La segunda<br />
etapa es la fase propia de la inversión, tomando el alto<br />
voltaje de CC y convirtiéndolo en potencia sinusoidal<br />
real de salida de CA.<br />
La forma de onda de salida de CC del Inversor <strong>Sine</strong> W<strong>ave</strong><br />
es “sinusoidal real”, con una Distorsión Total Armónica<br />
(THD) de 1%. La Figura 6 muestra la forma de onda de<br />
salida del Inversor <strong>Sine</strong> W<strong>ave</strong>. Esta forma de onda es casi<br />
idéntica a la electricidad suministrada por los servicios<br />
eléctricos y en los casos que la electricidad de<br />
Figura 6. Salida Sinusoidal Real del Inversor<br />
<strong>Sine</strong> W<strong>ave</strong> (Modelo de 120V de CC)<br />
8 Español Manuel del Usuario del Inversor <strong>Sine</strong> W<strong>ave</strong>
los servicios eléctricos no sea muy buena, el Inversor<br />
<strong>Sine</strong> W<strong>ave</strong> le brindará electricidad de CC clara y precisa.<br />
La potencia sinusoidal real presenta muchas ventajas<br />
sobre otras formas de ondas suministradas por otros<br />
inversores:<br />
• Los equipos de electricidad de CC están diseñados<br />
para funcionar con potencia sinusoidal real. Muchas<br />
cargas trabajarán mejor cuando estén conectadas al<br />
Inversor <strong>Sine</strong> W<strong>ave</strong>.<br />
• Los motores empezarán más fácilmente<br />
• La vida del equipo aumentará gracias a la reducción<br />
de tensión en el circuito de protección de la sobre<br />
carga.<br />
Muchas de las ventajas de la potencia sinusoidal real se<br />
deben también a la ausencia de los picos de las ondas<br />
que aparecen tanto en la potencia sinusoidal modificada<br />
como en los inversores de ondas cuadradas. Algunas de<br />
las ventajas son:<br />
• reducción de la interferencia en equipos electrónicos<br />
o de sonido, especialmente aquellos que usan<br />
suministro interno de electricidad de menor<br />
complejidad<br />
• reducción significativa de aumentos bruscos de<br />
corriente en las cargas capacitivas y menor tensión<br />
en los dispositivos de salida del inversor, alargando<br />
potencialmente la vida del equipo<br />
• los motores generalmente funcionan más callada y<br />
su<strong>ave</strong>mente sin la distorsión armónica adicional<br />
generada por la potencia sinusoidal modificada<br />
3.3 Tablero de Control<br />
ADVERTENCIA<br />
Revise las Instrucciones Importantes de<br />
Seguridad que se encuentran al comienzo<br />
de este manual antes de poner en<br />
funcionamiento el Inversor <strong>Sine</strong> W<strong>ave</strong>.<br />
Una vez que haya instalado apropiadamente el Inversor<br />
<strong>Sine</strong> W<strong>ave</strong> y haya conectado la batería, estará listo para<br />
suministrar electricidad de CA a sus cargas. El tablero de<br />
Manuel del Usuario del Inversor <strong>Sine</strong> W<strong>ave</strong><br />
control es el interlace entre Ud. y el inversor. Esta<br />
sección describe las características de este tablero y luego<br />
siguen otras secciones que contienen información sobre<br />
el funcionamiento del inversor.<br />
Figura 7. Tablero de Control del<br />
Inversor <strong>Sine</strong> W<strong>ave</strong><br />
1. CONTROL /I DEL INVERSOR: este interruptor<br />
sitúa al Inversor <strong>Sine</strong> W<strong>ave</strong> en BYPASS () o en ON (I).<br />
También se utiliza para activar o desactivar la modalidad<br />
POWERSAVE durante la secuencia de encendido.<br />
Cuando está en la posición , los modelos equipados<br />
con el relay de transferencia estarán en la modalidad<br />
BYPASS donde la electricidad de entrada de CC pasa a<br />
través de la carga. Este interruptor controla solo la salida<br />
del inversor y no controla la salida de CA de las unidades<br />
con cableado permanente equipadas con el relé de<br />
transferencia.<br />
2. PANTALLA DE CRISTAL LIQUIDO (LCD):<br />
muestra la corriente de entrada de la batería y el voltaje<br />
numérico de la batería. Una barra gráfica de segmentos<br />
múltiples muestra la electricidad de salida real en vatios<br />
del inversor cuando una carga está en funcionamiento.<br />
3. MULTIPLES POSICIONES PARA EL MONTAJE:<br />
el tablero de control está diseñado para poder ser removido<br />
y reajustado al chasis en incrementos de 90 grados<br />
dependiendo de la posición de montaje del mismo<br />
inversor. Con la compra opcional del Modulo de Interfaz<br />
Remoto, el tablero puede ser completamente removido<br />
de la unidad y montado separadamente.<br />
4. PANTALLA PARA CONDICIONES<br />
DEFECTUOSAS: si ocurriera cualquier desperfecto,<br />
la señal de error se encenderá inmediatamente. Sonará<br />
una alarma y se encenderá una luz intermitente en el<br />
alumbrado de fondo de la pantalla para que tome nota<br />
del desperfecto.<br />
Para funcionar el Inversor <strong>Sine</strong> W<strong>ave</strong>:<br />
1. Encienda la unidad situando el interruptor del tablero<br />
de control en la posición ON (I). La siguiente información<br />
aparecerá en la pantalla (cada vez que lo encienda)<br />
identificando el tipo y configuración de su <strong>Sine</strong> W<strong>ave</strong>:<br />
• Número de modelo de su <strong>Sine</strong> W<strong>ave</strong> (<strong>1000</strong> ó <strong>1800</strong> vatios)<br />
• Voltaje de entrada, Voltaje de Salida y configuración<br />
de la Frecuencia<br />
• Modalidad POWERSAVE en OFF (predeterminado<br />
por el fabricante)<br />
Luego de mostrar esta información, el tablero de control<br />
muestra la información estándar sobre el voltaje de<br />
entrada, corriente de entrada y potencia de salida.<br />
Cuando se conecta una carga, la potencia de salida<br />
(vatios) está representada por un gráfico de barras.<br />
Una vez mostrada la pantalla estándar, el Inversor <strong>Sine</strong><br />
W<strong>ave</strong> estará listo para suministrar electricidad de CA a<br />
Figura 8. Pantallas de Secuencias del Tablero de Control<br />
sus cargas. Puede conectar una carga en el tomacorrientes<br />
delantero de la unidad o, para la versión de cableado<br />
permanente, en el tomacorrientes conectado a la salida<br />
de CA del inversor. Desde el inversor, las cargas deben<br />
de funcionar de la misma manera que si fueran<br />
suministrados por los servicios eléctricos. La sección<br />
3.5 explica los rangos de funcionamiento del Inversor<br />
<strong>Sine</strong> W<strong>ave</strong>.<br />
Español 9
3.4 Modalidad POWERSAVE del <strong>Sine</strong><br />
W<strong>ave</strong><br />
Su inversor <strong>Sine</strong> W<strong>ave</strong> tiene una modalidad llamada<br />
POWERSAVE (= ‘ECONOMIZADOR’). Esta función<br />
“en reposo” apaga gran parte del circuito de control de<br />
potencia del Inversor <strong>Sine</strong> W<strong>ave</strong>, así como al alumbrado<br />
de fondo de la pantalla, reduciendo considerablemente la<br />
corriente de reserva. Cuando esta modalidad está<br />
activada, la unidad utiliza aproximadamente 1.5 vatios<br />
sin cargar al inversor. El Inversor <strong>Sine</strong> W<strong>ave</strong> detecta la<br />
presencia de una carga enviando pulsaciones<br />
aproximadamente una vez cada 2.5 segundos. La potencia<br />
total de salida sigue funcionando con la detección de una<br />
carga. La unidad se mantendrá en la modalidad<br />
POWERSAVE si la carga detectada es menor de 10W<br />
para el <strong>Sine</strong> W<strong>ave</strong> <strong>1000</strong> y menos de 20W para el <strong>Sine</strong><br />
W<strong>ave</strong> <strong>1800</strong>. Esta modalidad está configurada en la fábrica<br />
y no puede ser cambiada.<br />
Active la modalidad POWERSAVE solo si utiliza el<br />
inversor periódicamente para activar cargas. Esto permite<br />
que el inversor use menor potencia de las baterías durante<br />
períodos en desuso. Si utiliza el inversor con frecuencia<br />
y si recarga sus baterías mientras usa el inversor (por<br />
ejemplo el alternador de un vehículo), o poco después de<br />
usar el inversor, puede dejar el POWERSAVE<br />
desactivado.<br />
La fábrica predetermina que la modalidad POWERSAVE<br />
de su Inversor <strong>Sine</strong> W<strong>ave</strong> esté desactivada (OFF). Para<br />
activar la modalidad POWERSAVE, siga los siguientes<br />
pasos:<br />
1. Ponga el interruptor del tablero de control en la<br />
posición ().<br />
2. Vuelva a encender la unidad (I). Como lo describimos<br />
anteriormente, se mostrará la secuencia de encendido<br />
(número de modelo y configuración de voltaje/<br />
frecuencia).<br />
3. Cuando el tablero de control muestra<br />
“POWERSAVE OFF” apague la unidad (), espere<br />
aproximadamente 3 segundos y vuelva a encenderla<br />
(I). Durante la secuencia de encendido, notará que<br />
dice “POWERSAVE ON” y cuando aparece la<br />
imagen estándar, verá una pequeña marca indicando<br />
que el POWERSAVE está activado. Siga el mismo<br />
procedimiento si quiere desactivar la modalidad<br />
POWERSAVE.<br />
3.5 Limites de Funcionamiento y<br />
Características de Protección<br />
Potencia de salida: El Inversor <strong>Sine</strong> W<strong>ave</strong> <strong>1000</strong><br />
continuamente suministrará <strong>1000</strong> vatios y el Inversor<br />
<strong>Sine</strong> W<strong>ave</strong> <strong>1800</strong> continuamente suministrará <strong>1800</strong> vatios.<br />
La siguiente tabla muestra los tipos de corriente continua<br />
Modelo<br />
Tipo de<br />
Corriente de<br />
salida de CA<br />
continua<br />
Tipo de<br />
Corriente<br />
Máxima de<br />
salida de CA<br />
Tipo de sobre<br />
tensión (vatios<br />
máximos por 5<br />
segundos)<br />
1 000 8.3<br />
A<br />
25<br />
A<br />
150 0<br />
1 800 15<br />
A<br />
45<br />
A<br />
290 0<br />
1 000i 4.3<br />
A<br />
11<br />
A<br />
150 0<br />
1 800i 7.8<br />
A<br />
20<br />
A<br />
290 0<br />
y corriente máxima, y los tipos de sobre tensión<br />
dependiendo del modelo:<br />
Todas las unidades arriba mencionadas tienen la capacidad<br />
de funcionar con todas las cargas de régimen igual es o<br />
menores que los regimenes de potencia. Algunos motores<br />
de inducción de alto caballaje usados en bombas y otros<br />
equipos motorizados requieren de corrientes de arranque<br />
muy altas y se puede tener dificultad para encenderlos<br />
con el Inversor <strong>Sine</strong> W<strong>ave</strong> combinado con la batería. Si<br />
tiene problemas con ciertas cargas, asegúrese que las<br />
conexiones de la batería estén sólidas, los cables de CC<br />
sean del tamaño adecuado y que la batería tenga la<br />
capacidad suficiente y esté completamente cargada.<br />
Voltaje de entrada: el Inversor <strong>Sine</strong> W<strong>ave</strong> funciona<br />
como un voltaje de entrada variando desde:<br />
10 a 16 VCC para los modelos de 12V<br />
20 a 32 VCC para los modelos de 24V<br />
La performance óptima de estos inversores ocurre cuando<br />
el voltaje de entrada de CC oscila entre los 12 a 15 voltios<br />
para los modelos 12V y 24 a 30 voltios para los modelos<br />
24V. El Inversor <strong>Sine</strong> W<strong>ave</strong> le indicará las condiciones<br />
altas y bajas de voltaje de CC como sigue:<br />
Alarma Cierre por Alarma Cierre por<br />
por sobre por subtensión<br />
sobretensión<br />
de Entrada baja de de CC<br />
tensión de tensión de Entrada<br />
Entrada de CC Entrada<br />
Modelo de CC<br />
de CC<br />
modelos<br />
de 12V<br />
modelos<br />
de 24V<br />
15.8Vdc<br />
16.0Vd<br />
c 10.5Vd<br />
c 10.0Vd c<br />
31.6Vdc<br />
32.0Vd<br />
c 21.0Vd<br />
c 20.0Vd c<br />
En caso la unidad esté conectada a un voltaje más alto del<br />
especificado en el diseño, la protección de sobretensión<br />
y la interrupción de corriente protegerán al inversor contra<br />
el excesivo voltaje de entrada (hasta 35VDC—voltajes<br />
más altos pueden causar desperfectos). La interrupción<br />
de corriente por bajo voltaje de entrada protege a su<br />
batería para que no se descargue excesivamente. Luego<br />
de una interrupción causada por alto o bajo voltaje de<br />
entrada, el Inversor <strong>Sine</strong> W<strong>ave</strong> deberá de re-encenderse<br />
manualmente. Ponga el interruptor de encendido en ()<br />
y nuevamente en (I) para reactivar la unidad.<br />
Protección de la Sobrecarga de Salida: se puede<br />
producir un cortocircuito continuamente a la salida sin<br />
dañar ninguno de los componentes internos. El inversor<br />
<strong>Sine</strong> W<strong>ave</strong> se apagará en menos de 5 segundos cuando la<br />
salida cae un 10% por debajo del voltaje nominal, como<br />
resultado de corriente limitada.<br />
Protección contra retroalimentación de la CA:<br />
Aunque el Inversor <strong>Sine</strong> W<strong>ave</strong> ha sido diseñado para<br />
resistir la entrada de CA en la salida de CA como una<br />
medida de seguridad, la retroalimentación continua de<br />
CA puede malograr al inversor. Para evitar desperfectos<br />
en su inversor, verifique la instalación de los cables de<br />
entrada y salida de CA en las versiones configuradas con<br />
cableado permanente antes de encenderlo, y esté<br />
10 Español Manuel del Usuario del Inversor <strong>Sine</strong> W<strong>ave</strong>
seguro de la fuente de CA y la dirección de la electricidad<br />
de la fuente (por ejemplo, no conecte un cable de<br />
extensión con corriente al tomacorrientes de CA del<br />
<strong>Sine</strong> W<strong>ave</strong>).<br />
Protección para la Inversión de la Polaridad de la<br />
Entrada: el circuito interno del Inversor <strong>Sine</strong> W<strong>ave</strong> está<br />
protegido con un fusible interno de fusión rápida del<br />
siguiente de régimen medido a:<br />
Modelo<br />
Fabricante y número d e<br />
modelo<br />
<strong>1000</strong> - 24V<br />
<strong>1000</strong>i - 24V<br />
Littelfuse/Gould CNN80 ó<br />
Bussmann ANN80 rated 80A<br />
<strong>1800</strong> - 12V<br />
<strong>1800</strong>i - 12V<br />
Littelfuse Mega 225A<br />
resto de los<br />
modelos<br />
Littelfuse Mega 125A<br />
Este fusible solo debe de ser reemplazado por una persona<br />
calificada. En muchas condiciones de polaridad invertida,<br />
este fusible protegerá los circuitos internos, sin embargo,<br />
en ciertas situaciones de alto voltaje/corriente pueden<br />
causar daño interno.<br />
Manuel del Usuario del Inversor <strong>Sine</strong> W<strong>ave</strong><br />
4. Probando<br />
La prueba simple que señalamos a continuación, asegura<br />
que el Inversor <strong>Sine</strong> W<strong>ave</strong> esté conectado e instalado<br />
correctamente.<br />
Para probar el Inversor <strong>Sine</strong> W<strong>ave</strong>:<br />
1. Verifique todos los cables del inversor para observar<br />
la polaridad correcta y para asegurar las conexiones.<br />
2. Ponga el interruptor en (I) .<br />
3. Observe la secuencia de encendido en la pantalla.<br />
La información sobre la corriente de entrada y del<br />
voltaje de entrada serán mostradas en la imagen del<br />
estado normal del inversor.<br />
4. Conecte una carga de prueba (por ejemplo, una<br />
bombilla) en el tomacrrientes del Inversor <strong>Sine</strong> W<strong>ave</strong>.<br />
La carga debe funcionar normalmente. Observe la<br />
potencia de salida en el gráfico de barra—aumentará<br />
según la demanda de la carga.<br />
5. Para las versiones equipadas con cableado<br />
permanente y con relé de transferencia, enchufe una<br />
carga en el ramal de salida de la CA del <strong>Sine</strong> W<strong>ave</strong><br />
mientras que la entrada de CA está disponible. Quite<br />
la entrada de CA. La carga debe de seguir funcionando<br />
normalmente. Sustituya la fuente de electricidad de<br />
entrada de CA y otra vez, la carga debe funcionar<br />
normalmente, indicando la instalación y función<br />
correcta del relé de transferencia.<br />
6. Repita la prueba número 4 ó 5 con el <strong>Sine</strong> W<strong>ave</strong> en la<br />
modalidad “ Powers<strong>ave</strong> ”.<br />
7. El Inversor <strong>Sine</strong> W<strong>ave</strong> estará listo para funcionar.<br />
Español 11
l<br />
5. Guía de verificación y corrección de problemas<br />
ADVERTENCIA<br />
No abra o desarme el Inversor <strong>Sine</strong> W<strong>ave</strong>. Vea la sección 7, Servicio de Garantía, del manual sobre las instrucciones para obtener servicio para el Inversor <strong>Sine</strong> W<strong>ave</strong>. El<br />
intentar darle servicio usted mismo a la unidad, puede causar un riesgo de descarga eléctrica o incendio.<br />
Esta sección describe los problemas y posibles soluciones para la instalación y configuración, incluyendo las condiciones de falla e indicadores.<br />
5.1 Condiciones de falla e indicadores<br />
Las siguientes condiciones de falla se muestran en la pantalla en el tablero de control junto con un sonido del alarma y un contraluz intermitente del LCD.<br />
Indicación en el Tablero de<br />
Control<br />
C ondiciones de falla<br />
Solució n<br />
HIGH BATT SHUTDOWN V oltaje de la batería muy alt o<br />
R evise si hay desperfectos en el sistema de cargado de la batería. Reactive manualmente el inversor appagando ( ) y<br />
e ncendiendo ( I ) nuevamente .<br />
LOW BATT SHUTDOWN V oltaje de la batería demasiado baj o<br />
C argue la batería. Reactive manualmente el inversor appagando ( ) y encendiendo ( I ) nuevamente .<br />
O VERLOAD SHUTDOWN Corriente de la batería muy alta, probablemen t<br />
hay una sobrecarga de CA<br />
Reduzca la carga en el invrsor.<br />
OVERTEMP SHUTDOWN R ecalentamiento en el sistem a<br />
Mejore la ventilación y el enfriamiento y/o reduzca lacarga en el inversor .<br />
SYSTEM SHUTDOWN<br />
PS_FAULT SHUTDOWN<br />
DC-DC SHUTDOWN<br />
D esperfecto en el sistema o sobrecarga A segure que todas las cargas estén desconectadas. Trate de reactivar la unidad apagando ( ) y luego encendiendo ( I ) otr a<br />
vez. Si la unidad sigue sin funcionar, contacte a su distribuidor/Vendedor o a <strong>Xantrex</strong> si requiere de<br />
servicio/Reparación/Reemplazo en garantía.<br />
La siguiente tabla, muestra algunos consejos prácticos sobre como solucionar algunos problemas:<br />
P roblema y síntomas<br />
P osible Caus e<br />
Solució n<br />
No hay votaje de salida y el tablero de control señala<br />
10.0VCC o menos voltaje (20.4VCC en modelos de 24V)<br />
C ierre por bajo boltaje de entrada.<br />
Recargue la batería, revise las conexiones y cables .<br />
N o hay voltaje de salida, no hay indicación de voltaje E inversor está en la posición ( ) .<br />
E ncienda el inversor ( I ) .<br />
La batería no carga al inversor.<br />
Revise los cables hacia el inversor. Revise el fusible de la batería.<br />
Conexión inversa de polaridades de CC, el fusible<br />
interno está abierto.<br />
Contacte a un técnico calificado para darle servicio al inversor y reemplace el fusible (el<br />
fusible de reemplazo correcto está marcado en el interior de la unidad) OBSERVE QUE LA<br />
POLARIDAD DE CC SEA LA CORRECTA.<br />
No hay voltaje de salida y el tablero de control señala<br />
16.0VCC o más voltaje (32.0VCC en los modelos de 24V)<br />
C ierre por alto voltaje de entrada.<br />
Asegúrese que el inversor esté conectado al voltaje correcto de la batería .<br />
Revise las regulaciones del sistema de cargado.<br />
Constante advertencia por batería baja, indicador de voltaje<br />
menor que 11.0V (22.0VCC en modelos de 24V)<br />
Fallas en el cable de CC.<br />
Batería en mal estado.<br />
Use los cables apropiados y tenga conexiones sólidas.<br />
Cargue la batería o use una nueva batería.<br />
12 Español Manuel del Usuario del Inversor <strong>Sine</strong> W<strong>ave</strong>
6 Garantía limitada<br />
¿Qué cubre y cuánto dura la garantía?<br />
<strong>Xantrex</strong> Technology, Inc. (“<strong>Xantrex</strong>”) concede esta garantía limitada que cubre todos los<br />
defectos de fabricación y materiales que puedan aparecer en su <strong>Xantrex</strong> <strong>Sine</strong> W<strong>ave</strong><br />
Inverter <strong>1000</strong>i/<strong>1800</strong>i. La presente garantía tiene validez durante un Período de garantía<br />
de 24 months a partir de la fecha de compra en el punto de venta en que usted, el<br />
usuario final, adquirió el producto.<br />
La presente Garantía limitada se puede transferir a los propietarios posteriores del<br />
producto, pero sólo tendrá vigencia durante el tiempo restante del Período de garantía.<br />
¿Cómo actuará <strong>Xantrex</strong>?<br />
<strong>Xantrex</strong> reparará o sustituirá, según su propio criterio, el producto defectuoso de forma<br />
gratuita, siempre y cuando el defecto del producto se haya notificado a <strong>Xantrex</strong> dentro<br />
del Período de garantía y que <strong>Xantrex</strong>, tras una inspección, constate la existencia de<br />
dicho defecto y que está cubierto por la presente Garantía limitada.<br />
Además, <strong>Xantrex</strong> puede decidir, según su criterio, utilizar piezas nuevas y/o reconstruidas<br />
para realizar las reparaciones cubiertas por la garantía y fabricar productos de<br />
reposición. <strong>Xantrex</strong> se reserva el derecho de utilizar piezas o productos de diseño<br />
original o mejorado en la reparación o sustitución del producto. En caso de que <strong>Xantrex</strong><br />
repare o sustituya un producto, la presente garantía continuará vigente durante el período<br />
restante del Período de garantía original o durante un período de 90 días a partir de la<br />
fecha de devolución al cliente, el de mayor duración de los dos. <strong>Xantrex</strong> se quedará con<br />
la propiedad de todos los productos sustituidos y las piezas retiradas de los productos<br />
reparados.<br />
<strong>Xantrex</strong> se hará cargo de las piezas y la mano de obra necesarias para la reparación<br />
del producto, así como de la devolución del producto al cliente, que se realizará mediante<br />
un transporte por tierra no urgente seleccionado por <strong>Xantrex</strong> dentro de las zonas contiguas<br />
de Estados Unidos y Canadá. No se incluyen ni Alaska ni las islas Hawái. Si desea<br />
obtener información detallada sobre la política de transporte para la devolución de<br />
productos fuera de las fronteras de Estados Unidos y Canadá, póngase en contacto con<br />
el servicio de atención al cliente de <strong>Xantrex</strong>.<br />
¿Qué debe hacer para recibir asistencia?<br />
Si el producto requiere servicio de asistencia en garantía o resolución de<br />
problemas, póngase en contacto con su vendedor. Si no consigue ponerse en<br />
contacto con el vendedor o si éste no puede proporcionarle asistencia, póngase en<br />
contacto con <strong>Xantrex</strong> en las direcciones y teléfonos siguientes:<br />
Teléfono:1-800-670-0707, 1-360-925-5097<br />
Fax:1-360-925-5143<br />
Correo electrónico: CustomerService@xantrex.com<br />
Las devoluciones directas se realizarán según la política de autorización para la<br />
devolución de materiales (RMA) de <strong>Xantrex</strong> descrita en el manual del producto. Para<br />
determinados productos, <strong>Xantrex</strong> dispone de un red de centros regionales de asistencia<br />
autorizados. Póngase en contacto con <strong>Xantrex</strong> o visite nuestro sitio Web para comprobar<br />
si su producto se puede reparar en alguna de estas instalaciones.<br />
Para cualquier reclamación en garantía es necesario proporcionar una prueba de compra<br />
fechada y el producto no debe haber sido desmontado ni modificado sin previa<br />
autorización por escrito de <strong>Xantrex</strong>.<br />
Manuel del Usuario del Inversor <strong>Sine</strong> W<strong>ave</strong><br />
Constituyen prueba de compra los siguientes documentos:<br />
• El recibo de compra fechado correspondiente a la compra original<br />
del producto por parte del usuario final en el punto de venta.<br />
• El recibo de compra o la factura del distribuidor fechados que<br />
muestre el estado de equipo original del fabricante (OEM).<br />
• El recibo de compra o la factura fechados que indiquen el producto<br />
intercambiado dentro de la garantía.<br />
¿Qué limitaciones tiene la garantía?<br />
La presente Garantía limitada no cubre el desgaste normal del producto ni los<br />
costes relacionados con la retirada, instalación o resolución de problemas de los<br />
sistemas eléctricos del cliente. Esta garantía no tendrá aplicación, y <strong>Xantrex</strong> no<br />
se hará responsable de ningún daño o defecto del producto, en los siguientes<br />
casos:<br />
a) Cuando el producto no se haya utilizado debidamente, se haya descuidado,<br />
no se haya instalado correctamente, se haya dañado o modificado, ya<br />
sea por dentro o por fuera, o los daños que haya sufrido sean derivados<br />
del uso incorrecto o la utilización en un entorno inadecuado.<br />
b) Cuando el producto haya entrado en contacto con fuego, agua, corrosión<br />
generalizada o plagas biológicas, o se haya sometido a un voltaje que<br />
haga que las condiciones de funcionamiento sobrepasen los límites<br />
inferiores o superiores indicados en las especificaciones del producto<br />
de <strong>Xantrex</strong>, incluido el voltaje procedente de generadores y rayos.<br />
c) Cuando las tareas de reparación del producto no se hayan realizado en<br />
<strong>Xantrex</strong> o en uno de sus centros de asistencia autorizados (en adelante,<br />
“ASC”).<br />
d) Cuando el producto se haya utilizado como componente de un producto<br />
garantizado expresamente por otro fabricante.<br />
e) Cuando las marcas de identificación originales (marca comercial,<br />
número de serie) del producto se hayan desfigurado, alterado o eliminado.<br />
DESCARGO DE RESPONSABILIDAD<br />
Producto<br />
LA PRESENTE GARANTÍA LIMITADA CONSTITUYE LA ÚNICA Y EXCLUSIVA<br />
GARANTÍA PROPORCIONADA POR XANTREX PARA SU PRODUCTO<br />
XANTREX Y PREVALECE, EN LA MEDIDA PERMITIDA POR LA LEY, SOBRE<br />
CUALQUIER OTRA GARANTÍA, CONDICIÓN, AFIRMACIÓN, OBLIGACIÓN O<br />
RESPONSABILIDAD, YA SEA IMPLÍCITA O EXPRESA, ESTATUTARIA O DE<br />
CUALQUIER OTRO TIPO, RELACIONADA CON EL PRODUCTO O QUE<br />
PUDIESE SURGIR (YA SEA POR CONTRATO, AGRAVIO, NEGLIGENCIA,<br />
PRINCIPIOS DE RESPONSABILIDAD DEL FABRICANTE, APLICACIÓN DE<br />
LA LEY, COMPORTAMIENTO, DECLARACIÓN O CUALQUIER OTRO MODO),<br />
INCLUIDAS SIN RESTRICCIÓN TODAS LAS GARANTÍAS IMPLÍCITAS O<br />
CONDICIONES DE CALIDAD, COMERCIALIZACIÓN O ADECUACIÓN A UN<br />
FIN CONCRETO. LA DURACIÓN DE TODAS LAS GARANTÍAS IMPLÍCITAS<br />
DE COMERCIALIZACIÓN O ADECUACIÓN A FIN CONCRETO QUE EN LA<br />
MEDIDA REQUERIDA POR LA LEY SE APLIQUEN AL PRODUCTO ESTARÁ<br />
LIMITADA AL PERÍODO ESTIPULADO EN LA PRESENTE GARANTÍA<br />
LIMITADA.<br />
XANTREX NO SE HARÁ RESPONSABLE EN NINGÚN CASO DE LOS DAÑOS<br />
ESPECIALES, DIRECTOS, INDIRECTOS, ACCIDENTALES NI DERIVADOS, NI<br />
TAMPOCO DE LAS PÉRDIDAS, GASTOS O COSTES QUE SE PUDIESEN<br />
DERIVAR, YA SEA POR CONTRATO O AGRAVIO, INCLUIDAS SIN<br />
RESTRICCIÓN LAS PÉRDIDAS ECONÓMICAS DE CUALQUIER TIPO, LAS<br />
PÉRDIDAS O DAÑOS DE LA PROPIEDAD, LESIONES PERSONALES, DAÑOS<br />
O LESIONES DERIVADAS DE O PRODUCIDAS COMO RESULTADO DE UN<br />
MAL USO, ABUSO O DE UNA INSTALACIÓN, INTEGRACIÓN O<br />
FUNCIONAMIENTO INCORRECTOS DEL PRODUCTO.<br />
Exclusiones:<br />
Los derechos concedidos por esta garantía son un complemento de<br />
cualquier otro derecho legal o estatutario establecido por las leyes del país o<br />
estado en el que se haya adquirido el producto de <strong>Xantrex</strong> y dichos<br />
derechos legales no se verán afectados por esta garantía.<br />
Información<br />
SIN LIMITAR LA GENERALIDAD DE LO ANTERIOR Y A MENOS QUE ASÍ LO<br />
ACUERDE ESPECÍFICAMENTE POR ESCRITO, XANTREX<br />
(a) NO OFRECE NINGUNA GARANTÍA REFERENTE A LA EXACTITUD,<br />
SUFICIENCIA O ADECUACIÓN DE NINGÚN TIPO DE INFORMACIÓN,<br />
TÉCNICA NI DE NINGÚN OTRO TIPO, CONTENIDA EN SUS MANUALES O EN<br />
CUALQUIER OTRA DOCUMENTACIÓN PROPORCIONADA POR XANTREX<br />
EN RELACIÓN AL PRODUCTO, Y<br />
(b) NO SE HACE RESPONSABLE DE NINGUNA PÉRDIDA, DAÑO, COSTE<br />
O GASTO, YA SEA ESPECIAL, DIRECTO, INDIRECTO, DERIVADO O<br />
ACCIDENTAL, QUE SE PUEDA DERIVAR DEL USO DE DICHA INFORMACIÓN.<br />
EL USUARIO ASUME TODOS LOS RIESGOS DERIVADOS DEL USO DE DICHA<br />
INFORMACIÓN.<br />
ADVERTENCIA: LIMITACIONES DE USO<br />
Para obtener información sobre las limitaciones de uso del producto, consulte el manual<br />
del usuario del producto. Concretamente, tenga en cuenta que el producto <strong>Xantrex</strong><br />
<strong>Sine</strong> W<strong>ave</strong> Inverter <strong>1000</strong>i/<strong>1800</strong>i no ha sido diseñado para su uso con sistemas de<br />
mantenimiento vital y, por tanto, <strong>Xantrex</strong> no ofrece ninguna garantía ni realiza ninguna<br />
afirmación en relación al uso del producto para este fin.<br />
Tenga en cuenta que el producto <strong>Xantrex</strong> <strong>Sine</strong> W<strong>ave</strong> Inverter <strong>1000</strong>i/<strong>1800</strong>i no ha sido<br />
diseñado para su uso como fuente de alimentación ininterrumpida, por lo que <strong>Xantrex</strong><br />
no ofrece ninguna garantía ni realiza ninguna afirmación en relación al uso del producto<br />
para este fin.<br />
<strong>Xantrex</strong> Technology, Inc.<br />
8999 Nelson Way<br />
Burnaby, British Columbia<br />
Canadá<br />
V5A 4B5<br />
7 Política de autorización para la devolución de materiales (RMA)<br />
Antes de devolver un producto a <strong>Xantrex</strong>, deberá obtener el número de autorización<br />
para la devolución de materiales (RMA) y la dirección correcta a la que debe<br />
realizar el envío. Además, los productos deben enviarse a portes pagados. En caso<br />
de que los envíos de devoluciones de productos no hayan sido autorizados, no<br />
indiquen claramente el número de autorización para la devolución de materiales en<br />
la parte exterior del embalaje o se hayan enviado a portes debidos o a una dirección<br />
equivocada, el producto le será devuelto y usted correrá con los gastos de<br />
devolución.<br />
Cuando se ponga en contacto con <strong>Xantrex</strong> para solicitar asistencia, deberá disponer del<br />
manual de instrucciones para su consulta y proporcionar la siguiente información:<br />
• El número de serie del producto.<br />
• Información sobre la instalación y uso de la unidad.<br />
• Información sobre el defecto y/o la razón por la que se realiza la<br />
devolución.<br />
• Una copia de la prueba de compra fechada.<br />
Español 13
Cuando envíe el producto:<br />
8. Apéndices<br />
1. Embale la unidad de forma segura, preferiblemente en el embalaje<br />
original. Asegúrese de que el producto se envía completamente<br />
protegido por el embalaje original o uno equivalente. La presente<br />
garantía no se aplicará si el producto resulta dañado a causa de<br />
un embalaje incorrecto.<br />
2. Incluya la siguiente información:<br />
• Indique claramente en la parte exterior del paquete el número<br />
de autorización para la devolución de materiales que le haya<br />
proporcionado <strong>Xantrex</strong>.<br />
• La dirección a la que se debe enviar la unidad cuando se haya<br />
reparado. No se podrá utilizar un apartado de correos.<br />
• Un número de teléfono de contacto en el que se le pueda localizar<br />
durante las horas de trabajo.<br />
• Una breve descripción del problema.<br />
Envíe la unidad a portes pagados a la dirección que le haya indicado su<br />
representante del servicio de atención al cliente de <strong>Xantrex</strong>.<br />
Si devuelve un producto desde fuera de Estados Unidos o Canadá: Además<br />
de la información indicada anteriormente, deberá incluir el coste de transporte<br />
correspondiente a la devolución y se hará cargo de cualquier documentación,<br />
impuesto, arancel y depósito.<br />
Si devuelve un producto a un centro de asistencia autorizado (ASC) de<br />
<strong>Xantrex</strong>: No será necesario que <strong>Xantrex</strong> le proporcione el número de<br />
autorización para la devolución de materiales (RMA). Sin embargo, antes de<br />
devolver la unidad deberá ponerse en contacto con el centro de asistencia para<br />
comprobar los procedimientos de devolución específicos del mismo.<br />
8.1 Tipo de Batería<br />
Este apéndice explica algunas de las diferencias entre las<br />
baterías de ácido-plomo para ayudarlo a elegir la batería<br />
que le sea más conveniente.<br />
Probablemente la batería de ácido-plomo más común es<br />
la batería de encendido de su automóvil. La batería para<br />
el encendido de automóviles está diseñada para<br />
suministrar una gran cantidad de corriente por un período<br />
corto de tiempo (para poder encender el motor).<br />
Solamente se usa una pequeña porción de la capacidad<br />
de la batería cuando se enciende el motor y se recarga<br />
rápidamente cuando el motor está en funcionamiento.<br />
No está diseñada para ciclos repetidos de carga-descarga<br />
donde la batería se descarga casi totalmente y después<br />
se recarga. Las baterías de encendido se descargará<br />
rápidamente bajo este uso intenso de descarga.<br />
Su Inversor <strong>Sine</strong> W<strong>ave</strong> está diseñado para ser utilizado<br />
con las baterías de ácido-lomo de CICLO INTENSO.<br />
Estas baterías están diseñadas para el uso intenso de<br />
descarga donde serán cargadas y descargadas<br />
repetidamente. Este tipo de batería se usa normalmente<br />
en vehículo recreativos, embarcaciones marinas, o baterías<br />
de los carros de golf. <strong>Xantrex</strong> recomienda que use una o<br />
más de estas baterías separadamente de la batería de<br />
encendido de su vehículo o embarcación con un aislador<br />
de baterías.<br />
Los diversos tipos de baterías de ácido-plomo de ciclo<br />
intenso pueden agruparse en cuatro categorías: húmedas<br />
(o mojadas), selladas (“libre de mantenimiento”),<br />
14 Español Manuel del Usuario del Inversor <strong>Sine</strong> W<strong>ave</strong>
selladas recombinadas (“electrólito hambriento”), y<br />
baterías del gel. La siguiente tabla resume estos tipos<br />
de baterías, identificando las características distintivas,<br />
ventajas y desventajas.<br />
BATERIAS HUMEDAS:<br />
TROJAN: Golf Cart, Superior, Pacer<br />
WEST MARINE: Sea Volt<br />
MOTOMASTER: Nautilius<br />
CARACTERISTICAS DISTINTIVAS<br />
La rejilla de ventilación puede ser descubierta para llenar<br />
la batería con agua. Económica pero cara de mantener.<br />
VENTAJAS<br />
Como pueden ser rellenadas con agua, son más<br />
resistentes al sobrecargado. Son más baratas que otras<br />
baterías.<br />
DESVENTAJAS<br />
Deben de ser rellenadas con agua DESTILADA y<br />
normalmente requieren de una carga igualadora.<br />
Requieren mantenimiento.<br />
BATERIAS SELLADAS:<br />
DELCO: Voyager<br />
CARACTERISTICAS DISTINTIVAS<br />
Pareciera que la rejilla de ventilación puede ser<br />
descubierta pero en realidad no es posible hacerlo. Las<br />
venden marcadas como “Libres de Mantenimiento” a<br />
precios cómodos.<br />
VENTAJAS<br />
Menos mantenimiento que las baterías húmedas. No<br />
necesitan ser rellenadas con agua. Más económica.<br />
DESVENTAJAS<br />
Menos resistente al sobrecargado porque consumen agua<br />
pero no pueden ser rellenadas.<br />
Manuel del Usuario del Inversor <strong>Sine</strong> W<strong>ave</strong><br />
BATERIAS SELLADAS RECOMBINADAS:<br />
HAWKER ENERGY: Genesis<br />
OPTIMA: Yellow Top<br />
GNB INDUSTRIAL: Evolyte<br />
CARACTERISTICAS DISTINTIVAS<br />
Las rejillas de ventilación no son visibles. Las venden<br />
usando las siguientes frases: Recombinada, Válvulas<br />
Reguladas, Libre de mantenimiento, Electrolito<br />
hambriento.<br />
VENTAJAS<br />
No requieren de mantenimiento. No se derraman.<br />
DESVENTAJAS<br />
La carga igualadora puede malograrla. Es generalmente<br />
más cara.<br />
BATERIAS DE GEL:<br />
SONNENSCHEIN: Prevailer<br />
WEST MARINE: SeaGel<br />
CARACTERISTICAS DISTINTIVAS<br />
Las venden como baterias “Gel” o de “Electrolitos de<br />
Gel”<br />
VENTAJAS<br />
No requieren mantenimiento. Pueden ser usadas de<br />
costado. No se derraman. Auto descarga baja. Menos<br />
daño cuando se deja descargada.<br />
DESVENTAJAS<br />
La carga igualadora puede malograrla. Es generalmente<br />
más cara.<br />
8.2 Tamaño de la Batería<br />
El tamaño o capacidad de la batería es tan importante<br />
como el tipo de batería seleccionada para usar con su<br />
Inversor <strong>Sine</strong> W<strong>ave</strong>. Lamentablemente, existen diversos<br />
estándares para calificar la capacidad de almacenamiento<br />
de energía de las baterías. Las baterías para encendido<br />
de automóviles son calificadas normalmente por los<br />
amperios que suministran. Esta no es una calificación<br />
relevante si es usada continuamente. Las baterías de ciclo<br />
intenso son calificadas por la capacidad de reserva en<br />
minutos o en amperio-horas. La capacidad de la reserva<br />
de la batería es una medida para saber durante cuanto<br />
tiempo puede una batería suministrar cierta cantidad de<br />
corriente - generalmente 25 amperios. Por ejemplo, una<br />
batería con una capacidad de reserva de 180 minutos<br />
puede suministrar 25 amperios por 180 minutos antes<br />
de que se descargue totalmente. La capacidad Amperiohora<br />
es una medida para saber cuántos amperios puede<br />
suministrar una batería durante un tiempo específico—<br />
generalmente 20 horas. Por ejemplo, una batería marina<br />
típica o la batería de un Vehículo Recreativo de 100<br />
amperio-horas puede suministrar 5 amperios durante 20<br />
horas (5 amperios X 20 horas = 100 amperio-horas)<br />
Las baterías son una parte muy importante de su sistema,<br />
así que recomendamos que compre la batería de mayor<br />
capacidad que le sea posible. Una batería grande<br />
prolongará el tiempo de funcionamiento y asegurará que<br />
su Inversor <strong>Sine</strong> W<strong>ave</strong> suministre su potencia completa.<br />
Puede ser que la performance del inversor sufra con el<br />
uso de una batería pequeña, de pocos amperio-hora<br />
(por ejemplo: 50Ah). Así su batería esté en excelente<br />
condición y completamente cargada, probablemente<br />
experimentará poca potencia de funcionamiento y un<br />
tiempo de funcionamiento insatisfactorio en todo menos<br />
en una carga de CA pequeña. <strong>Xantrex</strong> recomienda un<br />
tamaño mínimo de la batería de 200Ah para cargas<br />
moderadas (
voltios y amperios, o VA. Para este cálculo, estos tres<br />
ratings son equivalentes (es decir voltios x amperios =<br />
vatios = VA). El ejemplo siguiente, basado en una batería<br />
recargada cada tres días, ilustra el cálculo:<br />
9. Gráficos de Performance<br />
9.1 Curva de Reducción de Potencia<br />
Carga<br />
TV y<br />
Video<br />
Consumo de<br />
Electricidad<br />
Tiempo de<br />
funcionamiento<br />
115<br />
vatios 3 hora s<br />
(1 hora al día)<br />
Cafetera<br />
750<br />
vatio s 1 hora (2 0<br />
Hornomicroondas<br />
minutos al día)<br />
800<br />
vatios 0.5 horas (1 0<br />
minutos al día)<br />
1 Consumo de electricidad x tiempo de funciona-miento<br />
Convierta los vatios-hora a las amperio-horas dividiendo<br />
el total de los vatios-hora entre 10:<br />
1495 vatios-horas / 10 = 149.5 amperio-horas<br />
1<br />
V atios-horas<br />
345<br />
750<br />
400<br />
TOTAL<br />
149 5<br />
Como con todos los inversores, la cantidad de potencia<br />
continua que los Inversores <strong>Sine</strong> W<strong>ave</strong> pueden suministrar<br />
sin sobrecalentarse está limitada por la temperatura<br />
ambiental (del aire circundante). La siguiente “Curva<br />
de Reducción de Potencia/Temperatura” muestra la<br />
relación entre la potencia de salida y la temperatura<br />
ambiental.<br />
Con un voltaje adecuado de entrada (12.0V ó 24V CC),<br />
los inversores suministrarán el total de su potencia<br />
(vatios) hasta los 50°C (122°F). Si opera su unidad por<br />
encima de esta temperatura, ocasionará una interrupción<br />
térmica o una disminución en la performance. En voltajes<br />
de entrada menores de 12V ó 24V, la unidad funciona<br />
mas caliente lo que causará una interrupción térmica a<br />
temperaturas bajo un ambiente de 50°C.<br />
Una batería de 150 amperio-horas debe de suministrar<br />
suficiente electricidad para las cargas arriba<br />
mencionadas, para luego descargarse totalmente.<br />
Idealmente, solamente debe de descargar la batería al<br />
50% de su capacidad, así que para las cargas arriba<br />
mencionadas, necesitará una batería con capacidad de<br />
300 amperio-horas.<br />
Si utiliza la unidad fuera de los límites de potencia y de<br />
temperatura (“por encima “ y “a la derecha “ de las curvas<br />
de reducción de potencia) ocasionará una interrupción<br />
térmica y/o una disminución evidente de la performance.<br />
Además, no está permitido el funcionamiento en éste<br />
margen por las agencias reguladoras del producto.<br />
Para obtener suficiente capacidad de la batería a medida<br />
que aumentan sus necesidades de electricidad, puede<br />
ser que necesite más de una batería. Dos baterías<br />
idénticas pueden ser conectadas positivo a positivo y<br />
negativo a negativo en un sistema paralelo que duplica<br />
la capacidad y mantiene el voltaje de una sola batería.<br />
No se recomienda conectar baterías de diferentes<br />
fabricantes o con regímenes diferentes de amperio-hora<br />
o con diferentes electrólitos de la batería en paralelo.<br />
Esto puede resultar en la disminución de la vida de la<br />
batería.<br />
16 Español Manuel del Usuario del Inversor <strong>Sine</strong> W<strong>ave</strong>
9.2 Curva de Eficiencia<br />
La curva de eficiencia del Inversor <strong>Sine</strong> W<strong>ave</strong> indica qué<br />
porcentaje de potencia de CC se convierte en CA útil en<br />
diferentes niveles de salida de potencia. Mientras más<br />
alto sea el régimen, menos potencia se perderá por el<br />
calor desprendido en el proceso de inversión. Los<br />
Inversores <strong>Sine</strong> W<strong>ave</strong> tienen una curva extremadamente<br />
llana de eficiencia dentro de sus márgenes operativos,<br />
por lo tanto se pierde menos potencia de batería tanto si<br />
funciona en niveles bajos o altos de potencia.<br />
Las siguentes medidas fueron tomadas de una entrada de<br />
12V y 24V CC en los inversores 120V, 60Hz y 230V,<br />
50Hz. Se logrará aún una mejor eficiencia en voltajes<br />
de entrada de CC, cuando alcance la eficiencia máxima.<br />
La eficiencia es ligeramente más baja en los modelos<br />
120VCA, de 60 hertzios.<br />
Manuel del Usuario del Inversor <strong>Sine</strong> W<strong>ave</strong><br />
Español 17
/<br />
/<br />
/<br />
10. Especificaciones de Performance<br />
<strong>1000</strong><br />
180<br />
0<br />
<strong>1000</strong><br />
i<br />
<strong>1800</strong> i<br />
Salida<br />
de potencia continua<br />
<strong>1000</strong><br />
W<br />
<strong>1800</strong><br />
W<br />
<strong>1000</strong><br />
W<br />
<strong>1800</strong> W<br />
Capacidad<br />
de sobretensión - 5 s<br />
1500<br />
W<br />
2900<br />
W<br />
1500<br />
W<br />
2900 W<br />
Corriente<br />
pico de salida<br />
25<br />
A<br />
45<br />
A<br />
11<br />
A<br />
20 A<br />
E ficiencia máxima del Inversor<br />
89<br />
%<br />
90<br />
%<br />
90 %<br />
Toma de corriente sin carga,<br />
modalidad de busca<br />
< 1.5W<br />
Inhaltsverzeichnis<br />
Wichtige Sicherheitshinweise ............................................................................................................................................................................................1<br />
1. Einleitung .....................................................................................................................................................................................................................2<br />
1.1 Hauptmerkmale des <strong>Sine</strong> W<strong>ave</strong> Wechselrichters ................................................................................................................................................2<br />
2. Einbau .........................................................................................................................................................................................................................3<br />
2.1 Einbauvoraussetzungen ......................................................................................................................................................................................3<br />
2.2 Einbauort des <strong>Sine</strong> W<strong>ave</strong>-Wechselrichters ..........................................................................................................................................................4<br />
2.3 Montage des <strong>Sine</strong> W<strong>ave</strong> .....................................................................................................................................................................................4<br />
2.4 Verdrahtung des <strong>Sine</strong> W<strong>ave</strong>-Wechselrichters ......................................................................................................................................................5<br />
2.4.1 Eingabe- und Ausgabeschutz .......................................................................................................................................................................................... 5<br />
2.4.2 Herstellen der Wechselstrom-verdrahtung ..................................................................................................................................................................... 6<br />
2.4.3 Erdschluß-Leistungstrenner ............................................................................................................................................................................................ 7<br />
2.4.4 Herstellen der Gleichstrom-Drahtverbindungen ............................................................................................................................................................. 7<br />
3. <strong>Sine</strong> W<strong>ave</strong>-Wechselrichterbetrieb ............................................................................................................................................................................... 10<br />
3.1 Funktionsweise ................................................................................................................................................................................................. 10<br />
3.2 Wellenform der Wechselstromausgabe ............................................................................................................................................................. 10<br />
3.3 Bedienfeld ......................................................................................................................................................................................................... 10<br />
3.4 Der ENERGIESPAR-Modus des <strong>Sine</strong> W<strong>ave</strong> ...................................................................................................................................................... 11<br />
3.5 Betriebsgrenzwerte und Schutzvorrichtungen des <strong>Sine</strong> W<strong>ave</strong> ............................................................................................................................ 12<br />
4. Überprüfung ................................................................................................................................................................................................................ 13<br />
5. Fehlersuche ............................................................................................................................................................................................................... 13<br />
5.1 Störungsursachen und Fehlermeldungen ........................................................................................................................................................... 13<br />
6. Garantie ..................................................................................................................................................................................................................... 14<br />
7. Materialrücksendungsdienst: ...................................................................................................................................................................................... 14<br />
8. Anhang ...................................................................................................................................................................................................................... 15<br />
8.1 Batteriearten ..................................................................................................................................................................................................... 15<br />
8.2 Batteriegröße .................................................................................................................................................................................................... 16<br />
<strong>Xantrex</strong> <strong>Sine</strong> W<strong>ave</strong> Wechselrichter Benutzerhandbuch<br />
Deutsch
9. Leistungsschaubilder, Fehlersuchetabelle und Technische Daten .............................................................................................................................16<br />
9.1 Leistungsverlustkurve .......................................................................................................................................................................................16<br />
9.2 Wirkungsgradkurve ..........................................................................................................................................................................................17<br />
9.3 Störungsursachen und Fehlermeldungen .........................................................................................................................................................18<br />
9.4 Tips bei der Fehlersuche: .................................................................................................................................................................................18<br />
9.5 Technische Daten .............................................................................................................................................................................................19<br />
SUPERIOR, PACER SIND EINGETRAGENE WARENZEICHEN DER TROJAN BATTERY COMPANY<br />
SEAVOLT, SEAGEL SIND EINGETRAGENE WARENZEICHEN DER WEST MARINE PRODUCTS<br />
VOYAGER IST EINGETRAGENES WARENZEICHEN VON DELCO-REMY<br />
GENESIS IST EINGETRAGENES WARENZEICHEN VON GATES ENERGY PRODUCTS (HAWKER ENERGY)<br />
EVOLYTE IST EINGETRAGENES WARENZEICHEN VON GNB INDUSTRIAL BATTERY CO.<br />
PREVAILER IST EINGETRAGENES WARENZEICHEN VON SONNENSCHEIN<br />
Deutsch <strong>Xantrex</strong> <strong>Sine</strong> W<strong>ave</strong> Wechselrichter Benutzerhandbuch
Wichtige Sicherheitshinweise<br />
WARNUNG!<br />
Lesen Sie vor dem Einbau und der<br />
erstmaligen Verwendung Ihres <strong>Sine</strong> W<strong>ave</strong>-<br />
Wechselrichters unbedingt die nachfolgenden<br />
Sicherheits-hinweise durch und<br />
bewahren Sie diese sorgfältig auf !<br />
Allgemeine Sicherheitsmaßnahmen<br />
1. BEWAHREN SIE DIESE SICHERHEITS-<br />
HINWEISE SORGFÄLTIG AUF. Dieses<br />
Benutzerhandbuch enthält wichtige Informationen<br />
über den sicheren Betrieb Ihres <strong>Sine</strong> W<strong>ave</strong><br />
Wechselrichters.<br />
2. Schützen Sie Ihren <strong>Sine</strong> W<strong>ave</strong> vor Regen, Schnee,<br />
Sprühnebel oder Schlagwasser. Die Lüftungsöffnungen<br />
des Gerätes niemals abdecken oder<br />
blockieren – Brandgefahr ! Installieren Sie den <strong>Sine</strong><br />
W<strong>ave</strong> nur dort, wo er zu allen Seiten hin ausreichend<br />
Luft hat ! Andernfalls kann es zur Überhitzung des<br />
Gerätes kommen.<br />
3. Verwenden Sie ausschließlich die vom Hersteller<br />
empfohlenen oder vertriebenen Halterungen. Die<br />
Verwendung anderer Halterungen könnte einen<br />
Brand, elektrischen Schlag oder Personenschäden<br />
verursachen.<br />
4. Der <strong>Sine</strong> W<strong>ave</strong> Wechselrichter ist für den<br />
dauerhaften Anschluß an Ihre elektrischen<br />
Gleichstromsysteme ausgelegt (bei festverdrahteten<br />
Modellversionen für den dauerhaften Anschluß an<br />
Ihre elektrischen Wechselstromsysteme). Um strikte<br />
Einhaltung der geltenden elektrischen<br />
Verdrahtungsvorschriften zu gewährleisten,<br />
empfiehlt <strong>Xantrex</strong>, alle Verdrahtungsarbeiten von<br />
einem zugelassenen Fachmann oder Elektriker<br />
ausführen zu lassen.<br />
5. Um die Gefahr eines Brandes oder eines elektrischen<br />
Schlages möglichst auszuschließen, sollten Sie<br />
sicherstellen, daß die vorhandene Verdrahtung<br />
<strong>Xantrex</strong> <strong>Sine</strong> W<strong>ave</strong> Wechselrichter Benutzerhandbuch<br />
einwandfrei in Ordnung ist und die Drahtdicken nicht<br />
zu klein bemessen sind. Betreiben Sie den <strong>Sine</strong> W<strong>ave</strong><br />
niemals bei beschädigter oder nicht standardgemäßer<br />
Verdrahtung !<br />
6. Betreiben Sie den <strong>Sine</strong> W<strong>ave</strong> niemals nach einer<br />
schweren Erschütterung, einem Sturz oder<br />
irgendeiner anderen Beschädigung. In einem solchen<br />
Fall bitte Kapital 7 dieses Handbuches<br />
‘Vorgehensweise im Falle einer Garantieleistung’ zu<br />
Rate ziehen.<br />
7. Demontieren Sie den <strong>Sine</strong> W<strong>ave</strong> niemals selbst.<br />
Lesen Sie hierzu bitte auch das Kapitel<br />
‘Kundendienst’ dieses Bedienerhandbuches durch.<br />
Dort finden Sie weitere Informationen zur genauen<br />
Vorgehensweise. Bei Versuchen, das Gerät selbst zu<br />
warten, besteht Brandgefahr oder die Gefahr eines<br />
elektrischen Schlages.<br />
8. Schalten Sie den angeschlossenen Gleichstrom (und<br />
bei festverdrahteten Versionen den Wechselstrom)<br />
ab, bevor Sie ver-suchen, selbst irgendwelche<br />
Wartungs- oder Reinigungsarbeiten oder sonstige<br />
Arbeiten an den Stromkreisen, die an den <strong>Sine</strong> W<strong>ave</strong><br />
angeschlossen sind, durchzuführen. Nur so können<br />
Sie die Gefahr eines elektrischen Schlages oder eines<br />
Brandes minimieren. Das Abschalten der<br />
Bedienungselemente alleine reicht hierzu nicht aus!<br />
9. Erdung: Der <strong>Sine</strong> W<strong>ave</strong>-Wechselrichter ist mit einem<br />
Geräte-Erdleiter zu versehen, der an die<br />
Erdungsklemme des Wechselstromeingangs<br />
anzuschließen ist. Die Erdung aller anderen<br />
Schaltungen muß den jeweils geltenden Regeln und<br />
Verordnungen entsprechen.<br />
10. Bei Verwendung des <strong>Sine</strong> W<strong>ave</strong>-Wechselrichters im<br />
marinen Bereich können spezielle gesetzliche<br />
Einbauvorschriften zur Anwendung kommen. So<br />
muß z.B. in den USA der Einbau des <strong>Sine</strong> W<strong>ave</strong>-<br />
Wichselrichters den elektrischen Vorschriften für die<br />
US-amerikanische Küstenwache entsprechen<br />
(33CFR183, Teil 1).<br />
Vorsichtsmaßnahmen bei explosiven<br />
Gasen<br />
1. Dieses Gerät enthält Bauteile, die zur Bogen- oder<br />
Funkenbildung führen können. Um Brände oder<br />
Explosionen zu vermeiden, sollte der <strong>Sine</strong> W<strong>ave</strong><br />
niemals in Räumen oder an Orten installiert werden<br />
leicht entzündliche Materialien aufbewahrt werden<br />
oder, wo Batterien oder wo entsprechend geschützte<br />
Geräte erforderlich sind. Hierzu gehören solche<br />
Räumlichkeiten und Orte, in oder an denen sich mit<br />
Benzinmotoren angetriebene Maschinen,<br />
Kraftstofftanks oder Ver-bindungen oder Anschlüsse<br />
an Komponenten eines Kraftstoffsystems befinden.<br />
2. Die Durchführung von Arbeiten in direkter Nähe<br />
von Bleiakkumulatoren ist gefährlich. Batterien<br />
geben während des normalen Betriebes explosive<br />
Gase ab.<br />
3. Befolgen Sie diese Anweisungen, die Ihres<br />
Batterieherstellers sowie die Anweisungen des<br />
Geräteherstellers, in dessen Gerät Sie diese Batterien<br />
verwenden, um die Gefahr einer Batterieexplosion<br />
möglichst auszuschließen.<br />
Vorsichtsmaßnahmen beim Arbeiten mit<br />
Batterien<br />
1. Es sollte immer eine andere Person in Hörweite oder<br />
nahe genug sein, um Ihnen zur Hilfe eilen zu können,<br />
wenn Sie in der Nähe eines Bleiakkumulators<br />
arbeiten.<br />
2. Sorgen Sie immer dafür, daß genügend frisches<br />
Wasser und Seife zurechtgestellt sind, für den Fall,<br />
daß Ihre Haut, Ihre Kleidung oder Ihre Augen mit<br />
Batteriesäure in Berührung kommen sollte.<br />
3. Tragen Sie immer Schutzkleidung und Augenschutz.<br />
Berühren Sie möglichst nicht Ihre Augen, wenn Sie<br />
in der Nähe einer Batterie arbeiten.<br />
4. Säubern Sie vor dem Tätigen der Anschlüsse die<br />
Batteriean-schlußklemmen. Tragen Sie einen<br />
Deutsch 1
Augenschutz, damit keine Korrosionsrückstände in<br />
Ihre Augen gelangen können.<br />
5. Sollte Batteriesäure auf Ihre Haut oder Ihre Kleidung<br />
gelangen, waschen Sie diese sorgfältig mit Wasser<br />
und Seife ab. Sollte Batteriesäure in Ihre Augen<br />
gelangen, spülen Sie diese unverzüglich mindestens<br />
20 Minuten lang mit kaltem, laufenden Wasser aus<br />
und suchen Sie unverzüglich einen Arzt oder einen<br />
medizinischen Notdienst auf.<br />
6. Rauchen Sie NIEMALS in der Nähe einer Batterie<br />
oder eines Motors. Vermeiden Sie Funken oder<br />
offenen Flammen.<br />
7. Lassen Sie niemals ein Metallwerkzeug auf die<br />
Batterie fallen. Es könnten Funken sprühen oder ein<br />
Kurzschluß verursacht werden - Explosionsgefahr!<br />
8. Entfernen Sie vor Arbeiten an einem<br />
Bleiakkumulator alle Metallgegenstände, d.h. ziehen<br />
Sie Ringe, Armbänder, Ketten und Uhren aus. Eine<br />
Batterie kann einen Kurzschlußstrom erzeugen, der<br />
groß genug ist, einen Ring oder ähnliches<br />
einzuschmelzen und so zu hochgradigen<br />
Verbrennungen zu führen.<br />
1. Einleitung<br />
Vielen Dank für den Kauf dieses <strong>Sine</strong> W<strong>ave</strong>-<br />
Wechselrichters. Da es sich hierbei um einen<br />
hochqualitativen Wechselrichter mit wahrer<br />
Sinuswellenausgabe handelt, können Sie davon<br />
ausgehen, daß Ihr <strong>Sine</strong> W<strong>ave</strong> ausgezeichnete Leistung<br />
erbringen und Ihnen jahrelang zuverlässige Dienste<br />
leisten wird. Durch die wahre Sinuswellen-<br />
Wechselstromausgabe des <strong>Sine</strong> W<strong>ave</strong> ist gewährleistet,<br />
daß alle angeschlossenen Wechselstromlasten effizient<br />
und korrekt arbeiten. Da die Verbraucherlasten in der<br />
Regel so ausgelegt sind, daß sie mit wahrer Sinuswellen-<br />
Spannung betrieben werden können, können Sie<br />
beruhigt davon ausgehen, daß diese mit dem <strong>Sine</strong> W<strong>ave</strong><br />
ebenso gut funktionieren, als wären Sie an das<br />
elektrische Netz angeschlossen. In einigen Fällen ist die<br />
wahre Sinuswellenausgabe Ihres <strong>Sine</strong> W<strong>ave</strong>-<br />
Wechselrichters sogar noch hochwertiger als die Ihres<br />
Stromversorgungsunter-nehmens.<br />
Um das Beste aus Ihrem <strong>Sine</strong> W<strong>ave</strong> Wechselrichter<br />
herauszuholen, empfehlen wir Ihnen, die nachfolgenden<br />
Anleitungen und Vorschriften dieses Handbuches<br />
genauestens durchzulesen und zu befolgen. Achten Sie<br />
vor allem auf die Wichtigen Sicherheitshinweise sowie<br />
auf die VORSICHT- und WARNHINWEISE, die immer<br />
wieder im Verlaufe dieses Handbuches auftauchen und<br />
auch auf dem Gerät selbst zu finden sind. Auch die<br />
Verpackung sollte zu diesem Zweck aufbewahrt werden.<br />
Sollten sich vor, während oder nach der Installation Ihres<br />
<strong>Sine</strong> W<strong>ave</strong>-Wechselrichters irgendwelche Fragen<br />
ergeben, so setzen Sie sich bitte mit dem <strong>Xantrex</strong>-<br />
Kundendienst in Verbindung. Dort wird man Ihnen gerne<br />
weiterhelfen.<br />
Telefonnummer Kundendienst:<br />
+49 (0)2461 - 690 - 770<br />
+1 - 360 - 925 - 5097<br />
Telefaxnummer Kundendienst:<br />
+49 (0)2461 - 690 - 779<br />
+1 - 360 - 925 - 5143<br />
Bitte halten Sie die folgenden Informationen bereit,<br />
wenn Sie sich an den <strong>Xantrex</strong>-Kundendienst wenden:<br />
Geräte-Serien-Nummer:<br />
______________________<br />
Erworben bei:<br />
______________________________<br />
Kaufdatum: _____________________________<br />
1.1 Hauptmerkmale des <strong>Sine</strong> W<strong>ave</strong><br />
Wechselrichters<br />
Während des Umrichtungsprozesses bedient sich der<br />
<strong>Sine</strong> W<strong>ave</strong> ultra-moderner Hochfrequenz-Schalttechnologie.<br />
Die verwendeten Strom-kreise sind die<br />
gleichen, wie sie in Netzgeräten für Computer oder<br />
anderen modernen, elektronischen Geräte zur<br />
Anwendung kommen. Diese Technologie bietet die<br />
folgenden Vorzüge:<br />
• geringes Gewicht: Einfach zu installieren<br />
• absolut geräuschlos: Leiser Betrieb<br />
• hohe Stoßstromfähigkeit: Geeignet für schwer<br />
anlaufende Wechselstromlasten<br />
Sollten Sie sich für weitere Produktdaten und -merkmale<br />
interessieren, so schauen Sie sich bitte Kapitel 9.5<br />
‘Technische Daten’ dieses Handbuches an.<br />
1.1.1 Wechselrichterfunktion<br />
Ist der <strong>Sine</strong> W<strong>ave</strong>-Wechselrichter ordnungsgemäß<br />
angeschlossen und der Netzschalter eingeschaltet (I), zieht<br />
das Gerät Gleichstrom von Ihrer Batterie ab und liefert<br />
eine wahre Sinuswellen-Wechselstromausgangsspannung,<br />
wie sie auch von Ihrem Energieversorgungsunternehmen<br />
bereitgestellt wird. Solange die Batteriespannung im<br />
Betriebsbereich des <strong>Sine</strong> W<strong>ave</strong> liegt, fährt das Gerät<br />
weiter damit fort, die angeschlossenen Verbraucherlasten<br />
mit Wechselstrom zu versorgen. Fällt die<br />
Battteriespannung jedoch aus dem definierten<br />
Betriebsbereich heraus (10–16 V Gleichstrom bei 12 V-<br />
Modellen, 20–32 V Gleichstrom bei 24 V-Modellen), so<br />
schaltet sich das Gerät automatisch ab; dies gilt für<br />
Unterspannung und Überspannung der Batterie.<br />
1.1.2 Bedienfeld<br />
Das Bedienfeld enthält den Hauptschalter ( /I)<br />
(‘Überbrücken’ oder ‘Bypass’ / ‘Einschalten’) des<br />
Gerätes; außerdem werden die Betriebsdaten angezeigt,<br />
so daß Sie in der Lage sind, den Status Ihres<br />
Wechselrichters und Ihrer Batterien jederzeit zu<br />
überwachen.<br />
WARNUNG!<br />
Beachten Sie, daß in der Stellung ( )<br />
(Überbrücken oder Bypass) des<br />
Frontplattenschalters NICHT alle Spannungen<br />
innerhalb des Gerätes abgeschaltet werden.<br />
Mit diesem Schalter werden nur die<br />
Wechselstrom-Umrichtschaltungen<br />
abgeschaltet. Bei den Versionen mit<br />
festverdrahtetem Wechselstrom bzw. mit<br />
Transferrelais ist die an den<br />
Wechselstromeingangs-anschlüssen<br />
anliegende Netzspannung auch an den<br />
Wechselstromausgangs-anschlüssen<br />
vorhanden.<br />
2 Deutsch <strong>Xantrex</strong> <strong>Sine</strong> W<strong>ave</strong> Wechselrichter Benutzerhandbuch
Das Bedienfeld läßt sich leicht abnehmen und in beliebiger<br />
Richtung (entsprechend den empfohlenen Befestigungskonfigurationen)<br />
wieder montieren - ganz so, wie es am<br />
Bequemsten für Sie ist. Mit dem optional erhältlichen <strong>Sine</strong><br />
W<strong>ave</strong>-Schnittstellen-Bedienungs-feld kann das Display<br />
sogar komplett vom Basisgehäuse losgelöst an einem Ort<br />
Ihrer Wahl angebracht werden (z.B. am Armaturenbrett<br />
Ihres Fahrzeuges).<br />
1.1.3 Automatischer Übertragungsschalter<br />
Ihr <strong>Sine</strong> W<strong>ave</strong>-Wechselrichter kann mit einem<br />
Übertragungsrelais ausgestattet werden, sofern Sie dies vor<br />
dem Erwerb des Gerätes entsprechend in Aufttrag geben.<br />
Dieses Übertragungsrelais hat zwei Funktionen:<br />
1) Es ermöglicht die Verdrahtung des Wechselstromausgangs<br />
Ihres <strong>Sine</strong> W<strong>ave</strong>-Wechsel-richters mit einem vorhandenen<br />
Wechselstromsystem als Energiequelle und<br />
2) der <strong>Sine</strong> W<strong>ave</strong>-Wechselrichter kann automatisch als<br />
Energiequelle dienen, falls eine alternative Energiequelle<br />
einmal ausfallen sollte. Bei einem Netzstromausfall wird<br />
das Übertragungsrelais abgeschaltet und die Verbraucherlast<br />
wird automatisch innerhalb vom 20-30 Millisekunden an<br />
den <strong>Sine</strong> W<strong>ave</strong>-Ausgang angeschlossen. Bei<br />
eingeschalteter ENERGIESPAR-Einheit (zur Verringerung<br />
des Stromverbrauchs im Standby-Modus empfohlen) kann<br />
die Wechselstromausgabe des Wechselrichter um bis zu 2,5<br />
Sekunde verzögert sein. Ist die Netzstromversorgung wieder<br />
hergestellt, schaltet sich das Relais wieder ab und die Last<br />
wird automatisch wieder an die Netzstromversorgung<br />
angeschlossen.<br />
So stellen Sie fest, ob Ihr Modell über einen<br />
Umschalter verfügt<br />
1) Überprüfen Sie den UPC-Code auf der<br />
Produktverpackung. Die UPC-Codes für Einheiten mit<br />
Umschaltern enden auf die folgenden fünf Ziffern:<br />
Model<br />
<strong>1000</strong>/<strong>1000</strong>i Model <strong>1800</strong>/<strong>1800</strong> i<br />
61084<br />
6188 4<br />
61074<br />
6187 4<br />
61052<br />
6185 2<br />
61008<br />
6180 8<br />
61002<br />
6180 2<br />
2) Wenn sich an der Vorderseite der Einheit ein<br />
Wechselstromausgang befindet, ist kein Umschalter in der<br />
Einheit vorhanden.<br />
<strong>Xantrex</strong> <strong>Sine</strong> W<strong>ave</strong> Wechselrichter Benutzerhandbuch<br />
3) Bei Sinuswellen-Invertern mit festverdrahteten<br />
Schaltungen können Sie feststellen, ob die Einheit über<br />
einen internen Umschalter verfügt, indem Sie die Abdeckung<br />
der Wechselstromverkabelung abnehmen und die<br />
Beschriftung über der inneren Klemmleiste überprüfen.<br />
Wenn die Einheit über eine Beschriftung verfügt, die den<br />
folgenden zwei Beschriftungen entspricht, hat diese einen<br />
internen Umschalter:<br />
Einheiten mit der folgenden Beschriftung verfügen über<br />
keinen Umschalter:<br />
WARNUNG!<br />
Bevor Sie mit dem Einbau des Gerätes weiter<br />
fortfahren, überprüfen Sie bitte die zu Beginn<br />
genannten Wichtigen Sicherheitshinweise<br />
noch einmal und studieren Sie aufmerksam<br />
den gesamten Abschnitt. Achten Sie hierbau<br />
vor allem auf die Vorsicht- und Warnhinweise!<br />
2. Einbau<br />
Dieses Kapitel enthält Anweisungen zum Einbau des <strong>Sine</strong><br />
W<strong>ave</strong> Wechselrichters. Schalten Sie das Gerät jedoch nach<br />
erfolgtem Einbau und erfolgter Verdrahtung nicht sofort<br />
ein - schauen Sie sich erst das nächste Kapitel dieses<br />
Handbuches an, das Ihnen entsprechende<br />
Bedienungshinweise gibt.<br />
2.1 Einbauvoraussetzungen<br />
Einbauvorschriften: Je nach Art und Beschaffenheit der<br />
Räumlichkeit, in der Sie Ihren <strong>Sine</strong> W<strong>ave</strong> einbauen, sind<br />
unterschiedliche Gesetze und Vorschriften bei der<br />
Installation zu beachten. So z.B. die national und örtlich<br />
gültigen Vorschriften für elektrische Installationen in<br />
Wohngebäuden. Andere Beispiele für Regeln und<br />
Verordnungen im Hinblick auf elektrische Installationen<br />
in Nordamerika sind:<br />
• die Vorschriften der US-amerikanischen Küstenwache<br />
und der ABYC für elektrische Installationen auf<br />
Schiffen und Booten<br />
VORSICHT!<br />
Der <strong>Sine</strong> W<strong>ave</strong> ist für den dauerhaften<br />
Anschluß an Ihr elektrisches Gleichstromsystem<br />
ausgelegt. Die festverdrahtete Wechselstrom-<br />
Modellversion ist darüber hinaus auch für den<br />
dauerhaften Anschluß an das elektrische<br />
Wechselstromsystem ausgelegt. Zur<br />
Gewährleistung der strikten Einhaltung der<br />
geltenden elektrischen Verdrahtungsvorschriften<br />
ist es unbedingt erforderlich, daß<br />
alle Verdrahtungsarbeiten von einem<br />
zugelassenen Fachmann oder Elektriker<br />
ausgeführt werden.<br />
• die Vorschriften der Kraftfahrzeugindustrie, der CSA<br />
und der UL für elektrische Installation in Freizeit-<br />
Fahrzeugen.<br />
Es fällt in den Verantwortungsbereich desjenigen, der das<br />
Gerät installiert, sicherzustellen, daß alle erforderlichen<br />
Einbauvoraus-setzungen erfüllt sind.<br />
Was Sie brauchen, um Ihren <strong>Sine</strong> W<strong>ave</strong> zu<br />
installieren:<br />
Sie benötigen zunächst die folgenden Werkzeuge, um Ihren<br />
<strong>Sine</strong> W<strong>ave</strong>- Wechselrichter ordnungsgemäß zu installieren:<br />
• eine Abisolierzange<br />
• Befestigungsschrauben /-dübel (Durchmesser 1/4'’<br />
oder 6 mm)<br />
• einen kleinen Schraubenzieher (für die<br />
festverdrahteten Modellversionen)<br />
• einen kleinen Kreuzschlitzschraubendreher<br />
• einen Schlüssel für die Gleichstrom-<br />
Anschlußklemmen (1/2'’ oder 13 mm)<br />
• Wechselstromkabel für die festverdrahteten Modelle<br />
(für Details siehe Kapitel Wechselstromverkabelung)<br />
• Gleichstromkabel (für Details siehe Kapitel<br />
Gleichstromverkabelung)<br />
• Steckverbinder und Quetschwerkzeug für Ihre<br />
Gleichstromkabel<br />
• Gleichstrom- und Wechselstromtrenner und<br />
Überstromschutz-vorrichtungen (für Details siehe<br />
Kapitel Eingabe- und Ausgabeschutz).<br />
Deutsch 3
2.2 Einbauort des <strong>Sine</strong> W<strong>ave</strong>-<br />
Wechselrichters<br />
Der <strong>Sine</strong> W<strong>ave</strong> verfügt über umfassende elektronische<br />
Schaltkreise. Obwohl bei der Auslegung des Gerätes<br />
entsprechende Vorkehrungen zum Schutz dieser<br />
Schaltkreise getroffen wurden, können diese dennoch<br />
bei Verwendung des Gerätes in extremer Umgebung<br />
beschädigt werden.<br />
Der <strong>Sine</strong> W<strong>ave</strong> sollte daher nur an Standorten installiert<br />
werden, die die folgenden Voraussetzungen erfüllen:<br />
• Trocken - Stellen Sie sicher, daß der <strong>Sine</strong> W<strong>ave</strong><br />
weder mit Wasser noch mit anderen Flüssigkeiten in<br />
Berührung kommt. Installieren Sie den <strong>Sine</strong> W<strong>ave</strong><br />
niemals an Orten, wo er Sprühnebel oder<br />
Schlagwasser ausgesetzt ist.<br />
• Kühl - die Umgebungstemperatur sollte zwischen<br />
0°C (32°F) und 25 °C (77°F) liegen - je kühler, desto<br />
besser. Siehe hierzu auch Kapitel ‘Technische<br />
Daten’, das weitere Informationen über die<br />
Betriebstemperatur gibt.<br />
• Gut belüftet - Sorgen Sie dafür, daß Ihr <strong>Sine</strong> W<strong>ave</strong>-<br />
Wechselrichter zu allen Seiten hin mindestens 13<br />
cm Freiraum hat. Stellen Sie sicher, daß die<br />
Lüftungsöffnungen des Gerätes nicht blockiert sind.<br />
Sollte der <strong>Sine</strong> W<strong>ave</strong> in einem Schrankfach, Schott,<br />
etc. installiert werden, sorgen Sie mit Hilfe von<br />
Luftklappen oder Lüftungsausschnitten für<br />
ausreichende Luftzirkulation.<br />
• Sicher - Installieren Sie Ihren <strong>Sine</strong> W<strong>ave</strong> niemals<br />
in der gleichen Räumlichkeit, in der Sie auch Ihre<br />
Batterien oder leicht entzündliche Flüssigkeiten, z.B.<br />
Benzin, aufbewahren. Installieren Sie das Gerät<br />
ebenfalls niemals in einem Motorraum oder an<br />
einem Standort, wo ausschließlich vor Entflammung<br />
geschützte Geräte verwendet werden dürfen.<br />
• Staubfrei - Installieren Sie den <strong>Sine</strong> W<strong>ave</strong>-<br />
Wechselrichter nicht in einer staubenden Umgebung<br />
- Staub, Holzpartikel, Feil- oder andere Späne<br />
können in das Gerät gelangen, wenn das<br />
Kühlgebläse in Betrieb ist.<br />
• Größtmögliche Nähe zur Wechselstrom-<br />
Verteilerdose - Vermeiden Sie nach Möglichkeit<br />
Kabel mit Überlängen.<br />
• Größtmögliche Nähe zur/ zu den Batterie(n) -<br />
Vermeiden Sie Kabel mit Überlängen. Allerdings<br />
den <strong>Sine</strong> W<strong>ave</strong> auch nicht in der gleichen<br />
Räumlichkeit wie Ihre Batterien installieren.<br />
Verwenden Sie die empfohlenen Kabellängen und -<br />
größen (siehe Kapitel 2.4.4). Installieren Sie Ihren<br />
<strong>Sine</strong> W<strong>ave</strong> ferner nicht an Standorten, wo er<br />
Batteriegasen ausgesetzt ist. Diese Gase sind äußerst<br />
korrosiv und beschädigen Ihren <strong>Sine</strong> W<strong>ave</strong>, wenn<br />
er ihnen für längere Zeit ausgesetzt sein sollte.<br />
• Gut geschützt vor Batteriesäure - Stellen Sie<br />
sicher, daß niemals Batteriesäure auf den <strong>Sine</strong> W<strong>ave</strong><br />
oder die Verdrahtung tropfen kann, wenn Sie die<br />
Batterien auffüllen oder sonstwie handhaben.<br />
2.3 Montage des <strong>Sine</strong> W<strong>ave</strong><br />
Bevor Sie den <strong>Sine</strong> W<strong>ave</strong> montieren, sollten Sie den<br />
ausgewählten Standort dahingehend überprüfen, ob rund<br />
um das Gerät genügend Freiraum zum Tätigen der<br />
Anschlüsse und für die Belüftung vorhanden ist. Die<br />
zum Einbau des Gerätes verwendeten Kleinteile sollten<br />
korrosionsbeständig sein und der Größe 1/4'' oder 6mm<br />
entsprechen. Stellen Sie sicher, daß die ausgewählte<br />
Montagefläche in der Lage ist, das dreifache Gewicht<br />
des <strong>Sine</strong> W<strong>ave</strong>-Wechselrichters, also 3 x 7,3 kg (= 21,9<br />
kg) zu tragen. Je mehr Freiraum zur Belüftung des Gerätes<br />
rundherum zur Verfügung steht, desto besser für die<br />
Leistung des <strong>Sine</strong> W<strong>ave</strong>. 13 cm zu allen Seiten hin sind<br />
absolutes Minimum !<br />
Vorgehensweise:<br />
1. Befestigen Sie den <strong>Sine</strong> W<strong>ave</strong> entweder auf einer<br />
waagerechten oder einer senkrechten Fläche (z.B.<br />
an einer Trennwand oder einem Schott) und<br />
verwenden Sie dabei die entsprechenden<br />
Montagelöcher. Zur Gewährleistung eines sicheren<br />
und dauerhaften Einbaus des Gerätes sollten Sie alle<br />
8 Befestigungslöcher verwenden. Der <strong>Sine</strong> W<strong>ave</strong>-<br />
Wechselrichter ist in einer der drei unten gezeigten<br />
Ausrichtungen zu befestigen.<br />
Abb. 1. Mögliche Ausrichtungen bei der<br />
Befestigung des Wechselrichters<br />
2. Entfernen Sie die Frontplatte und bringen Sie diese<br />
entsprechend der Ausrichtung der Basiseinheit<br />
wieder an. Ist das Gerät z.B. an einer senkrechten<br />
Oberfläche befestigt, können Sie die Frontplatte<br />
abnehmen und so wieder anbringen, daß die<br />
Schriftzüge waagerecht zu lesen sind. Hierzu<br />
brauchen Sie lediglich die vier Schrauben zu lösen,<br />
die Frontplatte von dem Gehäuse abzunehmen, zu<br />
drehen und wieder an der Basiseinheit zu befestigen.<br />
Abb. 2. Anbringen des Bedienfeldes<br />
4 Deutsch <strong>Xantrex</strong> <strong>Sine</strong> W<strong>ave</strong> Wechselrichter Benutzerhandbuch
Achten Sie jedoch darauf, daß Sie keine der vier<br />
Schrauben vergessen.<br />
3. Auch die Frontplatte kann von dem Grundgehäuse<br />
losgelöst an einer völlig anderen Stelle installiert<br />
werden. Hierzu entfernen Sie einfach das Bedienfeld<br />
von der Vorderseite des Gerätes, installieren die<br />
entsprechende Schnittstelle (die optional erhältlich<br />
ist) und schließen das 9 m lange Verlängerungskabel<br />
an. Dieses Kabel kann dorthin geführt werden, wo<br />
das Bedienfeld angebracht werden soll. Schließen<br />
Sie das Kabel an das Bedienfeld an und schon<br />
können Sie das Gerät von dem Ort Ihrer Wahl aus<br />
bedienen und überwachen. Befestigen Sie das<br />
Anzeigefeld jedoch niemals entfernt, ohne über das<br />
Schnittstellen-Bedienfeld zu verfügen und dies<br />
ordnungsgemäß an dem Wechselrichter angebracht<br />
zu haben. Das Schnittstellen-Bedienfeld reduziert<br />
die Störstrahlung, die entlang der gesamten<br />
Kabellänge erzeugt wird, erheblich und vermindert<br />
somit das Auftreten von Interferenzen mit anderen<br />
Geräten.<br />
2.4 Verdrahtung des <strong>Sine</strong> W<strong>ave</strong>-<br />
Wechselrichters<br />
WARNUNG!<br />
Brandgefahr! Gefahr eines elektrischen<br />
Schlages! Vergewissern Sie sich, daß die<br />
Verdrahtung von allen elektrischen Quellen<br />
getrennt ist, bevor Sie damit hantieren! Alle<br />
Verdrahtungen müssen so durchgeführt<br />
werden, daß sie den örtlichen und<br />
nationalen Vorschriften für elektrische<br />
Verdrahtungen entsprechen. <strong>Xantrex</strong><br />
empfiehlt, die Verdrahtung von einem<br />
zugelassenen Elektriker oder sonstigen<br />
Fachmann vornehmen zu lassen.<br />
Bei Geräten mit einem Wechselstromausgang:<br />
Verfügt Ihr <strong>Sine</strong> W<strong>ave</strong>-Wechselrichter auf der Vorderseite<br />
über einen Wechselstromausgang, dann sind für Sie in<br />
erster Linie die in Kapitel 2.4.4 noch folgenden Hinweise<br />
zur Gleichstromverdrahtung von Interesse. Nach dem<br />
<strong>Xantrex</strong> <strong>Sine</strong> W<strong>ave</strong> Wechselrichter Benutzerhandbuch<br />
Tätigen der Gleichstrom- und Masseanschlüsse ist Ihr<br />
Gerät dann bereit, Wechselstrom durch den Ausgang auf<br />
der Gerätevorderseite bereitzustellen.<br />
Bei festverdrahteten Modellversionen:<br />
Verfügt Ihr Gerät über eine festverdrahtete<br />
Wechselstrom-Anschlußklemmenleiste (mit oder ohne<br />
Übertragungsrelais), dann sind die nachfolgenden<br />
Informationen für Sie von äußerster Wichtigkeit. Die<br />
festverdrahtete Version ist in der Lage, jegliche Art von<br />
Wechselstrom zu handhaben und muß daher zwischen<br />
jeden Mehrzweckanschluß und jede Verteilertafel<br />
geschaltet werden.<br />
Zu Beginn der Verdrahtungshinweise geben wir Ihnen<br />
erst einmal eine kurze Zusammenfassung der<br />
Verdrahtungsreihenfolge bei festver-drahteten<br />
Wechselrichtermodellen. Bitte schauen Sie sich auch<br />
sorgfältig die übrigen Verdrahtungshinweise in Kapitel<br />
2.4.2 an, das dem Kapitel über den Eingabe- und<br />
Ausgabeschutz folgt. Hier wird Ihnen ausführlich erklärt,<br />
wie Sie bei der Verdrahtung vorgehen müssen.<br />
1. Vergewissern Sie sich, daß der (/I)-Schalter auf<br />
() steht. Bei den festverdrahteten Modellversionen,<br />
die über ein Übertragungsrelais verfügen, wird<br />
Strom aus der angeschlossenen Wechselstromquelle<br />
(Eingang) durch den Wechselrichter geleitet; die<br />
Ausgangsklemme und die angeschlossene<br />
Verdrahtung sind nun spannungsführend. Dies ist<br />
selbst dann der Fall, wenn der Schalter auf () steht!<br />
Vergewissern Sie sich also, daß alle Stromquellen<br />
abgeschaltet sind.<br />
2. Schließen Sie die Wechselstrom-<br />
Eingangsverdrahtung, die Wechselstrom-<br />
Ausgangsverdrahtung, den Masseanschluß des<br />
Gehäuses, das positive Gleichstromkabel und zu<br />
guter Letzt das negative Gleichstromkabel in eben<br />
dieser Reihenfolge an.<br />
3. Schließen Sie nun die Kreisläufe an die jeweiligen<br />
Quellen an.<br />
2.4.1 Eingabe- und Ausgabeschutz<br />
Zur Einhaltung der Vorschriften der kanadischen<br />
Normungsgesellschaft CSA, der UL und der gesetzlichen<br />
Vorschriften für elektrische Verdrahtungen müssen die<br />
Wechselstrom- und Gleichstromeingänge und -ausgänge<br />
mit einem Überstromschutz, wie z.B. einem Stromunterbrecher<br />
oder einer Sicherung, und einer<br />
Abschaltvorrichtung, wie nachfolgend aufgeführt,<br />
ausgestattet sein. (Beachten Sie bitte, daß sich die<br />
nachfolgenden Informationen über<br />
Wechselstromeingänge und -ausgänge lediglich auf<br />
Geräte beziehen, die mit einer festverdrahteten<br />
Wechselstromanschlußklemmen-leiste ausgestattet sind.<br />
Sie treffen nicht auf Modellversionen mit<br />
Ausgangssteckbuchsen zu!).<br />
Gleichstrom-Eingang: Zum Schutz der Verdrahtung<br />
zwischen Ihren Batterien und dem <strong>Sine</strong> W<strong>ave</strong>-<br />
Wechselrichter ist eine Schutz-vorrichtung in Form einer<br />
Inline-Sicherung oder eines Stromunterbrechers in<br />
größtmöglicher Nähe zur Batterie erforderlich. Die<br />
Nennstromstärke dieser Gleichstrom-Sicherung bzw.<br />
dieses Strom-unterbrechers muß groß genug sein, damit<br />
Ihr <strong>Sine</strong> W<strong>ave</strong> die angeschlossenen Verbraucherlasten<br />
betreiben kann. Ist die Nennstromstärke jedoch zu groß,<br />
machen die gesetzlichen Vorschriften es erforderlich,<br />
größere Gleichstromkabel zu verwenden als dies<br />
normalerweise der Fall wäre. Die Sicherung bzw. der<br />
Stromunterbrecher müssen mindestens für 12V oder 24V<br />
Gleichstromkreise - je nach Ihrem <strong>Sine</strong> W<strong>ave</strong>-Modell -<br />
bemessen und zugelassen sein. Sicherungen bzw.<br />
Stromunterbrecher, die nur für Wechselstromkreise<br />
bemessen sind, sind für die Verwendung in<br />
Gleichstromkreisen nicht geeignet und können eine<br />
Gefahr darstellen. Die Drahtdicke, die zwischen dem<br />
<strong>Sine</strong> W<strong>ave</strong> und der Sicherung bzw. dem<br />
Stromunterbrecher geschaltet wird, sollte der<br />
Nennleistung der Sicherung bzw. des Stromunterbrechers<br />
entsprechend bemessen sein und den gesetzlichen<br />
Bestimmungen und Vorschriften, die für Ihre Installation<br />
zur Anwendung kommen, genügen (siehe hierzu auch<br />
Tabelle 4).<br />
Wechselstrom-Eingang: Die Anlage muß über einen<br />
Überstromschutz für den Wechselstromeingangs-<br />
Deutsch 5
Stromkreis verfügen. Der Stromunterbrecher bzw. die<br />
Sicherung muß bei den 120V-Modellen für die<br />
Verwendung in 120V-Wechelstrom-Nebenstrom-kreisen<br />
und bei den 230V-Modellen für die Verwendung in<br />
230V-Wechelstrom-Nebenstrom-kreisen ausgelegt und<br />
zugelassen sein. Die Drahtdicke, die zwischen dem<br />
Unterbrecher und dem <strong>Sine</strong> W<strong>ave</strong>-Eingang geschaltet<br />
wird, sollte dem Stromkreis-unterbrecher entsprechend<br />
bemessen sein und den gesetzlichen Bestimmung und<br />
Vorschriften, die für Ihre Anlage zur Anwendung<br />
kommen, genügen (siehe hierzu auch Tabelle 1).<br />
Wechselstromkreise entsprechend den für Ihre<br />
Installation zur Anwendung kommenden Bestimmungen<br />
und Vorschriften ausgestattet haben, übereinstimmt.<br />
Tabelle 1 basiert auf dem US-amerikanischen Gesetz<br />
für elektrische Schaltungen (1999), dem kanadischen<br />
Pendant aus dem Jahre 1998 und den europäischen<br />
Verdrahtungs-vorschriften (für 230V-Modelle). Für Ihre<br />
elektrischen Anlagen können selbstverständlich auch<br />
noch andere Bestimmungen und Vorschriften zur<br />
Anwendung kommen.<br />
Wechselstrom-Ausgang: Der verwendete<br />
Stromunterbrecher bzw. die verwendete Sicherung muß<br />
bei den 120V-Modellen für die Verwendung in 120V-<br />
Wechelstrom-Nebenstromkreisen und bei den 230V-<br />
Modellen für die Verwendung in 230V-Wechelstrom-<br />
Nebenstromkreisen ausgelegt und zugelassen sein. Die<br />
Drahtdicke, die zwischen den <strong>Sine</strong> W<strong>ave</strong>-Ausgang und<br />
den Unterbrecher und zwischen den Unterbrecher und<br />
Ihre Verbraucherlasten geschaltet wird, sollte der<br />
Nennleistung des Stromkreisunterbrechers entsprechend<br />
bemessen sein und den gesetzlichen Bestimmungen und<br />
Vorschriften, die für Ihre Anlage zur Anwendung<br />
kommen, genügen (siehe hierzu Tabelle 1).<br />
Abschaltvorrichtungen: Da Stromkreisunterbrecher<br />
abgeschaltet bzw. Sicherungen aus dem Stromkreis<br />
entfernt werden können, müssen beide Arten von<br />
Vorrichtungen auch den Vorschriften für<br />
Abschaltvorrichtungen entsprechen, und zwar in jedem<br />
der obigen Stromkreise. Bitte beachten Sie, daß die<br />
erforderliche Abschaltvorrichtung nicht für eine<br />
Abschaltung unter Last gedacht ist! Sie dient lediglich<br />
dazu, den <strong>Sine</strong> W<strong>ave</strong> von den Eingabe- und Ausgabe-<br />
Stromquellen zu isolieren.<br />
2.4.2 Herstellen der Wechselstromverdrahtung<br />
Auch dieses Kapitel betrifft jene Modelle, die mit einer<br />
festverdrahteten Wechselstrom-Anschluß-klemmenleiste<br />
ausgestattet sind. Wie zuvor bereits erwähnt, muß Ihre<br />
Wechselstromverdrahtung derart bemessen sein, daß sie<br />
mit der aktuellen Nennleistung der Wechselstrom-<br />
Unterbrecher, mit der Sie Ihre Eingabe- und Ausgabe-<br />
Modell<br />
Wechselstrom-Eingabe un d<br />
Wechselstrom-Ausgabe<br />
<strong>1000</strong> - 12/24V<br />
<strong>1800</strong> - 12/24V<br />
<strong>1000</strong>i - 12/24V<br />
<strong>1800</strong>i - 12/24V<br />
Erforderliche<br />
Nennleistung<br />
des<br />
Stromunterbrechers<br />
* AWG = Amer. Einheit für Drahtdicke<br />
Erforderliche<br />
Drahtdicke<br />
m ax. 20A # 12 AWG *<br />
max.<br />
10A. ,0 - 2,5m m<br />
1<br />
2<br />
Tabelle 1. Stromunterbrecher und Drahtdicke<br />
Bitte beachten Sie, daß die Empfehlungen für die <strong>Sine</strong><br />
W<strong>ave</strong> <strong>1000</strong>- Modelle und die <strong>Sine</strong> W<strong>ave</strong> <strong>1800</strong>-Modelle<br />
die gleichen sind. Der Grund hierfür ist, daß die<br />
Überbrückungs-Nennleistung beider Produkte gleich ist<br />
(z.B. 15 A für den <strong>Sine</strong> W<strong>ave</strong> <strong>1000</strong> und den <strong>Sine</strong> W<strong>ave</strong><br />
<strong>1800</strong> sowie 10 A für den <strong>Sine</strong> W<strong>ave</strong> <strong>1000</strong>i und den <strong>Sine</strong><br />
W<strong>ave</strong> <strong>1800</strong>i).<br />
Die Abb. 3 kann hierbei recht hilfreich sein, da sie die<br />
Anschlußklemmen für die Wechselstromverdrahtung bei<br />
den <strong>Sine</strong> W<strong>ave</strong>-Modellen zeigt, die über festverdrahtete<br />
Wechselstromanschlußklemmen-leisten verfügen.<br />
Abb. 3. Anschlußklemmen des <strong>Sine</strong> W<strong>ave</strong>-<br />
Wechselrichters für die<br />
Wechselstromverdrahtung (nur bei<br />
festverdrahteten Modell-Versionen)<br />
WARNUNG!<br />
Stromschlaggefahr! Bevor Sie sich weiter<br />
mit den Wechselstrom-drahtverbindungen<br />
beschäftigen, vergewissern Sie sich, daß<br />
der <strong>Sine</strong> W<strong>ave</strong> im Augenblick NICHT an<br />
irgendwelche Batterien angeschlossen ist;<br />
auch die gesamte Verdrahtung darf nicht<br />
an irgendwelche elektrischen Stromquellen<br />
angeschlossen sein. Keinesfalls die<br />
Ausgangsklemmen des <strong>Sine</strong> W<strong>ave</strong>s an<br />
eine eingehende Wechselstromquelle<br />
anschließen!<br />
Die Wechselstromverdrahtung sollte in der folgenden<br />
Reihenfolge erfolgen:<br />
1. Wechselstromeingang (Stromquelle)<br />
2. Wechselstromausgang (Verbraucherlast)<br />
Zum Herstellen der Wechselstromverdrahtung wie<br />
folgt vorgehen:<br />
1. Der Bereich für die Wechselstromverdrahtung<br />
befindet sich von der Gerätevorderseite gesehen an<br />
der rechten Seite Ihres <strong>Sine</strong> W<strong>ave</strong>-Wechselrichters.<br />
Entfernen Sie die Abdeckung des Faches und<br />
verschaffen Sie sich so Zugang zu der innen<br />
liegenden Wechselstrom-Anschlußklemmenleiste.<br />
6 Deutsch <strong>Xantrex</strong> <strong>Sine</strong> W<strong>ave</strong> Wechselrichter Benutzerhandbuch
2. Bohren Sie Löcher für Ihre Kabelschellen in die<br />
Abdeckung des Faches (bedienen Sie sich hierzu<br />
der vorhandenen Sollbruchstellen). Die innere<br />
Sollbruchstelle ist für eine Kabelschelle mit einem<br />
Durchmesser von 16 mm für die 230V-Verdrahtung<br />
gedacht. Für die 120V-Verkabelung läßt sich eine<br />
zweite ringförmige Sollbruchstelle herausstanzen,<br />
die das Loch derart vergrößert, daß eine Kabelschelle<br />
oder ein Kabelkanal der Handelsgröße ½'' hindurch<br />
paßt.<br />
3. Führen Sie den dreiadrigen Wechselstrom-eingang<br />
(Stromquelle) durch eine Kabelschelle in das Innere<br />
des Verdrahtungsbereiches; verwenden Sie hierfür<br />
die Sollbruchstelle auf der rechten Seite der<br />
Frontplatte. Schließen Sie zuerst den Wechselstrom<br />
(Eingangs)-Erdleiter an die Erdanschlußklemme an<br />
(Erdungssymbol mit Kreis). Dann schließen Sie die<br />
Wechselstrom-(Eingangs)-Zuleitung und die<br />
neutralen Leiter an die entsprechenden<br />
Wechselstrom-Eingangsklemmen Ihres <strong>Sine</strong> W<strong>ave</strong><br />
an. Siehe auch Tabelle 2, die Aufschluß über die<br />
Farbkodierung und die Indentifikation der<br />
Anschlußklemmen gibt.<br />
4. Auf ähnliche Art und Weise schließen Sie nun die<br />
Wechselstrom-Ausgangsdrähte (Last) an die<br />
Wechselstrom-Ausgangsklemmen Ihres <strong>Sine</strong> W<strong>ave</strong><br />
an. Der Erdleiter des Wechselstromausgangs ist an<br />
die Erdanschlußöse (Erdungssymbol ohne Kreis)<br />
des <strong>Sine</strong> W<strong>ave</strong> anzuschließen. Die Anschlüsse der<br />
Drähte an die Klemmen sollten wie folgt hergestellt<br />
werden: (siehe Tabelle 2.)<br />
ANSCHLUSS-<br />
KLEMME<br />
Wstr. Leitung Farbe<br />
120V<br />
(Nordamerika)<br />
230V<br />
(Europa)<br />
NETZLEITUNG<br />
(LINE - L)<br />
Schwarz<br />
Brau n<br />
NULLEITER<br />
(NEUTRAL - N)<br />
Weiß<br />
Bla u<br />
ERDLEITER grün oder blankes grün / gelb oder<br />
(GROUND - G) Kupfer blankes Kupfer<br />
Tabelle 2. Anschlußklemmen- und Drahterkennung<br />
<strong>Xantrex</strong> <strong>Sine</strong> W<strong>ave</strong> Wechselrichter Benutzerhandbuch<br />
5. Nach erfolgter Verdrahtung sollten Sie alle getätigten<br />
Anschlüsse nochmals überprüfen, um ganz<br />
sicherzugehen, daß alle Drähte an die richtigen<br />
Anschlußklemmen angeschlossen sind und diese fest<br />
angezogen sind (das empfohlene Drehmoment<br />
beträgt 19 cm/Pfund; 9,8 Nm).<br />
Wechselstrom-Schutzerdung: Bei der Durchführung<br />
der Wechsel-stromverdrahtung werden die<br />
Wechselstrom-Eingangs- und -Ausgangserdleiter an den<br />
Wechselrichter angeschlossen. Der Erdleiter des<br />
Wechselstromeingangs ist an den hereinkommenden<br />
Erdleiter Ihrer Wechselstromnetzquelle anzuschließen.<br />
Der Erdleiter des Wechsel-stromausgangs sollte zum<br />
Erdungspunkt Ihrer angeschlossenen Verbraucherlasten<br />
geführt werden (z.B. zu einer Verteilertafel-<br />
Sammelerdleitung).<br />
Erdung des Nulleiters:<br />
a) 120 V-Modelle: Der Nulleiter des Ausgangs-<br />
Wechselstromkreises des <strong>Sine</strong> W<strong>ave</strong>-<br />
Wechselrichters ist während des<br />
Wechselrichterbetriebes automatisch an die<br />
Schutzerdung angeschlossen. Dies entspricht den<br />
nationalen Vorschriften für Elektroinstallationen, daß<br />
bei separat abgezweigten Wechsel-stromquellen (wie<br />
z.B. Wechselrichter und Generatoren) die Nulleiter<br />
genau so mit dem Erdleiter verbunden sein müssen<br />
wie auch der Nulleiter der Netzstromquelle mit dem<br />
Erdleiter des Wechselstrom-Unterbrecherfeldes<br />
verbunden sein muß. Bei Modellversionen, die mit<br />
einem Übertragungsrelais ausgestattet sind, ist dieser<br />
Anschluß (Nulleiter des Wechselstromausgangs des<br />
<strong>Sine</strong> W<strong>ave</strong>-Wechselrichters an die Eingangs-<br />
Schutzerdung) bei vorhan-dener Netz-<br />
Wechselstromleistung und Überbrückungs-betrieb<br />
des Wechselrichters nicht präsent , so daß der<br />
Nulleiter der Netzstrom-quelle nur, wie gefordert,<br />
an den Erdleiter Ihres Unterbrecherfeldes<br />
angeschlossen ist.<br />
b) 230 V-Modelle: Hier existiert kein automatischer<br />
interner Anschluß von einem der Netzleiter<br />
(Netzleitung oder Nulleiter) an die Schutzerdung.<br />
2.4.3 Erdschluß-Leistungstrenner<br />
Bei Installationen in Freizeitfahrzeugen (für Zulassung<br />
in Nordamerika) ist ein Erdschlußschutz aller an den<br />
Wechselstromausgang des mit einer festverdrahteten<br />
Anschlußklemme ausgestatteten <strong>Sine</strong> W<strong>ave</strong>-<br />
Wechselrichters angeschlossenen Nebenstromkreise<br />
erforderlich. Darüber hinaus machen die gesetzlichen<br />
Vorschriften und Bestimmungen den Erdschlußschutz<br />
verschiedener Steckbuchsen auch bei Installationen in<br />
Wohngebäuden unbedingt erforderlich. Während die<br />
wahre Sinuswellenausgabe des <strong>Sine</strong> W<strong>ave</strong>-<br />
Wechselrichters der Wellenform entspricht, die von den<br />
Energieversorungsunternehmen bereitgestellt wird, sind<br />
wir doch von Seiten der UL (Fire Underwriter’s<br />
Laboratories Inc. = Feuerversicherungs-gesellschaft) dazu<br />
gehalten, spezielle Erdschluß-Leistungstrenner zu testen<br />
und zu empfehlen.<br />
<strong>Xantrex</strong> hat die folgenden erdschlußgeschützten 15 A-<br />
Steckbuchsen, die beim Anschluß an den<br />
Wechselstromausgang des <strong>Sine</strong> W<strong>ave</strong> angemessen<br />
funktionieren, getestet:<br />
H ersteller<br />
Modell Nr .<br />
LEVITON<br />
6599/70 1<br />
L EVITON<br />
6598/722 *<br />
EAGLE<br />
Shock Sentr y<br />
PASS & SEYMOUR 1591-WC N<br />
HUBBELL<br />
GF252GY A<br />
BRYANT<br />
GFR52FT I<br />
B RYANT<br />
GFR82FTI* *<br />
* Mit Netzleiter/Last-Inversionskontrolle &<br />
Anzeigelampe<br />
** Notstromgüte<br />
2.4.4 Herstellen der Gleichstrom-<br />
Drahtverbindungen<br />
Befolgen Sie die nachstehende Vorgehensweise beim<br />
Anschließen der Batteriekabel an die Anschluß-klemmen<br />
des Gleichstromeingangs Ihres <strong>Sine</strong> W<strong>ave</strong>-<br />
Wechselrichters. Sie sollten die Kabellänge so kurz wie<br />
möglich wählen (im Idealfall kürzer als 3 m). Die<br />
Deutsch 7
Drahtdicke sollte allerdings ausreichend bemessen sein,<br />
um den erforderlichen Strom führen zu können.<br />
Außerdem muß sie den Bestimmungen und Vorschriften<br />
für Elektroinstallationen, die für Ihre Anlage zur<br />
Anwendung kommen, entsprechen. Kabel mit einem<br />
nicht ausreichenden Drahtdurchmesser (zu eng) oder zu<br />
großer Länge mindern die Leistung Ihres<br />
Wechselrichters - schlechtes Stoßspannungsvermögen,<br />
häufige Warnmeldungen wegen zu geringer Eingangsspannung<br />
und automatisches Abschalten können die<br />
Folge sein.<br />
Drahtdicke<br />
mm<br />
V = I x R<br />
Spannung = Stromstärke x Widerstand<br />
Wechselrichterausgabe<br />
(W)<br />
Stromstärke<br />
(A)<br />
(<br />
2 )<br />
d<br />
4/0<br />
(110)<br />
3/0<br />
(85)<br />
2/0<br />
(68)<br />
0<br />
(55)<br />
2<br />
(34)<br />
4<br />
(21)<br />
Widerstan<br />
(Ohm pro Fuß)<br />
@ 25°C<br />
500<br />
100<br />
0 150<br />
0 200<br />
0 250<br />
0 300 0<br />
50<br />
10<br />
0 15<br />
0 20<br />
0 25<br />
0 30 0<br />
Spannungs<br />
abfall<br />
pro Fuß<br />
Spannungs<br />
abfall<br />
pro Fuß<br />
Spannungs<br />
abfall<br />
pro Fuß<br />
Spannungs<br />
abfall<br />
pro Fuß<br />
Spannungs<br />
abfall<br />
pro Fuß<br />
Spannungs<br />
abfall<br />
pro Fuß<br />
0.000050<br />
0.002<br />
5 0.005<br />
0 0.007<br />
5 0.010<br />
0 0.012<br />
5 0.015 0<br />
0.000063<br />
0.003<br />
2 0.006<br />
3 0.009<br />
5 0.012<br />
6 0.015<br />
8 0.018 9<br />
0.000079<br />
0.004<br />
0 0.007<br />
9 0.011<br />
9 0.015<br />
8 0.019<br />
8 0.023 7<br />
0.000100<br />
0.005<br />
0 0.010<br />
0 0.015<br />
0 0.020<br />
0 0.025<br />
0 0.030 0<br />
0.000159<br />
0.008<br />
0 0.015<br />
9 0.023<br />
9 0.031<br />
8 0.039<br />
8 0.047 7<br />
0.000253<br />
0.012<br />
7 0.025<br />
3 0.038<br />
0 0.050<br />
6 0.063<br />
3 0.075 9<br />
1 Fuß = ca. 30 cm<br />
Tabelle 3. Spannungsabfall pro Fuß<br />
Gleichstromkabellänge<br />
Diese Warnmeldungen wegen zu geringer<br />
Eingangsspannung beruhen auf Gleichstrom-<br />
Spannungsabfällen in den Kabeln vom Wechsel-richter<br />
zu den Batterien. Je länger und enger diese Kabel sind,<br />
desto größer ist der Spannungsabfall. Tabelle 3 gibt<br />
Aufschluß über den Spannungs-abfall pro Fuß*<br />
Kabellänge auf verschiedenen Leistungs-abgabeniveaus.<br />
Befindet sich der <strong>Sine</strong> W<strong>ave</strong> <strong>1800</strong> z.B. 10 Fuß ( ca. 3 m)<br />
von Ihrer Batterie entfernt, wird mit 2000 Watt betrieben<br />
und ist nicht vorschrifts-mäßig angeschlossen - nämlich<br />
mit einem Kabel mit einer Drahtdicke von # 4 AWG -<br />
dann können Sie von einem Spannungsabfall von 0,0506<br />
V pro Fuß Kabellänge ausgehen. Die Gesamtkabellänge<br />
beträgt sogar eigentlich 20 Fuß und nicht 10 Fuß, da sie<br />
hin und zurück gemessen wird, d.h. von der Batterie bis<br />
zu Ihrem Wechselrichter und retour.<br />
Daher müßten Sie eigentlich die 0,0506 V mit 20<br />
multiplizieren, um den Gesamtspannungsabfall zu<br />
ermitteln. In diesem Fall würde er demnach 1,012 V<br />
betragen. Beträgt Ihre Batteriespannung dann z.B. nur<br />
11,2 Volt Gleichstrom, dann liegt die tatsächlich<br />
Spannung an Ihrem Wechselrichter aufgrund des<br />
beträchtlichen Spannungsabfalles bei nur 10,188 Volt<br />
(nämlich 11,2V–1,012V). In diesem Falle würde der <strong>Sine</strong><br />
W<strong>ave</strong>-Wechselrichter entweder die Warnung GERINGE<br />
EINGANGS-SPANNUNG ausgeben oder sich ganz<br />
abschalten. Bei hohem Stromabzug und Spitzenströmen<br />
kann es somit vorkommen, daß sich das Gerät aufgrund<br />
der geringen Eingangsspannung automatisch abschaltet,<br />
wenn die Kabel zu klein und zu lang bemessen sind.<br />
Kabel mit größeren Drahtdicken helfen also, die Situation<br />
zu verbessern. Aber selbst bei vorschriftsmäßig<br />
bemessenen Kabeln und einer Drahtdicke von #0 AWG<br />
liegt der Spannungsabfall bei 0,02V Gleichstrom<br />
(multipliziert mit 20 ergibt das einen Gesamtspannungsabfall<br />
von 0,4V Gleichstrom). Dies zeigt, daß<br />
bei einer Entfernung von 10 Fuß auch bei großen<br />
Drahtdicken mit einem Spannungsabfall zu rechnen ist.<br />
Also noch einmal: Versuchen Sie, die Kabellänge auf<br />
ein Minimum zu reduzieren und eine größtmögliche<br />
Kabeldicke zu verwenden. <strong>Xantrex</strong> empfiehlt zur<br />
Gewährleistung einer optimalen Leistung Ihres <strong>Sine</strong><br />
W<strong>ave</strong> die Verwendung der nachfolgenden Kabeldicken<br />
(gilt für beide Modellversionen, 120V und 230V):<br />
<strong>Sine</strong> W<strong>ave</strong> <strong>1000</strong>i/12: #0 AWG oder 55 mm²<br />
<strong>Sine</strong> W<strong>ave</strong> <strong>1000</strong>i/24: #6 AWG oder 13 mm²<br />
<strong>Sine</strong> W<strong>ave</strong> <strong>1800</strong>i/12: #4/0AWG oder 110mm²<br />
<strong>Sine</strong> W<strong>ave</strong> <strong>1800</strong>i/24: #2 AWG oder 34 mm²<br />
Verwenden Sie außerdem nur qualitativ hochwertiges<br />
Kupferkabel und beschränken Sie die Kabellänge nach<br />
Möglichkeit auf maximal 3-6 Fuß (0,9 - 1,8 m).<br />
<strong>Xantrex</strong> hat die Anforderungen, die an den Einsatz von<br />
Wechselrichtern auf den verschiedenen Märkten gestellt<br />
werden, geprüft und die folgende Tabelle erarbeitet, der<br />
Sie die MINIMALE von den entsprechenden diversen<br />
amerikanischen Behörden zugelassene<br />
Gleichstromkabelgröße und die maximal zugelassene<br />
Sicherungs-/Unterbrecher-Größe entnehmen können. Für<br />
Ihren Anwendungsfall können natürlich auch andere<br />
Vorschriften und Richtlinien Anwendung finden: (siehe<br />
Tabelle 4.)<br />
Modell<br />
<strong>1000</strong> 12V<br />
<strong>1000</strong>i 12V<br />
<strong>1000</strong> 24V<br />
<strong>1000</strong>i 24V<br />
<strong>1800</strong> 12V<br />
<strong>1800</strong>i 12V<br />
<strong>1800</strong> 24V<br />
<strong>1800</strong>i 24V<br />
Installation<br />
im marinen<br />
Bereich (1)<br />
Drahtdicke<br />
AWG<br />
Sicherung<br />
(A)<br />
Installation in Installation in<br />
Freizeit- Wohnfahrzeugen<br />
(2) gebäuden (3)<br />
Drahtdicke<br />
AWG<br />
Sicherung<br />
(A)<br />
1 Basierend auf der ABYC, Empfohlene Vorgehensweise E-9, 75°C- Leiter<br />
2 Basierend auf der NFPA 70, Abschnitt 551, 90°C-Leiter<br />
Drahtdicke<br />
AWG<br />
3 Basierend auf der NFPA 70, Abschnitt 240 und 310, 75°C-Leiter<br />
Sicherung<br />
(A)<br />
# 4 17<br />
5 # 4 15<br />
0 # 1 15 0<br />
# 8 90<br />
# 8 90<br />
# 6 7 0<br />
# 1 30<br />
0 # 1 22<br />
5 4/<br />
0 25 0<br />
# 6 10<br />
0 # 4 15<br />
0 # 2 12 5<br />
Tabelle 4. Drahtdicken für Gleichstromverdrahtung und<br />
Anforderungen an InlineSicherungen<br />
WARNUNG<br />
Säubern Sie die Batterieanschlußklemmen,<br />
bevor Sie die Anschlüsse tätigen.<br />
Tragen Sie einen Augenschutz, damit kein<br />
Rost in Ihre Augen gelangt.<br />
8 Deutsch <strong>Xantrex</strong> <strong>Sine</strong> W<strong>ave</strong> Wechselrichter Benutzerhandbuch
Herstellen der Gleichstrom-Drahtverbindungen:<br />
1. Bevor Sie mit dem Herstellen der Anschlüsse<br />
beginnen, führen Sie die positiven und negativen<br />
Batteriekabel auf direktem Wege zu den<br />
Gleichstrom-Anschlußklemmen an Ihrem <strong>Sine</strong><br />
W<strong>ave</strong>-Wechselrichter. Schieben Sie die Leitungsend-<br />
Plastikmuffen über die positiven und negativen<br />
Kabel (die rote Muffe auf das positive und die<br />
schwarze Muffe auf das negative Kabel). Führen Sie<br />
die Kabel NICHT durch eine elektrische<br />
Verteilertafel, einen Batterieisolator oder eine andere<br />
Vorrichtung, die für zusätzliche Spannungsabfälle<br />
sorgt, sondern nur durch die erforderliche Sicherung<br />
oder den Unterbrecher auf der positiven<br />
Batterieanschlußklemme. Installieren Sie den <strong>Sine</strong><br />
W<strong>ave</strong> so, daß die Länge der Batteriekabel möglichst<br />
minimal ist. Die Steckverbinder auf dem <strong>Sine</strong> W<strong>ave</strong><br />
sind derart ausgelegt, daß sie auf bis zu 250 MCM-<br />
Quetschkabelschuhe (entweder AMP oder ILSCO)<br />
oder Gehäuseklemmen passen (befestigen Sie diese<br />
an dem angeschlossenen Kabel mit Hilfe einer<br />
Stellschraube). Achten Sie bitte darauf, daß die<br />
farbigen Leitungsend-Muffen viel besser auf<br />
Quetschkabelschuhe passen. Diese sind daher<br />
empfehlenswerter als die Gehäuseklemmen.<br />
2. Schneiden Sie bitte die Kabel sauber auf die richtige<br />
Länge ab. Achten Sie darauf, daß genügend<br />
Isolierung für die richtige Installation der<br />
Kabelschuhe oder Gehäuseklemmen verbleibt.<br />
Befestigen Sie die Anschlußklemmen an beiden<br />
Kabeln; verwenden Sie hierfür die vom Hersteller<br />
der Kabelschuhe empfohlene Crimpzange. Es dürfen<br />
keine Streudrähte aus der Anschlußklemme<br />
herausragen. Schließen Sie die Anschlußklemme an<br />
dem positiven Kabel an den positiven Batteriestecker<br />
(Stift) Ihres <strong>Sine</strong> W<strong>ave</strong> an und ziehen Sie diese mit<br />
einem Schraubenschlüssel an. Empfohlenes<br />
Drehmoment: 9-10 Fuß/Pfund (11,7 - 13 Nm).<br />
Überprüfen Sie, ob das Kabel sicher sitzt und an<br />
die korrekte positive Anschlußklemme<br />
angeschlossen ist.<br />
<strong>Xantrex</strong> <strong>Sine</strong> W<strong>ave</strong> Wechselrichter Benutzerhandbuch<br />
3. Die Schaltung einer Inline-Sicherung zwischen den<br />
<strong>Sine</strong> W<strong>ave</strong> und die Batterie ist bei allen elektrischen<br />
Anlagen zwingend vorgeschrieben. Sehen Sie auch<br />
hierzu bitte Tabelle 4, die Beispiele für eine korrekte<br />
Auswahl der Sicherungsgröße gibt. Diese Sicherung<br />
schützt Ihre Batterie und Ihre Verdrahtung für den<br />
Fall eines zufälligen Kurzschlusses bei der<br />
Installation Ihres <strong>Sine</strong> W<strong>ave</strong>-Wechselrichters oder<br />
bewahrt Ihre Verkabelung vor späteren Schäden. Die<br />
Sicherung und die entsprechende Sicherungsfassung<br />
sind in der positiven Seite des Gleichstromkreises<br />
zu installieren und zwar in größtmöglicher Nähe zu<br />
den Batterien und im Einklang mit den zur<br />
Anwendung kommenden Richtlinien. Schließen Sie<br />
die Gleichstromkabel erst dann an die Batterien an,<br />
nachdem alle anderen Leistungs- und<br />
Masseanschlüsse an den <strong>Sine</strong> W<strong>ave</strong> getätigt worden<br />
sind.<br />
4. Schließen Sie das Kabel der positiven<br />
Steckverbindung an Ihrem <strong>Sine</strong> W<strong>ave</strong> an die positive<br />
Anschlußklemme (POS+) der Sicherungsfassung an.<br />
Achten Sie hierbei sorgfältig auf die richtige Polarität<br />
und vertauschen Sie nicht die Pole. Führen Sie beide<br />
Kabel erst, bevor Sie irgendwelche Anschlüsse<br />
tätigen<br />
Abb. 4. Batterieanschlüsse<br />
VORSICHT<br />
Eine versehentliche Verwechslung der<br />
Pole beim Tätigen der Anschlüsse kann zur<br />
Beschädigung Ihres <strong>Sine</strong> W<strong>ave</strong>-<br />
Wechselrichters führen und die<br />
Inanspruchnahme des Kundendienstes<br />
erforderlich machen (eingebaute Sicherung<br />
brennt durch). Überprüfen Sie daher<br />
sorgfältig die Polarität, bevor Sie die letzten<br />
Gleichstromanschlüsse tätigen, um so eine<br />
korrekte Verdrahtung zu gewährleisten.<br />
5. Schließen Sie das negative Gleichstromkabel an die<br />
negative Anschlußklemme (NEG-) Ihrer Batterie an.<br />
Als nächstes schließen Sie das Kabel an die negative<br />
Anschlußklemme Ihres Wechselrichters an. Der<br />
Anschluß an die negative Anschlußklemme des <strong>Sine</strong><br />
W<strong>ave</strong> sollte der letzte Anschluß sein, den Sie tätigen.<br />
Sollte hierbei ein Funke erzeugt werden, so<br />
erschrecken Sie nicht - das ist normal.<br />
WARNUNG<br />
Vergewissern Sie sich, daß alle<br />
Gleichstromanschlüsse fest getätigt wurden<br />
(Drehmoment bis 9–10 Fuß/Pfund, 11,7–<br />
13 Nm). Lockere Anschlüsse führen zu<br />
Überhitzungen und stellen ein mögliches<br />
Sicherheitsrisiko dar ( Brandgefahr).<br />
6. Bei der Installation in Wohngebäuden ist eine<br />
Abdeckung für die Gleichstromverdrahtung zum<br />
Abdecken der Gleichstromanschlüsse erforderlich.<br />
Setzen Sie sich hierfür mit <strong>Xantrex</strong> oder Ihrem<br />
Fachhändler in Verbindung. Für den Fall anderer<br />
Einbausituationen schieben Sie die<br />
Gummileitungsendmuffen über das Kabel und die<br />
Klemmenverbindungen.<br />
Gleichstrom-Erdung:<br />
Der <strong>Sine</strong> W<strong>ave</strong> verfügt auf der Gehäuserückwand über<br />
einen Kabelschuh mit der Bezeichnung ‘Gehäuseerdung’<br />
(‘Chassis Ground’). Dieser Kabelschuh dient der für<br />
einige Installationen vorgeschriebenen Verbindung Ihres<br />
<strong>Sine</strong> W<strong>ave</strong>-Gehäuses mit Ihrer Gleichstrom-Erdleitung.<br />
Deutsch 9
3. <strong>Sine</strong> W<strong>ave</strong>-Wechselrichterbetrieb<br />
Dieses Kapitel beschreibt detailliert, wie der <strong>Sine</strong> W<strong>ave</strong><br />
als Wechselrichter funktioniert; es liefert Informationen<br />
über das Bedienfeld und gibt Aufschluß über<br />
Betriebsgrenzwerte beim Wechselrichterbetrieb.<br />
3.1 Funktionsweise<br />
Der <strong>Sine</strong> W<strong>ave</strong>-Wechselrichter wandelt Batterie-strom<br />
in 2 Stufen um. Bei der ersten Stufe handelt es sich um<br />
eine Gleichstrom-in-Gleichstrom-Umrichtung, wobei<br />
der Niedervolt-Gleichstromeingang in Hochspannungs-<br />
Gleichstrom umwandelt wird. Bei der zweiten Stufe<br />
handelt es sich um die eigentliche Umrichtungsstufe,<br />
nämlich um diejenige, die den Hochspannungs-<br />
Gleichstrom in eine präzise und wahre Sinuswellen-<br />
Wechselstromausgabe umwandelt.<br />
3.2 Wellenform der<br />
Wechselstromausgabe<br />
Bei der Wellenform der Wechselstromausgabe des <strong>Sine</strong><br />
W<strong>ave</strong> handelt es sich um eine ‘’wahre Sinuswelle’’ mit<br />
einer typischen nichtlinearen Verzerrung (Klirrfaktor)<br />
von 1 %. Siehe hierzu auch Abb. 6. Diese Wellenform<br />
stimmt nahezu mit der, die von Ihrem Stromversorgungsunternehmen<br />
bereitgestellt wird, überein. Manchmal<br />
kann es sogar vorkommen, daß der Wechselstrom des<br />
<strong>Sine</strong> W<strong>ave</strong> noch sauberer und präziser ist als der Ihres<br />
Stromversorgers.<br />
Wechselrichtern mit modifizierten Sinuswellen oder<br />
Rechteckwellen vorherrschen, zurückzuführen.<br />
Nachfolgend einige dieser Vorteile:<br />
• weniger Störungen bei Tongeräten oder<br />
elektronischen Geräten, vor allem bei denjenigen<br />
Geräten, die über weniger komplexe interne<br />
Netzteile verfügen.<br />
• erheblich verminderte Einschaltstromstöße in<br />
kapazitive Lasten und geringere Belastung der<br />
Ausgabevorrichtungen des Wechselrichters, was<br />
eine längere Lebensdauer der beteiligten Geräte zur<br />
Folge haben kann.<br />
• angeschlossene Motoren laufen im Allgemeinen<br />
ruhiger und leiser ohne die nichtlineare Verzerrung,<br />
wie sie durch eine modifizierte Sinuswelle erzeugt<br />
wird.<br />
3.3 Bedienfeld<br />
Die Gleichstrom-in-Gleichstrom-Umrichterstufe bedient<br />
sich modernster Hochfrequenz-Stromrichttechnologie,<br />
die die sperrigen Niederfrequenz-Transformatoren (50–<br />
60 Hz) der alten Wechselrichter-Generation verdrängt<br />
hat. Hier kommen fortschrittliche Halbleiter zum Einsatz,<br />
die über ausgezeichnete Überlastfähigkeiten verfügen.<br />
Abb. 5. Funktionsweise<br />
Abb. 6: Wahre Sinuswellenausgabe<br />
des <strong>Sine</strong> W<strong>ave</strong>-Wechselrichters (120<br />
V Wechselstrom-Modell)<br />
Die wahre Sinuswelle bietet gegenüber anderen<br />
Wellenformen, wie sie von anderen Wechselrichtern<br />
bereitgestellt werden, zahlreiche Vorteile:<br />
• Geräte, die mit Wechselstrom betrieben werden, sind<br />
für den Betrieb mit wahren Sinuswellen ausgelegt.<br />
Zahlreiche Lasten werden also bessere Leistung<br />
liefern, wenn sie an den <strong>Sine</strong> W<strong>ave</strong>-Wechselrichter<br />
angeschlossen sind.<br />
• angeschlossene Motoren laufen leichter an.<br />
• geringere Belastung der Überspannungs-schutz-<br />
Schaltkreise und somit möglicherweise längere<br />
Lebensdauer der Geräte.<br />
WARNUNG<br />
Schauen Sie sich noch einmal die zu<br />
Anfang dieses Benutzerhandbuches<br />
aufgeführten Sicherheitshinweise an, bevor<br />
Sie den <strong>Sine</strong> W<strong>ave</strong>-Wechselrichter in<br />
Betrieb nehmen.<br />
Nachdem Sie den <strong>Sine</strong> W<strong>ave</strong>-Wechselrichter<br />
ordnungsgemäß installiert und an die Batterien<br />
angeschlossen haben, ist er nun bereit, Ihre<br />
angeschlossenen Verbraucherlasten unverzüglich mit<br />
Wechselstromleistung zu versorgen. Das Bedienfeld<br />
stellt hierbei die Schnittstelle zwischen Ihnen und Ihrem<br />
Wechselrichter dar. Dieses Kapitel beschäftigt sich nun<br />
mit den Merkmalen des Bedienfeldes. Die<br />
nachfolgenden Kapitel geben dann noch weiteren<br />
Aufschluß über den Betrieb des Wechselrichters.<br />
Zahlreiche Vorteile der wahren Sinuswelle sind auch auf<br />
das Fehlen scharfkantiger Wellenformen, wie sie bei<br />
10 Deutsch <strong>Xantrex</strong> <strong>Sine</strong> W<strong>ave</strong> Wechselrichter Benutzerhandbuch
Abb. 7. Bedienfeld des <strong>Sine</strong><br />
W<strong>ave</strong>-Wechselrichters<br />
1. WECHSELRICHTER /I: mit diesem Schalter<br />
schalten Sie den <strong>Sine</strong> W<strong>ave</strong> entweder EIN (I) oder auf<br />
BYPASS (Überbrückung) (). Außerdem dient er dem<br />
Ein- und Abschalten des ENERGIESPAR-Modus<br />
während der Anlauf-Sequenz. Steht der Schalter auf (),<br />
befinden sich die Modelle, die mit einem<br />
Übertragungsrelais ausgerüstet sind, im BYPASS-Modus<br />
(Überbrückungsmodus). Der ankommende<br />
Wechselstrom fließt dabei zum Verbraucher durch. Mit<br />
dem Schalter läßt sich jedoch lediglich die Ausgabe des<br />
Wechselrichters steuern, nicht die Wechselstromausgabe<br />
von festverdrahteten ModellenVersionen, die mit dem<br />
optional erhältlichen Übertragungsrelais ausgestattet<br />
sind.<br />
2. FLÜSSIGKRISTALLSICHTANZEIGE (LCD-<br />
ANZEIGE): zeigt den Eingangsstrom von der Batterie<br />
und die Batteriespannung numerisch an. Ein Mehrfach-<br />
Segment-Balkendiagramm zeigt die tatsächliche<br />
Ausgangsleistung des Wechselrichters in Watt an,<br />
während eine angeschlossene Verbraucherlast betrieben<br />
wird.<br />
3. MULTI-POSITIONS-MONTAGE: das Bedienungsfeld<br />
ist so ausgelegt, daß es von dem Gehäuse<br />
abgenommen und - je nach Ausrichtung des montierten<br />
Wechselrichters - um jeweils 90° gedreht wieder<br />
angebracht werden kann. Es kann aber auch an einer<br />
<strong>Xantrex</strong> <strong>Sine</strong> W<strong>ave</strong> Wechselrichter Benutzerhandbuch<br />
ganz anderen Stelle, d.h. vom Gehäuse des<br />
Wechselrichters entfernt, montiert werden, wenn Sie über<br />
das optional erhältliche <strong>Sine</strong> W<strong>ave</strong>-<br />
Schnittstellenbedienungsfeld verfügen.<br />
4. FEHLERANZEIGE: tritt ein Fehler auf, wird dieser<br />
unverzüglich angezeigt. Eine Alarmmeldung ertönt und<br />
die Hintergrundbeleuchtung der Anzeige blinkt auf, um<br />
Sie auf den Fehler aufmerksam zu machen (siehe Kapitel<br />
5.1).<br />
Zum Betrieb des <strong>Sine</strong> W<strong>ave</strong>-Wechselrichters:<br />
1. Schalten Sie das Gerät ein, indem Sie den Wippschalter<br />
des Bedienungsfeldes auf (I) stellen. Der Anzeige können<br />
Sie nun (bei jeder Anlaufphase) die folgenden<br />
Informationen entnehmen:<br />
• Modellnummer des <strong>Sine</strong> W<strong>ave</strong> (<strong>1000</strong> oder <strong>1800</strong> W)<br />
• Konfiguration der Eingangsspannung,<br />
Ausgangsspannung und der Frequenz<br />
• ENERGIESPAR-Modus AUS (Standardwerkseinstellung).<br />
Abb.8 Sequenzanzeigen des Bedienfeldes<br />
Im Anschluß hieran kehrt das Bedienfeld zu den<br />
Standardanzeigen Eingangsspannung, Eingangsstrom<br />
und Ausgangsleistung zurück. Wird eine Verbraucherlast<br />
angeschlossen, läßt sich die Ausgangsleistung (in Watt)<br />
anhand des Balkendiagramms leicht ablesen.<br />
Erscheint das Standardanzeigebild, ist der <strong>Sine</strong> W<strong>ave</strong>-<br />
Wechselrichter bereit, Ihre angeschlossenen<br />
Verbraucherlasten mit Wechselstrom zu versorgen. Sie<br />
können jetzt einen Verbraucher an die Ausgangsbuchse<br />
auf der Vorderseite Ihres Gerätes anschließen bzw. bei<br />
festver-drahteten Modellversionen an eine<br />
Ausgangsbuchse, die an den Wechselstromausgang des<br />
Wechselrichters angeschlossen ist. Die<br />
Verbraucherlasten sollten nun genau so funktionieren,<br />
als würden sie mit Strom aus dem öffentlichen Netz<br />
gespeist. Kapitel 3.5 gibt Aufschluß über die<br />
Betriebsgrenzwerte des <strong>Sine</strong> W<strong>ave</strong>-Wechselrichters.<br />
3.4 Der ENERGIESPAR-Modus des <strong>Sine</strong><br />
W<strong>ave</strong><br />
Ihr <strong>Sine</strong> W<strong>ave</strong>-Wechselrichter verfügt über eine<br />
Betriebsart mit der Bezeichnung ENERGIESPAR-<br />
Modus (POWERSAVE). Dieser ‘Ruhe’-Modus schaltet<br />
eine Reihe der Leistungsregelschaltkreise des <strong>Sine</strong> W<strong>ave</strong><br />
sowie die Hintergrundbeleuchtung des Anzeigefeldes ab<br />
und verringert somit den Stromabzug im Standby-Betrieb<br />
erheblich. Bei eingeschaltetem ENERGIESPAR-Modus<br />
zieht das Gerät nur ca. 1,5 Watt ab, wenn es - allerdings<br />
ohne angeschlossene Verbraucherlast - hochgefahren wird.<br />
Der <strong>Sine</strong> W<strong>ave</strong>-Wechselrichter ist in der Lage, das<br />
Vorhandensein einer angeschlossenen Verbraucherlast zu<br />
ermitteln, indem er Pulse im Abstand von ca. 2,5<br />
Sekunden aussendet. Hat er erkannt, daß ein Verbraucher<br />
angeschlossen ist, stellt er die gesamte Ausgangsleistung<br />
bereit. Liegt der Verbraucher jedoch unter 10W (<strong>Sine</strong><br />
W<strong>ave</strong> <strong>1000</strong>) oder 20W (<strong>Sine</strong> W<strong>ave</strong> <strong>1800</strong>), verbleibt das<br />
Gerät weiterhin im ENERGIESPAR-Modus. Es handelt<br />
sich hierbei um eine vom Werk eingestellte und<br />
unveränderliche Suchmoduseinstellung. Wird der<br />
Wechselrichter nur in regelmäßigen Zeitabständen<br />
verwendet, um Verbraucherlasten zu betreiben, sollten<br />
Sie den ENERGIESPAR-Modus aktivieren. Das Gerät<br />
zieht dann in den ‘Ruhezeiten’ weniger Leistung von<br />
Ihren Batterien ab. Wird der Wechselrichter jedoch häufig<br />
benutzt und Ihre Batterien erfahren währenddessen oder<br />
kurz darauf eine Aufladung (z.B.<br />
Wechselstromgeneratoren in Fahrzeugen), können Sie<br />
den ENERGIESPAR-Modus getrost abgeschaltet lassen.<br />
Ihr <strong>Sine</strong> W<strong>ave</strong>-Wechselrichter ist vom Werk aus auf<br />
ENERGIESPAR-Modus AUS eingestellt. Zur<br />
Aktivierung des ENERGIESPAR-Modus gehen Sie nun<br />
wie folgt vor:<br />
1. Stellen Sie den Wippschalter auf Ihrem Bedienfeld<br />
auf ().<br />
2. Schalten Sie das Gerät dann wieder ein, indem Sie<br />
den Schalter auf (I) stellen. Es erscheinen nun die<br />
Deutsch 11
ereits zuvor beschriebenen Anzeigen<br />
(Modellnummer und Spannungs-/Frequenzkonfiguration).<br />
3. Erscheint auf dem Bedienungsfeld die Anzeige<br />
‘ENERGIESPAR-Modus AUS’, schalten Sie den<br />
Wippschalter erneut auf (), warten ca. 3 Sekunden<br />
und schalten das Gerät dann wieder auf (I). Es<br />
erscheint nun während der Anlaufsequenz die<br />
Anzeige ENERGIESPAR-Modus AN. Erscheint<br />
dann die Standardanzeige, wird auch ein kleiner<br />
Zeiger sichtbar, als Zeichen dafür, daß der<br />
ENERGIESPAR-Modus einge-schaltet ist. Zur<br />
Deaktivierung des ENERGIESPAR-Modus<br />
wiederholen Sie die Schritte 1-3.<br />
3.5 Betriebsgrenzwerte und<br />
Schutzvorrichtungen des <strong>Sine</strong> W<strong>ave</strong><br />
Leistungsausgang: Der <strong>Sine</strong> W<strong>ave</strong> <strong>1000</strong>i stellt als<br />
Dauerleistung <strong>1000</strong> Watt bereit und der <strong>Sine</strong> W<strong>ave</strong> <strong>1800</strong>i<br />
<strong>1800</strong> Watt. Der nachfolgenden Tabelle können Sie die<br />
Dauerstrom- und Spitzenstromnennleistungen sowie die<br />
Stoßstromnennleistung für die verschiedenen Modelle<br />
entnehmen:<br />
Modell<br />
Nennstromdes<br />
stärke des leistung (Watt-<br />
Nennstrom-<br />
Stoßstromnennstärke<br />
Dauer-<br />
Spitzen-<br />
bereitstellung<br />
wechselstrom-<br />
ausgangs ausgangs Sekunden<br />
wechselstrom-<br />
max. 5<br />
lang)<br />
1 000 8.3<br />
A<br />
25<br />
A<br />
150 0<br />
1 800 15<br />
A<br />
45<br />
A<br />
290 0<br />
1 000i 4.3<br />
A<br />
11<br />
A<br />
150 0<br />
1 800i 7.8<br />
A<br />
20<br />
A<br />
290 0<br />
Leistungsabgabe: Jedes der o.g. Geräte ist in der Lage,<br />
alle Arten von Wechselstromlasten zu betreiben, deren<br />
Nennleistung den o.g. Leistungsdaten entspricht oder<br />
unter diesen liegt. Einige Induktionsmotoren mit hoher<br />
PS-Zahl, wie sie in Pumpen oder anderen<br />
motorbetriebenen Apparaturen zum Einsatz kommen,<br />
benötigen hohe Stoßströme, um anzulaufen. Hier kann<br />
es manchmal vorkommen, daß sich die Kombination aus<br />
<strong>Sine</strong> W<strong>ave</strong>-Wechselrichter und Batterie schwer tut,<br />
derartige Lasten zu starten. Sollte dies einmal der Fall<br />
sein, so überprüfen Sie, ob die Batterieanschlüsse massiv<br />
getätigt worden sind, Ihre Gleichstromkabel die richtige<br />
Größe haben und die Batterie über genügend Leistung<br />
verfügt und voll aufgeladen ist.<br />
Eingangsspannung: Der <strong>Sine</strong> W<strong>ave</strong> benötigt zum<br />
Betrieb eine Eingangsspannung zwischen:<br />
10 - 16 Volt Gleichstrom bei 12 V - Modellen<br />
20 - 32 Volt Gleichstrom bei 24 V - Modellen<br />
Spitzenleistung bringen die Wechselrichter, wenn die<br />
Gleichstrom- Eingangsspannung zwischen 12 und 15<br />
Volt bei den 12 V-Modellen und zwischen 24 und 30<br />
Volt bei den 24 V-Modellen liegt. Ist die<br />
Gleichstromspannung zu hoch oder zu niedrig, zeigt der<br />
<strong>Sine</strong> W<strong>ave</strong> dies wie folgt an:<br />
Modell<br />
12V -<br />
modelle<br />
24V -<br />
modelle<br />
Alarm bei Automatische<br />
Untertische<br />
Alarm bei Automa-<br />
Überspannung<br />
Abschalbei<br />
des tung bei<br />
spannung Abschal-<br />
des tung<br />
Gleich-<br />
Überspannunstromspannung<br />
Gleich-<br />
Unterstromeingangdes<br />
Gleicheingangdes<br />
Gleich-<br />
stromeingangs<br />
stromeingangs<br />
15.8Vdc<br />
16.0Vd<br />
c 10.5Vd<br />
c 10.0Vd c<br />
31.6Vdc<br />
32.0Vd<br />
c 21.0Vd<br />
c 20.0Vd c<br />
Sollte der <strong>Sine</strong> W<strong>ave</strong> einmal an eine höhere Spannung<br />
angeschlossen werden, als dies empfohlen ist, schützen<br />
der Überspannungsschutz und die automatische<br />
Abschaltung Ihr Gerät vor übermäßig hoher<br />
Eingangsspannung. Dies gilt allerdings nur bis 35 V<br />
Gleichstrom - höhere Spannungen können trotzdem zu<br />
Beschädigungen führen. Die automatische Abschaltung<br />
des <strong>Sine</strong> W<strong>ave</strong>’s bei zu niedriger Eingangsspannung<br />
dagegen schützt Ihre Batterie vor übermäßiger Entladung.<br />
Nach einer solchen automatischen Abschaltung - ob nun<br />
wegen zu hoher oder zu niedriger Eingangsspannung -<br />
ist es erforderlich, daß Sie Ihren <strong>Sine</strong> W<strong>ave</strong> manuell<br />
zurücksetzen. Stellen Sie den Leistungsschalter auf<br />
()und dann wieder auf (I), um das Gerät erneut zu<br />
starten.<br />
Ausgangsüberlastungsschutz: Wird an die<br />
Ausgangsleistung dauerhaft ein Kurzschluß angelegt,<br />
so führt dies nicht zur Beschädigung irgendwelcher<br />
Bauteile des <strong>Sine</strong> W<strong>ave</strong>. Der Wechselrichter schaltet<br />
sich in weniger als 5 Sekunden ab, sobald die<br />
Ausgangsleistung aufgrund der Strombegrenzung 10 %<br />
unter die Nennspannung abfällt.<br />
Wechselstrom-Rückeinspeisungsschutz: Obwohl der<br />
<strong>Sine</strong> W<strong>ave</strong>-Wechselrichter so ausgelegt ist, daß ihm<br />
ankommender Wechselstrom am Wechsel-stromausgang<br />
nichts anhaben kann, ist dies nur eine Schutzmaßnahme.<br />
Dauerhafte Wechselstrom-Rückeinspeisung könnte<br />
trotzdem zur Beschädigung Ihres Wechselrichters<br />
führen. Vermeiden Sie dies, indem Sie an Ihren<br />
festverdrahteten Modellen die Wechselstrom-Eingangsund<br />
Ausgangs-verkabelungen immer mehrfach<br />
überprüfen, bevor Sie irgendeine Leistung anlegen. Auch<br />
sollten Sie Ihre Wechselstromquelle kennen und wissen,<br />
wohin die Leistung der Stromquelle führt (stöpseln Sie<br />
so z.B. niemals ein stromführendes Verlängerungskabel<br />
in die Wechselstromausgangsbuchse Ihres <strong>Sine</strong> W<strong>ave</strong>-<br />
Wechselrichters ein!).<br />
Eingangsschutz vor Polumkehr: Die inneren<br />
Stromschaltkreise des <strong>Sine</strong> W<strong>ave</strong>-Wechselrichters sind<br />
durch eine eingebaute, flinke Sicherung mit folgender<br />
Nennleistung geschützt:<br />
M odell Hersteller und Modell Nr .<br />
<strong>1000</strong> - 24V<br />
<strong>1000</strong>i - 24V<br />
<strong>1800</strong> - 12V<br />
<strong>1800</strong>i - 12V<br />
allen anderen<br />
Modellen<br />
Littelfuse/Gould CNN80 (80A)<br />
oder Bussmann ANN80 (80A)<br />
Littelfuse Mega 225A<br />
Littelfuse Mega 125A<br />
12 Deutsch <strong>Xantrex</strong> <strong>Sine</strong> W<strong>ave</strong> Wechselrichter Benutzerhandbuch
Diese Sicherung kann nur von qualifiziertem<br />
Fachpersonal ausgetauscht werden. Sie schützt die<br />
internen Stromschaltkreise zwar in vielen Fällen vor<br />
Polumkehr, manche Hochspannungs-/strom-situationen<br />
können jedoch trotzdem zu Beschädigungen Ihres <strong>Sine</strong><br />
W<strong>ave</strong> führen.<br />
4. Überprüfung<br />
Das nachfolgende einfache Überprüfungsverfahren soll<br />
sicherstellen, daß der <strong>Sine</strong> W<strong>ave</strong>-Wechselrichter richtig<br />
angeschlossen und installiert wurde.<br />
Überprüfen des <strong>Sine</strong> W<strong>ave</strong>-Wechselrichters:<br />
1. Überprüfen Sie mehrfach alle Anschluß-klemmen<br />
an Ihrem Wechselrichter auf richtige Polarität und<br />
sicher hergestellte Anschlüsse.<br />
2. Stellen Sie den Wippschalter auf (I).<br />
3. Beobachten Sie die Anlaufsequenz auf dem Display.<br />
Die normale Statusanzeige zum Eingangsstrom und<br />
zur Eingangsspannung sollte erscheinen.<br />
4. Schließen Sie einen Testverbraucher (z.B. eine<br />
Glühbirne) an den Ausgang Ihres <strong>Sine</strong> W<strong>ave</strong>-<br />
Wechselrichters an. Der Verbraucher sollte normal<br />
funktionieren. Beobachten Sie das Balkendiagramm,<br />
das die Ausgangsleistung anzeigt - es sollte mit dem<br />
Leistungsbedarf des Verbrauchers ansteigen.<br />
5. Bei festverdrahteten Modellversionen mit<br />
Übertragungsrelais schließen Sie eine<br />
Verbraucherlast an den Wechselstromausgang Ihres<br />
<strong>Sine</strong> W<strong>ave</strong>’s an, während Eingangswechselstrom<br />
zur Verfügung steht. Nehmen Sie nun den<br />
Eingangswechselstrom ab. Der Verbraucher sollte<br />
auch jetzt noch normal funktionieren. Legen Sie nun<br />
die Eingangswechsel-stromquelle erneut an; der<br />
Verbraucher sollte immer noch normal<br />
funktionieren. Ist dies der Fall, können Sie davon<br />
ausgehen, daß das Übertragungsrelais richtig<br />
installiert wurde und korrekt arbeitet.<br />
6. Wiederholen Sie die Schritte 4 oder 5 bei<br />
eingeschaltetem ENERGIESPAR-Modus..<br />
7. Der <strong>Sine</strong> W<strong>ave</strong>-Wechselrichter ist nun<br />
betriebsbereit.<br />
<strong>Xantrex</strong> <strong>Sine</strong> W<strong>ave</strong> Wechselrichter Benutzerhandbuch<br />
5. Fehlersuche<br />
WARNUNG<br />
Öffnen oder demontieren Sie den <strong>Sine</strong><br />
W<strong>ave</strong> niemals selbst. Siehe hierzu auch<br />
Kapitel 7 ‘Garantieleistungen’. Hier finden<br />
Sie Hinweise über die Vorgehensweise,<br />
falls Sie einmal die Hilfe des<br />
Kundendienstes benötigen sollten. Bei<br />
eigenmächtigem Vorgehen laufen Sie<br />
Gefahr, einen elektrischen Schlag zu<br />
bekommen. Außerdem besteht<br />
Brandgefahr.<br />
5.1 Störungsursachen und<br />
Fehlermeldungen<br />
Auf dem Bedienfeld wird durch akustische Signale und<br />
entsprechend aufleuchtende LED-Anzeigen auf die<br />
folgenden Störungen hingewiesen: Siehe Tabelle 9.3.<br />
Die nachfolgende Tabelle 9.4 gibt Ihnen einige Tips bei<br />
der Fehlersuche.<br />
Deutsch 13
6. Beschränkte Gewährleistung<br />
Gewährleistungsumfang und Gewährleistungsdauer<br />
Diese beschränkte Gewährleistung stammt von <strong>Xantrex</strong> Technology, Inc. (“<strong>Xantrex</strong>”)<br />
und betrifft Herstellungs- und Materialdefekte bei: <strong>Xantrex</strong> <strong>Sine</strong> W<strong>ave</strong> Inverter <strong>1000</strong>i/<br />
<strong>1800</strong>i. Diese Gewährleistung erstreckt sich über eine Zeitspanne von 24 months vom<br />
Zeitpunkt des Verkaufs am Verkaufsort an Sie, den ursprünglichen Endkunden.<br />
Diese beschränkte Gewährleistung kann auf nachfolgende Besitzer übertragen werden,<br />
allerdings nur für den noch nicht abgelaufenen Rest der Gewährleistungsdauer.<br />
Was wird <strong>Xantrex</strong> leisten?<br />
<strong>Xantrex</strong> wird, nach eigenem Ermessen, das defekte Produkt kostenlos reparieren oder<br />
ersetzen, unter der Voraussetzung, dass Sie <strong>Xantrex</strong> vom Produktdefekt innerhalb der<br />
Gewährleistungsperiode informieren, und unter der Voraussetzung, dass <strong>Xantrex</strong> mittels<br />
Prüfung das Bestehen eines derartigen Defekts zur Kenntnis nimmt, und dass dieser<br />
Defekt der beschränkten Gewährleistung unterliegt.<br />
<strong>Xantrex</strong> wird, nach eigenem Ermessen, entweder neue oder überholte Teile für die<br />
Gewährleistungsreparatur und den Bau von Ersatzprodukten verwenden. <strong>Xantrex</strong> behält<br />
sich das Recht vor, Teile oder Produkte im Original- oder verbesserten Design für die<br />
Reparatur oder das Ersatzprodukt zu verwenden. Wenn <strong>Xantrex</strong> ein Produkt repariert<br />
oder ersetzt, unterliegt dieses der restlichen Gewährleistungsdauer dem das<br />
Originalprodukt noch unterlegen wäre oder einer Gewährleistungsdauer von neunzig<br />
(90) Tagen vom Zeitpunkt des Versands an den Kunden, je nach dem welcher<br />
Zeitabschnitt länger ist. Alle ersetzten Produkte und alle Teile, die von reparierten<br />
Produkten entfernt wurden, gehen in das Eigentum von <strong>Xantrex</strong> über.<br />
<strong>Xantrex</strong> übernimmt die Kosten sowohl für die Einzelteile als auch die notwendige<br />
Arbeitszeit, um das Produkt zu reparieren, und die Versandkosten (ohne Eilsendung)<br />
an den Kunden mittels eines von <strong>Xantrex</strong> ausgewählten Zustelldienstes innerhalb der<br />
48 US-Kontinentalbundesstaaten und Kanada. Alaska und Hawaii sind davon<br />
ausgeschlossen. Wenden Sie sich an den Kundendienst von <strong>Xantrex</strong>, um Informationen<br />
über den Zustelldienst für Sendungen außerhalb der 48 US-Kontinentalbundesstaaten<br />
und Kanada zu erhalten.<br />
Wie wende ich mich an den Kundendienst?<br />
Sollten Sie technische Probleme haben oder die Gewährleistung in Anspruch<br />
nehmen wollen, wenden Sie sich an Ihren Händler. Wenn Sie Ihren Händler nicht<br />
kontaktieren können, oder der Händler Ihnen die Dienstleistung nicht liefern kann,<br />
wenden Sie sich direkt an <strong>Xantrex</strong>:<br />
Telefon: 1 360 925 5097<br />
Fax:1 360 925 5143<br />
E-Mail: CustomerService @xantrex.com<br />
Bei einer direkten Rücksendung folgen Sie den Hinweisen des<br />
Materialrücksendungsdienstes von <strong>Xantrex</strong> (“Return Material Authorization Policy”),<br />
die in Ihrem Handbuch erläutert sind. Für gewisse Produkte verfügt <strong>Xantrex</strong> über ein<br />
Netz von regionalen autorisierten Kundendienstzentren (Authorized Service Centers).<br />
Rufen Sie <strong>Xantrex</strong> an, oder finden Sie auf der Website heraus, ob Ihr Produkt in einem<br />
dieser Zentren repariert werden kann.<br />
Dem Gewährleistungsanspruch muss ein Verkaufsnachweis mit Datum beiliegen,<br />
und das Produkt darf nicht disassembliert oder ohne vorherige Einwilligung von <strong>Xantrex</strong><br />
verändert worden sein.<br />
Der Verkaufsnachweis kann in einer der folgenden Formen vorliegen:<br />
• der Verkaufsbeleg mit Datum vom Originalverkauf des Produktes<br />
am Verkaufsort an den Endkunden, oder<br />
• die Rechnung des Händlers mit Datum oder ein Verkaufsbeleg,<br />
der den Status des Originalgeräteherstellers anzeigt, oder<br />
• die Rechnung mit Datum oder der Verkaufsbeleg, die beweisen,<br />
dass das Produkt der Gewährleistung unterliegt<br />
Was unterliegt dieser Gewährleistung nicht?<br />
Diese beschränkte Gewährleistung bezieht sich nicht auf den normalen Verschleiß<br />
des Produktes oder auf Kosten, die durch Entfernung, Installation oder<br />
Fehlerbehebung am elektrischen System des Kunden entstanden sind. Diese<br />
Gewährleistung bezieht sich nicht auf Folgendes und <strong>Xantrex</strong> übernimmt nicht die<br />
Verantwortung für einen Defekt oder Schaden am Produkt unter folgenden<br />
Umständen:<br />
a) wenn das Produkt falsch verwendet, vernachlässigt, falsch installiert,<br />
beschädigt oder verändert wurde (innerhalb oder außerhalb), oder durch<br />
falsche Verwendung oder Verwendung in unpassender Umgebung<br />
beschädigt wurde;<br />
b) wenn das Produkt Feuer, Wasser, allgemeiner Korrosion, biologischem<br />
Befall oder einer Eingangsspannung ausgesetzt wird, die zu<br />
Betriebsbedingungen führt, die das Maximum bzw. Minimum der<br />
<strong>Xantrex</strong>-Produktspezifikationen überschreiten, einschließlich zu hoher,<br />
durch Generatoren und Blitzschläge hervorgerufenen Eingangsspannung;<br />
c) wenn das Produkt von anderen Stellen als von <strong>Xantrex</strong> oder deren<br />
anerkannten Kundendienstzentren (im folgenden “ASCs”) repariert wurde;<br />
d) wenn das Produkt als Teil eines anderen Produktes verwendet wurde,<br />
das ausdrücklich der Gewährleistung eines anderen Herstellers unterliegt<br />
e) wenn die originalen Kennzeichen (Warenzeichen, Seriennummer)<br />
unleserlich gemacht, verändert oder entfernt wurden.<br />
GARANTIEAUSSCHLUSS<br />
Produkt<br />
DIESE BESCHRÄNKTE GEWÄHRLEISTUNG IST DIE EINZIGE UND<br />
AUSSCHLIESSLICHE GEWÄHRLEISTUNG, DIE XANTREX IN<br />
VERBINDUNG MIT IHREM XANTREX-PRODUKT LIEFERT UND BESTEHT,<br />
WO IMMER DAS GESETZ ES GESTATTET, AN STELLE VON ALLEN<br />
ANDEREN GEWÄHRLEISTUNGEN, BEDINGUNGEN, ERKLÄRUNGEN,<br />
VERPFLICHTUNGEN UND HAFTUNGEN, AUSDRÜCKLICH ODER<br />
IMPLIZIT, SCHRIFTLICH ODER ANDERNFALLS IN VERBINDUNG MIT DEM<br />
PRODUKT, WORAUF SIE AUCH IMMER BASIEREN (ENTWEDER AUF<br />
VERTRAG, UNERLAUBTER HANDLUNG, VERNACHLÄSSIGUNG,<br />
PRINZIPIEN DER HAFTUNG DES HERSTELLERS, RECHTSTÄTIGKEIT,<br />
VERHALTEN, ERKLÄRUNG ODER ANDERES), EINSCHLIESSLICH ABER<br />
NICHT BESCHRÄNKT AUF JEGLICHE IMPLIZITE GEWÄHRLEISTUNG<br />
ODER QUALITÄT, MARKTFÄHIGKEIT ODER EIGNUNG FÜR EINEN<br />
BESTIMMTEN ZWECK. JEGLICHE IMPLIZITE GEWÄHRLEISTUNG DER<br />
MARKTFÄHIGKEIT ODER EIGNUNG FÜR EINEN BESTIMMTEN ZWECK, IN<br />
DEM AUSMASSE WIE ES DAS ANWENDBARE RECHT ERFORDERT, SOLL<br />
AUF DIE ZEITDAUER EINGESCHRÄNKT SEIN, DIE UNTER DIESER<br />
BESCHRÄNKTEN GEWÄHRLEISTUNG FESTGELEGT WURDE.<br />
XANTREX WIRD AUF KEINEN FALL HAFTBAR FÜR BESONDERE, DIREKTE,<br />
INDIREKTE, VERSEHENTLICHE ODER KONKLUDENTE SCHÄDEN,<br />
VERLUSTE, KOSTEN ODER AUSGABEN SEIN, WIE AUCH IMMER DIESE<br />
AUFTRETEN, WEDER INNERHALB EINES VERTRAGES ODER<br />
UNERLAUBTER HANDLUNG EINSCHLIESSLICH ABER NICHT<br />
BESCHRÄNKT AUF WIRTSCHAFTLICHE VERLUSTE JEGLICHER ART,<br />
JEGLICHEN VERLUST ODER SCHADEN AN EIGENTUM, JEGLICHEN<br />
PERSONENSCHADEN, JEGLICHEN SCHADEN ODER VERLETZUNG DURCH<br />
ODER ALS ERGEBNIS VON FALSCHER VERWENDUNG ODER<br />
MISSBRAUCH, ODER FALSCHER INSTALLATION, INTEGRATION ODER<br />
BEDIENUNG DES PRODUKTES.<br />
Ausschlüsse:<br />
Die Rechte innerhalb dieser Gewährleistung bestehen zusätzlich zu allen<br />
geschriebenen oder anderen gesetzlichen Rechten, die innerhalb der<br />
Gesetze des Landes oder Staates gewährt wurden, in dem das <strong>Xantrex</strong>-<br />
Produkt gekauft wurde, und diese gesetzlichen Rechte sind nicht von dieser<br />
Gewährleistung betroffen.<br />
Informationen<br />
OHNE DIE ALLGEMEINHEIT DES ZUVOR GENANNTEN EINZUGRENZEN, ES<br />
SEI DENN XANTREX ERKLÄRTE SICH DAMIT SCHRIFTLICH<br />
EINVERSTANDEN, ÜBERNIMMT XANTREX:<br />
(a) KEINE GEWÄHRLEISTUNG FÜR DIE RICHTIGKEIT, VOLLSTÄNDIGKEIT<br />
ODER EIGNUNG JEGLICHER TECHNISCHER ODER ANDERER<br />
INFORMATIONEN, DIE SICH IN HANDBÜCHERN ODER ANDEREN<br />
UNTERLAGEN BEFINDEN, DIE MIT DEM PRODUKT MITGELIEFERT<br />
WURDEN; UND<br />
(b) KEINE VERANTWORTUNG ODER HAFTUNG FÜR VERLUSTE, SCHÄDEN,<br />
KOSTEN ODER AUSGABEN, WEDER BESONDERE, DIREKTE, INDIREKTE,<br />
KONKLUDENTE ODER VERSEHENTLICHE, ZU DENEN ES AUF GRUND DER<br />
VERWENDUNG DIESER INFORMATIONEN KOMMEN KÖNNTE.<br />
DIE VERWENDUNG DIESER INFORMATIONEN UNTERLIEGT GÄNZLICH DEM<br />
RISIKO DES ANWENDERS.<br />
WARNUNG: VERWENDUNGSEINSCHRÄNKUNGEN<br />
In Ihrem Produkthandbuch finden Sie Informationen zu Verwendungseinschränkungen<br />
des Produktes. Beachten Sie vor allem, dass das <strong>Xantrex</strong> <strong>Sine</strong> W<strong>ave</strong> Inverter <strong>1000</strong>i/<br />
<strong>1800</strong>i nicht in Verbindung mit Lebenserhaltungssystemen eingesetzt werden kann, und<br />
dass <strong>Xantrex</strong> keinerlei Gewährleistung oder Erklärung in Verbindung mit der<br />
Verwendung des Produktes für derartige Zwecke liefert.<br />
Beachten Sie, dass das <strong>Xantrex</strong> <strong>Sine</strong> W<strong>ave</strong> Inverter <strong>1000</strong>i/<strong>1800</strong>i nicht als<br />
unterbrechungsfreie Stromquelle eingesetzt werden kann, und <strong>Xantrex</strong> keinerlei<br />
Gewährleistung oder Erklärung in Verbindung mit der Verwendung des Produktes für<br />
derartige Zwecke liefert.<br />
<strong>Xantrex</strong> Technology, Inc.<br />
8999 Nelson Way<br />
Burnaby, British Columbia<br />
Kanada V5A 4B5<br />
7. Materialrücksendungsdienst<br />
Bevor Sie ein Produkt direkt an <strong>Xantrex</strong> zurücksenden können, müssen Sie eine<br />
Materialrücksendungsnummer (RMA-Nummer) und die korrekte Fabrikadresse<br />
erhalten, an die Sie das Produkt versenden. Der Versand der Produkte muss zuvor<br />
bezahlt werden. Produktsendungen werden verweigert oder auf Ihre Kosten an Sie<br />
zurückgesandt, wenn diese nicht autorisiert sind, mit einer RMA-Nummer<br />
versehen, die sich deutlich sichtbar auf der Außenseite der Verpackung befindet,<br />
wenn das Porto beim Empfänger zu erheben ist, oder wenn sie an die falsche<br />
Adresse versandt werden.<br />
Wenn Sie sich an <strong>Xantrex</strong> für Kundendienstleistungen wenden, halten Sie bitte Ihr<br />
Benutzerhandbuch bereit, um folgende Informationen anzugeben:<br />
Versandhinweise:<br />
• die Seriennummer Ihres Produktes<br />
• Informationen über Installation und Verwendung der Einheit<br />
• Informationen über das Problem bzw. den Grund für die<br />
Rücksendung<br />
• eine Kopie Ihres Verkaufsnachweises mit Datum<br />
1. Verpacken Sie die Einheit sicher, vorzugsweise in der<br />
Originalverpackung. Stellen Sie sicher, dass Ihr Produkt voll versichert<br />
in der Original- oder einer äquivalenten Verpackung versandt wird. Diese<br />
Gewährleistung bezieht sich nicht auf Schäden, die durch unsachgemäße<br />
Verpackung entstanden sind.<br />
2. Legen Sie Folgendes bei:<br />
• die RMA-Nummer, die von <strong>Xantrex</strong> Technology Inc an<br />
Sie weitergegeben wurde, und die sich deutlich sichtbar<br />
auf der Außenseite der Verpackung befindet.<br />
• einen Absender, an den die Einheit zurückgesandt werden<br />
kann. Postfachadressen sind nicht gültig.<br />
14 Deutsch <strong>Xantrex</strong> <strong>Sine</strong> W<strong>ave</strong> Wechselrichter Benutzerhandbuch
• eine Kontakttelefonnummer, unter der Sie tagsüber erreicht werden<br />
können<br />
• eine kurze Beschreibung des Problems<br />
Senden Sie die Einheit mit bezahltem Porto an die Adresse, die Ihnen von<br />
Ihrem <strong>Xantrex</strong>-Kundendienstvertreter angegeben wurde.<br />
Wenn Sie ein Produkt von außerhalb der USA oder Kanada zurücksenden:<br />
Zusätzlich zu Obigem MÜSSEN Sie die Mittel für die Rücksendung beilegen, und<br />
Sie sind für alle Dokumente, Abgaben, Gebühren und Einlagen verantwortlich.<br />
Wenn Sie ein Produkt an ein <strong>Xantrex</strong>-Kundendienstzentrum (ASC)<br />
zurücksenden: Benötigen Sie keine <strong>Xantrex</strong> RAM-Nummer; allerdings müssen<br />
Sie sich vor der Rücksendung an ein ASC wenden, oder die Einheit vorzeigen, um<br />
die Rücksendungsvorschriften zu überprüfen, die im jeweiligen<br />
Kundendienstzentrum gelten.<br />
8. Anhang<br />
8.1 Batteriearten<br />
Um Ihnen bei der Auswahl der für Ihre Bedürfnisse am<br />
besten geeigneten Batterieart zu helfen, werden in<br />
diesem Anhang einige Unterschiede erläutert, die es bei<br />
den diversen Bleiakkumulatoren zu beachten gilt.<br />
Der wohl gebräuchlichste Bleiakkumulator ist die<br />
Anlaßbatterie in Ihrem Auto. Eine Kfz-Batterie ist für<br />
die kurzzeitige Bereitstellung von großen Strommengen<br />
ausgelegt (zum Anlassen des Motors). Zum Starten des<br />
Motors wird nur ein Bruchteil der eigentlichen<br />
Batterieleistung benötigt und sie wird durch den<br />
laufenden Motor schnell wieder aufgeladen. Für<br />
wiederholte Lade- und Entladezyklen, bei denen die<br />
Batterie fast vollständig entladen und wieder aufgeladen<br />
wird, ist sie allerdings nicht ausgelegt. Anlasserbatterien,<br />
die für derartige Tiefenent-ladungen verwendet<br />
werden, verschleißen relativ schnell.<br />
Ihr <strong>Sine</strong> W<strong>ave</strong> ist für die Verwendung von Tiefenzyklus-<br />
Bleiakkumulatoren ausgelegt. Diese Batterien sind<br />
speziell für Tiefenentladungen ausgelegt, d.h. sie können<br />
problemlos wiederholt entladen und wieder aufgeladen<br />
werden. Diese Batterieart wird oft als Schiffs-,<br />
Freizeitfahrzeug- oder Golfcaddy-Batterie bezeichnet.<br />
<strong>Xantrex</strong> empfiehlt die Verwendung einer oder mehrerer<br />
dieser Batterien, wobei diese jedoch durch einen<br />
Batterieisolator von der Anlaßbatterie Ihres Fahrzeuges<br />
oder Schiffes getrennt sein sollte(n).<br />
<strong>Xantrex</strong> <strong>Sine</strong> W<strong>ave</strong> Wechselrichter Benutzerhandbuch<br />
Die vielen verschiedenen Tiefenzyklus-<br />
Batterieakkumulatorarten können in 4 Kategorien<br />
unterteilt werden:<br />
• geflutete (oder ‘nasse’) Batterien<br />
• versiegelt geflutete (‘wartungsfreie’) Batterien<br />
• recombinant geflutete (oftmals Teilelek-trolyt)<br />
Batterien<br />
• Gel-Batterien.<br />
Die nachfolgende Tabelle gibt eine Übersicht über diese<br />
Batteriearten und zeigt deren besondere Merkmale bzw.<br />
Vor- und Nachteile auf.<br />
Kategorie<br />
Beispiel<br />
e<br />
esondere Merkmal e<br />
B e<br />
Vorteil<br />
Nachteil e<br />
G eflutet Trojan :<br />
Golf Cart, Superior,<br />
Pacer West<br />
Marine:<br />
Sea Volt<br />
Motomaster:<br />
Nautilus<br />
Verschlußstopfen, die zum<br />
Nachkönnen.<br />
füllen von Wasser<br />
entfernt werden<br />
Niedriger Preis und<br />
höherer Wartungsaufwand.<br />
Weniger anfällig für<br />
Überladung, da Wasser<br />
nachgefüllt werden kann.<br />
Preisgünstiger als<br />
andere Batterien.<br />
Muß mit<br />
Wasser aufgefüllt<br />
Destilliertem<br />
benötigt<br />
Ausgleichs-ladungen.<br />
Wartung erforderlich.<br />
Versiegelt<br />
geflutet<br />
D elco :<br />
Voyager<br />
Verschlußstopfen<br />
sehen<br />
zwar so aus, als könnte<br />
man sie entfernen, sind<br />
aber nicht<br />
abnehmbar.<br />
‘wartungsfrei’<br />
Werden als<br />
zu attraktiven Preisen<br />
verkauft.<br />
Weniger<br />
Wartungsaufwand als<br />
bei geflutetenBatterien.<br />
Keine Notwendigkeit,<br />
Wasser nachzufüllen.<br />
Weniger Kostspielig.<br />
Anfälliger für<br />
Überladung, da<br />
zwar Wasser<br />
sie<br />
verbrauchen, man aber<br />
keines nach-füllen kann.<br />
werden und<br />
normaler- weise<br />
Recombi-nageflutet<br />
Genesis<br />
Hawker Energy:<br />
nt<br />
(versiegelt) Optima:<br />
Yellow top<br />
GNB Industrial:<br />
Evolyte<br />
reguliert,<br />
Teilelektrolyt<br />
Wartungsfrei,<br />
Erfordern keiner-lei<br />
Wartung. Laufen nicht<br />
Über.<br />
Können durch<br />
Ausgleich beschädigt<br />
werden. Im allgemeinen<br />
teurer.<br />
Gel<br />
(versiegelt)<br />
Sonnen-schein:<br />
Prevailer<br />
West Marine:<br />
Sea Gel<br />
Verschlußstopfen sind<br />
oftmals ver-deckt. Folgende<br />
Verkaufsargu-mente:<br />
Recombinant, ventil-<br />
Wird entweder als Gel-<br />
oder als gelierte Elektrolyt-<br />
batterie verkauft.<br />
Erfordern keiner-lei<br />
Wartung. Können<br />
oftmals auf der Seite<br />
liegend verwendet<br />
werden. Laufen nicht<br />
über. Geringe<br />
Selbstentladung. Nimmt<br />
im ent-ladenen Zustand<br />
selten Schaden.<br />
Beschädigung durch<br />
Ausgleichladung. Im<br />
Allgemeinen teurer.<br />
Deutsch 15
8.2 Batteriegröße<br />
Ebenso wichtig wie die Einstellung des <strong>Sine</strong> W<strong>ave</strong> auf<br />
die richtige Batterieart ist die Auswahl der richtigen<br />
Batteriegröße oder -leistung. Leider gibt es auch hier<br />
eine Reihe unterschiedlicher Standards zur Bemessung<br />
der Energiespeicherkapazität einer Batterie. Bei<br />
Anlaßbatterien für Kraftfahrzeuge springt man<br />
normalerweise von Anlaß-Ampere. Hierbei handelt es<br />
sich jedoch nicht um die entsprechende Bemessung für<br />
Dauerbetrieb. Tiefenzyklus-batterien werden entweder<br />
entsprechend der Reservekapazität in Minuten bemessen<br />
oder entsprechend der Amperestundenzahl. Die<br />
Reserveleistung einer Batterie ist ein Maß dafür, wie<br />
lange eine Batterie eine bestimmte Strommenge -<br />
normalerweise 25 Ampere - bereitstellen kann.<br />
So kann z.B. eine Batterie mit einer Reserveleistung von<br />
180 Minuten bis zur vollständigen Entleerung 180<br />
Minuten lang 25 Ampere bereitstellen. Die<br />
Amperestundenleistung ist ein Maß dafür, wieviel<br />
Ampere eine Batterie über einen bestimmten Zeitraum<br />
hinweg - normalerweise 20 Stunden - bereitstellen kann.<br />
So kann z.B. eine typische Schiffs- oder<br />
Freizeitmobilbatterie mit einer Nennleistung von 100<br />
Amperestunden 20 Stunden lang 5 Ampere bereitstellen<br />
(5 Ampere x 20 Stunden = 100 Amperestunden).<br />
Da es sich bei der Batterie um den wichtigsten<br />
Bestandteil Ihres Systems handelt, empfehlen wir Ihnen,<br />
möglichst viel Batterieleistung ein-zukaufen. Mit einer<br />
großen Batterie läuft Ihr <strong>Sine</strong> W<strong>ave</strong> nämlich länger und<br />
liefert die vollen Nennstoßströme.<br />
Bei kleinen Batterien mit geringer<br />
Amperestundenleistung (z.B. 50 Ah) müssen Sie<br />
Leistungseinbußen des <strong>Sine</strong> W<strong>ave</strong>-Wechselrichters hinnehmen.<br />
Selbst wenn Ihre Batterie in ausgezeichnetem<br />
Zustand und voll aufgeladen ist, wird die Spitzenleistung<br />
nur schwach und die Betriebszeit unzureichend sein -<br />
zumindest bei großen Wechsel-stromlasten. <strong>Xantrex</strong><br />
empfiehlt daher eine Mindestbatteriegröße von 200 Ah<br />
bei mittleren Lasten (< <strong>1000</strong> Watt) und von mehr als 400<br />
Ah bei großen Lasten.<br />
Um zu bestimmen, wie groß die Batterie oder<br />
Batteriereihe für die Geräte, die Sie über den<br />
Wechselrichter betreiben wollen, sein muß, addieren Sie<br />
einfach den Leistungsbedarf der entsprechenden<br />
elektrischen Geräte und multiplizieren diesen Wert mit<br />
der geschätzten Betriebszeit (in Stunden), die zwischen<br />
den Batteriaufladezyklen liegen wird. Alle Geräte<br />
werden entweder in Watt, Volt und Ampere, oder VA<br />
(Voltampere) bemessen. Zur Durchführung dieser<br />
Berechnung müssen alle drei dieser Bemessungen<br />
gleichwertig sein (d.h. Volt x Ampere = Watt). Das<br />
folgende Beispiel, basierend auf einer Batterieaufladung<br />
in Abständen von 3 Tagen, veranschaulicht die o.g.<br />
Berechnung:<br />
Ange-schlossene<br />
Last<br />
TV & Video-<br />
Casetten-Recorder<br />
Kaffee-maschine<br />
Micro-wellengerät<br />
Leistungsverbrauch<br />
115 Watt<br />
1<br />
Betriebszeit<br />
W att-stunde n<br />
3 Stunden<br />
(1 h/Tag)<br />
750<br />
Watt 1 Stund e<br />
(20 min./Tag)<br />
800<br />
Watt 0,5 Stunde n<br />
(10 min./Tag)<br />
1<br />
Leistungs-verbrauch x Betriebszeit<br />
Rechnen Sie die Wattstunden in Amperestunden um,<br />
indem Sie die Summe der Wattstunden durch 10 teilen:<br />
1495 Wattstunden : 10 = 149,5 Amperestunden<br />
345<br />
740<br />
400<br />
G ESAMT 149 5<br />
In diesem Falle ist also eine 150 Amperestunden-Batterie<br />
erforderlich, um bis zur endgültigen Entladung<br />
genügend Leistung für die o.g. Verbraucherlasten<br />
bereitstellen zu können. Im Idealfall sollten Sie Ihre<br />
Batterie nur zur Hälfte (also 50 %) entladen, was<br />
wiederum hieße, daß Sie für die o.g. Lasten eine 300-<br />
Amperestunden-Batterie benötigen.<br />
Bei der Auswahl der richtigen Batteriegröße sollten Sie<br />
großzügig sein. Entscheiden Sie sich lieber für die<br />
nächstgrößere Batterie, damit Sie im Zweifelsfalle mehr<br />
Reserveleistung zur Verfügung haben und Ihre Batterie<br />
nicht so tief entladen wird. Die Lebensdauer Ihrer<br />
Batterie hängt nämlich maßgeblich von der Tiefe der<br />
Entladung ab - es gilt: Je tiefer die Entladung, desto kürzer<br />
die Lebensdauer. Mit steigendem Leistungsbedarf kann<br />
es gegebenenfalls auch erforderlich werden, zwei oder<br />
mehrere Batterien gleichzeitig einzusetzen. Es ist möglich,<br />
zwei identische Batterien in einer Parallelschaltung<br />
miteinander zu verknüpfen (Pluspol an Pluspol und<br />
Minuspol an Minuspol), wodurch sich die Leistung zwar<br />
verdoppelt, die Spannung jedoch die gleiche bleibt. Es<br />
ist allerdings nicht empfehlenswert, Batterien<br />
unterschiedlicher Hersteller oder mit unterschiedlicher<br />
Ampere-stundenleistung parallel zu schalten, da dies<br />
wiederum die Lebensdauer der Batterien beeinträchtigen<br />
kann.<br />
16 Deutsch <strong>Xantrex</strong> <strong>Sine</strong> W<strong>ave</strong> Wechselrichter Benutzerhandbuch
9. Leistungsschaubilder,<br />
Fehlersuchetabelle und<br />
Technische Daten<br />
9.1 Leistungsverlustkurve<br />
Wie bei allen Wechselrichtern ist die Dauerleistung, die<br />
der <strong>Sine</strong> W<strong>ave</strong>-Wechselrichter ohne Überhitzung<br />
bereitstellen kann, von der Umgebungstemperatur<br />
abhängig. Die nach-folgende Abbildung<br />
‘Leistungsverlustkurve im Verhältnis zur Temperatur’<br />
zeigt den Zusammhang zwischen abgegebener Leistung<br />
und Umgebungs-temperatur.<br />
Wird das Gerät bei einer höheren Temperatur betrieben,<br />
schaltet es sich automatisch ab oder liefert nur noch eine<br />
verminderte Leistung. Bei Eingangsspannungen unter<br />
12 V läuft das Gerät schneller heiß; es schaltet sich daher<br />
schon automatisch bei Umgebungstemperaturen ab, die<br />
unter den angegebenen Richtwerten für die<br />
Umgebungstemperatur liegen. Wird das Gerät jenseits<br />
der Leistungs- und Temperaturgrenzen (‘oberhalb’ und<br />
‘rechts von’ den Leistungsverlustkurven) betrieben, führt<br />
dies zur automatischen Abschaltung und/oder zu einer<br />
erheblich verminderten Leistung der Geräte. Darüber<br />
hinaus liegt ein Betrieb in diesen Bereichen außerhalb<br />
der Nennleistungen, die durch die behördlichen<br />
Genehmigungen abgedeckt sind.<br />
<strong>Xantrex</strong> <strong>Sine</strong> W<strong>ave</strong> Wechselrichter Benutzerhandbuch<br />
Deutsch 17
9.2 Wirkungsgradkurve<br />
Der Nennwirkungsgrad des <strong>Sine</strong> W<strong>ave</strong>-Wechselrichters<br />
gibt an, wieviel Prozent der Gleichstromleistung bei<br />
vorgegebenen Leistungsabgabeniveaus in gebrauchsfertigen<br />
Wechselstrom umgewandelt werden. Je höher<br />
die Nennleistung, desto weniger Energie geht in Form<br />
von Wärme während des Umwandlungsprozesses<br />
verloren.<br />
Die Wirkungsgradkurve des <strong>Sine</strong> W<strong>ave</strong>-Wechselrichters<br />
verläuft über einen großen Teil des Betriebsbereiches<br />
extrem flach. So geht nur wenig Batterieleistung<br />
verloren, gleichgültig, ob das Gerät bei niedrigem oder<br />
hohem Leistungspegel betrieben wird.<br />
Die folgenden Messungen wurden mit 120V, 60Hz und<br />
230V, 50Hz Wechselrichtern bei 12V<br />
Gleichstromeingangsspannung durchgeführt. Bei<br />
höheren Gleichstromeingangsspannungen, werden<br />
sogar noch höhere Wirkungsgrade erzielt. Bei den<br />
Modellen mit 120V Wechselstrom, 60Hz liegen die<br />
Wirkungsgrade geringfügig niedriger.<br />
18 Deutsch <strong>Xantrex</strong> <strong>Sine</strong> W<strong>ave</strong> Wechselrichter Benutzerhandbuch
9.3 Störungsursachen und Fehlermeldungen<br />
Anzeige auf dem<br />
Bedienfeld<br />
Art<br />
der Störung<br />
Behebung der Störun g<br />
HIGH BATT SHUTDOWN = Batteriespannung ist<br />
autom. Abschaltung wegen zu hoch<br />
zu hoher Batteriespannung<br />
Überprüfen, ob ein Fehler des<br />
Batterieladesystems vorliegt.<br />
Wechselrichter manuell zurücksetzen;<br />
dazu den Leistungsschalter erst auf<br />
( ) und dann wieder auf ( I ) stellen .<br />
LOW BATT SHUTDOWN =<br />
autom. Abschaltung wegen<br />
zu niedriger<br />
Batteriespannung<br />
OVERLOAD SHUTDOWN<br />
= autom. Abschaltung<br />
wegen Überlast<br />
OVERTEMP SHUTDOWN<br />
= autom. Abschaltung<br />
wegen Überhitzung<br />
SYSTEM SHUTDOWN =<br />
autom. Systemabschaltung<br />
Batteriespannung ist<br />
zu niedrig<br />
Batteriestrom zu hoch,<br />
wahrscheinlich<br />
Wechselstromüberlast<br />
Batterie neu aufladen. Wechselrichter<br />
manuell zurücksetzen; dazu den<br />
L eistungsschalter erst auf ( ) un d<br />
d ann wieder auf ( I ) stellen .<br />
Die angeschlossenen<br />
Verbraucherlasten reduzieren.<br />
System überhitzt<br />
s<br />
Überlast oder<br />
Hardwarefehler des<br />
Systems<br />
Belüftung und Kühlung des Geräte<br />
verbessern und/oder die<br />
angeschlossenen Verbraucherlasten<br />
reduzieren.<br />
Vergewissern Sie sich, daß alle<br />
Verbraucher unterbrochen sind. Das<br />
System zurück-zusetzen versuchen;<br />
dazu den Leistungsschalter erst auf<br />
( ) und dann wieder auf ( I ) stellen .<br />
Funktioniert der Wechselrichter dann<br />
immer noch nicht, setzen Sie sich<br />
zwecks Kundendienst/<br />
Reparatur/Garantieleistung mit Ihrem<br />
Fachhändler oder mit <strong>Xantrex</strong> in<br />
Verbindung.<br />
<strong>Xantrex</strong> <strong>Sine</strong> W<strong>ave</strong> Wechselrichter Benutzerhandbuch<br />
9.4 Tips bei der Fehlersuche:<br />
Probleme<br />
und Symptome Mögliche<br />
Störungsursache n Behebung der Störun g<br />
Keine Ausgangsspannung<br />
und Anzeige auf dem<br />
Bedienungs-feld 10,0 V<br />
Gleichstrom oder niedriger<br />
(bei 24 V-Modellen 20,3 V<br />
Gleichstrom)<br />
Keine Ausgangsspannung,<br />
keine Spannungsanzeige<br />
Automatische Abschaltung<br />
wegen zu geringer Eingangs-<br />
spannung<br />
Schalter des Wechsel-richters<br />
i n Position ( )<br />
Batterie neu aufladen,<br />
Anschlüsse und Kabel überprüfen<br />
S chalter auf Position ( I)<br />
stellen.<br />
Keine Leistung von der<br />
Batterie zum Wechselrichter.<br />
Verkabelung zum<br />
Wechselrichter überprüfen.<br />
Batterie-sicherung überprüfen.<br />
Keine Ausgangsspannung<br />
und Anzeige auf dem Be-<br />
dienungsfeld 16,0 V<br />
Gleichstrom oder höher<br />
(bei 24 V-Modellen 32,0 V<br />
Gleichstrom)<br />
Die Warnung LOW BATT<br />
leuchtet permanent auf, die<br />
Spannungsanzeige liegt<br />
unter 11,0 V (bei 24 V-<br />
Modellen 22,0 V<br />
Gleichstrom).<br />
Falsche Gleichstroman-<br />
schlüsse - Polumkehr - interne<br />
Sicherung ist durchgebrannt.<br />
Automatische Abschaltung<br />
Wegen zu hoher Eingangsspannung.<br />
Mangelhafte Gleichstromver-<br />
Drahtung, schlechter Batterie-<br />
zustand.<br />
Interne Sicherung von<br />
qualifiziertem Fachpersonal<br />
überprüfen und austauschen<br />
lassen (Hinweise zum<br />
korrekten Austausch der<br />
Sicherung im Inneren des<br />
Gerätes). ACHTEN SIE AUF<br />
KORREKTE<br />
POLARITÄT<br />
DER GLEICHSTROM-<br />
ANSCHLÜSSE!<br />
Vergewissern Sie sich, ob der<br />
Wechselrichter an die<br />
korrekte Batterie-spannung<br />
angeschlossen ist. Überprüfen<br />
Sie die Einstellung des<br />
Ladesystems.<br />
Verwenden Sie geeignete<br />
Kabel und sorgen Sie für<br />
massive Anschlüsse. Laden<br />
Sie die Batterie neu auf oder<br />
verwenden Sie eine neue<br />
Batterie.<br />
Deutsch 19
9.5 Technische Daten<br />
Ausgangsleistung<br />
bei Dauerbetrieb<br />
W<br />
<strong>1000</strong><br />
180<br />
0<br />
<strong>1000</strong><br />
i<br />
<strong>1800</strong> i<br />
<strong>1000</strong><br />
<strong>1800</strong><br />
W<br />
<strong>1000</strong><br />
W<br />
<strong>1800</strong> W<br />
Stoßnennleistung<br />
(5 Sekunden)<br />
1500<br />
W<br />
3000<br />
W<br />
1500<br />
W<br />
3000 W<br />
Spitzenausgangsstrom<br />
25<br />
A<br />
45<br />
A<br />
11<br />
A<br />
20 A<br />
W echselrichter-Spitzenwirkungsgrad<br />
89<br />
%<br />
90<br />
%<br />
90 %<br />
L eerlauf-Stromabzug, Suchmodus<br />
< 1,5 W<br />
< 1,5 W<br />
Leerlauf-Stromabzug, Wechselrichter<br />
außer Betrieb<br />
2 2 W<br />
22 W<br />
A usgangsfrequenz<br />
6 0 Hz +/- 0,05 %<br />
50 Hz +/- 0,05 %<br />
A usgangswellenform (Wirklast)<br />
S inuswelle, Klirrfaktor
ANMERKUNGEN
<strong>Xantrex</strong> Technology Inc.<br />
Toll free 1 800 670 0707<br />
Direct 1 360 925 5097<br />
Fax 1 360 925 5143<br />
CustomerService@xantrex.com<br />
www.xantrex.com<br />
445-0049-01-01<br />
Printed in China