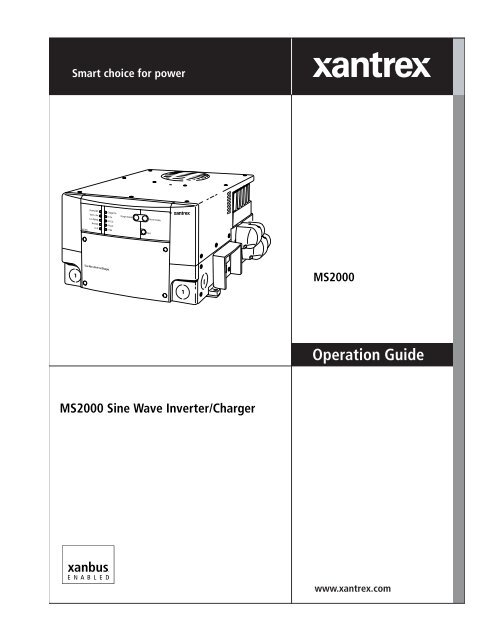
MS2000 Sine Wave Inverter/Charger - Xantrex
MS2000 Sine Wave Inverter/Charger - Xantrex
MS2000 Sine Wave Inverter/Charger - Xantrex
- No tags were found...

You also want an ePaper? Increase the reach of your titles
YUMPU automatically turns print PDFs into web optimized ePapers that Google loves.
<strong>MS2000</strong> <strong>Sine</strong> <strong>Wave</strong> <strong>Inverter</strong>/<strong>Charger</strong>Operation Guide
About <strong>Xantrex</strong><strong>Xantrex</strong> Technology Inc. is a world-leading supplier of advanced power electronics and controls with products from50 watt mobile units to one MW utility-scale systems for wind, solar, batteries, fuel cells, microturbines, and backuppower applications in both grid-connected and stand-alone systems. <strong>Xantrex</strong> products include inverters, batterychargers, programmable power supplies, and variable speed drives that convert, supply, control, clean, and distributeelectrical power.Trademarks<strong>MS2000</strong> <strong>Sine</strong> <strong>Wave</strong> <strong>Inverter</strong>/<strong>Charger</strong> is a trademark of <strong>Xantrex</strong> International. <strong>Xantrex</strong> and Xanbus are registeredtrademarks of <strong>Xantrex</strong> International.Other trademarks, registered trademarks, and product names are the property of their respective owners and are usedherein for identification purposes only.Notice of Copyright<strong>MS2000</strong> <strong>Sine</strong> <strong>Wave</strong> <strong>Inverter</strong>/<strong>Charger</strong> Operation Guide © September 2004 <strong>Xantrex</strong> International. All rights reserved.DisclaimerUNLESS SPECIFICALLY AGREED TO IN WRITING, XANTREX TECHNOLOGY INC. (“XANTREX”)(a) MAKES NO WARRANTY AS TO THE ACCURACY, SUFFICIENCY OR SUITABILITY OF ANYTECHNICAL OR OTHER INFORMATION PROVIDED IN ITS MANUALS OR OTHER DOCUMENTATION.(b) ASSUMES NO RESPONSIBILITY OR LIABILITY FOR LOSS OR DAMAGE, WHETHER DIRECT,INDIRECT, CONSEQUENTIAL OR INCIDENTAL, WHICH MIGHT ARISE OUT OF THE USE OF SUCHINFORMATION. THE USE OF ANY SUCH INFORMATION WILL BE ENTIRELY AT THE USER’S RISK.Date and RevisionSeptember 2004 Rev BPart Number975-0125-02-01Contact InformationTelephone: 1 800 670 0707 (toll free North America)1 360 925 5097 (direct)Fax: 1 800 994 7828 (toll free North America)1 360 925 5143 (direct)Email: customerservice@xantrex.comWeb: www.xantrex.com
About This GuidePurposeScopeAudienceOrganizationThe <strong>MS2000</strong> <strong>Sine</strong> <strong>Wave</strong> <strong>Inverter</strong>/<strong>Charger</strong> Operation Guide provides explanationsand procedures for operating, configuring, and troubleshooting the <strong>MS2000</strong> <strong>Sine</strong><strong>Wave</strong> <strong>Inverter</strong>/<strong>Charger</strong> (<strong>MS2000</strong>).The guide provides safety guidelines and information about operating,configuring, and troubleshooting the unit. It does not include installationinformation or battery information. Refer to the <strong>MS2000</strong> <strong>Sine</strong> <strong>Wave</strong> <strong>Inverter</strong>/<strong>Charger</strong> Installation Guide.For detailed information about particular brands of batteries, you will need toconsult individual battery manufacturers.The guide is intended for users who need to operate, configure, and troubleshootthe <strong>MS2000</strong> <strong>Sine</strong> <strong>Wave</strong> <strong>Inverter</strong>/<strong>Charger</strong>.This guide is organized into four chapters and three appendixes.Chapter 1, “Introduction”, outlines the main performance and safety features ofthe <strong>MS2000</strong> <strong>Sine</strong> <strong>Wave</strong> <strong>Inverter</strong>/<strong>Charger</strong>. Reading this chapter will give you aclear understanding of the inverter/charger’s capabilities.Chapter 2, “Operation”, provides information about operating the <strong>MS2000</strong>.Details are provided on how to read the front panel indicators to monitor the<strong>MS2000</strong>.Chapter 3, “Configuration”, explains how to configure the <strong>MS2000</strong> from thecontrol panel.Chapter 4, “Troubleshooting”, explains how to identify and solve problems thatcan occur with the <strong>MS2000</strong>.Appendix A, “Specifications” provides electrical, physical, and performancespecifications for the inverter/charger. It also provides Echo <strong>Charger</strong>specifications.Appendix B, “Battery Charging Reference for the Main <strong>Charger</strong>” providesinformation on three-stage charging, two-stage charging, and charging times.Appendix C, “Terminology” provides a glossary and a listing of commonly usedabbrevations and acronyms.975-0125-02-01 iii
Important Safety InstructionsREAD AND SAVE THESE INSTRUCTIONSThe <strong>MS2000</strong> <strong>Sine</strong> <strong>Wave</strong> <strong>Inverter</strong>/<strong>Charger</strong> Operation Guide contains importantsafety instructions.Before you install and use your <strong>MS2000</strong> <strong>Sine</strong> <strong>Wave</strong> <strong>Inverter</strong>/<strong>Charger</strong>, be sure toread, understand and save these safety instructions and those in the other productguides.Read all instructions and cautionary markings on the inverter/charger, thebatteries and all appropriate sections of this guide.WARNING: Risk of injury or loss of lifeThe <strong>MS2000</strong> <strong>Sine</strong> <strong>Wave</strong> <strong>Inverter</strong>/<strong>Charger</strong> shall not be used in connection withlife support systems or other medical equipment or devices.WARNINGThe following warnings identify conditions or practices that could result inpersonal injury or loss of life.1. Use of accessories not recommended or sold by <strong>Xantrex</strong> Technology, Inc.may result in a risk of fire, electric shock, or injury to persons.2. The inverter/charger is designed to be permanently connected to your AC andDC electrical systems. <strong>Xantrex</strong> recommends that all wiring be done by acertified technician or electrician to ensure adherence to the local and nationalelectrical codes applicable in your application.3. To avoid a risk of fire and electric shock, make sure that the existing wiring isin good condition and that the wire is not undersized. Do not operate theinverter/charger with damaged or substandard wiring.4. To reduce risk of damage and injury, charge only rechargeablelead-acid batteries: flooded, gel, or absorbed glass mat (AGM) types. Othertypes of batteries may burst causing personal injury and damage.5. Do not operate the inverter/charger if it has received a sharp blow, beendropped, or otherwise damaged in any way. If the unit is damaged, see the“Warranty and Product Information” section in the <strong>MS2000</strong> <strong>Sine</strong> <strong>Wave</strong><strong>Inverter</strong>/<strong>Charger</strong> Operation Guide.6. Do not disassemble the inverter/charger; it does not contain user serviceableparts. Take it to a qualified service person when service or repair is required.Incorrect reassembly may result in a risk of electrical shock or fire. Internal975-0125-02-01 vii
Safetycapacitors remain charged after all power is disconnected. For instructions onobtaining service, see the “Warranty and Product Information” section in the<strong>MS2000</strong> <strong>Sine</strong> <strong>Wave</strong> <strong>Inverter</strong>/<strong>Charger</strong> Operation Guide.7. Do not expose the inverter/charger to rain, snow, or splashing bilge water.8. To reduce risk of electric shock, disconnect all sources of AC and DC powerfrom the inverter/charger attempting any maintenance or cleaning. Turningoff controls will not reduce this risk.9. The inverter/charger must be provided with equipment grounding conductorsconnected to the AC input ground and chassis ground terminals.CAUTIONCautions identify conditions or practices that could result in damage to the unit orother equipment.To reduce the risk of overheating, keep the ventilation openings clear and do notinstall the inverter/charger in a compartment with limited airflow or inadequateclearances around the unit. Refer to the <strong>MS2000</strong> <strong>Sine</strong> <strong>Wave</strong> <strong>Inverter</strong>/<strong>Charger</strong>Installation Guide for required clearance.viii 975-0125-02-01
SafetyExplosive Gas PrecautionsWARNING: Risk of explosive gasesWorking in the vicinity of a lead-acid battery is dangerous. Batteries generateexplosive gases during normal battery operation. For this reason, it is of utmostimportance that you must read this guide and follow its instructions closely eachtime before you service equipment in the vicinity of the battery.1. To reduce risk of battery explosion, follow these instructions and thosepublished by the battery manufacturer and the manufacturer of any equipmentyou intend to use in the vicinity of a battery. Review cautionary markings onthese products and on the engine.2. This equipment contains components which tend to produce arcs or spark. Toprevent fire or explosion, do not install the inverter/charger in compartmentscontaining batteries or flammable materials or in locations that requireignition-protected equipment. This includes any space containing gasolinepowermachinery, fuel tanks, as well as joints, fittings, or other connectionsbetween components of the fuel system.Personal Precautions When Working With Batteries1. Someone should be within range of your voice or close enough to come toyour aid when you work near a lead-acid battery.2. Have plenty of fresh water and soap nearby in case battery acid contacts yourskin, clothing, or eyes.3. Wear complete eye protection and clothing protection. Avoid touching youreyes while working near batteries.4. If battery acid contacts your skin or clothing, wash immediately with soap andwater. If acid enters your eye, immediately flood the eye with running coldwater for at least ten minutes and get medical attention immediately.5. Never smoke or allow a spark or flame in the vicinity of the battery or engine.6. Be extra cautious to reduce risk of dropping a metal tool onto a battery. Itmight spark or short-circuit battery or other electrical parts that may causeexplosion.7. Remove personal metal items such as rings, bracelets, necklaces, and watcheswhen working with a lead-acid battery. A lead-acid battery can produce ashort-circuit current high enough to weld a ring or the like to metal, causing asevere burn.8. Never charge a frozen battery.975-0125-02-01 ix
Safety9. If it is necessary to remove a battery, always remove the grounded terminalfrom the battery first. Make sure all accessories are off, so as not to cause anarc.10. Be sure area around battery is well ventilated.11. Clean the battery terminals. Be careful to keep corrosion from coming incontact with your eyes.12. Study all battery manufacturer’s specific precautions such as removing or notremoving cell caps while charging and the recommended rates of charge.13. For refillable (flooded) batteries, add distilled water in each cell until thebattery acid reaches the level specified by the battery manufacturer. This helpsto purge excessive gas from cells. Do not overfill. Carefully follow themanufacturer’s recharging instructions.FCC Information to the UserThis equipment has been tested and found to comply with the limits for a Class Bdigital device, pursuant to part 15 of the FCC Rules. These limits are designed toprovide reasonable protection against harmful interference when the equipment isoperated in a residential environment. This equipment generates, uses and canradiate radio frequency energy and, if not installed and used in accordance withthe instruction guide, may cause harmful interference to radio communications.However, there is no guarantee that interference will not occur in a particularinstallation. If this equipment does cause harmful interference to radio ortelevision reception, which can be determined by turning the equipment off andon, the user is encouraged to try to correct the interference by one or more of thefollowing measures:• Reorient or relocate the receiving antenna.• Increase the separation between the equipment and the receiver.• Connect the equipment into an outlet on a circuit different from that to whichthe receiver is connected.• Consult the dealer or an experienced radio/TV technician for help.x 975-0125-02-01
ContentsImportant Safety Instructions - - - - - - - - - - - - - - - - - - - - - - - - - - - - - - - - - - - - - - - - - - -vii1 IntroductionAbout the <strong>MS2000</strong> <strong>Sine</strong> <strong>Wave</strong> <strong>Inverter</strong>/<strong>Charger</strong> - - - - - - - - - - - - - - - - - - - - - - - - - - - - - - - - - - 1–2Premium Power and Ease of Use - - - - - - - - - - - - - - - - - - - - - - - - - - - - - - - - - - - - - - - - - 1–2How <strong>MS2000</strong> Works - - - - - - - - - - - - - - - - - - - - - - - - - - - - - - - - - - - - - - - - - - - - - - - - - 1–3Inverting - - - - - - - - - - - - - - - - - - - - - - - - - - - - - - - - - - - - - - - - - - - - - - - - - - - - - - - 1–3Charging - - - - - - - - - - - - - - - - - - - - - - - - - - - - - - - - - - - - - - - - - - - - - - - - - - - - - - - 1–3Xanbus System - - - - - - - - - - - - - - - - - - - - - - - - - - - - - - - - - - - - - - - - - - - - - - - - - - - - - 1–5Xanbus Enabled - - - - - - - - - - - - - - - - - - - - - - - - - - - - - - - - - - - - - - - - - - - - - - - - - - - - - 1–5Comprehensive Electronic Protection - - - - - - - - - - - - - - - - - - - - - - - - - - - - - - - - - - - - - - - - - 1–6<strong>MS2000</strong> Features - - - - - - - - - - - - - - - - - - - - - - - - - - - - - - - - - - - - - - - - - - - - - - - - - - - - - - 1–7Front Panel Features - - - - - - - - - - - - - - - - - - - - - - - - - - - - - - - - - - - - - - - - - - - - - - - - - - 1–7Side Panel Features - - - - - - - - - - - - - - - - - - - - - - - - - - - - - - - - - - - - - - - - - - - - - - - - - - 1–9DC Terminal Covers and Battery Temperature Sensor - - - - - - - - - - - - - - - - - - - - - - - - - - 1–11DC Terminal Covers - - - - - - - - - - - - - - - - - - - - - - - - - - - - - - - - - - - - - - - - - - - - - - 1–11Battery Temperature Sensor - - - - - - - - - - - - - - - - - - - - - - - - - - - - - - - - - - - - - - - - - 1–11System Accessories and Network Components- - - - - - - - - - - - - - - - - - - - - - - - - - - - - - - - - - 1–122 OperationOperating the <strong>MS2000</strong> with the System Control Panel- - - - - - - - - - - - - - - - - - - - - - - - - - - - - - 2–2Using the System Control Panel- - - - - - - - - - - - - - - - - - - - - - - - - - - - - - - - - - - - - - - - - - - - - 2–3On Start Up - - - - - - - - - - - - - - - - - - - - - - - - - - - - - - - - - - - - - - - - - - - - - - - - - - - - - - - - - - 2–4Power On Reset - - - - - - - - - - - - - - - - - - - - - - - - - - - - - - - - - - - - - - - - - - - - - - - - - - - - - - - 2–4System Start-up Check - - - - - - - - - - - - - - - - - - - - - - - - - - - - - - - - - - - - - - - - - - - - - - - - - - - 2–5System Modes - - - - - - - - - - - - - - - - - - - - - - - - - - - - - - - - - - - - - - - - - - - - - - - - - - - - - - - - 2–6Operate Mode - - - - - - - - - - - - - - - - - - - - - - - - - - - - - - - - - - - - - - - - - - - - - - - - - - - - - - 2–7Power Save Mode - - - - - - - - - - - - - - - - - - - - - - - - - - - - - - - - - - - - - - - - - - - - - - - - - - - 2–7Safe Mode - - - - - - - - - - - - - - - - - - - - - - - - - - - - - - - - - - - - - - - - - - - - - - - - - - - - - - - - 2–8Putting the System into Safe Mode - - - - - - - - - - - - - - - - - - - - - - - - - - - - - - - - - - - - - 2–9Hibernate mode - - - - - - - - - - - - - - - - - - - - - - - - - - - - - - - - - - - - - - - - - - - - - - - - - - - - 2–10Operating in Invert Mode - - - - - - - - - - - - - - - - - - - - - - - - - - - - - - - - - - - - - - - - - - - - - - - - 2–12Load Sense Mode - - - - - - - - - - - - - - - - - - - - - - - - - - - - - - - - - - - - - - - - - - - - - - - - - - - 2–12Operating Limits for <strong>Inverter</strong> Operation - - - - - - - - - - - - - - - - - - - - - - - - - - - - - - - - - - - - 2–13Power Output - - - - - - - - - - - - - - - - - - - - - - - - - - - - - - - - - - - - - - - - - - - - - - - - - - - 2–13Operating in <strong>Charger</strong> Mode- - - - - - - - - - - - - - - - - - - - - - - - - - - - - - - - - - - - - - - - - - - - - - - 2–14Echo <strong>Charger</strong> Operation - - - - - - - - - - - - - - - - - - - - - - - - - - - - - - - - - - - - - - - - - - - - - - 2–15Enabling and Disabling Operation from the System Control Panel - - - - - - - - - - - - - - - 2–15975-0125-02-01 xi
ContentsClear Faults - - - - - - - - - - - - - - - - - - - - - - - - - - - - - - - - - - - - - - - - - - - - - - - - - - - - - - - 3–19View Device Info - - - - - - - - - - - - - - - - - - - - - - - - - - - - - - - - - - - - - - - - - - - - - - - - - - - 3–19Basic Menu - - - - - - - - - - - - - - - - - - - - - - - - - - - - - - - - - - - - - - - - - - - - - - - - - - - - - - - 3–19Selecting the <strong>MS2000</strong> Advanced Menu - - - - - - - - - - - - - - - - - - - - - - - - - - - - - - - - - - - - 3–20Returning to <strong>MS2000</strong> Basic Menu - - - - - - - - - - - - - - - - - - - - - - - - - - - - - - - - - - - - - - - 3–21Sub-Menus - - - - - - - - - - - - - - - - - - - - - - - - - - - - - - - - - - - - - - - - - - - - - - - - - - - - - - - - - - 3–22Configure Inv/Chg Menu (Configure <strong>Inverter</strong>/<strong>Charger</strong> Menu) - - - - - - - - - - - - - - - - - - - - - 3–22Lo DC Volt - - - - - - - - - - - - - - - - - - - - - - - - - - - - - - - - - - - - - - - - - - - - - - - - - - - - 3–22Batt Type - - - - - - - - - - - - - - - - - - - - - - - - - - - - - - - - - - - - - - - - - - - - - - - - - - - - - 3–22Batt Size - - - - - - - - - - - - - - - - - - - - - - - - - - - - - - - - - - - - - - - - - - - - - - - - - - - - - - 3–22Sense Below - - - - - - - - - - - - - - - - - - - - - - - - - - - - - - - - - - - - - - - - - - - - - - - - - - - 3–22Sense Interval - - - - - - - - - - - - - - - - - - - - - - - - - - - - - - - - - - - - - - - - - - - - - - - - - - 3–23Cfg AC Limits (Configure AC Limits) - - - - - - - - - - - - - - - - - - - - - - - - - - - - - - - - - - 3–23# Chg Stages - - - - - - - - - - - - - - - - - - - - - - - - - - - - - - - - - - - - - - - - - - - - - - - - - - - 3–23Eqz Volts - - - - - - - - - - - - - - - - - - - - - - - - - - - - - - - - - - - - - - - - - - - - - - - - - - - - - 3–24Force Charge - - - - - - - - - - - - - - - - - - - - - - - - - - - - - - - - - - - - - - - - - - - - - - - - - - - 3–24Cfg AC Limits (Configure AC Limits) - - - - - - - - - - - - - - - - - - - - - - - - - - - - - - - - - - - - 3–25Lo AC Volt - - - - - - - - - - - - - - - - - - - - - - - - - - - - - - - - - - - - - - - - - - - - - - - - - - - - 3–25Lo AC Freq - - - - - - - - - - - - - - - - - - - - - - - - - - - - - - - - - - - - - - - - - - - - - - - - - - - - 3–25Hi AC Volt - - - - - - - - - - - - - - - - - - - - - - - - - - - - - - - - - - - - - - - - - - - - - - - - - - - - 3–26Hi AC Freq - - - - - - - - - - - - - - - - - - - - - - - - - - - - - - - - - - - - - - - - - - - - - - - - - - - - 3–26View Device Info Menu (Device Information Menu) - - - - - - - - - - - - - - - - - - - - - - - - - - - 3–27View Fault Log - - - - - - - - - - - - - - - - - - - - - - - - - - - - - - - - - - - - - - - - - - - - - - - - - 3–27View Warning Log - - - - - - - - - - - - - - - - - - - - - - - - - - - - - - - - - - - - - - - - - - - - - - - 3–27View Event Log - - - - - - - - - - - - - - - - - - - - - - - - - - - - - - - - - - - - - - - - - - - - - - - - - 3–27Restore Defaults - - - - - - - - - - - - - - - - - - - - - - - - - - - - - - - - - - - - - - - - - - - - - - - - - 3–284 TroubleshootingFaults and Warnings - - - - - - - - - - - - - - - - - - - - - - - - - - - - - - - - - - - - - - - - - - - - - - - - - - - - 4–2Fault Types - - - - - - - - - - - - - - - - - - - - - - - - - - - - - - - - - - - - - - - - - - - - - - - - - - - - - - - - 4–2Warning Types - - - - - - - - - - - - - - - - - - - - - - - - - - - - - - - - - - - - - - - - - - - - - - - - - - - - - 4–3Troubleshooting Reference - - - - - - - - - - - - - - - - - - - - - - - - - - - - - - - - - - - - - - - - - - - - - - - - 4–4General Troubleshooting Guidelines- - - - - - - - - - - - - - - - - - - - - - - - - - - - - - - - - - - - - - - - - - 4–5Warning Messages- - - - - - - - - - - - - - - - - - - - - - - - - - - - - - - - - - - - - - - - - - - - - - - - - - - - - - 4–6Fault Messages - - - - - - - - - - - - - - - - - - - - - - - - - - - - - - - - - - - - - - - - - - - - - - - - - - - - - - - - 4–9<strong>Inverter</strong> Applications - - - - - - - - - - - - - - - - - - - - - - - - - - - - - - - - - - - - - - - - - - - - - - - - - - - 4–15Resistive Loads - - - - - - - - - - - - - - - - - - - - - - - - - - - - - - - - - - - - - - - - - - - - - - - - - - - - 4–15Motor Loads - - - - - - - - - - - - - - - - - - - - - - - - - - - - - - - - - - - - - - - - - - - - - - - - - - - - - - 4–15Problem Loads - - - - - - - - - - - - - - - - - - - - - - - - - - - - - - - - - - - - - - - - - - - - - - - - - - - - - 4–15Very Small Loads - - - - - - - - - - - - - - - - - - - - - - - - - - - - - - - - - - - - - - - - - - - - - - - - 4–15Fluorescent Lights & Power Supplies - - - - - - - - - - - - - - - - - - - - - - - - - - - - - - - - - - 4–15Clocks - - - - - - - - - - - - - - - - - - - - - - - - - - - - - - - - - - - - - - - - - - - - - - - - - - - - - - - 4–16Searching - - - - - - - - - - - - - - - - - - - - - - - - - - - - - - - - - - - - - - - - - - - - - - - - - - - - - 4–16975-0125-02-01 xiii
xvi
1 IntroductionCongratulations on your purchase of the <strong>MS2000</strong> <strong>Sine</strong> <strong>Wave</strong> <strong>Inverter</strong>/<strong>Charger</strong>.The <strong>MS2000</strong> has been designed to give you premium power, ease ofuse, and outstanding reliability.Please read this chapter to familiarize yourself with the mainperformance and protection features of the <strong>MS2000</strong>.
IntroductionHow <strong>MS2000</strong> WorksThe <strong>MS2000</strong> is designed to:• invert• chargeWith AC input available from the utility grid or a generator, power is passedthrough the <strong>MS2000</strong> <strong>Sine</strong> <strong>Wave</strong> <strong>Inverter</strong>/<strong>Charger</strong> to operate connected AC loads.The remaining AC power not used by loads is converted to DC power and used tocharge batteries.If AC input power becomes disconnected, fails, or falls out of specification and isno longer qualified as good AC, a quick transfer takes place and the <strong>MS2000</strong>begins converting DC power from the batteries into AC power, with nointerruption in power supplied to the AC loads.InvertingChargingThe <strong>MS2000</strong>’s inverting function:• produces 120 volts AC from your batteries• delivers 2000 watts of power on a continuous basis and 5000 watts of surgepower to start loads like pumps and refrigerators.To prevent power being drawn needlessly from the batteries, <strong>Xantrex</strong>® hasincluded the load sensing feature.Load Sense Mode To reduce battery draw, you can turn on Load Sense Modewith the System Control Panel. In Load Sense Mode, the inverter periodicallysends out a search pulse to see whether a load is present. If it finds a load, theinverter will turn on. You can adjust the interval between load sense pulses, andyou can also adjust the load power at which the inverter will turn on. If no load isfound, then the inverter will continue in Load Sense mode, which reduces theinverter draw from the battery to a minimum.In Load Sense mode, there’s a short delay—up to the interval you’ve set—between the time you turn on a load and the time the inverter/charger deliverspower. Load Sense mode can be disabled at any time if you find the delay to beinconvenient.The <strong>MS2000</strong>’s charging function:• produces 100 amps to charge your batteries• equalizes flooded, lead acid batteries975-0125-02-01 1–3
IntroductionBuilt-in Charge Formulas For the inverter to perform at the highest level, thebatteries must be charged correctly. The <strong>MS2000</strong> has optimized algorithms forflooded, gel, and AGM batteries.Battery Temperature Sensor Since battery temperature is a key factor incorrect charging, the charging formula must be adjusted (automatically andcontinuously) according to the actual battery temperature to ensure that batteriesare fully charged, but not overcharged. For this reason, <strong>Xantrex</strong> has included abattery temperature sensor with your <strong>MS2000</strong> <strong>Sine</strong> <strong>Wave</strong> <strong>Inverter</strong>/<strong>Charger</strong> andhas temperature compensated the charge formula.Manual Equalization Over a period of time, the cells in a flooded battery candevelop uneven chemical states. This can result in a weak (undercharged) cellwhich, in turn, can reduce the overall capacity of the battery. To improve the lifeand performance of a non-sealed, flooded battery, the <strong>MS2000</strong>’s multi-stagecharging cycle includes a manual equalize mode that can be used, if recommendedby the battery manufacturer.Dead Battery Charging Another feature that the <strong>MS2000</strong> includes is deadbattery charging. The <strong>MS2000</strong>—unlike many chargers— has the ability torecharge batteries even if the battery voltage is very low.Load Management The <strong>MS2000</strong> has a built-in transfer relay that connects ACinput from the utility grid, generator, or inverter output to your loads. Because theusual AC power sources such as marinas or small generators often have limitedcurrent availability, having the capability to manage your AC loads is extremelyvaluable. The <strong>MS2000</strong> provides a number of features to facilitate this:• The charger is power factor corrected to use AC current as efficiently aspossible and only requires 15 amps to provide rated charger output.Minimizing the AC current used by the charger means more current isavailable for your AC loads.• <strong>MS2000</strong> uses a power share feature which monitors the AC load on thesystem. It reduces the charge current and gives priority to the AC load toavoid nuisance tripping of the breaker.• Occasionally, AC input sources have low voltage. To avoid loading theseweak sources any further, the charger automatically reduces its AC currentdraw as the AC voltage approaches the minimum acceptable level.Echo <strong>Charger</strong> By default, the built-in Echo <strong>Charger</strong> is enabled by the <strong>MS2000</strong>to charge an engine battery when the main charger is enabled and operating inbulk or absorption mode. The Echo <strong>Charger</strong> may be disabled through the SystemControl Panel.1–4 975-0125-02-01
IntroductionXanbus SystemXanbus is a network communications protocol, developed by <strong>Xantrex</strong>. In aXanbus® system, the <strong>MS2000</strong> is the device that typically provides networkpower—800 mA at 15 volts DC. All of the Xanbus-enabled devices, such as the<strong>MS2000</strong>, the System Control Panel (SCP), and the Automatic Generator Start(AGS) are able to communicate their settings and activity to each other. SeeFigure 1-1.Figure 1-1 Typical Xanbus System DiagramXanbus EnabledThe Xanbus-enabled designation means that this product works on a Xanbusnetwork. Xanbus-enabled products are:• Easy to use. The Xanbus network simplifies operation and automates routinetasks.• Reliable. Software control eliminates errors due to analog signalling.• Accurate. Digital information is less susceptible to interference and line loss.• Upgradeable. Software upgrades mean your purchase will remain up to date.For detailed instructions and a complete list of Xanbus-enabled devices, visitwww.xantrex.com975-0125-02-01 1–5
IntroductionComprehensive Electronic Protection<strong>MS2000</strong> is CSA approved to UL 458 (including the Marine Supplement) andCSA C22.2 No. 107.1, and it is designed to American Boat and Yacht Council(ABYC) recommended practices E-11 and A-25 for marine use. See “RegulatoryApprovals” on page A–5 for more information.<strong>MS2000</strong> is equipped with numerous protection features to ensure safe operation.Protection featureBattery over-voltageprotectionBattery under-voltageprotectionOver-temperatureprotectionAutomatic over loadprotectionShort circuit protectionThis feature…Keeps the battery voltage from getting too high incharge mode. Shuts the inverter off in invert mode.Prevents inverter from discharging your batteriestoo low. The inverter doesn’t run if battery voltage istoo low.Protects the unit from overheating by either derating(charge mode) or by shutting down (invert mode).See “Invert Power Derating vs AmbientTemperature” on page A–6.Protects the unit from excessive loads. The unit willprovide 5000 watts (2.5 times of the rated load) forup to 5 seconds, and then protect itself by shuttingdown. See Specifications on page A–2 for moreinformation.Detects short circuits and protects the unit byshutting it down.1–6 975-0125-02-01
Introduction<strong>MS2000</strong> FeaturesFront Panel FeaturesBefore you begin to operate the <strong>MS2000</strong>, review the front panel features shown inFigure 1-2 and described in Table 1-1. A detailed view of the lights and buttons onthe front panel is shown in Figure 1-3 and described in Table 1-2.42232123Figure 1-2 Front Panel of the <strong>MS2000</strong>Table 1-1 Front Panel FeaturesFeature Description1 AC wiring compartment access panel provides access to the terminal block forwiring the AC input and AC output.2 AC knockouts provide access for AC input and AC output wiring. A total of fourknockouts are provided on the unit: two on the front and one on each side (notshown).3 Mounting flanges are used for mounting the unit. A total of six flanges areprovided on the unit.4 Fans are located on the top of the unit and the bottom of the unit.• Top external fan is an intake fan that activates when the internal temperature ofthe inverter/charger increases. The fan speed varies with the internal temperatureand turns off when the inverter/charger cools down. (This internal temperaturemay be caused by heat in the inverter/charger or by high ambient temperature.)• Bottom internal fan (not shown) is an exhaust fan and runs continuously if theunit is inverting or charging.975-0125-02-01 1–7
Introduction5 43216 711 12109813Figure 1-3 Front Panel Lights and ButtonsTable 1-2 Description of Front Panel Lights and ButtonsFeature Description1 External AC light illuminates when you are connected to an AC source like the utility grid or agenerator and the AC is qualified.2 <strong>Inverter</strong> ON light illuminates when the <strong>MS2000</strong> is operating in invert mode.3 Low Battery light illuminates when the battery voltage is low.4 Network light illuminates when there is activity on the network.5 Fault light illuminates if a fault condition occurs.6 <strong>Charger</strong> ON light illuminates when the main charger is in charge mode and is producing DC output tocharge your batteries.7 >75A light illuminates when the total charge current of the main charger and the Echo <strong>Charger</strong> is greaterthan or equal to 75 amps DC.8 25–75A light illuminates when the total charge current of the main charger and the Echo <strong>Charger</strong> isgreater than or equal to 25 amps DC and less than 75 amps DC.9 10–25A light illuminates when the total charge current of the main charger and the Echo <strong>Charger</strong> isgreater than or equal to 10 amps DC and less than 25 amps DC.10
IntroductionSide Panel FeaturesCAUTION: Equipment DamageConnect only to other Xanbus compatible devices. Although the cabling andconnectors used in this network system are the same as Ethernet connectors, thisnetwork is not an Ethernet system. Equipment damage may result fromattempting to connect two different systems.The side panel features with all connections completed is shown in Figure 1-4 andFigure 1-5.!123456789Figure 1-4 Completed Connections on Side PanelTable 1-3 Description of Side Panel FeaturesFeatureDescription1 AC knockout provides access for AC input and AC output wiring (shown with strain-relief clampinstalled). There are four knockouts on the unit: two on the front and two on the side.2, 6, 9 Mounting flanges are used for mounting the unit. A total of six flanges are on the unit.3 Echo <strong>Charger</strong> connector provides connection to the engine battery. Typically, this will be an enginestarting battery or an auxiliary battery for loads other than the inverter.4 Battery temperature sensor jack provides connection for the battery temperature sensor.5 Dual network jacks provide connection for network-enabled devices. (The number of connectionsdepends on your layout. Your connections may not be the same as shown here.)7 & 8 DC terminals – negative (black) (7) and positive (red) (8) —shown here with DC covers on.975-0125-02-01 1–9
IntroductionFigure 1-5 DC Grounding Completed1–10 975-0125-02-01
IntroductionDC Terminal Covers and Battery Temperature SensorDC Terminal CoversTwo covers are supplied to prevent accidental contact with the cabling connectorsafter installation. The red cover is for the positive cabling terminal, and the blackcover is for the negative cabling terminal.Battery Temperature SensorFigure 1-6 Battery Terminal CoversThe battery temperature sensor continuously measures the temperature of thebattery and adjusts the charger output for a more accurate, temperaturecompensatedcharge.321Figure 1-7 Battery Temperature SensorTable 1-4 Description of Battery Temperature Sensor FeaturesFeature Description1 Sensor can be mounted on the side of the house battery case oron the negative battery terminal.2 Sensor cable is 25 feet (7.6 meters).3 Connector plugs into the Battery Temp. jack (batterytemperature sensor) on the <strong>MS2000</strong>.975-0125-02-01 1–11
IntroductionSystem Accessories and Network ComponentsSystem accessories can be used with the <strong>MS2000</strong> in a Xanbus system. TheSystem Control Panel (SCP) provides configuration and monitoring capability forXanbus-enabled devices such as the <strong>MS2000</strong>. Automatic Generator Start (AGS)automatically starts and stops your generator. It continuously monitors yourbattery system and thermostats and starts the generator if the battery state ofcharge or the voltage reaches preset limits, or the air conditioner or heater needs tobe run.Table 1-5 provides the part numbers for the system accessories.Table 1-5 System AccessoriesAccessoryPart numberSystem Control Panel (SCP) 809-0910Automatic Generator Start (AGS) 809-0915Consult with your local system designer to determine what network componentswill be needed for your specific installation. Table 1-6 provides a list of networkcomponents and part numbers. Pre-made cables are available in standard lengthsranging from 3 feet to 75 feet.Table 1-6 Network Components and Part NumbersNetwork ComponentPart NumberNetwork termination — Male (2 per pack) 809-09013-way network connector 809-0903Network termination — Female (2 per pack) 809-0905Network cable 3 ft. (0.9 m) 809-0935Network cable 5 feet (1.5 m) 809-0936Network cable 7 feet (2.0 m) 809-0937Network cable 10 feet (3.0 m) 809-0938Network cable 14 feet (4.3 m) 809-0939Network cable 25 feet (7.6 m) 809-0940Network cable 50 feet (15.2 m) 809-0941Network cable 75 feet (22.9 m) 809-0942These accessories and network components are available from any authorized<strong>Xantrex</strong> dealer or at www.xantrex.com. Detailed information on planning andinstalling your network is available in the Xanbus System Installation Guide. Thisguide is available for downloading at www.xantrex.com1–12 975-0125-02-01
2 OperationChapter 2, “Operation” contains information and procedures for usingyour <strong>MS2000</strong>. This chapter begins with a system startup check thatyou carry out after installation and configuration to verify that the<strong>MS2000</strong> is operating correctly.If you’re using the System Control Panel to operate or monitor thestatus of the unit, also refer to the System Control Panel Owner’sGuide.WARNING: Restrictions on use<strong>MS2000</strong> <strong>Sine</strong> <strong>Wave</strong> <strong>Inverter</strong>/<strong>Charger</strong> shall not be used in connection with lifesupport systems or other medical equipment or devices.CAUTIONRead this chapter before operating the <strong>MS2000</strong> <strong>Sine</strong> <strong>Wave</strong> <strong>Inverter</strong>/<strong>Charger</strong>.
OperationOperating the <strong>MS2000</strong> with the System Control PanelThe System Control Panel (SCP) provides operating, configuration, andmonitoring capability for your Xanbus system.The System Control Panel:• Monitors activity throughout your onboard power system.• Displays the latest information about your inverter/charger, battery voltageand current level, battery charge output, and generator start and stop activity.• Displays the settings for each Xanbus-enabled device in the system.• Enables you to adjust the settings for each Xanbus-enabled device in thesystem.• Preserves all of its settings in non-volatile memory if system power isinterrupted. After power is restored, you don’t have to reconfigure the SCP orany of the Xanbus-enabled devices connected to it.This section provides information on operating the <strong>MS2000</strong> with the SystemControl Panel. Please refer to the System Control Panel Owner’s Guide forcomplete information on using the System Control Panel.Important: Any <strong>MS2000</strong> setting changed from the System Control Panel willbe saved if the unit is shut down by selecting Power Save mode, Safe mode orHibernate mode. See “System Modes” on page 2–6 for more information aboutthe different types of modes.2–2 975-0125-02-01
Using the System Control PanelDisplay screenIndicator lightsPush buttonsOperationThe System Control Panel has important features which you’ll want to be familiarwith, as shown in Figure 2-1.System information is shown on the display screen with an adjustable backlight.Four indicator lights on the front panel indicate the operating status of the Xanbussystem.Four push buttons allow you to select device menus and change or displaysettings. The red System button toggles the System Control Panel and Xanbusenableddevices between Operate mode and Power Save mode. For moreinformation on the different system modes, see “System Modes” on page 2–6.912345 6 7 8Figure 2-1 System Control PanelTable 2-1 System Control Panel Features and ButtonsFeature Description1 AC In/Charge light indicates that qualified AC is present atthe input of the inverter/charger. When the <strong>MS2000</strong> isconnected to a qualified AC source like the utility grid or agenerator, this light on the System Control Panel illuminates.2 <strong>Inverter</strong> On light illuminates when the <strong>MS2000</strong> is enabled(turned on).3 Low Battery light illuminates when the house battery voltageon the <strong>MS2000</strong> is low.4 Fault light indicates a condition that requires user attentionand intervention. The Fault light illuminates when anyXanbus-enabled device connected to the network is in fault.See “Faults and Warnings” on page 4–2 for the definitions of afault and warning.5 Enter button• Confirms selection of a menu item.• Moves you to the next screen.10975-0125-02-01 2–3
OperationTable 2-1 System Control Panel Features and ButtonsFeature Description6 Up arrow button• Scrolls up one line of text.• Increases a selected value.7 Down arrow button• Scrolls down one line of text.• Decreases a selected value.8 Exit button• Cancels selection of a menu item.• Returns you to the previous screen.9 System button:• Toggles all Xanbus-enabled devices on the system betweenOperate mode and Power Save mode. See “System Modes”on page 2–6.10 Screen displays menus, settings, and system information.On Start UpWhen the <strong>MS2000</strong> is powered up or comes out of a reset state, all of the frontpanel lights illuminate and remain on for a minimum of five seconds. After fiveseconds, the lights remain illuminated until the front panel has status informationfor all the lights.The <strong>MS2000</strong> is disabled every time the unit is powered up. The inverter must thenbe enabled. When a function is disabled, it is not allowed to occur and if it isoccurring, it is terminated. Regardless of other conditions, the function will not beactivated. For example, even if AC power is present, if the charger is disabled, theunit will not charge.When a function is enabled, it is allowed to occur but other conditions may haveto be met before the function is activated or turned on. For example, the chargerfunction on the <strong>MS2000</strong> may be enabled, but it will not charge unless qualifiedAC power is present.Power On ResetTo perform a power on reset, hold the reset button on the front panel for about 5seconds. All front panel lights will illuminate to indicate that the unit has reset.2–4 975-0125-02-01
OperationSystem Start-up CheckWARNINGReview the “Important Safety Instructions” on page vii before operating theinverter/charger.To test the charging and inverting functions from the <strong>MS2000</strong> front panel:1. Disconnect AC power from <strong>MS2000</strong> AC input by opening the breaker ordisconnect. Press the <strong>Inverter</strong> Enable button on the <strong>MS2000</strong>. The <strong>Inverter</strong> Onlight illuminates.2. Place a load on the inverter. For example, plug a 100 watt light bulb into anoutlet that the inverter is powering and make sure it works. The invertershould run the load using battery power.3. To test the charger, reconnect the AC input power to the AC input. The<strong>Charger</strong> On light should illuminate after a brief delay. Any AC loadspreviously powered by the inverter will also work at this time.4. Remove the AC input power. The inverter/charger should transfer to invertmode immediately. (The transfer relay will make a clicking sound and the<strong>Inverter</strong> On light will illuminate.) Loads should continue to operateuninterrupted.To test the transfer switch:1. If the inverter is enabled, press the <strong>Inverter</strong> Enable button on the unit todisable the inverter function. The <strong>Inverter</strong> On light is not illuminated.2. Apply qualified AC power to the <strong>MS2000</strong> input. After a brief delay, theExternal AC light should illuminate and AC loads on the output shouldoperate.If any part of this procedure fails, determine the cause before using theinverter/charger. Consult the “Troubleshooting” chapter starting on page 4–1.To test the Echo <strong>Charger</strong>:1. Check the System screen on the System Control Panel and ensure the<strong>MS2000</strong> is in the Bulk or Absorption charge cycle.2. From the <strong>MS2000</strong> advanced menu on the System Control Panel, verify thatthe Echo <strong>Charger</strong> is enabled.3. If the Echo <strong>Charger</strong> is enabled, verify that the <strong>MS2000</strong> advanced menu isdisplaying the Echo <strong>Charger</strong> current and voltage.The current displayed will depend on the voltage level of the house bank and thevoltage difference between the house battery bank and the engine battery.975-0125-02-01 2–5
OperationSystem ModesThis section provides an overview of the four different system modes.The system modes described in this section affect the performance and behaviorof the <strong>MS2000</strong> and all other Xanbus-enabled devices on the Xanbus system.You’ll have to change the system mode when putting your boat in storage, orwhen installing a Xanbus-enabled device.You can change system modes using the System Settings menu on the SystemControl Panel.You can also use the red System button on the System Control Panel to put theSystem Control Panel and all other Xanbus-enabled devices into Power Savemode only.SystembuttonFigure 2-2 System Control PanelSystem modes are changed using the System Settings menu. The four systemmodes are:• Operate• Power Save• Safe• HibernatePlease read the section about each system mode to find out which mode isappropriate for different conditions or situations.2–6 975-0125-02-01
OperationOperate ModeCharacteristicsIn Operate mode, all communications are enabled on the Xanbus system. Allpower conversion functions are enabled. Each Xanbus-enabled device ismonitoring and communicating its input.The basic state of the System Control Panel is Operate mode. In Operate mode,the System Control Panel communicates with other Xanbus-enabled devices anddisplays all the network information which it is configured to display.Whenever the System Control Panel or any other device on the Xanbus system ispowered on or reset, it will be in Operate mode.Power Save ModeFigure 2-3 Operate ModeCharacteristicsWhen to usePower Save mode minimizes power draw by the System Control Panel and otherXanbus-enabled devices on the Xanbus system. Power Save mode stops allcommunication on the network, and disables the power conversion functions ofXanbus devices. For example, in Power Save mode, the inverter/charger will notinvert and an Automatic Generator Start will not start a generator.Use Power Save mode during periods when your power needs are minimal.Putting the system in Power Save mode will help preserve the charge in yourbatteries during periods of minimal power usage.Entering and exiting Power Save mode also serves as a “reset” command for thesystem.If there are active faults in the system, you cannot put the system into Power Savemode. Clear any active fault, correct the condition that caused the fault, then putthe system into Power Save mode.To enter or exit Power Save mode:◆ Press and hold the System button on the System Control Panel for one second.After you release the System button, the System Control Panel screen andindicator lights will turn off.975-0125-02-01 2–7
OperationYou can also enter or exit Power Save mode on the System Settings menu byselecting Desired Mode and scrolling to PowerSave as shown in Figure 2-4.Operate[Advanced]Figure 2-4 Power Save ModeReturning toOperate modeIf an inverter/charger supplies power to the network, applying AC input withutility power or generator power automatically returns the system to Operatemode.Safe ModeCAUTION: Unexpected behaviorBefore installing or removing a device on the network, put the network into Safemode. This prevents unexpected behaviour.CharacteristicsWhen to useSelecting Safe mode stops the generator (if it is running) and puts the SystemControl Panel (and all Xanbus-enabled devices) into Safe mode. While in Safemode, the System Control Panel remains powered, “listening” to and reporting itsstatus to the network. However, the ouptut power of all Xanbus-enabled devices isdisabled and all inverting, charging, and generator starting activity stops. In Safemode, the <strong>MS2000</strong> will not pass AC.In Safe mode, the <strong>MS2000</strong> continues to communicate, but the inverting andcharging functions are disabled.Use Safe mode when you are adding or removing devices from the network.Authorized service personnel must also put the System Control Panel in Safemode before performing software upgrades and diagnostics with the <strong>Xantrex</strong>Diagnostic Tool.If the System Control Panel is powered off while in Safe mode, it will be in Safemode when it is powered up again.To return to Operate mode:◆ On the System Settings menu, under Desired Mode, select “Operate.”2–8 975-0125-02-01
OperationPutting the System into Safe ModeWhen you are installing or removing devices from the Xanbus system, putting thesystem into Safe mode prevents unexpected behavior.To enter Safe mode:1. On the Select Device menu, use the down arrow button to highlight System.The cursor on the right of the screen indicates where you are in the menu.Figure 2-5 Select Device Menu2. Press Enter.The System Settings menu appears.Figure 2-6 System Settings Menu3. On the System Settings menu, with Desired Mode highlighted, press Enter.4. Use the down arrow button to scroll through the other modes to select Safemode.For more information on the different system modes: Operate, Power Save,and Hibernate see “System Modes” on page 2–6.975-0125-02-01 2–9
OperationFigure 2-7 Safe Mode5. Press Enter.You are now in Safe mode.6. Press Exit twice to return to the System Home Screen.To exit Safe mode and return to Operate mode:1. On the System Settings menu, under Desired Mode, select “Operate.”2. Press Enter.Hibernate modeCharacteristicsWhen to useHibernate mode removes network power from the System Control Panel and allXanbus-enabled devices on the Xanbus system. All operations are suspended(including starting and stopping the generator) until power is restored to thenetwork. All Xanbus-enabled devices other than the <strong>MS2000</strong> have no networkpower.Use Hibernate mode when the Xanbus system is left unattended for long-periodsof time to prevent any unattended system activity and to prevent battery drainduring long periods of inactivity.The system will automatically enter Hibernate mode if it is in Power Save modefor more than two hours.Restoring powerImportant: To prevent any unattended system activity, put the system intoHibernate mode from the System Control Panel before putting your boat intostorage.If there are active faults in the system, you cannot force the system into Hibernatemode. Clear any active faults, correct the condition that caused the fault, then putthe system into Hibernate mode.Once in Hibernate mode, the System Control Panel cannot return the System toOperate mode. You must restore power to the network by pressing the Resetbutton on the <strong>MS2000</strong> front panel for several seconds.2–10 975-0125-02-01
OperationIf an inverter/charger supplies power to the network, you can bring the system outof Hibernate mode either by pressing the reset button on the inverter/charger frontpanel or by applying AC input with utility power or generator power.975-0125-02-01 2–11
OperationOperating in Invert ModeWARNINGReview the “Important Safety Instructions” on page vii before operating theinverter/charger.Once the inverter/charger is installed, you can operate it in invert mode.To operate in invert mode from the front panel:1. Press the <strong>Inverter</strong> Enable button on the <strong>MS2000</strong>.2. If external AC is present, the External AC light illuminates. If AC is presentand you want to run the inverter, remove AC so the inverter turns on.Once the <strong>Inverter</strong> On light is on, the <strong>MS2000</strong> inverter is ready to deliver ACpower to the loads.◆ To operate the inverter with the System Control Panel, refer to Chapter 3,“Configuration”.Load Sense ModeImportant: If you are having problems with any of your loads, refer to“<strong>Inverter</strong> Applications” on page 4–15.The Load Sense mode of the <strong>MS2000</strong> reduces battery power consumption in orderto conserve battery charge.When the inverter is enabled, the inverter/charger can be configured to search foran acceptable AC load. (It does this when you enable (turn on) “Load Sense” onthe <strong>MS2000</strong> Advanced Menu on the System Control Panel and set the load sensepower threshold “Sense Below.”)When the load sense feature is disabled (turned off), the inverter is continuouslyon. With load sense enabled, the inverter output consists of pulses if the unitdoesn’t detect a load that meets the load sense parameters. When an acceptableload is detected, the inverter output is turned on automatically and provides fulloutput power.2–12 975-0125-02-01
OperationOperating Limits for <strong>Inverter</strong> OperationPower OutputTemperature The continuous output rating for the <strong>MS2000</strong> is 2000 watts or 17 amps at 120volts AC. The <strong>MS2000</strong> can deliver this power in an ambient (surrounding)temperature up to 122 °F (50 °C). Above this temperature, you must reduce thepower demand or the unit may shut down to protect itself against overheating.As with all inverters, the amount of continuous power that the <strong>MS2000</strong> candeliver without overheating is limited by the ambient air temperature. The<strong>MS2000</strong> will operate and deliver its continuous power rating at highertemperatures, but the ambient temperature as well as the input voltage from thebattery will limit the extent to which it can run continuously. Operating theinverter/charger in conditions outside of power and temperature limits will resultin thermal shutdown and/or significantly decreased performance.In addition, operation in this range is outside the ratings covered by the regulatoryapprovals of the product. See “Invert Power Derating vs Ambient Temperature”on page A–6.Difficulty onstarting loadsThe inverter/charger should be able to operate all AC loads rated at or below itspower rating. Some high horsepower induction motors used in pumps and othermotor-operated equipment require very high surge currents to start, and theinverter/charger may have difficulty starting these loads. See “<strong>Inverter</strong>Applications” on page 4–15.If you have problems starting certain loads, ensure that the:• Battery connections are tight and clean• DC cabling is not longer than the recommended length. Refer to the <strong>MS2000</strong><strong>Sine</strong> <strong>Wave</strong> <strong>Inverter</strong>/<strong>Charger</strong> Installation Guide for this information.• AC wiring is of the recommended size. Refer to the <strong>MS2000</strong> <strong>Sine</strong> <strong>Wave</strong><strong>Inverter</strong>/<strong>Charger</strong> Installation Guide for this information.• Battery is of sufficient capacity and it is fully charged.975-0125-02-01 2–13
OperationOperating in <strong>Charger</strong> ModeWARNING: Explosive GasesReview the “Important Safety Instructions” on page vii before operating theinverter/charger. During charging, batteries may generate explosive gases.Thoroughly ventilate the areas around the batteries and ensure that there are nosources of flames or spark in the vicinity.Study all battery manufacturer’s precautions such as removing or not removingcell caps while charging and the recommended rates of charge.Important: If you are charging a non-sealed battery, ensure there is sufficientdistilled water in each cell. The battery acid should be at the level specified bythe battery manufacturer. This helps prevent over-heating and purges excessivegases from the cells. Do not overfill. For a battery without cell caps, follow themanufacturer’s recharging instructions carefully.To operate the <strong>MS2000</strong> in charger mode from the front panel:1. Connect AC input power.House bank charging starts automatically when qualified AC power isconnected if the charger is enabled, or the charger is disabled but the ForceCharge enable override is On. (See “Force Charge” on page 3–24.)The Echo <strong>Charger</strong> operates any time it is enabled and the main charger isenabled and operating in bulk or absorption mode, and the house battery bankvoltage is above 13.2 volts DC.• The house battery bank is charged according to the two-stage or threestageformula you have selected on the System Control Panel. (See“Battery Charging Reference for the Main <strong>Charger</strong>” on page B–1 formore information on two-stage or three-stage charging.)• You can interrupt the charge cycle any time you desire by disabling thecharger from the System Control Panel or by pressing the <strong>Charger</strong> Enablebutton (on the front panel of the <strong>MS2000</strong>) so it is no longer illuminated.• To maintain optimal performance in flooded batteries, an occasionalequalize cycle may be required on the house battery only. See “Operatingin Equalization Mode” on page 2–18.• While the house battery bank is being charged, you can monitor whichstage it is in from the System Control Panel.Important: The Echo <strong>Charger</strong> does not operate when the main charger is in Equalizemode. Echo <strong>Charger</strong> operation is suspended in Equalize mode.◆ To operate the charger with the System Control Panel, refer to Chapter 3,“Configuration”.2–14 975-0125-02-01
OperationEcho <strong>Charger</strong> OperationFor the built-in Echo <strong>Charger</strong> to operate, both the Echo <strong>Charger</strong> and the maincharger must be set to Enabled. By default, the Echo <strong>Charger</strong> is enabled by the<strong>MS2000</strong> to charge an engine battery 10 seconds after the main charger has enteredBulk or Absorption mode, and the house battery voltage is at 13.2 volts DC orhigher. The Echo <strong>Charger</strong>’s maximum charge current is 10 amps.The Echo <strong>Charger</strong> stops charging under the following conditions:• the maximum charge time of 8 hours is up.• the current to the engine battery is less than 1 amp for more than 3 minutes.• the engine battery voltage is equal to or greater than the house battery voltage.Operation of the Echo <strong>Charger</strong> is shut down when:• the <strong>MS2000</strong> exits Absorption mode. The Echo <strong>Charger</strong> does not operate whenthe main charger is in Float or Equalize mode.• you disable it from the System Control Panel.• it reaches a fault condition. See “Fault Messages” on page 4–9.See “Echo <strong>Charger</strong> Specifications” on page A–4 for more information.Enabling and Disabling Operation from the System Control PanelYou can enable or disable operation of the Echo <strong>Charger</strong> in the <strong>MS2000</strong> advancedmenu using the System Control Panel. By default, the System Control Panelshows the <strong>MS2000</strong> basic menu. To view the advanced menu, see “Selecting the<strong>MS2000</strong> Advanced Menu” on page 3–20.To enable or disable the Echo <strong>Charger</strong>:1. On the Select Device menu, highlight <strong>MS2000</strong>.The cursor on the right of the screen indicates where you are in the menu.Figure 2-8 Select Device Menu2. Press Enter.The <strong>MS2000</strong> menu appears.975-0125-02-01 2–15
Operation3. Use the down arrow button to scroll to Echo Chg.4. Press Enter.[30A]Max Chg Rate [100%][Enabled]Figure 2-9 Echo <strong>Charger</strong>5. Use either arrow button to highlight Enabled and Disabled.6. Press Enter.[30A]Max Chg Rate [100%][Enabled]Figure 2-10 Echo <strong>Charger</strong> Enabled7. Press Exit to return to the Select Device menu.2–16 975-0125-02-01
Operation<strong>Charger</strong> Operation with Battery Temperature SensorSince battery temperature is a key factor in optimal charging, the house batterycharger voltage will be adjusted (automatically and continuously) according to theactual battery temperature to ensure that the house battery is fully charged, but notovercharged. For this reason, <strong>Xantrex</strong> has included a battery temperature sensor(see Figure 2-11) with your <strong>MS2000</strong> <strong>Sine</strong> <strong>Wave</strong> <strong>Inverter</strong>/<strong>Charger</strong> that allows themain charger to provide this temperature-compensated charge formula. The Echo<strong>Charger</strong> output bank is not temperature compensated.The battery temperature sensor continuously measures the temperature of thehouse battery and adjusts the main charger output for a more accurate,temperature-compensated charge.When batteries are cold, their chemical reaction is sluggish, meaning they don’tabsorb charge as easily. Thus a charge level optimized for room temperature willnot charge the batteries sufficiently if they are cold. The main charger mustcompensate by increasing its voltage to achieve the compensated equivalent of aroom temperature charge.If the batteries are hot, the chemical reaction is hyperactive and they absorbenergy too easily; thus a standard room-temperature charge would tend toovercharge a hot battery. Therefore, the main charger compensates by reducing itsvoltage.The battery temperature sensor automatically, and continuously, makesadjustments to the main charger’s voltage setpoints to properly charge yourbatteries. The actual charge compensation formula can be found on page A–3.Important: It is normal to see a voltage that is different than the specifiedsetpoint when charging if the battery case temperature is above or below 77 °F(25 °C)If a battery temperature sensor is not present, the <strong>MS2000</strong> uses the cold, warm,and hot settings. Charging may not be effective at extreme temperatures. See“Main <strong>Charger</strong> Specifications” on page A–3.Figure 2-11 Battery Temperature Sensor975-0125-02-01 2–17
OperationOperating in Equalization ModeWARNING: Explosive gasesEqualization generates explosive gases. Ensure adequate ventilation.CAUTION: Batteries may be damagedSealed lead-acid batteries and gel batteries must NEVER be equalized orpremature battery failure will result. Equalize mode is disabled if you haveselected “Gel” and “AGM” as the battery type.Only flooded (wet) lead-acid batteries should be equalized. As a general rule, donot equalize a battery unless there are provisions to add water to it and themanufacturer recommends equalization.CAUTION: Batteries may be damagedIf carried out too frequently or done improperly, equalization can damage yourbatteries. Never equalize a battery more than necessary. Always check electrolytelevel before AND after equalization. Fill with distilled water per the batterymanufacturer’s recommendation.CAUTION: Risk of damage to DC load equipmentEqualization voltage may be as high as 15.5 volts DC. Disconnect sensitive loadsfrom the battery before equalizing.Follow the battery manufacturer’s recommendations for equalizing your batteries.As a guide, a heavily used flooded battery may need to be equalized once a month,and a battery in light service may only need to be equalized every two to fourmonths.Measure the specific gravity (S.G.) of each cell using a hydrometer. For fullycharged lead-acid batteries, the reading should be approximately 1.265. Lowspecific gravity after charging or a 0.25 difference from cell to cell indicates theneed for equalization.2–18 975-0125-02-01
OperationEqualizing BatteriesImportant: Equalization will be carried out after an absorption charge.Equalization only runs for 60 minutes and may need to be restarted if thespecific gravity is still uneven.To equalize your batteries:1. Turn off or disconnect all loads on the battery.The voltage applied to the battery during equalization may damage yourelectronic equipment. As well, equalization won’t proceed correctly if loadsare drawing current from the battery.2. Check electrolyte level.Fill with distilled water if the electrolyte level is low.3. To request the equalization charge, ensure the <strong>Charger</strong> switch is enabled, andthen scroll to the Equalize setting on the System Control Panel.4. In the <strong>MS2000</strong> home menu, highlight Equalize, as shown inFigure 2-12.[Enabled][10.0A][On][Flooded]Figure 2-12 Equalize OnWhen you select On, the equalization confirmation warning appears, as shown inFigure 2-13.975-0125-02-01 2–19
OperationYesNoFigure 2-13 Equalize Confirmation WarningSelecting Yes by pressing the Enter button takes you to the equalization systemhome screen, as shown in Figure 2-14.ORSelecting No by pressing the Exit button on Figure 2-13 takes you to the <strong>MS2000</strong>device screen.Yesn/a13.0VMenuCancelFigure 2-14 Equalization Home ScreenSee Table 2-2 for an explanation of the equalize home screen content.Table 2-2 Equalization Home Screen ContentEqualization HomeScreen content Explanation of items displayedPrecharging • “Yes”—precharging occurs if batteries are notfully charged before equalization. Batteries mustbe fully charged before equalization.• “Done”—indicates the precharge is complete or ifit was not required.2–20 975-0125-02-01
Table 2-2 Equalization Home Screen ContentEqualization HomeScreen content Explanation of items displayedTime Remaining Indicates the time left for equalization. Equalizationruns for 60 minutes; time is counted down in 1minutes increments until the Time Remainingdisplays 0 min. (During a precharge, the TimeRemaining displays “n/a”— not applicable.)Battery Voltage Displays a range of 13.2 V to 18.0 with increments of0.1V.MenuPressing Menu returns you to Select Device screen.CancelPressing Cancel will display a confirmation screen, asshown in Figure 2-15, asking you to confirm that youwant to cancel equalization.OperationEqualization?wantYesNoFigure 2-15 Equalize Cancellation WarningIf you choose Yes, the equalization process is cancelled and you are returned tothe <strong>MS2000</strong> home menu.0RIf you choose No and continue with equalization, the equalization home screen, asshown in Figure 2-14, appears.5. When equalization is finished, check the battery electrolyte level. Top up asnecessary with distilled water only and recheck the specific gravity asspecified by the battery manufacturer.975-0125-02-01 2–21
OperationTerminating the Equalization ProcessThe equalization process can be terminated in three ways:• user cancellation from the System Control Panel as shown in Figure 2-15• inverter/charger cancellation if AC is removed or the charger is disabled• successful completion of the equalization processOperating Limits for <strong>Charger</strong> OperationThe maximum output current for the <strong>MS2000</strong> is 100 amps, split between the maincharger (maximum 100 amps DC) and the Echo <strong>Charger</strong> (maximum 10 ampsDC). You can reduce the total output if you change the “Charge Rate” setting onthe <strong>MS2000</strong> Advanced Menu or the maximum Power Share setting on the<strong>MS2000</strong> Basic Menu.Power ShareImportant: Changing the “Charge Rate” setting does not affect the Echo <strong>Charger</strong>’soutput current.The charger can operate over an AC input range of 90–135 volts AC. This is thedefault setting and can be adjusted to 85–145 volts AC as a maximum range andto 110–120 volts AC as a minimum range.This wide range allows the <strong>MS2000</strong> tocharge your batteries even when incoming AC voltage is less than ideal.The <strong>MS2000</strong> charger shares incoming power with AC loads. The AC loads havepriority, which means that the charger will reduce its output with large AC loadsand increase the output again when the AC load decreases. The regulatorymaximum for continuous AC loads is 80% of the breaker rating that the loads areconnected to.The <strong>MS2000</strong> senses pass-through current going to the AC load. The differencebetween the pass-through (load) and 80% of the Power Share setting is the currentthat is available for charging the batteries.For example, if the AC input of the <strong>MS2000</strong> is from an AC panel with a 30Abreaker, the Power Share setting on the System Control Panel should be selectedas 30A. Based on this, the charger will control the charge current so that the totalcurrent draw is equal to or less than 24A in this case. Should the load current bemore than 24A, the charger output will reduce to 0A, but the <strong>MS2000</strong> willcontinue to supply the loads. The <strong>MS2000</strong> will continue to pass-through power tothe loads, even if the load current exceeds the Power Share setting. In this case, itwill be up to the user to remove/disconnect loads if tripping the AC input breakersupplying the <strong>MS2000</strong> is to be avoided.2–22 975-0125-02-01
OperationMonitoring the <strong>MS2000</strong> Indicator LightstTable 2-3 Front Panel LightsThe ten indicator lights on the front panel show you the operating status of the<strong>MS2000</strong>. A description of the lights is provided in Table 2-3.If none of the front panel lights are on, see “Troubleshooting Reference” onpage 4–4.LightIlluminated Color Status Action or Status ItemExternal AC Green When the <strong>MS2000</strong> is connected to aqualified AC source or a generator, theExternal AC light illuminates.<strong>Inverter</strong> ON Green When the <strong>MS2000</strong> is enabled (on) andproducing AC or load sensing, the<strong>Inverter</strong> ON light illuminates. This lightis not illuminated if the unit is charging.Low Battery Yellow When the Low Battery light illuminates,the battery level is low. The low voltageshutdown level is adjustable from 10volts DC (default) to 13 volts DC. See“Lo DC Volt” on page 3–22.Network Green Indicates that there is activity on thenetwork.You can run your appliances from anAC source like the utility grid or agenerator.You can run your appliances from theinverter.You can run your appliances but yourbattery level is low. Charge your batteryor connect to an AC source or turn offthe inverter.Communication on the networkFault Red A fault has occurred on the network. Investigate and clear the fault condition.<strong>Charger</strong> ON Green When the <strong>MS2000</strong> is in charge mode, the<strong>Charger</strong> ON light is illuminated. If the<strong>Charger</strong> ON light is off, the <strong>MS2000</strong> isnot in any charge mode.>75A Green Indicates that the total charge current ofthe main charger and the Echo <strong>Charger</strong> isgreater than or equal to 75 amps DC.25–75A Green Indicates that the total charge current ofthe main charger and the Echo <strong>Charger</strong> isgreater than or equal to 25 amps DC andless than 75 amps DC.10–25A Green Indicates that the total charge current ofthe main charger and the Echo <strong>Charger</strong> isgreater than or equal to 10 amps DC andless than 25 amps DC.
OperationFaults and WarningsA fault affects the operation of the unit. A manual fault requires user interventionby clearing the condition and then pressing the Reset button on the inverter/charger’s front panel. See the System Control Panel Owner’s Guide forinformation on clearing faults from the System Control Panel.A warning alerts you to a condition that could possibly affect operation of the unit.See “Faults and Warnings” on page 4–2 for more explanation on the differencebetween faults and warnings.Monitoring Status Messages on the System Control PanelRefer to “System Menu Map” on page 3–3 of the Configuration chapter.2–24 975-0125-02-01
3 ConfigurationChapter 3, “Configuration” contains information about allconfigurable settings and procedures for the <strong>MS2000</strong>.
ConfigurationGeneral Configuration InformationSystem ControlAll changes to the configuration of the <strong>MS2000</strong> are made with the System ControlPanel (SCP). The System Control Panel provides configuration and monitoringcapability for all Xanbus-enabled devices on the network.The front panel of the <strong>MS2000</strong> provides limited control, including reset; maincharger enable and disable; and inverter enable and disable. These functions canalso be controlled from the System Control Panel.3–2 975-0125-02-01
System Menu MapConfigurationFigure 3-1 provides a map of how the menus are organized. The order of devicesappearing on the System Control Panel will vary, depending on the order in whichthey’ve been connected to the network.Power UpStartup screenStartup screenStandbyInvertingSystem screenSystem screenCharging AC BypassLoad SenseEqualizeEnterExitSelect DeviceSelectmenuDevicemenuEnter Device menusExit<strong>Inverter</strong>/<strong>Charger</strong><strong>Inverter</strong>/<strong>Charger</strong>menumenuAuto Gen Start menuAuto Gen Start menuSystem Panel menuSystem Panel menuClock menuClock menuSystem SettingsSystemmenuSettingsmenuOptional device. This menu will=appear if this device is installed.Figure 3-1 System Menu Map975-0125-02-01 3–3
ConfigurationViewing the System ScreenThe System screen, as shown in Figure 3-2, is used to monitor system activity.You cannot select or change any of the information on the System screen. If youwould like to view more detailed information, press Enter to go to the SelectDevice menu.menuViewing the Select Device MenuFigure 3-2 <strong>MS2000</strong> Float System Screen (Example)The Select Device menu is where you can view a list of all the Xanbus-enableddevices in your power system. The number of items appearing on the SelectDevice menu depends on how many devices are installed as part of your system.To view the Select Device menu:◆ On the System screen, press Enter.The Select Device menu appears with <strong>MS2000</strong> highlighted.Figure 3-3 Select Device Menu3–4 975-0125-02-01
ConfigurationSelecting the <strong>MS2000</strong> Basic MenuTo select the <strong>MS2000</strong> from the Select Device menu:1. On the Select Device menu, <strong>MS2000</strong> appears highlighted.2. Press Enter.The <strong>MS2000</strong> basic menu appears by default.Invert[*Enabled]Figure 3-4 <strong>MS2000</strong> Basic Menu in Invert ModeSelecting and Adjusting the Configurable settingsYou can view <strong>MS2000</strong> settings or change <strong>MS2000</strong> settings from the <strong>MS2000</strong>menu. Display settings show status items and cannot be changed. Configurablesettings are indicated by square brackets [ ] and can be adjusted, as shown inFigure 3-4.Follow these steps to change any <strong>MS2000</strong> setting.1. On the <strong>MS2000</strong> menu, use the up arrow or down arrow button to highlight thesetting you want to change.2. Press Enter to highlight the value of that Configurable setting, indicated bysquare brackets [ ].The previously set value appears with an asterisk beside it, as shown in Figure3-4.3. Use the up arrow or down arrow button to change the value. Holding down abutton lets you scroll through values quickly.4. Press Enter to select the value.5. If you have another setting to change, return to step 1.OrIf you have no more settings to change, press Exit to return to the SelectDevice menu.975-0125-02-01 3–5
Configuration<strong>MS2000</strong> Configuration MenusThe System Control Panel displays the <strong>MS2000</strong> configuration menu in twoformats: basic and advanced. The System Control Panel shows the <strong>MS2000</strong> basicmenu by default.<strong>MS2000</strong> basic menu list status information and settings you may have to adjust ona routine basis. It provides access to basic control of the inverter/charger.<strong>MS2000</strong> advanced menu settings require that you understand and plan for thechanges you make. You may not have to adjust these settings as part of regularoperation. Advanced Menu can be enabled or disabled through the SystemControl Panel. See “Selecting the <strong>MS2000</strong> Advanced Menu” on page 3–20.To access the <strong>MS2000</strong> configurations menus, select the <strong>MS2000</strong> menu, as shownin Figure 3-5.Invert[Enabled]Figure 3-5 <strong>MS2000</strong> Menu3–6 975-0125-02-01
ConfigurationThe <strong>MS2000</strong> menu structure is shown in Figure 3-6. The first four lines appearingin both menus: Mode, Battery, AC Input or AC Out, are status items only and arenot configurable. Echo Chg Out in the Advanced Menu is also a status item and isnot configurable.-Figure 3-6 <strong>MS2000</strong> Menu Structure — Overview975-0125-02-01 3–7
Configuration<strong>MS2000</strong> Device MenuThe <strong>MS2000</strong> device menu displays status information on the different modes ofthe inverter/charger. The first three lines of the device screen displays dynamiccontent that changes, depending on what operation mode that the <strong>MS2000</strong> is in.Status information is not configurable; configurable items are indicated by squarebrackets [ ]. An asterisk indicates the value that was previously set.For example, in Figure 3-7, the <strong>MS2000</strong> is in invert mode with AC current goingout.Invert[*Enabled]ModeFigure 3-7 Invert Mode - Basic MenuThe first line indicates which mode that the <strong>MS2000</strong> is in. Table 3-1 defines thedifferent modes.Table 3-1 ModesModeBulk ChargeAbsorption ChargeFloat ChargeInvertDescriptionThe first stage of three-stage battery charging. Currentis supplied to the batteries at a constant rate whilevoltage gradually rises.The second stage of three-stage battery charging.Voltage remains constant and current reduces as thebattery becomes charged. This ensures completecharging.The third stage of three-stage battery charging. Afterbatteries reach full charge, charging voltage isreduced to a lower level to prevent gassing and toprolong battery life. This stage is often referred to as amaintenance charge. Rather than charging a battery, itkeeps an already-charged battery from dischargingwhile providing load current.The <strong>MS2000</strong> is converting DC power to AC power.3–8 975-0125-02-01
ConfigurationTable 3-1 ModesModeAC BypassEqualizeLoad SenseDescriptionAC input from an AC source like the utility grid orfrom a generator is allowed to pass through the unit tooperate connected AC loads. The charger is notenabled but AC is qualified and passed through theunit.To improve the life and performance of a non-sealed,flooded (or wet) battery, the <strong>MS2000</strong>’s multi-stagecharging cycle includes a manual equalize mode thatcan be used if recommended by the batterymanufacturer.In order to minimize power draw from the battery, theinverter will periodically check if a load is connectedwhen the inverter is enabled.BatteryThe second line of the device screen indicates the status of the house battery bank.This line displays the voltage (V); the current (A) as either (+) positive amps(indicating that the battery is charging) or (–) negative amps (indicating thebattery is discharging because you’re inverting), and the battery temperature ineither °F or °C.For the status of the engine battery, see “Echo Chg Out”.AC InputWhen the <strong>MS2000</strong> is in charge mode, this line indicates whether you have ACinput from the utility grid or from a generator. This line shows the values forcurrent (A), the frequency (Hz), and the AC voltage in (V).AC OutThis line is displayed when the <strong>MS2000</strong> is in invert mode or in AC bypass mode.This line indicates the AC output and shows the values for current (A), thefrequency (Hz), and the AC voltage in (V).Echo Chg OutThis line appears only in the <strong>MS2000</strong> Advanced Menu and displays the status ofthe Echo <strong>Charger</strong>. If the Echo <strong>Charger</strong> is enabled and operating, DC outputcurrent (A) and voltage (V) are displayed. If the Echo <strong>Charger</strong> is disabled or notoperating, the line will display “Inactive”.975-0125-02-01 3–9
Configuration<strong>MS2000</strong> Menu (Basic)<strong>Inverter</strong>The <strong>MS2000</strong> basic menu indicates the status of items and lists settings that youmay have to adjust on a routine basis.If advanced menu is enabled, scroll through the <strong>MS2000</strong> advanced menu itemsuntil Basic Menu is highlighted and press enter.This section describes each display item and configurable item in detail with anexample of the line item. Each item is described in terms of its purpose, whether itis a display or configurable setting, when to use, and the outcome of changing asetting.Configurable settingThis setting lets you enable or disable the inverter. In the example shown, theinverter is enabled. For an explanation of enable and disable, see “Terminology”on page C–1.<strong>Inverter</strong>[Enabled]ValueEnabledDisabledDefaultDisabledWhen to useOutcomeEnable the inverter when you would like to have AC power from the inverter.The inverter is enabled. The inverter provides power from the batteries unlessqualified AC input power is present.3–10 975-0125-02-01
Configuration<strong>Charger</strong>Configurable settingThis setting lets you enable or disable the operation of the main charger. When themain charger is enabled and AC is connected to the input, the house battery bankwill charge. The Echo <strong>Charger</strong> will charge if it is enabled separately in the Echo<strong>Charger</strong> menu. See “Echo Chg” on page 3–18.Important: Both the main charger and the Echo <strong>Charger</strong> must be set to enabled for theEcho <strong>Charger</strong> to operate.The Disabled setting of this item will disable the main charger and can be disabledat any time during the charge cycle.If the charger is enabled and the AC is not qualified as good, then the charger willnot operate until AC qualifies as good.The charger can be enabled or disabled from the front panel of the <strong>MS2000</strong> orfrom the System Control Panel (SCP). In the example shown, the charger isenabled.<strong>Charger</strong>[Enabled]ValueEnabledDisabledDefaultEnabledOutcomeUse the default Enabled setting to ensure batteries are always being charged whenconnected to an AC source. Disabling the charger will turn off the chargefunction. Then the next time qualified AC power is connected, the charger isautomatically enabled and charging will begin, if Force Charge is enabled. IfForce Charge is not enabled, charging will not occur until the <strong>Charger</strong> setting ischanged from disabled to enabled.See “Force Charge” on page 3–24 for more information on this feature.975-0125-02-01 3–11
ConfigurationPower ShareConfigurable settingPower Share is a configurable setting that you set to match to the breaker rating onthe AC input. This setting is used to ensure that the charger limits its output to tryto prevent nuisance tripping of the AC input breaker due to the total current drawnby the charger and your other AC loads. See also “Power Share” on page 2–22.Power Share[10A]Range of values Increment Default5 to 50 amps 5 amp increments 30 ampsWhen to useOutcomeSet the Power Share setting to match the AC input breaker. Use this setting whenconnecting to an AC source. If using multiple AC sources via an AC transferswitch, adjust this setting to the smaller AC breaker size.Setting the value higher than the AC source’s external breaker could cause theexternal breaker to trip.EqualizeConfigurable settingThis setting lets you enable or disable charger equalization, only if the battery typeis flooded (or wet).Equalization can be turned on (enabled) or off (disabled).Equalize[Off]ValueOnOffDefaultOffWhen to useReview the section, “Operating in Equalization Mode” on page 2–18 beforeadjusting this setting. This menu item is displayed if the battery type allowsequalization.3–12 975-0125-02-01
In the <strong>MS2000</strong> home menu, highlight Equalize, as shown in Figure 3-8.Configuration[Enabled][10.0A][On][Flooded]Figure 3-8 Equalize OnWhen you select On, the equalization confirmation warning appears, as shown inFigure 3-9.YesNoFigure 3-9 Equalize Confirmation WarningSelecting Yes takes you to the equalization system home screen, as shown inFigure 3-10.Yesn/a13.0VMenuCancelFigure 3-10 Equalization System Home Screen975-0125-02-01 3–13
ConfigurationBatteries must be fully charged before equalization. If they are not fully charged, aprecharge occurs. During precharge, the Time Remaining appears as “n/a”—notapplicable. When the equalization process begins, Time Remaining appears as avalue between 60 min and 1 min.You can cancel the equalization process by selecting Cancel, in which case Figure3-11 appears, asking if you want to cancel equalization.Equalization?wantYesNoFigure 3-11 Equalize Cancellation WarningIf you choose Yes, the equalization process is cancelled and you are returned tothe <strong>MS2000</strong> home menu.If you choose No, the equalization home screen as shown in Figure 3-10 appears.3–14 975-0125-02-01
ConfigurationBatt TypeFull nameConfigurable settingBattery TypeSelect the type of battery for your house battery from Flooded, AGM, Gel orCustom. If a battery temperature sensor is not present, the <strong>MS2000</strong> uses cold,warm or hot settings with the hot setting as the default.Batt Type[Flooded]ValueFloodedCustomAGMGelDefault BatteryTypeFloodedWhen to useThis setting is adjusted for the type of house battery you have. It is importantduring configuration to choose the correct setting (battery type) to optimize thecharge algorithm for your battery and to properly enable or disable equalization.See “Battery Charging Reference for the Main <strong>Charger</strong>” on page B–1 for moreinformation.The custom setting is selected to get the battery settings programmed by thedealer.Batt SizeFull nameConfigurable settingImportant: The Echo <strong>Charger</strong> is not affected by this setting.Battery sizeThis feature lets you select the size of the house battery bank.Batt Size[440 Ah]Range of values Increment Default50 Ah to 2000 Ah 10 Ah 440 AhWhen to useOutcomeAdjust this setting to match the amp-hour capacity of the house battery bank.Reduces the main charger output current to protect against charging smallerbattery banks too aggressively. This setting charges batteries appropriately basedon the amp-hour capacity of the house battery bank.The Echo <strong>Charger</strong> is optimized to produce a maximum 10 amps DC output and isnot affected by this setting. See “Battery Charging Reference for the Main<strong>Charger</strong>” on page B–1 for more information.975-0125-02-01 3–15
ConfigurationClear FaultsPurposeClear Faults is a command which clears all active faults in the <strong>MS2000</strong>. Whenfaults are cleared, the device will resume normal operation. If the fault conditionstill exists, the fault will reoccur.Clear FaultsValueYesNoEffectFaults are clearedNo action3–16 975-0125-02-01
Configuration<strong>MS2000</strong> Menu (Advanced)<strong>Inverter</strong><strong>Charger</strong>Power ShareThe <strong>MS2000</strong> advanced menu lists settings that provide you with additionalcontrol over <strong>MS2000</strong>. However, you may not have to adjust these settings as partof regular operation. For a listing of advanced menu items, see “<strong>MS2000</strong> MenuStructure — Overview” on page 3–7.These settings are only visible if Advanced Menu is selected. To select the<strong>MS2000</strong> Advanced Menu, see “Selecting the <strong>MS2000</strong> Advanced Menu” onpage 3–20.In addition to several items from the basic menu, the <strong>MS2000</strong> advanced menucontains the following sub-menus and commands:• Configure Inv/Chg (Configure <strong>Inverter</strong>/<strong>Charger</strong>)• Cfg AC Limits (Configure AC Limits)• Dev Info (Device Info)When you select a sub-menu and press Enter, a list of menu items appears.This section describes each display item and configurable item in detail. Eachitem is described as a display or configurable setting, when to use the setting, andthe outcome of changing a setting.See a description of this feature on page 3–10.See a description of this feature on page 3–11.See a description of this feature on page 3–12.Configure Inv/Chg (Configure <strong>Inverter</strong>/<strong>Charger</strong>)Cfg Inv/Chg is a sub menu command. If you select this item, you’ll access a list ofsub-menu items. See “Configure Inv/Chg Menu (Configure <strong>Inverter</strong>/<strong>Charger</strong>Menu)” on page 3–22.975-0125-02-01 3–17
ConfigurationMax Chg RateFull nameConfigurable settingMaximum charge rateThe actual battery charge rate is determined by two things. First, the <strong>MS2000</strong> usesthe house battery Batt Size setting (C) on page 3–15 divided by 5 (C÷5) todetermine that maximum total charger output. This value is then modified by thecharge rate setting.For example, if the house battery bank size is set to 300 Ah and the charge ratewas set at 100%, the calculation would be: 300 ÷ 5 or 60 amps × 100% which is a60 amp charge rate. If the charge rate is adjusted to 50%, the resulting charge ratewould be 30 amps (60 amps × 50%) total.Even though you can set a house battery bank size of 2000 Ah, where C÷5 is 400amps, the <strong>MS2000</strong> would still charge at 100 amp, the maximum total charge rate.Max Chg Rate [100%]Range of values Increment Default10% to 100% 10 100%When to useDisplayed only if in charger mode when you wish to control the maximum chargerate to your batteries.Echo ChgConfigurable settingThis setting lets you enable or disable the Echo <strong>Charger</strong> function.Echo <strong>Charger</strong>[Enabled]ValueEnabledDisabledDefaultEnabledWhen to useThe <strong>MS2000</strong> has a maximum total charge rate of 100 amps, split between themain charger and the Echo <strong>Charger</strong>. The Echo <strong>Charger</strong> uses a maximum of 10amps DC, which is not affected by the Max Chg Rate setting.When the Echo <strong>Charger</strong> is enabled, 10 amps of the 100 amp charge output couldbe delivered to the engine battery and 90 amps could be delivered to the housebattery bank. You must disable the Echo <strong>Charger</strong> if you want 100 amps of chargecurrent going to the house battery bank.For example, if the bank size is 500 Ah or more and the Max Chg Rate is set to100%, the calculation would be: 500 ÷ 5 or 100 amps × 100%. The total outputwould be 100 amps with 90 amps going to the house battery bank and 10 amps tothe engine battery.3–18 975-0125-02-01
ConfigurationIn another example where the bank size is 500 Ah or more and the Max Chg rateis set to 50%, the calculation would be: 500 ÷ 5 or 100 amps × 50%. The totaloutput would be 50 amps with 40 amps going to the house battery bank and 10amps to the engine battery.Load SenseConfigurable settingThis setting lets you enable or disable the load sensing function.Load sense[On]ValueOnOffDefaultOffWhen to useOutcomeEnable this setting if you want the inverter to conserve battery power when thereare small loads or no loads applied.A small load like a clock display on a microwave may not get power. When loadsare below the load sense threshold, the inverter will turn off the output to savebattery power.EqualizeSee a description of this feature on page 3–12.Clear FaultsSee a description of this feature on page 3–15.View Device InfoFor more information on this sub menu, Device Information, see “View DeviceInfo Menu (Device Information Menu)” on page 3–27.Basic MenuPurposeWhen to useSelecting Basic Menu takes you back to the basic menu of the <strong>MS2000</strong> only.Advanced menu items will no longer be visible on the System Control Panel.Use this setting when you want to return to the basic menu of the <strong>MS2000</strong>.975-0125-02-01 3–19
ConfigurationSelecting the <strong>MS2000</strong> Advanced MenuThe System Control Panel shows the <strong>MS2000</strong> basic menu by default. If youwould like to view the advanced menu, you must go to the System Settings menuand select Global Menus.Important: When you select Advanced on the Global Menu, the SystemControl Panel will display the advanced menus for all devices.To return toviewing the basic menu for any Xanbus-enabled devices, select BasicMenu from the advanced menu for that device.To select the <strong>MS2000</strong> Advanced Menu:1. On the Select Device menu with System highlighted, press Enter.SystemFigure 3-12 Highlighting System on the Select Device Menu2. Scroll with the down arrow button to highlight Global Menus.Figure 3-13 Highlighting Global Menus3. Press Enter to select Advanced.4. Press Enter.5. Press Exit to return to Select Device menu.3–20 975-0125-02-01
ConfigurationReturning to <strong>MS2000</strong> Basic MenuYou can return to viewing the <strong>MS2000</strong> basic menu by selecting Basic Menu fromthe <strong>MS2000</strong> advanced menu. See “Basic Menu” on page 3–19.975-0125-02-01 3–21
ConfigurationSub-MenusConfigure Inv/Chg Menu (Configure <strong>Inverter</strong>/<strong>Charger</strong> Menu)Cfg/Inv Chg is a sub-menu. If selected, a list of sub-menu items appears.Lo DC VoltFull nameConfigurable settingLow DC input voltage shutdownThis setting lets you set the low voltage shutdown level for the inverter.Lo DC Volt[10.0V]Range Increment Default10 to 13 volts 0.1 volt 10 voltsWhen to useThis setting limits the depth of discharge on your house battery bank.Batt TypeSee a description of this feature on page 3–15.Batt SizeSee a description of this feature on page 3–15.Sense BelowConfigurable settingThis setting lets you set the threshold for load sense power. This setting savesbattery consumption by keeping the inverter disabled (turned off) except whenload demand is present.Sense Below[50W]Range of values Increment Default40 watts to 150 watts 10 watts 50 wattsWhen to useOutcomeAdjust this setting to control the inverter based on the load.Sets the load threshold at a power level where you want the inverter to stay on, forexample, when a sufficient load is applied.3–22 975-0125-02-01
ConfigurationSense IntervalConfigurable settingThis setting lets you adjust the interval of load sensing. The longer the interval,the more power you will save. However, the longer intervals may cause delays inthe inverter power up and starting your loads.Sense Interval[1s]Range of values Increment Default1 second to 25seconds1 second 1 secondCfg AC Limits (Configure AC Limits)# Chg StagesCfg AC Limits is a sub-menu. If selected, a list of sub-menu items appear. Formore information on this sub menu, Configure AC Limits, see page 3–25.Full nameConfigurable settingNumber of charge stagesThese settings let you adjust the charger stages of your house battery bank toeither two-stage charging or three-stage charging. See “Battery ChargingReference for the Main <strong>Charger</strong>” on page B–1 for an explanation of two-stage andthree-stage charging.# Chg Stages [3Stage]Value2StgNoFloat3StageDefault3StageImportant: The Echo <strong>Charger</strong> is not affected by this setting.975-0125-02-01 3–23
ConfigurationEqz VoltsFull nameConfigurable settingEqualization voltageThis setting lets you set the desired equalization voltage. This menu is displayedonly if charger equalization is enabled on the house battery bank. Select a settingbased on the battery manufacturer’s recommendation. For more information, see“Battery Charging Reference for the Main <strong>Charger</strong>” on page B–1.Eqz Volts[15.5V]Range of values Increment Default13.5 to 15.5 VDC 0.1 volts 15.5 VDCForce ChargeFull nameConfigurable settingImportant: The Echo <strong>Charger</strong> is not affected by this setting.Force ChargeThis setting forces the main charger to be enabled (On) whenever you havequalified AC or reacquired qualified AC. If Force Enabled is not on, you mustturn it to On using the System Control Panel.Force Charge[On]ValuesOnOffDefaultOnWhen to useOutcomeIf you want the main charger to automatically start when you connect to qualifiedAC input.The main charger starts whenever qualified AC input appears.3–24 975-0125-02-01
ConfigurationCfg AC Limits (Configure AC Limits)Lo AC VoltCAUTION: Risk of damage to equipmentThe following configuration settings adjust the quality of the AC input source that theinverter/charger will qualify and pass through to your AC loads. Voltage or frequency thatis too high or too low for a particular piece of load equipment may cause damage to thatload.Before adjusting these settings, refer to the electrical rating of connected load equipment.Most equipment that is marked with a single voltage (120 VAC, for example) rather than arange (110–125 VAC) can be expected to run properly over the range of 108 VAC to 125VAC, since this is the normal operating range of electrical utilities.Full nameConfigurable settingLow AC Transfer voltage (AC under voltage level)Low AC Transfer voltage is the voltage below which the inverter/charger nolonger qualifies AC as “good”, opens the relay, and attempts to transfer to Invertmode if Invert is enabled.Lo AC Volt[90.0V]Range of values Increment Default85 to 110 VAC 1 volt 90 VACWhen to useOutcomeThis setting lets you adjust the AC parameters when AC supply is outside of thelower voltage range required for electrical equipment.The lower level of voltage that will be accepted as “good” by the inverter/chargercan be varied.Lo AC FreqFull nameConfigurable settingLow AC transfer frequency (AC under frequency level)This setting lets you adjust the frequency at which the inverter/charger no longerqualifies AC as “good” and attempts to transfer to invert mode.Lo AC Freq[55Hz]Range of values Increment Default55 to 58 Hz 1 Hz 55 HzWhen to useThis setting lets you adjust the AC parameters when the AC supply is outside thelower frequency range required for electrical equipment.975-0125-02-01 3–25
ConfigurationOutcomeThe lower frequency of voltage that will be qualified as “good” by the inverter/charger can be varied.Hi AC VoltFull nameConfigurable settingHi AC transfer voltage (AC over voltage level)This setting lets you adjust the voltage above which the inverter/charger no longerqualifies AC as “good” and attempts to transfer to Invert.Hi AC Volt[135V]Range of values Increment Default120 to 145 VAC 1 volt 135 VACWhen to useOutcomeThis setting lets you adjust the AC parameters when AC supply is outside theupper voltage range required for electrical equipment.The upper level of voltage that will be qualified as “good” by the inverter/chargercan be varied.Hi AC FreqFull nameConfigurable settingHi AC transfer frequency (AC over frequency level)This setting lets you adjust the frequency at which the <strong>MS2000</strong> no longer qualifiesAC as “good” and attempts to transfer to Invert.Hi AC Freq[65Hz]Range of values Increment Default62 to 70 Hz 1 Hz 65 HzWhen to useOutcomeThis setting lets you adjust the AC parameters when the AC supply is outside thehigher frequency range required for electrical equipment.The higher frequency of voltage that will be qualified as “good” by the inverter/charger can be varied.3–26 975-0125-02-01
ConfigurationView Device Info Menu (Device Information Menu)View Fault LogThe View Device Info menu allows you to view the Fault, Warning and Eventlogs. On the View Device Info menu, you can also restore the default setting forthe <strong>MS2000</strong>.For a definition of faults and warnings, see “Faults and Warnings” on page 4–2.An event is an indicator of the system modes that the unit has been in.Display settingThe Fault log displays the 20 most recent faults for your reference.View Warning LogDisplay settingThe Warning log displays the 10 most recent warnings.View Event LogDisplay settingWhen to useThe Event log displays the 10 most recent events. Events can include:• Changing the system mode• Enabling or disabling the chargerThe list provides useful information to a technical user about events on thesystem, including an event ID, number ID, and the date and time of the event.975-0125-02-01 3–27
ConfigurationRestore DefaultsConfigurable settingThe Restore Default command restores the default settings for each device.Restore DefaultsWhen to useAdjust this setting when you wish to restore your settings to defaults.Important: Restoring to defaults will overwrite all of the stored values.When you select Restore Defaults, a warning message appears, as shown inFigure 3-14:continuecancelFigure 3-14 Restore Defaults WarningDefaultsIf you select continue, your settings will be restored to default.If you select cancel, your existing settings will be retained and the Device Infomenu appears.If your dealer has created a set of defaults tailored to your unit, those defaults willautomatically be used in place of the factory defaults. The user cannot selectbetween these two sets of defaults.3–28 975-0125-02-01
4 TroubleshootingWARNING: Electrical shock and fire hazardDo not disassemble the <strong>MS2000</strong>. It does not contain any user serviceable parts.Attempting to service the unit yourself could result in electrical shock or fire.The <strong>MS2000</strong> is designed for high reliability of operation and has anumber of protection features to provide trouble free operation. If,however, you have any problems operating your inverter/charger readthis troubleshooting chapter.If you cannot resolve the problem, record the necessary informationon the form, “Information About Your System” on page WA–4. Thisinformation will help your dealer or <strong>Xantrex</strong> Customer Service toassist you better when you contact them.
TroubleshootingFaults and WarningsFault TypesWhen a fault or warning message appears, you can acknowledge the message toclear the screen. To acknowledge a fault or warning message, press the Enterbutton on the System Control Panel. This action does not clear the fault orwarning condition, so you should consult Table 4-3 and Table 4-4 for suggestedactions after you have acknowledged the message. Refer to the System ControlPanel Owner’s Guide for more information on faults and warnings.There are three types of fault messages: automatic faults, manual faults, andescalating automatic faults. Table 4-1 describes how they differ in their behaviorand how you can respond to them when they appear on the System Control Panel.Table 4-1 Faults Types and BehaviorsFault typeBehaviourAutomatic faults Clear automatically if the fault condition thatgenerated the message goes away. You can alsoacknowledge automatic faults without waiting forthem to clear automatically.Manual faultsRequire you to clear them by:• selecting Clear Faults on the <strong>MS2000</strong> or on thedevice that generated the fault (if the faultcondition still exists, the fault messagereappears)• correcting the condition that caused the faultEscalating automaticfaultsClear automatically if the fault condition goes away,just like an automatic fault.However, if an escalating automatic fault occursseveral times within a defined time period, theescalating automatic fault becomes a manual fault,requiring user intervention. For example, threefaults occur in one minute. It will no longer clearitself but becomes a manual fault. Then you mustidentify the problem, correct the fault condition, andclear the fault or reset the device.4–2 975-0125-02-01
TroubleshootingWarning TypesThere are two types of warnings: automatic and manual. When the <strong>MS2000</strong>detects a warning condition, it displays a warning message on the System ControlPanel.Table 4-2 describes how they differ in their behavior and in how you can respondto them when they appear on the System Control Panel.Table 4-2 Warning Types and BehaviorWarning typeBehaviourAutomatic warning Clear automatically if the fault condition thatgenerated the message goes away. You can alsoacknowledge automatic warnings without waitingfor them to clear automatically.Manual warning Require you to acknowledge them before you canproceed with configuring or operating the <strong>MS2000</strong>.Manual warnings are usually in the form of a Yes/No question that you may acknowledge by pressingthe Enter button on the System Control Panel forYes and the Exit button for No.Refer to the System Control Panel Owner’s Guidefor more information.975-0125-02-01 4–3
TroubleshootingTroubleshooting ReferenceThis chapter provides you with troubleshooting tips to identify and solve mostproblems that can occur with the <strong>MS2000</strong>.This chapter is divided into the following four sections:SectionPage NumberGeneral Troubleshooting Guidelines See page 4–5.Warning Messages See page 4–6.Fault Messages See page 4–9.<strong>Inverter</strong> Applications (Loads) See page 4–15.4–4 975-0125-02-01
TroubleshootingGeneral Troubleshooting GuidelinesThis section will help you narrow down the source of any problem you mayencounter. Please read the following troubleshooting steps:1. Check for a Warning or Fault message on the System Control Panel. See“Warning Messages” on page 4–6 and “Fault Messages” on page 4–9 fordescriptions of these messages and the specific actions to take. If a message isdisplayed, record it before doing anything further.2. As soon as possible, record on the form, “Information About Your System” onpage WA–4, the conditions at the time the problem occurred. These detailsshould include the following as well as any other information asked for onpage page WA–4:• Loads the <strong>MS2000</strong> was running or attempting to run• Battery condition at the time of failure (voltage, state of charge, forexample), if known• Recent sequence of events (for example, charging had just finished, wedisconnected external AC as we were preparing to leave the dock, but theinverter didn’t come on)• Any known unusual AC input factors such as low voltage or unstablegenerator output• Extreme conditions which may have existed at the time (temperature,vibrations, moisture, for example).3. Attempt the solution indicated in Table 4-3 or Table 4-4.4. If your <strong>MS2000</strong> or System Control Panel is not displaying a Fault light, checkthe following list to make sure that the present state of the installation allowsproper operation of the unit:❐ Is the inverter/charger located in a clean, dry, adequately ventilated place?❐❐❐❐❐❐Are the battery cables adequately sized and short enough?Is the battery in good condition and are all DC connections tight?Are the AC input and output connections and wiring in good condition?Are the configuration settings correct for your particular installation?Are the display panel and the communications cable properly connected andundamaged?Is the battery temperature sensor and its cable properly connected andundamaged?5. Contact <strong>Xantrex</strong> Customer Service for further assistance. Please be preparedto describe details of your system installation and provide the model andserial number of the unit. See “Contact Information” on page v for contactinformation.975-0125-02-01 4–5
TroubleshootingWarning MessagesWarning messages appear on the System Control Panel to alert you to animpending system change. You can retrieve and view the last ten warningmessages using the control panel. The warnings have been recorded with a timestamp to let you know the date and time that the warning appeared. See “WarningTypes” on page 4–3 for an explanation of automatic and manual warnings.You can view the most recent fault messages of the <strong>MS2000</strong> (up to 20) byselecting Fault Log from the Device Info menu in the <strong>MS2000</strong> Advanced Menu.If several warning messages occur before you can acknowledge or clear them,they are displayed together on a warning list. This list contains messages fromevery Xanbus-enabled device, not just the <strong>MS2000</strong>. You can select a message andview its details from warning list.To view a message from a warning list:1. On the list, use the up arrow or down arrow button to highlight the messageyou want to view.2. Press Enter.The complete message appears.After viewing the message, you can return to the warning list by pressing Exit orcontinue to the menu for the device that caused the fault by pressing Enter. Eachtime you return to the list after viewing a complete message, the viewed messageis removed from the list.If you have left the warning list, you can view them at any time from the SystemSettings menu.To view a fault list:1. On the Select Device menu, highlight System and press Enter.2. On the System Settings menu, highlight View Warning List.3. Press Enter.4–6 975-0125-02-01
Table 4-3 Warning MessagesTroubleshootingTable 4-3 provides a detailed description of the warning messages and solutions.WarningNumberW0W1W2W3W4W5W6W7W8MessageFET1 over-temp.Check airflowaround it.FET2 over-temp.Check airflowaround it.Bulk cap. over-temp.Check airflowaround it.Transf’r over-temp.Check airflowaround it.Battery over-temp.Check batterysettings.Over-temperature.Check airflowaround it.Too many AC loads.Turn some off.You have enabledsystem restart afterfaults.You have enabledbattery equalization.See manual.WarningType Cause SolutionAutomaticAutomaticAutomaticAutomaticAutomaticAutomaticAutomaticAutomaticAutomaticFET1 OverTemperature WarningFET2 OverTemperature WarningDC Bulk CapacitorOver TemperatureWarningTransformer OverTemperature WarningBattery OverTemperature WarningAmbient OverTemperature WarningAC Overload Warning(AC OUPUT)Auto Restart AfterFault Feature Enabled.(This parameter is notaccessible through theSystem Control Panel.In the future, thisfeature may beconfigurable withadvanced panels.)Equalization EnabledWarningEnsure adequate ventilationaround the <strong>MS2000</strong>. Reducethe AC loads.Ensure adequate ventilationaround the <strong>MS2000</strong>. Reducethe AC loads.Ensure adequate ventilationaround the <strong>MS2000</strong>. Reducethe AC loads.Ensure adequate ventilationaround the <strong>MS2000</strong>. Reducethe AC loads.Check battery voltage andbattery cable connections. Stopcharging, if necessary. Checkfor excessive ambienttemperature and adequateventilation in the batterycompartmentEnsure adequate ventilationaround the <strong>MS2000</strong>. Reducecharge rate or AC load.Turn off some AC loads.If in invert mode, the unit maystart up unexpectedly.Make sure voltage sensitiveloads are disconnected frombatteries.975-0125-02-01 4–7
TroubleshootingTable 4-3 Warning MessagesWarningNumberW9W10W11W12W13W14W15W16Battery temp sensornot detected. Checkconnections.Battery temp sensorfailure.Batt voltage too high.Check DC wiring toinverter/charger.Battery voltage isgetting low.Recharge battery.Line 1 AC voltagetoo high. System mayshut downLine 1 AC voltagetoo low. System mayshut down.Line 2 AC voltagetoo high. System mayshut down.Line 2 AC voltagetoo low. System mayshut down.AutomaticAutomaticAutomaticAutomaticAutomaticAutomaticAutomaticAutomaticBattery TemperatureSensor Not PresentBattery TemperatureSensor ShortedDC Over VoltageWarningDC Under VoltageWarningAC Over VoltageWarning (AC Line 1input)AC Under VoltageWarning (AC Line 1input)AC Over VoltageWarning (AC Line 2input)AC Under VoltageWarning (AC Line 2input)Install a battery temperaturesensor (BTS). This warningwill continue to display as longas no BTS is connected.Replace battery temperaturesensor.Turn off or check additionalcharging sources to batteries.Check battery cables.Recharge batteries and checkbattery cables from inverter tobatteries for loose connections.Check AC input voltage.Check high AC input voltagesetting.Check AC input voltage.Check low AC input voltagesetting.Not applicable to <strong>MS2000</strong>.Not applicable to <strong>MS2000</strong>.W18 Cannot Equalize Manual Cannot equalize Wrong battery type. Changebattery type only if the batterytype setting is not the same asactual battery type. Cannotequalize a gel or AGM battery.W19W500W501MessageEqualizationterminatedabnormallyLost networkconnectionInv/Chg is trying tofix a memoryproblemWarningType Cause SolutionManualAutomaticManualEqualizationterminated abnormallyLost networkconnectionNon-volatile memorywarningInvestigate cause of problem.Check network cables orterminators.Normal operation may returnor may go to fault. Push Resetbutton if normal operation doesnot resume.4–8 975-0125-02-01
TroubleshootingFault MessagesWhen the <strong>MS2000</strong> detects a fault condition, the fault is displayed on the SystemControl Panel and also is indicated by the illuminated red Fault light on the<strong>MS2000</strong> front panel. A fault affects the operation of the unit. See “Fault Types”on page 4–2 for an explanation of the different fault types.You can view the 20 most recent fault messages of the <strong>MS2000</strong> by selecting FaultLog from the Device Info menu in the <strong>MS2000</strong> Advanced Menu.If several faults occur before you can acknowledge or clear them, they aredisplayed together on a warning list. This list contains messages from everyXanbus-enabled device, not just the <strong>MS2000</strong>. You can select a message and viewits details from the fault list.To view a message from a fault list:1. On the list, use the up arrow or down arrow button to highlight the messageyou want to view.2. Press Enter.The complete message appears.After viewing the message, you can return to the fault list by pressing Exit orcontinue to the menu for the device that caused the fault by pressing Enter. Eachtime you return to the list after viewing a complete message, the viewed messageis removed from the list.If you have left the fault list, you can view them at any time from the SystemSettings menu.To view a fault list:1. On the Select Device menu, highlight System and press Enter.2. On the System Settings menu, highlight View Fault List.3. Press Enter.975-0125-02-01 4–9
TroubleshootingTable 4-4 Fault MessagesTable 4-4 provides a detailed description of the fault messages and solutions. Ifyou are unable to resolve the problem after referring to this table, contact yourdealer or Customer Service.FaultNumberF0F2F3F4F5F6Messageis too hot and hasshut down. Seeguide.is too hot and hasshut down. Seeguide.is too hot and hasshut down. Seeguide.Battery over-temp.Inv/Chg has shutdown. See guide.is too hot and hasshut down. Seeguide.Too many AC loads.Turn some off, clearfault, try again.FaultType Cause SolutionAutomaticAutomaticAutomaticAutomaticAutomaticEscalatingAuto Fault.Must occur3 times in30 secondsbeforebecominga manualfault.FET1 OverTemperature ShutdownFET2 OverTemperature ShutdownTransformer OverTemperature ShutdownBattery OverTemperature ShutdownAmbient OverTemperature ShutdownAC OverloadShutdown (ACOUTPUT)Clear the fault and attemptrestart. Ensure adequateventilation around the<strong>MS2000</strong>. Reduce AC loads.Clear the fault and attemptrestart. Ensure adequateventilation around the<strong>MS2000</strong>. Reduce AC loads.Clear the fault and attemptrestart. Ensure adequateventilation around the<strong>MS2000</strong>. Reduce AC loads.Clear the fault and attemptrestart. Stop charging, checkbattery voltage andtemperature. Check forexcessive ambient temperatureand adequate ventilation in thebattery compartment.Clear the fault and attemptrestart. Ensure adequateventilation around <strong>MS2000</strong>.Reduce AC loads.Clear the fault and attemptrestart. Reduce AC loads.4–10 975-0125-02-01
TroubleshootingTable 4-4 Fault MessagesFaultNumberF7F8F9F10F11F12F13F14MessageToo many AC loads.Turn some off, clearfault, try again.has lost input neutralconnection. Seeguide.Battery voltage is toohigh. See guide.Battery is too low,can’t invert.Recharge battery.Battery is too low,can’t invert.Recharge battery.Input AC too high.Check source, clearfault, try again.Input AC too low.Check source, clearfault, try again.Input AC too high.Check source, clearfault, try again.FaultType Cause SolutionEscalatingAuto Fault.Must occur3 times in30 secondsbeforebecominga manualfault.AC Overload (PEAKCURRENT) Shutdown(AC OUTPUT)Clear the fault and attemptrestart. Reduce AC loads.Manual Neutral loss shutdown Clear the fault and attemptrestart. Check AC input wiringfor presence of a proper neutralconnection and groundconnection. Check the ACinput source to make sure theneutral is bonded to ground.AutomaticAutomaticAutomaticAutomaticAutomaticAutomaticDC Over VoltageShutdownDC Under VoltageShutdown (Immediate)occurs if DC voltage isbelow 8 volts DCDC Under VoltageShutdown occurs ifDC voltage is below10 volts DC.AC Over VoltageShutdown (AC Line 1input)AC Under VoltageShutdown (AC Line 1input)AC Over VoltageShutdown (AC Line 2input)Clear the fault and attemptrestart. Ensure battery voltageis 10–16 VDC at <strong>MS2000</strong>terminals. Check all othercharging source outputs,battery cables.Clear the fault and attemptrestart. Recharge batteries.Check battery cableconnections.Clear the fault and attemptrestart. Recharge batteries.Check battery cableconnections.Clear the fault and attemptrestart. Check AC inputvoltage. Check and adjust ACinput high voltage settings.Clear the fault and attemptrestart. Check AC inputvoltage. Check and adjust ACinput low voltage setting.Not applicable for <strong>MS2000</strong>975-0125-02-01 4–11
TroubleshootingTable 4-4 Fault MessagesFaultNumberF15F16F17F18F19F23F24MessageInput AC too low.Check source, clearfault, try again.AC input frequencyproblem. Check genfor overspeed.AC input frequencyproblem. Check genfor underspeed.AC input frequencyproblem. Check genfor overspeed.AC input frequencyproblem. Check genfor underspeed.Reset the <strong>MS2000</strong>. Ifproblem persists, callcustomer service.Reset the <strong>MS2000</strong>. Ifproblem persists, callcustomer service.FaultType Cause SolutionAutomaticAutomaticAutomaticAutomaticAutomaticEscalatingAuto Fault.Must occur3 times in30 secondsbeforebecominga manualfault.EscalatingAuto Fault.Must occur3 times in60 secondsbeforebecominga manualfault.AC Under VoltageShutdown (AC Line 2input)AC Over FrequencyShutdown (AC Line 1input)AC Under FrequencyShutdown (AC Line 1input)AC Over FrequencyShutdown (AC Line 2input)AC Under FrequencyShutdown (AC Line 2input)AC Over VoltageShutdown (<strong>Inverter</strong>AC output)AC Under VoltageShutdown (<strong>Inverter</strong>AC output)Not applicable to <strong>MS2000</strong>.Clear the fault and attemptrestart. Check AC inputfrequency. Check and adjustAC input high frequencysetting.Clear the fault and attemptrestart. Check AC inputfrequency. Check and adjustAC input low frequencysetting.Not applicable to <strong>MS2000</strong>.Not applicable to <strong>MS2000</strong>.Clear the fault and attemptrestart. If problem persists, callcustomer service.Clear the fault and attemptrestart. If problem persists, callcustomer service.4–12 975-0125-02-01
TroubleshootingTable 4-4 Fault MessagesFaultNumberF25F26F29F30F31F32F33MessageReset the <strong>MS2000</strong>. Ifproblem persists, callcustomer service.Reset the <strong>MS2000</strong>. Ifproblem persists, callcustomer service.Reset the <strong>MS2000</strong>. Ifproblem persists, callcustomer service.is too cold and hasshut down. Seeguide.Echo <strong>Charger</strong> fault.Disable Echo<strong>Charger</strong>.Echo <strong>Charger</strong>disabled. Reversebattery polarity.Echo <strong>Charger</strong> inputover voltage.FaultType Cause SolutionEscalatingAuto Fault.Must occur3 times in30 secondsbeforebecominga manualfault.EscalatingAuto Fault.Must occur3 times in30 secondsbeforebecominga manualfault.ManualManualEscalatingAutomaticFaultsManualAutomaticAuxiliary PowerSupply Over VoltageShutdownAuxiliary PowerSupply Under VoltageShutdownAC BackfeedShutdownBattery UnderTemperature FaultEcho <strong>Charger</strong> ShortCircuitEcho <strong>Charger</strong> ReversePolarityEcho <strong>Charger</strong> InputOver VoltageClear the fault and attemptrestart. If problem persists, callcustomer service.Clear the fault and attemptrestart. If problem persists, callcustomer service.Clear the fault and attemptrestart. If problem persists, callcustomer service.Clear the fault and attempt onerestart. Try restart again whenambient temperature is warmeror gently warm the battery.Check wiring from Echo<strong>Charger</strong> to engine battery.Check Echo <strong>Charger</strong>connection to the battery.Clear the fault and attemptrestart. Ensure battery voltageis 10–16 VDC at <strong>MS2000</strong>terminals. Check all othercharging source outputs,battery cables.975-0125-02-01 4–13
TroubleshootingTable 4-4 Fault MessagesFaultNumberF37F40F41F500MessageEcho <strong>Charger</strong> fault.Disable Echo<strong>Charger</strong>.Reset the <strong>MS2000</strong>. Ifproblem persists, callcustomer service.Reset the <strong>MS2000</strong>. Ifproblem persists, callcustomer service.Silicon Serial IDFailureFaultType Cause SolutionManualManualManualManualEcho <strong>Charger</strong> NotCommunicatingNo internalcommunicationDead battery chargertimeoutSilicon Serial IDFailureDisable Echo <strong>Charger</strong> to stopthis message from reappearing.Service required.Try restarting dead batterycharging once. Then check thecondition of the battery andreplace if necessary.Service required.F502 Watchdog reset error Manual Watchdog reset error Service required.F505 Controller fault Manual Controller fault Service required.F506 Wrong fault Manual Wrong fault identifier Service required.identifierF507 Wrong identifier Manual Wrong identifier Service required.F508 Invalid interrupt Manual Invalid interrupt Service required.4–14 975-0125-02-01
Troubleshooting<strong>Inverter</strong> ApplicationsResistive LoadsMotor LoadsProblem LoadsVery Small LoadsFluorescent Lights & Power SuppliesThe Xanbus system performs differently depending on the AC loads connected toit. If you are having problems with any of your loads, read this section. TheXanbus system perform differently based on different loads.These are the loads that the inverter finds the simplest and most efficient to drive.Voltage and current are in phase, which means they are in step with one another.Resistive loads usually generate heat in order to accomplish their tasks. Toasters,coffee pots, and incandescent lights are typical resistive loads. It is usuallyimpractical to run larger resistive loads—such as electric stove and waterheaters—from an inverter due to their high current requirements. Even though theinverter may be able to accommodate the load, the size of battery bank requiredwould be impractical if the load is to be run for long periods.Induction motors (motors without brushes) require two to six times their runningcurrent on start up. The most demanding are those that start under load (forexample, compressors and pumps). Of the capacitor start motors (typical in drillpresses, band saws for example), the largest you can expect to run is ½ to 1 hp (the30 amp transfer relay is rated at 1 ½ hp). Universal motors are generally easier tostart. Since motor characteristics vary, only testing will determine whether aspecific load can be started and how long it can be run.If a motor fails to start within a few seconds or loses power after running for atime, it should be turned off. When the inverter attempts to start a load that isgreater than it can handle, the inverter will turn itself off after a few seconds.If the power consumed by a device is less than the threshold of the Load Sensemode circuitry, and load sense is enabled, the inverter will not run. Most likely thesolution will be to defeat the Load Sense mode feature or lower the sensethreshold. Refer to <strong>Xantrex</strong> Tech Note TN3 (979-0003-01-01 Rev. A) for moreinformation.Some devices cannot be detected when scanned by Load Sense circuitry. Smallfluorescent lights are the most common example. Some computers andsophisticated electronics have power supplies that do not present a load until linevoltage is available. When this occurs, each unit waits for the other to begin. To975-0125-02-01 4–15
Troubleshootingdrive these loads, either a small companion load must be used to bring the inverterout of its search mode, or the inverter may be programmed to remain on bydefeating the search mode feature.ClocksSearchingThe inverter’s crystal-controlled oscillator keeps the frequency accurate to withina few seconds a day. Most clocks do not draw enough power to trigger the loadsensing circuit. In order to operate without other loads present, the load sensingwill have to be defeated. The best solution is to buy a battery-operated clock or aclock that is not dependent on line frequency and voltage.If the amount of power which a load draws decreases after the load turns on, and ifthis “on” load is less than the load sensing threshold, it will be turned on and offby the inverter. Incandescent light bulbs may present this problem when the loadsensing threshold is set near the wattage rating of the bulb. The solution is toreduce the load sense power threshold.4–16 975-0125-02-01
A SpecificationsAppendix A, “Specifications” contains the electrical and physicalspecifications for the <strong>MS2000</strong> <strong>Sine</strong> <strong>Wave</strong> <strong>Inverter</strong>/<strong>Charger</strong>.All specifications are subject to change without notice.
Specifications<strong>Inverter</strong> SpecificationsTable A-1 <strong>Inverter</strong> SpecificationsAll inverter specifications are at nominal conditions: ambient temperature of 77 °F(25 °C), 2000 watt resistive load, 12 volts DC inverting on the <strong>MS2000</strong>, 120 voltsAC, unless otherwise specified.Output wave form<strong>Sine</strong> waveTotal harmonic voltage distortion 89%Efficiency at 2000W >85%Load sense consumption
Main <strong>Charger</strong> SpecificationsTable A-2 Main <strong>Charger</strong> SpecificationsSpecificationsAll charging specifications are at nominal conditions: ambient temperature of 77°F (25 °C), 120 VAC, 60 Hz input, unless otherwise specified.Charging method • Three-stage charge (Bulk, Absorption, Float)• Two-stage charge (Bulk, Absorption)The default charging method is three-stage.Without a battery temperaturesensorWith a battery temperaturesensorEqualization cycleNumber of independent batterybanksThree settings with the following temperaturevalues:• Cool 50 °F (10 °C)• Warm 77 °F (25 °C)• Hot 104 °F (40 °C)The default value for this setting is Hot, and it canonly be changed by a dealer, factory, or servicecenter.The temperature compensation coefficients on a12 volt battery are as follows:• Flooded: 27 mV × (25 °C – BTS °C)• Gel: 27 mV × (25 °C – BTS °C)• AGM: 21 mV × (25 °C – BTS °C)Yes, manual via System Control Panel1Battery bank size settings 50 – 2000 AhBattery type settingsFlooded, AGM, Gel, CustomPower factor corrected charging YesAC input voltage90 – 135 VACAC input frequency60 Hz nominal, 55 – 65 Hz operating rangeMinimum battery voltage 3.0 VDCMaximum DC output voltage 16.0 VDC<strong>Charger</strong> efficiency ≥ 85%Input power factor at full > 0.95charge rateMaximum charge current100 A975-0125-02-01 A–3
SpecificationsEcho <strong>Charger</strong> SpecificationsTable A-3 Echo <strong>Charger</strong> SpecificationsCharging methodTransfer and General SpecificationsTable A-4 Transfer and General SpecificationsTwo-stage charge (Bulk, Absorption)Number of independent battery banks 1Battery bank size50 Ah or largerCharge voltage14.3 VDCCharge current10 ABattery voltage> 3 VDCCut off current≤ 1 A for 3 minutesMaximum charge timeStops automatically after 8 hoursInput over voltage limit18.0 VDCAll transfer specifications are at nominal conditions: ambient temperature of 77 °F(25 °C), 120 VAC, 60 Hz input, unless otherwise specified.Transfer time—utility to invertMinimum AC input voltage for transferMaximum AC input voltage for transferMinimum AC input frequency for transferMaximum AC input frequency for transferCoolingNetwork power supply20 ms90 VAC RMS135 VAC RMS55 Hz65 HzFan-cooled, temperature controlled800 mA at 15 VDCA–4 975-0125-02-01
SpecificationsEnvironmental SpecificationsTable A-5 Environmental SpecificationsNominal Ambient temperatureFull Power Operating AmbientTemperature RangeMaximum Operating TemperatureStorage temperature rangeHumidity: Operation/Storage77 °F (25 °C)–4 ° to 122 °F (–20 ° to 50 °C)140 °F (60 °C)–40 ° to 185 °F (–40 to 85 °C)≤ 95% RH, non-condensingPhysical Specifications with ProjectionsTable A-6 Physical SpecificationsLengthWidthHeightWeightDC terminal bolt sizeGround terminal bolt size16.19 inches (411 mm)14.20 inches (361 mm)8.17 inches (208 mm)67 lbs (30 kg)3/8 inch1/4 inchRegulatory ApprovalsFan OperationSafety CSA certified to CSA C22.2 No. 107.1 and UL 458 (including MarineSupplement)EMC FCC Part 15B and Industry Canada Class BDesigned to ABYC recommended practices E-11 and A-25 for marine useThe internal cooling fans are automatic temperature-controlled.Important: This internal temperature of the inverter/charger may be causedby heat in the inverter/charger or by high ambient temperature.The bottom fan is an exhaust fan and runs continuously.975-0125-02-01 A–5
SpecificationsInvert Power Derating vs Ambient TemperatureThe inverter/charger delivers up to 2000 watts continuous of sine wave output to50 °C ambient temperature and 1500 watts continuous of sine wave output to 60°C ambient temperature, derated linearly from 50 °C to 60 °C.If the unit is in elevated ambient temperature above 50 °C, you are required toreduce power draw according to the Figure A-1 to avoid over-temperatureshutdown.200015001000500-20-10 0 10 20 30 40 50 60Ambient Temperature ( °C )Figure A-1 <strong>Inverter</strong> Output Power vs Ambient Temperature<strong>Charger</strong> ModeTotal maximum charger output is 100 amps DC to 60 °C ambient. In higherambients, the main charger will automatically derate (reduce output current) tomaintain internal temperatures at a safe level.A–6 975-0125-02-01
BBatteryChargingReference for the Main<strong>Charger</strong>Appendix B, “Battery Charging Reference for the Main <strong>Charger</strong>”describes the multistage charging algorithm (formula) for the maincharger of the <strong>MS2000</strong>.
Battery Charging Reference for the Main <strong>Charger</strong>Charging Algorithms (Formulas)Battery TypeFlooded (or wet)GelAGMCustom<strong>MS2000</strong> charges flooded (or wet) lead-acid, gel, AGM (absorbed glass mat), andcustom batteries.Flooded (or wet) batteries have removable battery caps for refilling with distilledwater and testing the electrolyte.Gel batteries have the electrolyte in the form of a gel rather than a liquid and donot require topping up. Gel batteries are sealed and the battery caps are notremovable.AGM (absorbed glass mat) batteries are similar to gel batteries except that theelectrolyte is absorbed into a fiberglass matting.Custom is configured by the dealer, factory, or service center for battery typesother than those listed above.Charge Algorithm StagesThree-stage chargingWARNING: Risk of battery damageSince the <strong>MS2000</strong> has only one battery type setting for all batteries connected toits bank, do not mix battery types. All connected batteries should be of one kind:Flooded (or wet) or Gel or AGM or Custom.If three-stage charging is enabled, the <strong>MS2000</strong> will charge batteries in a sequenceknown as three-stage charging. The charging voltage delivered to the batterydepends on the battery:• type setting• temperature (by switch setting or battery temperature sensor)• state of chargeThe three automatic stages are:• bulk• absorption• floatSee Figure B-1 for a graph of the three-stage charging profile.There is a fourth stage, equalization, which is initialized manually as it is onlyperformed occasionally and only on flooded (or wet) batteries.B–2 975-0125-02-01
Battery Charging Reference for the Main <strong>Charger</strong>Bulk ChargeIn the first stage—the bulk charge—<strong>MS2000</strong> delivers its full-rated output current.This constant current is delivered to the batteries until the battery voltageapproaches its gassing voltage—typically around 13.5 volts for 12 volt batteries.The bulk charge stage restores about 75% of the battery’s charge.The exit from bulk stage to the next stage, absorption, occurs under the followingcondition:• battery voltage is more than the gassing voltage (V G ) for a specified amountof time (3 minute default).With an AC reconnect to qualified AC from the utility power or a generatorduring the bulk stage, the unit will return to the bulk stage. See “AC ReconnectSummary” on page B–6.Absorption ChargeDuring the first part of absorption charge, the <strong>MS2000</strong> delivers its full ratedoutput current until the absorption voltage is reached. At this point, the <strong>MS2000</strong>will transition to a constant voltage mode by keeping the charge voltage constantat the absorption voltage level, and the battery gradually reduces the chargingcurrent it demands as the battery attains full charge.The absorption stage has the following exit criteria:• Overall time in absorption timeout (∆T A ) has a default of 6 hours.• Time in constant voltage absorption timeout (∆T CV ) has a default of 1 hour.• Charge current level drops below a specified limit (I H ) for a specified amountof time, which has a default of 2% of C in Ah for 3 minutes.See “Charge Algorithm Definitions” on page B–5 for more information.With an AC reconnect during the absorption stage, the unit will transition to thefloat stage for three-stage charging and no-float stage for two-stage charging. See“AC Reconnect Summary” on page B–6.Float ChargeIn the third stage—the float charge—which is a maintenance mode, the outputvoltage of the charger is reduced to a lower level, typically about 13.5 (V F1 ) voltsto maintain the battery’s charge without losing electrolyte through gassing.In the float mode, the charger will initiate a new three-stage charge cycle underany of these conditions:• any battery drops below 12.5 VDC for 15 minutes (V F2 )• 21 days have passed from the time the charger completed Absorption (∆T F )With AC reconnect during this stage, the unit will return to the float stage. See“AC Reconnect Summary” on page B–6.975-0125-02-01 B–3
Battery Charging Reference for the Main <strong>Charger</strong>Equalization ChargeTwo-Stage ChargingThe equalization charge must be manually initiated from the System ControlPanel because it is not required each time the battery is recharged. Equalization isa deliberate overcharge designed to return each cell to optimum condition byreducing sulfation and stratification in the battery. The overcharge helps thebattery to reach and maintain peak capacity.An equalization charge should be performed only on flooded, vented (non-sealedor “wet”) batteries. It should be performed only if recommended by the batterymanufacturer and only as often as specified.After initiating an equalize charge cycle, the charger will always execute a bulkand absorption charge stage before starting the actual equalize charge stage. Theequalize charge stage has a default current and voltage setpoint at 10% of capacityin Ah and 15.5 VDC, respectively. During the equalize charge stage, the chargerwill produce current equal to the current setpoint as long as the battery voltage isstill less than the voltage setpoint. When the voltage setpoint is reached, thecharger will change its current output to keep the battery voltage steady at thevoltage setpoint level.There is a timeout (default is 1 hour) for the equalize charge stage. The chargerwill exit equalize after the timeout has occurred, even if the voltage setpoint hasnot been reached. Should another equalize cycle be required, it has to be manuallyinitiated from the System Control Panel.Should an AC reconnect occur during the equalize charge stage, the charger willreturn to the float/no-float charge stage, depending on which one is selected.If the two-stage charge is enabled, the charger finishes the absorption charge butdoes not go to float mode because some battery manufacturers advise againstfloating their batteries. The <strong>MS2000</strong> goes into a monitoring mode instead wherethe charger monitors the batteries but does not float them.A new two-stage charge cycle will be initiated under the same conditions as forthree-stage charging.B–4 975-0125-02-01
Battery Charging Reference for the Main <strong>Charger</strong>Charge Algorithm GraphV ABulkAbsorptionFloatV GV F1V F2I BT CVT AT FI HTimeCharge Algorithm DefinitionsTable B-1 Battery DefaultsFigure B-1 Three-Stage Charging ProfileVoltage Flooded (or wet) Gel AGMV A Absorption Voltage (VDC) 14.4 14.4 14.3V G Gassing Voltage (VDC) 13.5 13.8 13.45V F1 Float Voltage (VDC) 13.5 13.8 13.45V F2 Float Exit Voltage (VDC) 12.5 12.5 12.5V E Equalize Voltage (VDC) 15.5 NA NACurrent Flooded (or wet) Gel AGMI B Bulk Current (ADC) 20% Ah 20% Ah 20% AhI H Absorption Exit Current (ADC) 2% Ah 2% Ah 2% AhI E Equalize Current (ADC) 10% Ah NA NATime Flooded (or wet) Gel AGM∆T A Absorption Timeout (hours) 6 6 6∆T CV Constant Voltage Absorption Timeout (hours) 1 1 1975-0125-02-01 B–5
Battery Charging Reference for the Main <strong>Charger</strong>Time Flooded (or wet) Gel AGM∆T F Float Timeout (days) 21 21 21∆T E Equalize Timeout (hours) 1 NA NAAC Reconnect SummaryTable B-2 AC Reconnect SummaryImportant: The custom battery factory defaults are the same as for an AGMbattery.If AC is disconnected during charging, the charge stage after AC is reconnected isindicated in Table B-2.Charge StageBefore AC ReconnectBulkAbsorptionFloat/No FloatEqualizeAfter AC ReconnectBulkFloat/No FloatFloat/No FloatFloat/No FloatB–6 975-0125-02-01
C TerminologyThis section provides a glossary of terms and a listing ofabbreviations used in this guide.
TerminologyGlossaryAbsorption ChargeAlternating Current (AC)Ambient TemperatureAmpere (Amp)Ampere Hour(Amp Hour/Ah)Bulk Charge<strong>Charger</strong>, DCCurrentDirect Current (DC)DisableDischargeDC LoadsEcho <strong>Charger</strong>ElectrolyteEnableThe second stage of three-stage battery charging. Voltage remains constant andcurrent reduces as the battery becomes charged. This ensures complete charging.The type of electrical power supplied by the power utility or an AC generator. Theunique characteristic of this form of electricity is that it reverses direction at regularintervals. For example, 120 VAC 60 Hz power reverses flow 60 times a second,hence the rating 60 Hz (cycles per second).Refers to the air temperature around the inverter, which will affect its output power.A measurement of the flow of electrical current. One amp is equal to the current thatflows when one volt is acting across the resistance of one ohm. (Ohm’s law: I = V/Rwhere I=current, V=volts, R=resistance)One amp of electrical current flowing for one hour. One way to measure the capacityof batteries.The first stage of three-stage battery charging. Current is supplied to the batteries at aconstant rate while voltage gradually rises.A device that is used to replenish the capacity of a battery (its “charge”) by supplyingDC current to the battery.The rate of flow of electrical charge measured in amps.The type of electricity stored in batteries and generated by solar electric devices.Current flows in a single direction without alternating.When a function is disabled, it is not allowed to occur and if it is occuring, it isterminated. Regardless of other conditions, the function will not be activated. Forexample, even if AC power is present, if the charger is disabled, the unit will notcharge. The charger must be enabled. See “Enable” in the glossary.Stored energy being released from a battery.These loads are those that run off a DC electrical system (battery). A few examplesof DC loads are pumps, lights, fans, power vents, toilet, inverters, and some waterheaters. DC loads rely on the batteries for power.Auxiliary charger that can charge your engine battery when the main charger is inBulk or Absorption mode and the house battery voltage is at 13.2 volts DC or higher.The liquid found inside storage batteries. Electrolyte is a conductive medium inwhich the flow of electricity takes place. In lead-acid batteries, the electrolyte is anacid-water mixture.When a function is enabled, it is allowed to occur but other conditions may have tobe met before the function is activated or turned on. For example, the chargerfunction on the <strong>MS2000</strong> may be enabled, but it will not charge unless qualified ACpower is present.C–2 975-0125-02-01
TerminologyEngine BatteryFloat ChargeHertz (Hz)House BatteryIdle CurrentInductive Loads<strong>Inverter</strong>Light Emitting Diode (LED)LoadLow Battery ProtectionMain <strong>Charger</strong>The engine battery is the battery connected to the Echo <strong>Charger</strong> output. Typically,this will be an engine starting battery or an auxiliary battery for loads other than theinverter.The third stage of three-stage battery charging. After batteries reach full charge,charging voltage is reduced to a lower level to prevent gassing and to prolong batterylife. This stage is often referred to as a maintenance charge. Rather than charging abattery, it keeps an already-charged battery from discharging while providing loadcurrent.The frequency, or number of times per second, that the flow of AC electricityreverses itself. Also referred to as cycles per second (see alternating current).The house battery is the large capacity, deep cycle battery that is connected to theinverter/charger’s main DC terminals.The amount of electrical current drawn from the battery to keep an inverter runningwithout a load.TVs, VCRs, stereos, computers, and electric motors (power tools, vacuum cleaners,for example) are examples of inductive loads which surge on start up. They require ahigh startup current compared to a resistive load such as a toaster or a coffee pot.A device that converts DC power to AC power.An LED is a type of solid-state lamp used to display various status functions.Any device that consumes electricity in order to operate. Appliances, tools, andlights are examples of electrical loads. There are different types of loads such as ACloads and DC loads.A control circuit that minimizes the flow of electricity from batteries to the inverterwhen battery voltage drops below a determined level.The main charger output is at the main DC terminals on the inverter/charger andconnects to the house batteries. The main charger replenishes the charge to the housebatteries. The main charger can be configured as a two stage or a three-stage charger.National Electric Code The electrical wiring and installation code used in the United States (NFPA 70).Overload/Over-currentProtectionParallel WiringResistive LoadsSeries WiringA control circuit designed to protect a device (wire, inverter or charger, for example)from loads exceeding its capacity. A fuse, for example, is an over-current protectiondevice. All <strong>Xantrex</strong> inverters have internal circuitry to protect themselves fromoverload/over-current conditions.A group of electrical devices, such as batteries or PV modules, wired together toincrease current, while voltage remains constant. Two 100 amp-hour 12 VDCbatteries wired in parallel form a 200 amp-hour 12 VDC battery bank.Toasters, coffee pots, and incandescent lights are examples of resistive loads. Theyuse a resistive heater element to generate heat or light.A group of electrical devices, such as batteries or PV modules, wired together toincrease voltage, while current remains constant. Two 100 amp-hour 12 VDCbatteries wired in series form a 100 amp hour 24 VDC battery bank.975-0125-02-01 C–3
Terminology<strong>Sine</strong> <strong>Wave</strong>Surge CapacityTransfer Switch, ACVoltsWatt(s)Watt Hour (W/h)Volt-amps(VA)XanbusThe standard waveform of electric utility AC power. A sine wave is a rounded,smooth waveform alternating above and below zero volts.The amount of current an inverter can deliver for short periods of time. Most electricmotors draw up to six to ten times their rated current when starting. An inverter will“surge” to meet these motor-starting requirements. Most <strong>Xantrex</strong> inverters havesurge capacities at least twice their continuous ratings.A switch that selects between two sources of AC power and isolates those sourcesfrom each other.A unit of measure of electric potential. Voltage is often explained using a liquidanalogy, comparing water pressure to voltage. For example, a high pressure hosewould be similar to high voltage.A measure of true electrical power. Watts are calculated by multiplying volts timesamps for resistive loads. For non-resistive loads, watts are calculated by multiplyingvolts times amps times power factor. (P=I × V, where P=power, I=current, V=volts)Electrical power measured over a period of time. One watt hour of electricity isequivalent to one watt of power being consumed for one hour. A 3-watt lightoperated for 2 hours would consume 6 Wh (watt hour) of electricity.A measure of the “apparent” power equivalent to the true power (watts) in resistiveloads, but exceeding watts in non-resistive loads. VA is calculated by multiplyingvolts times amps without using power factor.Xanbus is a network communications protocol, developed by <strong>Xantrex</strong>.C–4 975-0125-02-01
AbbreviationsAbbreviation Full name DefinitionA Ampere (Amps) See Glossary.ABYCAmerican Boat andYacht CouncilAC Alternating Current See Glossary.The ABYC is an American organization that publishesrecreational boating safety standards.AGM Absorbed Glass Mat A type of battery in which the electrolyte or battery fluid iscontained in glass-fibre mats between battery plates.AhASCAWGBTSCECCSAAmpere hour (amphour)Authorized ServiceCenterSee Glossary.ASC’s are service centers affiliated with <strong>Xantrex</strong> to provide repairservice.American Wire Gauge A standard used for indicating wire size: the larger the AWGnumber, the smaller the wire size.Battery TemperatureSensorCanadian ElectricCodeCanadian StandardsAssociationDC Direct Current See Glossary.EMCFCCGFCIElectro-MagneticCompatibilityFederalCommunicationsCommissionGround Fault CircuitInterrupterA BTS is a device attached to a battery and inverter/charger toensure that charge delivered to the batteries is adjusted accordingto their actual temperatures.The CEC is the Canadian national electrical code providing theindustry standard for safe electrical installations.A standards writing and certification body which tests andapproves products for regulatory compliance to internationalstandards.The ability of an electronic device to operate without causing orsuffering from radio frequency interference.US agency which regulates EMC and television, radio, wireless,cable, and satellite in the US.GFCI is a device that protects against electric shock. A GFCI tripsand stops the flow of power when leakage current is detected.Hz Hertz see GlossaryLED Light Emitting Diode see GlossarymA Milliamps 1/1000 of an ampNEC National Electric See Glossary.CodeRMA Return MaterialAuthorizationThe authorization provided to a customer to return materials to<strong>Xantrex</strong>.RMS Root Mean Square A measure of the effective value of an alternating (AC) voltage,current or power.Terminology975-0125-02-01 C–5
TerminologyAbbreviation Full name DefinitionSOC State of charge Indicates the quantity of electrical energy stored inside a battery.ULUnderwritersLaboratoryA standards writing and certification body which tests andapproves products for regulatory compliance to internationalstandards.THDVACTotal HarmonicDistortionVolts AlternatingCurrentA measure of how pure or clean a waveform is.See Alternating Current in Glossary.VDC Volts Direct Current See Direct Current in Glossary.W Watts See Glossary.°C Degrees Celsius Temperature system that uses 0 °C for the freezing point and100 °C for the boiling point of water.°F Degrees Fahrenheit Temperature system that uses 32 °F as the freezing point and212 °F as the boiling point of water.C–6 975-0125-02-01
Warranty and Product InformationWarrantyWhat does this warranty cover? This Limited Warranty is provided by <strong>Xantrex</strong> Technology, Inc. ("<strong>Xantrex</strong>")and covers defects in workmanship and materials in your <strong>MS2000</strong> <strong>Sine</strong> <strong>Wave</strong> <strong>Inverter</strong>/<strong>Charger</strong>. This warranty periodlasts for 24 months from the date of purchase at the point of sale to you, the original end user customer. You requireproof of purchase to make warranty claims.This Limited Warranty is transferable to subsequent owners but only for the unexpired portion of the WarrantyPeriod. Subsequent owners also require proof of purchase.What will <strong>Xantrex</strong> do?<strong>Xantrex</strong> will, at its option, repair or replace the defective product free of charge, provided that you notify <strong>Xantrex</strong> ofthe product defect within the Warranty Period, and provided that <strong>Xantrex</strong> through inspection establishes the existenceof such a defect and that it is covered by this Limited Warranty.<strong>Xantrex</strong> will, at its option, use new and/or reconditioned parts in performing warranty repair and buildingreplacement products. <strong>Xantrex</strong> reserves the right to use parts or products of original or improved design in the repairor replacement. If <strong>Xantrex</strong> repairs or replaces a product, its warranty continues for the remaining portion of theoriginal Warranty Period or 90 days from the date of the return shipment to the customer, whichever is greater. Allreplaced products and all parts removed from repaired products become the property of <strong>Xantrex</strong>.<strong>Xantrex</strong> covers both parts and labor necessary to repair the product, and return shipment to the customer via a<strong>Xantrex</strong>-selected non-expedited surface freight within the contiguous United States and Canada. Alaska and Hawaiiare excluded. Contact <strong>Xantrex</strong> Customer Service for details on freight policy for return shipments outside of thecontiguous United States and Canada.How do you get service? If your product requires troubleshooting or warranty service, contact your merchant. Ifyou are unable to contact your merchant, or the merchant is unable to provide service, contact <strong>Xantrex</strong> directly at:Telephone: 1 800 670 0707 (toll free North America)1 360 925 5097 (direct)Fax: 1 800 994 7828 (toll free North America)1 360 925 5143 (direct)Email: customerservice@xantrex.comDirect returns may be performed according to the <strong>Xantrex</strong> Return Material Authorization Policy described in yourproduct manual. For some products, <strong>Xantrex</strong> maintains a network of regional Authorized Service Centers. Call<strong>Xantrex</strong> or check our website to see if your product can be repaired at one of these facilities.975-0125-02-01 WA–1
Warranty and ReturnWhat proof of purchase is required? In any warranty claim, dated proof of purchase must accompany theproduct and the product must not have been disassembled or modified without prior written authorization by <strong>Xantrex</strong>.Proof of purchase may be in any one of the following forms:• The dated purchase receipt from the original purchase of the product at point of sale to the end user, or• The dated dealer invoice or purchase receipt showing original equipment manufacturer (OEM) status, or• The dated invoice or purchase receipt showing the product exchanged under warrantyWhat does this warranty not cover? This Limited Warranty does not cover normal wear and tear of theproduct or costs related to the removal, installation, or troubleshooting of the customer's electrical systems. Thiswarranty does not apply to and <strong>Xantrex</strong> will not be responsible for any defect in or damage to:a) the product if it has been misused, neglected, improperly installed, physically damaged or altered, either internallyor externally, or damaged from improper use or use in an unsuitable environment;b) the product if it has been subjected to fire, water, generalized corrosion, biological infestations, or input voltagethat creates operating conditions beyond the maximum or minimum limits listed in the <strong>Xantrex</strong> product specificationsincluding high input voltage from generators and lightning strikes;c) the product if repairs have been done to it other than by <strong>Xantrex</strong> or its authorized service centers (hereafter"ASCs");d) the product if it is used as a component part of a product expressly warranted by another manufacturer;e) the product if its original identification (trade-mark, serial number) markings have been defaced, altered, orremoved.DisclaimerProductTHIS LIMITED WARRANTY IS THE SOLE AND EXCLUSIVE WARRANTY PROVIDED BY XANTREX IN CONNECTION WITH YOURXANTREX PRODUCT AND IS, WHERE PERMITTED BY LAW, IN LIEU OF ALL OTHER WARRANTIES, CONDITIONS,GUARANTEES, REPRESENTATIONS, OBLIGATIONS AND LIABILITIES, EXPRESS OR IMPLIED, STATUTORY OR OTHERWISE INCONNECTION WITH THE PRODUCT, HOWEVER ARISING (WHETHER BY CONTRACT, TORT, NEGLIGENCE, PRINCIPLES OFMANUFACTURER'S LIABILITY, OPERATION OF LAW, CONDUCT, STATEMENT OR OTHERWISE), INCLUDING WITHOUTRESTRICTION ANY IMPLIED WARRANTY OR CONDITION OF QUALITY, MERCHANTABILITY OR FITNESS FOR A PARTICULARPURPOSE. ANY IMPLIED WARRANTY OF MERCHANTABILITY OR FITNESS FOR A PARTICULAR PURPOSE TO THE EXTENTREQUIRED UNDER APPLICABLE LAW TO APPLY TO THE PRODUCT SHALL BE LIMITED IN DURATION TO THE PERIODSTIPULATED UNDER THIS LIMITED WARRANTY.IN NO EVENT WILL XANTREX BE LIABLE FOR ANY SPECIAL, DIRECT, INDIRECT, INCIDENTAL OR CONSEQUENTIALDAMAGES, LOSSES, COSTS OR EXPENSES HOWEVER ARISING WHETHER IN CONTRACT OR TORT INCLUDING WITHOUTRESTRICTION ANY ECONOMIC LOSSES OF ANY KIND, ANY LOSS OR DAMAGE TO PROPERTY, ANY PERSONAL INJURY, ANYDAMAGE OR INJURY ARISING FROM OR AS A RESULT OF MISUSE OR ABUSE, OR THE INCORRECT INSTALLATION,INTEGRATION OR OPERATION OF THE PRODUCT.ExclusionsIf this product is a consumer product, federal law does not allow an exclusion of implied warranties. To the extentyou are entitled to implied warranties under federal law, to the extent permitted by applicable law they are limited tothe duration of this Limited Warranty. Some states and provinces do not allow limitations or exclusions on impliedwarranties or on the duration of an implied warranty or on the limitation or exclusion of incidental or consequentialdamages, so the above limitation(s) or exclusion(s) may not apply to you. This Limited Warranty gives you specificlegal rights. You may have other rights which may vary from state to state or province to province.Warning: Limitations On UsePlease refer to your product manual for limitations on uses of the product.WA–2 975-0125-02-01
Warranty and ReturnSPECIFICALLY, PLEASE NOTE THAT THE <strong>MS2000</strong> SINE WAVE INVERTER/CHARGER SHOULD NOT BE USED INCONNECTION WITH LIFE SUPPORT SYSTEMS OR OTHER MEDICAL EQUIPMENT OR DEVICES. WITHOUT LIMITING THEGENERALITY OF THE FOREGOING, XANTREX MAKES NO REPRESENTATIONS OR WARRANTIES REGARDING THE USE OF THEXANTREX <strong>MS2000</strong> SINE WAVE INVERTER/CHARGER IN CONNECTION WITH LIFE SUPPORT SYSTEMS OR OTHER MEDICALEQUIPMENT OR DEVICES.Please note that the <strong>MS2000</strong> <strong>Sine</strong> <strong>Wave</strong> <strong>Inverter</strong>/<strong>Charger</strong> is not intended for use as an uninterruptible power supplyand <strong>Xantrex</strong> makes no warranty or representation in connection with any use of the product for such purposes.Before returning a product directly to <strong>Xantrex</strong> you must obtain a Return Material Authorization (RMA) number andthe correct factory "Ship To" address. Products must also be shipped prepaid. Product shipments will be refused andreturned at your expense if they are unauthorized, returned without an RMA number clearly marked on the outside ofthe shipping box, if they are shipped collect, or if they are shipped to the wrong location.When you contact <strong>Xantrex</strong> to obtain service, please have your instruction manual ready for reference and be preparedto supply:• The serial number of your product• Information about the installation and use of the unit• Information about the failure and/or reason for the return• A copy of your dated proof of purchaseRecord these details in on page WA–4.Return Procedure1. Package the unit safely, preferably using the original box and packing materials. Please ensure that your productis shipped fully insured in the original packaging or equivalent. This warranty will not apply where the product isdamaged due to improper packaging.2. Include the following:• The RMA number supplied by <strong>Xantrex</strong> Technology, Inc. clearly marked on the outside of the box.• A return address where the unit can be shipped. Post office boxes are not acceptable.• A contact telephone number where you can be reached during work hours.• A brief description of the problem.3. Ship the unit prepaid to the address provided by your <strong>Xantrex</strong> customer service representative.If you are returning a product from outside of the USA or Canada In addition to the above, you MUSTinclude return freight funds and are fully responsible for all documents, duties, tariffs, and deposits.If you are returning a product to a <strong>Xantrex</strong> Authorized Service Center (ASC) A <strong>Xantrex</strong> returnmaterial authorization (RMA) number is not required. However, you must contact the ASC prior to returning theproduct or presenting the unit to verify any return procedures that may apply to that particular facility.Out of Warranty ServiceIf the warranty period for your <strong>MS2000</strong> <strong>Sine</strong> <strong>Wave</strong> <strong>Inverter</strong>/<strong>Charger</strong> has expired, if the unit was damaged by misuseor incorrect installation, if other conditions of the warranty have not been met, or if no dated proof of purchase isavailable, your inverter may be serviced or replaced for a flat fee.To return your <strong>MS2000</strong> <strong>Sine</strong> <strong>Wave</strong> <strong>Inverter</strong>/<strong>Charger</strong> for out of warranty service, contact <strong>Xantrex</strong> Customer Servicefor a Return Material Authorization (RMA) number and follow the other steps outlined in “Return Procedure” onpage WA–3.Payment options such as credit card or money order will be explained by the Customer Service Representative. Incases where the minimum flat fee does not apply, as with incomplete units or units with excessive damage, anadditional fee will be charged. If applicable, you will be contacted by Customer Service once your unit has beenreceived.975-0125-02-01 WA–3
Warranty and ReturnInformation About Your SystemAs soon as you open your <strong>MS2000</strong> <strong>Sine</strong> <strong>Wave</strong> <strong>Inverter</strong>/<strong>Charger</strong> package, record the following information and besure to keep your proof of purchase.❐ Serial Number _________________________________❐ Purchased From _________________________________❐ Purchase Date _________________________________If you need to contact Customer Service, please record the following details before calling. This information will helpour representatives give you better service.❐ Type of installation (e.g. boat, RV, truck) __________________________________❐ Length of time inverter/charger has been installed __________________________________❐ Battery/battery bank size __________________________________❐Battery type (e.g. flooded (or wet), sealed gel cell,AGM)__________________________________❐ DC wiring size and length __________________________________❐ Description of indicators on front panel __________________________________❐ Appliances operating when problem occurred __________________________________❐ Description of problem ________________________________________________________________________________________________________________________❐Any fault or warning displayed if using a SystemControl Panel?WA–4 975-0125-02-01
IndexAabsorption charge B–3AC knockoutillustrated 1–9locations of 1–7AC reconnect summary B–6AC wiring compartment access panel 1–7AGM (absorbed glass mat) batteries B–2BbatteriesAGM (absorbed glass mat) B–2custom B–2flooded B–2gel B–2wet B–2battery damage, risk of B–2battery temperature sensorcharger operation 2–17features 1–11illustrated 1–11battery temperature sensor jack, described 1–9battery types, description of B–2bolt sizeDC terminal A–5ground terminal A–5bulk charge B–3Ccharge algorithm definitions B–5charge algorithm graph B–5charge algorithm stagesthree-stage B–2two-stage B–4charger mode A–6charger operation, operating limits 2–22chargingbattery temperature sensor 1–4built-in charge formulas 1–4dead battery 1–4described 1–3equalization 1–4load management 1–4charging formulas. See charging algorithms. B–2configurable settings, how to select and adjust 3–5configuration sub-menus 3–17configure <strong>MS2000</strong> menuadvanced 3–17basic 3–10Customer Serviceemail vfax number vphone number 1–vpreparing to call WA–4DDC terminalsbolt size A–5covers 1–11described 1–9negative 1–9positive 1–9dead battery charging 1–4derate, defined A–6Down arrow button 2–4dual network jacks, described 1–9EEcho <strong>Charger</strong>definition C–2testing 2–5electronic protection 1–6Enter button 2–3equalizationprecharging 2–20procedure 2–18, 2–19recommended frequency 2–18terminating 2–22equalization charge B–4Ethernet incompatability 1–9Ffanbottom 1–7operation A–5top fan 1–7fault
Indexautomatic 4–2definition 2–24, 4–9escalating automatic 4–2manual 2–24, 4–2fault types 4–2faults and warnings 4–2FCCcompliance A–5regulations xfloat charge B–3Force Charge, defined 3–24front paneldescribed 1–7illustrated 1–7front panel light<strong>Charger</strong> ON 2–23External AC 2–23Fault 2–23<strong>Inverter</strong> ON 2–23Low Battery 2–23Network 2–23front panel lights and buttonsdescribed 1–8illustrated 1–8GGround terminal bolt size A–5Hhibernate mode 2–10bringing system out of 2–10when to use 2–10IInformation about Your System form WA–4invert power derating A–6inverterpurchase date WA–4serial number WA–4inverter operation, operating limits 2–13inverting, described 1–3LLoad Sense mode 1–3, 2–12Mmounting flangesdescribed 1–9<strong>MS2000</strong> advanced menu, selecting 3–20<strong>MS2000</strong> basic menuexample of 3–5returning to 3–21selecting 3–5<strong>MS2000</strong> configuration menus, described 3–6<strong>MS2000</strong> device menu, described 3–8<strong>MS2000</strong> menu structure, illustrated 3–7Ppower on reset 1–8, 2–4power save modeentering and exiting 2–7when to use 2–7power share, described 2–22proof of purchase WA–4protection features 1–6purchase date WA–4Rregulatory approvals A–5resetting the unit, described 1–8Ssafe modecaution 2–8exiting 2–10safety instructions viiSelect Device menu, viewing 3–4serial number WA–4side panel featuresdescribed 1–9illustrated 1–9specificationsEcho <strong>Charger</strong> A–4environmental A–5general A–4inverter A–2main charger A–3physical A–5transfer A–4system buttondescribed 2–6illustrated 2–6system checkcharging and inverting 2–5Echo <strong>Charger</strong> 2–5transfer switch 2–5IX–2 975-0125-02-01
IndexSystem Control Panelbuttons described 2–3function of 2–2illustrated 2–6using 2–3system menu map 3–3system modeoperate 2–7power save 2–7system screen, example of 3–4Tthree-stage charging algorithm B–2three-stage charging profile, illustrated B–2troubleshootingfault messages 4–9general guidelines 4–5motor loads 4–15problem loads 4–15resistive loads 4–15warning messages 4–6UUp arrow button 2–4Wwarningautomatic 4–3definition 2–24manual 4–3warning types 4–3warrantyout of warranty service WA–3terms and conditions WA–1web site vXXanbus systemdescribed 1–5illustrated 1–5Xanbus, defined 1–5Xanbus-enabled 1–5<strong>Xantrex</strong>, web site v975-0125-02-01 IX–3
IX-4
<strong>Xantrex</strong> Technology Inc.1 800 670 0707 Tel toll free NA1 360 925 5097 Tel direct1 800 994 7828 Fax toll free NA1 360 925 5143 Fax directcustomerservice@xantrex.comwww.xantrex.com975-0125-02-01 Printed in China