Alesis MicLink - Quickstart Guide - v1.2 - Pro Audio and Lighting
Alesis MicLink - Quickstart Guide - v1.2 - Pro Audio and Lighting
Alesis MicLink - Quickstart Guide - v1.2 - Pro Audio and Lighting

You also want an ePaper? Increase the reach of your titles
YUMPU automatically turns print PDFs into web optimized ePapers that Google loves.
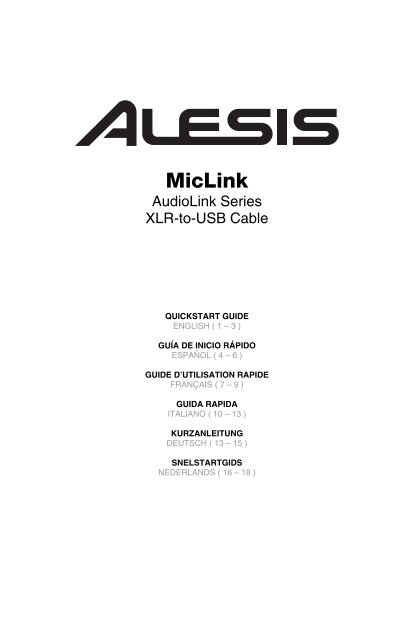
<strong>MicLink</strong><br />
<strong>Audio</strong>Link Series<br />
XLR-to-USB Cable<br />
QUICKSTART GUIDE<br />
ENGLISH ( 1 – 3 )<br />
GUÍA DE INICIO RÁPIDO<br />
ESPAÑOL ( 4 – 6 )<br />
GUIDE D’UTILISATION RAPIDE<br />
FRANÇAIS ( 7 – 9 )<br />
GUIDA RAPIDA<br />
ITALIANO ( 10 – 13 )<br />
KURZANLEITUNG<br />
DEUTSCH ( 13 – 15 )<br />
SNELSTARTGIDS<br />
NEDERLANDS ( 16 – 18 )
CONNECTING THE MICROPHONE<br />
<strong>Alesis</strong> <strong>MicLink</strong> is a plug-<strong>and</strong>-play device, which means that there<br />
are no drivers to install. The first time you connect it to your<br />
computer, it will automatically install all the necessary driver<br />
components <strong>and</strong> be ready to use.<br />
SYSTEM REQUIREMENTS:<br />
• PC: Windows XP, Vista or 7<br />
• Mac: OS 9 or higher<br />
• USB Port<br />
ABOUT AUDIO LATENCY<br />
“Latency” is the time it takes for your computer’s soundcard to process incoming data <strong>and</strong> output a sound.<br />
The lower your latency is, the faster your computer will respond to comm<strong>and</strong>s <strong>and</strong> output sound.<br />
If you experience significant delay between the time you sing into the microphone <strong>and</strong> the time that the<br />
computer outputs audio, we recommend going into your software’s “Preferences” settings to make sure<br />
that your soundcard’s latency (or buffer) is set to a low number – ideally lower than 15-20ms.<br />
If you still experience too much latency after adjusting your software latency settings, download the free<br />
ASIO4ALL (<strong>Audio</strong> Stream Input/Output) driver for PC at www.asio4all.com. ASIO drivers generally<br />
perform better <strong>and</strong> with lower latency since they create a more efficient communication between audio<br />
devices <strong>and</strong> software.<br />
AUDIO SETUP<br />
In most cases (especially if you are using Windows) <strong>MicLink</strong> will be automatically selected as your<br />
computer’s default recording device. If you find you are unable to record any audio with <strong>MicLink</strong>, follow the<br />
instructions below for your operating system.<br />
You can use <strong>MicLink</strong> with any digital audio workstation or recording software that supports USB audio<br />
devices. Be sure your audio software program is set up to receive audio via <strong>MicLink</strong>. This can usually be<br />
done in your software’s “Preferences” or “Device Setup.” Please consult your software manual for more<br />
information.<br />
WINDOWS 7<br />
1. Go to Start Menu Control Panel Hardware <strong>and</strong> Sound Sound.<br />
2. Select the “Recording” tab.<br />
3. Make sure Microphone – C-Media USB <strong>Audio</strong> Device is set as the default device, then click “OK.”<br />
1
WINDOWS VISTA<br />
1. Go to Start Menu Control Panel Sound. (If you don’t see Sound, select “Switch to Classic<br />
View,” <strong>and</strong> the Sound Control Panel should become available.)<br />
2. Select the “Recording” tab.<br />
3. Make sure Microphone – C-Media USB <strong>Audio</strong> Device is set as the default device, then click “OK.”<br />
WINDOWS XP<br />
1. Go to Start Menu Control Panel Sounds <strong>and</strong> <strong>Audio</strong> Devices.<br />
2. Click the “<strong>Audio</strong>” tab.<br />
3. Under “Sound Recording,” make sure C-Media USB <strong>Audio</strong> Device is selected as the default device,<br />
then click “OK.”<br />
2
MAC<br />
1. Go to System Preferences Sound.<br />
2. Click the “Input” tab.<br />
3. Make sure C-Media USB <strong>Audio</strong> Device is selected, then<br />
close the window.<br />
4. Go to Applications Utilities <strong>Audio</strong> MIDI Setup.<br />
5. In the “<strong>Audio</strong> Devices” tab under “System Settings,”<br />
select C-Media USB <strong>Audio</strong> Device as your Default<br />
Input, then close the window.<br />
3
CÓMO CONECTAR EL MICRÓFONO<br />
<strong>Alesis</strong> <strong>MicLink</strong> es un dispositivo Plug <strong>and</strong> Play, lo que significa que<br />
no es necesario instalar drivers. La primera vez que lo conecte a su<br />
computadora, se instalarán automáticamente todos los<br />
componentes de drivers necesario y estará listo para usar<br />
inmediatamente.<br />
REQUISITOS DE SISTEMA:<br />
• PC: Windows XP, Vista o 7<br />
• Mac: OS 9 o superior<br />
• Puerto USB<br />
ACERCA DE LA LATENCIA DE AUDIO<br />
“Latencia” es el tiempo que demora la tarjeta de sonido de la computadora para procesar los datos<br />
entrantes y producir un sonido de salida. Cu<strong>and</strong>o más baja es la latencia, más rápido responde su<br />
computadora a los com<strong>and</strong>os para producir sonido.<br />
Si experimenta un retardo significativo entre el momento en que usted canta en el micrófono y el momento<br />
en que la computadora produce audio, recomendamos entrar en los parámetros “Preferences”<br />
(Preferencias) de su software para asegurarse de que la latencia (o búfer de la tarjeta de sonido) esté<br />
ajustada a un número bajo —idealmente inferior a 15-20 ms.<br />
Si sigue experiment<strong>and</strong>o demasiada latencia después de ajustar los parámetros de latencia de su<br />
computadora, descargue gratuitamente el driver ASIO4ALL (Entrada/salida de corriente de audio) para PC<br />
de www.asio4all.com. En general, los drivers ASIO funcionan mejor y con menor latencia, dado que<br />
crean una comunicación más eficiente entre los dispositivos de audio y el software.<br />
CONFIGURACIÓN DE AUDIO<br />
En la mayoría de los casos (especialmente si está us<strong>and</strong>o Windows) <strong>MicLink</strong> será seleccionado<br />
automáticamente como dispositivo de grabación predeterminado de su computadora. Si observa que no<br />
puede grabar ningún audio con <strong>MicLink</strong>, cumpla las siguientes instrucciones correspondientes a su<br />
sistema operativo.<br />
Puede usar <strong>MicLink</strong> con cualquier estación de trabajo de audio digital o software de grabación que soporte<br />
dispositivos de audio USB. Asegúrese de que su programa de software de audio esté configurado para<br />
recibir audio por <strong>MicLink</strong>. Esto se puede hacer habitualmente en “Preferences” o “Device Setup”<br />
(Configuración de dispositivos) de su software. Para más información, consulte el manual de su software.<br />
WINDOWS 7<br />
1. Vaya a Start Control Panel Hardware <strong>and</strong> Sound Sound (Inicio > Panel de control ><br />
Hardware y Sonido > Sonido).<br />
2. Seleccione la pestaña “Recording” (Grabación).<br />
3. Asegúrese de que Microphone – C-Media USB <strong>Audio</strong> Device (Micrófono – Dispositivo de audio<br />
USB C-Media) esté configurado como dispositivo predeterminado y haga clic en “OK” (Aceptar).<br />
4
WINDOWS VISTA<br />
1. Vaya a Start Control Panel Sound (Inicio > Panel de control > Sonido). (Si no ve Sound,<br />
seleccione “Switch to Classic View” (Cambiar a vista clásica) —el panel de control Sound debe<br />
aparecer.)<br />
2. Seleccione la pestaña “Recording” (Grabación).<br />
3. Asegúrese de que Microphone – C-Media USB <strong>Audio</strong> Device (Micrófono – Dispositivo de audio<br />
USB C-Media) esté configurado como dispositivo predeterminado y haga clic en “OK” (Aceptar).<br />
WINDOWS XP<br />
1. Vaya a Start Control Panel Sounds <strong>and</strong> <strong>Audio</strong> Devices (Inicio > Panel de control ><br />
Dispositivos de sonido y audio).<br />
2. Haga clic en la pestaña “<strong>Audio</strong>”.<br />
3. Bajo “Sound Recording" (Grabación de sonido), asegúrese de que Microphone – C-Media USB<br />
<strong>Audio</strong> Device (Micrófono – Dispositivo de audio USB C-Media) esté configurado como dispositivo<br />
predeterminado y haga clic en “OK” (Aceptar).<br />
5
MAC<br />
1. Vaya a System Preferences Sound (Preferencias del<br />
sistema > Sonido).<br />
2. Haga clic en la pestaña “Input” (Entrada).<br />
3. Asegúrese de que esté seleccionado C-Media USB <strong>Audio</strong><br />
Device (Dispositivo de audio USB C-Media) y cierre la<br />
ventana.<br />
4. Vaya a Applications Utilities <strong>Audio</strong> MIDI Setup<br />
(Aplicaciones -> Utilidades -> Configuración de audio MIDI).<br />
5. En la ficha “<strong>Audio</strong> Devices” bajo “System Settings”<br />
(Configuración del sistema) seleccione C-Media USB <strong>Audio</strong><br />
Device como dispositivo predeterminado y cierre la ventana.<br />
6
BRANCHEMENT DU MICROPHONE<br />
Le <strong>Alesis</strong> <strong>MicLink</strong> est un appareil prêt à l’utilisation, c.-à-d. qu’il n’y a<br />
aucun pilote à installer. Lorsque vous le branchez à votre ordinateur<br />
la première fois, il installe automatiquement tous les pilotes<br />
nécessaires, puis est prêt à être utilisé.<br />
Configuration requise :<br />
• PC : Windows XP, Vista ou 7<br />
• Mac : OS 9 ou supérieur<br />
• Port USB<br />
LATENCE AUDIO<br />
La latence est le temps que met l’ordinateur à traiter les données entrantes et à produire un son. Plus<br />
faible est la latence, plus l'ordinateur répond rapidement aux comm<strong>and</strong>es et émet un signal.<br />
Si vous éprouvez un délai entre le moment que vous chanter dans le micro et que l’ordinateur reproduise<br />
un son, nous vous recomm<strong>and</strong>ons d'ajuster les réglages « Préférences » du logiciel en vous assurant que<br />
les paramètres de latence de votre carte son (ou mémoire tampon) soient à un réglage bas, idéalement<br />
moins de 15-20 ms.<br />
S'il y a toujours trop de latence après avoir modifié les paramètres de latence du logiciel, téléchargez<br />
gratuitement le pilote ASIO4ALL (<strong>Audio</strong> Stream Input/Output) pour PC de www.asio4all.com. Les pilotes<br />
ASIO permettent de meilleures performances avec moins de latence puisqu’ils créent une communication<br />
plus efficace entre les appareils audio et les logiciels.<br />
CONFIGURATION AUDIO<br />
Dans la plupart des cas, et surtout si vous utilisez Windows, <strong>MicLink</strong> sera automatiquement sélectionné<br />
comme appareil d’enregistrement par défaut de votre ordinateur. Si vous ne parvenez pas à enregistrer<br />
avec le <strong>MicLink</strong>, veuillez suivre les instructions ci-dessous selon votre système d’exploitation.<br />
Vous pouvez utiliser <strong>MicLink</strong> avec tout poste audio numérique logiciel ou logiciel d’enregistrement qui<br />
prend en charge les périphériques audio USB. Assurez-vous que le logiciel est configuré de manière à<br />
recevoir de l'audio via le <strong>MicLink</strong>. Vérifiez dans les paramètres « Préférences » ou « Installation du<br />
périphérique ». Pour de plus amples informations, veuillez consulter le guide d’utilisation du logiciel.<br />
WINDOWS 7<br />
1. Cliquez sur Démarrer Panneau de configuration Hardware et Son Son.<br />
2. Cliquez sur l’onglet « Enregistrement ».<br />
3. Assurez-vous que Microphone – C-Media USB <strong>Audio</strong> Device (Périphérique audio USB C-Media)<br />
est le paramètre par défaut, puis cliquez sur « OK ».<br />
7
WINDOWS VISTA<br />
1. Cliquez sur Démarrer Panneau de configuration Son. (Si vous ne voyez pas Son,<br />
sélectionnez « Basculer vers l'affichage classique » et le panneau de configuration Son devrait<br />
s'afficher.)<br />
2. Cliquez sur l’onglet « Enregistrement ».<br />
3. Assurez-vous que Microphone – C-Media USB <strong>Audio</strong> Device (Périphérique audio USB C-Media)<br />
est le paramètre par défaut, puis cliquez sur « OK ».<br />
WINDOWS XP<br />
1. Cliquez sur Démarrer Panneau de configuration Sons et périphériques audio.<br />
2. Cliquez sur l’onglet « <strong>Audio</strong> ».<br />
3. Assurez-vous que sous « Enregistrement audio », C-Media USB <strong>Audio</strong> Device (Périphérique audio<br />
USB C-Media) est le paramètre par défaut, puis cliquez sur « OK ».<br />
8
MAC<br />
1. Cliquez sur Préférence système Sons.<br />
2. Cliquez sur l’onglet « Entrée ».<br />
3. Assurez-vous que C-Media USB <strong>Audio</strong> Device<br />
(Périphérique audio USB C-Media) est sélectionné, puis<br />
fermez la fenêtre.<br />
4. Allez à Applications Utilitaires Configuration<br />
audio et MIDI.<br />
5. Dans l’onglet « Périphériques audio » sous « Réglages<br />
du système », sélectionnez C-Media USB <strong>Audio</strong> Device<br />
(Périphérique audio USB C-Media) comme Entrée par<br />
défaut, puis fermez la fenêtre.<br />
9
COLLEGAMENTO DEL MICROFONO<br />
<strong>Alesis</strong> <strong>MicLink</strong> è un dispositivo plug-<strong>and</strong>-play, dunque non è<br />
necessario installare driver. La prima volta che viene collegato al<br />
computer installerà automaticamente tutti i componenti driver<br />
necessari e sarà pronto per l’uso.<br />
REQUISITI DI SISTEMA:<br />
• PC: Windows XP, Vista o 7<br />
• Mac: OS 9 o successivi<br />
• Porta USB<br />
LA LATENZA AUDIO<br />
La “latenza” è il tempo che occorre alla scheda audio del vostro computer per elaborare i dati in arrivo ed<br />
emettere un suono. Più la latenza è bassa e più rapidamente il computer risponderà ai com<strong>and</strong>i emettendo<br />
suoni.<br />
Qualora si dovesse verificare un notevole ritardo tra il tempo in cui si canta nel microfono e quello in cui il<br />
computer emette audio, si consiglia di recarsi alla linguetta “Preferiti” delle configurazioni del software per<br />
assicurarsi che la latenza della scheda audio (o buffer) sia impostata su un livello basso: idealmente,<br />
inferiore a 15-20ms.<br />
Qualora si dovesse ancora verificare un’eccessiva latenza dopo averne sistemato la configurazione a<br />
livello del vostro software, scaricate il driver gratuito ASIO4ALL (<strong>Audio</strong> Stream Input/Output) per PC alla<br />
pagina www.asio4all.com. Solitamente, i driver ASIO hanno prestazioni migliori e con una minore latenza,<br />
in quanto creano una comunicazione più efficiente tra dispositivi audio e software.<br />
CONFIGURAZIONE AUDIO<br />
Nella maggior parte dei casi (soprattutto se utilizzate Windows) <strong>MicLink</strong> verrà selezionato automaticamente<br />
dal computer come dispositivo di registrazione predefinito. Qualora fosse impossibile registrare audio con<br />
<strong>MicLink</strong>, seguire le istruzioni di cui sotto relative al vostro sistema operativo.<br />
Si può utilizzare il <strong>MicLink</strong> con qualsiasi workstation audio digitale o software di registrazione che supporti<br />
dispositivi audio USB. Assicuratevi che il vostro programma audio sia configurato per ricevere audio da<br />
<strong>MicLink</strong>. Questo può essere fatto solitamente a livello delle “Preferenze” o della “Configurazione periferica”.<br />
Per maggiori informazioni, consultate il manuale del vostro software.<br />
WINDOWS 7<br />
1. Recarsi su Start Pannello di controllo Hardware e <strong>Audio</strong> <strong>Audio</strong>.<br />
2. Selezionare la linguetta “Registrazione”.<br />
3. Assicurarsi che Microfono – C-Media USB <strong>Audio</strong> Device sia selezionato quale periferica<br />
predefinita, quindi cliccare su “OK”.<br />
10
WINDOWS VISTA<br />
1. Recarsi su Start Pannello di controllo <strong>Audio</strong>. (Se non viene visualizzato <strong>Audio</strong>, selezionare<br />
“Visualizzazione classica” ed il Pannello di controllo <strong>Audio</strong> dovrebbe diventare disponibile.)<br />
2. Selezionare la linguetta “Registrazione”.<br />
3. Assicurarsi che Microfono – C-Media USB <strong>Audio</strong> Device sia selezionato quale periferica<br />
predefinita, quindi cliccare su “OK”.<br />
WINDOWS XP<br />
1. Recarsi su Start Pannello di controllo Suoni e periferiche audio.<br />
2. Fare clic sulla linguetta “<strong>Audio</strong>”.<br />
3. Sotto “Registrazione suoni”, assicurarsi che C-Media USB <strong>Audio</strong> Device sia selezionato quale<br />
periferica predefinita, quindi cliccare su “OK”.<br />
11
MAC<br />
1. Recarsi su Preferenze di sistema <strong>Audio</strong>.<br />
2. Fare clic sulla linguetta “Ingresso”.<br />
3. Assicurarsi che C-Media USB <strong>Audio</strong> Device sia<br />
selezionato, quindi chiudere la finestra.<br />
4. Recarsi su Applicazioni Utilità <strong>Audio</strong> MIDI Setup.<br />
5. Nella linguetta “Periferiche audio” sotto “Configurazione<br />
di sistema”, selezionare C-Media USB <strong>Audio</strong> Device<br />
come ingresso predefinito, quindi chiudere la finestra.<br />
12
ANSCHLUSS DES MIKROFONS<br />
Das <strong>Alesis</strong> <strong>MicLink</strong> arbeitet nach dem Plug-<strong>and</strong>-Play St<strong>and</strong>ard,<br />
was bedeutet, dass Sie keine Treiber installieren müssen. Wenn<br />
Sie <strong>MicLink</strong> das erste Mal an den Computer anschließen, werden<br />
automatisch die notwendigen Treiberkomponenten geladen und es<br />
ist sofort einsatzbereit.<br />
SYSTEMANFORDERUNGEN:<br />
• PC: Windows XP, Vista oder 7<br />
• Mac: OS 9 oder higher<br />
• USB Port<br />
WAS IST AUDIOLATENZ<br />
“Latenz” bezeichnet die Zeit, die Ihre Soundkarte im Computer zur Bearbeitung der eingehenden und<br />
ausgehenden <strong>Audio</strong>daten beenötigt. Je niedriger die eingestellte Latenz ist, desto schneller reagiert Ihr<br />
Computer auf Befehle und desto schneller wird der Klang ausgegeben.<br />
Sollten Sie eine wahrnehmbare Verzögerung zwischen dem Moment, in dem Sie in das Mikrofon singen<br />
und dem Zeitpunkt, an dem Sie das <strong>Audio</strong>signal am Ausgang des Computers hören, bemerken, empfehlen<br />
wir in die “Voreinstellungen” der Software zu wechseln, um die Latenz der Soundcard (oder auch “Buffer”<br />
genannt) herabzusetzen – idealerweise niedriger als 15-20ms.<br />
Sollten Sie nach der Anpassung immer noch eine zu hohe Verzögerung hören, laden Sie sich den<br />
kostenlosen ASIO4ALL (<strong>Audio</strong> Stream Input/Output) Treiber für von der Webseite www.asio4all.com<br />
herunter. ASIO Treiber besitzen im Allgemeinen eine bessere Performance und eine niedrigere Latenz, da<br />
sie auf effizientere Kommunikation zwischen <strong>Audio</strong>geräten und Software ermöglichen.<br />
AUDIO SETUP<br />
In den meisten Fällen (speziell bei der Verwendung von Windows) wird <strong>MicLink</strong> automatisch als St<strong>and</strong>ard<br />
Aufnahmegerät des Computers eingerichtet. Sollten es Ihnen jedoch nicht möglich sein, <strong>Audio</strong>signale mit<br />
<strong>MicLink</strong> aufzunehmen, folgen Sie den Ihres Systems entsprechenden Anweisungen (siehe unten).<br />
Sie können <strong>MicLink</strong> mit jeder Digital <strong>Audio</strong> Workstation oder Recording Software, die USB <strong>Audio</strong> Geräte<br />
unterstützt, verwenden. Achten Sie darauf, dass Ihre <strong>Audio</strong>software auf den Empfang von <strong>Audio</strong> über<br />
<strong>MicLink</strong> konfiguriert ist. Dazu öffnen Sie normalerweise die “Voreinstellungen” oder die<br />
“Gerätekonfiguration” der Software. Beachten Sie bitte auch die Hinweise in der Bedienungsanleitung der<br />
Software für weitere Informationen.<br />
WINDOWS 7<br />
1. Klicken Sie auf Start Systemsteuerung Sound. (Falls Sie Sound nicht sehenm wählen Sie<br />
“Zur klassichen Ansicht umschalten,” wodurch das Sound Control Panel sichtbar werden sollte.)<br />
2. Wählen Sie den “Aufnahme” Tab.<br />
3. Überprüfen Sie, dass Microphone – C-Media USB <strong>Audio</strong> Device als St<strong>and</strong>ardgerät eingestellt ist.<br />
13
WINDOWS VISTA<br />
1. Klicken Sie auf Start Systemsteuerung Sound. (Falls Sie Sound nicht sehenm wählen Sie<br />
“Zur klassichen Ansicht umschalten,” wodurch das Sound Control Panel sichtbar werden sollte.)<br />
2. Wählen Sie den “Aufnahme” Tab.<br />
3. Überprüfen Sie, dass Microphone – C-Media USB <strong>Audio</strong> Device als St<strong>and</strong>ardgerät eingestellt ist<br />
und klicken Sie auf “OK.”<br />
WINDOWS XP<br />
1. Gehen Sie in Start Systemsteuerung Sounds und <strong>Audio</strong>geräte.<br />
2. Klicken Sie auf den “<strong>Audio</strong>” Tab.<br />
3. Achten Sie darauf, dass unter “Soundaufnahme” das C-Media USB <strong>Audio</strong> Device als St<strong>and</strong>ardgerät<br />
definiert ist und klicken Sie dann auf “OK.”<br />
14
MAC<br />
1. Gehen Sie in Systemeinstellungen Sound.<br />
2. Löicken Sie auf den “Eingabe” Tab.<br />
3. Achten Sie darauf, dass C-Media USB <strong>Audio</strong> Device<br />
ausgewählt ist und schließen Sie danach das Fenster.<br />
4. Gehen Sie in <strong>Pro</strong>gramme Dienstprogramme <br />
<strong>Audio</strong> MIDI Setup.<br />
5. Stellen Sie im “<strong>Audio</strong> Geräte” Tab unter<br />
“Systemeinstellungen” das C-Media USB <strong>Audio</strong> Device<br />
als St<strong>and</strong>ard-Input ein und schließen Sie dann das<br />
Fenster.<br />
15
AANSLUITEN VAN DE MICROFOON<br />
<strong>Alesis</strong> <strong>MicLink</strong> is een plug-en-playapparaat, wat betekent dat er geen<br />
stuurprogramma's worden geïnstalleerd. De eerste keer dat u de<br />
<strong>MicLink</strong> aansluit op de PC worden alle benodigde componenten<br />
automatisch geïnstalleerd en is het apparaat klaar voor gebruik.<br />
SYSTEEMVEREISTEN:<br />
• PC: Windows XP, Vista of 7<br />
• Mac: OS 9 of hoger<br />
• USB-poort<br />
OVER GELUIDSLATENTIE<br />
"Latentie" is de tijd die de geluidskaart van de PC nodig heeft om inkomende gegevens te verwerken en<br />
een geluid uit te voeren. Hoe lager de latentie, hoe sneller de PC zal reageren op comm<strong>and</strong>o's en geluid<br />
zal uitvoeren.<br />
Wanneer er een grote vertraging zit tussen de tijd dat u in de microfoon zingt en de tijd dat de PC geluid<br />
weergeeft, wordt aanbevolen in de instellingen naar "Preferences" (voorkeuren) te gaan en ervoor te<br />
zorgen dat de latentie (of buffer) is ingesteld op een laag getal - idealiter lager dan 15-20 ms.<br />
Wanneer u nog steeds te veel latentie ervaart na het instellen van de latentie, download dan gratis<br />
stuurprogramma ASIO4ALL (<strong>Audio</strong> Stream Input/Output) voor de Pc via www.asio4all.com. In het<br />
algemeen presteren deze ASIO-stuurprogramma's beter en met minder vertraging omdat ze een efficiënter<br />
communicatie tussen audio-apparatuur en software opzetten.<br />
GELUIDSSET-UP<br />
Meestal (en zeker wanneer u Windows gebruikt) zal <strong>MicLink</strong> automatisch geselecteerd worden als<br />
st<strong>and</strong>aard opname-apparaat voor de PC. Als het niet mogelijk blijkt geluid op te nemen met <strong>MicLink</strong>, volg<br />
dan ondersta<strong>and</strong>e instructies voor uw besturingssysteem.<br />
U kunt <strong>MicLink</strong> gebruiken met elk werkstation met digitaal geluid of opnamesoftware die USBgeluidsapparatuur<br />
ondersteunt. Zorg er ook voor dat de geluidssoftware is ingesteld op het ontvangen van<br />
geluid via <strong>MicLink</strong>. Dit wordt gewoonlijk ingesteld in de "Voorkeuren" of "Apparaatset-up". Raadpleeg de<br />
h<strong>and</strong>leiding voor meer informatie.<br />
WINDOWS 7<br />
1. Ga naar Start menu Configuratiescherm Hardware en Geluid Geluid.<br />
2. Selecteer tab "Opnemen".<br />
3. Zorg ervoor dat Microfoon – C-Media USB Geluidsapparaat is ingesteld als st<strong>and</strong>aard apparaat en<br />
klik dan op “OK.”<br />
16
WINDOWS VISTA<br />
1. Ga naar Start menu Configuratiescherm Geluid. (Als u Geluid niet ziet, selecteer dan<br />
“Klassieke weergave” en in het configuratiescherm komt Geluid weer beschikbaar.)<br />
2. Selecteer tab "Opnemen".<br />
3. Zorg ervoor dat Microfoon – C-Media USB Geluidsapparaat is ingesteld als st<strong>and</strong>aard apparaat en<br />
klik dan op “OK.”<br />
WINDOWS XP<br />
1. Ga naar Start menu Configuratiescherm Geluiden en geluidsapparaten.<br />
2. Klik op tab "Geluid".<br />
3. Zorg ervoor dat onder "Geluidsopname" C-Media USB Geluidsapparaat is ingesteld als st<strong>and</strong>aard<br />
apparaat en klik dan op “OK.”<br />
17
MAC<br />
1. Ga naar Systeemvoorkeuren Geluid.<br />
2. Klik op tab "Input".<br />
3. Zorg ervoor dat C-Media USB Geluidsapparaat is<br />
geselecteerd en sluit het venster.<br />
4. Ga naar Toepassingen Hulpmiddelen Geluid<br />
MIDI Set-up.<br />
5. In tab "Geluidsapparaten" onder "Systeeminstellingen"<br />
selecteert u C-Media USB Geluidsapparaat als<br />
st<strong>and</strong>aard ingang en sluit het venster.<br />
18
<strong>Alesis</strong>, LLC<br />
Tel: (U.S.) 401.658.5760<br />
Email: support@alesis.com<br />
MANUAL VERSION 1.2
www.alesis.com