
Create successful ePaper yourself
Turn your PDF publications into a flip-book with our unique Google optimized e-Paper software.
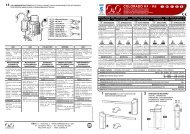
D811761_00 26-07-10<br />
8<br />
027908 380241<br />
<strong>IT</strong><br />
AUTOMAZIONI A PISTONE PER CANCELLI A BATTENTE<br />
EN<br />
PISTON AUTOMATIONS FOR SWING GATES<br />
FR<br />
AUTOMATIONS A PISTON POUR PORTAILS BATTANTS<br />
DE<br />
HYDRAULISCHER DREHTORANTRIEB<br />
ES<br />
AUTOMATIZACIONES A PISTON PARA PORTONES CON BATIENTE<br />
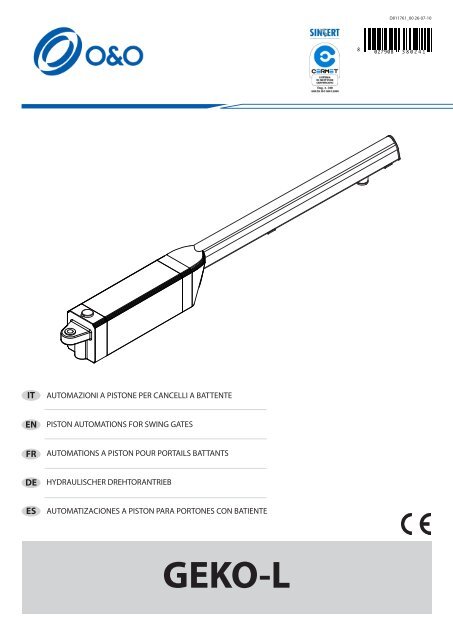
<strong>GEKO</strong>-L
AVVERTENZE GENERALI<br />
<strong>IT</strong>ALIANO<br />
ATTENZIONE Importanti istruzioni di sicurezza. Leggere e seguire attentamente<br />
l’opuscolo Avvertenze ed il Libretto istruzioni che accompagnano il<br />
prodotto poiché una installazione errata può causare danni a persone, animali<br />
o cose. Esse forniscono importanti indicazioni riguardanti la sicurezza,<br />
l’installazione, l’uso e la manutenzione.<br />
1) SICUREZZA GENERALE<br />
ATTENZIONE! Una installazione errata o un uso improprio del prodotto,<br />
può creare danni a persone, animali o cose.<br />
• Smaltire i materiali di imballo (plastica, cartone, polistirolo, ecc.) secondo<br />
quanto previsto dalle norme vigenti. Non lasciare buste di nylon e polistirolo<br />
a portata dei bambini.<br />
• Conservare le istruzioni per allegarle al fascicolo tecnico e per consultazioni<br />
future.<br />
• Questo prodotto è stato progettato e costruito esclusivamente per l’utilizzo<br />
indicato in questa documentazione.<br />
Usi non indicati in questa documentazione potrebbero essere fonte di<br />
danni al prodotto e fonte di pericolo.<br />
• La Ditta declina qualsiasi responsabilità derivante dall’uso improprio o<br />
diverso da quello per cui è destinato ed indicato nella presente documentazione.<br />
• Non installare il prodotto in atmosfera esplosiva.<br />
• Gli elementi costruttivi della macchina e l’installazione devono essere<br />
in accordo con le seguenti Direttive Europee: 2004/108/CEE, 2006/95/<br />
CEE, 2006/42/CEE, 99/05/CEE (e loro modifiche successive). Per tutti i<br />
Paesi extra CEE, oltre alle norme nazionali vigenti, per un buon livello di<br />
sicurezza è opportuno rispettare anche le norme sopracitate.<br />
• La Ditta declina qualsiasi responsabilità dall’inosservanza della Buona<br />
Tecnica nella costruzione delle chiusure (porte, cancelli, ecc.), nonché<br />
dalle deformazioni che potrebbero verificarsi durante l’uso.<br />
• Togliere l’alimentazione elettrica, prima di qualsiasi intervento sull’impianto.<br />
Scollegare anche eventuali batterie tampone se presenti.<br />
• Prevedere sulla rete di alimentazione dell’automazione, un interruttore<br />
o un magnetotermico onnipolare con distanza di apertura dei contatti<br />
uguale o superiore a 3,5 mm.<br />
• Verificare che a monte della rete di alimentazione, vi sia un interruttore<br />
differenziale con soglia da 0.03A.<br />
• Applicare tutti i dispositivi di sicurezza (fotocellule, coste sensibili, ecc.)<br />
necessari a proteggere l’area da pericoli di schiacciamento, convogliamento,<br />
cesoiamento, secondo ed in conformità alle direttive e norme<br />
tecniche applicabili.<br />
• Applicare almeno un dispositivo di segnalazione luminosa (lampeggiante)<br />
in posizione visibile, fissare alla struttura un cartello di Attenzione.<br />
• La Ditta declina ogni responsabilità ai fini della sicurezza e del buon<br />
funzionamento dell’automazione se vengono impiegati componenti di<br />
altri produttori.<br />
• Usare esclusivamente parti originali per qualsiasi manutenzione o riparazione.<br />
• Non eseguire alcuna modifica ai componenti dell’automazione se non<br />
espressamente autorizzata dalla Ditta.<br />
• Istruire l’utilizzatore dell’impianto per quanto riguarda i sistemi di comando<br />
applicati e l’esecuzione dell’apertura manuale in caso di emergenza.<br />
• Tutto quello che non è espressamente previsto in queste istruzioni, non<br />
è permesso.<br />
• L’installazione deve essere fatta utilizzando dispositivi di sicurezza e<br />
comandi conformi alla EN 12978.<br />
La forza di spinta si regola con estrema precisione mediante regolazione<br />
elettronica della centrale di comando. Il funzionamento a fine corsa è regolato<br />
elettronicamente nel quadro di comando.<br />
Per una buona sicurezza antischiacciamento, la forza di spinta deve essere di<br />
poco superiore a quella necessaria per muovere l’anta sia in chiusura che in<br />
apertura; la forza, misurata in punta all’anta, non deve comunque superare<br />
i limiti previsti dalle norme sopra indicate.<br />
COMANDO<br />
Il comando può essere di diverso tipo (manuale, con radiocomando, controllo<br />
accessi con badge magnetico, ecc.) secondo le necessità e le caratteristiche<br />
dell’installazione. Per i vari sistemi di comando, vedere le relative<br />
istruzioni.<br />
Gli utilizzatori dell’automazione devono essere istruiti al comando e<br />
all’uso.<br />
INCONVENIENTI E RIMEDI<br />
Funzionamento difettoso del motoriduttore<br />
• Verificare con apposito strumento la presenza di tensione ai capi del<br />
motoriduttore dopo il comando di apertura o chiusura.<br />
Se il motore vibra ma non gira, può essere:<br />
• Sbagliato il collegamento dei fili (rivedere schema di collegamento).<br />
• Se il movimento dell’anta, è contrario a quello che dovrebbe essere,<br />
invertire i collegamenti di marcia del motore nella centralina.<br />
Il primo comando dopo un’interruzione di rete deve essere di apertura<br />
ARRESTI ANTE.<br />
DEMOLIZIONE<br />
L’eliminazione dei materiali va fatta rispettando le norme vigenti. Nel caso<br />
di demolizione dell’automazione non esistono particolari pericoli o rischi<br />
derivanti dall’automazione stessa. È opportuno, in caso di recupero dei<br />
materiali, che vengano separati per tipologia (parti elettriche - rame - alluminio<br />
- plastica - ecc.).<br />
SMANTELLAMENTO<br />
Attenzione: Avvalersi esclusivamente di personale qualificato.<br />
Nel caso l’automazione venga smontata per essere poi rimontata in altro<br />
sito bisogna:<br />
• Togliere l’alimentazione e scollegare tutto l’impianto elettrico esterno.<br />
• Nel caso alcuni componenti non possano essere rimossi o risultino danneggiati,<br />
provvedere alla loro sostituzione.<br />
Il buon funzionamento dell’automazione è garantito solo se vengono<br />
rispettate i dati riportati in questo manuale. La Ditta non risponde dei<br />
danni causati dall’inosservanza delle norme di installazione e delle<br />
indicazioni riportate in questo manuale.<br />
Le descrizioni e le illustrazioni del presente manuale non sono<br />
impegnative. Lasciando inalterate le caratteristiche essenziali del<br />
prodotto, la Ditta si riserva di apportare in qualunque momento le<br />
modifiche che essa ritiene convenienti per migliorare tecnicamente,<br />
costruttivamente e commercialmente il prodotto, senza impegnarsi<br />
ad aggiornare la presente pubblicazione.<br />
VERIFICA DELL’AUTOMAZIONE<br />
Prima di rendere definitivamente operativa l’automazione, controllare scrupolosamente<br />
quanto segue:<br />
• Verificare che tutti i componenti siano fissati saldamente.<br />
• Controllare il corretto funzionamento di tutti i dispositivi di sicurezza<br />
(fotocellule, costa pneumatica, ecc).<br />
• Verificare il comando della manovra di emergenza.<br />
• Verificare l’operazione di apertura e chiusura con i dispositivi di comando<br />
applicati.<br />
• Verificare la logica elettronica di funzionamento normale (o personalizzata)<br />
nella centralina di comando.<br />
REGOLAZIONE DELLA FORZA DI SPINTA<br />
ATTENZIONE: Verificare che il valore della forza d’impatto misurato<br />
nei punti previsti dalla norma EN 12445, sia inferiore a quanto<br />
indicato nella norma EN 12453.<br />
3
<strong>IT</strong>ALIANO<br />
MANUALE PER L’INSTALLAZIONE<br />
2) GENERAL<strong>IT</strong>À<br />
Attuatore elettromeccanico progettato per automatizzare cancelli di tipo<br />
residenziale. Il motoriduttore mantiene il blocco in chiusura ed apertura senza<br />
necessità di elettroserratura per ante di lunghezza massima di 3 m.<br />
L’attuatore è provvisto di limitatore di coppia elettronico. Deve essere comandato<br />
da un quadro comandi elettronico dotato di regolazione di coppia.<br />
Il funzionamento a finecorsa è regolato da due finecorsa magnetici.<br />
L’attuatore è provvisto di un sistema di rilevamento ostacoli secondo le<br />
normative EN12453 e EN 12445.<br />
Sono disponibili i seguenti accessori opzionali:<br />
- Kit batteria tampone mod. K<strong>IT</strong>-BATT-BT<br />
Consente il funzionamento dell’automazione anche se manca per un breve<br />
periodo l’alimentazione di rete.<br />
3) DATI TECNICI<br />
Alimentazione<br />
Potenza max assorbita<br />
Corrente assorbita<br />
Forza di spinta e trazione<br />
Velocità Stelo<br />
Reazione all’urto<br />
Finecorsa<br />
Manovra manuale<br />
Condizione ambientali<br />
Tipo di utilizzo<br />
Massima lunghezza anta<br />
3 m<br />
senza elettroserratura<br />
Massima lunghezza anta<br />
5 m<br />
con elettroserratura<br />
Massimo peso anta ~250 kg<br />
Grado di protezione IP 44<br />
Peso attuatore<br />
~7,7kg<br />
Dimensioni<br />
Vedere Fig. K<br />
Lubrificazione<br />
grasso permanente<br />
<strong>GEKO</strong>-L<br />
24V<br />
40 W<br />
1,5 A<br />
2000 N<br />
14 mm/s circa<br />
Limitatore di coppia integrato su quadro di<br />
comando<br />
Magnetici incorporati e regolabili<br />
Chiave di sblocco<br />
- 15°C a +60°C<br />
semi-intensivo<br />
4) PREDISPOSIZIONE DELL’IMPIANTO ELETTRICO Fig. A<br />
Predisporre l’impianto elettrico facendo riferimento alle norme vigenti per<br />
gli impianti elettrici CEI 64-8, IEC364, armonizzazione HD384 ed altre norme<br />
nazionali.<br />
5) SCHEMA D’INSTALLAZIONE Fig. B<br />
1 staffa posteriore di fissaggio al pilastro<br />
2 forcella anteriore di fissaggio dell’anta<br />
a-b quote per determinare il punto di fissaggio della staffa “1”<br />
C valore dell’interasse di fissaggio<br />
D lunghezza del cancello<br />
X distanza dall’asse del cancello allo spigolo del pilastro<br />
S metà spessore anta<br />
Z valore sempre superiore a 45 mm (b - x)<br />
kg peso max dell’anta<br />
α° angolo d’apertura dell’anta<br />
6) QUOTE D’INSTALLAZIONE ANCORAGGI A PILASTRO Fig. B<br />
6.1) Come interpretare la tabella delle misure di installazione<br />
Dalla tabella è possibile scegliere valori di “a” e “b” in funzione dei gradi α°<br />
di apertura che si desiderano ottenere.<br />
Se si utilizzano valori di “a” e “b” troppo diversi tra loro, il movimento dell’anta<br />
non è costante e la forza di trazione o spinta varia durante il movimento.<br />
Per rispettare la velocità di apertura e garantire un buon funzionamento<br />
dell’operatore è opportuno che i valori “a” e “b” siano poco diversi tra loro.<br />
La tabella è stata ricavata per un cancello medio di spessore 50 mm. Verificare<br />
sempre che non ci siano collisioni tra cancello ed attuatore.<br />
7) ANCORAGGI DEGLI ATTACCHI AL PILASTRO Fig. C<br />
8) FISSAGGIO MOTORE SU ANCORAGGIO A PILASTRO Fig. D<br />
9) MASSIMA INCLINAZIONE Fig. E<br />
10) CORRETTA INSTALLAZIONE Fig. F<br />
Una corretta installazione prevede di mantenere un margine di corsa dello<br />
stelo di circa 5-10 mm; ciò evita possibili anomalie di funzionamento.<br />
11) ANCORAGGI DEGLI ATTACCHI ALL’ANTA Fig. G<br />
IMPORTANTE: il montaggio della staffa anteriore deve avvenire con il collarino<br />
boccola sporgente VERSO L’ALTO (Fig. F Rif. 1).<br />
12) FISSAGGIO OPERATORE SULL’ANTA Fig. H<br />
13) REGOLAZIONE FINECORSA CHIUSURA Fig. I<br />
ATTENZONE! Per evitare la rottura del cavo del finecorsa, fissare la vite A<br />
tenendo teso il filo B (come rappresentato in Fig. I Rif. 3).<br />
14) REGOLAZIONE FINECORSA APERTURA Fig. J<br />
15) DIMENSIONI Fig. K<br />
16) ACCORGIMENTI PER INSTALLAZIONI PARTICOLARI Fig. L, M, N.<br />
Quando l’anta è completamente aperta, realizzare una nicchia per raccogliere<br />
l’operatore. In Fig. L sono riportate le misure di nicchia minime per<br />
<strong>GEKO</strong>-L.<br />
Se la quota “b” risulta superiore ai valori riportati nelle tabelle di installazione:<br />
- ricavare una nicchia nel pilastro Fig. M.<br />
- avvicinare l’anta al filo pilastro Fig. N.<br />
17) BATTUTE D’ARRESTO DELLE ANTE AL SUOLO<br />
Per il corretto funzionamento dell’attuatore è consigliato utilizzare delle<br />
battute di arresto “Fig. O Rif. 1” sia in apertura che in chiusura come indicato<br />
in Fig. O.<br />
Le battute d’arresto delle ante, devono evitare che lo stelo dell’attuatore<br />
vada a finecorsa.<br />
18) COLLEGAMENTI ELETTRICI Fig. P<br />
La connessione tra operatore e quadro comando viene effettuata mediante tre<br />
cavi così identificati:<br />
• rosso motore +<br />
• nero motore -<br />
• bianco controllo fine corsa<br />
In Fig. P è riportato lo schema di collegamento della centrale comando mod.<br />
LOG-GK.<br />
Nel caso sia errato il verso di apertura e chiusura è possibile invertire le connessioni<br />
motore + e motore - (rosso/nero) sul quadro comando.<br />
Il primo comando dopo un’interruzione di rete deve essere di apertura.<br />
19) APERTURA MANUALE (Vedi MANUALE D’USO -FIG.Y-).<br />
20) ELETTROSERRATURA<br />
ATTENZIONE: nel caso di ante di lunghezza superiore a 3m,<br />
risulta indispensabile l’installazione di un’elettroserratura a scatto.<br />
Per il collegamento dell’elettroserratura è necessaria la scheda opzionale<br />
(consultare l’apposita istruzione).<br />
4
GENERAL WARNINGS<br />
ENGLISH<br />
WARNING! Important safety instructions. Carefully read and comply with<br />
the Warnings booklet and Instruction booklet that come with the product as<br />
incorrect installation can cause injury to people and animals and damage to<br />
property. They contain important information regarding safety, installation,<br />
use and maintenance.<br />
1) GENERAL SAFETY<br />
WARNING! An incorrect installation or improper use of the product can<br />
cause damage to persons, animals or things.<br />
• Scrap packing materials (plastic, cardboard, polystyrene etc) according<br />
to the provisions set out by current standards. Keep nylon or polystyrene<br />
bags out of children’s reach.<br />
• Keep the instructions together with the technical brochure for future<br />
reference.<br />
• This product was exclusively designed and manufactured for the use<br />
specified in the present documentation. Any other use not specified in<br />
this documentation could damage the product and be dangerous.<br />
• The Company declines all responsibility for any consequences resulting<br />
from improper use of the product, or use which is different from that<br />
expected and specified in the present documentation.<br />
• Do not install the product in explosive atmosphere.<br />
• The units making up the machine and its installation must meet the requirements<br />
of the following European Directives: 2004/108/EEC, 2006/95/<br />
EEC, 2006/42/EEC, 99/05/EEC (and later amendments). For all countries<br />
outside the EEC, it is advisable to comply with the above-mentioned<br />
standards, in addition to any national standards in force, to achieve a<br />
good level of safety.<br />
• The Company declines all responsibility for any consequences resulting<br />
from failure to observe Good Technical Practice when constructing closing<br />
structures (door, gates etc.), as well as from any deformation which<br />
might occur during use.<br />
• The installation must comply with the provisions set out by the following<br />
European Directives: 2004/108/EEC, 2006/95/EEC, 2006/42/EEC, 99/05/<br />
EEC and subsequent amendments.<br />
• Disconnect the electrical power supply before carrying out any work on<br />
the installation. Also disconnect any buffer batteries, if fitted.<br />
• Fit an omnipolar or magnetothermal switch on the mains power supply,<br />
having a contact opening distance equal to or greater than 3,5 mm.<br />
• Check that a differential switch with a 0.03A threshold is fitted just before<br />
the power supply mains.<br />
• Fit all the safety devices (photocells, electric edges etc.) which are needed<br />
to protect the area from any danger caused by squashing, conveying and<br />
shearing, according to and in compliance with the applicable directives<br />
and technical standards.<br />
• Position at least one luminous signal indication device (blinker) where it<br />
can be easily seen, and fix a Warning sign to the structure.<br />
• The Company declines all responsibility with respect to the automation<br />
safety and correct operation when other manufacturer’s components are<br />
used.<br />
• Only use original parts for any maintenance or repair operation.<br />
• Do not modify the automation components, unless explicitly authorised<br />
by the Company.<br />
• Instruct the product user about the control systems provided and the<br />
manual opening operation in case of emergency.<br />
• Anything which is not expressly provided for in the present instructions,<br />
is not allowed.<br />
• Installation must be carried out using the safety devices and controls<br />
prescribed by the EN 12978 Standard.<br />
ADJUSTING OPERATING FORCE<br />
WARNING: Check that the force of impact measured at the points<br />
provided for by standard EN 12445 is lower than the value laid<br />
down by standard EN 12453.<br />
Operating force is adjusted with extreme precision by means of the control<br />
unit’s electronic control. Operation at the end of travel is adjusted electronically<br />
in the control panel.<br />
To provide good anti-crush safety, the operating force must be slightly greater<br />
than that required to move the leaf both to close and to open it. Whatever<br />
the case, the force, which is measured at the top outer edge of the leaf, must<br />
not exceed the limits laid down by the above-mentioned standards.<br />
CONTROL<br />
There are various options when it comes to the control system (manual,<br />
remote control, access control with magnetic badge, etc.) depending on<br />
the installation’s needs and characteristics. See the relevant instructions for<br />
the various control system options.<br />
People due to use the automated device must be instructed how to control<br />
and use it.<br />
TROUBLESHOOTING<br />
Gearbox malfunctioning<br />
• Use an appropriate instrument to check for voltage across the gearbox<br />
motor terminals after giving the opening or closing command.<br />
If the motor vibrates but does not rotate, the problem may be:<br />
• Incorrect wiring (see wiring diagram)<br />
• If the leaf moves in the wrong direction, swap over the motor’s start<br />
connections in the control unit.<br />
The first command following a mains power outage should be open STOP<br />
LEAVES.<br />
SCRAPPING<br />
Materials must be disposed of in conformity with the current regulations.<br />
In case of scrapping, the automation devices do not entail any particular<br />
risks or danger. In case of recovered materials, these should be sorted out<br />
by type (electrical components, copper, aluminium, plastic etc.).<br />
DISMANTLING<br />
WARNING: before opening the door, the spring must be unloaded (vertical<br />
boom). When the automation system is disassembled to be reassembled<br />
on another site, proceed as follows:<br />
- Disconnect the power supply and the entire electrical installation.<br />
- Remove the actuator from its fixing base.<br />
- Disassemble all the installation components.<br />
- In the case where some of the components cannot be removed or are<br />
Correct controller operation is only ensured when the data contained in<br />
the present manual are observed. The Company is not to be held responsible<br />
for any damage resulting from failure to observe the installation<br />
standards and the instructions contained in the present manual.<br />
The descriptions and illustrations contained in the present manual are<br />
not binding. The Company reserves the right to make any alterations<br />
deemed appropriate for the technical, manufacturing and commercial<br />
improvement of the product, while leaving the essential product features<br />
unchanged, at any time and without undertaking to update the<br />
present publication.<br />
CHECKING INSTALLATION<br />
Before the automated device is finally put into operation, perform the following<br />
checks meticulously:<br />
• Make sure all components are fastened securely.<br />
• Check that all safety devices (photocells, pneumatic safety edge, etc.) are<br />
working properly.<br />
• Check the emergency operation control device.<br />
• Check opening and closing operations with the control devices applied.<br />
• Check the electronic logic for normal (or personalized) operation in the<br />
control panel.<br />
5
ENGLISH<br />
INSTALLATION MANUAL<br />
2) GENERAL INFORMATION<br />
Electromechanical operator designed to automate residential-type gates.<br />
The gearmotor keeps the gate locked on closing and on opening, without<br />
needing an electric lock for leaves up to 3 m long. For leaves ranging between<br />
3m and 5m long, the electric lock becomes indispensable.<br />
The operator is provided with an electronic torque limiter. It must be controlled<br />
by an electronic control panel provided with torque setting.<br />
The end-of-stroke operation is controlled by two magnetic limit devices.<br />
The operator is provided with an obstacle detection system complying with<br />
EN12453 and EN 12445 standards.<br />
The following optional accessories are available on request:<br />
- Buffer battery kit mod. K<strong>IT</strong>-BATT-BT<br />
Allows operation of the automation even when there is no mains power<br />
supply for a short period of time.<br />
3) TECHNICAL SPECIFICATIONS<br />
Power supply<br />
Max. Absorbed power<br />
Absorbed current<br />
Push and pull force<br />
Stem speed<br />
Impact reaction<br />
Limit devices<br />
Manual manoeuvre<br />
Environmental conditions<br />
Type of use<br />
<strong>GEKO</strong>-L<br />
24V<br />
40 W<br />
1,5 A<br />
2000 N<br />
14 mm/s approx.<br />
Torque limiter aboard control board<br />
Magnetic, incorporated and adjustable<br />
Release key<br />
- 15°C a +60°C<br />
semi-intensive<br />
Maximum leaf length without<br />
3 m<br />
electric lock<br />
Maximum leaf length with electric<br />
lock<br />
5 m<br />
Max. leaf weight<br />
~250 kg<br />
Protection level IP 44<br />
Controller weight<br />
~7,7kg<br />
Dimensions<br />
See Fig. K<br />
Lubrication<br />
permanent grease<br />
4) THE ELECTRICAL PLANT SET-UP Fig. A<br />
Install the electrical system referring to the standards in force for electrical<br />
systems CEI 64-8, IEC 364, harmonization document HD 384 and other<br />
national standards.<br />
5) INSTALLATION DIAGRAM Fig. B<br />
1 rear bracket fastening to pillar<br />
2 front fork fastening leaf<br />
a-b distances for determining bracket “1” fastening point<br />
C value of fastening centre-to-centre distance<br />
D gate length<br />
X distance from gate axis to corner of pillar<br />
S half door thickness<br />
Z value always greater than 45 mm (b - x)<br />
kg max. weight of leaf<br />
α° leaf opening angle<br />
7) FASTENING OF F<strong>IT</strong>TINGS TO PILLAR Fig. C<br />
8) ATTACHING MOTOR TO FASTENING ON PILLAR Fig. D<br />
9) MAXIMUM TILT Fig. E<br />
10) CORRECT INSTALLATION Fig. F<br />
Correct installation entails maintaining a rod stroke margin of approx. 5-10<br />
mm to avoid possible trouble with operation.<br />
11) FASTENING OF F<strong>IT</strong>TINGS TO LEAF Fig. G<br />
IMPORTANT: the front bracket must be fitted with the bush collar protruding<br />
UPWARDS (Fig. F Ref. 1).<br />
12) OPERATOR ATTACHMENT ON DOOR Fig. H<br />
13) Closing limit device adjustment Fig. I<br />
ATTENTION! To avoid braking the limit switch cable, tighten screw A keeping<br />
the wire B well tightened (as shown in Fig. I Rif. 3).<br />
14) Opening limit device adjustment (Fig. J)<br />
15) DIMENSIONS Fig. K<br />
16) TIPS FOR SPECIAL INSTALLATIONS Fig. L, M, N, .<br />
With the leaf fully open, create a recess to accommodate the operator.<br />
Fig. L gives the minimum dimensions of the recess for <strong>GEKO</strong>-L models.<br />
If distance “b” is greater than the values given in the installation tables:<br />
- create a recess in the pillar Fig. M<br />
- move the leaf so that it is flush with the pillar Fig. N.<br />
17) LEAF STOPS AT GROUND LEVEL<br />
For the actuator to work properly, it is advisable to use stops “Fig. O Rif. 1”<br />
to stop the leaves both when they are open and closed, as illustrated in Fig.<br />
O. The leaf stops must prevent the actuator rod from reaching the end of<br />
its travel.<br />
18) ELECTRICAL CONNECTIONS Fig. P<br />
For the connection from the controller to the control board, three cables have<br />
been provided having the following functions:<br />
• red motor +<br />
• black motor -<br />
• white end-of-stroke control<br />
Fig. P shows the wiring diagram of the LOG-GK control unit.<br />
Should the opening or closing direction be incorrect, it is possible to invert the<br />
connections of motor + and motor - (red/black) on the control board.<br />
The first command after an interruption of the power supply should be an opening<br />
manoeuvre.<br />
19) MANUAL OPENING (See USER GUIDE -FIG.Y-).<br />
20) ELECTRIC LOCK<br />
WARNING: In the case of leaves longer than 3m, it is indispensable<br />
to install a solenoid latch.<br />
For electric lock connection, the optional board is required (refer to the<br />
appropriate instruction).<br />
6) PILLAR FASTENINGS INSTALLATION DISTANCES Fig. B<br />
6.1) How to read the installation distance tables<br />
Select “a” and “b” according to the angle in degrees α° that the gate has to open.<br />
If there is too large a difference between “a” and “b”, the leaf will not travel<br />
smoothly and the pushing or pulling force will fluctuate during its stroke.<br />
To respect the opening speed and ensure the controller operates correctly,<br />
it is best to keep the difference between “a” and “b” as low as possible.<br />
The table has been worked out for a 50 mm thick medium-size gate. Always<br />
check that there is no possible collision between the gate and the<br />
operator.<br />
6
AVERTISSEMENTS GÉNÉRAUX<br />
FRANÇAIS<br />
ATTENTION! Consignes de sécurité importantes. Lire et suivre attentivement<br />
la brochure Avertissement et le livret d’instructions fournis avec le produit<br />
sachant qu’une installation incorrecte peut provoquer des dommages aux<br />
personnes, aux animaux ou aux choses. Elles fournissent des indications<br />
importantes concernant la sécurité, l’installation, l’utilisation et l’entretien.<br />
1) SECUR<strong>IT</strong>E GENERALE<br />
ATTENTION! Une installation erronée ou une utilisation impropre du<br />
produit peuvent provoquer des lésions aux personnes et aux animaux<br />
ou des dommages aux choses.<br />
• Eliminer les matériaux d’emballage (plastique, carton, polystyrène etc.)<br />
selon les prescriptions des normes en vigueur. Ne pas laisser des enveloppes<br />
en nylon et polystyrène à la portée des enfants.<br />
• Conserver les instructions et les annexer à la fiche technique pour les<br />
consulter à tout moment.<br />
• Ce produit a été conçu et réalisé exclusivement pour l’utilisation indiquée<br />
dans cette documentation. Des utilisations non indiquées dans cette<br />
documentation pourraient provoquer des dommages au produit et<br />
repré-senter une source de danger pour l’utilisateur.<br />
• La Société décline toute responsabilité dérivée d’une utilisation impropre<br />
ou différente de celle à laquelle le produit a été destiné et qui est indiquée<br />
dans cette documentation.<br />
• Ne pas installer le produit dans une atmosphère explosive.<br />
• Les éléments qui composent l’appareil doivent être conformes aux<br />
Directives Européennes suivantes : 2004/108/CE, 2006/95/CE, 2006/42/<br />
CE, 99/05/CE (et leurs modifications successives). Dans tous les pays<br />
n’appartenant pas à la CEE nous vous conseillons de respecter aussi les<br />
normes ci-dessus, outre les règlements nationaux en vigueur, afin de<br />
garantir un bon niveau de sécurité.<br />
• La Société décline toute responsabilité en cas de non respect des règles<br />
de bonne technique dans la construction des fermetures (portes, portails<br />
etc.), ainsi qu’en cas de déformations pouvant se produire pendant<br />
l’utilisation.<br />
• L’installation doit être conforme aux prescriptions des Directives Européennes:<br />
2004/108/CEE, 2006/95/CEE, 2006/42 CEE, 99/05/CEE et modifications<br />
successives.<br />
• Couper l’alimentation électrique avant d’effectuer n’importe quelle<br />
intervention sur l’installation. Débrancher aussi les éventuelles batteries<br />
de secours.<br />
• Prévoir sur la ligne d’alimentation de la motorisation un interrupteur<br />
ou un magnétothermique omnipolaire avec distance d’ouverture des<br />
contacts égale ou supérieure à 3,5 mm.<br />
• Vérifier qu’en amont de la ligne d’alimentation il y a un interrupteur<br />
différentiel avec seuil de 0,03A.<br />
• Appliquer tous les dispositifs de sécurité (cellules photoélectriques, barres<br />
palpeuses etc.) nécessaires à protéger la zone des dangers d’écrasement,<br />
d’entraînement, de cisaillement, selon et conformément aux directives<br />
et aux normes techniques applicables.<br />
• Appliquer au moins un dispositif de signalisation lumineuse (feu clignotant)<br />
en position visible, fixer à la structure un panneau de Attention.<br />
• La Société décline toute responsabilité en matière de sécurité et de bon<br />
fonctionnement de la motorisation si des composants d’autres producteurs<br />
sont utilisés.<br />
• Utiliser exclusivement des pièces originales pour n’importe quel entretien<br />
ou réparation.<br />
• Ne pas effectuer des modifications aux composants de la motorisation<br />
si non expressément autorisées par la Société.<br />
• Informer l’utilisateur de l’installation sur les systèmes de commande<br />
appliqués et sur l’exécution de l’ouverture manuelle en cas d’urgence.<br />
• Tout ce qui n’est pas expressément prévu dans ces instructions, est<br />
interdit.<br />
• L’installation doit être faite en utilisant des dispositifs de sécurité et des<br />
commandes conformes à la norme EN 12978.<br />
• Vérifier la logique électronique de fonctionnement normal (ou personnalisé)<br />
dans la centrale de commande.<br />
RÉGLAGES DE LA FORCE DE POUSSÉE<br />
ATTENTION : Vérifier si la valeur de la force d’impact mesurée<br />
dans les points prévus par la norme EN12445 est inférieure à celle<br />
indiquée dans la norme EN 12453.<br />
La force de poussée se règle de façon très précise avec le dispositif de réglage<br />
électronique de la centrale de commande. Le fonctionnement en fin de course<br />
est réglé électroniquement dans le tableau de commande.<br />
Pour garantir une bonne sécurité anti-écrasement, la force de poussée doit<br />
être légèrement supérieure à celle nécessaire pour déplacer le vantail, à la<br />
fermeture et à l’ouverture; la force mesurée à l’extrémité du vantail ne doit<br />
jamais dépasser les limites prévues par les normes citées plus haut.<br />
COMMANDE<br />
La commande peut être de différents types (manuelle, avec radiocommande,<br />
contrôles des accès avec un badge magnétique, etc.) en fonction des<br />
nécessités et des caractéristiques d’installation. Pour les différents systèmes<br />
de commande, voir les instructions correspondantes.<br />
Les utilisateurs de l’automatisation doivent connaître toutes les informations<br />
sur la commande et son utilisation.<br />
INCONVÉNIENTS ET REMÈDES<br />
Mauvais fonctionnement du motoréducteur<br />
• Vérifier avec l’instrument prévu à cet effet la présence de tension aux<br />
extrémités du motoréducteur après la commande d’ouverture ou de<br />
fermeture.<br />
Si le moteur vibre mais ne tourne pas, il se peut que:<br />
• Le branchement des fils soit erroné (revoir le schéma de branchement).<br />
• Si le mouvement du vantail est opposé à celui prévu, invertir les branchements<br />
de marche du moteur dans la centrale.<br />
La première commande après une coupure de courant doit être ouverture<br />
ARRÊT VANTAIL.<br />
DEMOL<strong>IT</strong>ION<br />
L’élimination des matériaux doit être faite en respectant les normes en<br />
vigueur. En cas de démolition de l’automatisme, il n’existe aucun danger<br />
ou risque particulier dérivant de l’automatisme. En cas de récupération de<br />
matériaux, il est opportun de les séparer selon le genre (parties électriques<br />
- cuivre - aluminium - plastique - etc.).<br />
DEMANTELEMENT<br />
ATTENTION: avant d’ouvrir la porte, le ressort doit être déchargé (lisse<br />
verticale). Si l’automatisme est démonté pour être ensuite remonté ailleurs,<br />
il faudra:<br />
- Couper l’alimentation et débrancher toute l’installation électrique. Enlever<br />
le vérin de la base de fixation.<br />
- Démonter tous les composants de l’installation.<br />
- Si des composants ne peuvent pas être démontés ou sont endommagés,<br />
Le bon fonctionnement de l’actionneur n’est assuré que si les données<br />
fournies dans ce manuel sont respectées. Le constructeur ne répond<br />
pas pour les dommages provoqués par le non respect des normes<br />
d’installation et des indications fournies dans ce manuel.<br />
Les descriptions et les figures de ce manuel n’engagent pas le<br />
constructeur. En laissant inaltérées les caractéristiques essentielles<br />
du produit, la Société se réserve le droit d’apporter à n’importe quel<br />
moment les modifications qu’elle juge opportunes pour améliorer le<br />
produit du point de vue technique, commercial et de construction,<br />
sans s’engager à mettre à jour cette publication.<br />
CONTROLE DE L’INSTALLATION<br />
Vérifier scrupuleusement ce qui suit avant de rendre l’automatisation définitivement<br />
opérationnelle :<br />
• Vérifier si tous les composants sont solidement fixés.<br />
• Contrôler le fonctionnement correct de tous les dispositifs de sécurité<br />
(photocellules, linteaux pneumatiques, etc.)<br />
• Vérifier la commande de la manœuvre d’urgence.<br />
• Vérifier l’opération d’ouverture et de fermeture avec les dispositifs de<br />
commande appliqués.<br />
7
FRANÇAIS<br />
MANUEL D’INSTALLATION<br />
2) GÉNÉRAL<strong>IT</strong>ÉS<br />
Actionneur électromécanique conçu pour automatiser les portails de type<br />
résidentiel.<br />
Le motoréducteur maintient le blocage en fermeture et ouverture sans<br />
nécessité de serrure électrique pour des vantaux ayant une longueur maxi<br />
de 3m. Pour des vantaux ayant une longueur comprise entre 3m et 5m la<br />
serrure électrique est indispensable.<br />
L’opérateur est doté d’un limiteur de couple électronique. Il doit être commandé<br />
par une centrale de commande électronique dotée de réglage du<br />
couple.<br />
Le fonctionnement avec fin de course est réalisé par deux fins de course<br />
magnétiques.<br />
L’opérateur est doté d’un système de détection des obstacles selon les normatives<br />
EN12453 et EN 12445.<br />
Les accessoires en option suivants sont disponibles:<br />
- Kit batterie de secours mod. K<strong>IT</strong>-BATT-BT<br />
Permet le fonctionnement de la motorisation même cas de faute d’alimentation<br />
pour une courte période.<br />
3) DONNÉES TECHNIQUES<br />
<strong>GEKO</strong>-L<br />
Alimentation<br />
24V<br />
Puissance absorbée<br />
40 W<br />
Courant absorbé<br />
1,5 A<br />
Force de poussée et de traction 2000 N<br />
Vitesse de la tige<br />
14 mm/s approx.<br />
Réaction au choc<br />
Limiteur de couple intégré sur tableau<br />
de commande<br />
Fins de course<br />
Magnétiques incorporées et réglables<br />
Manoeuvre manuelle<br />
Clé de déblocage<br />
Conditions ambiantes -15 °C à +60 °C<br />
Type d’utilisation<br />
semi-intensif<br />
Longueur maxi du vantail sans<br />
3 m<br />
serrure électrique<br />
Longueur maxi du vantail avec<br />
5 m<br />
serrure électrique<br />
Poids maxi du vantail<br />
~250 kg<br />
Degré de protection IP 44<br />
Poids de l’opérateur<br />
~7,7kg<br />
Dimensions<br />
See Fig. K<br />
Lubrification<br />
graisse permanente<br />
4) PRÉDISPOS<strong>IT</strong>ION DE L’INSTALLATION ÉLECTRIQUE Fig. A<br />
Préparez l’installation électrique en respectant les normes en vigueur sur<br />
les installations électriques CEI-64-8, IEC 364, harmonisation HD384 et les<br />
autres normes du pays où est installé l’appareil.<br />
5) SCHÉMA D’INSTALLATION Fig. B<br />
1 étrier arrière de fixation sur le pilier<br />
2 fourche avant de fixation du vantail<br />
a-b cotes permettant d’établir le point de fixation de l’étrier “1”<br />
C valeur de l’entraxe de fixation<br />
D longueur du portail<br />
X distance de l’axe du portail à l’arête du pilier<br />
S moitié épaisseur du vantail<br />
Z valeur toujours supérieure à 45 mm (b - x)<br />
kg poids maxi du vantail<br />
α° angle d’ouverture du vantail<br />
7) ANCRAGES DES RACCORDEMENTS SUR LE PILIER Fig. C<br />
8) FIXATION DU MOTEUR SUR L’ANCRAGE SUR LE PILIER Fig. D<br />
9) INCLINAISON MAXIMUM Fig. E<br />
10) INSTALLATION CORRECTE Fig. F<br />
Une installation correcte prévoit une marge de course de la tige d’environ<br />
5-10 mm, afin d’éviter tout risque de mauvais fonctionnement.<br />
11) ANCRAGES DES RACCORDEMENTS SUR LE VANTAIL Fig. G<br />
IMPORTANT: le montage de la patte avant doit être réalisé avec le collier<br />
saillant de la bague dirigé VERS LE HAUT (Fig. F Réf. 1).<br />
12) FIXATION DE L’ACTIONNEUR SUR LE VANTAIL Fig. H<br />
13) RÉGLAGE DES FINS DE COURSE de fermeture Fig. I<br />
ATTENTION! Afin d’éviter la rupture du câble de fin de course, fixer laA en<br />
maintenant le fil B tendu (comme indiqué dans la Fig. I Réf. 3).<br />
14) Réglage de la fin de course d’ouverture Fig. J<br />
15) Dimensions Fig. K<br />
16) PRÉCAUTIONS PARTICULIÈRES D’INSTALLATION Fig. L, M, N.<br />
Lorsque le vantail est complètement ouvert, prévoir une niche pour accueillir<br />
l’opérateur.<br />
La Fig. L inique les mesures minimum de la niche pour <strong>GEKO</strong>-L.<br />
Si la cote b est supérieure aux valeurs indiquées par les tableaux d’installation:<br />
- prévoir une niche dans le pilier Fig. M<br />
- arapprocher le vantail du ras du pilier Fig. N.<br />
17) BUTÉES D’ARRÊT DES VANTAUX AU SOL<br />
Pour garantir le bon fonctionnement de l’actionneur nous vous conseillons<br />
d’utiliser les butées d’arrêt “Fig. O Réf. 1” à l’ouverture et à la fermeture,<br />
comme le montre la Fig. O.<br />
Les butées d’arrêt des vantaux doivent empêcher la tige de l’actionneur<br />
d’aller en fin de course.<br />
18) BRANCHEMENTS ELECTRIQUES Fig.P<br />
La connexion entre opérateur et tableau de commande est effectuée par trois<br />
câbles identifiés comme suit:<br />
• rouge moteur +<br />
• noir moteur -<br />
• blanc contrôle butée de fin de course<br />
La Fig. P illustra le schéma de connexion de l’unité de commande mod. LOG-<br />
GK.<br />
Si la direction d’ouverture et de fermeture n’est pas exacte, il est possible d’inverser<br />
les connexions moteur + et moteur - (rouge/noir) sur le tableau de commande.<br />
La première commande après une coupure d’alimentation doit être d’ouverture.<br />
19) OUVERTURE MANUELLE (Voir MANUEL D’UTILISATION -FIG.Y-).<br />
20) SERRURE ÉLECTRIQUE<br />
ATTENTION: En cas de vantaux ayant une longueur de plus de 3m,<br />
il est indispensable d’installer une serrure électrique à déclic.<br />
La carte en option est nécessaire pour le branchement de la serrure<br />
électrique (consulter les instructions correspondantes).<br />
6) COTES D’INSTALLATION DES ANCRAGES SUR LE PILIER Fig. B<br />
6.1) Comment interpréter les tableaux des mesures d’installation<br />
Il est possible de choisir sur le tableau les valeurs de «a» et de «b» en fonction<br />
des degrés α° d’ouverture que l’on désire obtenir.<br />
Si on utilise des valeurs de «a» et «b» trop différentes entre elles, le mouvement<br />
du vantail n’est pas constant et la force de traction ou de poussée varie<br />
pendant le mouvement.<br />
Le tableau a été réalisé pour un portail moyen de 50 mm d’épaisseur. Toujours<br />
vérifier qu’il n’y a pas de collisions entre le portail et l’actionneur.<br />
8
ALLGEMEINE HINWEISE<br />
DEUTSCH<br />
ACHTUNG Wichtige Hinweise zur Sicherheit. Bitte lesen und befolgen Sie<br />
aufmerksam die Hinweise sowie die Bedienungsanleitung, die das Produkt<br />
begleiten, denn eine falsche Installation des Produkts kann zu Verletzungen<br />
von Menschen und Tieren sowie zu Sachschäden führen. Sie liefern wichtige<br />
Hinweise zur Sicherheit, zur Installation, zur Benutzung und zur Wartung.<br />
1) ALLGEMEINE SICHERHE<strong>IT</strong>SHINWEISE<br />
VORSICHT! Montagefehler oder der unsachgemäße Gebrauch des Produktes<br />
können zu Personen-oder Sachschäden führen.<br />
• Verpackungsmaterialien (Plastik, Karton, Polystyrol u. a.) sind nach den<br />
einschlägigen Vorschriften zu entsorgen. Keine Nylon-oder Polystyroltüten<br />
in Reichweite von Kindern liegenlassen.<br />
• Die Anleitung ist für zukünftige Einsichtnahme als Beilage zur technischen<br />
Akte aufzubewahren.<br />
• Dieses Produkt wurde ausschließlich für den Gebrauch entwickelt und<br />
gebaut, so wie er in dieser Dokumentation beschrieben wird. Davon<br />
abweichende Verwendungen können Schadens- und Gefahrenquellen<br />
darstellen.<br />
• Der Hersteller lehnt jede Verantwortung für Folgen ab, die durch den<br />
unsachgemäßen oder nicht bestimmungsgemäßen, weil in dieser Dokumentation<br />
nicht genannten Gebrauch entstehen.<br />
• Die Anlage darf nicht in explosionsgefährdeter Atmosphäre installiert<br />
werden.<br />
• Die Konstruktionsmaterialien der Maschine und die Installation müssen<br />
den folgenden EU-Richtlinien entsprechen: 2004/108, 2006/95, 2006/42<br />
(sowie nachfolgende Abänderungen). In allen Ländern außerhalb der<br />
Europäischen Union sollten außer den geltenden nationalen Bestimmungen<br />
auch die vorgenannten Normen zur Gewährleistung der Sicherheit<br />
befolgt werden.<br />
• Der Hersteller lehnt jede Verantwortung für Folgen ab, die durch nicht<br />
fachgerechte Ausführungen von Schließvorrichtungen (Türen, Tore usw.),<br />
oder durch Verformungen während des Betriebes entstehen.<br />
• Die Montage muß im Einklang mit folgenden Europäischen Richtlinien<br />
erfolgen: 2004/108/EWG, 2006/95/EWG, 2006/42/EWG, 99/05/EWG und<br />
nachfolgende Änderungen.<br />
• Vor jedem Eingriff an der Anlage die Stromversorgung unterbrechen.<br />
Auch Pufferbatterien abklemmen, falls vorhanden.<br />
• Versehen Sie die Versorgungsleitung der Anlage mit einem Schalter oder<br />
allpoligen magnetthermischen Schutzschalter mit einem Kontaktabstand<br />
von mindestens 3,5 mm.<br />
• Der Versorgungsleitung muß ein Fehlerstromschutzschalter mit einer<br />
Schwelle von 0.03A vorgeschaltet sein.<br />
• Alle Sicherheitsvorrichtungen (Fotozellen, Sicherheitsleisten u. a.) anbringen,<br />
die verhindern, daß sich im Torbereich jemand quetscht, schneidet<br />
oder mitgerissen wird.<br />
• Mindestens eine Leuchtsignaleinrichtung (Blinklicht) an gut sichtbarer<br />
Stelle anbringen. Befestigen Sie ein Warnschild am Torgestell.<br />
• Der Hersteller lehnt jede Verantwortung für die Sicherheit und die Funkti<br />
onstüchtigkeit der Anlage ab, wenn Komponenten anderer Produzenten<br />
verwendet werden.<br />
• Für Wartungen und Reparaturen ausschließlich Originalteile verwenden.<br />
• Keine Umbauten an Anlagenkomponenten vornehmen, wenn sie nicht<br />
ausdrücklich vom Hersteller genehmigt wurden.<br />
• Weisen Sie den Anlagennutzer in die vorhandenen Steuerungssysteme<br />
und die manuelle Toröffnung im Notfall ein.<br />
• Alles, was nicht ausdrücklich in dieser Anleitung genannt ist, ist untersagt.<br />
• Die Installation muß mit Sicherheits- und Steuerungsvorrichtungen<br />
vorgenommen werden, die der Norm EN 12978 entsprechen.<br />
ÜBERPRÜFUNG DER INSTALLATION<br />
Nehmen Sie eine sorgfältige Kontrolle der folgenden Punkte vor, bevor Sie<br />
Automatisierung in Betrieb nehmen:<br />
• Stellen Sie sicher, dass alle Komponenten sicher befestigt worden sind.<br />
• Stellen Sie sicher, dass alle Sicherheitsvorrichtungen (Fotozellen – Druckluft-Tastschienen<br />
usw.) ordnungsgemäß funktionieren.<br />
• Überprüfen Sie das Bedienelement für das Notfallmanöver.<br />
• Überprüfen Sie die Öffnung und die Schließung mit angeschlossenen<br />
Steuervorrichtungen.<br />
• Überprüfen Sie die Elektronik-Logik für den normalen (oder den individuell<br />
angepassten) Betrieb des Steuergeräts.<br />
EINSTELLUNG DER SCHUBKRAFT<br />
ACHTUNG: Stellen Sie sicher, dass der Wert der Kraft, gemessen an<br />
den gemäß Norm EN 12445 vorgesehenen Punkte, kleiner als der<br />
in der Norm EN 12453 angegeben ist.<br />
Die Schubkraft kann mit der elektronischen Einstellung des Steuergeräts<br />
mit großer Präzision eingestellt werden. Die Funktionsweise mit Endschalter<br />
wird im Steuergerät elektronisch eingestellt.<br />
Für einen sicheren Quetschungsschutz muss die Schubkraft ein wenig über<br />
der Kraft liegen, die für die Bewegung des Flügels beim Öffnen und Schließen<br />
liegt; die Kraft, die an der Spitze des Flügels gemessen wird, darf die von den<br />
oben angegebenen Normen vorgesehenen Grenzwerte nie überschreiten.<br />
BEFEHL<br />
Die Steuerung kann in Abhängigkeit von den Anforderungen der Installation<br />
auf verschiedene Weise erfolgen (manuell, mit Fernbedienung, Zugangskontrolle<br />
mit Magnet-Badge usw.). Bitte nehmen Sie für die verschiedenen<br />
Steuerungssysteme auf die entsprechenden Anweisungen Bezug.<br />
Die Benutzer der Automatisierung müssen in die Steuerung und Benutzung<br />
eingewiesen werden.<br />
FUNKTIONSSTÖRUNGEN UND IHRE BEHEBUNG<br />
Defekte Funktionsweise des Getriebemotors<br />
• Überprüfen Sie mit einem geeignete Messgerät, ob nach den Befehlen<br />
Öffnen oder Schließen Spannung an den Kontakten des Getriebemotors<br />
anliegt.<br />
Wenn der Motor vibriert oder nicht läuft, kann die Ursache sein:<br />
• Falscher Anschluss der Leiter (Anschlussplan überprüfen).<br />
• Die Anschlüsse des Betriebs des Motors im Steuergerät vertauschen, falls<br />
sich der Flügel entgegen der vorgesehenen Richtung bewegt.<br />
Der erste Befehl nach einer Unterbrechung der Stromversorgung muss<br />
Öffnung FLÜGEL ANHALTEN sein.<br />
VERSCHROTTUNG<br />
Die Materialentsorgung ist unter Beachtung der geltenden Vorschriften<br />
vorzunehmen. Beim Abbau der Anlage gibt es keine von ihr ausgehenden<br />
besonderen Gefahren oder Risiken. Es ist angebracht, die Materialarten<br />
zwecks Wiederverwertung getrennt zu sammeln (Elektrische Teile - Kupfer<br />
- Aluminium - Plastik - etc.).<br />
ABBAU<br />
ACHTUNG: Vor dem Öffnen der Klappe muss die Feder entlastet sein<br />
(Baum in senkrechter Stellung). Wenn die Anlage abgebaut wird, um sie<br />
an anderer Stelle wieder aufzubauen, ist folgendes zu beachten:<br />
• Die Stromversorgung unterbrechen und die Anschlüsse der ganzen<br />
Elektroanlage lösen.<br />
• Den Antrieb von der Grundplatte abnehmen.<br />
• Alle Anlagenbestandteile auseinanderbauen.<br />
• Ist einiges Zubehöhr nicht mehr entfernbar oder beschädigt, muss es<br />
ersetzt werden.<br />
Der einwandfreie Betrieb des Antriebes ist nur dann garantiert, wenn<br />
die Angaben aus diesem Handbuch beachtet werden. Der Hersteller<br />
haftet nicht für Schäden, die durch Mißachtung der Installationsanweisungen<br />
und der Angaben aus diesem Handbuch entstehen.<br />
Die Beschreibungen und bildlichen Darstellungen in diesem Handbuch<br />
sind unverbindlich. Der Hersteller behält sich - ohne auch zur<br />
Aktualisierung dieser Unterlagen verpflichtet zu sein - jederzeit vor,<br />
Änderungen vornehmen, wenn er diese für technische oder bauliche<br />
Verbesserungen als notwendig erachtet und die wesentlichen Produkteigenschaften<br />
unverändert bleiben.<br />
9
DEUTSCH<br />
MONTAGEANLE<strong>IT</strong>UNG<br />
2) ALLGEMEINES<br />
Elektromechanischer Antrieb, der für die Automatisierung von Toren an<br />
Wohngrundstücken ausgelegt ist.<br />
Der Getriebemotor hält bei Flügeln mit einer Höchstlänge von 3 m die Sperre<br />
im geschlossenen und geöffneten Zustand aufrecht, ein Elektroschloß ist<br />
insofern entbehrlich. Für Flügellängen zwischen 3 m und 5 m ist ein Elektroschloß<br />
hingegen unbedingt erforderlich.<br />
Der Antrieb besitzt eine elektronische Drehmomentbegrenzung. Er muß von<br />
einem elektronischen Schaltbrett mit Drehmomentregulierung gesteuert<br />
werden.<br />
Der Endtasterbetrieb wird von zwei Magnetendschaltern reguliert.<br />
Der Antrieb ist gemäß den Vorschriften EN12453 und EN 12445 mit einem<br />
Hinderniswarnsystem ausgestattet.<br />
Folgendes Sonderzubehör ist erhältlich:<br />
- Kit Pufferbatterie Mod. K<strong>IT</strong>-BATT-BT<br />
Es gestattet das Betreiben der Anlage auch bei kurzzeitigem Stromausfall.<br />
3) TECHNISCHE DATEN<br />
Versorgungsspannung<br />
Leistungsaufnahme<br />
Stromaufnahme<br />
Schub- und Zugkraft<br />
Schaftgeschwindigkeit<br />
Stoßreaktion<br />
Endtaster<br />
Handbedienung<br />
Umgebungsbedingungen<br />
Benutzungstyp<br />
Maximale Flügellänge ohne<br />
3 m<br />
Elektroschloß<br />
Maximale Flügellänge mit<br />
5 m<br />
Elektroschloß<br />
Max. Flügelgewicht<br />
~250 kg<br />
Schutzgrad IP 44<br />
Gewicht der Antriebsanlage ~7,7kg<br />
Abmessungen<br />
Siehe Fig. K<br />
Schmierung<br />
Permanentfett<br />
<strong>GEKO</strong>-L<br />
24V<br />
40 W<br />
1,5 A<br />
2000 N<br />
14 mm/s approx.<br />
Drehmomentbegrenzer, in die Steuerung<br />
integriert<br />
Eingebaute, einstellbare Magnetschalter<br />
Entriegelungsschlüssel<br />
- 15°C bis +60°C<br />
Halbintensiv<br />
4) VORBERE<strong>IT</strong>UNG DER ELEKTRISCHEN ANLAGE Fig. A<br />
Bereiten Sie die elektrische Anlage vor und nehmen Sie dabei auf die geltenden<br />
Bestimmungen für elektrische Anlagen CEI 64-8, IEC364, Harmonisierung<br />
HD384 sowie die sonstigen nationalen Normen Bezug.<br />
5) INSTALLATIONSSCHEMA Fig. B<br />
1 Hinterer Bügel für die Befestigung am Pfeiler<br />
2 Vordere Gabel für die Befestigung am Pfeiler<br />
a-b Quoten für die Bestimmung des Befestigungspunkts des Bügels “1”<br />
C Wert des Abstands für die Befestigung<br />
D Länge des Tors<br />
X Abstand der Achse des Tors von der Kante des Pfeilers<br />
S Halbe Stärke Flügel<br />
Z Wert immer größer als 45 mm (b - x)<br />
kg Max. Gewicht des Flügels<br />
α° Öffnungswinkel des Flügels<br />
6) INSTALLATIONSQUOTEN VERANKERUNGEN AM PFELIER Fig. B<br />
6.1) Erläuterung der Tabelle<br />
Aus der Tabelle kann man Werte “a” und “b” in Abhängigkeit des gewünschten<br />
Öffnungswinkels α° wählen.<br />
Wenn man Werte von “a” und “b” benutzt, die sich untereinander zu sehr<br />
unterscheiden, ist die Flügelgeschwindigkeit nicht gleichbleibend und die<br />
Zugbzw. Schubkraft ändert sich während der Bewegung.<br />
Um die Öffnungsgeschwindigkeit einzuhalten und einen störungsfreien<br />
Betrieb des Antriebes zu gewährleisten, ist es anzuraten, die Werte “a” und<br />
“b” untereinander nicht zu sehr abweichen zu lassen.<br />
Die Tabelle bezieht sich auf ein normales Tor mit einer Dicke von 50 mm. Prüfen<br />
Sie stets, ob Kollisionsstellen zwischen Tor und Antrieb vorhanden sind.<br />
7) VERANKERUNG DER ABSCHLÜSSE AM PFEILER Fig. C<br />
8) EFESTIGUNG DES MOTORS AUF DER VERANKERUNG AM PFEILER Fig. D<br />
9) MAX. NEIGUNG Fig. E<br />
10) RICHTIGE INSTALLATION Fig. F<br />
Eine richtige Installation sieht die Einhaltung eines Rands des Hubs des Schafts<br />
von ca. 5-10 mm vor; dies vermeidet mögliche Funktionsstörungen.<br />
11) VERANKERUNG DER ANSCHLÜSSE AM FLÜGEL Fig. G<br />
WICHTIG: Der vordere Bügel muss so montiert werden, dass das Bundstück<br />
der Buchse NACH OBEN hervorsteht (Fig. F Rif. 1).<br />
12) BEFESTIGUNG DES TRIEBS AM FLÜGEL Fig. H<br />
13) Einstellung SchlieSS-Endschalter Fig. I<br />
ACHTUNG! Damit das Kabel des Endtasters nicht reißt, muss die Schraube<br />
A festgezogen und der Draht B dabei gespannt gehalten werden (wie in<br />
Fig. I Rif. 3).<br />
14) Einstellung des Öffnungs-Endschalters Fig. J<br />
15) Abmessungen Fig. K<br />
16) MASSNAHMEN FÜR BESONDERE INSTALLATIONEN Fig. L. M, N.<br />
Realisieren Sie eine Nische für die Aufnahme des Triebs, wenn der Flügel<br />
vollkommen geöffnet ist.<br />
Auf Fig. L werden die Mindestabmessungen der Nische für die verschiedenen<br />
Modelle <strong>GEKO</strong>-L angegeben.<br />
Falls die Quote “b” größer als die in der Installationstabelle angegebenen<br />
Werte ist:<br />
- schaffen Sie eine Nische im Pfeiler Fig. M<br />
- nähern Sie den Flügel dem Pfeiler an Fig. N<br />
17) ANSCHLÄGE DER FLÜGEL AM BODEN<br />
Für den ordnungsgemäßen Betrieb des Triebs empfehlen wir die Verwendung<br />
der Anschläge “Fig. O Rif. 1” sowohl beim Öffnen, als auch beim Schließen,<br />
wie auf Fig. O gezeigt.<br />
Die Anschläge der Flügel müssen verhindern, dass der Schaft des Triebs bis<br />
zum Anschlag geht.<br />
18) ELEKTRISCHE ANSCHLÜSSE Fig. P<br />
Die Verbindung zwischen Antrieb und Steuerung erfolgt durch drei gekennzeichnete<br />
Kabel:<br />
• rot Motor +<br />
• schwarz Motor -<br />
• weiß Endschalterkontrolle<br />
In Fig. P ist der Anschlußplan der Steuerung LOG-GK dargestellt.<br />
Bei falscher Drehrichtung (nach stromlosen Zustand muß der erste Impuls<br />
das Tor öffnen) müssen die Anschlüsse Motor + und Motor - (rot/schwarz) auf<br />
der Steuerung getauscht werden.<br />
19) MANUELLES ÖFFNEN (Siehe BEDIENUNGSHANDBUCH - Fig. Y -).<br />
20) ELECTRIC LOCK<br />
WARNUNG: Im Fall von Flügeln mit einer Länge von mehr als 3 m<br />
ist die Installation eines einrastenden Elektroschlosses unverzichtbar.<br />
Für den Anschluss des Elektroschlosses ist die Zusatzplatine erforderlich<br />
(siehe die zugehörige Anleitung).<br />
10
ADVERTENCIAS GENERALES<br />
ESPAÑOL<br />
ATENCIÓN Instrucciones de seguridad importantes. Leer y seguir con atención<br />
el folleto Advertencias y el Manual de instrucciones que acompañan el<br />
producto, ya que la instalación incorrecta puede causar daños a personas,<br />
animales o cosas. Dichas instrucciones brindan importantes indicaciones<br />
concernientes a la seguridad, la instalación, el uso y el mantenimiento.<br />
SEGURIDAD GENERAL<br />
¡ATENCION! Una instalación equivocada o un uso impropio del producto<br />
puede crear daños a personas, animales o cosas.<br />
Es preciso:<br />
• Eliminar los materiales de embalaje (plástico, cartón, poliestireno, etc.)<br />
según lo previsto por las normas vigentes. No dejar bolsas de nylon o<br />
poliestireno al alcance de los niños.<br />
• Conservar las instrucciones para adjuntarlas al folleto técnico y para<br />
consultas futuras.<br />
• Este producto ha sido proyectado y construido exclusivamente para la<br />
utilización indicada en esta documentación. Usos no indicados en esta<br />
documentación podrían causar daños al producto y ser fuente de peligro.<br />
• La Empresa declina toda responsabilidad que derive del uso impropio<br />
del producto o de un uso distinto de aquél para el que está destinado y<br />
que aparece indicado en la presente documentación.<br />
• No instalar el producto en atmósfera explosiva.<br />
• Los elementos de fabricación de la máquina y la instalación deben presentar<br />
conformidad con las siguientes Directivas Europeas: 2004/108/CEE,<br />
2006/95/CEE, 2006/42/CEE, 99/05/CEE (y sus posteriores modificaciones).<br />
Para todos los países extra CEE, además de las normas nacionales vigentes,<br />
para lograr un nivel de seguridad apropiado se deben respetar también<br />
las normas antes citadas.<br />
• La Empresa declina toda responsabilidad que derive de la inobservancia<br />
de la Buena Técnica en la construcción de los elementos de cierre (puertas,<br />
cancelas, etc.), así como de las deformaciones que se podrían verificar<br />
durante el uso.<br />
• La instalación debe ser conforme a lo previsto por las siguientes Directivas<br />
Europeas: 2004/108/CEE, 2006/95/CEE, 2006/42/CEE, 99/05/CEE y<br />
modificaciones sucesivas.<br />
• Cortar el suministro de corriente antes de efectuar cualquier intervención<br />
en la instalación. Desconectar también eventuales baterías tampón, si las<br />
hay.<br />
• Prever, en la red de alimentación del automatismo, un interruptor o un<br />
magnetotérmico omnipolar con una distancia de abertura de los contactos<br />
igual o superior a 3,5 mm.<br />
• Verificar que, antes de la red de alimentación, haya un interruptor diferencial<br />
con un umbral de 0,03A.<br />
• Aplicar todos los dispositivos de seguridad (fotocélulas, barras sensibles,<br />
etc.) necesarios para proteger el área del peligro de aplastamiento, transporte<br />
o cizallado, de conformidad con las directivas y normas técnicas<br />
vigentes.<br />
• Aplicar al menos un dispositivo de señalización luminosa (luz intermitente)<br />
en posición visible y fijar a la estructura un cartel de Atención.<br />
• La Empresa declina toda responsabilidad, a efectos de la seguridad y del<br />
buen funcionamiento del automatismo, si se emplean componentes de<br />
otros fabricantes.<br />
• Usar exclusivamente partes originales al realizar cualquier operación de<br />
mantenimiento o reparación.<br />
• No modificar ningún componente del automatismo si antes no se ha sido<br />
expresamente autorizado por la Empresa.<br />
• Instruir al usuario del equipo sobre los sistemas de mando aplicados y la<br />
ejecución de la apertura manual en caso de emergencia.<br />
• Todo lo que no está expresamente previsto en estas instrucciones no<br />
está permitido.<br />
• La instalación debe realizarse utilizando dispositivos de seguridad y<br />
mandos conformes a la EN 12978.<br />
• Controlar la lógica electrónica de funcionamiento normal (o personalizada)<br />
en la centralita de mando.<br />
REGULACIÓN DE LA FUERZA DE EMPUJE<br />
ATENCIÓN: Controlar que el valor de la fuerza de impacto medido<br />
en los puntos previstos por la norma EN 12445 sea inferior al<br />
indicado en la norma EN 12453.<br />
La fuerza de empuje se regula con suma precisión mediante la regulación<br />
electrónica de la central de mando. El funcionamiento hasta final de carrera<br />
es regulado electrónicamente en el cuadro de mando.<br />
Para una buena seguridad antiaplastamiento, la fuerza de empuje debe ser<br />
un poco superior a la necesaria para mover la hoja tanto en fase de cierre<br />
como en fase de apertura; la fuerza, medida en el vértice de la hoja, no debe<br />
superar los límites previstos por las normas antes indicadas.<br />
ACCIONAMIENTO<br />
El accionamiento puede ser de diferente tipo (manual, con radiomando,<br />
control de accesos con ficha de identificación, etc.) según las necesidades y<br />
las características de la instalación. Para los diferentes sistemas de accionamiento,<br />
véanse las instrucciones correspondientes.<br />
Los usuarios de la automatización deben ser capacitados para el mando y<br />
el uso.<br />
INCONVENIENTES Y SOLUCIONES<br />
Funcionamiento defectuoso del motorreductor<br />
• Comprobar con instrumento específico que haya tensión en los extremos<br />
del motorreductor tras el accionamiento de la apertura y del cierre.<br />
Si el motor vibra pero no gira, puede deberse a que:<br />
• La conexión de los cables es incorrecta (controlar el esquema de conexión).<br />
• Si el movimiento de la hoja es contrario al que debería ser, invertir las<br />
conexiones de marcha del motor en la centralita.<br />
El primer mando tras una interrupción de red debe ser de apertura PA-<br />
RADAS HOJAS.<br />
DEMOLICION<br />
La eliminación de los materiales debe hacerse respetando las normas vigentes.<br />
En el caso de demolición de un automatismo, no existen particulares<br />
peligros o riesgos que deriven del automatismo mismo.<br />
Es conveniente, en caso de recuperación de materiales, que se separen por<br />
tipologías (partes eléctricas, cobre, aluminio, plástico, etc.).<br />
DESMANTELAMENTO<br />
ATENÇÃO: antes de abrir a portinhola, a mola tem que estar descarregada<br />
(haste vertical). Caso a automatização seja desmontada para em seguida<br />
ser remontada num outro sítio é necessário:<br />
- Cortar a alimentação e desligar todo o sistema eléctrico.<br />
- Extrair o accionador da base de fixação.<br />
- Desmontar todos os componentes da instalação.<br />
- No caso em que alguns componentes não possam ser removidos ou<br />
estejam danificados, substitua-os.<br />
El buen funcionamiento del operador resulta garantizado únicamente<br />
si se respetan los datos contenidos en este manual de instrucciones.<br />
La empresa no responde de los daños causados por el incumplimiento<br />
de las normas de instalación y de las indicaciones contenidas en este<br />
manual.<br />
Las descripciones y las ilustraciones del presente manual tienen un<br />
carácter puramente indicativo. Dejando inalteradas las características<br />
esenciales del producto, la Empresa se reserva la posibilidad de aportar,<br />
en cualquier momento, las modificaciones que considere convenientes<br />
para mejorar técnica, constructiva y comercialmente el producto, sin<br />
la obligación de poner al día esta publicación.<br />
CONTROL DE LA INSTALACIÓN<br />
Antes de que la automatización quede definitivamente operativa, controlar<br />
estrictamente lo siguiente:<br />
• Comprobar que todos los componentes estén fijados firmemente.<br />
• Controlar que todos los dispositivos de seguridad (fotocélulas, canto<br />
sensible, etc,) funcionen correctamente.<br />
• Controlar el mando de la maniobra de emergencia.<br />
• Controlar la operación de apertura y cierre con los dispositivos de mando<br />
aplicados.<br />
11
ESPAÑOL<br />
MANUAL DE INSTALACIÓN<br />
2) GENERALIDADES<br />
Automatismo electromecánico proyectado para automatizar cancelas de<br />
tipo residencial. El motorreductor mantiene el bloqueo de cierre y apertura<br />
sin necesidad de electrocerradura en hojas con una longitud máxima de 3<br />
m. En hojas con una longitud comprendida entre 3 y 5 m, la electrocerradura<br />
resulta indispensable. El servomotor está provisto de limitador del par electrónico.<br />
Debe ser gobernado por un cuadro de mandos electrónico dotado<br />
de regulación del par. El funcionamiento de fin de carrera está regulado por<br />
dos fines de carrera magnéticos.<br />
El servomotor está provisto de un sistema de detección de obstáculos, de<br />
conformidad con las normas EN12453 y EN 12445<br />
Están disponibles los siguientes accesorios opcionales:<br />
- Kit batería tampón mod. K<strong>IT</strong>-BATT-BT<br />
Permite el funcionamiento del automatismo en caso de que falte, por un<br />
breve período, el suministro de corriente.<br />
3) DATOS TECNICOS<br />
<strong>GEKO</strong>-L<br />
Alimentación<br />
24V<br />
Potencia absorbida<br />
40 W<br />
Corriente absorbida 1,5 A<br />
Fuerza de empuje y tracción 2000 N<br />
Velocidad vástago<br />
14 mm/s approx.<br />
Reacción al impacto Limitador de par integrado en el cuadro<br />
de mandos<br />
Fines de carrera<br />
magnéticos, incorporados y regulables<br />
Maniobra manual<br />
Llave de desbloqueo<br />
Condiciones ambientales De -15 °C a +60 °C<br />
Tipo de uso<br />
semi-intensivo<br />
Longitud máxima hoja sin<br />
3 m<br />
electrocerradura<br />
Longitud máxima hoja con<br />
5 m<br />
electrocerradura<br />
Peso máximo hoja<br />
~250 kg<br />
Grado de protección IP 44<br />
Peso operador<br />
~7,7kg<br />
Dimensiones<br />
Véase Fig. K<br />
Lubricación<br />
Grasa permanente<br />
4) PREDISPOSICION DE LA INSTALACION ELECTRICA Fig. A<br />
Realizar la instalación eléctrica remitiéndose a las normas vigentes para<br />
las instalaciones eléctricas CEI 64-8, IEC364, armonización HD384 y otras<br />
normas nacionales.<br />
5) ESQUEMA DE INSTALACIÓN Fig. B<br />
1 abrazadera posterior de fijación al pilar<br />
2 horquilla anterior de fijación a la hoja<br />
a-b cotas para determinar el punto de fijación de la abrazadera “1”<br />
C valor de la distancia entre ejes de fijación<br />
D longitud de la cancela<br />
X distancia del eje de la cancela al canto del pilar<br />
S mitad espesor hoja<br />
Z valor siempre superior a 45 mm (b - x)<br />
kg peso máx de la hoja<br />
α° ángulo de apertura de la hoja<br />
6) COTAS DE INSTALACIÓN DE ANCLAJES AL PILAR Fig. B<br />
6.1) Cómo interpretar la tabla de las medidas de instalación<br />
De la tabla se pueden escoger valores de “a” y “b” en función de los grados<br />
α° de apertura que se deseen obtener.<br />
Si se utilizan valores de “a” y “b” demasiado diferentes entre sí, el movimiento<br />
de la hoja no es constante y la fuerza de tracción o empuje varía durante<br />
el movimiento.<br />
Para respetar la velocidad de apertura y garantizar un buen funcionamiento<br />
del operador, es conveniente que los valores “a” y “b” sean poco diferentes<br />
entre sí.<br />
La tabla se ha elaborado para una cancela mediana de 50 mm de espesor.<br />
Hay que controlar siempre que no se produzcan colisiones entre la cancela<br />
y el servomotor.<br />
7) ANCLAJES DE LAS FIJACIONES AL PILAR Fig. C<br />
8) FIJACIÓN MOTOR EN ANCLAJE AL PILAR Fig. D<br />
9) INCLINACIÓN MÁXIMA Fig. E<br />
10) INSTALACIÓN CORRECTA Fig. F<br />
Una instalación correcta prevé mantener un margen de carrera del vástago<br />
de aproximadamente 5-10 mm; esto evita posibles anomalías de funcionamiento.<br />
11) ANCLAJES DE LAS FIJACIONES A LA HOJA Fig. G<br />
IMPORTANTE: El montaje de la abrazadera delantera debe producirse con<br />
el collarín del casquillo saliente HACIA ARRIBA (Fig. F Ref. 1).<br />
12) FIJACIÓN OPERADOR EN LA HOJA Fig. H<br />
13) Regulación del fin de carrera de cierre Fig. I<br />
¡ATENCION! Para evitar la rotura del cable del fin de carrera, hay que fijar<br />
el tornillo A manteniendo tenso el hilo B (como se representa en la Fig. I<br />
Rif. 3).<br />
14) Regulación del fin de carrera de apertura Fig. J<br />
15) Dimensiones Fig. K<br />
16) MEDIDAS PARA INSTALACIONES ESPECIALES Fig. L, M, N.<br />
Es necesario realizar una cavidad para alojar el operador cuando la hoja está<br />
completamente abierta.<br />
En la Fig. L se indican las medidas que tiene que tener la cavidad para<br />
<strong>GEKO</strong>-L.<br />
Si la cota “b” resulta superior a los valores indicados en las tablas de instalación:<br />
- realizar una cavidad en el pilar Fig. M.<br />
- acercar la hoja al filo del pilar Fig. N.<br />
17) TOPES DE LAS HOJAS EN EL SUELO<br />
Para el correcto funcionamiento del accionador se recomienda utilizar topes<br />
“Fig. O Rif. 1” tanto para la fase de apertura como para la de cierre, como se<br />
indica en la Fig. O.<br />
Los topes de las hojas deben evitar que el vástago del accionador llegue<br />
hasta el final de la carrera.<br />
18) CONEXIONES ELÉCTRICAS Fig. P<br />
La conexión entre el operador y el cuadro de mandos se efectúa mediante tres<br />
cables identificados de la siguiente manera:<br />
• rojo motor +<br />
• negro motor -<br />
• blanco control fin de carrera<br />
En la fig. P está representado el esquema de conexión de la central de mando<br />
mod. LOG-GK.<br />
En caso de que esté equivocado el sentido de apertura y cierre, es posible invertir<br />
las conexiones motor + y motor - (rojo/negro) en el cuadro de mandos.<br />
El primer comando después de una interrupción de corriente debe ser de<br />
apertura.<br />
19) APERTURA MANUAL (Véase MANUAL DE USO -FIG.Y-).<br />
20) ELECTROCERRADURA<br />
ATENCIÓN: En el caso de hojas con una longitud superior a 3m,<br />
resulta indispensable la instalación de una electrocerradura de<br />
resorte.<br />
Para la conexión de la electrocerradura, es necesaria la tarjeta opcional<br />
(consulte las instrucciones específicas).<br />
12
2x0,75 mm 2<br />
2x1,5 mm 2<br />
INSTALLAZIONE VELOCE • QUICK INSTALLATION • INSTALLATION RAPIDE<br />
SCHNELLINSTALLATION • INSTALACIÓN RÁPIDA<br />
PREDISPOSIZIONE DELL’IMPIANTO ELETTRICO • THE ELECTRICAL PLANT SET-UP<br />
PRÉDISPOS<strong>IT</strong>ION DE L’INSTALLATION ÉLECTRIQUE • VORBERE<strong>IT</strong>UNG DER ELEKTRISCHEN ANLAGE<br />
PREDISPOSICION DE LA INSTALACION ELECTRICA<br />
A<br />
5x0,75 mm 2<br />
3x1 mm 2<br />
RG58<br />
3x1 mm 2<br />
R<br />
Q<br />
2x0,75 mm 2 3x1,5 mm 2 3x1,5 mm 2<br />
2x1,5 mm 2 3x1,5 mm 2<br />
5x0,75 mm 2<br />
SCHEMA D’INSTALLAZIONE • INSTALLATION DIAGRAM • SCHÉMA D’INSTALLATION<br />
INSTALLATIONSSCHEMA • ESQUEMA DE INSTALACIÓN<br />
B<br />
Z=b-x >45mm<br />
x<br />
S<br />
D = MAX 5000mm<br />
2<br />
2S<br />
b<br />
Sulla tabella sono indicati i valori ottimali di A e di B per i diversi angoli di apertura "α°".<br />
1<br />
a<br />
Manca Inglese<br />
C=805 mm<br />
Le tableau montre les valeurs de A et de B optimales pour les différents angles d'ouverture "α°".<br />
In der Tabelle werden die optimalen Werte für A und B für die verschiedenen Öffnungswinkel „α°“ angegeben.<br />
Manca spagnolo<br />
kg<br />
a b 100 110 120 130 140 150 160 170 180 190 200 210 220 230<br />
130 103 106 110 112 116 118 121 123 126 124 113 107 103 99<br />
140 102 105 109 111 113 117 120 122 124 119 109 103 99 97<br />
150 101 104 108 110 112 116 118 120 123 112 105 100 96 94<br />
160 100 103 106 109 112 114 117 119 121 106 101 97 94 92<br />
170 100 102 105 108 111 113 116 118 109 102 98 94 91<br />
180 99 102 104 107 110 112 114 117 103 98 94 91<br />
190 98 101 104 107 109 111 113 107 99 95 91<br />
200 98 101 103 106 108 110 112 100 95 91<br />
210 97 100 103 105 107 109 103 95 91<br />
220 97 100 102 104 106 108 95 91<br />
230 96 99 101 104 105 97<br />
240 96 99 101 103 101 91<br />
250 95 98 100 102 91<br />
260 95 98 100 92 α°<br />
Sulla tabella, è possibile scegliere i valori di "A" e "B" in funzione del grado di apertura "α°" desiderato.<br />
Manca Inglese<br />
Il est possible de choisir sur le tableau les valeurs de "A" et "B" en fonction du degrés d’ouverture "α°" désiré.<br />
13
ANCORAGGI DEGLI ATTACCHI AL PILASTRO • FASTENING OF F<strong>IT</strong>TINGS TO PILLAR<br />
ANCRAGES DES RACCORDEMENTS SUR LE PILIER • VERANKERUNGEN DER ANSCCHLÜSSE AM PFEILER<br />
ANCLAJES DE LAS FIJACIONES AL PILAR<br />
C<br />
110<br />
Non in dotazione!<br />
Not provided!<br />
Pas fournis!<br />
Nicht mitgeliefert!<br />
No incluidos en el kit!<br />
Sinistra<br />
Left<br />
Gauche<br />
Links<br />
Izquierda<br />
Destra<br />
Right<br />
Droite<br />
Rechts<br />
Derecha<br />
FISSAGGIO MOTORE SU ANCORAGGIO A PILASTRO.<br />
ATTACHING MOTOR TO FASTENING ON PILLAR.<br />
FIXATION DU MOTEUR SUR L’ANCRAGGE SUR LE PILIER.<br />
BEFESTIGUNG DES MOTORS AUF VERANKERUNG AM PFEILER.<br />
FIJACIÓN MOTOR EN ANCLAJE AL PILAR.<br />
D<br />
MASSIMA INCLINAZIONE • MAXIMUM TILT<br />
INCLINAISON MAXIMUM • MAX. NEIGUNG<br />
INCLINACIÓN MÁXIMA<br />
E<br />
+ 60 mm<br />
- 60 mm<br />
CORRETTA INSTALLAZIONE • CORRECT INSTALLATION • INSTALLATION CORRECTE • RICHTIGE INSTALLATION • INSTALACIÓN CORRECTA<br />
F<br />
CHIUDI<br />
CLOSE<br />
FERME<br />
ÖFFNEN<br />
CERRAR<br />
1<br />
APRI<br />
OPEN<br />
OUVRE<br />
SCHLIESSEN<br />
ABRIR<br />
135<br />
14
ANCORAGGI DEGLI ATTACCHI ALL’ANTA • FASTENING OF F<strong>IT</strong>TINGS TO LEAF • ANCRAGES DES RACCORDEMENTS SUR LE VANTAIL<br />
VERANKERUNGEN DER ANSCHLÜSSE AM FLÜGEL • ANCLAJES DE LAS FIJACIONES A LA HOJA<br />
G<br />
*<br />
Non in dotazione! • Not provided! • Pas fournis!<br />
Nicht mitgeliefert! • No incluidos en el kit!<br />
FISSAGGIO OPERATORE SULL’ANTA • OPERATOR ATTACHMENT ON DOOR • FIXATION DE L’ACTIONNEUR SUR LE VANTAIL<br />
BEFESTIGUNG DES TRIEBS AM FLÜGEL • FIJACIÓN OPERADOR EN LA HOJA.<br />
1 2<br />
3<br />
H<br />
REGOLAZIONE FINECORSA DI CHIUSURA • CLOSING LIM<strong>IT</strong> DEVICE ADJUSTMENT • RÉGLAGE DES FINS DE COURSE DE FERMETURE<br />
VERANKERUNG DER ANSCHLÜSSE AM FLÜGEL • REGULACIÓN DEL FIN DE CARRERA DE CIERRE.<br />
I<br />
1 2<br />
3<br />
FC2 (CLOSE)<br />
CHIUDI<br />
CLOSE<br />
FERME<br />
ÖFFNEN<br />
CERRAR<br />
~5 mm<br />
A<br />
B<br />
A<br />
15
REGOLAZIONE FINECORSA DI APERTURA • OPENING LIM<strong>IT</strong> DEVICE ADJUSTMENT • RÉGLAGE DE LA FIN DE COURSE D’OUVERTURE<br />
EINSTELLUNG DES ÖFFNUNGS-ENDSCHALTERS • REGULACIÓN DEL FIN DE CARRERA DE APERTURA.<br />
J<br />
~5 mm<br />
APRI<br />
OPEN<br />
OUVRE<br />
SCHLIESSEN<br />
ABRIR<br />
OPENEN<br />
FC1 (OPEN)<br />
DIMENSIONI • DIMENSIONS • DIMENSIONS • ABMESSUNGEN • DIMENSIONES<br />
K<br />
915<br />
80<br />
108<br />
55<br />
36<br />
102<br />
Cu MAX 410 mm<br />
16
65<br />
a<br />
L<br />
M<br />
1050<br />
895<br />
b<br />
b<br />
N<br />
P<br />
230V a.c.<br />
L<br />
N<br />
1<br />
2<br />
JP1<br />
b<br />
b<br />
JP9<br />
M2<br />
3 + Rosso/Red/Rouges<br />
Rot/Rojos<br />
4 - Nero/Black/Noir<br />
Schwartz/Negro<br />
5 FC Bianco/White/Blanc<br />
Weiße/Blanco<br />
M1<br />
6 + Rosso/Red/Rouges<br />
Rot/Rojos<br />
M2<br />
M1<br />
40W max.<br />
+<br />
FC<br />
-<br />
+<br />
FC<br />
-<br />
3<br />
4<br />
5<br />
6<br />
7<br />
8<br />
9<br />
10<br />
JP9<br />
O<br />
7 - Nero/Black/Noir<br />
Schwartz/Negro<br />
8 FC Bianco/White/Blanc<br />
Weiße/Blanco<br />
24V a.c.<br />
24V a.c.<br />
VSafe<br />
11<br />
12<br />
13<br />
14<br />
COM<br />
15<br />
1<br />
Sinistra/Left/Gauche<br />
Links/Izquierda<br />
1<br />
Destra/Right/Droite<br />
Rechts/Derecha<br />
1<br />
NO<br />
NC<br />
NC<br />
NO<br />
NO<br />
START<br />
STOP<br />
PHOT<br />
FAULT<br />
PED<br />
16<br />
17<br />
18<br />
19<br />
20<br />
21<br />
JP8<br />
22<br />
ANT.<br />
ANT<br />
SHIELD<br />
23<br />
24<br />
JP7<br />
17
18<br />
NOTE • NOTES • NOTES • ANMERKUNGEN • NOTAS
MANUALE D’USO: MANOVRA DI EMERGENZA • USER GUIDE:EMERGENCY OPERATION<br />
MANUEL D’UTILISATION: DE LA MANŒUVRE D’URGENCE • BEDIENUNGSHANDBUCH: NOTFALLMANÖVER<br />
MANUAL DE USO: MANIOBRA DE EMERGENCIA<br />
FIG. Y<br />
Senza Elettroserratura • Without electric lock • Sans serrure électrique • Ohne Elektroschloß • Sin electrocerradura<br />
1 2<br />
ON<br />
ON<br />
OFF<br />
3<br />
Con Elettroserratura • With electric lock • Avec serrure électrique • Mit Elektroschloß • Con electrocerradura<br />
1<br />
2<br />
3<br />
ON<br />
ON<br />
OFF<br />
4
20<br />
<strong>IT</strong>ALIANO<br />
Nel ringraziarVi per la preferenza accordata a questo prodotto, la Ditta è certa che da esso<br />
otterrete le prestazioni necessarie al Vostro uso. Leggete attentamente l’opuscolo “AVVERTEN-<br />
ZE” ed il “LIBRETTO ISTRUZIONI” che accompagnano questo prodotto in quanto forniscono<br />
importanti indicazioni riguardanti la sicurezza, l’installazione, l’uso e la manutenzione.<br />
Questo prodotto risponde alle norme riconosciute della tecnica e della disposizioni relative<br />
alla sicurezza. Confermiamo che è conforme alle seguenti direttive europee: 2004/108/CEE,<br />
2006/95/CEE, 2006/42/CEE, 99/05/CEE (e loro modifiche successive).<br />
1) SICUREZZA GENERALE<br />
ATTENZIONE Importanti istruzioni di sicurezza. Leggere e seguire attentamente<br />
l’opuscolo Avvertenze ed il Libretto istruzioni che accompagnano il prodotto poiché<br />
un uso improprio può causare danni a persone, animali o cose. Conservare le istruzioni<br />
per consultazioni future.<br />
Questo prodotto è stato progettato e costruito esclusivamente per l’utilizzo indicato in<br />
questa documentazione. Usi non indicati potrebbero essere fonte di danni al prodotto<br />
e fonte di pericolo.<br />
- Gli elementi costruttivi della macchina e l’installazione devono essere in accordo con<br />
le seguenti Direttive Europee: 2004/108/CE, 2006/95/CE, 2006/42/CE, 89/106/CE e loro<br />
modifiche successive. Per tutti i Paesi extra CEE, oltre alle norme nazionali vigenti, per<br />
un buon livello di sicurezza è opportuno rispettare anche le norme citate.<br />
- La Ditta declina qualsiasi responsabilità derivante da un uso improprio o diverso da quello<br />
per cui è destinato ed indicato nella presente documentazione nonché dall’inosservanza<br />
della Buona Tecnica nella costruzione delle chiusure (porte, cancelli, ecc.) e dalle deformazioni<br />
che potrebbero verificarsi durante l’uso.<br />
L’automazione, se installata ed utilizzata correttamente, soddisfa il grado di sicurezza<br />
richiesto. Tuttavia è opportuno osservare alcune regole di comportamento per evitare<br />
inconvenienti accidentali:<br />
- Tenere bambini, persone e cose fuori dal raggio d’azione dell’automazione, in particolare<br />
durante il funzionamento.<br />
ENGLISH<br />
Thank you for choosing this product. The Firm is confident that its performance will<br />
meet your operating needs. Carefully read the “WARNINGS” booklet and “INSTRUCTION<br />
BOOKLET” that come with this product as they provide important information regarding<br />
safety, installation, use and maintenance. This product meets recognized technical standards<br />
and complies with safety provisions. We hereby confirm that it is in conformity with<br />
the following European directives: 2004/108/EEC, 2006/95/EEC, 2006/42/EEC, 99/05/EEC<br />
(and later amendments).<br />
1) GENERAL SAFETY<br />
WARNING Important safety instructions. Carefully read and comply with the Warnings<br />
booklet and Instruction booklet that come with the product as improper<br />
use can cause injury to people and animals and damage to property. Keep hold of<br />
instructions for future reference.<br />
This product has been designed and built solely for the purpose indicated herein. Uses<br />
not contemplated herein might result in the product being damaged and could be a<br />
source of danger.<br />
- The units making up the machine and its installation must meet the requirements of<br />
the following European Directives: 2004/108/EC, 2006/95/EC, 2006/42/EC, 89/106/EC<br />
and later amendments. For all countries outside the EEC, it is advisable to comply with<br />
the standards mentioned, in addition to any national standards in force, to achieve a<br />
good level of safety.<br />
- The Firm disclaims all responsibility resulting from improper use or any use other than<br />
that for which the product has been designed, as indicated herein, as well as for failure<br />
to apply Good Practice in the construction of entry systems (doors, gates, etc.) and for<br />
deformation that could occur during use.<br />
If installed and used correctly, the automated system will meet the required level of<br />
safety. Nonetheless, it is advisable to observe certain rules of behaviour so that accidental<br />
problems can be avoided:<br />
- Keep adults, children and property out of range of the automated system, especially<br />
while it is operating.<br />
FRANÇAIS<br />
Nous vous remercions d’avoir choisi ce produit qui, nous n’en doutons pas, saura vous<br />
garantir les performances attendues. Veuillez lire attentivement la brochure AVERTISSE-<br />
MENTS et le MANUEL D’INSTRUCTION qui accompagnent ce produit car ils contiennent<br />
d’importantes informations sur sa sécurité, son montage, son usage et son entretien. Ce<br />
produit est conforme aux normes techniques et aux prescriptions de sécurité établies.<br />
Nous confirmons qu’il est conforme aux directives européennes suivantes: 2004/108/CEE,<br />
2006/95/CEE, 2006/42/CEE (et leurs modifications successives).<br />
1) SÉCUR<strong>IT</strong>É GÉNÉRALE<br />
ATTENTION Instructions de sécurité importantes. Veuillez lire et suivre attentivement<br />
la brochure Avertissement et le Manuel d’instructions fournis avec le produit sachant<br />
qu’un usage incorrect peut provoquer des préjudices aux personnes, aux animaux<br />
ou aux choses. Rangez soigneusement les instructions afin de pouvoir les consulter<br />
par la suite. Ce produit a été conçu et réalisé exclusivement pour l’usage indiqué dans<br />
cette documentation. Tout autre usage risque d’endommager l’appareil et d’être à l’origine<br />
de dangers.<br />
- Les éléments qui composent l’appareil doivent être conformes aux Directives Européennes<br />
suivantes: 2004/108/CE, 2006/95/CE, 2006/42/CE, 89/106/CE et leurs modifications<br />
MANUALE D’USO<br />
USER’S MANUAL<br />
MANUEL D’UTILISATION<br />
- Poiché l’automazione può essere comandata a distanza e quindi non a vista, è indispensabile<br />
controllare frequentemente la perfetta efficienza di tutti i dispositivi di sicurezza.<br />
- Quest’ applicazione non è destinata all’uso da parte di persone (inclusi i bambini) con<br />
ridotte capacità mentali, fisiche e sensoriali, o persone che mancano di conoscenze<br />
adeguate, a meno che non siano sotto supervisione o abbiano ricevuto istruzioni d’uso<br />
da persone responsabili della loro sicurezza.<br />
- I bambini devono essere controllati affinché non giochino con l’applicazione. Non lasciare<br />
radiocomandi o altri dispositivi di comando alla portata dei bambini onde evitare<br />
azionamenti involontari.<br />
- Controllare spesso l’impianto, in particolare cavi, molle o supporti per scoprire eventuali<br />
sbilanciamenti e segni di usura o danni.<br />
- Per ogni operazione di pulizia esterna o altra manutenzione, togliere l’alimentazione di rete<br />
- Tenere pulite le ottiche delle fotocellule ed i dispositivi di segnalazione luminosa. Controllare<br />
che rami ed arbusti non disturbino i dispositivi di sicurezza (fotocellule).<br />
- Non utilizzare l’automatismo se necessita di interventi di riparazione. In caso di malfunzionamento,<br />
togliere l’alimentazione, attivare lo sblocco di emergenza per consentire<br />
l’accesso e richiedere l’intervento di un tecnico qualificato (installatore professionale).<br />
- Per qualsiasi intervento diretto all’automazione, avvalersi di personale qualificato (installatore<br />
professionale).<br />
- Annualmente far controllare l’automazione da personale qualificato.<br />
- Tutto quello che non è espressamente previsto in queste istruzioni, non è permesso.<br />
- ll buon funzionamento dell’operatore è garantito solo se vengono rispettati i dati riportati<br />
in questo manuale. La ditta non risponde dei danni causati dall’inosservanza delle norme<br />
di installazione e delle indicazioni riportate in questo manuale.<br />
- Le descrizioni e le illustrazioni del presente manuale non sono impegnative. Lasciando<br />
inalterate le caratteristiche essenziali del prodotto, la Ditta si riserva di apportare in qualunque<br />
momento le modifiche che essa ritiene convenienti per migliorare tecnicamente,<br />
costruttivamente e commercialmente il prodotto, senza impegnarsi ad aggiornare la<br />
presente pubblicazione.<br />
- As automation can be remotely controlled and therefore not within sight, it is essential<br />
to frequently check that all safety devices are perfectly efficient.<br />
- This application is not meant for use by people (including children) with impaired<br />
mental, physical or sensory capacities, or people who do not have suitable knowledge,<br />
unless they are supervised or have been instructed by people who are responsible for<br />
their safety.<br />
- Children must be supervised to ensure they do not play with the application. Keep<br />
remote controls or other control devices out of reach of children in order to avoid the<br />
automated system being operated inadvertently.<br />
- Check the system frequently, especially cables, springs or supports, to detect any loss<br />
of balance and signs of wear or damage.<br />
- When cleaning the outside or performing other maintenance work, always cut off<br />
mains power.<br />
- Keep the photocells’ optics and illuminating indicator devices clean. Check that no<br />
branches or shrubs interfere with the safety devices (photocells).<br />
- Do not use the automated system if it is in need of repair. In the event of a malfunction,<br />
cut off the power, activate the emergency release to allow access and call in qualified<br />
technical personnel (professional installer).<br />
- If the automated system requires work of any kind, employ the services of qualified<br />
personnel (professional installer).<br />
- Have the automated system checked by qualified personnel once a year.<br />
- Anything that is not explicitly provided for in these instructions is not allowed.<br />
- The operator’s proper operation can only be guaranteed if the information given herein<br />
is complied with. The Firm shall not be answerable for damage caused by failure to<br />
comply with the installation rules and instructions featured herein.<br />
- Descriptions and illustrations herein are not binding. While we will not alter the product’s<br />
essential features, the Firm reserves the right, at any time, to make those changes<br />
deemed opportune to improve the product from a technical, design or commercial<br />
point of view, and will not be required to update this publication accordingly.<br />
successives. Pour tous les pays n’appartenant pas à la CEE, nous conseillons de respecter<br />
aussi les normes citées, outre les règlements nationaux en vigueur, afin de garantir un<br />
bon niveau de sécurité.<br />
- L’entreprise décline toute responsabilité dérivant d’un usage incorrect ou différent de<br />
celui prévu et indiqué dans la présente documentation, de l’inobservation de la bonne<br />
technique dans la construction des fermetures (portes, portails, etc.) et des déformations<br />
pouvant apparaître à l’usage.<br />
Si l’automatisation est montée et utilisée correctement, elle est conforme au degré de<br />
sécurité prescrit. Il est cependant nécessaire de respecter certaines règles de comportement<br />
pour éviter tout inconvénient accidentel:<br />
- Tenez les enfants, les personnes et les objets à l’écart du rayon d’action de l’automatisation,<br />
en particulier pendant son fonctionnement.<br />
- L’automation pouvant être commandée àdistance, il est indispensable de contrôler<br />
souvent le bon fonctionnement de tous les dispositifs de sécurité.<br />
- Cette application n’est pas destinée à être utilisée par des personnes (y compris les<br />
enfants) ayant des capacités mentales, physiques et sensorielles réduites, ni par des<br />
personnes dépourvues des connaissances nécessaires, à moins d’agir sous la supervision<br />
de personnes responsables de leur sécurité ou d’avoir reçues les instructions nécessaires
de ces mêmes personnes.<br />
- Les enfants doivent être surveillés car ils ne doivent en aucun cas jouer avec l’application.<br />
Rangez les radiocommandes ou les autres dispositifs de commande hors de portée des<br />
enfants afin d’éviter tout actionnement involontaire de l’automatisation.<br />
- Contrôlez souvent l’installation, en particulier au niveau des câbles, des ressorts ou des<br />
supports pour découvrir les éventuels déséquilibres et signes d’usure ou de dommage.<br />
- Mettez hors tension l’application avant d’accomplir les opérations de nettoyage extérieur<br />
ou toute autre opération d’entretien.<br />
- Veillez à la propreté des systèmes optiques des photocellules et des lampes de signalisation.<br />
Veillez à ce que les dispositifs de sécurité ne soient pas dérangés par des branches<br />
ou des arbustes (photocellules).<br />
- N’utilisez pas l’automatisation si elle doit être réparée. En cas de mauvais fonctionnement,<br />
mettez hors tension, activez le déverrouillage d’urgence pour autoriser l’accès et<br />
demandez l’intervention d’un technicien qualifié (monteur professionnel).<br />
- Faites toujours appel à du personnel qualifié (monteur professionnel) si vous devez<br />
intervenir directement sur l’automatisation.<br />
- Faites contrôler une fois par an l’automatisation par du personnel qualifié.<br />
- Tout ce qui n’est pas expressément prévu dans ces instructions, est interdit.<br />
- Le bon fonctionnement de l’actionneur n’est garanti que si les instructions données dans<br />
ce manuel sont respectées. L’entreprise ne répond pas des dommages provoqués par<br />
l’inobservation des normes d’installation et des indications données dans ce manuel.<br />
- Les descriptions et les illustrations du présent manuel ne sont pas contraignantes. Sans<br />
modifier les caractéristiques essentielles de l’appareil, l’entreprise se réserve le droit<br />
d’apporter à tout moment les modifications qu’elle jugera opportunes pour améliorer<br />
le produit du point de vue technique, commercial et de sa construction, sans s’engager<br />
à mettre à jour la présente publication.<br />
DEUTSCH<br />
Wir danken Ihnen dafür, dass Sie diesem Produkt den Vorzug gegeben haben, und sind<br />
sicher, dass Sie mit ihm die für Ihre Anwendung erforderlichen Leistungen erzielen werden.<br />
Bitte lesen Sie aufmerksam die ”HINWEISE” und die ”BEDIENUNGSANLE<strong>IT</strong>UNG”, die diesem<br />
Produkt beiliegen, da sie wichtige Angaben zur Sicherheit, zur Installation, zur Benutzung<br />
und zur Wartung enthalten. Dieses Produkt entspricht den anerkannten technischen Normen<br />
sowie den Sicherheitsbestimmungen. Es entspricht den folgenden EU-Richtlinien: 2004/108,<br />
2006/95, 2006/42 (sowie nachfolgende Abänderungen).<br />
1) ALLGEMEINE SICHERHE<strong>IT</strong><br />
ACHTUNG Wichtige Hinweise zur Sicherheit. Bitte lesen und befolgen Sie aufmerksam<br />
die Hinweise sowie die Bedienungsanleitung, die das Produkt begleiten, denn eine<br />
falsche Benutzung des Produkts kann zu Verletzungen von Menschen und Tieren<br />
sowie zu Sachschäden führen. Bitte bewahren Sie die Anweisungen für zukünftige<br />
Konsultationen auf.<br />
Dieses Produkt wurde ausschließlich für die in der vorliegenden Dokumentation angegebene<br />
Verwendung konzipiert und gefertigt. Nicht angegebene Verwendungsweisen können zu<br />
Schäden und Gefahren führen.<br />
- Die Konstruktionsmaterialien der Maschine und die Installation müssen den folgenden<br />
EU-Richtlinien entsprechen: 2004/108, 2006/95, 2006/42, 89/106 sowie den nachfolgenden<br />
Abänderungen. In allen Ländern außerhalb der Europäischen Union sollten außer den<br />
geltenden nationalen Bestimmungen auch die vorgenannten Normen zur Gewährleistung<br />
der Sicherheit befolgt werden.<br />
- Die Firma lehnt jegliche Haftung für Schäden ab, sind zurückzuführen sind auf eine unsachgemäße<br />
Benutzung, die von der in der vorliegenden Dokumentation verschieden ist,<br />
auf die Nichtbeachtung des Prinzips der sachgerechten Ausführung bei den Türen, Toren<br />
usw. oder Verformungen, die während der Benutzung auftreten können.<br />
Bei ordnungsgemäßer Installation und Benutzung erfüllt die Automatisierung den geforderten<br />
Sicherheitsgrad. Dennoch sollte einige Verhaltensregeln beachtet werden, um<br />
Zwischenfälle zu vermeiden:<br />
- Halten Sie Kinder, Personen und Sachen aus dem Wirkungsbereich der Automatisierung<br />
fern, vor allem während des Betriebs.<br />
- Weil die Anlage auf Distanz und somit ohne Sichtverbindung bedient werden kann, ist<br />
die häufige Kontrolle der perfekten Funktionsfähigkeit aller Sicherheitseinrichtungen<br />
unerläßlich.<br />
ESPAÑOL<br />
Le agradecemos por haber elegido este producto, en la Empresa estamos seguros que obtendrán<br />
las prestaciones necesarias para su uso. Leer atentamente el folleto “ADVERTENCIAS” y el<br />
“MANUAL DE INSTRUCCIONES” que acompañan este producto, ya que brindan importantes<br />
indicaciones concernientes a la seguridad, la instalación, el uso y el mantenimiento. Este<br />
producto responde a las normas reconocidas de la técnica y de las disposiciones inherentes a<br />
la seguridad. Confirmamos que presenta conformidad con las siguientes directivas europeas:<br />
2004/108/CEE, 2006/95/CEE, 2006/42/CEE, 99/05/CEE (y sus posteriores modificaciones).<br />
1) SEGURIDAD GENERAL<br />
ATENCIÓN Instrucciones de seguridad importantes. Leer y seguir con atención el<br />
folleto Advertencias y el Manual de instrucciones que acompañan el producto, ya<br />
que un uso inadecuado puede causar daños a personas, animales o cosas. Conservar<br />
las instrucciones para consultas futuras. Este producto ha sido diseñado y fabricado<br />
exclusivamente para el uso indicado en la presente documentación. Usos no indicados<br />
podrían ocasionar daños al producto y ser fuente de peligro.<br />
- Los elementos de fabricación de la máquina y la instalación deben presentar conformidad<br />
con las siguientes Directivas Europeas: 2004/108/CE, 2006/95/CE, 2006/42/CE, 89/106/C<br />
y sus posteriores modificaciones. Para todos los países extra CEE, además de las normas<br />
nacionales vigentes, para lograr un nivel de seguridad apropiado se deben respetar<br />
también las normas antes citadas.<br />
- La Empresa no se responsabiliza por todo aquello que pudiera derivar del uso incorrecto<br />
o diferente a aquel para el cual está destinado e indicado en la presente documentación,<br />
como tampoco por el incumplimiento de la Buena Técnica en la fabricación de los cierres<br />
(puertas, cancelas, etc.), así como por las deformaciones que pudieran producirse durante<br />
su uso.<br />
La automatización, si se instala y utiliza de manera correcta, cumple con el grado de seguridad<br />
requerido. Sin embargo es conveniente respetar algunas reglas de comportamiento<br />
para evitar inconvenientes accidentales.<br />
- Mantener a niños, personas y cosas fuera del radio de acción de la automatización, especialmente<br />
durante su funcionamiento.<br />
- Debido a que el automatismo puede ser accionado a distancia y, por tanto, no a la vista,<br />
es indispensable controlar frecuentemente la perfecta eficiencia de todos los dispositivos<br />
BEDIENUNGSANLE<strong>IT</strong>UNG<br />
MANUAL DE USO<br />
- Diese Anwendung ist nicht für die Benutzung durch Personen (einschließlich Kinder) mit<br />
eingeschränkten geistigen, körperlichen oder sensoriellen Fähigkeiten bestimmt, oder<br />
aber durch Personen, die nicht über die erforderlichen Kenntnisse verfügen, es sein denn<br />
unter Überwachung oder nach Einweisung in die Benutzung durch die für ihre Sicherheit<br />
verantwortlichen Personen.<br />
- Es muss sichergestellt werden, dass Kinder nicht mit der Automatisierung spielen. Halten<br />
Sie die Funkfernbedienung oder sonstige Steuerungsvorrichtungen von Kindern fern, um<br />
unbeabsichtigte Betätigungen der Automatisierung zu vermeiden.<br />
- Kontrollieren Sie regelmäßig die Anlage und vor allem die Seile, die Federn und die Halterungen,<br />
um eventuelle Anzeichen von Ungleichgewicht oder ABnutzung festzustellen.<br />
- Unterbrechen Sie vor allen externen Reinigungsarbeiten oder sonstigen Wartungsarbeiten<br />
die Stromversorgung.<br />
- Halten Sie die Linsen der Fotozellen und die Anzeigevorrichtungen sauber. Stellen Sie<br />
sicher, dass die Sicherheitsvorrichtungen (Fotozellen) nicht durch Zweige oder Sträucher<br />
beeinträchtigt werden.<br />
- Benutzen Sie die Automatisierung nicht, falls sie Reparatureingriffe erforderlich macht.<br />
- Unterbrechen Sie bei Funktionsstörungen die Stromversorgung, aktivieren Sie die<br />
Notfallentsperrung, um den Zugang zu ermöglichen, und fordern Sie den Eingriff eines<br />
qualifizierten Fachtechnikers (Monteur) an.<br />
- Bitte wenden Sie sich für alle direkten Eingriffe an der Automatisierung an qualifiziertes<br />
Fachpersonal (Monteur).<br />
- Lassen Sie jährlich eine Kontrolle der Automatisierung durch qualifiziertes Fachpersonal<br />
vornehmen.<br />
- Alles, was in den vorliegenden Anweisungen nicht ausdrücklich erlaubt ist, ist als untersagt<br />
anzusehen.<br />
- Der ordnungsgemäße Betrieb des Triebs wird nur gewährleistet, wenn die im vorliegenden<br />
Handbuch angegebenen Daten eingehalten werden. Die Firma haftet nicht für Schäden,<br />
die auf die Nichtbeachtung der Installationsanweisungen sowie der Hinweise im vorliegenden<br />
Handbuch zurückzuführen sind.<br />
- Die Beschreibungen und Illustrationen im vorliegenden Handbuch sind unverbindlich.<br />
Unter Beibehaltung der wesentlichen Eigenschaften des Produktes kann die Firma jederzeit<br />
und ohne Verpflichtung zur Aktualisierung des vorliegenden Handbuches Änderungen<br />
zur technischen, konstruktiven oder handelstechnischen Verbesserung vornehmen.<br />
de seguridad.<br />
- Esta aplicación no está destinada para ser utilizada por personas (incluidos niños) con<br />
capacidades mentales, físicas y sensoriales reducidas, o personas que no cuenten con<br />
conocimientos adecuados, salvo que sean supervisadas o hayan recibido instrucciones<br />
de uso por parte de personas responsables de su seguridad.<br />
- Los niños deben ser controlados para que no jueguen con la aplicación. No dejar radiomandos<br />
u otros dispositivos de mando al alcance de niños, para evitar accionamientos<br />
involuntarios.<br />
- Controlar con frecuencia la instalación, especialmente cables, muelles y soportes para<br />
detectar eventuales desequilibrios y signos de desgaste o daños.<br />
- Para cualquier operación de limpieza exterior u otro tipo de mantenimiento, interrumpir<br />
la alimentación de red.<br />
- Mantener limpias las ópticas de las fotocélulas y los dispositivos de señalización luminosa.<br />
Controlar que ramas y arbustos no obstaculicen los dispositivos de seguridad (fotocélulas).<br />
- No utilizar la automatización si necesita intervenciones de reparación. En caso de defecto<br />
de funcionamiento, interrumpir la alimentación, activar el desbloqueo de emergencia y<br />
permitir el acceso y solicitar la intervención de un técnico cualificado (instalador profesional).<br />
- Para cualquier intervención directa en la automatización, recurrir a personal cualificado<br />
(instalador profesional).<br />
- Hacer controlar la automatización por personal cualificado una vez al año.<br />
- Todo aquello que no expresamente previsto en las presentes instrucciones, no está permitido.<br />
- El buen funcionamiento del operador es garantizado sólo si se respetan los datos indicados<br />
en el presente manual. La Empresa no se responsabiliza por los daños causados por el<br />
incumplimiento de las normas de instalación y de las indicaciones dadas en el presente<br />
manual.<br />
- Las descripciones y las ilustraciones del presente manual no son vinculantes. Dejando<br />
inalteradas las características esenciales del producto, la Empresa se reserva el derecho<br />
de realizar, en cualquier momento, modificaciones que considere convenientes para<br />
mejorar la técnica, la fabricación y la comercialización del producto, sin comprometerse<br />
a actualizar la presente publicación.<br />
21
22<br />
NOTE • NOTES • NOTES • ANMERKUNGEN • NOTAS
NOTE • NOTES • NOTES • ANMERKUNGEN • NOTAS<br />
23
035357 ver<br />
000 - 26-07-10<br />
O&O s.r.l. - Via Europa, 2 - 42015 Correggio (RE) - Italy<br />
Tel. +39 0522 740111 - Fax +39 0522 631290<br />
www.oeo.it e-mail: oeo@oeo.it<br />
Società soggetta ad attività di direzione e coordinamento di SOMFY S.A.<br />
Company subject to management and coordination activities by SOMFY S.A. - Société sujette à des activités de direction et de coordination de SOMFY S.A.<br />
Gesellschaft unter der Führung und Koordinierung von SOMFY S.A. - Sociedad sujeta a actividades de dirección y coordinación de