672T14 - V-Tech Garage Equipment
672T14 - V-Tech Garage Equipment
672T14 - V-Tech Garage Equipment
- No tags were found...

Create successful ePaper yourself
Turn your PDF publications into a flip-book with our unique Google optimized e-Paper software.
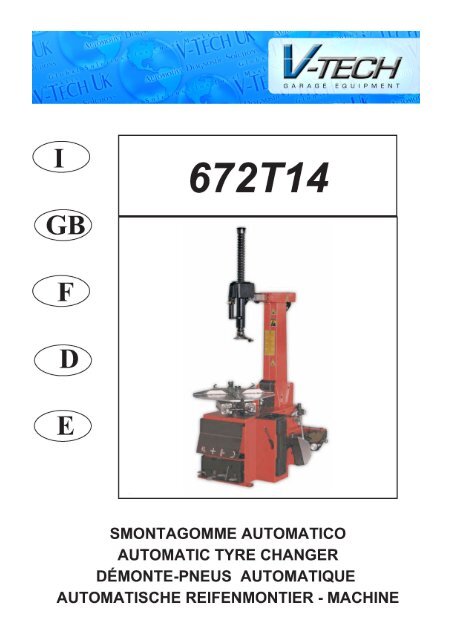
Manuale di istruzioni per l’uso e la manutenzione delloInstructions and maintenance manual forNotice d’instructions pourBedienungs- und Wartungsanleitung derManual de instrucciones para uso y mantenimento delSMONTAGOMME PER AUTOVETTURACARS TYRE CHANGERDÉMONTE-PNEUS AUTOMOBILESEMIAUTOMATISCHE REIFENMONTIER- MACHINEDESMONTADORA DE RUEDAS SEMI-AUTOMATICASModello -Model- Modèle -Model- Modelo:<strong>672T14</strong>COSTRUTTORE:-MANUFACTURER:-FABRICANT:-HERSTELLER:-FABRICANTEWERTHER INTERNATIONAL S.p.A.Via F.Brunelleschi, 1242040 CADE’ (RE) - ITALYTelefono ++ / +522 / 9431Telefax ++ / +522 / 941997E-MAIL sales@wertherint.comWEB http://www.wertherint.com1° Emissione -1st Edition-1ère Édition -1. Ausgabe:23/02/2010CENTRO DI ASSISTENZA AUTORIZZATOAUTHORISED SERVICE CENTRE:SERVICE APRS-VENTE AUTORISKUNDENDIENSTCENTER:CENTRO DE ASISTENCIA AUTORIZADO:Rev.1 ..........................................13/04/20101
IndiceINTRODUZIONE ....................................................Pag. 41. DESCRIZIONE DELLA MACCHINA.................. Pag. 62. GENERALITA’ ....................................................Pag. 63. TRASPORTO ......................................................Pag. 84. DISIMBALLO .......................................................Pag. 85. INSTALLAZIONE ..............................................Pag. 106. USO.................................................................. Pag. 187. GONFIAGGIO................................................... Pag. 298. MANUTENZIONE .............................................Pag. 329. TABELLA GUASTI RIMEDI.............................. Pag. 3610. DATI TECNICI................................................ Pag. 3811. DIAGRAMMI ELETTRICI E PNEUMATICI...... Pag.39IndexINTRODUCTION ...................................................Page 41. DESCRIPTION OF THE MACHINE ...................Page 62. GENERAL.......................................................... Page 63. TRANSPORT ...................................................Page 84. UNPACKING ....................................................Page 85. INSTALLATION ...............................................Page 106. OPERATION................................................... Page 187. INFLATING...................................................... Page 298. MAINTENANCE ............................................Page 329. TROUBLE-SHOOTING................................. Page 3610. TECHNICAL DATA .......................................Page 3811. ELECTR. AND PNEUM. DIAGRAMS........... Page 392
INDEX GÉNÉRALINTRODUCTION ...................................................Page 41. DESCRIPTION DE LA MACHINE .....................Page 62. GENERALITES .................................................Page 63. TRANSPORT ...................................................Page 84.DEBALLAGE.......................................................Page 85.INSTALLATION................................................Page 106. UTILISATION ..................................................Page 187 GONFLAGE...................................................... Page 298. ENTRETIEN ,..................................................Page 329. MAUVAIS FONCTIONN. CAUSES-REMEDES ...Page 3610. DONNES TECHNIQUES ...............................Page 3811. SCHEMAS ELECTRIQUE ET PNEUMATIQUE Page 39INHALTEINFÜHRUNG ......................................................Seite 41.BESCHREIBUNG DER MASCHINE.................. Seite 62.ALLGEMEINES................................................... Seite 63.TRANSPORT.................................................... Seite 84.AUSPACKEN DER MASCHINE........................ Seite 85.INSTALLATION .................................................Seite 106.BETRIEB ...........................................................Seite 187.AUFPUMPEN ....................................................Seite 298.WARTUNG...................................................... Seite 329.TABELLE DER BETRIEBESSTORUNGEN.....Seite 3610.TECHNISCHE DATE .....................................Seite 3811. SCHALT- UND DRUCKLUFT PLÄNE.......... Seite 393
INTRODUZIONEVi ringraziamo per aver acquistato un prodotto della Nostra linea dismontagomme automatici. La macchina è realizzataattraverso l’applicazione dei migliori principi in rispetto al concetto diqualità.Per un corretto funzionamento e per una lunga durata sarà sufficienteosservare le semplici istruzioni contenute nelpresente manuale che dovrà essere letto e compreso nel modo piùcompleto in ogni sua parte.ANAGRAFICA DELLO SMONTAGOMMEUna completa descrizione del “Modello dello Smontagomme” e il “N.rodi Matricola” faciliterà il servizio della Nostraassistenza e la spedizione di parti di ricambio. Per maggiore chiarezzae comodità ricordiamo i dati del Vostro smontagommenel riquadro sottostante. Qualora vi fossero delle discordanze fra i datiriportati nel presente manuale e quelli sulla targhetta applicata allosmontagomme, faranno fede quelli sulla targhetta.Il presente manuale costituisce parte integrante del prodotto.Prima di utilizzare lo smontagomme, leggere attentamente le avvertenzee le istruzioni contenute nel presentelibretto in quanto forniscono importanti indicazioni riguardanti la sicurezzad’uso e la manutenzione.Conservare con cura questo manuale per ogni ulteriore consultazioneKeep this manual for further reference.INTRODUCTIONThank you for purchasing a product from the line of Automatic tyrechangers. The machine has been manufactured inaccordance with the very best quality principles. Follow the simple instructionsprovided in this manual to ensure the correctoperation and long life of the machine. Read the entire manual thoroughlyand make sure you understand it.TYRE CHANGER IDENTIFICATION DATAA complete description of the “Tyre Changer Model” and the “Serialnumber” will make it easier for our technical assistanceto provide service and will facilitate delivery of any required spare parts.For clarity and convenience, we have inserted the data of your tyrechanger in the box below. If there is any discrepancy between the dataprovided in this manual and that shown on the plate fixed to the tyrechanger, the latter should be taken as correct.This manual is an integral part of the product.Before using the tyre changer, read carefully the warnings and instructionscontained in this manual sincethey provide important information on operating safety and maintenance.Keep this manual for further reference.NOTA: Parte delle illustrazioni contenute in questo manuale sono statericavate da fotografie di prototipi.Pertanto è possibile che alcune parti o componenti della macchine dellaproduzione standard risultinodiverse da quanto rappresentato.Note: part of the illustrations have been made out of prototypes pictures.It is therefore possible that someparts or components of standard production differ from those representedin the pictures.4
INTRODUCTIONNous vous remercions d’avoir choisi un produit de la ligne des démonte-pneusAutomatiques. La réalisation de ces machines a été soignéedans les moindres détails pour vous offrir des produits de qualité.Pour un fonctionnement correct et une longue durée, il suffit d’observerles instructions de ce manuel qui devront être lues avec beaucoup d’attentionpour être bien comprises.DONNEES DU DEMONTE-PNEUSUne description complète du “Modèle du démonte-pneus” et le “Numérode Matricule” faciliteront le service après-vente et l’expédition d’éventuellespièces de rechange. Pour plus de clarté, nous vous rappelons,ci-dessous, les données de votre démonte-pneus. Si les données de cemanuel et celles de la plaquette appliquée sur le démonte-pneus necorrespondent pas, ce sont celles de la plaquette qui font foi.Le présent manuel fait partie intégrante du produit.Avant d’utiliser le démonte-pneus, lire attentivement les instructions etles remarques du présent manuel car elles fournissent des indicationsimportantes sur la sécurité d’utilisation et l’entretien.Conserver très soigneusement ce manuel pour le consulter si nécessaire.Note: une partie des illustrations contenues dans ce notice a été obtenuepar des photos de prototypes. Il est donc possible qu’il y ait quelquesdifférences entre les composants de la production standard etceux répresentés enEINFÜHRUNGWir danken Ihnen für Ihr Vertrauen, das Sie uns mit dem Kauf eines unsererautomatischen Reifenmontiergeräte bewiesen haben.Die Maschine wurde unter Anwendung der besten Verfahrenstechnikund unter Berücksichtigung höchster Qualitätskriterien gebaut.Zur fachmännischen Bedienung und im Hinblick auf eine maximale Lebensdauergenügt es, die einfachen Bedienungsanweisungen zubefolgen, die in diesem Handbuch enthalten sind, das wir Sie aufmerksamzu lesen bitten.HERSTELLERDATEN DES REIFENMONTIERGERÄTESEine komplette Beschreibung Ihres Reifenmontiergeräte-Modells sowiedie Angabe der Matrikelnummer vereinfachen den Kundendienstsowie den Versand von Ersatzteilen.Zu Ihrer Information geben wir die Daten Ihres Reifenmontiergerätesuntenstehend an.Falls zwischen den unten angegebenen Daten und denjenigen, die Sieauf dem Typenschild Ihres Reifenmontiergerätes finden, Unterschiedebestehen, gelten die Angaben auf dem Typenschild.Dieses Handbuch ist Bestandteil des Produktes.Bevor Sie das Reifenmontiergerät zum ersten Mal benützen, lesen Siebitte aufmerksam die darin enthaltenen Anweisungen, denn sie enthaltenwichtige Hinweise zur Betriebssicherheit und Wartung.Bewahren Sie dieses Handbuch sorgfältig auf, damit Sie es jederzeitwieder konsultieren können!Anm.: ein Teil der in diesem Buch enthaltenen Abbildungen ist von Prototypphotographiengezogen. Es ist deshalb möglich, daß einige Maschinenteilevon Abbildung serienmäßig verschieden hergestellt werden.5
1. DESCRIZIONE DELLA MACCHINA1. DESCRIPTION OF THE MACHINEF)Commutatore di velocitàG) Griffe di bloccaggioI) Torretta integraleL) Pistoletta di gonfiaggioM) Braccio operanteN) Palo orizzontaleP) Palo verticaleQ) Alimentazione ariaR) StallonatoreS) Appoggio ruotaT) Leva alzatalloniU) Pedale comando stallonatoreV) Pedale comando griffeZ) Pedale comando invertitoreH) Pedale comando ribaltamento paloY) Piatto autocentranteK) Pulsante bloccaggioF) Speed change switchG) ClampsI) Mounting headL) Airline gaugeM) Mounting barN) Horizontal armP) Vertical armQ) Air supplyR) Bead breakerS) Wheel supportT) Bead lifting leverU) Bead breaker control pedalV) Clamp control pedalZ) Reverser control pedalH) Tilting arm pedalY) TurntableK) Locking buttonFig.1FIG.2 AVVERTENZE DI PERICOLOFIG.2 DANGER WARNING SIGN2. GENERALITÀ2.1 DESTINAZIONE D’USO.• Questo smontagomme automatico è stato progettato e realizzatoesclusivamente per lo smontaggio e il montaggio dei pneumatici dai/suicerchi con dimensioni da 10" a 24" e diametro max. 1000 mm.Qualsiasi altro uso è da considerarsi improprio e quindi irragionevole• In particolare IL COSTRUTTORE non può essere considerato responsabileper eventuali danni causati da usi non esplicati in questomanuale e quindi impropri, erronei ed irragionevoli.2. GENERAL2.1 INTENDED USE• This automatic tyre changer has been designed and manufactured exclusivelyfor removing and mounting tyres from/onto rims from 10" to24" and a maximum diameter of 1000 mm.Any other use is to be considered incorrect and unreasonable.• In particular THE MANUFACTURER cannot be held responsiblefor any damage caused through the use of this tyre changer forpurposes other than those specified in this manual, and thereforeinappropriate, incorrect and unreasonable.Fig.26
1. DESCRIPTION DE LA MACHINE1.BESCHREIBUNG DER MASCHINEF) Commutateur de vitesseG) Mors de blocageI) Tête de montageL) Pistolet de gonflageM) Barre de montageN) Bras horizontalP) Bras verticalQ) Raccord air compriméR) DétalonneurS) Supports de roueT) Levier démonte-pneusU) Pédale de commande du détalonneurV) Pédale de commande des morsZ) Pédale de commande de l’inverseurH) Pédale de commande de basculement du brasY) Plateau à centrage automatiqueK) Poignée de blocageF) GeschwindigkeitumschalterG) SpannklauenI) MontierfußL) ReifenfülldruckgerätM) WerkzeugarmN) HorizontalstabP) KipparmQ) DruckluftanschlußR) AbdrückblattS) RadanschlägeT) Hebel zur WulstanhebungU) Steuerpedal AbdrückblattV) Steuerpedal SpannklauenZ) Steuerpedal WendegetriebeH) KipparmschwenkungY) ZentriertischK) SperrdrucktasteFIG.2 AVIS DE DANGER2. GENERALITES2.1 DESTINATION• Le démonte-pneus semi-automatique a été projeté et réalisé exclusivementpour le démontage et le montage des pneus des/sur les jantesavec dimensions de 10" à 24" et diamètre max de 1000 mm.Toute autre utilisation doit être considérée impropre et donc irraisonnée.•LECONSTRUCTEURnepeutpasêtreconsidéréeresponsablededommages éventuels causés par des utilisations qui ne sont pas expliquéesdans ce manuel et par conséquent impropres et incorrectes.FIG.2 GEFAHRENHINWEISE2. ALLGEMEINES2.1 VERWENDUNGSZWECK• Das Automatische Reifenmontiergerät wurde ausschließlich zum AbundNeumontieren von Reifen von/auf Felgen geschaffen von 10" bis24" und einem Durchmesser bis zu 1000 mm. Jede anderweitige Verwendungist unsachgemäß und deshalb unzulässig !• DER HERSTELLER haftet daher nicht, wenn durch Verwendungen,die in diesem Handbuch nicht vorgesehen und deshalb unsachgemäß,falsch und unzulässig sind, Schäden entstehen.7
2.2 NORME GENERALI DI SICUREZZA.L’uso dello smontagomme è consentito solo ed esclusivamente a personaleesperto, appositamente addestrato ed autorizzato.• Ogni e qualsiasi manomissione o modifica dell’apparecchiatura nonpreventivamente autorizzate dal costruttore sollevano quest’ultimo daogni responsabilità per danni derivati o riferibili agli atti suddetti.• La rimozione o manomissione dei dispositivi di sicurezza comporta ladecadenza immediata della garanzia e la violazione delle Norme Europeeper la Sicurezza.• Lo smontagomme è corredato di decalcomanie di istruzione ed avvertenzeprogettate e realizzate per durare nel tempo.Qualora venissero danneggiate o distrutte, l'utente deve richiederle subitoal costruttore utilizzando i codici di pag.82.2 GENERAL SAFETY PRECAUTIONSThe tyre changer may only be used by specially trained and authorizedexpert personnel.• Any tampering or modification to the equipment carried out without themanufacturer’s prior authorization will free him from all responsibility fordamage caused directly or indirectly by the above actions.• Removing or tampering with safety devices immediately invalidatesthe guarantee and is in contravention of European Safety Standards.• The tyre changer comes complete with instruction and warning transferswhich are designed to be long-lasting.If they should for any reason be damaged or destroyed, please ask immediatelyfor replacements from the manufacturer using the codes givenon page 8.3. TRASPORTO• Lo smontagomme deve essere trasportato nell'imballo originale emantenuto nella posizione indicata sull'imballo stesso.• Lo spostamento della macchina imballata deve essere effettuato inforcandocon un carrello elevatore di adeguate capacità, nei punti indicatidalla figura 3.3. TRANSPORT• The tyre changer must be transported in its original packaging andkept in the position shown on the package itself.• The packaged machine may be moved by means of a fork lift truck ofsuitable capacity. Insert the forks at the points shown in figure 3.4. DISIMBALLOTogliere il cartone di protezione e il sacchetto in nylonAssicurarsi dell’integrità dell’apparecchio controllando che non vi siano partivisibilmente danneggiate o mancanti facendo riferimento alla fig.In caso di dubbio non utilizzare la macchina e rivolgersi al proprio rivenditore.4. UNPACKINGRemove the protective cardboard and the nylon bag.Check that the equipment is in perfect condition, making sure that noparts are damaged or missing. Use fig. 1 for reference.If in doubt do not use the machine and contact your retailer.STANDARD :Kg 279GT:Kg.2918
2.2 NORMES GENERALES DE SECURITEL’utilisation du démonte-pneus est permise exclusivement à du personnelspécialisé, expressément formé et autorisé.• Le constructeur n’est pas responsable des dommages causés par lesappareils qui ont été modifiés sans son autorisation préalable.• La garantie est immédiatement nulle si des modifications ou des transformationssont apportées aux dispositifs de sécurité; celles-ci sontune violation des normes européennes pour la sécurité.• Le démonte-pneus est équipé de décalcomanies d’instructions et d’avisde danger, projetées et réalisées pour durer dans le temps. Si ellessont endommagées ou détruites, l’utilisateur doit les demander immédiatementau constructeur en utilisant les codes de la page 8.3. TRANSPORT• Le démonte-pneus doit être transporté dans son emballage et maintenudans la position indiquée sur l’emballage même.• La machine emballée doit être déplacée sur les fourches d’un chariotélévateur d’une capacité appropriée, enfilées aux points indiqués sur lafigure 3.4. DEBALLAGEEnlever le carton de protection et le sac en nylon.Contrôler qu’il n’y ait pas de parties visiblement endommagées ou manquantesen se référant à la figure 1.En cas de doute, ne pas utiliser la machine et s’adresser au revendeurautorisé.2.2 ALLGEMEINE SICHERHEITSNORMENDie Verwendung des Reifenmontiergerätes ist nur Personen gestattet,die entsprechende Erfahrung haben, eingewiesen worden und zum Gebrauchbefugt sind.- Falls Veränderungen oder Eingriffe auf dem Gerät vorgenommen werden,die vom Hersteller nicht zuvor bewilligt worden sind, haftetdieser nicht für Schäden, die auf diese zurückzuführen sind.- Die Entfernung oder Veränderung von Sicherheitsvorrichtungen bewirktden sofortigen Verfall der Garantie und stellt eine Verletzung derEuropäischen Sicherheitsnormen dar.- Auf dem Reifenmontiergerät wurden Klebeetiketten mit Anweisungenund Warnungen angebracht, durch deren Beachtung die Lebensdauerdes Gerätes verlängert werden kann.Werden diese beschädigt oder entfernt, müssen sie sofort beim Herstellerunter Angabe der Bestell-Nummern von Seite 8 angefordert werden3. TRANSPORTDas Reifenmontiergerät darf nur in seiner Originalverpackung und inder auf der Verpackung angegebenen Position transportiert werden.Die verpackte Maschine darf nur mit einem dazu geeigneten Gabelstaplerangehoben und transportiert werden, wobei die Gabeln an den inAbb. 3 angegebenen Punkten einzuschieben sind.4. AUSPACKEN DER MASCHINESchutzkarton und Plastikbeutel entfernen.Kontrollieren, ob das Gerät intakt ist, ob keine sichtbaren Beschädigungenvorhanden sind oder Teile fehlen, siehe dazu Abb.1.Im Zweifelsfalle die Maschine nicht benützen und den Verkäufer benachrichtigen.9
5. INSTALLAZIONE5.1 SPAZIO NECESSARIOAl momento della scelta del luogo di installazione, è necessario osservarele normative vigenti perla sicurezza sul lavoro• Lo smontagomme necessita di collegamenti con la rete elettrica e conl’impianto di aria compressa.E’ perciò opportuno installare la macchina in prossimità di tali fontienergetiche.• Inoltre, sul luogo prescelto per l’installazione, devono essere disponibilialmeno gli spazi indicati dalle figure 4 - 4/A perpermettere il regolare funzionamento di tutte le sue parti senza alcunalimitazione.• Se la macchina viene installata all'aperto è necessario che sia protettada una tettoia.Nel caso lo smontagomme sia del tipo a motore elettrico è proibito l'usoin atmosfere esplosive a meno chenon si tratti di una apposita versione.5. INSTALLATION5.1 SPACE REQUIREDWhen choosing the place of installation be sure that it complies withcurrent safety at work regulations.•The tyre changer must be connected to the mains electric powersupply and the compressed air system.It is therefore advisable to install the machine near these powersources.•The place of installation must also provide at least the space shown inpictures 4 - 4/A so as to allow all parts of the machineto operate correctly and without any restriction.•If the machine is installed outside it must be protected by a lean-to.The tyre changer with electric motor cannot be used in explosive atmospheres,unless it is a proper version.10
5. INSTALLATION5.1 EMPLACEMENT NECESSAIREAu moment du choix du lieu d’installation, observer les normes en vigueurpour la sécurité du travail.•Le démonte-pneus devra être raccordé au réseau électrique et à l’installationd’air comprimé.Il faudra donc en tenir compte pour le choix de l’emplacement.•De plus, dans le lieu d’installation il faudra les espaces nécessairespour permettre le fonctionnement régulier de toutes les parties dudémontepneus, sans aucune limitation (voir fig. 4/A).•Si la machine doit être installée en plein air, elle devra être protégéepar un abri.Si le démonte-pneus est du type à moteur électrique, son utilisation estinterdite près de matières explosives, à moins qu’ilne s’agisse d’une version appropriée.5. INSTALLATION5.1 PLATZBEDARFBei der Wahl des Aufstellungsortes müssen die gültigen Bestimmungenzur Sicherheit am Arbeitsplatz beachtet werden.Das automatische Reifenmontiergerät benötigt Anschlüsse an dasStromnetz und an die Druckluftzufuhr. Deshalb ist es ratsam, dieMaschinein der Nähe dieser Energiequellen aufzustellen.Zudem muss am gewählten Installationsort mindestens soviel Platz vorhandensein, wie in Abb. 4/A angegeben ist, so daß der Betrieb allerMaschinenteile problemlos eingestellt werden kann.Wird die Maschine im Freien aufgestellt, muß sie durch ein Dachgeschützt werden.Falls das Reifenmontiergerät einen elektrischen Motor aufweist, darf esnicht in Räumen mit Explosionsgefahr verwendetwerden, außer wenn es um eine geeignete Ausführung handelt.11
Fig.75.2 MONTAGGIO COMPONENTI5.2.1 Montaggio pali Inserire il palo verticale nel supporto della carcassam infilandolocome indicato in fig. 5 Infilare le viti di fulcro posteriori (1), inserire le boccole (2), le rondelle(3) e serrare i dadi (4). Fig. 6 Infilare il perno (5) comprensivo di rondella (6) per collegare il cilindroribaltamento e il palo come indicato in fig. 7 Avvitare il dado (7) . Avvitare la vite e la rondella (10) per fissare la carenatura in plasticacome mostrato in Fig. 8. Montare la paletta stallonatore (R) sul braccio stallonatore, avendocura che la rondella (15) resti dalla parte interna del braccio e la rondella(16) dalla parte esterna. Bloccare il tutto avvitando il dado autobloccante (17) sul perno dellapaletta.5.2 PARTS ASSEMBLY5.2.1 Arms assembly Set the vertical arm into its housing on the machine body, as shownin picture 5 Set the back screws (1), the bushes (2), the washers (3) and tightenthe nuts (4). Picture 6 Set pin (5) and washer (6) to join the tilting control cylinder to thearm, as shown in picture 7. Screw up nut (7). Tighten screw and washer (10) to fix the plastic cover as shown inpicture 8. Set the blade (R) on the bead breaker arm taking care to place washer(15) inside the arm and washer (16) outside. Lock everything by tightening the self-locking nut (17) on the bladepin. Fig. 9/AFig.8Fig.6Fig.912
5.2 MONTAGE DES COMPOSANTS5.2.1 Montage des bras Insérer le bras vertical dans le logement sur le bâti, comme indiquéen fig. 5 Insérer les vis arrière (1), les coquilles (2) ainsi que les rondelles (3)et serrer par les écrous (4). Fig. 6 Insérer l’axe (5) avec rondelle (6) pour brancher le vérin de basculementau bras, comme indiqué en fig. 7 Visser l’écrou (7). Visser la vis et la rondelle (10) pour fixer la partie en plastique commeindiqué en fig. 8. Installer la palette (R) sur le bras décolleur en faisant attention à positionnerla rondelle (15) à l’intérieur du bras et la rondelle (16) à l’extérieur.Fig. 9 Bloquer le tout en vissant l’écrou de sécurité (17) sur l’axe de la palette.Fig. 95.2 BESTANDTEILENEINBAU5.2.1 Armeinbau Den senkrechten Arm in die dazu bestimmte Stütze auf der Maschinengehäuseeinfügen (siehe Abb. 5) Die hintere Schrauben (1), die Buchsen (2) sowie die Beilagsscheiben(3) einfügen und die Mutter (4) anziehen. Abb.6 Stift (5) mit Beilagsscheibe (6) einfügen, um den Kippzylinder mitdem Arm zu verbinden (siehe Abb. 7) Die Mutter (7) anschrauben aber nicht anziehe. Die Schraube und die Beilagsscheibe (10) anziehen, um dieKunststoffverkleidung zu befestigen. Abb.8 Schaufel (R) auf Wulstabdrückarm einbauen und feststellen, daßScheibe (15) auf Innerseite und Scheibe (16) auf Außenseite desArmes positioniert werden. Fig. 9. Die selbstsichernde Mutter (17) auf den Schaufelstift anziehen, umdie ganze Gruppe zu befestigen. Fig. 913
5.5.2 Montaggio e collegamento serbatoio aria per GTFissare il serbatoio sul retro della carcassa con le apposite viti (1)Smontare il pannello lateraleFare passare il tubo (2), situato all'interno della carcassa, nel foro postosul retro della stessa.Avvitare il tubo (2) al serbatoio tramite l'apposito raccordo.5.2.2 Mounting and connecting the GT-tankFix the tank on the back side of the machine body through the properscrews (1).Demount the side panel.Let the hose (2), situated inside the machine body, pass through thehole on the back side of the body.Tighten the hose (2) to the tank through the proper union.Fig.10Fig.115.2.3 Montaggio e collegamento manometroFissare la scatola manometro al palo verticale tramite le apposite viti indotazione.Fare passare il tubo di collegamento a spirale nel foro piccolo situatosul retro della carcassa.Collegare il tubo rilsan al raccordo del limitatore di pressione posto sulpedale di gonfiaggio5.2.3 Mounting and connecting the manometerFix the manometer box to the vertical arm through the properscrews.Let the connection spiral hose pass through the small hole onthe back side of the machine body.Connect the rilsan hose to the union of the pressure limitingdevice, situated on the inflating pedal.5.3 MESSA IN SERVIZIO5.3 COMMISSIONINGPrima di effettuare gli allacciamenti, accertarsi che le caratteristichedei propri impianti corrispondano a quelle richiestedalla macchina.Before making the connections, check that the characteristicsof your systems correspond to those requiredby the machine.• Se fosse necessario cambiare la tensione di funzionamento dellamacchina occorre intervenire sulla morsettiera(Cap.14 - schema elettrico)•If you have to change the machine’s operating voltage, make the necessaryadjustments to the terminal board (Chap.14)Interventi sull’impianto elettrico, anche se di lieve entità, richiedonol’intervento di personale professionalmente qualificato.Even small jobs done on the electrical system must becarried out by professionally qualified personnel.Fig.12• Collegare la macchina all’impianto d’aria compressa tramite l’attacco(Q) sporgente dalla parte posteriore (fig. 12)• Collegare la macchina alla rete elettrica che deve essere dotata di fusibilidi linea, di una buona presa a terracome da norme vigenti e collegata ad un interruttore automatico di alimentazione(differenziale) tarato a 30 mA.•Connect the machine to the compressed air system by means of theair connection (Q) that protrudes from the rear section as shown in thediagram 12.•Connect the machine to the electric network, which must be provided withline fuses, a good earth plate in compliance with regulationsinforceanditmust be connected to an automatic circuit breaker (differential) set at 30 mA.NOTA: Qualora lo smontagomme venga fornito senza spina elettrica,sarà cura dell'utente montarne una(almeno 16 A) adeguata allatensione della macchina e secondo le normative vigenti.Note: Should the tyre-changer be lacking in electric plug, so theuser must set one,which is at least 16 A and which conforms tothe voltage of the machine, in compliance with the regulations inforce.14
5.2.2 Montage et branchement du réservoir d'air pour GTFixer le réservoir sur la partie arrière du bâti moyennant les visappropriées (1).Démonter le panneau lateral.Laisser passer le tuyau (2), qui se trouve à l'intérieur du bâti, par le trouarrièr au bâti même.Visser le tuyau (2) au réservoir moyennant le raccord approprié.5.2.2 Montage und Verbindung von GT-LuftbehälterBehälter auf Hinterseite der Maschine durch die dazu bestimmtenSchrauben (1) befestigen.Seitenpanel abmontieren.Schlauch (2), der sich innerhalb der Maschine findet, durch Loch aurHinterseite der Maschine schieben lassen.Schlauch (2) an der dazu bestimmten Verschraubung befestigen.5.2.3 Montage et branchement du manomètreFixer la boîte manomètre au bras vertical moyennant les vis fournies.Laisser passer le tuyau-spirale de connexion par le petit trou qui setrouve arrière au bâti.Brancher le tuyau rilsan au raccord du limitateur de pression sur la pédalede gonflage.5.3 MISE EN MARCHEAvant d’effectuer les raccordements, vérifier que les caractéristiquesdes installations correspondent à cellesdemandées par la machine.5.2.3 Montage und Verbindung des ManometersManometergehäuse am Vertikalausleger durch die dazu bestimmtenSchrauben befestigen.Die Verbindungsspirale durch kleines Loch auf Hinterseite der Maschineschieben lassen.Rilsanschlauch mit der Verschraubung der Druckbegrenzvorrichtungauf dem Aufpumppedal verbinden5.3 INBETRIEBNAHMEVor dem Anschluß muß überprüft werden, ob die Eigenschaftender Betriebsanlagen den von der Maschine gefordertenWerten entsprechen.•S’il faut changer la tension de fonctionnement de la machine, intervenirsur le bornier (voir schéma électrique Chap. 14).Les interventions sur l’installation électrique, même sielles sont peu importantes, doivent être effectuées pardu personnel qualifié.•Raccorder la machine à l’installation d’air comprimé par le raccord (Q)situé à l’arrière (voir figure 12).•Relier la machine au reseau électrique, qui doit être equipé de fusiblesde ligne et d’une prise de terre conformément auxnormes en vigueur. De plus, il faut relier la machine à un interrupteurautomatique d’alimentation (différentiel) reglé à 30 mA.NOTE: Si le demonte-pneus est dépourvu de fiche électrique, l’utilisateurdevramonter une fiche qui soit proporsionnée à la tension de la machine( au moins 16 A) conformément aux normes en vigueur.-Falls die Betriebsspannung der Maschine geändert werden muß,entsprechend Schaltplan im Kap. 14 Klemmenbrett vorgehen.(Auch kleinere)Eingriffe an der elektrischen Anlage dürfen nur von Fachpersonalvorgenommen werden.-Maschine an das Druckluftnetz anschließen, hierzu den Anschlußstutzen(Q) verwenden, der gemäß Abbildung hinten hervorsteht.Maschine vorschriftsgemäß an das Stromnetz anschließen. Das Stromnetzmuß mit Schmelzsicherungen sowie mit einem guten Erdschlußversehen werden. Dazu muß die Maschine an einen selbstätigen 30mAgeeichten Ausschalter (Differential) verbindet werden.WICHTIG:Wenn das Reifenmontiergerät ohne Steckdose geliefertwird, muß der Verbraucher mindestens eine 16A Steckdoseanschließen. Diese muß an die Spannung der Maschine angemessenund gemäß der gültigen Bestimmungen sein.15
Fig.135.4 TEST DI FUNZIONAMENTO• Premendo il pedale (Z) il piatto autocentrante (Y) deve ruotare in sensoorario. Spingendo verso l'alto il pedale il piatto autocentrante (Y)deve ruotare in senso antiorario.N.B: Se il piatto girasse in senso opposto a quello indicato è necessarioinvertire due fili sulla spina trifase• Premendo il pedale (U) si aziona lo stallonatore (R); rilasciando il pedalelo stallonatore ritorna nella posizione originale• Premendo il pedale (V) si aprono le quattro griffe di bloccaggio (G);premendo nuovamente si chiudono.• Premendo il pedale (H) si ribalta il palo(P); premendo nuovamente ilpalo ritorna in posizione di lavoro• Ponendo il pulsante di bloccaggio (K) in pos.1, si bloccano il bracciooperante(M) ed il braccio orizzontale (N).La torretta si posiziona automaticamente alla giusta distanza dalcerchio.• Premendo il pulsante in pos. 2, i bracci si sbloccano e la torretta scendesul cerchio o fino all'altezza minima di servizio.• Premendo il pulsante in pos. 3, i bracci si sbloccano e la torretta sialza in posizione di fuori lavoro• Premendo il grilletto della pistoletta di gonfiaggio esce aria dallatestina.5.4 OPERATING TESTS•When pedal (Z) is pressed down the turntable (Y) should turn in a clockwisedirection.When pedal is pulled up the turntableshould turn in an anticlockwise direction.Note: If the turntable turns in the opposite direction to that shown,reverse two of the wires in the three-phase plug.•Pressing the pedal (U) activates the bead breaker (R); when the pedalis released the bead breaker returns to its originalposition.•Pressing the pedal (V) opens the four clamps (G) ; when the pedal ispressed again they close.•Pressing the pedal (H) tilts the arm (P); when the pedal is pressed againit returns to its working position.•Position 1 of the locking button (K) locks the mounting bar (N) and thehorizontal arm (M). The mounting head positions itself automatically atthe correct distance from the rim.•With the button in Pos.2, the arms are unlocked and the mounting headgoes down onto the rim or until it reaches the minimum working height.•With the button in Pos.3, the arms are unlocked and the mountinghead goes up to the out-of-work position.•Pressing the trigger on the airline gauge causes air to be releasedfrom the head.5.4.1 VERSIONE GT5.4.1 GT VERSIONNell'effettuare questa prova non tenere il viso sopra l'autocentrante.Eventuale sporcizia presente sul piatto potrebbecolpire gli occhi di chi opera. Fare attenzione an che a nonpremere accidentalmente il pedale di gonfiaggio durante levarie fasi di lavoro• Premendo in posizione intermedia (B) il pedale posto sul lato sinistrodella carcassa, deve uscire aria dalla testina di gonfiaggio.• Premendo a fondo il pedale (C) esce aria dalla testina e un potentegetto dagli ugelli posti sulle griffe del piatto autocentrante.Don't lean on the turntable during this operation. Possibledirty dust on turntable could offend the operator'seyes. For the same reason, be carefully as not to accidentallypush the inflating pedal while working.•Whenthepedallocatedontheleftsideofthemachinebodyispusheddown to its intermediate position (B), air is released from the airline gauge.• When the pedal (C) is pushed down completely, air is released fromthe airline gauge along with a powerful jet from thenozzles located on the turntable clamps.16
5.4 ESSAIS DE FONCTIONNEMENT•En appuyant sur la pédale (Z) le plateau (Y) doit tourner dans le senshoraire.•En poussant la pédale (Z) vers le haut le plateau (Y) doit tourner dansle sens anti-horaire.N.B.Si le plateau tourne dans le sens opposé à celui indiqué, invertirles deux fils sur la fiche triphasée.•En appuyant sur la pédale (U), le détalonneur (R) se met en marche;en lâchant la pédale, il retourne à sa position première.•En appuyant sur la pédale (V), les quatre mors (G) placés sur le plateaus’ouvrent; en appuyant de nouveau, ils se ferment.•En appuyant sur la pédale (H), le bras (P) bascule; en appuyant de nouveau,le bras revient à sa position de travail.•En positionnant le bouton de blocage (K) en position 1, le bras opérateur(M) et le bras horizontal (N) se bloquent.La tête de montage se déplace automatiquement jusqu'à la juste distancede la jante.•En positionnant le bouton de blocage (K) en position 2, le bras se débloquent•En appuyant sur la détente du pistolet de gonflage, l’air sort.5.4 FUNKTIONSTEST-Pedal (Z) drücken; der Zentriertisch (Y) dreht sich im Uhrzeigersinn.-Wird das Pedal (Z) nach oben gedrückt, sodreht sich der Zentriertisch(Y) im Gegenuhrzeigersinn.Wichtig! Falls sich der Zentriertisch in der falschen Richtungdreht, zwei Drähte auf dem Dreiphasenstecker umpolen.-Durch Pedaldruck (U) wird das Abdrückblatt (R) betätigt, das Pedal freigegeben,kehrt das Abdrückblatt in seine Ausgangsstellungzurück.-Durch Pedaldruck (V) öffnen sich die vier Spannklauen (G) auf demZentriertisch. Auf erneutem Druck schließen sie sich.- Durch Pedaldruck (H) kippt der Arm (P). Auf erneutem Druck kehrt erin die Arbeitsposition zurück.- Mit Sperrdrucktaste (K) in Position 1 werden der Werkzeugarm (M)und der Stützarm (N) blockiert. Der Montierfuß positioniert sich automatischauf den richtigen Abstand von Felge.- Mit Sperrdrucktaste (K) in Position 2 werden die Arme freigegeben.-Auf Druck des Abzugs der Druckluftpistole tritt Luft aus dem Scherkopf.5.4.1 VERSION GTLors de cet essai ne pas mettre le visage au-dessus du plateauautocentreur. La saleté qui se trouve sur le plateau autocentreurpourrait blesser les de l'operateur. Pour cette raisonfaire attention à ne pas appuyer accidentellement sur lapédale de gonflage pendant les opération.• En appuyant sur la pédale placée sur le côté gauche du bâti dans laposition intermédiaire (B), de l’air doit sortir du pistolet de gonflage.• En appuyant à fond sur la pédale (C), de l’air sort du pistolet de gonflageet un jet puissant sort par les gicleurs placés sur les mors du plateautournant.5.4.1 GT-AUSFÜHRUNGBeim Ausfüren dieser Prüfung das Gesicht das Gesichtauf keinen Fall über den Spanntisch halten. Eventuellauf dem Spanntisch vorhandener Schmutz könnte sonstdem Bediener in die Augen fliegen. Aus dem gleichenGrund darauf achten, daß man während der Arbeit nieaus Versehen auf das Reifenfüllpedal tritt.-Bei Druck des Pedals an der linken Gehäuseseite in die Mittelstellung(B) muß Luft aus dem Reifenfülldrückgerät strömen.-Wird das Pedal (C) ganz gedrückt, so strömt Luft aus dem Reifenfülldruckgerät,und ein starker Luftstrom aus den Düsen, die sich andenn Spannklauen des Zentriertisches befinden.17
5.5 REGOLAZIONE MISURE DI BLOCCAGGIO PIATTOAUTOCENTRANTE5.5 TURNTABLE LOCKING VALUE ADJUSTINGIl piatto autocentrante dello smontagomme viene regolato dal costruttore suuna misura di bloccaggio intermedia che va da 11" a 21" ext (rispetto all'esternodel cerchio) e da 13" a 23" int. (se si blocca il cerchio dalla parte interna).E' pero' possibile modificare tali valori qualora si debba operare su cerchidi dimensioni minori o maggiori spostando la posizione delle 4 griffecome indicato nelle figure sottostanti.Il range di valori ottenibili in questo modo varia da un minimo di 10"-20"ext. e 12-22" int. ad un massimo di 12"-22" ext e 14"-24" int.Per modificare la posizione:Svitare la vite (1) per mezzo di una chiave a brugolaRimuovere la griffa di bloccaggio (2) e lo scorrevole (3)Posizionare il foro dello scorrevole in corrispondenza di quello della guida(4) a seconda delle dimensioni di bloccaggio che si voglionoottenere. Fare riferimento alle misure riportate sotto.The tyre-changer turntable is preset by the manufacturer on a middlerange measure from 11" to 21" ext. (considering the rim outer side)and from 13" to 23" int. (if you lock the rim from inner side).It is however possible to change this dimension range in case of needwhen working on larger or smaller rims; it is enough to change theposition of the 4 clamps as shown in the figures below.The obtainable value scales start from a minimum of 10"-20" ext. and12"-22" int. until a maximum of 12"-22" ext. and 14"-24" int.To change the position proceed as follows:Unscrew screw (1) by means of the Allen wrenchRemove the locking clamp (2) and the slide piece (3)Let the slide hole coincide with one of the guide holes (4) according tothe locking dimensions you want to set. Use the measures belowfor reference.ATTENZIONE:e’importantecheleoperazionisuddettevenganoeffettuate in egualmaniera su tutte le 4 griffe di serraggio per evitare scompensi in fase dibloccaggio.6. USONon utilizzare la macchina prima di aver letto e capitotutto il manuale e gli avvertimenti in esso riportati.ATTENTION:it is important to perform the above mentioned operation for all the 4clamps to avoid any unbalance in ocking phase.6.OPERATIONDo not use the machine until you have read and understoodthe entire manual and the warnings it provides.L’uso dello smontagomme si suddivide in tre parti:a) STALLONATURA b)SMONTAGGIO DEL PNEUMATICOc)MONTAGGIO DEL PNEUMATICOThe operation of the tyre changer is divided into three parts:a) BREAKING THE BEAD b) REMOVING THE TYRE c) MOUNTING THETYREPrima di qualsiasi operazione è necessario sgonfiare ilpneumatico e togliere tutti i contrappesi diequilibraturaBefore carrying out any operation, deflate the tyre andtake off all the wheel balancing weights.18
5.5 REGLAGE MESURE DE BLOCAGE PLATEAUCENTREURLe plateau centreur du démonte-pneus est reglé par le constructeur sur unedimension de blocage moyenne de 11" à 21" ext (par rapport à l’extérieur dela jante) et de 13" à 23" int (si on bloque la jante de l’intérieur).Il est toutefois possible de modifier ces valeurs lors de l’emploi avecdes jantes plus petites ou plus grandes; il suffit de changer la positiondes 4 mors, d’après les figures ci-dessous.L’échelle des valeurs que l’on peut obtenir va d’un minimum de 10"-20"ext. et 12"-22" int. jusqu’à un maximum de 12"-22" ext et 14"-24" int.Pour modifier la position:Dévisser la vis (1) à l’aide de la clé Allen.Enlever le mors de blocage (2) et le patin (3)Positionner le trou du patin en correspondance de celui du guidage (4)selon les dimensions de blocage que l’on veut obtenir. Se réferer auxdimensions ci-dessous.5.5 ZENTRIERTISCH-EINSPANNMAß-EINSTELLENDer Montiermaschinezentriertisch wird vom Hersteller auf ein mittleresMaß von 11"-21" ext (Einspannen der Felge von außen) und 13"-23" int(Einspannen der Felge von innen) voreingestellt.Es ist jedenfalls möglich, diese Werte bei Arbeit auf größere oder kleinereFelgen zu ändern. Dafür sollen die 4 Klauen verstellt werden (sieheuntergegebene Abbildungen)Der Einspannbereich ändert sich von min. 10"-20" ext. und 12"-22" int.zu max. 12"-22" ext und 14"-24" int.Zum Verstellen: Schraube (1) durch einen Sechskantschlüssel abschraubenDie Einspannklaue (2) und das Gleitstück (3) abnehmenDie Gleitstückbohrung mit einer der Führungsbohrungen (4) nach dengewünschten Einspannmaßen zusammentreffen lassen. Die untergegebenenAbmessungen als Referenz nehmen.ATTENTION:les opérations susdites doivent être effectuées sur tous les 4mors afin d’éviter tout déséquilibre en phase de blocage.6.UTILISATIONWICHTIG:Der o.g. Vorgang soll auf alle 4 Klauen durchgeführt werden, ummögliche darauffolgende Unwucht bei Einspannen zu vermeiden6..BETRIEBNe pas utiliser la machine sans avoir lu et compris toutle manuel ainsi que les remarques.Vor der ersten Benützung der Maschine das ganze Handbuchsowie alle darin enthaltenen Hinweise, aufmerksamlesen.L’utilisation du démonte-pneus est divisée en trois parties:a) DECOLLAGE b) DEMONTAGE DU PNEU c) MONTAGE DU PNEUDie Benützung des Reifenmontiergerätes kann in drei Teile aufgeteilt werden:a)ABDRÜCKEN b)DEMONTAGE DES REIFENS c)MONTAGE DESREIFENSAvant toute opération, dégonfler le pneu et enlever toutesles masses d’équilibrage.Bevor mit der Arbeit begonnen wird, muß die Reifenluftabgelassen und alle Auswuchtungsgegengewichte entferntwerden.19
6.1 STALLONATURA6.1 BREAKING THE BEADL'operazione di stallonatura deve essere effettuata conla massima attenzione. L'azionamento del pedale stallonatorecausa una veloce chiusura del braccio e rappresentaun potenziale pericolo di schiacciamento• Assicurarsi che il pneumatico sia sgonfio, altrimenti sgonfiarlo• Chiudere completamente le griffe (G) dell'autocentrante (Y)Bead breaking must be done with the utmost care and attention.When the bead breaker pedal is operated the beadbreaker arm moves quickly and powerfully. Anything withinits range of action can be in danger of being crushed.•Check that the tyre is deflated. If not, deflate it.•Close the turntable clamps completelyEffettuare le seguenti operazioni con le griffe dell'autocentranteaperte potrebbe causare lo schiacciamenodelle mani. Accertarsi che siano chiuse e non tenere maile mani sui fianchi del pneumatico.Bead breaking with the clamps in open position can be extremlydangerous for operator's hands.During bead breaking operations NEVER touch the side ofthe tyre.Fig.14• Accostare la ruota agli appoggi in gomma sulla parte destra dellosmontagomme (S)• Avvicinare la paletta (R) al tallone del pneumatico, mantenendo unadistanza, dal bordo del cerchio, di circa 1 cm.(Fig.15)Prestare attenzione affinchè la paletta operi correttamente sul pneumaticoe non sul cerchio.• Premere il pedale (U) per azionare lo stallonatore e rilasciarlo quandola paletta è a fondo corsa o comunque quando la gomma è stallonata.• Ruotare leggermente il pneumatico e ripetere l’operazione per tutta lacirconferenza del cerchio e da entrambi i lati, fino al completo distaccodel tallone dal cerchio• Position the wheel against the rubber stops on the right side of thetyre changer (S).• Position the bead breaker blade (R) against the tyre bead at a distanceof about 1 cm from the rim (fig.15). Pay attention tothe blade, which must operate correctly onto the tyre and not onto the rim.• Press down the pedal (U) to activate the bead breaker and release itwhen the blade has reached the end of its travel or inany case when the bead is broken.• Rotate the tyre slightly and repeat the operation around the entire circumferenceof the rim and from both sides until the bead is completelydetached from the rim.20
6.1 DECOLLAGE6.1 ABDRÜCKENL'opération de décollage doit être exécutée avec le plusgrand soin. L'actionnement de la pédale de décollageprovoque une fermeture rapide et violente du bras; ellereprésente un danger potentiel d'écrasement pourtout ce qui se trouve dans son rayon d'action.•Vérifier si le pneu est dégonflé, sinon le dégonfler.•Fermer complètement les mors du centreurL'opération de décollage avec les mors ouvertes peutprovoquer l'écrasement des mains. Pendant l'opérationde détallonage NE JAMAIS mettre les mains sur le talondu pneuDieser Vorgang muß äußerst vorsichtig ausgeführt werden.Die Betätigung des Abdrückpedal veruusache eine schnelleund heftige Bewegung des Abdrücker-arms. Daher bestehtim seiner gesamten Reichweite Quetschgefahr.-Sicherstellen, daß der Reifen keine Luft enthält. Andernfalls Luft ablassen.-Die Klauen Zentriertisches völlig schließenFührt man den Abdrückvorgang mit geöffneten Spannklauenaus, besteht Quetschgefahr für die Hände des Bedieners.Während des Abdrückvorgangs die H132nde NIE auf denSeitenwänden des Reifens halten.• Appuyer la roue sur les supports en caoutchouc sur la droite du démonte-pneus(S).• Approcher la palette (R) au talon du pneu en maintenant une distanced’un cm. environ du bord de la jante (fig.15).Faire attention à la palette, qui doit opérer corrèctement sur le pneu etnon pas sur la jante.• Appuyer sur la pédale (U) pour mettre en marche le détalonneur et lalâcher quand la palette est arrivée à fin de course ou, en tout cas,quand le pneu est détalloné.• Tourner légèrement le pneu et répéter l’opération sur tout le pourtourde la jante et sur les 2 côtés jusqu’à ce que le talon se sépare complètementde la jante.- Reifen an die Gummianschläge auf der rechten Seite des Reifenmontiergerätes(S) anlegen.- Wulstabdrücker (V) dem Wulst nähern, etwa 1 cm. Luft von Felgenrandlassen (Abb.15) und darauf beachten, daß der Abdrücker fehlerfreiauf den Reifen und nicht auf die Felge wirkt.- Pedal (U) drücken, und das Abdrückblatt betätigen, loslassen, wenndas Blatt am Laufende angelangt ist.- Reifen leicht drehen und den Vorgang beidseitig auf dem gesamtenFelgenumfang wiederholen, bis sich der Wulst sich vollständig von derFelge gelöst hat.21
6.2 SMONTAGGIO6.2 REMOVING THE TYREPrima di qualsiasi operazione togliere dal cerchio i vecchicontrappesi di equilibratura e assicurarsi che il pneumaticosia sgonfioDurante l'operazione di ribaltamento del palo accertarsiche nessuno sosti dietro lo smontagommeBefore any operation remove the old wheel balancingweights and check that the tyre is deflated.During arm tilting make sure that nobody stays behindthe tyre-changer. Premere il pedale (H) per ribaltareil palo (P) liberando così il pianodi lavoro Spalmare il grasso in dotazione,o grasso di tipo simile, sui tallonidel pneumaticoNon usando il grasso indotazione si rischia didanneggiare gravementeil tallone delpneumatico Press pedal (H) to tilt the arm (P)thereby clearing the turntable. Spread the supplied grease (orgrease of a similar type) onto thetyre bead.Failure to use the greasesupplied risks causingserious damage tothe tyre bead.Fig.17Durante il bloccaggio del cerchio non tenere MAI le manisotto il pneumatico.Per un corretto bloccaggio posizionarela ruota esattamente al centro del piatto autocentranteBLOCCAGGIO ESTERNO Posizionare le griffe di bloccaggio (G) in base alla tacca di riferimento postasul piatto autocentrante (Y) premendo il pedale (V) in posizione intermedia Appoggiare il pneumatico sulle griffe e, tenendo premuto il cerchioverso il basso, premere a fondo il pedale (V)BLOCCAGGIO INTERNO Posizionare le griffe di bloccaggio (G) in modo che risultino completamentechiuse. Appoggiare il pneumatico sulle griffe e premere il pedale (V) per allargarele griffe e bloccare il cerchio.During rim locking NEVER keep your hands under thetyre. For a correct locking operation set the tyre exactlyin the middle of turntable.OUTER LOCKING Position the clamps (G) according to the reference mark on the turntable(Y) by pressing pedal (V) down to its intermediate position.Place the tyre on the clamps and, keeping the rim pressed down,press the pedal (V) as far as it will go.INNER LOCKING Position the clamps (G) so that they are completely closed. Place the tyre on the clamps and press down the pedal (V) to openthe clamps and thereby lock the rim.Assicurarsi che il cerchio sia ben agganciato alle griffeMake sure that the rim is firmly fixed to the clamps.22
6.2 DEMONTAGEAvant toute opération, enlever les masses d’équilibragede la jante et vérifier si le pneu est dégonflé6.2 DEMONTAGEVor jede Arbeit ist es nötig, die alten Auswuchtungsgegengewichtezu entfernen und auch sicherzustellen, daßder Reifen keine Luft enthält.Lors du basculement du bras s’assûrer que personne nese trouve derrière la machine.Bei Armkippen soll niemand hinter der Maschine sichbefinden.Appuyer sur la pédale (G) pourrenverser le bras (T) en libérantle plan de travail.Lubrifier le talon du pneu avec lagraisse fournie (A), ou une graissede même type.Si le talon du pneun’est pas lubrifié avecla graisse fournie, il risqued’être gravementendommagé. Pedal (H) drücken, um Arm (P)zu kippen, so daß die Arbeitsflächefrei wird. Mitgeliefertes Fett oder ähnlichesProdukt auf den Reifenwülstenver streichen.Falls das beigepackteFett nicht verwendetwird, kann der Reifenwulstschwerbeschädigt werdenLors du blocage de la jante ne tenir JAMAIS les mainssous le pneu.Pour le correct blocage positionner le pneu au centre duplateau centreurLOCAGE EXTERIEUR Placer les mors de blocage (G) selon le repère sur le plateau tournant(Y) en appuyant sur la pédale (V) en position intermédiaire. Poser le pneu sur les mors et, en tenant la jante pressée vers le bas,appuyer à fond sur la pédale (V).BLOCAGE INTERIEUR Placer les mors de blocage (G) de façon à ce qu’ils restent complètementfermés. Poser le pneu sur les mors et appuyer sur la pédale (V) pour élargirles mors et bloquer la jante.Falls das beigepackte Fett nicht verwendet wird, kannder Reifenwulst schwerAUßERE SPANNUNG Spannklauen (G) gemäß Bezugsmarke auf dem Zentriertisch (Y) positionieren,dabei Pedal (V) in die Mittelstellung drücken. Reifen auf Spannklauen legen, Felge nach unten drücken und Pedal(V) völlig durchdrückenINNERE SPANNUNG Spannklauen (G) so positionieren, daß sie völlig geschlossen sind. Reifen auf Spannklauen legen und auf Pedal (V) drücken, umSpannklauen zu öffnen und Felge zu blockieren.Vérifier si la jante est bien accrochée aux mors.Sicherstellen, daß die Felge an den Spannklauen gut befestigtist.23
Non tenere le mani sulla ruota: il ritorno in posizione "dilavoro" del braccio potrebbe causarne lo schiacciamentotra cerchio e torretta.• Richiamare il palo (P) premendo il pedale (H)•Posizionareilpulsantedibloccaggio(K)inposizione2.Spostare il bracciooperante (M) fino ad appoggiare la torretta (I) sul bordo superiore del cerchioebloccareiltuttopremendoilpulsantedibloccaggioinpos.1.In questo modo abbiamo bloccato il braccio sia in senso verticale eorizzontale spostando automaticamente la torretta integrale (I) di circa2 mm. dal cerchio.Tenere le mani e le altre parti del corpo il piu' lontanopossibile dalla torretta quando l'autocentrante e' in fasedi rotazione per evitare rischi di schiacciamentoNever keep your hands onto the wheel: the arm recoveryto “working position” could set the operator at risk ofhand crushing between rim and mounting tool.Return the arm (P) by pressing the pedal (H).•Set the locking button (K) in position 2. Move th operating arm (M) untilthe mounting tool (I) rests on the rim upper edge. Then lock everythingby setting the locking button in position 1.In this way, the arm gets locked both in a vertical and in a horizontal direction,while the mounting tool (I) is moved automatically of about 2mm. from rim.Never keep your hands onto the wheel: the arm recoveryto “working position” could set the operator at risk ofhand crushing between rim and mounting tool.• Con l’aiuto della leva (T), infilata fra tallone e la parte anteriore dellatorretta integrale (I), portare il tallone del pneumatico sopra la torrettastessa (Fig. 16)N.B: per evitare di danneggiare l’eventuale camera d’aria, è consigliabilefare questa operazione con la valvola circa 10 cm. a destradella torretta integrale.Collane, bracciali, abiti larghi od oggetti estranei nellevicinanze degli organi in movimento possono costituirepericolo per chi opera• Mantenendo la leva in questa posizione, far ruotare il piatto autocentrante(Y) in senso orario tenendo premuto il pedale (Z) fino allacompleta fuoriuscita del pneumatico dal cerchio. (Fig. 17)• Per togliere l'eventuale camera d'aria, senza sbloccare il braccio operante,ribaltare il palo (P) spingendo il pedale (H).• Ripetere le operazioni per l'altro tallone•With the lever (T) inserted between the bead and the front section ofthe mounting head (I), move the tyre bead over the mounting headNote: In order to avoid damaging the inner tube, if there is one, it is advisableto carry out this operation with the valve about 10 cm .right of the mounting head. (Fig. 16)Chains, bracelets, loose clothing or foreign objects inthe vicinity of moving parts can represent a danger forthe operator.•With the lever held in this position, let the turntable (Y) rotate in a clockwisedirection by pressing pedal (Z) down until the tyre is completelyseparated from the wheel rim (Fig. 17).•In order to remove the inner tube, if there is one, without unlocking themounting bar, tilt the arm (P) by pushing pedal (H) down.•Repeat the operation for the other bead.24
Ne pas tenir les mains sur le pneu: le retour en position “detravail” du bras pourrait en causer l’écrasement entre janteet outil.Die Hände auf den Reifen nicht halten: der Rücklauf desArmes zu “Arbeitsstellung”könnte eine Quetschung zwischenFelge und Montierwerkzeug verursachen.• Appuyer sur la pédale (G) pour rappeler le bras vertical•Placerleboutondeblocage(K)enposition2.Déplacerlebras opérateur(M) jusqu’à ce que l’outil de montage (I) s’appuie contre le bord supérieur dela jante et bloquer le tout par le bouton de blocage en position1.De cette façon, on a bloqué le bras en sens vertical et horizontal et déplacéautomatiquement l’outil de montage (I) de 2 mm. de la jante.Kipparm (P) durch Pedaldruck (H) rückstellen.Den Sicherungsknopf (K) auf Position 2 bringen. Bedienungsarm (M) verstellen,bis sich das Montierwerkzeug (I) an obere Felgenkante lehnt.Sicherungsknopf auf Position 1 jetzt bringen, damit alles blockiert wird.Auf diese Weise wird der Arm senkrecht und waagerecht blockiert unddas Montierwerkzeug (I) automatisch von 2 mm. aus Felge entfernt.Se tenir le plus loin possible de l’outil pendant la phase derotation du plateau centreur pour éviter tout risque d’écrasement.•Avec le levier (I) enfilé entre le talon et la partie avant de la tête (O),porter le talon du pneu au-dessus de la tête même (fig. 16).Note:pouréviterd’endommagerlachambreàair,ilestconseilléd’effectuercette opération avec la valve à 10 cm. environ à droite de la tête.Les personnes qui portent des colliers, des bracelets, desvêtements larges ne doivent pas s’approcher des organesen mouvement.Bei Tischdrehung, Hände und Körper möglichst fernvom Montierwerkzeug halten, um Quetschungen zuverhüten.Mit Hilfe des Hebels (T), der zwischen den Reifenwulst und den vorderenTeil des Montierfußes (I) eingeführt ist, der Wulst nun über denMontierfuß einstellen (Abb. 16).WICHTIG: Falls ein Schlauch vorhanden ist, wird es empfohlen, dasVentil bei dieser Operation zirka 10 cm rechts vom Montierfuß zu halten.Das wird eine Schlauchbeschädigung vermeiden.Halsketten, Armreife, weite Kleidungsstücke und andereGegenstände in der Nähe der sich bewegenden Maschinenorganekönnen für den Bediener gefährlich sein.• En tenant le levier dans cette position, faire tourner le plateau (L) dansle sens horaire en appuyant sur la pédale (A) jusqu’à ce que le pneusorte complètement de la jante (fig. 17).• S'il y a une chambre à air, il faut basculer le bras vertical (T), sans debloquerle bras opérateur, et l'enlever du pneu.• Rappeler le bras et répéter les operations susdites pour l'autre talon.Hebel in dieser Position halten; Zentriertisch (Y) durch konstanten Pedaldruck(Z) im Uhrzeigersinn drehen lassen, bis der Reifen komplettaus der Felge hervorgetreten ist (Abb. 17)Um den eventuellen Reifenschlauch zu entfernen, ohne den Werkzeugarmfreizugeben, Kipparm (P) durch Pedaldruck (H) kippen.Die ganze Operation auf dem anderen Wulst wiederholen.Falls das beigepackte Fett nicht verwendet wird, kann der Reifenwulstschwer beschädigt werden25
6.3 MONTAGGIOATTENZIONE: questo controllo è importantissimo per evitarerischi di scoppio del pneumatico durante la fase di gonfiaggio.Prima di iniziare l’operazione di montaggio verificareche:Sia visivamente che al tatto il pneumatico non presenti difetti e la telanon sia danneggiata.Se si riscontrano difetti NON montare il pneumatico.Il cerchio non presenti ammaccature o deformazioni. In particolare neicerchi in lega le ammaccature spesso provocano microfratture internenon visibili ad occhio nudo che possono compromettere la solidità delcerchio e costituire quindi pericolo anche in fase di gonfiaggioIl diametro del cerchio ed il pneumatico siano esattamente della stessamisura. Non montare pneumatici sui cerchi se non si è in grado di identificarecon esattezza i rispettivi diametri. Lubrificare con apposito grasso i talloni del pneumatico per evitaredanneggiamenti e facilitare il montaggioDurante il bloccaggio del cerchio non tenere MAI le manisotto il pneumatico.Per un corretto bloccaggio posizionarela ruota esattamente al centro del piatto autocentrante.6.3 MOUNTING THE TYREWARNING: This checking of tyre and rim is of th utmostimportance to prevent tyre explosion during the inflatingoperations. Before beginning mounting operation makesure that:The tyre and the cord fabric are not damaged. If you note defectsDO NOT mount the tyre.The rim is without dents and is not warped. Attention with alloyrims, dents cause internal micro-cracks not visible to naked eye.This can compromise the rim and can also be a source of dangerespecially during inflation.The diameter of the rim and tyre are exactly the same. NEVER tryto mount a tyre on a rim if you cannot identifythe diameters of both. Lubricate the tyre beads with the special grease in order to avoid damagingthem and to facilitate the mounting operations.During rim locking NEVER keep your hands under thetyre. For a correct locking operation set the tyre exactlyin the middle of turntable.Bloccare il cerchio sl piatto autocentranteDurante l'operazione di ribaltamento del palo accertarsiche nessuno sosti dietro lo smontagomme Lock the rim on the turntableDuring arm tilting make sure that nobody stays behindthe tyre-changerNOTA: quando si opera con cerchi di uguali dimensioni, non occorresempre bloccare e sbloccare il braccio operante ; basta ribaltare erichiamare il palo (P) con i bracci già bloccati in posizione di lavoro.Non tenere le mani sulla ruota: il ritorno in posizione "dilavoro" del braccio potrebbe causarne lo schiacciamentotra cerchio e torretta. Manipolare il pneumatico in modoche il tallone passi sotto la parteanteriore della torretta e venga appoggiato sopra il bordo della parteposterioredella torretta stessa Tenendo premuto con le mani il tallone del pneumatico nella gola delcerchio, premere il pedale (Z) per ruotare l’autocentrante in sensoorario per tutta la circonferenza del cerchio (Fig. 19).Tenere le mani e le altre parti del corpo il piu' lontanopossibile dalla torretta quando l'autocentrante e' in fasedi rotazione per evitare rischi di schiacciamento Inserire l’eventuale camera d’aria e ripetere le stesse operazioni permontare il bordo superiore del pneumaticoNOTA: entrambe le operazioni di smontaggio e montaggio vannoeffettuateruotando in senso orario l'autocentrante. Il senso di rotazione antiorarioserve solamente per rimediare ad eventuali errori dell'operatoreNote: when working with rims of the same size it is not necessary alwaysto lock and unlock the mounting bar; you only need to tilt andreturn the arm (P) with the arm and the bar locked in their working positions.Never keep your hands onto the wheel: the arm recoveryto “working position” could set the operator at risk ofhand crushing between rim and mounting head. Move the tyre so that the bead passes below the front section ofthemountinghead and is brought up against the edge of the rear section of themounting head itself. Keeping the tyre bead pressed down into the wheel rim channel with yourhands, press down on the pedal (Z) to rotate the turntable clockwise. Continueuntil you have covered the entire circumference of the wheel rim (Fig.19).To prevent industrial accidents, keep hands and otherparts of the body as far as possible from the tool armwhen the table top is turning. Insert the inner tube (if there is one) and repeat the same operationsto mount the upper side of the tyre.NOTE: Demounting and mounting are always done with the clockwiseturntable rotation. Anticlockwise rotation is used only tocorrect operator's errors or if the turntable stalls.26
6.3 MONTAGEATTENTION: ce contrôle est très important pour évitertout risque d’éclatement du pneu lors du gonflage.Avant de commencer l’opération de montage vérifier:Que le pneu ne présente pas de défauts, soit visuellement soit autoucher, et que la toile ne soit pas endommagée.En cas de défauts NE PAS monter le pneu.Que la jante ne soit pas cabossée ou déformée. En particulier,dans les jantes en alliage les bosses provoquent souvent desmicrofractures intérieures invisibles à l’oeuil nu qui peuvent compromettrela solidité de la jante et constituer donc danger en phasede gonflage.Que le diamètre de la jante coïncide exactement avec celui dupneu. Ne pas monter de pneus sur de jantes sans avoiridentifié exactement les rispectifs diamètres. Lubrifier le talon du pneu avec de la graisse appropriée pour éviterles endommagements et faciliter le montageLors du blocage de la jante ne tenir JAMAIS les mainssous le pneu. Pour le correct blocage positionner lepneu au centre du plateau centreur. Bloquer la jante sur le plateau centreurLors du basculement du bras s’assûrer que personne nese trouve derrière la machine.6.3 MONTAGEVORSICHT: Es ist sehr wichtig, diese Prüfung durchzuführen,um Reifenplatzen bei Aufpumpenphase zu vermeiden. Vorder Montage ist es wichtig, festzustellen, daß:-den Reifen sowohl bei Ansicht als auch beim Antasten keinen Mangelvorweist und daß das Leinen nicht beschädigt ist. Im Mangelfall, denReifen NICHT montieren.-die Felge keine Beule oder Verformung vorweist. Besonders beiAlu-Felgen können die Beulen innere Mikrobrüche verursachen, die mitbloßem Auge nicht sichtbar sind und die die Solidität der Felgegefährden und eine Gefahr bei Aufpumpenphase darstellen können.-der Durchmesser von Felge und Reifen gleich ist. Es ist empfohlen,einen Reifen auf die Felge nicht zu montieren, wenn diebezüglichen Durchmesser nicht genau festgestellt werden. Reifenwülste mit dem dazu vorgesehenen Fett schmieren, damit eineBeschädigung verhindert und die Montage erleichtert wird.Bei Spannung der Felge die Hände NIE unter dem Reifenhalten. Zu einer korrekten Spannung, den Reifen genauin die Mitte des Zentriertisches legen. Die Felge auf dem Zentriertisch einspannen.Vor Armumkippen immer sicherstellen, daß niemandhinter der Maschine steht.Note:avec des jantes de dimensions égales, il ne faut pas toujours bloqueret débloquer la barre de montage; il suffit de basculer et de rappelerle bras ((P) avec les bras déjà bloqués en position de travail.Ne pas tenir les mains sur le pneu: le retour en position“de travail” du bras pourrait en causer l’écrasement entrejante et outil. Passer le talon du pneu sous la partie avant de la tête et le poser au-dessusdu bord de la partie arrière de la tête même. (Fig. 19) Avec les mains, pousser le talon du pneu dans le creux de la jante, appuyersur la pédale (Z) (rotation du plateau) pour tout le pourtour de la jante.Se tenir le plus loin possible de l’outil pendant la phasede rotation du plateau centreur pour éviter tout risqued’écrasement. Introduire l’éventuelle chambre à air et répéter les mêmes opérationspour l’autre talon.NOTE: Les opérations de démontage et de montage doivent êtreeffectuées en faisant tourner le plateau dans le sens horaire. Lesens de rotation inverse sert uniquement à rattraper un erreuréventuel de l'operateuWICHTIG: Wird mit Felgen gleicher Abmessung gearbeitet, muß der Werkzeugarmnicht immer gesperrt und freigegeben werden; es genügt, denKipparm (P) mit den Armen, die bereits in Arbeitsposition blockiert sind, zukippen und zurückzustellen.Die Hände auf den Reifen nicht halten: der Rücklauf desArmes zu “Arbeitsstellung” könnte eine Quetschungzwischen Felge und Montierwerkzeug verursachen. Reifen so einspannen, daß der Wulst unter dem vorderen Teil des Montierfußeshindurchgeht und auf den Rand des hinteren Montierfußteils gelegtwird. Reifenwulst von Hand unter den Felgenrand pressen, Pedal (Z)drücken(Zentriertisch L-Drehung); gesamten Felgenumfang bearbeiten.Bei Tischdrehung, Hände und Körper möglichst fern vomMontierwerkzeug halten, um Quetschungen zu verhüten. Schlauch, sofern vorhanden, einlegen und am anderen Wulst gleichermaßenvorgehen.ANM.: Beide Vorgänge (Demontage und Montage) sollen durchRechtsdrehung des Zentriertisches durchgeführt werden. DieLinksdrehung dient nur, eventuelle Arbeitsfehler zu verbessern.27
7 GONFIAGGIOIl gonfiaggio dei pneumatici richiede la massima attenzione.Pertanto occorre attenersi strettamente alle indicazionidi seguito riportate poichè lo smontagomme NON èstato progettato e costruito per riparare l'utente (o chi sitrovi nei pressi della macchina) in caso di scoppio accidentaledel pneumatico.7 INFLATINGThe greatest attention is called for when inflating thetyres. Keep strictly to the following instructions sincethe tyre changer is NOT designed and built to protectthe user (or anyone else in the vicinity of the machine)if the tyre bursts accidentally.L'esplosione del pneumatico o la rottura del cerchiosotto pressione può causare ferite gravi omorte all'operatoreControllare attentamente che le dimensioni del cerchioe quelle del pneumatico siano uguali.Controllare anche lo stato d'usura del pneumatico edel cerchio per trovare eventuali difetti prima di iniziarela fase di gonfiaggioGonfiare la gomma con brevi getti d'aria e negli intervalli controllare spessola pressione.Tutti i nostri smontagomme sono autolimitati ad una pressione di gonfiaggiodi 3,5 bar (51 PSI)COMUNQUE NON SUPERARE MAI LA PRESSIONE CONSIGLIATA DALCOSTRUTTOREA burst tyre can cause serious injury or even death ofthe operator.Check carefully that the wheel rim and the tyre are ofthe same size.Check the state of wear of the tyre and that it has no defectsbefore beginning the inflationstage.Inflate the tyre with brief jets of air, checking the pressureafter every jet.All our tyre changers are automatically limited to a maximum inflating pressureof 3.5 bar (51 psi). In any case NEVER EXCEED THE PRESSURERECOMMENDED BY THE MANUFACTURER.Keep your hands and body as far away as possible from the tyre.7.1 Gonfiaggio pneumatico con pistoletta:Nella versione standard i Nostri smontagomme vengono forniti con pistolettadi gonfiaggioPer gonfiare un pneumatico procedere come segue: Collegare il raccordo della pistoletta alla valvola del pneumatico Verificare ulteriormente l'esatta corrispondenza dei diametri di cerchioepneumatico Verificare che cerchio e pneumatico siano sufficientementelubrificati;eventualmente lubrificare. Premere e rilasciare con frequenza il grilletto della pistoletta, controllandonegli intervalli la pressione sul manometro, fino al completo intallonamentodel pneumatico sul cerchio. Proseguire nel gonfiaggio fino a raggiungere la pressione indicata dalcostruttore. Gonfiare sempre a brevi tratti e sempre verificando la pressionenegli intervalli.PERICOLO DI ESPLOSIONE!Non superare mai la pressione consigliata dal costruttoree comunque i 3,5 bar (51 PSI) a cui lamacchina è auto-limitata.Quando fosse richiesta una pressione di eserciziodel pneumatico superiore, togliere la ruota dallosmontagomme e proseguire il gonfiaggio in unaapposita gabbia di sicurezza, normalmente reperibilisul mercato.Mantenere mani e corpo il piu' lontano possibile dalla ruota.Permettere l'utilizzo della macchina solo a personale addestrato perqueste operazioniNon permettere ad altri di utilizzare la macchina o di avvicinarsi soprattuttodurante il gonfiaggio.7.1 Inflating tyre using airline gauge:In the standard version our tyre changers are supplied with an airlinegauge. To inflate a tyre proceed as follows: •Connect the airline gauge fitting to the tyre valve. • Make a last check to be certain that tyre and rim diameter correspond. •Check to be certain that rim and beads are sufficiently lubricated. If necessarylubricate some more. •Seat the beads with short jets of air. Between air jets, check the airpressure on the inflator gauge. •Continue to inflate the tyre with short jets of air and constantly checkingthe pressure between air jets until the required pressure has been reached.EXPLOSION HAZARD!Never exceed 3.5 bar (51 PSI) when seating beads or inflatingtyres.If a higher inflating pressure is required remove thewheel from turntable and cpntinue theinflation procedure inside a special protection cage(commercially available)NEVER exceed the max. inflating pressure given by thetyre manufacturerALWAYS keep hands and body back from inflating tyreONLY specially trained personnel are allowed to perform these operations. Donot allow otherpersons to operate or to stay near the tyre changer28
7 GONFLAGEFaire très attention pour le gonflage des pneus.Suivre scrupuleusement les indications ci-dessous car ledémonte-pneus N’A PAS été projeté et construit pour réparerl’utilisateur (ou qui se trouve près de la machine) en casd’éclatement accidentel du pneu.7 AUFPUMPENBeim Aufpumpen der Reifen ist sehr sorgfältig vorzugehen.Dienachfolgenden Angaben sind streng zu befolgen,denn das Reifenmontiergerät bietet dem Benützer (oder Personen,die sich in der Nähe befinden) beim Platzen des ReifensKEINEN Schutz.L’explosion du pneu peut causer des blessures gravesou la mort de l’opérateur•Avant le gonflage contrôler que les dimensions de lajante et du pneu soient les mêmes. Contrôlerégalement l’état d’usure du pneu et les défauts éventuels.•Gonfler le pneu avec de brefs jets d’air en vérifiantsouvent la pression•La pression maximum de gonflage de tous nos démonte-pneus est de 3,5bars (51 psi).NE JAMAIS DÉPASSER LA PRESSION CONSEILLÉE PAR LECONSTRUCTEUR.•Les mains et le corps doivent être le plus loin possible du pneu..7.1 Gonflage avec pistolet:Dans la version standard nos démonte-pneus sont fournis avec le pistoletde gonflage.Gonflage du pneu: •Mettre le raccord du pistolet sur la valve du pneu •Vérifier encore une fois que les diamètres de la jante et du pneumatiquecorrespondent. •Vérifier que la jante et le pneumatique sont suffisamment lubrifiés;éventuellement lubrifier. •Talonner en introduisant l'air par petits jets et vérifier continuellement,dans les intervalles, la pression sur le manomètre du pistolet,jusqu'à ce que les talons sont à leur place. • Continuer en introduisant de l'air par petites doses et en vérifiant lapression dans les intervalles, jusqu'à atteindre la pression désirée.Falls ein Reifen platzt, kann dies zu schweren Verletzungenoder sogar zum Tod des Bedienersführen.Sorgfältig prüfen, ob die Abmessungen desReifens und der Felge gleich sind. AbnützungszustanddesReifens prüfen und eventuelle Beschädigungenfeststellen, bevor mit dem Aufpumpen begonnenwird.Reifen mit kurzen Luftströmen aufpumpen, dabei denDruck dauernd kontrollieren.Alle unsere Reifenmontiergeräte sind auf einen Höchstdruck von 3,5 bar (51psi) beschränkt.AUF KEINEN FALL DEN VOM HERSTELLER ANGEGEBENENHÖCHSTDRUCK ÜBERSTEIGEN.Hände und Körper so weit wie möglich vom Reifen entfernt halten.7.1 Aufpumpen mit Druckluftpistole:In der Standardausführung werden unsere Reifenmontiergeräte mit einerDruckluftpistole geliefert. Beim Aufpumpen eines Reifens wie folgtvorgehen: Anschlußstutzen der Druckluftpistole ans Reifenventil anschließen. Sicherstelen, daß Durchmesser von Felge und Reifen zuinander passen. Sicherstellen, daß Felge und Reifen ausreichend geschmiert sind.Ggf erneut einstreichen. Den Reifenwulst aufziehen, indem man kurzfristig Luft einbläst unddazwischen immer die Luftdruck auf dem Manometer der Pistolemißt, bis die Reifenwülste richtig in der Felge positioniert sind. Weitermachen und Luft einblasen, wobei man zwischendurch immerden Luftdruck mißt, bis der gewünschte Reifendruck erreicht ist.DANGER D'EXPLOSION !Ne jamais dépasser 3,5 bar (51 PSI) pendant le tallonageet le gonflage et ne jamais dépasser la pressionindiquée par le fabricant du pneumatiqueSi le pneumatique requiert une pression supérieurede service, déposer la roue du démone-pneus etcontinuer le gonflage dans une cage spéciale de securitéque l'on trouve d'ordinaire en commerce.Tenir les mains et le corps le plus loin possible de la roue.Seulement le personnel spécialement formé peut effectuer cette opération.Ne jamais permettre à d'autres personnes de travailler et de s'approcher dudémonte-pneus.EXPOSITIONSGEFAHR !Beim Aufpumpen darf Druckwert von 3,5 bar (51 PSI) nieüberschritten werden.Anm: Falls ein Reifen einen höheren Reifendruck verlangt,ist das Rad von der Reifenmontiermaschineabzunehmen,um es dann in einer der speziellen Schutzkäfige,die im Handel erhältlich sind, weiter aufzupumpen.Nie den Reifendruck überschreiten, den der Herstellervorschreibt.Die Hände und den Körper immer so weit wie möglich entfernt vomReifenhalten,wenn er oufgepumpt wird.Nur besonders geschultes Personal darf diese Arbeiten ausführen. Erlauben SieUnbefugten auf keinen Fall, sich in der Nähe der Reifenmontiermaschine aufzuhaltenoder an ihr zu arbeiten.29
7.2 Gonfiaggio pneumatici con sistema GT (optional)Il sistema di gonfiaggio GT facilita il gonfiaggio dei pneumatici tubelessgrazie ad un potente getto d'aria dagli ugelli posti sulle griffe.In questa fase della lavorazione si possono avere livelli dirumore attorno agli 85 db(A). E' consigliabile utilizzare unaprotezione anti-rumore.• Collegare il raccordo del gonfiatore alla valvola del pneumatico• Verificare ulteriormente l'esatta corrispondenza dei diametri di cerchioe pneumatico• Verificare che cerchio e pneumatico siano sufficientemente lubrificati;eventualmente lubrificare.• Premere il pedale di gonfiaggio in posizione intermedia (B - Fig. 21).• Se il pneumatico non si intallona sollevarlo manualmente in modo cheil tallone superiore faccia tenuta contro il cerchio,quindi premere a fondo il pedale (C - Fig. 21). Un potente getto d'ariauscirà dagli ugelli posti sulle griffe consentendol'intallonatura.• Rilasciare il pneumatico e sollevare leggermente il piede in modo dariportare il pedale in pos. B (fig. 21). Continuare il gonfiaggio sempre abrevi getti d'aria leggendo negli intervalli la pressione indicata sulmanometro.7.2 Inflating tyres with GT system (optional)The GT inflation system facilitates inflation of tubeless tyres thanks to apowerful jet of air from the nozzles positioned on the clamps.During this phase of work the level of noise can reach 85db(A). It is advisable to use a noise protection.•Lock the wheel on the turntable and connect the inflation head to thetyre valve.• Make a last check to be certain that tyre and rim diameter correspond.•Check to be certain that rim and beads are sufficiently lubricated. If necessarylubricate some more.•Press the pedal down to intermediate position (B - Fig. 21).•If the bead of tyre is not well seated, due to a strong bead, lift tyre manuallyuntil the upper bead seals against the rim, thenpress pedal all the way down (C - Fig, 21). A strong jet of air will be releasedthrough the nozzles in the slides and this willhelp the bead seal.•Release the tyre; set the pedal in the intermediate position (B - Fig. 21)and continue to inflate the tyre with short jets of air and constantly checkingthe pressure between air jets until the required pressure has beenreached.PERICOLO DI ESPLOSIONE!Non superare mai la pressione consigliata dal costruttoree comunque i 3,5 bar (51 PSI) a cui lamacchina è auto-limitata.Quando fosse richiesta una pressione di eserciziodel pneumatico superiore, togliere la ruotadallo smontagomme e proseguire il gonfiaggio inuna apposita gabbia di sicurezza, normalmentereperibili sul mercato.Mantenere mani e corpo il piu' lontano possibile dalla ruota.Permettere l'utilizzo della macchina solo a personale addestrato perqueste operazioni.Non permettere ad altri di utilizzare la macchina o di avvicinarsi soprattuttodurante ilgonfiaggio.EXPLOSION HAZARD!Never exceed 3.5 bar (51 PSI) when seating beadsor inflating tyres.If a higher inflating pressure is required removethe wheel from turntable and continue theinflation procedure inside a special protectioncage (commercially available)NEVER exceed the max. inflating pressure givenby the tyre manufacturerALWAYS keep hands and body back from inflating tyreONLY specially trained personnel are allowed to perform these operations.Do not allow other persons to operate or to stay near thetyrechanger.30
7.2 Gonflage avec système GT (sur demande):Le système GT facilite le gonflage des pneus tubeless grâceà un puissant jet d’air qui sort des gicleurs placés sur lesmors.Pendant cette phase de travail on peut avoir un niveau debruit de 85 db (A) environ.Il est recommandé d’utiliser une protection contre le bruit.• Bloquer la roue sur le plateau à centrage automatique et mettre le raccordsur la valve du pneu.• Vérifier encore une fois que les diamètres de la jante et du pneumatiquecorrespondent.• Vérifier que la jante et le pneumatique sont suffisamment lubrifiés;éventuellement lubrifier.• Appuyer sur la pédale de gonflage dans la position intermédiarie (B -Fig. 21).• Si le pneumatique ne se talonne pas, le soulever manuellement demanière que le talon supérieur adhère parfaitement contre la jante.• Appuyer à fond la pédale (C - Fig. 21). Un jet d'air puissant sortirà desbuses qui se trouvent sur les support coulissants en permettant letallonage.• Relâcher le pneumatique et soulever doucement le pied pour remettrela pédale de gonflage dans la position intermédiarie (B - Fig. 21).• Continuer en introduisant de l'air par petites doses et en vérifiant la pressiondans les intervalles, jusqu'à atteindre la pression désirée.7.2 Aufpumpen der Reifen mit GT-System (Auf Befragen)Das Reifenaufpumpsystem GT erleichtert das Aufpumpenvon schlauchlosen Reifen durch starken Lufteinlaß aus denDüsen auf den Spannklauen.Beim GT System kann Lärmpegel um 85 db(A) kommen. Esis ratsam, eine Lärmschutz zu benutzen.Rad auf dem Zentriertisch blockieren und Pumpstutzen an das Reifenventilanschließen.Sicherstelen, daß Durchmesser von Felge und Reifen zuinanderpassen.Sicherstellen, daß Felge und Reifen ausreichend geschmiert sind. Ggferneut einstreichen.Das Reifenfüllpedal auf die Zwischenstellung bringen. (B - Abb.21).Wenn der Reifenwulst nicht in die Felge rutscht, ist der Reifen vonHand abzuheben, bis sein oberer Wulst gegen die Felge stößt, umdanndas Pedal durchzutreten (C - Abb.21). Dabei tritt ein heftiger Luftstrahlaus den Öffnungen in den gleitfähigen Spannklauen aus und hilftbeim Aufziehen des Reifens.Den Reifen loslassen und den Fuß auf dem Pedal leicht anheben, damitdieses in die Zwischenstellung bringen. (B - Abb.21).Weitermachen und Luft einblasen, wobei man zwischendurch immer denLuftdruck mißt, bis der gewünschte Reifendruck erreicht ist.DANGER D'EXPLOSION !Ne jamais dépasser 3,5 bar (51 PSI) pendant letallonage et le gonflage et ne jamais dépasserla pression indiquée par le fabricant du pneumatiqueSi le pneumatique requiert une pression supérieurede service, déposer la roue du démone-pneuset continuer le gonflage dans unecage spéciale de securité que l'on trouve d'ordinaireen commerce.Tenir les mains et le corps le plus loin possible de la roue. Seulementle personnel spécialement formé peut effectuer cette opération.Ne jamais permettre à d'autres personnes de travailler et des'approcher du démonte-pneus.EXPOSITIONSGEFAHR !Beim Aufpumpen darf Druckwert von 3,5 bar (51PSI) nie überschritten werden.Anm: Falls ein Reifen einen höheren Reifendruckverlangt, ist das Rad von der Reifenmontiermaschineabzunehmen, um es dann in einer der speziellenSchutzkäfige, die im Handel erhältlichsind, weiter aufzupumpen.Nie den Reifendruck überschreiten, den der Herstellervorschreibt.Die Hände und den Körper immer so weit wie möglich entfernt vomReifenhalten, wenn er oufgepumpt wird.Nur besonders geschultes Personal darf diese Arbeiten ausführen.Erlauben Sie Unbefugten auf keinen Fall, sich in der Nähe der Reifenmontiermaschineaufzuhalten oder an ihr zu arbeiten.31
8. MANUTENZIONE8.1 Avvertenze generaliLa manutenzione è sempre vietata a personalenon autorizzato8. MAINTENANCE8.1 General warningsUnauthorized personnel may not carry outmaintenance work. La manutenzione regolare, come da istruzioni, è fondamentale perun corretto funzionamento e una lunga durata dello smontagomme Se la manutenzione non viene effettuata regolarmente, il funzionamentoe l'affidabilità della macchina possono essere compromesse,a rischio sia dell'operatore che di terzi.Prima di effettuare qualsiasi intervento di manutenzione, disinserire l'allacciamentoelettrico, scollegandola spina, e quello pneumatico, chiudendo il rubinetto.Inoltre, per scaricare l'aria in pressione dal circuito, è necessario effettuare3 - 4 stallonature a vuoto.Le parti difettose devono essere sostituite esclusivamente da personaleesperto e con pezzi originali.La rimozione o manomissione dei dispositivi di sicurezza (valvola dimax. pressione - regolatore di pressione) comportauna violazione delle Norme Europee per la Sicurezza sul Lavoro.In particolare il COSTRUTTORE non è imputabileper reclami derivanti dall'uso di ricambi nonoriginali o per danni causati dalla rimozione omanomissione dei sistemi di sicurezza. Regular maintenance as described in the instructions is essential forcorrect operation and long lifetime of the tyre changer. If maintenance is not carried out regularly, the operation and reliabilityof the machine may be compromised, thus placing the operatorand anyone else in the vicinity at risk.Before carrying out any maintenance work, disconnect the electric andpneumatic supplies. Moreover, it is necessary to break the bead loadless3-4 times in order to let the air in pressure go out of the circuit.Defective parts must be replaced exclusively by expert personnel usingthe manufacturer’s spare parts .Removing or tampering with safety devices (pressure limiting and regulatingvalves) represents a contravention of EuropeanSafety Standards.In particular The MANUFACTURER shall not beheld responsible for complaints deriving fromthe use of spare parts made by other manufacturersor for damage caused by tampering orremoval of safety systems.32
8. ENTRETIEN8.1 Remarques généralesL’entretien ne doit jamais être effectué pardu personnel non autorisé8. WARTUNG8.1 Allgemeine HInweiseUnbefugtes Personal darf keine Wartungsarbeitenvornehmen. L’entretien régulier, selon les instructions données, est fondamentalpour un fonctionnement correct et une longue durée. Si l’entretien n’est pas effectué régulièrement, le fonctionnement et la fiabilitéde la machine peuvent être compromis, aux risques et périls de l’opérateuret de tiers.Avant d’effectuer toute opération d’entretien, débrancher l’installationélectrique, en déconnectant la fiche,et celle pneumatique, en fermant le robinet. De plus, afin de faire sortirl’air en pression dans le circuit,il faut effectuer 3-4 décollages à vide.Les pièces défectueuses doivent être remplacées uniquement par dupersonnel spécialisé et par les pièces d’origine indiquées dans lecatalogue“pièces de rechange” ci-joint.L’enlèvement ou la modification des dispositifs de sécurité (soupape depression maxi. - régulateur de pression) est une violation des normeseuropéennes sur la sécurité. Eine regelmäßige Wartung, wie in diesem Handbuch beschrieben, istfür einen störungsfreien Betrieb und eine lange Lebensdauer IhresReifenmontiergerätes von wesentlicher Bedeutung. Eine unregelmäßige Wartung kann den Betrieb und die Zuverlässigkeitder Maschine beeinträchtigen, und für den Bediener und eventuelle Dritteeine Gefahr darstellen.Bevor Wartungsarbeiten irgendwelcher Art ausgeführt werden, müssenStrom- und Druckluftzufuhr unterbrochen werden.Dazu, um Druckluft abzulassen, ist es nötig, 3-4 Leerabdrücken auszuführen.Fehlerhafte Teile dürfen nur durch erfahrenes Personal ausgewechseltwerden, dabei dürfen nur die im beiliegenden Ersatzteilkatalogangegebenen Original-Teile verwendet werden.Die Veränderung oder Entfernung der Sicherheitsvorrichtungen (Überdruckventil,Druckregler), stellt eine Verletzung der EuropäischenSicherheitsvorschriften dar.Le Constructeur n’est pas responsable des réclamationsqui dérivent de l’utilisation de piècesde rechange qui ne sont pas d’origine ou pourles dommages causés par la modification oul’enlèvement des systèmes de sécurité.Der Hersteller kann bei Reklamationen im Zusammenhangmit der Verwendung vonNicht-Originalersatzteilen oder bei Schäden aufgrundder Veränderung oder Entfernung vonSicherheitssystemen nicht haftbar gemachtwerden.33
OPERAZIONI DI MANUTENZIONE:• Pulire settimanalmente il piatto autocentrante con nafta per evitare laformazione di sporcizia e ingrassare le guide di scorrimento delle griffe.• Effettuare almeno ogni 30 giorni le seguenti operazioni:- Controllare il livello olio nella tazza del lubrificatore.Eventualmenterabboccare svitando la tazza F.Utilizzare solamente olio per impianti pneumatici di classe ISO HG conviscosità ISO VG 32 . (fig. 22)- Controllare che ogni 3 - 4 pressioni sul pedale U cada una goccia diolio nella tazza F. In caso contrario regolare l'apposita vite D (fig. 22)NOTA: Dopo i primi 20 gg. di lavoro stringere nuovamente le viti di serraggiodelle griffe e degli scorrevoli del piatto autocentrante (fig. 23).NOTA: Se la macchina accusasse un calo di potenza, controllare latensione della cinghia motore procedendo come segue:Prima di qualsiasi intervento , disinserire l'allacciamento elettrico epneumatico• Togliere la fiancata sinistra dello smontagomme svitando le quattro vitidi fissaggio• Tirare la cinghia del motore agendo sull'apposito registro X sul supportomotore (fig.24).NOTA: Qualora si rendesse necessario registrare la piastra di bloccaggiodel palo, perchè l'utensile non si blocca o non si alza dalcerchio dei 2 mm necessari alla lavorazione, registrare i dadi indicatiin figura 25.Se la torretta integrale lavora troppo lontana o troppo vicina al cerchio,in senso orizzontale, è necessario effettuare la regolazione della piastradi bloccaggio intervenendo sui dadi indicati nella fig. 26 fino ad ottenereuna distanza di 2 mm.NOTA: Per la pulizia o sostituzione del silenziatore per l'apertura/chiusuragriffe fare riferimento alla fig. 26 e procedere come descritto:1) Togliere la fiancata sinistra della carcassa svitando le quattro viti difissaggio2) Svitare il silenziatore situato sulla pedaliera, in corrispondenza delpedale di apertura/chiusura griffe.3) Pulire con un getto d'aria compressa o, se danneggiato, sostituire facendoriferimento al catalogo parti di ricambio.Per la pulizia o sostituzione del silenziatore per lo stallonatore, fare riferimentoalla figura 28 e procedere come ai punti 1 e 3 precedenti.MAINTENANCE OPERATIONS•Clean the turntable once a week with diesel fuel so as to prevent theformation of dirt, and grease the clamp sliding guides.•Carry out the following operations at least once every 30 days:-Check the oil level in the lubricator tank. If necessary, fill up by unscrewingthe reservoir F.Only use ISO VG viscosity ISOHG class oil for compressed air circuit(Fig. 22)-Check that a drop of oil is injected into the reservoir F every3-4timesthepedal U is pressed down. If not, regulate using the screw D (Fig. 22).Note: After the first 20 days of work, retighten the clamp tighteningscrews and the screws on the turntable slides (Fig. 23).Note: In the event of a loss of power, check that the drive belt istight as follows:Before any operation disconnect the electric power supplies.•Remove the left side body panel of the tyre changer by unscrewing thefour fixing screws.•Tighten the drive belt by means of the special adjusting screw X on themotor support (Fig. 24).Note:If it is necessary to adjust the vertical arm locking plate becausethe tool doesn’t lock or it doesn’t rise from the rim of 2mm necessaryfor working, adjust nuts as shown in figure 25.If the mounting head is working too far or too close to the rim, in horizontaldirection, it is necessary to adjust the locking plate by actingon the nuts shown in figure 26 until 2mm. distance is reached.Note:For cleaning or replacing the silencer for opening/closingclamps, see fig.26 and proceed as follows:1) Remove the left side panel of the machine body by unscrewing thefour fixing screws.2) Unscrew the silencer put on the pedal system, on the clamp opening/closingpedal.3) Clean by a jet of compressed air or, if damaged, replace by referringto the spare parts catalogue.For cleaning or replacing the silencer of bead breaker, see fig.28 andproceed as shown on previous point 1 and 334
ENTRETIEN:•Toutes les semaines nettoyer le plateau tournant avec du mazout pouréviter la formation de saleté et graisser les glissières des mors.•Tous les mois vérifier:•le niveau de l’huile dans le réservoir du graisseur. Si nécessaire, ajouterde l’huile en dévissant le reservoir F.Rajouter en utilisant de l'huile pour installation pneumatiques de classeISO HG à viscosité ISO VG 32.Fig. 22•qu’une goutte d’huile tombe dans le réservoir F toutes les 3-4 manoeuvresde la pédale U. Si nécessaire, régler par la vis D (fig. 22).NB.Après les 20 premiers jours de travail, serrer de nouveau lesvis des mors et les glissières du plateau tournant (fig. 23).NB.Si la machine a une baisse de puissance, contrôler la tensionde la courroie du moteur en effectuant les opérations suivantes:Avant toute intervention débrancher l’installation électrique et celle pneumatique.•Enlever le côté gauche du démonte-pneus en dévissant les quatre visde fixation.•Tirer la courroie du moteur en agissant sur le tendeur X sur le supportdu moteur (fig. 24).NB.Si la plaque de blocage du bras doit être réglée parce que l’outilne se bloque pas ou il ne se léve de la jante des 2 mm nécessairespour le travail, il faut régler les écrous indiqués dans la fig. 25.Si la tête de montage travaille trop loin ou trop près de la jante, dans lesens horizontal, il faut régler la plaque de blocage en agissant sur lesécrous indiqués par la fig. 26 jusqu’à obtenir une distance de 2mm.NOTE: Pour nettoyer ou remplacer l’atténuateur de bruit ouverture/fermeturedes mors, il faut se réferer à la figure 26 et opérer dela façon suivante:- Enlever le côté gauche du bâti en dévissant les quatres vis di fixage- Dévisser l’atténuateur de bruit placé sur le pédalier, près de la pédaleouverture /fermeture des mors.- Nettoyer moyennant un jet d’air comprimé ou, si endommagé, remplaceren se réferant au catalogue des pièces de rechange.Pour le nettoyage ou le remplacement de l’atténuateur de bruit du détalloneuril faut se réferer à la figure 28 et procéder de la façon indiquéepar le points 1 - 3 précédentsWARTUNGSARBEITEN:-Einmal wöchentlich den Zentriertisch mit Dieselöl reinigen, damit sichkein Schmutz bildet, Gleitführungen der Spannklauen einfetten.-Mindestens einmal pro Monat folgende Operationen ausführen:-Ölstand im Schmiergefäß überprüfen. Erforderlichenfalls, Gefäß Fabschrauben und mit neuem Öl auffüllen, dessen Qualität folgenderDaten entsprechen soll: Klasse ISO HG, Viskosität ISO VG 32. (Abb.22).-Überprüfen, ob nach jeweils 3 - 4 Pedaldrücken (U) ein Tropfen Öl insGefäß F fällt. Ist dies nicht der Fall, Schraube D regulieren (Abb. 22).WICHTIG:Nach den ersten 20 Arbeitstagen muß die Blockierungsschraubeder Spannklauen und der Zentriertisch- Gleitführungennachgezogen werden (Abb. 23).WICHTIG:Falls die Maschine einen Leistungsabfall hat, die Spannungdes Motorenriemens überprüfen. Wie folgt vorgehen:Vor jedem Eingriff Strom- und Druckluftzufuhr unterbrechen.-Linke Seitenwand des Reifenmontiergerätes abnehmen; hierzu die 4Blockierungsschrauben lösen.-Motorriemen mittels Regler X an der Motorhalterung ziehen (Abb. 24).WICHTIG:Falls die Blockierungsplatte des Arms eingestellt werdenmuß, weil sich Werkzeug oder Kipparm nicht blockieren oder vonden nötigen 2mm nicht heben lassen, wie in Abbildung 25beschrieben vorgehen.Solltet das Montierwerkzeug waagrechtsweise zu fern oder zunahderFelgearbeiten, so es ist nötig die Einstellung der Blockierungsplatte auszuführen,beim Zutun der Mutter, wie in Abb. 26, bis eine Weite von 2 mmerreicht wird.WICHTIG: Bei der Reinigung oder Auswechselung desSchalldämpfers, für die Öffnung und Schließung der Spannklauen,Abbildung 26 beachten:1) Linke Seitenwand abnehmen, beim Abschrauben der 4 Klemmschrauben2) Schalldämpfer auf Pedalgehäuse abschrauben, beim Ein/Aus Klauepedal.3) Mit einem Luftstoß reinigen, oder, falls beschädigt, auswechseln. Dabeiden Ersatzteilkatalog konsultieren.Bei der Reinigung oder Auswechselung des Schalldämpfers für dasAbdrückblatt Abbildung 28 beachten und wie Punkt 1-3 oben beschriebenvorgehen.35
9. TABELLA GUASTI E RIMEDIINCONVENIENTE CAUSA RIMEDIOAutocentrante gira Invertitore giri rotto Sostituire invertitorein un solo sensoAutocentrante nongiraAutocentrante sibloccaApertura / chiusuralenta delle griffeAutocentrante nonblocca il cerchioL'utensile tocca ilcerchio durante i lavoriCinghia rottaInvertitore di giri rottoProblemi al motoreCinghia allentataSilenziatore otturatoGriffe usurateCilindro/i autocentrantedifettoso/iPiastra bloccaggionon registrata o difettosaVite bloccaggio autocentranteallentataI pedali si bloccano Molla ritorno rottafuori posizioneOperazione di stallonaturadifficoltosaSilenziatore otturatoGuarnizioni cilindrostall. rotteSostituireSostituireControllare eventuali filistaccati nella spina, nelmotore o nella presa - SostituireRegolare tensione cinghia(Cap. 11 - fig. 24)Pulire o sostituire il silenziatoreSostituire griffeSostituire guarnizioniRegistrare o sostituire piastradi bloccaggio (Cap. 11- Fig. 25-26)Serrare viteSostituire mollaPulire silenziatore o sostituirlo(Cap. 11 - fig. 28)Sostituire guarnizioni9. TROUBLE-SHOOTING - MAUVAISFONCTIONNEMENT:TROUBLES POSSIBLE REASON SOLUTIONTurntable rotates Reverser broken Replace reverseronly in one directionTurntable doesnot rotateBelt brokenReverser brokenProblem with motorReplaceReplace reverserCheck for loose wire inthe motor, plug or socket-Replace motorTurntable lock Belt loose Adjust belt tension(Chap. 11 fig. 24)Clamp slow to Silencer clogged Clean or replace silenceropen/closeTurntable doesnot lock the wheelrim correctly -Clamps wornTurntable cylinder(s) defectiveReplace clampsReplace cylinder gaskets- The tool touchesthe rim duringthe tyre removing/ mountingoperations -Pedals lock outof working positionBead breakingoperation difficultLocking plate incorrectlyadjusted or defectiveTurntable locking screwlooseReturn spring brokenSilencer cloggedBead breaker cylindergaskets brokenAdjust or replace lockingplate (chap.11 fig.25-26)Tighten screwReplace springClean or replace silencer(chap.11 fig. 28)Replace gaskets36
9.CAUSES - REMEDES - TABELLEANOMALI CAUSE REMÈDELe plateau à centragetourne seulementdans un sensInverseur de tourscasséLe remplacerPlateau ne tournepasCourroie cassée rInverseur de tourscasséLa remplaceLe remplaceContrôler les fils dans la fiche,dans le moteur ou dansla priseProblèmes au moteurRemplacer le moteurPlateau se bloque Courroie détendue Régler la tension de la courroie(chap. 11- fig.24)Ouverture/fermeturelente desmors -Le plateau tournantne bloquepas bien la janteL’outil touche lajante au cours dudémontage/montageLes pédales sebloquent hors positionOpération de détalonnagedifficileSilencieux obstruéMors usésVérin/s plateau tournantdéfectueuxPlaque de blocagenon réglée ou défectueuseVis de blocage duplateau tournantdesserréeRessort de retourcasséSilencieux obstruéGarnitures du vérindu détalonneurcasséesLe nettoyer ou le remplacerLes remplacerRemplacer les garnituresdu/des vérin/sRégler ou remplacer la plaque(Chap.11 - fig.25-26)Serrer la visLe remplacerLe nettoyer ou le remplacer(Chap.11 - fig.28)Les remplacer9.DER BETRIEBSSTÖRUNGEN UND IHREBEHEBUNGFehler Mögliche Ursache AbhilfeDer Zentriertischdreht sich nur in einerRichtungWendegetriebe defektWendegetriebe auswechselnDer Zentriertischdreht sich nicht-Zentriertisch stehtwährend der Reifenmontageoder-demontage stillSpannklauen öffnen/schließensich langsamZentriertisch befestigtdie FelgenschlechtDas Werkzeugberührt währendder Montage/Demontagedie FelgePedals werden inder falschen PositionblockiertSchwierigkeitenbei der ReifenabdrückungRiemen gerissenWendegetriebe defektProbleme im MotorRiemen hat sichgelockertSchalldämpfer verstopftSpannklauen abgenütztZentriertischzylinderdefektBlockierungsplattenicht eingestellt oderdefektBlockierungsschraubedes ZentriertischeslockerRücklauffeder defektSchalldämpfer verstopftDie ZylinderdichtungendesAbdrückblattessind abgenutztRiemen auswechselnWendegetriebe auswechselnÜberprüfen, ob sich eventuellDrähte im Stecker, im Motoroder in derSteckdose gelöst haben - MotorauswechselnRiemenspannung einstellen(Kap. 11 - Abb. 24)Schalldämpfer reinigen oderauswechselnSpannklauen auswechselnZylinderdichtungen auswechselnBlockierungsplatte einstellenoder auswechseln (Kap. 11 -Abb. 25-26)Schraube anziehenFeder auswechselnSchalldämpfer reinigen oderauswechseln (Kap.11 -Abb.28)Dichtungen auswechseln37
DATI TECNICI / DONNEES TECHNIQUE/ STANDARD FEATURES / TECHNISCHE DATENBloccaggio cerchio dall'esternoExternal locking rim dimensionsBloccaggio cerchio dall'interno Internal locking rim dimensionsDimens. jante blocage externeDimens. jante blocage interneAbmessungen der äußeren BlockierungsfelgeAbmessungen der inneren Blockierungsfelge10” – 20”11” – 21”12” – 22”12”- 22”13” – 23”14” – 24”Diametro max. ruota Max. tyre diameter Diamètre maxi. pneu Max. Reifendurchmesser 1000mm (39”)Larghezza max. ruota Max. tyre width Largeur maxi. pneu Max. Reifenbreite 350mm (15”)Forza paletta stallonatore a 10barForce on bead breaker blade(10 bar)Force sur la palette détalloneur(10barKraft auf Abdrückblatt Druck 10barPressione d'esercizio Working pressure Pression de service Betriebsdruck 10 bar (145 psi)Limitatore di pressione gonfiaggionflating pressure limiting devicemax.Limitateur de press. degonflage maxi.Max. Eingang-DruckbegrenzerAlimentazione Power supply voltage Tension d'alimentation EingangspannungPotenza motore Motor power Puissance moteur MotorleistungVelocità di rotazioneRotating speed2500 kg3.5 bar (50 psi)Vitesse de rotation Drehgeschwindigkeit 7 – 14 rpmCoppia max mandrino Max. spindle torque Maximales Couple maxi. mandrin Kräftepaar an der Hauptspindel 1200 NM220V/380V 230V/400V 3 Ph110V 220V 230V 1Ph0.55/0.66 (3 ph single speed)0.8/1.1 kw (3ph double speed)0.75 kw (1ph)Dimensioni max. d'ingombro Dimensions Dimensions maxi. Abmessungen (BxBxH) 1080 x950 x 920Peso netto Net Weight Poids net NettogewichtLivello rumore in condizioni di lavoroNoise level in working conditionsNiveau de bruit pendant letravailLärmpegel bei Betrieb279 kg STND291 kg GT< 70 dB (A)38
DIAGRAMMA ELETTRICO EPNEUMATICO110V/220V/230V-1PHELECTRIC AND PNEUMATICDIAGRAMDiagramme électriques et pneumatiques39
220V/230V/380V/400V-3PH(DOUBLE SPEED)41
DIAGRAMMA SISTEMAPNEUMATICOSTANDARDSTANDARD PNEUMATICSYSTEM DIAGRAMDIAGRAMME SYSTEMEPNEUMATIQUE STANDARD1 Inflating gauge Indicateur de gonflage2 Silencer 1/4” Silentiateur 1/43 Silencer 1/8” Silentiateur 1/84 Quick relief valve Soupape de secours rapide5 Bead breaker cylinder Détalonneur cylindre6 Turntable cylinder Cylindre de platine7 Bead breaking valve Soupape de détalonnage8 Turntable valve Soupape de platine9 Rotation union Rotation union10 Lubricator Lubrificateur11 Pressure regulator Régulateur de pression12 Air intake cock Robinet d'admission d'air13 Safety valve Soupape de sécurité14 Pressure regulator Régulateur de pression42
DIAGRAMMA SISTEMAPNEUMATICO GTGT PNEUMATICSYSTEM DIAGRAMDIAGRAMME SYSTEMEPNEUMATIQUE GT3 Safety Valve Soupape de sécurité4 Tank Réservoir5 Setting solenoid Réglage de solénoïde6 GT pedal valve GT pédale de valve8 Safety Valve Soupape de sécurité9 inflating head gonfler la tête10 Divider Cloison11 Pressure gauge Manomètre12 Inflating unit unité de gonflage13 Deflating valve Dégonflage robinet14 Rotation union Rotation union43
BODY
ITEM CODE REF. NO DESCRIPTION1 GB/T70.1 Screw M6X102 4398848 GB/T97.1 Washer63 3012269 YC2-3012269 Sidecover4 4398708 GB/T70.1 ScrewM6X165 203B-006 Pedal cover6 4398723 GB/T70.1 ScrewM6X127 2412453 YC2-2412453 Pedalsupport8 3002099 YC1-3002099 Plasticfoot9 3006970 YC1-3006970 Beadlifting10 3002102 YC1-3002102 Wheel support11 GB/T96 Washer 612 2415583 YC2-2415583 Shell13 4399971 GB/T6182 Self-locking14 3000069 YC1-3000069 Spring15 4299984 YC1-4299984 Grease cup16 4398925 GB/T70.1 Screw M10X8517 4399966 GB/T5783 Screw M10X2518 3000206 YC2-3000206 Pivot19 3000495 YC2-3000495 Washer 10X36X520 4399967 GB/T6170 Nut M1021 4399228 GB/T5783 Screw M10X3022 3012312 YC2-3012312 Spacer23 4399957 GB/T78 Screw M6X824 4399378 GB/T97.1 Washer 1025 3012450 YC2-3012450 Protection26 301831 203B-3018314 Cover27 GB/T6170 Nut M628 GB/T5783 Screw M6X16
HORIZ.AND VERT.ARMS
ITEM CODE REF. NO DESCRIPTION1 2002831 YC2-2002831 Tiltingcylinder2 Arm control spares3 2008335 YC2-2008335 Armlockingcontrol4 4197743 Union M5 D45 4399827 GB/T5783 ScrewM8X206 3007935 YC2-3007935 Shockabsorber7 4399896 GB/T70.1 ScrewM4X358 2415594 YC3-2415594 Horizontalarm9 4399900 GB/T6182 Self-lockingnut10 3015566 YC3-3015566 Hexagonal arm11 3002601 YC1-3012601 Mounting tool shock absorber12 4399892 GB/T5783 Screw M6X2013 GB/T70.1 Screw M8X3514 4399967 GB/T6172 Nut M1015 3012459 YC2-3012459 Thread bar M10X12016 4399895 GB/T6182 Self-locking nut17 3006106 YC2-3006106 Arm locking plate18 4399971 GB/T6182 Self-locking nut19 3005407 YC3-3005407 Spring20 3001759 YC1-3001759 Operating arm knob21 4399134 GB/T70.1 Screw M8X3022 3015860 YC2-3015860 Arm frame23 3002602 YC2-3002602 Guide24 4398284 GB/T77 Screw M10X3025 4299524 YC2-4299524 Cylinder liner26 4399135 GB/T70.1 Screw M6X3527 4299522 YC2-4299522 Sealing ring28 4299523 YC2-4299523 Piston29 2099665 YC2-2099665 Locking cylinder30 4197740 Quick union 1/8?? 431 3007990 Rilsan hose 4X2 L=30032 3007988 Rilsan hose 4X2 L=210033 4399865 GB/T6170 Nut M1234 3015677 YC2-3015677 Adjustable screw35 3015597 YC2-3015597 Spring36 2115676 YC2-3015676 Arm locking plate37 3012978 YC3-3012978 Hook38 3002273 YC2-3002273 Spring39 4399829 GB/T96 Washer 840 4398763 YC2-001 Parallel pin41 3002474 YC2-3002474 Roller42 4398734 GB/T77 Screw M8X2043 4399976 GB/T6170 Nut M844 4399947 YC2-4399947 Washer 8X32X445 3000181 YC2-3000181 Washer 9X30X546 4197741 Quick union 1/8?? 447 2415598 YC2-2415598 Vertical arm48 3000599 YC2-3000599 Pin M12X5549 4399865 GB/T6182 Self-locking nut M1250 4199098 Quick union 1/8?? 851 3000218 Rilsan hose 6X4 L=120052 4199098 Quick union 1/8?? 653 4198993 Quick union 1/8?? 654 3000217 Rilsan hose 6X4 L=110055 3199599 GB/T893.1 Seeger 3056 4398146 YC1-4398146 Washer 24X30X0.557 3002624 YC2-3002624 Piston rod58 3015024 YC1-3015024 Flange59 4299168 GB/T3452.1 O-ring 20X2.75
60 3199601 Scraper 20X30X761 4298822 GB/T3452.1 O-ring 75X3.5562 3008084 YC2-3008084 Cylinder liner63 4397678 GB/T6177 Flange nut64 3008085 YC2-3008085 Special screw65 4198856 YC1-4198856 Piston66 4398637 GB/T97.1 Washer 1267 3015032 YC1-3015032 Flange68 4399539 GB/T70.1 Screw M12X12069 4399998 GB/T97.1 Washer 670 4399964 GB/T70.1 Screw M6X1071 3012450 YC2-3012450 Front protection72 6612270 YC3-2415683- Arm support73 4399877 GB/T5782 Screw M10X6074 4399378 GB/T97.1 Washer 1075 YC3-001 Special screw76 3015668 YC3-3015668 Pivot pin77 3000495 YC2-3000495 Washer78 4399228 GB/T5783 Screw M10X2579 4399880 GB/T5783 Screw M10X4080 2008082 YC2-2008082 Cylinder unit81 YC3-002 Absorber82 3007988 Rilsan hose 4X2 L=100083 4399889 GB/T6170 Nut M6
PEDAL BOX
ITEM CODE REF. NO DESCRIPTION1 4399998 REF.NO Toothedwasher62 4399890 GB/T97.1 ScrewM6X203 4399905 GB/T70.1 ScrewM4X124 4398848 GB/T70.1 ScrewM6X125 4399044 GB/T5783 ScrewM5X206 4399893 GB/T70.1 Self-lockingnutM67 3015342 GB/T6182 Support8 4399889 YC1-3015342 NutM69 4399996 GB/T6170 NutM410 GB/T6170 Toothed locking washer 411 4399998 Grounding cable12 4399890 Grounding sticker13 4399905 GB/T97.1 Washer 414 4398848 GB/T5783 Screw M4X1215 4399044 Reverser cover16 4399893 Cable holder17 2001512 Power connection cable18 2001171 YC1-2001171 Motor connection cable19 4595380 Reverser 40A20 2115340 YC1-2115340 Support21 3000175 YC1-3000175 Reverser lever22 3015341 YC1-3015341 Connection rod23 2006514 YC2-2006514 Pedal control unit24 3013333 YC1-3013333 Pedal return spring25 GB/T5783 Screw M8X1626 3002161 YC1-3002161 Pedal box base27 3002157 YC1-3002157 Reverser control pedal A28 3002159 YC1-3002159 Pedal B29 4399864 GB/T894.1 Seeger 1230 3003095 YC2-3003095 Pedal alignment pin31 3002160 YC2-3002160 Tilting control pedal C32 3007953 YC1-3007953 Bush33 3000142 YC1-3000142 Pedal control spring34 4397649 GB/T5782 Screw M6X5035 4399900 GB/T6182 Self-locking nut M836 2002529 YC1-2002529 Turntable valve37 2006297 YC1-2006297 Bead breaking valve unit38 3007598 YC1-3007598 Valve shaft39 4398783 GB/T879.2 Spring pin 4X2540 2002444 YC1-2002444 Valve unit41 4199610 Silencer 1/8”42 4198954 Quick union 1/8?? - 843 4198778 Quick union 1/8?? - 844 Rilsan hose 8X5 L75045 3000144 Rilsan hose 8X5 L70046 4197629 YC1-4197629 Nylon washer47 4398633 GB/T97.1 Washer 1048 4398848 GB/T96 Washer 649 3099335 Rilsan hose 8X5 L=85050 3002442 YC1-3002442 Valve pin51 4399894 GB/T860 Washer 852 4299912 YC1-4299912 Connection rod53 4299911 YC1-4299911 Forked leaf spring54 4198990 Quick union 1/8”855 3002446 Rilsan hose 8X5 L=8056 4299913 YC1-4299913 Cam57 4399891 GB/T845 Self-tapping screw ST3X658 4299910 YC1-3099910 Connection rod guide59 3000217 Rilsan hose 6X4 L=1100
60 3002446 Rilsan hose 8X5 L=25061 4199842 Quick union 1/8”- 862 4198993 Quick union 1/8”- 663 4199843 Silencer outlet adjuster G1/8??64 3000218 Rilsan hose 8X5 L=100065 4299000 YC1-4299000 O-ring 17X466 3001584 YC1-3001584 Spacer for valve 300158367 3001585 YC1-3001585 Flange for valve 300158368 4398999 GB/T845 Self-tapping screw ST3.5X1369 4198594 Quick union D870 3001342 Rilsan hose 8X5 L=110071 3000218 Rilsan hose 6X4 L=120072 2002531 YC2-2002531 Tilting control valve unit73 GB/T97.1 Washer 874 3000145 Rilsan hose 8X5L=25075 3001583 YC1-3001583 Distribution valve
BEAD BREAKER
ITEM CODE REF. NO DESCRIPTION1 3005053 YC1-3005053 Cylinderliner2 4394969 GB/T6171 NutM18X1.53 4398289 GB/T97.1 Washer184 4195069 YC1-4195069 Seal5 3016806 YC1-3016806 Cylinderpiston6 3007852 YC1-3007852 Pistonrod7 4198145 GB/T3452.1 O-ring195X5.18 2115571 YC1-2415571 Cylinderflange9 4399892 GB/T5783 ScrewM6X1610 4398007 GB/T6177 Flange nut M611 3015573 YC1-3015573 Bush12 4399943 GB/T70.1 Screw M12X3513 3000889 Rilsan hose 8x5 L=70014 4198578 Rotation union 1/4?? - 815 2015850 YC1-2015850 Bead breaker cylinder16 4298168 GB/T3452.1 O-ring 20X2.7517 3199601 Scraper 20X30X718 4398146 YC1-4398146 Shim 24X30X0.519 3199599 GB/T893.1 Seeger 3020 2415581 YC2-2415581- Support21 GB/T70.1 Screw M6X1622 4399945 GB/T5782 Screw M16X9023 2415581 YC1-2415581 Bead breaker arm24 4398178 GB/T894.1 Seeger 4025 3008990 YC1-3008990 Pivot pin26 4399949 GB/6182 Self-locking nut M1427 4398899 GB/T955 Elastic washer 1428 4398751 GB/T96 Washer 1429 4299952 YC1-4299952 Knob30 4396941 GB/T6172 Nut M1431 3010293 YC2-3010293 Pivot32 2412271 YC1-2412271 Bead breaker plate33 3013240 YC2-3013240 Protective cover34 4399971 GB/T6182 Self-locking nut M1035 4397145 GB/T70.1 Screw M10X7036 4399963 GB/T6182 Self-locking nut M1637 3000114 YC1-3000114 Arm spring38 YC1-002 Limit rubber protection39 4399998 GB/T97.1 Washer 6
MOUNTING TOOLITEM CODE REF. NO DESCRIPTION1 2002215 YC1-2002215 Mountingtoolunit2 4395804 YC1-4395804 Washer14.2X35X53 4395805 YC1-4395805 Washer10.2X21X44 3006689 YC1-3006689 Plasticinsert5 4399953 GB/T5783 ScrewM10X166 3000215 YC1-3000215 Peakroll7 5395530 GB/T80 ScrewM12X128 3009018 YC1-3009018 SpecialpinD.5M69 3002214 YC1-2002214 Mountingtool10 4395805 GB/T77 Screw M12X1611 3013650 YC1-3013650 Tool protection
SELF CENTERING TURNTABLE
ITEM CODE REF. NO DESCRIPTION1 2015845 YC1-2015845 Turntablesystem2 3015187 YC1-3015187 Guidepin3 3009778 YC1-3009778 Washer16.3X47X134 3000062 YC1-3000062 Turntablecap5 4399926 GB/T5783 ScrewM16X1.5X406 2112865 YC1-2112865 Turntable7 3006255 YC1-3006255 Slide8 2115756 YC1-2415756 Slideguide9 4398637 GB/T97.1 Washer1210 4399864 GB/T894.1 Seeger 1211 3002901 YC1-3002901 Cylinder shaft12 4198856 YC1-4198856 Piston13 4399865 GB/T6182 Self-locking nut M1214 Rotation union 1/8?? - 815 3199601 Scraper 20X30X716 4398146 YC1-4398146 Washer 24X30X0.517 3199599 GB/T893.1 Seeger 3018 4299168 GB/T3452.1 O-ring 20X2.7519 4397678 GB/T6177 Flange nut M820 3007941 YC1-3007941 Special screw21 3015023 YC1-3015023 Back flange22 3008042 YC1-3008042 Cylinder liner23 4298822 GB/T3452.1 O-ring 75X3.5524 4198898 Union 1/8?? - 825 Rilsan hose 8X5 L=7026 3002225 Rilsan spiral hose 8X5 L32027 TunionD.828 3015024 YC1-3015024 Front flange29 3002225 Rilsan hose 8X5 L=85030 3199589 GB/T3452.1 O-ring 60X2.6531 3015169 YC1-3015169 Turntable plate32 2008060 YC1-2008060 Turntable cylinder unit33 3099335 Rilsan hose 8X5 L=27034 3006870 YC1-3006870 Connection plate35 4399932 GB/T894.1 Seeger 6536 4398037 GB/T70.1 Screw M10X1.25X2537 3002297 YC1-3002297 Oversize clamp38 2115755 YC1-3015755 Slide guide39 3006879 YC1-3006879 Turntable spacer40 3006880 YC1-3006880 Connection rod spacer41 4398637 GB/T97.1 Washer 1242 4398838 GB/T70.1 Screw M12X1.25X4543 4298955 YC1-4298955 Rotation union44 2006393 YC1-2006393 Clamp cover45 4198954 Quick union 1/8?? - 846 Quick T union 1/8?? - 847 GB/T5783 Screw M6X1248 4399889 GB/T6170 Nut M649 3006878 YC1-3006878 Connection pin50 3006869 YC1-3006869 Turntable flange51 3007420 YC1-3007420 Bush52 3006869 YC1-3006869-A Turntable spacer
SELF CENTERING TURNTABLE GT
ITEM CODE REF. NO1 2015856 YC2-2015856 GTturntable2 3015187 YC1-3015187 Guidepin123 3009778 YC1-3009778 Washer16.3X47X134 3000062 YC1-3000062 Turntablecap5 4399926 GB/T5783 ScrewM16X1.5X406 2107384 YC2-2107384 Turntable7 2107387 YC2-2407387 GTslide8 2115756 YC1-2415756 Slideguide9 4398637 GB/T97.1 Washer1210 4399864 GB/T894.1 Seeger 1211 3002901 YC1-3002901 Piston rod12 4198856 YC1-4198856 Piston13 4399865 GB/T6182 Self-locking nutM1214 2006393 YC1-2006393 Clamp cover15 3199601 Oil scraper 20X30X716 4398146 YC1-4398146 Shim 24X30X0.517 4198035 GB/T893.1 Seeger 3018 4299168 GB/T3452.1 O-ring 20X2.7519 4397678 GB/T6177 Flange nut20 3007941 YC1-3007941 Special screw21 3015023 YC1-3015023 Back flange22 3008042 YC1-3008042 Cylinder liner23 4298822 GB/T3452.1 O-ring 75X3.5524 4198898 90º union 1/8?? - 825 Rilsan hose 8X5 L=7026 Rilsan spiral hose 8X527 TunionD.828 3015024 YC1-3015024 Front flange29 4198954 Quick union 1/8?? - 830 Rilsan hose 8X5 L=27031 3015169 YC1-3015169 Turntable plate32 2008060 YC1-2008060 Turntable cylinder33 4398037 GB/T70.1 Screw M10X1.25X2534 2002297 YC1-3002297 Oversize clamp35 2115755 YC1-3015755 Slide guide36 3006879 YC1-3006879 Turntable spacer37 3006880 YC1-3006880 Connection rod spacer38 4398637 GB/T97.1 Washer 1239 4398838 GB/T70.1 Screw M12X1.25X4540 GB/T5783 Screw M6X1241 4399889 GB/T6170 Nut M642 3006878 YC1-3006878 Pin43 3006869 YC1-3006869 Turntable flange44 3007420 YC1-3007420 bush45 4399932 GB/T894.1 Seeger 6546 3006870 YC1-3006870 Connection plate47 3002109 Rilsan hose 14X11 L=70048 4198035 Quick union 1/4?? 1049 3006478 Rilsan hose 10X6.5 L=40050 4197207 T union 1/8?? 1051 3006477 Rilsan hose 10X6.5 L=30052 4298992 YC2-4298992 Rotation union53 Union 1/8?? 854 3001996 GB/T77 Screw M6X2555 4298802 GB/T3452.1 O-ring60X2.6556 Tunion1/8??-857 3099335 Rilsan hose 8X5 L=85058 3006869 YC1-3006869-A Flange spacer
MOTOR REDUCTION GEAR GROUP
ITEM CODE REF. NO DESCRIPTION1 4399900 GB/T6182 Self-lockingnutM82 3010873 YC1-3010873 Bottompartofreductiongearbox3 4296910 GB/T276 Bearing62124 4396948 GB/T1096 Tab16X10X705 3010885 YC1-3010885 Helicalgearstud6 4399664 GB/T70.1 ScrewM6X107 3010884 YC1-3010884 Helicalgear8 4396946 GB/T894.1 Seeger609 4296943 GB/T3452.1 O-ring34.5X3.5510 4396947 GB/T1096 Tab 6X6X1811 3010883 YC1-3010883 Worm12 4296944 GB/T297 Bearing 3020413 2100166 YC1-3000166 Motor pulley14 3010886 YC1-3010886 Sealing cap15 4296945 GB/T279 Bearing 6212 2RS16 4296942 YC1-4296942 O-ring 20X35X1017 3199596 YC1-3199596 Gear box pulley18 4396940 GB/T119.1 Pin 8X2019 3010872 YC1-3010872 Upper part of reduction gear box20 4399134 GB/T70.1 Screw M8X3021 2011967 YC1-2011967 Reduction gear unit22 4299923 GB/T11544-1997 Belt V A58023 4396941 GB/T6172 Nut M1424 4398807 GB/T97.1 Washer 1425 4399922 GB/T79 Screw M8X1426 4398633 GB/T97.1 Washer 1027 4399829 GB/T97.1 Washer 828 4399976 GB/T6170 Nut M829 Motor30 3000164 YC1-3000164 Belt-stretcher shoe31 4399966 GB/T5783 Screw M10X2032 4399935 GB/T5783 Screw M8X2533 3000149 YC1-3000149 Motor support34 4399880 GB/T5783 Screw M10X3535 4399969 GB/T6170 Nut M1036 4399933 GB/T5782 Screw M10X5037 4396700 GB/T894.1 Seeger 50
GT INFLATING DEVICE
ITEM CODE REF. NO DESCRIPTION1 4399890 GB/T70.1 ScrewM6X202 4399889 GB/T6170 NutM63 4399892 GB/T5783 ScrewM6X204 2110288 YC2-2410288 GTpedal5 3010287 YC2-3010287 Valveunitsupport6 3008005 YC2-3008005 Limitstopscrewsupport7 4298942 YC2-4298942 Spring8 4399100 GB/T91 Splitpin3.2X309 4398890 YC2-4398890 Springbolt10 4399999 GB/T70.1 Screw M6X2511 4399893 GB/T6182 Self-locking nut M612 3002110 Rilsan hose 6X4 L=50013 3010798 Rilsan hose 8X5 L=40014 Rilsan hose 8X5 L=50015 2009718 YC2-2009718 Valve unit16 4399998 GB/T97.1 Washer 617 4399897 GB/T5782 Screw M4X2518 3001853 YC2-3001853 Valve connection lever19 4399895 GB/T6182 Self-locking nut M420 4398999 GB/T845 Self-tapping screw ST3.5X1321 3001585 YC1-3001585 Flange for valve 300158522 4299000 YC1-4299000 O-ring 17X423 3001849 YC2-3001849 GT pneumatic valve shaft24 3001584 YC1-3001584 Spacer for valve 300158325 3001583 YC1-3001583 Distribution valve26 4198954 Quick union 1/8?? - 827 4199161 Plug 1/8?? - 828 4199888 Tunion1/8??-829 4199098 Quick union 1/8?? - 630 3001382 Rilsan hose 8X5 L=100031 4198884 Quick union 1/4?? - 832 3002109 Rilsan hose 14X11 L=70033 4198531 YC2-4198531 Pneumatic valve 1??34 90º quick union 1/4?? - 635 4198642 Sleeve collar F 1??36 3005041 YC2-3005041 Pipe 1”37 3005041 Union 1”38 2012485 YC2-2012485 Air tank39 4198703 Safety valve 1/4?? 10bar40 4398723 GB/T5783 Screw M6X1241 4398848 GB/T96 Washer 642 3000144 Rilsan hose 8X5 L=110043 2014217 YC2-2014217 GT pneumatic control unit44 4198435 Safety valve 1/8?? 4bar45 4198578 90º union 1/4?? - 846 4198173 Regulator 1/4?? 3.5bar47 4399964 GB/T70.1 Screw M6X1048 3015111 YC2-3015111/1 Connection stud49 4299354 YC2-4299354 Relief pushbutton50 4399256 YC2-4399256 Washer T3 13X19X1.551 3015108 YC2-3015108 GT front plate52 4299069 Pressure gauge D.80 10bar/140ps 1/4??53 4198908 Union 1/4??54 4399946 GB/T5783 Screw M8X3055 YC2-3015109 GT back plate56 4398945 GB/T70.1 Self-tapping screw M4X857 4399903 GB/T97.1 Washer 458 4399976 GB/T6170 Nut M459 3015111 YC2-3015111 Gauge support60 Rilsan hose 8X5 L=80061 2008872 GT control unit hose 1/4?? L=1500
AIR LUBRICATION GROUPITEM CODE REF. NO DESCRIPTION1 4198173 Regulator 1/4?? 3.5bar2 4198435 Safety valve 1/8?? 4bar3 4198884 Quick union 1/4?? - 84 2010781 YC2-2010781 Pressureregulatorunit5 4198578 90º quick union 1/4?? - 86 4199797 YC2-4199797 Screw1/4??7 4196316 Lubricator cup8 4196315 Lubricator9 4196313 Filter body10 4196314 Filter cup11 4196481 Lubricator 1/4??12 4196480 Filter regulator 1/4??13 4198883 Quick union 1/4?? - 814 4396593 GB/T70.1 Screw M4X4015 4298308 Pressure gauge D.40 0-16bar 1/8??16 4198818 Union 1/4??17 2014217 YC2-2014217 GT pressure gauge18 9298243 Inflating gauge19 4198143 Valve 1/4??20 4199987 Union 1/4??21 2012307 YC2-2012307 Lubricator/filter regulator
Dichiarazione di conformità - Déclaration de conformitéDeclaration of Conformity - KonformitätserklärungDeclaración de conformidad - OverensstemmelseserklæringÖverensstämmande intyg - EG-ConformiteitsverklaringWERTHER INTERNATIONAL S.p.A.Via F.Brunelleschi, 12 42124 CADE’ (Reggio Emilia) ItalyTel.++/+522/9431 (r.a.) Fax ++/+522/941997dichiariamo che lo smontagomme modellodéclare que le monte-demonte pneus modèlehereby we declare that the tyre changer modelhiermit erklären wir, daß die Reinfenmontirgerätdeclara, que la desmontadora de neumáticos modeloVi erklærer dækskiftermodellenVi deklarerer däckomläggermodellenWij verklaren dat de bandenwisselmachine<strong>672T14</strong>Matricola N° - N° de série -Serial N° - MaschinennummerFascicolo tecnico - Dossier technique<strong>Tech</strong>nical file - <strong>Tech</strong>n. DokumentationWERTHER INTERNATIONAL S.p.A.Via F.Brunelleschi,1242124 CADE’ (Reggio Emilia) ItalyCadè, 31/03/2011Vice president Iori Werter