INSTALLATION GUIDE AXIS M32 Network Camera Series ... - IP Way
INSTALLATION GUIDE AXIS M32 Network Camera Series ... - IP Way
INSTALLATION GUIDE AXIS M32 Network Camera Series ... - IP Way
- No tags were found...

You also want an ePaper? Increase the reach of your titles
YUMPU automatically turns print PDFs into web optimized ePapers that Google loves.
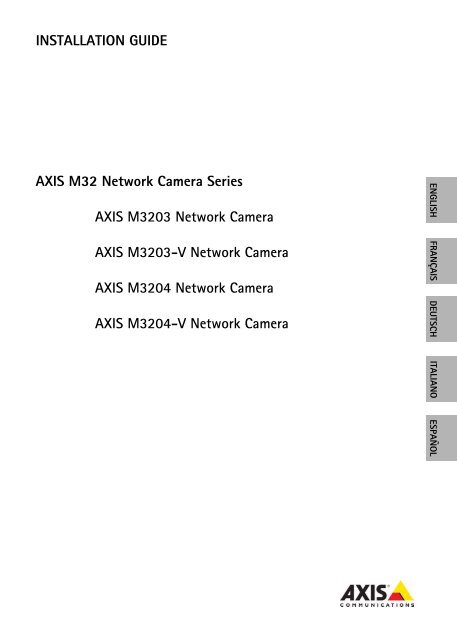
<strong>INSTALLATION</strong> <strong>GUIDE</strong><strong>AXIS</strong> <strong>M32</strong> <strong>Network</strong> <strong>Camera</strong> <strong>Series</strong><strong>AXIS</strong> <strong>M32</strong>03 <strong>Network</strong> <strong>Camera</strong><strong>AXIS</strong> <strong>M32</strong>03-V <strong>Network</strong> <strong>Camera</strong><strong>AXIS</strong> <strong>M32</strong>04 <strong>Network</strong> <strong>Camera</strong><strong>AXIS</strong> <strong>M32</strong>04-V <strong>Network</strong> <strong>Camera</strong>ENGLISH FRANÇAIS DEUTSCH ITALIANO ESPAÑOL
About this DocumentThis document includes instructions for installing the<strong>AXIS</strong> <strong>M32</strong> series on your network. Previous experience ofnetworking will be beneficial when installing theproduct.Legal ConsiderationsVideo and audio surveillance can be prohibited by lawsthat vary from country to country. Check the laws inyour local region before using this product forsurveillance purposes.This product includes one (1) H.264 decoder license. Topurchase further licenses, contact your reseller.Electromagnetic Compatibility (EMC)This equipment generates, uses and can radiate radiofrequency energy and, if not installed and used inaccordance with the instructions, may cause harmfulinterference to radio communications. However, there isno guarantee that interference will not occur in aparticular installation.If this equipment does cause harmful interference toradio or television reception, which can be determinedby turning the equipment off and on, the user isencouraged to try to correct the interference by one ormore of the following measures: Re-orient or relocatethe receiving antenna. Increase the separation betweenthe equipment and receiver. Connect the equipment toan outlet on a different circuit to the receiver. Consultyour dealer or an experienced radio/TV technician forhelp. Shielded (STP) network cables must be used withthis unit to ensure compliance with EMC standards.USA - This equipment has been tested and found tocomply with the limits for a Class B computing devicepursuant to Subpart B of Part 15 of FCC rules, which aredesigned to provide reasonable protection against suchinterference when operated in a commercialenvironment. Operation of this equipment in aresidential area is likely to cause interference, in whichcase the user at his/her own expense will be required totake whatever measures may be required to correct theinterference.Canada - This Class B digital apparatus complies withCanadian ICES-003.Europe - This digital equipment fulfills therequirements for radiated emission according to limit Bof EN55022, and the requirements for immunityaccording to EN55024 residential and commercialindustry.Japan - This is a class B product based on the standardof the Voluntary Control Council for Interference fromInformation Technology Equipment (VCCI). If this is usednear a radio or television receiver in a domesticenvironment, it may cause radio interference. Install anduse the equipment according to the instruction manual.Australia - This electronic device meets therequirements of the Radio communications(Electromagnetic Compatibility) Standard AS/NZSCISPR22.Equipment ModificationsThis equipment must be installed and used in strictaccordance with the instructions given in the userdocumentation. This equipment contains nouser-serviceable components. Unauthorized equipmentchanges or modifications will invalidate all applicableregulatory certifications and approvals.LiabilityEvery care has been taken in the preparation of thisdocument. Please inform your local Axis office of anyinaccuracies or omissions. Axis Communications ABcannot be held responsible for any technical ortypographical errors and reserves the right to makechanges to the product and documentation withoutprior notice. Axis Communications AB makes nowarranty of any kind with regard to the materialcontained within this document, including, but notlimited to, the implied warranties of merchantabilityand fitness for a particular purpose. AxisCommunications AB shall not be liable nor responsiblefor incidental or consequential damages in connectionwith the furnishing, performance or use of this material.RoHSThis product complies with both the EuropeanRoHS directive, 2002/95/EC, and the ChineseRoHS regulations, ACPE<strong>IP</strong>.WEEE DirectiveThe European Union has enacted a Directive2002/96/EC on Waste Electrical and ElectronicEquipment (WEEE Directive). This directive isapplicable in the European Union member states.The WEEE marking on this product (see right) or itsdocumentation indicates that the product must not bedisposed of together with household waste. To preventpossible harm to human health and/or the environment,the product must be disposed of in an approved andenvironmentally safe recycling process. For furtherinformation on how to dispose of this product correctly,contact the product supplier, or the local authorityresponsible for waste disposal in your area.Business users should contact the product supplier forinformation on how to dispose of this product correctly.This product should not be mixed with other commercialwaste. For more information, visithttp://www.axis.com/corporate/about/environment.htmSupportShould you require any technical assistance, pleasecontact your Axis reseller. If your questions cannot beanswered immediately, your reseller will forward yourqueries through the appropriate channels to ensure arapid response. If you are connected to the Internet, youcan:• download user documentation and firmware updates• find answers to resolved problems in the FAQ database.Search by product, category, or phrases• report problems to Axis support by logging in to yourprivate support area.
<strong>AXIS</strong> <strong>M32</strong> <strong>Series</strong> Installation Guide Page 3<strong>AXIS</strong> <strong>M32</strong> <strong>Series</strong> Installation GuideThis installation guide provides instructions for installing the <strong>AXIS</strong> <strong>M32</strong> <strong>Series</strong> on your network. Forall other aspects of using the product, please see the User’s Manual, available on the CD included inthis package, or from www.axis.com/techsupInstallation steps1. Check the package contents against the list below.2. Hardware overview. See page 4.3. Install the hardware. See page 6.4. Assign an <strong>IP</strong> address. See page 7.5. Set the password. See page 10.6. Adjust the focus. See page 12.7. Complete the installation. See page 12.Important!This product must be used incompliance with local laws andregulations.ENGLISHPackage contentsItem<strong>Network</strong> cameraMounting kitCDPrinted MaterialsModels/variants/notes<strong>AXIS</strong> <strong>M32</strong>03 - Tamper-resistant <strong>Network</strong> <strong>Camera</strong><strong>AXIS</strong> <strong>M32</strong>03-V - Vandal-resistant <strong>Network</strong> <strong>Camera</strong><strong>AXIS</strong> <strong>M32</strong>04 - Tamper-resistant <strong>Network</strong> <strong>Camera</strong><strong>AXIS</strong> <strong>M32</strong>04-V - Vandal-resistant <strong>Network</strong> <strong>Camera</strong>Screwdriver for tamper-proof screws2 tamper-proof screws (M4x16 Resitorx)Drill template<strong>AXIS</strong> <strong>Network</strong> Video Product CD, including product documentation,installation tools and other software<strong>AXIS</strong> <strong>M32</strong> <strong>Series</strong> Installation Guide (this document)Axis Warranty Document, AVHS Authentication key
Page 4<strong>AXIS</strong> <strong>M32</strong> <strong>Series</strong> Installation GuideHardware overview16mm cable conduit(not supplied) fitted to<strong>AXIS</strong> <strong>M32</strong> seriesCover platesControl buttonProduct ID & Serial number (S/N).The serial number may berequired during the installation.Power indicator LED<strong>Network</strong> connector<strong>Network</strong> indicator LEDStatus indicator LEDDimensionsHxWxD = 94 x 144 x 132mm (3.7" x 5.7" x 5.2")<strong>AXIS</strong> <strong>M32</strong>03, <strong>AXIS</strong> <strong>M32</strong>04: 425 g (0.94 lb)<strong>AXIS</strong> <strong>M32</strong>03-V, <strong>AXIS</strong> <strong>M32</strong>04-V: 580 g (1.28 lb)
<strong>AXIS</strong> <strong>M32</strong> <strong>Series</strong> Installation Guide Page 5LED indicatorsLED Color Indication<strong>Network</strong> Green Steady for connection to a 100 Mbit/s network. Flashes for network activity.Amber Steady for connection to 10 Mbit/s network. Flashes for network activity.Unlit No network connection.Status Green Steady green for normal operation.Note: The Status LED can be configured to be unlit during normal operation, or toflash only when the camera is accessed. To configure, go to Setup > SystemOptions > LED. See the online help files for more information.Amber Steady during startup, during reset to factory default or when restoring settings.Red Slow flash for failed upgrade.Power Green Normal operation.Amber Flashes green/amber during firmware upgrade.ENGLISH
Page 6<strong>AXIS</strong> <strong>M32</strong> <strong>Series</strong> Installation GuideInstall the hardware!IMPORTANT!- The casing of the <strong>AXIS</strong> <strong>M32</strong>03-V and <strong>AXIS</strong> <strong>M32</strong>04-V is not approvedfor outdoor use - the product may only be installed in indoor environments.Mount the cameraThe <strong>AXIS</strong> <strong>M32</strong> <strong>Series</strong> network cameras can be mounted with the cables routed through the wall/ceiling, or from above or below. There are cover plates for the openings on both sides of the domecover.The <strong>AXIS</strong> <strong>M32</strong> <strong>Series</strong> can also be fitted with a metal conduit for protecting the cabling whenconnected via the side openings. See the illustrations on page 4.1. Using the drill template, drill two holes in the ceiling/wall. Ensure the camera is positioned sothat the tamper-proof screws can be tightened using the supplied screwdriver.2. Route the required cables. See Connect to the network, on page 7 for details.3. Fasten the camera unit to a ceiling or wall, using screws and plugs appropriate for the ceiling/wall material.4. Proceed to Connect to the network, on page 7.Mounting on a drop ceilingTo mount the <strong>AXIS</strong> <strong>M32</strong> <strong>Series</strong> on a drop ceiling, check that the ceiling is sturdy enough to hold theweight of the camera.The camera can also be secured using a plate or board that better carries the weight of the camera,and which is more suitable for securing the screws.Plate or boardCeiling<strong>AXIS</strong> <strong>M32</strong> seriesScrewsThe <strong>AXIS</strong> <strong>M32</strong> <strong>Series</strong> can also be mounted using the <strong>AXIS</strong> <strong>M32</strong> <strong>Series</strong> Drop Ceiling Mount, whichallows the camera to be mounted more discreetly. Please see www.axis.com for all availablemounting accessories.
<strong>AXIS</strong> <strong>M32</strong> <strong>Series</strong> Installation Guide Page 7Connect to the network1. Connect the camera to the network using a shielded network cable.2. Check that the indicator LEDs indicate the correct conditions. See the table on page 5 forfurther details. Note that some LEDs can be disabled and may be unlit.Assign an <strong>IP</strong> addressFollow these instructions to assign an <strong>IP</strong> address or see page 13 for other methods of connecting the<strong>AXIS</strong> <strong>M32</strong> <strong>Series</strong> to the Internet.Assign an <strong>IP</strong> addressMost networks today have a DHCP server that automatically assigns <strong>IP</strong> addresses to connecteddevices. If your network does not have a DHCP server the <strong>AXIS</strong> <strong>M32</strong> <strong>Series</strong> will use 192.168.0.90 asthe default <strong>IP</strong> address.If you would like to assign a static <strong>IP</strong> address, the recommended method in Windows is either <strong>AXIS</strong><strong>IP</strong> Utility or <strong>AXIS</strong> <strong>Camera</strong> Management. Depending on the number of cameras you wish to install,use the method that best suits your purpose.Both of these free applications are available on the Axis <strong>Network</strong> Video Product CD supplied withthis product, or they can be downloaded from www.axis.com/techsupENGLISHMethod Recommended for Operating system<strong>AXIS</strong> <strong>IP</strong> UtilitySee page 8<strong>AXIS</strong> <strong>Camera</strong> ManagementSee page 9Single cameraSmall installationsMultiple camerasLarge installationsInstallation on a different subnetWindowsWindows 2000Windows XP ProWindows 2003 ServerWindows VistaWindows 7Notes:• If assigning the <strong>IP</strong> address fails, check that there is no firewall blocking the operation.• For other methods of assigning or discovering the <strong>IP</strong> address of the <strong>AXIS</strong> <strong>M32</strong> <strong>Series</strong>, e.g. in otheroperating systems, see page 13.
Page 8<strong>AXIS</strong> <strong>M32</strong> <strong>Series</strong> Installation Guide<strong>AXIS</strong> <strong>IP</strong> Utility - single camera/small installation<strong>AXIS</strong> <strong>IP</strong> Utility automatically discovers and displays Axis devices on your network. The applicationcan also be used to manually assign a static <strong>IP</strong> address.Note that the computer running <strong>AXIS</strong> <strong>IP</strong> Utility must be on the same network segment (physicalsubnet) as the <strong>AXIS</strong> <strong>M32</strong> <strong>Series</strong>.Automatic discovery1. Check that the <strong>AXIS</strong> <strong>M32</strong> <strong>Series</strong> is connected to the network and that power has been applied.2. Start <strong>AXIS</strong> <strong>IP</strong> Utility.3. When the camera appears in the window, double-click it to open its home page.4. See page 10 for instructions on how to assign the password.Assign the <strong>IP</strong> address manually (optional)1. Acquire an unused <strong>IP</strong> address on the same network segment as your computer.2. Select the <strong>AXIS</strong> <strong>M32</strong> <strong>Series</strong> network camera in the list.3. Click the button Assign new <strong>IP</strong> address to the selected device and enter the <strong>IP</strong> address.4. Click the Assign button and follow the on-screen instructions. Note that the camera must berestarted within 2 minutes for the new <strong>IP</strong> address to be set.5. Click the Home Page button to access the camera’s web pages.6. See page 10 for instructions on how to set the password.Note:<strong>AXIS</strong> <strong>M32</strong>03-V and <strong>AXIS</strong> <strong>M32</strong>04-V will display in <strong>AXIS</strong> <strong>IP</strong> Utility as <strong>AXIS</strong> <strong>M32</strong>03 and <strong>AXIS</strong><strong>M32</strong>04.
<strong>AXIS</strong> <strong>M32</strong> <strong>Series</strong> Installation Guide Page 9<strong>AXIS</strong> <strong>Camera</strong> Management - multiple cameras/large installations<strong>AXIS</strong> <strong>Camera</strong> Management can automatically discover multiple Axis devices, show connectionstatus, manage firmware upgrades and set <strong>IP</strong> addresses.ENGLISHAutomatic discovery1. Check that the camera is connected to the network and that power has been applied.2. Start <strong>AXIS</strong> <strong>Camera</strong> Management. When the <strong>AXIS</strong> <strong>M32</strong> <strong>Series</strong> network camera appears in thewindow, double-click it to open the camera’s home page.3. See page 10 for instructions on how to set the password.Assign an <strong>IP</strong> address in a single device1. Select the <strong>AXIS</strong> <strong>M32</strong> <strong>Series</strong> network camera in <strong>AXIS</strong> <strong>Camera</strong>Management and click the Assign <strong>IP</strong> button.2. Select Assign the following <strong>IP</strong> address and enter the <strong>IP</strong>address, subnet mask and default router the device will use.3. Click the OK button.Assign <strong>IP</strong> addresses in multiple devices<strong>AXIS</strong> <strong>Camera</strong> Management speeds up the process of assigning <strong>IP</strong>addresses to multiple devices, by suggesting <strong>IP</strong> addresses from aspecified range.1. Select the devices you wish to configure (different models canbe selected) and click the Assign <strong>IP</strong> button.2. Select Assign the following <strong>IP</strong> address range and enter therange of <strong>IP</strong> addresses, the subnet mask and default router thedevices will use.3. Click the OK button.Note:<strong>AXIS</strong> <strong>M32</strong>03-V and <strong>AXIS</strong> <strong>M32</strong>04-V will display in <strong>AXIS</strong> <strong>Camera</strong> Management as <strong>AXIS</strong><strong>M32</strong>03 and <strong>AXIS</strong> <strong>M32</strong>04.
Page 10<strong>AXIS</strong> <strong>M32</strong> <strong>Series</strong> Installation GuideSet the passwordTo gain access to the product, the password for the default administrator user root must be set. Thisis done in the ‘Configure Root Password’ dialog, which is displayed when the <strong>AXIS</strong> <strong>M32</strong> <strong>Series</strong>network camera is accessed for the first time.To prevent network eavesdropping when setting the root password, this can be done via anencrypted HTTPS connection, which requires an HTTPS certificate (see note below).To set the password via a standard HTTP connection, enter it directly in the first dialog shownbelow.To set the password via an encrypted HTTPS connection, follow these steps:1. Click the Create self-signed certificate button.2. Provide the requested information and click OK. The certificate is created and the password cannow be set securely. All traffic to and from the <strong>AXIS</strong> <strong>M32</strong> <strong>Series</strong> is encrypted from this point on.3. Enter a password and then re-enter it to confirm the spelling. Click OK. The password has nowbeen configured.To create an HTTPS connection, start byclicking this button.To configure the password directly via anunencrypted connection, enter the passwordhere.4. To log in, enter the user name “root” in the dialog as requestedNote:The default administrator user name root cannot be deleted.5. Enter the password as set above, and click OK.
<strong>AXIS</strong> <strong>M32</strong> <strong>Series</strong> Installation Guide Page 11Access the video streamThe Live View page of the <strong>AXIS</strong> <strong>M32</strong> <strong>Series</strong> is displayed, with links to the Setup link menus, whichallow you to customize the camera.If required, click Yes to install AMC (<strong>AXIS</strong> Media Control), which allows viewing of the video streamin Internet Explorer. You will need administrator rights on the computer to do this.Setup - Provides all the tools for configuring thecamera to requirements.ENGLISHHelp - Displaysonline help on allaspects of usingthe camera.Notes:• HTTPS (Hypertext Transfer Protocol over Secure Socket Layer) is a protocol used to encrypt the trafficbetween web browsers and servers. The HTTPS certificate controls the encrypted exchange ofinformation.• The default administrator user root cannot be deleted.• If the password for root is lost or forgotten, the <strong>AXIS</strong> <strong>M32</strong> <strong>Series</strong> must be reset to the factory defaultsettings. See Resetting to the Factory Default Settings, on page 14.
Page 12<strong>AXIS</strong> <strong>M32</strong> <strong>Series</strong> Installation GuideAdjust the image and focusOpen the Live View page in the web interface and make the following adjustments to the camera:1. Loosen the locking screw and tilt adjustmentscrews.2. Turn the lens to the desired position.3. Once satisfied, gently tighten the lockingscrew and tilt adjustment screws to securethe camera’s position.4. Turn the image balance ring to set thehorizontal position.5. To set the focus and zoom, loosen the zoomand focus pullers anti-clockwise and rotatethe rings.6. Lock the focus and zoom pullers in positionby rotating the screws clockwise.Tilt adjustmentscrew(on each side)Image balance ringLocking screwZoom pullerFocus pullerNote:Due to the dome’s refraction, the image may appear slightly out of focus once the domehas been placed. Focus on an object slightly closer than the intended area to compensatefor this.The image can also be fine-tuned for low light conditions.Go to Setup > Video > <strong>Camera</strong> Settings in the camera’s web interface and see the online help formore information.Complete the installation1. Rotate the black protective shield inside the dome casing to match the camera’s position.2. Clean the dome with a dry soft cloth to remove dust and finger prints and use a blower toremove dust from the lens.3. Mount the dome casing using the supplied tamper-proof screws and screw driver.4. Now that the dome is in place, double-check that the camera is properly focused.5. The installation is now complete.
<strong>AXIS</strong> <strong>M32</strong> <strong>Series</strong> Installation Guide Page 13Other methods of setting the <strong>IP</strong> addressThe table below shows the other methods available for setting or discovering the <strong>IP</strong> address. Allmethods are enabled by default, and all can be disabled.Use in operatingsystemNotesAVHS ServiceConnection<strong>AXIS</strong> Dynamic DNSServiceAllAllTo connect the camera to an AVHS server, refer to the server provider’sInstallation guide. For information and help to find a localAVHS Service Provider go to www.axis.comA free service from Axis that allows you to quickly and simplyinstall your camera. Requires an Internet connection with noHTTP proxy. See www.axiscam.net for more information.ARP/Ping All See below. The command must be issued within 2 minutes ofconnecting power to the camera.UPnPBonjourWindows(ME or XP)MAC OSX(10.4 or later)When enabled on your computer, the camera is automaticallydetected and added to “My <strong>Network</strong> Places.”Applicable to browsers with support for Bonjour. Navigate to theBonjour bookmark in your browser (e.g. Safari) and click on thelink to access the camera’s web pages.DHCP All To view the admin pages for the network DHCP server, see theserver’s own documentation.ENGLISHSet the <strong>IP</strong> address with ARP/Ping1. Acquire an <strong>IP</strong> address on the same network segment your computer is connected to.2. Locate the serial number (S/N) on the <strong>AXIS</strong> <strong>M32</strong> <strong>Series</strong> label.3. Open a command prompt on your computer and enter the following commands:Windows syntax:arp -s ping -l 408 -t UNIX/Linux/Mac syntax:arp -s tempping -s 408 Windows example:arp -s 192.168.0.125 00-40-8c-18-10-00ping -l 408 -t 192.168.0.125UNIX/Linux/Mac example:arp -s 192.168.0.125 00:40:8c:18:10:00 tempping -s 408 192.168.0.1254. Check that the network cable is connected to the camera and then start/restart the camera, bydisconnecting and reconnecting power.5. Close the command prompt when you see ‘Reply from 192.168.0.125: ...’ or similar.6. In your browser, type in http:// in the Location/Address field and press Enter onyour keyboard.Notes:• To open a command prompt in Windows: from the Start menu, select Run... and type cmd. Click OK.• To use the ARP command on a Mac OS X, use the Terminal utility in Application > Utilities.
Page 14<strong>AXIS</strong> <strong>M32</strong> <strong>Series</strong> Installation GuideResetting to the Factory Default SettingsThis will reset all parameters, including the <strong>IP</strong> address, to the Factory Default settings:1. Disconnect power from the camera.2. Press and hold the Control button and reconnect power.3. Keep the Control button pressed until the Power indicator flashes amber (this may take up to15 seconds).4. Release the Control button. When the Power indicator displays green (which can take up to 1minute) the process is complete and the camera has been reset.5. Re-assign the <strong>IP</strong> address, using one of the methods described in this document.It is also possible to reset parameters to the original factory default settings via the web interface.For more information, please see the online help or the user’s manual.Accessing the camera from the InternetOnce installed, your <strong>AXIS</strong> <strong>M32</strong> <strong>Series</strong> is accessible on your local network (LAN). To access thecamera from the Internet, network routers must be configured to allow incoming traffic, which isusually done on a specific port• HTTP port (default port 80) for viewing and configuration• RTSP port (default port 554) for viewing H.264 video streamsPlease refer to the documentation for your router for further instructions. For more information onthis and other topics, visit the Axis Support Web at www.axis.com/techsupFurther informationThe user’s manual is available from the Axis Web site at www.axis.com or from the Axis <strong>Network</strong>Video Product CD supplied with this product.Tip!Visit www.axis.com/techsup to check if there is updated firmware available for your <strong>AXIS</strong><strong>M32</strong> <strong>Series</strong> <strong>Network</strong> <strong>Camera</strong>. To see the currently installed firmware version, see Setup >About.
Guide d’installation de la Série <strong>AXIS</strong> <strong>M32</strong> Page 15Série <strong>AXIS</strong> <strong>M32</strong> Guide d’installationCe guide d’installation explique comment installer la caméra réseau <strong>AXIS</strong> Série <strong>M32</strong> sur votreréseau. Pour toute autre question concernant l’utilisation du produit, reportez-vous au Manuel del’utilisateur que vous trouverez sur le CD joint ou sur le site www.axis.com/techsupProcédure d’installation1. Vérifiez le contenu de l’emballage par rapport à la liste ci-dessous.2. Description du matériel. Cf. page 16.3. Installation du matériel. Cf. page 18.4. Attribution d’une adresse <strong>IP</strong>. Cf. page 19.5. Configuration du mot de passe. Cf. page 22.6. Réglage de la mise au point. Cf. page 24.7. Fin de l’installation. Cf. page 24.Important !Ce produit doit être utiliséconformément aux lois etdispositions locales en vigueur.FRANÇAISContenu de l’emballageÉlémentCaméra réseau à dôme fixeKit de montageCDDocumentation impriméeModèles/variantes/remarques<strong>AXIS</strong> <strong>M32</strong>03 - Caméra réseau inviolable<strong>AXIS</strong> <strong>M32</strong>03-V - Caméra réseau résistant au vandalisme<strong>AXIS</strong> <strong>M32</strong>04 - Caméra réseau inviolable<strong>AXIS</strong> <strong>M32</strong>04-V - Caméra réseau résistant au vandalismeTournevis pour vis inviolables2 vis inviolables (M4x16 Resitorx)Gabarit de perçageCD du produit de vidéo sur <strong>IP</strong> <strong>AXIS</strong> comprenant la documentation,les outils d’installation et les autres logicielsGuide d’installation de la Série <strong>AXIS</strong> <strong>M32</strong> (le présent document)Document de garantie d’Axis, clé d’authentification AVHS
Page 16Série <strong>AXIS</strong> <strong>M32</strong> Guide d'installationDescription du matérielConduit de câbles 16 mm(non fourni) installé sur unesérie <strong>AXIS</strong> <strong>M32</strong>Plaques d’obturationBouton decommandeVoyantd’alimentationConnecteur réseauID du produit et numéro de série (S/N).Le numéro de série peut êtredemandé pendant l’installation.Voyant réseauVoyant d’étatDimensionsH x L x P = 94 x 144 x 132 mm (3.7" x 5.7" x 5.2")<strong>AXIS</strong> <strong>M32</strong>03, <strong>AXIS</strong> <strong>M32</strong>04 : 425 g (0.94 lb)<strong>AXIS</strong> <strong>M32</strong>03-V, <strong>AXIS</strong> <strong>M32</strong>04-V : 580 g (1.28 lb)
Guide d’installation de la Série <strong>AXIS</strong> <strong>M32</strong> Page 17Voyants lumineuxVoyant Couleur IndicationRéseau Vert Continu en cas de connexion à un réseau de 100 Mbits/s. Clignote en cas d’activitéréseau.Orange Continu en cas de connexion à un réseau de 10 Mbits/s. Clignote en cas d’activitéréseau.Éteint Pas de connexion au réseau.État Vert Vert continu en cas de fonctionnement normal.Remarque : le voyant d’état peut être configuré pour être éteint pendant lefonctionnement normal ou pour clignoter uniquement en cas d’accès à la caméra.Pour ce faire, cliquez sur Setup > System Options > LED (Configuration >Options système > DEL). Reportez-vous à l’aide en ligne pour plus d’informations.Orange Continu pendant le démarrage, la réinitialisation des paramètres d’usine par défautou la restauration des paramètres.Rouge Clignote lentement en cas d’échec de la mise à niveau.Alimentat Vert Fonctionnement normal.ionOrange Clignote en vert/orange pendant la mise à niveau des micrologiciels.FRANÇAIS
Page 18Série <strong>AXIS</strong> <strong>M32</strong> Guide d'installationInstallation du matériel!IMPORTANT! - Il n’est pas recommandé d’utiliser le boîtier de l’<strong>AXIS</strong> <strong>M32</strong>03-V et del’<strong>AXIS</strong> <strong>M32</strong>04-V à l’extérieur. Le produit doit être installé en intérieur uniquement.Montage de la caméraLes caméras réseau Série <strong>AXIS</strong> <strong>M32</strong> peuvent être montées avec les câbles d’alimentation et réseauacheminés dans le mur/plafond, ou depuis le haut ou le bas. Vous disposez de plaques d’obturationpour les ouvertures des deux côtés du capot du dôme.La caméra Série <strong>AXIS</strong> <strong>M32</strong> peut être également dotée d’un conduit métallique pour protéger lescâbles lors d’une connexion par les ouvertures latérales. Consultez les schémas de la page 16.1. En vous servant du gabarit de perçage, percez deux trous dans le plafond/mur. Veillez à ce quela caméra soit positionnée de telle manière que les vis inviolables puissent être serrées à l’aidedu tournevis fourni.2. Acheminez les câbles nécessaires. Pour plus d’informations, consultez la section Connexion auréseau, sur page 19.3. Fixez la caméra au plafond ou au mur à l’aide des vis et des chevilles appropriées.4. Passez à la section Connexion au réseau, sur page 19.Montage sur faux-plafondPour monter la caméra Série <strong>AXIS</strong> <strong>M32</strong> sur un faux-plafond, vérifiez que le plafond est assez solidepour supporter le poids de la caméra.La caméra peut être également fixée à l’aide d’une plaque ou d’une planche qui peut supporter lepoids de la caméra et qui peut être plus adaptée pour la fixation des vis.Plaque ou planchePlafond<strong>AXIS</strong> <strong>M32</strong> <strong>Series</strong>VisLa caméra Série <strong>AXIS</strong> <strong>M32</strong> peut être également montée à l’aide du kit de montage pour fauxplafondSérie <strong>AXIS</strong> <strong>M32</strong>, qui permet un montage plus discret. Visitez www.axis.com pour découvrirles accessoires de montage disponibles.
Guide d’installation de la Série <strong>AXIS</strong> <strong>M32</strong> Page 19Connexion au réseau1. Connectez la caméra au réseau à l’aide d’un câble réseau blindé.2. Vérifiez que les voyants lumineux indiquent les bonnes conditions. Pour plus d’informations,reportez-vous au tableau de la page 17. Notez que certains voyants peuvent être désactivés etdonc éteints.Attribution d’une adresse <strong>IP</strong>Procédez comme suit pour définir une adresse <strong>IP</strong> ou reportez-vous à la page 25 pour d’autresméthodes de connexion de la Série <strong>AXIS</strong> <strong>M32</strong> à Internet.Attribution d’une adresse <strong>IP</strong>Aujourd’hui, la plupart des réseaux sont équipés d’un serveur DHCP qui attribue automatiquementdes adresses <strong>IP</strong> aux périphériques connectés. Si votre réseau en est dépourvu, votre Série <strong>AXIS</strong> <strong>M32</strong>utilisera 192.168.0.90 comme adresse <strong>IP</strong> par défaut.Si vous souhaitez paramétrer une adresse <strong>IP</strong> statique sous Windows, nous recommandonsl’utilisation de l’application <strong>AXIS</strong> <strong>IP</strong> Utility ou de l’application <strong>AXIS</strong> <strong>Camera</strong> Management. Selon lenombre de caméras à installer, choisissez la méthode qui vous convient le mieux.Ces deux applications gratuites sont disponibles sur le CD de la caméra vidéo sur <strong>IP</strong> Axis fourni avecce produit. Vous pouvez également les télécharger à partir du site www.axis.com/techsup.FRANÇAISMéthode Recommandée pour Systèmed’exploitation<strong>AXIS</strong> <strong>IP</strong> UtilityVoir page 20<strong>AXIS</strong> <strong>Camera</strong> ManagementVoir page 21Une seule caméraPetites installationsPlusieurs camérasGrandes installationsInstallation sur un autre sousréseauWindowsWindows 2000Windows XP ProWindows 2003 ServerWindows VistaWindows 7Remarques :• En cas d’échec de l’attribution d’adresse <strong>IP</strong>, vérifiez qu’aucun pare-feu ne bloque l’opération.• Pour connaître les autres méthodes d’affectation ou de détection de l’adresse <strong>IP</strong> de votre Série <strong>AXIS</strong><strong>M32</strong>, par exemple sous d’autres systèmes d’exploitation, reportez-vous à la page 25.
Page 20Série <strong>AXIS</strong> <strong>M32</strong> Guide d'installation<strong>AXIS</strong> <strong>IP</strong> Utility : une seule caméra et une petite installation<strong>AXIS</strong> <strong>IP</strong> Utility recherche et affiche automatiquement les périphériques Axis présents sur votreréseau. Cette application sert également à attribuer manuellement une adresse <strong>IP</strong> statique.Notez que l’ordinateur exécutant l’application <strong>AXIS</strong> <strong>IP</strong> Utility doit se trouver sur le même segmentde réseau (sous-réseau physique) que la Série <strong>AXIS</strong> <strong>M32</strong>.Détection automatique1. Vérifiez que la Série <strong>AXIS</strong> <strong>M32</strong> est connectée au réseau et sous tension.2. Lancez <strong>AXIS</strong> <strong>IP</strong> Utility.3. Lorsque l’icône de la caméra apparaît dans la fenêtre, cliquez deux fois dessus pour ouvrir lapage d’accueil correspondante.4. Reportez-vous à la page 22 pour savoir comment configurer le mot de passe.Attribution manuelle de l’adresse <strong>IP</strong> (facultatif)1. Trouvez une adresse <strong>IP</strong> non utilisée sur le même segment de réseau que celui de votreordinateur.2. Sélectionnez la caméra réseau Série <strong>AXIS</strong> <strong>M32</strong> dans la liste.3. Cliquez sur le bouton Assign new <strong>IP</strong> address to the selected device (Attribuer unenouvelle adresse <strong>IP</strong> au périphérique sélectionné) et saisissez l’adresse <strong>IP</strong>.4. Cliquez sur le bouton Assign (Attribuer) et suivez les instructions affichées à l’écran. La caméradoit être redémarrée dans les 2 minutes pour que la nouvelle adresse <strong>IP</strong> soit prise en compte.5. Cliquez sur le bouton Home Page (Page d’accueil) pour accéder aux pages Web de la caméra.6. Reportez-vous à la page 22 pour savoir comment configurer le mot de passe.Remarque :<strong>AXIS</strong> <strong>M32</strong>03-V et <strong>AXIS</strong> <strong>M32</strong>04-V s'affichent dans <strong>AXIS</strong> <strong>IP</strong> Utility sous les noms <strong>AXIS</strong> <strong>M32</strong>03et <strong>AXIS</strong> <strong>M32</strong>04.
Guide d’installation de la Série <strong>AXIS</strong> <strong>M32</strong> Page 21<strong>AXIS</strong> <strong>Camera</strong> Management : plusieurs caméras et de grandesinstallations<strong>AXIS</strong> <strong>Camera</strong> Management peut détecter automatiquement plusieurs périphériques Axis, afficherl’état de connexion, gérer les mises à niveau des micrologiciels et configurer les adresses <strong>IP</strong>.Détection automatique1. Vérifiez que la caméra est connectée au réseau et sous tension.2. Lancez <strong>AXIS</strong> <strong>Camera</strong> Management. Lorsque l’icône de la caméra réseau Série <strong>AXIS</strong> <strong>M32</strong> apparaîtdans la fenêtre, cliquez deux fois dessus pour ouvrir la page d’accueil correspondante.3. Reportez-vous à la page 22 pour savoir comment configurer le mot de passe.FRANÇAISAttribution d’une adresse <strong>IP</strong> à un seul périphérique1. Sélectionnez la caméra réseau Série <strong>AXIS</strong> <strong>M32</strong> dansl’application <strong>AXIS</strong> <strong>Camera</strong> Man-agement, puis cliquez sur lebouton Assign <strong>IP</strong> (Attribuer une adresse <strong>IP</strong>).2. Sélectionnez Assign the following <strong>IP</strong> address (Attribuerl’adresse <strong>IP</strong> suivante) et saisissez l’adresse <strong>IP</strong>, le masque desous-réseau et le routeur par défaut que le périphériqueutilisera.3. Cliquez sur le bouton OK.Attribution d’adresses <strong>IP</strong> à plusieurs périphériques<strong>AXIS</strong> <strong>Camera</strong> Management accélère le processus d’attributiond’adresses <strong>IP</strong> à plusieurs périphériques en suggérant des adresses <strong>IP</strong>dans une plage spécifiée.1. Sélectionnez les périphériques à configurer (il peut s'agir deplusieurs modèles), puis cliquez sur le bouton Assign <strong>IP</strong>(Attribuer une adresse <strong>IP</strong>).2. Sélectionnez Assign the following <strong>IP</strong> address range (Attribuerla plage d’adresses <strong>IP</strong> suivante) et saisissez la plage d’adresses<strong>IP</strong>, le masque de sous-réseau et le routeur par défaut que les périphériques utiliseront.3. Cliquez sur OK.
Page 22Série <strong>AXIS</strong> <strong>M32</strong> Guide d'installationRemarque :<strong>AXIS</strong> <strong>M32</strong>03-V et <strong>AXIS</strong> <strong>M32</strong>04-V s'affichent dans <strong>AXIS</strong> <strong>Camera</strong> Management sous les noms<strong>AXIS</strong> <strong>M32</strong>03 et <strong>AXIS</strong> <strong>M32</strong>04.Configuration du mot de passePour accéder au produit, le mot de passe par défaut de l’administrateur root doit être configuré.Pour ce faire, utilisez la boîte de dialogue Configure Root Password (Configurer le mot de passeroot) qui s’affiche lors du premier accès à la caméra réseau Série <strong>AXIS</strong> <strong>M32</strong>.Pour éviter les écoutes électroniques lors de la configuration du mot de passe root, utilisez uneconnexion HTTPS cryptée nécessitant un certificat HTTPS (voir la remarque ci-dessous).Pour configurer le mot passe avec une connexion HTTP standard, saisissez directement le mot depasse dans la première boîte de dialogue représentée ci-dessous.Pour configurer le mot passe avec une connexion HTTPS cryptée, procédez comme suit :1. Cliquez sur le bouton Create self-signed certificate (Créer un certificat autosigné).2. Saisissez les informations demandées, puis cliquez sur OK. Le certificat est créé et le mot depasse peut maintenant être configuré en toute sécurité. L’ensemble du trafic entrant et sortantde la Série <strong>AXIS</strong> <strong>M32</strong> est désormais crypté.3. Saisissez un mot de passe, puis saisissez-le de nouveau pour confirmation. Cliquez sur OK. Lemot de passe est maintenant configuré.Pour créer une connexion HTTPS, cliquez surce bouton.Pour configurer directement le mot de passe par le biais d’uneconnexion cryptée, saisissez le mot de passe dans cette section.4. Pour vous connecter, saisissez le nom d’utilisateur « root » dans la boîte de dialogue à l’invite.Remarque :Le nom d’utilisateur par défaut de l’administrateur est root et il ne peut pas être supprimé.5. Saisissez le mot de passe tel que vous venez de le configurer et cliquez sur OK.
Guide d’installation de la Série <strong>AXIS</strong> <strong>M32</strong> Page 23Accès au flux de données vidéoLa page Live View (Vidéo en direct) de la caméra Série <strong>AXIS</strong> <strong>M32</strong> s'affiche, indiquant les liens versles menus de configuration pour adapter la caméra à vos besoins.Si nécessaire, cliquez sur Yes (Oui) pour installer AMC (Axis Media Control) afin de pouvoirvisualiser le flux vidéo dans Internet Explorer. Pour ce faire, vous devrez être connecté à l’ordinateuravec des droits d’administrateur.Setup (Configuration) : contient tous les outilsnécessaires pour configurer la caméra en fonctionde vos besoins.Help (Aide) :affiche l’aide enligne sur tout cequi a trait àl’utilisation de lacaméra.FRANÇAISRemarques :• Le protocole HTTPS (Hypertext Transfer Protocol over Secure Socket Layer) est utilisé pour crypter letrafic entre les navigateurs Web et les serveurs. Le certificat HTTPS contrôle l’échange cryptéd’informations.• Le nom d’utilisateur par défaut de l’administrateur root ne peut pas être supprimé.• Si vous perdez ou oubliez le mot de passe root, les paramètres par défaut définis en usine de lacaméra Série <strong>AXIS</strong> <strong>M32</strong> devront être rétablis. Cf. Rétablissement des paramètres d’usine par défaut,sur page 26.
Page 24Série <strong>AXIS</strong> <strong>M32</strong> Guide d'installationRéglage de l’image et de la mise au pointOuvrez la page Live View (Vidéo en direct) dans l’interface Internet et effectuez les réglagessuivants sur la caméra :1. Desserrez la vis de verrouillage et les vis deréglage de l’inclinaison.2. Tournez l’objectif dans la position souhaitée.3. Une fois que vous avez terminé, serrezdélicatement la vis de verrouillage et les visde réglage de l’inclinaison pour bien fixer lacaméra.4. Tournez l’anneau d’équilibrage d’image pourdéfinir la position horizontale.5. Pour régler le zoom et la mise au point,desserrez les commandes correspondantesen tournant dans le sens inverse desaiguilles d’une montre, puis faites tournerles anneaux.6. Verrouillez les commandes de zoom et de mise au point en serrant les vis dans le sens desaiguilles d’une montre.Remarque :Du fait de la réfraction du dôme, L’image peut apparaître légèrement floue une fois le dômeinstallé. Effectuez la mise au point sur un objet légèrement plus proche que la zone ciblepour compenser ce défaut.L’image peut également être ajustée en cas de faible éclairage.Accédez à Setup > Video > <strong>Camera</strong> Settings (Configuration > Vidéo > Réglages caméra) dansl’interface Web de la caméra et consultez l’aide en ligne pour plus d’informations.Fin de l’installationVis de verrouillageAnneau d’équilibrage d’imageVis de réglage del’inclinaison(de chaque côté)Point ZoomDispositif de mise au point1. Tournez l’écran protecteur noir à l’intérieur du boîtier du dôme, conformément à la position dela caméra.2. Nettoyez le dôme avec un chiffon doux et sec pour enlever la poussière et les traces de doigt.Dépoussiérez l’objectif avec un ventilateur.3. Montez le boîtier du dôme à l’aide des vis inviolables et du tournevis fournis.4. Une fois le dôme en place, vérifiez une nouvelle fois que la mise au point est correctementréglée.5. L’installation est terminée.
Guide d’installation de la Série <strong>AXIS</strong> <strong>M32</strong> Page 25Autres méthodes de définition de l’adresse <strong>IP</strong>Le tableau ci-dessous indique les autres méthodes permettant de configurer ou de déterminerl’adresse <strong>IP</strong>. Toutes les méthodes sont activées par défaut et peuvent être désactivées.Utilisation sous lesystèmed’exploitationRemarquesAVHS ServiceConnection<strong>AXIS</strong> Dynamic DNSServiceTousTousPour connecter la caméra à un serveur AVHS, reportez-vous auGuide d’installation du four-nisseur. Pour obtenir desrenseignements et trouver un fournisseur de service AVHS,consultez le site www.axis.comService Axis gratuit permettant d’installer rapidement etfacilement votre caméra. Nécessite une connexion Internet sansproxy HTTP. Pour plus d’informations, rendez-vous surwww.axiscam.net.ARP/Ping Tous Voir ci-dessous. La commande doit être saisie dans les 2 minutessuivant la mise sous tension de la caméra.UPnPBonjourWindows(ME ou XP)MAC OSX(10.4 ou versionultérieure)Lorsque cette option est activée sur l’ordinateur, la caméra estautomatiquement détectée et ajoutée au dossier Favoris réseau.Pour les navigateurs compatibles avec Bonjour. Accédez ausignet de Bonjour dans votre navigateur (par exemple, Safari),puis cliquez sur le lien pour accéder aux pages Web de la caméra.DHCP Tous Pour consulter les pages administratives du serveur DHCP réseau,reportez-vous à la documentation du serveur.FRANÇAISDéfinition de l’adresse <strong>IP</strong> à l’aide d’ARP/Ping1. Trouvez une adresse <strong>IP</strong> sur le même segment de réseau que celui de votre ordinateur.2. Repérez le numéro de série (S/N) sur l’étiquette de la Série <strong>AXIS</strong> <strong>M32</strong>.3. Ouvrez une invite de commandes sur votre ordinateur et saisissez les commandes suivantes :Syntaxe pour Windows : Exemple pour Windows :arp -s ping -l 408 -t arp -s 192.168.0.125 00-40-8c-18-10-00ping -l 408 -t 192.168.0.125Syntaxe pour UNIX/Linux/Mac : Exemple pour UNIX/Linux/Mac :arp -s tempping -s 408 arp -s 192.168.0.125 00:40:8c:18:10:00 tempping -s 408 192.168.0.1254. Vérifiez que le câble réseau est connecté à la caméra, puis démarrez/redémarrez cette dernièreen débranchant puis en rebranchant l’alimentation.5. Fermez l’invite de commandes lorsque le message « Reply from 192.168.0.125:... » (Réponse de192.168.0.125 : ...) ou un message similaire s’affiche.6. Dans votre navigateur, saisissez http:// dans le champ Emplacement/Adresse, puisappuyez sur la touche Entrée de votre clavier.
Page 26Série <strong>AXIS</strong> <strong>M32</strong> Guide d'installationRemarques :• Ouvrir une invite de commandes sous Windows : dans le menu Démarrer, sélectionnez Exécuter… ettapez cmd. Cliquez sur OK.• Pour utiliser la commande ARP sous Mac OS X, utilisez l’utilitaire Terminal dans Application>Utilitaires.Rétablissement des paramètres d’usine par défautProcédez comme suit pour rétablir tous les paramètres par défaut définis en usine, y comprisl’adresse <strong>IP</strong> :1. Débranchez l’alimentation de la caméra.2. Maintenez le bouton de commande enfoncé et rebranchez l’alimentation.3. Appuyez sur le bouton jusqu'à ce que le voyant d’alimentation passe à l’orange et clignote (celapeut prendre jusqu'à 15 secondes).4. Relâchez le bouton de commande. Une lumière verte émise par le voyant d’alimentation (peutprendre 1 minute) indique que l’opération est terminée et que la caméra a été réinitialisée.5. Attribuez à nouveau l’adresse <strong>IP</strong> à l’aide de l’une des méthodes décrites dans ce document.Il est également possible de rétablir les paramètres d’usine par défaut d’origine à partir del’interface Web. Pour obtenir plus d’informations, reportez-vous à l’aide en ligne ou au manueld’utilisation.Accès à la caméra sur InternetUne fois installée, votre Série <strong>AXIS</strong> <strong>M32</strong> est accessible sur votre réseau local (LAN). Pour accéder àla caméra sur Internet, les routeurs réseau doivent être configurés pour autoriser le trafic entrant,ce qui est généralement réalisé sur un port spécifique :• Le port HTTP (port 80 par défaut) pour l’affichage et la configuration• Le port RTSP (port 554 par défaut) pour l’affichage des flux de données vidéo H.264Pour plus d’informations, consultez la documentation du routeur. Pour plus d’informations à cesujet ou pour toute autre question, consultez la page d’assistance technique d’Axis à l’adressewww.axis.com/techsup.Plus d’informationsLe manuel de l’utilisateur est disponible sur le site Web d’Axis (www.axis.com) ou sur le CDaccompagnant votre caméra réseau Axis.Conseil :visitez le site www.axis.com/techsup pour vérifier si des micrologiciels mis à jour sontdisponibles pour votre caméra réseau Série <strong>AXIS</strong> <strong>M32</strong>. Pour connaître la version dumicrologiciel actuellement installée, reportez-vous à la page Setup > About (Configuration> À propos de).
<strong>AXIS</strong> <strong>M32</strong> Serie Installationsanleitung Seite 27<strong>AXIS</strong> <strong>M32</strong> Serie InstallationsanleitungIn dieser Anleitung wird die Installation der Netzwerk-Kameras der <strong>AXIS</strong> <strong>M32</strong> Serie in einemNetzwerk beschrieben. Alle weiteren Hinweise zur Verwendung des Produkts finden Sie imBenutzerhandbuch, das auf der mitgelieferten CD sowie auf unserer Website unter „www.axis.com/techsup“ zur Verfügung steht.Installationsschritte1. Prüfen Sie, ob alle in der nachfolgenden Liste aufgeführten Komponenten vorhanden sind.2. Sehen Sie sich die Hardwareübersicht an. Siehe Seite 28.3. Installieren Sie die Hardware. Siehe Seite 30.4. Weisen Sie eine <strong>IP</strong>-Adresse zu. Siehe Seite 31.5. Legen Sie das Kennwort fest. Siehe Seite 34.6. Stellen Sie die Bildschärfe ein. Siehe Seite 36.7. Schließen Sie die Installation ab. Siehe Seite 36.LieferumfangWichtig!Verwenden Sie dieses Produktunter Beachtung der geltendenrechtlichen Bestimmungen.DEUTSCHKomponenteNetzwerk KameraMontagesatzCD-ROMGedruckte DokumenteModelle/Varianten/Anmerkungen<strong>AXIS</strong> <strong>M32</strong>03 - Manipulationsgeschützte Netzwerk Kamera<strong>AXIS</strong> <strong>M32</strong>03-V - Vandalismusgeschützte Netzwerk Kamera<strong>AXIS</strong> <strong>M32</strong>04 - Manipulationsgeschützte Netzwerk Kamera<strong>AXIS</strong> <strong>M32</strong>04-V - Vandalismusgeschützte Netzwerk KameraSchraubendreher für manipulationssichere Schraubenzwei manipulationssichere Schrauben (M4x16 Resitorx)BohrschabloneCD für <strong>AXIS</strong>-Netzwerkvideoprodukte einschließlich Produktdokumentation,Installationswerkzeugen und anderer SoftwareInstallationsanleitung für die <strong>AXIS</strong> <strong>M32</strong> Serie (dieses Dokument)Axis-Garantieerklärung, AVHS-Authentifizierungsschlüssel
Seite 28<strong>AXIS</strong> <strong>M32</strong> Serie InstallationsanleitungHardwareübersicht16-mm-Kabelführung(nicht mitgeliefert)angebracht an <strong>AXIS</strong> <strong>M32</strong>SerieAbdeckplattenSteuertasteSeriennummer (S/N).Die Seriennummer wird fürdie Installation benötigt.Betriebsanzeige (LED)NetzwerkanschlussNetzwerkanzeige (LED)Statusanzeige (LED)AbmessungenH × B × T = 94 x 144 x 132 mm (3.7" x 5.7" x 5.2")<strong>AXIS</strong> <strong>M32</strong>03, <strong>AXIS</strong> <strong>M32</strong>04: 425 g (0.94 lb)<strong>AXIS</strong> <strong>M32</strong>03-V, <strong>AXIS</strong> <strong>M32</strong>04-V: 580 g (1.28 lb)
<strong>AXIS</strong> <strong>M32</strong> Serie Installationsanleitung Seite 29LED-AnzeigenLED Farbe BedeutungNetzwerk Grün Leuchtet dauerhaft bei Verbindung mit einem 100-MBit/s-Netzwerk. Blinkt beiNetzwerkaktivität.Gelb Leuchtet dauerhaft bei Verbindung mit einem 10-MBit/s-Netzwerk. Blinkt beiNetzwerkaktivität.Leuchtet Keine Netzwerkverbindung vorhanden.nichtStatus Grün Leuchtet bei Normalbetrieb konstant grün.Hinweis: Die Status-LED kann so konfiguriert werden, dass sie bei normalem Betriebnicht leuchtet oder nur dann blinkt, wenn auf die Kamera zugegriffen wird. DieseKonfiguration können Sie unter Setup > System Options > LED (Setup >Systemoptionen > LED) vornehmen. Weitere Informationen hierzu finden Sie inder Online-Hilfe.Gelb Leuchtet konstant beim Einschalten und beim Wiederherstellen derWerkseinstellungen bzw. von vorherigen Einstellungen.Rot Blinkt langsam bei Aktualisierungsfehler.Stromvers Grün Normaler Betrieb.orgungGelb Blinkt grün/gelb während Firmware-Aktualisierung.DEUTSCH
Seite 30<strong>AXIS</strong> <strong>M32</strong> Serie InstallationsanleitungInstallation der Hardware!WICHTIG!- Das Gehäuse der <strong>AXIS</strong> <strong>M32</strong>03-V und <strong>AXIS</strong> <strong>M32</strong>04-V ist nicht für denEinsatz im Außenbereich geeignet. Diese Kameramodelle dürfen nur in Innenräumeninstalliert werden.Montieren der KameraFür die Montage der Netzwerk-Kameras der <strong>AXIS</strong> <strong>M32</strong> Serie können die Kabel durch die Wand/Decke oder von oben bzw. unten verlegt werden. Für die Öffnungen auf beiden Seiten derKuppelhaube sind Abdeckplatten vorhanden.Die <strong>AXIS</strong> <strong>M32</strong> Serie kann auch mit einer Kabelführung aus Metall ausgestattet werden, um dieVerkabelung zu schützen, wenn der Anschluss über die seitlichen Öffnungen erfolgt. SieheAbbildungen auf Seite 28.1. Bohren Sie mithilfe der Bohrschablone zwei Löcher in die Decke bzw. Wand. Die Kamera mussso platziert werden, dass die manipulationssicheren Schrauben mit dem mitgeliefertenSchraubendreher festgezogen werden können.2. Ziehen Sie die erforderlichen Kabel. Weitere Informationen finden Sie unter Verbindung mitdem Netzwerk, auf Seite 31.3. Schrauben Sie die Kameraeinheit an der Decke bzw. Wand fest. Verwenden Sie dazu dieSchrauben und Dübel, die für das Material der Decke bzw. der Wand geeignet sind.4. Fahren Sie mit Verbindung mit dem Netzwerk, auf Seite 31 fort.HängedeckenmontageWenn die Kamera der <strong>AXIS</strong> <strong>M32</strong> Serie an einer Hängedecke befestigt werden soll, müssen Sieüberprüfen, ob das Deckenmaterial stabil genug ist, um das Gewicht der Kamera zu tragen.Die Kamera kann auch unter Verwendung einer Platte oder einem Brett befestigt werden. Das bieteteine bessere Tragfähigkeit und erleichtert das Befestigen der Schrauben.Platte oder BrettDecke<strong>AXIS</strong> <strong>M32</strong> Seri eSchraubenDie <strong>AXIS</strong> <strong>M32</strong> Serie kann auch unter Verwendung des <strong>AXIS</strong> <strong>M32</strong> Serie-Montagesatzes fürHängedecken befestigt werden, um sie unauffälliger anzubringen. Mehr Information zum gesamtenBefestigungszubehör finden Sie unter www.axis.com.
<strong>AXIS</strong> <strong>M32</strong> Serie Installationsanleitung Seite 31Verbindung mit dem Netzwerk1. Verbinden Sie die Kamera über ein abgeschirmtes Netzwerkkabel mit dem Netzwerk.2. Überprüfen Sie, ob die LED-Anzeigen die Betriebszustände korrekt angeben. WeitereInformationen hierzu finden Sie in der Tabelle auf Seite 29. Beachten Sie, dass LEDs deaktiviertsein können und deshalb nicht leuchten.Zuweisen einer <strong>IP</strong>-AdresseFühren Sie die folgenden Schritte aus, um eine <strong>IP</strong>-Adresse zuzuweisen. Auf Seite 37 werdenalternative Methoden zur Verbindung der <strong>AXIS</strong> <strong>M32</strong> Serie mit dem Internet beschrieben.Zuweisen einer <strong>IP</strong>-AdresseIn den meisten Netzwerken ist heutzutage ein DHCP-Server eingebunden, der angeschlossenenGeräten automatisch <strong>IP</strong>-Adressen zuweist. Wenn Ihr Netzwerk über keinen DHCP-Server verfügt,wird für die <strong>AXIS</strong> <strong>M32</strong> Serie die Standard-<strong>IP</strong>-Adresse 192.168.0.90 verwendet.Zum Zuweisen einer statischen <strong>IP</strong>-Adresse stehen unter Windows die Programme <strong>AXIS</strong> <strong>IP</strong> Utilityund <strong>AXIS</strong> <strong>Camera</strong> Management zur Verfügung. Verwenden Sie die Methode, die für die gewünschteAnzahl der zu installierenden Kameras geeignet ist.Beide Anwendungen stehen kostenlos auf der mitgelieferten CD für Axis-Netzwerkvideoproduktezur Verfügung oder können unter „www.axis.com/techsup“ heruntergeladen werden.DEUTSCHMethode Empfohlen für Betriebssystem<strong>AXIS</strong> <strong>IP</strong> UtilitySiehe Seite 32<strong>AXIS</strong> <strong>Camera</strong> ManagementSiehe Seite 33Einzelne KameraKleine InstallationenMehrere KamerasGroße InstallationenInstallation in einem anderenSubnetzWindowsWindows 2000Windows XP ProWindows 2003 ServerWindows VistaWindows 7Hinweise:• Falls Sie die <strong>IP</strong>-Adresse nicht zuweisen können, müssen ggf. die Einstellungen der Firewall überprüftwerden.• Weitere Informationen über alternative Methoden zum Festlegen bzw. Ermitteln der <strong>IP</strong>-Adresse der<strong>AXIS</strong> <strong>M32</strong> Serie (z. B. bei anderen Betriebssystemen) finden Sie auf Seite 37.
Seite 32<strong>AXIS</strong> <strong>M32</strong> Serie Installationsanleitung<strong>AXIS</strong> <strong>IP</strong> Utility – einzelne Kamera/kleine Installation<strong>AXIS</strong> <strong>IP</strong> Utility erkennt automatisch die im Netzwerk vorhandenen Axis-Geräte und zeigt diese an.Die Anwendung kann außerdem zur manuellen Zuweisung einer statischen <strong>IP</strong>-Adresse verwendetwerden.Beachten Sie, dass sich die Kamera der <strong>AXIS</strong> <strong>M32</strong> Serie und der Computer, auf dem <strong>AXIS</strong> <strong>IP</strong> Utilityausgeführt wird, im gleichen Netzwerksegment (d. h. physischen Subnetz) befinden müssen.Automatische Erkennung1. Stellen Sie sicher, dass die <strong>AXIS</strong> <strong>M32</strong> Serie an das Netzwerk und die Stromversorgungangeschlossen ist.2. Starten Sie <strong>AXIS</strong> <strong>IP</strong> Utility.3. Doppelklicken Sie auf das Symbol der Kamera, um die entsprechende Startseite zu öffnen.4. Anweisungen zum Festlegen des Kennworts finden Sie auf Seite 34.Manuelle Zuweisung der <strong>IP</strong>-Adresse (optional)1. Wählen Sie eine nicht zugewiesene <strong>IP</strong>-Adresse im selben Netzwerksegment, in dem sich IhrComputer befindet.2. Wählen Sie die gewünschte Netzwerk-Kamera der <strong>AXIS</strong> <strong>M32</strong> Serie in der Liste aus.3. Klicken Sie auf die Schaltfläche Assign new <strong>IP</strong> address to the selected device (Zuweisungeiner neuen <strong>IP</strong>-Adresse an das ausgewählte Gerät) und geben Sie die <strong>IP</strong> Adresse ein.4. Klicken Sie auf die Schaltfläche Assign (Zuweisen) und befolgen Sie die Anweisungen auf demBildschirm. Beachten Sie, dass die Kamera innerhalb von 2 Minuten neu gestartet werden muss,um die neue <strong>IP</strong>-Adresse festzulegen.5. Klicken Sie auf die Schaltfläche Home Page (Startseite), um auf die Webseiten der Kamerazuzugreifen.6. Anweisungen zum Festlegen des Kennworts finden Sie auf Seite 34.Hinweis:Die Kameramodelle <strong>AXIS</strong> <strong>M32</strong>03-V und <strong>AXIS</strong> <strong>M32</strong>04-V werden in <strong>AXIS</strong> <strong>IP</strong> Utility als <strong>AXIS</strong><strong>M32</strong>03 und <strong>AXIS</strong> <strong>M32</strong>04 angezeigt.
<strong>AXIS</strong> <strong>M32</strong> Serie Installationsanleitung Seite 33<strong>AXIS</strong> <strong>Camera</strong> Management – mehrere Kameras/große InstallationenMit <strong>AXIS</strong> <strong>Camera</strong> Managementkönnen automatisch mehrereAxis-Geräte erkannt, derVerbindungsstatus angezeigt, dieFirmware-Aktualisierungenverwaltet und <strong>IP</strong>-Adressenfestgelegt werden.Automatische Erkennung1. Stellen Sie sicher, dass dieKamera an das Netzwerk und die Stromversorgung angeschlossen ist.2. Starten Sie <strong>AXIS</strong> <strong>Camera</strong> Management. Doppelklicken Sie auf das Symbol der Netzwerk-Kamerader <strong>AXIS</strong> <strong>M32</strong> Serie, um die Startseite der Kamera zu öffnen.3. Anweisungen zum Festlegen des Kennworts finden Sie auf Seite 34.Zuweisen einer <strong>IP</strong>-Adresse für ein einzelnes Gerät1. Wählen Sie in <strong>AXIS</strong> <strong>Camera</strong> Management die Netzwerk-Kamera der <strong>AXIS</strong> <strong>M32</strong> Serie aus- und klicken Sie auf dieSchaltfläche Assign <strong>IP</strong> (<strong>IP</strong>-Adresse zuweisen).2. Wählen Sie die Option Assign the following <strong>IP</strong> address(Folgende <strong>IP</strong>-Adresse zuweisen) und geben Sie die <strong>IP</strong>-Adresse,die Subnetzmaske und den Standardrouter für das Gerät ein.3. Klicken Sie auf OK.DEUTSCHZuweisen von <strong>IP</strong>-Adressen für mehrere Geräte<strong>AXIS</strong> <strong>Camera</strong> Management beschleunigt die Zuweisung von <strong>IP</strong>-Adressen an mehrere Geräte, indem <strong>IP</strong>-Adressen aus einemangegebenen Bereich vorgeschlagen werden.1. Wählen Sie die zu konfigurierenden Geräte aus (es können auchunterschiedliche Modelle gewählt werden) und klicken Sie aufdie Schaltfläche Assign <strong>IP</strong> (<strong>IP</strong>-Adresse zuweisen).2. Wählen Sie die Option Assign the following <strong>IP</strong> address range(Folgenden <strong>IP</strong>-Adressbereich zuweisen) und geben Sie den <strong>IP</strong>-Adressbereich, die Subnetzmaske und den Standardrouter für die Geräte ein.3. Klicken Sie auf OK.Hinweis:Die Kameramodelle <strong>AXIS</strong> <strong>M32</strong>03-V und <strong>AXIS</strong> <strong>M32</strong>04-V werden in <strong>AXIS</strong> <strong>Camera</strong>Management als <strong>AXIS</strong> <strong>M32</strong>03 und <strong>AXIS</strong> <strong>M32</strong>04 angezeigt.
Seite 34<strong>AXIS</strong> <strong>M32</strong> Serie InstallationsanleitungFestlegen des KennwortsFür den Zugriff auf das Produkt muss das Kennwort für den standardmäßigen Administrator-Benutzer root festgelegt werden. Beim erstmaligen Zugriff auf die Netzwerk-Kamera der <strong>AXIS</strong> <strong>M32</strong>Serie wird das Dialogfeld ‘Configure Root Password’ (Root-Kennwort konfigurieren) angezeigt. Dortkann das Kennwort festgelegt werden.Um ein Abhören der Datenkommunikation während der Festlegung des Root-Kennworts zuvermeiden, können Sie diesen Vorgang über eine verschlüsselte HTTPS-Verbindung durchführen, dieein HTTPS-Zertifikat erfordert (siehe folgenden Hinweis).Zum Festlegen des Kennworts über eine standardmäßige HTTP-Verbindung geben Sie es direkt indas erste unten abgebildete Dialogfeld ein.Um das Kennwort über eine verschlüsselte HTTPS-Verbindung festzulegen, führen Sie die folgendenSchritte aus:1. Klicken Sie auf die Schaltfläche Create self-signed certificate (Selbstsigniertes Zertifikaterstellen).2. Geben Sie die angeforderten Informationen ein und klicken Sie auf OK. Das Zertifikat wirderstellt, und das Kennwort kann jetzt sicher festgelegt werden. Der gesamte Datenverkehr derKamera der <strong>AXIS</strong> <strong>M32</strong> Serie wird ab diesem Zeitpunkt verschlüsselt.3. Geben Sie ein Kennwort ein, und wiederholen Sie die Eingabe, um die korrekte Schreibweise zubestätigen. Klicken Sie auf OK. Damit ist das Kennwort konfiguriert.Klicken Sie zum Herstellen einer HTTPS-Verbindung zunächst auf diese Schaltfläche.Um das Kennwort direkt über eineunverschlüsselte Verbindung zu konfigurieren,geben Sie es hier ein.4. Geben Sie in das Anmeldungsdialogfeld den Benutzernamen „root“ wie erforderlich ein.
<strong>AXIS</strong> <strong>M32</strong> Serie Installationsanleitung Seite 35Hinweis:Der standardmäßige Administrator-Benutzername „root“ kann nicht gelöscht werden.5. Geben Sie das zuvor festgelegte Kennwort ein und klicken Sie auf „OK“.Zugriff auf den VideostromDie Seite Live-View (Live-Ansicht) der <strong>AXIS</strong> <strong>M32</strong> Serie wird geöffnet. Sie enthält Links zu Setup-Menüs, mit denen Sie die Kamera an Ihre Bedürfnisse anpassen können.Klicken Sie auf Yes (Ja), um AMC (<strong>AXIS</strong> Media Control) zu installieren. Nach Abschluss derInstallation können Sie Videoströme in Microsoft Internet Explorer anzeigen. Hierzu müssen Sieüber Administratorrechte für den Computer verfügen.Setup: Alle zur benutzerspezifischen Konfigurationder Kamera notwendigen Werkzeuge.Hilfe: ZumAufrufen derOnline-Hilfe für dieKamera.DEUTSCHHinweise:• Das Protokoll HTTPS (Hypertext Transfer Protocol over Secure Socket Layer) wird verwendet, um denDatenverkehr zwischen Webbrowsern und Servern zu verschlüsseln. Das HTTPS-Zertifikat steuert denverschlüsselten Informationsaustausch.• Der standardmäßige Administrator-Benutzer root kann nicht gelöscht werden.• Wenn Sie das Kennwort für root vergessen haben, muss die <strong>AXIS</strong> <strong>M32</strong> Serie auf dieWerkseinstellungen zurückgesetzt werden. Siehe Wiederherstellen der werkseitigenStandardeinstellungen, auf Seite 39.
Seite 36<strong>AXIS</strong> <strong>M32</strong> Serie InstallationsanleitungBildschärfe einstellenÖffnen Sie die Seite Live View (Live-Ansicht) und nehmen Sie folgende Einstellung an der Kameravor:1. Lösen Sie die Feststellschraube und dieEinstellschrauben- für die Neigung.2. Drehen Sie das Objektiv in die gewünschtePosition.3. Wenn die richtige Ausrichtung erreicht ist,schrauben Sie die Feststellschraube und dieEinstellschrauben für die Neigung vorsichtigwieder fest, um die Kameraposition zusichern.4. Stellen Sie mit dem Ring zum Bildausgleichdie horizontale Ausrichtung ein.5. Lösen Sie für die Einstellung der Bildschärfeund des Zooms die Regler für Zoom undFokus entgegen dem Uhrzeigersinn und drehen Sie die Ringe.6. Arretieren Sie Zoomregler und Schärferegler in der gewählten Position. Ziehen Sie dazu dieSchrauben im Uhrzeigersinn fest.Hinweis:Aufgrund der Lichtbrechungen auf der Glasoberfläche kann das Bild leicht unscharferscheinen, nachdem die Kuppel installiert wurde. Um diesen Effekt auszugleichen, stellenSie die Kamera auf ein Objekt scharf, dass etwas näher als der zu erfassende Bereich liegt.Sie können auch eine Feinabstimmung des Bildes für schlechte Lichtverhältnisse vornehmen.Weitere Informationen hierzu finden Sie in der Online-Hilfe unter Setup > Video > <strong>Camera</strong>Settings (Setup > Video > Kameraeinstellungen) in der Weboberfläche der Kamera.Installation abschließenNeigungs-Einstell-Schraube(auf beiden Seiten)BildausgleichsringFeststellschraubeZoomreglerSchärferegler1. Bringen Sie das schwarze Schutzschild in der Kuppelhaube durch Drehen in Übereinstimmungmit der Kameraposition.2. Entfernen Sie Fingerabdrücke und Staub mit einem trockenen, weichen Tuch von derGlasoberfläche. Blasen Sie Staub ggf. mit Druckluft von der Linse.3. Befestigen Sie die Kuppelhaube mit Hilfe der im Lieferumfang enthaltenenmanipulationssicheren Schrauben und des Schraubendrehers.4. Wenn die Kamera angebracht ist, vergewissern Sie sich sorgfältig, dass die Schärfe richtigeingestellt ist.5. Die Installation ist damit abgeschlossen.
<strong>AXIS</strong> <strong>M32</strong> Serie Installationsanleitung Seite 37Andere Methoden zum Festlegen der <strong>IP</strong>-AdresseDiese Tabelle bietet einen Überblick über weitere Methoden, die <strong>IP</strong>-Adresse festzulegen bzw. zuermitteln. Alle Methoden sind standardmäßig aktiviert und können deaktiviert werden.Verwendung imBetriebssystemHinweiseVerbindung zumAVHS-Service<strong>AXIS</strong> Dynamic DNSServiceAlleAlleInformationen zur Verbindung der Kamera mit einem AVHS-Server finden Sie in der Installationsanleitung des AVHS-Dienstanbieters.- Informationen zu lokalen AVHS-Dienstanbieternfinden Sie unter „www.axis.com“.Ein kostenloser Service von Axis, mit dem Sie Ihre Kamera schnellund einfach installieren können. Eine Internetverbindung ohneHTTP-Proxyserver ist Voraussetzung. Weitere Informationenhierzu finden Sie auf „www.axiscam.net“.ARP/Ping Alle Siehe unten. Der Befehl muss innerhalb von 2 Minuten erfolgen,nachdem die Kamera an das Stromnetz angeschlossen wurde.UPnPBonjourWindows(ME oder XP)MAC OSX(10.4 oder höher)Wenn die Funktion auf dem Computer aktiviert ist, wird dieKamera automatisch erkannt und zu „Netzwerkumgebung“hinzugefügt.Kann nur bei Browsern verwendet werden, die Bonjourunterstützen. Navigieren Sie zum Bonjour-Lesezeichen IhresBrowsers (z. B. Safari) und klicken Sie auf den Link, um auf dieWebseiten der Kamera zu gelangen.DHCP Alle Hinweise zum Anzeigen der Administrationsseiten des DHCP-Servers im Netzwerk finden Sie in der Serverdokumentation.DEUTSCHZuweisen der <strong>IP</strong>-Adresse per ARP/Ping1. Wählen Sie eine <strong>IP</strong>-Adresse aus dem Netzwerksegment, in dem sich auch Ihr Computerbefindet.2. Suchen Sie nach der Seriennummer (S/N) auf dem Produktaufkleber der Kamera der <strong>AXIS</strong> <strong>M32</strong>Serie.3. Öffnen Sie auf Ihrem Computer die Eingabeaufforderung und geben Sie die folgenden Befehleein:Windows-Syntax:arp -s ping -l 408 -t Syntax unter UNIX/Linux/Mac:arp -s tempping -s 408 Beispiel für Windows:arp -s 192.168.0.125 00-40-8c-18-10-00ping -l 408 -t 192.168.0.125Beispiel für UNIX/Linux/Mac:arp -s 192.168.0.125 00:40:8c:18:10:00 tempping -s 408 192.168.0.125
Seite 38<strong>AXIS</strong> <strong>M32</strong> Serie Installationsanleitung4. Stellen Sie sicher, dass das Netzwerkkabel mit der Kamera verbunden ist und starten Sie dieKamera bzw. starten Sie diese neu, indem Sie die Stromversorgung unterbrechen undwiederherstellen.5. Schließen Sie die Befehlszeile, sobald „Reply from 192.168.0.125:“ oder eine ähnliche Meldungerscheint.6. Starten Sie einen Browser, geben Sie im Adressfeld „http://“ ein und drücken Siedie Eingabetaste auf der Tastatur.Hinweise:• So öffnen Sie die Eingabeaufforderung unter Windows: Wählen Sie im Startmenü die Option„Ausführen...“ aus und geben Sie „cmd“ ein. Klicken Sie auf OK.• Verwenden Sie zum Eingeben des Befehls „ARP“ unter Mac OS X das Dienstprogramm „Terminal“, dasSie unter „Anwendung > Dienstprogramme“ finden.
<strong>AXIS</strong> <strong>M32</strong> Serie Installationsanleitung Seite 39Wiederherstellen der werkseitigen StandardeinstellungenGehen Sie wie folgt vor, um sämtliche Parameter einschließlich der <strong>IP</strong>-Adresse auf die werkseitigenStandardeinstellungen zurückzusetzen:1. Trennen Sie die Kamera von der Stromversorgung.2. Halten Sie die Steuertaste gedrückt und schließen Sie den Netzstecker wieder an.3. Halten Sie die Steuertaste so lange gedrückt, bis die Betriebsanzeige gelb blinkt (dies kann biszu 15 Sekunden dauern).4. Lassen Sie die Steuertaste los. Sobald die Betriebsanzeige grün leuchtet (dies kann bis zu 1Minute dauern), ist die Kamera auf die werkseitigen Standardeinstellungen zurückgesetzt.5. Legen Sie die <strong>IP</strong>-Adresse erneut fest. Wenden Sie dabei eines der in diesem Handbuchbeschriebenen Verfahren an.Die Parameter können auch über die Weboberfläche auf die werkseitigen Einstellungenzurückgesetzt werden. Weitere Informationen dazu finden Sie in der Online-Hilfe und imBenutzerhandbuch.Zugriff auf die Kamera über das InternetNach der Installation können Sie über Ihr lokales Netzwerk (LAN) auf die <strong>AXIS</strong> <strong>M32</strong> Serie zugreifen.Um auch über das Internet auf die Kamera zugreifen zu können, müssen Sie die Netzwerk-Router sokonfigurieren, dass diese den eingehenden Datenverkehr zulassen, was üblicherweise durchZuweisung eines bestimmten Ports geschieht.DEUTSCH• HTTP-Port (standardmäßig Port 80) für die Anzeige und Konfiguration• RTSP-Port (standardmäßig Port 554) für die Anzeige von H.264-VideoströmenAusführliche Informationen zu diesem Thema finden Sie in der Dokumentation des Routers. WeitereInformationen zu diesem und zu anderen Themen erhalten Sie auf der Axis Support-Website unter„www.axis.com/techsup“.Weitere InformationenDas Benutzerhandbuch ist auf der Axis Website unter „http://www.axis.com“ erhältlich undbefindet sich auch auf der mitgelieferten CD für Axis-Netzwerkvideoprodukte.Tipp!Unter „www.axis.com/techsup“ finden Sie Firmware-Aktualisierungen für Ihre Netzwerk-Kamera der <strong>AXIS</strong> <strong>M32</strong> Serie. Informationen zur aktuellen Firmware-Version finden Sie unterSetup > Info.
Guida all'installazione della telecamera Serie <strong>AXIS</strong> <strong>M32</strong> Pagina 41Serie <strong>AXIS</strong> <strong>M32</strong> Guida all’installazioneQuesto documento fornisce le istruzioni necessarie per installare le Telecamere Serie <strong>AXIS</strong> <strong>M32</strong>nella rete in uso. Per ulteriori informazioni sull’utilizzo del prodotto, consultare la Guida per l’utentedisponibile sul CD incluso nella confezione oppure visitare il sito web all’indirizzo www.axis.com/techsup.Procedura di installazione1. Controllare il contenuto della confezione utilizzando l’elenco fornito di seguito.2. Panoramica dell’hardware. Vedere a pagina 42.3. Installazione dell’hardware. Vedere a pagina 44.4. Assegnazione di un indirizzo <strong>IP</strong>. Vedere a pagina 45.5. Impostazione della password. Vedere a pagina 48.6. Regolazione della messa a fuoco. Vedere a pagina 50.7. Completamento dell’installazione. Vedere a pagina 50.Contenuto della confezioneImportante!Il prodotto deve essere utilizzatoin conformità alle leggi e alleregolamentazioni locali.ArticoloTelecamera di rete a cupolafissaKit di montaggioCDModelli/varianti/note<strong>AXIS</strong> <strong>M32</strong>03 - Telecamera di rete resistente alle manomissioni<strong>AXIS</strong> <strong>M32</strong>03-V - Telecamera di rete resistente agli atti vandalici<strong>AXIS</strong> <strong>M32</strong>04 - Telecamera di rete resistente alle manomissioni<strong>AXIS</strong> <strong>M32</strong>04-V - Telecamera di rete resistente agli atti vandaliciCacciavite per viti antimanomissione2 viti antimanomissione (M4x16 Resitorx)Sagoma per la foraturaCD di <strong>AXIS</strong> <strong>Network</strong> Video Product, comprensivo della documentazione delprodotto,utensili di installazione ed altro softwareITALIANODocumentazione cartaceaGuida all’installazione della telecamera Serie <strong>AXIS</strong> <strong>M32</strong> (questo documento)Certificato di garanzia Axis, chiave di autenticazione AVHS
Pagina 42Guida all'installazione della telecamera Serie <strong>AXIS</strong> <strong>M32</strong>Panoramica dell’hardwareCavo da 16 mm(non fornita) adattata allaserie <strong>AXIS</strong> <strong>M32</strong>CoperturePulsante dicomandoIndicatore dialimentazioneConnettore di reteIndicatore di rete(LED)ID prodotto e numero di serie (S/N).Il numero di serie è talvoltarichiesto durante l’installazione.LED di statoDimensioniA x L x P = 94 x 144 x 132 mm (3.7" x 5.7" x 5.2")<strong>AXIS</strong> <strong>M32</strong>03, <strong>AXIS</strong> <strong>M32</strong>04: 425 g (0,94 lb)<strong>AXIS</strong> <strong>M32</strong>03-V, <strong>AXIS</strong> <strong>M32</strong>04-V: 580 g (1.28 lb)
Guida all'installazione della telecamera Serie <strong>AXIS</strong> <strong>M32</strong> Pagina 43Indicatori LEDIndicatore LEDColoreIndicazioneRete Verde Luce fissa: connessione di rete a 100 Mbit/s. Luce lampeggiante: attività di rete.Giallo Luce fissa: connessione di rete a 10 Mbit/s. Luce lampeggiante: attività di rete.Spento Assenza di connessione.Stato Verde Luce verde fissa: condizioni di normale utilizzo.Nota è possibile configurare il LED di stato in modo che rimanga spento incondizioni di normale utilizzo oppure in modo da ottenere una luce intermittentequando si effettua l’accesso alla telecamera. Per configurarlo, selezionare Setup(Configurazione) > System Options (Opzioni di sistema) > LED. Per ulterioriinformazioni, consultare la Guida in linea.Giallo Luce fissa: durante l’avvio o il ripristino delle impostazioni predefinite o dellaconfigurazione.Rosso Luce lampeggiante lenta: aggiornamento non riuscito.Alimentaz Verde Normale utilizzo.ioneGiallo Luce lampeggiante verde/gialla: aggiornamento firmware.ITALIANO
Pagina 44Guida all'installazione della telecamera Serie <strong>AXIS</strong> <strong>M32</strong>Installazione dell’hardware!IMPORTANTE!- L’alloggiamento dei modelli <strong>AXIS</strong> <strong>M32</strong>03-V e <strong>AXIS</strong> <strong>M32</strong>04-V non èapprovato per l'utilizzo in ambienti esterni. I prodotti possono essere installatisoltanto in ambienti interni.Montaggio della telecameraLa telecamera Serie <strong>AXIS</strong> <strong>M32</strong> può essere montata con i cavi di rete e di alimentazione incassatinella parete o nel soffitto oppure inseriti dall’alto o dal basso. Sono previste aperture su entrambi ilati della copertura della cupola.La Serie <strong>AXIS</strong> <strong>M32</strong> può essere munita di un conduttore in metallo per proteggere i cavi nel caso incui siano collegati tramite aperture laterali. Vedere le illustrazioni a pagina 42.1. Eseguire due fori nel soffitto o nella parete utilizzando la sagoma fornita nella confezione.Verificare che la telecamera sia posizionata correttamente e che sia possibile stringere le vitiantimanomissione con l’apposito cacciavite incluso nella confezione.2. Collegare i cavi richiesti. Vedere Collegamento alla rete, a pagina 45 per informazionidettagliate.3. Bloccare la telecamera alla parete o al soffitto mediante viti e tasselli appropriati.4. Passare a Collegamento alla rete, a pagina 45.Montaggio su un controsoffittoPrima di montare la telecamera Serie <strong>AXIS</strong> <strong>M32</strong> su un controsoffitto, verificare che lo stesso siaabbastanza solido per sostenere il peso della telecamera.La telecamera può essere fissata utilizzando una tavola o una lastra in modo da sostenerne il peso,una tavola od una lastra sono inoltre piu' adatte al serraggio delle viti.Tavola o lastraSoffitto<strong>AXIS</strong> serie <strong>M32</strong>VitiLa telecamera Serie <strong>AXIS</strong> <strong>M32</strong> può essere montata utilizzando il supporto di montaggio per soffittie controsoffitti Serie <strong>AXIS</strong> <strong>M32</strong> che consente un montaggio più discreto. Visitare il sito webwww.axis.com per informazioni su tutti gli accessori di montaggio disponibili.
Guida all'installazione della telecamera Serie <strong>AXIS</strong> <strong>M32</strong> Pagina 45Collegamento alla rete1. Collegare la telecamera alla rete mediante un cavo di rete schermato.2. Verificare che i LED indichino le condizioni di funzionamento corrette. Per ulteriori dettagli,vedere la tabella a pagina 43. Si noti che alcuni LED possono essere disabilitati o spenti.Assegnazione di un indirizzo <strong>IP</strong>Seguire queste istruzioni per assegnare un indirizzo <strong>IP</strong> o vedere a pagina 51 per altri metodi diconnessione dell’unità Serie <strong>AXIS</strong> <strong>M32</strong> a Internet.Assegnazione di un indirizzo <strong>IP</strong>La maggior parte delle reti dispone di un server DHCP che assegna automaticamente gli indirizzi <strong>IP</strong>alle periferiche connesse. Se la rete non dispone di un server DHCP, per la telecamera Serie <strong>AXIS</strong><strong>M32</strong> viene utilizzato l’indirizzo <strong>IP</strong> predefinito 192.168.0.90.Per assegnare un indirizzo <strong>IP</strong> statico, utilizzare <strong>AXIS</strong> <strong>IP</strong> Utility o <strong>AXIS</strong> <strong>Camera</strong> Management inambiente Windows. In base al numero di videocamere da installare, utilizzare il metodo che megliosi adatta alle proprie esigenze.Entrambe le applicazioni sono disponibili gratuitamente sul CD del prodotto oppure possono esserescaricate dal sito web all’indirizzo www.axis.com/techsup.Metodo Consigliato per Sistema operativo<strong>AXIS</strong> <strong>IP</strong> UtilityVedere pagina 46Telecamera singolaPiccole installazioniWindowsITALIANO<strong>AXIS</strong> <strong>Camera</strong> ManagementVedere pagina 47Più videocamereGrandi installazioniInstallazione in una subnet diversaWindows 2000Windows XP ProWindows 2003 ServerWindows VistaWindows 7Note:• Se l’assegnazione dell’indirizzo <strong>IP</strong> non è riuscita correttamente, verificare che non siano presentifirewall che bloccano l’operazione.• Per altri metodi di assegnazione o di rilevazione dell’indirizzo <strong>IP</strong> per la telecamera di rete Serie <strong>AXIS</strong><strong>M32</strong>, ad esempio in altri sistemi operativi, vedere la pagina 51.
Pagina 46Guida all'installazione della telecamera Serie <strong>AXIS</strong> <strong>M32</strong><strong>AXIS</strong> <strong>IP</strong> Utility: telecamera singola/piccole installazioni<strong>AXIS</strong> <strong>IP</strong> Utility rileva e visualizza automaticamente i dispositivi Axis collegati alla rete.L’applicazione può anche essere utilizzata per assegnare manualmente un indirizzo <strong>IP</strong> statico.Si tenga presente che la periferica Serie <strong>AXIS</strong> <strong>M32</strong> deve essere installata sullo stesso segmento direte (subnet fisica) del computer sul quale è in esecuzione <strong>AXIS</strong> <strong>IP</strong> Utility.Rilevamento automatico1. Verificare che la telecamera Serie <strong>AXIS</strong> <strong>M32</strong> sia collegata alla rete e alimentata correttamente.2. Avviare <strong>AXIS</strong> <strong>IP</strong> Utility.3. Quando la telecamera viene visualizzata nella finestra, selezionarla con un doppio clic peraprire la home page.4. Vedere la pagina 48 per istruzioni su come assegnare la password.Assegnazione manuale dell’indirizzo <strong>IP</strong> (opzionale)1. Acquisire un indirizzo <strong>IP</strong> non utilizzato sullo stesso segmento di rete del computer.2. Selezionare la telecamera di rete Serie <strong>AXIS</strong> <strong>M32</strong> dall’elenco.3. Fare clic sul pulsante Assign new <strong>IP</strong> address to the selected device (Assegna uno nuovoindirizzo <strong>IP</strong> alla periferica selezionata) e immettere l’indirizzo <strong>IP</strong>.4. Fare clic sul pulsante Assign (Assegna) e seguire le istruzioni visualizzate. Si tenga presente chela telecamera deve essere riavviata entro due minuti per assegnare il nuovo indirizzo <strong>IP</strong>.5. Fare clic sul pulsante Home Page (Pagina iniziale) per accedere alle pagine web dellatelecamera.6. Vedere a pagina 48 le istruzioni per impostare la password.Nota:Le telecamere <strong>AXIS</strong> <strong>M32</strong>03-V e <strong>AXIS</strong> <strong>M32</strong>04-V appaiono nella <strong>AXIS</strong> <strong>IP</strong> Utility come <strong>AXIS</strong><strong>M32</strong>03 e <strong>AXIS</strong> <strong>M32</strong>04.
Guida all'installazione della telecamera Serie <strong>AXIS</strong> <strong>M32</strong> Pagina 47<strong>AXIS</strong> <strong>Camera</strong> Management: più telecamere/grandi installazioniÈ possibile utilizzare <strong>AXIS</strong> <strong>Camera</strong>Management per individuareautomaticamente la presenza dipiù periferiche Axis, visualizzare lostato di connessione, gestire gliaggiornamenti del firmware edassegnare gli indirizzi <strong>IP</strong>.Rilevamento automatico1. Verificare che la telecamera sia collegata alla rete e alimentata correttamente.2. Avviare <strong>AXIS</strong> <strong>Camera</strong> Management. Quando la telecamera di rete Serie <strong>AXIS</strong> <strong>M32</strong> vienevisualizzata nella finestra, fare doppio clic per aprire la home page della telecamera.3. Vedere a pagina 48 le istruzioni per impostare la password.Assegnazione di un indirizzo <strong>IP</strong> ad un singolodispositivo1. Selezionare la telecamera di rete Serie <strong>AXIS</strong> <strong>M32</strong> in <strong>AXIS</strong><strong>Camera</strong> -Management e fare clic sul pulsante Assign <strong>IP</strong>(Assegna <strong>IP</strong>).2. Selezionare Assign the following <strong>IP</strong> address (Assegna ilseguente indirizzo <strong>IP</strong>) e immettere l’indirizzo <strong>IP</strong>, la subnet maske il router predefinito utilizzati dalla periferica.3. Fare clic sul pulsante OK.ITALIANOAssegnazione degli indirizzi <strong>IP</strong> a più telecamere<strong>AXIS</strong> <strong>Camera</strong> Management facilita il processo di assegnazione degliindirizzi <strong>IP</strong> di più periferiche, suggerendo gli indirizzi <strong>IP</strong> in base a unintervallo specifico.1. Selezionare le periferiche da configurare (è possibile selezionarepiù modelli) e fare clic sul pulsante Assign <strong>IP</strong> (Assegna <strong>IP</strong>).2. Selezionare Assign the following <strong>IP</strong> address range (Assegna ilseguente intervallo di indirizzi <strong>IP</strong>) e immettere l’intervallo diindirizzi <strong>IP</strong>, la subnet mask e il router predefinito utilizzati dallaperiferica.3. Fare clic sul pulsante OK.Nota:Le telecamere <strong>AXIS</strong> <strong>M32</strong>03-V e <strong>AXIS</strong> <strong>M32</strong>04-V appaiono in <strong>AXIS</strong> <strong>Camera</strong> Managementcome <strong>AXIS</strong> <strong>M32</strong>03 e <strong>AXIS</strong> <strong>M32</strong>04.
Pagina 48Guida all'installazione della telecamera Serie <strong>AXIS</strong> <strong>M32</strong>Impostazione della passwordPer ottenere l’accesso al prodotto, è necessario impostare la password dell’utente amministratorepredefinito root. Questa operazione può essere effettuata nella finestra di dialogo ’Configure RootPassword’ (Configura password root), che viene visualizzata quando si accede alla telecamera direte Serie <strong>AXIS</strong> <strong>M32</strong> per la prima volta.Per evitare l’interruzione della connessione di rete durante l’impostazione della password root, èpossibile eseguire questa operazione tramite la connessione crittografata HTTPS, che richiede uncertificato HTTPS (vedere la nota seguente).Per impostare la password tramite una connessione HTTP standard, inserirla direttamente nellaprima finestra di dialogo mostrata di seguito.Per impostare la password tramite una connessione HTTPS crittografata, attenersi alla seguenteprocedura.1. Fare clic sul pulsante Create self-signed certificate (Crea certificato autofirmato).2. Fornire le informazioni richieste e fare clic su OK. Il certificato viene creato e la password puòessere ora impostata in modo sicuro. Da questo momento in poi tutto il traffico verso e dallatelecamera Serie <strong>AXIS</strong> <strong>M32</strong> viene cifrato.3. Immettere una password e reimmetterla per confermarla. Fare clic su OK. La password è stataora configurata.Per creare una connessione HTTPS, iniziarefacendo clic su questo pulsante.Per configurare la passworddirettamente tramite una connessione noncrittografata, immettere qui la password.4. Per eseguire l’accesso, inserire il nome utente “root” nella finestra di dialogo appena ilprogramma lo richiedeNota: non è possibile eliminare il nome utente predefinito dell’amministratore.5. Inserire la password impostata in precedenza e fare clic su OK.
Guida all'installazione della telecamera Serie <strong>AXIS</strong> <strong>M32</strong> Pagina 49Accesso al flusso videoViene visualizzata la pagina Immagini dal vivo della telecamera Serie <strong>AXIS</strong> <strong>M32</strong> con i collegamentiagli strumenti di configurazione che consentono di personalizzare la telecamera.Se necessario, fare clic su Yes (Sì) per installare AMC (Axis Media Control) che consente divisualizzare il flusso video in Microsoft Internet Explorer. A questo scopo è necessario disporre deiprivilegi di amministratore.Setup (Configurazione): fornisce tutti gli strumentinecessari per configurare la telecamera.Help (Guida):visualizza la Guidain linea relativa allamodalità di utilizzodella telecamera.ITALIANONote:• HTTPS (Hypertext Transfer Protocol over Secure Socket Layer) è un protocollo utilizzato percrittografare il traffico tra i browser e i server web. Il certificato HTTPS controlla lo scambiocrittografato di informazioni.• Non è possibile eliminare la password root dell’utente amministratore predefinito.• Se si smarrisce o si dimentica la password root, la telecamera Serie <strong>AXIS</strong> <strong>M32</strong> deve esserereimpostata sulle impostazioni predefinite. Vedere a Ripristino delle impostazioni predefinite, apagina 52.
Pagina 50Guida all'installazione della telecamera Serie <strong>AXIS</strong> <strong>M32</strong>Regolazione della messa a fuocoAprire la pagina Live View (Immagini dal vivo) dell’interfaccia web ed effettuare le seguentioperazioni nella telecamera:1. Allentare la vite di fissaggio e le vitidi -regolazione dell’inclinazione.2. Posizionare l’obiettivo nella posizionedesiderata.3. Stringere delicatamente la vite di fissaggio ele viti di regolazione dell’inclinazione perbloccare la telecamera nella posizionedesiderata.4. Ruotare la ghiera di bilanciamento delleimmagini per impostare la posizioneorizzontale.5. Per impostare la messa a fuoco e lo zoom,allentare le rispettive levette in sensoantiorario e ruotare le ghiere.6. Bloccare le levette di messa a fuoco e di zoom nella posizione desiderata ruotando le viti insenso orario.Nota:A causa della rifrazione della cupola, dopo aver posizionato la cupola è possibile chel’immagine appaia leggermente sfocata. Mettere a fuoco un oggetto leggermente più vicinodella zona desiderata per compensare questa imperfezione.È possibile inoltre ottimizzare l’immagine in caso di condizioni di ridotta luminosità.Passare a Setup (Configurazione) > Video > <strong>Camera</strong> Settings (Impostazioni telecamera)nell’interfaccia web della telecamera e consultare la Guida in linea per maggiori informazioni.Completamento dell’installazioneAnello di bilanciamento immagineVite di regolazioneVite(su ciascun lato)Vite di fissaggioLevetta zoomLeva messa a fuoco1. Ruotare lo schermo di protezione di colore nero all’interno della cupola per posizionarecorrettamente la telecamera.2. Pulire la cupola con un panno morbido e asciutto per rimuovere polvere e impronte digitali;utilizzare un soffietto per rimuovere la polvere dall’obiettivo.3. Montare la cupola utilizzando le viti antimanomissione ed il cacciavite inclusi nella confezione.4. Dopo aver posizionato la cupola, verificare di nuovo che la telecamera sia stata messa a fuococorrettamente.5. L’installazione è completata.
Guida all'installazione della telecamera Serie <strong>AXIS</strong> <strong>M32</strong> Pagina 51Altri metodi di assegnazione dell’indirizzo <strong>IP</strong>La seguente tabella descrive gli altri metodi disponibili assegnare o individuare l’indirizzo <strong>IP</strong>. Perimpostazione predefinita, tutti i metodi sono disponibili e possono essere disabilitati.Utilizzo nel sistemaoperativoNoteConnessione alservizio AVHSTutti i sistemioperativiPer connettere la telecamera ad un server AVHS, consultare laguida all’installazione fornita dal -provider. Per informazioni eaiuto nella ricerca di un Service Provider AVHS nella propriazona, accedere a www.axis.comServizio gratuito fornito da Axis che consente di installare latelecamera in modo facile e veloce. È necessaria una connessionea Internet senza proxy http. Per ulteriori informazioni, visitare ilsito web all’indirizzo www.axiscam.net.Vedere le sezioni che seguono. È necessario eseguire il comandoentro 2 minuti dal collegamento dell’alimentazione allatelecamera.Se abilitata sul computer, la telecamera viene rilevataautomaticamente e aggiunta a “Risorse di rete”.Si applica ai browser con supporto Bonjour. Selezionare ilsegnalibro Bonjour nel browser (ad esempio Safari) e fare clic sulcollegamento per accedere alle pagine web della telecamera.Per visualizzare le pagine di amministrazione del server DHCP direte, vedere la documentazione specifica del server.<strong>AXIS</strong> Dynamic DNSServiceTutti i sistemioperativiARP/PingTutti i sistemioperativiUPnPWindows(ME o XP)MAC OSX(versione 10.4 osuccessive)Tutti i sistemioperativiBonjourDHCPITALIANOAssegnare dell’indirizzo <strong>IP</strong> con ARP/Ping1. Acquisire un indirizzo <strong>IP</strong> sullo stesso segmento di rete cui è connesso il computer in uso.2. Individuare il numero di serie indicato sull’etichetta della telecamera Serie <strong>AXIS</strong> <strong>M32</strong>.3. Aprire una finestra MS-DOS sul computer e digitare i seguenti comandi:Sintassi di Windows:arp -s ping -l 408 -t Sintassi di UNIX/Linux/Mac:arp -s tempping -s 408 Esempio di Windows:arp -s 192.168.0.125 00-40-8c-18-10-00ping -l 408 -t 192.168.0.125Esempio di UNIX/Linux/Mac:arp -s 192.168.0.125 00:40:8c:18:10:00 tempping -s 408 192.168.0.1254. Verificare che il cavo di rete sia collegato alla telecamera, quindi avviare/riavviare latelecamera, scollegando e ricollegando l’alimentazione.5. Chiudere la finestra MS-DOS appena viene visualizzato il messaggio "Reply from192.168.0.125:" (Risposta da 192.168.0.125) o altro messaggio simile.
Pagina 52Guida all'installazione della telecamera Serie <strong>AXIS</strong> <strong>M32</strong>6. Nel browser immettere http:// nel campo dell’indirizzo e premere Invio sullatastiera.Note:• Per aprire una finestra MS-DOS in Windows: dal menu Start, scegliere Esegui... e digitare cmd. Fareclic su OK.• Per utilizzare il comando ARP in Mac OS X, usare l’utility Terminal, in Applicazioni > Utilità.Ripristino delle impostazioni predefiniteQuesta procedura consente di ripristinare le impostazioni predefinite per tutti i parametri, inclusol’indirizzo <strong>IP</strong>.1. Scollegare l’alimentazione dalla telecamera.2. Tenere premuto il pulsante Control e ricollegare il cavo di alimentazione.3. Tenere premuto il pulsante Control fino a quando l’indicatore di alimentazione emette una lucegialla lampeggiante (l’operazione può richiedere fino a 15 secondi).4. Rilasciare il pulsante di comando. Quando l’indicatore di alimentazione diventa verde(l’operazione può richiedere fino a 1 minuto) la procedura è completata e sono state ripristinatele impostazioni predefinite per la telecamera.5. Riassegnare l’indirizzo <strong>IP</strong> utilizzando uno dei metodi descritti in questo documento.È possibile inoltre reimpostare i parametri alle impostazioni predefinite in fabbrica mediantel’interfaccia web. Per ulteriori informazioni, consultare la Guida in linea o la Guida per l’utente.Accesso alla telecamera da InternetDopo l’installazione, la telecamera Serie <strong>AXIS</strong> <strong>M32</strong> è accessibile nella rete locale (LAN). Per accederealla telecamera da Internet, è necessario configurare i router di rete per consentire il traffico inentrata, che di norma avviene su una porta specifica.• Porta HTTP (porta predefinita 80) per la visualizzazione e la configurazione• Porta RTSP (porta predefinita 554) per la visualizzazione di flussi video in formato H.264Per ulteriori istruzioni, consultare la documentazione del router. Per maggiori informazioni suquesto e altri argomenti, visitare il sito web per il supporto Axis all’indirizzo www.axis.com/techsupUlteriori informazioniLa Guida per l’utente è disponibile sul sito web di Axis all’indirizzo www.axis.com oppure sul CDfornito con il prodotto.SuggerimentoVisitare il sito di Axis all’indirizzo www.axis.com/techsup per verificare se sono statipubblicati aggiornamenti per la telecamera di rete Serie <strong>AXIS</strong> <strong>M32</strong>. Per conoscere laversione installata del firmware, vedere >About (Informazioni su) nella pagina Setup(Configurazione).
Guía de instalación de Serie <strong>AXIS</strong> <strong>M32</strong> Página 53Serie <strong>AXIS</strong> <strong>M32</strong> Guía de instalaciónEsta guía de instalación incluye las instrucciones necesarias para instalar las cámaras de la Serie<strong>AXIS</strong> <strong>M32</strong> en su red. Para obtener información sobre cualquier cuestión relacionada con el uso delproducto, consulte el Manual del usuario, disponible en el CD que se incluye en este paquete, o lapágina www.axis.com/techsup.Pasos para la instalación1. Verifique el contenido del paquete con la lista que aparece más abajo.2. Presentación del hardware. Consulte la página 54.3. Instale el hardware. Consulte la página 56.4. Asignación de una dirección <strong>IP</strong>. Consulte la página 57.5. Configuración de la contraseña. Consulte la página 60.6. Ajuste el enfoque. Consulte la página 62.7. Complete la instalación. Consulte la página 62.Contenido del paqueteImportante:Este producto debe utilizarse deconformidad con la legislación ynormativas locales.ArtículoModelos/variantes/notasCámara Serie <strong>AXIS</strong> <strong>M32</strong>Kit de montajeCDMaterial impreso<strong>AXIS</strong> <strong>M32</strong>03 - Cámara de red a prueba de manipulaciones<strong>AXIS</strong> <strong>M32</strong>03-V - Cámara de red a prueba de agresiones<strong>AXIS</strong> <strong>M32</strong>04 - Cámara de red a prueba de manipulaciones<strong>AXIS</strong> <strong>M32</strong>04-V - Cámara de red a prueba de agresionesDestornillador para tornillos de alta resistencia2 tornillos a prueba de manipulaciones (M4x16 Resitorx)Plantilla de taladroCD de los productos de vídeo en red de <strong>AXIS</strong>, incluida la documentación delproducto, herramientas de instalación y otro softwareGuía de instalación de Serie <strong>AXIS</strong> <strong>M32</strong> (este documento)Documento de garantía de Axis, Clave de autenticación AVHSESPAÑOL
Página 54Guía de instalación de Serie <strong>AXIS</strong> <strong>M32</strong>Presentación del hardwareconducto del cable de 16 mm(no proporcionado) a medidade la serie <strong>AXIS</strong> <strong>M32</strong>Placas de cubiertaBotón de controlID del producto y número de serie (N/S).El número de serie puede serrequerido durante la instalación.LED indicador dealimentaciónConector de redLED indicador de redLED indicador de estadoDimensionesAlt. x Anch. x Prof. = 94 x 144 x 132 mm (3.7" x 5.7" x 5.2")<strong>AXIS</strong> <strong>M32</strong>03, <strong>AXIS</strong> <strong>M32</strong>04: 425 g (0.94 lb)<strong>AXIS</strong> <strong>M32</strong>03-V, <strong>AXIS</strong> <strong>M32</strong>04-V: 580 g (1.28 lb)
Guía de instalación de Serie <strong>AXIS</strong> <strong>M32</strong> Página 55Indicadores LEDLED Color IndicaciónRed Verde Fijo para indicar la conexión a una red de 100 Mbits/s. Parpadea para indicaractividad en la red.Ámbar Fijo para indicar la conexión a una red de 10 Mbits/s. Parpadea para indicaractividad en la red.Apagado Desconexión de la red.Estado Verde Verde fijo para indicar funcionamiento normal.Nota: Puede configurarse el LED de estado para que esté apagado durante elfuncionamiento normal o para que parpadee únicamente cuando se accede ala cámara. Para configurarlo, vaya a Setup > System > Options > LED(Configuración > Opciones del sistema > LED). Para más información,consulte los archivos de ayuda en línea.Ámbar Fijo durante el inicio o durante el restablecimiento de los valores o laconfiguración iniciales.Rojo Parpadeo lento si no se puede realizar una actualización.Alimentación Verde Funcionamiento normal.Ámbar Parpadeo en verde/ámbar durante la actualización del firmware.ESPAÑOL
Página 56Guía de instalación de Serie <strong>AXIS</strong> <strong>M32</strong>Instalación del hardware!IMPORTANTE:- La carcasa de las cámaras <strong>AXIS</strong> <strong>M32</strong>03-V y <strong>AXIS</strong> <strong>M32</strong>04-V no hasido certificada para uso en exteriores: el producto puede instalarse sólo eninteriores.Montaje de la cámaraLas cámaras de red Serie <strong>AXIS</strong> <strong>M32</strong> pueden montarse haciendo pasar los cables guiados a través dela pared o el techo, desde arriba o desde abajo. Existen placas de cubiertas para aberturas a los doslados de la cubierta de la cúpula.La Serie <strong>AXIS</strong> <strong>M32</strong> también se puede instalar con un conducto metálico para proteger el cableadocuando se conecte a través de las aperturas laterales. Consulte las ilustraciones de la página 54.1. Utilizando la plantilla de taladro, haga dos orificios en el techo o la pared. Asegúrese de que lacámara está colocada de modo que los tornillos de alta resistencia puedan apretarse utilizandoel destornillador suministrado.2. Extienda los cables requeridos. Consulte Conexión a la red, en la página 57 para más detalles.3. Fije la cámara al techo o la pared con los tornillos y tacos adecuados para el material del techoo la pared.4. Siga con Conexión a la red, en la página 57.Montaje en falso techoPara montar la Serie <strong>AXIS</strong> <strong>M32</strong> en un falso techo, compruebe que el techo es suficientementeresistente para soportar el peso de la cámara.La cámara también puede ser fijada si se usa una placa o tabla que pueda soportar mejor el peso dela cámara y que sea más adecuada para apretar los tornillos.Placa o tablaTechoSerie <strong>AXIS</strong> <strong>M32</strong>TornillosLa Serie <strong>AXIS</strong> <strong>M32</strong> también puede montarse usando el montaje del falso techo de Serie <strong>AXIS</strong> <strong>M32</strong>,que permite que la cámara quede montada con más discreción. Por favor visite www.axis.com paracomprobar qué accesorios de montaje están disponibles.
Guía de instalación de Serie <strong>AXIS</strong> <strong>M32</strong> Página 57Conexión a la red1. Conecte la cámara a la red con un cable de red blindado (STP).2. Compruebe que los indicadores LED indican las condiciones adecuadas. Para obtenerinformación más detallada, consulte la tabla de la página 55. Tenga en cuenta que algunos LEDpueden deshabilitarse y puede que se encuentren apagados.Asignación de una dirección <strong>IP</strong>Siga estas instrucciones para asignar una dirección <strong>IP</strong> o consulte la página 63 para ver otros métodospara conectar Serie <strong>AXIS</strong> <strong>M32</strong> a Internet.Asignación de una dirección <strong>IP</strong>Actualmente, la mayoría de redes disponen de un servidor DHCP que asigna direcciones <strong>IP</strong> a losdispositivos conectados de forma automática. Si su red no dispone de un servidor DHCP, Serie <strong>AXIS</strong><strong>M32</strong> utilizará 192.168.0.90 como dirección <strong>IP</strong> predeterminada.Si desea asignar una dirección <strong>IP</strong> estática, el método recomendado en Windows es <strong>AXIS</strong> <strong>IP</strong> Utility o<strong>AXIS</strong> <strong>Camera</strong> Management. En función del número de cámaras que desee instalar, deberá utilizar elmétodo que se adapte mejor a sus necesidades.Ambas aplicaciones son gratuitas y están disponibles en el CD del producto de vídeo en red de Axissuministrado con este producto o pueden descargarse de www.axis.com/techsup.Método Recomendado para Sistema operativo<strong>AXIS</strong> <strong>IP</strong> UtilityConsulte la página 58Cámaras individualesInstalaciones pequeñasWindows<strong>AXIS</strong> <strong>Camera</strong> ManagementConsulte la página 59Varias cámarasInstalaciones grandesInstalación en una subreddiferenteWindows 2000Windows XP ProWindows 2003 ServerWindows VistaWindows 7ESPAÑOLNotas:• Si no puede asignar la dirección <strong>IP</strong>, compruebe que no haya ningún cortafuegos que bloquee laoperación.• Consulte la página 63 para conocer otros métodos para asignar o detectar la dirección <strong>IP</strong> de la Serie<strong>AXIS</strong> <strong>M32</strong>, por ejemplo, en otros sistemas operativos.
Página 58Guía de instalación de Serie <strong>AXIS</strong> <strong>M32</strong><strong>AXIS</strong> <strong>IP</strong> Utility: para cámaras individuales o instalaciones pequeñas<strong>AXIS</strong> <strong>IP</strong> Utility detecta y muestra automáticamente los dispositivos Axis que existen en la red.Además, esta aplicación puede utilizarse para asignar manualmente una dirección <strong>IP</strong> estática.Recuerde que el equipo que ejecute <strong>AXIS</strong> <strong>IP</strong> Utility debe instalarse en el mismo segmento de red(subred física) que la Serie <strong>AXIS</strong> <strong>M32</strong>.Detección automática1. Compruebe que la Serie <strong>AXIS</strong> <strong>M32</strong> está conectada a la red y que recibe alimentación.2. Inicie <strong>AXIS</strong> <strong>IP</strong> Utility.3. Cuando la cámara aparezca en la ventana, haga doble clic en ella para abrir su página de inicio.4. Consulte la página 60 para obtener instrucciones sobre cómo asignar la contraseña.Asignación manual de la dirección <strong>IP</strong> (opcional)1. Obtenga una dirección <strong>IP</strong> que no esté en uso y que se encuentre en el mismo segmento de redde la que su equipo.2. Seleccione la cámara de red de la Serie <strong>AXIS</strong> <strong>M32</strong> en la lista.3. Haga clic en el botón Asignar nueva dirección <strong>IP</strong> al dispositivo seleccionado e introduzcala dirección <strong>IP</strong>.4. Haga clic en el botón Asignar y siga las instrucciones que aparecen en la pantalla. Recuerdeque la cámara debe reiniciarse en los dos minutos siguientes a la configuración de la dirección<strong>IP</strong>.5. Haga clic en el botón Página de inicio para acceder a las páginas Web de la cámara.6. Consulte la página 60 para obtener instrucciones sobre cómo configurar la contraseña.Nota:<strong>AXIS</strong> <strong>M32</strong>03-V y <strong>AXIS</strong> <strong>M32</strong>04-V aparecerán en <strong>AXIS</strong> <strong>IP</strong> Utility como <strong>AXIS</strong> <strong>M32</strong>03 y <strong>AXIS</strong><strong>M32</strong>04.
Guía de instalación de Serie <strong>AXIS</strong> <strong>M32</strong> Página 59<strong>AXIS</strong> <strong>Camera</strong> Management: para varias cámaras e instalacionesgrandes<strong>AXIS</strong> <strong>Camera</strong> Management puededetectar automáticamente variosdispositivos Axis, mostrar elestado de la conexión, administrarlas actualizaciones del firmware yconfigurar direcciones <strong>IP</strong>.Detección automática1. Compruebe que la cámaraesté conectada a la red y querecibe alimentación.2. Inicie <strong>AXIS</strong> <strong>Camera</strong> Management. Cuando aparezca la cámara de red de la Serie <strong>AXIS</strong> <strong>M32</strong> en laventana, haga doble clic en ella para abrir la página de inicio.3. Consulte la página 60 para obtener instrucciones sobre cómo configurar la contraseña.Asignación de una dirección <strong>IP</strong> en un dispositivoindividual1. Seleccione la cámara de red de la Serie <strong>AXIS</strong> <strong>M32</strong> en <strong>AXIS</strong><strong>Camera</strong> Management y haga clic en el botón Asignar <strong>IP</strong>.2. Seleccione Asignar la dirección siguiente e introduzca ladirección <strong>IP</strong>, la máscara de subred y el router predeterminadoque utilizará el dispositivo.3. Haga clic en el botón Aceptar.Asignación de direcciones <strong>IP</strong> en varios dispositivos<strong>AXIS</strong> <strong>Camera</strong> Management acelera el proceso de asignación dedirecciones <strong>IP</strong> en varios dispositivos indicando el rango dedirecciones <strong>IP</strong> disponibles dentro de un intervalo especificado.ESPAÑOL1. Seleccione los dispositivos que desee configurar (se puedenseleccionar varios modelos) y haga clic en el botón Asignar<strong>IP</strong>.2. Seleccione Asignar el siguiente rango de direcciones <strong>IP</strong> eintroduzca las direcciones <strong>IP</strong>, la máscara de subred y el routerpredeterminado que utilizará el dispositivo.3. Haga clic en el botón Aceptar.Nota:<strong>AXIS</strong> <strong>M32</strong>03-V y <strong>AXIS</strong> <strong>M32</strong>04-V aparecerán en <strong>AXIS</strong> <strong>Camera</strong> Management como <strong>AXIS</strong><strong>M32</strong>03 y <strong>AXIS</strong> <strong>M32</strong>04.
Página 60Guía de instalación de Serie <strong>AXIS</strong> <strong>M32</strong>Configuración de la contraseñaPara poder acceder al producto, hay que configurar la contraseña del usuario predeterminado parael administrador root. Aparecerá el cuadro de diálogo ‘Configurar contraseña de root’ cuando seacceda a la cámara de red Serie <strong>AXIS</strong> <strong>M32</strong> por primera vez.Para evitar la intercepción de la contraseña de root cuando se configura, este proceso se puederealizar a través de una conexión HTTPS cifrada, que precisa un certificado HTTPS (consulte la notamás abajo).Para configurar la contraseña a través de una conexión HTTP estándar, escríbala directamente en elprimer cuadro de diálogo que se muestra a continuación.Para configurar la contraseña a través de una conexión HTTPS cifrada, siga estos pasos:1. Haga clic en el botón Crear un certificado de autofirma.2. Proporcione la información que se le solicita y haga clic en Aceptar. Se creará el certificado y sepodrá configurar la contraseña con seguridad. Todo el tráfico hacia y desde la Serie <strong>AXIS</strong> <strong>M32</strong>estará cifrado a partir de este momento.3. A continuación, escriba una contraseña y vuelva a escribirla para confirmarla. Haga clic enAceptar. La contraseña ya se ha configurado.Para crear una conexión HTTPS, empiecehaciendo clic en este botón.Para configurar directamente la contraseña através de una conexión sin cifrar, escriba aquí lacontraseña.4. Para iniciar sesión, escriba el nombre de usuario 'root' en el cuadro de diálogo.Nota:El nombre de usuario predeterminado para el administrador root no se puede borrar.5. Escriba la contraseña que introdujo anteriormente y haga clic en Aceptar.
Guía de instalación de Serie <strong>AXIS</strong> <strong>M32</strong> Página 61Acceso a la transmisión de vídeoLa página Live View de la Serie <strong>AXIS</strong> <strong>M32</strong> aparece con enlaces a los menús de enlace deconfiguración que le permiten personalizar la cámara.En caso necesario, haga clic en Sí para instalar el AMC (<strong>AXIS</strong> Media Control) y así permitir lavisualización de la transmisión de vídeo en Internet Explorer. Para ello, debe tener derechos deadministrador en su equipo.Configuración: proporciona todas las herramientasnecesarias para configurar la cámara según susnecesidades.Ayuda: presentaayuda en líneasobre todos losaspectos del uso dela cámara.ESPAÑOLNotas:• HTTPS (Hypertext Transfer Protocol over Secure Socket Layer) es un protocolo usado para cifrar eltráfico entre navegadores y servidores en red. El certificado HTTPS controla el intercambio cifrado deinformación.• El usuario administrador root predeterminado no se puede borrar.• Si ha perdido u olvidado la contraseña root, la Serie <strong>AXIS</strong> <strong>M32</strong> debe restablecerse a los valoresiniciales. Consulte Restablecimiento de la configuración predeterminada de fábrica, en la página 64.
Página 62Guía de instalación de Serie <strong>AXIS</strong> <strong>M32</strong>Ajuste la imagen y el enfoqueAbra la página Live View en la interfaz de la web y realice los siguientes ajustes en la cámara:1. Afloje el tornillo de bloqueo e incline lostornillos de ajuste.2. Gire la lente hasta la posición deseada.3. Una vez que haya conseguido la posicióndeseada, apriete con cuidado el tornillo debloqueo y los tornillos de ajuste de lainclinación para fijar la posición de lacámara.4. Gire el anillo de balance de la imagen paraestablecer la posición horizontal.5. Para establecer el enfoque y el zoom, aflojelos botones del zoom y del enfoque en elsentido contrario a las agujas del reloj y girelos anillos.6. Bloquee los botones de enfoque y zoom en posición girando los tornillos en el sentido de lasagujas del reloj.Nota:Debido a la refracción de la burbuja, puede que la imagen aparezca ligeramentedesenfocada una vez que se haya colocado la burbuja. Para compensarlo, enfoque un objetoligeramente más cercano que la zona que nos interesa.La imagen también puede ajustarse en caso de poca iluminación.Vaya a Setup > Video > <strong>Camera</strong> Settings (Configuración > Vídeo > Configuración de la cámara)en la interfaz web de la cámara y consulte la ayuda en línea para obtener más información.Complete la instalaciónTornillo de bloqueoAnillo de balance de la imagenAjuste de la inclinacióntornillo(a ambos lados)Botón del zoomBotón de enfoque1. Gire el revestimiento de protección negro del interior de la carcasa de la burbuja para quecoincida con la posición de la cámara.2. Limpie la burbuja con un trapo suave y seco para eliminar el polvo y las huellas dactilares yutilice un soplador para retirar el polvo de la lente.3. Monte la carcasa de la burbuja utilizando los tornillos de alta resistencia y el destornilladorsuministrados.4. Ahora que la burbuja está en su sitio, vuelva a comprobar que la cámara está correctamenteenfocada.5. La instalación ha finalizado.
Guía de instalación de Serie <strong>AXIS</strong> <strong>M32</strong> Página 63Otros métodos para configurar la dirección <strong>IP</strong>Esta tabla presenta otros métodos disponibles para configurar o detectar la dirección <strong>IP</strong>. Todos losmétodos están habilitados de forma predeterminada y es posible deshabilitarlos.Uso en sistemaoperativoNotasServicio deconexión AVHSServicio de DNSdinámico de <strong>AXIS</strong>TodosTodosPara conectar la cámara a un servidor AVHS, consulte la guía deinstalación del proveedor del servidor. Para obtener informacióny asistencia para encontrar un Proveedor local de Servicio AVHS,visite www.axis.com.Servicio gratuito suministrado por Axis que permite instalar lacámara de forma rápida y sencilla. Es necesario disponer deconexión a Internet sin proxy HTTP. Para más información,consulte www.axiscam.net.ARP/Ping Todos Véase más adelante. El comando debe emitirse en los dosminutos posteriores al encendido de la cámara.UPnPBonjourWindows(ME o XP)MAC OSX(10.4 o posterior)La cámara se detecta y añade a “Mis sitios de red”automáticamente, siempre que esta opción esté habilitada en elequipo.Aplicable a navegadores compatibles con Bonjour. Naveguehasta el favorito Bonjour del explorador (p. ej., Safari) y haga clicen el vínculo para acceder a las páginas Web de la cámara.DHCP Todos Para acceder a las páginas de administración del servidor DHCPen red, consulte la documentación del servidor.Configuración de la dirección <strong>IP</strong> con ARP/Ping1. Adquiera una dirección <strong>IP</strong> en el mismo segmento de red en el que está conectado su equipo.2. Localice el número de serie (S/N) en la etiqueta de la Serie <strong>AXIS</strong> <strong>M32</strong>.3. Abra una línea de comando en su equipo y escriba los comandos siguientes:ESPAÑOLSintaxis en Windows:arp -s ping -l 408 -t Sintaxis en UNIX/Linux/Mac:arp -s tempping -s 408 Ejemplo en Windows:arp -s 192.168.0.125 00-40-8c-18-10-00ping -l 408 -t 192.168.0.125Ejemplo en UNIX/Linux/Mac:arp -s 192.168.0.125 00:40:8c:18:10:00 tempping -s 408 192.168.0.1254. Compruebe que el cable de red está conectado a la cámara y desconecte y vuelva a conectar lacorriente para iniciarla o reiniciarla.5. Cierre la línea de comando cuando vea “Respuesta de 192.168.0.125:” o similar.6. En el explorador, escriba http:// en el campo Ubicación/Dirección y pulse Intro enel teclado.
Página 64Guía de instalación de Serie <strong>AXIS</strong> <strong>M32</strong>Notas:• Para abrir una línea de comando en Windows: desde el menú Inicio, seleccione Ejecutar... y escribacmd. Haga clic en Aceptar.• Para utilizar el comando ARP en un sistema operativo Mac OS X, utilice la herramienta Terminal, quese encuentra en Aplicaciones > Utilidades.Restablecimiento de la configuración predeterminada defábricaEsta operación restaurará todos los parámetros, incluida la dirección <strong>IP</strong>, a los valores iniciales:1. Desconecte la alimentación de la cámara.2. Mantenga pulsado el botón de Control y vuelva a conectar la alimentación.3. Mantenga presionado el botón de control hasta que el indicador de alimentación encienda unaluz ámbar (puede tardar hasta 15 segundos).4. Suelte el botón Control. Cuando el indicador de alimentación emita una luz verde (puede tardarhasta 1 minuto), ha finalizado el proceso y se han restablecido los valores iniciales de lacámara.5. Vuelva a asignar la dirección <strong>IP</strong>, utilizando uno de los métodos descritos en este documento.También es posible restablecer los valores predeterminados originales mediante la interfaz Web. Sidesea más información, consulte la ayuda en línea o el manual del usuario.Acceso a la cámara desde InternetUna vez instalada, su Serie <strong>AXIS</strong> <strong>M32</strong> es accesible desde su red local (LAN). Para acceder a lacámara desde Internet, los routers de red deben configurarse para permitir tráfico entrante, quenormalmente se realiza en un puerto específico.• Puerto HTTP (puerto 80 predeterminado) para visualización y configuración• Puerto RTSP (puerto 554 predeterminado) para visualización de transmisiones de vídeoH.264Consulte la documentación de su router para obtener más instrucciones. Si desea más informaciónsobre éste y otros temas, visite la página web de soporte de Axis en www.axis.com/techsupMás informaciónEl manual del usuario está disponible en el sitio web de Axis, www.axis.com, o en el CD deproductos de vídeo en red de Axis suministrado con este producto.Un consejo:Visite www.axis.com/techsup para comprobar si hay firmware actualizado disponible parasu cámara de red de la Serie <strong>AXIS</strong> <strong>M32</strong>. Para consultar la versión firmware que tieneinstalada actualmente, vaya a Setup > Basic Setup (Configuración > Configuración Básica).
Installation GuideVer.1.2<strong>AXIS</strong> <strong>M32</strong> <strong>Series</strong> Printed: April 2010© Axis Communications AB, 2010 Part No. 38987