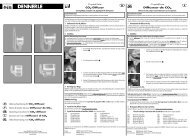
CO2 fertilizer system Exclusive DeLuxe - Dennerle
CO2 fertilizer system Exclusive DeLuxe - Dennerle
CO2 fertilizer system Exclusive DeLuxe - Dennerle

You also want an ePaper? Increase the reach of your titles
YUMPU automatically turns print PDFs into web optimized ePapers that Google loves.
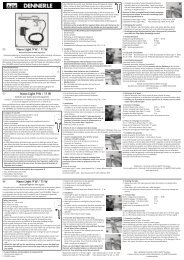
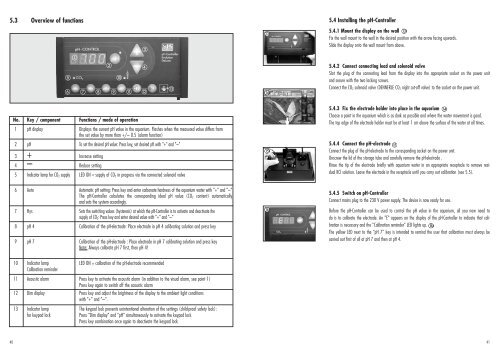
5.3 Overview of functions5.4 Installing the pH-Controller 1314min. 1 cm5.4.1 Mount the display on the wall 13Fix the wall mount to the wall in the desired position with the arrow facing upwards.Slide the display onto the wall mount from above.5.4.2 Connect connecting lead and solenoid valveSlot the plug of the connecting lead from the display into the appropriate socket on the power unitand secure with the two locking screws.Connect the CO 2 solenoid valve (DENNERLE CO 2 night cut-off valve) to the socket on the power unit.No. Key / component Functions / mode of operation1 pH display Displays the current pH value in the aquarium. Flashes when the measured value differs fromthe set value by more than +/– 0.5 (alarm function)2 pH To set the desired pH value: Press key, set desired pH with "+" and "–"3 + Increase setting4 – Reduce setting5 Indicator lamp for CO 2 supply LED ON = supply of CO 2 in progress via the connected solenoid valve155.4.3 Fix the electrode holder into place in the aquarium 14Choose a point in the aquarium which is as dark as possible and where the water movement is good.The top edge of the electrode holder must be at least 1 cm above the surface of the water at all times.5.4.4 Connect the pH-electrode 15Connect the plug of the pH-electrode to the corresponding socket on the power unit.Unscrew the lid of the storage tube and carefully remove the pH-electrode .Rinse the tip of the electrode briefly with aquarium water in an appropriate receptacle to remove residualKCl solution. Leave the electrode in the receptacle until you carry out calibration (see 5.5).6 Auto Automatic pH setting: Press key and enter carbonate hardness of the aquarium water with "+" and "–"The pH-Controller calculates the corresponding ideal pH value (CO 2 content) automaticallyand sets the <strong>system</strong> accordingly.7 Hys Sets the switching values (hysteresis) at which the pH-Controller is to activate and deactivate thesupply of CO 2 : Press key and enter desired value with "+" and "–"8 pH 4 Calibration of the pH-electrode: Place electrode in pH 4 calibrating solution and press key9 pH 7 Calibration of the pH-electrode : Place electrode in pH 7 calibrating solution and press keyNote: Always calibrate pH 7 first, then pH 4!165.4.5 Switch on pH-ControllerConnect mains plug to the 230 V power supply. The device is now ready for use.Before the pH-Controller can be used to control the pH value in the aquarium, all you now need todo is to calibrate the electrode. An "E" appears on the display of the pH-Controller to indicate that calibrationis necessary and the "Calibration reminder" LED lights up. 16The yellow LED next to the "pH 7" key is intended to remind the user that calibration must always becarried out first of all at pH 7 and then at pH 4.10 Indicator lamp LED ON = calibration of the pH-electrode recommendedCalibration reminder11 Acoustic alarm Press key to activate the acoustic alarm (in addition to the visual alarm, see point 1)Press key again to switch off the acoustic alarm12 Dim display Press key and adjust the brightness of the display to the ambient light conditionswith "+" and "–".13 Indicator lamp The keypad lock prevents unintentional alteration of the settings (child-proof safety lock):for keypad lockPress "Dim display" and "pH" simultaneously to activate the keypad lockPress key combination once again to deactivate the keypad lock40 41