Alesis Trigger IO Multilingual Quickstart Manual - revision A
Alesis Trigger IO Multilingual Quickstart Manual - revision A
Alesis Trigger IO Multilingual Quickstart Manual - revision A

Create successful ePaper yourself
Turn your PDF publications into a flip-book with our unique Google optimized e-Paper software.
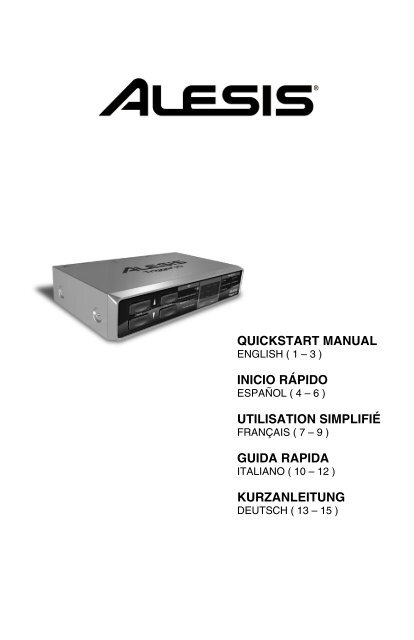
QUICKSTART MANUAL<br />
ENGLISH ( 1 – 3 )<br />
INIC<strong>IO</strong> RÁPIDO<br />
ESPAÑOL ( 4 – 6 )<br />
UTILISAT<strong>IO</strong>N SIMPLIFIÉ<br />
FRANÇAIS ( 7 – 9 )<br />
GUIDA RAPIDA<br />
ITALIANO ( 10 – 12 )<br />
KURZANLEITUNG<br />
DEUTSCH ( 13 – 15 )
HOOKUP DIAGRAM<br />
Please study the following diagram to connect your <strong>Trigger</strong> <strong>IO</strong>.<br />
ATTACH 2 BUTTON FOOTSWITCH HERE<br />
ATTACH ADDIT<strong>IO</strong>NAL TRIGGERS HERE<br />
1<br />
TO COMPUTER<br />
POWER ADAPTER<br />
(OPT<strong>IO</strong>NAL)<br />
TO EXTERNAL MIDI MODULE<br />
1. Before turning on the <strong>Trigger</strong> <strong>IO</strong>, connect all triggers, pads, footswitches, MIDI devices and external modules as<br />
shown above. If you would like to use the <strong>Trigger</strong> <strong>IO</strong> with a computer, connect a USB cord from the <strong>Trigger</strong> <strong>IO</strong><br />
to your computer’s USB port.<br />
2. Connect a power source to the <strong>Trigger</strong> <strong>IO</strong>. You have two options for powering the <strong>Trigger</strong> <strong>IO</strong>:<br />
a. Connect the <strong>Trigger</strong> <strong>IO</strong> to a computer’s USB port – the computer’s USB bus will provide power.<br />
b. Connect an optional 9V AC power adapter to the <strong>Trigger</strong> <strong>IO</strong>.<br />
3. Use the power switch on the rear panel of the <strong>Trigger</strong> <strong>IO</strong> to turn it on.<br />
Important: Please use the appropriate cables to connect your triggers to the <strong>Trigger</strong> <strong>IO</strong>. For single zone<br />
triggers, please use TS cables to connect them to the <strong>Trigger</strong> <strong>IO</strong>. If using dual-zone triggers, please make sure<br />
that you are using TRS cables. Using TS cables to connect dual-zone triggers to the <strong>Trigger</strong> <strong>IO</strong> will only allow<br />
you to use the primary zone (tip) of the drum.<br />
COMPUTER INSTALLAT<strong>IO</strong>N<br />
The <strong>Trigger</strong> <strong>IO</strong> is a Plug-and-Play device under Mac OS X and Windows XP so there is no driver or special software<br />
installation required. The <strong>Trigger</strong> <strong>IO</strong> will automatically be recognized once it is plugged into your computer’s USB<br />
port.<br />
To use the <strong>Trigger</strong> <strong>IO</strong> with a software application, you will need to select and enable the <strong>Trigger</strong> <strong>IO</strong> as a MIDI input<br />
device in your software’s preferences. Please consult your software’s documentation for information on selecting and<br />
enabling MIDI input devices.<br />
IMPORTANT: Please make sure that the <strong>Trigger</strong> <strong>IO</strong> is connected and powered before starting any software<br />
applications with which you intend to use the <strong>Trigger</strong> <strong>IO</strong>. Otherwise, the software program will not recognize the<br />
<strong>Trigger</strong> <strong>IO</strong> as being connected.<br />
ABOUT AUD<strong>IO</strong> LATENCY: If you experience a significant delay when you trigger sounds in your software, you will<br />
need to adjust your latency (or buffer) settings to smaller values. These adjustments are often made in your<br />
software’s Preferences menu. In addition, you may wish to download a free AS<strong>IO</strong> sound driver from the Internet,<br />
such as the AS<strong>IO</strong>4ALL driver which can be found at www.asio4all.com. These drivers typically improve audio<br />
performance and allow for the use of small buffer sizes.
FRONT PANEL OVERVIEW<br />
1. FUNCT<strong>IO</strong>N UP/DOWN – These buttons are used to select through different functions on the <strong>Trigger</strong> <strong>IO</strong>.<br />
2. VALUE UP/DOWN – These buttons are used to cycle through kits and parameters for the different functions.<br />
3. FUNCT<strong>IO</strong>N LEDs – Each function on the <strong>Trigger</strong> <strong>IO</strong> is paired with a corresponding LED on the panel. These LED<br />
will reflect which function is currently being selected.<br />
4. LED SCREEN – The LED screen displays information about the state of the <strong>Trigger</strong> <strong>IO</strong>. The screen also features a<br />
small “Activity” LED which will light up each time a trigger generates a Note On message, as well as a “Trig B” LED<br />
which will light up when the secondary zone (ring) of a dual-zone trigger generates a Note On message.<br />
FUNCT<strong>IO</strong>N SUMMARY<br />
The <strong>Trigger</strong> <strong>IO</strong> features a set of programmable functions which can be accessed via the function up/down buttons<br />
on the front panel. Once a function has been selected, you can change its value or parameter with the value<br />
up/down buttons.<br />
The <strong>Trigger</strong> <strong>IO</strong> features two sets of functions – Kit and Global. Kit functions will only affect the trigger settings for the<br />
particular kit, whereas Global functions will affect a specific trigger’s settings across all kits.<br />
KIT FUNCT<strong>IO</strong>NS<br />
KIT – A Kit, also known as a Preset, is a collection of parameters which describe different configurations on the<br />
<strong>Trigger</strong> <strong>IO</strong>, such as assigned MIDI Note Numbers, MIDI Channels and associated Program Change messages.<br />
There are 21 kits available that you can load, modify and store. While in Kit function, you can use the value up/down<br />
buttons to step through and load different kits.<br />
PROGRAM CHANGE – A Program Change message is a MIDI message which is used for sending data to devices to<br />
cause them to change to a new program, or in other words, bank of sounds. In essence, Program Change messages<br />
allow you to tell your hardware or software device which sound to play. Each kit can be assigned a unique Program<br />
Change message (0-127) which will be sent when the Kit is loaded. By default, each kit’s Program Change message<br />
is assigned to “---“, which means that no Program Change message will be sent when the kits are loaded.<br />
TRIG MIDI CHANNEL – This is the MIDI Channel on which a specific trigger will be sending its information. To select<br />
which trigger’s MIDI Channel you wish to edit, engage the trigger.<br />
TRIG MIDI NOTE # - This is the MIDI Note Number that will be sent by a specific trigger. To select which trigger’s<br />
MIDI Note Number you wish to edit, engage the trigger.<br />
GLOBAL FUNCT<strong>IO</strong>NS<br />
The following parameters will affect each trigger input on a global level, regardless of the specific kit that you are<br />
working with. To adjust a trigger’s global parameters, you will need to select the trigger for editing by triggering it –<br />
this is often referred to as Chase Mode. Once the trigger is selected, you can adjust its parameter with the value<br />
up/down buttons. To select another trigger, simply trigger it.<br />
GAIN – The Gain parameter adjusts the pad or trigger sensitivity. With a high gain setting, you don’t have to hit the<br />
pad or trigger very hard to achieve a maximum velocity output. On the other hand, with a low gain setting it is harder<br />
to achieve a maximum velocity output when striking the trigger. If you find it very easy to achieve maximum velocity<br />
(127) when you strike a specific pad/trigger, you might want to set its Gain to a lower value.<br />
VELOCITY CURVE – A Velocity Curve describes how a trigger’s velocity varies with the force applied. This is a useful<br />
feature when trying to customize how a trigger responds to your playing style. Different Velocity Curves will have<br />
different input/output ratios associated with them and will cause a different response, so take some time to get familiar<br />
with how the Velocity Curve setting corresponds to the way you like to play. The different Velocity Curve options are:<br />
“Lin” – Linear<br />
“Cst” – Constant (127)<br />
“Off” – Offset<br />
“EP” – Exponential (4 available)<br />
2<br />
“LG” – Logarithmic (4 available)<br />
“SP” – Spline (4 available)
THRESHOLD – False triggering can occur when a trigger is engaged accidentally, often due to stage vibrations. The<br />
Threshold setting helps prevent false triggering. The threshold value is the minimum velocity needed to be registered<br />
for the trigger to output data. When editing a hi-hat pedal, the Threshold function has a slightly different meaning.<br />
NOTE: For a hi-hat pedal, the Threshold value describes the minimum distance between pedal positions,<br />
when changing directions, necessary for the <strong>Trigger</strong> <strong>IO</strong> to output a CC value. If you like to use the hi-hat pedal<br />
for subtle nuances, you may wish to set the hi-hat pedal Threshold to a low value.<br />
X-TALK – Crosstalk occurs when triggers in close proximity are falsely triggered. For example, when using acoustic<br />
drum triggers mounted on a drum kit, hitting a certain drum may cause the drums to vibrate and other triggers to<br />
trigger as well. The X-Talk feature describes the degree to which the <strong>Trigger</strong> <strong>IO</strong> will attempt to reject crosstalk.<br />
Positive X-Talk values attempt to intelligently suppress crosstalk. If a very loud and a very soft trigger arrive almost<br />
simultaneously, the X-Talk function will assume that the soft trigger is crosstalk and will suppress it from sounding.<br />
The higher the X-Talk value, the higher the velocities that will be suppressed. This means that when using high X-<br />
Talk values, you can’t play hard and soft notes simultaneously. At a setting of 7, it may even be difficult to play a<br />
drum roll.<br />
NOTE: For a hi-hat pedal, the X-Talk function is used as a Calibration function. This allows you to calibrate the<br />
pedal for optimum performance. If a hi-hat pedal is selected, you will see “CAL” displayed on the screen. You<br />
can adjust the calibration manually or you can let the <strong>Trigger</strong> <strong>IO</strong> adjust it automatically by leaving the pedal in<br />
the up position and pressing up value and down value buttons simultaneously. This will automatically<br />
calibrate the pedal.<br />
RETRIGGER – The Retrigger setting describes how the <strong>Trigger</strong> <strong>IO</strong> interprets and outputs successive triggers from<br />
the same input. The Retrigger setting is the minimum amount of time between successive triggers needed to<br />
generate a second sound. If you hear a flamming sound, you should raise the Retrigger amount.<br />
TRIGGER TYPE – Please make sure that your trigger’s <strong>Trigger</strong> Type is configured correctly before editing or using it.<br />
If the <strong>Trigger</strong> Type is configured incorrectly, your trigger may not function properly or at all. You will need to select a<br />
<strong>Trigger</strong> Type which matches your specific trigger, as shown in the table below. If you have a single zone drum trigger,<br />
then ignore the “ring” column in the table below. Select PP if you have a piezo trigger or SS if you have a switch<br />
trigger. If you have a dual zone drum, then use a TRS cable and select the appropriate type from the table below. If<br />
you have a dual zone drum but only a TS cable, then you can still use the primary zone (tip) but not the secondary<br />
zone (ring). Hi-hat pedals are automatically detected by the <strong>Trigger</strong> <strong>IO</strong>, so there will be no need to set the <strong>Trigger</strong><br />
Type.<br />
TRIGGER TYPE TIP RING<br />
PIEZO PIEZO<br />
SWITCH SWITCH<br />
PIEZO SWITCH<br />
SWITCH PIEZO<br />
SWITCH AS SUSTAIN PEDAL*<br />
HI-HAT PEDAL**<br />
*To be used with footswitches. When the footswitch is pressed down, it generates<br />
a sustain message (MIDI CC 64). When it is depressed, it cancels the sustain.<br />
**Hi-hat foot pedals will automatically be detected<br />
so there is no need to set a <strong>Trigger</strong> Type.<br />
SAVING PARAMETER SETTINGS<br />
If you have made changes to Kit and Global parameters (i.e. changed MIDI note numbers, channels, trigger settings),<br />
you will notice that the LED next to Kit will begin blinking. This means that there are changes which have not yet<br />
been saved. To save these changes, please use the function up/down buttons to return to the Kit function. This will<br />
save the changes you have made. Alternatively, if you have made changes but do not wish to save them, press<br />
function down and value down buttons simultaneously. This will cancel any changes made after the kit was<br />
loaded.<br />
SENDING MESSAGES<br />
• To send an All Notes Off message, press function up and<br />
function down buttons simultaneously.<br />
• To send a Return to Default Value message, press the<br />
function down and value down buttons simultaneously.<br />
• To send a Factory Reset message, hold down the value up<br />
and value down buttons simultaneously while powering on<br />
the <strong>Trigger</strong> <strong>IO</strong>. You will see “rES” displayed on the screen to<br />
let you know that the <strong>Trigger</strong> <strong>IO</strong> has been reset.<br />
ADDIT<strong>IO</strong>NAL INFORMAT<strong>IO</strong>N<br />
3<br />
• To request a SysEx Data Dump from the <strong>Trigger</strong> <strong>IO</strong>,<br />
press function up and value up simultaneously. This<br />
will transfer all the presets from the <strong>Trigger</strong> <strong>IO</strong> to your<br />
SysEx application.<br />
• To transfer SysEx data to the <strong>Trigger</strong> <strong>IO</strong>, simply play<br />
the SysEx data you would like to transfer to the <strong>Trigger</strong><br />
<strong>IO</strong>.<br />
For additional information, please see the included Reference <strong>Manual</strong> or visit www.alesis.com.
DIAGRAMA DE CONEXIÓN<br />
Estudie el siguiente diagrama para conectar su <strong>Trigger</strong> <strong>IO</strong>.<br />
CONECTE AQUÍ EL INTERRUPTOR DE PEDAL DE 2 BOTONES<br />
CONECTE AQUÍ LOS DISPARADORES ADIC<strong>IO</strong>NALES<br />
4<br />
ADAPTADOR DE ALIMENTACIÓN<br />
(OPC<strong>IO</strong>NAL)<br />
AL MÓDULO MIDI EXTERNO<br />
A LA COMPUTADORA<br />
1. Antes de encender el <strong>Trigger</strong> <strong>IO</strong>, conecte todos los disparadores, pads, interruptores de pedal, dispositivos MIDI<br />
y módulos externos tal como se ilustra. Si desea usar el <strong>Trigger</strong> <strong>IO</strong> con una computadora, conecte un cable<br />
USB desde el mismo hasta el puerto USB de la computadora.<br />
2. Conecte una fuente de alimentación al <strong>Trigger</strong> <strong>IO</strong>. Existen dos opciones para alimentar el <strong>Trigger</strong> <strong>IO</strong>:<br />
a. Conectarlo al puerto USB de una computadora —el bus USB de esta última suministra la<br />
alimentación.<br />
b. Conectar un adaptador de alimentación de 9V CA al <strong>Trigger</strong> <strong>IO</strong>.<br />
3. Use el interruptor de encendido del panel trasero del <strong>Trigger</strong> <strong>IO</strong> para encenderlo.<br />
Importante: Use los cables apropiados para conectar sus disparadores al <strong>Trigger</strong> <strong>IO</strong>. Para disparadores de<br />
zona única, use cables TS para conectarlos al <strong>Trigger</strong> <strong>IO</strong>. Si usa disparadores de zona dual, asegúrese de usar<br />
cables TRS. El uso de cables TS para conectar disparadores de zona dual al <strong>Trigger</strong> <strong>IO</strong> sólo le permite usar la<br />
zona primaria (punta) del tambor.<br />
INSTALACIÓN EN LA COMPUTADORA<br />
<strong>Trigger</strong> <strong>IO</strong> es un dispositivo Plug-and-Play bajo Mac OS X y Windows XP, de modo que no se requiere instalar<br />
ningún driver o software especial. <strong>Trigger</strong> <strong>IO</strong> es reconocido automáticamente una vez enchufado al puerto USB de<br />
su computadora.<br />
Para usar <strong>Trigger</strong> <strong>IO</strong> con una aplicación de software, debe seleccionar y habilitar el <strong>Trigger</strong> <strong>IO</strong> como dispositivo de<br />
entrada MIDI en las preferencias de su software. Para información sobre la selección y habilitación de dispositivos<br />
de entrada MIDI; consulte la documentación de su software.<br />
IMPORTANTE: Asegúrese de que el <strong>Trigger</strong> <strong>IO</strong> esté conectado y alimentado antes de iniciar cualquier aplicación de<br />
software con la desee usarlo. De lo contrario, el programa no reconocerá que está conectado el <strong>Trigger</strong> <strong>IO</strong>.<br />
ACERCA DE LA LATENCIA DE AUD<strong>IO</strong> Si experimenta un retardo significativo cuando dispara sonidos en su<br />
software, debe ajustar sus parámetros de latencia (o buffer) a valores menores. Estos ajustes se hacen a menudo<br />
en el menú Preferencias de su software. Además, es conveniente que descargue de Internet un driver de sonido<br />
AS<strong>IO</strong> gratuito, tal como el AS<strong>IO</strong>4ALL que puede encontrar en www.asio4all.com. Estos drivers mejoran<br />
habitualmente el rendimiento del audio y permiten el uso de tamaños de buffers más pequeños.
VISTA DEL PANEL FRONTAL<br />
1. FUNCT<strong>IO</strong>N (Función) ARRIBA/ABAJO – Estos botones se usan para seleccionar entre diferentes funciones de <strong>Trigger</strong> <strong>IO</strong>.<br />
2. VALUE (Valor) ARRIBA/ABAJO– Estos botones se usan para recorrer los kits y parámetros de las diferentes funciones.<br />
3. LED DE FUNC<strong>IO</strong>NES – Cada función de <strong>Trigger</strong> <strong>IO</strong> está asociada con un LED correspondiente en el panel. Estos LED<br />
reflejan la función seleccionada.<br />
4. PANTALLA DE LED – Muestra información acerca del estado de <strong>Trigger</strong> <strong>IO</strong>. La pantalla incluye también un pequeño LED<br />
“Activity” (Actividad), que se enciende cada vez que un disparo genera un mensaje Note On (Nota activada), así como un<br />
LED “Trig B” (Disparo B) que se enciende cada vez que la zona secundaria (nuca) de un disparador de zona dual genera un<br />
mensaje Note On.<br />
RESUMEN DE FUNC<strong>IO</strong>NES<br />
<strong>Trigger</strong> <strong>IO</strong> ofrece un conjunto de funciones programables a las que se puede acceder a través de los botones de<br />
función arriba/abajo del panel frontal. Una vez seleccionado un botón, es posible cambiar su valor o parámetro con<br />
los botones de valor arriba/abajo.<br />
<strong>Trigger</strong> <strong>IO</strong> ofrece dos tipos de funciones – Kit y Global. Las funciones de kit sólo afectan a los parámetros de disparo<br />
de ese kit particular, mientras que las funciones globales afectan a un conjunto específico de parámetros en todos<br />
los kits.<br />
FUNC<strong>IO</strong>NES DE KIT<br />
KIT – Un kit, conocido también como preset (ajuste predeterminado), es un conjunto de parámetros que describen diferentes<br />
configuraciones de <strong>Trigger</strong> <strong>IO</strong>, tales como los números de notas MIDI asignados, los canales MIDI y los mensajes de cambio<br />
de programa asociados. Hay 21 kits disponibles para cargar, modificar y almacenar. En la función de kit, es posible usar los<br />
botones de valor arriba/abajo para recorrer y cargar diferentes kits.<br />
PROGRAM CHANGE (Cambio de programa) – Un mensaje de cambio de programa es un mensaje MIDI que se usa para<br />
enviar datos a dispositivos a fin de hacer que cambien a un nuevo programa o, en otras palabras, banco de sonidos. En<br />
esencia, los mensajes de cambio de programa le permiten indicarle a su dispositivo de hardware o software qué sonido tocar.<br />
A cada kit se le puede asignar un mensaje de cambio de programa exclusivo (0-127) que se envía cuando se carga el kit. Por<br />
defecto, se asigna el mensaje de cambio de programa de cada kit a “---“, que significa que no envía ningún mensaje de cambio<br />
de programa cuando se cargan los kits.<br />
TRIG MIDI CHANNEL (Canal MIDI de disparo) – Canal MIDI por el que un disparador específico envía su información. Para<br />
seleccionar qué canal MIDI de disparo desea editar, acople el disparador.<br />
TRIG MIDI NOTE # (Nº de nota MIDI de disparo) – Número de nota MIDI que envía un disparador específico. Para<br />
seleccionar qué número de nota MIDI de disparo desea editar, acople el disparador.<br />
FUNC<strong>IO</strong>NES GLOBALES<br />
Los siguientes parámetros afectan a la entrada de cada disparador a nivel global, independientemente del kit<br />
específico con el que esté trabajando. Para ajustar los parámetros globales de un disparador, es necesario que<br />
seleccione el disparador a editar disparándolo —esto se denomina a menudo modo “Chase”. Una vez seleccionado<br />
el disparador, puede ajustar su parámetro con los botones de valor arriba/abajo. Para seleccionar otro disparador,<br />
simplemente dispárelo.<br />
GAIN (Ganancia) – El parámetro de ganancia ajusta la sensibilidad del pad o disparador. Con un ajuste alto de la ganancia,<br />
no es necesario golpear el pad o disparador muy fuerte para obtener una salida de velocidad máxima. Por el contrario, con un<br />
ajuste bajo de la ganancia, es más difícil obtener una salida de velocidad máxima cuando se golpea el pad o disparador. Si<br />
encuentra muy fácil obtener la máxima velocidad (127) cuando golpea un pad o disparador específico, es conveniente que<br />
ajuste su ganancia a un valor más bajo.<br />
VELOCITY CURVE (Curva de velocidad) – La curva de velocidad describe cómo varía la velocidad del disparador con la fuerza<br />
aplicada. Ésta es una función útil cuando trata de personalizar la forma en que un disparador responde a su estilo de<br />
interpretación. Las diferentes curvas de velocidad tienen asociadas distintas relaciones entrada/salida y causan una respuesta<br />
diferente, de modo que conviene tomarse cierto tiempo para familiarizarse con la forma en que la configuración de la curva de<br />
velocidad se corresponde con la manera en que a usted le gusta tocar. Las diferentes opciones de curva de velocidad son:<br />
“Lin” – Lineal<br />
“Cst” – Constante (127)<br />
“Off” – Desplazada<br />
“EP” – Exponencial (4 disponibles)<br />
5<br />
“LG” – Logarítmica (4 disponibles)<br />
“SP” – Spline (curva matemática) (4 disponibles)
THRESHOLD (Umbral)– Se puede producir un disparo falso cuando un disparador se acopla accidentalmente, a menudo<br />
debido a vibraciones del escenario. El ajuste del umbral evita los disparos en falso. El valor del umbral es la mínima velocidad<br />
necesaria para que el disparador la registre y produzca datos de salida. Cuando se edita un pedal hi-hat, la función de umbral<br />
tiene un significado ligeramente diferente.<br />
NOTA: Para el pedal hi-hat, el valor del umbral describe la mínima distancia entre posiciones del pedal, cuando se<br />
cambian direcciones, necesaria para que <strong>Trigger</strong> <strong>IO</strong> produzca a la salida un valor de CC. Si desea usar el pedal hi-hat<br />
para matices sutiles, es conveniente que ajuste el umbral del pedal hi-hat a un valor bajo.<br />
X-TALK (Diafonía) – Se produce diafonía cuando se disparan falsamente disparadores muy próximos entre sí. Por ejemplo,<br />
cuando se usan disparadores de tambores acústicos montados en una batería, al golpear un determinado tambor puede<br />
ocurrir que los tambores vibren y se disparen también otros disparadores. La función X-Talk describe el grado en el que<br />
<strong>Trigger</strong> <strong>IO</strong> intenta rechazar la diafonía. Los valores positivos de X-Talk intentan suprimir inteligentemente la diafonía. Si llegan<br />
casi simultáneamente un disparo de gran intensidad sonora y uno muy suave, la función X-Talk supone que el más suave es<br />
diafonía y suprime su sonido. Cuanto mayor es el valor de X-Talk, mayores son las velocidades que se suprimen. Esto<br />
significa que cuando use valores altos de X-Talk, no puede tocar notas fuertes y suave simultáneamente. Con un valor 7,<br />
puede ser difícil incluso tocar un redoble de tambor.<br />
NOTA: Para el pedal hi-hat, la función X-Talk se usa como función de calibración. Le permite calibrar el pedal para<br />
óptimo funcionamiento. Si se selecciona un pedal hi-hat, aparece “CAL” en la pantalla. Puede ajustar la calibración<br />
manualmente o dejar que <strong>Trigger</strong> <strong>IO</strong> la ajuste automáticamente dejando el pedal en posición hacia arriba y pulsando<br />
simultáneamente los botones valor arriba y valor abajo. De esta forma, el pedal se calibra automáticamente.<br />
RETRIGGER (Redisparo) – El parámetro de redisparo describe cómo <strong>Trigger</strong> <strong>IO</strong> interpreta y produce disparos sucesivos<br />
provenientes de la misma entrada. Este parámetro es el tiempo mínimo entre disparos sucesivos necesario para generar un<br />
segundo sonido. Si escucha un sonido llameante, debe elevar el valor de Retrigger.<br />
TRIGGER TYPE (Tipo de disparo) – Asegúrese de que el tipo de su disparo esté configurado correctamente antes de editarlo o<br />
usarlo. Si el tipo de disparo se configura incorrectamente, puede no funcionar bien o no funcionar en absoluto. Debe<br />
seleccionar un tipo de disparo que se adapte a su disparo específico, como se muestra en la tabla de más abajo. Si tiene un<br />
disparo de tambor de zona única, ignore la columna “nuca” de la tabla. Seleccione PP si tiene un disparador piezoeléctrico o<br />
SS si tiene uno de interruptor. Si tiene un tambor de zona dual, use un cable TRS y seleccione el tipo apropiado en la tabla de<br />
más abajo. Si tiene un tambor de zona dual pero sólo un cable TS, puede usar todavía la zona primaria (punta) pero no la<br />
secundaria (nuca). <strong>Trigger</strong> <strong>IO</strong> detecta automáticamente los pedales hi-hat, por lo que no es necesario configurar el tipo de<br />
disparo.<br />
TIPO DE DISPARO PUNTA NUCA<br />
PIEZOELÉCTRICO PIEZOELÉCTRICO<br />
INTERRUPTOR INTERRUPTOR<br />
PIEZOELÉCTRICO INTERRUPTOR<br />
INTERRUPTOR PIEZOELÉCTRICO<br />
INTERRUPTOR COMO PEDAL DE SOSTENIDO*<br />
PEDAL HI-HAT**<br />
*Para usar con interruptores de pedal. Cuando se pulsa el interruptor de pedal, genera<br />
un mensaje de sostenido (MIDI CC 64). Cuando se presiona, cancela el sostenido.<br />
**Los pedales hi-hat se detectan automáticamente, de modo que no es necesario configurar un tipo de disparo.<br />
CÓMO GUARDAR LOS PARÁMETROS<br />
Si introdujo cambios a los parámetros de kit y globales (como cambiar números de nota o canales MIDI o parámetros<br />
de disparo), notará que el LED que está junto a kit comienza a parpadear. Esto significa que hay cambios que aún<br />
no se guardaron. Para guardar estos cambios, use los botones de función arriba/abajo para volver a la función de<br />
kit. De esta forma se guardan los cambios que hizo. Como alternativa, si hizo cambios pero no desea guardarlos,<br />
pulse los botones de función abajo y valor abajo simultáneamente. De esta forma se cancelan los cambios<br />
efectuados después de cargar el kit.<br />
CÓMO ENVIAR MENSAJES<br />
• Para enviar un mensaje All Notes Off (Desactivar todas las<br />
notas), pulse los botones de función arriba y función abajo<br />
simultáneamente.<br />
• Para enviar un mensaje Return to Default Value (Volver al valor<br />
por defecto), pulse los botones de función abajo y valor abajo<br />
simultáneamente.<br />
• Para enviar un mensaje Factory Reset (Reponer a condición de<br />
fábrica), mantenga presionados los botones valor arriba y valor<br />
abajo simultáneamente mientras enciende el <strong>Trigger</strong> <strong>IO</strong>.<br />
Aparece “rES” en la pantalla para hacerle saber que se <strong>Trigger</strong><br />
<strong>IO</strong> se reinicializó.<br />
INFORMACIÓN ADIC<strong>IO</strong>NAL<br />
Para obtener información adicional, vea el <strong>Manual</strong> de referencia incluido.<br />
6<br />
• Para solicitar un SysEx Data Dump (Volcado de datos<br />
SysEx) desde <strong>Trigger</strong> <strong>IO</strong>, pulse los botones de<br />
función arriba y valor arriba simultáneamente. De<br />
esta forma, se transfieren todos los ajustes<br />
predeterminados de <strong>Trigger</strong> <strong>IO</strong> a su aplicación SysEx.<br />
• Para transferir datos de SysEx a <strong>Trigger</strong> <strong>IO</strong>,<br />
simplemente reproduzca los datos de SysEx que<br />
desea transferir a <strong>Trigger</strong> <strong>IO</strong>.
SCHÉMA D’INSTALLAT<strong>IO</strong>N<br />
Veuillez examiner le schéma suivant afin de brancher le <strong>Trigger</strong> <strong>IO</strong> correctement.<br />
BRANCHER 2 COMMUTATEURS AU PIED ICI<br />
BRANCHER D'AUTRES DÉCLENCHEURS ICI<br />
7<br />
BLOC D’ALIMENTAT<strong>IO</strong>N<br />
(OPT<strong>IO</strong>NNEL)<br />
VERS MODULE MIDI EXTERNE<br />
VERS L’ORDINATEUR<br />
1. Avant de mettre le <strong>Trigger</strong> <strong>IO</strong> sous tension, branchez tous les déclencheurs, pads, commutateurs aux pieds,<br />
appareils MIDI et autres modules externes tel qu’indiqué ci-dessus. Si vous désirez utiliser le <strong>Trigger</strong> <strong>IO</strong> avec<br />
un ordinateur, branchez un câble USB depuis le <strong>Trigger</strong> <strong>IO</strong> au port USB de l’ordinateur.<br />
2. Branchez une source d’alimentation au <strong>Trigger</strong> <strong>IO</strong>. Il y a deux façons d’alimenter le <strong>Trigger</strong> <strong>IO</strong> :<br />
a. Branchez le <strong>Trigger</strong> <strong>IO</strong> au port USB d’un ordinateur – le port USB de l’ordinateur fournit<br />
l'alimentation.<br />
b. Branchez un adaptateur c.c. de 9 V au <strong>Trigger</strong> <strong>IO</strong>.<br />
3. Utilisez l’interrupteur sur le panneau arrière du <strong>Trigger</strong> <strong>IO</strong> pour le mettre sous tension.<br />
Important : Veuillez utiliser des câbles appropriés pour relier les déclencheurs au <strong>Trigger</strong> <strong>IO</strong>. Pour des<br />
déclencheurs à une zone, veuillez utiliser des câbles TS pour les relier au <strong>Trigger</strong> <strong>IO</strong>. Pour des déclencheurs à<br />
deux zones, veuillez utiliser des câbles TRS. Utiliser des câbles TS pour relier des déclencheurs à deux zones<br />
au <strong>Trigger</strong> <strong>IO</strong>, vous permettra d’utiliser que la zone primaire (bout) de la batterie.<br />
INSTALLAT<strong>IO</strong>N DE L’ORDINATEUR<br />
Le <strong>Trigger</strong> <strong>IO</strong> est un appareil prêt à l’utilisation (Plug-and-Play) sous Mac OS X et Windows EP, il ne nécessite donc<br />
pas de pilote ou de logiciel spécial. Le <strong>Trigger</strong> <strong>IO</strong> est reconnu automatiquement une fois qu’il est branché au port<br />
USB de l’ordinateur.<br />
Afin d’utiliser le <strong>Trigger</strong> <strong>IO</strong> avec vos applications, vous devrez l’ajouter en tant qu’appareil d’entrée MIDI dans les<br />
préférences de vos applications. Veuillez consulter la documentation fournie avec vos logiciels afin d'apprendre<br />
comment sélectionner et activer les appareils d'entrée MIDI.<br />
IMPORTANT : Veuillez vous assurer de brancher et de mettre le <strong>Trigger</strong> <strong>IO</strong> sous tension avant de lancer toute<br />
application logicielle avec laquelle vous désirez utiliser le <strong>Trigger</strong> <strong>IO</strong>. Autrement, le logiciel ne reconnaîtra pas le<br />
<strong>Trigger</strong> <strong>IO</strong>.<br />
LATENCE AUD<strong>IO</strong> : Si vous éprouvez un retard significatif lorsque vous déclenchez des sons dans votre logiciel,<br />
vous aurez besoin d'ajuster les réglages de latence (mémoire tampon) aux plus petites valeurs. Ces réglages<br />
peuvent être faits à partir du menu Préférences de votre logiciel. De plus, vous pouvez télécharger du Web un pilote<br />
audio AS<strong>IO</strong> gratuit, tel que le AS<strong>IO</strong>4ALL que vous pouvez trouver au www.asio4all.com. Ces pilotes améliorent<br />
habituellement la performance audio et permettent l’utilisation de mémoires tampons de plus petite taille.
CARACTÉRISTIQUES DU PANNEAU AVANT<br />
1. FUNCT<strong>IO</strong>N (HAUT/BAS) – Ces touches permettent de parcourir les fonctions du <strong>Trigger</strong> <strong>IO</strong>.<br />
2. VALUE (HAUT/BAS) – Ces touches permettent parcourir les réglages et les paramètres pour les différentes<br />
fonctions.<br />
3. DEL DE FONCT<strong>IO</strong>N – Chaque fonction sur le <strong>Trigger</strong> <strong>IO</strong> est jumelée avec une DEL correspondante sur le<br />
panneau d’affichage. Ces DEL s’allument selon la fonction qui est en cours de sélection.<br />
4. ÉCRAN D’AFFICHAGE DEL – L’écran DEL affiche de l’information concernant l’état du <strong>Trigger</strong> <strong>IO</strong>. L’écran est<br />
également doté de deux petites DEL, « ACTIVITY » qui s’allume chaque fois qu'un déclencheur génère un<br />
message « Note On », et « TRIG B » qui s'allume lorsque la zone secondaire (cercle) d’un déclencheur génère<br />
un message « Note On ».<br />
SOMMAIRE DES FONCT<strong>IO</strong>NS<br />
Le <strong>Trigger</strong> <strong>IO</strong> est doté de fonctions programmables qui peuvent être accédé à l’aide des touches FUNCT<strong>IO</strong>N<br />
haut/bas sur le panneau avant. Une fois la fonction sélectionnée, vous pouvez modifier sa valeur ou ses paramètres<br />
à l’aide des touches VALUE haut/bas.<br />
Le <strong>Trigger</strong> <strong>IO</strong> est doté de deux ensembles de fonctions – Kit et Global. Les fonctions Kit affectent les réglages du<br />
déclencheur pour ce kit en particulier, alors que les fonctions Global affectent les réglages du déclencheur pour tous<br />
les kits.<br />
FONCT<strong>IO</strong>NS KIT<br />
KIT – Un Kit, ou préréglage, est un ensemble de paramètres qui identifient différentes configurations du <strong>Trigger</strong> <strong>IO</strong>, tel que les<br />
numéros de notes MIDI, les canaux MIDI et les messages associés aux modifications de programme. Il y a 21 kits disponibles<br />
que vous pouvez charger, modifier et sauvegarder. Lorsqu’en fonction Kit, vous pouvez utiliser les touches haut/bas pour<br />
parcourir et charger différents kits.<br />
PROGRAM CHANGE – Un message « Program change », ou de changement de programme, est un message MIDI utilisé<br />
pour transmettre des données à des appareils pour qu’ils effectuent un changement de programme, ou de banque de sons.<br />
Ce message (Program Change) permet d’indiquer à un module matériel ou logiciel quels sons utiliser. Chaque kit peut être<br />
assigné un message « Program Change » unique (0 - 127) qui est envoyé chaque fois que ce kit est chargé. Par défaut, un<br />
message de changement de programme de « --- » signifie qu’aucun message de changement de programme ne sera<br />
acheminé lorsque ce kit sera chargé.<br />
TRIG MIDI CHANNEL – C’est le canal MIDI qu’utilise le déclencheur pour acheminer les données. Pour sélectionner un canal<br />
MIDI à modifier, actionnez le déclencheur.<br />
TRIG MIDI NOTE # - C’est le numéro de note MIDI qui est envoyé par le déclencheur. Pour sélectionner un des numéros de<br />
note MIDI à modifier, actionnez le déclencheur.<br />
FONCT<strong>IO</strong>NS GLOBALES<br />
Les paramètres suivants règlent le fonctionnement général de chaque déclencheur, sans tenir compte du kit avec lequel vous<br />
travaillez. Pour modifier les paramètres globaux d’un déclencheur, vous devez le sélectionner en le déclenchant – reconnu<br />
comme le mode Chase. Une fois le déclencheur sélectionné, vous pouvez modifier ses paramètres à l’aide des touches<br />
VALUE haut/bas. Pour sélectionner un autre déclencheur, actionnez-le.<br />
GAIN – Ce paramètre permet d’ajuster la sensibilité du pad ou du déclencheur. Avec un réglage élevé, vous n’avez pas à<br />
frapper très fort pour atteindre le maximum de vitesse de sortie. Par contre, avec un réglage faible, vous devez frapper très fort<br />
pour atteindre le maximum de vitesse de sortie. Si vous atteignez très facilement la vitesse maximale (127) lorsque vous<br />
frappez un pad/déclencheur il sera peut-être préférable de diminuer sa sensibilité.<br />
VELOCITY CURVE – Une courbe de vélocité indique comment la sensibilité du déclencheur varie en fonction de la force de<br />
frappe. Fonction très utile lors de la personnalisation des pads ou des déclencheurs. Des vélocités différentes ont différents<br />
ratios d’entrée/sorties qui leur sont propres, prenez votre temps pour vous familiariser avec les réglages. Les options pour la<br />
vélocité sont :<br />
« Lin » – Linéaire<br />
« Cst » – Constante (127)<br />
« Off » – Décalage<br />
« EP » – Exponentielle (4 disponibles)<br />
8<br />
« LG » – Logarithmique (4 disponibles)<br />
« SP » – Spline (4 disponibles)
THRESHOLD – Une production accidentelle de son peut être déclenchée par les vibrations de la scène. Les paramètres du<br />
seuil permettent de prévenir la production accidentelle de son. La valeur du seuil est le niveau de dynamique minimale à partir<br />
duquel le déclencheur est activé. La fonction Threshold a une utilité légèrement différente pour la pédale Charleston.<br />
NOTE : Pour la pédale Charleston, la valeur des paramètres du seuil indique la distance minimum entre les positions de<br />
la pédale, en changeant de directions, le <strong>Trigger</strong> <strong>IO</strong> doit produire une valeur CC. Si vous aimez utiliser la pédale<br />
Charleston pour produire des nuances subtiles, diminuez la valeur des paramètres du seuil.<br />
X-TALK – Il peut se produire de l’interférence lorsque des déclencheurs sont près les uns des autres et qu’ils sont déclenchés<br />
accidentellement. Par exemple, lorsque des déclencheurs pour batterie acoustique sont montés sur une batterie et que vous<br />
frappiez sur une des composantes, les vibrations produites peuvent déclencher les autres déclencheurs. La fonction X-Talk<br />
permet de régler le <strong>Trigger</strong> <strong>IO</strong> afin qu’il élimine l'interférence. Des valeurs X-Talk positives permettent d'éliminer de façon<br />
intelligente les interférences. Si un déclenchement fort et doux se produisent quasi simultanément, la fonction X-Talk assume<br />
que le déclenchement doux est provoqué par de l'interférence et l'élimine. Plus la valeur de la fonction X-Talk est haute, plus<br />
les hautes vitesses seront supprimées. C’est-à-dire lorsque vous augmentez les valeurs de la fonction X-Talk, vous ne pouvez<br />
pas jouer des notes fortes et douces simultanément. Même au réglage 7, il peut être difficile de faire un roulement de tambour.<br />
NOTE : Pour une pédale Charleston, la fonction X-Talk sert de calibration. Ceci vous permet de calibrer la pédale pour<br />
une performance optimale. Si une pédale Charleston est sélectionnée, « CAL » s’affiche à l’écran. Vous pouvez régler<br />
la calibration manuellement ou vous pouvez laisser le <strong>Trigger</strong> <strong>IO</strong> faire en laissant la pédale en position ouverte et en<br />
appuyant sur les touches du haut et du bas de VALUE en même temps. Le calibrage de la pédale se fera<br />
automatiquement.<br />
RETRIGGER – Les réglages de la fonction Retrigger permettent au <strong>Trigger</strong> <strong>IO</strong> d’interpréter et de réagir aux déclenchements<br />
successifs provenant de la même entrée. Le réglage de la fonction Retrigger représente le temps minimum requis entre<br />
chaque déclenchement successif. Si vous entendez un son parasitaire, augmentez la valeur du réglage de la fonction<br />
Retrigger.<br />
TRIGGER TYPE – Veuillez vous assurer de configurer correctement le type de déclencheur avant de l'utiliser ou d'effectuer des<br />
modifications à ses paramètres. Si le type de déclencheur est incorrect, le déclencheur peut ne pas fonctionner correctement ou<br />
même ne pas fonctionner du tout. Vous devez sélectionner le type de déclencheur qui correspond spécifiquement au<br />
déclencheur utilisé, tel qu’indiqué dans le tableau ci-dessous. Si vous avez un déclencheur à une zone, ne pas tenir compte de<br />
la colonne (cercle) ci-dessous. Sélectionnez PP si vous avez un capteur piézo ou SS si vous avez un commutateur. Si vous<br />
avez une batterie à zone double, utilisez un câble TRS et sélectionnez le type approprié du tableau ci-dessous. Si vous avez<br />
une batterie à deux zones, mais que vous utilisez un câble TS, vous pourrez utiliser la zone primaire (peau), mais pas la zone<br />
secondaire (cercle). Les pédales Charleston sont automatiquement détectées par le <strong>Trigger</strong> <strong>IO</strong>, vous n’avez pas à sélectionner<br />
le type de déclencheur.<br />
TYPE DE PEAU CERCLE<br />
DÉCLENCHEUR<br />
PIEZO PIEZO<br />
COMMUTATEUR COMMUTATEUR<br />
PIEZO COMMUTATEUR<br />
COMMUTATEUR PIEZO<br />
COMMUTATEUR AU PIED*<br />
PÉDALE CHARLESTON**<br />
*À utiliser avec des pédales. Lorque la pédale est enfoncée, elle génère un message de maintenir la note (MIDI CC 64).<br />
Lorsque la pédale est relâchée, la note est relâchée.<br />
**Les pédales de Charleston sont détectées automatiquement, vous n’avez pas à sélectionner le type de déclencheur.<br />
SAUVEGARDE DES PARAMÈTRES<br />
Si vous avez apporté des modifications aux paramètres Kit et aux paramètres globaux (p. ex. modifier des numéros<br />
de note MIDI, canaux, réglages des déclencheurs), le témoin DEL Kit clignote. Ceci indique que les modifications<br />
n’ont pas été sauvegardées. Pour les sauvegarder, veuillez utiliser les touches FUNCT<strong>IO</strong>N haut/bas pour retourner<br />
à la fonction Kit. Les modifications effectuées sont automatiquement sauvegardées. Ou, si vous avez fait des<br />
modifications, mais que vous ne désirez pas les sauvegarder, appuyez sur les touches du bas de FUNCT<strong>IO</strong>N et de<br />
VALUE simultanément. Ceci permet d’annuler toutes les modifications effectuées après le chargement du kit.<br />
TRANSMISS<strong>IO</strong>N DES MESSAGES<br />
• Pour envoyer un message « All Notes Off » (Extinction des<br />
notes), appuyez simultanément sur la touche du haut et du bas<br />
de FUNCT<strong>IO</strong>N.<br />
• Pour envoyer un message « Return to Default Value » (restaurer<br />
valeur par défaut), appuyez simultanément sur la touche du bas<br />
de FUNCT<strong>IO</strong>N et de VALUE.<br />
• Pour envoyer un message « Factory Reset » (restaurer valeur<br />
d’usine), appuyez simultanément sur la touche du haut et du<br />
bas de VALUE. Le message « rES » s'affiche à l’écran afin de<br />
vous laisser savoir que le <strong>Trigger</strong> <strong>IO</strong> a été réinitialisé.<br />
9<br />
• Vous pouvez demander une transmission en bloc des<br />
données de configuration du système du <strong>Trigger</strong> <strong>IO</strong> en<br />
appuyant sur les touches du haut de FUNCT<strong>IO</strong>N et de<br />
VALUE. Ceci permet de transmettre tous les<br />
préréglages du <strong>Trigger</strong> <strong>IO</strong> à votre application SysEx.<br />
• Pour transmettre des données SysEx au <strong>Trigger</strong> <strong>IO</strong>,<br />
faites tout simplement jouer les données SysEx que<br />
vous désirez transférer au <strong>Trigger</strong> <strong>IO</strong>.<br />
INFORMAT<strong>IO</strong>N SUPLÉMENTAIRE<br />
Pour obtenir des informations supplémentaires, veuillez consulter le guide de référence inclus.
ANSCHLUSSÜBERSICHT<br />
Bitte beachten Sie die folgende Übersicht zur Verbindung Ihres <strong>Trigger</strong> <strong>IO</strong>.<br />
ANSCHLUSS FÜR 2-TASTEN FUßSCHALTER<br />
ANSCHLUSS FÜR ZUSÄTZLICHE TRIGGER<br />
10<br />
NETZTEIL<br />
(OPT<strong>IO</strong>NAL)<br />
ZUM EXTERNEN MIDI MODUL<br />
ZUM COMPUTER<br />
1. Schließen Sie vor dem Einschalten des <strong>Trigger</strong> <strong>IO</strong> alle <strong>Trigger</strong>, Pads, Fußschalter, MIDI Geräte und externen<br />
Module, wie oben abgebildet, an. Wenn Sie beabsichtigen, das <strong>Trigger</strong> <strong>IO</strong> mit einem Computer zu verwenden,<br />
verbinden Sie ein USB Kabel vom USB Port des <strong>Trigger</strong> <strong>IO</strong> zum USB Anschluss Ihres Computers.<br />
2. Verbinden Sie das <strong>Trigger</strong> O mit einer Spannungsquelle. Dazu stehen Ihnen zwei Möglichkeiten zur Verfügung:<br />
a. Schließen Sie das <strong>Trigger</strong> <strong>IO</strong> an den USB Port eines Computers an – Der USB Bus des Computers<br />
versorgt das gerät mit der notwendigen Spannung.<br />
b. Schließen Sie ein optionales 9V Wechselstromnetzteil an das <strong>Trigger</strong> <strong>IO</strong> an.<br />
3. Schalten Sie das <strong>Trigger</strong> <strong>IO</strong> mit dem Netzschalter (POWER) an der Rückseite des Gerätes ein.<br />
Wichtig: Bitte verwenden Sie zum Anschluss der <strong>Trigger</strong> die richtigen Kabel. Einzonentrigger werden mit<br />
6,3mm Monoklinkenkabeln mit dem <strong>Trigger</strong> <strong>IO</strong> verbunden. Beim Anschluss von Zweizonentriggern Sie darauf,<br />
dass Sie diese mit 6,3mm Stereoklinkenkabeln an das <strong>Trigger</strong> <strong>IO</strong> anschließen. Werden Zweizonentrigger mit<br />
Monoklinkenkabeln verbunden kann nur die primäre Zone (Spitze) des <strong>Trigger</strong>s verwendet werden.<br />
COMPUTER INSTALLAT<strong>IO</strong>N<br />
Da das <strong>Trigger</strong> <strong>IO</strong> sowohl unter Mac OS X als auch unter Windows XP als Plug-and-Play Gerät funktioniert, ist die<br />
Installation spezieller Treiber nicht notwendig. Das <strong>Trigger</strong> <strong>IO</strong> wird nach dem Anschluss an den USB Port des<br />
Computers automatisch erkannt.<br />
Zur Verwendung des <strong>IO</strong> mit einem Softwareprogramm müssen Sie das <strong>Trigger</strong> <strong>IO</strong> in den Einstellungen der Software<br />
als MIDI Gerät auswählen und aktivieren. Bitte lesen Sie in der Anleitung der Software nach, wie MIDI Geräte<br />
ausgewählt und aktiviert werden können.<br />
WICHTIG: Achten Sie bitte darauf, dass das <strong>Trigger</strong> <strong>IO</strong> vor dem Start eines Programms mit dem Computer<br />
verbunden und in Betrieb ist. Anderenfalls erkennt das Programm das <strong>Trigger</strong> <strong>IO</strong> nicht als angeschlossenes Gerät.<br />
ÜBER AUD<strong>IO</strong> LATENZ: Falls es beim <strong>Trigger</strong>n von Sounds Ihrer Software zu merklichen Verzögerungen kommt,<br />
sollten Sie die Latenz- oder Audioblockeinstellung auf kleinere Werte bringen. Diese Einstellungen werden zumeist in<br />
den Voreinstellungen einer Software vorgenommen. Es gibt auch kostenlose AS<strong>IO</strong> Treiber, wie den AS<strong>IO</strong>4ALL<br />
Treiber, den Sie auf der Webseite www.asio4all.com finden. Diese Treiber verbessern oft die Audioleistungsfähigkeit<br />
und ermöglichen den Einsatz geringer Audioblockgrößen.
ÜBERBLICK ÜBER DIE VORDERSEITE<br />
1. FUNCT<strong>IO</strong>N AUF/AB – Mit diesen Tasten wechseln Sie durch die verschiedenen Funktionen des <strong>Trigger</strong> <strong>IO</strong>.<br />
2. VALUE AUF/AB – Diese Tasten verwenden Sie, um Kits oder die Parameter der verschiedenen Funktionen aufzurufen.<br />
3. FUNCT<strong>IO</strong>N LEDs – Jede Funktion des <strong>Trigger</strong> <strong>IO</strong> wird durch eine zugehörige LED visualisiert. Diese LED gibt<br />
Aufschluss über die gegenwärtig ausgewählte Funktion.<br />
4. LED ANZEIGE – Die LED Anzeige gibt Statusinformationen des <strong>Trigger</strong> <strong>IO</strong> wieder. Die Anzeige besitzt zudem eine<br />
kleine “Activity” LED, die jedes Mal, wenn ein <strong>Trigger</strong> einen Note On Befehl erzeugt, aufleuchtet. Eine weitere “Trig B”<br />
LED leuchtet auf, wenn eine zweite Zone eines Zweizonentriggers einen Note On Befehl erzeugt.<br />
ÜBERSICHT ÜBER DIE FUNKT<strong>IO</strong>NEN<br />
Das <strong>Trigger</strong> <strong>IO</strong> besitzt programmierbare Funktionen. Diese erreichen Sie mit den FUNCT<strong>IO</strong>N AUF/AB Tasten der<br />
Vorderseite. Nach Auswahl einer Funktion können Sie den Wert oder einen Parameter über die VALUE AUF/AB<br />
Tasten ändern.<br />
Die Funktionen des <strong>Trigger</strong> <strong>IO</strong> unterteilen sich in Kit- und Global Funktionen. Kit Funktionen beeinflussen die<br />
<strong>Trigger</strong>einstellungen eines einzelnen Kits. Global Funktionen ändern übergreifend für alle Kits eine bestimmte<br />
<strong>Trigger</strong>einstellung.<br />
KIT FUNKT<strong>IO</strong>NEN<br />
KIT – Ein Kit, auch Preset genannt, vereint verschiedene konfigurierbare Parameter, wie MIDI Note Nummern, MIDI Kanäle<br />
und zugewiesene Programmwechselbefehle (Program Change). Insgesamt stehen Ihnen 21 Kits zum Laden, Verändern und<br />
Speichern zur Verfügung. Innerhalb der Kit Funktion können Sie die VALUE AUF/AB Tasten zum Anwählen und Laden der<br />
Kits verwenden.<br />
PROGRAM CHANGE – Ein Programmwechselbefehl ist ein MIDI Befehl, der zu Geräten gesendet wird, die daraufhin zu<br />
einem anderen Programm (also einer anderen Bank von Sounds) wechselt. Ein Programmwechselbefehl gibt Ihrer Software<br />
oder Ihrem Sound Modul also die Anweisung, welcher Klang gespielt werden soll. Jedes Kit kann einen eigenen<br />
Programmwechselbefehl (0-127) ausgeben, der beim Laden des Kits ausgegeben wird. In der Grundeinstellung ist der<br />
Programmwechselbefehl jedes Kits auf “---“ eingestellt. Es werden also keine Programmwechsel gesendet, wenn die Kits<br />
geladen werden.<br />
TRIG MIDI CHANNEL – Das ist der MIDI Kanal, auf dem ein <strong>Trigger</strong> MIDI Befehle sendet. Um den zu bearbeitenden MIDI<br />
Kanal eines <strong>Trigger</strong>s festzulegen, schlagen Sie den entsprechenden <strong>Trigger</strong> an.<br />
TRIG MIDI NOTE # - Hier haben Sie die MIDI Note Nummer, die von einem <strong>Trigger</strong> gesendet wird. Die MIDI Note Nummer<br />
eines <strong>Trigger</strong>s, den Sie bearbeiten wollen, können Sie durch Anschlagen des <strong>Trigger</strong>s auswählen.<br />
GLOBAL FUNKT<strong>IO</strong>NEN<br />
Die folgenden Parameter beeinflussen jeden <strong>Trigger</strong> auf globaler Ebene, unabhängig davon, mit welchem Kit Sie gegenwärtig<br />
arbeiten. Zur Einstellung der globalen Parameter eines <strong>Trigger</strong>s, müssen Sie diesen auswählen, indem Sie einen<br />
<strong>Trigger</strong>impuls auslösen. Dieser Vorgang wird oft als Chase Modus bezeichnet. Nach der Auswahl des <strong>Trigger</strong>s lassen sich die<br />
Parameter mit den VALUE AUF/AB Tasten verändern. Zur Auswahl eines anderen <strong>Trigger</strong>s, schlagen Sie diesen einfach an.<br />
GAIN – Der Gain Parameter definiert die Empfindlichkeit des Pads oder <strong>Trigger</strong>s. Bei einer hohen Gain Einstellung müssen Sie<br />
das Pad oder den <strong>Trigger</strong> nicht sonderlich hart anschlagen, um die maximale Ausgangslautstärke (Velocity) zu erreichen. Mit<br />
einer niedrigen Gain Einstellung ist es andererseits schwieriger die Maximallautstärke beim Auslösen des <strong>Trigger</strong>impulses<br />
abzurufen. Wenn es Ihnen also leicht fällt, den größten Velocitywert (127) beim Anschlagen eines bestimmten Pads/<strong>Trigger</strong>s<br />
auszulösen, sollten Sie den Gain Parameter auf einen niedrigeren Wert einstellen.<br />
VELOCITY CURVE – Eine Velocity Curve (Anschlagkurve) bestimmt, wie sich die Anschlagempfindlichkeit in Abhängigkeit von<br />
der Anschlagstärke verändert. Mit dieser Funktion lässt sich das Ansprechverhalten eines <strong>Trigger</strong>s auf Ihre Spielweise perfekt<br />
anpassen. Die verschiedenen Velocity Curves besitzen unterschiedliche Ein- und Ausgangsverhältnisse und verursachen so ein<br />
unterschiedliches Ansprechverhalten. Nehmen Sie sich etwas Zeit, um die Velocity Curve Einstellungen kennen zu lernen. Die<br />
verschiedenen Velocity Curve Optionen sind:<br />
“Lin” – Linear<br />
“Cst” – Constant (127)<br />
“Off” – Offset<br />
“EP” – Exponential (4 x)<br />
11<br />
“LG” – Logarithmic (4 x)<br />
“SP” – Spline (4 x)
THRESHOLD – Fehlerhaftes <strong>Trigger</strong>ing kann Ihre Performance stören und tritt beispielsweise durch Vibrationen auf der Bühne<br />
auf. Die Threshold Einstellung beugt dem ungewollten <strong>Trigger</strong>n vor. Der Threshold Wert beschreibt die minimale Velocity, die<br />
zum <strong>Trigger</strong>n eines Sounds notwendig ist. Bei der Editierung eines Hi-Hat Pedals besitzt die Threshold Funktion eine etwas<br />
andere Bedeutung.<br />
HINWEIS: Bei einem Hi-Hat Pedal definiert der Threshold Wert den geringsten Abstand zwischen den Pedalpositionen<br />
bei der Änderung der „Trittrichtung“. Das ist notwenig, damit das <strong>Trigger</strong> <strong>IO</strong> einen CC (Command Change) Wert ausgibt.<br />
Wenn Sie das Hi-Hat Pedal nuanciert einsetzen wollen, sollten Sie den Hi-Hat Pedal Threshold niedrig einstellen.<br />
X-TALK – Crosstalk (Übersprechen) wird dann vorkommen, wenn benachbarte <strong>Trigger</strong> falsch getriggert werden. Wenn Sie<br />
beispielsweise akustische Drumtrigger, die auf Trommeln angebracht sind, verwenden, kann durch das Anschlagen einer<br />
bestimmten Drum durch Vibrationen andere <strong>Trigger</strong> auch ausgelöst werden. Die X-Talk Funktion definiert den Grad, auf dem<br />
das <strong>Trigger</strong> <strong>IO</strong> nicht auf Übersprechen reagiert. Positive X-Talk Werte führen zu einem intelligentem Unterdrücken des<br />
Übersprechens. Wenn ein sehr starker und ein sehr schwacher <strong>Trigger</strong>impuls fast gleichzeitig ankommen, nimmt dann die X-<br />
Talk Funktion an, dass der schwächere Impuls ein Übersprechen ist und sortiert ihn aus. Je höher der X-Talk Wert ist, desto<br />
höhere Velocity Werte werden unterdrückt. Das bedeutet, dass Sie bei hohen X-Talk Einstellungen harte und leichte Noten<br />
nicht gleichzeitig spielen können. Bei der Einstallung von 7, kann es sogar schwierig werden, einen Trommelwirbel zu spielen.<br />
HINWEIS: Bei einem Hi-Hat Pedal wird X-Talk als Kalibrierungsfunktion verwendet. Dadurch können Sie das Pedal auf<br />
Ihre Spielweise anpassen. Bei der Auswahl eines Hi-Hat Pedals sehen Sie im Display “CAL”. Sie können die<br />
Kalibrierung manuell vornehmen oder können durch das <strong>Trigger</strong> <strong>IO</strong> eine automatische Kalibrierung vornehmen lassen.<br />
Dazu treten Sie das Pedal nicht und drücken gleichzeitig die VALUE AUF und VALUE AB Tasten.<br />
RETRIGGER – Die Retrigger Einstellung definiert, wie das <strong>Trigger</strong> <strong>IO</strong> hintereinander gespielte <strong>Trigger</strong>impulse desselben<br />
<strong>Trigger</strong>eingangs interpretiert und ausgibt. Die Retrigger Einstellung regelt also den kleinsten Zeitabstand zwischen<br />
aufeinander folgenden <strong>Trigger</strong>n, um einen zweiten Sound zu generieren. Falls Sie also einen ungewollten Doppelschlag der<br />
<strong>Trigger</strong> hören, sollten Sie den Retrigger Wert erhöhen.<br />
TRIGGER TYPE – Bitte achten Sie auf die korrekte Einstellung des <strong>Trigger</strong> Types (<strong>Trigger</strong>art) eines <strong>Trigger</strong>s, bevor Sie ihn<br />
editieren oder verwenden. Wenn der <strong>Trigger</strong> Type nicht richtig definiert wurde, könnte Ihr <strong>Trigger</strong> nicht richtig funktionieren. Sie<br />
sollten den <strong>Trigger</strong> Type auswählen, der Ihrem speziellen <strong>Trigger</strong> entspricht. Verwenden Sie dazu bitte die untere Tabelle. Wenn<br />
Sie nur einen Einzonentrigger einsetzen, beachten Sie einfach die „Ring“ Spalte nicht. Wenn Sie einen Piezo <strong>Trigger</strong><br />
verwenden, wählen Sie PP aus. Bei einem Switch <strong>Trigger</strong> (z.B. Fußschalter) verwenden Sie die SS Einstellung. Falls Sie einen<br />
Zweizonentrigger einsetzen, schließen Sie es mit einem Stereoklinkenkabel an und wählen die entsprechende <strong>Trigger</strong>art gemäß<br />
der unteren Tabelle. Beim Anschluss eines Zweizonentriggers mit einem Monoklinkenkabel können Sie die erste Zone (der<br />
Spitze der Monoklinke zugeordnet) verwenden. Die zweite Zone (Ring) bleibt dann inaktiv. Hi-Hat Pedale werden automatisch<br />
durch das <strong>Trigger</strong> <strong>IO</strong> erkannt. Sie müssen dafür keinen <strong>Trigger</strong> Type festlegen.<br />
TRIGGER TYPE SPITZE RING<br />
PIEZO PIEZO<br />
SWITCH SWITCH<br />
PIEZO SWITCH<br />
SWITCH PIEZO<br />
SWITCH ALS SUSTAINPEDAL*<br />
HI-HAT PEDAL**<br />
*Zur Verwendung mit Fußschaltern. Beim Drücken des Fußschalters wird ein<br />
Sustain Befehl (MIDI CC 64). Wird das Pedal losgelassen wird das Sustain beendet.<br />
**Hi-Hat Fußpedale werden automatisch erkannt.<br />
Ein <strong>Trigger</strong> Type muss nicht ausgewählt werden.<br />
SPEICHERN VON PARAMETER EINSTELLUNGEN<br />
Nach dem Ändern von Kit sowie Global Parametern (z.B. geänderte MIDI Note Nummern, Kanälen, <strong>Trigger</strong><br />
Einstellungen), werden Sie bemerken, dass die LED neben Kit blinkt. Das bedeutet, dass Ihre Änderungen noch<br />
nicht gespeichert wurden. Zum Speichern von Änderungen verwenden Sie bitte die FUNCT<strong>IO</strong>N AUF/AB Tasten, um<br />
zur Kit Funktion zurückzukehren. Dadurch werden die vorgenommenen Einstellungen gespeichert. Wenn Sie<br />
Parameteränderungen nicht übernehmen wollen, drücken Sie die Tasten FUNCT<strong>IO</strong>N AB und VALUE AB<br />
gleichzeitig.<br />
SENDEN VON BEFEHLEN<br />
• Zum Senden eines All Notes Off Befehls (alle Noten aus) drücken<br />
Sie gleichzeitig die Tasten FUNCT<strong>IO</strong>N AUF und FUNCT<strong>IO</strong>N AB.<br />
• Zum Senden eines Return to Default Value Befehls (zurück zum<br />
Grundwert) drücken Sie die FUNCT<strong>IO</strong>N AB und VALUE AB Tasten<br />
gleichzeitig.<br />
• Um einen Factory Reset Befehl zu senden, halten Sie die Tasten<br />
VALUE UP und VALUE DOWN beim Einschalten des <strong>Trigger</strong> <strong>IO</strong><br />
gedrückt. Im Display sehen Sie die Meldung “rES” zur Bestätigung<br />
des Resets.<br />
12<br />
• Zur Anforderung einer SysEx Datenübertragung<br />
vom <strong>Trigger</strong> <strong>IO</strong> drücken Sie die Tasten FUNCT<strong>IO</strong>N<br />
AUF und VALUE AUF gleichzeitig. Dadurch<br />
werden die Daten aller Presets von Ihrem <strong>Trigger</strong><br />
<strong>IO</strong> zu einem SysEx Programm gesendet.<br />
• Zum Übertragen von SysEx Daten zum <strong>Trigger</strong> <strong>IO</strong><br />
spielen Sie diese Daten einfach mit einem SysEx<br />
Programm ab, das mit dem <strong>Trigger</strong> <strong>IO</strong> verbunden<br />
ist.<br />
ZUSÄTZLICHE INFORMAT<strong>IO</strong>NEN<br />
Weitere Hinweise finden Sie in der Bedienungsanleitung, die Sie online auf www.alesis.de finden.
SCHEMA DEI COLLEGAMENTI<br />
Studiare il seguente schema per collegare il <strong>Trigger</strong> <strong>IO</strong>.<br />
COLLEGARE A QUESTO LIVELLO UN INTERRUTTORE<br />
A PEDALE A 2 PULSANTI<br />
COLLEGARE A QUESTO LIVELLO<br />
TRIGGER AGGIUNTIVI<br />
13<br />
ADATTATORE DI ALIMENTAZ<strong>IO</strong>NE<br />
(OPZ<strong>IO</strong>NALE)<br />
A COMPUTER<br />
A MODULO MIDI ESTERNO<br />
1. Prima di accendere il <strong>Trigger</strong> <strong>IO</strong>, collegare tutti i trigger, i pad, gli interruttori a pedale, i dispositivi MIDI e i moduli<br />
esterni come illustrato in alto. Se si desidera utilizzare il <strong>Trigger</strong> <strong>IO</strong> con un computer, collegare il <strong>Trigger</strong> <strong>IO</strong><br />
stesso alla porta USB del computer servendosi di un cavo USB.<br />
2. Collegare una fonte di alimentazione al <strong>Trigger</strong> <strong>IO</strong>. Vi sono due modi possibili di alimentare il <strong>Trigger</strong> <strong>IO</strong>:<br />
a. Collegare il <strong>Trigger</strong> <strong>IO</strong> alla porta USB di un computer: il bus USB del computer stesso fornirà<br />
l’energia necessaria.<br />
b. Collegare un adattatore di alimentazione opzionale CA da 9V al <strong>Trigger</strong> <strong>IO</strong>.<br />
3. Servirsi dell’interruttore di alimentazione posto sul pannello posteriore del <strong>Trigger</strong> <strong>IO</strong> per accenderlo.<br />
Importante: servirsi dei giusti cavi per collegare i trigger al <strong>Trigger</strong> <strong>IO</strong>. In caso di trigger a zona singola, servirsi<br />
di cavi TS per collegarli al <strong>Trigger</strong> <strong>IO</strong>. Per trigger a doppia zona, assicurarsi di utilizzare cavi TRS. L’uso di cavi<br />
TS per il collegamento di trigger a doppia zona al <strong>Trigger</strong> <strong>IO</strong> consentirà unicamente l’uso della zona primaria<br />
(punta) della batteria.<br />
INSTALLAZ<strong>IO</strong>NE A COMPUTER<br />
In Mac OS X e in Windows XP, il <strong>Trigger</strong> <strong>IO</strong> è un dispositivo Plug and Play, dunque non è necessario installare driver<br />
o software particolari. Il <strong>Trigger</strong> <strong>IO</strong> verrà riconosciuto automaticamente una volta collegato alla porta USB del<br />
computer.<br />
Per utilizzare il <strong>Trigger</strong> Io con un’applicazione software, bisogna selezionare a abilitare il <strong>Trigger</strong> <strong>IO</strong> come dispositivo<br />
di ingresso MIDI tra le opzioni software. Consultare la documentazione del software per maggiori informazioni sulla<br />
selezione e l’abilitazione di dispositivi d’ingresso MIDI.<br />
IMPORTANTE: prima di lanciare qualsiasi applicazione software con cui si desidera utilizzare il <strong>Trigger</strong> <strong>IO</strong>,<br />
assicurarsi che sia collegato e acceso. In caso contrario, il software non riconoscerà il <strong>Trigger</strong> <strong>IO</strong> come collegato.<br />
NOTE CIRCA LA LATENZA AUD<strong>IO</strong>: se quando si attivano suoni a livello del software si sperimenta un notevole<br />
ritardo, è necessario regolare le impostazioni di latenza (o buffer) su valori inferiori. Tali regolazioni vengono spesso<br />
effettuate nel menu Preferences (opzioni). Inoltre, si può scaricare un driver audio gratuito AS<strong>IO</strong> da Internet, quale il<br />
driver AS<strong>IO</strong>4ALL, che si può trovare all’indirizzo www.asio4all.com. Questi driver tipicamente migliorano le<br />
prestazioni audio e permettono di utilizzare buffer di dimensioni limitate.
PANORAMICA PANNELLO ANTER<strong>IO</strong>RE<br />
1. FUNCT<strong>IO</strong>N UP/DOWN (funzione su/giù) – Questi tasti servono a selezionare le varie funzioni del <strong>Trigger</strong> <strong>IO</strong>.<br />
2. VALUE UP/DOWN (valore su/giù) – Questi tasti servono scorrere tra i kit e i parametri delle varie funzioni.<br />
3. FUNCT<strong>IO</strong>N LED (led funzione) – Ogni funzione del <strong>Trigger</strong> <strong>IO</strong> è associata a un corrispondente LED sul<br />
pannello. Questi LED riflettono la funzione correntemente selezionata.<br />
4. SCHERMO DEI LED - Lo schermo dei LED visualizza le informazioni circa lo stato del <strong>Trigger</strong> <strong>IO</strong>. Lo schermo<br />
presenta anche un piccolo LED “Activity” (attività) che si accenderà ogni volta che un trigger genera un<br />
messaggio Note On, e un LED “Trig B”che si accenderà quando la zona secondaria (anello) di un trigger a<br />
doppia zona genera un messaggio Note On.<br />
RIASSUNTO FUNZ<strong>IO</strong>NI<br />
Il <strong>Trigger</strong> <strong>IO</strong> presenta una serie di funzioni programmabili cui si può accedere tramite i tasti function up/down posti<br />
sul pannello frontale. Una volta selezionata una funzione, se ne può cambiare il valore o i parametri tramite i tasti<br />
value up/down.<br />
Il <strong>Trigger</strong> <strong>IO</strong> è dotato di due set di funzioni: Kit e Global. Le funzioni Kit influenzano unicamente le funzioni del trigger<br />
in un determinato kit, mentre le funzioni Global influenzano le impostazioni di un trigger specifico in tutti i kit.<br />
FUNZ<strong>IO</strong>NI KIT<br />
KIT – Un Kit, chiamato anche Preset, è una collezione di parametri che descrivono diverse configurazioni del <strong>Trigger</strong> <strong>IO</strong>, quali<br />
numeri di nota MIDI assegnati, canali MIDI e messaggi Program Change associati. Sono disponibili 21 kit da caricare,<br />
modificare e salvare. Quando ci si trova in funzione Kit, si possono usare i tasti value up/down per scorrere tra i kit e caricarli.<br />
PROGRAM CHANGE – Un messaggio Program Change è un messaggio MIDI impiegato per inviare dati ai dispositivi e per<br />
farli passare ad un nuovo programma o, in altre parole, banco di suoni. Fondamentalmente, i messaggi Program Change<br />
permettono di dire al dispositivo hardware o software quale suono riprodurre. Ad ogni kit può essere assegnato un messaggio<br />
Program Change unico (0-127) che sarà inviato ogniqualvolta viene caricato il Kit stesso. In via predefinita, il messaggio<br />
Program Change di ogni kit è assegnato a “---“, cosa che significa che non verranno caricati messaggi Program Change<br />
quando i kit vengono caricati.<br />
TRIG MIDI CHANNEL – Questo è il canale MIDI a cui un determinato trigger invia le informazioni. Per scegliere di quale trigger<br />
si desidera modificare il canale MIDI, attivare il trigger.<br />
TRIG MIDI NOTE # - Questo è il numero di nota MIDI che verrà inviato a un determinato trigger. Per scegliere di quale trigger<br />
si desidera modificare il numero di nota MIDI, attivare il trigger.<br />
FUNZ<strong>IO</strong>NI GLOBAL<br />
I seguenti parametri influenzeranno ogni ingresso trigger ad un livello globale, indipendentemente dal kit specifico<br />
con cui si sta lavorando. Per regolare i parametri globali di un trigger, selezionare il trigger da modificare, attivandolo;<br />
questa è spesso definita Chase Mode. Una volta selezionato un trigger, se ne possono regolare i parametri<br />
servendosi dei tasti value up/down. Per selezionare un altro trigger, basterà ingaggiarlo.<br />
GAIN (guadagno) – Il parametro Gain regola la sensibilità dei pad o dei trigger. Con un’impostazione di guadagno elevata, non<br />
sarà necessario battere il pad o il trigger con forza per ottenere un’uscita alla massima velocità. D’altro canto, con<br />
un’impostazione di guadagno bassa è più difficile ottenere un’uscita a velocità massima quando si colpisce il trigger. Se è molto<br />
facile raggiungere la massima velocità (127) quando si batte un determinato pad/trigger, se ne può impostare il guadagno ad<br />
un valore più basso.<br />
VELOCITY CURVE (curva di velocità) – Una curva di velocità descrive il variare della velocità di un trigger al variare della forza<br />
applicata. Questa funzione è utile quando si cerca di personalizzare la risposta di un trigger al proprio stile di suonare. Diverse<br />
curve di velocità presenteranno diversi rapporti ingresso/uscita ad essi associati e provocheranno una risposta diversa, quindi è<br />
bene prendersi del tempo per familiarizzare con il modo in cui l’impostazione della curva di velocità corrisponde al modo in cui<br />
piace suonare. Le diverse opzioni di curva di velocità sono:<br />
“Lin” – Lineare<br />
“Cst” – Costante (127)<br />
“Off” – Offset<br />
“EP” – Esponenziale (4 disponibili)<br />
14<br />
“LG” – Logaritmica (4 disponibili)<br />
“SP” – Spline (4 disponibili)
THRESHOLD (soglia) – Quando un trigger viene attivato accidentalmente, si può verificare una falsa attivazione: ciò spesso è<br />
dovuto alle vibrazioni del palcoscenico. L’impostazione della soglia aiuta ad evitare false attivazioni. Il valore di soglia è la<br />
velocità minima necessaria da registrare affinché il trigger produca dati. Quando si modifica un pedale hi-hat, la funzione di<br />
soglia assume un significato leggermente diverso.<br />
NOTA BENE: nel caso del pedale hi-hat, il valore di soglia descrive la distanza minima tra le posizioni dei pedali, al<br />
momento di cambiare direzioni, necessaria al <strong>Trigger</strong> <strong>IO</strong> per emettere un valore CC. Se si ama utilizzare il pedale hi-hat<br />
per sfumature raffinate, si può impostare la soglia del pedale hi-hat ad un valore basso.<br />
X-TALK – Quando trigger che si trovano vicini uno all’altro vengono attivati accidentalmente, si verifica un’interferenza. Ad<br />
esempio, quando si utilizzano dei trigger per batteria acustica montati su un kit, la percussione di una determinata parte della<br />
batteria può far vibrare la batteria stessa, provocando l’attivazione anche di altri trigger. La funzione X-Talk descrive il grado in<br />
cui il <strong>Trigger</strong> <strong>IO</strong> tenta di rifiutare le interferenze. Valori X-Talk positivi tentano di sopprimere le interferenze in maniera<br />
intelligente. Se un trigger molto forte e uno molto debole arrivano quasi contemporaneamente, la funzione X-Talk supporrà che<br />
quello debole sia un’interferenza e non lo lascerà suonare, eliminandolo. Maggiore è il valore di X-Talk, maggiori saranno le<br />
velocità soppresse. Ciò significa che, quando si utilizzano elevati valori di X-Talk, non è possibile suonare note forti e delicate<br />
simultaneamente. Con un’impostazione di 7, potrebbe perfino risultare difficile eseguire un rullo di batteria.<br />
NOTA BENE: nel caso di un pedale hi-hat, la funzione X-Talk serve come funzione di calibratura. Ciò permette di<br />
calibrare il pedale per prestazioni ottimali. Nel caso in cui venga selezionato un pedale hi-hat, a display apparirà il<br />
simbolo “CAL”. Si può regolare la calibratura manualmente, oppure si può lasciare che il <strong>Trigger</strong> <strong>IO</strong> la regoli<br />
automaticamente lasciando il pedale in posizione alzata e premendo simultaneamente i pulsanti value up e value<br />
down. Questo calibrerà automaticamente il pedale.<br />
RETRIGGER – L’impostazione Retrigger descrive come il <strong>Trigger</strong> <strong>IO</strong> interpreta ed emette trigger successivi provenienti dallo<br />
stesso ingresso. L’impostazione Retrigger rappresenta la quantità minima di tempo tra trigger successivi necessaria a generare<br />
un secondo suono. Se si dovesse sentire un suono violento, va aumentata la quantità di Retrigger.<br />
TRIGGER TYPE (tipo di trigger) – Assicurarsi che il <strong>Trigger</strong> Type di ogni trigger sia configurato propriamente prima di modificarlo<br />
o di usarlo. Se il <strong>Trigger</strong> Type è mal configurato, il trigger potrebbe funzionare male o non funzionare affatto. Bisognerà<br />
selezionare un <strong>Trigger</strong> Type che corrisponda al trigger specifico, come illustrato nella tabella che segue. Se si possiede un<br />
trigger di batteria a zona singola, ignorare la colonna “anello” nella tabella sottostante. Selezionare PP in caso si abbia un<br />
trigger piezoelettrico o SS in caso di trigger a interruttore. Se si possiede un trigger di batteria a doppia zona, servirsi di un cavo<br />
TRS e selezionare il giusto tipo dalla tabella sottostante. Se si possiede un trigger di batteria a doppia zona, ma unicamente un<br />
cavo TS, si può sempre utilizzare la zona primaria (punta), ma non quella secondaria (anello). I pedali hi-hat vengono rilevati<br />
automaticamente dal <strong>Trigger</strong> <strong>IO</strong>, quindi non sarà necessario fissare il <strong>Trigger</strong> Type.<br />
TRIGGER TYPE<br />
(tipo di trigger)<br />
PUNTA ANELLO<br />
PIEZO PIEZO<br />
INTERRUTTORE INTERRUTTORE<br />
PIEZO INTERRUTTORE<br />
INTERRUTTORE PIEZO<br />
INTERRUTTORE QUALE PEDALE SUSTAIN*<br />
PEDALE HI-HAT**<br />
*Da utilizzare con interruttori a pedale. Quando l’interruttore a pedale viene premuto, genera<br />
un messaggio sustain (MIDI CC 64). Quando viene premuto nuovamente, annulla il sustain.<br />
**I pedali hi-hat vengono rilevati automaticamente<br />
quindi non è necessario impostare un <strong>Trigger</strong> Type.<br />
SALVATAGG<strong>IO</strong> DELLE IMPOSTAZ<strong>IO</strong>NI DEI PARAMETRI<br />
Quando vengono sono state apportate modifiche ai parametri Kit e Global (ossia sono stati modificati numeri di note<br />
MIDI, canali, impostazioni trigger), si nota che il LED vicino alla scritta Kit inizia a lampeggiare. Questo indica che<br />
sono presenti modifiche che non sono ancora state salvate. Per salvare tali modifiche, servirsi dei tasti function<br />
up/down per tornare alla funzione Kit. In questo modo verranno salvate le modifiche apportate. Alternativamente, se<br />
sono state apportate modifiche che non si desidera salvare, premere simultaneamente i pulsanti function down e<br />
value down. In questo modo verranno annullate tutte le modifiche apportate dopo che il kit è stato caricato.<br />
INV<strong>IO</strong> DI MESSAGGI<br />
• Per inviare un messaggio All Notes Off (tutte le note off), premere<br />
simultaneamente i tasti function up e function down.<br />
• Per inviare un messaggio Return to Default Value (torna al valore<br />
predefinito), premere simultaneamente i tasti function down e<br />
value down.<br />
• Per inviare un messaggio Factory Reset (azzeramento ai valori di<br />
fabbrica), premere simultaneamente i tasti value up e value down<br />
al momento di accendere il <strong>Trigger</strong> <strong>IO</strong>. A display apparirà “rES” a<br />
indicare che il <strong>Trigger</strong> <strong>IO</strong> è stato resettato.<br />
ULTER<strong>IO</strong>RI INFORMAZ<strong>IO</strong>NI<br />
Per ulteriori informazioni, vedi il <strong>Manual</strong>e di Riferimento incluso.<br />
15<br />
• Per richiedere al <strong>Trigger</strong> <strong>IO</strong> un comando SysEx<br />
Data Dump, premere simultaneamente function<br />
up e value up. Questo trasferirà tutti i valori<br />
predefiniti dal <strong>Trigger</strong> <strong>IO</strong> all’applicativo SysEx.<br />
• Per trasferire dati SysEx al <strong>Trigger</strong> <strong>IO</strong>, basta<br />
riprodurre i dati SysEx che si vogliono trasferire al<br />
<strong>Trigger</strong> <strong>IO</strong>.
7-51-0234-A
www.alesis.com