

Samsung NP-NS310 (NP-NS310-A01FR ) - Manuel de l'utilisateur (Windows 7) 16.01 MB, pdf, Anglais
Samsung NP-NS310 (NP-NS310-A01FR ) - Manuel de l'utilisateur (Windows 7) 16.01 MB, pdf, Anglais
Samsung NP-NS310 (NP-NS310-A01FR ) - Manuel de l'utilisateur (Windows 7) 16.01 MB, pdf, Anglais

Create successful ePaper yourself
Turn your PDF publications into a flip-book with our unique Google optimized e-Paper software.
<strong>Samsung</strong> Recovery Solution (Optional)<br />
Chapter 4.<br />
Backup/Restore<br />
95<br />
Data Backup/Restore<br />
Data Backup enables you to save specific files or fol<strong>de</strong>rs onto<br />
another drive or DVD. Data Restore enables you to restore data<br />
using the data saved by a Data Backup when data is lost. This<br />
gui<strong>de</strong> <strong>de</strong>scribes the Backup and Restore procedures on the basis<br />
of backing up and restoring by using DVD.<br />
Data Backup<br />
1<br />
2<br />
3<br />
When the <strong>Samsung</strong> Recovery Solution start screen appears,<br />
click Backup and then click Data Backup.<br />
In the data selection screen, select either Basic Selection or<br />
Select from all, select a fol<strong>de</strong>r or file to be backed up, and<br />
then click the Next button.<br />
Enter a <strong>de</strong>scription for the backup in the Description field<br />
so that you can easily recognize it later and specify the Save<br />
Path. If your computer has a DVD-Writer, you can specify the<br />
DVD drive as the Save Path.<br />
4<br />
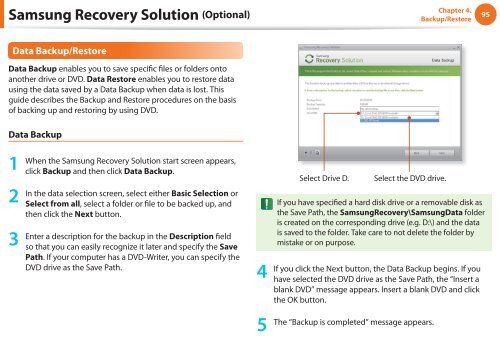
Select Drive D.<br />
Select the DVD drive.<br />
If you have specified a hard disk drive or a removable disk as<br />
the Save Path, the <strong>Samsung</strong>Recovery\<strong>Samsung</strong>Data fol<strong>de</strong>r<br />
is created on the corresponding drive (e.g. D:\) and the data<br />
is saved to the fol<strong>de</strong>r. Take care to not <strong>de</strong>lete the fol<strong>de</strong>r by<br />
mistake or on purpose.<br />
If you click the Next button, the Data Backup begins. If you<br />
have selected the DVD drive as the Save Path, the “Insert a<br />
blank DVD” message appears. Insert a blank DVD and click<br />
the OK button.<br />
5<br />
The “Backup is completed” message appears.


