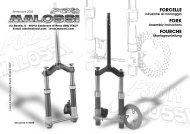
cilindro completo 4-stroke complete cylinder 4-stroke cylindre ...
cilindro completo 4-stroke complete cylinder 4-stroke cylindre ...
cilindro completo 4-stroke complete cylinder 4-stroke cylindre ...

You also want an ePaper? Increase the reach of your titles
YUMPU automatically turns print PDFs into web optimized ePapers that Google loves.
I<br />
T<br />
A LI<br />
A<br />
N<br />
O<br />
E<br />
N<br />
G LISH<br />
F<br />
R<br />
A<br />
N<br />
C AIS<br />
D EUTS<br />
C H<br />
E<br />
S<br />
P<br />
A<br />
Ñ<br />
O L<br />
-12-<br />
del carter parti grezze che impediscano il passaggio del canotto del <strong>cilindro</strong> o altri piccoli problemi che non consentono un inserimento libero del <strong>cilindro</strong> fino a battuta sul<br />
carter motore. In caso vi siano punti di attrito significativi si consiglia di asportarli.<br />
- Superata questa fase, sfilare il <strong>cilindro</strong> e iniziare il montaggio seguendo le istruzioni.<br />
Montaggio GRUPPO TERMICO<br />
- Pulire accuratamente il nuovo pistone e soffiarlo con aria compressa, controllando che non vi siano corpi estranei che ostruiscono i forellini di scarico nella cava del<br />
segmento raschia-olio.<br />
- Montare nel pistone uno dei due fermi spinotto, avendo cura di controllare che sia inserito perfettamente nella propria sede.<br />
preventing the passage of the <strong>cylinder</strong> steering shaft or other minor problems preventing free entry of the <strong>cylinder</strong> flush with the crankcase. In the event of significant<br />
blocked entry, we advise you to remove useless or damaging parts.<br />
- Once this phase has been <strong>complete</strong>d, slide off the <strong>cylinder</strong> and start the assembly according to this instructions.<br />
CYLINDER KIT assembly<br />
- Clean the new piston thoroughly and blow it with compressed air. Ensure that there is no foreign matter blocking the small exhaust holes in the slot found on the scraper<br />
ring segment.<br />
- Fit one of the two spin locks in the piston, ensuring that it is perfectly inserted in its seat.<br />
- Faites descendre le <strong>cylindre</strong> le long des goujons de serrage du groupe thermique et emboîtez le <strong>cylindre</strong> dans l’embase du moteur. Vérifiez qu’il n’y a pas des parties brutes<br />
dans le carter du moteur qui bloquent le passage du fourreau du <strong>cylindre</strong>, ou des autres petits problèmes qui gênent l’insertion fluide du <strong>cylindre</strong> en butée sur le carter du<br />
moteur. S’il y a des points de friction importants, il est recommandé d’enlever les parties inutiles et créant des dégâts.<br />
- Une fois cette phase terminée, retirez le <strong>cylindre</strong> et commencez le montage en suivant les instructions.<br />
Montage GROUPE THERMIQUE<br />
- Nettoyez avec soin le nouveau piston et le souffler avec de l’air comprimé; contrôlez qu’il n’y ait pas des corps étrangers qui bouchent les trous de sortie dans la rainure<br />
du segment racleur d’huile.<br />
die den Durchgang der Zylinderbüchse behindern und das freie Einsetzen des Zylinders bis zum Anschlag im Motorgehäuse erschweren. Jegliche Reibungen sind zu<br />
beseitigen.<br />
- Anschließend den Zylinder herausnehmen und gemäß folgender Anleitung die Montage beginnen.<br />
Montage des ZYLINDERS<br />
- Den neuen Kolben sorgfältig reinigen und mit Druckluft ausblasen; sicherstellen, dass keine Fremdkörper vorhanden sind, welche die Auslassöffnungen in der Nut des<br />
Ölabstreifrings verstopfen.<br />
- Eine der beiden Kolbenbolzensicherungen auf den Kolben montieren, wobei auf deren perfekten Sitz zu achten ist.<br />
partes sin acabar, que impidan el paso del tubo del <strong>cilindro</strong>, ni otros pequeños problemas que no permitan una introducción libre del <strong>cilindro</strong> hasta el tope en el cárter<br />
motor. Si hay puntos de roce significativos, se recomienda eliminarlos.<br />
- Una vez superada esta fase, sacar el <strong>cilindro</strong> y empezar el montaje conforme a las instrucciones.<br />
Montaje GRUPO TÉRMICO<br />
- Limpiar escrupulosamente el nuevo pistón y soplarlo con aire comprimido, controlando que no haya cuerpos ajenos que obstruyan los pequeños orificios de descarga en<br />
la ranura del segmento rascador de aceite.<br />
- Montar en el pistón uno de los dos sujetadores clavija, asegurándose de controlar que esté perfectamente introducido en su asiento.