Batidora de brazo SSMS 600 B2 Frullatore ad ... - Kompernass
Batidora de brazo SSMS 600 B2 Frullatore ad ... - Kompernass
Batidora de brazo SSMS 600 B2 Frullatore ad ... - Kompernass

Create successful ePaper yourself
Turn your PDF publications into a flip-book with our unique Google optimized e-Paper software.
5<br />
KITCHEN TOOLS<br />
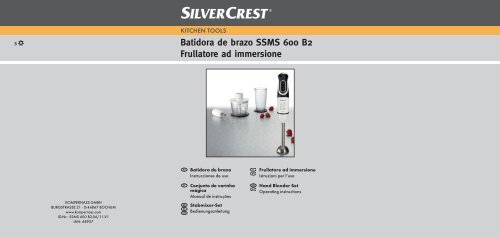
<strong>Batidora</strong> <strong>de</strong> <strong>brazo</strong> <strong>SSMS</strong> <strong>600</strong> <strong>B2</strong><br />
<strong>Frullatore</strong> <strong>ad</strong> immersione<br />
KOMPERNASS GMBH<br />
BURGSTRASSE 21 · D-44867 BOCHUM<br />
www.kompernass.com<br />
ID-Nr.: <strong>SSMS</strong> <strong>600</strong> <strong>B2</strong>-06/11-V1<br />
IAN: 68957<br />
<strong>Batidora</strong> <strong>de</strong> <strong>brazo</strong><br />
Instrucciones <strong>de</strong> uso<br />
Conjunto <strong>de</strong> varinha<br />
mágica<br />
Manual <strong>de</strong> instruções<br />
Stabmixer-Set<br />
Bedienungsanleitung<br />
<strong>Frullatore</strong> <strong>ad</strong> immersione<br />
Istruzioni per l‘uso<br />
Hand Blen<strong>de</strong>r Set<br />
Operating instructions
<strong>SSMS</strong> <strong>600</strong> <strong>B2</strong><br />
1<br />
2<br />
3<br />
6<br />
4<br />
7<br />
5<br />
8<br />
9<br />
q<br />
0<br />
w
Indice<br />
Información sobre estas instrucciones <strong>de</strong> uso . . . . . . . . . . . . . . . . . . . . . . . 2<br />
Derechos <strong>de</strong> autor . . . . . . . . . . . . . . . . . . . . . . . . . . . . . . . . . . . . . . . . . . . . . . . . . . . . . . . . 2<br />
ES<br />
Finalid<strong>ad</strong> <strong>de</strong> uso . . . . . . . . . . . . . . . . . . . . . . . . . . . . . . . . . . . . . . . . . . . . . . . 2<br />
Indicaciones <strong>de</strong> segurid<strong>ad</strong> . . . . . . . . . . . . . . . . . . . . . . . . . . . . . . . . . . . . . . . 3<br />
Volumen <strong>de</strong> suministro . . . . . . . . . . . . . . . . . . . . . . . . . . . . . . . . . . . . . . . . . . 4<br />
Evacuación <strong>de</strong>l embalaje . . . . . . . . . . . . . . . . . . . . . . . . . . . . . . . . . . . . . . . . . . . . . . . . . . 4<br />
Características técnicas . . . . . . . . . . . . . . . . . . . . . . . . . . . . . . . . . . . . . . . . . . 5<br />
Descripción <strong>de</strong>l aparato / accesorio . . . . . . . . . . . . . . . . . . . . . . . . . . . . . . . 5<br />
Utilización . . . . . . . . . . . . . . . . . . . . . . . . . . . . . . . . . . . . . . . . . . . . . . . . . . . . 6<br />
Ensamblaje . . . . . . . . . . . . . . . . . . . . . . . . . . . . . . . . . . . . . . . . . . . . . . . . . . . 7<br />
Ensamblaje <strong>de</strong> la batidora <strong>de</strong> <strong>brazo</strong> . . . . . . . . . . . . . . . . . . . . . . . . . . . . . . . . . . . . . . . . . . 7<br />
Ensamblaje <strong>de</strong>l accesorio <strong>de</strong> batir . . . . . . . . . . . . . . . . . . . . . . . . . . . . . . . . . . . . . . . . . . . 7<br />
Ensamblar la tritur<strong>ad</strong>ora . . . . . . . . . . . . . . . . . . . . . . . . . . . . . . . . . . . . . . . . . . . . . . . . . . . 7<br />
Sujetar el aparato . . . . . . . . . . . . . . . . . . . . . . . . . . . . . . . . . . . . . . . . . . . . . . 8<br />
Manejo . . . . . . . . . . . . . . . . . . . . . . . . . . . . . . . . . . . . . . . . . . . . . . . . . . . . . . . 9<br />
Montaje mural. . . . . . . . . . . . . . . . . . . . . . . . . . . . . . . . . . . . . . . . . . . . . . . . 11<br />
Limpieza . . . . . . . . . . . . . . . . . . . . . . . . . . . . . . . . . . . . . . . . . . . . . . . . . . . . 11<br />
Evacuación <strong>de</strong>l aparato . . . . . . . . . . . . . . . . . . . . . . . . . . . . . . . . . . . . . . . . 12<br />
Indicaciones relativas a la <strong>de</strong>claración <strong>de</strong> conformid<strong>ad</strong> CE . . . . . . . . . . . 12<br />
Import<strong>ad</strong>or . . . . . . . . . . . . . . . . . . . . . . . . . . . . . . . . . . . . . . . . . . . . . . . . . . 12<br />
Garantía . . . . . . . . . . . . . . . . . . . . . . . . . . . . . . . . . . . . . . . . . . . . . . . . . . . . 13<br />
Asistencia técnica . . . . . . . . . . . . . . . . . . . . . . . . . . . . . . . . . . . . . . . . . . . . . 13<br />
Recetas . . . . . . . . . . . . . . . . . . . . . . . . . . . . . . . . . . . . . . . . . . . . . . . . . . . . . . 14<br />
Crema <strong>de</strong> verduras . . . . . . . . . . . . . . . . . . . . . . . . . . . . . . . . . . . . . . . . . . . . . . . . . . . . . . 14<br />
Sopa <strong>de</strong> calabaza . . . . . . . . . . . . . . . . . . . . . . . . . . . . . . . . . . . . . . . . . . . . . . . . . . . . . . . 15<br />
Confi tura dulce <strong>de</strong> frutas . . . . . . . . . . . . . . . . . . . . . . . . . . . . . . . . . . . . . . . . . . . . . . . . . . 16<br />
Crema <strong>de</strong> chocolate . . . . . . . . . . . . . . . . . . . . . . . . . . . . . . . . . . . . . . . . . . . . . . . . . . . . . 17<br />
Mayonesa . . . . . . . . . . . . . . . . . . . . . . . . . . . . . . . . . . . . . . . . . . . . . . . . . . . . . . . . . . . . . 17<br />
<strong>SSMS</strong> <strong>600</strong> <strong>B2</strong><br />
1
ES<br />
Información sobre estas instrucciones <strong>de</strong> uso<br />
Estas instrucciones <strong>de</strong> uso forman parte <strong>de</strong>l set <strong>de</strong> la batidora <strong>de</strong> <strong>brazo</strong> <strong>SSMS</strong><br />
<strong>600</strong> <strong>B2</strong> (<strong>de</strong>nomin<strong>ad</strong>o en a<strong>de</strong>lante "el aparato") y proporcionan informaciones<br />
importantes para el uso conforme a lo previsto, la segurid<strong>ad</strong>, el montaje y la<br />
conexión, así como el manejo <strong>de</strong>l aparato.<br />
Estas instrucciones <strong>de</strong> uso <strong>de</strong>ben estar disponibles siempre cerca <strong>de</strong>l aparato.<br />
Deben ser leídas y comprendidas por todas las personas encarg<strong>ad</strong>as <strong>de</strong>l manejo<br />
y la solución <strong>de</strong> averías <strong>de</strong>l aparato.<br />
Conserve estas instrucciones <strong>de</strong> uso y entréguelas junto con el aparato a cualquier<br />
posible propietario futuro.<br />
Derechos <strong>de</strong> autor<br />
Esta documentación está protegida por <strong>de</strong>rechos <strong>de</strong> autor.<br />
Toda copia o toda reimpresión, incluso en extracto, así como la reproducción<br />
<strong>de</strong> sus fi guras, aunque hayan sido modifi c<strong>ad</strong>as, sólo están permitidas con la<br />
autorización por escrito <strong>de</strong>l fabricante.<br />
Finalid<strong>ad</strong> <strong>de</strong> uso<br />
El conjunto <strong>de</strong> la batidora <strong>de</strong> <strong>brazo</strong> sirve exclusivamente para la elaboración <strong>de</strong><br />
alimentos en pequeñas cantida<strong>de</strong>s. Sólo es a<strong>de</strong>cu<strong>ad</strong>a para el uso en ámbitos<br />
priv<strong>ad</strong>os. El conjunto <strong>de</strong> la batidora <strong>de</strong> <strong>brazo</strong> no está prevista para el uso<br />
comercial.<br />
ADVERTENCIA<br />
¡Peligro <strong>de</strong>bido al uso contrario a lo dispuesto!<br />
El aparato pue<strong>de</strong> ser una fuente <strong>de</strong> peligros en caso <strong>de</strong> uso contrario a lo<br />
dispuesto y/o para una fi nalid<strong>ad</strong> diferente.<br />
► Usar el aparato exclusivamente según lo previsto.<br />
►<br />
Deben seguirse los procedimientos <strong>de</strong>scritos en estas instrucciones <strong>de</strong> uso.<br />
ADVERTENCIA<br />
► El aparato pue<strong>de</strong> ser una fuente <strong>de</strong> peligros en caso <strong>de</strong> uso contrario a lo<br />
dispuesto y/o para una fi nalid<strong>ad</strong> diferente. Use el aparato exclusivamente<br />
según lo previsto. Deben seguirse los procedimientos <strong>de</strong>scritos en estas<br />
instrucciones <strong>de</strong> uso. Quedan excluidos todos los <strong>de</strong>rechos <strong>de</strong> cualquier<br />
tipo por daños producidos por un uso no conforme <strong>de</strong>l aparato, por<br />
reparaciones <strong>de</strong>fectuosas, por modifi caciones no autoriz<strong>ad</strong>as o por el uso<br />
<strong>de</strong> piezas <strong>de</strong> repuesto no homolog<strong>ad</strong>as. El riesgo será responsabilid<strong>ad</strong><br />
exclusiva <strong>de</strong>l usuario.<br />
2 <strong>SSMS</strong> <strong>600</strong> <strong>B2</strong>
Indicaciones <strong>de</strong> segurid<strong>ad</strong><br />
ES<br />
PELIGRO DE ELECTROCUCIÓN<br />
► Conecte el set <strong>de</strong> la batidora <strong>de</strong> <strong>brazo</strong> únicamente a una base <strong>de</strong> enchufe<br />
instal<strong>ad</strong>a según la normativa con una tensión <strong>de</strong> red <strong>de</strong> 220 - 240 V ~ ,<br />
con 50 Hz.<br />
► Antes <strong>de</strong> limpiar o en caso <strong>de</strong> fallos <strong>de</strong> funcionamiento <strong>de</strong>l set <strong>de</strong> la batidora<br />
<strong>de</strong> <strong>brazo</strong>, extraiga siempre la clavija <strong>de</strong> red <strong>de</strong>l enchufe.<br />
► El aparato no <strong>de</strong>be estar expuesto a la humed<strong>ad</strong> ni ser utiliz<strong>ad</strong>o a la<br />
intemperie.<br />
► Si por cualquier motivo penetrase líquido en la carcasa <strong>de</strong>l aparato,<br />
extraiga la clavija <strong>de</strong> red <strong>de</strong> la base <strong>de</strong> enchufe y encomien<strong>de</strong> a personal<br />
especialista cualifi c<strong>ad</strong>o que se encargue <strong>de</strong> la reparación.<br />
► Extraiga siempre el cable <strong>de</strong> red <strong>de</strong> la base <strong>de</strong> enchufe tirando <strong>de</strong> la<br />
clavija, y no <strong>de</strong>l mismo cable.<br />
► No doble ni aplaste el cable <strong>de</strong> red y tiéndalo <strong>de</strong> modo que n<strong>ad</strong>ie pueda<br />
pisarlo ni tropezar con él.<br />
► En caso <strong>de</strong> una clavija <strong>de</strong> red dañ<strong>ad</strong>a o cable <strong>de</strong> red dañ<strong>ad</strong>o, encomien<strong>de</strong><br />
su sustitución a personal técnico autoriz<strong>ad</strong>o o al servicio <strong>de</strong> posventa con<br />
el fi n <strong>de</strong> evitar riesgos.<br />
► No está autoriz<strong>ad</strong>o para abrir la carcasa <strong>de</strong>l bloque <strong>de</strong>l set <strong>de</strong> la batidora<br />
<strong>de</strong> <strong>brazo</strong>. En este caso queda garantiz<strong>ad</strong>a la segurid<strong>ad</strong> y per<strong>de</strong>rá el<br />
<strong>de</strong>recho a la garantía.<br />
► No permita utilizar el aparato a personas (incluidos los niños) cuyas faculta<strong>de</strong>s<br />
físicas, sensoriales o mentales, así como su falta <strong>de</strong> conocimientos o<br />
<strong>de</strong> experiencia, les impida hacer un uso seguro <strong>de</strong>l mismo si no están bajo<br />
vigilancia o han sido instruidos correctamente acerca <strong>de</strong>l uso <strong>de</strong>l aparato.<br />
► Vigile a los niños para asegurarse <strong>de</strong> que no juegan con el aparato.<br />
PELIGRO DE ELECTROCUCIÓN<br />
De ningún modo sumerja el bloque motor <strong>de</strong>l set <strong>de</strong> la batidora <strong>de</strong><br />
<strong>brazo</strong> en líquido y evite que penetren líquidos en el interior <strong>de</strong> la<br />
carcasa <strong>de</strong>l bloque motor.<br />
¡ADVERTENCIA! ¡PELIGRO DE LESIONES!<br />
► Cuando coloque o retire accesorios o <strong>de</strong>je el aparato sin vigilancia, <strong>de</strong>berá<br />
<strong>de</strong>sconectar por regla general el aparato <strong>de</strong> la corriente eléctrica.<br />
<strong>SSMS</strong> <strong>600</strong> <strong>B2</strong><br />
3
ES<br />
Volumen <strong>de</strong> suministro<br />
El aparato se suministra <strong>de</strong> serie con los componentes siguientes:<br />
▯ Juego <strong>de</strong> batidora <strong>de</strong> barra<br />
▯ Vaso medidor con tapa/base combin<strong>ad</strong>a<br />
▯ Varilla<br />
▯ Tritur<strong>ad</strong>ora (cuchilla y bol con tapa/base combin<strong>ad</strong>a)<br />
▯ Soporte mural<br />
▯ 2 x tacos<br />
▯ 2 x tornillos<br />
▯ Instrucciones <strong>de</strong> uso<br />
1) Extraiga todos los componentes <strong>de</strong>l aparato y el manual <strong>de</strong> instrucciones <strong>de</strong><br />
la caja.<br />
2) Retire todo el material <strong>de</strong> embalaje.<br />
3) Limpie todas las piezas <strong>de</strong>l aparato conforme a lo <strong>de</strong>scrito en el capítulo<br />
“Limpieza”.<br />
ADVERTENCIA<br />
► Compruebe la integrid<strong>ad</strong> <strong>de</strong> suministro y si hay daños visibles.<br />
► Si el suministro es incompleto o hay daños <strong>de</strong>bido a un embalaje <strong>de</strong>fi ciente<br />
o al transporte, póngase en contacto con la línea directa <strong>de</strong> asistencia<br />
(véase el apart<strong>ad</strong>o Asistencia técnica).<br />
Evacuación <strong>de</strong>l embalaje<br />
El embalaje protege el aparato durante el transporte. El material <strong>de</strong> embalaje se<br />
ha seleccion<strong>ad</strong>o teniendo en cuenta criterios ecológicos y la técnica <strong>de</strong> evacuación<br />
y por ello es reciclable.<br />
La reintroducción <strong>de</strong>l embalaje en el ciclo <strong>de</strong> materiales ahorra materias primas<br />
y reduce el volumen <strong>de</strong> residuos. Evacue los materiales <strong>de</strong> embalaje que no<br />
sean necesarios según las normativas locales aplicables.<br />
ADVERTENCIA<br />
► Si es posible, conserve el embalaje original durante el periodo <strong>de</strong> garantía<br />
<strong>de</strong>l aparato para po<strong>de</strong>r empaquetarlo correctamente en caso <strong>de</strong> aplicación<br />
<strong>de</strong> la garantía.<br />
4 <strong>SSMS</strong> <strong>600</strong> <strong>B2</strong>
Características técnicas<br />
ES<br />
Tensión <strong>de</strong> red<br />
Potencia nominal<br />
Clase <strong>de</strong> protección<br />
Capacid<strong>ad</strong> :<br />
Vaso medidor<br />
Cantid<strong>ad</strong> <strong>de</strong> llen<strong>ad</strong>o máx. <strong>de</strong><br />
líquidos.<br />
220 - 240 V ~ , 50 Hz<br />
<strong>600</strong> W<br />
II<br />
700 ml.<br />
300 ml<br />
Recomendamos el siguiente horario <strong>de</strong> funcionamiento:<br />
Después <strong>de</strong> 1 minuto <strong>de</strong> funcionamiento <strong>de</strong>jar enfriar la batidora.<br />
Después <strong>de</strong> 1 minuto <strong>de</strong> funcionamiento <strong>de</strong>jar enfriar la pic<strong>ad</strong>ora.<br />
Después <strong>de</strong> 2 minutos <strong>de</strong> funcionamiento <strong>de</strong>jar enfriar la varilla.<br />
Descripción <strong>de</strong>l aparato / accesorio<br />
1 Regul<strong>ad</strong>or <strong>de</strong> velocid<strong>ad</strong><br />
2 Interruptor (velocid<strong>ad</strong> norma)<br />
3 Interruptor turbo (velocid<strong>ad</strong> rápida)<br />
4 Bloque motor<br />
5 <strong>Batidora</strong> <strong>de</strong> <strong>brazo</strong><br />
6 Tapa <strong>de</strong>l bol<br />
7 Cuchilla<br />
8 Bol (con tapa/base combin<strong>ad</strong>a)<br />
9 Soporte para la varilla<br />
0 Varilla<br />
q Vaso medidor (con tapa/base combin<strong>ad</strong>a)<br />
w Soporte mural incl. tornillos y tacos<br />
<strong>SSMS</strong> <strong>600</strong> <strong>B2</strong><br />
5
ES<br />
Utilización<br />
ADVERTENCIA<br />
► Con el vaso medidor q pue<strong>de</strong> medir líquidos hasta 700 ml. Introduzca<br />
para su preparación un máximo <strong>de</strong> 300 ml, <strong>de</strong> lo contrario pue<strong>de</strong> salirse<br />
el líquido fuera <strong>de</strong>l vaso medidor q.<br />
► Si <strong>de</strong>sea consevar líquidos/alimentos en el vaso medidor q pue<strong>de</strong> retirar<br />
la base <strong>de</strong>l vaso medidor q y utilizarla como tapa. Observe que también<br />
queda cerr<strong>ad</strong>o el pico <strong>de</strong>l vaso medidor q.<br />
■ Con la batidora <strong>de</strong> <strong>brazo</strong> 5 pue<strong>de</strong>n prepararse dippas, salsas, sopas y<br />
alimentos para bebés. Aconsejamos <strong>de</strong>spués <strong>de</strong> hacer funcionar la batidora<br />
<strong>de</strong> <strong>brazo</strong> 5 durante 1 minuto como máx., <strong>de</strong> modo continuo, <strong>de</strong>jarla enfriar<br />
durante un rato.<br />
¡ATENCIÓN - DAÑOS MATERIALES!<br />
► No utilice la batidora <strong>de</strong> <strong>brazo</strong> 5 para la preparación <strong>de</strong> alimentos<br />
sólidos. ¡Esto provocaría daños irreparables en el aparato!<br />
■ Con la varilla 0 pue<strong>de</strong> hacer mayonesa, nata y montar clara <strong>de</strong> huevo<br />
o postres.Aconsejamos <strong>de</strong>spués <strong>de</strong> hacer funcionar la varilla para montar<br />
nieve 0 durante 2 minuto como máx., <strong>de</strong> modo continuo, <strong>de</strong>jarla enfriar<br />
durante un rato.<br />
■ Con la tritur<strong>ad</strong>ora compuesta <strong>de</strong> cuchilla 7, bol 8 y tapa <strong>de</strong> bol 6,<br />
también pue<strong>de</strong> triturar alimentos más duros. Aconsejamos <strong>de</strong>spués <strong>de</strong> hacer<br />
funcionar la tritur<strong>ad</strong>ora durante 1 minuto como máx., <strong>de</strong> modo continuo,<br />
<strong>de</strong>jarla enfriar durante un rato.<br />
¡ATENCIÓN - DAÑOS MATERIALES!<br />
► No utilice la tritur<strong>ad</strong>ora para la preparación <strong>de</strong> líquidos. ¡Esto provocaría<br />
daños irreparables en el aparato!<br />
6 <strong>SSMS</strong> <strong>600</strong> <strong>B2</strong>
Ensamblaje<br />
ES<br />
►<br />
¡ADVERTENCIA! ¡PELIGRO DE LESIONES!<br />
Inserte <strong>de</strong>spués <strong>de</strong>l ensamblaje la clavija <strong>de</strong> red en la base <strong>de</strong> enchufe.<br />
ADVERTENCIA<br />
► Limpie antes <strong>de</strong> la primera puesta en servicio todas las piezas conforme a<br />
lo <strong>de</strong>scrito en el capitulo „Limpieza“.<br />
Ensamblaje <strong>de</strong> la batidora <strong>de</strong> <strong>brazo</strong><br />
¡ADVERTENCIA! ¡PELIGRO DE LESIONES!<br />
► ¡la cuchilla está extrem<strong>ad</strong>amente afi l<strong>ad</strong>a! Manipulelas con mucha precaución.<br />
■ Coloque la batidora <strong>de</strong> <strong>brazo</strong> 5 sobre el bloque <strong>de</strong> motor 4, <strong>de</strong> modo<br />
que la fl echa señale sobre el símbolo . Gire la batidora <strong>de</strong> <strong>brazo</strong> 5,<br />
hasta que señale la fl echa en el bloque <strong>de</strong> motor 4 sobre el símbolo .<br />
Ensamblaje <strong>de</strong>l accesorio <strong>de</strong> batir<br />
■ È inserte el accesorio <strong>de</strong> batir 0 en el soporte <strong>de</strong>l accesorio <strong>de</strong> batir 9.<br />
■ Coloque la varilla para montar nata ensambl<strong>ad</strong>a 0 sobre el bloque <strong>de</strong><br />
motor 4, <strong>de</strong> modo que la fl echa señale sobre el símbolo . Gire la varilla<br />
para montar nata 0, hasta que señale la fl echa en el bloque <strong>de</strong> motor 4<br />
sobre el símbolo .<br />
Ensamblar la tritur<strong>ad</strong>ora<br />
¡ADVERTENCIA! ¡PELIGRO DE LESIONES!<br />
► La cuchilla <strong>de</strong> la batidora 7 está extrem<strong>ad</strong>amente afi l<strong>ad</strong>a! Manipulelas<br />
con mucha precaución.<br />
■ Coloque con precaución la cuchilla 7 sobre el soporte en el bol 8.<br />
■ Introduzca en el bol los alimentos a triturar 8.<br />
ADVERTENCIA<br />
► Llene el bol 8 siempre sólo hasta la marca <strong>de</strong> máx. De lo contrario el<br />
aparato no funciona óptimamente.<br />
<strong>SSMS</strong> <strong>600</strong> <strong>B2</strong><br />
7
ES<br />
■ Coloque la tapa 6 sobre el bol 8 y gírela fuertemente. En este proceso los<br />
salientes en el bor<strong>de</strong> <strong>de</strong>l bol 8 <strong>de</strong>ben guiarse en el carril en la tapa <strong>de</strong>l<br />
bol 6.<br />
■ Coloque el bloque <strong>de</strong>l motor 4 sobre la tapa <strong>de</strong>l bol 6, <strong>de</strong> modo que<br />
señale la fl echa sobre el símbolo . Gire el bloque <strong>de</strong>l motor 4, hasta que<br />
señale la fl echa sobre el símbolo .<br />
ADVERTENCIA<br />
► Si <strong>de</strong>sea conservar los alimentos en el bol 8, pue<strong>de</strong> retirar la base <strong>de</strong>l<br />
bol 8 y utilizarla como tapa. Para ello, retire con cuid<strong>ad</strong>o la tapa <strong>de</strong>l<br />
bol 6, el bloque motor 4 y, si es necesario, la cuchilla 7. Suelte la<br />
base <strong>de</strong>l bol 8 y colóquela sobre el bol 8.<br />
Sujetar el aparato<br />
Para manejar el aparato, sujételo <strong>de</strong>l modo siguiente:<br />
8 <strong>SSMS</strong> <strong>600</strong> <strong>B2</strong>
Manejo<br />
ES<br />
►<br />
¡ADVERTENCIA! ¡PELIGRO DE LESIONES!<br />
¡Los alimentos no <strong>de</strong>ben estar <strong>de</strong>masi<strong>ad</strong>o calientes! El contenido salpicante<br />
podría producir heridas por líquidos hirvientes.<br />
ADVERTENCIA<br />
► Si <strong>de</strong>sea batir nata con el accesorio para batir 0, mantenga al batir el<br />
recipiente inclin<strong>ad</strong>o. De este modo la nata se solidifi cará antes. Preste<br />
atención <strong>de</strong> no salpicar la nata al batir. Deslice para batir nata el regul<strong>ad</strong>or<br />
<strong>de</strong> velocid<strong>ad</strong> 1 a la gr<strong>ad</strong>uación „5“.<br />
Una vez ensambl<strong>ad</strong>o el conjunto <strong>de</strong> la batidora <strong>de</strong> <strong>brazo</strong> tal como ha elegido:<br />
1) Conecte la clavija <strong>de</strong> red a la base <strong>de</strong> enchufe.<br />
2) Mantenga puls<strong>ad</strong>o el interruptor 2 para batir los alimentos a velocid<strong>ad</strong><br />
normal. Deslice el regul<strong>ad</strong>or <strong>de</strong> velocid<strong>ad</strong> 1 en dirección „5“, para<br />
aumentar la velocid<strong>ad</strong>. Deslice el regul<strong>ad</strong>or <strong>de</strong> velocid<strong>ad</strong> 1 en dirección<br />
„1“, para reducir la velocid<strong>ad</strong>.<br />
3) Mantenga puls<strong>ad</strong>o el interruptor turbo 3 para batir los alimentos a una<br />
mayor velocid<strong>ad</strong>. Accionando el interruptor turbo 3 dispone <strong>de</strong> inmediato<br />
<strong>de</strong> la velocid<strong>ad</strong> operativa máxima.<br />
4) Una vez fi naliz<strong>ad</strong>a la elaboración <strong>de</strong> los alimentos, suelte simplemente el<br />
puls<strong>ad</strong>or accion<strong>ad</strong>o.<br />
ADVERTENCIA<br />
► Si durante el funcionamiento aprecia ruidos raros tales como chirridos o<br />
similar, aplique un poco <strong>de</strong> aceite para comidas neutro en el árbol <strong>de</strong><br />
accionamiento <strong>de</strong>l molinillo <strong>de</strong> barra:<br />
<strong>SSMS</strong> <strong>600</strong> <strong>B2</strong><br />
9
ES<br />
Ejemplos para el tritur<strong>ad</strong>o y <strong>de</strong>smenuz<strong>ad</strong>o <strong>de</strong> diferentes alimentos con la tritur<strong>ad</strong>ora:<br />
Ingredientes<br />
Cantid<strong>ad</strong><br />
máx.<br />
Tiempo <strong>de</strong><br />
elaboración<br />
VELOCIDAD<br />
Cebollas 200 g aprox. 20 seg. Nivel 1 - 3<br />
Perejil 30 g aprox. 20 seg. turbo<br />
Ajo 20 dientes aprox. 20 seg. Nivel 1 - 5<br />
Zanahorias<br />
gruesas<br />
200 g aprox. 15 seg. Nivel 1 - 5<br />
Avellanas/<br />
almendras<br />
200 g aprox. 30 seg. turbo<br />
Nueces 200 g aprox. 25 seg. Nivel 3 - 4<br />
Parmesano<br />
1 cm<br />
250 g aprox. 30 seg. turbo<br />
10 <strong>SSMS</strong> <strong>600</strong> <strong>B2</strong>
Montaje mural<br />
En el volumen <strong>de</strong> suministro se encuentran 2 tacos y 2 tornillos, para montar el<br />
soporte para pared w.<br />
ES<br />
►<br />
¡ADVERTENCIA PELIGRO DE ELECTROCUCIÓN!<br />
¡Antes <strong>de</strong>l montaje <strong>de</strong>l soporte mural w, compruebe si transcurren líneas o<br />
tuberías a través <strong>de</strong> la pared!<br />
Limpieza<br />
1) Marque la posición <strong>de</strong> los tal<strong>ad</strong>ros conforme al soporte mural w.<br />
2) Tal<strong>ad</strong>re los orifi cios con una broca <strong>de</strong> 6 mm <strong>de</strong> Ø.<br />
3) Inserte los tacos en los agujeros.<br />
4) Posicione los dos agujeros <strong>de</strong>l soporte mural w sobre los orifi cios y fíjelo<br />
con ambos tornillos.<br />
►<br />
¡ADVERTENCIA PELIGRO DE ELECTROCUCIÓN!<br />
Antes <strong>de</strong> limpiar el set <strong>de</strong> la batidora <strong>de</strong> <strong>brazo</strong>, extraiga siempre la clavija<br />
<strong>de</strong> red <strong>de</strong>l enchufe.<br />
► De ningún modo pue<strong>de</strong> sumergir el bloque motor 4 durante la<br />
limpieza en agua o mantenerlo bajo agua corriente.<br />
¡ADVERTENCIA - PELIGRO DE LESIONES!<br />
► Al manipular cuchillas extrem<strong>ad</strong>amente afi l<strong>ad</strong>as 7 existe riesgo <strong>de</strong> lesiones.<br />
Monte <strong>de</strong> nuevo la pic<strong>ad</strong>ora <strong>de</strong>spués <strong>de</strong> su utilización y limpieza para no<br />
dañarse con la cuchilla suelta. Guar<strong>de</strong> bien la cuchilla fuera <strong>de</strong>l alcance <strong>de</strong><br />
los niños.<br />
¡ATENCIÓN - DAÑOS MATERIALES!<br />
► No <strong>de</strong>be limpiar las piezas <strong>de</strong>l set <strong>de</strong> la batidora <strong>de</strong> <strong>brazo</strong> <strong>de</strong>ntro <strong>de</strong>l<br />
lavavajillas, estas podrían dañarse.<br />
► ¡No use productos <strong>de</strong> limpieza abrasivos, agresivos o químicos! ¡Podrían<br />
dañar la superfi cie <strong>de</strong> forma irreparable!<br />
<strong>SSMS</strong> <strong>600</strong> <strong>B2</strong><br />
11
ES<br />
1) Retire la clavija <strong>de</strong> red.<br />
2) Limpie el bloque <strong>de</strong> motor 4, la batidora <strong>de</strong> <strong>brazo</strong> 5, la tapa <strong>de</strong>l bol 6 el<br />
soporte <strong>de</strong> varilla para montar nata 9 y el soporte mural w con un paño<br />
húmedo.<br />
Asegúrese <strong>de</strong> que no entra agua en los orifi cios <strong>de</strong> la batidora <strong>de</strong> <strong>brazo</strong> 5.<br />
En caso <strong>de</strong> sucied<strong>ad</strong> persistente añ<strong>ad</strong>a al paño un <strong>de</strong>tergente suave.<br />
3) Limpie el resto <strong>de</strong> los accesorios (Bol 8, Varilla para montar nata 0,Vaso<br />
medidor q y cuchilla <strong>de</strong> la batidora 7) bajo agua corriente, secándola<br />
bien a continuación con un paño seco.<br />
Evacuación <strong>de</strong>l aparato<br />
De ningún modo <strong>de</strong>berá tirar el aparato en la basura doméstica.<br />
Este producto está sujeto a la directiva europea<br />
2002/96/EC.<br />
Entregue el aparato a un centro <strong>de</strong> eliminación autoriz<strong>ad</strong>o o al centro <strong>de</strong> eliminación<br />
<strong>de</strong> residuos comunitario. Tenga en cuenta las normativas actuales en<br />
vigor. En caso <strong>de</strong> duda póngase en contacto con las instalaciones municipales<br />
<strong>de</strong> eliminación <strong>de</strong> residuos.<br />
Indicaciones relativas a la <strong>de</strong>claración <strong>de</strong><br />
conformid<strong>ad</strong> CE<br />
Este aparato cumple los requisitos básicos y las <strong>de</strong>más normas<br />
relevantes <strong>de</strong> la directiva europea sobre compatibilid<strong>ad</strong> electromagnética<br />
2004/108/EC así como acerca <strong>de</strong> la directiva<br />
<strong>de</strong> baja tensión 2006/95/EC.<br />
La <strong>de</strong>claración <strong>de</strong> conformid<strong>ad</strong> original completa la pue<strong>de</strong><br />
solicitar a la empresa <strong>de</strong> importación.<br />
Import<strong>ad</strong>or<br />
KOMPERNASS GMBH<br />
BURGSTRASSE 21<br />
44867 BOCHUM, ALEMANIA<br />
www.kompernass.com<br />
12 <strong>SSMS</strong> <strong>600</strong> <strong>B2</strong>
Garantía<br />
Este aparato tiene 3 años <strong>de</strong> garantía <strong>de</strong>s<strong>de</strong> la fecha <strong>de</strong> compra. . El aparato<br />
ha sido fabric<strong>ad</strong>o cuid<strong>ad</strong>osamente y ha sido prob<strong>ad</strong>o antes <strong>de</strong> su entrega.<br />
Guar<strong>de</strong> el comprobante <strong>de</strong> caja como justifi cante <strong>de</strong> compra. Si necesitara<br />
hacer uso <strong>de</strong> la garantía, póngase en contacto por teléfono con su punto <strong>de</strong><br />
servicio habitual. Éste es el único modo <strong>de</strong> garantizar un envío gratuito.<br />
ES<br />
ADVERTENCIA<br />
► La garantía cubre los <strong>de</strong>fectos <strong>de</strong> fabricación o <strong>de</strong>l material, pero no para<br />
los daños <strong>de</strong> transporte, piezas sujetas a <strong>de</strong>sgaste y los daños sufridos por<br />
las piezas frágiles p. ej. el interruptor.<br />
El producto ha sido diseñ<strong>ad</strong>o únicamente para el uso priv<strong>ad</strong>o y no para el uso<br />
comercial. En caso <strong>de</strong> manipulación in<strong>de</strong>bida e incorrecta, uso <strong>de</strong> la fuerza y<br />
en caso <strong>de</strong> abrir el aparato personas extrañas a nuestros centros <strong>de</strong> asistencia<br />
técnica autoriz<strong>ad</strong>os, la garantía pier<strong>de</strong> su vali<strong>de</strong>z.<br />
Esta garantía no reduce en forma alguna sus <strong>de</strong>rechos legales.<br />
La duración <strong>de</strong> la garantía no se prolonga con la garantía <strong>de</strong> reparaciones. Lo<br />
mismo suce<strong>de</strong> con las piezas que se hayan cambi<strong>ad</strong>o o repar<strong>ad</strong>o.<br />
Los daños y <strong>de</strong>fectos que puedan estar presentes en el momento <strong>de</strong> la compra<br />
<strong>de</strong>berán notifi carse inmediatamente <strong>de</strong>spués <strong>de</strong>l <strong>de</strong>sembal<strong>ad</strong>o o como máximo<br />
dos días <strong>de</strong>spués <strong>de</strong> la fecha <strong>de</strong> compra.<br />
Una vez transcurrido el periodo <strong>de</strong> garantía, <strong>de</strong>berá abonarse el costo <strong>de</strong> las<br />
reparaciones.<br />
Asistencia técnica<br />
Servicio España<br />
Tel.: 902 59 99 22<br />
(0,08 EUR/Min. + 0,11 EUR/llam<strong>ad</strong>a (tarifa normal))<br />
(0,05 EUR/Min. + 0,11 EUR/llam<strong>ad</strong>a (tarifa reducida))<br />
E-Mail: kompernass@lidl.es<br />
IAN 68957<br />
<strong>SSMS</strong> <strong>600</strong> <strong>B2</strong><br />
13
ES<br />
Recetas<br />
Crema <strong>de</strong> verduras<br />
2-4 personas<br />
Ingredientes<br />
■ 2-3 cuchar<strong>ad</strong>as aceite<br />
■ 200 g <strong>de</strong> cebolla<br />
■ 200 g <strong>de</strong> patatas (son especialmente buenas las varieda<strong>de</strong>s<br />
harinosas para cocer)<br />
■ 200 g <strong>de</strong> zanahorias<br />
■ 350-400 ml <strong>de</strong> caldo <strong>de</strong> verduras (fresco o instantáneo)<br />
■ Sal, pimienta, nuez mosc<strong>ad</strong>a<br />
■ 5 g <strong>de</strong> perejil<br />
Preparación<br />
1) Pelar la cebolla y picarla en pedacitos pequeños. Lavar las zanahorias,<br />
pelarlas y cortarlas en rodajas. Pelar las patatas, lavarlas y cortarlas en<br />
d<strong>ad</strong>os <strong>de</strong> aprox. 2 cm.<br />
2) Calentar aceite en una olla y rehogar la cebolla. Agregar las zanahorias<br />
y las patatas, y rehogarlas también. Agregar caldo hasta cubrir bien las<br />
verduras y cocer durante 10-15 minutos. Si es necesario, agregar más caldo<br />
durante la cocción si queda al <strong>de</strong>scubierto la verdura.<br />
3) Lavar el perejil, agitarlo para secarlo y quitar los tallos. Desmenuzar el<br />
perejil en trozos gran<strong>de</strong>s y añ<strong>ad</strong>irlo a la sopa. Triturar todo con la batidora<br />
<strong>de</strong> <strong>brazo</strong> 5 durante aproxim<strong>ad</strong>amente 1 minuto. Sazonar con sal, pimienta<br />
y nuez mosc<strong>ad</strong>a rall<strong>ad</strong>a.<br />
14 <strong>SSMS</strong> <strong>600</strong> <strong>B2</strong>
Sopa <strong>de</strong> calabaza<br />
4 personas<br />
Ingredientes<br />
■ 1 cebolla mediana<br />
■<br />
■<br />
■<br />
2 dientes <strong>de</strong> ajo<br />
10 - 20 g <strong>de</strong> jengibre fresco<br />
3 cuchar<strong>ad</strong>as <strong>de</strong> aceite <strong>de</strong> colza<br />
■ 400 g <strong>de</strong> carne <strong>de</strong> calabaza (la mejor varied<strong>ad</strong> para esta receta<br />
es la calabaza Hokkaido, pues la piel se reblan<strong>de</strong>ce al cocerla y<br />
no es necesario pelarla)<br />
■ 250 -300 ml <strong>de</strong> leche <strong>de</strong> coco<br />
■<br />
■<br />
■<br />
■<br />
■<br />
250 -500 ml <strong>de</strong> caldo <strong>de</strong> verdura<br />
zumo <strong>de</strong> ½ naranja<br />
un poco <strong>de</strong> vino blanco seco<br />
1 cuchar<strong>ad</strong>ita <strong>de</strong> azúcar<br />
sal y pimienta<br />
ES<br />
Preparación<br />
1) Pelar y picar la cebolla y el ajo. Pelar el jengibre y picarlo fi no. En primer<br />
lugar, rehogar la cebolla y el jengibre en aceite caliente. Tras 2 minutos,<br />
agregar también el ajo y rehogar.<br />
2) Limpiar la calabaza con un cepillo para verdura y agua caliente y cortarla<br />
en d<strong>ad</strong>os <strong>de</strong> 2-3 cm. (Si se utiliza una calabaza <strong>de</strong> una varied<strong>ad</strong> diferente<br />
a Hokkaido, es necesario pelarla ahora). Agregar los d<strong>ad</strong>os <strong>de</strong> calabaza<br />
a la cebolla y el jengibre y rehogar. Agregar la mit<strong>ad</strong> <strong>de</strong> la leche <strong>de</strong> coco<br />
y sufi ciente caldo <strong>de</strong> verduras como para cubrir bien la calabaza. Cocer<br />
con tapa aprox. 20-25 minutos. Batir todo bien con la batidora <strong>de</strong> <strong>brazo</strong> 5.<br />
Al mismo tiempo, agregar leche <strong>de</strong> coco hasta que la sopa <strong>ad</strong>quiera la<br />
consistencia suave y cremosa a<strong>de</strong>cu<strong>ad</strong>a.<br />
3) Sazonar la sopa con zumo <strong>de</strong> naranja, vino blanco, azúcar, sal y pimienta,<br />
<strong>de</strong> modo que la sopa <strong>ad</strong>quiera un gusto picante y dulce, a<strong>de</strong>más <strong>de</strong> un<br />
toque equilibr<strong>ad</strong>o <strong>de</strong> agrio y sal<strong>ad</strong>o.<br />
<strong>SSMS</strong> <strong>600</strong> <strong>B2</strong><br />
15
ES<br />
Confitura dulce <strong>de</strong> frutas<br />
Ingredientes<br />
■ 250 g <strong>de</strong> fresas u otra fruta (fresca o congel<strong>ad</strong>a)<br />
■<br />
■<br />
■<br />
1 paquete (aprox. 125 g) <strong>de</strong> azúcar gelatinizante sin cocer<br />
1 chorrito <strong>de</strong> zumo <strong>de</strong> limón<br />
1 pizca <strong>de</strong> semillas <strong>de</strong> vainilla en rama<br />
Preparación<br />
1) Lavar y limpiar las fresas, quitando las hojas ver<strong>de</strong>s al pie <strong>de</strong>l tallo. Dejar<br />
escurrir bien en un escurridor para eliminar el exceso <strong>de</strong> agua y evitar que<br />
la confi tura que<strong>de</strong> <strong>de</strong>masi<strong>ad</strong>o líquida. Picar las fresas gran<strong>de</strong>s.<br />
2) Pesar 250 g <strong>de</strong> fresas e introducirlas en un recipiente a<strong>de</strong>cu<strong>ad</strong>o para batir.<br />
3) Agregar un chorrito <strong>de</strong> zumo <strong>de</strong> limón.<br />
4) Si es necesario, raspar las semillas <strong>de</strong> una rama <strong>de</strong> vainilla y agregarlo.<br />
5) Agregar el contenido <strong>de</strong>l paquete <strong>de</strong> azúcar gelatinizante sin cocer y batir<br />
bien con la batidora <strong>de</strong> <strong>brazo</strong> 5 durante 45-60 segundos. Si quedasen<br />
todavía trozos gran<strong>de</strong>s, <strong>de</strong>jar reposar todo durante 1 minuto y batir <strong>de</strong><br />
nuevo durante 60 segundos.<br />
6) La confi tura se pue<strong>de</strong> consumir al momento o <strong>de</strong>jar enfriar en un tarro cerr<strong>ad</strong>o<br />
con tapa <strong>de</strong> rosca.<br />
16 <strong>SSMS</strong> <strong>600</strong> <strong>B2</strong>
Crema <strong>de</strong> chocolate<br />
Para 4 personas<br />
Ingredientes<br />
■ 350 g <strong>de</strong> nata para montar<br />
■<br />
■<br />
200 g <strong>de</strong> chocolate amargo (> 60% <strong>de</strong> cacao)<br />
½ rama <strong>de</strong> vainilla (semillas)<br />
Preparación<br />
1) Hervir la nata, <strong>de</strong>smenuzar el chocolate y <strong>de</strong>jar que se <strong>de</strong>rrita lentamente<br />
a fuego lento. Raspar las semillas <strong>de</strong> media rama <strong>de</strong> vainilla y agregar a la<br />
masa.<br />
2) Dejar que se enfríe por completo y se endurezca en el frigorífi co.<br />
3) Antes <strong>de</strong> servir, batir con el batidor 0 para dar una consistencia cremosa.<br />
Consejo: acompañar con fruta fresca.<br />
ES<br />
Mayonesa<br />
■ 200 ml <strong>de</strong> aceite vegetal neutro, p. ej. aceite <strong>de</strong> colza<br />
■ 1 huevo (yema y clara)<br />
■ 10 g <strong>de</strong> vinagre suave o zumo <strong>de</strong> limón<br />
■ Sal y pimienta al gusto<br />
Preparación<br />
1) Agregar al recipiente para batir el huevo y el zumo <strong>de</strong> limón, mantener el<br />
batidor 0 en el recipiente en posición vertical y pulsar la tecla Turbo.<br />
2) Agregar el aceite vertiendo un fi no chorro uniforme (durante aprox. 1:30<br />
minutos), <strong>de</strong> modo que el aceite se ligue con el resto <strong>de</strong> ingredientes.<br />
3) Por último, sazonar con sal y pimienta al gusto.<br />
<strong>SSMS</strong> <strong>600</strong> <strong>B2</strong><br />
17
Indice<br />
Informazioni sul presente manuale di istruzioni . . . . . . . . . . . . . . . . . . . . 20<br />
Diritto d’autore . . . . . . . . . . . . . . . . . . . . . . . . . . . . . . . . . . . . . . . . . . . . . . . . . . . . . . . . . . 20<br />
Uso conforme . . . . . . . . . . . . . . . . . . . . . . . . . . . . . . . . . . . . . . . . . . . . . . . . 20<br />
IT<br />
MT<br />
Indicazioni di sicurezza . . . . . . . . . . . . . . . . . . . . . . . . . . . . . . . . . . . . . . . . 21<br />
Volume <strong>de</strong>lla fornitura . . . . . . . . . . . . . . . . . . . . . . . . . . . . . . . . . . . . . . . . . 22<br />
Smaltimento <strong>de</strong>lla confezione . . . . . . . . . . . . . . . . . . . . . . . . . . . . . . . . . . . . . . . . . . . . . . 22<br />
Dati tecnici . . . . . . . . . . . . . . . . . . . . . . . . . . . . . . . . . . . . . . . . . . . . . . . . . . . 23<br />
Descrizione <strong>de</strong>ll’apparecchio / Accessori . . . . . . . . . . . . . . . . . . . . . . . . . . 23<br />
Uso . . . . . . . . . . . . . . . . . . . . . . . . . . . . . . . . . . . . . . . . . . . . . . . . . . . . . . . . . 24<br />
Montaggio . . . . . . . . . . . . . . . . . . . . . . . . . . . . . . . . . . . . . . . . . . . . . . . . . . . 25<br />
Montaggio <strong>de</strong>l frullatore: . . . . . . . . . . . . . . . . . . . . . . . . . . . . . . . . . . . . . . . . . . . . . . . . . . 25<br />
Montaggio <strong>de</strong>lla frusta . . . . . . . . . . . . . . . . . . . . . . . . . . . . . . . . . . . . . . . . . . . . . . . . . . . 25<br />
Montare il tritatutto . . . . . . . . . . . . . . . . . . . . . . . . . . . . . . . . . . . . . . . . . . . . . . . . . . . . . . 25<br />
Come mantenere l’apparecchio . . . . . . . . . . . . . . . . . . . . . . . . . . . . . . . . . 26<br />
Uso . . . . . . . . . . . . . . . . . . . . . . . . . . . . . . . . . . . . . . . . . . . . . . . . . . . . . . . . . 27<br />
Montaggio a parete . . . . . . . . . . . . . . . . . . . . . . . . . . . . . . . . . . . . . . . . . . . 29<br />
Pulizia . . . . . . . . . . . . . . . . . . . . . . . . . . . . . . . . . . . . . . . . . . . . . . . . . . . . . . 29<br />
Smaltimento <strong>de</strong>ll’apparecchio . . . . . . . . . . . . . . . . . . . . . . . . . . . . . . . . . . . 30<br />
Indicazioni sulla dichiarazione di conformità CE . . . . . . . . . . . . . . . . . . . . 30<br />
Importatore . . . . . . . . . . . . . . . . . . . . . . . . . . . . . . . . . . . . . . . . . . . . . . . . . . 30<br />
Garanzia . . . . . . . . . . . . . . . . . . . . . . . . . . . . . . . . . . . . . . . . . . . . . . . . . . . . 31<br />
Assistenza . . . . . . . . . . . . . . . . . . . . . . . . . . . . . . . . . . . . . . . . . . . . . . . . . . . 31<br />
Ricette . . . . . . . . . . . . . . . . . . . . . . . . . . . . . . . . . . . . . . . . . . . . . . . . . . . . . . 32<br />
Minestra cremosa di verdure . . . . . . . . . . . . . . . . . . . . . . . . . . . . . . . . . . . . . . . . . . . . . . . 32<br />
Minestra di zucca . . . . . . . . . . . . . . . . . . . . . . . . . . . . . . . . . . . . . . . . . . . . . . . . . . . . . . . 33<br />
Composta di frutta . . . . . . . . . . . . . . . . . . . . . . . . . . . . . . . . . . . . . . . . . . . . . . . . . . . . . . . 34<br />
Crema al cioccolato . . . . . . . . . . . . . . . . . . . . . . . . . . . . . . . . . . . . . . . . . . . . . . . . . . . . . 35<br />
Maionese . . . . . . . . . . . . . . . . . . . . . . . . . . . . . . . . . . . . . . . . . . . . . . . . . . . . . . . . . . . . . . 35<br />
<strong>SSMS</strong> <strong>600</strong> <strong>B2</strong><br />
19
Informazioni sul presente manuale di istruzioni<br />
IT<br />
MT<br />
Il presente manuale di istruzioni è parte integrante <strong>de</strong>l set di mixer <strong>ad</strong> asta <strong>SSMS</strong><br />
<strong>600</strong> <strong>B2</strong> (di seguito <strong>de</strong>nominata l’apparecchio) e fornisce informazioni importanti<br />
per l’uso conforme, la sicurezza, l’installazione e il collegamento nonché l’uso<br />
<strong>de</strong>ll’apparecchio.<br />
Il manuale di istruzioni <strong>de</strong>v’essere sempre disponibile nelle vicinanze <strong>de</strong>ll’apparecchio.<br />
Esso <strong>de</strong>v’essere letto e applicato da tutti coloro che sono incaricati<br />
<strong>de</strong>ll’uso e <strong>de</strong>ll’eliminazione <strong>de</strong>i guasti <strong>de</strong>ll’apparecchio.<br />
Conservare il presente manuale di istruzioni e consegnarlo insieme all’apparecchio<br />
in caso di cessione <strong>de</strong>llo stesso a terzi.<br />
Diritto d’autore<br />
La presente documentazione è tutelata dal diritto d’autore.<br />
Qualsiasi riproduzione o ristampa, anche parziale, nonché la riproduzione <strong>de</strong>lle<br />
illustrazioni, anche se modifi cate, è consentita solo previa autorizzazione scritta<br />
<strong>de</strong>l produttore.<br />
Uso conforme<br />
Il set di mixer <strong>ad</strong> asta è realizzato esclusivamente per lavorare cibi in piccole<br />
dosi. Esso è previsto esclusivamente per l’uso in ambiente domestico privato.<br />
Il set di mixer <strong>ad</strong> asta non è previsto per l’uso commerciale.<br />
AVVISO<br />
Pericolo <strong>de</strong>rivante da uso non conforme!<br />
In caso di uso non conforme o diverso da quello previsto, possono verifi carsi<br />
situazioni di pericolo.<br />
► Utilizzare l'apparecchio esclusivamente in conformità alla sua <strong>de</strong>stinazione.<br />
►<br />
Attenersi alle procedure <strong>de</strong>scritte nel presente manuale di istruzioni.<br />
AVVERTENZA<br />
► In caso di uso non conforme o diverso da quello previsto, possono verifi carsi<br />
situazioni di pericolo. Utilizzare l'apparecchio esclusivamente in conformità<br />
alla sua <strong>de</strong>stinazione. Attenersi alle procedure <strong>de</strong>scritte nel presente manuale<br />
di istruzioni. Si esclu<strong>de</strong> qualsiasi rivendicazione per i danni <strong>de</strong>rivanti da<br />
uso non conforme, riparazioni non professionali, modifi che non autorizzate<br />
o impiego di parti di ricambio non omologate. Il rischio è esclusivamente<br />
a carico <strong>de</strong>ll'utente.<br />
20 <strong>SSMS</strong> <strong>600</strong> <strong>B2</strong>
Indicazioni di sicurezza<br />
PERICOLO DI SCOSSA ELETTRICA<br />
► Connettere il mixer <strong>ad</strong> asta solo a una presa di rete installata a norma con<br />
tensione di rete di 220 - 240 V ~ / 50 Hz.<br />
► In caso di guasti di funzionamento, e prima di pulire il mixer <strong>ad</strong> asta, estrarre<br />
la spina dalla presa di rete.<br />
► Non esporre l'apparecchio all'umidità e non utilizzarlo all'aperto.<br />
► In caso di infi ltrazioni di liquidi nell'alloggiamento <strong>de</strong>ll'apparecchio,<br />
disinserire subito la spina dalla presa di rete e farlo riparare da personale<br />
specializzato qualifi cato.<br />
► Disconnettere il cavo di rete dalla presa tirando sempre dalla spina, mai<br />
dal cavo.<br />
► Non piegare o schiacciare il cavo di rete e non collocarlo in modo che<br />
qualcuno possa calpestarlo o inciamparvi.<br />
► Fare sostituire immediatamente le spine o i cavi di rete danneggiati dal<br />
personale specializzato autorizzato o dal servizio clienti, per evitare rischi.<br />
► Non aprire l'alloggiamento <strong>de</strong>l blocco motore <strong>de</strong>l set di mixer <strong>ad</strong> asta.<br />
La sua apertura comporta <strong>de</strong>i pericoli e la <strong>de</strong>ca<strong>de</strong>nza <strong>de</strong>lla garanzia.<br />
► Questo apparecchio non è indicato per l'uso da parte di persone (inclusi<br />
bambini) con limitate capacità fi siche, sensoriali o mentali o prive <strong>de</strong>ll'esperienza<br />
e/o <strong>de</strong>lla conoscenza necessaria, a meno che tali persone non vengano<br />
sorvegliate da un responsabile per la sicurezza o abbiano ricevuto<br />
indicazioni sull'impiego <strong>de</strong>ll'apparecchio.<br />
► Sorvegliare i bambini per assicurarsi che non giochino con l'apparecchio.<br />
IT<br />
MT<br />
PERICOLO DI SCOSSA ELETTRICA<br />
Non immergere assolutamente il blocco motore <strong>de</strong>l mixer <strong>ad</strong> asta in<br />
liquidi e impedire la penetrazione di liquidi nell'alloggiamento <strong>de</strong>l<br />
blocco motore.<br />
ATTENZIONE! PERICOLO DI LESIONI!<br />
► Disconnettere l'apparecchio dalla rete elettrica prima di rimuovere o<br />
applicare gli accessori o se si lascia l'apparecchio incustodito.<br />
<strong>SSMS</strong> <strong>600</strong> <strong>B2</strong><br />
21
Volume <strong>de</strong>lla fornitura<br />
IT<br />
MT<br />
La fornitura standard <strong>de</strong>ll’apparecchio compren<strong>de</strong> i seguenti componenti:<br />
▯ Set di mixer con asta<br />
▯ Misurino con coperchio/base<br />
▯ Frusta<br />
▯ Tritatutto (lama e ciotola con coperchio/base combinati)<br />
▯ Supporto a parete<br />
▯ 2 tasselli<br />
▯ 2 viti<br />
▯ Istruzioni per l’uso<br />
1) Prelevare tutte le componenti <strong>de</strong>ll’apparecchio e il manuale di istruzioni<br />
dalla confezione.<br />
2) Rimuovere completamente il materiale di imballaggio.<br />
3) Pulire tutte le componenti <strong>de</strong>ll’apparecchio come <strong>de</strong>scritto nel capitolo<br />
“Pulizia”.<br />
AVVERTENZA<br />
► Controllare la completezza e integrità <strong>de</strong>lla fornitura in relazione ai danni<br />
visibili.<br />
► In caso di fornitura incompleta o in presenza di danni <strong>de</strong>rivanti da imballaggio<br />
insuffi ciente o causati dal trasporto, rivolgersi alla Hotline di assistenza<br />
(v. capitolo Assistenza<br />
Smaltimento <strong>de</strong>lla confezione<br />
L’imballaggio protegge l’apparecchio dai danni da trasporto. I materiali di<br />
imballaggio sono stati selezionati in relazione alla loro ecocompatibilità e alle<br />
caratteristiche di smaltimento, e pertanto sono riciclabili.<br />
Il riciclo <strong>de</strong>ll’imballaggio consente di risparmiare materie prime e riduce la generazione<br />
di rifi uti. Smaltire il materiale di imballaggio inutilizzato in conformità<br />
alle norme vigenti localmente.<br />
AVVERTENZA<br />
► Durante il periodo di validità <strong>de</strong>lla garanzia, se possibile, conservare<br />
l'imballaggio originale, per poter imballare a<strong>de</strong>guatamente l'apparecchio<br />
in caso di intervento in garanzia.<br />
22 <strong>SSMS</strong> <strong>600</strong> <strong>B2</strong>
Dati tecnici<br />
Tensione di rete<br />
Tensione nominale<br />
Classe di protezione<br />
Capacità :<br />
Misurino<br />
Capacità massima per i liquidi<br />
220 - 240 V ~ , 50 Hz<br />
<strong>600</strong> W<br />
II<br />
700 ml<br />
300 ml<br />
IT<br />
MT<br />
Consigliamo i seguenti tempi di funzionamento:<br />
far raff reddare il mixer <strong>ad</strong> asta dopo 1 minuto di funzionamento.<br />
Far raff reddare il tritatutto dopo 1 minuto di funzionamento.<br />
Far raff reddare la frusta dopo 2 minuti di funzionamento.<br />
Descrizione <strong>de</strong>ll’apparecchio / Accessori<br />
1 Regolatore di velocità<br />
2 Interruttore (velocità normale)<br />
3 Interruttore turbo (velocità superiore)<br />
4 Corpo motore<br />
5 Mixer a immersione<br />
6 Coperchio-ciotola<br />
7 Coltello<br />
8 Ciotola (con coperchio/basse di appoggio combinati)<br />
9 Supporto per frusta<br />
0 Frusta<br />
q Misurino (con coperchio combinato/base)<br />
w Supporto a parete incluse viti e tasselli<br />
<strong>SSMS</strong> <strong>600</strong> <strong>B2</strong><br />
23
Uso<br />
IT<br />
MT<br />
AVVERTENZA<br />
► Con il misurino q si possono misurare quantità di liquidi fi no a 700 ml.<br />
Per la lavorazione, introdurre un massimo di 300 ml, altrimenti il liquido<br />
potrebbe fuoriuscire dal misurino q.<br />
► Per conservare cibi solidi o liquidi nel misurino q, togliere la base <strong>de</strong>l<br />
misurino q e impiegarla come coperchio. Assicurarsi che il beccuccio <strong>de</strong>l<br />
misurino q sia chiuso.<br />
■ Con il mixer <strong>ad</strong> asta 5 si possono preparare salsine, salse, minestre o pappe<br />
per bambini. Consigliamo di far funzionare il mixer <strong>ad</strong> asta 5 per max.<br />
1 minuto per volta e quindi lasciarlo raff reddare.<br />
ATTENZIONE - DANNI MATERIALI!<br />
► Non utilizzare il mixer 5 per la lavorazione di alimenti solidi. Ciò crea<br />
danni irreparabili all'apparecchio!<br />
■ Con la frusta 0 si può ottenere maionese, montare panna o albumi o preparare<br />
<strong>de</strong>ssert. Consigliamo di far funzionare la frusta 0 per max. 2 minuti<br />
per volta e quindi lasciarla raff reddare.<br />
■ Con il tritatutto, composto da coltello 7, ciotola 8 e ciotola-coperchio 6,<br />
si possono sminuzzare anche alimenti più duri. Consigliamo di far funzionare<br />
il tritatutto per max. 1 minuto per volta e quindi lasciarlo raff reddare.<br />
ATTENZIONE - DANNI MATERIALI!<br />
► Non usare il tritattuto per lavorare cibi liquidi. Ciò crea danni irreparabili<br />
all'apparecchio!<br />
24 <strong>SSMS</strong> <strong>600</strong> <strong>B2</strong>
Montaggio<br />
ATTENZIONE! PERICOLO DI LESIONI!<br />
► Inserire la spina nella presa solo dopo il montaggio <strong>de</strong>ll'apparecchio.<br />
AVVERTENZA<br />
► Prima <strong>de</strong>lla prima messa in funzione, pulire tutte le componenti come<br />
<strong>de</strong>scritto al capitolo “Pulizia”.<br />
IT<br />
MT<br />
Montaggio <strong>de</strong>l frullatore:<br />
ATTENZIONE! PERICOLO DI LESIONI!<br />
► Il coltello è estremamente tagliente! Prestare quindi sempre molta attenzione.<br />
■ Inserire il mixer <strong>ad</strong> asta 5 sul blocco motore 4, in modo che la freccia punti<br />
sul simbolo . Ruotare il mixer <strong>ad</strong> asta 5 fi no a quando la freccia sul<br />
blocco motore 4 non punterà verso il simbolo .<br />
Montaggio <strong>de</strong>lla frusta<br />
■ Inserire la frusta 0 nel supporto per frusta 9.<br />
■ Inserire la frusta così composta 0 sul blocco motore 4, in modo che la<br />
frusta punti sul simbolo . Ruotare la frusta 0 fi no a quando la freccia sul<br />
blocco motore 4 non punterà verso il simbolo .<br />
Montare il tritatutto<br />
►<br />
ATTENZIONE! PERICOLO DI LESIONI!<br />
Il coltello 7 è estremamente tagliente! Agire sempre con cautela.<br />
■ Inserire cautamente il coltello 7 sul supporto nella ciotola 8.<br />
■ Versare gli alimenti da tritare nella ciotola 8.<br />
AVVERTENZA<br />
► Riempire la ciotola 8 sempre fi no alla marcatura MAX. In caso contrario,<br />
l'apparecchio non funzionerà bene.<br />
<strong>SSMS</strong> <strong>600</strong> <strong>B2</strong><br />
25
IT<br />
MT<br />
■ Posizionare la ciotola-coperchio 6 sulla ciotola 8 e avvitare saldamente.<br />
In tal caso, i perni al margine <strong>de</strong>lla ciotola 8 <strong>de</strong>vono essere portati nella<br />
scanalatura sulla ciotola-coperchio 6.<br />
■ Inserire il blocco motore 4 sulla ciotola-coperchio 6 in modo che la freccia<br />
punti verso il simbolo . Ruotare il blocco motore 4 fi no a quando la freccia<br />
non punterà verso il simbolo .<br />
AVVERTENZA<br />
► Se si <strong>de</strong>si<strong>de</strong>ra conservare gli alimenti nella ciotola 8 è possibile rimuovere<br />
la base <strong>de</strong>lla ciotola 8 e utilizzarla come coperchio. Rimuovere a tale<br />
scopo la ciotola-coperchio 6 e il blocco motore 4, ed eventualmente la<br />
lama 7, esercitando cautela. Svitare la base <strong>de</strong>lla ciotola 8 e collocarla<br />
sulla ciotola 8.<br />
Come mantenere l’apparecchio<br />
Per utilizzare l’apparecchio, proce<strong>de</strong>re come segue:<br />
26 <strong>SSMS</strong> <strong>600</strong> <strong>B2</strong>
Uso<br />
►<br />
ATTENZIONE! PERICOLO DI LESIONI!<br />
Gli alimenti non <strong>de</strong>vono essere troppo caldi! In caso di schizzi, si potrebbero<br />
riportare ustioni.<br />
IT<br />
MT<br />
AVVERTENZA<br />
► Se si <strong>de</strong>si<strong>de</strong>ra montare la panna con la frusta 0, durante il procedimento<br />
tenere il contenitore in posizione obliqua. In tal modo la panna si monterà<br />
più rapidamente. Fare attenzione a non far schizzare la panna fuori dal<br />
contenitore durante il procedimento. Per montare la panna, spingere il<br />
regolatore di velocità 1 su "5".<br />
Dopo aver montato il set di mixer <strong>ad</strong> asta come <strong>de</strong>si<strong>de</strong>rato:<br />
1) Inserire la spina di rete nella presa elettrica.<br />
2) Tenere premuto l’interruttore 2 per elaborare gli alimenti a velocità normale.<br />
Spingere il regolatore di velocità 1 in direzione “5” per aumentare la<br />
velocità. Spingere il regolatore di velocità 1 in direzione “1” per diminuire<br />
la velocità.<br />
3) Tenere premuto l’interruttore Turbo 3 per elaborare gli alimenti a velocità<br />
superiore. Premendo l’interruttore Turbo 3 si ha immediatamente a disposizione<br />
la massima velocità di lavorazione.<br />
4) Dopo aver terminato la lavorazione <strong>de</strong>i cibi, rilasciare semplicemente il tasto<br />
che si era premuto.<br />
AVVERTENZA<br />
► Se durante l‘uso si verifi cassero rumori insoliti, come cigolii o simili, versare<br />
un po‘ di olio alimentare neutro sull‘albero motore:<br />
<strong>SSMS</strong> <strong>600</strong> <strong>B2</strong><br />
27
Esempi per la triturazione e lo sminuzzamento di vari alimenti con il tritatutto:<br />
IT<br />
MT<br />
Ingredienti<br />
Quantità<br />
max.<br />
Tempo di<br />
lavorazione<br />
Velocità<br />
Cipolle 200 g ca. 20 sec. Livello 1 - 3<br />
Prezzemolo 30 g ca. 20 sec. turbo<br />
Aglio 20 spicchi ca. 20 sec. Livello 1 - 5<br />
Carotine 200 g ca. 15 sec. Livello 1 - 5<br />
Nocciole/<br />
Mandorle<br />
200 g ca. 30 sec. turbo<br />
Noci 200 g ca. 25 sec. Livello 3 - 4<br />
Parmigiano<br />
1 cm<br />
250 g ca. 30 sec. turbo<br />
28 <strong>SSMS</strong> <strong>600</strong> <strong>B2</strong>
Montaggio a parete<br />
Nella fornitura sono contenuti 2 tasselli e 2 viti per il montaggio <strong>de</strong>l supporto a<br />
parete w.<br />
IT<br />
MT<br />
►<br />
AVVISO - PERICOLO DI FOLGORAZIONE!<br />
Prima <strong>de</strong>l montaggio <strong>de</strong>l supporto a parete w assicurarsi che nella parete<br />
non si trovino cavi o tubazioni!<br />
Pulizia<br />
1) Marcare la posizione <strong>de</strong>i fori in base al supporto a parete w.<br />
2) Eseguire i fori con un trapano da 6 mm.<br />
3) Inserire i tasselli nei fori.<br />
4) Posizionare entrambe le aperture <strong>de</strong>l supporto a parete w sui fori e fi ssare<br />
il supporto con entrambe le viti.<br />
►<br />
AVVISO - PERICOLO DI FOLGORAZIONE!<br />
Prima di pulire il set di mixer <strong>ad</strong> asta, staccare sempre la spina dalla presa<br />
di rete.<br />
► Per la pulizia, non immergere mai il blocco motore 4 in acqua e non<br />
collocarlo sotto l'acqua corrente.<br />
AVVISO - PERICOLO DI LESIONI!<br />
► L'uso <strong>de</strong>l coltello estremamente affi lato 7 comporta il pericolo di lesioni.<br />
Dopo l'uso e la pulizia, ricomporre il tritatutto, per evitare ferimenti con il<br />
coltello lasciato scoperto. Ren<strong>de</strong>re il coltello inaccessibile ai bambini.<br />
ATTENZIONE - DANNI MATERIALI!<br />
► Non lavare le parti <strong>de</strong>l set di mixer <strong>ad</strong> asta in lavastoviglie perché potrebbero<br />
danneggiarsi.<br />
► Non utilizzare <strong>de</strong>tergenti aggressivi, chimici o abrasivi! Essi possono attaccare<br />
la superfi cie in modo irreparabile!<br />
<strong>SSMS</strong> <strong>600</strong> <strong>B2</strong><br />
29
IT<br />
MT<br />
1) Staccare la spina.<br />
2) Pulire il blocco motore 4, il mixer <strong>ad</strong> asta 5, la ciotola-coperchio 6 la<br />
frusta-supporto 9 e il supporto a parete w con un panno umido.<br />
Assicurarsi che non penetri acqua nelle aperture <strong>de</strong>l mixer <strong>ad</strong> asta 5. In<br />
caso di sporco resistente, versare un po’ di <strong>de</strong>tergente <strong>de</strong>licato sul panno.<br />
3) Pulire il resto <strong>de</strong>gli accessori (ciotola 8, frusta 0, misurino q e coltello 7)<br />
sotto acqua corrente e asciugarli bene con un panno asciutto.<br />
Smaltimento <strong>de</strong>ll’apparecchio<br />
Non gettare per alcun motivo l’apparecchio insieme ai normali<br />
rifiuti domestici.<br />
Questo prodotto è conforme alla Direttiva Europea 2002/96/EC.<br />
Smaltire l’apparecchio presso un’azienda autorizzata o presso l’ente comunale<br />
di smaltimento. Rispettare le norme attualmente in vigore. In caso di dubbi mettersi<br />
in contatto con l’ente di smaltimento competente.<br />
Indicazioni sulla dichiarazione di conformità CE<br />
Il presente apparecchio corrispon<strong>de</strong> ai requisiti fondamentali<br />
in relazione alla conformità e alle relative prescrizioni <strong>de</strong>lla<br />
Direttiva europea di compatibilità elettromagnetica 2004/<br />
108/EC e <strong>de</strong>lla Direttiva basse tensioni 2006/95/EC.<br />
La dichiarazione di conformità originale e completa è<br />
a disposizione presso l'importatore.<br />
Importatore<br />
KOMPERNASS GMBH<br />
BURGSTRASSE 21<br />
44867 BOCHUM, GERMANY<br />
www.kompernass.com<br />
30 <strong>SSMS</strong> <strong>600</strong> <strong>B2</strong>
Garanzia<br />
Questo apparecchio è garantito per tre anni a partire dalla data di acquisto.<br />
L’apparecchio è stato prodotto con cura e <strong>de</strong>bitamente collaudato prima <strong>de</strong>lla<br />
consegna.<br />
Conservare lo scontrino come prova d’acquisto. Nei casi contemplati dalla<br />
garanzia, mettersi in comunicazione telefonicamente con il centro di assistenza<br />
più vicino. Solo in tal modo è possibile garantire una spedizione gratuita <strong>de</strong>lla<br />
merce.<br />
IT<br />
MT<br />
Assistenza<br />
AVVERTENZA<br />
► La garanzia vale solo per i difetti relativi ai materiali o difetti di fabbricazione,<br />
ma non per i danni <strong>de</strong>rivanti dal trasporto, danni alle parti soggette a usura<br />
o fragili, come <strong>ad</strong> es. interruttori.<br />
Il prodotto è <strong>de</strong>stinato esclusivamente all’uso domestico e non a quello commerciale.<br />
La garanzia <strong>de</strong>ca<strong>de</strong> in caso di impiego improprio o manomissione, uso<br />
<strong>de</strong>lla forza e interventi non eseguiti dalla nostra fi liale di assistenza autorizzata.<br />
Questa garanzia non costituisce alcun limite ai diritti legali <strong>de</strong>l consumatore.<br />
Il periodo di garanzia non viene prolungato da interventi in garanzia. Ciò vale<br />
anche per le parti sostituite e riparate.<br />
I danni e difetti eventualmente presenti già all’atto <strong>de</strong>ll’acquisto <strong>de</strong>vono essere<br />
segnalati immediatamente dopo il disimballaggio, e comunque entro due giorni<br />
dalla data di acquisto.<br />
Le riparazioni eseguite dopo la sca<strong>de</strong>nza <strong>de</strong>lla garanzia sono a pagamento.<br />
Assistenza Italia<br />
Tel.: 02 3<strong>600</strong>3201<br />
E-Mail: kompernass@lidl.it<br />
IAN 68957<br />
Assistenza Malta<br />
Tel.: 80062230<br />
E-Mail: kompernass@lidl.com.mt<br />
IAN 68957<br />
<strong>SSMS</strong> <strong>600</strong> <strong>B2</strong><br />
31
Ricette<br />
IT<br />
MT<br />
Minestra cremosa di verdure<br />
2 -4 persone<br />
Ingredienti<br />
■ 2-3 cucchiai di olio<br />
■ 200 g di cipolle<br />
■ 200 g di patate (si consiglia di utilizzare patate farinose)<br />
■ 200 g di carotine<br />
■ 350-400 ml di brodo di verdura (fresco o istantaneo)<br />
■ Sale, pepe, noce moscata<br />
■ 5 g di prezzemolo<br />
Preparazione<br />
1) Sbucciare le cipolle e aff ettarle sottilmente a d<strong>ad</strong>ini. Lavare e pelare le carotine,<br />
tagliandole quindi a fette. Sbucciare le patate, sciacquarle e tagliarle a<br />
d<strong>ad</strong>ini di circa 2 cm di spessore.<br />
2) Riscaldare l’olio in un tegame, e farvi soff riggere le cipolle fi no a farle diventare<br />
trasparenti. Aggiungere carotine e patate e far soff riggere anch’esse.<br />
Versare brodo in quantità suffi ciente a coprire bene le verdure e continuare<br />
a cuocerle per 10-15 minuti. In caso di necessità, nel frattempo aggiungere<br />
altro brodo, qualora le verdure risultassero scoperte.<br />
3) Lavare il prezzemolo, scuoterlo per asciugarlo e rimuovere i gambi. Tagliarlo<br />
a grossi pezzi e aggiungerlo alla minestra. Ridurre il tutto in purea utilizzando<br />
il mixer <strong>ad</strong> asta 5 per circa 1 minuto. Insaporire con sale, pepe e noce<br />
moscata grattugiata.<br />
32 <strong>SSMS</strong> <strong>600</strong> <strong>B2</strong>
Minestra di zucca<br />
4 persone<br />
Ingredienti<br />
■ 1 cipolla di gran<strong>de</strong>zza media<br />
■<br />
■<br />
■<br />
2 spicchi d’aglio<br />
10 - 20 g di zenzero fresco<br />
3 cucchiai di olio di colza<br />
■ 400 g di polpa di zucca (la specie più indicata di zucca è quella<br />
<strong>de</strong>nominata Hokkaido, poiché la buccia si ammorbidisce durante<br />
la cottura e non è necessario rimuoverla)<br />
■ 250 -300 ml di latte di cocco<br />
■<br />
■<br />
■<br />
■<br />
■<br />
250 -500 ml di brodo di verdure<br />
Succo di mezza arancia<br />
Un po’ di vino bianco secco<br />
1 cucchiaino di zucchero<br />
Sale, pepe<br />
IT<br />
MT<br />
Preparazione<br />
1) Sbucciare e tagliare a d<strong>ad</strong>ini cipolla e aglio. Sbucciare lo zenzero e aff ettarlo<br />
fi nemente a d<strong>ad</strong>ini. Fare soff riggere prima la cipolla e l’aglio in olio<br />
bollente. Dopo 2 minuti aggiungere anche l’aglio e continuare a soff riggere.<br />
2) Pulire accuratamente la zucca con una spazzola per verdure sotto acqua<br />
corrente calda e quindi tagliarla in cubetti di dimensioni pari a 2-3 cm. (Se<br />
si usano zucche di specie diversa dalla Hokkaido, è necessario sbucciarle).<br />
Aggiungere i cubetti di zucca alla cipolla e allo zenzero e continuare a<br />
soff riggere. Versare la metà <strong>de</strong>l latte di cocco e il brodo necessario a coprire<br />
bene la zucca. Incoperchiare e cuocere per circa 20-25 minuti. Ridurre a<br />
una purea omogenea con il mixer <strong>ad</strong> asta 5. Aggiungere altro latte di<br />
cocco fi no a ottenere una minestra di consistenza cremosa e morbida.<br />
3) Insaporire la minestra con il succo d’arancia, il vino bianco, lo zucchero,<br />
il sale e il pepe, in modo da conferire alla minestra anche una nota dolce,<br />
accanto al gusto piccante, e un sapore equilibrato fra il dolce e il salato.<br />
<strong>SSMS</strong> <strong>600</strong> <strong>B2</strong><br />
33
IT<br />
MT<br />
Composta di frutta<br />
Ingredienti<br />
■ 250 g di fragole o altra frutta (fresca o surgelata)<br />
■ 1 pacchetto (ca. 125 g) di zucchero gelifi cante istantaneo (nessuna necessità<br />
di cottura)<br />
■ 1 spruzzo di succo di limone<br />
■<br />
1 punta di coltello di polpa di baccello di vaniglia<br />
Preparazione<br />
1) Lavare e pulire le fragole, rimuovendo i piccioli. Fare sgocciolare bene in un<br />
colino, al fi ne di eliminare l’acqua in eccesso e impedire che la composta<br />
divenga troppo liquida. Tagliare le fragole più grosse a pezzetti.<br />
2) Pesare 250 g di fragole e collocarle in un recipiente per frullati <strong>ad</strong>atto.<br />
3) Aggiungere uno spruzzo di succo di limone.<br />
4) In caso di necessità, grattare un po’ di polpa di baccello di vaniglia e<br />
aggiungerla.<br />
5) Versare il pacchetto di zucchero gelifi cante istantaneo e mescolare accuratamente<br />
con il mixer <strong>ad</strong> asta 5 per 45-60 secondi. Se fossero presenti ancora<br />
grossi pezzi di frutta, fare riposare il tutto per 1 minuto e quindi ridurre il<br />
resto in purea per 60 secondi.<br />
6) Consumare subito oppure versare la composta in un barattolo di vetro con<br />
coperchio e chiu<strong>de</strong>rlo.<br />
34 <strong>SSMS</strong> <strong>600</strong> <strong>B2</strong>
Crema al cioccolato<br />
Per 4 persone<br />
Ingredienti<br />
■ 350 g di panna da montare<br />
■<br />
■<br />
200 g di cioccolato amaro (> 60% di cacao)<br />
½ baccello di vaniglia (polpa)<br />
Preparazione<br />
1) Mettere la panna sul fuoco, sbriciolare il cioccolato e farvelo sciogliere<br />
<strong>de</strong>ntro a fi amma bassa. Grattare la polpa di mezzo baccello di vaniglia e<br />
aggiungerla al liquido.<br />
2) Mettere a refrigerare in frigorifero fi no <strong>ad</strong> avvenuta solidifi cazione.<br />
3) Prima di servire, lavorare la crema con la frusta 0 fi no a ottenere una<br />
consistenza cremosa.<br />
Suggerimento: aggiungere frutta fresca.<br />
IT<br />
MT<br />
Maionese<br />
■<br />
■<br />
■<br />
■<br />
200 ml di olio vegetale neutro, <strong>ad</strong> es. olio di colza<br />
1 uovo (tuorlo e albume)<br />
10 g di aceto dal sapore <strong>de</strong>licato o succo di limone<br />
Sale e pepe a piacere<br />
Preparazione<br />
1) Versare l’uovo e il succo di limone nel contenitore, collocare la frusta 0<br />
obliquamente nel contenitore e premere il tasto Turbo.<br />
2) Versare l’olio lentamente a fi lo sottile, in modo uniforme (distribuendo la<br />
quantità in un periodo di tempo pari a circa 1:30 minuti), in modo che l’olio<br />
possa legarsi agli altri ingredienti.<br />
3) Insaporire infi ne con sale e pepe, in base ai propri gusti.<br />
<strong>SSMS</strong> <strong>600</strong> <strong>B2</strong><br />
35
Índice<br />
Informações acerca <strong>de</strong>ste manual <strong>de</strong> instruções . . . . . . . . . . . . . . . . . . . . 38<br />
Direitos <strong>de</strong> autor . . . . . . . . . . . . . . . . . . . . . . . . . . . . . . . . . . . . . . . . . . . . . . . . . . . . . . . . 38<br />
Utilização correcta . . . . . . . . . . . . . . . . . . . . . . . . . . . . . . . . . . . . . . . . . . . . 38<br />
Indicações <strong>de</strong> segurança . . . . . . . . . . . . . . . . . . . . . . . . . . . . . . . . . . . . . . . 39<br />
Volume <strong>de</strong> fornecimento . . . . . . . . . . . . . . . . . . . . . . . . . . . . . . . . . . . . . . . 40<br />
Eliminação da embalagem . . . . . . . . . . . . . . . . . . . . . . . . . . . . . . . . . . . . . . . . . . . . . . . . 40<br />
PT<br />
D<strong>ad</strong>os técnicos . . . . . . . . . . . . . . . . . . . . . . . . . . . . . . . . . . . . . . . . . . . . . . . . 41<br />
Descrição do aparelho / dos acessórios . . . . . . . . . . . . . . . . . . . . . . . . . . . 41<br />
Utilização . . . . . . . . . . . . . . . . . . . . . . . . . . . . . . . . . . . . . . . . . . . . . . . . . . . . 42<br />
Montagem . . . . . . . . . . . . . . . . . . . . . . . . . . . . . . . . . . . . . . . . . . . . . . . . . . . 43<br />
Montar a varinha mágica . . . . . . . . . . . . . . . . . . . . . . . . . . . . . . . . . . . . . . . . . . . . . . . . . 43<br />
Montar o batedor <strong>de</strong> claras . . . . . . . . . . . . . . . . . . . . . . . . . . . . . . . . . . . . . . . . . . . . . . . 43<br />
Montar o pic<strong>ad</strong>or . . . . . . . . . . . . . . . . . . . . . . . . . . . . . . . . . . . . . . . . . . . . . . . . . . . . . . . 43<br />
Segurar o aparelho . . . . . . . . . . . . . . . . . . . . . . . . . . . . . . . . . . . . . . . . . . . 44<br />
Utilização . . . . . . . . . . . . . . . . . . . . . . . . . . . . . . . . . . . . . . . . . . . . . . . . . . . . 45<br />
Montagem na pare<strong>de</strong>. . . . . . . . . . . . . . . . . . . . . . . . . . . . . . . . . . . . . . . . . . 47<br />
Limpeza . . . . . . . . . . . . . . . . . . . . . . . . . . . . . . . . . . . . . . . . . . . . . . . . . . . . . 47<br />
Eliminar o aparelho . . . . . . . . . . . . . . . . . . . . . . . . . . . . . . . . . . . . . . . . . . . 48<br />
Indicações acerca da Declaração <strong>de</strong> Conformida<strong>de</strong> CE . . . . . . . . . . . . . . . 48<br />
Import<strong>ad</strong>or . . . . . . . . . . . . . . . . . . . . . . . . . . . . . . . . . . . . . . . . . . . . . . . . . . 48<br />
Garantia . . . . . . . . . . . . . . . . . . . . . . . . . . . . . . . . . . . . . . . . . . . . . . . . . . . . 49<br />
Assistência Técnica . . . . . . . . . . . . . . . . . . . . . . . . . . . . . . . . . . . . . . . . . . . . 49<br />
Receitas . . . . . . . . . . . . . . . . . . . . . . . . . . . . . . . . . . . . . . . . . . . . . . . . . . . . . 50<br />
Creme <strong>de</strong> legumes . . . . . . . . . . . . . . . . . . . . . . . . . . . . . . . . . . . . . . . . . . . . . . . . . . . . . . . 50<br />
Sopa <strong>de</strong> abóbora . . . . . . . . . . . . . . . . . . . . . . . . . . . . . . . . . . . . . . . . . . . . . . . . . . . . . . . 51<br />
Compota doce <strong>de</strong> frutos . . . . . . . . . . . . . . . . . . . . . . . . . . . . . . . . . . . . . . . . . . . . . . . . . . 52<br />
Creme <strong>de</strong> chocolate . . . . . . . . . . . . . . . . . . . . . . . . . . . . . . . . . . . . . . . . . . . . . . . . . . . . . 53<br />
Maionese . . . . . . . . . . . . . . . . . . . . . . . . . . . . . . . . . . . . . . . . . . . . . . . . . . . . . . . . . . . . . . 53<br />
<strong>SSMS</strong> <strong>600</strong> <strong>B2</strong><br />
37
Informações acerca <strong>de</strong>ste manual <strong>de</strong> instruções<br />
PT<br />
Este manual <strong>de</strong> instruções é parte integrante do conjunto <strong>de</strong> varinha mágica<br />
<strong>SSMS</strong> <strong>600</strong> <strong>B2</strong> (<strong>de</strong>sign<strong>ad</strong>o a partir daqui como aparelho) e fornece indicações<br />
importantes para uma utilização correcta, segurança, montagem e ligação, bem<br />
como para a operação do aparelho.<br />
O manual <strong>de</strong> instruções <strong>de</strong>ve estar sempre ao alcance do aparelho. Deve ser<br />
lido e aplic<strong>ad</strong>o por todos aqueles encarregues da montagem, operação e<br />
resolução <strong>de</strong> avarias do aparelho.<br />
Conserve o manual <strong>de</strong> instruções e entregue-o a terceiros juntamente com o<br />
aparelho.<br />
Direitos <strong>de</strong> autor<br />
Esta documentação está protegida por direitos <strong>de</strong> autor.<br />
Qualquer reprodução ou reedição, mesmo que parcial, bem como a reprodução<br />
das fi guras, mesmo em est<strong>ad</strong>o alter<strong>ad</strong>o, é permitida apenas sob consentimento<br />
escrito por parte do fabricante.<br />
Utilização correcta<br />
O conjunto <strong>de</strong> varinha mágica foi concebido exclusivamente para o processamento<br />
<strong>de</strong> alimentos em pequenas quantida<strong>de</strong>s. Destina-se apenas ao uso<br />
doméstico e priv<strong>ad</strong>o. O conjunto <strong>de</strong> varinha mágica não está previsto para<br />
uma utilização comercial.<br />
AVISO<br />
Perigo <strong>de</strong>vido a uma utilização incorrecta!<br />
Po<strong>de</strong>m surgir riscos resultantes <strong>de</strong> uma utilização incorrecta e/ou não a<strong>de</strong>qu<strong>ad</strong>a<br />
do aparelho.<br />
► O aparelho <strong>de</strong>ve ser utiliz<strong>ad</strong>o apenas para a fi nalida<strong>de</strong> <strong>de</strong>scrita.<br />
►<br />
Cumprir os procedimentos <strong>de</strong>scritos neste manual <strong>de</strong> instruções.<br />
NOTA<br />
► Po<strong>de</strong>m surgir riscos resultantes <strong>de</strong> uma utilização incorrecta e/ou não<br />
a<strong>de</strong>qu<strong>ad</strong>a do aparelho. Utilize o aparelho apenas para a fi nalida<strong>de</strong> <strong>de</strong>scrita.<br />
Cumprir os procedimentos <strong>de</strong>scritos neste manual <strong>de</strong> instruções. Está<br />
excluído qualquer tipo <strong>de</strong> reclamações <strong>de</strong>vido a danos caus<strong>ad</strong>os por uma<br />
utilização incorrecta, reparações incorrectas, alterações efectu<strong>ad</strong>as sem<br />
permissão ou utilização <strong>de</strong> peças <strong>de</strong> reposição não autoriz<strong>ad</strong>as. O proprietário<br />
do aparelho <strong>de</strong>verá assumir a responsabilida<strong>de</strong> pelo aparelho.<br />
38 <strong>SSMS</strong> <strong>600</strong> <strong>B2</strong>
Indicações <strong>de</strong> segurança<br />
PERIGO DE CHOQUE ELÉCTRICO<br />
► Ligue o conjunto <strong>de</strong> varinha mágica apenas a uma tom<strong>ad</strong>a correctamente<br />
instal<strong>ad</strong>a com uma tensão <strong>de</strong> re<strong>de</strong> <strong>de</strong> 220 - 240 V ~ / 50 Hz.<br />
► Em caso <strong>de</strong> avarias <strong>de</strong> funcionamento ou antes <strong>de</strong> limpar o conjunto <strong>de</strong><br />
varinha mágica, <strong>de</strong>sligue a fi cha <strong>de</strong> re<strong>de</strong> da tom<strong>ad</strong>a.<br />
► Não <strong>de</strong>ve expor o aparelho a humida<strong>de</strong>, nem utilizá-lo ao ar livre.<br />
► Caso a estrutura do aparelho entre em contacto com algum líquido, retire<br />
imediatamente a fi cha <strong>de</strong> re<strong>de</strong> do aparelho da tom<strong>ad</strong>a e permita que este<br />
seja repar<strong>ad</strong>o por pessoal técnico qualifi c<strong>ad</strong>o.<br />
► Retire o cabo <strong>de</strong> alimentação da tom<strong>ad</strong>a, puxando sempre pela fi cha <strong>de</strong><br />
re<strong>de</strong> e não pelo próprio cabo.<br />
► Não dobre nem aperte o cabo <strong>de</strong> alimentação e disponha-o <strong>de</strong> modo que<br />
não possa ser pis<strong>ad</strong>o, nem possam tropeçar nele.<br />
► Em caso <strong>de</strong> danos, a fi cha <strong>de</strong> re<strong>de</strong> ou o cabo <strong>de</strong> re<strong>de</strong> <strong>de</strong>vem ser imediatamente<br />
substituídos por técnicos autoriz<strong>ad</strong>os ou pela Assistência Técnica,<br />
<strong>de</strong> modo a evitar perigos.<br />
► Não <strong>de</strong>ve abrir a caixa do bloco do motor do conjunto <strong>de</strong> varinha mágica.<br />
Neste caso a segurança não é garantida e a garantia não po<strong>de</strong> ser<br />
aplic<strong>ad</strong>a.<br />
► Este aparelho não <strong>de</strong>ve ser utiliz<strong>ad</strong>o por pessoas (incluindo crianças) com<br />
capacida<strong>de</strong>s físicas, sensoriais ou mentais limit<strong>ad</strong>as ou falta <strong>de</strong> experiência<br />
e/ou <strong>de</strong> conhecimento, a não ser que estas sejam supervision<strong>ad</strong>as por uma<br />
pessoa responsável pela sua segurança ou que <strong>de</strong>sta recebam instruções<br />
acerca do funcionamento do aparelho.<br />
► As crianças <strong>de</strong>vem ser supervision<strong>ad</strong>as, <strong>de</strong> modo a garantir que não<br />
brincam com o aparelho.<br />
PT<br />
PERIGO DE CHOQUE ELÉCTRICO<br />
Não <strong>de</strong>ve mergulhar o bloco do motor do conjunto <strong>de</strong> varinha<br />
mágica em líquidos, nem permitir a infi ltração <strong>de</strong> líquidos na caixa<br />
do bloco do motor.<br />
AVISO! PERIGO DE FERIMENTOS!<br />
► Desligue o aparelho da re<strong>de</strong> eléctrica sempre que retirar ou colocar acessórios<br />
ou se o aparelho se encontrar sem vigilância.<br />
<strong>SSMS</strong> <strong>600</strong> <strong>B2</strong><br />
39
Volume <strong>de</strong> fornecimento<br />
PT<br />
Por norma, o aparelho é fornecido com os seguintes componentes:<br />
▯ Conjunto <strong>de</strong> varinha mágica<br />
▯ Copo <strong>de</strong> medição com tampa/suporte<br />
▯ Batedor <strong>de</strong> claras<br />
▯ Pic<strong>ad</strong>or (lâmina e recipiente com tampa/suporte)<br />
▯ Suporte <strong>de</strong> pare<strong>de</strong><br />
▯ 2 buchas<br />
▯ 2 parafusos<br />
▯ Manual <strong>de</strong> instruções<br />
1) Retire todas as peças do aparelho e o manual <strong>de</strong> instruções da embalagem.<br />
2) Retire todo o material <strong>de</strong> embalagem.<br />
3) Limpe todas as peças do aparelho como <strong>de</strong>scrito no capítulo “Limpeza”.<br />
NOTA<br />
►<br />
Verifi que o fornecimento quanto à sua integrida<strong>de</strong> e danos visíveis.<br />
► Caso o material fornecido esteja incompleto ou danifi c<strong>ad</strong>o <strong>de</strong>vido a<br />
embalagem insufi ciente ou ao transporte, entre em contacto com a linha<br />
directa <strong>de</strong> assistência (ver capítulo Assistência Técnica).<br />
Eliminação da embalagem<br />
A embalagem protege o aparelho <strong>de</strong> danos durante o transporte. Os materiais<br />
da embalagem <strong>de</strong>vem ser seleccion<strong>ad</strong>os numa perspectiva ecológica e <strong>de</strong><br />
poupança energética e, como tal, recicl<strong>ad</strong>os.<br />
A reciclagem da embalagem permite a poupança <strong>de</strong> matérias-primas e reduz a<br />
formação <strong>de</strong> lixo. Elimine os materiais <strong>de</strong> embalagem que já não são necessários<br />
em conformida<strong>de</strong> com as normas locais em vigor.<br />
NOTA<br />
► Se possível, conserve a embalagem original durante o período <strong>de</strong> garantia,<br />
para que possa embalar o aparelho correctamente em caso <strong>de</strong> <strong>de</strong>volução<br />
ou semelhante.<br />
40 <strong>SSMS</strong> <strong>600</strong> <strong>B2</strong>
D<strong>ad</strong>os técnicos<br />
Tensão <strong>de</strong> re<strong>de</strong><br />
Potência nominal<br />
Classe <strong>de</strong> protecção<br />
Volume:<br />
Copo gr<strong>ad</strong>u<strong>ad</strong>o<br />
Nível máx. <strong>de</strong> enchimento<br />
para líquidos<br />
220 - 240 V ~ , 50 Hz<br />
<strong>600</strong> W<br />
II<br />
700 ml<br />
300 ml<br />
PT<br />
Recomendamos as seguintes durações <strong>de</strong> funcionamento:<br />
Deixe a varinha mágica arrefecer após 1 minuto <strong>de</strong> funcionamento.<br />
Deixe o pic<strong>ad</strong>or arrefecer após 1 minuto <strong>de</strong> funcionamento.<br />
Deixe o batedor <strong>de</strong> claras arrefecer após 2 minutos <strong>de</strong> funcionamento.<br />
Descrição do aparelho / dos acessórios<br />
1 Regul<strong>ad</strong>or <strong>de</strong> velocida<strong>de</strong><br />
2 Interruptor (velocida<strong>de</strong> normal)<br />
3 Interruptor turbo (velocida<strong>de</strong> rápida)<br />
4 Bloco do motor<br />
5 Varinha mágica<br />
6 Tampa do recipiente<br />
7 Lâmina<br />
8 Recipiente (com tampa/suporte)<br />
9 Suporte do batedor <strong>de</strong> claras<br />
0 Batedor <strong>de</strong> claras<br />
q Copo <strong>de</strong> medição (com tampa/suporte)<br />
w Suporte <strong>de</strong> pare<strong>de</strong> incluindo parafusos e buchas<br />
<strong>SSMS</strong> <strong>600</strong> <strong>B2</strong><br />
41
Utilização<br />
PT<br />
NOTA<br />
► Com o copo <strong>de</strong> medição q po<strong>de</strong> medir líquidos até 700 ml. Para preparação<br />
<strong>de</strong>ve encher, no máximo, 300 ml, caso contrário o líquido do copo <strong>de</strong><br />
medição q po<strong>de</strong> verter.<br />
► Caso pretenda guardar líquidos/alimentos no copo <strong>de</strong> medição q, po<strong>de</strong><br />
retirar o suporte do copo <strong>de</strong> medição q e utilizá-lo como uma tampa.<br />
Certifi que-se <strong>de</strong> que também o escoamento do copo <strong>de</strong> medição q está<br />
fech<strong>ad</strong>o.<br />
■ Com a varinha mágica 5 po<strong>de</strong> preparar molhos, sopas ou alimentação<br />
para bebé. Recomendamos que utilize a varinha mágica 5 durante, no<br />
máx., 1 minuto e, <strong>de</strong> seguida, a <strong>de</strong>ixe arrefecer.<br />
ATENÇÃO - DANOS MATERIAIS!<br />
► Não utilize a varinha mágica 5 para o processamento <strong>de</strong> alimentos<br />
sólidos. Isto provoca danos irreparáveis no aparelho!<br />
■ Com o batedor <strong>de</strong> claras 0 po<strong>de</strong> preparar maionese, bater natas e claras<br />
ou misturar sobremesas. Recomendamos que utilize o batedor <strong>de</strong> claras 0<br />
durante, no máx., 2 minutos e, <strong>de</strong> seguida, o <strong>de</strong>ixe arrefecer.<br />
■ Com o pic<strong>ad</strong>or, composto por uma lâmina 7, recipiente 8 e tampa do<br />
recipiente 6, também po<strong>de</strong> picar alimentos mais sólidos. Recomendamos<br />
que utilize o pic<strong>ad</strong>or durante, no máx., 1 minuto e, <strong>de</strong> seguida, o <strong>de</strong>ixe<br />
arrefecer.<br />
ATENÇÃO - DANOS MATERIAIS!<br />
► Não utilize o pic<strong>ad</strong>or para processar líquidos. Isto provoca danos irreparáveis<br />
no aparelho!<br />
42 <strong>SSMS</strong> <strong>600</strong> <strong>B2</strong>
Montagem<br />
►<br />
AVISO! PERIGO DE FERIMENTOS!<br />
Introduza a fi cha <strong>de</strong> re<strong>de</strong> na tom<strong>ad</strong>a apenas <strong>de</strong>pois da montagem.<br />
NOTA<br />
► Antes da primeira colocação em funcionamento, limpe todas as peças como<br />
<strong>de</strong>scrito no capítulo “Limpeza”.<br />
PT<br />
Montar a varinha mágica<br />
AVISO! PERIGO DE FERIMENTOS!<br />
► A lâmina é extremamente afi <strong>ad</strong>a! Por isso, proceda com cuid<strong>ad</strong>o.<br />
■ Coloque a varinha mágica 5 sobre o bloco do motor 4, <strong>de</strong> modo que a<br />
seta aponte para o símbolo . Ro<strong>de</strong> a varinha mágica 5, até que a seta<br />
no bloco do motor 4 fi que volt<strong>ad</strong>a para o símbolo .<br />
Montar o batedor <strong>de</strong> claras<br />
■ Coloque o batedor <strong>de</strong> claras 0 no suporte do batedor <strong>de</strong> claras 9.<br />
■ Coloque o batedor <strong>de</strong> claras 0 mont<strong>ad</strong>o sobre o bloco do motor 4,<br />
<strong>de</strong> modo que a seta fi que volt<strong>ad</strong>a para o símbolo . Ro<strong>de</strong> o batedor<br />
<strong>de</strong> claras 0 até que a seta no bloco do motor 4 fi que volt<strong>ad</strong>a para<br />
o símbolo .<br />
Montar o pic<strong>ad</strong>or<br />
AVISO! PERIGO DE FERIMENTOS!<br />
► A lâmina 7 é extremamente afi <strong>ad</strong>a! Por isso, proceda com cuid<strong>ad</strong>o.<br />
■ Coloque cuid<strong>ad</strong>osamente a lâmina 7 no suporte no recipiente 8.<br />
■ Coloque os alimentos a picar no recipiente 8.<br />
NOTA<br />
► Encha o recipiente 8 sempre apenas até à marcação MAX. Caso contrário,<br />
o aparelho não funciona <strong>de</strong> forma i<strong>de</strong>al.<br />
<strong>SSMS</strong> <strong>600</strong> <strong>B2</strong><br />
43
■<br />
■<br />
Coloque a tampa 6 no recipiente 8 e ro<strong>de</strong>-a até fi xar. As patilhas no<br />
rebordo do recipiente 8 <strong>de</strong>vem encaixar na ranhura na tampa 6.<br />
Coloque o bloco do motor 4 sobre a tampa do recipiente 6, <strong>de</strong> modo<br />
que a seta fi que volt<strong>ad</strong>a para o símbolo . Ro<strong>de</strong> o bloco do motor 4 até<br />
que a seta fi que volt<strong>ad</strong>a para o símbolo .<br />
PT<br />
NOTA<br />
► Caso pretenda guardar alimentos no recipiente 8, po<strong>de</strong> retirar o suporte<br />
do recipiente 8 e utilizá-lo como uma tampa. Para tal, retire a tampa<br />
do recipiente 6 e o bloco do motor 4 e, se necessário, a lâmina 7,<br />
proce<strong>de</strong>ndo com prudência. Retire o suporte do recipiente 8 e coloque-o<br />
sobre o recipiente 8.<br />
Segurar o aparelho<br />
Para utilizar o aparelho, segure-o da seguinte forma:<br />
44 <strong>SSMS</strong> <strong>600</strong> <strong>B2</strong>
Utilização<br />
►<br />
AVISO! PERIGO DE FERIMENTOS!<br />
Os alimentos não po<strong>de</strong>m estar muito quentes! Um conteúdo que provoca<br />
salpicos po<strong>de</strong> provocar queim<strong>ad</strong>uras.<br />
NOTA<br />
► Caso pretenda bater natas com o batedor <strong>de</strong> claras 0, mantenha o<br />
recipiente inclin<strong>ad</strong>o durante o processo. Desta forma as natas fi cam mais<br />
rapidamente fi rmes. Tenha cuid<strong>ad</strong>o para que as natas não salpiquem ao<br />
bater. Para bater natas, <strong>de</strong>sloque o regul<strong>ad</strong>or <strong>de</strong> velocida<strong>de</strong> 1 para "5".<br />
Se tiver mont<strong>ad</strong>o o conjunto <strong>de</strong> varinha mágica conforme pretendido:<br />
1) Encaixe a fi cha <strong>de</strong> re<strong>de</strong> na tom<strong>ad</strong>a.<br />
2) Mantenha o interruptor 2 premido para processar os alimentos à velocida<strong>de</strong><br />
normal. Desloque o regul<strong>ad</strong>or <strong>de</strong> velocida<strong>de</strong> 1 em direcção à posição "5"<br />
para aumentar a velocida<strong>de</strong>. Desloque o regul<strong>ad</strong>or <strong>de</strong> velocida<strong>de</strong> 1 em<br />
direcção à posição "1" para reduzir a velocida<strong>de</strong>.<br />
3) Mantenha o interruptor turbo 3 premido para processar os alimentos a uma<br />
velocida<strong>de</strong> elev<strong>ad</strong>a. Ao premir o interruptor turbo 3, é-lhe disponibiliz<strong>ad</strong>a<br />
<strong>de</strong> imediato a velocida<strong>de</strong> máxima <strong>de</strong> processamento.<br />
4) Depois <strong>de</strong> terminar o processamento dos alimentos, basta libertar o interruptor.<br />
PT<br />
NOTA<br />
► Se surgirem ruídos invulgares durante o funcionamento, como guinchos ou<br />
semelhante, aplique um pouco <strong>de</strong> óleo alimentar neutro no eixo motor da<br />
varinha.<br />
<strong>SSMS</strong> <strong>600</strong> <strong>B2</strong><br />
45
Exemplos para picar e triturar diversos alimentos com o pic<strong>ad</strong>or:<br />
Ingredientes<br />
Quantida<strong>de</strong><br />
máx.<br />
Tempo <strong>de</strong><br />
processamento<br />
Velocida<strong>de</strong><br />
PT<br />
Cebolas 200 g Aprox. 20 seg. Nível 1 - 3<br />
Salsa 30 g Aprox. 20 seg. Turbo<br />
Alhos 20 <strong>de</strong>ntes Aprox. 20 seg. Nível 1 - 5<br />
Cenouras 200 g Aprox. 15 seg. Nível 1 - 5<br />
Avelãs/<br />
Amêndoas<br />
200 g Aprox. 30 seg. Turbo<br />
Nozes 200 g Aprox. 25 seg. Nível 3 - 4<br />
Queijo<br />
parmesão<br />
1 cm<br />
250 g Aprox. 30 seg. Turbo<br />
46 <strong>SSMS</strong> <strong>600</strong> <strong>B2</strong>
Montagem na pare<strong>de</strong><br />
O material fornecido inclui 2 buchas e 2 parafusos para montar o suporte <strong>de</strong><br />
pare<strong>de</strong> w.<br />
►<br />
AVISO PERIGO DE CHOQUE ELÉCTRICO!<br />
Antes da montagem do suporte <strong>de</strong> pare<strong>de</strong> w, verifi que se se encontram<br />
cabos ou tubos na pare<strong>de</strong>!<br />
PT<br />
Limpeza<br />
1) Marque a posição dos orifícios com base no suporte <strong>de</strong> pare<strong>de</strong> w.<br />
2) Perfure os orifícios com uma broca <strong>de</strong> 6 mm.<br />
3) Introduza as buchas nos orifícios perfur<strong>ad</strong>os.<br />
4) Posicione as duas aberturas do suporte <strong>de</strong> pare<strong>de</strong> w sobre os orifícios e<br />
fi xe com ambos os parafusos.<br />
►<br />
AVISO - PERIGO DE CHOQUE ELÉCTRICO!<br />
Antes <strong>de</strong> limpar o conjunto <strong>de</strong> varinha mágica, <strong>de</strong>sligue sempre a fi cha <strong>de</strong><br />
re<strong>de</strong> da tom<strong>ad</strong>a.<br />
► Nunca mergulhe o bloco do motor 4 em água nem o coloque sob<br />
água corrente durante a limpeza.<br />
AVISO - PERIGO DE FERIMENTOS!<br />
► O manuseamento da lâmina 7 extremamente afi <strong>ad</strong>a acarreta perigo <strong>de</strong><br />
ferimentos. Após a utilização e limpeza, monte o pic<strong>ad</strong>or para que não<br />
se possa ferir na lâmina solta. Mantenha a lâmina fora do alcance <strong>de</strong><br />
crianças.<br />
ATENÇÃO - DANOS MATERIAIS!<br />
► Não po<strong>de</strong> lavar as peças do conjunto <strong>de</strong> varinha mágica na máquina <strong>de</strong><br />
lavar louça, pois estas fi cariam danifi c<strong>ad</strong>as.<br />
► Não utilize produtos <strong>de</strong> limpeza agressivos, químicos ou abrasivos! Estes<br />
po<strong>de</strong>m provocar danos irreparáveis na superfície!<br />
<strong>SSMS</strong> <strong>600</strong> <strong>B2</strong><br />
47
PT<br />
1) Retire a fi cha <strong>de</strong> re<strong>de</strong>.<br />
2) Limpe o bloco do motor 4, a varinha mágica 5, a tampa do recipiente 6,<br />
o suporte do batedor <strong>de</strong> claras 9 e o suporte <strong>de</strong> pare<strong>de</strong> w com um pano<br />
húmido.<br />
Certifi que-se <strong>de</strong> que não há infi ltração <strong>de</strong> água nas aberturas da varinha<br />
mágica 5. Em caso <strong>de</strong> sujida<strong>de</strong> profunda, aplique um <strong>de</strong>tergente suave no<br />
pano.<br />
3) Limpe os acessórios restantes (recipiente 8, batedor <strong>de</strong> claras 0, copo <strong>de</strong><br />
medição q e lâmina 7) sob água corrente e seque-os bem com um pano.<br />
Eliminar o aparelho<br />
Nunca <strong>de</strong>posite o aparelho no lixo doméstico comum.<br />
Este produto é abrangido pela Directiva Europeia<br />
2002/96/EC.<br />
Elimine o aparelho através <strong>de</strong> um serviço <strong>de</strong> eliminação autoriz<strong>ad</strong>o ou das<br />
entida<strong>de</strong>s <strong>de</strong> eliminação locais. Respeite os regulamentos actualmente em<br />
vigor. Em caso <strong>de</strong> dúvida entre em contacto com a entida<strong>de</strong> <strong>de</strong> eliminação<br />
<strong>de</strong> resíduos.<br />
Indicações acerca da Declaração <strong>de</strong><br />
Conformida<strong>de</strong> CE<br />
Este aparelho está em conformida<strong>de</strong> com os requisitos fundamentais<br />
e outras prescrições relevantes da Directiva Europeia<br />
relativa a Compatibilida<strong>de</strong> Electromagnética 2004/108/EC,<br />
bem como da Directiva <strong>de</strong> Baixa Tensão 2006/95/EC.<br />
Po<strong>de</strong> obter a versão completa e original da <strong>de</strong>claração <strong>de</strong><br />
conformida<strong>de</strong> junto do import<strong>ad</strong>or.<br />
Import<strong>ad</strong>or<br />
KOMPERNASS GMBH<br />
BURGSTRASSE 21<br />
44867 BOCHUM, GERMANY<br />
www.kompernass.com<br />
48 <strong>SSMS</strong> <strong>600</strong> <strong>B2</strong>
Garantia<br />
Com este aparelho obtém 3 anos <strong>de</strong> garantia a partir da data <strong>de</strong> compra. Este<br />
aparelho foi fabric<strong>ad</strong>o com o maior cuid<strong>ad</strong>o e test<strong>ad</strong>o escrupulosamente antes<br />
da sua distribuição.<br />
Guar<strong>de</strong> o talão <strong>de</strong> caixa como comprovativo da compra. Em caso <strong>de</strong> reclamação<br />
<strong>de</strong> garantia, entre em contacto com o seu serviço <strong>de</strong> Assistência Técnica<br />
por telefone. Apenas <strong>de</strong>ste modo po<strong>de</strong> ser garantido um envio gratuito do seu<br />
produto.<br />
PT<br />
NOTA<br />
► A garantia abrange apenas <strong>de</strong>feitos <strong>de</strong> material e <strong>de</strong> fabrico, mas não<br />
danos <strong>de</strong> transporte, peças <strong>de</strong> <strong>de</strong>sgaste ou danos em peças frágeis, por<br />
ex. interruptores.<br />
O produto foi concebido apenas para uso priv<strong>ad</strong>o e não para uso comercial.<br />
A garantia extingue-se no caso <strong>de</strong> utilização incorrecta e <strong>de</strong> intervenções que<br />
não foram efectu<strong>ad</strong>as pelo nosso representante autoriz<strong>ad</strong>o <strong>de</strong> Assistência<br />
Técnica.<br />
Os seus direitos legais não são limit<strong>ad</strong>os por esta garantia.<br />
O período <strong>de</strong> garantia não é prolong<strong>ad</strong>o pela prestação <strong>de</strong> um serviço ao<br />
abrigo da mesma. O mesmo se aplica a peças substituídas e repar<strong>ad</strong>as.<br />
Eventuais danos e falhas já presentes no momento da entrega <strong>de</strong>vem ser notifi -<br />
c<strong>ad</strong>os imediatamente após a <strong>de</strong>sembalagem ou, o mais tardar, dois dias após<br />
a data <strong>de</strong> compra.<br />
Depois <strong>de</strong> expir<strong>ad</strong>a a garantia, as reparações necessárias estão sujeitas a<br />
pagamento.<br />
Assistência Técnica<br />
Assistência Portugal<br />
Tel.: 70778 0005 (0,12 EUR/Min.)<br />
E-Mail: kompernass@lidl.pt<br />
IAN 68957<br />
<strong>SSMS</strong> <strong>600</strong> <strong>B2</strong><br />
49
Receitas<br />
PT<br />
Creme <strong>de</strong> legumes<br />
2-4 pessoas<br />
Ingredientes<br />
■ 2-3 colheres <strong>de</strong> sopa <strong>de</strong> óleo<br />
■ 200 g cebolas<br />
■ 200 g batatas (são mais a<strong>de</strong>qu<strong>ad</strong>os os tipos <strong>de</strong> batata mais farinhenta)<br />
■ 200 g cenouras<br />
■ 350-400 ml caldo <strong>de</strong> legumes (fresco ou instantâneo)<br />
■ Sal, pimenta, noz mosc<strong>ad</strong>a<br />
■ 5 g salsa<br />
Preparação<br />
1) Descascar a cebolas e picar. Lavar as cenouras, <strong>de</strong>scascar e cortar às ro<strong>de</strong>las.<br />
Descascar as batatas, lavar e cortar em cubos com aprox. 2 cm.<br />
2) Aquecer óleo num tacho, cozinhar as cebolas até fi carem transparentes.<br />
Adicionar as cenouras e as batatas, cozer. Verter caldo sufi ciente para<br />
cobrir bem os legumes e <strong>de</strong>ixar cozer em lume brando durante 10-15<br />
minutos. Se necessário <strong>ad</strong>icionar mais caldo caso os legumes <strong>de</strong>ixem <strong>de</strong><br />
estar cobertos.<br />
3) Lavar a salsa, secar e retirar os talos. Cortar a salsa em pedaços grosseiros<br />
e <strong>ad</strong>icionar à sopa. Passar com a varinha mágica 5 durante aprox. 1<br />
minuto. Temperar com sal, pimenta e noz mosc<strong>ad</strong>a ral<strong>ad</strong>a.<br />
50 <strong>SSMS</strong> <strong>600</strong> <strong>B2</strong>
Sopa <strong>de</strong> abóbora<br />
4 pessoas<br />
Ingredientes<br />
■ 1 cebola média<br />
■ 2 <strong>de</strong>ntes <strong>de</strong> alho<br />
■ 10 - 20 g gengibre fresco<br />
■ 3 colheres <strong>de</strong> sopa <strong>de</strong> óleo <strong>de</strong> colza<br />
■ 400 g polpa <strong>de</strong> abóbora (a mais a<strong>de</strong>qu<strong>ad</strong>a é a abóbora Hokkaido,<br />
visto a casca fi car macia ao cozer e não ser preciso por isso <strong>de</strong>scascar)<br />
■ 250 -300 ml leite <strong>de</strong> coco<br />
■ 250 -500 ml caldo <strong>de</strong> legumes<br />
■ Sumo <strong>de</strong> ½ laranja<br />
■ Um pouco <strong>de</strong> vinho branco seco<br />
■ 1 colher <strong>de</strong> chá <strong>de</strong> açúcar<br />
■ Sal, pimenta<br />
PT<br />
Preparação<br />
1) Descascar a cebola e picar; fazer o mesmo com o alho. Descascar o<br />
gengibre e picar fi namente. Primeiro saltear a cebola e o gengibre em<br />
óleo quente. Após 2 minutos <strong>ad</strong>icionar o alho e cozinhar um pouco mais.<br />
2) Limpar bem a abóbora com uma escova para legumes, passando por água<br />
morna; <strong>de</strong> seguida cortar em cubos <strong>de</strong> 2-3 cm. (Se for utiliz<strong>ad</strong>o outro tipo<br />
<strong>de</strong> abóbora que não a Hokkaido, esta <strong>de</strong>ve ser também <strong>de</strong>scasc<strong>ad</strong>a).<br />
Adicionar os cubos <strong>de</strong> abóbora à cebola e ao gengibre e cozer. Encher<br />
com meta<strong>de</strong> do leite <strong>de</strong> coco e caldo <strong>de</strong> legumes sufi ciente para cobrir bem<br />
a abóbora. Com a tampa fech<strong>ad</strong>a, <strong>de</strong>ixar cozinhar em lume brando por<br />
aprox. 20-25 minutos. Fazer em puré com a varinha mágica 5. Adicionar<br />
leite <strong>de</strong> coco sufi ciente até a sopa obter a consistência cremosa a<strong>de</strong>qu<strong>ad</strong>a.<br />
3) Temperar a sopa com sumo <strong>de</strong> laranja, vinho branco, açúcar, sal e pimenta<br />
até que a sopa obtenha um pal<strong>ad</strong>ar doce com uma nota ligeiramente ácida<br />
e salg<strong>ad</strong>a.<br />
<strong>SSMS</strong> <strong>600</strong> <strong>B2</strong><br />
51
PT<br />
Compota doce <strong>de</strong> frutos<br />
Ingredientes<br />
■ 250 g morangos ou outros frutos (frescos ou congel<strong>ad</strong>os)<br />
■<br />
■<br />
■<br />
1 pacotinho (aprox. 125g) <strong>de</strong> açúcar para geleia sem aquecer<br />
Gotas <strong>de</strong> sumo <strong>de</strong> limão<br />
1 pit<strong>ad</strong>a do miolo <strong>de</strong> uma vagem <strong>de</strong> baunilha<br />
Preparação<br />
1) Lavar e preparar os morangos, removendo os caules ver<strong>de</strong>s. Deixar secar<br />
bem sobre uma peneira para que a água em excesso possa escorrer e a<br />
compota não fi que <strong>de</strong>masi<strong>ad</strong>o líquida. Cortar os morangos maiores em<br />
pedaços menores.<br />
2) Pesar 250 g <strong>de</strong> morangos e colocar num copo mistur<strong>ad</strong>or a<strong>de</strong>qu<strong>ad</strong>o.<br />
3) Adicionar umas gotas <strong>de</strong> sumo <strong>de</strong> limão.<br />
4) Se necessário raspar o miolo <strong>de</strong> uma vagem <strong>de</strong> baunilha e <strong>ad</strong>icionar.<br />
5) Adicionar o conteúdo <strong>de</strong> um pacotinho <strong>de</strong> açúcar para geleia sem aquecer<br />
e misturar com a varinha mágica 5 por 45-60 segundos. Caso se tratem<br />
<strong>de</strong> pedaços maiores, <strong>de</strong>ixar repousar a mistura durante 1 minuto e voltar a<br />
passar a varinha mágica por 60 segundos.<br />
6) Servir <strong>de</strong> imediato ou colocar a compota <strong>de</strong> frutos num copo com tampa e<br />
fechar.<br />
52 <strong>SSMS</strong> <strong>600</strong> <strong>B2</strong>
Creme <strong>de</strong> chocolate<br />
Para 4 pessoas<br />
Ingredientes<br />
■ 350 g natas<br />
■<br />
■<br />
200 g chocolate amargo (> 60% <strong>de</strong> teor <strong>de</strong> cacau)<br />
½ vagem <strong>de</strong> baunilha (miolo)<br />
Preparação<br />
1) Deixar levantar fervura das natas, esfarelar o chocolate e <strong>de</strong>rreter em lume<br />
brando junto com as natas. Raspar o miolo <strong>de</strong> meia vagem <strong>de</strong> baunilha e<br />
<strong>ad</strong>icionar à massa.<br />
2) Colocar no frigorífi co e refrigerar até solifi car.<br />
3) Antes <strong>de</strong> servir utilizar a bate<strong>de</strong>ira 0 até fi car cremoso.<br />
Conselho: É <strong>de</strong>licioso com frutos frescos.<br />
PT<br />
Maionese<br />
■<br />
■<br />
■<br />
■<br />
200 ml óleo vegetal neutro, por ex. óleo <strong>de</strong> colza<br />
1 ovo (gema e clara)<br />
10 g vinagre suave ou sumo <strong>de</strong> limão<br />
Sal e pimenta a gosto<br />
Preparação<br />
1) Colocar o ovo e o sumo <strong>de</strong> limão num copo mistur<strong>ad</strong>or, segurar a bate<strong>de</strong>ira 0<br />
verticalmente no copo e premir o botão Turbo.<br />
2) Verter lentamente o óleo num fi o uniforme (no espaço <strong>de</strong> aprox. 1:30 minutos)<br />
para que o óleo se misture bem com os outros ingredientes.<br />
3) De seguida temperar a gosto com sal e pimenta.<br />
<strong>SSMS</strong> <strong>600</strong> <strong>B2</strong><br />
53
In<strong>de</strong>x<br />
Information for these operating instructions . . . . . . . . . . . . . . . . . . . . . . . 56<br />
Copyright . . . . . . . . . . . . . . . . . . . . . . . . . . . . . . . . . . . . . . . . . . . . . . . . . . . . . . . . . . . . . . 56<br />
Inten<strong>de</strong>d use . . . . . . . . . . . . . . . . . . . . . . . . . . . . . . . . . . . . . . . . . . . . . . . . . 56<br />
Safety instructions . . . . . . . . . . . . . . . . . . . . . . . . . . . . . . . . . . . . . . . . . . . . 57<br />
Items supplied . . . . . . . . . . . . . . . . . . . . . . . . . . . . . . . . . . . . . . . . . . . . . . . . 58<br />
Disposal of the packaging . . . . . . . . . . . . . . . . . . . . . . . . . . . . . . . . . . . . . . . . . . . . . . . . . 58<br />
Technical data . . . . . . . . . . . . . . . . . . . . . . . . . . . . . . . . . . . . . . . . . . . . . . . . 59<br />
GB<br />
MT<br />
Description of appliance / Accessories . . . . . . . . . . . . . . . . . . . . . . . . . . . . 59<br />
Utilisation . . . . . . . . . . . . . . . . . . . . . . . . . . . . . . . . . . . . . . . . . . . . . . . . . . . . 60<br />
Assembling . . . . . . . . . . . . . . . . . . . . . . . . . . . . . . . . . . . . . . . . . . . . . . . . . . 61<br />
To assemble the hand blen<strong>de</strong>r . . . . . . . . . . . . . . . . . . . . . . . . . . . . . . . . . . . . . . . . . . . . . . 61<br />
Assembling the wire whisk . . . . . . . . . . . . . . . . . . . . . . . . . . . . . . . . . . . . . . . . . . . . . . . . . 61<br />
Assembling the liquidiser . . . . . . . . . . . . . . . . . . . . . . . . . . . . . . . . . . . . . . . . . . . . . . . . . . 61<br />
Holding the appliance . . . . . . . . . . . . . . . . . . . . . . . . . . . . . . . . . . . . . . . . . 62<br />
Operation . . . . . . . . . . . . . . . . . . . . . . . . . . . . . . . . . . . . . . . . . . . . . . . . . . . 63<br />
Wall mounting . . . . . . . . . . . . . . . . . . . . . . . . . . . . . . . . . . . . . . . . . . . . . . . . 65<br />
Cleaning . . . . . . . . . . . . . . . . . . . . . . . . . . . . . . . . . . . . . . . . . . . . . . . . . . . . . 65<br />
Disposal of the appliance . . . . . . . . . . . . . . . . . . . . . . . . . . . . . . . . . . . . . . . 66<br />
Notes on the EC Declaration of Conformity . . . . . . . . . . . . . . . . . . . . . . . . 66<br />
Importer . . . . . . . . . . . . . . . . . . . . . . . . . . . . . . . . . . . . . . . . . . . . . . . . . . . . . 66<br />
Warranty . . . . . . . . . . . . . . . . . . . . . . . . . . . . . . . . . . . . . . . . . . . . . . . . . . . . 67<br />
Service . . . . . . . . . . . . . . . . . . . . . . . . . . . . . . . . . . . . . . . . . . . . . . . . . . . . . . 67<br />
Recipes . . . . . . . . . . . . . . . . . . . . . . . . . . . . . . . . . . . . . . . . . . . . . . . . . . . . . . 68<br />
Cream of Vegetable Soup . . . . . . . . . . . . . . . . . . . . . . . . . . . . . . . . . . . . . . . . . . . . . . . . . 68<br />
Pumpkin Soup . . . . . . . . . . . . . . . . . . . . . . . . . . . . . . . . . . . . . . . . . . . . . . . . . . . . . . . . . . 69<br />
Sweet Fruit Spre<strong>ad</strong> . . . . . . . . . . . . . . . . . . . . . . . . . . . . . . . . . . . . . . . . . . . . . . . . . . . . . . . 70<br />
Chocolate Cream . . . . . . . . . . . . . . . . . . . . . . . . . . . . . . . . . . . . . . . . . . . . . . . . . . . . . . . 71<br />
Mayonnaise . . . . . . . . . . . . . . . . . . . . . . . . . . . . . . . . . . . . . . . . . . . . . . . . . . . . . . . . . . . . 71<br />
<strong>SSMS</strong> <strong>600</strong> <strong>B2</strong><br />
55
Information for these operating instructions<br />
GB<br />
MT<br />
Copyright<br />
These operating instructions are a component of the Hand Blen<strong>de</strong>r Set <strong>SSMS</strong><br />
<strong>600</strong> <strong>B2</strong> (henceforth <strong>de</strong>signated as the appliance) and they supply you with<br />
important information for the inten<strong>de</strong>d use, safety, connection and operation of<br />
the appliance.<br />
These operating instructions must be constantly kept available close to the appliance.<br />
They are to be re<strong>ad</strong> and applied by everyone assigned to operate the<br />
appliance and to eliminate faults with it.<br />
Retain these operating instructions and pass them on, together with the appliance,<br />
to any future owners.<br />
This documentation is copyright protected.<br />
Any copying or reproduction, including as extracts, as well as the reproduction of<br />
images, also in an altered state, is only permitted with the written authorisation of<br />
the manufacturer.<br />
Inten<strong>de</strong>d use<br />
This hand blen<strong>de</strong>r is inten<strong>de</strong>d exclusively for processing foodstuff s in small quantities.<br />
It is inten<strong>de</strong>d exclusively for use in domestic households. This hand blen<strong>de</strong>r set is<br />
not inten<strong>de</strong>d for commercial applications.<br />
WARNING<br />
Danger from uninten<strong>de</strong>d use!<br />
Danger can come from the appliance if used for uninten<strong>de</strong>d purposes and/or<br />
other types of use.<br />
► Use the appliance exclusively for inten<strong>de</strong>d purposes.<br />
►<br />
Observe the procedures <strong>de</strong>scribed in these operating instructions.<br />
NOTICE<br />
► Risks can can be engen<strong>de</strong>red if the appliance if used for uninten<strong>de</strong>d purposes<br />
and/or other types of use. Use the appliance exclusively for its inten<strong>de</strong>d<br />
purposes. Observe the procedures <strong>de</strong>scribed in these operating instructions.<br />
Claims of any kind resulting from damage caused by improper use, incompetent<br />
repairs, unauthorized modifi cations or the use of non-approved<br />
spare parts will not be acknowledged. The operator alone bears liability.<br />
56 <strong>SSMS</strong> <strong>600</strong> <strong>B2</strong>
Safety instructions<br />
RISK OF ELECTRIC SHOCK<br />
► Connect this hand blen<strong>de</strong>r only to correctly installed mains power sockets<br />
supplying a power voltage of 220 - 240 V ~ / 50 Hz.<br />
► Disconnect the hand blen<strong>de</strong>r from the mains power socket if you notice any<br />
faulty operation and before beginning to clean it.<br />
► Do not expose the appliance to humidity and do not use it outdoors.<br />
► Should liquids enter the housing, disconnect the appliance from the mains<br />
power socket immediately and arrange for it to be repaired by a qualifi ed<br />
technician.<br />
► To unplug the appliance, always pull the plug from the socket, do not pull<br />
on the power cable itself.<br />
► Do not crease or crimp the power cable and place it in such a way as to<br />
prevent anyone from stepping on or tripping over it.<br />
► To avoid unnecessary risks, arrange for <strong>de</strong>fective power plugs and/or<br />
cables to be replaced at once by qualifi ed technicians or our Customer<br />
Service Department.<br />
► You may not open the motor unit housing of the hand blen<strong>de</strong>r. Should you<br />
do so, the safety concept of the appliance may be compromised and the<br />
warranty becomes void.<br />
► This appliance is not inten<strong>de</strong>d for use by individuals (including children)<br />
with restricted physical, physiological or intellectual abilities or <strong>de</strong>fi ciences<br />
in experience and/or knowledge unless they are supervised by a person<br />
responsible for their safety or receive from this person instruction in how the<br />
appliance is to be used.<br />
► Children should be supervised to ensure that they do not play with the<br />
appliance.<br />
GB<br />
MT<br />
RISK OF ELECTRIC SHOCK<br />
Un<strong>de</strong>r no circumstances may the motor unit of the hand mixer be immersed<br />
in liquids, or liquids be permitted to permeate into the motor<br />
unit housing.<br />
WARNING! RISK OF INJURY!<br />
► Fundamentally, always disconnect the appliance from the mains power<br />
socket when you install or remove accessories or the unit is to be left<br />
unatten<strong>de</strong>d.<br />
<strong>SSMS</strong> <strong>600</strong> <strong>B2</strong><br />
57
Items supplied<br />
GB<br />
MT<br />
The appliance is <strong>de</strong>livered with the following components as standard:<br />
▯ Hand Mixer – Set<br />
▯ Measuring beaker with combined lid/base<br />
▯ Whisk<br />
▯ Liquidiser (Bla<strong>de</strong> and bowl with combined lid/base)<br />
▯ Wall bracket<br />
▯ 2 x Plugs<br />
▯ 2 x Screws<br />
▯ Operating instructions<br />
1) Remove all parts of the appliance and these operating instructions from the<br />
box.<br />
2) Remove all packing material.<br />
3) Clean all parts of the appliance as <strong>de</strong>scribed in the chapter “Cleaning”.<br />
NOTICE<br />
►<br />
Check the contents to make sure everything is there and for visible damage.<br />
► If the contents are incomplete, or have been damaged due to <strong>de</strong>fective<br />
packaging or transportation, contact the Service Hotline (see chapter<br />
Service).<br />
Disposal of the packaging<br />
The packaging protects the appliance from transport damage. The packaging<br />
materials are selected from the point of view of their environmental friendliness<br />
and disposal technology and are therefore recyclable.<br />
The recirculation of packaging into the material circuit saves on raw material<br />
and reduces generated waste. Dispose of packaging material that is no longer<br />
nee<strong>de</strong>d according to the regionally established regulations.<br />
NOTICE<br />
► If possible preserve the appliance's original packaging during the warranty<br />
period so that in the case of a warranty claim you can package the appliance<br />
properly for return.<br />
58 <strong>SSMS</strong> <strong>600</strong> <strong>B2</strong>
Technical data<br />
Voltage<br />
Nominal Power Rating<br />
220 - 240 V ~ , 50 Hz<br />
<strong>600</strong> W<br />
Protection Class<br />
Capacity:<br />
Measuring beaker<br />
Max. fi ll volume for fl uids<br />
II<br />
700 ml<br />
300 ml<br />
We recommend the following operating times:<br />
Let the hand blen<strong>de</strong>r cool after 1 minute of operation.<br />
Let the liquidiser cool after 1 minute of operation.<br />
Let the whisk cool after 2 minute of operation.<br />
GB<br />
MT<br />
Description of appliance / Accessories<br />
1 Speed regulator<br />
2 Switch (Standard Speed)<br />
3 Turbo-Switch (High Speed)<br />
4 Motor unit<br />
5 Hand blen<strong>de</strong>r<br />
6 Bowl lid<br />
7 Bla<strong>de</strong><br />
8 Bowl (with combined lid/base)<br />
9 Whisk hol<strong>de</strong>r<br />
0 Whisk<br />
q Measuring beaker (with combined lid/base)<br />
w Wall bracket, incl. screws & plugs<br />
<strong>SSMS</strong> <strong>600</strong> <strong>B2</strong><br />
59
Utilisation<br />
GB<br />
MT<br />
NOTICE<br />
► With the measuring beaker q you can measure volumes of fl uids up to<br />
700 ml. For food processing, fi ll it to a maximun of 300 ml, otherwise<br />
fl uids could overfl ow from the measuring beaker q.<br />
► Should you wish to keep liquids/foods in the measuring beaker q, you<br />
can remove the base of the measuring beaker q and use it as a lid.<br />
Ensure that the spout of the measuring beaker q is also closed.<br />
■ With this hand blen<strong>de</strong>r 5 you can prepare dips, sauces, soups or baby<br />
food. We recommend using the hand blen<strong>de</strong>r 5 for a maximum of 1 minute<br />
at a time and then letting it cool down.<br />
WARNING - PROPERTY DAMAGE!<br />
► Do not use this hand blen<strong>de</strong>r for the 5 preparation of solid foods.<br />
This would le<strong>ad</strong> to irreparable damage to the appliance!<br />
■ With the whisk 0 you can whip cream, beat egg whites and mix pastry,<br />
<strong>de</strong>sserts or mayonnaise. We recommend using the whisk 0 for a maximum<br />
of 2 minutes at a time and then letting it cool down.<br />
■ With the liquidiser, comprising of the bla<strong>de</strong> 7, bowl 8 and bowl lid 6,<br />
you can also liquidise solid foods. We recommend using the liquidiser for<br />
a maximum of 1 minute at a time and then letting it cool down.<br />
WARNING - PROPERTY DAMAGE!<br />
► Do not use the liquidiser to process liquids. This would le<strong>ad</strong> to irreparable<br />
damage to the appliance!<br />
60 <strong>SSMS</strong> <strong>600</strong> <strong>B2</strong>
Assembling<br />
►<br />
WARNING! RISK OF INJURY!<br />
Only insert the plug into the power socket after you have assembled the<br />
appliance for use.<br />
NOTICE<br />
► Before the fi rst use, clean all parts as <strong>de</strong>scribed in the chapter “Cleaning”.<br />
To assemble the hand blen<strong>de</strong>r<br />
GB<br />
MT<br />
►<br />
WARNING! RISK OF INJURY!<br />
The bla<strong>de</strong> is extremely sharp! Handle it with great care.<br />
■ Place the hand blen<strong>de</strong>r 5 on the motor unit 4 so that the arrow points to<br />
the symbol . Turn the hand blen<strong>de</strong>r 5 until the arrow on the motor unit 4<br />
points to the symbol .<br />
Assembling the wire whisk<br />
■ Insert the whisk 0 into the whisk hol<strong>de</strong>r 9.<br />
■ Place the assembled whisk 0 on the motor unit 4, so that the arrow points<br />
to the symbol . Turn the whisk 0 until the arrow on the motor unit 4<br />
points to the symbol .<br />
Assembling the liquidiser<br />
►<br />
WARNING! RISK OF INJURY!<br />
The bla<strong>de</strong> 7 is extremely sharp! Handle it with great care.<br />
■ Carefully place the bla<strong>de</strong> 7 onto its retainer in the bowl 8.<br />
■ Fill the bowl with the foodstuff s you wish to liquidise 8.<br />
NOTICE<br />
► NEVER fi ll the bowl 8 BEYOND the MAX marking. Otherwise, the appliance<br />
does not function optimally.<br />
<strong>SSMS</strong> <strong>600</strong> <strong>B2</strong><br />
61
■ Place the bowl lid 6 onto the bowl 8 and turn it until tight. Thereby, the<br />
lugs on the edge of the bowl 8 must be gui<strong>de</strong>d into the rail on the bowl<br />
lid 6.<br />
■ Place the motor unit 4 on the bowl lid 6 so that the arrow points to the<br />
symbol . Turn the motor unit 4 until the arrow points to the symbol .<br />
GB<br />
MT<br />
NOTICE<br />
► Should you wish to keep foodstuff s in the bowl 8 you can remove the<br />
base of the bowl 8 and use it as a lid. For this, carefully remove the bowl<br />
lid 6 and motor unit 4 and, if needs be, the bla<strong>de</strong> 7. Loosen the base<br />
of the bowl 8 and then place it onto the bowl 8.<br />
Holding the appliance<br />
To operate the appliance, hold it as follows:<br />
62 <strong>SSMS</strong> <strong>600</strong> <strong>B2</strong>
Operation<br />
►<br />
WARNING! RISK OF INJURY!<br />
Foodstuff s should not be too hot. Squirting contents may cause scalding.<br />
NOTICE<br />
► When you beat cream with the whisk 0 hold the container at a slant<br />
during the beating. In this way the cream will be thicker quicker. Ensure<br />
that cream cannot be sprayed out of the container while it is being beaten.<br />
When whipping cream, sli<strong>de</strong> the speed regulator 1 to position "5".<br />
When you have assembled the blen<strong>de</strong>r set as you wish to use it:<br />
1) Insert the plug into a mains power socket.<br />
2) Press and hold the switch 2 to process foodstuff s at the standard speed.<br />
Sli<strong>de</strong> the speed regulator 1 in the direction of “5” to increase the speed.<br />
Sli<strong>de</strong> the speed regulator 1 in the direction of “1” to reduce the speed.<br />
3) Press and hold the turbo-switch 3 to process foodstuff s at a higher speed.<br />
By pressing the turbo-switch 3 the maximum processing speed is available<br />
immediately.<br />
4) When you have completed the processing of the foodstuff s, simply release<br />
the switch.<br />
GB<br />
MT<br />
NOTICE<br />
► Should unusual noises be heard during operation, such as squeaks or<br />
similar, lubricate the drive shaft of the blen<strong>de</strong>r with a few drops of neutral<br />
cooking oil:<br />
<strong>SSMS</strong> <strong>600</strong> <strong>B2</strong><br />
63
Examples for the chopping and liquiding of various foods with the liquidiser:<br />
Ingredients<br />
max.<br />
amount<br />
Processing time<br />
SPEED<br />
Onions 200 g approx. 20 Sec. Level 1 - 3<br />
GB<br />
MT<br />
Parsley 30 g approx. 20 Sec. Turbo<br />
Garlic 20 cloves approx. 20 Sec. Level 1 - 5<br />
Baby-carrots 200 g approx. 15 Sec. Level 1 - 5<br />
Hazelnuts/<br />
Almonds<br />
200 g approx. 30 Sec. Turbo<br />
Walnuts 200 g approx. 25 Sec. Level 3 - 4<br />
Parmesan<br />
1 cm<br />
250 g approx. 30 Sec. Turbo<br />
64 <strong>SSMS</strong> <strong>600</strong> <strong>B2</strong>
Wall mounting<br />
2 plugs and 2 screws are supplied to enable the wall bracket w to be mounted.<br />
►<br />
WARNING RISK OF ELECTRIC SHOCK!<br />
Before mounting the wall bracket w check whether there are any power<br />
cables or pipes in the wall!<br />
Cleaning<br />
1) Mark the positions for the drill holes using the wall bracket w.<br />
2) Bore the holes with a 6 mm drill.<br />
3) Insert the dowels into the drill holes.<br />
4) Position both the openings of the wall-hol<strong>de</strong>r w over the drill holes and then<br />
fi x it tightly using both screws.<br />
GB<br />
MT<br />
►<br />
WARNING RISK OF ELECTRIC SHOCK!<br />
Before you start to clean the hand blen<strong>de</strong>r, ALWAYS unplug the appliance<br />
from the mains power socket.<br />
► Un<strong>de</strong>r no circumstances may the motor unit 4 be cleaned by immersing<br />
it in water or holding it un<strong>de</strong>r running water.<br />
WARNING - RISK OF PHYSICAL INJURY!<br />
► To avoid injuries, exercise caution when handling the extremely sharp<br />
bla<strong>de</strong> 7. Reassemble the liquidiser after use and cleaning to prevent injury<br />
from the exposed bla<strong>de</strong>. Keep the bla<strong>de</strong> out of the reach of children.<br />
WARNING - PROPERTY DAMAGE!<br />
► DO NOT clean the accessories of your hand blen<strong>de</strong>r in the dishwasher as<br />
it may cause damage to them.<br />
► Do not use aggressive, chemical or abrasive cleaning agents! They could<br />
irreparably damage the upper surfaces!<br />
<strong>SSMS</strong> <strong>600</strong> <strong>B2</strong><br />
65
1) Remove the power plug from the socket.<br />
2) Clean the motor unit 4, the hand blen<strong>de</strong>r 5, the bowl lid 6 the whiskhol<strong>de</strong>r<br />
9 and the wall bracket w with a moist cloth.<br />
Ensure that water cannot permeate through the openings of the hand mixer 5.<br />
For stubborn soiling use a mild <strong>de</strong>tergent on the cloth.<br />
3) Clean the remaining accessories (bowl 8, whisk 0, measuring beaker q<br />
and bla<strong>de</strong> 7) un<strong>de</strong>r running water and dry them well with a dish towel.<br />
Disposal of the appliance<br />
GB<br />
MT<br />
Do not dispose of the appliance in your normal domestic waste.<br />
This product is subject to the provisions of European Directive<br />
2002/96/EC.<br />
Dispose of this appliance through an approved disposal centre or at your community<br />
waste facility. Observe the currently applicable regulations. In case of<br />
doubt, please contact your waste disposal centre.<br />
Notes on the EC Declaration of Conformity<br />
With regard to conformity with essential requirements and<br />
other relevant provisions, this appliance complies with the<br />
gui<strong>de</strong>lines of the Electromagnetic Compatibility Directive<br />
2004/108/EC and the Low Voltage Directive 2006/95/EC.<br />
The complete original <strong>de</strong>claration of conformity can be<br />
obtained from the importer.<br />
Importer<br />
KOMPERNASS GMBH<br />
BURGSTRASSE 21<br />
44867 BOCHUM, GERMANY<br />
www.kompernass.com<br />
66 <strong>SSMS</strong> <strong>600</strong> <strong>B2</strong>
Warranty<br />
The warranty for this appliance is for 3 years from the date of purchase. The<br />
appliance has been manufactured with care and meticulously examined before<br />
<strong>de</strong>livery.<br />
Please retain your receipt as proof of purchase. In the event of a warranty claim,<br />
please make contact by telephone with our service <strong>de</strong>partment. Only in this way<br />
can a post-free <strong>de</strong>spatch for your goods be assured.<br />
NOTICE<br />
► The warranty covers only claims for material and manufacturing <strong>de</strong>fects, not<br />
for transport damages, wearing parts or for damage to fragile components,<br />
e.g. switches.<br />
GB<br />
MT<br />
Service<br />
This product is for domestic use only and is not inten<strong>de</strong>d for commercial use.<br />
In the event of misuse and improper handling, use of force and modifi cations not<br />
carried out by our authorized service branch, the warranty will become void.<br />
Your statutory rights are not restricted in any way by this warranty.<br />
The warranty period is not exten<strong>de</strong>d by repairs ma<strong>de</strong> un<strong>de</strong>r the warranty. This<br />
applies also to replaced and repaired parts.<br />
Damages and <strong>de</strong>fects extant at the time of purchase must be reported immediately<br />
after unpacking, resp. no later than two days after the date of purchase.<br />
Repairs ma<strong>de</strong> after the lapse of the warranty period are subject to charge.<br />
Service Great Britain<br />
Tel.: 0871 5000 720 (£ 0.10/Min.)<br />
E-Mail: kompernass@lidl.co.uk<br />
IAN 68957<br />
Service Malta<br />
Tel.: 80062230<br />
E-Mail: kompernass@lidl.com.mt<br />
IAN 68957<br />
<strong>SSMS</strong> <strong>600</strong> <strong>B2</strong><br />
67
Recipes<br />
GB<br />
MT<br />
Cream of Vegetable Soup<br />
2 - 4 People<br />
Ingredients<br />
■ 2-3 tbsp Cooking oil<br />
■ 200 g Onions<br />
■ 200 g Potatoes (specially suitable are fl oury varieties)<br />
■ 200 g Carrots<br />
■ 350-400 ml Vegetable stock (fresh or instant)<br />
■ Salt, Pepper, Nutmeg<br />
■ 5 g Parsley<br />
Preparation<br />
1) Peel and fi nely chop the onions. Wash, peel and cut the carrots into slices.<br />
Peel and rinse the potatoes, then cut them into approx. 2 cm cubes.<br />
2) Heat the oil in a pan, sauté the onions until glassy. Add the carrots and<br />
potatoes and sauté them also. Pour in suffi cient broth so that the vegetables<br />
are well covered and then boil everything for 10-15 minutes until soft. If necessary,<br />
<strong>ad</strong>d more broth if the vegetables are no longer completely covered.<br />
3) Wash the parsley, shake it dry and remove the stems. Break the parsley<br />
into large pieces and <strong>ad</strong>d them to the soup. Puree everything with the hand<br />
mixer 5 for about 1 minute. Season with salt, pepper and grated nutmeg.<br />
68 <strong>SSMS</strong> <strong>600</strong> <strong>B2</strong>
Pumpkin Soup<br />
4 People<br />
Ingredients<br />
■ 1 medium-sized Onion<br />
■ 2 Garlic cloves<br />
■ 10 - 20 g fresh Ginger<br />
■ 3 tbsp Rapeseed oil<br />
■ 400 g Pumpkin (i<strong>de</strong>ally suited is Hokkaido pumpkin, because the shell<br />
becomes soft when cooked and it does not need to be peeled)<br />
■ 250 -300 ml Coconut milk<br />
■ 250 -500 ml Vegetable stock<br />
■ Juice of ½ of an Orange<br />
■ some dry white wine<br />
■ 1 tsp. Sugar<br />
■ Salt, Pepper<br />
GB<br />
MT<br />
Preparation<br />
1) Peel and chop the onion, the garlic also. Peel and fi nely chop the ginger.<br />
Firstly, sauté the onion and ginger in hot oil. After 2 minutes <strong>ad</strong>d the garlic<br />
and sauté this also.<br />
2) Thoroughly clean the pumpkin un<strong>de</strong>r warm water with a vegetable brush,<br />
then cut it into 2-3 cm cubes. (If a pumpkin other than Hokkaido pumpkin<br />
is being used, it must be peeled in <strong>ad</strong>dition). Add the diced pumpkin to the<br />
onions and ginger and sauté them also. Fill with half the amount of coconut<br />
milk and suffi cient vegetable broth to cover the pumpkin well. Cook for<br />
approx. 20-25 minutes with the lid on until soft. Mix everything with a hand<br />
blen<strong>de</strong>r 5 until smooth. Thereby, <strong>ad</strong>d <strong>ad</strong>ditional coconut milk until the soup<br />
has the correct soft and creamy consistency.<br />
3) Season the soup with orange juice, white wine, sugar, salt and pepper so<br />
that it has both a sweet and a balanced sour-salty note in <strong>ad</strong>dition to the<br />
sharp fl avour.<br />
<strong>SSMS</strong> <strong>600</strong> <strong>B2</strong><br />
69
GB<br />
MT<br />
Sweet Fruit Spre<strong>ad</strong><br />
Ingredients<br />
■ 250 g Strawberries or other fruit (fresh or frozen)<br />
■<br />
■<br />
■<br />
1 packet (about 125g) Preserving sugar without cooking<br />
1 dash of Lemon juice<br />
1 pinch of the pulp of a Vanilla pod<br />
Preparation<br />
1) Wash and clean the strawberries, at the same time removing the green<br />
stems. Drain well in a colan<strong>de</strong>r, so that you are rid of excess water and the<br />
spre<strong>ad</strong> is not too watery. Slice larger strawberries into small pieces.<br />
2) Weigh 250 g of strawberries and place in a suitable blen<strong>de</strong>r jug.<br />
3) Add a dash of lemon juice.<br />
4) If <strong>de</strong>sired, scrape out and <strong>ad</strong>d the pulp of a vanilla pod.<br />
5) Add the contents of the packet of preserving sugar without cooking and<br />
mix thoroughly with a hand blen<strong>de</strong>r 5 for 45-60 seconds. If there are still<br />
large pieces in it, allow it to stand for 1 minute and then purée it again for<br />
60 seconds.<br />
6) Enjoy the fruit spre<strong>ad</strong> straight away or pour it into a glass jar with a screw<br />
cap and fi rmly seal it.<br />
70 <strong>SSMS</strong> <strong>600</strong> <strong>B2</strong>
Chocolate Cream<br />
For 4 people<br />
Ingredients<br />
■ 350 g Whipping cream<br />
■<br />
■<br />
200 g Dark chocolate (> 60% Cocoa)<br />
½ Vanilla pod (Pulp)<br />
Preparation<br />
1) Bring the cream to a boil, crumble the chocolate and melt it slowly over low<br />
heat. Scrape out the pulp of half a vanilla pod and blend it into the mixture.<br />
2) Allow it to cool and set completely in the refrigerator.<br />
3) Before serving, stir with the whisk 0 until creamy.<br />
Tip: This tastes good with fresh fruit.<br />
GB<br />
MT<br />
Mayonnaise<br />
■<br />
■<br />
■<br />
■<br />
200 ml neutral vegetable oil, e.g. Rapeseed oil<br />
1 Egg (yolk and egg white)<br />
10 g mild Vinegar or Lemon juice<br />
Salt and Pepper to taste<br />
Preparation<br />
1) Place the egg and lemon juice in the mixing jug, hold the whisk 0 perpendicular<br />
to the jug and press and hold the turbo button.<br />
2) Slowly <strong>ad</strong>d the cooking oil in a thin uniform stream (within 1:30 minutes),<br />
so that the oil combines with the other ingredients.<br />
3) Finally, season to taste with salt and pepper.<br />
<strong>SSMS</strong> <strong>600</strong> <strong>B2</strong><br />
71
Inhaltsverzeichnis<br />
Informationen zu dieser Bedienungsanleitung . . . . . . . . . . . . . . . . . . . . . 74<br />
Urheberrecht . . . . . . . . . . . . . . . . . . . . . . . . . . . . . . . . . . . . . . . . . . . . . . . . . . . . . . . . . . . 74<br />
Bestimmungsgemäße Verwendung . . . . . . . . . . . . . . . . . . . . . . . . . . . . . . 74<br />
Sicherheitshinweise . . . . . . . . . . . . . . . . . . . . . . . . . . . . . . . . . . . . . . . . . . . 75<br />
Lieferumfang . . . . . . . . . . . . . . . . . . . . . . . . . . . . . . . . . . . . . . . . . . . . . . . . . 76<br />
Entsorgung <strong>de</strong>r Verpackung . . . . . . . . . . . . . . . . . . . . . . . . . . . . . . . . . . . . . . . . . . . . . . . 76<br />
Technische Daten . . . . . . . . . . . . . . . . . . . . . . . . . . . . . . . . . . . . . . . . . . . . . . 77<br />
Gerätebeschreibung/Zubehör . . . . . . . . . . . . . . . . . . . . . . . . . . . . . . . . . . 77<br />
Verwendung . . . . . . . . . . . . . . . . . . . . . . . . . . . . . . . . . . . . . . . . . . . . . . . . . 78<br />
DE<br />
AT<br />
CH<br />
Zusammenbauen . . . . . . . . . . . . . . . . . . . . . . . . . . . . . . . . . . . . . . . . . . . . . 79<br />
Den Stabmixer zusammenbauen . . . . . . . . . . . . . . . . . . . . . . . . . . . . . . . . . . . . . . . . . . . . 79<br />
Den Schneebesen zusammenbauen . . . . . . . . . . . . . . . . . . . . . . . . . . . . . . . . . . . . . . . . . 79<br />
Den Zerkleinerer zusammenbauen . . . . . . . . . . . . . . . . . . . . . . . . . . . . . . . . . . . . . . . . . . 79<br />
Gerät halten . . . . . . . . . . . . . . . . . . . . . . . . . . . . . . . . . . . . . . . . . . . . . . . . . 80<br />
Bedienen . . . . . . . . . . . . . . . . . . . . . . . . . . . . . . . . . . . . . . . . . . . . . . . . . . . . 81<br />
Wandmontage . . . . . . . . . . . . . . . . . . . . . . . . . . . . . . . . . . . . . . . . . . . . . . . 83<br />
Reinigen . . . . . . . . . . . . . . . . . . . . . . . . . . . . . . . . . . . . . . . . . . . . . . . . . . . . . 83<br />
Gerät entsorgen . . . . . . . . . . . . . . . . . . . . . . . . . . . . . . . . . . . . . . . . . . . . . . 84<br />
Hinweise zur EG-Konformitätserklärung . . . . . . . . . . . . . . . . . . . . . . . . . . 84<br />
Importeur . . . . . . . . . . . . . . . . . . . . . . . . . . . . . . . . . . . . . . . . . . . . . . . . . . . 84<br />
Garantie. . . . . . . . . . . . . . . . . . . . . . . . . . . . . . . . . . . . . . . . . . . . . . . . . . . . . 85<br />
Service . . . . . . . . . . . . . . . . . . . . . . . . . . . . . . . . . . . . . . . . . . . . . . . . . . . . . . 85<br />
Rezepte . . . . . . . . . . . . . . . . . . . . . . . . . . . . . . . . . . . . . . . . . . . . . . . . . . . . . 86<br />
Gemüse-Cremesuppe . . . . . . . . . . . . . . . . . . . . . . . . . . . . . . . . . . . . . . . . . . . . . . . . . . . . 86<br />
Kürbissuppe . . . . . . . . . . . . . . . . . . . . . . . . . . . . . . . . . . . . . . . . . . . . . . . . . . . . . . . . . . . . 87<br />
Süßer Fruchtaufstrich . . . . . . . . . . . . . . . . . . . . . . . . . . . . . . . . . . . . . . . . . . . . . . . . . . . . . 88<br />
Schoko-Creme . . . . . . . . . . . . . . . . . . . . . . . . . . . . . . . . . . . . . . . . . . . . . . . . . . . . . . . . . . 89<br />
Mayonnaise . . . . . . . . . . . . . . . . . . . . . . . . . . . . . . . . . . . . . . . . . . . . . . . . . . . . . . . . . . . . 89<br />
<strong>SSMS</strong> <strong>600</strong> <strong>B2</strong><br />
73
Informationen zu dieser Bedienungsanleitung<br />
Diese Bedienungsanleitung ist Bestandteil <strong>de</strong>s Stabmixer-Sets <strong>SSMS</strong> <strong>600</strong> <strong>B2</strong><br />
(nachfolgend als Gerät bezeichnet) und gibt Ihnen wichtige Hinweise für <strong>de</strong>n<br />
bestimmungsgemäßen Gebrauch, die Sicherheit, <strong>de</strong>n Anschluss sowie die Bedienung<br />
<strong>de</strong>s Gerätes.<br />
Die Bedienungsanleitung muss ständig in <strong>de</strong>r Nähe <strong>de</strong>s Gerätes verfügbar sein.<br />
Sie ist von je<strong>de</strong>r Person zu lesen und anzuwen<strong>de</strong>n, die mit <strong>de</strong>r Bedienung und<br />
Störungsbehebung <strong>de</strong>s Gerätes beschäftigt ist.<br />
Bewahren Sie diese Bedienungsanleitung auf und geben Sie diese mit <strong>de</strong>m<br />
Gerät an Nachbesitzer weiter.<br />
DE<br />
AT<br />
CH<br />
Urheberrecht<br />
Diese Dokumentation ist urheberrechtlich geschützt.<br />
Je<strong>de</strong> Vervielfältigung, bzw. je<strong>de</strong>r Nachdruck, auch auszugsweise, sowie die<br />
Wie<strong>de</strong>rgabe <strong>de</strong>r Abbildungen, auch im verän<strong>de</strong>rten Zustand ist nur mit schriftlicher<br />
Zustimmung <strong>de</strong>s Herstellers gestattet.<br />
Bestimmungsgemäße Verwendung<br />
Das Stabmixer-Set dient ausschließlich <strong>de</strong>r Verarbeitung von Lebensmitteln in<br />
kleinen Mengen. Es ist ausschließlich für die Benutzung im privaten Haushalt bestimmt.<br />
Das Stabmixer-Set ist nicht für <strong>de</strong>n gewerblichen Gebrauch vorgesehen.<br />
WARNUNG<br />
Gefahr durch nicht bestimmungsgemäße Verwendung!<br />
Von <strong>de</strong>m Gerät können bei nicht bestimmungsgemäßer Verwendung und/<br />
o<strong>de</strong>r an<strong>de</strong>rsartiger Nutzung Gefahren ausgehen.<br />
► Das Gerät ausschließlich bestimmungsgemäß verwen<strong>de</strong>n.<br />
► Die in dieser Bedienungsanleitung beschriebenen Vorgehensweisen<br />
einhalten.<br />
HINWEIS<br />
► Von <strong>de</strong>m Gerät können bei nicht bestimmungsgemäßer Verwendung und/<br />
o<strong>de</strong>r an<strong>de</strong>rsartiger Nutzung Gefahren ausgehen. Verwen<strong>de</strong>n Sie das Gerät<br />
ausschließlich bestimmungsgemäß. Die in dieser Bedienungsanleitung<br />
beschriebenen Vorgehensweisen einhalten. Ansprüche jeglicher Art wegen<br />
Schä<strong>de</strong>n aus nicht bestimmungsgemäßer Verwendung, unsachgemäßen<br />
Reparaturen, unerlaubt vorgenommenen Verän<strong>de</strong>rungen o<strong>de</strong>r Verwendung<br />
nicht zugelassener Ersatzteile sind ausgeschlossen. Das Risiko trägt allein<br />
<strong>de</strong>r Betreiber.<br />
74 <strong>SSMS</strong> <strong>600</strong> <strong>B2</strong>
Sicherheitshinweise<br />
STROMSCHLAGGEFAHR<br />
► Schließen Sie das Stabmixer-Set nur an eine vorschriftsmäßig installierte<br />
Netzsteckdose mit einer Netzspannung von 220 - 240 V ~ / 50 Hz an.<br />
► Ziehen Sie bei Betriebsstörungen, und bevor Sie das Stabmixer-Set reinigen,<br />
<strong>de</strong>n Netzstecker aus <strong>de</strong>r Netzsteckdose.<br />
► Sie dürfen das Gerät keiner Feuchtigkeit aussetzen und nicht im Freien<br />
benutzen.<br />
► Falls doch einmal Flüssigkeit in das Gerätegehäuse gelangt, ziehen Sie<br />
sofort <strong>de</strong>n Netzstecker <strong>de</strong>s Geräts aus <strong>de</strong>r Netzsteckdose und lassen Sie<br />
es von qualifi ziertem Fachpersonal reparieren.<br />
► Ziehen Sie das Netzkabel stets am Netzstecker aus <strong>de</strong>r Netzsteckdose,<br />
ziehen Sie nicht am Kabel selbst.<br />
► Knicken o<strong>de</strong>r quetschen Sie das Netzkabel nicht und verlegen Sie das<br />
Netzkabel so, dass niemand darauf treten o<strong>de</strong>r darüber stolpern kann.<br />
► Lassen Sie beschädigte Netzstecker o<strong>de</strong>r Netzkabel sofort von autorisiertem<br />
Fachpersonal o<strong>de</strong>r <strong>de</strong>m Kun<strong>de</strong>nservice austauschen, um Gefährdungen<br />
zu vermei<strong>de</strong>n.<br />
► Sie dürfen das Motorblock-Gehäuse <strong>de</strong>s Stabmixer-Sets nicht öff nen. In diesem<br />
Falle ist die Sicherheit nicht gegeben und die Gewährleistung erlischt.<br />
► Dieses Gerät ist nicht dafür bestimmt, durch Personen (einschließlich<br />
Kin<strong>de</strong>r) mit eingeschränkten physischen, sensorischen o<strong>de</strong>r geistigen<br />
Fähigkeiten o<strong>de</strong>r mangels Erfahrung und/o<strong>de</strong>r mangels Wissen benutzt zu<br />
wer<strong>de</strong>n, es sei <strong>de</strong>nn, sie wer<strong>de</strong>n durch eine für ihre Sicherheit zuständige<br />
Person beaufsichtigt o<strong>de</strong>r erhielten von ihr Anweisungen, wie das Gerät zu<br />
benutzen ist.<br />
► Kin<strong>de</strong>r sollten beaufsichtigt wer<strong>de</strong>n, um sicherzustellen, dass sie nicht mit<br />
<strong>de</strong>m Gerät spielen.<br />
DE<br />
AT<br />
CH<br />
STROMSCHLAGGEFAHR<br />
Sie dürfen <strong>de</strong>n Motorblock <strong>de</strong>s Stabmixer-Sets keinesfalls in Flüssigkeit<br />
tauchen und keine Flüssigkeiten in das Gehäuse <strong>de</strong>s Motorblocks<br />
gelangen lassen.<br />
WARNUNG! VERLETZUNGSGEFAHR!<br />
► Trennen Sie das Gerät grundsätzlich vom Stromnetz, wenn Sie Zubehörteile<br />
abnehmen o<strong>de</strong>r anbringen o<strong>de</strong>r das Gerät unbeaufsichtigt ist.<br />
<strong>SSMS</strong> <strong>600</strong> <strong>B2</strong><br />
75
Lieferumfang<br />
DE<br />
AT<br />
CH<br />
Das Gerät wird standardmäßig mit folgen<strong>de</strong>n Komponenten geliefert:<br />
▯ Stabmixer-Set<br />
▯ Messbecher mit kombiniertem Deckel/Standfuß<br />
▯ Schneebesen<br />
▯ Zerkleinerer (Messer und Schüssel mit kombiniertem Deckel/Standfuß)<br />
▯ Wandhalter<br />
▯ 2 x Dübel<br />
▯ 2 x Schrauben<br />
▯ Bedienungsanleitung<br />
1) Entnehmen Sie alle Teile <strong>de</strong>s Gerätes und die Bedienungsanleitung aus <strong>de</strong>m<br />
Karton.<br />
2) Entfernen Sie sämtliches Verpackungsmaterial.<br />
3) Reinigen Sie alle Teile <strong>de</strong>s Gerätes wie im Kapitel „Reinigen“ beschrieben.<br />
HINWEIS<br />
►<br />
Prüfen Sie die Lieferung auf Vollständigkeit und auf sichtbare Schä<strong>de</strong>n.<br />
► Bei einer unvollständigen Lieferung o<strong>de</strong>r Schä<strong>de</strong>n infolge mangelhafter<br />
Verpackung o<strong>de</strong>r durch Transport wen<strong>de</strong>n Sie sich an die Service-Hotline<br />
(siehe Kapitel Service).<br />
Entsorgung <strong>de</strong>r Verpackung<br />
Die Verpackung schützt das Gerät vor Transportschä<strong>de</strong>n. Die Verpackungsmaterialien<br />
sind nach umweltverträglichen und entsorgungstechnischen Gesichtspunkten<br />
ausgewählt und <strong>de</strong>shalb recyclebar.<br />
Die Rückführung <strong>de</strong>r Verpackung in <strong>de</strong>n Materialkreislauf spart Rohstoff e und<br />
verringert das Abfallaufkommen. Entsorgen Sie nicht mehr benötigte Verpackungsmaterialien<br />
gemäß <strong>de</strong>n örtlich gelten<strong>de</strong>n Vorschriften.<br />
HINWEIS<br />
► Heben Sie wenn möglich die Originalverpackung während <strong>de</strong>r Garantiezeit<br />
<strong>de</strong>s Gerätes auf, um das Gerät im Garantiefall ordnungsgemäß<br />
verpacken zu können.<br />
76 <strong>SSMS</strong> <strong>600</strong> <strong>B2</strong>
Technische Daten<br />
Netzspannung<br />
Nennleistung<br />
Schutzklasse<br />
Fassungsvermögen:<br />
Messbecher<br />
Max. Einfüllmenge Flüssigkeiten<br />
220 - 240 V ~, 50 Hz<br />
<strong>600</strong> W<br />
II<br />
700 ml<br />
300 ml<br />
Wir empfehlen folgen<strong>de</strong> Betriebszeiten:<br />
Den Stabmixer nach 1 Minute Betrieb abkühlen lassen.<br />
Den Zerkleinerer nach 1 Minute Betrieb abkühlen lassen.<br />
Den Schneebesen nach 2 Minuten Betrieb abkühlen lassen.<br />
Gerätebeschreibung/Zubehör<br />
DE<br />
AT<br />
CH<br />
1 Geschwindigkeitsregler<br />
2 Schalter (normale Geschwindigkeit)<br />
3 Turbo-Schalter (schnelle Geschwindigkeit)<br />
4 Motorblock<br />
5 Stabmixer<br />
6 Schüssel-Deckel<br />
7 Messer<br />
8 Schüssel (mit kombiniertem Deckel/Standfuß)<br />
9 Schneebesen-Halter<br />
0 Schneebesen<br />
q Messbecher (mit kombiniertem Deckel/Standfuß)<br />
w Wandhalter inkl. Schrauben & Dübel<br />
<strong>SSMS</strong> <strong>600</strong> <strong>B2</strong><br />
77
Verwendung<br />
DE<br />
AT<br />
CH<br />
HINWEIS<br />
► Mit <strong>de</strong>m Messbecher q können Sie Flüssigkeiten bis zu 700 ml abmessen.<br />
Füllen Sie zum Bearbeiten maximal 300 ml ein, sonst kann Flüssigkeit aus<br />
<strong>de</strong>m Messbecher q herauslaufen.<br />
► Wenn Sie Flüssigkeiten/Lebensmittel im Messbecher q aufbewahren<br />
möchten, können Sie <strong>de</strong>n Standfuß <strong>de</strong>s Messbechers q abnehmen und<br />
diesen als Deckel verwen<strong>de</strong>n. Achten Sie darauf, dass auch <strong>de</strong>r Ausguss<br />
am Messbecher q verschlossen ist.<br />
■ Mit <strong>de</strong>m Stabmixer 5 können Sie Dips, Saucen, Suppen o<strong>de</strong>r Baby-Nahrung<br />
zubereiten. Wir empfehlen <strong>de</strong>n Stabmixer 5 max. 1 Minute am Stück<br />
zu betreiben und ihn dann abkühlen zu lassen.<br />
ACHTUNG - SACHSCHADEN!<br />
► Benutzen Sie <strong>de</strong>n Stabmixer 5 nicht zur Bearbeitung fester Lebensmittel.<br />
Das führt zu irreparablen Schä<strong>de</strong>n am Gerät!<br />
■ Mit <strong>de</strong>m Schneebesen 0 können Sie Mayonnaise herstellen, Sahne und<br />
Eiweiß schlagen o<strong>de</strong>r Nachtisch anrühren. Wir empfehlen <strong>de</strong>n Schneebesen<br />
0 max. 2 Minuten am Stück zu betreiben und ihn dann abkühlen zu lassen.<br />
■ Mit <strong>de</strong>m Zerkleinerer, bestehend aus Messer 7, Schüssel 8 und Schüssel-<br />
Deckel 6, können Sie auch härtere Lebensmittel zerkleinern. Wir empfehlen<br />
<strong>de</strong>n Zerkleinerer max. 1 Minute am Stück zu betreiben und ihn dann<br />
abkühlen zu lassen.<br />
ACHTUNG - SACHSCHADEN!<br />
► Benutzen Sie <strong>de</strong>n Zerkleinerer nicht zur Bearbeitung von Flüssigkeiten. Das<br />
führt zu irreparablen Schä<strong>de</strong>n am Gerät!<br />
78 <strong>SSMS</strong> <strong>600</strong> <strong>B2</strong>
Zusammenbauen<br />
►<br />
WARNUNG! VERLETZUNGSGEFAHR!<br />
Stecken Sie <strong>de</strong>n Netzstecker erst nach <strong>de</strong>m Zusammenbau in die<br />
Steckdose.<br />
HINWEIS<br />
► Vor <strong>de</strong>r ersten Inbetriebnahme, reinigen Sie alle Teile wie im Kapitel „Reinigen“<br />
beschrieben.<br />
Den Stabmixer zusammenbauen<br />
WARNUNG! VERLETZUNGSGEFAHR!<br />
► Das Messer ist extrem scharf! Gehen Sie stets vorsichtig damit um.<br />
DE<br />
AT<br />
CH<br />
■ Setzen Sie <strong>de</strong>n Stabmixer 5 auf <strong>de</strong>n Motorblock 4, so dass <strong>de</strong>r Pfeil auf<br />
das Symbol weist. Drehen Sie <strong>de</strong>n Stabmixer 5, bis <strong>de</strong>r Pfeil am Motorblock<br />
4 auf das Symbol weist.<br />
Den Schneebesen zusammenbauen<br />
■ Setzen Sie <strong>de</strong>n Schneebesen 0 in <strong>de</strong>n Schneebesen-Halter 9.<br />
■ Setzen Sie <strong>de</strong>n so zusammengebauten Schneebesen 0 auf <strong>de</strong>n Motorblock<br />
4, so dass <strong>de</strong>r Pfeil auf das Symbol weist. Drehen Sie <strong>de</strong>n Schneebesen<br />
0, bis <strong>de</strong>r Pfeil am Motorblock 4 auf das Symbol weist.<br />
Den Zerkleinerer zusammenbauen<br />
►<br />
WARNUNG! VERLETZUNGSGEFAHR!<br />
Das Messer 7 ist extrem scharf! Gehen Sie stets vorsichtig damit um.<br />
■ Setzen Sie vorsichtig das Messer 7 auf die Halterung in <strong>de</strong>r Schüssel 8.<br />
■ Füllen Sie die zu zerkleinern<strong>de</strong>n Lebensmittel in die Schüssel 8.<br />
HINWEIS<br />
► Befüllen Sie die Schüssel 8 immer nur bis zur MAX-Markierung. Ansonsten<br />
funktioniert das Gerät nicht optimal.<br />
<strong>SSMS</strong> <strong>600</strong> <strong>B2</strong><br />
79
■ Setzen Sie <strong>de</strong>n Schüssel-Deckel 6 auf die Schüssel 8 und drehen Sie ihn<br />
fest. Dabei müssen die Nasen am Rand <strong>de</strong>r Schüssel 8 in die Schiene am<br />
Schüssel-Deckel 6 geführt wer<strong>de</strong>n.<br />
■ Setzen Sie <strong>de</strong>n Motorblock 4 auf <strong>de</strong>n Schüssel-Deckel 6, so dass <strong>de</strong>r Pfeil<br />
auf das Symbol weist. Drehen Sie <strong>de</strong>n Motorblock 4, bis <strong>de</strong>r Pfeil auf<br />
das Symbol weist.<br />
DE<br />
AT<br />
CH<br />
Gerät halten<br />
HINWEIS<br />
► Wenn Sie Lebensmittel in <strong>de</strong>r Schüssel 8 aufbewahren möchten, können<br />
Sie <strong>de</strong>n Standfuß <strong>de</strong>r Schüssel 8 abnehmen und diesen als Deckel<br />
verwen<strong>de</strong>n. Nehmen Sie dazu <strong>de</strong>n Schüssel-Deckel 6 und Motorblock 4<br />
ab, sowie gegebenenfalls das Messer 7 vorsichtig heraus. Lösen Sie <strong>de</strong>n<br />
Standfuß <strong>de</strong>r Schüssel 8 und setzen Sie ihn auf die Schüssel 8.<br />
Um das Gerät zu bedienen, halten Sie es bitte folgen<strong>de</strong>rmaßen:<br />
80 <strong>SSMS</strong> <strong>600</strong> <strong>B2</strong>
Bedienen<br />
►<br />
WARNUNG! VERLETZUNGSGEFAHR!<br />
Die Lebensmittel dürfen nicht zu heiß sein! Herausspritzen<strong>de</strong>r Inhalt könnte<br />
zu Verbrühungen führen.<br />
HINWEIS<br />
► Wenn Sie Sahne mit <strong>de</strong>m Schneebesen 0 schlagen wollen, halten Sie das<br />
Gefäß während <strong>de</strong>s Schlagens schräg. So wird die Sahne schneller steif.<br />
Achten Sie darauf, dass keine Sahne während <strong>de</strong>s Schlagens herausspritzt.<br />
Schieben Sie zum Schlagen von Sahne <strong>de</strong>n Geschwindigkeitsregler 1 auf<br />
„5“.<br />
Wenn Sie das Stabmixer-Set wie gewünscht zusammengebaut haben:<br />
1) Stecken Sie <strong>de</strong>n Netzstecker in die Netzsteckdose.<br />
2) Halten Sie <strong>de</strong>n Schalter 2 gedrückt, um die Lebensmittel mit normaler<br />
Geschwindigkeit zu verarbeiten. Schieben Sie <strong>de</strong>n Geschwindigkeitsregler<br />
1 Richtung „5“, um die Geschwindigkeit zu erhöhen. Schieben Sie <strong>de</strong>n Geschwindigkeitsregler<br />
1 Richtung „1“, um die Geschwindigkeit zu verringern.<br />
3) Halten Sie <strong>de</strong>n Turbo-Schalter 3 gedrückt, um die Lebensmittel mit hoher<br />
Geschwindigkeit zu verarbeiten. Mit Drücken <strong>de</strong>s Turbo-Schalters 3 steht<br />
Ihnen sofort die maximale Bearbeitungsgeschwindigkeit zur Verfügung.<br />
4) Wenn Sie mit <strong>de</strong>r Verarbeitung <strong>de</strong>r Lebensmittel fertig sind, lassen Sie einfach<br />
<strong>de</strong>n gedrückten Schalter los.<br />
DE<br />
AT<br />
CH<br />
HINWEIS<br />
► Sollte es während <strong>de</strong>s Betriebes zu ungewöhnlichen Geräuschen, wie<br />
Quietschen o<strong>de</strong>r ähnlichem, kommen, geben Sie ein wenig neutrales Speiseöl<br />
an die Antriebswelle <strong>de</strong>s Stabmixers:<br />
<strong>SSMS</strong> <strong>600</strong> <strong>B2</strong><br />
81
Beispiele für das Hacken und Zerkleinern von verschie<strong>de</strong>nen Lebensmitteln mit<br />
<strong>de</strong>m Zerkleinerer:<br />
Zutaten<br />
max.<br />
Menge<br />
Verarbeitungszeit<br />
Geschwindigkeit<br />
Zwiebeln 200 g ca. 20 Sek. Stufe 1 - 3<br />
DE<br />
AT<br />
CH<br />
Petersilie 30 g ca. 20 Sek. Turbo<br />
Knoblauch 20 Zehen ca. 20 Sek. Stufe 1 - 5<br />
Möhren 200 g ca. 15 Sek. Stufe 1 - 5<br />
Haselnüsse/<br />
Man<strong>de</strong>ln<br />
200 g ca. 30 Sek. Turbo<br />
Walnüsse 200 g ca. 25 Sek. Stufe 3 - 4<br />
Parmesan<br />
1 cm<br />
250 g ca. 30 Sek. Turbo<br />
82 <strong>SSMS</strong> <strong>600</strong> <strong>B2</strong>
Wandmontage<br />
Im Lieferumfang enthalten sind 2 Dübel und 2 Schrauben, um <strong>de</strong>n Wandhalter<br />
w zu montieren.<br />
►<br />
WARNUNG STROMSCHLAGGEFAHR!<br />
Prüfen Sie vor <strong>de</strong>r Montage <strong>de</strong>s Wandhalters w, ob sich Leitungen o<strong>de</strong>r<br />
Rohre in <strong>de</strong>r Wand befi n<strong>de</strong>n!<br />
Reinigen<br />
1) Markieren Sie sich die Position <strong>de</strong>r Bohrlöcher anhand <strong>de</strong>s Wandhalters w.<br />
2) Bohren Sie die Löcher mit einem 6 mm-Bohrer.<br />
3) Setzen Sie die Dübel in die gebohrten Löcher ein.<br />
4) Positionieren Sie die bei<strong>de</strong>n Öff nungen <strong>de</strong>s Wandhalters w über die Bohrungen<br />
und fi xieren Sie diesen mit <strong>de</strong>n bei<strong>de</strong>n Schrauben.<br />
DE<br />
AT<br />
CH<br />
►<br />
WARNUNG - STROMSCHLAGGEFAHR!<br />
Bevor Sie das Stabmixer-Set reinigen, ziehen Sie immer <strong>de</strong>n Netzstecker<br />
aus <strong>de</strong>r Netzsteckdose.<br />
► Sie dürfen <strong>de</strong>n Motorblock 4 bei <strong>de</strong>r Reinigung keinesfalls in Wasser<br />
tauchen o<strong>de</strong>r unter fl ießen<strong>de</strong>s Wasser halten.<br />
WARNUNG - VERLETZUNGSGEFAHR!<br />
► Beim Umgang mit <strong>de</strong>m extrem scharfen Messer 7 besteht Verletzungsgefahr.<br />
Setzen Sie <strong>de</strong>n Zerkleinerer nach Benutzung und Reinigung wie<strong>de</strong>r<br />
zusammen, damit Sie sich nicht am freiliegen<strong>de</strong>n Messer verletzen. Machen<br />
Sie das Messer für Kin<strong>de</strong>r unzugänglich.<br />
ACHTUNG - SACHSCHADEN!<br />
► Sie dürfen die Teile <strong>de</strong>s Stabmixer-Sets nicht in <strong>de</strong>r Geschirrspülmaschine<br />
reinigen, diese wür<strong>de</strong>n d<strong>ad</strong>urch beschädigt.<br />
► Benutzen Sie keine aggressiven, chemischen o<strong>de</strong>r scheuern<strong>de</strong> Reinigungsmittel!<br />
Diese können die Oberfl äche irreparabel angreifen!<br />
<strong>SSMS</strong> <strong>600</strong> <strong>B2</strong><br />
83
1) Ziehen Sie <strong>de</strong>n Netzstecker.<br />
2) Reinigen Sie Motorblock 4, <strong>de</strong>n Stabmixer 5, <strong>de</strong>n Schüssel-Deckel 6 <strong>de</strong>n<br />
Schneebesen-Halter 9 und <strong>de</strong>n Wandhalter w mit einem feuchten Tuch.<br />
Stellen Sie sicher, dass kein Wasser in die Öff nungen <strong>de</strong>s Stabmixers 5<br />
gelangt. Bei hartnäckigen Verschmutzungen geben Sie ein mil<strong>de</strong>s Spülmittel<br />
auf das Tuch.<br />
3) Reinigen Sie die restlichen Zubehörteile (Schüssel 8, Schneebesen 0,Messbecher<br />
q und Messer 7) unter fl ießen<strong>de</strong>m Wasser und trocknen Sie diese<br />
mit einem Trockentuch gut ab.<br />
Gerät entsorgen<br />
DE<br />
AT<br />
CH<br />
Werfen Sie das Gerät keinesfalls in <strong>de</strong>n normalen Hausmüll.<br />
Dieses Produkt unterliegt <strong>de</strong>r europäischen Richtlinie<br />
2002/96/EC.<br />
Entsorgen Sie das Gerät über einen zugelassenen Entsorgungsbetrieb o<strong>de</strong>r über<br />
Ihre kommunale Entsorgungseinrichtung. Beachten Sie die aktuell gelten<strong>de</strong>n<br />
Vorschriften. Setzen Sie sich im Zweifelsfall mit Ihrer Entsorgungseinrichtung in<br />
Verbindung.<br />
Hinweise zur EG-Konformitätserklärung<br />
Dieses Gerät entspricht hinsichtlich Übereinstimmung mit <strong>de</strong>n<br />
grundlegen<strong>de</strong>n Anfor<strong>de</strong>rungen und <strong>de</strong>n an<strong>de</strong>ren relevanten<br />
Vorschriften <strong>de</strong>r europäischen Richtlinie für elektromagnetische<br />
Verträglichkeit 2004/108/EC sowie <strong>de</strong>r Nie<strong>de</strong>rspannungsrichtlinie<br />
2006/95/EC.<br />
Die vollständige Original-Konformitätserklärung ist beim<br />
Importeur erhältlich.<br />
Importeur<br />
KOMPERNASS GMBH<br />
BURGSTRASSE 21<br />
44867 BOCHUM, GERMANY<br />
www.kompernass.com<br />
84 <strong>SSMS</strong> <strong>600</strong> <strong>B2</strong>
Garantie<br />
Sie erhalten auf dieses Gerät 3 Jahre Garantie ab Kaufdatum. Das Gerät wur<strong>de</strong><br />
sorgfältig produziert und vor Anlieferung gewissenhaft geprüft.<br />
Bitte bewahren Sie <strong>de</strong>n Kassenbon als Nachweis für <strong>de</strong>n Kauf auf. Bitte setzen<br />
Sie sich im Garantiefall mit Ihrer Servicestelle telefonisch in Verbindung. Nur so<br />
kann eine kostenlose Einsendung Ihrer Ware gewährleistet wer<strong>de</strong>n.<br />
Service<br />
HINWEIS<br />
► Die Garantieleistung gilt nur für Material- o<strong>de</strong>r Fabrikationsfehler, nicht<br />
aber für Transportschä<strong>de</strong>n, Verschleißteile o<strong>de</strong>r für Beschädigungen an<br />
zerbrechlichen Teilen, z. B. Schalter.<br />
Das Produkt ist lediglich für <strong>de</strong>n privaten und nicht für <strong>de</strong>n gewerblichen<br />
Gebrauch bestimmt. Bei missbräuchlicher und unsachgemäßer Behandlung,<br />
Gewaltanwendung und bei Eingriff en, die nicht von unserer autorisierten Service-<br />
Nie<strong>de</strong>rlassung vorgenommen wur<strong>de</strong>n, erlischt die Garantie.<br />
Ihre gesetzlichen Rechte wer<strong>de</strong>n durch diese Garantie nicht eingeschränkt.<br />
Die Garantiezeit wird durch die Gewährleistung nicht verlängert. Dies gilt auch<br />
für ersetzte und reparierte Teile.<br />
Eventuell schon beim Kauf vorhan<strong>de</strong>ne Schä<strong>de</strong>n und Mängel müssen sofort nach<br />
<strong>de</strong>m Auspacken gemel<strong>de</strong>t wer<strong>de</strong>n, spätestens aber zwei Tage nach Kaufdatum.<br />
Nach Ablauf <strong>de</strong>r Garantiezeit anfallen<strong>de</strong> Reparaturen sind kostenpfl ichtig.<br />
DE<br />
AT<br />
CH<br />
Service Deutschland<br />
Tel.: 0180 5772033 (0,14 EUR/Min. aus <strong>de</strong>m dt. Festnetz,<br />
Mobilfunk max. 0,42 EUR/Min.)<br />
E-Mail: kompernass@lidl.<strong>de</strong><br />
IAN 68957<br />
Service Österreich<br />
Tel.: 0820 201 222 (0,15 EUR/Min.)<br />
E-Mail: kompernass@lidl.at<br />
IAN 68957<br />
Service Schweiz<br />
Tel.: 0842 665566 (0,08 CHF/Min., Mobilfunk max. 0,40 CHF/Min.)<br />
E-Mail: kompernass@lidl.ch<br />
IAN 68957<br />
<strong>SSMS</strong> <strong>600</strong> <strong>B2</strong><br />
85
Rezepte<br />
DE<br />
AT<br />
CH<br />
Gemüse-Cremesuppe<br />
2-4 Personen<br />
Zutaten<br />
■ 2-3 EL ÖL<br />
■ 200 g Zwiebeln<br />
■ 200 g Kartoff eln (beson<strong>de</strong>rs geeignet sind mehlig kochen<strong>de</strong> Sorten)<br />
■ 200 g Möhren<br />
■ 350-400 ml Gemüsebrühe (frisch o<strong>de</strong>r Instant)<br />
■ Salz, Pfeff er, Muskatnuss<br />
■ 5 g Petersilie<br />
Zubereitung<br />
1) Zwiebeln abziehen und fein würfeln. Möhren waschen, schälen und in<br />
Scheiben schnei<strong>de</strong>n. Kartoff eln schälen, abspülen und in ca. 2 cm große<br />
Würfel schnei<strong>de</strong>n.<br />
2) Öl in einem Topf erhitzen, Zwiebeln darin glasig dünsten. Möhren und<br />
Kartoff eln hinzufügen, mitdünsten. So viel Brühe angießen, dass das Gemüse<br />
gut be<strong>de</strong>ckt ist und alles 10-15 Minuten weich kochen lassen. Bei Bedarf<br />
zwischendurch Brühe hinzugießen, falls das Gemüse nicht mehr be<strong>de</strong>ckt ist.<br />
3) Petersilie waschen, trocken schütteln und Stiele entfernen. Petersilie in grobe<br />
Stücke reißen und zur Suppe geben. Alles mit <strong>de</strong>m Stabmixer 5 für etwa<br />
1 Minute pürieren. Mit Salz, Pfeff er und geriebener Muskatnuss abschmecken.<br />
86 <strong>SSMS</strong> <strong>600</strong> <strong>B2</strong>
Kürbissuppe<br />
4 Personen<br />
Zutaten<br />
■ 1 mittelgroße Zwiebel<br />
■ 2 Knoblauchzehen<br />
■ 10 - 20 g frischer Ingwer<br />
■ 3 EL Rapsöl<br />
■ 400 g Kürbisfl eisch (am besten eignet sich Hokkaido-Kürbis, da die Schale<br />
beim Kochen weich wird und er nicht geschält wer<strong>de</strong>n muss)<br />
■ 250 -300 ml Kokosmilch<br />
■ 250 -500 ml Gemüsebrühe<br />
■ Saft einer ½ Orange<br />
■ etwas trockener Weißwein<br />
■ 1 TL Zucker<br />
■ Salz, Pfeff er<br />
DE<br />
AT<br />
CH<br />
Zubereitung<br />
1) Zwiebel abziehen und würfeln, Knoblauch ebenso. Ingwer schälen und fein<br />
würfeln. Zunächst Zwiebel und Ingwer in heißem Öl andünsten. Nach 2<br />
Minuten auch Knoblauch hinzufügen und mitdünsten.<br />
2) Kürbis mit einer Gemüsebürste unter warmem Wasser gründlich säubern,<br />
dann in 2-3 cm große Würfel schnei<strong>de</strong>n. (Wenn an<strong>de</strong>rer Kürbis als<br />
Hokkaido-Kürbis verwen<strong>de</strong>t wird, muss dieser zusätzlich geschält wer<strong>de</strong>n).<br />
Kürbiswürfel zu Zwiebeln und Ingwer geben und mitdünsten. Mit <strong>de</strong>r halben<br />
Menge Kokosmilch und so viel Gemüsebrühe anfüllen, dass <strong>de</strong>r Kürbis gut<br />
be<strong>de</strong>ckt ist. Bei geschlossenem Deckel ca. 20-25 Minuten weich kochen.<br />
Alles mit <strong>de</strong>m Stabmixer 5 glatt mixen. Dabei so viel Kokosmilch zufügen<br />
bis die Suppe die richtige, sanft-cremige Konsistenz hat.<br />
3) Die Suppe mit Orangensaft, Weißwein, Zucker, Salz und Pfeff er abschmecken,<br />
sodass die Suppe neben <strong>de</strong>r scharfen auch eine süße und eine ausgewogene<br />
säuerlich-salzige Note hat.<br />
<strong>SSMS</strong> <strong>600</strong> <strong>B2</strong><br />
87
DE<br />
AT<br />
CH<br />
Süßer Fruchtaufstrich<br />
Zutaten<br />
■ 250 g Erdbeeren o<strong>de</strong>r an<strong>de</strong>re Früchte (frisch o<strong>de</strong>r tiefgekühlt)<br />
■<br />
■<br />
■<br />
1 Päckchen (ca. 125g) Gelierzucker ohne Kochen<br />
1 Spritzer Zitronensaft<br />
1 Messerspitze Mark einer Vanilleschote<br />
Zubereitung<br />
1) Erdbeeren waschen und putzen, dabei <strong>de</strong>n grünen Stielansatz entfernen.<br />
Gut auf einem Sieb abtropfen lassen, damit überfl üssiges Wasser ablaufen<br />
kann und <strong>de</strong>r Aufstrich nicht zu fl üssig wird. Größere Erdbeeren klein<br />
schnei<strong>de</strong>n.<br />
2) 250 g Erdbeeren abwiegen und in einen geeigneten Mixbecher geben.<br />
3) Einen Spritzer Zitronensaft darüber geben.<br />
4) Bei Bedarf das Mark einer Vanilleschote auskratzen und zugeben.<br />
5) Den Inhalt <strong>de</strong>s Päckchens Gelierzucker ohne Kochen dazugeben und mit<br />
<strong>de</strong>m Stabmixer 5 45-60 Sekun<strong>de</strong>n lang gründlich mixen. Sollten noch<br />
größere Stücke vorhan<strong>de</strong>n sein, das Ganze 1 Minute ruhen lassen und dann<br />
erneut 60 Sekun<strong>de</strong>n pürieren.<br />
6) Gleich genießen o<strong>de</strong>r <strong>de</strong>n Fruchtaufstrich in ein Glas mit Schraub<strong>de</strong>ckel<br />
abfüllen und verschließen.<br />
88 <strong>SSMS</strong> <strong>600</strong> <strong>B2</strong>
Schoko-Creme<br />
Für 4 Personen<br />
Zutaten<br />
■ 350 g Schlagsahne<br />
■<br />
■<br />
200 g Bitterschokola<strong>de</strong> (> 60% Kakaoanteil)<br />
½ Vanilleschote (Mark)<br />
Zubereitung<br />
1) Die Sahne aufkochen, Schokola<strong>de</strong> zerbröckeln und darin bei niedriger Hitze<br />
langsam schmelzen. Das Mark einer halben Vanilleschote auskratzen und<br />
unter die Masse rühren.<br />
2) Im Kühlschrank vollständig abkühlen und fest wer<strong>de</strong>n lassen.<br />
3) Vor <strong>de</strong>m Servieren mit <strong>de</strong>m Schneebesen 0 cremig aufrühren.<br />
Tipp: Dazu schmecken frische Früchte.<br />
DE<br />
AT<br />
CH<br />
Mayonnaise<br />
Zutaten<br />
■ 200 ml neutrales Pfl anzenöl, z.B. Rapsöl<br />
■<br />
■<br />
■<br />
1 Ei (Eigelb und Eiweiß)<br />
10 g mil<strong>de</strong>r Essig o<strong>de</strong>r Zitronensaft<br />
Salz und Pfeff er nach Geschmack<br />
Zubereitung<br />
1) Ei und Zitronensaft in <strong>de</strong>n Mixbecher geben, <strong>de</strong>n Schneebesen 0 senkrecht<br />
in <strong>de</strong>n Becher halten und <strong>de</strong>n Turbo-Schalter 3 drücken.<br />
2) Das Öl in einem gleichmäßig dünnen Strahl langsam (innerhalb von ca.<br />
1:30 Minute) dazu geben, so dass das Öl sich mit <strong>de</strong>n an<strong>de</strong>ren Zutaten<br />
verbin<strong>de</strong>t.<br />
3) Abschließend nach Geschmack mit Salz und Pfeff er würzen.<br />
<strong>SSMS</strong> <strong>600</strong> <strong>B2</strong><br />
89