THM2042 V1.5 1112 Válvula de zona 2 vÃas STAqua
THM2042 V1.5 1112 Válvula de zona 2 vÃas STAqua
THM2042 V1.5 1112 Válvula de zona 2 vÃas STAqua

You also want an ePaper? Increase the reach of your titles
YUMPU automatically turns print PDFs into web optimized ePapers that Google loves.
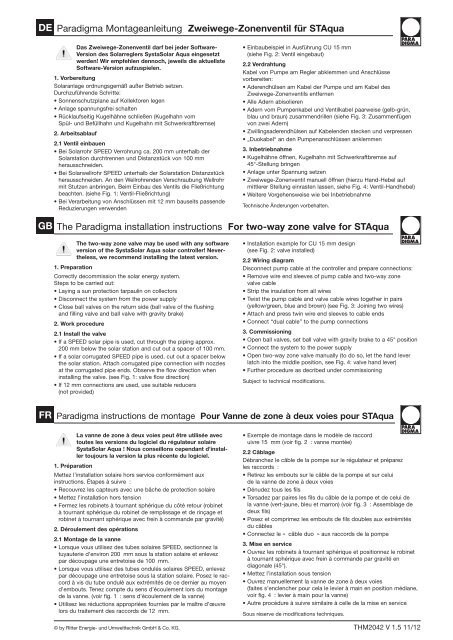
DEParadigma Montageanleitung Zweiwege-Zonenventil für <strong>STAqua</strong>Das Zweiwege-Zonenventil darf bei je<strong>de</strong>r Software-Version <strong>de</strong>s Solarreglers SystaSolar Aqua eingesetztwer<strong>de</strong>n! Wir empfehlen <strong>de</strong>nnoch, jeweils die aktuellsteSoftware-Version aufzuspielen.1. VorbereitungSolaranlage ordnungsgemäß außer Betrieb setzen.Durchzuführen<strong>de</strong> Schritte:• Sonnenschutzplane auf Kollektoren legen• Anlage spannungsfrei schalten• Rücklaufseitig Kugelhähne schließen (Kugelhahn vomSpül- und Befüllhahn und Kugelhahn mit Schwerkraftbremse)2. Arbeitsablauf2.1 Ventil einbauen• Bei Solarrohr SPEED Verrohrung ca. 200 mm unterhalb <strong>de</strong>rSolarstation durchtrennen und Distanzstück von 100 mmherausschnei<strong>de</strong>n.• Bei Solarwellrohr SPEED unterhalb <strong>de</strong>r Solarstation Distanz stückherausschnei<strong>de</strong>n. An <strong>de</strong>n Well rohren<strong>de</strong>n Verschraubung Wellrohrmit Stutzen anbringen. Beim Einbau <strong>de</strong>s Ventils die Fließrichtungbeachten. (siehe Fig. 1: Ventil-Fließrichtung)• Bei Verarbeitung von Anschlüssen mit 12 mm bauseits passen<strong>de</strong>Reduzierungen verwen<strong>de</strong>n• Einbaubeispiel in Ausführung CU 15 mm(siehe Fig. 2: Ventil eingebaut)2.2 VerdrahtungKabel von Pumpe am Regler abklemmen und Anschlüssevorbereiten:• A<strong>de</strong>rendhülsen am Kabel <strong>de</strong>r Pumpe und am Kabel <strong>de</strong>sZweiwege-Zonenventils entfernen• Alle A<strong>de</strong>rn abisolieren• A<strong>de</strong>rn vom Pumpenkabel und Ventilkabel paarweise (gelb-grün,blau und braun) zusammendrillen (siehe Fig. 3: Zusammenfügenvon zwei A<strong>de</strong>rn)• Zwillingsa<strong>de</strong>rendhülsen auf Kabelen<strong>de</strong>n stecken und verpressen• „Duokabel“ an <strong>de</strong>n Pumpenanschlüssen anklemmen3. Inbetriebnahme• Kugelhähne öffnen, Kugelhahn mit Schwerkraft bremse auf45°-Stellung bringen• Anlage unter Spannung setzen• Zweiwege-Zonenventil manuell öffnen (hierzu Hand-Hebel aufmittlerer Stellung einrasten lassen, siehe Fig. 4: Ventil-Handhebel)• Weitere Vorgehensweise wie bei InbetriebnahmeTechnische Än<strong>de</strong>rungen vorbehalten.GBThe Paradigma installation instructions For two-way zone valve for <strong>STAqua</strong>The two-way zone valve may be used with any softwareversion of the SystaSolar Aqua solar controller! Nevertheless,we recommend installing the latest version.1. PreparationCorrectly <strong>de</strong>commission the solar energy system.Steps to be carried out:• Laying a sun protection tarpaulin on collectors• Disconnect the system from the power supply• Close ball valves on the return si<strong>de</strong> (ball valve of the flushingand filling valve and ball valve with gravity brake)2. Work procedure2.1 Install the valve• If a SPEED solar pipe is used, cut through the piping approx.200 mm below the solar station and cut out a spacer of 100 mm.• If a solar corrugated SPEED pipe is used, cut out a spacer belowthe solar station. Attach corrugated pipe connection with nozzlesat the corrugated pipe ends. Observe the flow direction wheninstalling the valve. (see Fig. 1: valve flow direction)• If 12 mm connections are used, use suitable reducers(not provi<strong>de</strong>d)• Installation example for CU 15 mm <strong>de</strong>sign(see Fig. 2: valve installed)2.2 Wiring diagramDisconnect pump cable at the controller and prepare connections:• Remove wire end sleeves of pump cable and two-way zonevalve cable• Strip the insulation from all wires• Twist the pump cable and valve cable wires together in pairs(yellow/green, blue and brown) (see Fig. 3: Joining two wires)• Attach and press twin wire end sleeves to cable ends• Connect “dual cable” to the pump connections3. Commissioning• Open ball valves, set ball valve with gravity brake to a 45° position• Connect the system to the power supply• Open two-way zone valve manually (to do so, let the hand leverlatch into the middle position, see Fig. 4: valve hand lever)• Further procedure as <strong>de</strong>cribed un<strong>de</strong>r commissioningSubject to technical modifications.FRParadigma instructions <strong>de</strong> montage Pour Vanne <strong>de</strong> zone à <strong>de</strong>ux voies pour <strong>STAqua</strong>La vanne <strong>de</strong> zone à <strong>de</strong>ux voies peut être utilisée avectoutes les versions du logiciel du régulateur solaireSystaSolar Aqua ! Nous conseillons cependant d’installertoujours la version la plus récente du logiciel.1. PréparationMettez l’installation solaire hors service conformément auxinstructions. Étapes à suivre :• Recouvrez les capteurs avec une bâche <strong>de</strong> protection solaire• Mettez l’installation hors tension• Fermez les robinets à tournant sphérique du côté retour (robinetà tournant sphérique du robinet <strong>de</strong> remplissage et <strong>de</strong> rinçage etrobinet à tournant sphérique avec frein à comman<strong>de</strong> par gravité)2. Déroulement <strong>de</strong>s opérations2.1 Montage <strong>de</strong> la vanne• Lorsque vous utilisez <strong>de</strong>s tubes solaires SPEED, sectionnez latuyauterie d’environ 200 mm sous la station solaire et enlevezpar découpage une entretoise <strong>de</strong> 100 mm.• Lorsque vous utilisez <strong>de</strong>s tubes ondulés solaires SPEED, enlevezpar découpage une entretoise sous la station solaire. Posez le rac -cord à vis du tube ondulé aux extrémités <strong>de</strong> ce <strong>de</strong>rnier au moyend’embouts. Tenez compte du sens d’écoulement lors du montage<strong>de</strong> la vanne. (voir fig. 1 : sens d’écoulement <strong>de</strong> la vanne)• Utilisez les réductions appropriées fournies par le maître d’œuvrelors du traitement <strong>de</strong>s raccords <strong>de</strong> 12 mm.• Exemple <strong>de</strong> montage dans le modèle <strong>de</strong> raccorduivre 15 mm (voir fig. 2 : vanne montée)2.2 CâblageDébranchez le câble <strong>de</strong> la pompe sur le régulateur et préparezles raccords :• Retirez les embouts sur le câble <strong>de</strong> la pompe et sur celui<strong>de</strong> la vanne <strong>de</strong> zone à <strong>de</strong>ux voies• Dénu<strong>de</strong>z tous les fils• Torsa<strong>de</strong>z par paires les fils du câble <strong>de</strong> la pompe et <strong>de</strong> celui <strong>de</strong>la vanne (vert-jaune, bleu et marron) (voir fig. 3 : Assemblage <strong>de</strong><strong>de</strong>ux fils)• Posez et comprimez les embouts <strong>de</strong> fils doubles aux extrémitésdu câbles• Connectez le « câble duo » aux raccords <strong>de</strong> la pompe3. Mise en service• Ouvrez les robinets à tournant sphérique et positionnez le robinetà tournant sphérique avec frein à comman<strong>de</strong> par gravité endiagonale (45°).• Mettez l’installation sous tension• Ouvrez manuellement la vanne <strong>de</strong> zone à <strong>de</strong>ux voies(faites s’enclencher pour cela le levier à main en position médiane,voir fig. 4 : levier à main pour la vanne)• Autre procédure à suivre similaire à celle <strong>de</strong> la mise en serviceSous réserve <strong>de</strong> modifications techniques.© by Ritter Energie- und Umwelttechnik GmbH & Co. KG. <strong>THM2042</strong> V 1.5 11/12
ITParadigma di istruzioni per il montaggio Valvola di <strong>zona</strong> a due vie per <strong>STAqua</strong>ESLa valvola di <strong>zona</strong> a due vie può essere utilizzata perqualsiasi versione di software <strong>de</strong>lla regolazione solareSystaSolar Aqua! Si raccomanda comunque di utilizzarela versione di software più recente.1. PreparazioneDisattivare correttamente l’impianto solare.Eseguire le seguenti operazioni:• Posare il telo di protezione dal sole sui collettori• Scollegare l’impianto dalla corrente• Chiu<strong>de</strong>re i rubinetti a sfera sul ritorno (rubinetto a sfera <strong>de</strong>lrubinetto di lavaggio e di riempimento e rubinetto a sferacon valvola di ritegno)2. Procedura2.1 Installare la valvola• Per l’esecuzione con tubo solare SPEED: separare il tubo ca.200 mm al di sotto <strong>de</strong>lla stazione solare e accorciarlo di 100 mm.• Per l’esecuzione con tubo ondulato SPEED: accorciare il tubo aldi sotto <strong>de</strong>lla stazione solare. Applicare alle estremità <strong>de</strong>i tubiondulati un collegamento a vite con raccordo per tubi ondulati.Nell’ installare la valvola porre attenzione alla direzione <strong>de</strong>l flusso.(vedi fig. 1: direzione di flusso <strong>de</strong>lla valvola)• In caso di utilizzo di collegamenti da 12 mm da parte <strong>de</strong>lcostruttore utilizzare riduzioni idonee• Esempio di montaggio in versione CU 15 mm(vedi fig. 2: valvola installata)2.2 CablaggioScollegare il cavo dalla pompa di regolazione e prepararei collegamenti:• Rimuovere le guaine isolanti dal cavo <strong>de</strong>lla pompa e dal cavo<strong>de</strong>lla valvola di <strong>zona</strong> a due vie• Isolare tutti i fili• Atorciliare tra loro i fili <strong>de</strong>lla pompa e <strong>de</strong>lla valvola (giallo-ver<strong>de</strong>,blu e marrone) in coppia (ve<strong>de</strong>re fig. 3: Collegamento di due fili)• Inserire le guaine doppie isolanti sui terminali <strong>de</strong>i fili e pressarle• Inserire il “doppio cavo” nel morsetto <strong>de</strong>lla pompa3. Messa in funzione• Aprire i rubinetti a sfera, posizionare il rubinetto a sfera con valvoladi ritegno su 45°• Ricollegare l’impianto alla corrente elettrica• Aprire manualmente la valvola di <strong>zona</strong> a due vie (a tal fine portarela leva manuale in posizione intermedia, vedi fig. 4: leva manuale<strong>de</strong>lla valvola)• In seguito proce<strong>de</strong>re come durante la messa in funzioneCon riserva di modifiche tecniche.Paradigma instrucciones <strong>de</strong> montaje Para válvula <strong>de</strong> <strong>zona</strong> <strong>de</strong> dos pasos para <strong>STAqua</strong>¡La válvula <strong>de</strong> <strong>zona</strong> <strong>de</strong> dos pasos es compatible contodas las versiones <strong>de</strong> software <strong>de</strong>l regulador solarSystaSolar Aqua! No obstante, se recomienda usar laversión <strong>de</strong> software más reciente.1. PreparativosPoner fuera <strong>de</strong> funcionamiento <strong>de</strong>bidamente la instalación solar.Pasos a seguir:• Colocar el toldo <strong>de</strong> protección sobre el colector• Desconectar la tensión <strong>de</strong> la instalación• Cerrar las llaves esféricas (llave esférica <strong>de</strong>l grifo <strong>de</strong> lavadoy llenado y llave esférica <strong>de</strong>l freno <strong>de</strong> gravedad)2. Procedimiento <strong>de</strong> trabajo2.1 Montar la válvula• En el tubo solar SPEED separar la tubería a 200 mm <strong>de</strong>bajo <strong>de</strong> laestación solar y cortar un distanciador <strong>de</strong> 100 mm.• En el tubo ondulado solar SPEED cortar un distanciador <strong>de</strong>bajo<strong>de</strong> la estación solar. En los extremos <strong>de</strong> los tubos onduladosintroducir racores <strong>de</strong>l tubo ondulado con una pieza <strong>de</strong> conexión.Al montar la válvula tener en cuenta la dirección <strong>de</strong> flujo.(ver Fig. 1: Dirección <strong>de</strong> flujo <strong>de</strong> la válvula)• Al trabajar con conexiones <strong>de</strong> 12 mm, utilizar reduccionesa<strong>de</strong>cuadas (puestas a disposición por el propietario)• Ejemplo <strong>de</strong> montaje en la versión CU 15 mm(ver Fig. 2: Válvula montada)2.2 CableadoDesconectar el cable <strong>de</strong> la bomba en el regulador y prepararlas conexiones:• Retirar las virolas <strong>de</strong>l cable <strong>de</strong> la bomba y <strong>de</strong>l cable <strong>de</strong> laválvula <strong>de</strong> <strong>zona</strong> <strong>de</strong> dos pasos• Aislar todos los conductores• Cablear los conductores <strong>de</strong>l cable <strong>de</strong> la bomba y <strong>de</strong>l cable<strong>de</strong> la válvula <strong>de</strong> dos en dos (amarillo-ver<strong>de</strong>, azul y marrón(véase Fig. 3: Cablear los dos conductores)• Insertar y apretar las virolas <strong>de</strong> doble cables en los extremos<strong>de</strong> los cables• Conectar el cable “duo” a las conexiones <strong>de</strong> las bombas3. Puesta en funcionamiento• Abrir las llaves esféricas, colocar la llave esférica en la posición 45°con el freno <strong>de</strong> gravedad• Conectar la tensión <strong>de</strong> la instalación• Abrir <strong>de</strong> forma manual la válvula <strong>de</strong> <strong>zona</strong> <strong>de</strong> dos pasos(para ello, hacer encajar la palanca manual en la posiciónmedia, véase Fig. 4: Palanca manual <strong>de</strong> la válvula).• Al seguir proce<strong>de</strong>r como en la puesta en funcionamientoSujeto a cambios técnicos.gelb-grün / yellow-green / vert-jaune /giallo-ver<strong>de</strong> / amarillo-ver<strong>de</strong>blau / blue /bleu / blu /azulbraun / brownmarron / marrone /marrónFig. 1: Ventil-Fließrichtung / valve flow direction /sens d’écoulement <strong>de</strong> la vanne / direzionedi flusso / Dirección <strong>de</strong> flujo <strong>de</strong> la válvulaFig. 3: Zusammenfügen von zwei A<strong>de</strong>rn / Joining two wires /Assemblage <strong>de</strong> <strong>de</strong>ux fils / Collegamento di due fili /Cablear los dos conductoresFig. 2: Ventil eingebaut / valve installed /vanne montée / valvola installata /Válvula montadaFig. 4: Ventil-Handhebel / valve hand lever / levier à main pour la vanne/ leva manuale <strong>de</strong>lla valvola / Palanca manual <strong>de</strong> la válvula© by Ritter Energie- und Umwelttechnik GmbH & Co. KG. <strong>THM2042</strong> V 1.5 11/12