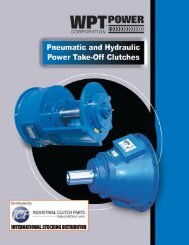
FRENI A PINZA CALIPERS BRAKES Positivi & Manuale
FRENI A PINZA CALIPERS BRAKES Positivi & Manuale
FRENI A PINZA CALIPERS BRAKES Positivi & Manuale
- No tags were found...

Create successful ePaper yourself
Turn your PDF publications into a flip-book with our unique Google optimized e-Paper software.
2.3.3 Remove the spring C62142.2.3.4 Remove the screws C61534 and take off the piston K90187 ( K90188 fordisc sp. 12,7 mm ).2.3.5 Remove the internal piston C61896 ( C61898 for disc sp. 12,7 mm )from piston assy K90187 ( K90188 for disc sp. 12,7 mm ) by pushingwith a screwdriver into the air supply hose 1/8"gas.2.3.6 Replace the seal C61676 with a new one greased with mineral grease.2.3.7 Reassemble the piston assy K90187 ( K90188 for disc sp.12,7mm ) andthe brake.2.3.8 Reconnect the air supply hose and supply the piston with a 6 barmaximum pressure.2.3.9 Operate the brake several times to ensure that there is no air leakageand the piston rod is moving correctly.MPA-05 BRAKE2.3.10 Remove look nut C61133 completely and remove the piston from thebrake.2.3.11 Slacken the piston cover screws C61371 and remove the cover D70865and the internal piston Z50007.2.3.12 Replace the seal C61139 with a new one greased with a mineral grease.2.3.13 Reassemble the internal piston Z50007, the cover D70865 and thescrews C61371.2.3.14 Reassemble the piston assy on to the brake placing the correct numberof shims C61894 and lock the lock nut C61133.2.3.15 Operate the brake few times to ensure the internal piston is workingfreely also to check for any air leeks.MPA-1 BRAKE2.3.16 Remove lock nut C61133 completely and remove the piston from thebrake.2.3.17 Slacken the piston cover screws C61198 and remove the cover E80710.2.3.18 Replace the diaphragm C61518 with a new one. Reassemble the brakefollowing backward from point 2.3.17 up to point 2.3.16 and the point2.3.1.17