PV1 Perfect Vaner - Duro Dyne
PV1 Perfect Vaner - Duro Dyne
PV1 Perfect Vaner - Duro Dyne

You also want an ePaper? Increase the reach of your titles
YUMPU automatically turns print PDFs into web optimized ePapers that Google loves.
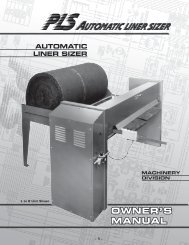
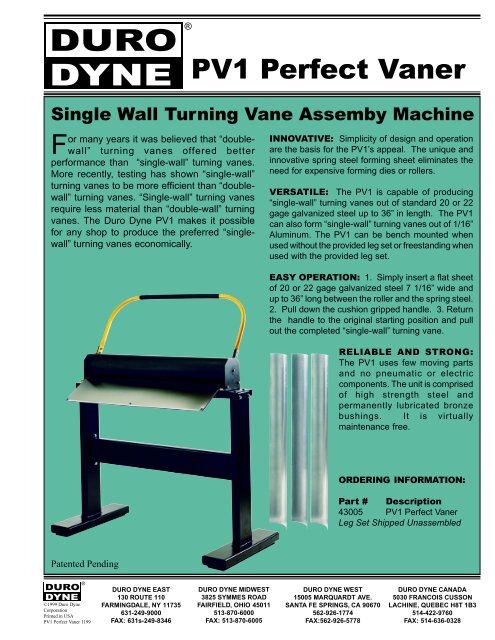
OPERATION:1. Begin with a strip of 20 or 22 gage galvanized steel 7 1/16” wide up to 36” in length.2. Insert the galvanized strip in between the spring steel and the large roller. Adjust the 2 knobs located underthe main base until material is snug but can be slid in or out of the machine.3. Starting with the handle in the full upright position, pull down the handle until the galvanized steel strip ishidden from view. Return the handle to the original upright position.4. Remove the finished turning vane.5. Repeat the process for additional turning vanes. (Further adjustment is not required unless the gage of thematerial of the turning vane or the thickness changes.)LOCATION OF FEATURES:Cushioned Hand Grip1” Dia. Leveraged Handle<strong>PV1</strong> <strong>Perfect</strong> <strong>Vaner</strong>Side Plate5-1/2” Dia. Black Oxide RollerBlue Tempered Spring SteelPolished Stainless Steel Front PlateMain BaseAdjustment Knob RightAdjustment Knob Left2”x6” Cold Rolled Steel Support2”x6” Cross Brace50”46-1/4”25-3/4”SPECIFICATIONS:Electrical Requirements: NONEAir Requirements: NONEApproximate Weight (w/ Leg Set): 265 lbs.Turning Vane Size (finished) 4-1/2” RadiusTurning Angle Nominal: 90 DegreesTurning Vane Thickness: 20 or 22 gageTurning Vane Width When Flat: 7-1/16”Turning Vane Length: Up to 36”Turning Vane Type: Single-Wall36-1/2”<strong>PV1</strong> <strong>Perfect</strong> <strong>Vaner</strong>* Use only with <strong>Duro</strong> <strong>Dyne</strong> Type VR2