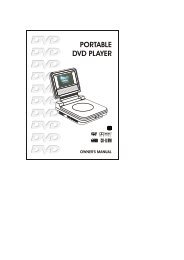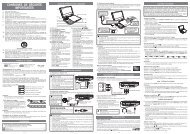
PVS7287 IB Zoran UL English.indd - Venturer
PVS7287 IB Zoran UL English.indd - Venturer
PVS7287 IB Zoran UL English.indd - Venturer
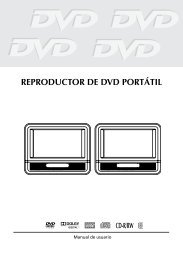
- No tags were found...

You also want an ePaper? Increase the reach of your titles
YUMPU automatically turns print PDFs into web optimized ePapers that Google loves.
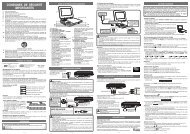
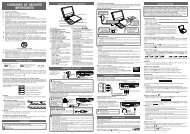
PLAYING A DISC Basic playbackThis owner’s manual explains the basic instructions for operating this unit. Some DVDs are produced ina manner that allows specific or limited operation during playback. Therefore, this unit may not respondto all operating commands. THIS IS NOT A DEFECT. Please refer to the instructions accompanying thespecific DVD in question for more information about the options available on that DVD.“ ” may appear on the screen during operation. A “ ” means that the desired operation is notpermitted by the unit or disc.Playing a Disc1. Slide the STANDBY / ON switch on the top of the unit to the ON position.See CUSTOMIZING THE FUNCTION SETTINGS before proceeding to step 2.2. Press the button and hold the front panel to open the disc door.3. Hold the disc by its sides and carefully place it onto the spindle with the label side facing up, pushing gently untilyou hear a “click”.4. Gently push the disc door closed. It takes a short while for your unit to load the disc. After loading, for most DVDs,the unit will automatically start playing or take you to the main menu.5. If the unit does not automatically start playing the DVD, press the PLAY button.Pausing Playback (Still Mode)Press the PAUSE button. To resume normal playback, press the PLAY button.Each time you press the PAUSE button, the picture advances one frame on a DVD.Stopping PlaybackPress the STOP button at the location where you want to interrupt playback. To resume playback at the positionwhere the disc was stopped, press the PLAY button.If you press the STOP button twice, the unit’s memory will be cleared and pressing the PLAY button will reset thedisc to the beginning.Fast Forward / Fast Reverse1. Press the SEARCH or SEARCH button when a disc is playing. Each time you press the SEARCH orSEARCH button, the playback speed changes in the following sequence:x2 x4 x8 x16 x2 x4 x8 x162. Press the PLAY button when you reach the desired point to resume normal playback.Notes:• The DVD player mutes sound and subtitles during reverse and forward scan of DVDs.• The fast playback speed may differ depending on the disc.Skip (Forward / Reverse)• Press the NEXT button to advance chapters/tracks.• Press the PREV button to go back to current or previous chapters/tracks.• For Audio CDs, use the number buttons on the remote control to jump directly to the desired track.Audio SelectionOn some DVDs, the sound is recorded in two or more formats. Follow the directions below to select the preferredlanguage and sound system.1. While a disc is playing, press the AUDIO button to show the current audio format number.2. Press the AUDIO button repeatedly to select the desired audio format.Notes:• If only one audio format is recorded on the DVD, the number does not change.• Some DVDs allow you to change audio selections via the disc menu only. If this is the case, press the MENU buttonand choose the appropriate language on the disc menu.• You can select different audio channels (Stereo, Left or Right) on an Audio CD by pressing the AUDIO buttonrepeatedly.Subtitle SelectionDVD1. While a DVD is playing, press the SUBTITLE button to display the current language setting, as 1/4shown in the example.2. Press the SUBTITLE button repeatedly to select the desired subtitle language. You can turn subtitles off by pressingthe SUBTITLE button repeatedly until “ Off ” is displayed.Notes:• Some DVDs are set to display subtitles automatically, and you cannot turn them off even if you set the subtitlefunction to off.• During some scenes, the subtitles may not appear immediately after you select your desired scene.• The number of subtitle languages recorded differs depending on the disc. If only one language is recorded, thelanguage does not change.• This function can only be used for discs on which subtitles have been recorded in multiple languages.• Some DVDs allow you to change subtitles via the disc menu only. If this is the case, press the MENU button andchoose the appropriate subtitle on the disc menu.DVDAngle SelectionSome DVDs contain scenes which have been shot from a number of different angles. For these discs, the same scenecan be viewed from each of these different angles.1. While you are playing a DVD with different angles recorded, press1/3the ANGLE button to view the number of current angles available.2. Press the ANGLE button repeatedly to change the scene to theSequence of angle shots(Example)next recorded angle.• After approx. two seconds, playback will continue from the newangle selected.• If no button is pressed within 10 seconds, playback continueswithout changing the current angle.Notes:• This function can only be used for discs on which scenes shot from multiple angles have been recorded.• If only one angle is recorded, “ 1/1 ” is displayed.Display FunctionDVDWhile the disc is playing, press the DISPLAY button repeatedly todisplay information on operation status.Elapsed Time: Elapsed time from the beginning of the title which iscurrently playing.Remain Time: Remaining time of the title which is currently playing.DVDAdjust the LCD ScreenYou can adjust the Brigntness, Contrast, Color or View Mode of the LCD screen.1. Press the VIDEO MODE button.2. Press the / button to select Brightness, Contrast, Color or View Mode.3. Then press the / button to change the setting.(For View Mode, press the ENTER button to change the setting.)4. Press the VIDEO MODE button to exit the menu.Sequence of DISPLAY (Example)Elapsed Time 00:05:18Remain Time 00:30:28Title 1/3 Chapter 1/5AudioSubtitle 1/4 EngAngle 1/3REPEAT PLAYBACKYou can play a specifi c title or chapter repeatedly. (Title repeat, chapter repeat, A-B repeat)Repeating a Chapter DVD1. While the DVD is playing, press the REPEAT DISC button until the “ Repeat Chapter ” indicator displays on thescreen. The current chapter is played repeatedly.Repeating a Title2. While the DVD is playing, press the REPEAT DISC button until the “ Repeat Title ” indicator displays on the screen.The current title is played repeatedly.To Resume Normal Playback3. While the DVD is playing, press the REPEAT DISC button until the “ Repeat Off ” indicator displays on the screen.Repeating a Single Track1. While the CD disc is playing, press the REPEAT DISC button until the “ Repeat single ” indicator displays on thescreen. The current track is played repeatedly.Repeating a Whole Disc2. While the CD disc is playing, press the REPEAT DISC button until the “ Repeat all ” indicator displays on the screen.The whole disc is played repeatedly.To Resume Normal Playback3. Press the REPEAT DISC button until the “ Repeat off ” indicator displays on the screen.Repeating a Specific SectionYou can play a specifi c section repeatedly.1. While the disc is playing, press the REPEAT A-B button at the beginning of the section (“ Rep A- ” is displayed) youwant to play repeatedly.2. Press the REPEAT A-B button again at the end of the section (“ Rep A-B ” is displayed).3. The Unit will immediately begin replaying your selection.To Resume Normal Playback4. While the disc is playing, press the REPEAT A-B button until the “ RepA-B Off ” indicator displays on the screen.Notes:• Some discs may not permit A-B repeat operation.• You can not set the A-B repeat function for a segment that includes multiple camera angles.• You can specify a segment only within the current title or track.• There may be a slight difference between point A and the location where playback actually resumes depending onthe disc.LOCATING A DESIRED SECTIONLocating a Specific TitleDVDIf a DVD contains title numbers, you can locate a specifi c title by directly selecting its title number.1. Press the GOTO button.2. Press the corresponding number button(s) for the title you want.3. Press the ENTER button to confirm. Playback starts from the selected section.Title - - -DVDLocating a Specific ChapterIf you know the chapter number for the chapter that you want to play, you can locate it by directly selecting that number.1. Press the GOTO button.2. Press or button to display Chapter and press the corresponding number Chapter - - -button(s) for the chapter you want.3. Press the ENTER button to confirm. Playback starts from the selected section.Locating a Specific TimeYou can move to a specifi c location by entering its corresponding time (hours, minutes, seconds).1. Press the GOTO button.2. Press or button to display Time and press the corresponding number Time --:--:--buttons for the setting point you want.3. Press the ENTER button to confirm. Playback starts from the selected section.Notes:• If the numbers you entered is not permited by the DVD, after you press the ENTER button, it will restore to “- - -”.You should re-enter correct numbers.• Some discs may not respond to this process.• Some scenes may not be located as precisely as you specifi ed.• This method for accessing specific locations is available only within the current title of the DVD.DVD PROGRAMMABLE MEMORYPlaying Titles/Chapters in a Favorite OrderYou can combine your favorite titles/chapters and play them in the order you determine.1. When a DVD is stopped, press the MEMORY button, the following display appears.2. Select the items in the order you want by pressing the number buttons.Each time you press the Cursor buttons ( , , , ), the space is highlighted.Highlight where you want to enter, then press the corresponding number buttons.3. Press the Cursor buttons ( , , , ) to move the highlighted bar to Play Memory,then press the ENTER button.The DVD player starts memory playback.4. To resume normal playback from memory playback1). Press the MEMORY button.Title Chapter2). Press the Cursor buttons ( , , , ) to move the highlighted bar to “Clear All”, then press the ENTER button.All the input programs will be cleared.3). Press the PLAY button to resume normal playback.Notes:• If the title or chapter numbers you entered is not permited by the DVD, after you press the ENTER button, it willrestore to “- - -”. You should re-enter correct numbers.• Some discs may not permit memory playback operation.• If you select repeat during memory playback, the DVD player repeats the current memory playback.• If you press the MEMORY button while the display appears on the TV screen, the display disappears.• The programmed selections will be cleared when you open the disc tray or turn off the DVD player.VIEWING JPG FILESThis unit can play JPG fi les recorded on a CD-R or CD-ROM disc (CD-RW is not recommended).Viewing JPG Files1. Press the button and hold the front panel to open the disc door.2. Hold the disc by its edges and gently push it onto the spindle with label sidefacing towards you until you hear a “click”.3. Close the disc door. A list of folders/files will appear on the screen.4. Press the or button to select your desired fi le. The selected picture willappear in the lower right corner. Press the PLAY button to start playback.Press the STOP button to display a folder list.Notes:• You can press the PAUSE button to freeze the picture, and press the PLAY button to resume slide show.• You can press the STOP button to quit playback.• You can press the PREV or NEXT button to change the picture. Press the PREV button to view theprevious picture. Press the NEXT button to view the next picture.• You can press the ANGLE buttonon on the remote control to rotate the direction of the picture by 90 o .• Some discs may not permit this operation.When play CD / JPG discs, you can modify the Play Modes through the Toolkit which appears on the right of belowpicture on the screen. Press the / button to navigate between the windows and the / button to select fi les/tracks or play mode items. Then press the ENTER button.1. In Stop mode, press the Cursor buttons ( , , , ) to select "Edit mode" then press the ENTER button.2. Use the Cursor buttons ( , , , ) to select tracks/fi les shown on the left hand side of the window. Press theENTER button to confirm the selected tracks/fi les. " " will appear in front of the selected tracks/fi les.3. Select "Add to program" then press the ENTER button. " " will disappear from the screen. It means that thetracks/fi les you have selected are added into the "Program view".4. Select "Program view" to view programmed fi les. To add more fi les by "Browser view" repeat the above steps.5. Press the PLAY button to start the program playback.The Toolkit has the following play mode items:• Repeat (Off/Single/All):Off: Resumes normal playback.Single: Repeats the current track/fi le.All: Repeats all files on the current folder or all tracks on the disc.• Mode (Normal / Shuffle / Music intro):Normal: Resumes normal playback.Shuffle: Playbacks track/fi le in random order.Music intro (for Audio CD only): Only playbacks the fi rst 10 seconds of all thetracks on the current folder/disc.• Edit mode: Program operation works only when "Edit mode" is selected.• Program view: To view tracks/fi les in the "Program view" list. It is disabled when the "Program view" list is empty.• Add to program: Add files/tracks to the "Program view" list. It is disabled if the "Edit mode" is not selected.• Browser view: To view files/tracks in the original view list.• Clear program: Delete the fi les/tracks in the "Program view" list.Select a file/track or more you want to delete in complete stop mode (press the STOP button twice). " " willappear besides the deleted file/track. Select "Clear program" and then press the ENTER button. It is disabled if the"Edit mode" is not selected.Note:The program will be deleted if disc door is opened or selected files are deleted by selecting "Clear program" in "Edit mode".LanguagePLAY MODES FOR CD OR JPG DISCCUSTOMIZING THE FUNCTION SETTINGSOSD Language1. Press the SETUP button in stop mode.2. Press the button to select OSD Language.3. Press the ENTER button, then the / button to shift and changethe Language.4. Press the ENTER button.5. Press the SETUP or RETURN button to exit the menu.Subtitle1. Press the SETUP button in stop mode.2. Press the button, then the / button to select Subtitle.3. Press the ENTER button, then the / button to shift and changethe Language.4. Press the ENTER button.5. Press the SETUP or RETURN button to exit the menu.Notes:• Some DVDs are programmed with a specifi c language. You may notbe able to change this feature.• Some DVDs allow you to change subtitle selections via the discmenu only. If this is the case, press the MENU button and choose the appropriate subtitle language from theselection on the disc menu.Audio1. Press the SETUP button in stop mode.2. Press the button, then the / button to select Audio.3. Press the ENTER button, then the / button until your preferredAudio is displayed.4. Press the ENTER button.5. Press the SETUP or RETURN button to exit the menu.Note: Some DVDs are programmed with a specifi c language. You maynot be able to change this feature.DVD Menu1. Press the SETUP button in stop mode.2. Press the button, then the / button to select DVD Menu.3. Press the ENTER button, then the / button until your preferredDVD Menu language is displayed.4. Press the ENTER button.5. Press the SETUP or RETURN button to exit the menu.Note: Some DVDs are programmed with a specifi c language. You maynot be able to change this feature.VideoAspect RatioAspect Ratio1. Press the SETUP button in stop mode.2. Press the / button to select Video.3. Press the button, then the / button to select Aspect Ratio.4. Press the ENTER button, then the / button to shift and changethe aspect ratio.5. Press the ENTER button.6. Press the SETUP or RETURN button to exit the menu.Notes:• The displayable picture size is preset on the DVD. Therefore, the playback picture of some DVDs may not conformto the picture size selected.• When you play DVDs recorded in the 4:3 picture size only, the playback picture always appears in the 4:3 picturesize regardless of the Aspect Ratio setting.• Select 16:9 to conform to the LCD screen on the unit. Always be sure that your Aspect Ratio conforms to the actualTV in use if you connect the unit to a TV.View Mode1. Press the SETUP button in stop mode.2. Press the / button to select Video.3. Press the button, then the / button to select View Mode.4. Press the ENTER button, then the / button to shift and changethe View Mode.5. Press the ENTER button.6. Press the SETUP or RETURN button to exit the menu.Fill Fill the screen with decoded image.Original Display image as it’s original size.Auto Fit Automatically fi t the decoded image on screen withoutdistortion. Black bars will be present on top/bottom or left/right of screen.Pan Scan Select when a standard 4:3 TV is connected. Displays pictures cropped to fi ll your TV screen. Sides ofthe picture are cut off.Note: Depending on the DVD, you may not be able to view the mode as selected.MiscUse Default Settings1. Press the SETUP button in stop mode.2. Press the / button to select Misc.3. Press the button, then press the / button to select Use DefaultSettings dialogue box.4. Press the ENTER followed by the / button to select “Yes”, thenpress the ENTER button. The original setting will be restored. Theunit will exit the menu automatically and re-load the disc in the disctray.Note: It will take 3-5 seconds to reset the DVD player to the factory default.Screen Saver1. Press the SETUP button in stop mode.2. Press the / button to select Misc.3. Press the button, then press the / button to select ScreenSaver.4. Press the ENTER button, then press the / button to change theOn/Off mode.5. Press the ENTER button.6. Press the SETUP or RETURN button to exit the menu.SYMPTOM CAUSE (AND REMEDY)No power.The remote controldoes not function.No sound or only avery low-level sound isheard.No pictureThe picture is not clearSevere hum or noise isheard.The disc does not play.MAINTENANCECleaning the DiscA defective or soiled disc inserted into the unit can cause sound to drop out during playback.Handle the disc by holding its inner and outer edges.• Do NOT touch the surface of the unlabeled side of the disc.• Do NOT stick paper or tape on the surface.• Do NOT expose the disc to direct sunlight or excessive heat.• Clean the disc before playback. Wipe the disc from the center outward with a cleaning cloth.• NEVER use solvents such as benzine or alcohol to clean the disc.• Do NOT use irregular shaped discs (example: heart shaped, octagonal, etc.). They may cause malfunctions.Cleaning the Unit• Be sure to turn the unit off and disconnect the AC power adapter before maintaining the unit.• Wipe the unit with a dry soft cloth. If the surfaces are extremely dirty, wipe clean with a cloth that has been dippedin a weak soap-and-water solution and wrung out thoroughly, then wipe with a dry cloth.• Never use alcohol, benzine, thinner, cleaning fl uid or other chemicals. Do NOT use compressed air to remove dust.Important Note• Before transporting the unit, remove any disc from the disc compartment.TROUBLESHOOTING GUIDE• Ensure the AC power adapter is connected.• The unit is not turned on.• Make sure the infrared remote sensor is not blocked.• Make sure the plastic sheet has been removed from the remote control.• Point the remote directly at the infrared remote sensor on the unit.• Replace the battery in the remote control with a new one.• Use remote control with GREEN keys with the unit which has GREEN mark.Use remote control with BLUE keys with the unit which has BLUE mark.• Make sure ON mode was selected.• The volume control is located on the side of the unit – please try adjusting this.• The system is in pause mode. Press the PLAY button to return to normal play mode.• The unit is in fast-forward or fast-reverse mode. Press the PLAY button to return tonormal play mode.• Make sure the AUDIO/VIDEO output connections are correct.• The DTS DVD cannot be decoded to have speaker output.• The unit is too hot; shut off the unit for 30 minutes to cool it down.• The region number of the disc doesn't match the region number of this unit.• Clean the disc.• The disc is scratched.• Adjust the LCD's brightness, contrast and color using the VIDEO MODE button on theremote control.• The plugs and jacks are dirty. Wipe them with a cloth slightly moistened with alcohol.• Clean the disc.• There is no disc inside (“No Disc” appears on the screen).• Insert the disc correctly with the playback side facing down.• Clean the disc.• A non-NTSC disc has been inserted. The unit and disc region number are incompatible.• Condensation may have formed inside the unit due to a sudden change in temperature.Wait about an hour for it to clear and try again.Specifications and external appearance are subject to change without notice.Need More Help?Please visit online help athttp://www.venturer.comDO NOT RETURN THIS PRODUCT TO THE STORETWIN 8” DVD BACKSEAT THEATEROWNER’S MANUALSAFETY PRECAUTIONSThe lightning fl ash with an arrowhead symbol, withinthe equilateral triangle, is intended to alert the userto the presence of uninsulated "dangerous voltage"within the product's enclosure that may be of suffi cientmagnitude to cause an electric shock.The exclamation point within the equilateral triangle isintended to alert the user to the presence of importantoperating and maintenance (servicing) instructions inthis owner’s manual.* SEE BOTTOM OF UNIT FOR GRAPHIC SYMBOLS *This productcontains a lowpower laser device.WARNING: TO REDUCE THE RISKOF ELECTRIC SHOCK, DO NOTREMOVE COVER (OR BACK). NO USER-SERVICEABLE PARTS INSIDE. REFERSERVICING TO QUALIFIED SERVICEPERSONNEL.WARNING: TO PREVENT FIRE ORSHOCK HAZARD, DO NOT EXPOSE THISAPPLIANCE TO RAIN OR MOISTURE.DO NOT PLACE OBJECTS FILLED WITHLIQUIDS ON OR NEAR THIS UNIT.CAUTION: USE OF CONTROLS ORADJUSTMENTS OR PERFORMANCE OFPROCEDURES OTHER THAN THOSESPECIFIED MAY RES<strong>UL</strong>T IN HAZARDOUSRADIATION EXPOSURE.CAUTION: DANGER OF EXPLOSION IFBATTERY IS INCORRECTLY REPLACED.REPLACE ONLY WITH THE SAME OREQUIVALENT TYPE.CAUTIONINVIS<strong>IB</strong>LE LASER RADIATIONWHEN OPEN.AVOID EXPOSURE TO BEAM.THIS CLASS B DIGITAL APPARATUSCOMPLIES WITH CANADIAN ICES-003.On Placement• Do not use the unit in places that are extremely hot, cold, dusty, or humid.• Place the unit on a fl at and even surface.• Do not restrict the air fl ow of the unit by placing it in a place with poor air flow, by covering it with a cloth, orby placing it on carpeting.• To avoid magnetized, do not place the unit near speaker or magnet.• Do not use this unit in direct sunlight or leave the unit in a closed automobile (or yacht, etc) where it wouldbe exposed to high temperatures above 104°F (40°C).• No naked flame sources such as lighted candles should be placed on the AC power adapter and main unit.• The apparatus shall not be exposed to dripping or splashing and that no objects fi lled with liquids, such asvases, shall be placed on apparatus.On Safety• When connecting or disconnecting the AC power adapter, grip the plug and not the cord itself. Pulling thecord may damage it and create a hazard.• When you are not going to use the unit for a long period of time, disconnect the AC power adapter.On Condensation• When left in a heated room where it is warm and damp, water droplets or condensation may form inside theunit. When there is condensation inside the unit, the unit may not function normally. Let the unit stand for 1 to2 hours before turning the power on, or gradually heat the room and allow the unit to dry before use.Ventilation Warning• Do not block the ventilation openings or holes. (If the ventilation openings or holes are blocked by anewspaper or cloth, etc., the heat may not be able to get out.)• Do not operate the unit in a confined space, such as a bookcase or built-in cabinet, allow about 4 inch (10cm)of free space all around the unit for adequate ventilation.Rating Plate Location• The rating plate is located on the bottom of unit.FCC StatementsNOTE: This equipment has been tested and found to comply with the limits for a Class B digital device,pursuant to Part 15 of the FCC Rules. These limits are designed to provide reasonable protection againstharmful interference in a residential installation. This equipment generates, uses and can radiate radiofrequency energy and, if not installed and used in accordance with the instructions, may cause harmfulinterference to radio communications. However, there is no guarantee that interference will not occur in aparticular installation. If this equipment does cause harmful interference to radio or television reception,which can be determined by turning the equipment off and on, the user is encouraged to try to correct theinterference by one or more of the following measures:– Reorient or relocate the receiving antenna.– Increase the separation between the equipment and receiver.– Connect the equipment into an outlet on a circuit different from that to which the receiver is connected.– Consult the dealer or an experienced radio/TV technician for help.WARNING: Changes or modifications to this unit not expressly approved by the party responsible forcompliance could void the user's authority to operate the equipment.WARNING: Should any trouble occur, disconnect the AC power adapter and refer servicing to aqualified technician.Notes on CopyrightIt is forbidden by law to copy, broadcast, show, broadcast on cable, play in public, or rent copyrighted materialwithout permission.Apparatus Claims of U.S. Patent Nos. 6,836,549; 6,381,747; 7,050,698; 6,516,132 and 5,583,936 licensed forlimited viewing uses only.This product incorporates copyright protection technology that is protected by U.S. patents and otherintellectual property rights. Use of this copyright protection technology must be authorized by Macrovision,and is intended for home and other limited viewing uses only unless otherwise authorized by Macrovision.Reverse engineering or disassembly is prohibited.E - 7E - 8 E - 9Printed in China 811-728791W010E - 1