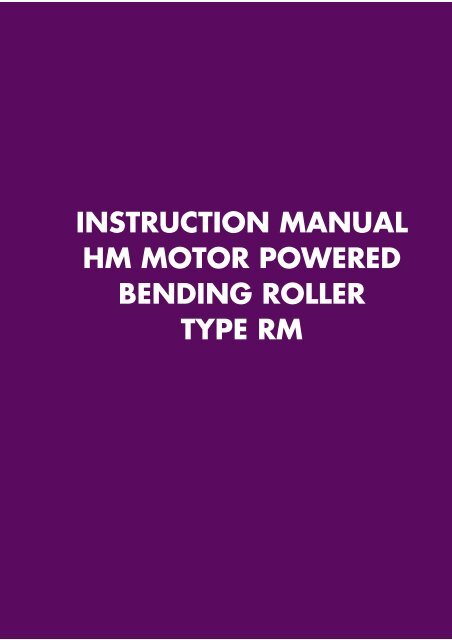
instruction manual hm motor powered bending roller type rm
instruction manual hm motor powered bending roller type rm
instruction manual hm motor powered bending roller type rm

You also want an ePaper? Increase the reach of your titles
YUMPU automatically turns print PDFs into web optimized ePapers that Google loves.
INSTRUCTION MANUAL<br />
HM MOTOR POWERED<br />
BENDING ROLLER<br />
TYPE RM
INDEX:<br />
Main components ..........................................................................................2<br />
Operation ..........................................................................................................3<br />
Safety....................................................................................................................5<br />
Service and maintenance.......................................................................10<br />
Technical data...............................................................................................11<br />
Machine plates and stickers..................................................................12<br />
1
MAIN COMPONENTS<br />
Set screw<br />
top roll<br />
Top roll<br />
Gear<br />
transmission<br />
Stand,<br />
power<br />
operated<br />
side<br />
Motor<br />
Lower roll<br />
Drop end<br />
Safety<br />
equipment<br />
Stand drop<br />
end<br />
Reversing switch<br />
Cone <strong>bending</strong> device<br />
2
OPERATION<br />
Pre<strong>bending</strong><br />
In order to obtain a symmetrically round<br />
shape, it is necessary to prebend the front<br />
as well as the rear edge of the workpiece.<br />
This pre<strong>bending</strong> can be carried out by<br />
means of suitable equipment e.g.a press<br />
brake or <strong>manual</strong> folding machine.<br />
Bending<br />
This <strong>bending</strong> <strong>roller</strong> shall be used for <strong>bending</strong><br />
sheets to a round shape. Also cylinders<br />
with conical shape can be bent if the<br />
machine is equipped with cone <strong>bending</strong><br />
device.<br />
Bending operation:<br />
The upper roll is screwed up so that the<br />
workpiece can be introduced between the<br />
upper and lower rolls. After having centered<br />
the workpiece in the machine, the<br />
upper roll is screwed down towards the<br />
workpiece so that a bend appears. How<br />
much the upper roll must be screwed down<br />
depends partly on the thickness of the material<br />
and partly on the final diameter.<br />
Generally the sheet must be run through<br />
the machine several times in order to obtain<br />
the desired shape. When the workpiece<br />
has been introduced between the<br />
rolls, the machine can be started by means<br />
of the pedal switch. The workpiece should<br />
then be run through the machine until it<br />
nearly leaves the lower roll. After this the<br />
upper roll is screwed down somewhat and<br />
the procedure is repeated but in the opposite<br />
direction by means of the pedal switch.<br />
Continue to run the workpiece forwards<br />
and backwards at the same time as the upper<br />
roll is screwed down, until the workpiece<br />
has obtained the desired shape.<br />
In order to get a better cylinder, the workpiece<br />
can be run through the machine<br />
some extra times, either direct after the rolling<br />
or after the joint has been welded and<br />
emery ground.<br />
Note: If the upper roll is screwed down<br />
too much at a time, the <strong>motor</strong> can be<br />
overloaded when starting.<br />
When <strong>bending</strong> steel sheet or stainless steel<br />
the capacity of the machine will be reduced<br />
compared with mild steel sheet.<br />
3
SAFETY<br />
When writing the safety chapter below adjustment has been made to the EC council<br />
directive for machinery No 89/392 EEC approved on June 14 1989 as well as appendix<br />
No 91/368 EEC approved on June 20 1991, 93/44/EEC of June 14, 1993 and<br />
93/68/EEC of July 22, 1993.<br />
General<br />
This <strong>bending</strong> <strong>roller</strong> is designed with a view to eliminating personal injuries provided that the <strong>instruction</strong>s<br />
in this <strong>manual</strong> are being followed.<br />
Only authorized and trained staff is allowed to use the machine. Read the whole <strong>instruction</strong> <strong>manual</strong><br />
and make sure that you understand the contents before the machine is taken into use. It is<br />
important that you read the safety <strong>instruction</strong>s below:<br />
Lifting <strong>instruction</strong>s<br />
This machine must be lifted by truck as long as it is packed in a crate or a wooden case. When<br />
lifting it from the packing to the pe<strong>rm</strong>anent working site an approved lifting device <strong>type</strong> travel-<br />
ling crane must be used. Instructions for lifting<br />
be means of travelling crane:<br />
1. Check that the top roll is in the locked position.<br />
2. Put a lifting sling around the rolls as per<br />
fig. 1<br />
3. Lift carefully at the same time as you<br />
check that the rolls are pressed together.<br />
Re weights: see technical data<br />
Fig. 1<br />
1,5 m<br />
Dangerous area<br />
The dangerous area of the machine<br />
is described in fig. 2.<br />
This area shall in an appropriate<br />
way be marked in the floor.<br />
A person staying in the dangerous<br />
area will henceforth be called "exposed<br />
person" and the user of the<br />
machine the "operator".<br />
1 m<br />
Operator<br />
2 m<br />
1,5 m<br />
Fig. 2<br />
5
Safety <strong>instruction</strong>s in connection with the installation<br />
The machine must be bolted to the floor with 4 pcs expansion shell bolts diameter<br />
16 mm. Electrical installation of the machine must be carried out by authorized<br />
staff.<br />
Before the machine is operated the following steps must be<br />
taken:<br />
Check that all safety devices function and that they are not damaged. Also check that moveable<br />
parts are not exposed to obstacles e.g. owing to incorrectly mounted guards or parts. Broken<br />
parts or safety components must be changed by authorized staff.<br />
Application<br />
Never use the machine for material, which is outside the capacity range of the<br />
machine. Check machine plate and the section "technical data".<br />
Check that the environment around the machine is suitable.<br />
• Do not expose the machine to rain.<br />
• Do not use the machine in wet or damp premises.<br />
• Check that the lighting of the premises is satisfactory.<br />
• The floor must be clean, dry and free from oil and grease spots.<br />
• Never use easily inflammable material close to the machine.<br />
• Dirty working sites increase the risk of accidents.<br />
Avoid unstable working positions<br />
Check that the operator always has a secure and stable working position.<br />
Do not keep tools on the machine<br />
Remove all tools from the machine before it is operated.<br />
All repairs must be carried out by authorized staff.<br />
The machine and its electrical equipment has been made according to valid safety<br />
rules. All repairs must be carried out by trained and qualified staff. Only original<br />
spares must be used.<br />
Note: If the repairs also involve dismantling of the machine, this must be carried out according<br />
to the enclosed dismantling <strong>instruction</strong>. This <strong>instruction</strong> must not be kept together with<br />
the machine.<br />
6
Cut the power<br />
Cut the current before touching live parts.This is done either by disconnecting the<br />
main switch of the machine or by disconnecting the voltage of the electrical cabinet.<br />
Note: Do not put the main switch or the safety switch of the machine out of operation.<br />
Keep the <strong>instruction</strong> <strong>manual</strong> of the machine in a safe place.<br />
The <strong>instruction</strong> <strong>manual</strong> contains important info<strong>rm</strong>ation that besides the safety info<strong>rm</strong>ation also<br />
give important info<strong>rm</strong>ation regarding operation,service, maintenance etc.<br />
Danger zone<br />
In connection with production work check that no<br />
part of the body comes too close to the infeed side<br />
of the clamping rolls of the machine (see fig. 3).<br />
Note: The infeed side may vary owing to the direction of rotation<br />
of the rolls.<br />
Fig. 3<br />
Modification of the machine<br />
All conversion, modification or change of this machine is strictly forbidden with the exception of<br />
• original spare parts<br />
• optional equipment supplied by the manufacturer.<br />
Falling workpieces<br />
Be careful when working with heavy<br />
workpieces so that they do not fall<br />
down by mistake when the grip loosens between<br />
the upper and lower rolls (see fig. 4). If necessary<br />
use a support table, travelling crane or<br />
some other lifting device.<br />
Fig. 4<br />
Emergency stop<br />
This machine is equipped with two emergency stop functions, i.e. one emergency stop on the<br />
electrical cabinet and one emergency wire running around the machine at foot height. This together<br />
with the fact that the machine is equipped with brake <strong>motor</strong> enables the machine to stop<br />
instantaneously in case of injury or risk of injury no matter where you are around the machine.<br />
7
Pinching risk of the<br />
workpiece<br />
Note that there is a pinching risk<br />
between the ends of the workpiece,<br />
see fig. 5 .<br />
Pinching risk<br />
Fig. 5<br />
Gearing protection<br />
All machine transmissions are completely covered by fixed protections. Thes<br />
protections are partly made of perforated sheet in order to enbable a certain supervision<br />
during operation. Note! The machine must not be run if one of these protections<br />
has been removed. Before removing a protection the main switch must be disconnected.<br />
The main switch must not be connected again until all protections have been mounted.<br />
Protective clothing<br />
Important! Never use gloves when <strong>bending</strong>,<br />
as this considerably increases the risk of getting<br />
pinched between the rolls. For other handling of the<br />
workpieces use gloves. The operator must not carry belts,<br />
rings or necklaces.<br />
Working shoes with steel inserts must be used.<br />
Loose hanging clothes must not be used.<br />
If the operator has long hair, this must not hang loose.<br />
Fig. 6<br />
Deburring of the workpiece<br />
Burrs and sharp edges must be removed from the workpiece before <strong>bending</strong>.<br />
Airborne noise<br />
The following noise level has been measured at the operator's place:<br />
Equivalent noise level Leq , idle running 70 dB(A)<br />
Equivalent noise level Leq, operation 73 dB(A)<br />
Service and maintenance<br />
Before service and maintenance are carried out on the machine you must have had <strong>instruction</strong>s<br />
from your foreman. You must also read and understand this <strong>instruction</strong> <strong>manual</strong>. Disconnect the<br />
main switch before the service job begins. If the machine must be dismantled,completely or<br />
partly, contact your foreman.<br />
8
Jamming<br />
If for some reason the machine stops while <strong>bending</strong> a workpiece, proceed as follows:<br />
Crank down the bottom roll and possibly also the <strong>bending</strong> roll.<br />
Remove the workpiece<br />
Identify the trouble reason<br />
If the <strong>motor</strong> protection is released, wait for some minutes before it is reset. The machine is then<br />
ready for use again.<br />
If the trouble is mechanical or electrical: Cut the current and contact the supervisor.<br />
Regular checking<br />
Daily check the function of the foot switch as well as the condition of the electric cable of the<br />
foot switch.<br />
Also check that the emergency stop works. Carry also out the regular service, which is described<br />
in the chapter Service and Maintenance in the <strong>instruction</strong> <strong>manual</strong>.<br />
Safety in general<br />
The chapters describing the safety devices are based on the assumption that the machine is<br />
used in the manner described in this <strong>instruction</strong> <strong>manual</strong>, that the operator has got the necessary<br />
info<strong>rm</strong>ation regarding the safety of the machine as well as the special risks involved with this <strong>type</strong><br />
of machine.<br />
If the machine is not used in the proper way, the manufacturer cannot be held responsible for<br />
personal injuries or material damages, which may be the result. Also check the following:<br />
• Take all necessary safety precautions when loading, setting, changing spare parts, cleaning,<br />
repairing and servicing so that the exposed person cannot start the machine.<br />
• Do not disconnect the safety devices of the machine.<br />
• Do not remove any part of the machine belonging to the safety devices.<br />
• Always check that all safety devices have been remounted after repair work etc.<br />
9
Installation:<br />
SERVICE AND MAINTENANCE<br />
The machine must be placed on fi<strong>rm</strong> ground e.g. cemented floor. The ground must be level in<br />
order to avoid tensions in the machine when fixing it to the floor.<br />
Check that the <strong>motor</strong> is branched to the right voltage. Also check the direction of rotation. Plates<br />
with "Forward" and "Reverse" are mounted on the protection cover of the foot switch.<br />
Maintenance<br />
The machine is delivered with greased bearings for about 200 hours' continuous duty. After this<br />
period it should be lubricated with ball bearing grease of good quality e.g. Esso Multi Purpose<br />
Grease H or equivalent.<br />
List of points of lubrication (6 grease fittings):<br />
1 Grease fitting (51) on each side of the front part (8) on a level with the lower rolls (6)<br />
1 Grease fitting (51) on each side of the rear part (2) on a level with the lower rolls<br />
2 Grease fittings (28) inside the recesses of the cover (38)<br />
The numbers within brackets refer to the section drawing.<br />
Daily check<br />
• Brake function of the <strong>motor</strong><br />
• All emergency stop functions<br />
10
TECHNICAL DATA<br />
Machine No.....................................................................................................................<br />
Size.....................................................................................................................................<br />
Rolling speed ...................................................................................................................m/min<br />
Max. sheet thickness (400 N/mm 2 ).......................................................................... mm<br />
Operating length............................................................................................................ mm<br />
Total net weight ............................................................................................................... kg<br />
Weight of rolls<br />
Upper roll ..................................................................................................................... kg/m<br />
Lower rolls .................................................................................................................... kg/m<br />
Total dimensions LengthWidthHeight ............................................................... mm<br />
Working height ............................................................................................................... mm<br />
Motor rating..................................................................................................................... kW<br />
Voltage .............................................................................................................................. V<br />
Main <strong>motor</strong><br />
Brand .............................................................................................................................<br />
Type ................................................................................................................................<br />
............................................................................................................................................. V<br />
............................................................................................................................................. kW<br />
Diameter of upper roll .................................................................................................. mm<br />
Diameter of lower rolls ................................................................................................. mm<br />
Drive belt<br />
No................................................................................................................................... st<br />
Brand .............................................................................................................................<br />
Type ................................................................................................................................<br />
Length............................................................................................................................. mm<br />
Optional equipment □ Cone <strong>bending</strong> device<br />
□ Hardened and ground rolls<br />
□ Adiprene-coated rolls<br />
Deviation from the no<strong>rm</strong>al execution<br />
.................................................................................................................................................................................<br />
.................................................................................................................................................................................<br />
.................................................................................................................................................................................<br />
.................................................................................................................................................................................<br />
.................................................................................................................................................................................<br />
Copyright: Luna AB. All rights reserved.<br />
11
Black/Silver<br />
HM PRODUCTION A/S<br />
7700 THISTED<br />
DENMARK<br />
Black/Silver<br />
Red/White<br />
This protection cover<br />
must not be removed<br />
unless the main current<br />
is disconnected.<br />
602<br />
REVERSE<br />
Blue/White<br />
902<br />
Blue/White<br />
MAIN SWITCH MUST BE<br />
DISCONNECTED FOR ALL<br />
TYPES OF SERVICE AND<br />
MAINTENANCE.<br />
202<br />
FORWARD<br />
Blue/White<br />
802<br />
12
WARNING!<br />
Pinching risk<br />
between the rolls<br />
Blue/White<br />
ONLY TRAINED<br />
STAFF MAY HANDLE<br />
THIS MACHINE.<br />
402<br />
1002<br />
Yellow/Black<br />
CHECK THE DIRECTION OF<br />
ROTATION OF THE MOTOR.<br />
MOTOR DATA<br />
WARNING!<br />
Pinching risk<br />
Voltage: (V) Frequency:<br />
(Hz)<br />
Blue/White<br />
302<br />
502<br />
Yellow/Black<br />
13
DISMANTLING OF BENDING ROLLER<br />
This <strong>instruction</strong> is made in order to support trained staff when repairing with a<br />
view to minimizing the risk of personal injuries and damage to the machine.<br />
To enable dismantling of the machine in a safe way, the job must be carried<br />
out by at least two trained mechanics.<br />
This dismantling <strong>instruction</strong> must not be kept together with the machine. The<br />
proper holder is the supervisor and/or service staff.<br />
Procedure:<br />
1 Dismount the protection cover (38)<br />
2. Remove the locking ring of the upper roll (53)<br />
3. Lower the rear bar (16) on the opposite drive side.<br />
4. Pull the upper roll (7) out of the bearing die (17) so that it rests on the lower<br />
rolls (86)<br />
5. Place a lifting strap in the middle of the upper roll. Remove the roll and<br />
place it e.g. on a bench<br />
6. Remove the locking ring (27) and dismount the gear wheels (30, 31)<br />
7. Pull off the <strong>roller</strong> gears (25) from the lower rolls<br />
8. Lower the lifting strap between the lower rolls and secure them by means<br />
of a strong flat iron<br />
9. Loosen the nuts (4) on the outside of the front part (8)<br />
10. Release the front part<br />
11. Place a strong support under the detached roll ends. Note: not under the<br />
roll necks, and place the lifting strap under the centre of gravity of one of<br />
the rolls. Pull the roll out of the frame (2), lift it down and place it on e.g.<br />
a bench. Repeat this procedure with the other lower roll.<br />
Note: Handle the loose parts carefully and check that all pieces removed also<br />
are mounted in their right places, but in the reverse order.<br />
The letters in the above text refer to numbered machine components in the enclosed<br />
sketch drawings. The number of your machine is found at the top of the<br />
first page of the sketch drawings.