manual Kronos - Audio Physic
manual Kronos - Audio Physic
manual Kronos - Audio Physic

Erfolgreiche ePaper selbst erstellen
Machen Sie aus Ihren PDF Publikationen ein blätterbares Flipbook mit unserer einzigartigen Google optimierten e-Paper Software.
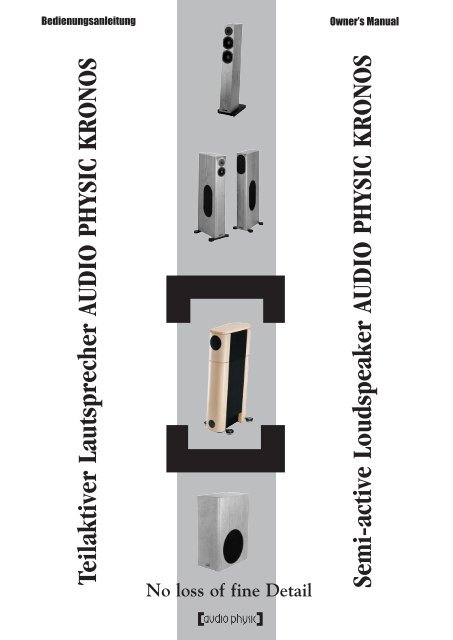
Bedienungsanleitung Owner’s Manual<br />
Teilaktiver Lautsprecher AUDIO PHYSIC KRONOS<br />
No loss of fine Detail<br />
Semi-active Loudspeaker AUDIO PHYSIC KRONOS
Sehr geehrter <strong>Kronos</strong>-Besitzer.<br />
Mit Ihrer Wahl der <strong>Audio</strong> <strong>Physic</strong> KRONOS haben Sie den<br />
richtigen Schritt zur kompromisslosen Wiedergabe des<br />
gesamten wahrnehmbaren Frequenzspektrums unternommen.<br />
Um dieses Ziel zu erreichen, ist eine exakte Abstimmung<br />
des aktiven Tieftonbereichs auf den Hörraum erforderlich.<br />
Das bei der <strong>Kronos</strong> realisierte Einstellungskonzept<br />
ermöglicht eine exakte Anpassung an die Raumcharakteristik.<br />
So lässt sich unabhängig vom Raum eine<br />
konstant hohe und ausgeglichene Wiedergabequalität<br />
erreichen.<br />
Damit Sie ein optimales Ergebnis mit Ihrer KRONOS erzielen<br />
und Beschädigungen an Ihrer KRONOS oder der<br />
angeschlossenen Anlage vermeiden, sollten Sie diese<br />
Bedienungsanleitung in Ruhe und vollständig lesen. Bitte<br />
beachten Sie die hier genannten Empfehlungen zu<br />
Anschluss und Einstellung.<br />
Falls Ihnen etwas unklar bleiben sollte oder falls Sie<br />
weiter gehende Fragen haben, wenden Sie sich bitte an<br />
Ihren autorisierten <strong>Audio</strong> <strong>Physic</strong> Fachhändler.<br />
Viel Spaß bei der Entdeckung neuer Aspekte der Musik<br />
wünscht Ihnen<br />
<strong>Audio</strong> <strong>Physic</strong><br />
Inhaltsverzeichnis<br />
Kapitel 1: Sicherheitshinweise S. 3<br />
Kapitel 2: Auspacken und Aufstellung S. 4<br />
Kapitel 3: Anschluss und Justage S. 7<br />
Kapitel 3: Funktionsstörung S. 10<br />
Kapitel 4: Pflege S. 11<br />
Kapitel 5: Wartung S. 11<br />
Kapitel 6: Technische Daten S. 11<br />
Lieferumfang:<br />
2 x KRONOS Lautsprecher<br />
2 x Netzkabel<br />
1 x Fernbedienung mit festem Kabel<br />
1 x Verbindungskabel für Fernbedienung<br />
4 x Verbindungskabel für Tief- und Hochtonmodule<br />
1 x Libelle<br />
12 x Schrauben, 1 Imbusschlüssel<br />
1 x Garantieunterlagen<br />
1 x Bedienungsanleitung<br />
2<br />
Dear customer,<br />
Congratulations! You are now the proud owner of <strong>Audio</strong><br />
<strong>Physic</strong> KRONOS loudspeakers - a state-of-the-art audio<br />
component which provides uncompromised quality and<br />
excellent sound reproduction over the whole frequency<br />
range.<br />
In order to ensure the highest degree of performance, it<br />
is necessary to precisely adjust the active woofer to the<br />
listening room. In designing the KRONOS, this inspired us<br />
to include an adjustment concept which allows perfect<br />
adjustment to the features of the listening room where the<br />
same high quality of sonic reproduction and balance is<br />
constantly achieved, independent of room variations.<br />
We encourage you to read this <strong>manual</strong> thoroughly and in<br />
depth, as there is a great deal of information provided.<br />
This <strong>manual</strong> offers you a perspective on how to attain the<br />
greatest possible performance from the KRONOS as well<br />
as instructions on how to avoid damages to your loukdspeakers<br />
or associated equipment. Please, follow all instructions<br />
provided in this <strong>manual</strong> as regards setup, connection<br />
and adjustment of your KRONOS.<br />
Should you encounter any problems which cannot be<br />
solved or any questions which cannot be answered,<br />
please contact your authorized <strong>Audio</strong> <strong>Physic</strong> dealer.<br />
Enjoy the discovery of a new aspect of music reproduction.<br />
<strong>Audio</strong> <strong>Physic</strong><br />
Table of contents<br />
Section 1: Safety instructions p. 3<br />
Section 2: Unpacking and Setup p. 4<br />
Section 3: Setup, Connection and Adjustment p. 7<br />
Section 3: Troubleshooting p. 10<br />
Section 4: Maintenance p. 11<br />
Section 5: Service p. 11<br />
Section 6: Technical Data p. 11<br />
Included in the delivery is:<br />
2 KRONOS loudspeakers<br />
1 x remote control with fixed cable<br />
1 x remote control cable<br />
4 x connection cable for the woofer-tweeter-unit<br />
1 x spirit level<br />
12 screws, 1 x allen key<br />
2 x power supply cord<br />
1 x Warranty certificate<br />
1 x Owner’s <strong>manual</strong>
1. Sicherheitshinweise 1. Safety instructions<br />
Bitte lesen Sie diese Bedienungsanleitung vor<br />
INBETRIEBNAHME Ihrer <strong>Audio</strong> <strong>Physic</strong> KRONOS sorgfältig<br />
durch. Die folgenden Sicherheitshinweise sollten Sie<br />
unbedingt befolgen:<br />
Die Lautsprecher dürfen nur in trockenen Räumen<br />
betrieben oder gelagert werden. Vermeiden Sie, dass<br />
Flüssigkeiten oder Fremdkörper in die KRONOS gelaangen.<br />
Sollten dennoch Flüssigkeiten oder Fremdkörper<br />
in die KRONOS gelangt sein, ziehen Sie sofort den<br />
Netzstecker der KRONOS, schalten Sie Ihren angeschlossenen<br />
Verstärker oder Mehrkanal-Decoder ab und ziehen<br />
Sie anschließend das Verbindungskabel zwischen Ihrer<br />
KRONOS und Ihrem Verstärker oder Mehrkanal-Decoder<br />
von der KRONOS ab. Lassen Sie Ihre KRONOS anschließend<br />
von einem autorisierten <strong>Audio</strong> <strong>Physic</strong> Fachhändler<br />
überprüfen.<br />
Stellen Sie die KRONOS nur auf festen und ebenen Böden<br />
auf.<br />
Achten Sie bei der Aufstellung darauf, dass die Kühlung<br />
der KRONOS nicht beeinträchtigt wird und dass die<br />
entstehende Wärme entweichen kann.<br />
Waren Ihre KRONOS größerer Kälte (zum Beispiel beim<br />
Transport) ausgesetzt, so warten Sie mit der<br />
Inbetriebnahme, bis sich Ihre KRONOS auf<br />
Raumtemperatur aufgewärmt haben und eventuell<br />
entstandenes Kondenswasser verdunstet ist.<br />
Bei längerer Nichtbenutzung sollten Sie die Netzstecker<br />
der KRONOS aus der Steckdose ziehen.<br />
Lassen Sie Ihre KRONOS während des Betriebes nicht<br />
unbeaufsichtigt.<br />
Schließen Sie Ihre KRONOS genau entsprechend der in<br />
Kapitel 2 angegebenen Anleitung an.<br />
Halten Sie bei der Aufstellung der KRONOS immer einen<br />
Abstand von mindestens 1 m zu Fernsehern, Computermonitoren<br />
oder anderen Geräten mit Kathodenstrahlröhre<br />
ein. Die Magnetfelder der Lautsprecherchassis der<br />
KRONOS können sonst bleibende Bildverzerrungen verursachen.<br />
Vermeiden Sie starke, direkte UV-Einstrahlung auf Ihre<br />
KRONOS.<br />
Halten Sie kleine Kinder von den KRONOS und insbesondere<br />
von deren Anschlussklemmen fern.<br />
Schalten Sie den KRONOS vor Reinigungsarbeiten aus.<br />
Zur Reinigung des Gehäuses verwenden Sie bitte einen<br />
weichen, sauberen Lappen, der mit einer milden Seifenwasserlösung<br />
angefeuchtet (aber nicht nass!) ist.<br />
Entfernen Sie nach der Reinigung Feuchtigkeitsreste mit<br />
einem weichen, sauberen und trockenen Tuch.<br />
Verwenden Sie zur Reinigung niemals chemisch aggressive<br />
Flüssigkeiten, wie zum Beispiel Alkohol,<br />
Lösungsmittel, Farbverdünner oder Reinigungsbenzin. Die<br />
Lautsprecherchassis dürfen nur sehr sanft und vorsichtig<br />
mit einem sauberen, weichen und trockenen Pinsel gereinigt<br />
werden. Stellen Sie vor der Wiederinbetriebnahme<br />
der KRONOS sicher, dass keine Kurzschlüsse an den<br />
Anschlussklemmen bestehen und dass alle Anschlüsse<br />
ordnungsgemäß sind.<br />
Die KRONOS darf nur von einem autorisierten <strong>Audio</strong><br />
<strong>Physic</strong> Fachhändler geöffnet und repariert werden. Bei<br />
Beschädigungen oder bei Verdacht auf eine nicht ordnungsgemäße<br />
Funktion Ihrer KRONOS sollten Sie sofort den<br />
Netzstecker ziehen und Ihre KRONOS von einem autorisierten<br />
<strong>Audio</strong> <strong>Physic</strong> Fachhändler überprüfen lassen.<br />
3<br />
Please take the time to thoroughly read the information<br />
provided in this operation <strong>manual</strong> BEFORE you operate<br />
the <strong>Audio</strong> <strong>Physic</strong> KRONOS loudspeakers. The following<br />
safety instructions must be strictly observed:<br />
Only use or store the KRONOS in a dry place. Do not spill<br />
any kind of liquid on or insert any object into the loudspeakers.<br />
If any liquid or object has entered your<br />
KRONOS, unplug the loudspeaker immediately from the<br />
wall outlet and switch off all other equipment (amplifier<br />
or multi-channel decoder). Remove also the cables connecting<br />
your KRONOS to the amplifier or multi-channel<br />
decoder. Refer safety check and servicing to an authorized<br />
<strong>Audio</strong> <strong>Physic</strong> dealer.<br />
Position the KRONOS on a stable and level floor.<br />
Make sure the location of the KRONOS allows sufficient<br />
air exchange for cooling and ventilation for the generated<br />
heat.<br />
If your KRONOS has been exposed to a cold environment<br />
(for example during transportation), do not operate the<br />
loudspeakers until they have regained room temperature<br />
and possible condensation has evaporated.<br />
Unplug the KRONOS when not in use for a longer period<br />
of time.<br />
Do not leave your KRONOS unattended when in use.<br />
Make sure you exactly follow the instructions given in<br />
section 2 (Setup, Connection and Adjustment).<br />
When positioning your KRONOS, leave at least 3.3 feet<br />
(1m) of clearance around any television sets, computer<br />
monitors or other devices equipped with a cathode-ray<br />
tube. Otherwise, the magnetic field created by the drivers<br />
of the KRONOS may permanently distort your television<br />
or monitor screen.<br />
Do not expose your KRONOS to strong and direct sunlight<br />
(ultraviolet light).<br />
Keep the KRONOS and especially the connecting terminals<br />
out of reach of small children.<br />
Unplug the KRONOS from the AC outlet before cleaning<br />
the loudspeakers. Only use a soft, clean cloth, moistened<br />
with a mild soap solution (but not wet!) to clean the<br />
cabinet of your KRONOS. Remove residual moisture with<br />
a soft, dry and clean cloth. Never use chemically aggressive<br />
liquids such as alcohol, solvents, diluting agents or<br />
petrol to clean your KRONOS. Use a clean, dry, soft brush<br />
to clean the drivers. You should be extremely careful<br />
when doing so. Make sure that no short circuit condition<br />
exists at the connecting terminals and that all terminals<br />
and plugs are properly connected before you restart the<br />
KRONOS.<br />
Contact an authorized <strong>Audio</strong> <strong>Physic</strong> dealer if your<br />
KRONOS is in need of repair or has to be opened. If your<br />
KRONOS is damaged or if it does not function properly,<br />
unplug the loudspeaker immediately and refer safety<br />
check and servicing to an authorized <strong>Audio</strong> <strong>Physic</strong> dealer.
Auspacken und Aufstellung Unpacking and Setup<br />
Die <strong>Audio</strong> <strong>Physic</strong> <strong>Kronos</strong> wird in drei<br />
Holzkisten geliefert.<br />
Verwenden Sie einen Schraubenzieher<br />
zum Öffnen beziehungsweise Aufbiegen<br />
der Laschen.<br />
Nehmen Sie als erstes den Deckel der<br />
Kiste, die den Woofer enthält ab. Für<br />
späteres Wiedereinpacken sind alle<br />
Verpackungsteile gekennzeichnet.<br />
Entfernen Sie die beiden seitlichen<br />
Kartons.<br />
Nehmen Sie die oberen Schaumstoffteile<br />
ab.<br />
Wichtiger Hinweis: Zum<br />
problemlosen Aufbau der<br />
KRONOS ist eine zweite<br />
Person dringend erforderlich!<br />
4<br />
The <strong>Audio</strong> <strong>Physic</strong> KRONOS is delivered in<br />
three wooden boxes.<br />
Use a screwdriver to open the boxes, i. e.<br />
to bend up the corner of the clips.<br />
Make sure that you first remove the lid<br />
of the box containing the woofer. All<br />
packaging materials are labeled in case<br />
you need to repack the loudspeakers at a<br />
later date.<br />
Remove the two pieces of cardboard<br />
from both sides.<br />
Remove the foam cover from the top
Auspacken und Aufstellung Unpacking and Setup<br />
Nehmen Sie die äußere Holzkiste nach<br />
oben ab.<br />
Entnehmen Sie dem Zubehörkarton die<br />
Lautsprecherfüße.<br />
Diese Werkzeuge und Schrauben benötigen<br />
Sie zur Montage der Füße. Vergewissern<br />
Sie sich, dass das komplette Zubehör<br />
(kleines Bild) ebenfalls enthalten ist:<br />
Fernbedienung x 1<br />
Verbindungskabel f. Fernbed. x 1<br />
Verbindungskabel Tiefton-Hochton-<br />
Modul x 4<br />
Libelle x 1<br />
Schrauben (12 Stück), Imbus x 1<br />
Netzkabel x 2<br />
Montieren Sie die Füße mit den sechs<br />
beigelegten Schrauben und entfernen Sie<br />
die Platikfolie solange das<br />
Woofergehäuse noch liegt.<br />
Drehen Sie die Spikes zunächst ganz<br />
hinein, damit die Spitze bei der<br />
Positionierung nicht den Fußboden<br />
beschädigt. Stellen Sie den Woofer<br />
anschließend auf. An den<br />
Anschlussklemmen finden Sie die<br />
Kennzeichnungen a und b, die die<br />
Zuordnung zum Oberteil mit dem<br />
passenden Furnier ermöglichen.<br />
Important: To set up the<br />
KRONOS it is strongly<br />
recommended to request the<br />
help of a second person!<br />
5<br />
Carefully remove the wooden box by<br />
lifting it up.<br />
Take out the loudspeaker stands from<br />
the accessory box.<br />
The following tools and screws are necessary<br />
to mount the stands. Make sure<br />
that all accessories (small illustration)<br />
are included in the delivery:<br />
1 x remote control with fixed cable<br />
1 x remote control cable<br />
4 x connection cable for the woofertweeter-unit<br />
1 x spirit level<br />
12 screws, 1 x allen key<br />
2 x power supply cord<br />
Attach the stands to the base using the<br />
six provided screws and then remove the<br />
plastic wrap while the woofer unit is still<br />
in a horizontal position.<br />
First screw the spikes completely into<br />
the stands in order to ensure that their<br />
pointed ends do not cause damage to<br />
your floor when you start positioning the<br />
loudspeakers. Then carefully return the<br />
woofer unit to a vertical position. The<br />
terminal screws are labeled a and b to<br />
facilitate the matching of the upper with<br />
the lower unit.
Auspacken und Aufstellung Unpacking and Setup<br />
Packen Sie die Mittelhochton-Gehäuse<br />
genauso aus wie den Woofer. Achten Sie<br />
dabei auf die Stoffbespannungen, die<br />
neben den Gehäusen untergebracht sind,<br />
und entnehmen Sie sie vorsichtig.<br />
Ansicht der beiden Mitteltonmodule.<br />
Kennzeichnungen a und b befinden sich<br />
unten an den Anschlussklemmen.<br />
Entnehmen Sie den Deckel und legen ihn<br />
für spätere Verwendung zur Seite.<br />
Nehmen Sie sich Zeit für das Aufsetzen<br />
der Mittel-Hochton-Gehäuse. Während<br />
eine zweite Person das Oberteil festhält,<br />
verbinden Sie beide <strong>Kronos</strong>-Module mit<br />
den beiliegenden Kabeln – rot mit rot,<br />
schwarz mit schwarz.<br />
Ziehen Sie die Polklemmen handfest an<br />
(nicht mit Schraubzwingen). Achten Sie<br />
darauf, dass die Andernhülsen durch die<br />
Querlöcher in den Polklemmen gesteckt<br />
werden. Beachten Sie die<br />
Kennzeichnung der Anschlussfelder.<br />
(Montage der Bespannungen und<br />
Deckplatte auf Seite 9)<br />
6<br />
Follow the same steps when unpacking<br />
the high-midrange unit. Watch out for<br />
the grille cloths that are packed next to<br />
the cabinets and remove them with care.<br />
Illustration of the two high-midrange<br />
units. The terminal screws are labeled a<br />
and b.<br />
Remove the lid and set it aside for later<br />
use.<br />
The best advice is to take care and time<br />
when mounting the high-midrange unit.<br />
A second person should hold the upper<br />
unit in place while you connect the two<br />
KRONOS units using the provided cables<br />
– red to red, black to black.<br />
Tighten the binding posts firmly but without<br />
using undue force (do not use<br />
screw clamps). Be careful to insert the<br />
bolts through the cross holes of the<br />
binding posts. The labeling of the connection<br />
terminals must be strictly observed.<br />
(For the mounting of the grille cloth and<br />
the cover plate see page 9).
Anschluss und Justage Setup, Connection and<br />
Adjustment<br />
Verbinden Sie die rückseitigen<br />
Lautsprecherklemmen Ihrer <strong>Kronos</strong> über<br />
das beigelegte Solid-Core-<br />
Lautsprecherkabel mit dem Verstärker<br />
und die Netzbuchse über das beiliegende<br />
Stromkabel mit der Steckdose.<br />
Funktionstest: Schalten Sie jetzt Ihre<br />
<strong>Kronos</strong> ein. Danach sollte die vordere<br />
LED auf Rot springen. Wenn dies nicht<br />
geschieht, liegt eine<br />
Funktionsstörung vor. Sehen Sie in<br />
diesem Fall im Kapitel „Fehlersuche”<br />
nach.<br />
Verkabelung der Fernbedienung. Der<br />
Anschluss befindet sich von vorne<br />
gesehen auf der rechten Seite des<br />
<strong>Kronos</strong>-Woofers. Verbinden Sie die<br />
Fernbedienung mit dem rechten Remote-<br />
Eingang. Der linke Remote-Ausgang<br />
besitzt zwei Pins weniger. Das hilft Ihnen<br />
bei der Kabel-Identifikation.<br />
Verbinden Sie den linken Remote-<br />
Ausgang der ersten mit dem rechten<br />
Remote-Eingang der zweiten <strong>Kronos</strong>. Die<br />
beiden Lautsprecher sind dann betriebsbereit.<br />
Sie können jetzt Ihre <strong>Kronos</strong> in<br />
Betrieb nehmen, indem Sie die Netzschalter<br />
beider Lautsprecher anschalten<br />
und die Musikwiedergabe starten.<br />
Die Knöpfe der Fernbedienung.<br />
7<br />
Use the provided solid core cable to<br />
connect the loudspeaker terminals in the<br />
rear of the KRONOS to the amplifier, and<br />
use the supplied power supply cord to<br />
connect the loudspeaker's mains socket<br />
to an AC outlet.<br />
Function test: Switch on the KRONOS in<br />
order to check the functioning of the<br />
loudspeaker. The LED in the front panel<br />
should now light up in red. If this is not<br />
the case, the KRONOS is not functioning<br />
properly. Please refer to the troubleshooting<br />
section of this <strong>manual</strong>.<br />
Connection of remote control. The<br />
connection for the remote control is<br />
located on the right side of the woofer’s<br />
front panel. Connect the remote control<br />
to the right remote input. The left<br />
remote output has two pins less which<br />
enables you to easily identify the correct<br />
cable.<br />
Connect the left remote output of the<br />
first KRONOS to the right remote input<br />
of the second KRONOS. Now both loukdspeakers<br />
are ready to operate. After<br />
turning on the power switches of both<br />
KRONOS, you can now listen to music<br />
and enjoy a new dimension of music<br />
reproduction.<br />
Operation buttons of the Remote<br />
Control.
Anschluss und Justage Setup, Connection and<br />
Adjustment<br />
Displayanzeige der Fernbedienung nach<br />
dem Einschalten.<br />
Wenn die <strong>Kronos</strong>-Lautsprecher ein<br />
Signal bekommen, gehen sie nach 20<br />
Sekunden auf „Power on”.<br />
Nach einigen Sekunden sehen Sie nur<br />
AUDIO PHYSIC im Display der<br />
Fernbedienung.<br />
Drücken Sie einmal die „Preset”-Taste.<br />
Diese Anzeige erscheint daraufhin im<br />
Display Ihrer Fernbedienung. Indem Sie<br />
innerhalb weniger Sekunden noch<br />
einmal „Preset” drücken, wechselt die<br />
Statusanzeige, während ein<br />
zweiter Tastendruck die Änderung der<br />
gewählten Parameter ermöglicht.<br />
„Roomgain” können Sie zwischen 0 dB<br />
und +30 dB einstellen.<br />
„Volume” zwischen -10 dB und +10 dB<br />
in 1-dB-Schritten.<br />
8<br />
Display of the remote control when<br />
switched on.<br />
When a signal is detected by the KRONOS<br />
input terminals, the loudspeakers switch<br />
to "POWER ON” after 20 seconds.<br />
After a few seconds you will only see<br />
AUDIO PHYSIC in the display of the<br />
remote control.<br />
Press the "Preset" button once. The<br />
following text will appear in the display<br />
of your remote control. Press the<br />
"Preset" button again within a few<br />
seconds to move to the next menu item.<br />
Or, press the button again to change the<br />
selected parameter.<br />
The "Roomgain” value can be set<br />
between 0 dB and +30 dB. The "Volume”<br />
can be adjusted in 1dB steps between -<br />
10 dB and +10 dB.
Anschluss und Justage Setup, Connection and<br />
Adjustment<br />
Ihre beiden <strong>Kronos</strong>-Lautsprecher sind<br />
nun grundeingestellt und spielbereit. Um<br />
das ganze Potenzial Ihrer AUDIO PHYSIC<br />
<strong>Kronos</strong> zu erschließen, sollten Sie noch<br />
eine Feineinstellung und klangliche<br />
Abstimmung auf den Hörraum<br />
vornehmen.<br />
Den optischen Feinschliff erhalten Ihre<br />
KRONOS wie folgt: Setzen Sie zuerst die<br />
unteren Stoffabdeckungen des<br />
Tieftongehäuses gemäß der Abbildung<br />
vorne zuerst in die Aussparungen ein,<br />
dann hinten.<br />
So muß die Stoffabdeckung anschließend<br />
sitzen. Gehen Sie entsprechend auf<br />
beiden Seiten beider Lautsprecher vor.<br />
Setzen Sie nun auf beiden Seiten beider<br />
KRONOS die Mitteltonabdeckung ein.<br />
Deren Kontur und Schräge ist so<br />
gestaltet, dass sie immer nur auf eine<br />
Seite passen. Nehmen Sie sich dazu<br />
etwas Zeit, um die Zuordnung heraus zu<br />
finden. Das Einsetzen ist ohne Gewalt<br />
möglich. Wenn eine Bespannung sich<br />
nicht mühelos einsetzen lassen sollte,<br />
zeigt das an, dass für diesen Platz eine<br />
andere Bespannung vorgesehen ist.<br />
Anschließend brauchen Sie nur noch die<br />
hölzerne Deckplatte aufzusetzen und<br />
auszurichten. Sie liegt auf<br />
Neoprenstreifen und bleibt durch ihr<br />
eigenes Gewicht in Position. Ihre KRONOS<br />
sehen nun so aus, wie wir sie gestaltet<br />
haben, aber Sie können sie freilich auch<br />
ohne Stoffabdeckungen betreiben.<br />
9<br />
Now you have completed the basic setup<br />
of your KRONOS. We recommend that<br />
you now concentrate on fine-tuning and<br />
precisely adjusting the loudspeakers to<br />
the features of your listening room<br />
allowing them to release their full<br />
potential.<br />
You can add visual appeal to your<br />
KRONOS by attaching the grille cloths to<br />
the woofer units as shown in the illustration.<br />
Gently guide the grille locator pins<br />
into the grille holes being careful that<br />
you first align the front pins with the<br />
grille holes in the woofer units and then<br />
the back pins.<br />
This illustration shows the correctly attached<br />
grille cloth. Follow the same steps<br />
when attaching the other grille cloths to<br />
the sides of the two loudspeakers.<br />
Now attach the grille cloths to the midrange<br />
units of both KRONOS loudspeakers. Due to<br />
the shape and slant of the grilles it is only<br />
possible to align them to one particular<br />
side. We recommend therefore that you take<br />
some time to select the right grille cloth for<br />
the respective side. Be careful not to apply<br />
undue force when aligning them. If the<br />
grille locator pins cannot be gently guided<br />
into the grille holes, you have selected the<br />
wrong grille cloth.<br />
To finish the setup procedure you are<br />
now required to mount and adjust the<br />
wooden cover plate which is fitted with<br />
neoprene and remains in place under its<br />
own weight. Now your KRONOS look as<br />
elegant and refined as we designed them.<br />
However, if you favor the more high-tech<br />
look of loudspeakers, you can also operate<br />
them without grille covers.
Störung:<br />
KRONOS schaltet nicht ein.<br />
Ursache:<br />
a) KRONOS bekommt keinen Strom;<br />
b) Netzsicherung durchgebrannt.<br />
Abhilfe:<br />
a) Netzkabel auf richtigen Anschluss überprüfen.<br />
Netzsteckdose auf Funktionsfähigkeit überprüfen<br />
(anderes Gerät an die Netzsteckdose anschließen),<br />
gegebenenfalls andere Netzsteckdose benutzen.<br />
b) Bitte wenden Sie sich an einen autorisierten <strong>Audio</strong><br />
<strong>Physic</strong> Fachhändler.<br />
Störung:<br />
Strom vorhanden, aber kein Ton im Bass.<br />
Ursache:<br />
a) Übertemperatursicherung hat angesprochen;<br />
b) sonstiger Defekt.<br />
Abhilfe:<br />
a) KRONOS ausschalten und nach ausreichender<br />
Abkühlung wieder einschalten. Überprüfen Sie, ob<br />
ausreichende Belüftung sichergestellt ist (siehe<br />
auch Kapitel 2 Aufstellung).<br />
b) Bitte wenden Sie sich an einen autorisierten <strong>Audio</strong><br />
<strong>Physic</strong> Fachhändler.<br />
Störung:<br />
Abbildung diffus, wenig Basswiedergabe.<br />
Ursache:<br />
Polarität der beiden Kabeladern eines Kanals<br />
entweder am Verstärkerausgang oder an den<br />
Eingangsklemmen desKRONOS vertauscht.<br />
Abhilfe:<br />
Überprüfen Sie nochmals beide<br />
Kabelverbindungen zwischen Verstärker und<br />
Lautsprecher und stellen Sie sicher, dass die<br />
Farbmarkierungen bzw. Kennzeichnungen für "+"<br />
und "–" an beiden Kabelenden mit den korrespondierenden<br />
Anschlussklemmen verbunden<br />
sind.<br />
Sonstige Störung.<br />
Abhilfe:<br />
3. Funktionsstörung 3. Troubleshooting<br />
Bitte wenden Sie sich an einen autorisierten <strong>Audio</strong><br />
<strong>Physic</strong> Fachhändler.<br />
Händler in Ihrer Nähe finden Sie unter:<br />
www.audiophysic.de/kontakt/index.html<br />
10<br />
Problem:<br />
KRONOS does not switch on.<br />
Cause:<br />
a) Power failure.<br />
b) F use has blown.<br />
Solution:<br />
a) Check power supply cord for correct connection.<br />
Check the AC outlet (try another electrical appliance).<br />
Use another outlet, if necessary.<br />
b) Please contact an authorized <strong>Audio</strong> <strong>Physic</strong> dealer.<br />
Problem:<br />
Power available, but no woofer sound.<br />
Cause:<br />
a) Safety heat fuse has blown.<br />
b) Other defects.<br />
Solution:<br />
a) Switch off the KRONOS, allow the loudspeakers to<br />
cool down, and then switch them on again. Make<br />
sure the location of the KRONOS allows for sufficient<br />
air exchange in order to cool down (see<br />
chapter 2 Setup).<br />
b) Please contact an authorized <strong>Audio</strong> <strong>Physic</strong> dealer.<br />
Problem:<br />
Poor image, weak bass.<br />
Cause:<br />
The polarity of the two cables of a channel is<br />
reversed either at the amplifier outputs or loud<br />
speaker inputs.<br />
Solution:<br />
Check both cables again between the amplifier<br />
and loudspeakers and make sure you have connected<br />
the cable ends labeled "+” and "-" correctly<br />
to the corresponding input terminals.<br />
Other faults or defects.<br />
Solution:<br />
Please contact an authorized <strong>Audio</strong> <strong>Physic</strong> dealer.<br />
A list of authorized <strong>Audio</strong> <strong>Physic</strong> dealers<br />
and distributors is available under<br />
www.audiophysic.de/kontakt/index.html
Pflege, Wartung, technische Daten Maintenance, Service, Technical Data<br />
4. Pflege<br />
Ziehen Sie vor Reinigungsarbeiten am KRONOS bitte den<br />
Netzstecker des KRONOS aus der Steckdose und schalten<br />
Sie Ihren angeschlossenen Verstärker oder Mehrkanal-<br />
Decoder aus.<br />
Zur Reinigung des KRONOS verwenden Sie bitte einen<br />
weichen, sauberen Lappen, der mit einer milden<br />
Seifenwasserlösung angefeuchtet (aber nicht nass!) ist.<br />
Entfernen Sie anschließend Feuchtigkeitsreste mit einem<br />
weichen, sauberen und trockenen Tuch. Verwenden Sie<br />
zur Reinigung niemals chemisch aggressive Flüssigkeiten<br />
wie zum Beispiel Alkohol, Lösungsmittel, Farbverdünner<br />
oder Reinigungsbenzin!<br />
Achten Sie darauf, dass keine Flüssigkeiten in den<br />
KRONOS eindringen!<br />
5. Wartung<br />
Ihr <strong>Audio</strong> <strong>Physic</strong> KRONOS-Lautsprecher enthält keine<br />
Teile, die Sie selbst warten können. Er darf daher von<br />
Ihnen nicht geöffnet werden.<br />
Wenden Sie sich bitte an Ihren autorisierten <strong>Audio</strong> <strong>Physic</strong><br />
Vertragshändler, wenn eine der folgenden Beschädigungen<br />
auftreten sollte:<br />
• wenn Netzkabel oder Netzstecker beschädigt<br />
sind;<br />
• wenn Gegenstände oder Flüssigkeiten in den<br />
KRONOS gelangt sind;<br />
• wenn Ihr KRONOS übermäßiger Feuchtigkeit<br />
aus gesetzt wurde;<br />
• wenn Ihr KRONOS mechanisch stark belastet<br />
(zum Beispiel fallen gelassen) oder mechanisch<br />
beschädigt wurde.<br />
6. Technische Daten<br />
Höhe: 1300 mm<br />
Breite: 360 mm<br />
Tiefe: 600 mm<br />
Gewicht: 120 kg<br />
Empfindlichkeit: 91 dB bei 1 Watt / 1 Meter<br />
Impedanz 4 Ohm<br />
Leistungsaufnahme: 15 W (Standby)<br />
1000 W (Vollast)<br />
Netzspannung: 100 / 115 / 230 V / 50 - 60 Hz<br />
entsprechend der Angabe auf dem Typenschild<br />
© <strong>Audio</strong> <strong>Physic</strong>. Alle Rechte vorbehalten.<br />
11<br />
4. Maintenance<br />
Before cleaning the KRONOS, unplug it from the AC outlet<br />
and switch off all other equipment (e.g. amplifier or<br />
multi-channel decoder).<br />
Only use a soft, clean cloth, moistened with a mild soap<br />
solution (but not wet!) to clean your loudspeakers.<br />
Remove residual moisture with a soft, clean, dry cloth.<br />
Never use chemically aggressive liquids such as alcohol,<br />
solvents, diluting agents or petrol to clean your KRONOS.<br />
Make sure that no liquid is spilt on your KRONOS<br />
5. Service<br />
There are no user-serviceable parts inside your <strong>Audio</strong><br />
<strong>Physic</strong> KRONOS loudspeakers. Do not open the loudspeakers<br />
or attempt to service this product yourself.<br />
If one of the following conditions occurs, please refer<br />
servicing to your authorized <strong>Audio</strong> <strong>Physic</strong> dealer:<br />
• The power supply cord or plug is damaged.<br />
• Objects have fallen into the KRONOS or liquid<br />
has been spilled on the loudspeakers.<br />
• Your KRONOS has been exposed to extensive<br />
moisture.<br />
• Your KRONOS has been exposed to strong<br />
mechanical pressure, or it has been dropped or<br />
mechanically damaged in any way<br />
6. Technical Data<br />
Height: 51” (1,300 mm)<br />
Width: 14” (360 mm)<br />
Depth: 24” (600 mm)<br />
Weight: 265 lbs. (120 kg)<br />
Sensitivity: 91 dB at 1 W / 1 meter<br />
Input impedance 4 ohms<br />
Power: 15 W (standby)<br />
1000 W (full load)<br />
Mains voltage: 100 / 115 / 230 V / 50 - 60 Hz<br />
as specified on the name plate<br />
© <strong>Audio</strong> <strong>Physic</strong>. All rights reserved.
<strong>Audio</strong> <strong>Physic</strong> GmbH • Almerfeldweg 38 • 59929 Brilon<br />
Tel: ++ 49 (0) 29 61 - 961 70 • Fax:++ 49 (0) 29 61 -516 40 • E-Mail: info@audiophysic.de<br />
www.audiophysic.de