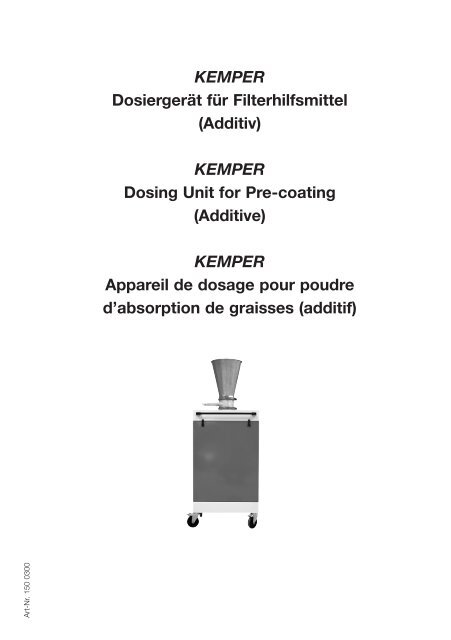
(Additiv) KEMPER Dosing Unit for Pre-coating (Additive)
(Additiv) KEMPER Dosing Unit for Pre-coating (Additive)
(Additiv) KEMPER Dosing Unit for Pre-coating (Additive)

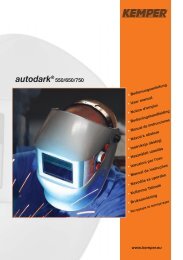
Sie wollen auch ein ePaper? Erhöhen Sie die Reichweite Ihrer Titel.
YUMPU macht aus Druck-PDFs automatisch weboptimierte ePaper, die Google liebt.
Art-Nr. 150 0300<br />
<strong>KEMPER</strong><br />
Dosiergerät für Filterhilfsmittel<br />
(<strong>Additiv</strong>)<br />
<strong>KEMPER</strong><br />
<strong>Dosing</strong> <strong>Unit</strong> <strong>for</strong> <strong>Pre</strong>-<strong>coating</strong><br />
(<strong>Additiv</strong>e)<br />
<strong>KEMPER</strong><br />
Appareil de dosage pour poudre<br />
d’absorption de graisses (additif)
A. Bedienunsanleitung ......................…….… 2 - 5<br />
B. User Manual …......…….............................. 6 - 9<br />
C. Notice d’emploi ….................................. 10 - 13<br />
1
A. Verwendung und Wirkungsweise<br />
Für die Abscheidung einzelner problembehafteter Stäube und Rauche kann es sinnvoll sein,<br />
der abgesaugten Luft nach jeder Abreinigung ein Filterhilfsmittel vom Typ DCH 100<br />
beizugeben.<br />
Das Filterhilfsmittel bildet auf der Oberfläche der Filterpatronen eine Schicht und trägt so zur<br />
Filterung z.B. ölhaltiger oder klebriger Schweißrauche bei. Feinster Ölnebel wird aufgesaugt<br />
und klebrige Partikel werden von der eigentlichen Filteroberfläche ferngehalten.<br />
Der sich bildende Staubkuchen bleibt luftdurchlässig und lässt sich bei Erreichen<br />
des vorgegebenen Differenzdruckes gut abreinigen.<br />
Bei dem <strong>KEMPER</strong> - Dosiergerät wird das Filterhilfsmittel über eine Injektordüse mittels<br />
Druckluft (4-6 bar) zudosiert. Über ein Magnetventil wird dieser Vorgang von der Steuerung<br />
der Absaug- und Filteranlage ausgelöst. Um ein gleichmäßiges nachrutschen des Filterhilfsmittels<br />
zu gewährleisten ist das Geräte mit einer Rüttelvorrichtung ausgerüstet.<br />
In dem Druckluftstrahl wird das mitgerissene Filterhilfsmittel fein zerstäubt und über einen<br />
Schlauch in den Ansaugbereich der Filteranlage geblasen. Auf diese Weise gelangt das<br />
Filterhilfsmittel fein verteilt auf die Oberfläche der Filterpatronen und somit genau dorthin,<br />
wohin auch die Schadstoffe gelangen und können sich so optimal mit ihnen mischen.<br />
Achtung!<br />
• Wird ein bestimmter Füllstand des Filterhilfsmittels unterschritten<br />
wird dieses durch ein akustisches Signal mitgeteilt.<br />
• Bei nicht ausreichendem Pulvervorrat müssen Sie unverzüglich<br />
das Dosiergerät wieder befüllen.<br />
Mittels des <strong>KEMPER</strong> – Dosiergerätes wird eine automatische, diskontinuierliche Zugabe<br />
des Filterhilfsmittels erreicht.<br />
Eine Zugabe des Filterhilfsmittels erfolgt<br />
• kurz nach dem Einschalten der Filteranlage (da nach dem Ausschalten eine automatische<br />
Abreinigung der Filterpatronen stattgefunden hat und es somit keine Schutzschicht aus<br />
Filterhilfsmittel mehr auf den Filterpatronen gibt).<br />
• nach jeder Abreinigung der Filterpatronen während des Betriebes, um eine neue<br />
Schutzschicht aufzubringen.<br />
• nach einer gewissen Betriebsdauer, um eine Sättigung des Filterhilfsmittels<br />
mit den problematischen Stäuben und Rauchen zu vermeiden.<br />
Die so erfassten Schadstoffe gelangen mit dem Luftstrom über eine Rohrleitung zur<br />
Absaug- und Filteranlage.<br />
Hinweis:<br />
Da das Filterhilfsmittel DCH 100 stark hygroskopisch ist, muss es unbedingt trocken<br />
gelagert werden. Das Dosiergerät ist nur für Innenaufstellung geeignet. Während längerer<br />
Betriebspausen (z.b. Betriebsurlaub) sollte das Filterhilfsmittel aus dem Dosiergerät<br />
entnommen werden.<br />
2
B. Anschluss und Inbetriebnahme des Dosiergerätes<br />
• Montieren Sie die mitgelieferte Schlauchtülle (2) an das Übergangsstück<br />
bzw. an den Anschlusskasten (1) auf der Rohluftseite der Filteranlage.<br />
• Verbinden Sie den Schlauchanschluss (3) des Dosiergerätes mit der zuvor<br />
montierten Schlauchtülle (2) und dem mitgelieferten Schlauch (4).<br />
• Schließen Sie die Druckluftversorgung (4-6 bar) an das Dosiergerät (5) an.<br />
• Stecken Sie das Steuerkabel (6) von dem Dosiergerät in die passende Buchse (7)<br />
der Filteranlage.<br />
• Öffnen Sie den Gehäusedeckel des Dosiergerätes und befüllen Sie es mit dem<br />
Filterhilfsmittel (Art.-Nr.: 10 902 75). Beim Befüllen sollten Schutzhandschuhe und<br />
eine Staubschutzmaske getragen werden (beachten Sie auch die Hinweise<br />
auf der Verpackung des Filterhilfsmittels).<br />
• Die Filteranlage mit Dosiergerät ist nun Betriebsbereit.<br />
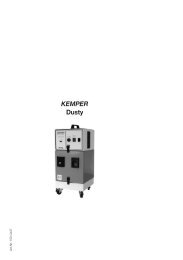
Dosiergerät<br />
Hinweis:<br />
Es ist zwingend er<strong>for</strong>derlich die Filteranlage mit Filterhilfsmittel zu betreiben, daher sollten<br />
Sie ausreichende Mengen vom Filterhilfsmittel (Art.-Nr.: 1090275) bevorraten.<br />
Ein Betreiben der Filteranlage ohne Filterhilfsmittel führt zu Defekten an den Filterpatronen.<br />
Bei einigen Schweißverfahren ist es notwendig die Filterpatronen mit einem Vorbeschichtungsmittel<br />
zu imprägnieren. Dieses Vorbeschichtungmittel muss auf der Filterpatrone verdichtet werden, daher<br />
kann es vorkommen, dass bei der Filteranlage in den ersten Betriebstagen keine Abreinigungen<br />
ausgelöst werden.<br />
3<br />
6<br />
7<br />
Absaug- und Filteranlage
C. Befüllen des Dosiergerätes<br />
• Öffnen Sie den unteren Schnellspannverschluss des Einfülltrichters<br />
und nehmen Sie den gesamten Trichter von dem Dosiergerät.<br />
• Öffnen Sie den Behälter des neuen Filterhilfsmittels durch Öffnen<br />
des Schnellspannverschlusses.<br />
• Schließen Sie den Absperrschieber des Trichters und setzten den Trichter<br />
umgedreht auf den Behälter mit dem Filterhilfsmittel.<br />
• Mit dem Schnellspannverschluss befestigen Sie den Trichter dicht<br />
an dem geöffneten Behälter, so dass kein Pulver entweichen kann.<br />
• Setzten Sie nun den gesamten Trichter mit befestigtem Behälter wieder<br />
auf das Dosiergerät und befestigen Sie ihn mit dem Schnellspannverschluss.<br />
• Öffnen Sie nun den Absperrschieber und stellen Sie durch leichtes Klopfen an den Trichter<br />
sicher, dass das gesamte Filterhilfsmittel in das Dosiergerät gelangt.<br />
• Danach können Sie den Behälter durch Öffnen des Schnellspannverschlusses<br />
wieder abnehmen und den Absperrschieber schließen.<br />
• Das Dosiergerät ist wieder betriebsbereit.<br />
D. Sicherheitshinweise<br />
4
E. Bei einigen Filteranlage ist eine einmalige Vorbehandlung der<br />
Filterpatronen notwendig! (Nur bei Filterpatronen ohne PTFE-Membran)<br />
Bei einigen Filterpatronen ist eine einmalige Vorbehandlung er<strong>for</strong>derlich.<br />
Bei diesen Filterpatronen muss das Mittel als erstes auf die noch neuen Filterpatronen<br />
aufgebracht und verdichtet werden.<br />
Dafür wird der Beutel mit dem Vorbeschichtungsmittel noch vor dem Anschließen der Saugrohrleitung<br />
bei laufender Filteranlage vor die Ansaugöffnung gehalten und so das Pulver eingesaut.<br />
Mit dem Luftstrom gelangt es dann auf die Filteroberfläche.<br />
Die benötigte Menge des Vorbeschichtungsmittels errechnet sich anhand der Filterfläche<br />
der eingesetzten Filterpatronen. Je m 2 Filterfläche benötigen Sie 10 g <strong>Pre</strong>-Coat-Mittel.<br />
Somit benötigen Sie für eine 12 m 2 Filterpatrone 120 g <strong>Pre</strong> Coat-Mittel.<br />
Die entsprechende Filterfläche entnehmen Sie bitte der Bedienungsanleitung Ihrer <strong>KEMPER</strong><br />
Absaug- und Filteranlage. Nach erfolgter Beschichtung bitte die Filteranlage ca. 2 min.<br />
eingeschaltet lassen.<br />
Schalten Sie die Filteranlage nun wieder aus und verbinden nun wieder die Saugrohrleitung<br />
mit dem Ansaugstutzen der Filteranlage. Die Filteranlage ist nun betriebsbereit.<br />
Achtung: Ein Betreiben der Filteranlage ohne Vorbeschichtungsmittel<br />
führt zu Defekten an den Filterpatronen!<br />
F. Liste der Verbrauchsmaterialien<br />
Pos.<br />
1<br />
Bezeichnung<br />
Filterhilfsmittel DCH 100<br />
5<br />
Artikel-Nr.<br />
109 0275
A. Application and Mode of Operation<br />
We recommend to add pre-<strong>coating</strong> power type DCH 100 to the extracted air after each<br />
cleaning cycle, this in particular to clean the filter cartridges from problematic oil-containing<br />
dusts and fumes.<br />
The pre-<strong>coating</strong> powder creates a layer on the surface of the filter cartridges and this is<br />
helpful during filtering of welding smoke containing oil or adhesives. Superfine oilmist is<br />
absorbed and adhesive particles are held back from real filter surface itself.<br />
The air can pass unhindered through this layer which is generated by the powder.<br />
Furthermore the filter cartridge can be cleaned very easily as soon as a particular<br />
differential pressure has been reached.<br />
The <strong>KEMPER</strong> dosing unit is adding the pre-<strong>coating</strong> powder by a compressed air blow out<br />
(4 - 6 bar) of an injector nozzle. This procedure will be actuated by the control unit in the<br />
extraction and filter unit. The unit is equipped with a joggle device to ensure an even slipping<br />
of the pre-<strong>coating</strong> powder. The pre-<strong>coating</strong> powder is pulverized by the compressed air blow<br />
and is blown into the extraction part of the unit via a hose. The powder is dispersed on the<br />
surface of the filter cartridges, exactly to the place where also harmful substances are lead to.<br />
The powder and the harmful substances can mix optimal.<br />
Attention!<br />
• The unit indicates by an acoustic signal if a certain liquid level<br />
of the filter pre-<strong>coating</strong> powder is underrun.<br />
• The dosing unit has to be refilled if the powder supply is not sufficient.<br />
You can achieve an automated and discontinous adding of the pre-<strong>coating</strong> powder<br />
by the <strong>KEMPER</strong> dosing unit.<br />
Adding of the pre-<strong>coating</strong> powder is done:<br />
• shortly after switching on of the filter unit (because an automatic cleaning cycle has been<br />
done after switching off the unit and there is no protection layer of pre-<strong>coating</strong> powder on<br />
the filter cartridges any more.)<br />
• after each cleaning cycle of the filter cartridges during operation, in order to generate<br />
a new protection layer.<br />
• after a certain period of operation, in order to avoid a saturation of the pre-<strong>coating</strong><br />
powder with problematic dusts and smokes.<br />
Together with the air stream the hazardous substances are lead via a ducting into the<br />
extraction and filter unit.<br />
In<strong>for</strong>mation:<br />
The pre-<strong>coating</strong> DCH 100 is highly hygroscopic and it is essential to keep this powder dry.<br />
The dosing unit may only be installed inside a building. Furthermore the pre-<strong>coating</strong> powder<br />
should be taken out of the dosing unit during longer periods of non-operation<br />
(e.g. during plant holidays).<br />
6
B. Installation and Start of Operation of the <strong>Dosing</strong> <strong>Unit</strong><br />
• Station the dosing unit as close to the filter unit as possible.<br />
Mount the included hose nozzle (2) to the transition piece or the connection box (1)<br />
on the air inlet side of the filter unit.<br />
• Connect the coupler of the hose (3) of the dosing unit with the hose nozzle (2)<br />
via the included hose (4).<br />
• Connect the compressed air supply (4-6 bar) to the dosing unit (5).<br />
• Plug the control cable (6) of the dosing unit into the adequate jack of the filter unit.<br />
• Open the lid of the housing of the dosing unit and fill in the pre-<strong>coating</strong> powder<br />
(part no.: 1090275). Protective gloves and a protection mask should be worn during<br />
loading of the unit (please see also in<strong>for</strong>mation on the packing of the pre-<strong>coating</strong> powder)<br />
• The filter unit with the dosing unit is now ready <strong>for</strong> operation.<br />
<strong>Dosing</strong> unit<br />
In<strong>for</strong>mation:<br />
It is obligatory to run the filter unit together with pre-<strong>coating</strong> powder.<br />
For this reason you should store sufficient pre-<strong>coating</strong> powder (part no.: 1090275).<br />
Using the filter unit without pre-<strong>coating</strong> can cause damages to the filter cartridges.<br />
For some welding techniques it is necessary to impregnate the filter cartridges with a pre<strong>coating</strong><br />
powder. This powder has to be compressed on the filter cartridge and it can happen that the<br />
filter unit does not clean automatically during the first days of operation.<br />
7<br />
6<br />
7<br />
Extraction and filter unit
C. Charging of the <strong>Dosing</strong> <strong>Unit</strong><br />
• Loosen the lower toggle tip fastener at the funnel tube<br />
and take the complete funnel tube off the dosing unit.<br />
• Open the new container with pre<strong>coating</strong> powder by taking off the toggle tip fastener.<br />
• Lock the slide valve of the funnel tube and put the funnel tube upside down onto the<br />
container with pre-<strong>coating</strong> powder.<br />
• Fasten the funnel tube with the toggle tip to the open container to prevent any<br />
escaping of the powder.<br />
• Put the complete funnel tube together with the container back onto the dosing unit<br />
and fasten it with the toggle tip fastener.<br />
• Open the slide valve and let all the powder fall into the dosing unit by thumping<br />
onto the funnel tube.<br />
• After this you can take off the container by opening the toggle tip fastener<br />
and lock the slide valve.<br />
• The dosing unit is ready <strong>for</strong> operation again.<br />
D. Safety instructions<br />
8
E. <strong>Pre</strong>-treatment<br />
For some filter units a one-time pre-treatment of the filter cartridges is necessary!<br />
(Only <strong>for</strong> filter cartridges without PTFE membrane)<br />
For some cartridges units a one-time pre-treatment of the filter cartridges is necessary!<br />
The powder has to be superimposed onto the new filter material <strong>for</strong> these filter cartridges<br />
and also to be compressed. You have to hold the bag with the pre<strong>coating</strong> powder to the<br />
extraction opening to extract the powder into the unit. This has to be done during operation<br />
of the machine but be<strong>for</strong>e the suction ducting has been connected.<br />
Together with the air stream the powder gets onto the filter surface.<br />
The volume of pre<strong>coating</strong> powder which is necessary can be determined according to the<br />
filter surface of the filter cartridges inside the unit. Per mÇ filter surface you will need 10 g<br />
pre<strong>coating</strong> powder. For a filter cartridge with 12 m 2 surface you will need 120 gr <strong>for</strong> example.<br />
For the filter surface of your <strong>KEMPER</strong> extraction and filter unit, please refer to the installation<br />
and operation manual of the unit. Please leave the unit in operation <strong>for</strong> approximately 2 min.<br />
after the powder has been superimposed.<br />
You can switch off the machine then and connect the suction ducting with the inlet<br />
connection of the filter unit. The unit is ready <strong>for</strong> operation now.<br />
Attention: An operation of the filter unit without adding pre<strong>coating</strong> powder<br />
can result in damages to the filter cartridges.<br />
F. List of spare parts<br />
Pos.<br />
1<br />
Description<br />
<strong>Pre</strong>-<strong>coating</strong> powder<br />
9<br />
Part no.<br />
109 0275
A. Principe d’utilisation et de fonctionnement<br />
Pour la séparation de poussières et fumées particulièrement colmatantes, il est utile<br />
d’injecteur, après chaque décolmatage, une poudre absorbante de type DCH 100.<br />
Cette poudre <strong>for</strong>me une fine pellicule sur les cartouches qui absorbe les graisses et autres<br />
matières collantes, en protégeant le média filtrant tout en assurant le passage d’air. Ce<br />
mélange de poudre et de poussières se laisse facilement décolmater.<br />
Sur l’appareil de dosage Kemper la poudre est injectée par air comprimé (4-6 bar) via une<br />
électrovanne activée par le terminal de commande de la centrale d’aspiration .Pour assurer un<br />
flux régulier de poudre dans la trémie, l’appareil est pourvu d’un système de vibration.<br />
La poudre, propulsée par le jet d’air comprimé est injectée dans la centrale par le biais<br />
d’un tuyau flexible. De cette façon, la poudre se répartie de façon homogène sur la surface<br />
des cartouches et se mélange aux polluants à absorber. Un signal acoustique prévient quand<br />
le niveau minium de poudre est atteint dans l’appareil.<br />
L’appareil de dosage Kemper garantit une adjonction automatique de poudre.<br />
Une insufflation de poudre parvient:<br />
• Dès la mise en route de la centrale (étant donné qu’un décolmatage a été effectué à l’arrêt<br />
de la centrale, et que les cartouches ne sont donc plus garnies de poudre).<br />
• Après chaque décolmatage durant le fonctionnement de la centrale pour renouveler la<br />
pellicule de protection.<br />
Nota :<br />
La poudre DCH 100 étant <strong>for</strong>tement hygroscopique, il faut la stocker dans un endroit<br />
sec. L’appareil de dosage sera implanté uniquement à l’intérieur des locaux.<br />
Pendant un arrêt prolongé (par ex. congés) la poudre devrait être retirée de l’appareil.<br />
10
B. Raccordement et fonctionnement de l’appareil de dosage<br />
• Positionner l’appareil de dosage le plus près possible de la centrale de filtration.<br />
• Monter le raccord (2) fourni sur la pièce de trans<strong>for</strong>mation ou au caisson d’aspiration (1)<br />
côté entrée du filtre<br />
• A l’aide du tuyau, relier le raccord de tuyau (3) de l’appareil de dosage au raccord (2) mis<br />
en place précédemment.<br />
• Brancher l’alimentation en air comprimé (4-6 bar) à l’appareil de dosage (5)<br />
• Brancher le câble de commande (6) de l’appareil de dosage sur la prise correspondante (7)<br />
de la centrale d’aspiration<br />
• Ouvrir le couvercle de l’appareil de dosage. Remplir l’appareil de poudre (art. 1090275).<br />
Lors du remplissage, il est impératif de porter des gants de protection et un masque<br />
antipoussières (tenir compte des indications portées sur l’emballage de la poudre)<br />
• L’installation est prête à fonctionner.<br />
Appareil de dosage<br />
Remarque :<br />
Il est absolument nécessaire de toujours faire fonctionner le filtre avec la poudre.<br />
Il faut donc prévoir un stock suffisant de poudre (Art. 1090275)<br />
Le fonctionnement de l’installation sans cette poudre détériore les cartouches !<br />
Lors de certaines opérations de soudage il est nécessaire d’imprégner les cartouches avec un<br />
revêtement préliminaire. Ce revêtement n’est effectué que lors de la première mise en service<br />
des cartouches. Ensuite, après chqaue décolmatage sera insufflée la poudre absorbante DCH 100.<br />
11<br />
6<br />
7<br />
Centrale de filtration
C. Remplissage du doseur<br />
• Retirer l'entonnoir de remplissage de l'appareil en ôtant la bride à fermeture rapide<br />
• Ouvrir le seau de poudre de rechange<br />
• Fermer le glissoir coulissant de l'entonnoir et poser l'entonnoir à l'envers sur le seau<br />
• A l'aide de la bride à fermeture rapide vous fixez l'entonnoir de façon étanche sur le seau<br />
ouvert, de façon à éviter la dispersion de la poudre lors du transfert<br />
• Reposer maintenant l'entonnoir complet avec le seau sur le doseur et fixer le l'aide de la<br />
bride à fermeture rapide<br />
• Ouvrir le glissoir coulissant pour le transfert de la poudre dans le doseur (tapoter l'entonnoir<br />
pour garantir l'écoulement de la totalité de la poudre)<br />
• Retirer le seau en ouvrant la bride à fermeture rapide et refermer le glissoir<br />
• Le doseur est à nouveau prêt à fonctionner<br />
D. Consignes de sécurité<br />
12
E. Sur certaines centrales de filtration une imprégnation préliminaire des<br />
cartouches est nécessaire<br />
Sur certaines centrales une imprégnation préliminaire des cartouches est nécessaire<br />
La poudre de préimprégnation doit être apposée sur les cartouches neuves pour les étancher<br />
Pour ce, le sac contenant la poudre doit être positionné devant l'ouverture d'aspiration de la centrale<br />
en marche, avant même la fixation de l'élément d'aspiration (tuyauterie etc...), pour qu'elle soit<br />
aspirée et ainsi parvenir sur la surface des cartouches.<br />
La quantité nécessaire de poudre de préimprégnation est calculée en fonction de la surface de<br />
filtration. Vous nécessitez 10 gr/m 2 de poudre <strong>Pre</strong> Coat.<br />
Pour une cartouche d'une surface de 12 m 2 il vous faut donc 120 gr de poudre de préimprégnation.<br />
Vous trouverez les indications sur les surfaces de filtration dans les notices de montage des centrales<br />
d'aspiration et de filtration.<br />
Après la préimprégnation, il faut laisser tourner la centrale encore pendant 2 minutes env.<br />
Arrêter ensuite la centrale et brancher la tuyauterie d'aspiration sur le manchon de la centrale.<br />
L'installation est maintenant prête à l'utilisation.<br />
ATTENTION: Le fonctionnement de l'installation sans cette poudre détériore les cartouches!<br />
F. Liste des consommables<br />
Pos.<br />
1<br />
Désignation<br />
Poudre absorbante DCH 100<br />
13<br />
Réf.<br />
109 0275