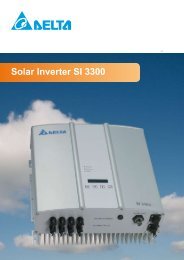
Solar Inverter SI 3300 - ET SolarPower GmbH
Solar Inverter SI 3300 - ET SolarPower GmbH
Solar Inverter SI 3300 - ET SolarPower GmbH

Sie wollen auch ein ePaper? Erhöhen Sie die Reichweite Ihrer Titel.
YUMPU macht aus Druck-PDFs automatisch weboptimierte ePaper, die Google liebt.
8 Diagnostics and data evaluation<br />
8.1 Malfunction rectification<br />
The solar inverter is provided with an automatic diagnostics system which independently identifies<br />
certain faults and which can make them visible externally on the display.<br />
Troubleshooting in the field<br />
In principle, it is always worth attempting a reset by reinitialising the solar inverter whenever an error<br />
message appears on the display.<br />
To reset the device, proceed as follows:<br />
1. Isolate the solar inverter from the mains (open automatic cutouts).<br />
2. Switch off DC main switch.<br />
3. Wait time: approx. 1 minute.<br />
4. Switch DC main switch back on.<br />
5. Switch in mains (close automatic cutouts).<br />
(In the field, the first step is to scan for potential fault causes that could be picked up by the solar<br />
inverter and result in tripping.)<br />
Various key parameters can be scanned via the display, thereby enabling conclusions to be drawn<br />
about potential fault causes.<br />
Current values in the N menu<br />
AC Voltage -> Display of current output voltage -> Voltage limiting values<br />
AC Frequency -> Display of current mains frequency -> Frequency limiting values<br />
<strong>Solar</strong> Voltage -> Display of current solar cell voltage -> Switch-in threshold<br />
8.2 Display messages<br />
LED Status<br />
Display<br />
message<br />
Cause<br />
Elimination<br />
green: <br />
red: <br />
yellow: <br />
-<br />
Display communication<br />
faulty.<br />
- If the fault persists after the device has<br />
been reset, please inform your service<br />
technician.<br />
green: <br />
red: <br />
yellow: <br />
AC frequency<br />
failure<br />
Mains frequency overshooting<br />
or undershooting<br />
specified limit range.<br />
- Check the mains frequency via the<br />
display in the N menu.<br />
green: <br />
red: <br />
yellow: <br />
AC voltage<br />
failure<br />
Mains voltage overshooting<br />
or undershooting<br />
specified limit range.<br />
- Check the mains voltage via the display in<br />
the N menu.<br />
- If no voltage present, check mains automatic<br />
cutouts.<br />
green: <br />
red: <br />
yellow: <br />
AC relay<br />
failure<br />
One of the ENS output<br />
relays is faulty / defective.<br />
- The solar inverter is defective.<br />
- Return the device.<br />
green: <br />
red: <br />
yellow: <br />
Calibration<br />
ongoing<br />
Check of internal settings.<br />
Normal function before input mode.<br />
green: <br />
red: <br />
yellow: <br />
DC injection<br />
failure<br />
DC component of inputside<br />
alternating current is<br />
too high.<br />
- If the fault persists after the device has<br />
been reset, please inform your service<br />
technician.<br />
20