ZE-NC2011D - Zenec
ZE-NC2011D - Zenec
ZE-NC2011D - Zenec

Erfolgreiche ePaper selbst erstellen
Machen Sie aus Ihren PDF Publikationen ein blätterbares Flipbook mit unserer einzigartigen Google optimierten e-Paper Software.
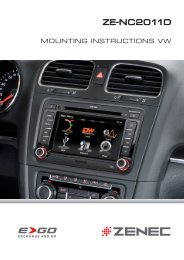
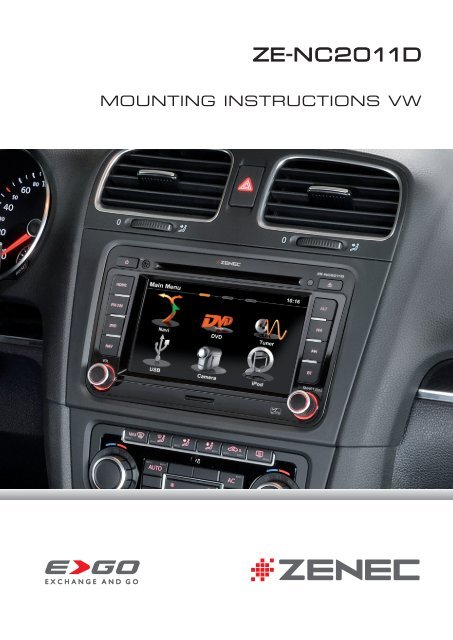
<strong>ZE</strong>-N C 2 011DMOUNTING INSTRUCTIONS VW
1Montage:1Bevor Sie sich an den Ausbaudes VW Originalgerätes machen,bereiten Sie das <strong>ZE</strong>-<strong>NC2011D</strong> fürden Anschluss vor. VerbindenSie das Hauptanschlusskabelim Lieferumfang wie imAnschlussdiagramm zu sehen mitdem <strong>ZE</strong>-<strong>NC2011D</strong>. Verbinden Sienun den verbleibenden Stecker desHauptanschlusskabels mit demCAN/Stalk Interface.Installation:Before you approach the removalof the OE factory installed device,start by preparing the <strong>ZE</strong>-<strong>NC2011D</strong>for mounting as follows: Connectthe main harness of the set contentto the <strong>ZE</strong>-<strong>NC2011D</strong> as shown in thewiring diagram. Proceed to connectthe appropriate cable end of themain harness to the CAN/Stalkinterface.22Hebeln Sie von rechts beginnendvorsichtig den das Radioumgebenden Plastikrahmen ausseiner gesteckten Verankerung.Für diesen Schritt benötigen Sieein entsprechendes Werkzeugzur Entfernung von Kunststoff-Paneelen.Remove the OE unit: Gently lift thetrim frame starting on the rightside of OE device, using a plasticpanel removal tool. For successfulcompletion of this step, using anappropriate tool is mandatory.33Fahren Sie einmal gegenden Uhrzeigersinn mit demLösewerkzeug um den Rahmen.Der Zierrahmen sollte sich nunvollständig von der Konsole ablösenlassen.Run the tool anticlockwise torelease the whole trim framefrom the console. The trim frameshould detach from the consolecompletely.44Lösen und entfernen Sie dievier Torx-Schrauben vom VWOriginalgerät.Unscrew and remove the four Torxscrews of the original VW radio.55Ziehen Sie das VW Originalgerätlangsam und vorsichtig demSchacht. Stecken Sie alle Kabelan der Gerätrückseite ab. LegenSie das Gerät zur Seite um es vorBeschädigungen zu schützen.Remove the original VW radio unitby pulling it out of the mountingslot. Detach all the cables from thebackside of the OE device. Put theunit aside in a safe place, to protect itfrom damage.Ziehen Sie die Kabel aus demKonsolenschacht, für die nunfolgenden Arbeiten.Pull the cables out of the console,so they are within reach for deviceconnections to be attempted.
66Montieren Sie jetzt die GPSAntenne an geeigneter Stelle(freie Sicht nach oben) undziehen Sie das Antennenkabel inden Schacht. Montieren sie dasexterne Bluetooth Mikrofon, fallserwünscht. Die beste Position isthinter dem Rückspiegel, bzw. hinterdem Steuerrad.Install the GPS antenna in asuitable location underneath thefront window (unobstructed viewup to the sky). Proceed with routingthe antenna cable to the mountingslot. Mount the external Bluetoothmicrophone, if so desired. Idealplaces are behind the rear mirror orbehind the steering wheel.77Stecken Sie den Quadlocksteckervom vorbereiteten <strong>ZE</strong>-<strong>NC2011D</strong> Gerätan das Gegenstück im Fahrzeug anund schliessen Sie die Verriegelung.Verbinden Sie die den Fakrasteckervom GPS Antennenkabel mit demGerät und auch das Kabel vomexternen Mikro, wenn diesesmontiert wurde.Bevor das <strong>ZE</strong>-<strong>NC2011D</strong> in denSchacht geschoben wird, stecken sieden Doppelfakra Antennensteckervom Fahrzeug am Gerät an.Insert the Quadlock plug of the<strong>ZE</strong>-<strong>NC2011D</strong> into the receptor ofthe vehicle and lock it. Connectthe Fakra plug of the GPS antennacable on the backside of thedevice - and do the same with theplug of the external microphone, ifthe external mic has been fitted.Before you can insert the<strong>ZE</strong>-<strong>NC2011D</strong> into the slot, you mustconnect the FM antenna dual Fakraplug to the respective connector ofthe device.88Verstauen Sie die Kabel in denRandbereichen und schiebenSie das <strong>ZE</strong>-<strong>NC2011D</strong> in denSchacht. Vermeiden Sie zuvielmechanischen Druck auf die Front.Es könnten Stecker abbrechenoder Kabel gequetscht werden.Schrauben Sie das <strong>ZE</strong>-<strong>NC2011D</strong>mit den vier Originalschraubenwieder fest.Lay the wires to the side, makingroom for the device. Carefully slidethe <strong>ZE</strong>-<strong>NC2011D</strong> into the bay. Avoidapplying too much mechanicalpressure to prevent shearing ofwires and broken connectors.Fix the the <strong>ZE</strong>-<strong>NC2011D</strong> in place,using the four original Torx screws.99Drücken Sie die Zierblende wiederauf. Der Einbau ist hiermit beendet.Press the trim frame back on.The installation is completed.blblNach beendetem Einbau startenSie den Motor und fahren aus derGarage ins Freie (GPS Antennebraucht „freie Sicht nach oben“).Das <strong>ZE</strong>-<strong>NC2011D</strong> schaltet sich mitder Zündung ein – wechseln Sienun manuell in den Navigationsmodusdurch drücken der NAVtaste und lassen Sie das Gerät ca.3 - 5 Minuten lang den „Sat Fix“erstellen.Solange das Gerät noch Satellitensucht, wird dies über ein Icon mitkreisenden Punkten auf dem Bildschirmdargestellt.Sie können nun das Gerätausschalten, ein Navigationszieleingeben oder aber weitereEinstellungen im Setup Menü nachpersönlichem Wunsch vornehmen.With the installation completed, startthe engine and drive your vehicleout of the garage into open terrain(GPS antenna must have free “sightup to the sky”). The <strong>ZE</strong>-NC2011 willturn on with the ignition – pleaseselect the navigation mode manuallyby pressing the NAV button. Devicenow needs 3 to 5 minutes to create“Sat Fix”.As long as the device is searching forGPS satellites, you can see a smallicon with rotating dots on the screen.You can turn your device off, entera destination or continue to setfunctions according to personalpreferences in the setup menu.
Bitte Beachten/Please Note➜ Das Fahrzeug ist mit einem Eigendiagnosegerät (DME)ausgestattet.Um Fehlermeldungen zu vermeiden, muss vorMontagebeginn unbedingt der negative Pol derFahrzeugbatterie abgehängt werden.➜ Eine einwandfreie Funktion des <strong>ZE</strong>-<strong>NC2011D</strong> kann nurdann gewährleistet werden, wenn Sie das im Lieferumfangenthaltene Zubehör verwenden.➜ Es ist nicht nötig, am originalen AnschlusskabelVeränderungen irgendwelcher Art vorzunehmen.➜ Achten Sie bei der Installation darauf, dass dieverschiedenen Anschlusskabel und Zubehörteile nichtdurch scharfe Kanten beschädigt und die Anschlusskabelnicht geknickt werden.➜ Je nach Präferenz und Wahl des geräteinternen oderdes externen (zu montierenden) Mikrofons, muss im„Setup Menü“ die Mikrofonquelle für den BluetoothModus entsprechend angepasst werden.➜ Achten Sie vor der finalen Montage des <strong>ZE</strong>-<strong>NC2011D</strong>darauf, dass alle Steckverbindungen auf der Geräterückseiterichtig verbunden und fest eingerastet sind.➜ Bei Fragen oder Problemen wenden Sie sich anIhren <strong>ZE</strong>NEC-Händler, bei dem Sie das Gerät gekaufthaben. Zusätzlich finden Sie unter www.zenec.com eineausführliche FAQ Datenbank, wo viele der Fragen undProbleme, welche während der Installation auftretenkönnten, entsprechend beantwortet werden.➜ Da Updates (Software und Kartenmaterial) fürdas Navigationssystem nur über den USB-Anschlussinstalliert werden können und sich der USB-Anschluss an der Rückseite des <strong>ZE</strong>-<strong>NC2011D</strong> befindet,sollten Sie die im Lieferumfang befindliche MediaLink Box unbedingt an einem leicht zugänglichen Ortinstallieren. Die Media Link Box verfügt über einenentsprechenden USB Port.➜ Tampering with the on-board electrical system mightcause error codes to be stored in the DME.It is thus recommended to disconnect the GND wire of thenegative battery pole before you start with any installationwork.➜ The flawless function of the <strong>ZE</strong>-<strong>NC2011D</strong> can onlybe guaranteed, when the original accessories and wireharnesses contained in the set are deployed as described inthis installation manual.➜ The <strong>ZE</strong>-<strong>NC2011D</strong> is a plug and play product,modifications on the original wire loom of the vehicle arenot required at all.➜ When mounting the <strong>ZE</strong>-<strong>NC2011D</strong> always pay properattention not to damage any of the wires, plugs or otherparts. Avoid applying too much mechanical force especiallywhen pushing the unit back into the slot.➜ Depending on the preference and selection of thedevice internal or external (to be installed) microphone,the BT microphone source must be checked and chosenaccordingly, in the setup menu.➜ Please check if all plug-and-socket connections on therear of the <strong>ZE</strong>-<strong>NC2011D</strong> are properly seated before you lockthe unit in place.➜ Please contact your authorized <strong>ZE</strong>NEC dealer or thedistributor of the country, where you have purchased yourE>GO unit, if you have any technical problems or furtherquestions.In addition, you can look up a detailed FAQ data base onwww.zenec.com, where most of the questions revolvingaround the connectivity or the installation of a given E>GOmodel are explained in detail.➜ Any update of the main unit software or thenavigation system (software and map data) requiresthe USB port of the media link box to be present andaccessible. For this purpose, the installation of themedia link box is mandatory. The media link box iscontained in the <strong>ZE</strong>-<strong>NC2011D</strong> set – just make sure youfind a good and suitable mounting location that is easyto access (i.e. glove compartment, arm rest box etc.).