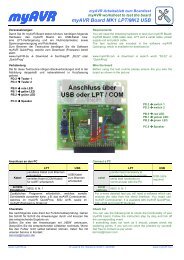
Projektbeschreibung Project description USB-RS232-Bridge - myAVR
Projektbeschreibung Project description USB-RS232-Bridge - myAVR
Projektbeschreibung Project description USB-RS232-Bridge - myAVR

Sie wollen auch ein ePaper? Erhöhen Sie die Reichweite Ihrer Titel.
YUMPU macht aus Druck-PDFs automatisch weboptimierte ePaper, die Google liebt.
<strong>myAVR</strong><strong>Projektbeschreibung</strong><strong>Project</strong> <strong>description</strong><strong>USB</strong>-<strong>RS232</strong>-<strong>Bridge</strong>InhaltEinleitung ....................................................................... 3Eigenschaften............................................................. 3Beachte.......................................................................... 3Handhabung................................................................... 4Schaltplan................................................................... 5Technische Beschreibung....................................... 5Betriebsdaten ............................................................. 5Schnittstellendaten ..................................................... 5Mechanische Daten ....................................................... 5Layout......................................................................... 6Bestückungsplan ........................................................ 6Bohrplan ..................................................................... 6Fertigungshinweise ........................................................ 7Anwendungsbeispiel ...................................................... 8Hinweis ....................................................................... 8ContentsGeneral <strong>description</strong>........................................................ 3Properties ................................................................... 3Pay attention .................................................................. 3Handling......................................................................... 4Circuit diagram ........................................................... 5Technical Data ............................................................... 5Operating Data, .......................................................... 5Interface Data............................................................. 5Mechanical Data ............................................................ 5Layout......................................................................... 6Layout diagram........................................................... 6Drilling plan................................................................. 6Production memos ......................................................... 7Example of use .............................................................. 8Advice......................................................................... 8www.<strong>myAVR</strong>.de © Laser & Co. Solutions GmbH – 01/2010 www.<strong>myAVR</strong>.com
Seite: 2/8<strong>Projektbeschreibung</strong> / <strong>Project</strong> <strong>description</strong> <strong>USB</strong>-<strong>RS232</strong>-<strong>Bridge</strong>Die Informationen in diesem Produkt werden ohneRücksicht auf einen eventuellen Patentschutzveröffentlicht.Warennamen werden ohne Gewährleistung der freienVerwendbarkeit benutzt.Bei der Zusammenstellung von Texten und Abbildungenwurde mit größter Sorgfalt vorgegangen.Trotzdem können Fehler nicht vollständigausgeschlossen werden.Die Autoren können für fehlerhafte Angaben und derenFolgen weder eine juristische Verantwortung nochirgendeine Haftung übernehmen.Für Verbesserungsvorschläge und Hinweise auf Fehlersind die Autoren dankbar.Alle Rechte vorbehalten, auch die der fotomechanischenWiedergabe und der Speicherung in elektronischenMedien.Die gewerbliche Nutzung der in diesem Produktgezeigten Modelle und Arbeiten ist nicht zulässig.Fast alle Hardware- und Softwarebezeichnungen, die indiesem Dokument erwähnt werden, sind gleichzeitig aucheingetragene Warenzeichen und sollten als solchebetrachtet werden.© Laser & Co. Solutions GmbHPromenadenring 802708 LöbauDeutschlandwww.<strong>myAVR</strong>.deIn spite of the great care taken while writing thisdocument the author is not responsible for the topicality,correctness, completeness or quality of the informationprovided. Liability claims regarding damage caused bythe use of any information provided, including any kind ofinformation which is incomplete or incorrect, will thereforebe rejected.All rights reserved. Unless otherwise specified, no part ofthis publication may be reproduced or utilized in any formor by any means, electronic or mechanical, includingphotocopying and microfilm, without permission in writingfrom the publisher.All trademarks and registered trademarks appearing inthis document are the property of their respective owners.© Laser & Co. Solutions GmbHPromenadenring 802708 LöbauGermanywww.<strong>myAVR</strong>.comTel: ++49 (0) 358 470 222Fax: ++49 (0) 358 470 233Tel: ++49 (0) 358 470 222Fax: ++49 (0) 358 470 233www.<strong>myAVR</strong>.de © Laser & Co. Solutions GmbH - 02/2010 www.<strong>myAVR</strong>.com
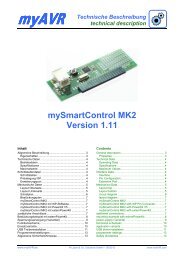
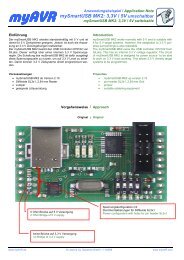
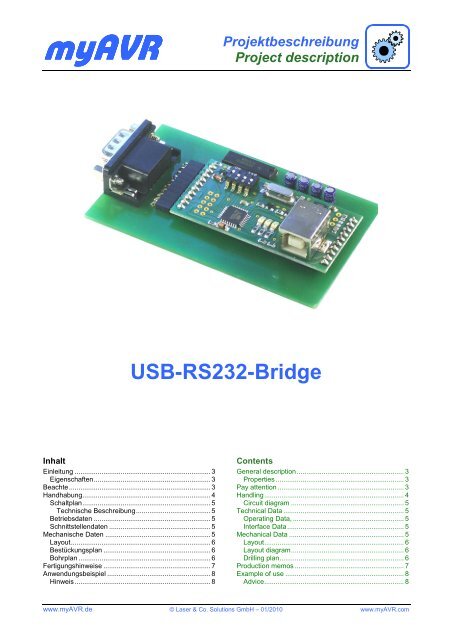
<strong>Projektbeschreibung</strong> / <strong>Project</strong> <strong>description</strong> <strong>USB</strong>-<strong>RS232</strong>-<strong>Bridge</strong> Seite: 3/8EinleitungDie <strong>USB</strong>-<strong>RS232</strong>-<strong>Bridge</strong> ist ein Adapter zummySmart<strong>USB</strong> MK2. Dieser gibt Ihnen die Möglichkeit IhrenComputer um einen echten seriellen Anschluss (COM-Port, <strong>RS232</strong>-<strong>Bridge</strong>) zu erweitern bzw. über einen <strong>USB</strong>-Anschluss mit einem <strong>RS232</strong>-Gerät zu kommunizieren.Achtung:Mit dieser <strong>Bridge</strong> können Sie nur die Daten zwischen demPC und beispielsweise dem <strong>myAVR</strong> Board MK1übertragen.Eigenschaften• Interface für mySmart<strong>USB</strong> MK2• SUB-D 9 polig• MAX232N, <strong>RS232</strong> TreiberGeneral <strong>description</strong>The <strong>USB</strong>-<strong>RS232</strong>-bridge is an adapter to themySmart<strong>USB</strong> MK2. With help of this you can extend yourcomputer at a serial interface (Com-Port, <strong>RS232</strong>) orrather you can communicate with a <strong>RS232</strong>-device abouta <strong>USB</strong>-interface.Warning:With help of this bridge you can only transfer databetween the PC and for example <strong>myAVR</strong> board MK1.Properties• Interface for mySmart<strong>USB</strong> MK2• SUB-D 9 pin• MAX232N, <strong>RS232</strong> driver<strong>USB</strong> Kabel / <strong>USB</strong> cablemySmart<strong>USB</strong> MK2mySmart<strong>USB</strong>InterfaceMAX232NSUB-D 9 polig /SUB-D 9 pinSeriellkabelserial cableAbbildung: FunktionsskizzePicture: view of the functionsPC/Notebook<strong>USB</strong> Kabel A-B /<strong>USB</strong> cable A-BmySmart<strong>USB</strong> MK2<strong>USB</strong>-<strong>RS232</strong>-<strong>Bridge</strong><strong>USB</strong>-<strong>RS232</strong>-bridgeNullmodemKabel /null modemcableEndgerät mit <strong>RS232</strong>-Anschluss,zum Beispiel:end device with <strong>RS232</strong> interface,for example:<strong>myAVR</strong> Board MK1 LPT<strong>RS232</strong>-Port<strong>RS232</strong>-portAbbildung: PrinzipskizzePicture: schematic diagramBeachteDer <strong>USB</strong> - Programmer mySmart<strong>USB</strong> MK2 muss ggf. mitden zwei 10 poligen Stiftleisten zum Aufsetzen auf denAdapter ergänzt werden.Pay attentionFor the <strong>USB</strong>-programmer mySmart<strong>USB</strong> MK2 you need,perhaps, two 10 pin of the multi-pin connectors to put theadapter on.www.<strong>myAVR</strong>.de © Laser & Co. Solutions GmbH - 02/2010 www.<strong>myAVR</strong>.com
Seite: 4/8<strong>Projektbeschreibung</strong> / <strong>Project</strong> <strong>description</strong> <strong>USB</strong>-<strong>RS232</strong>-<strong>Bridge</strong>HandhabungVor der Benutzung ist sicherzustellen, dass der Treiber fürden CP2102 installiert worden ist. Zur Installation sindAdministratorrechte notwendig. Den Treiber, sowie dieTreiberdokumentation finden Sie unter:www.myavr.deKlicken Sie als erstes auf die Schaltfläche „Shop“, danachgehen Sie auf die Registerkarte „Download“ und geben imSuchfeld den Suchbegriff „Treiber“ ein. Sie finden dannden <strong>USB</strong> Treiber für die <strong>myAVR</strong> Produkte.Den Treiber und die dazugehörigen Informationen findenSie auch unter:www.silabs.comHandlingFor the first use you have to make sure, that vou haveinstalled the driver for CP2102. For this installation youneed administrator rights. You can find the driver, also thedocuments of the driver, on our website:www.myavr.comPlease click at first on the button „Shop“, after that pleaseclick on the register card „Download” and write in thesearch box the keyword “Treiber”. You will find the <strong>USB</strong>driver for the <strong>myAVR</strong> products.You find also the driver and the correspondinginformation on the website:www.silabs.comNachdem der Treiber erfolgreichinstalliert wurde, setzen Sie denmySmart<strong>USB</strong> MK2 Programmer aufdie <strong>USB</strong>-<strong>RS232</strong>-<strong>Bridge</strong> auf.After the end of the installation ofthe driver you have to insert themySmart<strong>USB</strong> MK2 on the<strong>USB</strong>-<strong>RS232</strong>-bridge.Der mySmart<strong>USB</strong> MK2 Programmerist auf den Datenmodus einzustellen.Die DIP – Schalterstellung können Sie mitdem nebenstehenden Bild vergleichen.You have to set the mySmart<strong>USB</strong> MK2programmer to the data mode.You can compare the DIP-switch settingwith the adjacent picture.1 = ON2 = ON3 = OFF4 = OFFZuerst ist das serielle Kabel an denSUB-D-Anschluss anzuschließen.Zuletzt wird der <strong>USB</strong>-Anschluss mitdem Computer verbunden.1. Schritt / first stepAt first you have to connect theserial cable on the SUB-Dinterface.At last you have to connect theadapter with the computer over<strong>USB</strong>.2. Schritt / last stepwww.<strong>myAVR</strong>.de © Laser & Co. Solutions GmbH - 02/2010 www.<strong>myAVR</strong>.com
Seite: 6/8LayoutDas folgende Layout kann als Belichtungsvorlage genutztwerden.Es ist gespiegelt von der Lötseite aus gesehen.<strong>Projektbeschreibung</strong> / <strong>Project</strong> <strong>description</strong> <strong>USB</strong>-<strong>RS232</strong>-<strong>Bridge</strong>LayoutThe following layout can be used of guideline ofexposition.It is reflected of the soldering site.BestückungsplanLayout diagramBohrplanDrilling plan0,8 mm1,0 mm2,8 mmwww.<strong>myAVR</strong>.de © Laser & Co. Solutions GmbH - 02/2010 www.<strong>myAVR</strong>.com
<strong>Projektbeschreibung</strong> / <strong>Project</strong> <strong>description</strong> <strong>USB</strong>-<strong>RS232</strong>-<strong>Bridge</strong> Seite: 7/8FertigungshinweiseBei der Bestückung ist auf die korrekte Polarität derKondensatoren und auf die Einbaurichtung des MAX232Nzu achten. Hilfreich ist es weiterhin mit den flachstenBauteilen zu beginnen. Buchsenleisten, MAX232N,Elektrolytkondensatoren und zuletzt die SUB-D 9 polig,das ist die günstigste Reihenfolge.Production memosAt the equipment you should look after the right polarityand the direction of installation of MAX232N. Furthermoreit is helpful to start with the flat elements. At first thefemale connectors, MAX232N, electrolytic capacitors andat last the SUB-D 9 pin, that is the best order.<strong>USB</strong> Kabel zum PC /<strong>USB</strong> cable to PCAbbildung: <strong>USB</strong>-<strong>RS232</strong>-<strong>Bridge</strong> mit aufgestecktem mySmart<strong>USB</strong> MK2 Programmer und InterfacePicture: to insert the <strong>USB</strong>-<strong>RS232</strong>-bridge on the mySmart<strong>USB</strong> MK2 programmer and interfacewww.<strong>myAVR</strong>.de © Laser & Co. Solutions GmbH - 02/2010 www.<strong>myAVR</strong>.com
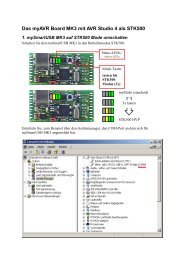
Seite: 8/8AnwendungsbeispielDieses Anwendungsbeispiel zeigt die <strong>USB</strong>-<strong>RS232</strong>-<strong>Bridge</strong>in Verbindung mit dem <strong>myAVR</strong> Board MK1 LPT.<strong>Projektbeschreibung</strong> / <strong>Project</strong> <strong>description</strong> <strong>USB</strong>-<strong>RS232</strong>-<strong>Bridge</strong>Example of useThis example of use shows the <strong>USB</strong>-<strong>RS232</strong>-bridge inconnection with the <strong>myAVR</strong> board MK1 LPT.Nullmodemkabel als Verbindung zwischen<strong>USB</strong>-Programmer und LPT-Programmer /null modem cable as connection between<strong>USB</strong>-programmer and LPT-programmergeregeltes 9V Netzteil, /regulated 9V power supply<strong>USB</strong> Kabel zum PC /<strong>USB</strong> cable to PC<strong>USB</strong>-<strong>RS232</strong>-<strong>Bridge</strong> mit mySmart<strong>USB</strong> MK2 /<strong>USB</strong>-<strong>RS232</strong>-bridge with mySmart<strong>USB</strong> MK2<strong>myAVR</strong> Board MK1 LPT /<strong>myAVR</strong> board MK1 LPTHinweisDas Projekt funktioniert nur mit dem mySmart<strong>USB</strong> MK2.AdviceThis project just works with mySmart<strong>USB</strong> MK2.www.<strong>myAVR</strong>.de © Laser & Co. Solutions GmbH - 02/2010 www.<strong>myAVR</strong>.com