Bedienungsanleitung User Instructions MultiSafe DSP ... - bei Tietzsch
Bedienungsanleitung User Instructions MultiSafe DSP ... - bei Tietzsch
Bedienungsanleitung User Instructions MultiSafe DSP ... - bei Tietzsch

Sie wollen auch ein ePaper? Erhöhen Sie die Reichweite Ihrer Titel.
YUMPU macht aus Druck-PDFs automatisch weboptimierte ePaper, die Google liebt.
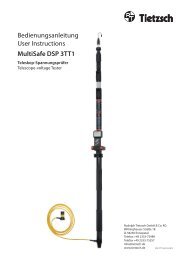
<strong>Bedienungsanleitung</strong><br />
<strong>User</strong> <strong>Instructions</strong><br />
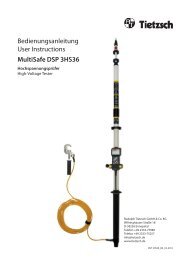
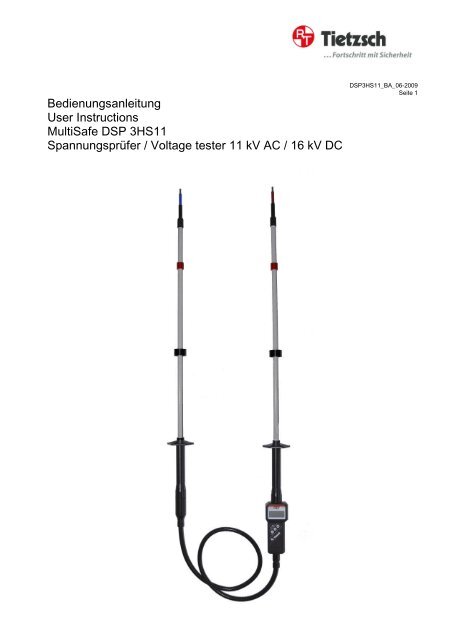
<strong>MultiSafe</strong> <strong>DSP</strong> 3HS11<br />
Spannungsprüfer / Voltage tester 11 kV AC / 16 kV DC<br />
<strong>DSP</strong>3HS11_BA_06-2009<br />
Seite 1
Anwendung<br />
<strong>DSP</strong>3HS11_BA_06-2009<br />
Seite 2<br />
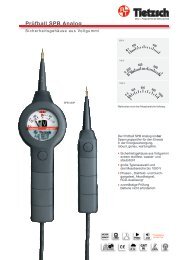
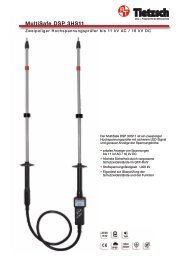
Der <strong>MultiSafe</strong> <strong>DSP</strong> 3HS11 ist ein zweipoliger Spannungsprüfer für Wechselspannungen bis 11 kV und<br />
Gleichspannungen bis 16 kV. Er ist besonders geeignet um die Spannung an Kondensatorenbatterien<br />
und Zwischenkreisen von Umrichtern sowie an Einspeisungen von Verkehrsbahnanlagen usw. schnell<br />
und sicher festzustellen.<br />
Die Spannung wird durch 3 rote LEDs signalisiert und der Wert digital auf dem LCD angezeigt.<br />
Beide Systeme ar<strong>bei</strong>ten unabhängig voneinander und bieten doppelte Anzeigesicherheit.<br />
Mit dem Eigentest (R-TEST) wird die Funktion des Prüfers einfach und schnell überprüft.<br />
Bereitschaft und nicht vorhandene Spannung wird durch eine grüne LED angezeigt.<br />
Der <strong>MultiSafe</strong> <strong>DSP</strong> 3HS11 ist auf Basis des langjährig erfolgreichen <strong>MultiSafe</strong> <strong>DSP</strong> aufgebaut der für<br />
Niederspannungen durch VDE nach EN/IEC 61243-3 zertifiziert ist.<br />
Das Gerät ist mit fest angeschlossenen Hochspannungs-Prüfspitzen und einem Wellschlauch als Schutz<br />
für die Gummischlauchleitung versehen.<br />
Sicherheitshinweise<br />
Um den sicherheitstechnisch einwandfreien Zustand zu<br />
erhalten und die gefahrlose Anwendung sicherzustellen, ist<br />
es unerlässlich, dass Sie vor dem Einsatz Ihres Gerätes<br />
diese <strong>Bedienungsanleitung</strong> vollständig lesen und diese in<br />
allen Punkten befolgen, sonst besteht Lebensgefahr!<br />
Bitte beachten Sie folgende<br />
Sicherheitsvorkehrungen:<br />
▲ Nur eingewiesenes Fachpersonal mit entsprechender<br />
Schutzausrüstung darf diese Ar<strong>bei</strong>ten ausführen.<br />
Beachten Sie die Mindestabstände zu anderen unter<br />
Spannung stehenden oder geerdeten Anlagenteilen und<br />
verwenden Sie persönliche Schutzausrüstung gemäß den<br />
landesspezifischen Unfallverhütungsvorschriften<br />
(in Deutschland: BGV A3 oder VDE 0105-100).<br />
▲ Die Spannungsangaben auf dem <strong>DSP</strong> 3HS11 sind Nennwerte.<br />
Der Spannungsprüfer darf nur in Anlagen mit dem<br />
angegebenen Nennspannungsbereich benutzt werden.<br />
▲ Eine einwandfreie Anzeige ist nur im Temperaturbereich<br />
von - 10° C bis + 55° C sichergestellt.<br />
▲ Gerät nur unterhalb der sechseckigen Begrenzungsscheibe<br />
anfassen, Prüfspitzen und Prüfelektroden<br />
nicht berühren.<br />
▲ Die Prüfspitzen dürfen nur bis zur roten Grenzmarke an<br />
spannungsführende oder geerdete Anlagenteile gebracht<br />
werden, mit allen anderen Teilen des Spannungsprüfers<br />
muss ein möglichst großer Abstand gehalten werden.<br />
▲ Spannungsprüfer müssen kurz vor dem Einsatz und möglichst auch danach auf Funktion geprüft werden.<br />
Überprüfen Sie das Gerät an einer bekannten Spannungsquelle und mittels dem Eigentest (R-TEST).<br />
Fällt hier<strong>bei</strong> die Anzeige eines oder mehrerer Systeme aus, darf das Gerät nicht mehr verwendet werden.<br />
▲ Die maximal zulässige Einschaltdauer des <strong>DSP</strong> 3HS11 beträgt 15 min.<br />
▲ Unbefugte dürfen den Spannungsprüfer nicht zerlegen.<br />
▲ Spannungsprüfgeräte müssen trocken und sauber sein.<br />
▲ Das Gerät darf nicht verwendet werden, wenn Beschädigungen am Gehäuse, an den<br />
Hochspannungsspitzen oder der Verbindungsleitung zu erkennen sind.
Kurzanleitung <strong>MultiSafe</strong> <strong>DSP</strong> 3HS11<br />
Achtung!<br />
Die gesamte <strong>Bedienungsanleitung</strong> des <strong>MultiSafe</strong> <strong>DSP</strong> 3HS11<br />
ist in allen Punkten zu befolgen.<br />
Die Sicherheitsvorschriften sind zu beachten,<br />
sonst besteht Lebensgefahr!<br />
Einschalten / Ausschalten<br />
Ein-Aus-Taster drücken, „TEST“ blinkt auf dem Display.<br />
Achtung! Der R-TEST ist durchzuführen, um das Gerät in den betriebsbereiten<br />
Zustand zu bringen.<br />
Ausschalten: Ein-Aus-Taster drücken bis „oFF“ erscheint.<br />
Hinweis: Gerät schaltet nach 90 s automatisch aus.<br />
Displaytest (Eigentest 1) - täglich<br />
Gerät einschalten und die Ein-Aus-Taste gedrückt halten.<br />
Alle Displaysymbole und LEDs müssen erscheinen.<br />
Nach Loslassen des Tasters blinkt „TEST“ auf der oberen Zeile der Anzeige.<br />
Fällt hier<strong>bei</strong> die Anzeige eines oder mehrerer Systeme aus, darf das Gerät<br />
nicht mehr verwendet werden.<br />
R-TEST (Eigentest 2) –vor jeder Prüfung<br />
Taste R-TEST drücken. „TEST“ hört auf zu blinken, der 3-teilige Wartebalken<br />
darunter blinkt. Gleichzeitig leuchten 3 LEDs.<br />
Beide Spitzen zusammenhalten (kurzschließen) bis „rdy“ erscheint.<br />
Dies muss geschehen solange der Wartebalken angezeigt wird.<br />
Wenn die grüne LED konstant leuchtet und in der Anzeige 000 V bis 010 V<br />
erscheint, ist das Gerät betriebsbereit.<br />
Hinweis: Falls der R-TEST nicht erfolgreich war wird „Er“ angezeigt und der<br />
Buzzer ertönt. Das Gerät schaltet aus. Möglicherweise wurden die Spitzen nicht in<br />
dem vorgegebenen Zeitfenster zusammengehalten.<br />
Der Vorgang ist zu wiederholen.<br />
Spannung prüfen<br />
Achtung!<br />
Gerät nur unterhalb der sechseckigen Griffbegrenzung anfassen<br />
und Grenzmarken der Prüfspitzen <strong>bei</strong>m Antasten beachten!<br />
Wenn <strong>bei</strong>de Prüfelektroden an eine Spannung angelegt werden, wird diese durch<br />
rote LEDs in 3 Stufen und der Spannungswert in „V“ bzw. „kV“ auf dem Display<br />
angezeigt. (Messbereiche siehe Technische Daten.)<br />
Spannungen ab 1000 V werden zusätzlich akustisch angezeigt.<br />
Liegt keine Spannung an, leuchtet die grüne LED.<br />
Hinweis: Spannungswerte werden nur nach erfolgreich durchgeführtem<br />
R-TEST angezeigt. Die roten LEDs zeigen Spannungen jederzeit an.<br />
HOLD-Funktion<br />
Mit der HOLD-Taste kann der angezeigte Wert festgehalten werden.<br />
Die Speicherung wird durch „Hold“ in der oberen LCD-Zeile angezeigt.<br />
Der Wert wird angezeigt solange der Taster HOLD gedrückt bleibt.<br />
Batteriezustandkontrolle<br />
volle Kapazität<br />
noch viele Prüfungen möglich<br />
Batterie bald ersetzen - Symbol blinkend: keine Prüfungen mehr zulässig!<br />
<strong>DSP</strong>3HS11_BA_06-2009<br />
Seite 3
Weitere Anleitung<br />
Allgemeine Hinweise<br />
<strong>DSP</strong>3HS11_BA_06-2009<br />
Seite 4<br />
Um die Batterie zu schonen schaltet sich das Gerät automatisch nach etwa 90 s aus, wenn keine Messung<br />
erfolgt. Die Hintergrundbeleuchtung schaltet sich nach 5 s aus.<br />
Bei einpoligem Anlegen eines Prüftasters an Spannung oder an ein statisch aufgeladenes Teil kann sich<br />
der <strong>MultiSafe</strong> automatisch einschalten. Dieser Vorgang ist ohne Bedeutung.<br />
Mit Betätigung des HOLD-Tasters kann der angezeigte Wert auf dem Display festgehalten werden.<br />
Es erscheint „Hold“ in der oberen Zeile.<br />
„OL“ (out of limit) auf dem Anzeige bedeutet, dass der Messwert außerhalb des Messbereiches liegt.<br />
Blinkt das leere Batteriesymbol auf der Anzeige, ist die Batterie vor weiterer Anwendung zu wechseln.<br />
Einschalten / Ausschalten<br />
Der <strong>DSP</strong> 3HS11 schaltet <strong>bei</strong> Spannungen ab 50 V automatisch ein.<br />
Für den Eigentest und für Spannungen unter 50 V muss das Gerät mit dem Ein-Aus-Taster aktiviert werden.<br />
„TEST“ blinkt auf dem Display.<br />
Achtung! Der R-TEST ist durchzuführen, um das Gerät in den betriebsbereiten Zustand zu bringen.<br />
Ausschalten: Ein-Aus-Taster drücken bis „oFF“ erscheint.<br />
Hinweis: Gerät schaltet nach 90 s automatisch aus, wenn keine Spannung anliegt.<br />
Eigentest<br />
Der komplette Eigentest wird in 2 Schritten durchgeführt, 1. dem Displaytest und 2. dem R-TEST.<br />
Achtung! Der Displaytest ist an jedem Anwendungstag und der R-TEST vor jeder Spannungsprüfung<br />
durchzuführen.<br />
Displaytest<br />
Solange der Ein-Aus-Taster <strong>bei</strong>m Einschalten gedrückt wird, werden alle Segmente des Displays<br />
sowie 4 LEDs zur Anzeige gebracht und es ertönt ein akustisches Signal.<br />
Nach Loslassen der Taste wird der Anwender zum R-TEST aufgefordert: Es erscheint „TEST“<br />
auf der oberen und ein Wartebalken in der unteren Displayzeile.<br />
Hinweis: Fällt ein Segment der LCD oder eine LED aus darf der Prüfer nicht verwendet werden.<br />
R-TEST<br />
Bei Betätigung des Tasters R-TEST im eingeschaltetem Zustand blinkt nach kurzem Akustiksignal<br />
„TEST“ in der oberen Display-Zeile, zwei rote Dioden leuchten und die grüne Diode blinkt.<br />
Solange der Wartebalken in der unteren Display-Zeile angezeigt wird, muss der Innenwiderstand<br />
des Gerätes kontrolliert werden. Hierzu sind die Prüfelektroden zusammenzuhalten (kurzschließen).<br />
Die kurze Meldung „rdy“ auf dem Display bedeutet dass der Innenwiderstand des Prüfers innerhalb seiner<br />
Grenzwerte liegt.<br />
Wenn auf dem Display 000 bis 010 V angezeigt wird und die grüne LED konstant leuchtet,<br />
ist der <strong>MultiSafe</strong> <strong>DSP</strong> 3HS11 einsatzbereit.<br />
Hinweis: Vorzeitiges Abbrechen und unzulässige Abweichung des Innenwiderstands-Wertes führen<br />
zur Fehlermeldung „Er Ω“ und der <strong>MultiSafe</strong> schaltet ab. Der Vorgang ist zu wiederholen.<br />
Der R-TEST muss innerhalb der vorgegebenen Zeit (Wartebalken) durchgeführt werden.<br />
Spannung prüfen<br />
Achtung! Gerät nur unterhalb der sechseckigen Griffbegrenzung anfassen. Prüfselektroden nicht berühren!<br />
Die Prüfspitzen dürfen nur bis zur roten Grenzmarke an spannungsführende oder geerdete Anlagenteile<br />
gebracht werden, mit allen anderen Teilen des Spannungsprüfers muss ein möglichst großer Abstand<br />
eingehalten werden. Der Spannungsprüfer darf nur verwendet werden, wenn <strong>bei</strong>de Eigentests erfolgreich<br />
durchgeführt wurden.<br />
Nach dem Einschalten und erfolgreich durchgeführtem R-TEST ist der <strong>MultiSafe</strong> <strong>DSP</strong> 3HS11 betriebsbereit.<br />
Wenn <strong>bei</strong>de Prüfelektroden an eine Spannung innerhalb des Nennspannungsbereichs gelegt werden,<br />
wird die Spannung je nach Höhe durch 3 rote LEDs und auf dem Display digital in V bzw. KV angezeigt.<br />
Liegt keine Spannung an, leuchtet die grüne LED.<br />
Hinweis: Spannungen unter 50 V werden nur auf dem Display angezeigt. Spannungen ab 1000 V werden<br />
zusätzlich akustisch signalisiert. Bei Spannungen ab 50 V schaltet sich das Gerät automatisch ein.<br />
Diese wird dann nur durch durch rote LEDs signalisiert, ein Messwert erschein nicht auf dem Display.<br />
Der R-TEST ist in jedem Fall vor Spannungsprüfungen durchzuführen.
Wechselspannungsprüfungen können bis 11.000 V durchgeführt werden und werden durch das<br />
Symbol „~“ vor dem angezeigten Wert dargestelt.<br />
Hinweis: Ab 12 kV blinkt der angezeigte Wert und es erscheint „OL“.<br />
<strong>DSP</strong>3HS11_BA_06-2009<br />
Seite 5<br />
Gleichspannungsprüfungen können bis 16.000 V durchgeführt werden.<br />
Bei Anlegen der rot gekennzeichneten Prüfspitze (Prüfspitze mit Anzeige) an den Pluspol einer<br />
Gleichspannung erscheint kein Vorzeichen, liegt dort Minus an erscheint „-“ vor dem angezeigten Wert.<br />
Hinweis: Ab 16,5 kV blinkt der angezeigte Wert und es erscheint „OL“.<br />
Anwendung in feuchter Umgebung<br />
Der <strong>DSP</strong> 3HS11 kann <strong>bei</strong> Feuchtigkeit eingesetzt werden. Vor dem Einsatz muss das Gerät trocken<br />
und sauber sein. Bei Regen soll der Prüfer nur 30 s für eine Prüfung verwendet werden.<br />
Vor jeder weiteren Prüfung ist der Prüfer trocken zu wischen.<br />
Energiequelle<br />
Es darf nur ein 9 V-Block IEC 6LR61 Alkali-Mangan verwendet werden.<br />
Der Batteriezustand wird durch das Batterie-Symbol auf dem LCD wie folgt dargestellt:<br />
Symbol gefüllt: volle Kapazität<br />
Symbol halb gefüllt: noch viele Prüfungen möglich<br />
Symbol leer: Batterie bald ersetzen –noch ca. 30 Prüfungen möglich<br />
Symbol blinkend: keine Prüfungen mehr zulässig<br />
Batterie austauschen<br />
Batteriefachdeckel auf der Geräterückseite abschrauben. Batterie aus der<br />
CAT IV-Schutzhaube gleiten lassen. Batterieanschlusskontakte lösen.<br />
Nach Anschließen der neuen Batterie diese mit der CAT IV-Schutzhaube<br />
in das Batteriefach einsetzen und Deckel wieder festschrauben.<br />
Achtung!<br />
Der Spannungsprüfer darf <strong>bei</strong> geöffnetem Batteriefach nicht benutzt werden.<br />
Prüfelektrode wechseln<br />
Der <strong>MultiSafe</strong> <strong>DSP</strong> 3HS11 kann mit verschiedenen Prüfelektroden ausgestattet werden.<br />
Diese können einfach auf die Hochspannungsprüfspitze aufgeschraubt werden.<br />
Hier<strong>bei</strong> ist die Polarität zu beachten: Rote Elektrode auf die Prüfspitze mit Anzeige,<br />
blaue Elektrode auf die Prüfspitze ohne Anzeige. Danach R-TEST (Eigentest 2) durchführen!<br />
Wartung<br />
Der <strong>MultiSafe</strong> <strong>DSP</strong> 3HS11 ist stets in trockenem und sauberen Zustand möglichst in einem<br />
festen Behältnis aufzubewahren.<br />
Das Gehäuse einschließlich der Prüfspitzen kann mit einem mit klarem Wasser (ohne Reinigungsmittel)<br />
oder mit Isopropanol (Alkohol) befeuchteten Tuch gereinigt werden.<br />
Überzeugen Sie sich in regelmäßigen Abständen, dass die Batterie ihres Gerätes nicht ausgelaufen ist.<br />
Bei ausgelaufener Batterie müssen Sie den Batterie-Elektrolyt vollständig entfernen und eine neue<br />
Batterie einsetzen.<br />
Wir empfehlen, die Batterie <strong>bei</strong> längerem Nichtgebrauch aus dem Gerät zu entnehmen.<br />
Wiederholungsprüfung<br />
Die Frist für die Wiederholungsprüfung <strong>bei</strong>m <strong>DSP</strong>3 HS11 darf 6 Jahre nicht überschreiten, je nach<br />
Einsatzbedingungen und Häufigkeit der Benutzung kann eine frühere Prüfung empfehlenswert sein.<br />
Das letzte Prüfdatum befindet sich auf einer Prüfplakette seitlich am Anzeigeteil.<br />
Das Herstelldatum ist auf der Rückseite eingeprägt.<br />
Reparatur<br />
Eine Reparatur ist nur durch den Hersteller oder durch vom Hersteller ausdrücklich ermächtigte Werkstätten<br />
zulässig. Bei Beschädigung des Gerätes oder zur Wiederholprüfung/Kalibrierung wenden Sie sich bitte an:<br />
service@tietzsch.de oder senden Sie das Gerät mit Fehlerbeschreibung an den Hersteller<br />
(Adresse siehe Seite 8).
Technische Daten <strong>MultiSafe</strong> <strong>DSP</strong> 3HS11<br />
Spannung: Nennspannungsbereich 50 ... 11000 V AC / 16000 V DC<br />
Anzeige durch zwei redundante Systeme<br />
System 1 durch LEDs 50 V, 120 V, 1000 V<br />
System 2 durch zweizeiliges LC Display mit Hintergrundbeleuchtung<br />
Anzeigebereich 1999 Digit<br />
Einschalt-Automatik ab 50 V –nur LED-Anzeige<br />
Betriebsarterkennung +/ -/ ~ erfolgt automatisch<br />
Akustisches Signal ab 1000 V<br />
Frequenzbereich: 0 ... 500 Hz<br />
Messbereiche/ 10 … 1000 V DC ± 2,5% + 5 Digits Auflösung 1 V<br />
Grenzabweichung/ 15 … 1000 V AC ± 5% + 10 Digits Auflösung 1 V<br />
Auflösung: 1,01 … 16,00 (16,50) kV DC ± 2,5% + 5 Digits Auflösung 10 V<br />
1,01 … 11,00 (12,00) kV AC ± 5% + 10 Digits Auflösung 10 V<br />
automatische Bereichsumschaltung<br />
Messstrom: 1,07 mA <strong>bei</strong> 16000 V DC<br />
Betriebstemperatur: –10°C … + 55°C<br />
Eingangswiderstand: 15 MΩ ± 3 MΩ - überprüfbar durch integrierten R-TEST<br />
Einschaltdauer: 15 min<br />
Energiequelle: 9 V-Block IEC 6LR61 Alkali-Mangan<br />
<strong>DSP</strong>3HS11_BA_06-2009<br />
Seite 6<br />
Aufbau: Zweipoliger Spannungsprüfer<br />
Basisgerät <strong>DSP</strong> 3:<br />
schlagfestes, staubdichtes Kunststoffgehäuse mit unzerbrechlicher<br />
Anzeigeabdeckung, Schutzart IP 65, CAT IV<br />
Verbindungsleitung H07RN-F<br />
Erweiterung <strong>DSP</strong> 3HS11:<br />
zwei fest verbundene Hochspannungsprüfspitzen aus GFK<br />
vergossene Widerstandsdekade, ca. 7,5 MΩ je Spitze<br />
Verbindungsleitung zusätzlich durch flexiblen Kunststoff-Wellschlauch isoliert<br />
Prüfungen/ Basisgerät <strong>DSP</strong> 3 nach IEC 61243-3<br />
Normen: Erweiterung <strong>DSP</strong>3HS11 durch Stoßspannung nach IEC 60071<br />
Impuls 1,2/ 50 µs mit 60 kV positiv und negativ<br />
weitere angewandte Normen: IEC 61243-2 und IEC 61010<br />
Gewicht / Maße: 1,0 kg komplettes Gerät inkl. aufgerollter Leitung ca. 1150 x 200 x 60 mm<br />
Länge der Prüfspitzen 790 mm,<br />
Koffer (Zubehör) 6,9 kg 1242 x 272 x 122 mm<br />
Bestell-Nr.: <strong>MultiSafe</strong> <strong>DSP</strong> 3HS11-x Art.-Nr. 89304-x<br />
x = Form der Prüfelektroden bitte angeben!<br />
i = runde Elektroden<br />
G = spitze Elektroden mit 5mm-Gewinde<br />
Y = gegabelte Elektroden
Ausführungen der Prüfelektroden<br />
Der <strong>MultiSafe</strong> <strong>DSP</strong> 3HS11 wird standardmäßig mit folgenden 125 mm langen<br />
Prüfelektroden geliefert:<br />
HS11-i = runde Elektrode<br />
HS11-G = spitze Elektrode mit<br />
5mm-Gewinde<br />
HS11-Y = gegabelte Elektrode<br />
Andere Längen und Formen<br />
bitte anfragen.<br />
Zubehör<br />
Für den Transport und die sichere Aufbewahrung wird ein festes Behältnis empfohlen.<br />
Art.-Nr. 84330 Stabiler Koffer mit Alu-Rahmen 1242 x 272 x 122 mm<br />
<strong>DSP</strong>3HS11_BA_06-2009<br />
Seite 7
<strong>Tietzsch</strong> GmbH & Co. KG - Willringhauser Str. 18 - D-58256 Ennepetal - Tel.: +49-2333-75989 - Fax: +49-2333 -75257<br />
www.tietzsch.de - info@tietzsch.de
<strong>User</strong> <strong>Instructions</strong><br />
<strong>MultiSafe</strong> <strong>DSP</strong> 3HS11<br />
Voltage tester 11 kV AC / 16 kV DC<br />
<strong>DSP</strong>3HS11_BA_06-2009<br />
page 1
<strong>DSP</strong>3HS11_BA_06-2009<br />
page 2<br />
Application<br />
The <strong>MultiSafe</strong> <strong>DSP</strong> 3HS11 is a two pole voltage tester for a.c. voltages up to 11 kV and d.c. voltages<br />
up to 16 kV. It is particularly suited for fast and safe detection of voltage at capacitor banks and links<br />
of converters, as well as at feeders for railway systems et cetera.<br />
Voltage is signalised by 3 LEDs and the value is indicated digital on the LCD.<br />
Both systems operate independently and therefore offer double safe indication.<br />
When doing the self-test (R-TEST) you can check out easily and quickly the functions of<br />
the testing device. The green LED signalises that the device is ready for operation and that<br />
no voltage is impressed.<br />
The <strong>MultiSafe</strong> <strong>DSP</strong> 3HS11 bases on the long-time success of the <strong>MultiSafe</strong> <strong>DSP</strong>, which is certified for<br />
low voltages by VDE in accordance with EN/IEC 61243-3.<br />
The device is provided with an attached high-tension test prod and a corrugated hose as protection<br />
for the rubber hose.<br />
Safety Precautions<br />
In order to maintain flawless technical safety conditions, and to assure safe use, it is imperative that<br />
you read these operating instructions thoroughly and carefully before placing your instrument into<br />
service, and that you follow all instructions contained therein otherwise there is danger of life!<br />
▲ The maximum on-time of the <strong>DSP</strong> 3HS11 is 15 minutes.<br />
▲ The voltage tester may only be dismantled by authorized personnel.<br />
▲ Voltage testers must be kept dry and clean.<br />
Please observe the following safety precautions:<br />
▲ Only qualified personnel with appropriate protective<br />
equipment may do these workings.<br />
▲ Observe the minimum object distance to other plant<br />
components that are energized or earthed and use personal<br />
protective equipment as specified by national accident<br />
prevention regulations<br />
(in Germany: BGV A3 or VDE 0105-100).<br />
▲ The voltages indicated on the <strong>DSP</strong> 3HS11 are rated<br />
voltages. The voltage tester may only be used in systems<br />
working with those rated voltage ranges.<br />
▲ Faultless indication of display values is only guaranteed<br />
between -10°C and +55°C.<br />
▲ Hold the instrument only beneath its hexagonal hand guard<br />
do not touch test prods and test electrodes.<br />
▲ The test prods may only be connected up to the red barrier<br />
mark to live or earthed plant components.<br />
Keep the distance to all other parts of the voltage tester<br />
as big as possible.<br />
▲ Just before they are used, and as possible afterwards as<br />
well, voltage testers need to be checked to ensure they<br />
function correctly. Check the instrument at a known voltage<br />
source by performing the self-test (R-TEST). If the display of<br />
one or several systems fails in the course of checking, the<br />
instrument must not be used again.<br />
▲ Do not use the device when damages at the casing, the high-tension peak or the connecting cable<br />
can be identified.
Quick user guide <strong>MultiSafe</strong> <strong>DSP</strong> 3HS11<br />
Attention!<br />
Follow the operating instructions of the <strong>MultiSafe</strong> <strong>DSP</strong> 3HS11<br />
in every particular.<br />
Observe the safety regulations, otherwise there is danger of life!<br />
Switch on / Switch off<br />
Press the on/of switch, “TEST” flashes on the display.<br />
Attention! You have to perform the R-TEST in order to prepare the device<br />
for operation.<br />
Switch of: Press the on/of switch until “oFF” appears.<br />
Note! The device switches off automatically after 90 seconds.<br />
Display test (self-test 1) - daily<br />
Switch on the device and keep the on-off switch pressed.<br />
All display symbols and LEDs must appear.<br />
Then, after releasing the on-of switch, “TEST” flashes in the upper part of the display.<br />
If the display of one or several systems fails in the course of checking,<br />
the instrument must not be used again.<br />
R-TEST (self-test 2) –before starting with tests<br />
Press button R-TEST. “TEST” stopps flashing, the threepart wait bar starts flashing.<br />
Simultaneously, three LEDs gleam.<br />
Hold peaks to earth (to short-circuit) until „rdy“ appears and continue doing that until<br />
the wait bar appears.<br />
The device is ready for operation when the green LED lights up constantly and<br />
000 up to 010 V appears on the display.<br />
Note: If the R-TEST wasn’t successful, „Er“ appears and you hear a buzzer sound.<br />
The device switches off automatically. Maybe the R-TEST hasn’t been performed<br />
in the given timeframe. Repeat the R-TEST.<br />
Testing voltage<br />
Attention!<br />
Hold the instrument only beneath its hexagonal grip limit and observe<br />
the limit markers during the touch!<br />
When you apply both test electrodes to voltage, it’l be indicated by the red LEDs<br />
in three stages and by the voltage value in “V” or “kV” on the display.<br />
(See Technical Data for measurement ranges) With voltages of 1000 V or<br />
more indication occurs additionally by an acoustic signal.<br />
The green LED lights up when no voltage is impressed.<br />
Note: Voltage values only will be indicated after a successful R-TEST.<br />
The red LEDs indicate voltage at any time.<br />
HOLD function<br />
With the HOLD-button you can record the indicated value. Storage is indicated by<br />
“Hold” in the upper line of the LCD. This value wil be indicated as long as you keep<br />
pressing the HOLD-button.<br />
Checking battery condition<br />
full capacity<br />
still many measurements possible<br />
replace the battery soon - if flashing: no further measurements admissible!<br />
<strong>DSP</strong>3HS11_BA_06-2009<br />
page 3
Further instructions<br />
General information<br />
<strong>DSP</strong>3HS11_BA_06-2009<br />
page 4<br />
In order to save on battery the device switches off automatically after aproximately 90 seconds when no<br />
measurement is taken. The LCD backlight switches off automatically after 5 seconds.<br />
The <strong>MultiSafe</strong> can switch on automatically close to electrical fields or when you connect unipolar one test<br />
button to voltage or to a statically charged particle. This procedure is without significance.<br />
By pressing the HOLD-button values can be stored on the display.<br />
Then „HOLD“ appears in the upper display line.<br />
„OL“ (out of limit) on the display means that the measurement value is outside of the rated measurent range.<br />
You need to change the battery of the device before continuing with testing when the empty battery symbol<br />
on the display flashes.<br />
Switch on / Switch off<br />
The <strong>DSP</strong> 3HS11 switches on automatically with voltages of 50 V or more. For self-tests and for voltages<br />
of less than 50 V the device needs to be activated with the on-of switch. “TEST” flashes on the display.<br />
Attention! You have to perform the R-TEST in order to prepare the device for operation.<br />
Switch of: Press the on/of switch until “oFF” appears.<br />
Note: The device switches off automatically after 90 seconds, when no voltage is applied.<br />
Self-test<br />
The complete self-test is performed within two steps, 1. the display-test and 2. the R-TEST.<br />
Attention! Perform the display-test each day of operation and the R-TEST before each measurement.<br />
Display-test<br />
As long as the on-off switch is pressed, all display segments appear, the 4 LEDs gleam and an acoustic signal<br />
occurs.<br />
When you stop pressing the on-off switch the operator is asked to perform the R-TEST: “TEST” appears in the<br />
upper display line and a wait bar in the lower one.<br />
Note: When a segment of the LCD or a LED fails you may not use the tester anylonger.<br />
R-TEST<br />
When pressing the R-TEST button while the device is switched on, an acoustic signal occurs and<br />
afterwards “TEST” flashes in the upper line of the display, 2 red diodes gleam and the green diode flashes.<br />
As long as a wait bar is indicated in the lower display line, the internal resistance of the device must be<br />
checked. Therefore hold the test electrodes together (to short-circuit).<br />
The device reports „rdy“ which means that the internal resistance of the tester is within its limit values.<br />
When 000 up to 010 V is indicated on the display and the green LED gleams constantly,<br />
then the <strong>MultiSafe</strong> <strong>DSP</strong> 3HS11 is ready for operation.<br />
Note: Premature cancel and improper deviation of internal resistance value lead to error message<br />
„Er Ω“ and the <strong>MultiSafe</strong> switches of. Repeat this procedure.<br />
The R-TEST needs to be performed within the given time (see wait bar).<br />
Testing voltage<br />
Attention! Hold the instrument only beneath its hexagonal grip limit, do not touch the test electrodes!<br />
The test prods may only be connected up to the red limit marker to live or earthed plant components.<br />
To all other parts of the voltage tester it has to be kept a distance as big as possible.<br />
You may only use the voltage tester when both tests were performed successfully.<br />
The <strong>MultiSafe</strong> <strong>DSP</strong> 3HS11 is ready for operation after switching on the device and a successful performance<br />
of the R-TEST.<br />
When you apply both test electrodes to voltage within the rated voltage range, it will indicated, depending<br />
on its value, by 3 red LEDs and a digital indication of the value in volt or kilovolt occurs on the display.<br />
The green LED lights up when no voltage is impressed.
<strong>DSP</strong>3HS11_BA_06-2009<br />
page 5<br />
Note! Voltages below 50 V are only indicated on the display. With voltages of 1000 V or more indication<br />
occurs additionally by an acoustic signal. With an impressed voltage of 50 V or more the device switches on<br />
automatically. Then, voltage is only indicated by red LEDs, the value does not appear on the display.<br />
In either case, the R-TEST needs to be performed before performing voltage tests.<br />
Measurements of alternating voltage can be performed up to 11.000 V and are describes by symbol<br />
„ ~ „ left to indicated value.<br />
Note: At 12 kV or more, the indicated value flashes and “OL” appears on the display.<br />
Measurements of direct voltage can be performed up to 16.000 V<br />
When you connect the red marked test prod (test prod with indication) to the positive pole of a direct voltage,<br />
the indicated value is unsigned; is it connected to minus, „-“ appears left to the indicated value.<br />
Note: At 16,5 kV or more, the indicated value flashes and “OL” appears on the display.<br />
Application in humid environments<br />
The <strong>DSP</strong> 3HS11 can be used in humid environments. The device has to be clean and dry before<br />
the operation. When it’s raining, the voltage tester shal not be used longer than 30s for one test<br />
operation. Everytime before starting the next test operation dry the tester again.<br />
Energy source<br />
You may only use a 9 V-block IEC 6LR61, best possible alkali-manganese.<br />
The battery condition is indicated by a battery symbol in the display as follows:<br />
battery symbol filled full capacity<br />
battery symbol semi-filled still many measurements possible –about 30<br />
battery symbol empty replace the battery soon<br />
battery symbol flashing no further measurements admissible<br />
Battery change<br />
Unscrew the cover of the battery compartment on the back of the device.<br />
Let the battery slide out of the CAT IV protection cover.<br />
Release battery contacts.<br />
After connecting the new battery use the CAT IV protection cover to insert the battery<br />
into the battery compartment, tighten the cover.<br />
Attention!<br />
The voltage tester shall not be used if the battery box is open.<br />
Change test electrodes<br />
The <strong>MultiSafe</strong> <strong>DSP</strong> 3HS11 can be equipped with different test electrodes. Those can be easily<br />
screwed onto the high-tension test prods. Please observe polarity:<br />
red test electrode onto the test prod with display, blue test electrode onto the test prod without display.<br />
After this, perform the R-TEST (self-test 2)!<br />
Maintainance<br />
The <strong>MultiSafe</strong> <strong>DSP</strong> 3HS11 needs to be kept dry and clean, best possible within a solid box.<br />
The casing and the test electrodes can be cleaned with a cloth dampened with isopropyl<br />
(alcohol) or with clear water without detergents.<br />
Regularly make sure that the battery does not leak. In case it does, you have to replace the electrolyte<br />
completely and insert a new battery.<br />
During longer disuse, we recommend to remove the battery from the device.<br />
Repeated inspection<br />
Repeated inspections with the <strong>DSP</strong>3 HS11 may not exceed the time-limit of 6 years.<br />
Depending on operation conditions and frequency a previous inspection may be recommendable.<br />
The latest date of inspection can be found on the inspection plate on the side of the display section.<br />
The date of manufacturing is imprinted on the back side.<br />
Repair<br />
Repair is only allowed by the manufacturer or explicitly authorised repair shops.<br />
In case of damages or for repeated inspection and calibration, please contact:<br />
service@tietzsch.de or send the device back to the manufacturer<br />
(address see page 8).
Technical Data <strong>MultiSafe</strong> <strong>DSP</strong> 3HS11<br />
Voltage: Rated voltage range 50...11000 V AC / 16000 V DC<br />
Indication by two redundant systems<br />
System 1 by LEDs 50 V, 120 V, 1000 V<br />
System 2 by two line LC Display with backlight<br />
Display range up to 1999 digit<br />
Switch on automatic at 50 V –LED indication only<br />
Identification of operation category +/ -/ ~ occurs automatically<br />
Acoustic signal at 1000 V<br />
Frequency range: 0...500 Hz<br />
Measurement range/ 10…1000 V d.c. ± 2,5% + 5 digits resolution 1 V<br />
Limiting deviation / 15…1000 V a.c. ± 5% + 10 digits resolution 1 V<br />
Resolution: 1,01…16,0 (16,50) kV d.c. ± 2,5% + 5 digits resolution 10 V<br />
1,01…11,00 (12,00) kV a.c. ± 5% DC + 10 digits resolution 10 V<br />
automatic range switch over<br />
Measuring current: 1,07 mA at 16000 V DC<br />
Operating temperature: -10°C ... + 55°C<br />
Input resistance: 15 MΩ± 3 MΩ–checkable with integrated R-test<br />
On-period: 15 min<br />
Energy source: 9 V flat cell IEC 6LR61 alkali-manganese<br />
<strong>DSP</strong>3HS11_BA_06-2009<br />
page 6<br />
Construction: two pole voltage tester<br />
basic device <strong>DSP</strong> 3:<br />
impact resistant, dust proof plastic casing with unbreakable display cover<br />
protection category IP 65, CAT IV<br />
connection cable H07 RN-F<br />
expansion <strong>DSP</strong> 3HS11:<br />
two attached high-tension test prods made of GRP<br />
moulded resistor decade, approx. 7,5 MΩeach prod<br />
connection cable additionally insulated by an enclosed flexible plastic corrugated hose<br />
Testings/ basic device <strong>DSP</strong> 3 in accordance with IEC 61243-3<br />
standards: <strong>DSP</strong> 3HS11 surge voltage in accordance to IEC 60071;<br />
impulse 1,2/ 50 μs with 60 kV positive and negative<br />
further applied standards: IEC 61243-2 and IEC 61010<br />
Weight/ 1,0 kg<br />
Dimension: entire device incl. furled lead aprox. 1150 x 200 x 60 mm<br />
length of test prods 790 mm<br />
case with alu frame (accessory) 6,9 kg, 1242 x 272 x 122 mm<br />
Art. No.: <strong>MultiSafe</strong> <strong>DSP</strong> 3HS11-x Art.-No. 89304-x<br />
x = please state shape of test electrodes!<br />
i = round electrodes<br />
G = peaked electrodes with 5mm thread<br />
Y = forked electrodes<br />
Case with aluminium frame Art. No.: 84330
Design of test electrodes<br />
The <strong>MultiSafe</strong> <strong>DSP</strong> 3HS11 is delivered with the following 125 mm long test<br />
electrodes as a standard feature:<br />
HS11-i = round electrode<br />
HS11-G = peaked electrode<br />
with 5mm thread<br />
HS11-Y = forked electrode<br />
Please contact us for other<br />
lengths and shapes.<br />
Accessories<br />
It’s recommended to use a solid box for transportation and secure storage.<br />
Art.-No. 84330 Solid case with aluminium frame 1242 x 272 x 122 mm<br />
<strong>DSP</strong>3HS11_BA_06-2009<br />
page 7
<strong>Tietzsch</strong> GmbH & Co. KG - Willringhauser Str. 18 - D-58256 Ennepetal - Tel.: +49-2333-75989 - Fax: +49-2333 -75257<br />
www.tietzsch.de - info@tietzsch.de