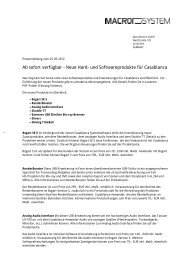
PDF Download - MacroSystem
PDF Download - MacroSystem
PDF Download - MacroSystem

Erfolgreiche ePaper selbst erstellen
Machen Sie aus Ihren PDF Publikationen ein blätterbares Flipbook mit unserer einzigartigen Google optimierten e-Paper Software.
Bedienungsanleitung / User manual<br />
Disk-Transfer<br />
für Casablanca Avio DVD, Prestige, Kron und Solitaire<br />
for Casablanca Avio DVD, Prestige, Kron and Solitaire
Bedienungsanleitung<br />
Disk-Tansfer<br />
für Casablanca Avio DVD, Prestige, Kron und Solitaire
Sicherheitshinweise<br />
Wir empfehlen Ihnen, die Hinweise in dieser Bedienungsanleitung genau zu beachten, um Bedienungsfehler<br />
auszuschließen.<br />
Wir weisen außerdem darauf hin, dass das Programm Disk-Transfer für den Hobbyanwender konzipiert<br />
worden ist.<br />
Wir haben sehr große Sorgfalt auf die Programmierung und die Prüfung dieses Programms verwendet.<br />
Da eine völlig fehlerfreie Anwendungssoftware nach bisherigen Erkenntnissen nicht unter allen Umständen<br />
und jederzeit gewährleistet werden kann, können wir leider nicht völlig ausschließen, dass<br />
sich Mängel eingeschlichen haben.<br />
Sollte dies wider Erwarten der Fall sein, werden wir festgestellte Fehler durch Überarbeitung der<br />
Programmierung beseitigen lassen und den betroffenen Kunden die neue Software kostenlos zur<br />
Verfügung stellen. Wir können allerdings keine Haftung für einen möglichen Daten- oder Zeitverlust<br />
und daraus eventuell entstehende Folgeschäden übernehmen, zumal wir keinerlei Einfluss auf die<br />
korrekte Programminstallation und -bedienung durch den Kunden haben. <strong>MacroSystem</strong> Digital Video<br />
AG und deren Fachhändler sind folglich nicht haftbar für Fehler sowie unbeabsichtigte Beschädigungen<br />
in Verbindung mit der Installation oder Anwendung des Programms Disk-Transfer.<br />
<strong>MacroSystem</strong> Digital Video AG und deren Fachhändler gewährleisten nicht die störungsfreie Anwendung<br />
des Produktes bzw. dessen völlige Fehlerfreiheit.<br />
Jegliche stillschweigende Gewährleistung ist ausgeschlossen, einschließlich der Gewährleistung auf<br />
Eignung der Software bzw. der Bedienungsanleitung für einen bestimmten Zweck.<br />
Weder <strong>MacroSystem</strong> Digital Video AG noch deren Fachhändler sind für Schäden aus direkter oder<br />
indirekter Folge, die aus dem Gebrauch der Software oder der Bedienungsanleitung entstehen,<br />
verantwortlich, z.B. für Gewinnminderung, Kosten, Hardware- oder Softwareprobleme oder andere<br />
Unannehmlichkeiten.
Inhaltsverzeichnis<br />
1. Wichtige Informationen ....................................................................................... 7<br />
1.1 Lieferumfang ............................................................................................ 7<br />
1.2 Weitere Informationen............................................................................. 7<br />
2. Über Disk-Transfer .............................................................................................. 9<br />
Seite<br />
3. Systemvoraussetzungen ..................................................................................... 11<br />
4. Installation ............................................................................................................ 11<br />
5. DiskTransfer Handhabung ................................................................................... 13<br />
5.1 Disk-Transfer Export ................................................................................ 13<br />
5.2 Disk-Transfer Import ................................................................................ 15<br />
Anhang A - Disk-Transfer und die PC-Software „Adobe Premiere Pro“ ............. 16<br />
Anhang B - Fragen und Antworten......................................................................... 17
Kapitel 1<br />
Wichtige Informationen<br />
Vielen Dank, dass Sie Disk-Transfer bei Ihrem<br />
Händler erworben haben!<br />
Wir bedanken uns für Ihr Vertrauen.<br />
1.1 Lieferumfang<br />
Bitte prüfen Sie Ihren Kauf sofort auf Vollständigkeit.<br />
Disk-Transfer besteht aus folgenden<br />
Komponenten:<br />
• Disk-Transfer Software, welche von Ihrem<br />
Fachhändler auf eine SmartMedia Karte überspielt<br />
wurde.<br />
• Handbuch<br />
• Freischaltcode für die Disk-Transfer Software<br />
1.2 Weitere Informationen<br />
Um Missverständnisse auszuschließen: Dieses<br />
Handbuch erklärt prinzipiell nur, wie Disk-Transfer<br />
funktioniert. Es erläutert Ihnen nicht, wie<br />
Ihre Casablanca grundsätzlich zu bedienen ist.<br />
Für Fragen, die über den Umfang dieses Handbuches<br />
hinausgehen, für Anregungen und Verbesserungsvorschläge,<br />
sowie bei technischen<br />
Problemen stehen wir Ihnen gerne zur Verfügung.<br />
Bitte wenden Sie sich dazu an die in Ihrem<br />
Casablanca Handbuch angegebenen Adressen<br />
und Telefonnummern. Bitte halten Sie bei jeder<br />
Kontaktaufnahme die Seriennummer Ihrer Casablanca<br />
bereit.<br />
7
Kapitel 2<br />
Über Disk-Transfer<br />
Disk-Transfer ist die ideale Software, um Einzelszenen<br />
auf einer DVD verlustfrei und dauerhaft<br />
zu archivieren. In Verbindung mit DVD-Arabesk<br />
können beliebig viele Szenen aus verschiedenen<br />
Projekten auf eine DVD gebrannt werden. Die<br />
maximale Gesamtlänge beträgt bis zu ca. 20<br />
Minuten auf einer Single-Layer DVD (4,7 GByte)<br />
und bis zu 40 Minuten auf einer Double-Layer<br />
DVD (9,6 GByte).<br />
Da die Daten unverändert im DV-Format auf DVD<br />
geschrieben werden, können die Szenen auch<br />
wieder praktisch verlustfrei in Casablanca eingelesen<br />
werden. „Disk-Transfer“ ist daher nicht<br />
nur für die Archivierung die perfekte Lösung,<br />
sondern eignet sich auch für den Datentausch<br />
mit anderen Casablanca-Geräten oder Computern.<br />
Szenen lassen sich beispielsweise mit<br />
PC-Programmen weiter bearbeiten und via DVD<br />
wieder in Casablanca einlesen. So kombiniert<br />
Disk-Transfer die Möglichkeiten und Vorteile von<br />
Casablanca mit diverser Computer-Software.<br />
9
Kapitel 3<br />
Voraussetzungen<br />
Disk-Transfer ist kompatibel mit allen Casablanca<br />
Systemen der zweiten Generation – von Casablanca<br />
Avio über Casablanca Prestige bis hin zu<br />
Casablanca Kron und Solitaire, die mit einem<br />
internen DVD-Brenner ausgestattet sind und über<br />
DVD-Arabesk 2, Version 2.2 oder höher, verfügen.<br />
Als Systemsoftware muss mindestens Smart-<br />
Edit Version 3.4 oder höher auf der Casablanca<br />
installiert sein.<br />
Die jeweils aktuelle Version der Systemsoftware<br />
erhalten Sie bei Ihrem Fachhändler.<br />
DVD-Arabesk 2 ist ebenfalls bei Ihrem Fachhändler<br />
erhältlich.<br />
Zur Wiedergabe oder Weiterverarbeitung der<br />
Disk-Transfer DVD‘s auf einem PC ist die Installation<br />
eines geeigneten DV-Codecs auf dem PC<br />
erforderlich.<br />
Kapitel 4<br />
Installation<br />
Disk-Transfer wird als Zusatzsoftware über den<br />
Menüpunkt „Produkt installieren“ unter „Systemeinstellungen“<br />
installiert.<br />
Rufen Sie das Menü „Produkt installieren“ auf<br />
und legen Sie die Smartmedia Karte mit der<br />
Disk-Transfer Software wie in Ihrem Casablanca<br />
Handbuch beschrieben in das SmartMedia Laufwerk<br />
Ihrer Casablanca ein.<br />
Nach kurzer Wartezeit erscheint „Disk-Transfer“<br />
in der Liste der Zusatzsoftware.<br />
Wählen Sie den Eintrag „Disk-Transfer“ aus<br />
dieser Liste durch einfachen Klick an, so dass er<br />
mit einem Balken hinterlegt ist und wählen Sie<br />
anschließend den Menüpunkt „aktivieren“.<br />
Ihr Casablanca fragt Sie nun nach dem Freischaltcode,<br />
den Sie bei Ihrem Fachhändler erworben<br />
haben. Geben Sie den 12-stelligen Code<br />
ein und bestätigen Sie Ihre Eingabe mit „Ok“.<br />
Eine gelungene Freischaltung erkennen Sie daran,<br />
dass hinter dem Eintrag „Disk-Transfer“ der<br />
Eintrag „(aktiv)“ angezeigt wird.<br />
Um Disk-Transfer als Demoversion zu installieren,<br />
klicken Sie in dem Fenster zur Eingabe des<br />
Freischaltcodes einfach auf „Demo“.<br />
Im Demomodus wird beim Export ein DEMO<br />
Schriftzug in die Szenen eingerechnet.<br />
11
Kapitel 5<br />
Disk-Transfer Handhabung<br />
Mit Disk-Transfer lassen sich einzelne Szenen<br />
aus der Szenenablage verlustfrei auf eine DVD<br />
auslagern („Export“) und ebenfalls verlustfrei<br />
von einer DVD wieder in die Szenenablage zurücklesen<br />
(„Import“).<br />
Disk-Transfer besteht daher aus zwei Teilen:<br />
einem „Disk-Transfer Export“ als Erweiterung<br />
zu DVD-Arabesk 2 und einem „Disk-Transfer Import“<br />
unter „Bearbeiten, Neu“.<br />
5.1 Disk-Transfer Export<br />
Disk-Transfer Export bereitet Videoszenen aus der<br />
Szenenablage beliebiger Projekte zum Brennen<br />
auf DVD vor. Ausgewähltes DV-Direkt Material<br />
aus der Szenenablage wird hierbei in PC-kompatible<br />
AVI-Dateien quasi wie in „Containern“ verpackt<br />
und für den späteren Brennvorgang in einer<br />
Ablage gesammelt. Der Ablauf entspricht also<br />
etwa dem „Projekt hinzufügen“ von DVD-Arabesk,<br />
ohne dass jedoch eine MPEG 2-Umwandlung<br />
des Videomaterials stattfindet.<br />
Der Aufruf von Disk-Transfer erfolgt aus DVD-<br />
Arabesk heraus. Starten Sie DVD-Arabesk über<br />
den Schalter „Programm starten“ im Menü „Fertigstellen“<br />
und wählen Sie im dort zunächst den<br />
Punkt „Einstellungen“.<br />
Rechts neben „Disk-Transfer Format“ muss jetzt<br />
der DV „Typ 1“ oder „Typ 2“ als AVI-Dateityp für<br />
das DV-Direkt Videomaterial ausgewählt werden:<br />
• Typ 1<br />
Die AVI-Dateien auf der künftigen DVD enthalten<br />
Bild- und Ton als Einheit. Dieses Format<br />
ist zwar gegenüber Typ 2 platzsparender (es<br />
passen etwa 5 % mehr Videomaterial auf eine<br />
DVD), jedoch kann „Typ 1“ nur von wenigen<br />
Programmen auf dem PC wiedergegeben und<br />
weiterverarbeitet werden. Der „Typ 1“ sollte<br />
daher vorrangig zum Einsatz kommen, um Szenen<br />
für die spätere Verwendung in Casablanca<br />
zu archivieren.<br />
• Typ 2<br />
Die AVI-Dateien auf der künftigen DVD enthalten<br />
Bild- und Ton getrennt. Der „Typ 2“ sollte<br />
gegenüber „Typ 1“ bevorzugt werden, wenn<br />
Sie die Dateien am PC weiterverarbeiten.<br />
Verlassen Sie nun das Menü „Einstellungen“ mit<br />
„Ok“ und wählen Sie den Menüpunkt „Export“.<br />
Abbildung<br />
Wichtiger Hinweis:<br />
• Bevor Sie den Disk-Transfer „Export“ starten,<br />
müssen alle DVD-Arabesk Projekte abgeschlossen<br />
und auf DVD geschrieben sein. Disk-Transfer<br />
verwendet den gleichen Festplattenplatz<br />
wie DVD-Arabesk und kann daher nicht parallel<br />
zu DVD-Arabesk verwendet werden.<br />
13
14<br />
Wenn vor der Verwendung von Disk-Transfer mit<br />
DVD-Arabesk gearbeitet wurde, dann erscheint<br />
an dieser Stelle folgender Hinweis:<br />
Bestätigen Sie die Frage nur dann mit „Ja“,<br />
wenn Ihre DVD-Arabesk Projekte tatsächlich gelöscht<br />
werden dürfen. Anderenfalls klicken Sie<br />
bitte auf „Nein“ und stellen Sie zunächst Ihre<br />
Projekte unter DVD-Arabesk fertig.<br />
Nach dem Start von Disk-Transfer Export können<br />
Videoszenen zum Brennen auf DVD vorbereitet<br />
und in einer speziellen Ablage von Disk-Transfer<br />
gesammelt werden.<br />
• Projekt wählen<br />
Dieser Schalter öffnet das Fenster zur Projektauswahl.<br />
Wählen Sie nun ein beliebiges Projekt<br />
von Ihrer aktuellen Festplatte. Aus der Szenenablage<br />
dieses Projektes werden anschließend<br />
einzelne Szenen zum Brennen auf DVD vorbereitet.<br />
• Szene wählen<br />
Dieser Schalter öffnet das Fenster zur Szenenauswahl.<br />
Suchen Sie in dem Fenster das<br />
gewünschte Szenenbildchen, klicken Sie es an<br />
und bestätigen Sie Ihre Auswahl mit „Ok“.<br />
• Laufzeit<br />
Hier können Sie die Länge der aktuell ausgewählten<br />
Szene im Format „Minuten : Sekunden<br />
: Einzelbilder“ ablesen.<br />
• Platzbedarf<br />
Aus der Laufzeit ergibt sich direkt der künftige<br />
Platzbedarf der ausgewählten Szene auf der<br />
DVD. Ein Platzbedarf von 100 % bedeutet, dass<br />
die DVD vollständig belegt ist, sobald die Szene<br />
hinzugefügt wird.<br />
• DVD-Restkapazität<br />
Diese Prozentangabe zeigt den noch verbleibenden<br />
Speicherplatz der ausgewählten Szene<br />
so an, als wäre die Szene bereits hinzugefügt<br />
worden. Somit können Sie noch vor dem Hinzufügen<br />
erkennen, ob die ausgewählte Szene<br />
auf die DVD passt, oder nicht.<br />
• Szene hinzufügen<br />
Die ausgewählte Szene wird in eine- oder mehrere<br />
AVI-Dateien vom „Typ 1“ oder „Typ 2“<br />
(siehe Einstellungen) umgewandelt und in der<br />
Szenenablage von Disk-Transfer abgelegt. Eine<br />
automatische Aufteilung der Szene in mehrere<br />
AVI-Dateien findet dann statt, wenn die unter<br />
dem Dateisystem „UDF“ zulässige, maximale<br />
Dateigröße von 1 GByte überschritten ist.<br />
• Szene entfernen<br />
Entfernt die markierte Szene aus der Szenenablage.<br />
Wählen Sie eine Szene in der Szenenablage<br />
an, um sie anschließend mit „Szene<br />
entfernen“ herauszunehmen. Die ursprüngliche<br />
Szene in der Szenenablage des Projektes<br />
ist hiervon nicht betroffen.<br />
• Szeneablage<br />
Die Szenenablage ist der Sammelbehälter für<br />
alle zum Brennen auf DVD vorbereiteten AVI-<br />
Videodateien mit DV-Direkt Videomaterial.<br />
Drücken Sie die Taste „Ok“,um das Disk-Transfer<br />
Export Menü zu schließen und die Änderungen<br />
zu übernehmen. Ein Klick auf den Schalter:
• DVD brennen<br />
Startet den Brennvorgang, sobald eine unbeschriebene<br />
DVD-R oder DVD-RW in das DVD-<br />
Laufwerk Ihrer Casablanca eingelegt wird.<br />
Wenn Sie zu einem späteren Zeitpunkt erneut<br />
ein Projekt mit DVD-Arabesk erstellen möchten<br />
und hierzu eine der DVD-Arabesk Tasten betätigen<br />
(Film hinzufügen, DVD gestalten, etc.), erscheint<br />
folgender Hinweis:<br />
Bestätigen Sie die Frage nur dann mit „Ja“,<br />
wenn Ihre von Disk-Transfer vorbereiteten AVI-<br />
Dateien in der Disk-Transfer Szenenablage tatsächlich<br />
gelöscht werden dürfen. Anderenfalls<br />
klicken Sie bitte auf „Nein“ und stellen Sie zunächst<br />
Ihre Projekte unter Disk-Transfer fertig.<br />
5.2 Disk-Transfer Import<br />
Mit Disk-Transfer erstellte DVDs können verlustfrei<br />
in die Szenenablage von Casablanca zurückgelesen<br />
werden. Die hierfür erforderliche Import-Funktion<br />
von Disk-Transfer wird über das<br />
Menü „Bearbeiten, Neu“ aufgerufen.<br />
Starten Sie ein beliebiges Projekt und klicken<br />
Sie im Menü „Bearbeiten“ auf „Neu“. Wählen<br />
Sie anschließend in der Liste links den Eintrag<br />
„Disk-Transfer“ und bestätigen Sie Ihre Auswahl<br />
mit „Ok“.<br />
Wichtiger Hinweis<br />
• Der im Menü „Neu“ unter „Länge“ eingestellte<br />
Wert hat keine Auswirkung auf die Länge eines<br />
Disk-Transfer Imports. Diskt-Transfer importiert<br />
grundsätzlich komplette Szenen ohne Zeitlimit.<br />
Es erscheint das Disk-Transfer Import Menü auf<br />
dem Bildschirm:<br />
Legen Sie nun eine bespielte DVD mit geeignetem<br />
Videomaterial (DV-AVI im UDF-Format)<br />
in das DVD-Laufwerk Ihrer Casablanca ein und<br />
warten Sie, bis die blinkende LED des Laufwerks<br />
erlischt, also bis das Laufwerk die eingelegte<br />
DVD akzeptiert hat. Nun stehen Ihnen folgende<br />
Bedienelemente zur Verfügung:<br />
• Inhalt anzeigen<br />
Das Inhaltsverzeichnis der eingelegten DVD<br />
wird gelesen und anschließend in der Auswahlliste<br />
angezeigt. Das Lesen des Inhaltsverzeichnisses<br />
der DVD kann einige Zeit dauern.<br />
• Ok<br />
Der aktuell in der Auswahlliste markierte Titel<br />
wird von der DVD in die Casablanca Szenenablage<br />
übertragen.<br />
• Alle<br />
Sämtliche in der Auswahlliste angezeigten Titel<br />
werden von der DVD in die Casablanca Szenenablage<br />
übertragen.<br />
• Abbruch<br />
Schließt das Disk-Transfer Import Menü, ohne<br />
eine Szene zu importieren.<br />
Die mit Disk-Transfer importierten Szenen werden<br />
nach dem Import in der Szenenablage des Projektes<br />
abgelegt und mit den Szenennamen der Auswahlliste<br />
versehen. Nun stehen Ihnen die Szenen<br />
zur weiteren Bearbeitung zur Verfügung.<br />
15
16<br />
Anhang A<br />
DiskTransfer und die PC-Software<br />
„Adobe Premiere Pro“<br />
Dieser Anhang beschreibt den Import von Disk-<br />
Transfer Szenen in Adobe Premiere Pro und den<br />
Disk-Transfer kompatiblen Export aus Adobe<br />
Premiere Pro auf eine DVD, die von Casablanca<br />
wieder gelesen werden kann.<br />
Wichtiger Hinweis<br />
• Die hier beschriebenen Funktionen funktionieren<br />
so nur in Verbindung mit Adobe Premiere<br />
Pro, nicht jedoch beispielsweise mit Adobe<br />
Premiere 5.1. Insbesondere für den Disk-Transfer<br />
kompatiblen Export von Szenen mit anderer<br />
Software muss gegebenenfalls ein geeigneter<br />
DV-Codec (siehe Anhang B) installiert werden.<br />
A.1 Szenen mit Premiere Pro importieren<br />
Sobald die Disk-Transfer DVD vom DVD-Laufwerk<br />
des PC erkannt wurde, können einzelne<br />
AVI-Szenen mit DV-Direkt Videomaterial in Adobe<br />
Premiere Pro importiert werden.<br />
Erstellen Sie zunächst ein neues Projekt und<br />
laden Sie die Vorgabe „DV - PAL - Standard 48<br />
kHz“. Öffnen Sie anschließend über den Menüpunkt<br />
„Datei - Importieren“ das Menü zur Szenenauswahl.<br />
Die gewünschten Szenen liegen<br />
auf der DVD im Verzeichnis „DVEXPORT“ als<br />
AVI-Dateien vor. Wählen Sie eine Szene an und<br />
bestätigen Sie Ihre Auswahl mit „Öffnen“.<br />
Um sämtliche Aufnahmen von der DVD auf einmal<br />
zu importieren, wählen Sie den Ordner „DV-<br />
EXPORT“ auf der DVD lediglich an, ohne ihn zu<br />
öffnen und klicken Sie anschließend auf „Ordner<br />
importieren“.<br />
Die importierten Aufnahmen stehen anschliessend<br />
zur weiteren Bearbeitung in Adobe Premiere<br />
Pro bereit.<br />
A.2 Szenen mit Premiere Pro exportieren<br />
Um fertiges Projekt aus Adobe Premiere Pro heraus<br />
zu exportieren, wählen Sie den Menüpunkt<br />
„Datei - Exportieren - Film“<br />
Unter den „Einstellungen für den Filmexport“<br />
sollten nun folgende Einstellungen vorgenommen<br />
werden:<br />
• Allgemein<br />
Als „Dateityp“ ist „Microsoft DV AVI“ auszuwählen.<br />
Die Häkchen bei „Video exportieren“<br />
und „Audio exportieren“ sollten ebenso<br />
gesetzt sein, wie der Punkt „Nach Abschluss<br />
dem Projekt hinzufügen“. Als „Einbettungsoptionen“<br />
ist „Ohne“ einzustellen.<br />
• Video<br />
Bei „Kompressor:“ ist DV (PAL) einzustellen<br />
und die „Farbtiefe“ sollte „16,7 Mio. Farben“<br />
betragen. Alle übrigen Einstellungen sind in<br />
diesem Menü durch die Wahl des TV-Standards<br />
(PAL oder NTSC) vorgegeben und müssen<br />
nicht verändert werden.<br />
•Keyframe und Rendern<br />
Die vorgegebenen Werte sollten nicht verändert<br />
werden.<br />
• Audio<br />
Es sollte lediglich beachtet werden, dass die<br />
„Samplerate“ 48.000 Hz beträgt. Alle übrigen<br />
Werte bleiben auf den Voreinstellungen.
Anhang B<br />
Fragen und Antworten<br />
• Benötige ich spezielle DVD-Rohlinge für Disk-<br />
Transfer?<br />
Nein, jede beschreibbare DVD+/-R oder DVD-<br />
/+RW. die in Verbindung mit DVD-Arabesk<br />
einwandfreie Resultate liefert, kann auch für<br />
Disk-Transfer eingesetzt werden.<br />
• Was unterscheidet Disk-Transfer grundsätzlich<br />
von DVD-Arabesk?<br />
Während DVD-Arabesk bis zu 180 Minuten Vidematerial<br />
im komprimierten MPEG-2 Format<br />
auf eine DVD schreibt, erzeugt Disk-Transfer<br />
spezielle AVI-Dateien mit unkomprimiertem<br />
DV-Videomaterial. Daher passen auf eine Disk-<br />
Transfer DVD auch lediglich rund 20 Minuten<br />
Videomaterial.<br />
• Spielt denn jeder handelsübliche DVD-Player<br />
die mit Disk-Transfer erzeugten DVDs ab?<br />
Nein, uns ist derzeit kein Stand-Alone DVD-<br />
Player bekannt, die die Wiedergabe von DV<br />
AVI-Material unterstützt. Von handelsüblichen<br />
DVD-Playern abspielbare DVDs müssen weiterhin<br />
mit DVD-Arabesk erzeugt werden.<br />
• Mein PC akzeptiert die Disk-Transfer DVD<br />
nicht. Immer wenn ich das DVD-Laufwerk mit<br />
der Disk-Transfer DVD anwähle, meldet Windows<br />
„kein Datenträger“.<br />
Ihr DVD-Laufwerk ist möglicherweise nicht in<br />
der Lage, selbstgebrannte DVD-R oder DVD-RW<br />
Medien zu lesen. Bitte überprüfen Sie die DVD<br />
in einem anderen PC und tauschen Sie gegebenenfalls<br />
Ihr DVD-Laufwerk gegen ein geeignetes<br />
Modell aus.<br />
• Anstelle eines DVD-Lauferkes soll mein PC<br />
gleich einen DVD-Brenner erhalten, um mit<br />
Disk-Transfer auch PC-Videoszenen zu Casablanca<br />
übertragen zu können. Welche DVD-<br />
Brenner sind geeignet?<br />
Im Prinzip ist jeder DVD-Brenner geeignet, der<br />
DVDs nach dem „Minus“-Standard erzeugt,<br />
also DVD-R und DVD-RW. In Casablanca Avio<br />
DVD, Prestige und Kron finden derzeit DVD-<br />
Brenner der Firma Pioneer Verwendung.<br />
• Die mit Disk-Transfer erzeugte DVD wird zwar<br />
vom DVD-Laufwerk meines PC erkannt, jedoch<br />
ist es nicht möglich, die darauf befindliche(n)<br />
AVI-Datei(en) abzuspielen oder zu bearbeiten.<br />
Beispielsweise meldet der Windows Media<br />
Player „Es wurde kein geeigneter Videocodec<br />
gefunden“, Wie bringe ich Windows dazu, die<br />
von Disk-Transfer erzeugte(n) AVI-Datei(en)<br />
abzuspielen?<br />
Jede Disk-Transfer AVI-Datei enthält Videomaterial<br />
im DV-Format. Auf dem PC muss daher ein geeigneter<br />
DV-Videocodec, also eine Software zur<br />
Aufbereitung und zur Darstellung von DV-Videomaterial,<br />
installiert sein, Häufig wird ein solcher<br />
DV-Videocodec bereits zusammen mit diversen<br />
PC-Videoschnittprogramm installiert. Es sind<br />
jedoch auch DV-Videocodecs beispielsweise der<br />
Firma MainConcept (http://www.mainconcept.de)<br />
einzeln im Internet erhältlich.<br />
• Weshalb ruckeln die Disk-Transfer AVI-Dateien<br />
bei der Wiedergabe auf meinem PC?<br />
Das Abspielen von DV-Material stellt hohe Anforderungen<br />
an den PC. Um die durchschnittlich<br />
3,6 MByte Videodaten pro Sekunde ruckelfrei auf<br />
den Bildschirm zu bringen, müssen alle PC-Komponenten<br />
(DVD-Laufwerk, Mainboard, Prozessor,<br />
Grafikkkarte) ausreichend schnell und optimal<br />
aufeinander abgestimmt sein.<br />
• Wie finde ich heraus, mit welchem Videocodec<br />
mein PC versucht, die Disk-Transfer Videodateien<br />
abzuspielen?<br />
Unter der Internetadresse:<br />
http://gspot.headbands.com<br />
kann ein Werkzeug zur Videocodec-Analyse<br />
geladen werden. Dieses Werkzeug für erfahrene<br />
Anwender zeigt genau an, welche Bestandteile<br />
von Windows für die Darstellung einer<br />
bestimmten Videodatei zuständig sind.<br />
17
User manual<br />
Disk-Transfer<br />
for Casablanca Avio, Prestige, Kron and Solitaire
Safety notices<br />
To avoid making mistakes during operation, we recommend that you carefully follow the<br />
instructions provided in this manual.<br />
We would also like to point out that Disk-Transfer has been designed with the hobby enthusiast in<br />
mind.<br />
We have taken a great deal of care while programming and checking this software.<br />
Nevertheless, since it is not possible to guarantee totally error-free software applications in all<br />
environments and at any time, we unfortunately cannot rule out the possibility that some errors may<br />
have crept in. If, contrary to all expectations, this is indeed the case, we shall remedy any errors in<br />
the program and supply the affected customers with the new software free of charge. We cannot,<br />
however, accept any liability for loss of data/time or any consequential damages that may occur as<br />
a result, particularly since we have no influence over correct software installation and operation by<br />
the customer. <strong>MacroSystem</strong> Digital Video AG and its dealers therefore cannot be held liable for any<br />
defects or unintentional damage in connection with the installation or use of Disk-Transfer.<br />
<strong>MacroSystem</strong> Digital Video AG and its dealers do not guarantee error-free use of the software or<br />
complete flawlessness of the program.<br />
Any implied guarantee is null and void, including guarantee of suitability of the software or<br />
operating instructions for a particular purpose.<br />
Neither <strong>MacroSystem</strong> Digital Video AG nor its dealers are responsible for any damages resulting<br />
either directly or indirectly through the use of the software or the operating instructions, e.g. for<br />
profit loss, costs, hardware or software problems or other issues.
Table of contents<br />
1. Important information ......................................................................................... 5<br />
1.1 Supplied items ......................................................................................... 5<br />
1.2 Further information.................................................................................. 5<br />
2. About Disk-Transfer ............................................................................................ 7<br />
3. Requirements ....................................................................................................... 9<br />
4. Installation ............................................................................................................ 9<br />
Seite<br />
5. Using DiskTransfer ............................................................................................... 11<br />
5.1 Disk-Transfer Export ................................................................................ 11<br />
5.2 Disk-Transfer Import ................................................................................ 13<br />
Anhang A - Disk-Transfer and the PC-Software „Adobe Premiere Pro“ ............. 14<br />
Anhang B - Questions and answers ....................................................................... 15
Chapter 1<br />
Important information<br />
Thank you for purchasing Disk-Transfer from<br />
your dealer.<br />
We appreciate your confidence in us, and we are<br />
sure you will find that Disk-Transfer is a powerful<br />
and time-saving addition to your Casablanca..<br />
1.1 Supplied items<br />
Please check that your purchase is complete.<br />
Disk-Transfer includes the following:<br />
• Disk -Transfer software that was copied by your<br />
dealer on to a SmartMedia card.<br />
• Manual<br />
• Access code for the Disk-Transfer software<br />
1.2 Further information<br />
We shall be happy to help you with questions<br />
outside the scope of this manual, ideas, suggested<br />
improvements and technical problems.<br />
Please use the address and telephone numbers<br />
quoted in your Casablanca manual. Please have<br />
the serial number of your Casablanca ready<br />
when calling us.<br />
5
Chapter 2<br />
About Disk-Transfer<br />
Disk-Transfer it the ideal software for the longterm<br />
archiving of individual scenes onto DVD<br />
without losses in quality. In conjunction with<br />
DVD Arabesk, you can burn as many scenes as<br />
you like from various projects onto a DVD. The<br />
maximum total length possible is up to approx.<br />
20 minutes on a single-layer DVD (4.7 GBytes)<br />
and up to 40 minutes on a double-layer DVD (9.6<br />
GBytes).<br />
Since the data are written onto DVD in DV format<br />
(i.e. they are not altered), you can import scenes<br />
back onto the Casablanca with no loss in quality.<br />
“Disk-Transfer” is therefore not just the perfect<br />
solution for archiving, it is also suitable for data<br />
exchange between other Casablanca devices or<br />
computers. So, for instance, you can edit scenes<br />
using PC programs and then import them back<br />
into the Casablanca via DVD. Disk-Transfer therefore<br />
allows you to combine all the advantages<br />
and possibilities provided by the Casablanca with<br />
various types of computer software.<br />
7
Chapter 3<br />
Requirements<br />
Disk-Transfer is compatible with all second generation<br />
Casablanca systems – the Casablanca<br />
Avio, Casablanca Prestige, and the Casablanca<br />
Kron and Solitaire systems that are fitted with an<br />
internal DVD burner and that have DVD Arabesk<br />
2 (version 2.2 or higher) installed.<br />
The Casablanca must have system software installed<br />
that is at least SmartEdit version 3.4 or<br />
higher.<br />
You can obtain the latest version of the system<br />
software from your dealer.<br />
You can likewise obtain DVD Arabesk 2 from<br />
your dealer.<br />
If you want to play or process Disk-Transfer<br />
DVDs on a PC, you must install a suitable DV<br />
codec on the PC.<br />
Chapter 4<br />
Installation<br />
Disk-Transfer must be installed as add-on software<br />
via the “Install product” menu item in<br />
“System settings”.<br />
Open the “Install product” menu and insert the<br />
SmartMedia card containing the Disk-Transfer<br />
software into your Casablanca’s SmartMedia<br />
drive, as described in the Casablanca manual.<br />
After a short time, “Disk-Transfer” appears in<br />
the list of add-on software.<br />
Select the “Disk-Transfer” entry from the list<br />
simply by clicking on it so that it appears with a<br />
background bar and then select the “activate”<br />
menu item.<br />
Your Casablanca will now ask you for the license<br />
code that you purchased from your dealer. Enter<br />
the 12-digit code and confirm your input with<br />
“Ok”.<br />
You will know that the product has been successfully<br />
licensed if you see “(active)” displayed<br />
after the “Disk-Transfer” entry.<br />
To install Disk-Transfer as a demo version, simply<br />
click on “Demo” in the window for entering<br />
the license code.<br />
In demo mode, the software adds a DEMO text<br />
to exported scenes.<br />
9
Chapter 5<br />
Using Disk-Transfer<br />
You can use Disk-Transfer to export individual<br />
scenes from the scene bin onto a DVD without<br />
losses in quality and import scenes from a DVD<br />
into the scene bin likewise without losses.<br />
Disk-Transfer therefore comprises two components:<br />
“Disk-Transfer Export” as an add-on to<br />
DVD Arabesk 2 and “Disk-Transfer Import” located<br />
under “Edit, New”.<br />
5.1 Disk-Transfer Export<br />
Disk-Transfer Export prepares video scenes located<br />
in the scene bins of any projects so that<br />
they are ready for burning onto DVD. DV Direct<br />
footage that is selected in the scene bin is<br />
packed into PC-compatible AVI files, which act<br />
like “containers”. The footage is then collected<br />
in a scene bin ready for burning later on. The<br />
procedure is therefore similar to the “Add project”<br />
function in DVD Arabesk, however, without<br />
the video material being converted to MPEG 2.<br />
Disk-Transfer is started from within DVD Arabesk.<br />
Start DVD Arabesk via the “Start program”<br />
button in the “Finish” menu, and then select the<br />
“Settings” item first of all.<br />
On the right next to “Disk-Transfer Format”, you<br />
must now select DV “Type 1” or “Type 2” as the<br />
AVI file type for the DV Direct video footage:<br />
• Type 1<br />
The AVI files on the DVD that you are going to<br />
burn will contain video and audio combined.<br />
Although this format is more space saving compared<br />
to Type 2 (approx. 5 % more video footage<br />
fits on a DVD), only a few programs are capable<br />
of playing and processing “Type 1” on a PC.<br />
Therefore, “Type 1” should primarily be used<br />
when you want to archive scenes for later use<br />
on the Casablanca.<br />
• Type 2<br />
The AVI files on the DVD that you are going to<br />
burn will contain video and audio separately.<br />
You should favor “Type 2” over “Type 1” if you<br />
want to process the files on a PC.<br />
Now close the “Settings” menu by clicking on<br />
“Ok” and select the “Export” menu.<br />
Important notice:<br />
Important Note:<br />
• Before starting the Disk-Transfer “Export”<br />
function, you must make sure that all DVD<br />
Arabesk projects are concluded and written to<br />
DVD. Disk-Transfer uses the same location on<br />
the hard drive as DVD Arabesk and therefore<br />
cannot be used parallel to DVD Arabesk.<br />
11
12<br />
If you used DVD Arabesk before Disk-Transfer,<br />
you will see the following notice appear:<br />
Only answer the question with “Yes” if you are<br />
sure that it is alright for your DVD Arabesk projects<br />
to be actually deleted. If not, please click on<br />
“No” and first complete your projects in DVD<br />
Arabesk.<br />
After Disk-Transfer Export starts, you can prepare<br />
video scenes for burning onto DVD and<br />
then collect them in Disk-Transfer’s own special<br />
scene bin.<br />
• Select project<br />
This button opens the window for selecting a<br />
project. Now select any project that you like<br />
that is stored on your hard drive. In a moment,<br />
you will start preparing individual scenes in<br />
this project’s scene bin so that they are ready<br />
for burning onto DVD.<br />
• Select scene<br />
This button opens the window for selecting<br />
a scene. In this window, search for the scene<br />
thumbnail that you want and confirm your<br />
selection with “Ok”.<br />
• Scene length<br />
This is where you can read the length of the<br />
currently selected scene in the format “Minutes<br />
: Seconds : Frames”.<br />
• Size<br />
The amount of space that the selected scene<br />
will take up on the DVD is directly related to the<br />
scene length. A size of 100 % means that the<br />
DVD will be used to full capacity as soon as the<br />
scene is added.<br />
• Free capacity<br />
This percentage indicates the remaining<br />
storage space that would be available on the<br />
DVD if you were to add this scene. It therefore<br />
allows you to see whether the selected scene<br />
can fit on the DVD or not even before you add<br />
the scene.<br />
• Add scene<br />
The selected scene is converted into one or<br />
more AVI files (“Type 1” or “Type 2”) – see<br />
Settings – and is stored in Disk-Transfer’s scene<br />
bin. The scene is automatically split up into<br />
several AVI files if the maximum file size of<br />
1 GByte that is allowed under the “UDF” file<br />
system is exceeded.<br />
• Remove scene<br />
Removes the marked scene from the scene bin.<br />
Select a scene in the scene bin and then remove<br />
it with “Remove scene”. The original scene<br />
in the project’s scene bin is not affected by this.<br />
• Scene bin<br />
The scene bin is the storage container for all<br />
AVI video files with DV Direct footage that have<br />
been prepared for burning onto DVD.<br />
Press the “Ok” button to close the Disk-Transfer<br />
Export menu and to apply the changes. A<br />
click on the button:
• Write DVD<br />
Starts the burning process as soon as an<br />
unwritten DVD-R or DVD-RW is inserted in the<br />
Casablanca’s DVD drive.<br />
If you want to create a project with DVD Arabesk<br />
again at a later point in time and in doing so<br />
press one of the DVD Arabesk buttons (Add film,<br />
Read DVD, etc.), you will see the following notice<br />
appears:<br />
Only answer the question with “Yes” if you are<br />
sure that it is alright for your AVI files prepared<br />
by Disk-Transfer to be actually deleted from<br />
Disk-Transfer’s scene bin. If not, please click on<br />
“No” and first complete your projects in Disk-<br />
Transfer.<br />
5.2 Disk-Transfer Import<br />
You can import the data on DVDs created using<br />
Disk-Transfer back into the Casablanca’s scene<br />
bin without any loss in quality. The import function<br />
provided by Disk-Transfer that you need for<br />
this can be started using the “Edit, New” menu.<br />
Open any project and click on “New” in the<br />
“Edit” menu. Next, in the list on the left, select<br />
the ”Disk-Transfer” entry and confirm your selection<br />
with “Ok”.<br />
Important notice<br />
• The value that is set for “Length” in the “New”<br />
menu does not have any effect on the length<br />
of a Disk-Transfer import. Disk-Transfer always<br />
imports whole scenes without a time limit.<br />
The Disk-Transfer Import menu appears onscreen:<br />
Now insert a DVD containing suitable video footage<br />
(DV-AVI in UDF format) into the Casablanca’s<br />
DVD drive and wait for the flashing LED on<br />
the drive to go out, i.e. wait until the drive has<br />
accepted the inserted DVD. You can now use<br />
the following controls:<br />
• Display contents<br />
The table of contents of the inserted DVD is<br />
read and then displayed in the selection list. It<br />
can take a while for the contents of the DVD to<br />
be read.<br />
• Ok<br />
The title that is currently highlighted in the selection<br />
list is transferred from the DVD into the<br />
Casablanca’s scene bin.<br />
• All<br />
All the titles displayed in the selection list are<br />
transferred from the DVD into the Casablanca’s<br />
scene bin.<br />
• Cancel<br />
Closes the Disk-Transfer Import menu without<br />
importing a scene.<br />
The scenes imported using Disk-Transfer are<br />
stored after the import process in the scene bin<br />
of the project and are labeled with the scene<br />
names that are displayed in the selection list. The<br />
scenes are now available for further processing.<br />
13
14<br />
Appendix A<br />
Disk-Transfer and the PC software<br />
“Adobe Premiere Pro”<br />
This appendix describes how to import Disk-<br />
Transfer scenes into Adobe Premiere Pro and<br />
how to export scenes that are compatible with<br />
Disk-Transfer from Adobe Premiere Pro onto a<br />
DVD that can be read by the Casablanca.<br />
Important notice<br />
• The functions described here only work in the<br />
way explained here with Adobe Premiere Pro<br />
and not, for instance, with Adobe Premiere 5.1.<br />
A suitable DV codec (see Appendix B) might<br />
need to be installed in order to be able to<br />
export Disk-Transfer compatible scenes using<br />
other software.<br />
A.1 Importing scenes with Premiere Pro<br />
As soon as the Disk-Transfer DVD has been detected<br />
by the PC’s DVD drive, you can import<br />
individual AVI scenes with DV Direct video footage<br />
into Adobe Premiere Pro.<br />
First create a new project and load the “DV - PAL<br />
- Standard 48 kHz” setting. Then, use the “File<br />
- Import” menu item to open the scene selection<br />
menu. The scenes that you want are stored on<br />
the DVD in the “DVEXPORT” directory as AVI<br />
files. Select a scene and confirm your selection<br />
with “Open”.<br />
To import all the recordings from the DVD in one<br />
go, simply select the “DVEXPORT” directory on<br />
the DVD without opening it and then click on<br />
“Import directory”.<br />
The imported recordings will then be available<br />
for further processing in Adobe Premiere Pro.<br />
A.2 Exporting scenes with Premiere Pro<br />
To export a completed project from Adobe<br />
Premiere Pro, select the “File - Export - Film”<br />
menu item.<br />
You should now make the following changes<br />
to the settings in the “Settings for film export”<br />
section.<br />
• General<br />
You must select “Microsoft DV AVI” as the<br />
“File type”. You must activate the check marks<br />
next to “Export video” and “Export audio” and<br />
activate the “Add to the project after completion”<br />
setting. The “Imbedding options” must be<br />
set to “None”.<br />
• Video<br />
You should set the “Compressor:” setting to<br />
“DV (PAL)” and the “Color depth” to “16.7 million<br />
colors”. All the other settings in this menu<br />
are determined by the selected TV standard<br />
(PAL or NTSC) and do not need to be changed.<br />
• Keyframe and Render<br />
The preset values should not be changed.<br />
• Audio<br />
You only need to make sure that the “Sample<br />
rate” is set to “48,000 Hz”. All the other values<br />
should remain set to their presets.
Appendix B<br />
Questions and answers<br />
• Do I need special DVD blanks for Disk-Transfer?<br />
No, every writable DVD+/-R or DVD-/+RW that<br />
provides good results when used with DVD<br />
Arabesk can also be used with Disk-Transfer.<br />
• What is the main difference between Disk-<br />
Transfer and DVD Arabesk?<br />
DVD Arabesk can write up to 180 minutes of<br />
video material in compressed MPEG-2 format<br />
onto a DVD whilst Disk-Transfer creates special<br />
AVI files with uncompressed DV video footage.<br />
For this reason, only around 20 minutes of<br />
video footage will fit onto a Disk-Transfer DVD.<br />
• Is any standard DVD player able to play DVDs<br />
created using Disk-Transfer?<br />
No, we currently do not know of any standalone<br />
DVD player that can play DV AVI footage.<br />
DVDs that are to be played on standard DVD<br />
players must still be created using DVD Arabesk.<br />
• My PC does not accept the Disk-Transfer DVD.<br />
Whenever I select the DVD drive containing<br />
the Disk-Transfer DVD, Windows informs me<br />
that there is no medium present.<br />
It is possible that your DVD drive is not capable<br />
of reading DVD-R or DVD-RW media that you<br />
have burned yourself. Please check the DVD in<br />
another PC and if necessary replace your DVD<br />
drive with a suitable model.<br />
• Instead of a DVD drive my PC is going to be<br />
fitted with a DVD burner so that I can use Disk-<br />
Transfer to transfer PC video scenes to the<br />
Casablanca. Which DVD burners are suitable?<br />
Basically every DVD burner is suitable that can<br />
create DVDs according to the “minus” standard,<br />
i.e. DVD-R and DVD-RW. DVD burners<br />
manufactured by Pioneer are currently fitted to<br />
the Casablanca Avio DVD, Prestige and Kron.<br />
• Although my PC’s DVD drive detects the DVD<br />
created using Disk-Transfer, it is not possible<br />
to play or process the AVI file(s) stored on it.<br />
For instance, Windows Media Player notifies<br />
me that “No suitable video codec was found”.<br />
How do I make Windows play the AVI file(s)<br />
created using Disk-Transfer?<br />
Each Disk-Transfer AVI file contains video footage<br />
in DV format. For this reason, the PC must<br />
have a suitable DVD video codec installed,<br />
i.e. software for processing and displaying<br />
DV video footage. This kind of DV video codec<br />
is often installed together with various<br />
PC video editing programs. You can however,<br />
also obtain DV video codecs separately on the<br />
Internet, for instance from MainConcept (http:<br />
//www.mainconcept.de).<br />
• Why does playback appear shaky on my PC<br />
when I play the Disk-Transfer AVI files?<br />
Playing DV footage places high demands on<br />
the PC. In order to be able to display an average<br />
of 3.6 MBytes per second of video data<br />
smoothly on-screen, all the PC components<br />
(DVD drive, motherboard, processor, graphics<br />
card) must be fast enough and optimally suited<br />
to one another.<br />
• How do I find out what video codec my PC is<br />
using to try to play Disk-Transfer video files?<br />
At the following Internet address:<br />
http://gspot.headbands.com<br />
you can download a video codec analysis tool.<br />
This is a tool for experienced users that provides<br />
precise information on which Windows<br />
components are responsible for playing a particular<br />
video file.<br />
15
168-07/04