Sigma 500 Kombipilot
Sigma 500 Kombipilot
Sigma 500 Kombipilot

Erfolgreiche ePaper selbst erstellen
Machen Sie aus Ihren PDF Publikationen ein blätterbares Flipbook mit unserer einzigartigen Google optimierten e-Paper Software.
Waarschuwing<br />
Waarschuwing<br />
Waarschuwing<br />
Deze apparatuur is uitgerust met een hoogspanning EL lamp onder de folie en met<br />
hoogspanning elektronica in de behuizing om deze lamp aan te sturen.<br />
Maak geen krassen of andere beschadigingen op de folie en maak het apparaat niet open<br />
tijdens gebruik. Gevaar voor elektrocutie als het apparaat ondeugdelijk wordt gebruikt.<br />
Indien u het zichtinstrument opent, vermijdt dan alle contact met de wijzerplaat van de<br />
indicator. De mogelijkheid bestaat dat u statische elektriciteit overbrengt op de indicator<br />
waardoor deze tijdelijk een misaanwijzing geeft. Het afregelen van het apparaat kan pas<br />
dan gebeuren als de indicator goed in de middenpositie staat als het apparaat is<br />
uitgeschakeld.<br />
De gyro-unit bevat precisie onderdelen en mag uitsluitend door RZ personeel onderhouden<br />
worden. Reparatie door derden kan leiden tot slecht functioneren van het apparaat. Indien<br />
service noodzakelijk is dient u zich te wenden tot uw lokale dealer.<br />
Warning Warning<br />
Warning<br />
This device is fitted with a high-voltage EL lamp under the foil and with high-voltage<br />
electronics in the casing for operation of the lamp.<br />
Do not abrade or damage the foil and do not open the device during operation. Danger<br />
of electrocution if the device is used improperly.<br />
When you open the display unit avoid all contact with the indicator plate of the indicator<br />
as you may expose the indicator to static electricity causing it to give a temporary false<br />
reading. The device can then be set only when the indicator is exactly in the central<br />
position and the device is switched off.<br />
The gyro unit contains precision components and may only be maintained by RZ<br />
personnel. Repairs by third parties may cause the device to malfunction. Please contact<br />
your local dealer for all service requirements.<br />
Achtung<br />
Achtung<br />
Dieses Gerät ist mit einer unter Hochspannung stehenden EL-Leuchte unter der Folie<br />
und mit Hochspannungselektronik im Gehäuse um diese Leuchte herum ausgerüstet,<br />
damit diese Leuchte angesteuert werden kann.<br />
Vermeiden Sie Kratzer oder andere Beschädigungen an der Folie und öffnen Sie den<br />
Apparat nicht, während er verwendet wird. Es besteht dabei Lebensgefahr durch<br />
Stromschlag, wenn der Apparat nicht sachgemäß verwendet wird.<br />
Vermeiden Sie jeden Kontakt mit der Rundskala der Anzeige, wenn Sie das<br />
Sichtinstrument öffnen. Es besteht die Möglichkeit, dass Sie statische Elektrizität auf die<br />
Anzeige übertragen, wodurch diese vorübergehend eine falsche Anzeige liefert. Das<br />
Abgleichen des Apparats kann erst dann erfolgen, wenn die Anzeige richtig in der<br />
Mittelposition steht, während der Apparat ausgeschaltet ist.<br />
Die Kreiseleinheit enthält Präzisionsteile und darf nur durch Techniker von RZ gewartet<br />
werden. Reparatur durch Dritte kann zu einem schlechten Funktionieren des Geräts<br />
führen. Wenden Sie sich an Ihren nächsten Händler, wenn eine Wartung notwendig ist.<br />
Version: 01 ongecontroleerd<br />
Date:<br />
Document: <strong>Sigma</strong><strong>500</strong>.doc Page 4 of 108<br />
Date 1 e release:
INDEX<br />
INDEX<br />
Version: 01 ongecontroleerd<br />
Date:<br />
Document: <strong>Sigma</strong><strong>500</strong>.doc Page 5 of 108<br />
Date 1 e release:<br />
Pagina:<br />
NEDERLANDS ................................................................................................................................................... 12<br />
Algemene beschrijving / Technische gegevens.................................................................................................... 13<br />
1.1 Leveringsomvang <strong>Sigma</strong> <strong>500</strong> ............................................................................................................... 13<br />
1.2 Beschrijving meegeleverde items ......................................................................................................... 13<br />
1.2.1 Manual.......................................................................................................................................... 13<br />
1.2.2 Bediening/Zichtinstrument <strong>Sigma</strong> <strong>500</strong>. ........................................................................................ 13<br />
1.2.3 Bediening <strong>Sigma</strong> 600.................................................................................................................... 13<br />
1.2.4 Roerstandgever RZ 610. ............................................................................................................... 13<br />
1.2.5 Gyro eenheid RZ 630.................................................................................................................... 14<br />
1.2.6 Junctionbox RZ 219: .................................................................................................................... 14<br />
1.2.7 Filterunit RZ 203: ......................................................................................................................... 14<br />
1.2.8 Montageset. .................................................................................................................................. 14<br />
Installatie voorschrift............................................................................................................................................ 15<br />
2.1 Montage zichtinstrument SIGMA <strong>500</strong>. ................................................................................................ 15<br />
2.2 Montage bediening <strong>Sigma</strong> 600. ........................................................................................................... 15<br />
2.3 Montage junctionbox............................................................................................................................ 15<br />
2.4 Montage roerstandgever ....................................................................................................................... 15<br />
2.5 Montage opnemer RZ 630.................................................................................................................... 16<br />
Aansluitingen........................................................................................................................................................ 17<br />
3.1 Aansluitingen <strong>Sigma</strong><strong>500</strong>....................................................................................................................... 17<br />
3.1.1 K1: Voeding <strong>Sigma</strong> <strong>500</strong> ............................................................................................................... 17<br />
3.1.2 K2 : <strong>Sigma</strong> <strong>500</strong>............................................................................................................................ 18<br />
3.1.3 K3: <strong>Sigma</strong> <strong>500</strong>.............................................................................................................................. 19<br />
3.1.4 K4 : <strong>Sigma</strong><strong>500</strong>.............................................................................................................................. 19<br />
3.2 Aansluitingen <strong>Sigma</strong> 600...................................................................................................................... 21<br />
3.2.1 K1: Voeding ................................................................................................................................. 21<br />
3.2.2 K2: Communicatie........................................................................................................................ 21<br />
3.2.3 Dipswitch settings <strong>Sigma</strong> 600. ...................................................................................................... 22<br />
3.3 Aansluitingen/ instellingen in de junctionbox RZ 219 ........................................................................ 23<br />
3.3.1 Aansluitingen in de junctionbox RZ 219 op print RZ1703/A2..................................................... 23<br />
3.3.2 Aansluitingen in de junctionbox RZ 219 op print RZ 1711.......................................................... 26<br />
3.3.3 DIP switch instellingen op print RZ 1703/A2 .............................................................................. 26<br />
Bediening ............................................................................................................................................................. 27<br />
4.1 Bediening <strong>Sigma</strong> <strong>500</strong>............................................................................................................................ 27<br />
4.1.1 Potmeter on/off/dim <strong>Sigma</strong> <strong>500</strong>.................................................................................................... 27<br />
4.1.2 Reset /Test toets............................................................................................................................ 27<br />
4.1.3 Select <strong>Sigma</strong> <strong>500</strong> .......................................................................................................................... 27<br />
4.1.4 Test PORT .................................................................................................................................... 27<br />
4.1.5 Test STBD.................................................................................................................................... 27<br />
4.1.6 Functie ROERSTAND. ................................................................................................................ 28<br />
4.1.7 Functie WEGAFHANKELIJK..................................................................................................... 28<br />
4.1.8 Functie BOCHTAANWIJZER PILOOT...................................................................................... 28<br />
4.1.9 Functie AUX................................................................................................................................. 28<br />
4.1.10 GEVOELIGHEID ........................................................................................................................ 28<br />
4.1.11 ROER ........................................................................................................................................... 28<br />
4.1.12 DEMPING.................................................................................................................................... 29<br />
4.1.13 TRIM. ........................................................................................................................................... 29
4.2 Bediening <strong>Sigma</strong> 600............................................................................................................................ 30<br />
4.2.1 “FOLLOW UP”........................................................................................................................... 30<br />
4.2.2 “SELECT”................................................................................................................................... 30<br />
4.2.3 “PILOT” ...................................................................................................................................... 30<br />
4.2.4 “PORT” ....................................................................................................................................... 30<br />
4.2.5 “STBD” ........................................................................................................................................ 30<br />
4.2.6 “POOKJE”.................................................................................................................................... 30<br />
Alarmen................................................................................................................................................................ 31<br />
4.3 ALARMEN SIGMA <strong>500</strong>...................................................................................................................... 31<br />
4.3.1 Gyroalarm..................................................................................................................................... 31<br />
4.3.2 Roerwerkalarm ............................................................................................................................. 31<br />
4.3.3 Koersalarm. .................................................................................................................................. 31<br />
4.3.4 Spanningsalarm ............................................................................................................................ 31<br />
4.4. Alarmering en signalering <strong>Sigma</strong> 600 : ................................................................................................ 32<br />
4.4.1 Led wegafhankelijke besturing..................................................................................................... 32<br />
4.4.2 Led R.O.T. Pilot ........................................................................................................................... 32<br />
4.4.3 Led Select. .................................................................................................................................... 32<br />
4.4.4 Led voeding spanning................................................................................................................... 32<br />
Foutzoekprocedure ............................................................................................................................................... 33<br />
5.1.1 Zichtinstrument SIGMA <strong>500</strong> schakelt niet aan. ............................................................................... 33<br />
5.1.2 Zichtinstrument SIGMA <strong>500</strong> schakelt wel aan maar er verschijnt COMMUNICATIE ALARM. . 33<br />
5.1.3 SIGMA <strong>500</strong> schakelt aan maar geeft SPANNINGS ALARM. ........................................................ 33<br />
5.1.4 Zichtinstrument schakelt aan maar geeft geen juiste BAW informatie. ........................................... 33<br />
5.1.5 SIGMA <strong>500</strong> geeft ROER ALARM .................................................................................................. 33<br />
5.1.6 Piloot stuurt niet, maar geeft ook geen ROER ALARM ................................................................. 33<br />
Version: 01 ongecontroleerd<br />
Date:<br />
Document: <strong>Sigma</strong><strong>500</strong>.doc Page 6 of 108<br />
Date 1 e release:
ENGLISH............................................................................................................................................................. 34<br />
General description / technical data...................................................................................................................... 35<br />
1.1 Scope of delivery of <strong>Sigma</strong> <strong>500</strong>............................................................................................................ 35<br />
1.2 Description of the items supplied with the equipment.......................................................................... 35<br />
1.2.1 Manual.......................................................................................................................................... 35<br />
1.2.2 Operating the <strong>Sigma</strong> <strong>500</strong> .............................................................................................................. 35<br />
1.2.3 Operating unit <strong>Sigma</strong> 600............................................................................................................. 35<br />
1.2.4 Rudder angle transmitter RZ 610.................................................................................................. 35<br />
1.2.5 Gyro unit RZ 630.......................................................................................................................... 36<br />
1.2.6 Junction box RZ 219..................................................................................................................... 36<br />
1.2.7 Filter unit RZ 203. ........................................................................................................................ 36<br />
1.2.8 Mounting set................................................................................................................................. 36<br />
Installation instructions ........................................................................................................................................ 37<br />
2.1 Mounting display/operating unit SIGMA <strong>500</strong>...................................................................................... 37<br />
2.2 Mounting the operating system of the <strong>Sigma</strong> 600. ............................................................................... 37<br />
2.3 Mounting the junction box.................................................................................................................... 37<br />
2.4 Mounting the rudder angle transmitter. ................................................................................................ 37<br />
2.5 Mounting the recording unit RZ 630. ................................................................................................... 38<br />
Connections.......................................................................................................................................................... 39<br />
3.1 SIGMA <strong>500</strong>. ......................................................................................................................................... 39<br />
3.1.1 K1: Power supply to the <strong>Sigma</strong> <strong>500</strong> ............................................................................................. 39<br />
3.1.2 K2 : <strong>Sigma</strong> <strong>500</strong>............................................................................................................................. 40<br />
3.1.3 K3: <strong>Sigma</strong> <strong>500</strong>.............................................................................................................................. 41<br />
3.1.4 K4: <strong>Sigma</strong> <strong>500</strong>.............................................................................................................................. 41<br />
3.2 Connections <strong>Sigma</strong> 600 control unit..................................................................................................... 43<br />
3.2.1 K1: Power supply. ........................................................................................................................ 43<br />
3.2.2 K2: Communication.................................................................................................................... 43<br />
3.2.3 Dipswitch settings <strong>Sigma</strong> 600. ..................................................................................................... 44<br />
3.3 Connections in the junction box RZ 219 to the PCB RZ1703/A2........................................................ 45<br />
3.4 Connections in the junction box RZ 219 to the PCB RZ 1711............................................................. 48<br />
3.5 DIP switch settings on the pcb RZ 1703/A2......................................................................................... 48<br />
Operation.............................................................................................................................................................. 49<br />
4.1 Operation SIGMA <strong>500</strong>. ........................................................................................................................ 49<br />
4.1.1 Potentiometer on/off/dim <strong>Sigma</strong> <strong>500</strong>............................................................................................ 49<br />
4.1.2 Reset /Test key.............................................................................................................................. 49<br />
4.1.3 Select <strong>Sigma</strong> <strong>500</strong>. ......................................................................................................................... 49<br />
4.1.4 PORT test. .................................................................................................................................... 49<br />
4.1.5 STBD test. ................................................................................................................................... 49<br />
4.1.6 Function RUDDER ANGLE. ....................................................................................................... 49<br />
4.1.7 The ROUTE-DEPENDENT function........................................................................................... 50<br />
4.1.8 Function TURN-INDICATOR PILOT......................................................................................... 50<br />
4.1.10 SENSITIVITY.............................................................................................................................. 50<br />
4.1.11 RUDDER...................................................................................................................................... 50<br />
4.1.12 DAMPING. .................................................................................................................................. 51<br />
4.1.13 TRIM. ........................................................................................................................................... 51<br />
4.2 Operation of the <strong>Sigma</strong> 600.................................................................................................................. 52<br />
4.2.1 “FOLLOW UP”........................................................................................................................... 52<br />
4.2.2 “SELECT”................................................................................................................................... 52<br />
4.2.3 “PILOT” ....................................................................................................................................... 52<br />
4.2.4 “PORT” ........................................................................................................................................ 52<br />
4.2.5 “STBD” ........................................................................................................................................ 52<br />
4.2.6 “LEVER”...................................................................................................................................... 52<br />
Version: 01 ongecontroleerd<br />
Date:<br />
Document: <strong>Sigma</strong><strong>500</strong>.doc Page 7 of 108<br />
Date 1 e release:
4.3 Alarms <strong>Sigma</strong> <strong>500</strong>. ..................................................................................................................................... 53<br />
4.3.1 Gyro alarm.................................................................................................................................... 53<br />
4.3.2 Rudder system alarm. ................................................................................................................... 53<br />
4.3.3 Course alarm................................................................................................................................. 53<br />
4.3.4 Voltage alarm. .............................................................................................................................. 53<br />
4.4 Alarms and sinnaling <strong>Sigma</strong> 600................................................................................................................ 53<br />
4.4.1 Led Follow up...................................................................................................................................... 53<br />
4.4.2 Led Pilot. ............................................................................................................................................. 53<br />
4.4.3 Led Select. ........................................................................................................................................... 53<br />
4.4.4 Power l.ed............................................................................................................................................ 53<br />
Fault detection procedure ..................................................................................................................................... 54<br />
5.1.1 Display unit SIGMA <strong>500</strong> does not switch on. .............................................................................. 54<br />
5.1.2 SIGMA <strong>500</strong> switches on but a communication alarm is given..................................................... 54<br />
5.1.3 SIGMA <strong>500</strong> SPANNINGS ALARM indicator is lichted. ............................................................ 54<br />
5.1.4 SIGMA <strong>500</strong> switches on but does not indicate the correct R.O.T. Information. .......................... 54<br />
5.1.5 SIGMA <strong>500</strong> given a RUDDER ALARM. .................................................................................... 54<br />
5.1.6 Pilot does not steer, but also does not give any RUDDER ALARM............................................ 54<br />
Version: 01 ongecontroleerd<br />
Date:<br />
Document: <strong>Sigma</strong><strong>500</strong>.doc Page 8 of 108<br />
Date 1 e release:
DEUTSCH............................................................................................................................................................ 55<br />
Allgemeine Beschreibung / Technische Daten..................................................................................................... 56<br />
1.1 Lieferungsumfang <strong>Sigma</strong> <strong>500</strong>............................................................................................................... 56<br />
1.2 Beschreibung der Artikel im Lieferungsumfang. ................................................................................. 56<br />
1.2.1 Handbuch...................................................................................................................................... 56<br />
1.2.2 Sichtinstrument <strong>Sigma</strong> <strong>500</strong>........................................................................................................... 56<br />
1.2.3 Steuerung <strong>Sigma</strong> 600.................................................................................................................... 56<br />
1.2.4 Ruderlagengeber RZ 610.............................................................................................................. 57<br />
1.2.5 Kreiseleinheit RZ 630................................................................................................................... 57<br />
1.2.6 Anschlusskasten RZ 219............................................................................................................... 57<br />
1.2.7 Filterelement RZ 203.................................................................................................................... 57<br />
1.2.8 Montageset. .................................................................................................................................. 57<br />
2.1 Montage Sichtinstrumente SIGMA <strong>500</strong>. ............................................................................................. 58<br />
2.2 Montage Steuerung SIGMA 600.......................................................................................................... 58<br />
2.3 Montage Anschlusskasten. ............................................................................................................... 58<br />
2.4 Montage Ruderlagengeber................................................................................................................ 58<br />
2.5 Montage Sensor RZ 630. ...................................................................................................................... 59<br />
Anschlüsse............................................................................................................................................................ 60<br />
3.1 SIGMA <strong>500</strong>. ......................................................................................................................................... 60<br />
3.1.1 K1: Spannungsversorgung <strong>Sigma</strong> <strong>500</strong>.......................................................................................... 60<br />
3.1.2 K2: <strong>Sigma</strong> <strong>500</strong>.............................................................................................................................. 61<br />
3.1.3 K3: <strong>Sigma</strong> <strong>500</strong>.............................................................................................................................. 63<br />
3.1.4 K4: <strong>Sigma</strong> <strong>500</strong>............................................................................................................................. 63<br />
3.2 Anschlüsse <strong>Sigma</strong> 600.......................................................................................................................... 65<br />
3.2.1 K1: Stromversorgung.................................................................................................................... 65<br />
3.2.2 K2: Kommunikation (Datenleitung)................................................................................................. 65<br />
3.3 DIP-Schalters <strong>Sigma</strong> 600...................................................................................................................... 66<br />
3.3 Anschlüsse in dem Anschlusskasten RZ 219 an RZ 1703/A2.............................................................. 67<br />
3.4 Anschlüsse in dem Anschlusskasten RZ 219 an RZ 1711.................................................................... 70<br />
3.5 Einstellungen für DIP-Schalter im modul RZ 1703/A2.................................................................... 70<br />
Bedienung............................................................................................................................................................. 71<br />
4.1 Bedienung SIGMA <strong>500</strong>. ....................................................................................................................... 71<br />
4.1.1 Potmeter on/off/dim (Potentiometer ein/aus/abblenden) <strong>Sigma</strong> <strong>500</strong>. ........................................... 71<br />
4.1.2 Taste "Reset/Test" (Zurücksetzen/Test) ....................................................................................... 71<br />
4.1.3 Select (Auswählen) <strong>Sigma</strong> <strong>500</strong>..................................................................................................... 71<br />
4.1.4 Test Backbord............................................................................................................................... 71<br />
4.1.5 Test Steuerbord............................................................................................................................. 71<br />
4.1.6 Funktion Ruderlage. ..................................................................................................................... 71<br />
4.1.7 Funktion Wegabhängig................................................................................................................. 72<br />
4.1.8 Funktion Wendezeiger Pilot. ........................................................................................................ 72<br />
4.1.9 Funktion AUX. ............................................................................................................................. 72<br />
4.1.10 Empfindlichkeit. ........................................................................................................................... 72<br />
4.1.11 Ruder . .......................................................................................................................................... 72<br />
4.1.12 Dämpfung. .................................................................................................................................... 73<br />
4.1.13 Trim (Trimmen)............................................................................................................................ 73<br />
4.2 Bedienung SIGMA 600. ....................................................................................................................... 74<br />
4.2.1 Wegabhängig................................................................................................................................ 74<br />
4.2.2 Auswählen. ................................................................................................................................... 74<br />
4.2.3 Pilot............................................................................................................................................... 74<br />
4.2.4 Backbord....................................................................................................................................... 74<br />
4.2.5 Steuerbord.................................................................................................................................... 74<br />
4.2.6 Steuerhebel. .................................................................................................................................. 74<br />
Version: 01 ongecontroleerd<br />
Date:<br />
Document: <strong>Sigma</strong><strong>500</strong>.doc Page 9 of 108<br />
Date 1 e release:
Alarme.................................................................................................................................................................. 75<br />
4.3 Alarme SIGMA <strong>500</strong>. ............................................................................................................................ 75<br />
4.3.1 Kreiselalarm.................................................................................................................................. 75<br />
4.3.2 Ruderanlagenalarm....................................................................................................................... 75<br />
4.3.3 Kursalarm ..................................................................................................................................... 75<br />
4.3.4 Spannungsalarm............................................................................................................................ 75<br />
4.4 Alarme und signale SIGMA 600. ......................................................................................................... 75<br />
4.4.1 Led wegabhängig.......................................................................................................................... 75<br />
4.4.2 Led Pilot. ............................................................................................................................................. 75<br />
4.4.3 Led Auswählen.................................................................................................................................... 75<br />
4.4.4 Led Spannungsversorgung................................................................................................................... 76<br />
Fehlersuche und Fehlerbehebung ......................................................................................................................... 77<br />
5.1.1 Sichtinstrument SIGMA <strong>500</strong> schaltet nicht ein. ........................................................................... 77<br />
5.1.2 Sichtinstrument SIGMA <strong>500</strong> schaltet zwar ein, es erscheint aber "COMMUNICATIE ALARM"<br />
(Datenübertragungsalarm). ........................................................................................................................... 77<br />
5.1.3 SIGMA <strong>500</strong> gibt “SPANNUNGSALARM”. ............................................................................... 77<br />
5.1.4 Sichtinstrument schaltet zwar ein, zeigt aber nicht die richtige Wendezeiger an. ....................... 77<br />
5.1.5 SIGMA <strong>500</strong> gibt RUDERALARM. ............................................................................................. 77<br />
5.1.6 Pilot steuert nicht und gibt auch keinen RUDERALARM. .......................................................... 77<br />
Version: 01 ongecontroleerd<br />
Date:<br />
Document: <strong>Sigma</strong><strong>500</strong>.doc Page 10 of 108<br />
Date 1 e release:
APPENDIX .......................................................................................................................................................... 78<br />
SIGMA <strong>500</strong> dimensions. .............................................................................................................................. 79<br />
SIGMA <strong>500</strong> frame........................................................................................................................................ 80<br />
SIGMA <strong>500</strong> cut-out...................................................................................................................................... 81<br />
SIGMA 600 dimensions. .............................................................................................................................. 82<br />
SIGMA 600 frame........................................................................................................................................ 83<br />
SIGMA 600 cut-out...................................................................................................................................... 84<br />
RZ219 dimensions........................................................................................................................................ 85<br />
RZ 203 dimensions....................................................................................................................................... 86<br />
RZ 347 Dimensions...................................................................................................................................... 87<br />
RZ 610 dimensions....................................................................................................................................... 88<br />
RZ 630 dimensions....................................................................................................................................... 89<br />
SIGMA <strong>500</strong> overall diagram. ....................................................................................................................... 90<br />
SIGMA <strong>500</strong> overall blockdiagramm. ........................................................................................................... 91<br />
SIGMA <strong>500</strong> connection diagram to EURO/DELTA 800............................................................................. 92<br />
SIGMA <strong>500</strong> connection diagram to EURO/DELTA 810............................................................................. 93<br />
SIGMA <strong>500</strong> settings on pcb RZ 1999. ......................................................................................................... 94<br />
Connections junctionbox RZ219.................................................................................................................. 95<br />
Connection power supply rudder section...................................................................................................... 96<br />
SIGMA<strong>500</strong> CONNECTION. ....................................................................................................................... 97<br />
Connection rudder potmeter RZ610. ............................................................................................................ 98<br />
Connection diagram rate gyro unit RZ 630. ................................................................................................. 99<br />
Connection rate of turn indicator................................................................................................................ 100<br />
Connection auxiliary input. ........................................................................................................................ 101<br />
Connection RZ 347..................................................................................................................................... 102<br />
Connection TMC RZ 348........................................................................................................................... 103<br />
Connection symchro 1:1 400 Hz. ............................................................................................................... 104<br />
Connection sin/cos input. ........................................................................................................................... 105<br />
Connection NMEA input............................................................................................................................ 106<br />
Connection Diagram SIGMA <strong>500</strong> RZ 219................................................................................................. 107<br />
Connection power supply RZ 219.............................................................................................................. 108<br />
Version: 01 ongecontroleerd<br />
Date:<br />
Document: <strong>Sigma</strong><strong>500</strong>.doc Page 11 of 108<br />
Date 1 e release:
NEDERLANDS<br />
Version: 01 ongecontroleerd<br />
Date:<br />
Document: <strong>Sigma</strong><strong>500</strong>.doc Page 12 of 108<br />
Date 1 e release:
Algemene beschrijving / Technische gegevens<br />
1.1 Leveringsomvang <strong>Sigma</strong> <strong>500</strong><br />
In de verpakking treft u de volgende zaken aan:<br />
- Manual<br />
- Bediening/zichtinstrument <strong>Sigma</strong> <strong>500</strong><br />
- Bediening <strong>Sigma</strong> 600<br />
- Roerstandgever RZ 610<br />
- Gyro unit RZ 630<br />
- Junctionbox RZ 219<br />
- Filter unit RZ 203<br />
- Montageset<br />
Controleer of de bovengenoemde items aanwezig zijn. Is dit niet het geval, neem dan zo<br />
snel mogelijk contact op met uw dealer.<br />
Lees voor het installeren van de <strong>Sigma</strong> <strong>500</strong> aandachtig deze manual door. Als er vragen<br />
of onduidelijkheden zijn, neem dan contact op met uw dealer.<br />
1.2 Beschrijving meegeleverde items<br />
1.2.1 Manual.<br />
Hierin is het aansluiten, de functionaliteit en de bediening van de <strong>Sigma</strong> <strong>500</strong><br />
terug te vinden.<br />
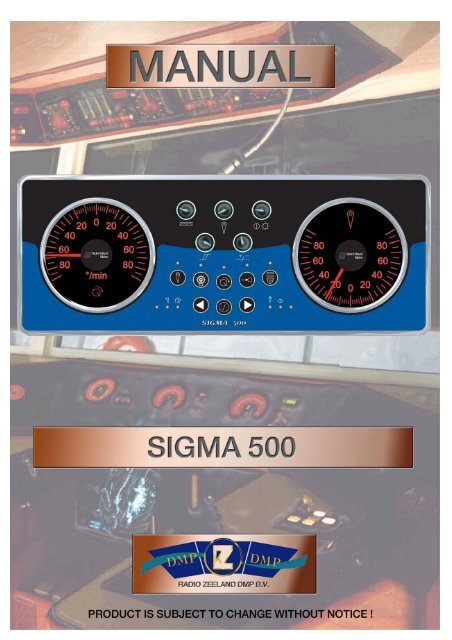
1.2.2 Bediening/Zichtinstrument <strong>Sigma</strong> <strong>500</strong>.<br />
- Voedingsspanning van dit apparaat is 20-36 Vdc.<br />
- Voedingsspanning alarm.<br />
- Gyro alarm.<br />
- Koers alarm,<br />
- Roerwerkalarm.<br />
- Roerstand Indicator 90° – 0° – 90°.<br />
- Bochtaanwijzer Indicator 90° – 0° – 90°.<br />
- Keuze tussen rode of blauwe of gele verlichting in de meter.<br />
- De stroomopname bedraagt minder dan 1A.<br />
- Dimbaar van 5 tot 100%.<br />
1.2.3 Bediening <strong>Sigma</strong> 600.<br />
- Voedingsspanning van dit apparaat is 20-36 Vdc.<br />
- De stroomopname is minder dan 0,5A.<br />
1.2.4 Roerstandgever RZ 610.<br />
Deze sensor is voor het opnemen van de roerstand.<br />
Version: 01 ongecontroleerd<br />
Date:<br />
Document: <strong>Sigma</strong><strong>500</strong>.doc Page 13 of 108<br />
Date 1 e release:
1.2.5 Gyro eenheid RZ 630.<br />
Deze in eigen laboratorium ontwikkelde middelsnel draaiende tol levert op<br />
basis van het gyroscopisch effect en ingebouwde intelligentie een zeer<br />
nauwkeurige Rate Of Turn (draaisnelheid) aan de gekoppelde piloten.<br />
1.2.6 Junctionbox RZ 219:<br />
In deze junctionbox worden de noodzakelijke aansluitingen van de piloot op<br />
de externe apparaten gemaakt. Aansluitmogelijkheden voor: repeater<br />
instrumenten, gyrotol. kompassensor, NMEA input en output en Aux input.<br />
1.2.7 Filterunit RZ 203:<br />
Filter voor de voeding van de piloot.<br />
1.2.8 Montageset.<br />
- 2x 4 polige connector + kap.<br />
- 2x 5 polige connector + kap.<br />
- 10 polige connector + kap.<br />
- 12 polige connector + kap.<br />
- Inbouwring <strong>Sigma</strong> <strong>500</strong>.<br />
- Inbouwring <strong>Sigma</strong> 600.<br />
- 10x Veer.<br />
Version: 01 ongecontroleerd<br />
Date:<br />
Document: <strong>Sigma</strong><strong>500</strong>.doc Page 14 of 108<br />
Date 1 e release:
Installatie voorschrift<br />
2.1 Montage zichtinstrument SIGMA <strong>500</strong>.<br />
Het zichtinstrument wordt zodanig geplaatst dat het op een duidelijke zichtbare plaats<br />
komt voor de roerganger.<br />
Er moet voldoende ruimte overblijven om de bekabeling te leggen.<br />
Een montage tekening is te vinden achter in deze manual.<br />
2.2 Montage bediening <strong>Sigma</strong> 600.<br />
De SIGMA 600 bediening dient te worden ingebouwd op een plaats die voor de<br />
roerganger goed bereikbaar is. Er kunnen maximaal 3 <strong>Sigma</strong>600 bedieningen op een<br />
junctionbox worden aangesloten.<br />
2.3 Montage junctionbox<br />
De junctionbox dient te worden geplaatst op een locatie die goed toegankelijk is voor<br />
service doeleinden, en die makkelijk bereikbaar is voor de kabels. De junctionbox dient te<br />
worden gevoed met 3 separate voedingen van 24Volt, deze voedingen dienen extern<br />
gezekerd te worden met een automatische zekering van 6A.<br />
2.4 Montage roerstandgever<br />
De roerstandgever moet mechanisch worden verbonden met de roerinrichting (met<br />
behulp van een verbindingsstaaf). Ook kan de roerstandgever gemonteerd worden in de<br />
buurt van de roeras en verbonden worden met de roeras m.b.v. tandwielen en een ketting<br />
(zie figuur 1). De verhouding van de tandwielen dient zo gekozen te worden dat wanneer<br />
het roer van max. stuurboord naar max. bakboord gaat, de potmeter een verdraaiing heeft<br />
van ± 180°. De roerstandgever dient zo te worden gemonteerd dat de ketting in lijn loopt<br />
met de twee bevestigingsbeugels op de roerstandgever (dit in verband met de mechanische<br />
krachten op de roerstandgever).<br />
Version: 01 ongecontroleerd<br />
Date:<br />
Document: <strong>Sigma</strong><strong>500</strong>.doc Page 15 of 108<br />
Date 1 e release:
2.5 Montage opnemer RZ 630<br />
De gyro-eenheid moet bij voorkeur gemonteerd worden op een plaats dicht bij het<br />
zwaartepunt van een dwarsdoorsnede van het schip.<br />
Hierdoor wordt het effect van rol- en stampbewegingen van het schip geminimaliseerd.<br />
Dit is vooral belangrijk indien het de bedoeling is de bochtaanwijzer (eventueel later) op te<br />
nemen in de regelkring van een automatische piloot. De gyro-eenheid moet gemonteerd<br />
worden met het deksel naar boven en horizontaal, dit om te zorgen dat de bochtaanwijzer<br />
alleen hoeksnelheden om de verticale as meet.<br />
De lijn op het deksel van de gyro-eenheid moet samenvallen met of evenwijdig lopen aan<br />
de lengteas van het schip. De gyro-eenheid dient met bouten op de gekozen plaats<br />
gemonteerd te worden.<br />
(N.B. Veilige kompasafstand gyro-eenheid: 0.9 mtr.)<br />
Version: 01 ongecontroleerd<br />
Date:<br />
Document: <strong>Sigma</strong><strong>500</strong>.doc Page 16 of 108<br />
Date 1 e release:
3.1 Aansluitingen <strong>Sigma</strong><strong>500</strong><br />
3.1.1 K1: Voeding <strong>Sigma</strong> <strong>500</strong><br />
Aansluitingen<br />
GND (BACKUP)<br />
+24VDC (BACKUP)<br />
SCREEN<br />
GND (MAIN)<br />
+24VDC (MAIN)<br />
Op K1 van de <strong>Sigma</strong><strong>500</strong> kunnen 1 of op 2 voedingen worden aangesloten. Voor een<br />
grotere bedrijfszekerheid adviseren wij de <strong>Sigma</strong> <strong>500</strong> aan te sluiten op 2 voedingen.<br />
Indien één van de voedingen wegvalt, dan zal he <strong>Sigma</strong> zichtinstrument blijven werken<br />
op de andere 24V voeding.<br />
Als er maar één voeding wordt gebruikt moet de aansluitingen op de hoofdvoeding<br />
worden doorgelust naar de aansluitingen van de reservevoeding.<br />
Indien dit wordt vergeten gaat iedere keer als het apparaat wordt ingeschakeld het<br />
akoestisch signaal klinken en licht de voedingsspanning LED rood op ten teken dat er<br />
een spanningsbron mist.<br />
Version: 01 ongecontroleerd<br />
Date:<br />
Document: <strong>Sigma</strong><strong>500</strong>.doc Page 17 of 108<br />
Date 1 e release:
3.1.2 K2 : <strong>Sigma</strong> <strong>500</strong><br />
K2-1 t/m 2: Externe dimmer uitgang.<br />
Op K2-1 en K2-2 is een uitgang voorzien om de dochterinstrumenten mee te dimmen.<br />
De uitgangsspanning van dit dimsignaal is 15V en kan maximaal 150 mA aansturen.<br />
K2-4 t/m 8: Dochter uitgang<br />
Via K2-4 en K2-5 kan men een externe analoge indicator van 1mA aansluiten. Deze<br />
indicator geeft de stand van de stuurhendel van de geselecteerde <strong>Sigma</strong>600 weer. Met<br />
P12 kan men het instrument op 0 stellen en met P13 kan men de uitslag van deze<br />
dochter uitgang regelen<br />
Via K2-7 en K2-8 kan men een externe analoge bochtaanwijzer indicator van 1mA<br />
aansluiten. Met P8 kan men het instrument op 0 stellen en met P9 kan men de uitslag<br />
van deze dochter regelen. Op K2-6 is eventueel een externe ref spanning aan te bieden.<br />
K2-9 en 10: NMEA-uit<br />
Op deze uitgang worden NMEA-signalen uitgegeven volgens de NMEA 183 standaard.<br />
$..ROT,$..RSA. en wordt gebruikt om de piloot af te regelen.<br />
K2-11 en 12: NMEA in<br />
Deze ingang wordt gebruikt om de piloot af te regelen.<br />
Version: 01 ongecontroleerd<br />
Date:<br />
Document: <strong>Sigma</strong><strong>500</strong>.doc Page 18 of 108<br />
Date 1 e release:
3.1.3 K3: <strong>Sigma</strong> <strong>500</strong><br />
K3-1 en 2: Communicatie in<br />
Op K3-1 en 2 wordt de inkomende communicatie (van bijvoorbeeld de junctionbox)<br />
aangesloten. Indien de communicatie ontbreekt, zal het de voedingsindicator rood gaan<br />
knipperen en de zoemer zal pulserend weerklinken.<br />
K3-3 en 4: Communicatie uit<br />
Op K3-3 en 4 wordt de uitgaande communicatie (naar bijvoorbeeld de <strong>Sigma</strong>600 of een<br />
tweede zichtinstrument) aangesloten.<br />
3.1.4 K4 : <strong>Sigma</strong><strong>500</strong><br />
Version: 01 ongecontroleerd<br />
Date:<br />
Document: <strong>Sigma</strong><strong>500</strong>.doc Page 19 of 108<br />
Date 1 e release:
K4-1 t/m 2: Externe dimmer<br />
Op K2-1 en K2-2 is een uitgang voorzien om de dochterinstrumenten mee te dimmen.<br />
De uitgangsspanning van dit dimsignaal is 15V en kan maximaal 150 mA aansturen.<br />
K4-3 t/m 4: Dochter uitgangen<br />
De <strong>Sigma</strong> <strong>500</strong> heeft een uitgang voor een analoge roerstandmeter. Met P2 kan men het<br />
instrument op 0 stellen en met P3 kan men de uitslag van deze dochter uitgang regelen<br />
K4-5 en 6: Roerstand ingang<br />
De <strong>Sigma</strong> <strong>500</strong> wordt aangesloten op de RZ 219. zie tek “CONNECTION SIGMA<br />
<strong>500</strong>” achter in deze manual.<br />
K4-7 en 8: Extern on/off.<br />
De roerstand indictar van de <strong>Sigma</strong> <strong>500</strong> wordt aangeschakeld door de RZ 219. zie tek<br />
“CONNECTION SIGMA <strong>500</strong>” achter in deze manual.<br />
K4-9 en 10: Voeding roerstand indicator.<br />
De <strong>Sigma</strong><strong>500</strong> heeft een aparte 24V voeding nodig voor het roerstand circuit.<br />
Version: 01 ongecontroleerd<br />
Date:<br />
Document: <strong>Sigma</strong><strong>500</strong>.doc Page 20 of 108<br />
Date 1 e release:
3.2 Aansluitingen <strong>Sigma</strong> 600.<br />
3.2.1 K1: Voeding<br />
De <strong>Sigma</strong> 600 kan op 1 of op 2 voedingen worden aangesloten. Voor een grotere<br />
bedrijfszekerheid adviseren wij de <strong>Sigma</strong> 600 aan te sluiten op 2 voedingen. Indien dan<br />
de 24V hoofdvoeding wegvalt, dan zal de <strong>Sigma</strong> 600 blijven werken op de 24V<br />
reservevoeding. Als er maar 1 voeding wordt gebruikt moet de aansluitingen op de<br />
hoofdvoeding worden doorgelust naar de aansluitingen van de reservevoeding. Indien<br />
dit niet wordt gedaan licht de voedingsspanning LED rood op ten teken dat er een<br />
spanningsbron mist.<br />
Als de <strong>Sigma</strong> 600 is aangesloten op 2 actieve voedingen dan zal dan zal de<br />
voedingsspanning indicator LED groen oplichten. Mocht één van de twee voedingen<br />
uitvallen dan zal de voedingsspanning indicator LED rood oplichten.<br />
3.2.2 K2: Communicatie<br />
K2-1 en 2: Bidirectionele communicatie poort 1A<br />
GND (BACKUP)<br />
+24VDC (BACKUP)<br />
SCREEN<br />
GND (MAIN)<br />
+24VDC (MAIN)<br />
Rx/Tx+<br />
Rx/Tx-<br />
Rx/Tx+<br />
Rx/Tx-<br />
Screen<br />
COMMUNICATIONS<br />
COMMUNICATIONS<br />
Version: 01 ongecontroleerd<br />
Date:<br />
Document: <strong>Sigma</strong><strong>500</strong>.doc Page 21 of 108<br />
Date 1 e release:
K2-3 en 4: Bidirectionele communicatie poort 1B<br />
Poort 1A en 1B zijn identiek (intern door gelust)<br />
Op poort 1A kan bijv. de junctionbox of de <strong>Sigma</strong> <strong>500</strong> worden aangesloten en op poort<br />
1B een tweede bedienunit.<br />
3.2.3 Dipswitch settings <strong>Sigma</strong> 600.<br />
In de <strong>Sigma</strong> 600 kan men het adres kiezen en met welke bedienunit de <strong>Sigma</strong> 600<br />
meedimt. Dit kan men doen d.m.v. de DIPswitch. Indien er slechts één <strong>Sigma</strong> 600<br />
wordt gebruikt, dient het adres op 0 te staan.<br />
Address DIPswitch<br />
0 1 off, 2 off.<br />
1 1 on, 2 off.<br />
2 1 off, 2 on.<br />
Vrijgeven DIPswitch<br />
uit 3 off.<br />
aan 3 on.<br />
Dimgroep DIPswitch<br />
0 4 off.<br />
1 4 on.<br />
1234<br />
ON<br />
ZERO SETTING<br />
STEERING LEVER<br />
Version: 01 ongecontroleerd<br />
Date:<br />
Document: <strong>Sigma</strong><strong>500</strong>.doc Page 22 of 108<br />
Date 1 e release:<br />
OFF
3.3 Aansluitingen/ instellingen in de junctionbox RZ 219<br />
3.3.1 Aansluitingen in de junctionbox RZ 219 op print RZ1703/A2<br />
K1: Aansluiting voor de voeding van het roerstandgedeelte.<br />
K2: Aansluiting voor de <strong>Sigma</strong> <strong>500</strong> roerstand indicator.<br />
Om een <strong>Sigma</strong> <strong>500</strong> aan te sluiten op een RZ 219 zie tek “CONNECTION<br />
SIGMA <strong>500</strong>” achter in de manual. In de RZ 219 moet indien een <strong>Sigma</strong> <strong>500</strong><br />
wordt aangesloten een jumper worden geplaatst op RZ 1703/A2 IC1 tussen pin1<br />
en pin2.<br />
K3: RZ 610 (roerstand sensor) aansluiting. Aansluiting zie tekening :<br />
K 4: Aansluiting RZ 630 gyrotol. Zie tekening:<br />
Version: 01 ongecontroleerd<br />
Date:<br />
Document: <strong>Sigma</strong><strong>500</strong>.doc Page 23 of 108<br />
Date 1 e release:
K5: Aansluiting voor een externe bochtaanwijzer. Zie tekening:<br />
K6: Auxiliary input: Hierop kan een extern stuursignaal worden aangesloten.<br />
(extern analoog).<br />
1 = +15V out 3 = signaal in +7,5V ( +/- 5V)<br />
2 = +7,5V out 4 = 0V out<br />
K7: TMC spoel of synchro: Hier kan men de TMC direct op aansluiten. Indien men een<br />
synchro wil aansluiten, dan zal D17 er uit geknipt moeten worden, en er moet een<br />
condensator van 470 nF geplaatst worden tussen K7/1 en K7/2.<br />
Version: 01 ongecontroleerd<br />
Date:<br />
Document: <strong>Sigma</strong><strong>500</strong>.doc Page 24 of 108<br />
Date 1 e release:
K8: Sin/Cos ingang: Hier kan een Sin/Cos en referentie op worden aangeboden. Het<br />
Sin/Cos ligt op +- 2.5V van de referentie.<br />
K9: NMEA in en uit. De ingang is galvanisch gescheiden van de overige circuits. De<br />
uitgang beschikt niet over een scheiding. De berichten die men kan zenden en<br />
ontvangen zijn volgens NMEA 0183. Zenden: NMEA 0183 HDM, HDT, ROT,<br />
RSA. Ontvangen: NMEA 0183 APA, APB, HDT,HDM,HDG.<br />
K10: Verbinding naar het 1 e zichtinstrument.<br />
Version: 01 ongecontroleerd<br />
Date:<br />
Document: <strong>Sigma</strong><strong>500</strong>.doc Page 25 of 108<br />
Date 1 e release:
K11: Voeding van het systeem.<br />
K12: Uitgang wachtalarm: Dit is een potentiaal vrij relais contact dat bekrachtigd<br />
wordt op het moment dat de piloot handmatig bediend wordt het een maximum<br />
van 1 maal per minuut. De maximale belasting van deze uitgang is<br />
24V, 1A.<br />
K13: Alarm uitgang: dit is een potentiaal vrij contact dat bekrachtigd wordt op het<br />
moment dat er een alarm is. Op deze uitgang is een externe optische of<br />
akoestische alarm indicatie aan te sluiten. Deze uitgang kan ook worden<br />
verbonden met een ander alarm systeem. De maximale belasting van deze<br />
uitgang is 24V, 1A..<br />
3.3.2 Aansluitingen in de junctionbox RZ 219 op print RZ 1711<br />
Op de output print RZ 1711 kan worden aangesloten:<br />
- Danfoss<br />
- Common+<br />
- Common -<br />
Deze print is door middel van een vlakbandkabel verbonden met print RZ 1703/A2. Print<br />
RZ 1711/A0 is verbonden met output 1 op print RZ 1703/A2, op connector K1 kan men<br />
stuurwerk 1 aansluiten.<br />
3.3.3 DIP switch instellingen op print RZ 1703/A2<br />
Afhankelijk van de mogelijkheden van de piloot dienen er verschillende DIP-switch<br />
instellingen gemaakt te worden. Voordat er spanning op de Junctionbox gezet wordt,<br />
dient DIP switch 1 te worden ingesteld.<br />
1 2 3 4 Omschrijving:<br />
OFF X X OFF Normal functionality<br />
ON X X OFF Danfoss reversed<br />
X ON OFF X Compass input K7 RZ347/RZ348<br />
X OFF ON X Compass input nmea<br />
X OFF OFF X Compas input Sin/Cos<br />
ON ON ON ON Test/ production<br />
Version: 01 ongecontroleerd<br />
Date:<br />
Document: <strong>Sigma</strong><strong>500</strong>.doc Page 26 of 108<br />
Date 1 e release:
4.1 Bediening <strong>Sigma</strong> <strong>500</strong>.<br />
4.1.1 Potmeter on/off/dim <strong>Sigma</strong> <strong>500</strong><br />
Bediening<br />
Dit is een potmeter met schakelaar, door de potmeter rechtsom te draaien wordt de<br />
piloot aangeschakeld. Als het apparaat aangeschakeld is kan door deze potmeter verder<br />
naar rechts te draaien, de verlichting geregeld worden van 5 naar 100%.Als de<br />
verlichting helemaal maximaal wordt gedraaid, dan wordt de verlichting in de folie<br />
uitgeschakeld om de levensduur van de lamp te verhogen.De <strong>Sigma</strong> 600 dimt mee met<br />
de <strong>Sigma</strong> <strong>500</strong><br />
4.1.2 Reset /Test toets<br />
Reset<br />
Als er een alarm komt zal de betreffende alarm led gaan branden en is er een akoestisch<br />
alarm signaal te horen. Met behulp van de reset toets is het akoestich alarm uit te<br />
schakelen.<br />
Indien er een communicatie alarm is het niet mogelijk te resseten en blijft het akoestich<br />
alarm klinken tot de communicatie weer in orde is of het apparaat wordt uitgeschakeld.<br />
Test.<br />
Indien op de toets gedrukt wordt als er geen alarmen zijn werkt deze toets als test.<br />
Door op deze toets te drukken lichten alle indicatoren op. De voedingsspanning<br />
indicator zal rood oplichten en zal het akoestisch alarm te horen zijn totdat deze toets<br />
weer losgelaten wordt.<br />
4.1.3 Select <strong>Sigma</strong> <strong>500</strong><br />
Indien er een <strong>Sigma</strong> 550 bediening in het systeem is opgenomen, dient men alvorens men<br />
de <strong>Sigma</strong><strong>500</strong> kan bedienen, op SELECT te drukken, om de <strong>Sigma</strong> <strong>500</strong> de moeder status<br />
te geven. De indicator boven de toets geeft aan dat de <strong>Sigma</strong><strong>500</strong> geselecteerd is.<br />
4.1.4 Test PORT<br />
Met deze toets is het mogelijk de functionaliteit van de bochtaanwijzer te testen.<br />
Door op deze knop te drukken krijgt de gyrotol een afwijking die overeen komt met een<br />
bochtsnelheid van 20/min naar bakboord.<br />
4.1.5 Test STBD<br />
Met deze toets is het mogelijk de functionaliteit van de bochtaanwijzer te testen.<br />
Door op deze knop te drukken krijgt de gyrotol een afwijking die overeen komt met een<br />
bochtsnelheid van 20/min naar stuurboord.<br />
Version: 01 ongecontroleerd<br />
Date:<br />
Document: <strong>Sigma</strong><strong>500</strong>.doc Page 27 of 108<br />
Date 1 e release:
4.1.6 Functie ROERSTAND.<br />
Met de toets is de piloot in de in de functie roerstand te zetten. De indicator boven<br />
de toets geeft aan of deze functie geselecteerd is. In de stand roerstand kan de piloot geen<br />
stuur kommado’s geven.<br />
4.1.7 Functie WEGAFHANKELIJK<br />
Met de toets kan de functie wegafhankelijk worden geselecteerd. De indicator boven<br />
de toets geeft aan of deze functie geselecteerd is. In de stand wegafhankelijk is de stand<br />
van de het roer gelijk aan de staan van de stuurhendel op de <strong>Sigma</strong> 600.<br />
4.1.8 Functie BOCHTAANWIJZER PILOOT.<br />
Met de toets kan de functie bochtaanwijzer piloot worden geselecteerd. De indicator<br />
boven de toets geeft aan of deze functie geselecteerd is. In de stand bochtaanwijzer piloot<br />
wordt met de stuurhendel op de <strong>Sigma</strong> 600 een bochtsnelheid ingesteld.<br />
4.1.9 Functie AUX.<br />
Met de toets kan de functie aux piloot worden geselecteerd. De indicator boven de<br />
toets geeft aan of deze functie geselecteerd is. Op de functie AUX reageert de piloot op<br />
een op de aux ingang, het signaal uit de <strong>Sigma</strong>370 of op een NMEA bericht, afhankelijk<br />
van de met de afregelsoftware geselecteerde ingang.<br />
4.1.10 GEVOELIGHEID<br />
4.1.11 ROER<br />
Met deze gevoeligheid kan de gevoeligheid van de piloot worden afgesteld. Deze<br />
instelling is werkzaam in de posities “PILOT”. Met de GEVOELIGHEID wordt het<br />
reactiepunt van de piloot ingesteld. Met deze instelling helemaal minimaal is de<br />
gevoeligheid het kleinst. Er zal nu een relatief grote koersfout moeten optreden voordat de<br />
piloot gaat bijsturen. Met de instelling helemaal maximaal, zal zelfs bij de geringste<br />
koersafwijking een correctie signaal worden afgegeven. Bij ruw weer dient de piloot op een<br />
verminderde gevoeligheid te worden ingesteld.<br />
Met ROER is het mogelijk om het stuurgedrag te beïnvloeden afhankelijk van de<br />
hoeveelheid lading, vaarsnelheid en watercondities. Als ROER maximaal wordt gedraaid,<br />
zal de piloot sneller en met meer roeruitslag reageren op een kleine verandering. Dit is om<br />
een goede stuurreactie te krijgen bij ruw weer, zware lading of lage vaarsnelheden. ROER<br />
kan minimaal worden ingesteld bij goede condities, zoals weinig lading, goed weer en<br />
relatief hoge vaarsnelheden. De beste instelling is om de knop zover mogelijk minimaal te<br />
houden, zover dat nog juist voldoende roeruitslag wordt gegeven om op de ingestelde<br />
koers te blijven. De ROER-instelling is werkzaam in alle standen, behalve in “RUDDER”<br />
en “FOLLOW-UP”<br />
Version: 01 ongecontroleerd<br />
Date:<br />
Document: <strong>Sigma</strong><strong>500</strong>.doc Page 28 of 108<br />
Date 1 e release:
4.1.12 DEMPING.<br />
4.1.13 TRIM.<br />
Deze instelling is actief in de stand PILOT. Door slechte weersomstandigheden kan het<br />
schip enigszins gaan slingeren zonder uit de koers te geraken. Dit slingeren kan wel tot<br />
gevolg hebben dat de piloot continue gaat staan sturen door het steeds maar veranderen<br />
van het bochtaanwijzer of kompas signaal. Door dit telkens sturen bestaat de kans dat het<br />
schip meer gaat slingeren. Met de DEMPING kan men de reactietijd van de piloot<br />
vertragen om zodanig onnodig sturen tegen te gaan. Als de DEMPING minimaal staat<br />
reageert de piloot het snelst. De DEMPING maximaal betekent een aanzienlijk tragere<br />
reactie van de piloot. De demping dempt ook de bochtaanwijzer indicator .<br />
Als een blijvende koersfout optreedt (bijv. door getijdenstroom of door een verkeerde<br />
lading) die niet gecorrigeerd wordt door een automatische TRIM, dan kan deze worden<br />
bijgeregeld met de TRIM regeling. Met de TRIM kan het roer enkele graden uit het<br />
midden worden gezet, zodanig dat het schip toch recht voor uit vaart. TRIM naar links<br />
geeft een correctie naar bakboord. TRIM naar rechts resulteert in een correctie naar<br />
stuurboord. De TRIM regeling kan alleen benut worden in de stand “R.O.T. PILOT”.<br />
Version: 01 ongecontroleerd<br />
Date:<br />
Document: <strong>Sigma</strong><strong>500</strong>.doc Page 29 of 108<br />
Date 1 e release:
4.2 Bediening <strong>Sigma</strong> 600.<br />
4.2.1 “FOLLOW UP”<br />
Hiermee schakelt de piloot naar de Follow Up functie, de functie waarin de piloot reageert<br />
op de roercommando’s die met het pookje gegeven worden.<br />
4.2.2 “SELECT”<br />
Indien er meerde pookjes in het systeem zijn opgenomen, dient men alvorens<br />
men via een pookje kan bedienen, op SELECT te drukken, om het pookje de moeder<br />
status te geven.<br />
4.2.3 “PILOT”<br />
Met deze toets schakelt de bediening over naar de piloot functie.<br />
4.2.4 “PORT”<br />
Dodge functie PORT: door het drukken op deze toets zal de piloot indien actief in de<br />
functie “COMPASS PILOT” en “NMEA PILOT” een koersverandering naar bakboord<br />
maken, zolang deze toets is ingedrukt. Als de toets wordt losgelaten zal de piloot de oude<br />
koers weer terug opnemen.<br />
4.2.5 “STBD”<br />
Dodge functie STBD: door het drukken op deze toets zal de piloot indien actief in de<br />
functie “COMPASS PILOT” en “NMEA PILOT” een koersverandering naar stuurboord<br />
maken, zolang deze toets is ingedrukt. Als de toets wordt losgelaten zal de piloot de oude<br />
koers weer terug opnemen.<br />
4.2.6 “POOKJE”<br />
Hiermee kan een direct roercommando gegeven worden in de stand FOLLOW UP” en in<br />
de stand “R.O.T. PILOT kan hiermee de gewenste bochtsnelheid worden ingesteld.<br />
Version: 01 ongecontroleerd<br />
Date:<br />
Document: <strong>Sigma</strong><strong>500</strong>.doc Page 30 of 108<br />
Date 1 e release:
4.3 ALARMEN SIGMA <strong>500</strong>.<br />
Alarmen.<br />
4.3.1 Gyroalarm<br />
Indien de gyrotol niet goed functioneert of nog niet op toeren is (direct na het<br />
aanschakelen) zal deze indicatie oplichten ten teken dat de aanwijzing niet betrouwbaar<br />
is. Zodra de gyrotol op toeren is en/of correct functioneert gaat deze indicator weer uit.<br />
4.3.2 Roerwerkalarm<br />
Indien het roerwerk niet de stuurcommando’s van de piloot volgt. Geeft de <strong>Sigma</strong><strong>500</strong><br />
een roeralarm.<br />
4.3.3 Koersalarm.<br />
Indien het verschil in op de functie bochtaanwijzer piloot tussen ingestelde<br />
bochtsnelheid en gemeten bochtsnelheid meer dan 12 seconden groter is dan de<br />
ingestelde alarmwaarde wordt een koersalarm gegeven.<br />
4.3.4 Spanningsalarm<br />
Indien een spanning ontbreekt of de spanning te laag is voor een correcte werking van<br />
de piloot wordt een spannings alarm gegeven. Indien alle spanning ok zijn en de <strong>Sigma</strong><br />
<strong>500</strong> is aangeschakeld licht deze indicator groen op.<br />
Ingeval van een communicatie alarm knippert het spannings alarm en is het akoestische<br />
alarm niet te resetten.<br />
Version: 01 ongecontroleerd<br />
Date:<br />
Document: <strong>Sigma</strong><strong>500</strong>.doc Page 31 of 108<br />
Date 1 e release:
4.4. Alarmering en signalering <strong>Sigma</strong> 600 :<br />
4.4.1 Led wegafhankelijke besturing.<br />
LED boven : Brandt deze LED continu dan is de wegafhankelijke besturing<br />
geselecteerd. Deze LED knippert bij een roerwerk alarm.<br />
4.4.2 Led R.O.T. Pilot<br />
LED boven : Brandt deze LED continu dan is de ROT piloot functie<br />
geselecteerd.<br />
Deze LED knippert bij een koers of gyro alarm.<br />
4.4.3 Led Select.<br />
LED boven :Brandt de LED dan is de bediening geselecteerd.<br />
Knippert deze LED i.c.m. buzzer (korte pulsjes) dan is de bediening<br />
vrijgegeven en kan deze overgenomen worden.<br />
4.4.4 Led voeding spanning.<br />
LED tussen en : Brandt deze LED groen dan staat het apparaat aan.<br />
Brandt deze LED rood dan is er een spanningsalarm.<br />
Knippert deze LED rood dan is er een communicatie alarm.<br />
Bij een alarm gaat de buzzer aan op alle bedieningen ongeacht of ze<br />
geselecteerd zijn of niet.<br />
Version: 01 ongecontroleerd<br />
Date:<br />
Document: <strong>Sigma</strong><strong>500</strong>.doc Page 32 of 108<br />
Date 1 e release:
Foutzoekprocedure<br />
5.1.1 Zichtinstrument SIGMA <strong>500</strong> schakelt niet aan.<br />
Controleer voeding op K1 van de SIGMA <strong>500</strong>.<br />
Zo nee Controleer voedingspanning op K11 van de junctionbox print RZ 1703A2.<br />
Zo ja Controleer de kabel tussen junctionbox en zichtinstrument.<br />
5.1.2 Zichtinstrument SIGMA <strong>500</strong> schakelt wel aan maar er verschijnt<br />
COMMUNICATIE ALARM.<br />
Controleer of D9 in de junctionbox brand.<br />
Zo nee Controleer zekering F1 op de print RZ 1703A2 in de junctionbox.<br />
Zo ja Controleer de kabel tussen de junctionbox en het zichtinstrument.<br />
5.1.3 SIGMA <strong>500</strong> schakelt aan maar geeft SPANNINGS ALARM.<br />
Controleer voeding op K1 van de SIGMA <strong>500</strong>.<br />
Controleer voeding op K4-1 en K4-2 van de SIGMA <strong>500</strong>.<br />
Controleer voeding op K11 van de junctionbox. Print RZ1703A2.<br />
Controleer of D24 op de junctionbox Print RZ1703A2 brandt.<br />
Zo nee. Controleer voeding op K1 van de junctionbox Print RZ1703A2.<br />
5.1.4 Zichtinstrument schakelt aan maar geeft geen juiste BAW informatie.<br />
Controleer of D12 en D14 op de junctionbox print RZ 1703/A2 branden.<br />
Als D12 niet brand controleer dan zekering F2 op de print RZ 1703/A2<br />
Als D14 niet brand controleer dan zekering F1 op de print RZ 1703/A2.<br />
5.1.5 SIGMA <strong>500</strong> geeft ROER ALARM<br />
Controleer of het roer beweegt op grote stuurcommando’s.<br />
Zo nee Controleer of de LED D8 op de print RZ 1711/A0 in de junctionbox brandt.<br />
Zo nee Controleer de voeding spanning tussen K1-1 en K1-2 op de print RZ<br />
1711/A0<br />
Zo ja Controleer of een van de LEDs D5 of D6 brandt.<br />
Zo ja Controleer of de uitgang spanning naar de kleppen op de klemmen strook K1<br />
staat.<br />
Controleer of de noodschakelaar HAND/PILOOT in de stand PILOOT<br />
staat.<br />
5.1.6 Piloot stuurt niet, maar geeft ook geen ROER ALARM<br />
Controleer of op het zichtinstrument niet voor de functie “ROERSTAND” is gekozen.<br />
Controleer of de juiste bediening is geselecteerd.<br />
Version: 01 ongecontroleerd<br />
Date:<br />
Document: <strong>Sigma</strong><strong>500</strong>.doc Page 33 of 108<br />
Date 1 e release:
ENGLISH<br />
Version: 01 ongecontroleerd<br />
Date:<br />
Document: <strong>Sigma</strong><strong>500</strong>.doc Page 34 of 108<br />
Date 1 e release:
1.1 Scope of delivery of <strong>Sigma</strong> <strong>500</strong><br />
General description / technical data<br />
The packing of the equipment shall contain the following items:<br />
- Manual<br />
- Operating/Display unit <strong>Sigma</strong> <strong>500</strong><br />
- Operating unit <strong>Sigma</strong> 600<br />
- Rudder angle transmitter RZ 610<br />
- Gyro unit RZ 630<br />
- Junction box RZ 219<br />
- Filter unit RZ 203<br />
- Mounting set<br />
Always check whether you have received all the above-mentioned items. If any item is<br />
missing, contact your dealer as soon as possible.<br />
Before installing the <strong>Sigma</strong> <strong>500</strong>, read this manual carefully. If you have any doubts or<br />
questions, please contact your dealer.<br />
1.2 Description of the items supplied with the equipment<br />
1.2.1 Manual<br />
Here you will find information concerning the connections, functionality and<br />
operation of the <strong>Sigma</strong> <strong>500</strong><br />
1.2.2 Operating the <strong>Sigma</strong> <strong>500</strong><br />
- The power supply is for this device is 18-36 Vdc.<br />
- Power supply alarm.<br />
- Gyro alarm.<br />
- Course alarm,<br />
- Rudder system alarm.<br />
- Rudder indicator 90° – 0° – 90°.<br />
- Rate-of-turn indicator 90° – 0° – 90°.<br />
- Choice between red, yellow or blue lighting in the meter.<br />
- The power consumption is less than 1A.<br />
- Dimming capability from 5 to 100%.<br />
1.2.3 Operating unit <strong>Sigma</strong> 600<br />
- Supply voltage of this device is 18-36 Vdc.<br />
- The electrical current consumption is less than 0.5A.<br />
1.2.4 Rudder angle transmitter RZ 610<br />
This sensor is for recording the rudder angle.<br />
Version: 01 ongecontroleerd<br />
Date:<br />
Document: <strong>Sigma</strong><strong>500</strong>.doc Page 35 of 108<br />
Date 1 e release:
1.2.5 Gyro unit RZ 630.<br />
This rate gyro that has been developed in our own laboratory; it rotates at<br />
medium speed and provides a very accurate Rate-of-turn (speed of rotation)<br />
using the gyroscopic effect and built-in intelligence.<br />
1.2.6 Junction box RZ 219.<br />
The connections required to connect the pilot to the external devices are made<br />
in this junction box. Connecting possibilities for: repeater instruments, rate<br />
gyro, compass sensor, NMEA input and output and Aux input.<br />
1.2.7 Filter unit RZ 203.<br />
Filter for the power supply to the pilot.<br />
1.2.8 Mounting set.<br />
- 2x 4-pole connector + insulating cap.<br />
- 2x 5-pole connector + insulating cap.<br />
- 10-pole connector + insulating cap.<br />
- 12-pole connector + insulating cap.<br />
- Mounting ring <strong>Sigma</strong><strong>500</strong>.<br />
- Mounting ring <strong>Sigma</strong>600.<br />
- 10x springs<br />
Version: 01 ongecontroleerd<br />
Date:<br />
Document: <strong>Sigma</strong><strong>500</strong>.doc Page 36 of 108<br />
Date 1 e release:
Installation instructions<br />
2.1 Mounting display/operating unit SIGMA <strong>500</strong>.<br />
The display units should be placed so as to be clearly visible to the rudder operator.<br />
There must be sufficient space left over to lay the cabling.<br />
An assembly drawing may be found in the back of this manual.<br />
2.2 Mounting the operating system of the <strong>Sigma</strong> 600.<br />
The operating unit should be placed such that the helmsman may readily operate it. A<br />
maximum of three operating units may be placed in one communication line.<br />
Sufficient space must be left to lay the cables.<br />
A construction drawing will be found at the back of this manual.<br />
2.3 Mounting the junction box.<br />
The junction box should be placed so as to be easily accessible for service purposes and<br />
cabling. The junction box should be provided with 3 separate power supply sources of<br />
24Volt and these power supply sources should be externally protected with an automatic<br />
fuse of 6A.<br />
2.4 Mounting the rudder angle transmitter.<br />
The rudder angle transmitter should be mechanically connected to the rudder system (with<br />
a connecting rod). The rudder angle transmitter may also be mounted near the rudder<br />
shaft and connected to the rudder shaft with gears and a chain (see figure 1). The gearing<br />
ratio must be selected in such a manner that when the rudder goes from max. starboard to<br />
max. port side, the potentiometer should turn by ± 180°. The rudder angle transmitter<br />
must be installed in such a manner that the chain runs in line with the two clamping<br />
brackets on the rudder angle transmitter (in view of the mechanical forces acting on the<br />
rudder angle transmitter).<br />
Version: 01 ongecontroleerd<br />
Date:<br />
Document: <strong>Sigma</strong><strong>500</strong>.doc Page 37 of 108<br />
Date 1 e release:
2.5 Mounting the recording unit RZ 630.<br />
The gyro unit should preferably be installed at a location close to the centre of gravity of a<br />
cross section of the ship.<br />
This will minimise the effect of the rolling and pitching motion of the ship. This is<br />
important mainly if it is intended to include the turn-indicator (possibly later on) into the<br />
control circuit of an automatic pilot. The gyro unit should be installed with a cover near<br />
the top in the horizontal position, in order to ensure that the turn-indicator only measures<br />
angular velocities around the vertical axis.<br />
The line on the cover of the gyro unit should coincide with or should run parallel to the<br />
longitudinal axis of the ship. The gyro unit should be mounted on the selected spot with<br />
bolts.<br />
(Note: safe compass distance with respect to the gyro unit: 0.9 metres.)<br />
Version: 01 ongecontroleerd<br />
Date:<br />
Document: <strong>Sigma</strong><strong>500</strong>.doc Page 38 of 108<br />
Date 1 e release:
3.1 SIGMA <strong>500</strong>.<br />
Connections<br />
3.1.1 K1: Power supply to the <strong>Sigma</strong> <strong>500</strong><br />
GND (BACKUP)<br />
+24VDC (BACKUP)<br />
SCREEN<br />
GND (MAIN)<br />
+24VDC (MAIN)<br />
The <strong>Sigma</strong> <strong>500</strong> display units may be connected to either one power source or to two<br />
power sources. For greater operating reliability, we recommend that the <strong>Sigma</strong> display<br />
unit should be connected to 2 power sources. If one of the power sources fails, the<br />
<strong>Sigma</strong> display unit will continue to receive power from the other 24V power supply<br />
source.<br />
If only 1 power supply source is used, the connections to the main power supply must<br />
be looped-through to the connections of the emergency power supply.<br />
If this is not done, each time that the power supply fails, the acoustic signal will be<br />
sounded and the power supply LED will light up in red indicating the absence of one of<br />
the power supply sources.<br />
This acoustic signal can be switched-off by pressing the key.<br />
Version: 01 ongecontroleerd<br />
Date:<br />
Document: <strong>Sigma</strong><strong>500</strong>.doc Page 39 of 108<br />
Date 1 e release:
3.1.2 K2 : <strong>Sigma</strong> <strong>500</strong>.<br />
K2-1 to 2: External dimmer output.<br />
If a repeater instrument is connected, this can be dimmed along with the main<br />
instrument. In such case, the dimmer signal K2-1 and K2-2 of the main instrument<br />
should be connected to the repeater unit, so that the repeater unit can be dimmed along<br />
with the main instrument. The output voltage of this dimming signal is 15V and can<br />
control a maximum of 150 mA.<br />
K2-4 to 8: Repeater outputs<br />
An external analogue indicator of 1mA can be connected via K2-4 and K2-5. With P12,<br />
one can set the instrument at 0 and with P13, one can control the deflection of the lever<br />
repeater.<br />
An external rate of turn analogue indicator of 1mA can be connected via K2-7 and K2-<br />
8. With P8, one can set the instrument at 0 and with P9, one can control the deflection<br />
of the repeater.<br />
K2-9 and 10: NMEA Out<br />
The output of a NMEA signal takes place at this output in accordance with the NMEA<br />
183 standard. $..ROT and $..RSA, This output is also used to adjust the pilot.<br />
K2-11 and 12: NMEA In<br />
This input can used to adjust the <strong>Sigma</strong><strong>500</strong>.<br />
Version: 01 ongecontroleerd<br />
Date:<br />
Document: <strong>Sigma</strong><strong>500</strong>.doc Page 40 of 108<br />
Date 1 e release:
3.1.3 K3: <strong>Sigma</strong> <strong>500</strong>.<br />
K3-1 and 2: Communication in<br />
The incoming communication (for example from the junction box) can be connected to<br />
K3-1 and 2. If there is no communication, the power supply indicator will flash in red<br />
and the buzzer shall produce a pulsating sound.<br />
K3-3 and 4: Communication out<br />
The outgoing communication (to a <strong>Sigma</strong>600, for example) is connected to K3-3 and 4.<br />
3.1.4 K4: <strong>Sigma</strong> <strong>500</strong>.<br />
K4-1 to 2: External dimmer output.<br />
If a repeater instrument is connected, this can be dimmed along with the main<br />
instrument. In such case, the dimmer signal K4-1 and K4-2 of the main instrument<br />
should be connected to the repeater unit, so that the repeater unit can be dimmed along<br />
Version: 01 ongecontroleerd<br />
Date:<br />
Document: <strong>Sigma</strong><strong>500</strong>.doc Page 41 of 108<br />
Date 1 e release:
with the main instrument. The output voltage of this dimming signal is 15V and can<br />
control a maximum of 150 mA.<br />
K4-3 to 4: Repeater output<br />
An external analogue rudder indicator of 1mA can be connected via K4-3 and K4-4.<br />
With P2, one can set the instrument at 0 and with P3, one can control the deflection of<br />
the repeater.<br />
K4-5 and 6: Rudder angle input<br />
The <strong>Sigma</strong> 600 is connected to the RZ 219. See drawing “CONNECTION SIGMA<br />
<strong>500</strong>” at the back of this manual.<br />
K4-7 and 8: External on/off in<br />
The <strong>Sigma</strong> <strong>500</strong> is switched-on by the RZ 219. See drawing “CONNECTION SIGMA<br />
<strong>500</strong>” at the back of this manual.<br />
K4-9 to 10 Power supply to rudder indicator.<br />
The <strong>Sigma</strong> <strong>500</strong> need a separate 24V power supply for the rudder indicator.<br />
Version: 01 ongecontroleerd<br />
Date:<br />
Document: <strong>Sigma</strong><strong>500</strong>.doc Page 42 of 108<br />
Date 1 e release:
3.2 Connections <strong>Sigma</strong> 600 control unit.<br />
3.2.1 K1: Power supply.<br />
The <strong>Sigma</strong> 600 may be connected to 1 or to 2 supplies. For greater reliability we<br />
recommend that the <strong>Sigma</strong> 600 be connected to 2 supplies. Should the 24V main supply<br />
fail, the <strong>Sigma</strong> 600 will continue to operate on the 24V-back-up supply. When only 1<br />
supply is used the connections to the main supply should be looped through to the<br />
connection of the back-up supply. When this is not done the supply voltage LED will<br />
light up red, indicating that a power source is missing.<br />
When the <strong>Sigma</strong> 600 is connected to 2 active supplies the supply voltage indicator LED<br />
will light up green. Should one of the two supplies fail the supply voltage indicator LED<br />
will light up red.<br />
3.2.2 K2: Communication.<br />
K2-1 and 2: Bi-directional communication port 1A<br />
K2-3 and 4: Bi-directional communication port 1B<br />
GND (BACKUP)<br />
+24VDC (BACKUP)<br />
SCREEN<br />
GND (MAIN)<br />
+24VDC (MAIN)<br />
Rx/Tx+<br />
Rx/Tx-<br />
Rx/Tx+<br />
Rx/Tx-<br />
Screen<br />
COMMUNICATIONS<br />
COMMUNICATIONS<br />
Version: 01 ongecontroleerd<br />
Date:<br />
Document: <strong>Sigma</strong><strong>500</strong>.doc Page 43 of 108<br />
Date 1 e release:
Port 1A and 1B are identical (internally looped through)<br />
The junction box or the <strong>Sigma</strong> 550 for example may be connected to port 1A and the<br />
second operating unit to port 1 B.<br />
3.2.3 Dipswitch settings <strong>Sigma</strong> 600.<br />
For the <strong>Sigma</strong> 600 the address may be selected, as may the operating unit with which<br />
the <strong>Sigma</strong> 600 dims. The DIPswitch is employed for this purpose. When only one<br />
<strong>Sigma</strong> 600 is used the address should be set to 0.<br />
Address DIPswitch<br />
0 1 off, 2 off.<br />
1 1 on, 2 off.<br />
2 1 off, 2 on.<br />
Released DIPswitch<br />
off 3 off.<br />
on 3 on.<br />
Dimming DIPswitch<br />
group<br />
0 4 off.<br />
1 4 on.<br />
1234<br />
ON<br />
ZERO SETTING<br />
STEERING LEVER<br />
Version: 01 ongecontroleerd<br />
Date:<br />
Document: <strong>Sigma</strong><strong>500</strong>.doc Page 44 of 108<br />
Date 1 e release:<br />
OFF
3.3 Connections in the junction box RZ 219 to the PCB RZ1703/A2.<br />
K1: Power supply connection for the rudder angle system.<br />
K2: Connection for the <strong>Sigma</strong> <strong>500</strong> rudder angle indicator.<br />
For details of how to connect a <strong>Sigma</strong> <strong>500</strong> to a RZ 219, see drawing<br />
“CONNECTION SIGMA <strong>500</strong>” at the back of this manual, a jumper must be<br />
placed in the RZ 219 between pin1 and pin2 on the PCB RZ 1703/A2 IC1.<br />
K3: RZ 610 (rudder angle sensor) connection. For connections, see drawing:<br />
K 4: Connection for RZ 630 rate gyro. See drawing:<br />
Version: 01 ongecontroleerd<br />
Date:<br />
Document: <strong>Sigma</strong><strong>500</strong>.doc Page 45 of 108<br />
Date 1 e release:
K5: Connection for an external turn-indicator. See drawing:<br />
K6: Auxiliary input: an external control signal can be connected here. (External<br />
analog).<br />
1 = +15V out 3 = signal in +7.5V ( +/- 5V)<br />
2 = +7.5V out 4 = 0V out<br />
K7: TMC coil of synchro: the TMC may be connected directly.<br />
If you want to connect a synchro, D17 should be cut out and a capacitor of 470<br />
nF should be placed between K7/1 and K7/2.<br />
Version: 01 ongecontroleerd<br />
Date:<br />
Document: <strong>Sigma</strong><strong>500</strong>.doc Page 46 of 108<br />
Date 1 e release:
K8: Sin/Cos input: A Sin/Cos and reference can be offered here. The Sin/Cos is at<br />
+- 2.5V of the reference.<br />
K9: NMEA in and out. The input is galvanically separated from the remaining<br />
circuits. The output does not have an isolator. The messages that can be sent and<br />
received are as per NMEA 0183. Transmission: NMEA 0183 HDM, HDT,<br />
ROT, RSA.,HTD. Reception: NMEA 0183 APA, APB, HDT,HDM,HDG.<br />
K10: Connection to the first display unit.<br />
Version: 01 ongecontroleerd<br />
Date:<br />
Document: <strong>Sigma</strong><strong>500</strong>.doc Page 47 of 108<br />
Date 1 e release:
K11: Power supply to the system.<br />
K12: Output of the wait alarm: this is a potential-free relay contact that gets energised<br />
when the pilot is manually operated, for a maximum of once every minute. The<br />
maximum load at this output is 24V, 1A.<br />
K13: Alarm output: this is a potential-free contact that gets energised when there is an<br />
alarm. An external visual or acoustic alarm indication should be connected to this<br />
output. This output can also be connected to another alarm system. The<br />
maximum load of this output is 24V, 1A.<br />
3.4 Connections in the junction box RZ 219 to the PCB RZ 1711.<br />
The following can be connected to the output of the PCB RZ 1711:<br />
- Danfoss<br />
- Common+<br />
- Common -<br />
This PCB is connected to the PCB RZ 1703/A2. The PCB RZ 1711/A0 is connected to<br />
the output 1 on the PCB RZ 1703/A2; steering system 1 may be connected at the<br />
connector K1.<br />
3.5 DIP switch settings on the pcb RZ 1703/A2.<br />
Various DIP-switch settings can be made in accordance with the functionalities of the<br />
pilot. Before applying voltage to the junction box, the DIPswitch 1 should be set.<br />
1 2 3 4 Description:<br />
OFF X X OFF Normal functionality<br />
ON X X OFF Danfoss reversed<br />
X ON OFF X Compass input K7 RZ347/RZ348<br />
X OFF ON X Compass input nmea<br />
X OFF OFF X Compass input Sin/Cos<br />
ON ON ON ON Test/ production<br />
Version: 01 ongecontroleerd<br />
Date:<br />
Document: <strong>Sigma</strong><strong>500</strong>.doc Page 48 of 108<br />
Date 1 e release:
4.1 Operation SIGMA <strong>500</strong>.<br />
Operation<br />
4.1.1 Potentiometer on/off/dim <strong>Sigma</strong> <strong>500</strong>.<br />
This is a potentiometer with a switch that switches-on the device when turned in the<br />
clockwise direction. With the device switched-on, the lighting can be adjusted between<br />
5 to 100% by turning this potentiometer further to the right. If the lighting is increased<br />
to the maximum level, the lighting in the foil is switched-off to increase the life of the<br />
lamp. The <strong>Sigma</strong> 600 dims along with the <strong>Sigma</strong> <strong>500</strong>.<br />
4.1.2 Reset /Test key.<br />
Reset <strong>Sigma</strong> <strong>500</strong><br />
The acoustic alarm can be switched-off using the -- key. The red alarm LED will<br />
continue to be lighted.<br />
Test <strong>Sigma</strong> <strong>500</strong><br />
If the key is pressed, and if there are no existing alarms, the key can be used for<br />
testing. On pressing the key, the power supply LED will light-up in red and an acoustic<br />
alarm will be heard until this key is released.<br />
4.1.3 Select <strong>Sigma</strong> <strong>500</strong>.<br />
If <strong>Sigma</strong><strong>500</strong> and <strong>Sigma</strong>550 operations have been included in the system, the device can be<br />
operated after first pressing SELECT to assign parent status to the <strong>Sigma</strong><strong>500</strong>. The<br />
indicator above the key indicates that the operation has been selected.<br />
4.1.4 PORT test.<br />
With this button, one can test the functionality of the rate of turn indicator. By pressing<br />
this button, the red gyro will obtain a deviation that corresponds to an angular velocity<br />
of 20°/min toward the port side.<br />
4.1.5 STBD test.<br />
With this button, one can test the functionality of the rate of turn part indicator. By<br />
pressing this button, the red gyro will obtain a deviation that corresponds to an angular<br />
velocity of 20°/min toward the starboard side.<br />
4.1.6 Function RUDDER ANGLE.<br />
With the key , the function can be placed in the rudder angle function. The indicator<br />
above the key indicates whether this function is selected or not. The pilot cannot give any<br />
control commands in the rudder angle position.<br />
Version: 01 ongecontroleerd<br />
Date:<br />
Document: <strong>Sigma</strong><strong>500</strong>.doc Page 49 of 108<br />
Date 1 e release:
4.1.7 The ROUTE-DEPENDENT function.<br />
The route-dependent function can be selected using the key. The indicator above<br />
the key indicates whether this function is selected or not. In the route-dependent position,<br />
the position of the rudder is equal to the position of the control lever on the <strong>Sigma</strong>600.<br />
4.1.8 Function TURN-INDICATOR PILOT.<br />
With the key the function turn-indicator pilot can be selected. The indicator above<br />
the key indicates whether this function is selected or not. In the position turn-indicator<br />
pilot, a rate-of-turn can be set using the control lever on the <strong>Sigma</strong> 600.<br />
4.1.9 Function AUX.<br />
With the key the function aux pilot can be selected. The indicator above the key<br />
indicates whether this function is selected or not. In the function AUX, the pilot responds<br />
to a signal connected to the aux.,the <strong>Sigma</strong>370 or a NMEA message.<br />
4.1.10 SENSITIVITY.<br />
The sensitivity of the pilot can be set using this parameter. This setting works in the<br />
“PILOT” positions. The response threshold of the pilot can be set using SENSITIVITY.<br />
When this setting is at the minimum level, the sensitivity is the lowest. It will require a<br />
relatively large fault in the course before the pilot makes adjustments. With the setting at<br />
the maximum level, a correction signal shall be given at the smallest deviation in the<br />
course. In rough weather, the pilot has to be set at a reduced sensitivity.<br />
4.1.11 RUDDER.<br />
With RUDDER, it is possible to influence the steering pattern depending on the amount<br />
of load, the travelling speed and the water conditions. When the RUDDER placed in the<br />
maximum position, the pilot will respond faster and with greater rudder deflection even in<br />
response to small changes. This is in order to achieve a good steering response in rough<br />
weather, with heavy loads or low travelling speeds. The best setting is to keep the button in<br />
the lowest possible position, provided that there is adequate rudder deflection in order to<br />
remain on the course that has been set. The RUDDER setting works in all positions<br />
except in “RUDDER” and “FOLLOW-UP”<br />
Version: 01 ongecontroleerd<br />
Date:<br />
Document: <strong>Sigma</strong><strong>500</strong>.doc Page 50 of 108<br />
Date 1 e release:
4.1.12 DAMPING.<br />
This setting is acted in the PILOT position. The ship may roll to some extent without<br />
going off-course. As a consequence of the rolling of the ship, the pilot may continue to<br />
steer, but with a constant change in the compass signal. Due to these repeated steering<br />
actions, there is chance that the ship may roll. With DAMPING, one can slow down the<br />
response time of the pilot in order to prevent unnecessary steering actions. If the<br />
DAMPING is set at the minimum level, the pilot will respond the fastest. In the maximum<br />
DAMPING position, the pilot will respond considerably more slowly. The damping of the<br />
<strong>Sigma</strong> <strong>500</strong> operating system also damps the rate of turn indicators.<br />
4.1.13 TRIM.<br />
In the case of a consistent course fault (for example due to tide streams or due to wrongly<br />
placed loading) that is not corrected by an automatic TRIM, it may be corrected with the<br />
TRIM control system. With the TRIM, rudder can be set a few degrees off the centre so<br />
that the ship continues to move in a straight line. TRIM to the left results in a correction<br />
toward the port side. TRIM toward the right results in a correction toward the starboard.<br />
The TRIM control system can only be used in the position “R.O.T. PILOT”.<br />
Version: 01 ongecontroleerd<br />
Date:<br />
Document: <strong>Sigma</strong><strong>500</strong>.doc Page 51 of 108<br />
Date 1 e release:
4.2 Operation of the <strong>Sigma</strong> 600.<br />
4.2.1 “FOLLOW UP”<br />
This switches the pilot to the Follow Up function, which is the function in which the pilot<br />
responds to the rudder commands that are given with the lever.<br />
4.2.2 “SELECT”<br />
If there are several levers in the system, it is necessary to first press SELECT before the<br />
lever can be operated, in order to assign parent status to the lever.<br />
4.2.3 “PILOT”<br />
With this key, the control system switches over to the pilot function.<br />
4.2.4 “PORT”<br />
Dodge function PORT: on pressing this key, the pilot, if active in the functions<br />
“COMPASS PILOT” and “NMEA PILOT”, will change course toward the port side, as<br />
long as this key is pressed. When this key is released, the pilot shall go back to the earlier<br />
course.<br />
4.2.5 “STBD”<br />
Dodge function STBD: on pressing this key, the pilot, if active in the functions<br />
“COMPASS PILOT” and “NMEA PILOT”, will change course toward the starboard<br />
side, as long as this key is pressed. When this key is released, the pilot shall go back to the<br />
earlier course.<br />
4.2.6 “LEVER”<br />
With this, a direct rudder command can be given in the “FOLLOW UP” position and the<br />
desired curve speed can thereby be set in the “R.O.T. PILOT position.<br />
Version: 01 ongecontroleerd<br />
Date:<br />
Document: <strong>Sigma</strong><strong>500</strong>.doc Page 52 of 108<br />
Date 1 e release:
4.3 Alarms <strong>Sigma</strong> <strong>500</strong>.<br />
4.3.1 Gyro alarm<br />
This indication will light up if the rate gyro is not working properly or has not reached<br />
the required speed (immediately after switching-on), to show that the indication is not<br />
reliable. This indicator will switch-off again as soon as the rate gyro has reached the<br />
required speed and/or is functioning properly.<br />
4.3.2 Rudder system alarm.<br />
If the rudder system does not respond to the control commands of the pilot. The <strong>Sigma</strong><br />
<strong>500</strong> gives a rudder alarm.<br />
4.3.3 Course alarm.<br />
If in the turn-indicator function, the difference between the rate-of-turn set and the<br />
rate-of-turn measured exceeds the alarm value set by more than 12 seconds, a course<br />
alarm will be sounded.<br />
4.3.4 Voltage alarm.<br />
If there is no voltage or if the voltage is too low for the correct working of the pilot, a<br />
voltage alarm will be given. If all the voltages are ok and the <strong>Sigma</strong> <strong>500</strong> is switched-on,<br />
this indicator will light-up in green.<br />
In the case of a communication alarm, the voltage alarm will flash and the acoustic<br />
alarm cannot be reset.<br />
4.4 Alarms and sinnaling <strong>Sigma</strong> 600.<br />
4.4.1 Led Follow up..<br />
LED above : When this LED is on continuously the route-dependent operation<br />
has been selected. This LED flickers during a rudder operation alarm.<br />
4.4.2 Led Pilot.<br />
LED above : In conjunction with <strong>Sigma</strong> 550: When this LED is on continuously<br />
the ROT pilot has been selected.<br />
In conjunction with RZ903: When this LED is on continuously a<br />
linked connection has been selected.<br />
This LED flickers during a course or gyro alarm.<br />
4.4.3 Led Select.<br />
4.4.4 Power l.ed.<br />
LED above : When the LED is on the operation has been<br />
selected.<br />
When this LED flickers in conjunction with buzzer (short impulses)<br />
the operation has been released and may be taken over.<br />
LED between and : When this LED is green the device is<br />
on. When this LED is red there is a voltage alarm.<br />
In the event of an alarm the buzzer will activate at all operations<br />
whether they are selected or not.<br />
Version: 01 ongecontroleerd<br />
Date:<br />
Document: <strong>Sigma</strong><strong>500</strong>.doc Page 53 of 108<br />
Date 1 e release:
Fault detection procedure<br />
5.1.1 Display unit SIGMA <strong>500</strong> does not switch on.<br />
Check the power supply to the SIGMA <strong>500</strong>.<br />
If No: Check the power supply at K11 of the junction box PCB RZ 1703A2.<br />
If Yes: Check the cable between the junction box and display unit.<br />
5.1.2 SIGMA <strong>500</strong> switches on but a communication alarm is given.<br />
Check whether D9 in the junction box is lighted.<br />
If No: Check the fuse F1 on the PCB RZ 1703A2 in the junction box.<br />
If Yes: Check the communication cable between the junction box and the display unit.<br />
5.1.3 SIGMA <strong>500</strong> SPANNINGS ALARM indicator is lichted.<br />
Check power on K1 of SIGMA<strong>500</strong>.<br />
Check power between K4-1 and K4-2 on the SIGMA<strong>500</strong>.<br />
Check power on K11 of the junctionbox PCB RZ1703.<br />
Check whether D24 in the junction box is lighted.<br />
If No: Check Power on K1 of the Junctionbox PCB 1703A2.<br />
5.1.4 SIGMA <strong>500</strong> switches on but does not indicate the correct R.O.T. Information.<br />
Check whether D12 and D14 on the junction box PCB RZ 1703/A2 are lighted.<br />
If D12 is not lighted, check the fuse F2 on the PCB RZ 1703/A2<br />
If D14 is not lighted, check the fuse F1 on the PCB RZ 1703/A2.<br />
5.1.5 SIGMA <strong>500</strong> given a RUDDER ALARM.<br />
Check whether the rudder responds to the control commands.<br />
If No: Check whether the LED D8 on the PCB RZ 1711/A0 in the junction box is<br />
lighted.<br />
If No: Check the voltage supply between K1-1 and K1-2 on the PCB RZ<br />
1711/A0<br />
If Yes: Check whether the LED’s D5 or D6 are lighted.<br />
If Yes: Check whether there is output voltage to the valves on the terminal strip K1.<br />
Check whether emergency switch HAND/PILOT is in the position PILOT.<br />
5.1.6 Pilot does not steer, but also does not give any RUDDER ALARM.<br />
Check whether the function “RUDDER” has been selected on the display unit or not.<br />
Check whether the correct <strong>Sigma</strong> 600 has been selected.<br />
Version: 01 ongecontroleerd<br />
Date:<br />
Document: <strong>Sigma</strong><strong>500</strong>.doc Page 54 of 108<br />
Date 1 e release:
DEUTSCH<br />
Version: 01 ongecontroleerd<br />
Date:<br />
Document: <strong>Sigma</strong><strong>500</strong>.doc Page 55 of 108<br />
Date 1 e release:
Allgemeine Beschreibung / Technische Daten<br />
1.1 Lieferungsumfang <strong>Sigma</strong> <strong>500</strong>.<br />
In der Verpackung finden Sie die folgenden Artikel vor:<br />
- Handbuch<br />
- Sichtinstrument <strong>Sigma</strong> <strong>500</strong><br />
- Steuerung <strong>Sigma</strong> 600<br />
- Ruderlagengeber RZ 610<br />
- Kreiseleinheit RZ 630<br />
- Anschlusskasten RZ 219<br />
- Filterelement RZ 203<br />
- Montageset<br />
Überprüfen Sie, ob die oben genannten Artikel vorhanden sind. Setzen Sie sich bitte so<br />
schnell wie möglich mit Ihrem Händler in Verbindung, wenn das nicht der Fall ist.<br />
Lesen Sie vor der Installation von dem <strong>Sigma</strong> <strong>500</strong> dieses Handbuch aufmerksam durch.<br />
Fragen Sie Ihren Händler, wenn Sie Fragen haben oder etwas unklar ist.<br />
1.2 Beschreibung der Artikel im Lieferungsumfang.<br />
1.2.1 Handbuch.<br />
Im Handbuch finden Sie Anweisungen über das Anschließen, die<br />
Funktionsweise und die Bedienung von dem <strong>Sigma</strong> <strong>500</strong>.<br />
1.2.2 Sichtinstrument <strong>Sigma</strong> <strong>500</strong>.<br />
- Die Spannungsversorgung für dieses Gerät beträgt 18 - 36 Volt<br />
Gleichspannung.<br />
- Spannungsversorgungsalarm.<br />
- Kreiselalarm.<br />
- Kursalarm.<br />
- Ruderanlagenalarm<br />
- Der Stromverbrauch beträgt weniger als 1 A.<br />
- Wahl zwischen roter ,blauer oder gelber Beleuchtung im Messgerät.<br />
- Ruder anzeige 90° – 0° – 90°.<br />
- Wendezeiger 90° – 0° – 90°.<br />
- Abblendbar von 5 bis 100%.<br />
1.2.3 Steuerung <strong>Sigma</strong> 600.<br />
- Die Spannungsversorgung für dieses Gerät beträgt 18 - 36 Volt<br />
Gleichspannung.<br />
- Spannungsversorgungsalarm.<br />
- Der Stromverbrauch beträgt weniger als 0,5 A.<br />
Version: 01 ongecontroleerd<br />
Date:<br />
Document: <strong>Sigma</strong><strong>500</strong>.doc Page 56 of 108<br />
Date 1 e release:
1.2.4 Ruderlagengeber RZ 610.<br />
Dieser Sensor dient zur Erfassung der Ruderlage.<br />
1.2.5 Kreiseleinheit RZ 630.<br />
Dieser, im eigenen Labor entwickelte, mittelschnell drehende Kreisel liefert auf<br />
der Grundlage des gyroskopischen Effekts und der eingebauten Intelligenz<br />
eine sehr genaue "Rate of Turn" (Wendegeschwindigkeit) an den<br />
angeschlossenen Pilot.<br />
1.2.6 Anschlusskasten RZ 219.<br />
In diesem Anschlusskasten werden die erforderlichen Anschlüsse zwischen<br />
dem Pilot und den externen Geräten vorgenommen. Es bestehen<br />
Anschlussmöglichkeiten für: Rückmelder, Kreiseleinheit, Kompasssensor,<br />
NMEA Eingang und Ausgang sowie Aux Eingang.<br />
1.2.7 Filterelement RZ 203.<br />
Filter für die Speisung zu dem Piloten.<br />
1.2.8 Montageset.<br />
- 2 x 4-poliger Anschluss + Abdeckung.<br />
- 2 x 5-poliger Anschluss + Abdeckung.<br />
- 10 -poliger Anschluss + Abdeckung.<br />
- 12-poliger Anschluss + Abdeckung.<br />
- Einbauring <strong>Sigma</strong> <strong>500</strong>.<br />
- Einbauring <strong>Sigma</strong> 600.<br />
- 10x Feder.<br />
Version: 01 ongecontroleerd<br />
Date:<br />
Document: <strong>Sigma</strong><strong>500</strong>.doc Page 57 of 108<br />
Date 1 e release:
Installationsvorschrift<br />
2.1 Montage Sichtinstrumente SIGMA <strong>500</strong>.<br />
Die Sichtinstrumente werden so montiert, dass sie sich an einem deutlich sichtbaren Platz<br />
für den Rudergänger befinden.<br />
Es muss ausreichend Platz übrig bleiben, um die Verkabelung zu legen.<br />
Eine Montagezeichnung befindet sich am Ende von diesem Handbuch.<br />
2.2 Montage Steuerung SIGMA 600.<br />
Die Steuerung SIGMA 600 muss an einer Stelle montiert werden, die für den Rudergänger<br />
gut erreichbar ist.<br />
2.3 Montage Anschlusskasten.<br />
Der Anschlusskasten muss an einem Platz angebracht werden, der zu Wartungszwecken<br />
gut zugänglich und für die Kabel leicht erreichbar ist. Der Anschlusskasten muss mit zwei<br />
separaten Spannungsversorgungen zu je 24 Volt gespeist werden. Diese Speisungen<br />
müssen extern mit einer automatischen Sicherung für 6 A abgesichert werden.<br />
2.4 Montage Ruderlagengeber.<br />
Der Ruderlagengeber muss mechanisch mit der Ruderanlage (mit Hilfe einer<br />
Verbindungsstange) verbunden werden. Der Ruderlagengeber kann auch in der Nähe der<br />
Ruderachse montiert werden und kann mit Hilfe von Zahnrädern und einer Kette (siehe<br />
dazu Abbildung 1) verbunden werden. Die Übersetzung der Zahnräder muss so gewählt<br />
werden, dass an dem Potentiometer eine Drehung von ± 180° erfolgt, wenn das Ruder<br />
von maximal Steuerbord nach maximal Backbord geschwenkt wird. Der Ruderlagengeber<br />
muss so montiert werden, dass die Kette in einer Linie mit den zwei Haltebügeln an dem<br />
Ruderlagengeber läuft (dies im Zusammenwirken mit den mechanischen Kräften an dem<br />
Ruderlagengeber).<br />
Version: 01 ongecontroleerd<br />
Date:<br />
Document: <strong>Sigma</strong><strong>500</strong>.doc Page 58 of 108<br />
Date 1 e release:
2.5 Montage Sensor RZ 630.<br />
Die Kreiseleinheit ist vorzugsweise an einer Stelle in der Nähe des Schwerpunkts von<br />
einem Querschnitt des Schiffs zu montieren.<br />
Dadurch wird der Effekt von Roll- und Stampfbewegungen des Schiffs minimiert. Das ist<br />
vor allem wichtig, wenn beabsichtigt wird, den Wendezeiger (eventuell später) in den<br />
Regelkreis eines Autopiloten aufzunehmen. Die Kreiseleinheit muss mit der Abdeckung<br />
nach oben und horizontal montiert werden, was dazu dient, dafür zu sorgen, dass der<br />
Wendezeiger nur Winkelgeschwindigkeiten um die vertikale Achse misst.<br />
Die Linie auf der Abdeckung von der Kreiseleinheit muss in einer Flucht sein mit oder<br />
parallel verlaufen zu der Längsachse des Schiffs. Die Kreiseleinheit muss mit Bolzen an der<br />
gewählten Stelle montiert werden.<br />
(Bitte beachten: Sicherer Kompassabstand Kreiseleinheit: 0,9 m.)<br />
Version: 01 ongecontroleerd<br />
Date:<br />
Document: <strong>Sigma</strong><strong>500</strong>.doc Page 59 of 108<br />
Date 1 e release:
3.1 SIGMA <strong>500</strong>.<br />
Anschlüsse<br />
3.1.1 K1: Spannungsversorgung <strong>Sigma</strong> <strong>500</strong>.<br />
GND (BACKUP)<br />
+24VDC (BACKUP)<br />
SCREEN<br />
GND (MAIN)<br />
+24VDC (MAIN)<br />
Die <strong>Sigma</strong>-Sichtinstrumente können an eine oder zwei Spannungsversorgungen angeschlossen<br />
werden. Wir empfehlen im Hinblick auf eine bessere Betriebssicherheit die<br />
<strong>Sigma</strong>-Sichtinstrumente an zwei Spannungsversorgungen anzuschließen. Wenn dann<br />
eine der Spannungsversorgungen ausfällt, wird das <strong>Sigma</strong>-Sichtinstrument mit der<br />
anderen Spannungsversorgung mit 24 Volt weiter arbeiten können.<br />
Wenn nur eine Spannungsversorgung verwendet wird, müssen die Anschlüsse an der<br />
Hauptspannungsversorgung zu den Anschlüssen der Reservespannungsversorgung<br />
durchgeschaltet werden.<br />
Falls dies vergessen wird, ertönt jedes mal, wenn das Gerät eingeschaltet wird, das<br />
akustische Warnsignal und leuchtet die LED für die Versorgungsspannung zur Anzeige<br />
dazu rot auf, dass eine Spannungsquelle nicht angeschlossen ist.<br />
Dieses akustische Signal kann durch Drücken auf die Taste ausgeschaltet werden.<br />
Version: 01 ongecontroleerd<br />
Date:<br />
Document: <strong>Sigma</strong><strong>500</strong>.doc Page 60 of 108<br />
Date 1 e release:
3.1.2 K2: <strong>Sigma</strong> <strong>500</strong>.<br />
K2-1 bis 2: Externe Dimmer ausgänge.<br />
Wenn ein Tochterinstrument angeschlossen ist, kann es zusammen mit dem<br />
Hauptinstru-ment abgeblendet werden. Das Dimmersignal des Hauptinstruments muss<br />
dann an K2-1 und K2-2 angeschlossen werden, wodurch das Tochterinstrument mit<br />
dem Hauptinstru-ment mit abgeblendet wird. Die Ausgangsspannung für dieses<br />
Dimmsignal beträgt 15 V und kann maximal 150 mA ansteuern.<br />
K2-4 bis 8: Tochterausgänge<br />
Über K2-4 und K2-5 kann man eine externe analoge Anzeige von 1 mA anschließen.<br />
Mit P12 kann man das Instrument auf 0 stellen und mit P13 kann man den Ausschlag<br />
für diese Tochter regeln.<br />
Über K2-7 und K2-8 kann man eine externe analoge Anzeige von 1 mA anschließen.<br />
Mit P8 kann man das Instrument auf 0 stellen und mit P9 kann man den Ausschlag für<br />
diese Tochter regeln.<br />
K2-9 und 10: NMEA-Ausgang<br />
An diesem Ausgang wird ein NMEA-Signal gemäß der Norm NMEA 183 ausgegeben.<br />
$..ROT und $..RSA.<br />
K2-11 und 12: NMEA-Eingang<br />
Dieser Eingang kann nicht verwendet werden.<br />
Version: 01 ongecontroleerd<br />
Date:<br />
Document: <strong>Sigma</strong><strong>500</strong>.doc Page 61 of 108<br />
Date 1 e release:
Version: 01 ongecontroleerd<br />
Date:<br />
Document: <strong>Sigma</strong><strong>500</strong>.doc Page 62 of 108<br />
Date 1 e release:
3.1.3 K3: <strong>Sigma</strong> <strong>500</strong>.<br />
K3-1 und 2: Daten Eingang<br />
An K3-1 und 2 wird die Leitung für die eingehenden Daten (z. B. von dem Anschlusskasten)<br />
angeschlossen. Wenn die Datenübertragung unterbrochen wird, blinkt die LED<br />
für die Versorgungsspannung rot auf, und es ist ein periodisch auftretendes Signal des<br />
Sum-mers zu hören.<br />
K3-3 und 4: Daten Ausgang<br />
An K3-3 und 4 wird die Leitung für die ausgehenden Daten (z. B. zu einem zweiten<br />
Sichtinstrument) angeschlossen.<br />
3.1.4 K4: <strong>Sigma</strong> <strong>500</strong>.<br />
Version: 01 ongecontroleerd<br />
Date:<br />
Document: <strong>Sigma</strong><strong>500</strong>.doc Page 63 of 108<br />
Date 1 e release:
K4-1 bis 2: Externe Dimmer ausgänge.<br />
Wenn ein Tochterinstrument angeschlossen ist, kann es zusammen mit dem<br />
Hauptinstru-ment abgeblendet werden. Das Dimmersignal des Hauptinstruments muss<br />
dann an K4-1 und K4-2 angeschlossen werden, wodurch das Tochterinstrument mit<br />
dem Hauptinstru-ment mit abgeblendet wird. Die Ausgangsspannung für dieses<br />
Dimmsignal beträgt 15 V und kann maximal 150 mA ansteuern.<br />
K4-3 bis 4: Tochterausgänge<br />
Über K4-3 und K4-4 kann man eine externe analoge Anzeige von 1 mA anschließen.<br />
Mit P2 kann man das Instrument auf 0 stellen und mit P3 kann man den Ausschlag für<br />
diese Tochter regeln.<br />
K4-5 bis 6: Ruder eingang<br />
Ruder Eingang.<br />
K4-7 und 8: Extern on/off in (Extern ein/aus ein)<br />
Das <strong>Sigma</strong> <strong>500</strong> ruder anzeiger wird durch den RZ 219 eingeschaltet. Siehe Zeichn.<br />
"ANSCHLUSS SIGMA <strong>500</strong>" am Ende von diesem Handbuch.<br />
K4-9 bis 10: Spannungsversorgung Ruder anzeiger <strong>Sigma</strong><strong>500</strong>.<br />
Anschluss für die Spannungsversorgung der Ruder anzeiger.<br />
Version: 01 ongecontroleerd<br />
Date:<br />
Document: <strong>Sigma</strong><strong>500</strong>.doc Page 64 of 108<br />
Date 1 e release:
3.2 Anschlüsse <strong>Sigma</strong> 600.<br />
3.2.1 K1: Stromversorgung.<br />
Das <strong>Sigma</strong> 600 kann an eine oder an zwei Stromversorgungen angeschlossen werden.<br />
Um eine bessere Betriebssicherheit zu gewährleisten, empfehlen wir den Anschluss des<br />
<strong>Sigma</strong> 600 an zwei Stromversorgungen. In diesem Fall steuert bei einem Ausfall der 24-<br />
Volt-Hauptversorgung die 24-Volt-Reserveversorgung die Funktionen des <strong>Sigma</strong> 600.<br />
Wenn mehr als eine Stromversorgung zugeschaltet wird, müssen die Anschlüsse an der<br />
Hauptversorgung zur Reserveversorgung durchgeschleift werden. Wird dies nicht<br />
durchgeführt, leuchtet die Kontroll-LED für die Stromversorgung rot auf – als<br />
Zeichen, dass eine Stromquelle fehlt.<br />
Wenn das <strong>Sigma</strong> 600 an zwei aktive Stromversorgungen angeschlossen ist, leuchtet die<br />
Kontroll-LED für die Stromversorgung grün auf. Beim Ausfall einer der beiden<br />
Stromversorgungen wird die Kontroll-LED dann rot aufleuchten.<br />
3.2.2 K2: Kommunikation (Datenleitung).<br />
GND (BACKUP)<br />
+24VDC (BACKUP)<br />
SCREEN<br />
GND (MAIN)<br />
+24VDC (MAIN)<br />
Rx/Tx+<br />
Rx/Tx-<br />
Rx/Tx+<br />
Rx/Tx-<br />
Screen<br />
COMMUNICATIONS<br />
COMMUNICATIONS<br />
Version: 01 ongecontroleerd<br />
Date:<br />
Document: <strong>Sigma</strong><strong>500</strong>.doc Page 65 of 108<br />
Date 1 e release:
K2-1 und -2: Bidirektionaler Kommunikationsport 1A<br />
K2-3 und -4: Bidirektionaler Kommunikationsport 1B<br />
Port 1A und 1B sind identisch (intern durchgeschleift)<br />
An Port 1A kann z.B. der Anschlusskasten oder das <strong>Sigma</strong> <strong>500</strong> und an Port 1B eine<br />
zweite Steuereinheit angeschlossen werden.<br />
3.3 DIP-Schalters <strong>Sigma</strong> 600.<br />
Im <strong>Sigma</strong> 600 kann über die Adresse festgelegt werden, welche Steuereinheit die<br />
Dimmerwirkung beim <strong>Sigma</strong> 600 mitregelt. Diese Einstellung wird mit Hilfe eines DIP-<br />
Schalters vorgenommen. Wenn nur ein <strong>Sigma</strong> 600 eingesetzt wird, muss die Adresse auf<br />
0 eingestellt werden.<br />
Adresse DIP-Schalter<br />
0 1 aus, 2 aus<br />
1 1 ein, 2 aus<br />
2 1 aus, 2 ein<br />
Freigeben DIP-Schalter<br />
Aus 3 aus<br />
Ein 3 ein<br />
Dimmergruppe DIP-Schalter<br />
0 4 aus<br />
1 4 ein<br />
1234<br />
ON<br />
ZERO SETTING<br />
STEERING LEVER<br />
Version: 01 ongecontroleerd<br />
Date:<br />
Document: <strong>Sigma</strong><strong>500</strong>.doc Page 66 of 108<br />
Date 1 e release:<br />
OFF
3.3 Anschlüsse in dem Anschlusskasten RZ 219 an RZ 1703/A2.<br />
K1: Anschluss für die Spannungsversorgung der Ruderlagensteuerung.<br />
K2: Anschluss für die Ruderlagenanzeige des <strong>Sigma</strong> <strong>500</strong>.<br />
Sehen Sie sich die Zeichn. "ANSCHLUSS SIGMA <strong>500</strong>" am Ende von dem<br />
Handbuch an, um ein <strong>Sigma</strong> <strong>500</strong> an einen RZ 219 anzuschließen. In dem RZ 219<br />
muss ein Schaltdraht an RZ 1703/A2 IC1 zwischen Kontaktstift 1 und<br />
Kontaktstift 2 gesteckt werden.<br />
K3: RZ 610 (Ruderlagensensor) Anschluss. Anschluss siehe Zeichnung:<br />
K4: Anschluss RZ 630 Kreiseleinheit. Siehe Zeichnung:<br />
Version: 01 ongecontroleerd<br />
Date:<br />
Document: <strong>Sigma</strong><strong>500</strong>.doc Page 67 of 108<br />
Date 1 e release:
K5: Anschluss für einen externen Wendezeiger. Siehe Zeichnung:<br />
K6: Aux Eingang: Daran kann ein externes Steuersignal angeschlossen werden.<br />
(extern analog).<br />
1 = +15 V Ausgang 3 = Signal Eingang +7,5 V (+/- 5 V)<br />
2 = +7,5 V Ausgang 4 = 0 V Ausgang<br />
K7: TMC Spule oder Synchro: Hier kann man das TMC direkt anschließen.<br />
Wenn man ein Synchro anschließen möchte, muss D17 getrennt werden<br />
und muss ein Kondensator mit 470 nF zwischen K7/1 und K7/2 geschaltet<br />
werden.<br />
Version: 01 ongecontroleerd<br />
Date:<br />
Document: <strong>Sigma</strong><strong>500</strong>.doc Page 68 of 108<br />
Date 1 e release:
K8: Sin/Cos Eingang: Hier kann ein Sin/Cos und eine Referenz dazu angeboten<br />
werden. Das Signal Sin/Cos liegt bei +- 2,5 V von der Referenz.<br />
K9: NMEA Eingang und Ausgang: Der Eingang ist von den anderen Schaltkreisen<br />
galvanisch getrennt. Der Ausgang verfügt nicht über eine solche Trennung. Die<br />
Meldungen, die man senden und empfangen kann, sind entsprechend NMEA<br />
0183: Senden: NMEA 0183 HDM, HDT, ROT, RSA. Empfangen: NMEA<br />
0183 APA, APB, HDT.<br />
K10: Verbindung zu dem ersten Sichtinstrument.<br />
Version: 01 ongecontroleerd<br />
Date:<br />
Document: <strong>Sigma</strong><strong>500</strong>.doc Page 69 of 108<br />
Date 1 e release:
K11: Spannungsversorgung des Systems.<br />
K12: Ausgang Wachalarm: Dieses potentialfreie Relais wird aktiviert, wenn der Pilot<br />
manuell bedient wird. Das Maximum beträgt ein Mal je Minute. Die maximale<br />
Belastung für diesen Ausgang ist 24 V, 1 A.<br />
K13: Alarm Ausgang: Dies ist ein potentialfreier Kontakt, der aktiviert wird, wenn ein<br />
Alarm anliegt. An diesen Ausgang wird ein externer optischer oder akustischer<br />
Alarmmelder angeschlossen. Dieser Ausgang kann auch mit einem anderen<br />
Alarmsystem verbunden werden. Die maximale Belastung dieses Ausgangs ist 24<br />
V, 1 A.<br />
3.4 Anschlüsse in dem Anschlusskasten RZ 219 an RZ 1711.<br />
An das Ausgangsschaltkartenmodul RZ 1711 kann Folgendes angeschlossen werden:<br />
- Danfoss<br />
- Masse +<br />
- Masse -<br />
Dieses Schaltkartenmodul ist mit Hilfe eines Flachbandkabels mit dem Schaltkartenmodul<br />
RZ 1703/A2 verbunden. Schaltkartenmodul RZ 1711/A0 ist mit Ausgang 1 an<br />
Schaltkarten-modul RZ 1703/A2 verbunden. Am Anschluss K1 kann man Steueranlage 1<br />
anschließen.<br />
3.5 Einstellungen für DIP-Schalter im modul RZ 1703/A2.<br />
Je nach den Möglichkeiten des Piloten müssen verschiedene Einstellungen für den DIP-<br />
Schalter vorgenommen werden. Bevor Spannung an den Anschlusskasten angelegt wird,<br />
muss der DIP-Schalter 1 eingestellt werden.<br />
1 2 3 4 Beschreibung:<br />
OFF X X OFF Normale Funktionsweise<br />
ON X X OFF Danfoss Umgekehrt<br />
X ON OFF X Kompass Eingang K7 RZ347/RZ348<br />
X OFF ON X Kompass Eingang NMEA<br />
X OFF OFF X Kompass Eingang Sin/Cos<br />
ON ON ON ON Test/ Produktion<br />
Version: 01 ongecontroleerd<br />
Date:<br />
Document: <strong>Sigma</strong><strong>500</strong>.doc Page 70 of 108<br />
Date 1 e release:
4.1 Bedienung SIGMA <strong>500</strong>.<br />
Bedienung<br />
4.1.1 Potmeter on/off/dim (Potentiometer ein/aus/abblenden) <strong>Sigma</strong> <strong>500</strong>.<br />
Dieses ist ein Potentiometer mit Schalter. Durch das Drehen des Potentiometers nach<br />
rechts wird der Pilot eingeschaltet. Wenn das Gerät eingeschaltet ist, kann durch das<br />
weiter nach rechts drehen die Beleuchtung von 5 bis 100% geregelt werden. Wenn die<br />
Beleuchtung ganz auf maximal gedreht wird, erfolgt eine Ausschaltung der Beleuchtung<br />
in der Folie, um die Lebensdauer der Leuchte zu verlängern. Das <strong>Sigma</strong> 600 wird mit<br />
dem <strong>Sigma</strong> <strong>500</strong> mit abgeblendet.<br />
4.1.2 Taste "Reset/Test" (Zurücksetzen/Test)<br />
Reset (Zurücksetzen) <strong>Sigma</strong> <strong>500</strong><br />
Wenn die <strong>Sigma</strong> <strong>500</strong> eine alarmmelding gibt, wird die rote LED aufleuchten und ist ein<br />
akustisches Alarmsignal zu hören. Mit Hilfe der Taste -- lässt sich das akustische<br />
Alarmsignal ausschalten. Die LED den Alarm leuchtet weiterhin rot auf.<br />
Test <strong>Sigma</strong> <strong>500</strong><br />
Wenn auf die Taste gedrückt wird, ohne dass es eine Alarmmeldung gibt,<br />
funktioniert diese Taste als Test. Durch das Drücken auf diese Taste leuchtet die LED<br />
auf und wird der akustische Alarm zu hören sein, bis diese Taste wieder losgelassen<br />
wird.<br />
4.1.3 Select (Auswählen) <strong>Sigma</strong> <strong>500</strong>.<br />
Wenn mehrere Steuerungen des Typs <strong>Sigma</strong> <strong>500</strong> in dem System integriert sind, muss man<br />
auf "SELECT" (Auswählen) drücken, bevor man mit einem Steuerhebel bedienen kann,<br />
um dem Steuerhebel den Status "moeder" (Mutter) zuzuordnen. Auf der Anzeige über der<br />
Taste lässt sich ablesen, dass die Steuerung ausgewählt ist.<br />
4.1.4 Test Backbord.<br />
Mit dieser Taste ist es möglich, die Funktionstüchtigkeit von dem <strong>Sigma</strong> <strong>500</strong> zu<br />
überprüfen. Durch das Drücken auf diese Taste erfährt die Kreiseleinheit eine<br />
Abweichung, die einer Wendegeschwindigkeit von 20°/min nach Backbord entspricht.<br />
4.1.5 Test Steuerbord.<br />
. Mit dieser Taste ist es möglich, die Funktionstüchtigkeit von dem <strong>Sigma</strong> <strong>500</strong> zu<br />
überprüfen. Durch das Drücken auf diese Taste erfährt die Kreiseleinheit eine<br />
Abweichung, die einer Wendegeschwindigkeit von 20°/min nach Steuerbord entspricht.<br />
4.1.6 Funktion Ruderlage.<br />
Mit der Taste kann der Pilot in die Funktion "Ruderlage" gestellt werden. Auf der<br />
Anzeige über der Taste lässt sich ablesen, ob diese Funktion ausgewählt ist. In der Stellung<br />
"Ruderlage" kann der Pilot keine Steuerbefehle geben.<br />
Version: 01 ongecontroleerd<br />
Date:<br />
Document: <strong>Sigma</strong><strong>500</strong>.doc Page 71 of 108<br />
Date 1 e release:
4.1.7 Funktion Wegabhängig.<br />
Mit der Taste kann die Funktion wegabhängig ausgewählt werden. Auf der Anzeige<br />
über der Taste lässt sich ablesen, ob diese Funktion ausgewählt ist. In der Stellung für<br />
"wegabhängig" ist die Lage des Ruders gleich der Stellung von dem Steuerhebel am <strong>Sigma</strong><br />
600.<br />
4.1.8 Funktion Wendezeiger Pilot.<br />
Mit der Taste kann die Funktion "Wendezeiger Pilot" ausgewählt werden. Auf der<br />
Anzeige über der Taste lässt sich ablesen, ob diese Funktion ausgewählt ist. In der Stellung<br />
"Wendezeiger Pilot"<br />
wird mit dem Steuerhebel an dem <strong>Sigma</strong> 600 eine Wendegeschwindigkeit eingestellt.<br />
4.1.9 Funktion AUX.<br />
Mit der Taste kann die Funktion "Aux Pilot" ausgewählt werden. Auf der Anzeige<br />
über der Taste lässt sich ablesen, ob diese Funktion ausgewählt ist. In der Funktion<br />
"AUX" reagiert der Pilot auf ein an Aux angeschlossenes Signal.<br />
4.1.10 Empfindlichkeit.<br />
Mit diesem Parameter kann die Empfindlichkeit des Piloten eingestellt werden. Diese<br />
Einstellung wirkt sich in der Stellung “PILOT” aus. Mit Empfindlichkeit wird der<br />
Reaktionspunkt des Piloten eingestellt. Bei der Einstellung auf den niedrigsten Wert ist die<br />
Empfindlichkeit am geringsten. In diesem Fall ist eine vergleichsweise starke<br />
Kursabweichung erforderlich, bevor der Pilot eine Kurskorrektur vornimmt. Bei der<br />
Einstellung auf den höchsten Wert wird der Pilot selbst bei der kleinsten Kursabweichung<br />
ein Korrektursignal abgeben. Bei rauem Wetter muss der Pilot auf eine geringere<br />
Empfindlichkeit eingestellt werden.<br />
4.1.11 Ruder .<br />
Mit Ruder kann das Steuerverhalten in Abhängigkeit von der Menge der Ladung, der<br />
Fahrgeschwindigkeit und den Gegebenheiten des Gewässers beeinflusst werden. Wenn<br />
ROER auf die höchste Stellung gedreht wird, wird der Pilot schneller und mit größerem<br />
Ruderausschlag auf eine kleine Veränderung reagieren. So lässt sich ein gutes<br />
Steuerverhalten bei schlechter Wetterlage, schwerer Ladung oder geringen<br />
Fahrgeschwindigkeiten erzielen. Bei günstigen Bedingungen kann ROER auf den kleinsten<br />
Wert eingestellt werden, also bei geringer Beladung, guter Wetterlage und relativ hohen<br />
Fahrgeschwindigkeiten. Die beste Einstellung bedeutet, den Drehknopf auf einen so<br />
geringen Wert wie möglich einzustellen, so dass ein ausreichender Ruderausschlag noch<br />
gewährleistet ist, um auf dem eingestellten Kurs zu bleiben. Die Einstellung für Ruder<br />
wirkt sich in allen Stellungen mit Ausnahme von “Ruderlage” und “Wegabhängig ” aus.<br />
Version: 01 ongecontroleerd<br />
Date:<br />
Document: <strong>Sigma</strong><strong>500</strong>.doc Page 72 of 108<br />
Date 1 e release:
4.1.12 Dämpfung.<br />
Diese Einstellung wirkt sich in der Stellung "Pilot" aus. Bei schlechten Wetterbedingungen<br />
kann das Schiff etwas zu schlingern (stampfen und rollen) beginnen, ohne dabei außer<br />
Kurs zu geraten. Dieses Schlingern kann allerdings zur Folge haben, dass der Pilot bestrebt<br />
ist, durch eine ständige Veränderung des Kompasssignals gegenzusteuern. Es besteht die<br />
Möglichkeit, dass das Schiff durch diese ständigen Steuereingriffe noch stärker zu<br />
schlingern beginnt. Mit DEMPING (Dämpfung) kann man die Reaktionszeit des Piloten<br />
verzögern, um solche unnötigen Steuerbewegungen zu vermeiden. Wenn Dämpfung auf<br />
den kleinsten Wert gestellt ist, reagiert der Pilot am schnellsten. Wenn Dämpfung auf den<br />
höchsten Wert gestellt ist, hat das eine bedeutend trägere Reaktion des Piloten zur Folge.<br />
Die Dämpfung an der Steuerung <strong>Sigma</strong> <strong>500</strong> dämpft auch die Anzeige auf dem <strong>Sigma</strong> <strong>500</strong>.<br />
4.1.13 Trim (Trimmen).<br />
Wenn eine anhaltende Kursabweichung auftritt (z. B. durch Gezeitenströmung oder durch<br />
schlecht positionierte Ladung), die nicht durch automatisches Trimmen korrigiert wird,<br />
dann kann diese mit der Steuerfunktion Trim (Trimmen) ausgeglichen werden. Mit Trim<br />
kann das Ruder um einige Grad aus der Mittelstellung versetzt werden, so dass das Schiff<br />
dennoch geradeaus fährt. Trim nach links bewirkt eine Korrektur nach Backbord. trim<br />
nach rechts bewirkt eine Korrektur nach Steuerbord. Die Funktion Trim kann nur in der<br />
Stellung “Wendeanzeiger Pilot” verwendet werden.<br />
Version: 01 ongecontroleerd<br />
Date:<br />
Document: <strong>Sigma</strong><strong>500</strong>.doc Page 73 of 108<br />
Date 1 e release:
4.2 Bedienung SIGMA 600.<br />
4.2.1 Wegabhängig.<br />
Mit der Taste wird die wegabhängige Funktion des Pilots eingeschaltet.<br />
4.2.2 Auswählen.<br />
Wenn das System mehrere Steuerhebel umfasst, muss anfangs Auswählen gedrückt<br />
werden, um einem Steuerhebel den Status Mutter zu geben und die Hebelsteuerung zu<br />
aktivieren.<br />
4.2.3 Pilot.<br />
Mit der Taste wird die steurung durch die Funktion PILOT übernommen.<br />
4.2.4 Backbord.<br />
Ausweich-Funktion backbord: Bei aktivierter Funktion COMPASS PILOT (Kompass-<br />
Pilot) und NMEA PILOT wird durch Betätigen dieser Taste eine Kursänderung nach<br />
Backbord vorgenommen, solange diese Taste gedrückt bleibt. Nach dem Loslassen der<br />
Taste wird der Pilot den alten Kurs wieder aufnehmen.<br />
4.2.5 Steuerbord.<br />
Ausweich-Funktion steuerbord: Bei aktivierter Funktion COMPASS PILOT (Kompass-<br />
Pilot) und NMEA PILOT wird durch Betätigen dieser Taste eine Kursänderung nach<br />
Steuerbord vorgenommen, solange diese Taste gedrückt bleibt. Nach dem Loslassen der<br />
Taste wird der Pilot den alten Kurs wieder aufnehmen.<br />
4.2.6 Steuerhebel.<br />
Hiermit kann in der Stellung FOLLOW UP (Verfolgen) ein direkter Ruderbefehl gegeben<br />
werden und in der Stellung R.O.T. PILOT kann hiermit die gewünschte<br />
Wendegeschwindigkeit eingestellt werden.<br />
Version: 01 ongecontroleerd<br />
Date:<br />
Document: <strong>Sigma</strong><strong>500</strong>.doc Page 74 of 108<br />
Date 1 e release:
4.3 Alarme SIGMA <strong>500</strong>.<br />
4.3.1 Kreiselalarm.<br />
Alarme<br />
Wenn die Kreiseleinheit nicht richtig funktioniert oder (direkt nach dem Einschalten)<br />
noch nicht auf Touren gekommen ist, wird diese Leuchtanzeige zum Zeichen dafür<br />
aufleuchten, dass die Anzeige nicht zuverlässig ist. Sobald die Kreiseleinheit auf Touren<br />
gekommen ist und/oder richtig funktioniert, erlischt diese Leuchtanzeige wieder.<br />
4.3.2 Ruderanlagenalarm<br />
Wenn die Ruderanlage nicht die Steuerbefehle des Piloten befolgt, gibt das <strong>Sigma</strong> <strong>500</strong><br />
einen Ruderalarm.<br />
4.3.3 Kursalarm<br />
Wenn bei der Funktion "Wendezeiger Pilot" der Unterschied zwischen der eingestellten<br />
Wendegeschwindigkeit und der gemessenen Wendegeschwindigkeit mehr als zwölf<br />
Sekunden als der eingestellte Alarmwert beträgt, wird ein Kursalarm ausgelöst.<br />
4.3.4 Spannungsalarm.<br />
Wenn eine Spannung ausfällt oder die Spannung zu niedrig für ein richtiges<br />
Funktionieren des Piloten ist, wird ein Spannungsalarm ausgelöst. Wenn alle<br />
Spannungswerte in Ordnung sind und das <strong>Sigma</strong> <strong>500</strong> eingeschaltet ist, leuchtet diese<br />
Kontrollleuchte grün auf.<br />
Im Fall eines Datenübertragungsalarms blinkt der Spannungsalarm und lässt sich der<br />
akustische Alarm nicht zurücksetzen.<br />
4.4 Alarme und signale SIGMA 600.<br />
4.4.1 Led wegabhängig.<br />
LED über : Wenn diese LED dauerhaft leuchtet, wurde die wegabhängige<br />
Steuerung aktiviert. Bei einem Alarm an der Ruderanlage blinkt diese<br />
LED.<br />
4.4.2 Led Pilot.<br />
LED über : Bei <strong>Sigma</strong> 550: Wenn diese LED dauerhaft leuchtet, wurde der ROT<br />
Pilot aktiviert.<br />
Bei RZ903: Wenn diese LED dauerhaft leuchtet, wurde die<br />
Verbundfunktion (Koppelverband) aktiviert.<br />
Diese LED blinkt bei einem Kurs- oder Gyro-Alarm (Kreiseleinheit).<br />
4.4.3 Led Auswählen..<br />
LED über : Wenn diese LED leuchtet, dann wurde die Steuerung ausgewählt.<br />
Wenn diese LED mit einem Alarmsummer blinkt (kurze Pulse), dann<br />
ist diese Steuerung freigegeben und kann übernommen werden.<br />
Version: 01 ongecontroleerd<br />
Date:<br />
Document: <strong>Sigma</strong><strong>500</strong>.doc Page 75 of 108<br />
Date 1 e release:
4.4.4 Led Spannungsversorgung.<br />
LED zwischen und :<br />
Wenn diese LED grün leuchtet, dann liegt das Gerät an.<br />
Leuchtet diese LED rot, so liegt ein Alarm der Stromversorgung vor.<br />
Blinkt diese LED rot, so liegt ein Alarm der<br />
Kommunikationsverbindung (Datenleitung) vor.<br />
Version: 01 ongecontroleerd<br />
Date:<br />
Document: <strong>Sigma</strong><strong>500</strong>.doc Page 76 of 108<br />
Date 1 e release:
Fehlersuche und Fehlerbehebung<br />
5.1.1 Sichtinstrument SIGMA <strong>500</strong> schaltet nicht ein.<br />
Die Spannungsversorgung für SIGMA <strong>500</strong> prüfen.<br />
Falls nein Prüfen Sie die Versorgungsspannung an K11 von dem Anschlusskasten<br />
Schaltkartenmodul RZ 1703A2.<br />
Falls ja Das Kabel zwischen dem Anschlusskasten und dem Sichtinstrument<br />
prüfen.<br />
5.1.2 Sichtinstrument SIGMA <strong>500</strong> schaltet zwar ein, es erscheint aber<br />
"COMMUNICATIE ALARM" (Datenübertragungsalarm).<br />
Prüfen, ob D9 in dem Anschlusskasten leuchtet.<br />
Falls nein Die Sicherung F1 auf dem Schaltkartenmodul RZ 1703A2 in dem<br />
Anschlusskasten prüfen.<br />
Falls ja Das Kabel zwischen dem Anschlusskasten und dem Sichtinstrument<br />
prüfen.<br />
5.1.3 SIGMA <strong>500</strong> gibt “SPANNUNGSALARM”.<br />
Prüfen die spannungs versorging an K1 SIGMA <strong>500</strong>.<br />
Prüfen die spannungs versorging an K4-1 und K4-2 auf SIGMA <strong>500</strong>.<br />
Prüfen die spannungs versorging an K11 von dem Anschlusskasten Schaltkartenmodul<br />
RZ 1703A2.<br />
Prüfen, ob D24 in dem Anschlusskasten auf dem Schaltkartenmodul RZ 1703/A2<br />
leuchten.<br />
Wenn D24 nicht leuchtet, prüfen die spannungs versorging an K1 von dem<br />
Anschlusskasten Schaltkartenmodul RZ 1703A2.<br />
5.1.4 Sichtinstrument schaltet zwar ein, zeigt aber nicht die richtige Wendezeiger an.<br />
Prüfen, ob D12 und D14 in dem Anschlusskasten auf dem Schaltkartenmodul RZ<br />
1703/A2 leuchten.<br />
Wenn D12 nicht leuchtet, Sicherung F2 am Schaltkartenmodul RZ 1703/A2 prüfen.<br />
Wenn D14 nicht leuchtet, Sicherung F1 am Schaltkartenmodul RZ 1703/A2 prüfen.<br />
5.1.5 SIGMA <strong>500</strong> gibt RUDERALARM.<br />
Prüfen, ob sich das Ruder nach größeren Steuerbefehlen bewegt.<br />
Falls nein Prüfen, ob LED D8 am Schaltkartenmodul RZ 1711/A0 im<br />
Anschlusskasten leuchtet.<br />
Falls nein Versorgungsspannung zwischen K1-1 und K1-2 am<br />
Schaltkartenmodul 1711/A0 prüfen.<br />
Falls ja Prüfen, ob eine der LEDs D5 oder D6 leuchtet.<br />
Falls ja Prüfen, ob die Ausgangsspannung zu den Ventilen am Klemmstreifen K1<br />
anliegt.<br />
Prüfen, ob der Notschalter "HAND/PILOOT" in der Stellung "PILOOT"<br />
steht.<br />
5.1.6 Pilot steuert nicht und gibt auch keinen RUDERALARM.<br />
Prüfen, ob am Sichtinstrument nicht die Funktion “RUDDER” (Ruder) ausgewählt<br />
wurde. Prüfen, ob das richtige <strong>Sigma</strong> 600 ausgewählt ist.<br />
Version: 01 ongecontroleerd<br />
Date:<br />
Document: <strong>Sigma</strong><strong>500</strong>.doc Page 77 of 108<br />
Date 1 e release:
APPENDIX<br />
Version: 01 ongecontroleerd<br />
Date:<br />
Document: <strong>Sigma</strong><strong>500</strong>.doc Page 78 of 108<br />
Date 1 e release:
SIGMA <strong>500</strong> dimensions.<br />
80<br />
60<br />
80<br />
60<br />
40<br />
60<br />
80<br />
20<br />
0<br />
20<br />
40<br />
60<br />
80<br />
40<br />
40<br />
°/min<br />
20<br />
0<br />
20<br />
Version: 01 ongecontroleerd<br />
Date:<br />
Document: <strong>Sigma</strong><strong>500</strong>.doc Page 79 of 108<br />
Date 1 e release:<br />
Project:<br />
SIGMA <strong>500</strong><br />
ALL SIZES IN MM<br />
AMERICAN PROJECTION STYLE<br />
COMMENTS:<br />
SIGMA <strong>500</strong> dimensions<br />
Size: Page:<br />
Revision number:<br />
A4 01 of 01<br />
A<br />
O:\MANUALS\Dr..gs\<strong>Sigma</strong> <strong>500</strong>\<strong>Sigma</strong> <strong>500</strong> di...ns.DWG<br />
Part:<br />
RADIO ZEELAND DMP B.V.<br />
Industrieweg 17<br />
4538 AG Terneuzen<br />
The Netherlands<br />
Tel: +31 115 645400 Fax: +31 115 620040<br />
COPYRIGHT © RADIO ZEELAND DMP B.V.<br />
M.Martinet<br />
Drawn:<br />
File name:<br />
27-04-2004<br />
Date:
SIGMA <strong>500</strong> frame.<br />
Version: 01 ongecontroleerd<br />
Date:<br />
Document: <strong>Sigma</strong><strong>500</strong>.doc Page 80 of 108<br />
Date 1 e release:<br />
Project:<br />
SIGMA <strong>500</strong><br />
ALL SIZES IN MM<br />
AMERICAN PROJECTION STYLE<br />
COMMENTS:<br />
Part:<br />
SIGMA <strong>500</strong> frame<br />
Size: Page:<br />
Revision number:<br />
A4 01 of 01<br />
A<br />
O:\MANUALS\Dr..gs\<strong>Sigma</strong> <strong>500</strong>\Inbouwraam.DWG<br />
M.Martinet<br />
Drawn:<br />
File name:<br />
Date:<br />
27-04-2004<br />
RADIO ZEELAND DMP B.V.<br />
Industrieweg 17<br />
4538 AG Terneuzen<br />
The Netherlands<br />
Tel: +31 115 645400 Fax: +31 115 620040<br />
COPYRIGHT © RADIO ZEELAND DMP B.V.
SIGMA <strong>500</strong> cut-out.<br />
Version: 01 ongecontroleerd<br />
Date:<br />
Document: <strong>Sigma</strong><strong>500</strong>.doc Page 81 of 108<br />
Date 1 e release:<br />
Project:<br />
SIGMA <strong>500</strong><br />
ALL SIZES IN MM<br />
AMERICAN PROJECTION STYLE<br />
COMMENTS:<br />
SIGMA <strong>500</strong> Cut-out<br />
Size: Page:<br />
Revision number:<br />
A4 01 of 01<br />
A<br />
O:\MANUALS\Drawings\<strong>Sigma</strong> <strong>500</strong>\Cut-out.DWG<br />
Part:<br />
M.Martinet<br />
Drawn:<br />
File name:<br />
Date:<br />
27-04-2004<br />
RADIO ZEELAND DMP B.V.<br />
Industrieweg 17<br />
4538 AG Terneuzen<br />
The Netherlands<br />
Tel: +31 115 645400 Fax: +31 115 620040<br />
COPYRIGHT © RADIO ZEELAND DMP B.V.
SIGMA 600 dimensions.<br />
Version: 01 ongecontroleerd<br />
Date:<br />
Document: <strong>Sigma</strong><strong>500</strong>.doc Page 82 of 108<br />
Date 1 e release:<br />
SIG 600<br />
Project:<br />
SIGMA 600<br />
ALL SIZES IN MM<br />
AMERICAN PROJECTION STYLE<br />
COMMENTS:<br />
DIMENSIONS HOUSING<br />
Size: Page:<br />
Revision number:<br />
A4 01 of 01<br />
A<br />
O:\MANUALS\Drawings\<strong>Sigma</strong> 600\<strong>Sigma</strong> 600 di..ns.DWG<br />
Part:<br />
RADIO ZEELAND DMP B.V.<br />
Industrieweg 17<br />
4538 AG Terneuzen<br />
The Netherlands<br />
Tel: +31 115 645400 Fax: +31 115 620040<br />
COPYRIGHT © RADIO ZEELAND DMP B.V.<br />
M.Martinet<br />
Drawn:<br />
File name:<br />
07-10-2002<br />
Date:
SIGMA 600 frame.<br />
xxx<br />
Version: 01 ongecontroleerd<br />
Date:<br />
Document: <strong>Sigma</strong><strong>500</strong>.doc Page 83 of 108<br />
Date 1 e release:<br />
Project:<br />
SIGMA 600<br />
ALL SIZES IN MM<br />
AMERICAN PROJECTION STYLE<br />
COMMENTS:<br />
FRAME<br />
Size: Page:<br />
Revision number:<br />
A4 01 of 01<br />
A<br />
O:\MANUALS\Drawings\<strong>Sigma</strong> 600\Inbouwraam.DWG<br />
Part:<br />
RADIO ZEELAND DMP B.V.<br />
Industrieweg 17<br />
4538 AG Terneuzen<br />
The Netherlands<br />
Tel: +31 115 645400 Fax: +31 115 620040<br />
COPYRIGHT © RADIO ZEELAND DMP B.V.<br />
M.Martinet<br />
Drawn:<br />
File name:<br />
28-04-2004<br />
Date:
SIGMA 600 cut-out.<br />
Version: 01 ongecontroleerd<br />
Date:<br />
Document: <strong>Sigma</strong><strong>500</strong>.doc Page 84 of 108<br />
Date 1 e release:<br />
BUILD IN DEPTH MIN 55mm (EXCL CONNECTORS)<br />
BUILD IN DEPTH 90mm (INCL CONNECTORS<br />
Project:<br />
SIGMA 600<br />
ALL SIZES IN MM<br />
AMERICAN PROJECTION STYLE<br />
COMMENTS:<br />
Part:<br />
CUT-OUT<br />
RADIO ZEELAND DMP B.V.<br />
Industrieweg 17<br />
4538 AG Terneuzen<br />
The Netherlands<br />
Tel: +31 115 645400 Fax: +31 115 620040<br />
COPYRIGHT © RADIO ZEELAND DMP B.V.<br />
Size: Page:<br />
Revision number:<br />
A4 01 of 01<br />
A<br />
O:\MANUALS\Drawings\<strong>Sigma</strong> 600\Cut-out.DWG<br />
M.Martinet<br />
Drawn:<br />
File name:<br />
28-04-2004<br />
Date:
RZ219 dimensions.<br />
Version: 01 ongecontroleerd<br />
Date:<br />
Document: <strong>Sigma</strong><strong>500</strong>.doc Page 85 of 108<br />
Date 1 e release:<br />
Project:<br />
RZ 219<br />
ALL SIZES IN MM<br />
AMERICAN PROJECTION STYLE<br />
COMMENTS:<br />
RZ219 dimensions<br />
Size: Page:<br />
Revision number:<br />
A4 01 of 01<br />
A<br />
O:\MANUALS\Drawings\RZ 219\RZ 219 dimensions.DWG<br />
Part:<br />
RADIO ZEELAND DMP B.V.<br />
Industrieweg 17<br />
4538 AG Terneuzen<br />
The Netherlands<br />
Tel: +31 115 645400 Fax: +31 115 620040<br />
COPYRIGHT © RADIO ZEELAND DMP B.V.<br />
M.Martinet<br />
Drawn:<br />
File name:<br />
27-04-2004<br />
Date:
RZ 203 dimensions<br />
Version: 01 ongecontroleerd<br />
Date:<br />
Document: <strong>Sigma</strong><strong>500</strong>.doc Page 86 of 108<br />
Date 1 e release:<br />
Project:<br />
RZ 203<br />
ALL SIZES IN MM<br />
AMERICAN PROJECTION STYLE<br />
COMMENTS:<br />
Part:<br />
RZ 203 dimensions<br />
COPYRIGHT © RADIO ZEELAND DMP B.V.<br />
A<br />
Revision number:<br />
01 of 01<br />
Size: Page:<br />
A4<br />
M.Martinet<br />
Drawn:<br />
File name:<br />
27-04-2004<br />
Date:<br />
Industrieweg 17<br />
4538 AG Terneuzen<br />
The Netherlands<br />
Tel: +31 115 645400 Fax: +31 115 620040
RZ 347 Dimensions.<br />
Version: 01 ongecontroleerd<br />
Date:<br />
Document: <strong>Sigma</strong><strong>500</strong>.doc Page 87 of 108<br />
Date 1 e release:<br />
Project:<br />
RZ 347<br />
ALL SIZES IN MM<br />
AMERICAN PROJECTION STYLE<br />
COMMENTS:<br />
RZ347 dimensions<br />
Size: Page:<br />
Revision number:<br />
A4 01 of 01<br />
A<br />
O:\MANUALS\Drawings\RZ 347\RZ 347 dimensions.DWG<br />
Part:<br />
M.Martinet<br />
Drawn:<br />
File name:<br />
Date:<br />
27-04-2004<br />
RADIO ZEELAND DMP B.V.<br />
Industrieweg 17<br />
4538 AG Terneuzen<br />
The Netherlands<br />
Tel: +31 115 645400 Fax: +31 115 620040<br />
COPYRIGHT © RADIO ZEELAND DMP B.V.
RZ 610 dimensions.<br />
Version: 01 ongecontroleerd<br />
Date:<br />
Document: <strong>Sigma</strong><strong>500</strong>.doc Page 88 of 108<br />
Date 1 e release:<br />
Project:<br />
RZ 610<br />
ALL SIZES IN MM<br />
AMERICAN PROJECTION STYLE<br />
COMMENTS:<br />
RZ610 dimensions<br />
Size: Page:<br />
Revision number:<br />
A4 01 of 01<br />
A<br />
O:\MANUALS\Drawings\RZ 610\RZ 610 dimensions.DWG<br />
Part:<br />
RADIO ZEELAND DMP B.V.<br />
Industrieweg 17<br />
4538 AG Terneuzen<br />
The Netherlands<br />
Tel: +31 115 645400 Fax: +31 115 620040<br />
COPYRIGHT © RADIO ZEELAND DMP B.V.<br />
M.Martinet<br />
Drawn:<br />
File name:<br />
27-04-2004<br />
Date:
RZ 630 dimensions.<br />
Version: 01 ongecontroleerd<br />
Date:<br />
Document: <strong>Sigma</strong><strong>500</strong>.doc Page 89 of 108<br />
Date 1 e release:<br />
Project:<br />
RZ 630<br />
ALL SIZES IN MM<br />
AMERICAN PROJECTION STYLE<br />
COMMENTS:<br />
Part:<br />
RZ 630 dimensions<br />
A<br />
Revision number:<br />
01 of 01<br />
Size: Page:<br />
A4<br />
M.Martinet<br />
Drawn:<br />
O:\MANUALS\Drawings\RZ 630\RZ 630 dimensions.DWG<br />
File name:<br />
Date:<br />
27-04-2004<br />
RADIO ZEELAND DMP B.V.<br />
Industrieweg 17<br />
4538 AG Terneuzen<br />
The Netherlands<br />
Tel: +31 115 645400 Fax: +31 115 620040<br />
COPYRIGHT © RADIO ZEELAND DMP B.V.
SIGMA <strong>500</strong> overall diagram.<br />
20<br />
20 0<br />
80<br />
60<br />
80<br />
60<br />
40<br />
60<br />
80<br />
40<br />
80<br />
60<br />
40<br />
40<br />
°/min<br />
20<br />
0<br />
20<br />
SIG 600<br />
���������������<br />
���������������<br />
���������������<br />
�������<br />
���������������<br />
��������<br />
�������<br />
��������<br />
���<br />
���������������<br />
Version: 01 ongecontroleerd<br />
Date:<br />
Document: <strong>Sigma</strong><strong>500</strong>.doc Page 90 of 108<br />
Date 1 e release:<br />
������<br />
�������<br />
��������<br />
�������<br />
��������<br />
�������<br />
��������<br />
���������������<br />
���������������<br />
���������������<br />
���������������<br />
������<br />
������<br />
��������<br />
�������������������������<br />
����������������������������<br />
Project:<br />
SIGMA <strong>500</strong><br />
ALL SIZES IN MM<br />
AMERICAN PROJECTION STYLE<br />
COMMENTS:<br />
Part:<br />
OVERALL DIAGRAM<br />
COPYRIGHT © RADIO ZEELAND DMP B.V.<br />
A<br />
Revision number:<br />
01 of 01<br />
Size: Page:<br />
A4<br />
M.Martinet<br />
Drawn:<br />
File name:<br />
28-04-2004<br />
Date:<br />
Industrieweg 17<br />
4538 AG Terneuzen<br />
The Netherlands<br />
Tel: +31 115 645400 Fax: +31 115 620040
SIGMA <strong>500</strong> overall blockdiagramm.<br />
SIGMA <strong>500</strong> SIGMA 600 SIGMA 600 SIGMA 600 SIGMA 345 SIGMA 370<br />
OR<br />
SIGMA 600 SIGMA 550<br />
OR<br />
RZ219<br />
SIGMA 550 SIGMA 550<br />
Version: 01 ongecontroleerd<br />
Date:<br />
Document: <strong>Sigma</strong><strong>500</strong>.doc Page 91 of 108<br />
Date 1 e release:<br />
RZ610<br />
RZ630<br />
RZ347<br />
Project:<br />
SIGMA <strong>500</strong><br />
ALL SIZES IN MM<br />
AMERICAN PROJECTION STYLE<br />
COMMENTS:<br />
Part:<br />
OVERALL BLOCK DIAGRAM<br />
COPYRIGHT © RADIO ZEELAND DMP B.V.<br />
A<br />
Revision number:<br />
01 of 01<br />
Size: Page:<br />
A4<br />
M.Martinet<br />
Drawn:<br />
File name:<br />
28-04-2004<br />
Date:<br />
Industrieweg 17<br />
4538 AG Terneuzen<br />
The Netherlands<br />
Tel: +31 115 645400 Fax: +31 115 620040
SIGMA <strong>500</strong> connection diagram to EURO/DELTA 800.<br />
MASTER<br />
SIGMA 800<br />
Version: 01 ongecontroleerd<br />
Date:<br />
Document: <strong>Sigma</strong><strong>500</strong>.doc Page 92 of 108<br />
Date 1 e release:<br />
INDICATOR<br />
INDICATOR<br />
ILL+ RED<br />
ILL+ BLUE<br />
ILL-<br />
Screen<br />
4x0.5mm²<br />
Screened<br />
Project:<br />
SIGMA <strong>500</strong><br />
ALL SIZES IN MM<br />
AMERICAN PROJECTION STYLE<br />
COMMENTS:<br />
Part:<br />
CONNECTION DIAGRAM MASTER TO SIGMA 800<br />
Drawn:<br />
Size: Page:<br />
Revision number:<br />
M.Martinet<br />
A4 01 of 01<br />
A<br />
Date:<br />
File name:<br />
27-05-2004<br />
O:\MANUALS\Dr..gs\<strong>Sigma</strong> <strong>500</strong>\Master to <strong>Sigma</strong> 800.DWG<br />
RADIO ZEELAND DMP B.V.<br />
Industrieweg 17<br />
4538 AG Terneuzen<br />
The Netherlands<br />
Tel: +31 115 645400 Fax: +31 115 620040<br />
COPYRIGHT © RADIO ZEELAND DMP B.V.
SIGMA <strong>500</strong> connection diagram to EURO/DELTA 810<br />
MASTER<br />
SIGMA 810<br />
Version: 01 ongecontroleerd<br />
Date:<br />
Document: <strong>Sigma</strong><strong>500</strong>.doc Page 93 of 108<br />
Date 1 e release:<br />
INDICATOR<br />
INDICATOR<br />
ILL+ RED<br />
ILL+ BLUE<br />
ILL-<br />
Screen<br />
4x0.5mm²<br />
Screened<br />
Project:<br />
SIGMA <strong>500</strong><br />
ALL SIZES IN MM<br />
AMERICAN PROJECTION STYLE<br />
COMMENTS:<br />
Part:<br />
CONNECTION DIAGRAM MASTER TO SIGMA 810<br />
Drawn:<br />
Size: Page:<br />
Revision number:<br />
M.Martinet<br />
A4 01 of 01<br />
A<br />
Date:<br />
File name:<br />
27-05-2004<br />
O:\MANUALS\Dr..gs\<strong>Sigma</strong> <strong>500</strong>\Master to <strong>Sigma</strong> 810.DWG<br />
RADIO ZEELAND DMP B.V.<br />
Industrieweg 17<br />
4538 AG Terneuzen<br />
The Netherlands<br />
Tel: +31 115 645400 Fax: +31 115 620040<br />
COPYRIGHT © RADIO ZEELAND DMP B.V.
SIGMA <strong>500</strong> settings on pcb RZ 1999.<br />
JP2<br />
JP1<br />
BLUE<br />
BLUE<br />
JP2<br />
JP1<br />
YELLOW<br />
YELLOW<br />
JP2<br />
JP1<br />
RED<br />
RED<br />
JP1 INDICATOR LIGHT COLOR CON1 EL-lamp on/off<br />
JP2 INDICATOR LIGHT COLOR<br />
Version: 01 ongecontroleerd<br />
Date:<br />
Document: <strong>Sigma</strong><strong>500</strong>.doc Page 94 of 108<br />
Date 1 e release:<br />
RAI REPEATER RAI LEVER INDICATOR ROT REPEATER ROT<br />
Project:<br />
SIGMA <strong>500</strong><br />
ALL SIZES IN MM<br />
AMERICAN PROJECTION STYLE<br />
COMMENTS:<br />
Part:<br />
SIGMA <strong>500</strong> SETTINGS ON PCB RZ1999<br />
COPYRIGHT © RADIO ZEELAND DMP B.V.<br />
A<br />
Revision number:<br />
01 of 01<br />
Size: Page:<br />
A4<br />
M.Martinet<br />
Drawn:<br />
File name:<br />
28-04-2004<br />
Date:<br />
Industrieweg 17<br />
4538 AG Terneuzen<br />
The Netherlands<br />
Tel: +31 115 645400 Fax: +31 115 620040
Connections junctionbox RZ219.<br />
TO STEERING OUTPUT 1<br />
TO STEERING OUTPUT 2<br />
P2 = "0" R.O.T.<br />
P5 = GAIN R.O.T. REP<br />
P1 = GAIN RUDDER REP.<br />
P3 = "0" RUDDER<br />
P4 = GAIN RUDDER<br />
ALARM / WACHT ALARM<br />
Power supply<br />
system<br />
Connection<br />
<strong>Sigma</strong> 550 / 300<br />
Connection<br />
NMEA in/out<br />
Connection<br />
Sin/Cos input<br />
Connection<br />
Compass input<br />
Connection<br />
Auxiliary input<br />
Connection repeater<br />
Rate of turn indicator<br />
Connection<br />
RZ 630<br />
Connection<br />
RZ 610<br />
Connection analog<br />
<strong>Sigma</strong> 100<br />
Power supply<br />
rudder section<br />
Version: 01 ongecontroleerd<br />
Date:<br />
Document: <strong>Sigma</strong><strong>500</strong>.doc Page 95 of 108<br />
Date 1 e release:<br />
Project:<br />
RZ 219<br />
ALL SIZES IN MM<br />
AMERICAN PROJECTION STYLE<br />
COMMENTS:<br />
Part:<br />
CONNECTIONS JUNCTIONBOX RZ219 PRINT RZ1703<br />
Drawn:<br />
Size: Page:<br />
Revision number:<br />
M.Martinet<br />
A4 01 of 01<br />
Date:<br />
File name:<br />
27-04-2004<br />
COPYRIGHT © RADIO ZEELAND DMP B.V.<br />
A<br />
Industrieweg 17<br />
4538 AG Terneuzen<br />
The Netherlands<br />
Tel: +31 115 645400 Fax: +31 115 620040
Connection power supply rudder section.<br />
RZ219 PCB RZ1703/A2<br />
K1<br />
2<br />
1<br />
+ -<br />
2x FUSE 6A<br />
24V DC<br />
NO PART OF<br />
THE DELIVERY<br />
Version: 01 ongecontroleerd<br />
Date:<br />
Document: <strong>Sigma</strong><strong>500</strong>.doc Page 96 of 108<br />
Date 1 e release:<br />
Project:<br />
RZ 219<br />
ALL SIZES IN MM<br />
AMERICAN PROJECTION STYLE<br />
COMMENTS:<br />
Part:<br />
CONNECTION POWER SUPPLY RUDDER SECTION<br />
Drawn:<br />
Size: Page:<br />
Revision number:<br />
M.Martinet<br />
A4 01 of 01<br />
Date:<br />
File name:<br />
27-04-2004<br />
COPYRIGHT © RADIO ZEELAND DMP B.V.<br />
A<br />
Industrieweg 17<br />
4538 AG Terneuzen<br />
The Netherlands<br />
Tel: +31 115 645400 Fax: +31 115 620040
SIGMA<strong>500</strong> CONNECTION.<br />
RZ219 PCB RZ1703/A2<br />
* JUMPER BETWEEN<br />
IC1 PIN 1 & IC1 PIN 2<br />
K2<br />
1 2 3 4<br />
-<br />
+<br />
RAI-<br />
RAI+<br />
Version: 01 ongecontroleerd<br />
Date:<br />
Document: <strong>Sigma</strong><strong>500</strong>.doc Page 97 of 108<br />
Date 1 e release:<br />
+<br />
-<br />
RAI+<br />
RAI-<br />
Screen<br />
Project:<br />
RZ 219<br />
ALL SIZES IN MM<br />
AMERICAN PROJECTION STYLE<br />
COMMENTS:<br />
Part:<br />
CONNECTION SIGMA <strong>500</strong><br />
COPYRIGHT © RADIO ZEELAND DMP B.V.<br />
Revision number:<br />
Size: Page:<br />
A4 01 of 01<br />
A<br />
M.Martinet<br />
Drawn:<br />
File name:<br />
Date:<br />
28-04-2004<br />
Industrieweg 17<br />
4538 AG Terneuzen<br />
The Netherlands<br />
Tel: +31 115 645400 Fax: +31 115 620040
Connection rudder potmeter RZ610.<br />
RZ219 PCB RZ1703/A2<br />
K3<br />
2 3<br />
1<br />
-P<br />
W<br />
+P<br />
3x0.5mm²<br />
screened<br />
+P<br />
W<br />
-P<br />
1<br />
2<br />
3<br />
Version: 01 ongecontroleerd<br />
Date:<br />
Document: <strong>Sigma</strong><strong>500</strong>.doc Page 98 of 108<br />
Date 1 e release:<br />
RZ 610<br />
Project:<br />
RZ 219<br />
ALL SIZES IN MM<br />
AMERICAN PROJECTION STYLE<br />
COMMENTS:<br />
Part:<br />
CONNECTION DIAGRAM RUDDER POTMETER RZ610<br />
Drawn:<br />
Size: Page:<br />
Revision number:<br />
M.Martinet<br />
A4 01 of 01<br />
Date:<br />
File name:<br />
27-04-2004<br />
COPYRIGHT © RADIO ZEELAND DMP B.V.<br />
A<br />
Industrieweg 17<br />
4538 AG Terneuzen<br />
The Netherlands<br />
Tel: +31 115 645400 Fax: +31 115 620040
Connection diagram rate gyro unit RZ 630.<br />
RZ219 PCB RZ1703/A2<br />
CABLE<br />
K4<br />
2 3 4 5 6 7<br />
1<br />
A B C D E F G<br />
K1<br />
RZ1029<br />
1<br />
2<br />
A<br />
B<br />
3<br />
C<br />
4<br />
D<br />
5<br />
E<br />
7x0.5mm²<br />
screened<br />
WIRES<br />
SCREEN CONNECT TO GROUND<br />
Version: 01 ongecontroleerd<br />
Date:<br />
Document: <strong>Sigma</strong><strong>500</strong>.doc Page 99 of 108<br />
Date 1 e release:<br />
6<br />
F<br />
7<br />
G<br />
scr<br />
H<br />
RZ 630<br />
Project:<br />
RZ 219<br />
ALL SIZES IN MM<br />
AMERICAN PROJECTION STYLE<br />
COMMENTS:<br />
Part:<br />
CONNECTION DIAGRAM RATE GYRO UNIT RZ630<br />
Drawn:<br />
Size: Page:<br />
Revision number:<br />
M.Martinet<br />
A4 01 of 01<br />
Date:<br />
File name:<br />
27-04-2004<br />
COPYRIGHT © RADIO ZEELAND DMP B.V.<br />
A<br />
Industrieweg 17<br />
4538 AG Terneuzen<br />
The Netherlands<br />
Tel: +31 115 645400 Fax: +31 115 620040
Connection rate of turn indicator.<br />
RZ219 PCB RZ1703/A2<br />
K5<br />
1 2 3 4<br />
-<br />
+<br />
-<br />
+<br />
ILL.<br />
ROT<br />
4x0.5mm²<br />
Screened<br />
Version: 01 ongecontroleerd<br />
Date:<br />
Document: <strong>Sigma</strong><strong>500</strong>.doc Page 100 of 108<br />
Date 1 e release:<br />
1 2 3 4<br />
-<br />
+<br />
-<br />
+<br />
ILL.<br />
ROT<br />
Project:<br />
RZ 219<br />
ALL SIZES IN MM<br />
AMERICAN PROJECTION STYLE<br />
COMMENTS:<br />
Part:<br />
CONNECTION RATE OF TURN INDICATOR<br />
COPYRIGHT © RADIO ZEELAND DMP B.V.<br />
Size: Page:<br />
A4 01 of 01<br />
A<br />
Revision number:<br />
M.Martinet<br />
Drawn:<br />
File name:<br />
Date:<br />
27-04-2004<br />
Industrieweg 17<br />
4538 AG Terneuzen<br />
The Netherlands<br />
Tel: +31 115 645400 Fax: +31 115 620040
Connection auxiliary input.<br />
RZ219 PCB RZ1703/A2<br />
K6<br />
1 2 3 4<br />
-<br />
in<br />
ref<br />
+<br />
4x0.5mm²<br />
screened<br />
Version: 01 ongecontroleerd<br />
Date:<br />
Document: <strong>Sigma</strong><strong>500</strong>.doc Page 101 of 108<br />
Date 1 e release:<br />
AUXILIARY INPUT<br />
Project:<br />
RZ 219<br />
ALL SIZES IN MM<br />
AMERICAN PROJECTION STYLE<br />
COMMENTS:<br />
Part:<br />
CONNECTION AUXILIARY INPUT<br />
COPYRIGHT © RADIO ZEELAND DMP B.V.<br />
Revision number:<br />
Size: Page:<br />
A4 01 of 01<br />
A<br />
M.Martinet<br />
Drawn:<br />
File name:<br />
Date:<br />
27-04-2004<br />
Industrieweg 17<br />
4538 AG Terneuzen<br />
The Netherlands<br />
Tel: +31 115 645400 Fax: +31 115 620040
Connection RZ 347.<br />
RZ219 PCB RZ1703/A2<br />
K7<br />
11<br />
1 2 3 4 5 6 7 8 9 10<br />
HC-<br />
HC+<br />
VS2<br />
VS1<br />
VD2<br />
VD1<br />
HS3<br />
HS2<br />
HS1<br />
HD2<br />
HD1<br />
11x0.5mm²<br />
screened<br />
Version: 01 ongecontroleerd<br />
Date:<br />
Document: <strong>Sigma</strong><strong>500</strong>.doc Page 102 of 108<br />
Date 1 e release:<br />
RZ 347<br />
Project:<br />
RZ 219<br />
ALL SIZES IN MM<br />
AMERICAN PROJECTION STYLE<br />
COMMENTS:<br />
Part:<br />
CONNECTION RZ 347<br />
COPYRIGHT © RADIO ZEELAND DMP B.V.<br />
Revision number:<br />
Size: Page:<br />
A4 01 of 01<br />
A<br />
M.Martinet<br />
Drawn:<br />
File name:<br />
Date:<br />
27-04-2004<br />
Industrieweg 17<br />
4538 AG Terneuzen<br />
The Netherlands<br />
Tel: +31 115 645400 Fax: +31 115 620040
Connection TMC RZ 348.<br />
RZ219 PCB RZ1703/A2<br />
K7<br />
5 6 7 8 9 10 11<br />
1 2 3 4<br />
Green<br />
Yellow<br />
Grey<br />
White<br />
Brown<br />
Version: 01 ongecontroleerd<br />
Date:<br />
Document: <strong>Sigma</strong><strong>500</strong>.doc Page 103 of 108<br />
Date 1 e release:<br />
TMC RZ348<br />
Project:<br />
RZ 219<br />
ALL SIZES IN MM<br />
AMERICAN PROJECTION STYLE<br />
COMMENTS:<br />
Part:<br />
CONNECTION TMC RZ 348<br />
COPYRIGHT © RADIO ZEELAND DMP B.V.<br />
Revision number:<br />
Size: Page:<br />
A4 01 of 01<br />
A<br />
M.Martinet<br />
Drawn:<br />
File name:<br />
Date:<br />
27-04-2004<br />
Industrieweg 17<br />
4538 AG Terneuzen<br />
The Netherlands<br />
Tel: +31 115 645400 Fax: +31 115 620040
Connection symchro 1:1 400 Hz.<br />
RZ219 PCB RZ1703/A2<br />
* REMOVE D17<br />
K7<br />
1 2 3 4 5 6 7 8 9 10 11<br />
Blue<br />
Yellow<br />
Black<br />
White / Black<br />
White / Red<br />
Version: 01 ongecontroleerd<br />
Date:<br />
Document: <strong>Sigma</strong><strong>500</strong>.doc Page 104 of 108<br />
Date 1 e release:<br />
470nF<br />
S3<br />
S2<br />
S1<br />
R2<br />
R1<br />
SYNCHRO 1:1 400Hz<br />
Project:<br />
RZ 219<br />
ALL SIZES IN MM<br />
AMERICAN PROJECTION STYLE<br />
COMMENTS:<br />
Part:<br />
CONNECTION SYNCHRO<br />
COPYRIGHT © RADIO ZEELAND DMP B.V.<br />
Revision number:<br />
Size: Page:<br />
A4 01 of 01<br />
A<br />
M.Martinet<br />
Drawn:<br />
File name:<br />
Date:<br />
27-04-2004<br />
Industrieweg 17<br />
4538 AG Terneuzen<br />
The Netherlands<br />
Tel: +31 115 645400 Fax: +31 115 620040
Connection sin/cos input.<br />
RZ219 PCB RZ1703/A2<br />
15V<br />
GND<br />
K8<br />
1 2 3 4 5<br />
3x0.5mm²<br />
screened<br />
2.5V<br />
REF<br />
Version: 01 ongecontroleerd<br />
Date:<br />
Document: <strong>Sigma</strong><strong>500</strong>.doc Page 105 of 108<br />
Date 1 e release:<br />
5V<br />
2.5V<br />
COSINUS<br />
0V<br />
5V<br />
2.5V<br />
SINUS<br />
0V<br />
Project:<br />
RZ 219<br />
ALL SIZES IN MM<br />
AMERICAN PROJECTION STYLE<br />
COMMENTS:<br />
Part:<br />
CONNECTION SIN/COS INPUT<br />
COPYRIGHT © RADIO ZEELAND DMP B.V.<br />
Revision number:<br />
Size: Page:<br />
A4 01 of 01<br />
A<br />
M.Martinet<br />
Drawn:<br />
File name:<br />
Date:<br />
27-04-2004<br />
Industrieweg 17<br />
4538 AG Terneuzen<br />
The Netherlands<br />
Tel: +31 115 645400 Fax: +31 115 620040
Connection NMEA input.<br />
RZ219 PCB RZ1703/A2<br />
K9<br />
1 2 3 4<br />
- OUT<br />
+ OUT<br />
- IN<br />
+ IN<br />
2x0.5mm²<br />
screened<br />
NMEA OUTPUT<br />
2x0.5mm²<br />
screened<br />
Version: 01 ongecontroleerd<br />
Date:<br />
Document: <strong>Sigma</strong><strong>500</strong>.doc Page 106 of 108<br />
Date 1 e release:<br />
NMEA INPUT<br />
Project:<br />
RZ 219<br />
ALL SIZES IN MM<br />
AMERICAN PROJECTION STYLE<br />
COMMENTS:<br />
Part:<br />
CONNECTION NMEA INPUT<br />
COPYRIGHT © RADIO ZEELAND DMP B.V.<br />
Size: Page:<br />
A4 01 of 01<br />
A<br />
Revision number:<br />
M.Martinet<br />
Drawn:<br />
File name:<br />
Date:<br />
27-04-2004<br />
Industrieweg 17<br />
4538 AG Terneuzen<br />
The Netherlands<br />
Tel: +31 115 645400 Fax: +31 115 620040
RZ219 PCB RZ1703/A2<br />
Connection Diagram RX/TX- SIGMA <strong>500</strong> RZ 219.<br />
RX/TX+<br />
+<br />
K10<br />
4<br />
3<br />
2<br />
1<br />
-<br />
Screen<br />
RxTx +<br />
RxTx -<br />
2x0.5mm²<br />
screened<br />
Version: 01 ongecontroleerd<br />
Date:<br />
Document: <strong>Sigma</strong><strong>500</strong>.doc Page 107 of 108<br />
Date 1 e release:<br />
Project:<br />
RZ 219<br />
ALL SIZES IN MM<br />
AMERICAN PROJECTION STYLE<br />
COMMENTS:<br />
Part:<br />
CONNECTION DIAGRAM SIGMA <strong>500</strong><br />
COPYRIGHT © RADIO ZEELAND DMP B.V.<br />
Revision number:<br />
Size: Page:<br />
A4 01 of 01<br />
A<br />
M.Martinet<br />
Drawn:<br />
File name:<br />
Date:<br />
28-04-2004<br />
Industrieweg 17<br />
4538 AG Terneuzen<br />
The Netherlands<br />
Tel: +31 115 645400 Fax: +31 115 620040
Connection power supply RZ 219.<br />
RZ219 PCB RZ1703/A2<br />
K11<br />
2<br />
1<br />
+ -<br />
RZ 203<br />
2xFUSE 6A<br />
24V DC<br />
NO PART OF<br />
THE DELIVERY<br />
Version: 01 ongecontroleerd<br />
Date:<br />
Document: <strong>Sigma</strong><strong>500</strong>.doc Page 108 of 108<br />
Date 1 e release:<br />
Project:<br />
RZ 219<br />
ALL SIZES IN MM<br />
AMERICAN PROJECTION STYLE<br />
COMMENTS:<br />
Part:<br />
CONNECTION POWER SUPPLY SYSTEM<br />
COPYRIGHT © RADIO ZEELAND DMP B.V.<br />
Revision number:<br />
Size: Page:<br />
A4 01 of 01<br />
A<br />
M.Martinet<br />
Drawn:<br />
File name:<br />
Date:<br />
27-04-2004<br />
Industrieweg 17<br />
4538 AG Terneuzen<br />
The Netherlands<br />
Tel: +31 115 645400 Fax: +31 115 620040