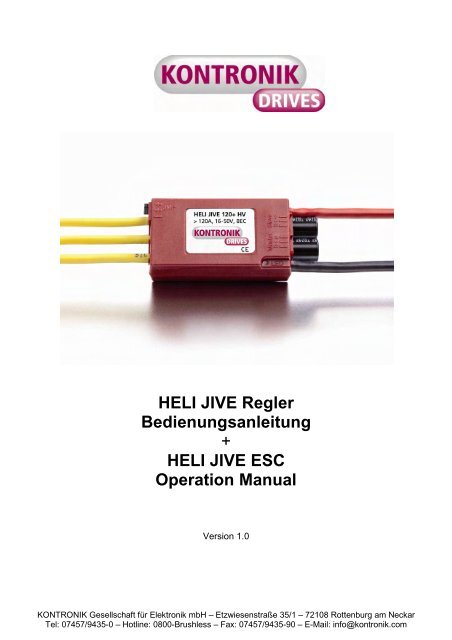
HELI JIVE Regler Bedienungsanleitung + HELI JIVE ... - Speedmodels
HELI JIVE Regler Bedienungsanleitung + HELI JIVE ... - Speedmodels
HELI JIVE Regler Bedienungsanleitung + HELI JIVE ... - Speedmodels
Sie wollen auch ein ePaper? Erhöhen Sie die Reichweite Ihrer Titel.
YUMPU macht aus Druck-PDFs automatisch weboptimierte ePaper, die Google liebt.
<strong>HELI</strong> <strong>JIVE</strong> <strong>Regler</strong><br />
<strong>Bedienungsanleitung</strong><br />
+<br />
<strong>HELI</strong> <strong>JIVE</strong> ESC<br />
Operation Manual<br />
Version 1.0<br />
KONTRONIK Gesellschaft für Elektronik mbH – Etzwiesenstraße 35/1 – 72108 Rottenburg am Neckar<br />
Tel: 07457/9435-0 – Hotline: 0800-Brushless – Fax: 07457/9435-90 – E-Mail: info@kontronik.com
1 Definitionen .................................................................................................................................................................... 2<br />
2 Sicherheitshinweise ...................................................................................................................................................... 2<br />
3 Technische Daten .......................................................................................................................................................... 3<br />
4 Allgemeines .................................................................................................................................................................... 3<br />
4.1 Eigenschaften 3<br />
4.2 BEC 3<br />
4.3 Ringkern 4<br />
4.4 Tiefentladungsschutz 4<br />
4.5 Kühlung/Befestigung 4<br />
4.6 Teillastfestigkeit 4<br />
4.7 Aktiver Freilauf 4<br />
4.8 Sensorlose Kommutierung 4<br />
4.9 Variable Taktfrequenz 4<br />
5 Anschluss der Kabel ..................................................................................................................................................... 4<br />
5.1 BEC-Kabel 4<br />
5.2 Motor-Kabel 4<br />
6 Schnelleinstieg .............................................................................................................................................................. 5<br />
7 Programmierung ............................................................................................................................................................ 5<br />
7.1 Auto-Programmier-Modus APM (Modus 1) 6<br />
7.2 Motor/Stellerbetrieb (Modus 2) 5<br />
7.3 Kombi Modus (Modus 3) 6<br />
7.4 Heli Modus (Modus 4) 6<br />
7.5 Heli Modus mit fester Drehzahlregelung (Modus 5) 7<br />
7.6 Durchgängige Drehzahlregelung (Modus 6) 7<br />
7.7 Drehrichtungsumkehr (Modus 7) 7<br />
7.8 Externer Regelmodus (Flybarless, Modus 8) 7<br />
7.9 KSA-Modus (Modus 9) 8<br />
7.10 LRPM-Modus (Modus 10) 8<br />
7.11 Autorotation AR (Bail-out) 8<br />
8 Fehlerbehebung ............................................................................................................................................................. 8<br />
8.1 Fehler beim Anstecken des Akkus 8<br />
8.2 Fehler während der Programmierung 9<br />
8.3 Fehler im Betrieb 9<br />
9 Beratung, Technische Hilfe, Hotline .......................................................................................................................... 10<br />
10 Recycling ...................................................................................................................................................................... 10<br />
11 Gewährleistung ............................................................................................................................................................ 10<br />
1 Definitionen<br />
APM Auto-Programmier-Modus<br />
AR Autorotation/Bail-out<br />
BEC Battery Eliminating Circuit<br />
(Schaltung zur Versorgung des<br />
Empfängers aus dem Antriebsakku)<br />
DS Dauerstrom<br />
EMK Elektromotorische Kraft<br />
<strong>HELI</strong> <strong>JIVE</strong> <strong>HELI</strong> <strong>JIVE</strong> Drehzahlsteller<br />
Jumper Steckbrücke<br />
LED Leuchtdiode/Kontrollleuchte<br />
Modus (Modi) Betriebsart (Betriebsarten)<br />
Parameter veränderbarer Wert<br />
Pitch Blatt-Anstellwinkel<br />
SB Strombegrenzung<br />
Signale<br />
� Einzelton<br />
� Signalpause<br />
���… Signalfolge<br />
��� aufsteigende Signalfolge<br />
2<br />
������������ absteigende Signalfolge<br />
2 Sicherheitshinweise<br />
!<br />
Grundsätzlich ist immer für gute Kühlung zu<br />
sorgen, um ein Überhitzen des <strong>Regler</strong>s zu<br />
verhindern. Auf keinen Fall den <strong>Regler</strong> mit<br />
der Kühlblechseite am Chassis befestigen.<br />
� Nicht den Akku vom <strong>HELI</strong> <strong>JIVE</strong> abziehen,<br />
solange der Motor noch läuft.<br />
� Nicht den <strong>Regler</strong> selbst mit Kabelbindern o.ä. befestigen.<br />
Es könnten Bauteile beschädigt werden.<br />
� Sobald Antriebsakku und Motor an den <strong>Regler</strong><br />
angeschlossen sind, besteht die Möglichkeit,<br />
dass der Motor anläuft (z.B. durch Fehlbedienung<br />
oder durch elektrischen Defekt).<br />
� Ein Elektromotor (speziell mit Luftschraube) kann<br />
erhebliche Verletzungen verursachen. Ebenso<br />
können durch fortfliegende Teile erhebliche<br />
Verletzungen hervorgerufen werden.<br />
� Der Betrieb dieses <strong>Regler</strong>s ist nur in Situationen<br />
zulässig, in denen Sach- und Personenschäden<br />
ausgeschlossen sind.
� Der <strong>Regler</strong> ist nur zum Einsatz in Umgebungen<br />
vorgesehen, in denen keine Entladung von<br />
statischer Elektrizität auftritt.<br />
� Einen beschädigten <strong>Regler</strong> (z.B. durch mechanische<br />
oder elektrische Einwirkung, durch<br />
Feuchtigkeit, usw.) keinesfalls weiter verwenden.<br />
Anderenfalls kann es zu einem späteren<br />
Zeitpunkt zu einem plötzlichen Versagen des<br />
<strong>Regler</strong>s kommen.<br />
� Der <strong>Regler</strong> darf nur aus LiPo/Fepo -Akkus<br />
gespeist werden. Ein Betrieb an Netzgeräten ist<br />
nicht zulässig. Es darf in keinem Fall eine<br />
elektrische Verbindung zwischen dem <strong>Regler</strong><br />
und dem 230V Wechselstromnetz hergestellt<br />
werden. Bei Akkus mit hoher Kapazität muss<br />
gewährleistet sein, dass der <strong>Regler</strong> ausreichend<br />
gekühlt wird.<br />
� Eine Verlängerung der Akku- oder Motorkabel<br />
darf nicht erfolgen.<br />
� Bei Strommessungen ist ein Zangenampermeter<br />
zu verwenden, da ein eingeschleiftes Messgerät<br />
/ -shunt den <strong>Regler</strong> beschädigen kann.<br />
� Bei Verwendung des BEC muss aus<br />
Sicherheitsgründen immer ein geladener,<br />
ausreichend großer Empfängerakku verwendet<br />
werden (siehe BEC). Fehler, z.B. Kabelbruch,<br />
Akkubruch, Wackelkontakt oder Ausfall eines<br />
BEC-Bauteils, führen sonst zum Ausfall der<br />
Empfangsanlage. Vor dem Erstflug müssen<br />
Tests am Boden durchgeführt werden, um<br />
sicherzustellen, dass die BEC-Belastbarkeit für<br />
die Anwendung ausreicht.<br />
3 Technische Daten<br />
Die <strong>HELI</strong> <strong>JIVE</strong> <strong>Regler</strong> verfügen über eine Modusprogrammierung.<br />
Jeder Modus stellt die für den<br />
jeweiligen Betriebszustand benötigten Parameter<br />
selbst ein. Eine aufwendige Programmierung der<br />
einzelnen Parameter entfällt. Sollen die Eigenschaften<br />
einzeln verändert werden, so ist dies über<br />
PROGDISC (Best.-Nr.: 9310) möglich.<br />
Typenübersicht / Neue Funktionen<br />
<strong>HELI</strong> <strong>JIVE</strong> 120+ HV<br />
• Autorotationsfunktion<br />
• Neuer Stellerbetrieb<br />
• Kombi-Modus (Steller/<strong>Regler</strong>betrieb)<br />
• Externer Governor Modus<br />
• Erhöhte Abschaltspannung<br />
• Erhöhte BEC-Spannung<br />
• Durchgehende Drehzahlregelung<br />
• Extrem niedrige Drehzahlen möglich<br />
• Eingangsspannung 16-50V<br />
• Dauerstrom 120A<br />
BEC Spannung (Standard/min-max): 5,6V / 5V–6V<br />
BEC Strom (Dauer/max): 5A / 15A<br />
4 Allgemeines<br />
Mit dem <strong>HELI</strong> <strong>JIVE</strong> Drehzahlsteller haben Sie ein<br />
hochwertiges Produkt erworben. Hochwertige<br />
Steckkontakte (z.B. KONTRONIK Stecker Best.<br />
Nr.: 9050), sowie hochwertig verlötete Akkus<br />
sollten daher obligatorisch sein. Sollten Sie Fragen<br />
bzgl. des Einsatzes dieses <strong>Regler</strong>s haben,<br />
kontaktieren Sie bitte den KONTRONIK Service.<br />
4.1 Eigenschaften<br />
� Sensorloser Betrieb, es werden keine<br />
Sensorsignale vom Motor benötigt<br />
� Modusprogrammierung<br />
� Automatische Unterspannungsabregelung, in<br />
der Spannung veränderbar.<br />
� Unbegrenzt teillastfest solange bei Vollgas der<br />
zulässige Dauerstrom nicht überschritten<br />
wird.(aktiver Freilauf)<br />
� Abschaltanalyse (Abschaltgrund wird angezeigt)<br />
� Einstellkontrolle per LED oder akustischem<br />
Signal<br />
� Beim Anstecken des Lipo-Akkus wird<br />
automatisch die Zellenzahl erkannt und als<br />
Signalton ausgegeben. Die Anzahl der Pieptöne<br />
entspricht der Anzahl der erkannten Lipo-Zellen.<br />
!<br />
� Der <strong>HELI</strong><strong>JIVE</strong> <strong>Regler</strong> kann die Zellenzahl<br />
des Akkus nur dann korrekt erfassen, wenn<br />
dieser beim Anstecken voll geladen ist.<br />
� Sehr feinfühliges Regelverhalten, kein Ruckeln<br />
beim Anlaufen<br />
� Automatische Erfassung der Motorparameter,<br />
dadurch<br />
− Angepasste Taktfrequenz (8-32kHz)<br />
− Dynamisches Timing<br />
� Anlauf-, Blockier-, Übertemperaturschutz,<br />
Strombegrenzung<br />
� Digitale Mikroprozessorsteuerung, kein Temperaturdrift,<br />
„Update-fähig" (nicht online)<br />
� 24 Monate Gewährleistung wenn innerhalb der<br />
EU gekauft, CE geprüft, schneller<br />
Reparaturservice, kostenlose Hotline<br />
� Entwickelt und produziert in Rottenburg,<br />
Deutschland<br />
4.2 BEC<br />
Alle <strong>HELI</strong> <strong>JIVE</strong> <strong>Regler</strong> verfügen über ein getaktetes<br />
BEC. Im Gegensatz zu herkömmlichen BEC-<br />
Systemen ist die Belastbarkeit dieses BECs<br />
weitgehend unabhängig von der Eingangsspannung.<br />
Damit ist die Verwendung des BECs<br />
auch bei höheren Spannungen möglich. Zudem<br />
3
zeichnet sich das BEC durch eine bislang<br />
ungekannte Störfestigkeit aus.<br />
Bei den <strong>HELI</strong> <strong>JIVE</strong> <strong>Regler</strong>n ist es möglich über<br />
PROGCARDII/PROGDISC die BEC Spannung in<br />
0,2V Schritten von 5V bis 6V einzustellen.<br />
!<br />
Aus Sicherheitsgründen muss immer ein 4-<br />
Zelliger NiCd/NiMH Akku parallel zum BEC<br />
am Empfänger eingesteckt werden.<br />
Ein Betrieb ohne BEC ist ebenfalls möglich. Das<br />
rote Empfängerkabel wird dazu aus dem Stecker<br />
gezogen oder durchtrennt.(Bei Verwendung von<br />
High-Voltage Servos ( im 2s Betrieb) müßen<br />
zwingend beide rote Leitungen (Master<br />
+Slavekabel) unterbrochen werden. Andernfalls<br />
droht die Zerstörung des BECs.<br />
4.3 Ringkern<br />
Der Ringkern im Empfängeranschlusskabel dient<br />
der Störunterdrückung und ist für die Betriebssicherheit<br />
des <strong>Regler</strong>s notwendig. Er darf nicht<br />
entfernt werden, kann aber bei Bedarf innerhalb<br />
des Kabels verschoben werden.<br />
4.4 Tiefentladungsschutz<br />
Die <strong>HELI</strong> <strong>JIVE</strong> <strong>Regler</strong> sind je nach Modus mit<br />
einem automatischen Tiefentladungsschutz<br />
ausgestattet. Dieser regelt den Motor ab, wenn die<br />
Akkuentladespannung erreicht ist Einstellbar mit<br />
der PROGDISC/PROGCARD zwischen ca.2.0V<br />
(LiFePo) bis 3,2V (LiPo) pro Zelle.<br />
Sobald die eingestellte Abregelspannung<br />
!<br />
unterschritten wird, leitet der <strong>HELI</strong><strong>JIVE</strong> die<br />
Unterspannungsabregelung ein. Nach<br />
durchlaufen dieser ist kein weiterer Betrieb<br />
möglich bis der Akku gewechselt wird.<br />
!<br />
Bitte beachten Sie die veränderte Abregelspannung<br />
(2,0-3,2V/Zelle). Der Default-Wert<br />
beträgt 2,8V/Zelle<br />
4.5 Kühlung/Befestigung<br />
Ausreichende Kühlung verbessert den<br />
Wirkungsgrad und die Lebensdauer des <strong>Regler</strong>s.<br />
Die <strong>HELI</strong> <strong>JIVE</strong> <strong>Regler</strong> sind so aufgebaut, dass sich<br />
ihre Leistungsfähigkeit mit zunehmender Kühlung<br />
stark erhöht (Kühlkörper, Best. Nr. 9470). Andere,<br />
insbesondere schwere Kühlkörper können hohe<br />
mechanische Kräfte auf die Kühlplatte ausüben<br />
und dadurch den Drehzahlsteller beschädigen<br />
Der <strong>HELI</strong><strong>JIVE</strong> sollte so im Modell fixiert werden,<br />
dass die Kühlplatte/Kühlkörper nach außen zeigt.<br />
4.6 Teillastfestigkeit<br />
Der <strong>HELI</strong> <strong>JIVE</strong> ist durch seinen aktiven Freilauf voll<br />
teillastfest. Dies gilt, solange bei Vollgas und<br />
Volllast der Akkustrom die zulässige Dauerstromgrenze<br />
nicht überschreitet.<br />
4<br />
4.7 Aktiver Freilauf<br />
Um den Wirkungsgrad im Teillastbereich zu<br />
optimieren, verfügen <strong>HELI</strong> <strong>JIVE</strong> <strong>Regler</strong> über den<br />
aktiven Freilauf. Er verbessert den Wirkungsgrad<br />
im Teillastbetrieb und verringert so die Erwärmung<br />
des <strong>Regler</strong>s. Der aktive Freilauf wird bei zu wenig<br />
Last abgeschaltet. Dies kann zu einem kleinen<br />
Drehzahlsprung führen. Der Teillastbetrieb ist dann<br />
jedoch einzuschränken.<br />
4.8 Sensorlose Kommutierung<br />
Der <strong>HELI</strong> <strong>JIVE</strong> arbeitet ohne Sensoren im Motor.<br />
Er arbeitet mit einem 3D Kennfeld. Eine<br />
Veränderung der Kommutierung erfolgt automatisch<br />
und ist nun dynamisch statt bisher statisch.<br />
Der <strong>HELI</strong> <strong>JIVE</strong> kann jedoch ohne Drehung des<br />
Motors dessen Rotorposition nicht erkennen. Aus<br />
diesem Grund ist es möglich, dass beim Anlaufen<br />
der Motor minimal schwingt.<br />
4.9 Variable Taktfrequenz<br />
Die <strong>HELI</strong> <strong>JIVE</strong> <strong>Regler</strong> verändern die verwendete<br />
Taktfrequenz zwischen 8 und 32 kHz. Die Höhe der<br />
Taktfrequenz ist abhängig vom Motor und der<br />
momentanen Belastung und wird optimal auf diese<br />
Parameter abgestimmt. Der Motor arbeitet somit<br />
immer im Punkt des optimalen Wirkungsgrades.<br />
5 Anschluss der Kabel<br />
Empfänger (beliebiger<br />
Steckplatz)<br />
Jumper<br />
5.1 BEC-Kabel<br />
Mit 5A Dauerstrom und 15A Maximalstrom<br />
ermöglicht das <strong>HELI</strong> <strong>JIVE</strong>-BEC auch die<br />
Verwendung leistungsstarker Digitalservos. Um<br />
den vollen BEC-Strom bereitstellen zu können,<br />
verfügen alle <strong>HELI</strong> <strong>JIVE</strong> <strong>Regler</strong> über zwei BEC-<br />
Buchsen, welche bei Strömen über 2A auch<br />
benutzt werden müssen. Die mit „Master“<br />
gekennzeichnete Buchse muss dabei an dem<br />
Empfängerkanal angeschlossen werden der die<br />
Gasfunktion übernimmt. Die „Slave“-Buchse kann<br />
mit jedem beliebigen freien Empfängerkanal<br />
verbunden werden. Das passende BEC-Kabel<br />
(Best. Nr.: 9250) ist als Zubehör verfügbar.<br />
5.2 Motor-Kabel<br />
Empfänger (Kanal<br />
mit Gasfunktion)<br />
Die Reihenfolge ist beliebig. Das Tauschen von 2<br />
Motorkabeln ändert die Motordrehrichtung.<br />
Alternativ kann die Motordrehrichtung über<br />
PROGDISC oder Modus 7 geändert werden.
Sollte der Motor über Sensorleitungen verfügen, so<br />
werden diese nicht benötigt und bleiben unbenutzt.<br />
!<br />
An den BEC sowie Akkukabeln verpolungssichere<br />
Stecker verwenden, da eine<br />
Verpolung irreparable Schäden hervorruft<br />
6 Schnelleinstieg<br />
Bitte beachten Sie, dass der <strong>HELI</strong> <strong>JIVE</strong> nicht<br />
PROGCARD I kompatibel ist.<br />
Der <strong>Regler</strong> befindet sich im Neuzustand im APM<br />
(Auto-Programmier-Modus), d.h. er gleicht sich<br />
selbst auf die Knüppelwege der Fernsteuerung<br />
ab:<br />
7 Programmierung<br />
Modus<br />
Knüppelwege fest<br />
Online updatefähig<br />
Modus 1 ist im <strong>HELI</strong> <strong>JIVE</strong> nur zum Reset nutzbar.<br />
Das Programmieren des APM löscht alle<br />
!<br />
bisherigen Einstellungen und versetzt den<br />
Drehzahlsteller in den Auslieferungszustand<br />
(Reset).<br />
Unterspannungsabschaltung<br />
1. Sender einschalten - Gasknüppel auf<br />
Anschlag minimum Pitch stellen. (Bei Futaba<br />
Sendern vorher Gaskanal auf Reverse<br />
stellen).<br />
2. Empfänger einschalten.<br />
3. Antriebsakku an <strong>HELI</strong> <strong>JIVE</strong> anschließen.<br />
4. Fertig.<br />
Sollte der Motor nicht anlaufen: Antriebsakku<br />
abziehen und im Sender die Funktion<br />
„Servoumkehr“ ein- bzw. ausschalten. Weiter<br />
ab1.<br />
Übertemperaturschutz<br />
1 APM Reset<br />
2 Motor (Stellerbetrieb) ���� - ���� ���� ���� ���� - ����<br />
3 Kombi ���� - ���� ���� ���� ���� -/���� ����<br />
4 Helikopter 1 ���� - ���� ���� ���� ���� ���� ����<br />
5<br />
Heli + Drehzahlregelung auf<br />
Festwert<br />
���� - ���� ���� ���� ���� ���� ����<br />
6 Durchgängige<br />
Drehzahlregelung<br />
���� - ���� ���� ���� ���� ���� ����<br />
7 Drehrichtungsumkehr Kehrt die Drehrichtung des Motors um<br />
8<br />
Externer Regelmodus<br />
(Flybarless Modus 8)<br />
���� - ���� ���� ���� ���� - -<br />
9 KSA Aktiviert den KONTRONIK Special Application Modus<br />
10 LRPM Freischaltung niedriger Drehzahlbereiche<br />
7.1 Auto-Programmier-Modus APM (Modus 1)<br />
7.2 Motor/Stellerbetrieb (Modus 2)<br />
Der Motor/Stellerbetrieb (Modus 2) zeichnet sich<br />
durch einen reinen Stellerbetrieb über den<br />
gesamten Gasweg hinweg aus, allerdings mit<br />
deutlich größeren Hochlaufzeiten als im<br />
Flächenflug. Daher ist dieser Modus optimal für<br />
Helikopterpiloten, die auf eine automatische<br />
Drehzahlregelung verzichten wollen.<br />
Strombegrenzung<br />
Abregeln<br />
Drehzahlregelung<br />
Autorotation<br />
Die Regelung im Modus 2 erfolgt aktiv über den<br />
Piloten.<br />
Für den Modus 2 muss eine Gaskurve über den<br />
Sender programmiert werden. Wie Sie an Ihrem<br />
Sender eine Gaskurve programmieren, entnehmen<br />
Sie bitte der <strong>Bedienungsanleitung</strong> Ihres Senders.<br />
Beispielhafte Gaskurve:<br />
Gas<br />
Knüppelweg<br />
5
Programmierablauf<br />
6<br />
1. Jumper auf die 2 gekennzeichneten Programmierkontakte aufstecken.<br />
Für ein akustisches Signal, Motor am <strong>Regler</strong> anschließen.<br />
2. Sender einschalten. Gasknüppel/Schalter in Bremsstellung bringen.<br />
3. Antriebsakku anstecken.<br />
4.<br />
2 Sekunden. warten, oder bis ���<br />
5. Jumper abziehen.<br />
6. ���<br />
7. Moduston: Der <strong>Regler</strong> geht die einzelnen Modi durch. Zwischen den Tonfolgen ist eine Pause.<br />
Modus 1: ein Ton, Modus 2: zwei Töne, … , Modus 8: acht Töne<br />
� � �� �…� ��������<br />
Gas-Knüppel in Vollgasstellung (Knüppel/Schalter vorn) wenn der gewünschte Modus erreicht ist.<br />
8. ���<br />
9. Wenn AR programmiert werden soll, den Knüppel/Schalter in AR Position bringen<br />
(Knüppel/Schalter in Vollgasstellung belassen, wenn keine AR programmiert werden soll)<br />
10. ������������<br />
11. Kontrollausgabe: Der <strong>Regler</strong> gibt programmierten Modus erneut aus, zusätzlich ertönt Warnton bei<br />
aktivierter AR<br />
12. Fertig - Antriebsakku abstecken – Jumper aufstecken<br />
7.3 Kombi Modus (Modus 3)<br />
7.4 Heli Modus (Modus 4)<br />
Der Kombi Modus zeichnet sich durch eine<br />
Kombination aus Stellerbetrieb und automatischer<br />
Drehzahlregelung aus. Bis zu einem über die<br />
PROGDISC (<strong>HELI</strong> <strong>JIVE</strong> Card – Programmierung –<br />
Übergangspunkt – Prozentwert [Default-Wert 50%])<br />
vorher festzulegenden Prozentsatz X des<br />
Gasknüppelweges arbeitet der <strong>HELI</strong> <strong>JIVE</strong> im reinen<br />
Stellerbetrieb (Gaskurve des Senders). Beim<br />
überschreiten des Prozentsatzes X geht der<br />
Drehzahlsteller in die Drehzahlregelung über.<br />
Damit können nun (Flugzustand Idle1/Idle2)<br />
unterschiedliche <strong>Regler</strong>charakteristiken geflogen<br />
werden. Im unteren Drehzahlbereich im<br />
Stellerbetrieb, und nach Umschalten des<br />
Flugzustandes (Idle2) im höheren Drehzahlbereich<br />
mit Drehzahlregelung. Dieser Modus bietet sich für<br />
das F3C-Fliegen an.<br />
In Idle1 wird mit individueller Gaskurve geflogen.<br />
Dabei ist zu beachten, dass der höchste Punkt der<br />
Gaskurve den Prozentwert des Übergangspunktes<br />
(Prozentsatz X) für den Stellerbetrieb nicht<br />
überschreitet. Beim Umschalten in Idle2 übernimmt<br />
der <strong>HELI</strong> <strong>JIVE</strong> die Drehzahlregelung.<br />
Bitte beachten Sie bei der Festlegung des<br />
Übergangspunktes, dass der Prozentwert<br />
!<br />
des Übergangspunktes immer über dem<br />
Prozentwert der über den Sender<br />
programmierten Gaskurve liegt. Hier bietet<br />
sich die Servowegbegrenzung am Sender<br />
(ATV) an. Ist diese aktiviert, können sowohl<br />
Übergangspunkt als auch Gaskurvenwert<br />
übereinstimmen.<br />
Der Heli Modus des <strong>HELI</strong> <strong>JIVE</strong> <strong>Regler</strong>s aktiviert die<br />
Drehzahlregelung. Das bedeutet, dass die<br />
Motordrehzahl konstant gehalten wird. Lastschwankungen<br />
und das Absinken der Akkuspannung<br />
werden kompensiert, solange die Leistung des<br />
Akkus und des Motors dafür ausreichen. Im Modus<br />
4 lernt der <strong>HELI</strong> <strong>JIVE</strong> bei jedem Neustart<br />
(Anstecken des Antriebsakkus) die Parameter der<br />
Drehzahlregelung neu ein, um ein optimales<br />
Regelverhalten zu erreichen. Je nach Spannung<br />
des angeschlossenen Akkus kann dabei die<br />
Drehzahl trotz identischer Drehzahlvorwahl leicht<br />
variieren. Es wird kein separater Mischer der<br />
Fernsteuerung benötigt, um die Rotordrehzahl zu<br />
stabilisieren. Diese Drehzahlregelung funktioniert<br />
nur im eingebauten Zustand. Wird der Motor ohne<br />
die Schwungmasse des Helikopters betrieben,<br />
kann ein ruckender Betrieb entstehen.<br />
Mittels Sanftanlauf erhöht der Drehzahlsteller<br />
innerhalb einiger Sekunden (einstellbar von 8-25<br />
Sekunden) die Motordrehzahl. Wenn die für die<br />
Drehzahlregelung nötige Drehzahl erreicht ist,<br />
schaltet der <strong>HELI</strong> <strong>JIVE</strong> auf Regelung um. Je höher<br />
die Prozentangabe des Senders, desto höher ist<br />
die eingeregelte Drehzahl. KONTRONIK empfiehlt,<br />
für ein optimales Regelverhalten eine<br />
<strong>Regler</strong>öffnung von ca. 65-70% im Sender in Bezug<br />
auf 100% Knüppelweg. Damit ist gewährleistet,<br />
dass der <strong>Regler</strong> über ausreichend Reserven<br />
verfügt, um eine abfallende Akkuspannung zu<br />
kompensieren.
Das Fernsteuerkabel des <strong>Regler</strong>s wird in einen<br />
freien Empfängeranschluss gesteckt, der vom<br />
Sender aus mittels Schieberegler (ohne Mischer)<br />
bedient wird. Dieser Schieber wird dann auch zum<br />
Programmieren des Heli-Modus verwendet.<br />
Die Drehzahlregelung des <strong>HELI</strong> <strong>JIVE</strong>s lernt sich<br />
beim ersten Start des Motors nach Anstecken des<br />
Akkus selbständig auf die Anwendung ein.<br />
Empfehlenswert ist, immer auf 0° Pitch zu stellen,<br />
damit die Drehzahl bei jedem Flug annähernd<br />
gleich ist. Zum Starten den Schieber Richtung<br />
Vollgas schieben.<br />
Mittels Sanftanlauf erhöht der <strong>Regler</strong> innerhalb<br />
einiger Sekunden die Motordrehzahl. Wenn die für<br />
die Drehzahlregelung nötige Drehzahl erreicht ist,<br />
schaltet er auf Regelung um. Je näher der<br />
Schieber der Vollgasstellung kommt, desto höher<br />
ist die eingeregelte Drehzahl.<br />
Im Heli Modus sind folgende Schutzmechanismen<br />
aktiviert:<br />
− Wird länger als 4 Sekunden kein gültiges<br />
Empfangssignal erkannt, schaltet der<br />
Drehzahlsteller den Motor ab.<br />
− Bei Übertemperatur regelt der Drehzahlsteller<br />
das Gas langsam (ca. 30 Sekunden) auf Null<br />
zurück.<br />
− Die Unterspannungserkennung führt zu einer<br />
langsamen (ca. 30 Sekunden) Abregelung.<br />
Wenn der <strong>HELI</strong> <strong>JIVE</strong> die Drehzahl<br />
heruntergeregelt hat, ist kein Hochfahren mehr<br />
möglich. Erst nach Anstecken eines geladenen<br />
Akkus wird der Betrieb wieder freigegeben.<br />
7.5 Heli Modus mit fester Drehzahlregelung<br />
(Modus 5)<br />
Der Heli Modus des <strong>HELI</strong> <strong>JIVE</strong>-<strong>Regler</strong>s arbeitet mit<br />
einer echten Drehzahlregelung. Das bedeutet, dass<br />
die Motordrehzahl konstant gehalten wird, sowohl<br />
Lastschwankungen als auch das Absinken der<br />
Akkuspannung werden kompensiert. Daher wird<br />
kein separater Mischer in der Fernsteuerung<br />
benötigt, um die Rotordrehzahl zu stabilisieren.<br />
Im Modus 5 werden alle relevanten Parameter nur<br />
beim ersten Hochlaufen nach dem Programmieren<br />
des Motors eingelernt, auch das Verhältnis von<br />
Drehzahlvorwahl am Sender und der Rotordrehzahl<br />
werden fest gespeichert. Bei verschiedenen Akkus<br />
werden damit reproduzierbare identische<br />
Drehzahlen erreicht. Unterschieidliche Zellenzahlen<br />
des Antriebsakkus können damit jedoch nicht<br />
kompensiert werden. Es ist nicht zulässig den<br />
Modus 5 z.B. mit einem 4S Akku zu programmieren<br />
und dann die gleiche Drehzahl mit einem 6S Akku<br />
zu verwenden.<br />
Bei Änderungen am System (Änderungen von<br />
Motor, Übersetzung, Rotorblättern etc.) muss<br />
Modus 5 neu programmiert werden.<br />
Das Fernsteuerkabel des <strong>Regler</strong>s wird in einen<br />
freien Empfängeranschluss gesteckt, der vom<br />
Sender aus mittels Schieberegler oder Schalter<br />
(entsprechende Wegbegrenzung) bedient werden<br />
kann. Dieser Schieberegler bzw. Schalter wird<br />
auch zum Programmieren des Heli-Modus<br />
verwendet, um die korrekten Wege einzuprogrammieren.<br />
Um den Motor zu starten, den<br />
Schieberegler/Schalter in Richtung Vollgas<br />
schieben. Mittels Sanftanlauf erhöht der <strong>HELI</strong> <strong>JIVE</strong><br />
<strong>Regler</strong> mit der eingestellten Hochlaufzeit die<br />
Motordrehzahl. Wenn die für die Drehzahlregelung<br />
nötige Drehzahl erreicht ist, schaltet der <strong>HELI</strong> <strong>JIVE</strong><br />
<strong>Regler</strong> auf Drehzahlregelung um. Je näher der<br />
Schieberegler/Schalter der Vollgas-Stellung<br />
kommt, desto höher ist die eingeregelte Drehzahl.<br />
Erreicht der Schieberegler/Schalter die Motor-Aus<br />
Stellung, so wird der Motor ausgeschaltet. Dies<br />
sollte nicht während des Fluges geschehen, (außer<br />
bei eingeschalteter Autorotationsfunktion) da zum<br />
Wiederanfahren durch den Sanftanlauf die<br />
eingestellte Hochlaufzeit benötigt wird.<br />
!<br />
!<br />
Bitte beachten Sie, dass der Drehzahlsteller<br />
in Modus 5 bei Änderungen des Setups wie<br />
z.B. Motor, Zellenzahl, Rotorblätter etc. auf<br />
jeden Fall neu programmiert werden muss.<br />
7.6 Durchgängige Drehzahlregelung<br />
(Modus 6)<br />
In Modus 6 ist eine durchgängige<br />
Drehzahlregelung über den gesamten Gasbereich<br />
implementiert. Im Unterschied zu Modus 4 kann<br />
der Pilot in Modus 6 auch Gaswerte kleiner als<br />
50% anwählen. Die Regelung ist dabei stets aktiv.<br />
Um eine weichere Regelung im unteren<br />
Gasbereich zu erreichen, wird der P-Anteil des<br />
<strong>Regler</strong>s unterhalb des Übergangspunktes X<br />
[Defaultwert 50%] (einzustellen über die<br />
PROGDISC, Best. Nr. 9310) des Gasknüppelwegs<br />
linear reduziert. Unterhalb von X%-16% hat der P-<br />
Anteil dann den Minimalwert null erreicht.<br />
7.7 Drehrichtungsumkehr (Modus 7)<br />
Um die Drehrichtung des Motor umzukehren,<br />
entweder zwei Motorkabel tauschen, mit der<br />
PROGDISC/PROGCARDII oder Modus 7<br />
programmieren. Er verändert vorher programmierte<br />
Eigenschaften nicht.<br />
Modus 7 lässt sich nur programmieren, wenn<br />
zuvor ein anderer Modus als Modus 1<br />
programmiert wurde.<br />
7.8 Externer Regelmodus (Flybarless, Modus<br />
8)<br />
Der externe Regelmodus (FBL) Modus ermöglicht<br />
die Drehzahlregelung durch ein externes System.<br />
Im FBL-Modus erhält der <strong>HELI</strong> <strong>JIVE</strong> die<br />
Drehzahlvorgabe von einem FBL-System. Dabei<br />
7
efindet sich der <strong>HELI</strong> <strong>JIVE</strong> im Stellermodus und<br />
erwartet eingehende Signale. Die genaue<br />
Konfiguration entnehmen Sie bitte der<br />
<strong>Bedienungsanleitung</strong> Ihres externen Systems. Die<br />
Konfiguration der Drehzahlregelung muss über die<br />
Einstellungen am externen System vorgenommen<br />
werden.<br />
7.9 KSA-Modus (Modus 9)<br />
Der KONTRONIK Special Application Modus kann<br />
zusätzlich zu den Betriebsmodi programmiert<br />
werden. Durch einen differenzierten Algorithmus<br />
ermöglicht Modus 9 den Betrieb an Motoren, die<br />
mit der bisherigen Ansteuerung nicht<br />
ordnungsgemäß betrieben werden konnten, wie<br />
beispielsweise den HACKER Turbinen. Der<br />
KSA Modus wird zurückgesetzt, sobald ein<br />
anderer Modus programmiert wird und muss dann<br />
erneut eingestellt werden.<br />
7.10 LRPM-Modus (Modus10)<br />
Der Modus 10 (Low RPM Modus, Freischaltung<br />
niedrigster Drehzahlbereiche) ist für hochdrehende<br />
Motoren (hohe kv Zahlen). Mit Modus 10 ist es<br />
möglich, hochdrehende Motoren extrem langsam<br />
laufen zu lassen. Nicht geeignet für Motoren mit<br />
niedriger kv.<br />
7.11 Autorotation AR (Bail-out)<br />
Durch die Autorotations-Schnellanlauf-Funktion<br />
läuft der Motor nach einer (abgebrochenen/missglückten)<br />
Autorotation in deutlich verkürzter<br />
Zeit wieder an und bringt den Rotor schneller auf<br />
Drehzahl. Dadurch sind abrupte Abfangmanöver<br />
möglich. Die Hochlaufzeit während des<br />
Schnellanlaufs ist dabei von der eingestelleten<br />
Hochlaufzeit der Drehzahlregelung abhängig und<br />
beträgt 1/5 von dieser. Wurde z.B. über die<br />
PROGDISC/PROGCARD eine Hochlaufzeit von 10<br />
Sekunden eingestellt, verkürzt sich die Hochlaufzeit<br />
nun auf 2 Sekunden. Die maximale Hochlaufzeit in<br />
der AR beträgt 3 Sekunden.<br />
Für die Nutzung der Funktion ist diese zunächst<br />
über PROGDISC – <strong>HELI</strong> <strong>JIVE</strong> Card einzuschalten<br />
und die Knüppelpostionen „Vollgas-Position“,<br />
„Motor-Aus-Position“ und „AR-An-Position“ korrekt<br />
zu setzen.<br />
Zur Programmierung der AR ist folgende<br />
Vorgehensweise empfehlenswert:<br />
Programmieren Sie im Sender auf einen Schalter 3<br />
Positionen (1: 0%= „Motor- Aus“, 2: 100%=<br />
„Vollgas“, 3: 15-20%= Autorotationsstellung).<br />
Überprüfen Sie im Servomonitor, ob die<br />
Prozentwerte richtig angefahren werden.<br />
Anschließend verbinden Sie den Antriebsakku mit<br />
dem <strong>HELI</strong> <strong>JIVE</strong> und warten 2 Sekunden bis zur<br />
Tonfolge. Im Anschluss ziehen Sie den Jumper ab<br />
und Sie hören den Moduston (Modus 1: ein Ton;<br />
Modus 2: zwei Töne; bis Modus 8: 8 Töne). Warten<br />
8<br />
Sie die Tonfolge ab, bis der gewünschte Modus<br />
ertönt, anschließend Vollgasposition anfahren.<br />
Nach dem Bestätigungston (3 Töne), die<br />
gewünschte AR-Position anfahren. Der <strong>HELI</strong><strong>JIVE</strong><br />
bestätigt die AR-Position (3 Töne). Danach ertönt<br />
ein Klingelton als Bestätigung der erfolgreichen<br />
Programmierung der AR-Position. Abschließend<br />
ziehen Sie den Antriebsakku ab.<br />
Der Motor wird bei Aktivierung der AR ohne<br />
Verzögerung abgeschaltet. Sollte die Autorotation<br />
unterbrochen, und der Motor wieder eingeschaltet<br />
werden, fährt der <strong>HELI</strong> <strong>JIVE</strong> die Drehzahl im<br />
Schnellanlauf wieder auf die zuvor angewählte<br />
Drehzahl hoch. Bleibt der Schalter länger als 15<br />
Sekunden in der Autorotationsposition, wird beim<br />
erneuten Hochfahren der Drehzahl wieder der<br />
Sanftanlauf aktiviert.<br />
! 8 Fehlerbehebung<br />
Achtung: Durch das schnelle Hochfahren<br />
ergeben sich hohe Belastungen für die<br />
Mechanik. Hauptrotorblätter fest anziehen.<br />
Es werden 3 Fehlerpunkte unterschieden: nach<br />
Anstecken des Akkus, während der Programmierung<br />
und im Betrieb.<br />
8.1 Fehler beim Anstecken des Akkus<br />
Der <strong>HELI</strong> <strong>JIVE</strong> <strong>Regler</strong> verfügt über einen zweiten<br />
Mikroprozessor, der bereits beim Anstecken des<br />
Akkus einen umfangreichen Selbsttest durchführt.<br />
���� LED blinkt einmal<br />
� Kein weiterer Betrieb möglich. Bitte<br />
schicken Sie den <strong>Regler</strong> mit ausgefülltem<br />
Serviceformular und Kaufbeleg (Kopie)<br />
an KONTRONIK.<br />
���� LED blinkt doppelt<br />
� Induktivität der einzelnen Phasen um<br />
>50% unterschiedlich oder kein Motor<br />
angeschlossen. Löt-, Steckkontakte<br />
prüfen und ggf. nachlöten, Motor beim<br />
Hersteller reklamieren.<br />
���� LED blinkt dreifach<br />
� Induktivität des Motors im Verhältnis zur<br />
Akkuspannung zu niedrig. Akkuspannung<br />
reduzieren, selber Motor mit<br />
mehr Windungen einsetzen.<br />
���� LED blinkt vierfach<br />
� Bitte schicken Sie den <strong>Regler</strong> mit<br />
ausgefülltem Serviceformular und<br />
Kaufbeleg (Kopie) an KONTRONIK.
� LED blinkt fünffach<br />
� Kein weiterer Betrieb möglich. Wenden<br />
Sie sich bitte an die Hotline oder<br />
schicken Sie uns eine E-Mail.<br />
���� LED blinkt sechsfach<br />
� Kein weiterer Betrieb möglich. Wenden<br />
Sie sich bitte an die Hotline oder<br />
schicken Sie uns eine E-Mail.<br />
���� LED blinkt siebenfach<br />
� Bitte schicken Sie den <strong>Regler</strong> mit<br />
ausgefülltem Serviceformular und<br />
Kaufbeleg (Kopie) an KONTRONIK.<br />
� LED blinkt achtfach<br />
� Kein weiterer Betrieb möglich. Wenden<br />
Sie sich bitte an die Hotline oder<br />
schicken Sie uns eine E-Mail.<br />
���� LED blinkt neunfach<br />
� Überspannung. Akkuspannung kontrollieren,<br />
reduzieren.<br />
���� LED blinkt zehnfach<br />
� Fehler beim Abspeichern. Reset<br />
durchführen.<br />
���� LED blinkt elffach<br />
� Vorwiderstand zu groß. Empfehlung<br />
kleiner 10Ohm.<br />
8.2 Fehler während der Programmierung<br />
���� Es kommt kein Signal<br />
� Den Sender einschalten.<br />
� Den <strong>Regler</strong> richtig am Empfänger<br />
einstecken.<br />
� Empfängerakku anschließen.<br />
���� Signal - dann Dauerlicht oder kein<br />
weiteres Signal:<br />
� Die Knüppelstellung „hinten“ ist zu<br />
dicht an der Knüppelstellung „vorne“.<br />
� Der Abstand zwischen der Knüppelstellung<br />
„hinten“ und Knüppelstellung<br />
„vorne“ ist zu groß.<br />
� Den Servoweg für den Gas-Knüppel<br />
auf +/-100% (ggf. auch weniger)<br />
programmieren. Starke Verschiebung<br />
der Knüppelstellungen in Richtung<br />
lange Impulse (eine der Knüppelstellungen<br />
muss eine Impulslänge<br />
kürzer als 2ms besitzen). Dieser<br />
Fehler kann nur bei Computersendern<br />
auftreten.<br />
� Am Fernsteuersender keine Verschiebung<br />
(Offset) der Servowege<br />
programmieren.<br />
8.3 Fehler im Betrieb<br />
Unerwartete Motorabschaltung<br />
Wenn Sie nach der Abschaltung kein Gas mehr<br />
geben, zeigt die LED nach der Landung den<br />
Abschaltgrund an.<br />
���� LED blinkt einmal<br />
� Unterspannung: Der Akku ist entladen.<br />
���� LED blinkt doppelt<br />
� Überstrom. Der Maximalstrom des<br />
<strong>Regler</strong>s wurde überschritten. Andere<br />
Übersetzung oder weniger Zellen<br />
verwenden.<br />
���� LED blinkt dreifach<br />
� Übertemperatur. Für bessere Kühlung<br />
des <strong>Regler</strong>s sorgen.<br />
���� LED blinkt vierfach<br />
� Kein gültiges Empfangssignal. Den<br />
Empfänger und die Antenne mit mehr<br />
Abstand von <strong>Regler</strong> und Motor einbauen.<br />
���� LED blinkt sechsfach<br />
� Hardware Reset im Betrieb wegen Unterspannung<br />
der internen Stromversorgung.<br />
BEC evtl. überlastet.<br />
���� LED blinkt siebenfach<br />
� Unerwarteter Reset im Betrieb.<br />
���� LED blinkt achtfach<br />
� Hardware Überstromerkennung, sofortiges<br />
Abschalten, kein Abregeln möglich,<br />
kein Wiedereinschalten möglich. Extreme<br />
Überlast, möglicherweise durch mechanisch<br />
blockierten Motor, ggf. Mechanik<br />
kontrollieren.<br />
���� Schnelles Dauerblinken der LED<br />
� Der <strong>Regler</strong> steht entweder durch<br />
Übertemperatur oder zu hohen Strom<br />
kurz vor der Abschaltung<br />
Kann der Abschaltgrund nicht zuverlässig<br />
!<br />
verhindert werden, sollte in jedem Fall der<br />
KONTRONIK Service kontaktiert werden, um<br />
eine Zerstörung des <strong>Regler</strong>s zu vermeiden.<br />
Tel: 0800-Brushless<br />
Motor lässt sich nicht einschalten<br />
Der <strong>Regler</strong> gibt nach Anschluss des Antriebsakkus<br />
den Motor erst frei, nach Erkennung der<br />
Knüppelstellung „hinten“ oder „Neutral“.<br />
Erkennt der <strong>Regler</strong> keine dieser Stellungen, erfolgt<br />
kein ��� und der Motor bleibt ausgeschaltet.<br />
9
10<br />
� Position der Trimmung des Gas-<br />
Knüppels beachten, auf Motor-<br />
Aus/Bremse stellen.<br />
� Den <strong>Regler</strong> auf die aktuellen Servowege<br />
programmieren.<br />
� Manche Fernsteueranlagen weisen eine<br />
gewisse Temperaturdrift der Servowege<br />
auf. In diesem Fall empfiehlt es sich, bei<br />
der Programmierung etwas Abstand von<br />
den Anschlagstellungen des<br />
Gasknüppels einzuhalten, um im Betrieb<br />
etwas Reserveweg zur Verfügung zu<br />
haben.<br />
� Wenn ein Blinksignal auftritt hat der<br />
<strong>Regler</strong> beim Selbsttest einen Defekt<br />
festgestellt. Bitte mit Beschreibung des<br />
Blinksignals, an die KONTRONIK<br />
einschicken.<br />
9 Beratung, Technische Hilfe, Hotline<br />
Hotline : 0800 BRUSHLESS (0800 278745377)<br />
aus Deutschland kostenlos<br />
Tel.: +49 (0)7457 9435 0<br />
Fax: +49 (0)7457 9435 90<br />
Email: info@kontronik.com<br />
Internet: www.kontronik.com<br />
!<br />
Die neuesten KONTRONIK Produktinformationen,<br />
FAQs und Telefonzeiten<br />
finden Sie stets aktuell auf der KONTRONIK<br />
Homepage.<br />
10 Recycling<br />
Elektronische Bauteile dürfen nicht in den<br />
Hausmüll geraten, sondern müssen nach<br />
Gebrauch sach- und umweltgerecht entsorgt<br />
werden!<br />
Die nationalen und regionalen Abfallbestimmungen<br />
müssen befolgt werden. Elektronische Abfälle sind<br />
den dafür vorgesehenen Systemen der<br />
Getrenntentsorgung zu zuführen.<br />
11 Gewährleistung<br />
Die KONTROINK GmbH bietet 24 Monate<br />
Gewährleistung auf dieses Produkt bei Kauf in<br />
der EU. Produktkäufe außerhalb der EU<br />
entsprechen den jeweiligen gesetzlichen<br />
Vorschriften. Alle weitergehenden Ansprüche<br />
sind ausgeschlossen. Dies gilt insbesondere für<br />
Schadensersatzansprüche die durch Ausfall<br />
oder Fehlfunktion ausgelöst wurden. Für<br />
Personenschäden, Sachschäden und deren<br />
Folgen, die aus unserer Lieferung oder Arbeit<br />
entstehen, können wir, außer bei Vorsatz oder<br />
grober Fahrlässigkeit unsererseits, keine<br />
Haftung übernehmen, da uns eine Kontrolle der<br />
Handhabung und Anwendung nicht möglich ist.<br />
Jegliche Gewährleistungsansprüche verfallen<br />
bei Öffnen des Produktes.<br />
Zur Anerkennung der Gewährleistung muss ein<br />
maschinenerstellter Originalkaufbeleg, auf dem<br />
das Produkt, das Kaufdatum und die<br />
Bezugsquelle erkennbar sind, beigelegt sein.<br />
Bei Einsendung ist eine genaue<br />
Fehlerbeschreibung notwendig, die folgende<br />
Parameter enthalten sollte: Verwendeter Motor,<br />
Luftschraube, Anzahl und Typ der Akkus,<br />
zeitliches Auftreten des Fehlers. Vorzugweise ist<br />
das KONTRONIK Serviceformular zu<br />
verwenden.<br />
!<br />
Bitte vergessen Sie nicht die korrekte<br />
Rücksendeadresse anzugeben.<br />
EG-Konformitätserklärung<br />
Für die <strong>JIVE</strong> <strong>Regler</strong> wird hiermit bestätigt, dass<br />
sie den EMV-Richtlinien<br />
89/336/EWG, 91/263/EWG und 92/31/EWG<br />
entsprechen.<br />
Folgende Fachgrundnormen wurden<br />
herangezogen: EN 61000-6-1<br />
Rottenburg, 14.10.2003<br />
KONTRONIK Gesellschaft für Elektronik mbH
<strong>HELI</strong> <strong>JIVE</strong> ESC<br />
Operation Manual<br />
11
1 Definitions .................................................................................................................................................................... 12<br />
2 Safety Notes ................................................................................................................................................................. 12<br />
3 Technical data of <strong>HELI</strong> <strong>JIVE</strong> ESCs ............................................................................................................................. 13<br />
4 Features of <strong>HELI</strong> <strong>JIVE</strong> ESCs ....................................................................................................................................... 13<br />
4.1 Properties 13<br />
4.2 BEC 13<br />
4.3 Toroidal core 13<br />
4.4 Under voltage disconnection 14<br />
4.5 Cooling/Fixing 14<br />
4.6 Part load capability 14<br />
4.7 Active freewheeling circuit 14<br />
4.8 Sensorless Commutation 14<br />
4.9 Variable beat frequency 14<br />
5. Connection of cables .................................................................................................................................................. 14<br />
5.1 Connection to Receiver 14<br />
5.2 Motor cables 14<br />
6 Quick Set-up ................................................................................................................................................................. 14<br />
7 Programming ............................................................................................................................................................... 15<br />
7.1 Auto-Programming-Mode APM (Mode 1) 15<br />
7.2 Gas Mode (Manual Throttle, Mode 2) 16<br />
7.3 Combination Mode (Mode 3) 16<br />
7.4 Heli Mode (Mode 4) 16<br />
7.5 Heli Mode with fixed governor control (Mode 5) 16<br />
7.6 Continuous governor control (Mode 6) 17<br />
7.7 Reverse Motor Rotation (Mode 7) 17<br />
7.8 External Governor Mode (Mode 8) 17<br />
7.9 KSA-Mode (Mode 9) 17<br />
7.10 LRPM Mode (Mode 10) 17<br />
7.11 Autorotation (Bail-out) 17<br />
8 Trouble Shooting ......................................................................................................................................................... 17<br />
8.1 Errors during connecting battery 17<br />
8.2 Errors during programming 18<br />
8.3 Errors in use 18<br />
9 Service, Technical Support, Hotline .......................................................................................................................... 19<br />
10 Recycling ...................................................................................................................................................................... 19<br />
11 Warranty ....................................................................................................................................................................... 19<br />
1 Definitions<br />
ESC electronic ESC<br />
APM auto-programming mode<br />
AR Autorotation/Bail-Out<br />
<strong>HELI</strong> <strong>JIVE</strong> <strong>HELI</strong> <strong>JIVE</strong> ESC<br />
BEC battery eliminating circuit<br />
EMF electromotive force<br />
FAI competition class<br />
Jumper bridging pin<br />
LED light emitting diode<br />
Mode type of operation<br />
Parameter adjustable value<br />
Pitch blade angle<br />
Signals<br />
� single signal<br />
� signal break<br />
���… signal sequence<br />
��� ascending signal sequence<br />
12<br />
��� descending signal sequence<br />
2 Safety Notes<br />
!<br />
Sufficient cooling is necessary to avoid<br />
temperature problems of the ESC.<br />
� Never unplug battery from <strong>HELI</strong> <strong>JIVE</strong> ESC as<br />
long as motor is running.<br />
� Do not attach ESC with cable ties or similar.<br />
Electronic parts may be damaged.<br />
� As soon as a battery and a motor are connected<br />
to the ESC the motor may start (e.g. by<br />
operating error or electric defect)<br />
� A motor (especially with propeller) or broken<br />
parts can cause considerable injuries.<br />
� Use of this ESC is only permitted in situations in<br />
which damage of objects and injuries to persons<br />
are excluded.<br />
� Under no circumstances use a damaged ESC<br />
(e.g. by mechanical or electric influences, by<br />
moisture, a.s.o.). Further use may result in a<br />
sudden failure of the ESC.<br />
� The ESC may only be supplied by LiPo<br />
batteries. A use of power supply units is not<br />
permissible. Any contact to the AC network is
prohibited. When used with high capacity<br />
batteries sufficient cooling must be guaranteed.<br />
� The ESC can only be used in environments in<br />
which no discharge of static electricity occurs.<br />
� Do not extend motor cables or battery cables.<br />
� For current measurement, a tie meter has to be<br />
used, since an inserted meter can damage the<br />
ESC.<br />
� When using a BEC it is necessary to connect a<br />
charged receiver battery with enough capacity in<br />
parallel (see BEC). Otherwise a broken wire,<br />
broken battery, loose of contact or a defect of<br />
one electronic BEC part may result in total loss<br />
of the receiver system. The system has to be<br />
tested on ground before the first flight, to assure<br />
that BEC capacity is sufficient for this<br />
application.<br />
3 Technical data of <strong>HELI</strong> <strong>JIVE</strong> ESCs<br />
<strong>HELI</strong> <strong>JIVE</strong> ESCs have a mode programming<br />
option. Each mode configures in the respective<br />
operation conditions all necessary parameters.<br />
Complex programming of individual parameters is<br />
not necessary. For adjusting single parameters use<br />
PROGDISC (Order # 9310)<br />
.<br />
BEC data for all <strong>HELI</strong> <strong>JIVE</strong> ESCs:<br />
BEC Voltage (standard / min / max): 5,6V / 5V–6V<br />
BEC Current (cont../max) : 5A / 15A<br />
Specifications<br />
<strong>HELI</strong> <strong>JIVE</strong> 120+ HV<br />
• Bail-out function<br />
• New gas mode/manual throttle mode<br />
• Combination Mode (Gas mode/governor)<br />
• FBL-Mode<br />
• Increased cut-off voltage<br />
• Increased BEC voltage<br />
• Continuous governor<br />
• Extremely low RPM possible<br />
• Input voltage 16-50V<br />
• Continuous current 120A<br />
4 Features of <strong>HELI</strong> <strong>JIVE</strong> ESCs<br />
With the <strong>HELI</strong> <strong>JIVE</strong> you purchased a high quality<br />
product. High quality plugs (e.g. KONTRONIK<br />
Plugs, order # 9050) as well as exactly soldered<br />
batteries should be obligatory. Please contact<br />
KONTRONIK service for detailed questions about<br />
special applications of this ESC.<br />
4.1 Properties<br />
� Sensorless, no sensor signals from motor are<br />
required<br />
� Mode programming<br />
� Automatic under voltage disconnection,<br />
adjustable and detachable. Reducing power,<br />
instead of switching off is possible.<br />
� Unlimited part load capability as long as<br />
maximum current is not exceeded in full throttle<br />
(active free wheeling)<br />
� Analysis of switching-off reason<br />
� Adjusting monitored by LED or audio signal<br />
� Automatic recognition of connected battery<br />
cells. Number of tones refers to number of<br />
connected LiPo cells.<br />
!<br />
The <strong>HELI</strong> <strong>JIVE</strong> can only recognize the<br />
correct number of connected cells if they<br />
are fully charged.<br />
� Very sensitive control characteristic, smooth<br />
start up<br />
� Sensing and computing of the actual motor data<br />
− self adjusting beat frequency (8-32kHz)<br />
− dynamic timing<br />
� Start protection at power up, blocked motor<br />
protection, over temperature protection, over<br />
current limitation<br />
� Digital microprocessor control, therefore no<br />
thermal drift, possible to update (not online)<br />
� 24 months warranty if purchased in EU, CE<br />
tested, fast repair service, hotline service<br />
� Developed and produced in Rottenburg,<br />
Germany<br />
4.2 BEC<br />
All <strong>HELI</strong> <strong>JIVE</strong> ESCs include a synchronized BEC.<br />
Compared to general BEC-systems the capacity of<br />
the BEC is mostly independent from the input<br />
voltage. This allows the usage of the BEC also at<br />
higher voltages. Also, the BEC features a high<br />
suppression of interference. The BEC-Voltage can<br />
be changed between 5V and 6V (0.2V steps) by<br />
using PROGDISC.<br />
!<br />
For safety reasons a four cell NiCd/NiMH<br />
battery must be connected to the receiver<br />
in parallel to the BEC.<br />
For BEC voltages exceeding 5.6V a redundant<br />
receiver DC current supply should be connected.<br />
Using this ESC without BEC is possible by pulling<br />
the red receiver cable off the connector or by<br />
ripping this cable. This is required if an external<br />
BEC/direct 2S LiPo battery with higher voltage is<br />
connected. The ESC may be permanently<br />
damaged if red receiver cable is not torn off the<br />
connector in these cases.<br />
4.3 Toroidal core<br />
The toroidal core on the receiver cable allows<br />
suppression of interference and must not be<br />
removed from the cable for security reasons.<br />
13
4.4 Under voltage disconnection<br />
Dependant on the mode set the <strong>HELI</strong> <strong>JIVE</strong> ESC<br />
includes an automatic under voltage disconnection.<br />
It slows the motor down if the battery pack is on low<br />
capacity (2.8-3.2V/cell for LiPo 2.0V for LiFePo).<br />
The motor can be switched on again, by pulling the<br />
throttle into motor-off position and then pushing it<br />
forward again.<br />
!<br />
!<br />
14<br />
As soon as the selected under voltage level<br />
is reached the <strong>HELI</strong> <strong>JIVE</strong> starts slowing the<br />
motor down. No further operation possible<br />
until new battery is connected.<br />
Please note the changed under voltage<br />
disconnection (2.0-3.2V/cell). Default:<br />
2.8V/cell<br />
4.5 Cooling/Fixing<br />
Sufficient cooling increases efficiency and lifespan<br />
of the ESC. The <strong>HELI</strong> <strong>JIVE</strong> ESC improves<br />
performance with increased cooling. If the <strong>HELI</strong><br />
<strong>JIVE</strong> ESC is fixed on the model leave the cooling<br />
plate uncovered (Heatsink, #9470). Other, heavier<br />
heatsinks may put mechanical pressure on the<br />
ESC and may damage the ESC.<br />
The ESC should be fixed to the helicopter such that<br />
the heatsink is showing to the outside.<br />
4.6 Part load capability<br />
Due to its active freewheeling circuit the ESC can<br />
be operated in part load conditions if at full throttle<br />
and full load the battery current does not exceed<br />
the <strong>HELI</strong> <strong>JIVE</strong> continuous current limit.<br />
4.7 Active freewheeling circuit<br />
To optimize the efficiency at part load and to<br />
reduce heating the ESC features an active<br />
freewheeling circuit. The active freewheeling<br />
circuit cannot be used at very little load. Very little<br />
load may result in a short discontinuity of the<br />
motor RPM.<br />
4.8 Sensorless Commutation<br />
<strong>HELI</strong> <strong>JIVE</strong> ESCs work without sensors inside the<br />
motor via a 3D recognition system. Commutation of<br />
the motor will automatically be optimized to the<br />
application. Thus the <strong>HELI</strong> <strong>JIVE</strong> cannot detect the<br />
motor position at zero RPM. Therefore little motor<br />
oscillation during start is possible.<br />
4.9 Variable beat frequency<br />
<strong>HELI</strong> <strong>JIVE</strong> ESCs vary beat frequency between 8<br />
and 32 kHz. The actual beat frequency depends<br />
on the motor data and actual load. Due to optimal<br />
adjustment the motor always works at the point of<br />
best efficiency.<br />
5. Connection of cables<br />
5.1 Connection to Receiver<br />
Due to 5A continuous current and 15A peak<br />
current <strong>HELI</strong> <strong>JIVE</strong> ESCs allow the use of high<br />
performance digital servos. To provide full BEC<br />
power all <strong>HELI</strong> <strong>JIVE</strong> ESCs feature two BEC<br />
connectors which have to be used obligatory at<br />
power greater than 2A. The master connector must<br />
be plugged to the throttle channel. The slave<br />
connector can be plugged in to each unused<br />
receiver channel. The KONTRONIK BEC cable is<br />
available (# 9250).<br />
5.2 Motor cables<br />
The sequence is arbitrary. The motor rotation will<br />
be reversed by changing 2 motor cables,<br />
PROGDISC option or programming mode 7. Motor<br />
sensor cables are not used.<br />
!<br />
Use polarized connectors for battery cables<br />
only! Connecting the battery with reverse<br />
polarity will destroy the ESC.<br />
6 Quick Set-up<br />
At delivery status the ESC is set at APM (Auto-<br />
Programming-Mode). It will adapt itself to the<br />
throttle positions of the RC.<br />
1. Switch on TX - set throttle control to off<br />
2. Switch on RX<br />
3. Connect battery to <strong>JIVE</strong> ESC<br />
4. Give 1s full throttle or start with full throttle<br />
5. Ready<br />
If the motor fails to start, disconnect battery and<br />
switch TX option “servo reverse of throttle channel”<br />
on or off.<br />
!<br />
Jumper<br />
Receiver (free channel<br />
or battery port)<br />
Receiver (Throttlechannel)<br />
In all other modes the throttle position will be<br />
programmed and fixed and not learnt with<br />
every start.
7 Programming<br />
Mode<br />
Fixed throttle<br />
positions<br />
Online updateable<br />
Untervoltage<br />
disconnection<br />
Overtemperature<br />
protection<br />
1 APM Reset<br />
2 Gas Mode ���� - ���� ���� ���� ���� - ����<br />
3 Combination Mode ���� - ���� ���� ���� ���� -/���� ����<br />
4 Helicopter Mode ���� - ���� ���� ���� ���� ���� ����<br />
5<br />
Heli + governor on fixed<br />
value<br />
���� - ���� ���� ���� ���� ���� ����<br />
6 Continuous governor ���� - ���� ���� ���� ���� ���� ����<br />
7 Reverse Motor Rotation Reverses RPM direction of the motor<br />
8 Flybarless Mode ���� - ���� ���� ���� ���� - -<br />
9 KSA Mode Activates KONTRONIK Special Application Mode<br />
10 LRPM Allows lower RPM values<br />
Programming procedure<br />
1. Place Jumper on 2 arbitrary of total 3 programming contacts<br />
Connect motor for audio signal<br />
2. Switch on TX and Rx. Set throttle to EMF-brake position<br />
3. Connect battery<br />
4.<br />
Wait 2 seconds or ���<br />
5. Disconnect Jumper<br />
6. ���<br />
7. Mode tone: ESC switches to every single mode. There is a break between single signal sequences.<br />
Mode 1: one tone, Mode 2: two tones, … , Mode 8: eight tones<br />
� � �� �…� �����������<br />
Set throttle/switch to full speed (front position) if desired mode is reached.<br />
8. ���<br />
9. If AR should be programmed, move throttle to AR position<br />
(leave throttle/switch in full speed position, if no AR should be programmed)<br />
10. ������������<br />
11 Control output: ESC repeats the programmed mode again. If AR is activated there is an additional tone.<br />
12. Ready – disconnect battery – plug jumper<br />
7.1 Auto-Programming-Mode APM (Mode 1)<br />
In APM the ESC equalizes itself after every battery<br />
connection to the actual throttle control. For <strong>HELI</strong><br />
<strong>JIVE</strong> ESCs mode 1 allows only reset.<br />
!<br />
Current limitation<br />
Motor slow down<br />
Governor<br />
Autorotation<br />
Programming APM deletes all previous<br />
settings (Reset)<br />
15
7.2 Gas Mode (Manual Throttle, Mode 2)<br />
Mode 2 is characterized by complete throttle<br />
control with longer spool up times compared to<br />
fixed wing applications. This qualifies the mode for<br />
pilots who choose to fly without governor. In mode<br />
2 RPM control is completely dependent on the<br />
pilot. Mode 2 requires programming a gas curve to<br />
the sender. Please refer to the manual of your<br />
sender how to program a gas curve.<br />
Sample gas curve<br />
7.3 Combination Mode (Mode 3)<br />
The new combination mode is characterized by<br />
mixed operation of gas mode (manual throttle) and<br />
governor. Via PROGDISC (<strong>HELI</strong> <strong>JIVE</strong> Card –<br />
Programming – Transition Point – Percentage<br />
[Defalut 50%]) a percentage of throttle way can be<br />
set. Until this percentage the <strong>HELI</strong> <strong>JIVE</strong> operates<br />
under gas mode (gas curve of sender). Above the<br />
set percentage the ESC operates first in a<br />
transition phase to finally switch to governor<br />
control. This allows to fly different control<br />
characteristics (Idle1/Idele2): at low RPM in gas<br />
mode (Idle1) and at high RPM in governor (Idle2).<br />
Mode 3 is optimal for F3C applications.<br />
Idle1 requires an individual gas curve. Please make<br />
sure that the highest point of the gas curve is below<br />
the transition point. When switching to Idle2 the<br />
ESC operates in governor.<br />
Please make sure that the percentage value<br />
of the gas curve is not exceeding the value<br />
!<br />
of the transition point. It is recommendable<br />
to use the ATV function of the sender. If this<br />
is activated, transition point and gas curve<br />
value can coincide.<br />
7.4 Heli Mode (Mode 4)<br />
In mode 4 the ESC operates with active RPM<br />
control. This means, that the motor RPM will be<br />
kept constant. Changes in load and falling battery<br />
voltage will be compensated, as long as motor and<br />
battery capacity allow. It is not necessary to use a<br />
TX mixer to stabilize RPM. RPM control works only,<br />
if the ESC is installed in the helicopter. Operation<br />
under no load may result in a jerking ESC. Due to<br />
the adjustable spool up time (8-12 seconds) the<br />
ESC can increase the motor RPM in soft start. As<br />
soon as the needed RPM rate is reached the ESC<br />
switches to governor. KONTRONIK recommends a<br />
value of 65-70% of full throttle setting set on TX for<br />
optimal governor control.<br />
16<br />
Gas<br />
Throttle way<br />
The <strong>HELI</strong> <strong>JIVE</strong> RPM control is adjusted<br />
automatically to the application during the first start<br />
of the motor after connecting the battery. It is<br />
recommended to set 0° pitch to ensure relatively<br />
constant RPM during each flight. To start the motor<br />
push the throttle stick towards full throttle. The<br />
<strong>HELI</strong> <strong>JIVE</strong> will smoothly increase the motor RPM in<br />
a few seconds. As soon as the designated RPM is<br />
reached the <strong>JIVE</strong> switches over to close loop<br />
speed. The closer the throttle position is to full<br />
throttle, the higher is the designated motor RPM.<br />
Use flat curves in the TX for IDLE modes.<br />
The following protection functions are active in Heli<br />
mode:<br />
� If there is no valid TX signal for more than 4<br />
seconds, the ESC switches the motor off.<br />
� At excess temperature, the ESC lowers the<br />
power slowly (30 seconds) to zero<br />
� At under voltage cut-off the ESC lowers the<br />
power slowly (30 seconds) to zero. No further<br />
operation possible until new battery is<br />
connected.<br />
If LiPo-Mode is active, detection of under voltage<br />
cut off also lowers powers motor slowly. Without<br />
LiPo Mode under voltage disconnection is disabled.<br />
Restart is possible after disconnecting and<br />
reconnecting the battery.<br />
7.5 Heli Mode with fixed governor control<br />
(Mode 5)<br />
In mode 5 the ESC operates with active RPM<br />
control. This means, that the motor RPM will be<br />
kept constant. Changes in load and falling battery<br />
voltage will be compensated, as long as motor and<br />
battery capacity allow. It is not necessary to use a<br />
TX mixer to stabilize RPM. RPM control works only,<br />
if the ESC is installed in the helicopter. In mode 5<br />
all relevant parameters are programmed only once<br />
at the first start of the motor. Also the relation<br />
between RPM setting at the sender and rotor RPM<br />
is stored. Different batteries lead therefore to<br />
identical RPM. However, differences in the cell<br />
count of batteries can only be compensated to a<br />
certain extend. It is not allowed to program mode 5<br />
with a four cell battery and take the same RPM for<br />
a six cell battery. After changing the set-up (motor,<br />
rotor blades etc.) mode 5 must be reprogrammed in<br />
order to guarantee a stable and fast RPM control.<br />
Due to the adjustable spool up time (8-12 seconds)<br />
the ESC can increase the motor RPM in soft start.<br />
As soon as the needed RPM rate is reached the<br />
ESC switches to governor. KONTRONIK<br />
recommends a value of 65-70% of full throttle<br />
setting set on sender for optimal governor control.<br />
To start the motor push the throttle towards full<br />
throttle. The <strong>HELI</strong> <strong>JIVE</strong> will smoothly increase the<br />
motor RPM within the selected spool up time. As<br />
soon as the designated RPM is reached the <strong>JIVE</strong>
switches over to close loop speed. The closer the<br />
throttle position is to full throttle, the higher is the<br />
designated motor RPM.<br />
Use flat curves in the TX for IDLE modes.<br />
!<br />
Please note that in mode 5 the ESC has to be<br />
reprogrammed after changing any set-up<br />
components.<br />
7.6 Continuous governor control (Mode 6)<br />
Mode 6 features a continuous governor control<br />
over the complete throttle way. In contrast to mode<br />
4 the pilot can set gas values smaller than 50%<br />
with active governor. To realize a smoother RPM<br />
control at lower RPM, the P- value [Default 50%] of<br />
the ESC is reduced below the point X (adjustable<br />
via PROGDISC).<br />
7.7 Reverse Motor Rotation (Mode 7)<br />
The motor rotation will be reversed by changing 2<br />
motor cables, using PROGDISC/PROGCARD II, or<br />
programming mode 7. This mode does not change<br />
any other features programmed before. During<br />
programming procedure wait for signal sequence of<br />
7 signals.<br />
!<br />
Mode 7 can only be programmed if a mode<br />
different than Mode 1 was programmed<br />
before.<br />
7.8 External Governor Mode (Mode 8)<br />
Mode 7 allows RPM control with via an external<br />
governor system. In mode 7 the <strong>HELI</strong> <strong>JIVE</strong><br />
receives signals from the governor system and<br />
operates in gas mode/manual throttle mode.<br />
Please refer to the manual of your governor system<br />
how to adjust the settings of the governor system. It<br />
is necessary to program a throttle curve to the TX<br />
in order to operate in this mode. Configuration of<br />
RPM control must be made via the external<br />
governor system.<br />
7.9 KSA-Mode (Mode 9)<br />
The KONTRONIK Special Application Mode can be<br />
programmed additionally to other operation modes.<br />
Via a differentiated algorithm it is possible to run<br />
motors which previously could not operate<br />
efficiently (e.g. HACKER turbines, certain Align<br />
motrs). The KSA mode is reset after programming<br />
any other mode and needs to be programmed<br />
again.<br />
7.10 LRPM Mode (Mode 10)<br />
Mode 10 (Low RPM Mode, allowing lowest RPM<br />
ranges) is designed for motors for high kv (high<br />
RPM). If activated, motors with high RPM can run<br />
on extremely low RPM values. Not applicable for<br />
motors which originally have low RPM values.<br />
7.11 Autorotation (Bail-out)<br />
The autorotation allows the motor to spool up in a<br />
shorter time to higher RPM. This allows for abrupt<br />
interception maneuvers. The spool up time in<br />
autorotation mode is depended on the set RPM<br />
spool up time and is 1/6 of this value. If a general<br />
spool up time of 12 seconds is set, in autorotation<br />
mode the spool up time is now 3 seconds.<br />
Autorotation has to be activated via PROGDISC –<br />
<strong>HELI</strong> <strong>JIVE</strong> Card and “Full throttle”, “Motor-Off” and<br />
“Brake” positions have to be set. The percentage<br />
throttle value can be set via throttle.<br />
For programming autorotation please follow the<br />
procedure as described:<br />
Program 3 switch positions to your TX (1: 0%=<br />
“motor off”, 2: 100%= “full throttle”, 3: 15-20%=<br />
Autorotation position). Check on your TX monitor<br />
whether the respective percentages are valid.<br />
Connect battery to <strong>HELI</strong> <strong>JIVE</strong> and wait for acoustic<br />
signals (2 seconds). Unplug Jumper from ESC and<br />
wait for mode tones (mode 1: one tone, mode 2:<br />
two tones…mode 8: eight tones). Wait for desired<br />
mode and move throttle to full throttle position.<br />
After confirmation signal (3 tones) move throttle to<br />
AR position. The <strong>HELI</strong> <strong>JIVE</strong> confirms AR position<br />
(3 tones). Finally, disconnect battery.<br />
Should the bail-out maneuver be stopped and the<br />
motor is switched on again, the <strong>HELI</strong> JIE returns to<br />
the preset RPM in quick spool up. If the switch<br />
remains in autorotation position for more than 12<br />
seconds soft start of the motor is reactivated. Due<br />
to security considerations the quick spool up will<br />
also be deactivated for the next one spool up, if the<br />
throttle is in Motor-Off position for more than 15<br />
seconds.<br />
!<br />
Attention: Due to the fast spool up strong<br />
forces are put on the mechanic. Fix main<br />
blades tights<br />
8 Trouble Shooting<br />
Note that three different types of errors can be identified:<br />
1: error when connecting battery, 2: error during<br />
programming ESC, 3: error in use/operation<br />
8.1 Errors during connecting battery<br />
The <strong>HELI</strong> <strong>JIVE</strong> ESC contains a second micro<br />
processor, which performs a self check after<br />
connecting a battery.<br />
���� LED is blinking one time<br />
� Please send the ESC together with<br />
the completed service form and a<br />
copy of the proof of purchase to<br />
KONTRONIK.<br />
���� LED is blinking two times<br />
� No motor connected or motor<br />
inductance to high. Change the motor.<br />
17
���� LED is blinking three times<br />
� Motor inductance too small. Change<br />
the motor.<br />
���� LED is blinking four times<br />
� Defect motor wire. Check the<br />
connectors.<br />
���� LED is blinking five times<br />
� Different motor connections. Check<br />
the connectors.<br />
���� LED is blinking six times<br />
� Internal error. Please send the ESC<br />
together with the completed service<br />
form and a copy of the proof of<br />
purchase to KONTRONIK.<br />
���� LED is blinking seven times<br />
� Reversal polarity detected. Please<br />
send the ESC together with the<br />
completed service form and a copy of<br />
the proof of purchase to KONTRONIK.<br />
���� LED is blinking eight times<br />
� Internal error. Please send the ESC<br />
together with the completed service<br />
form and a copy of the proof of<br />
purchase to KONTRONIK.<br />
���� LED is blinking nine times<br />
� Over Voltage detected. Try to change<br />
the battery.<br />
���� LED is blinking ten times<br />
� Internal error. Please send the ESC<br />
together with the completed service<br />
form and a copy of the proof of<br />
purchase to KONTRONIK.<br />
���� LED is blinking eleven times<br />
� Series resistance too high. Use<br />
smaller resistance (
� Consider position of throttle control<br />
trim and adjust to motor-off and/or<br />
brake position.<br />
� Program ESC to current throttle<br />
positions.<br />
� Some Rx show thermal drift. In this<br />
case, it is recommended to keep<br />
some distance to the end of the<br />
throttle control positions while<br />
programming.<br />
� If there is a blinking signal, the ESC<br />
has detected damage during start-up.<br />
Send the ESC to KONTRONIK<br />
Service with description of blink code.<br />
9 Service, Technical Support, Hotline<br />
Hotline: 0800 BRUSHLESS<br />
(+49(0)800 278745377)<br />
free when calling from Germany<br />
Tel.: +49 (0)7457 9435 0<br />
Fax: +49 (0)7457 9435 90<br />
Email: info@kontronik.com<br />
Web: www.kontronik.com<br />
www.kontronikusa.com<br />
! 10 Recycling<br />
Latest KONTRONIK product information,<br />
FAQ, and telephone reachability can be<br />
found up-to-date on KONTRONIK homepage.<br />
Electronic components must not be disposed with<br />
household waste but have to be disposed according to<br />
legal and environmental regulations. National and local<br />
disposal regulation have to be respected.<br />
11 Warranty<br />
KONTRONIK guarantees this product to be free<br />
from factory defects in material and workmanship<br />
for a period of 24 months from date of purchase<br />
and purchase within the EU. Warranty for<br />
purchases made outside the EU is inline with the<br />
respective legal regulations. This warranty does<br />
not cover: suitability for specific application,<br />
components worn by use, application of reverse or<br />
improper voltage, tampering, misuse or shipping.<br />
Our warranty liability shall be limited to repairing or<br />
replacing the unit to our original specifications.<br />
Because we have no control over the installation or<br />
use of these products, in no case shall our liability<br />
exceed the original cost of the product. All<br />
warranty claims terminate with opening of the<br />
product. To accept guarantee the original bill on<br />
which the product the date of purchase and the<br />
dealer is named must be sent together with the<br />
product. Also a detailed fault description is<br />
necessary and should include: used motor,<br />
propeller, count and type of batteries, time of<br />
failure. Please use the KONTRONIK service form<br />
for sending in.<br />
!<br />
Do not forget to write your address on the<br />
package.<br />
By the act of using this ESC the user accepts all<br />
resulting liability.<br />
EG conformity declaration<br />
For all products of the <strong>JIVE</strong> family we confirm that<br />
the electromagnetic compatibility directives<br />
89/336/EWG, 91/263/EWG and 92/31/EWG are<br />
met.<br />
The following fundamental standards were used:<br />
EN 61000-6-1<br />
Rottenburg, 10-14-2003<br />
KONTRONIK Gesellschaft für Elektronik mbH<br />
19
20<br />
We electrify you<br />
KONTRONIK Gesellschaft für Elektronik mbH – Etzwiesenstraße 35/1 – 72108 Rottenburg am Neckar<br />
Tel: 07457/9435-0 – Hotline: 0800-Brushless – Fax: 07457/9435-90 – E-Mail: info@kontronik.com


