PRO-70 50-Channel Portable Scanner - Radio Shack
PRO-70 50-Channel Portable Scanner - Radio Shack
PRO-70 50-Channel Portable Scanner - Radio Shack
You also want an ePaper? Increase the reach of your titles
YUMPU automatically turns print PDFs into web optimized ePapers that Google loves.
20-310.fm Page 1 Wednesday, August 4, 1999 10:49 AM<br />
OWNER’S MANUAL<br />
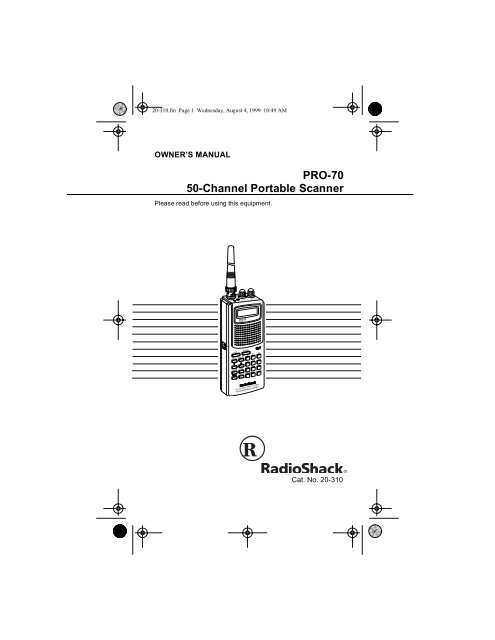
<strong>PRO</strong>-<strong>70</strong><br />
<strong>50</strong>-<strong>Channel</strong> <strong>Portable</strong> <strong>Scanner</strong><br />
Please read before using this equipment.<br />
Cat. No. 20-310
20-310.fm Page 2 Wednesday, August 4, 1999 10:49 AM<br />
INTRODUCTION<br />
Your new <strong>Radio</strong><strong>Shack</strong> <strong>PRO</strong>-<strong>70</strong> <strong>50</strong>-<strong>Channel</strong> <strong>Portable</strong><br />
<strong>Scanner</strong> lets you in on all the action. This scanner gives<br />
you direct access to over 22,000 exciting frequencies, including<br />
police and fire departments, ambulance services,<br />
and amateur radio services. You can select up to <strong>50</strong> channels<br />
to scan, and you can change your selection at any<br />
time.<br />
The secret to your scanner’s ability to scan so many frequencies<br />
is its custom-designed microprocessor — a tiny,<br />
built-in computer. Your scanner also has these special<br />
features:<br />
Ten Preprogrammed Search Bands — let you search<br />
for transmissions within preset frequency ranges, so you<br />
can find interesting frequencies more quickly.<br />
Ten Preprogrammed Weather Frequencies — keep<br />
you informed about current weather conditions.<br />
Two-Second Automatic Scan Delay — delays scanning<br />
for 2 seconds before moving to another channel, so you<br />
can hear more replies.<br />
<strong>50</strong> <strong>Channel</strong>s — let you store up to <strong>50</strong> of your favorite frequencies<br />
for easy recall and scanning.<br />
Monitor Memory — lets you temporarily save an active<br />
frequency you locate during a direct search, until you decide<br />
whether or not you want to save it into a channel.<br />
Memory Backup — keeps the channel frequencies<br />
stored in memory for about 1 hour during a power loss.<br />
© 1997 Tandy Corporation.<br />
All Rights Reserved.<br />
<strong>Radio</strong><strong>Shack</strong> is a registered trademark used by Tandy Corporation.<br />
U.S. Patent No’s. 3,794,925: 3,801,914: 3,961,261: 3,962,644:<br />
4,027,251: 4,092,594: 4,123,715: 4,245,348.<br />
2
20-310.fm Page 3 Wednesday, August 4, 1999 10:49 AM<br />
<strong>Channel</strong> Lockout — keeps channels you select from being<br />
scanned.<br />
Key Lock — lets you lock the scanner’s keys to help prevent<br />
accidentally changing the scanner’s programming.<br />
Flexible Antenna with BNC Connector — provides excellent<br />
reception and is designed to help prevent antenna<br />
breakage.<br />
Liquid Crystal Display — makes it easy to view and<br />
change programming information.<br />
Display Backlight — makes the scanner easy to read in<br />
low light situations.<br />
Three Power Options — let you power the scanner from<br />
internal batteries (non-rechargeable batteries or a rechargeable<br />
scanner battery pack) or external AC or DC<br />
power (using optional adapters).<br />
We recommend you record your scanner’s serial number<br />
here. This number is on the scanner’s back panel.<br />
Serial Number:<br />
3
20-310.fm Page 4 Wednesday, August 4, 1999 10:49 AM<br />
Your <strong>PRO</strong>-<strong>70</strong> scanner contains the following preprogrammed<br />
frequencies (divided into search bands). See<br />
“Using Band Search” on Page 25.<br />
In addition, your scanner is preprogrammed with the following<br />
weather service frequencies:<br />
4<br />
Band<br />
Frequency<br />
Search<br />
Range<br />
(in MHz)<br />
Description<br />
0 29-30 10-Meter Amateur <strong>Radio</strong><br />
1 30-<strong>50</strong> VHF Low<br />
2 <strong>50</strong>-54 6-Meter Amateur <strong>Radio</strong><br />
3 137-144 Aircraft/Air Shows,<br />
Government<br />
4 144-148 2-Meter Amateur <strong>Radio</strong><br />
5 148-174 VHF Hi<br />
6 380-420 U.S. Government<br />
7 420-4<strong>50</strong> <strong>70</strong>-Centimeter Amateur <strong>Radio</strong><br />
8 4<strong>50</strong>-4<strong>70</strong> UHF Low<br />
9 4<strong>70</strong>-512 UHF “T” Band<br />
161.6<strong>50</strong> 161.775 162.400 162.425<br />
162.525 162.4<strong>50</strong> 162.475<br />
162.<strong>50</strong>0 162.5<strong>50</strong> 163.275
20-310.fm Page 5 Wednesday, August 4, 1999 10:49 AM<br />
This owner’s manual also includes the section “A General<br />
Guide to Scanning,” which helps you target frequency<br />
ranges in your service area so you can search for a wide<br />
variety of broadcasts.<br />
FCC NOTICE<br />
Your scanner might cause TV or radio interference even<br />
when it is operating properly. To determine whether your<br />
scanner is causing the interference, turn off your scanner.<br />
If the interference goes away, your scanner is causing<br />
the interference. Try the following methods to eliminate<br />
the interference.<br />
• Move your scanner away from the TV or radio<br />
• Connect your scanner to an outlet that is on a different<br />
electrical circuit from the TV or radio<br />
• Contact your local <strong>Radio</strong><strong>Shack</strong> store for help<br />
If you cannot eliminate the interference, the FCC requires<br />
that you stop using your scanner.<br />
This device complies with Part 15 of the FCC Rules. Operation<br />
is subject to the following conditions: (1) This device<br />
must not cause harmful interference, and (2) This<br />
device must accept any interference received, including<br />
interference that may cause undesired operation.<br />
Note: Mobile use of this scanner is unlawful or requires a<br />
permit in some areas. Check the laws in your area.<br />
5
20-310.fm Page 6 Wednesday, August 4, 1999 10:49 AM<br />
SCANNING LEGALLY<br />
Scanning is a fun and interesting hobby. You can hear<br />
police and fire departments, ambulance services, government<br />
agencies, private companies, amateur radio services,<br />
aircraft, and military operations. It is legal to listen to<br />
almost every transmission your scanner can receive.<br />
However, there are some electronic and wire communications<br />
that are illegal to intentionally intercept. These include:<br />
• Telephone conversations (cellular, cordless, or other<br />
private means of telephone signal transmission)<br />
• Pager transmissions<br />
• Scrambled or encrypted transmissions<br />
According to the Federal Electronic Communications Privacy<br />
Act (ECPA), as amended, you could be fined and<br />
possibly imprisoned for intentionally listening to, using, or<br />
disclosing the contents of such a transmission unless you<br />
have the consent of a party to the communication (unless<br />
such activity is otherwise illegal). These laws change from<br />
time to time and there might be state or local laws that also<br />
affect legal scanner usage.<br />
6
20-310.fm Page 7 Wednesday, August 4, 1999 10:49 AM<br />
CONTENTS<br />
Preparation .................................................................. 9<br />
Power Sources ...................................................... 9<br />
Using Batteries ............................................... 9<br />
Using Standard AC Power ............................ 11<br />
Using Vehicle Battery Power ........................ 12<br />
Charging a Rechargeable Battery Pack ....... 13<br />
Connecting the Antenna ...................................... 14<br />
Connecting an Optional Antenna .................. 15<br />
Connecting an Earphone/Headphones ................ 16<br />
Listening Safely ........................................... 16<br />
Traffic Safety ................................................. 16<br />
Connecting an Extension Speaker ...................... 17<br />
Using the Belt Clip ............................................... 17<br />
Understanding the <strong>PRO</strong>-<strong>70</strong> ...................................... 18<br />
A Look at the Keypad .......................................... 18<br />
A Look at the Display ........................................... 19<br />
Operation ................................................................... 21<br />
Turning On the <strong>Scanner</strong> and Setting SQUELCH . 21<br />
Searching For and Storing Active Frequencies ... 22<br />
Active Frequency References ...................... 22<br />
Storing Frequencies ..................................... 23<br />
Using Band Search ....................................... 25<br />
Using Direct Search ...................................... 27<br />
Using the Monitor Memory ................................... 28<br />
Listening to the Monitor Memory .................. 28<br />
Moving a Frequency from the Monitor<br />
Memory to a <strong>Channel</strong> ................................... 28<br />
Scanning the Stored <strong>Channel</strong>s ............................ 29<br />
Monitoring a Stored <strong>Channel</strong> ............................... 30<br />
Clearing a Stored <strong>Channel</strong> .................................. 31<br />
Special Features ....................................................... 32<br />
Using the Keylock ................................................ 32<br />
Locking Out <strong>Channel</strong>s ......................................... 32<br />
Using a 2-Second Delay ...................................... 33<br />
Using the Display Backlight ................................. 34<br />
Listening to a Weather Band ............................... 34<br />
7
20-310.fm Page 8 Wednesday, August 4, 1999 10:49 AM<br />
A General Scanning Guide ...................................... 36<br />
Guide to Frequencies .......................................... 36<br />
National Weather Frequencies ..................... 36<br />
Ham <strong>Radio</strong> Frequencies ............................... 36<br />
Birdie Frequencies ....................................... 37<br />
Guide to the Action Bands ................................... 37<br />
United States Broadcast Bands ................... 37<br />
Typical Band Usage ..................................... 38<br />
Primary Usage .............................................. 38<br />
Specified Intervals ........................................ 39<br />
Band Allocation .................................................... 40<br />
Avoiding Image Frequencies ............................... 45<br />
Frequency Conversion ........................................ 46<br />
Troubleshooting ........................................................ 47<br />
Resetting/Initializing the <strong>Scanner</strong> ........................ 49<br />
Resetting the <strong>Scanner</strong> .................................. 49<br />
Initializing the <strong>Scanner</strong> ................................. <strong>50</strong><br />
Care and Maintenance .............................................. 51<br />
Specifications ........................................................... 52<br />
8
20-310.fm Page 9 Wednesday, August 4, 1999 10:49 AM<br />
PREPARATION<br />
POWER SOURCES<br />
You can power your scanner from any of three sources:<br />
• Internal batteries or a rechargeable scanner battery<br />
pack (not supplied — see “Using Batteries”)<br />
• Standard AC power (with an optional AC adapter —<br />
see “Using Standard AC Power” on Page 11)<br />
• Vehicle battery power (with an optional DC adapter<br />
— see “Using Vehicle Battery Power” on Page 12)<br />
Notes:<br />
• Connecting an AC or DC adapter to the scanner disconnects<br />
any internal batteries, but it does not disconnect<br />
a rechargeable battery pack. If you install a<br />
rechargeable battery pack, you can operate the<br />
scanner and recharge the battery pack at the same<br />
time. See “Using Batteries” and “Charging a<br />
Rechargeable Battery Pack” on Page 13.<br />
• If the scanner stops working properly after connecting<br />
it to power, try resetting it. See “Resetting/Initializing<br />
the <strong>Scanner</strong>” on Page 49.<br />
Using Batteries<br />
You can power your scanner from six AA batteries. For the<br />
longest operation and best performance, we recommend<br />
alkaline batteries, such as <strong>Radio</strong><strong>Shack</strong> Cat. No. 23-552.<br />
You can also power the scanner from a rechargeable<br />
scanner battery pack, such as Cat. No. 23-288.<br />
Note: You can also use six rechargeable nickel-cadmium<br />
batteries (such as Cat. No. 23-125) to power the scanner.<br />
To charge or recharge nickel-cadmium batteries, however,<br />
you must remove them from the scanner and use an<br />
external charger (such as Cat. No. 23-134).<br />
9
20-310.fm Page 10 Wednesday, August 4, 1999 10:49 AM<br />
Follow these steps to install batteries or a battery pack.<br />
1. Press down on the battery compartment cover on the<br />
bottom of the scanner and slide the cover in the<br />
direction of the arrow to remove it.<br />
10<br />
2. Pull up and slide the battery holder or battery pack<br />
out of the battery compartment.<br />
3. If you are installing individual batteries, insert six batteries<br />
in the battery holder as indicated by the polarity<br />
symbols (+ and –) marked on the battery holder.
20-310.fm Page 11 Wednesday, August 4, 1999 10:49 AM<br />
4. Slide the battery holder or battery pack into the compartment.<br />
Caution: The battery holder or battery pack fits only<br />
one way inside the battery compartment. Do not<br />
force it.<br />
5. Replace the cover.<br />
If BATT flashes on the display, immediately replace all six<br />
non-rechargeable batteries, remove and recharge all six<br />
rechargeable batteries, or recharge the battery pack. See<br />
“Charging a Rechargeable Battery Pack” on Page 13.<br />
Caution: Always dispose of old batteries promptly and<br />
properly. Do not bury or burn them.<br />
Using Standard AC Power<br />
To power the scanner from AC power, you need an AC<br />
adapter such as <strong>Radio</strong><strong>Shack</strong> Cat. No. 273-1665. Plug the<br />
adapter’s barrel plug into the scanner’s PWR/DC 9V jack.<br />
Then plug the adapter’s power module into a standard AC<br />
outlet.<br />
PWR/DC 9V<br />
11
20-310.fm Page 12 Wednesday, August 4, 1999 10:49 AM<br />
Warning: Do not use an AC adapter’s polarized plug with<br />
an extension cord, receptacle, or other outlet unless the<br />
blades can be fully inserted to prevent blade exposure.<br />
Cautions:<br />
• You must use an AC adapter that supplies 9 volts<br />
and delivers at least 300 milliamps. Its center tip<br />
must be set to negative, and its plug must correctly fit<br />
the scanner’s PWR/DC 9V jack. The recommended<br />
adapter meets these specifications. Using an<br />
adapter that does not meet these specifications<br />
could damage the scanner or the adapter.<br />
• When you finish using the AC adapter, disconnect it<br />
from the AC outlet first. Then disconnect it from the<br />
scanner.<br />
Using Vehicle Battery Power<br />
To power the scanner from your vehicle’s cigarette lighter<br />
socket, you need a DC Adapter, such as Cat. No. 2<strong>70</strong>-<br />
1560.<br />
Cautions:<br />
• You must use a DC adapter that supplies (regulated)<br />
9-volt power and delivers at least 300 milliamps. Its<br />
center tip must be set to negative, and its plug must<br />
correctly fit the scanner’s PWR/DC 9V jack. The recommended<br />
adapter meets these specifications.<br />
Using an adapter that does not meet these specifications<br />
could damage the scanner or the adapter.<br />
• To protect your vehicle’s electrical system, always<br />
plug the adapter into the scanner before you plug it<br />
into your vehicle’s cigarette-lighter socket. Always<br />
unplug the adapter from the vehicle’s cigarettelighter<br />
socket before you unplug it from the scanner.<br />
12
20-310.fm Page 13 Wednesday, August 4, 1999 10:49 AM<br />
4<br />
2<br />
1. Connect the DC adapter’s orange barrel plug to the<br />
adapter’s cable, with the tip set to – (negative).<br />
2. Set the adapter’s voltage switch to 9V.<br />
3. Insert the barrel plug into the scanner’s PWR/DC 9V<br />
jack.<br />
4. Plug the other end of the adapter into your vehicle’s<br />
cigarette-lighter socket.<br />
Note: If the scanner does not operate properly when you<br />
connect a DC adapter, unplug the adapter from the cigarette-lighter<br />
socket and clean the socket to remove ashes<br />
and other debris.<br />
Charging a Rechargeable Battery Pack<br />
Your scanner has a built-in charging circuit that lets you<br />
charge a rechargeable scanner battery pack (Cat. No. 23-<br />
288, not supplied) while it is in the scanner. To charge a<br />
battery pack, simply connect an appropriate AC or DC<br />
adapter to the PWR/DC 9V jack.<br />
Note: If you want to take the battery pack out of the scanner<br />
to charge it, follow the instructions provided with the<br />
battery pack.<br />
It takes about 14-16 hours to recharge a battery pack that<br />
is fully discharged. You can operate the scanner while recharging<br />
the battery pack, but the charging time is lengthened.<br />
13<br />
1<br />
3
20-310.fm Page 14 Wednesday, August 4, 1999 10:49 AM<br />
Note: A rechargeable battery pack lasts longer and delivers<br />
more power if you occasionally let it fully discharge. To<br />
do this, simply use the scanner until BATT appears on the<br />
display. Then fully charge the battery pack.<br />
Important! At the end of a rechargeable battery pack’s<br />
useful life, it must be recycled or disposed of properly.<br />
Contact your local, county, or state hazardous waste management<br />
authorities for information on recycling or disposal<br />
programs in your area. Some options that might be<br />
available are: municipal curb-side collection, drop-off boxes<br />
at retailers, recycling collection centers, and mail-back<br />
programs.<br />
CONNECTING THE ANTENNA<br />
Follow these steps to attach the supplied flexible antenna<br />
to the ANT jack on the top of your scanner.<br />
1. Align the slots around the antenna’s connector with<br />
the tabs on the ANT jack.<br />
2. Press the antenna down over the jack and turn the<br />
antenna’s base clockwise until it locks into place.<br />
14
20-310.fm Page 15 Wednesday, August 4, 1999 10:49 AM<br />
Connecting an Optional Antenna<br />
The antenna connector on your scanner makes it easy to<br />
use the scanner with a variety of antennas. Instead of the<br />
supplied antenna, you can attach a different one, such as<br />
an external mobile antenna or outdoor base station antenna.<br />
Your local <strong>Radio</strong><strong>Shack</strong> store sells a variety of antennas.<br />
Always use <strong>50</strong>-ohm coaxial cable, such as RG-58 or RG-<br />
8, to connect an outdoor antenna. For lengths over <strong>50</strong><br />
feet, use RG-8 low-loss dielectric coaxial cable. If your antenna’s<br />
cable does not have a BNC connector, you will<br />
also need a BNC adapter (also available at your local <strong>Radio</strong><strong>Shack</strong><br />
store).<br />
Follow the installation instructions supplied with the antenna,<br />
route the antenna cable to the scanner, then connect<br />
it to the ANT jack.<br />
Warning: Use extreme caution when installing or removing<br />
an outdoor antenna. If the antenna starts to fall, let it<br />
go! It could contact overhead power lines. If the antenna<br />
touches a power line, contact with the antenna, mast, cable<br />
or guy wires can cause electrocution and death! Call<br />
the power company to remove the antenna. Do not attempt<br />
to do so yourself.<br />
15
20-310.fm Page 16 Wednesday, August 4, 1999 10:49 AM<br />
CONNECTING AN EARPHONE/<br />
HEADPHONES<br />
For private listening, you can plug an earphone or mono<br />
headphones (such as Cat. No. 33-175 or 20-210) into the<br />
jack on top of your scanner. This automatically disconnects<br />
the internal speaker.<br />
Listening Safely<br />
To protect your hearing, follow these guidelines when you<br />
use an earphone or headphones:<br />
• Do not listen at extremely high volume levels.<br />
Extended high-volume listening can lead to permanent<br />
hearing loss.<br />
• Set the volume to the lowest setting before you begin<br />
listening. After you begin listening, adjust the volume<br />
to a comfortable level.<br />
• Once you set the volume, do not increase it. Over<br />
time, your ears adapt to the volume level, so a volume<br />
level that does not cause discomfort might still<br />
damage your hearing.<br />
Traffic Safety<br />
Do not wear an earphone or headphones while you drive<br />
a vehicle or ride a bicycle. This can create a traffic hazard<br />
and can be illegal in some areas.<br />
16
20-310.fm Page 17 Wednesday, August 4, 1999 10:49 AM<br />
Even though some earphones and headphones let you<br />
hear some outside sounds when you listen at normal levels,<br />
they still can present a traffic hazard.<br />
CONNECTING AN EXTENSION<br />
SPEAKER<br />
In a noisy area, an extension speaker (such as Cat. No.<br />
21-549) or an amplified speaker (such as Cat. No. 21-<br />
541), positioned in the right place, might provide more<br />
comfortable listening. Plug the speaker cable’s 1 /8-inch<br />
mini-plug into your scanner’s jack.<br />
USING THE BELT CLIP<br />
You can use the belt clip attached to the back of the scanner<br />
for hands-free carrying when you are on the go. Simply<br />
slide the belt clip over your belt or waistband.<br />
17
20-310.fm Page 18 Wednesday, August 4, 1999 10:49 AM<br />
UNDERSTANDING THE <strong>PRO</strong>-<strong>70</strong><br />
A LOOK AT THE KEYPAD<br />
Your scanner’s keys might seem confusing at first, but this<br />
information should help you understand each key’s function.<br />
WX — scans through the 10<br />
preprogrammed weather<br />
channels.<br />
18<br />
BAND — selects a preprogrammed<br />
search band.<br />
SCAN — scans through the<br />
programmed channels.<br />
MANUAL — stops scanning and lets you directly enter a<br />
channel number.<br />
/ — begins searching up or down for active frequencies,<br />
or selects the direction when you scan channels.<br />
CLEAR — clears an incorrect entry.<br />
PGM — programs frequencies into channels.<br />
— locks/unlocks the keypad to prevent accidental entries.<br />
LIGHT — turns on/off the display’s backlight.<br />
Number Keys (1-9) — enter a channel/frequency number.<br />
0/MON — enters a zero or accesses the monitor memory.<br />
./DLY — enters a decimal point (necessary when programming<br />
frequencies), or programs a 2-second delay for the<br />
selected channel.<br />
E/L-OUT — (enter/lockout) enters frequencies into channels,<br />
or locks out channels so they will not be scanned.
20-310.fm Page 19 Wednesday, August 4, 1999 10:49 AM<br />
A LOOK AT THE DISPLAY<br />
The display has indicators that show the scanner’s current<br />
operation. A quick look at the display will help you understand<br />
how to operate your scanner.<br />
MAN — appears when you manually select a channel.<br />
SCAN — appears when you scan channels.<br />
WX — appears when you scan or manually search the 10<br />
preprogrammed weather channels.<br />
MON — appears when you listen to the monitor memory.<br />
BATT — appears when the batteries are low.<br />
L/O — appears when you manually select a channel you<br />
locked-out while scanning.<br />
SRCH — appears during band and direct frequency<br />
searches.<br />
/ — indicate the search or scan direction.<br />
DELAY — appears when you program a 2-second delay<br />
for a channel.<br />
PGM — appears while you program frequencies into the<br />
scanner’s channels.<br />
— appears when you lock the keypad.<br />
19
20-310.fm Page 20 Wednesday, August 4, 1999 10:49 AM<br />
ch — the digits that precede this indicator (1—<strong>50</strong>) show<br />
which channel the scanner is tuned to.<br />
–d — appears during a direct frequency search.<br />
000.0000 — the digits in the middle of the display show<br />
which frequency the scanner is tuned to.<br />
Error — appears when you make an entry error.<br />
dUPL — (duplicate) appears when you try to store a frequency<br />
that is already stored in another channel.<br />
20
20-310.fm Page 21 Wednesday, August 4, 1999 10:49 AM<br />
OPERATION<br />
TURNING ON THE SCANNER AND<br />
SETTING SQUELCH<br />
1. Turn SQUELCH fully counterclockwise before you<br />
turn on the scanner.<br />
VOLUME SQUELCH<br />
OFF MAX MIN MAX<br />
2. Turn VOLUME clockwise until you hear a hissing<br />
sound.<br />
VOLUME SQUELCH<br />
OFF MAX MIN MAX<br />
3. Turn SQUELCH clockwise, just until the hissing sound<br />
stops.<br />
Note: To listen to a weak or distant station, turn SQUELCH<br />
counterclockwise. If reception is poor, turn SQUELCH<br />
clockwise to cut out weak transmissions.<br />
21
20-310.fm Page 22 Wednesday, August 4, 1999 10:49 AM<br />
SEARCHING FOR AND STORING<br />
ACTIVE FREQUENCIES<br />
Your scanner can store up to 51 frequencies. Each frequency<br />
can be stored in either a memory called a channel,<br />
or the temporary memory called a monitor. This scanner<br />
has <strong>50</strong> channels and one monitor memory.<br />
You can store frequencies using any of these methods.<br />
• Manually enter and store a specific frequency (see<br />
“Storing Frequencies” on Page 23).<br />
• Search for active frequencies within a range of preprogrammed<br />
frequencies and store selected frequencies<br />
in the scanner’s channel memories (see<br />
“Using Band Search” on Page 25).<br />
• Search for active frequencies starting directly from<br />
one specific frequency and store a frequency in the<br />
scanner’s monitor memory (see “Using Direct<br />
Search” on Page 27).<br />
• Recall the monitor memory frequency and move that<br />
frequency to a channel memory (see “Using the<br />
Monitor Memory” on Page 28).<br />
Active Frequency References<br />
Good references for active frequencies are <strong>Radio</strong><strong>Shack</strong>’s<br />
Beyond Police Call, Police Call <strong>Radio</strong> Guide Including Fire<br />
and Emergency Services, Aeronautical Frequency Directory,<br />
and <strong>Radio</strong>! magazine. We update these references<br />
often, so be sure to get a current copy.<br />
If you do not have a reference to frequencies in your area,<br />
or if you want to search for unlisted frequencies, use a<br />
band search or direct search. See also “Guide to the Action<br />
Bands” on Page 37 in this manual.<br />
22
20-310.fm Page 23 Wednesday, August 4, 1999 10:49 AM<br />
Storing Frequencies<br />
Follow these steps to store frequencies into your scanner’s<br />
channels.<br />
1. Press PGM. PGM appears on the display to indicate<br />
the scanner is in the programming mode.<br />
2. Use the number keys to enter the channel number<br />
(1-<strong>50</strong>) where you want to store the frequency, then<br />
press PGM again. Or, repeatedly press PGM until the<br />
desired channel number appears.<br />
Notes:<br />
• If you enter an invalid channel number, Error<br />
appears on the display. Simply repeat this step.<br />
• If a frequency is currently stored in the selected<br />
channel, the channel number does not flash but<br />
the current frequency number appears on the display.<br />
You can either repeat this step to select a different<br />
channel, or replace the current frequency<br />
with a new one.<br />
3. Use the number keys and ./DLY to enter the frequency<br />
(including the decimal point) you want to<br />
store in that channel.<br />
23
20-310.fm Page 24 Wednesday, August 4, 1999 10:49 AM<br />
24<br />
4. Press E/L-OUT to store the frequency. The selected<br />
channel number stops flashing, indicating that the<br />
selected channel is stored.<br />
Notes:<br />
• If you entered an invalid frequency in Step 3,<br />
Error appears on the display after you press E/<br />
L-OUT. Simply repeat Steps 3 and 4 and enter a<br />
valid frequency in Step 3.<br />
• Your scanner automatically rounds the entered<br />
frequency down to the nearest valid frequency.<br />
For example, if you try to enter a frequency of<br />
151.4730, your scanner accepts it as 151.4<strong>70</strong>0.<br />
• If you entered a frequency that is already stored in<br />
another channel, dUPL (duplicate) and the lowest-numbered<br />
channel containing the duplicate<br />
frequency flash on the display for about 3 seconds.<br />
To store the duplicate frequency, press E/L-OUT<br />
again. To store a different frequency, repeat Steps<br />
3 and 4, and enter a different frequency in Step 3.<br />
5. Repeat Steps 2-4 to program another channel.
20-310.fm Page 25 Wednesday, August 4, 1999 10:49 AM<br />
Using Band Search<br />
If you do not know of a frequency to store, you can search<br />
your scanner’s preprogrammed search bands for active<br />
frequencies, then store any that you find into your scanner’s<br />
channels.<br />
Follow these steps to search for and store active frequencies<br />
using band search.<br />
1. Press BAND. The last selected band number (b followed<br />
by a number, such as b2) and the associated<br />
frequency search range appear on the display.<br />
2. To select a different band, within 2 seconds, enter<br />
the desired band number (0-9, see Page 4 for<br />
descriptions) or repeatedly press BAND until the<br />
desired band number appears on the display. After<br />
about 2 seconds, SRCH appears, the next available<br />
channel flashes, and the scanner begins<br />
searching rapidly upward in that band (from lowest to<br />
highest frequency) for an active frequency.<br />
Notes:<br />
• To select a different band after the scanner begins<br />
searching the current band, simply repeat this<br />
step.<br />
25
20-310.fm Page 26 Wednesday, August 4, 1999 10:49 AM<br />
• To reverse the rapid search direction at any time,<br />
press and hold or for about 1second.<br />
• To search the selected band upward or downward<br />
in small increments (in steps of 5 or 12.5 kHz,<br />
depending on the band), press and release or<br />
so or disappears from the display. See<br />
“Specified Intervals” on Page 39.<br />
3. When the scanner finds an active frequency, it stops<br />
scanning and displays that frequency’s number. To<br />
store that frequency in the channel currently flashing<br />
on the display, simply press E/L-OUT. The scanner<br />
stores the frequency, then the next available channel<br />
flashes on the display.<br />
Notes:<br />
• You cannot store an active frequency in the monitor<br />
memory during band search.<br />
• After you store a frequency into the last available<br />
channel, --ch appears instead of a channel<br />
number. If you try to store a channel while --ch<br />
appears, Ch FULL appears briefly on the display.<br />
In order to store more frequencies, you must clear<br />
some channels. See “Clearing a Stored <strong>Channel</strong>”<br />
on Page 31.<br />
4. To search for another active frequency in the<br />
selected band, press and hold<br />
second, then repeat Step 3.<br />
or for about 1<br />
To select a different band then search for another<br />
active frequency, repeat Steps 2 and 3.<br />
26
20-310.fm Page 27 Wednesday, August 4, 1999 10:49 AM<br />
Using Direct Search<br />
During a direct search, the scanner searches upward or<br />
downward, starting from a frequency you specify. Follow<br />
these steps to use direct search.<br />
1. Press MANUAL or PGM, then enter the frequency you<br />
want to use as a starting point for the search.<br />
Note: To start from a frequency already stored in one<br />
of your scanner’s channels, press MANUAL or PGM,<br />
enter the desired channel number, then press MAN-<br />
UAL or PGM again.<br />
2. Press and hold or for about 1 second to search<br />
upward or downward. –d, SRCH, and or appear<br />
on the display.<br />
3. When the scanner stops on an active frequency, you<br />
can either:<br />
• Press 0/MON to store it in the monitor memory.<br />
• Press and hold or to continue the search.<br />
27
20-310.fm Page 28 Wednesday, August 4, 1999 10:49 AM<br />
USING THE MONITOR MEMORY<br />
After you store a frequency in the scanner’s monitor memory<br />
during a direct search, you can recall it and move it to<br />
one of your scanner’s channel memories.<br />
Listening to the Monitor Memory<br />
To recall a frequency stored in the monitor memory, simply<br />
press MANUAL then 0/MON. MAN then MON and the<br />
stored frequency appear on the display.<br />
Moving a Frequency from the Monitor<br />
Memory to a <strong>Channel</strong><br />
1. Press MANUAL, enter the channel number where<br />
you want to store the frequency, then press PGM.<br />
PGM and the selected channel number appear on<br />
the display.<br />
2. Press MON. MON and the monitor memory frequency<br />
appear on the display.<br />
3. Press E/L-OUT. MON disappears, the channel number<br />
stops flashing, and the frequency is stored in the<br />
selected channel.<br />
28
20-310.fm Page 29 Wednesday, August 4, 1999 10:49 AM<br />
SCANNING THE STORED<br />
CHANNELS<br />
To set the scanner to continuously scan through all channels<br />
with stored frequencies, simply press SCAN. SCAN<br />
and appear on the display, and the scanner begins to<br />
rapidly scan upward until it finds an active frequency.<br />
If the scanner finds an active frequency, it stops and displays<br />
that channel and frequency number, then it automatically<br />
begins scanning again when the transmission ends<br />
on that frequency.<br />
Notes:<br />
• To reverse the scanning direction, press or .<br />
• To set the scanner to remain on the current channel<br />
for 2 seconds after the transmission ends, see<br />
“Using a 2-Second Delay” on Page 33.<br />
• To set the scanner to remain on the current channel,<br />
even after the transmission stops, press MANUAL at<br />
any time during the transmission so MAN appears<br />
and SCAN disappears from the display (see “Monitoring<br />
a Stored <strong>Channel</strong>” on Page 30).<br />
• To lock out channels so the scanner does not stop<br />
for a transmission on those channels, see “Locking<br />
Out <strong>Channel</strong>s” on Page 32.<br />
29
20-310.fm Page 30 Wednesday, August 4, 1999 10:49 AM<br />
MONITORING A STORED CHANNEL<br />
You can continuously monitor a specific channel without<br />
scanning. This is useful if you hear an emergency broadcast<br />
on a channel and do not want to miss any details —<br />
even though there might be periods of silence — or if you<br />
simply want to monitor that channel.<br />
Follow these steps to manually select a channel.<br />
1. Press MANUAL.<br />
2. Enter the channel number.<br />
3. Press MANUAL again.<br />
30
20-310.fm Page 31 Wednesday, August 4, 1999 10:49 AM<br />
CLEARING A STORED CHANNEL<br />
If you no longer want a frequency stored in a channel<br />
(and you do not want to replace that frequency with a different<br />
one), follow these steps to clear the stored frequency.<br />
1. Select the channel that you want to clear.<br />
2. Press PGM. PGM appears on the display.<br />
3. Press CLEAR. The frequency number flashes on the<br />
display.<br />
4. Press E/L-OUT. L/O (lockout — see “Locking Out<br />
<strong>Channel</strong>s” on Page 32) appears, the channel number<br />
flashes, and the frequency number changes to<br />
000.0000 on the display to indicate the channel is<br />
cleared.<br />
5. To clear another channel, use the number keys to<br />
enter that channel number (1-<strong>50</strong>), then press PGM<br />
again. Or, repeatedly press PGM until the desired<br />
channel number appears. Then repeat Steps 3-4.<br />
31
20-310.fm Page 32 Wednesday, August 4, 1999 10:49 AM<br />
SPECIAL FEATURES<br />
USING THE KEYLOCK<br />
Once you program your scanner, you can protect it from<br />
accidental program changes by turning on the keylock<br />
feature. When the keypad is locked, the only controls that<br />
operate are LIGHT (see “Using the Display Backlight” on<br />
Page 34), VOLUME, and SQUELCH.<br />
Note: The keylock does not prevent the scanner from<br />
scanning channels or monitoring a single channel, whichever<br />
feature you last selected.<br />
To turn on the keylock, press and hold for about 3<br />
seconds until appears on the display. To turn it off,<br />
press and hold for about 3 seconds until disappears<br />
from the display.<br />
LOCKING OUT CHANNELS<br />
You can increase the effective scanning speed by locking<br />
out individual channels that have a continuous transmission,<br />
such as a weather channel (see “National Weather<br />
Frequencies” on Page 36) or birdie frequency (see “Birdie<br />
Frequencies” on Page 37). To lock out a channel, select<br />
that channel then press E/L-OUT. L/O appears on the display.<br />
32
20-310.fm Page 33 Wednesday, August 4, 1999 10:49 AM<br />
To remove the lock-out from a channel, select that channel<br />
again, then press E/L-OUT so L/O disappears from the<br />
display.<br />
Notes:<br />
• You can manually select locked-out channels.<br />
• Your scanner automatically locks out empty channels.<br />
USING A 2-SECOND DELAY<br />
Many agencies use a two-way radio system that has a period<br />
of several seconds between a query and a reply. To<br />
avoid missing a reply, you can program a 2-second delay<br />
into any channel or frequency. When your scanner stops<br />
on a channel or frequency with a programmed delay, DE-<br />
LAY appears on the display and the scanner continues to<br />
monitor that frequency for 2 seconds after the transmission<br />
stops before resuming scanning.<br />
You can program a 2-second delay in these three ways:<br />
• If the scanner is scanning and stops on an active<br />
channel, quickly press ./DLY before it continues scanning<br />
again.<br />
• If the desired channel is not selected, manually<br />
select the channel, then press ./DLY.<br />
33
20-310.fm Page 34 Wednesday, August 4, 1999 10:49 AM<br />
34<br />
• If the scanner is in the search mode, press ./DLY<br />
while the scanner is searching. DELAY appears on<br />
the display and the scanner automatically adds a 2second<br />
delay to every transmission it stops on.<br />
To turn off the 2-second delay, press ./DLY while the scanner<br />
is monitoring the channel or frequency. DELAY disappears<br />
from the display.<br />
USING THE DISPLAY BACKLIGHT<br />
You can turn on the display’s backlight for easy viewing in<br />
the dark. Press LIGHT to turn on the display light for 5 seconds.<br />
To turn off the light before 5 seconds elapse, press<br />
LIGHT again.<br />
LISTENING TO A WEATHER BAND<br />
The FCC (Federal Communications Commission) has allocated<br />
11 channels for use by the National Oceanic and<br />
Atmospheric Administration (NOAA). NOAA broadcasts<br />
your local forecast and regional weather information on<br />
one or more of these channels. We have programmed<br />
your scanner with 10 of the U.S. frequencies most commonly<br />
used by NOAA.
20-310.fm Page 35 Wednesday, August 4, 1999 10:49 AM<br />
To hear your local forecast and regional weather information,<br />
simply press WX. Your scanner begins to scan<br />
through the weather band, and and WX appear on the<br />
display. To reverse the scanning direction, press or .<br />
Your scanner should stop within a few seconds on your local<br />
weather broadcast. If the broadcast is weak, you can<br />
press or again to resume scanning.<br />
Note: To manually select a preprogrammed weather<br />
channel, you can:<br />
• repeatedly press WX until MAN appears on the display,<br />
then repeatedly press or to move forward<br />
or backward through the channels.<br />
• press the number (0-9) of the channel you want to listen<br />
to.<br />
35
20-310.fm Page 36 Wednesday, August 4, 1999 10:49 AM<br />
A GENERAL SCANNING GUIDE<br />
Reception of the frequencies covered by your scanner is<br />
mainly “line-of-sight.” This means you usually cannot hear<br />
stations that are beyond the horizon.<br />
GUIDE TO FREQUENCIES<br />
National Weather Frequencies<br />
*Not preprogrammed in this scanner, but you can manually<br />
program it.<br />
Ham <strong>Radio</strong> Frequencies<br />
Ham radio operators often transmit emergency information<br />
when other means of communication break down.<br />
The following chart shows the frequencies this scanner receives<br />
that Ham radio operators normally use:<br />
Note: Your scanner cannot receive AM transmissions on<br />
these bands.<br />
36<br />
161.6<strong>50</strong> 161.775 162.400 162.425<br />
162.440* 162.4<strong>50</strong> 162.475 162.<strong>50</strong>0<br />
162.525 162.5<strong>50</strong> 163.275<br />
Wavelength<br />
(meters)<br />
Frequency<br />
(MHz)<br />
10-meter 29.000–29.<strong>70</strong>0<br />
6-meter <strong>50</strong>.000–54.000<br />
2-meter 144.000–148.000<br />
<strong>70</strong>-cm 420.000–4<strong>50</strong>.000
20-310.fm Page 37 Wednesday, August 4, 1999 10:49 AM<br />
Birdie Frequencies<br />
Every scanner has birdie frequencies. Birdies are signals<br />
created inside the scanner’s receiver. These operating<br />
frequencies might interfere with broadcasts on the same<br />
frequencies. If you program one of these frequencies, you<br />
hear only noise on that frequency. If the interference is not<br />
severe, you might be able to turn SQUELCH clockwise to<br />
cut out the birdie.<br />
The birdie frequencies on this unit to watch for are:<br />
29.900 30.455 30.735 31.480<br />
32.090 32.530 33.580 38.400<br />
51.200 51.225 140.800 143.430<br />
144.000 147.200 153.600 156.800<br />
160.000 162.200 166.400<br />
To find the birdies in your scanner, begin by disconnecting<br />
the antenna and moving it away from the receiver. Make<br />
sure that no other nearby radio or TV sets are turned on<br />
near the scanner. Use the search function and scan every<br />
frequency band from its lowest frequency to the highest.<br />
Occasionally, the searching will stop as if it had found a<br />
signal, often without any sound. That is a birdie. Make a<br />
list of all the birdies in your particular scanner for future<br />
reference.<br />
GUIDE TO THE ACTION BANDS<br />
United States Broadcast Bands<br />
In the United States, there are several broadcast bands.<br />
The standard AM and FM bands are probably the most<br />
well known. There are also four television audio broadcast<br />
bands — the lower three transmit on the VHF band and<br />
the fourth transmits on the UHF band.<br />
37
20-310.fm Page 38 Wednesday, August 4, 1999 10:49 AM<br />
Typical Band Usage<br />
Primary Usage<br />
As a general rule, most of the radio activity is concentrated<br />
on the following frequencies:<br />
VHF Band<br />
38<br />
HF Band (3.00–30.0 MHz)<br />
10-Meter Amateur 29.00–29.<strong>70</strong> MHz<br />
High Range 29.<strong>70</strong>–29.90 MHz<br />
VHF Band (30.00–300.0 MHz)<br />
Low Range 30.00–<strong>50</strong>.00 MHz<br />
6-Meter Amateur <strong>50</strong>.00–54.00 MHz<br />
U.S. Government 137.00–144.00 MHz<br />
2-Meter Amateur 144.00–148.00 MHz<br />
High Range 148.00–174.00 MHz<br />
UHF Band(300.00 MHz–3.0 GHz)<br />
Military Aircraft 380.00–384.00 MHz<br />
U.S. Government 406.00–420.00 MHz<br />
<strong>70</strong>-Centimeter Amateur 420.00–4<strong>50</strong>.00 MHz<br />
Low Range 4<strong>50</strong>.00–4<strong>70</strong>.00 MHz<br />
FM-TV Audio Broadcast,<br />
Wide Band 4<strong>70</strong>.00–512.00 MHz<br />
Activities Frequencies (MHz)<br />
Government, Police, and Fire 153.785–155.980<br />
Emergency Services 158.730–159.460<br />
Railroad 160.000–161.900
20-310.fm Page 39 Wednesday, August 4, 1999 10:49 AM<br />
UHF Band<br />
Activities<br />
Land-Mobile<br />
Frequencies (MHz)<br />
“Paired” Frequencies 4<strong>50</strong>.000–4<strong>70</strong>.000<br />
Base Stations 451.025–454.9<strong>50</strong><br />
Mobile Units 456.025–459.9<strong>50</strong><br />
Relay Repeater Units 460.025–464.975<br />
Remote Control Stations 465.025–469.975<br />
Note: Remote control stations and mobile units operate at<br />
5 MHz higher than their associated base stations and relay<br />
repeater units.<br />
Specified Intervals<br />
Frequencies in different bands are accessible only at specific<br />
intervals. For example:<br />
Frequency Range(s) Specified Interval<br />
29–54 and 137–144 MHz 5.0 kHz steps<br />
380–512 12.5 kHz steps<br />
Note: Your scanner automatically rounds the entered frequency<br />
down to the closest valid frequency. For example,<br />
if you try to enter 151.473, your scanner accepts this as<br />
151.4<strong>70</strong>.<br />
39
20-310.fm Page 40 Wednesday, August 4, 1999 10:49 AM<br />
BAND ALLOCATION<br />
To help decide which frequency ranges to scan, use the<br />
following listing of the typical services that use the frequencies<br />
your scanner receives. These frequencies are<br />
subject to change, and might vary from area to area. For<br />
a more complete listing, refer to Police Call <strong>Radio</strong> Guide<br />
Including Fire and Emergency Services, available at your<br />
local <strong>Radio</strong><strong>Shack</strong> store.<br />
Abbreviations Services<br />
AIR.........................................................................Aircraft<br />
BIFC............................Boise (ID) Interagency Fire Cache<br />
BUS ....................................................................Business<br />
CAP ............................................................Civil Air Patrol<br />
CB............................................................... Citizens Band<br />
CCA ........................................................Common Carrier<br />
CSB .............................................. Conventional Systems<br />
CTSB .............................. Conventional/Trunked Systems<br />
FIRE........................................................ Fire Department<br />
HAM............................................... Amateur (Ham) <strong>Radio</strong><br />
GOVT............................................... Federal Government<br />
GMR .............................................. General Mobile <strong>Radio</strong><br />
GTR ....................................................... General Trunked<br />
IND.......................................................Industrial Services<br />
(Manufacturing, Construction, Farming, Forest Products)<br />
MAR..............................................Military Amateur <strong>Radio</strong><br />
MARI............................................ Maritime Limited Coast<br />
(Coast Guard, Marine telephone,<br />
Shipboard <strong>Radio</strong>, Private stations)<br />
MARS ................................Military Affiliate <strong>Radio</strong> System<br />
MED....................................Emergency/Medical Services<br />
MIL.................................................................U.S. Military<br />
MOV................................... Motion Picture/Video Industry<br />
NEW ..................................................New Mobile Narrow<br />
NEWS .......................Relay Press (Newspaper reporters)<br />
OIL .................................................Oil/Petroleum Industry<br />
POL......................................................Police Department<br />
PUB ..........................................................Public Services<br />
(Public Safety, Local Govt., Forestry Conservation)<br />
PSB.............................................................. Public Safety<br />
40
20-310.fm Page 41 Wednesday, August 4, 1999 10:49 AM<br />
PTR..........................................................Private Trunked<br />
ROAD................................Road & Highway Maintenance<br />
RTV......................... <strong>Radio</strong>/TV Remote Broadcast Pickup<br />
TAXI .............................................................Taxi Services<br />
TELB .....................................................Mobile Telephone<br />
(Aircraft, <strong>Radio</strong> Common Carrier, Landline companies)<br />
TELC......................................................Cordless Phones<br />
TELM ..........................................Telephone Maintenance<br />
TOW................................................................ Tow Trucks<br />
TRAN .......................................... Transportation Services<br />
(Trucks, Tow Trucks, Buses, Railroad, Other)<br />
TSB ....................................................... Trunked Systems<br />
TVn .............................................FM-TV Audio Broadcast<br />
USXX ............................................Government Classified<br />
UTIL ............................................. Power & Water Utilities<br />
WTHR ................................................................. Weather<br />
High Frequency (HF) Hi — (3 MHz–30 MHz)<br />
10-Meter Amateur Band— (28.0–29.7 MHz)<br />
29.000–29.<strong>70</strong>0 ..........................................................HAM<br />
Very High Frequency (VHF) — (30 MHz–300 MHz)<br />
Low Band — (29.7–<strong>50</strong> MHz — in 5 kHz steps)<br />
29.<strong>70</strong>0–29.790 ............................................................IND<br />
29.900–30.5<strong>50</strong> ................................................ GOVT, MIL<br />
30.580–31.980 .................................................. IND, PUB<br />
32.000–32.990 ................................................ GOVT, MIL<br />
33.020–33.980 .........................................BUS, IND, PUB<br />
34.010–34.990 ................................................ GOVT, MIL<br />
35.020–35.980 ............................. BUS, PUB, IND, TELM<br />
36.000–36.230 ................................................ GOVT, MIL<br />
36.2<strong>50</strong> ...................................................Oil Spill Clean-Up<br />
36.2<strong>70</strong>–36.990 ................................................ GOVT, MIL<br />
37.020–37.980 .................................................. PUB, IND<br />
38.000–39.000 ................................................ GOVT, MIL<br />
39.020–39.980 ...........................................................PUB<br />
40.000–42.000 ..................................... GOVT, MIL, MARI<br />
42.020–42.940 ...........................................................POL<br />
42.960–43.180 ............................................................IND<br />
43.220–43.680 .......................................TELM, IND, PUB<br />
43.<strong>70</strong>0–44.600 ........................................................ TRAN<br />
44.620–46.580 ................................................. POL, PUB<br />
46.600–46.990 ............................................. GOVT, TELC<br />
41
20-310.fm Page 42 Wednesday, August 4, 1999 10:49 AM<br />
47.020–47.400...........................................................PUB<br />
47.420.............................................. American Red Cross<br />
47.440–49.580...................................................IND, PUB<br />
49.610–49.990................................................. MIL, TELC<br />
6-Meter Amateur Band — (<strong>50</strong>–54 MHz)<br />
<strong>50</strong>.00–54.00.............................................................. HAM<br />
U.S. Government Band (138–144 MHz)<br />
137.000–144.000............................................ GOVT, MIL<br />
2-Meter Amateur Band (144–148 MHz)<br />
144.000–148.000...................................................... HAM<br />
VHF-Hi BAND (148–174 MHz)<br />
148.0<strong>50</strong>–1<strong>50</strong>.345..................................... CAP, MAR, MIL<br />
1<strong>50</strong>.775–1<strong>50</strong>.790...................................................... MED<br />
1<strong>50</strong>.815–1<strong>50</strong>.965......................................................TOW<br />
1<strong>50</strong>.980.................................................Oil Spill Clean Up<br />
1<strong>50</strong>.995–151.130....................................................ROAD<br />
151.145–151.475.......................................................POL<br />
151.490–151.955...............................................IND, BUS<br />
151.985....................................................................TELM<br />
152.0075................................................................... MED<br />
152.030–152.240..................................................... TELB<br />
152.2<strong>70</strong>–152.465.............................................. IND, TAXI<br />
152.480......................................................................BUS<br />
152.510–152.840..................................................... TELB<br />
152.8<strong>70</strong>–153.020..............................................IND, MOV<br />
153.035–153.725...................................... IND, OIL, UTIL<br />
153.740–154.445.............................................PUB, FIRE<br />
154.490–154.5<strong>70</strong>...............................................IND, BUS<br />
154.585.................................................Oil Spill Clean-Up<br />
154.600–154.625.......................................................BUS<br />
154.655–156.240....................... MED, ROAD, POL, PUB<br />
156.255....................................................................... OIL<br />
156.275–157.425..................................................... MARI<br />
157.4<strong>50</strong>..................................................................... MED<br />
157.4<strong>70</strong>–157.515......................................................TOW<br />
157.530–157.725.............................................. IND, TAXI<br />
157.740......................................................................BUS<br />
157.7<strong>70</strong>–158.100..................................................... TELB<br />
158.130–158.460................. BUS, IND, OIL, TELM, UTIL<br />
158.490–158.<strong>70</strong>0..................................................... TELB<br />
158.730–159.465................................. POL, PUB, ROAD<br />
42
20-310.fm Page 43 Wednesday, August 4, 1999 10:49 AM<br />
159.480 ....................................................................... OIL<br />
159.495–161.565 .................................................... TRAN<br />
161.580 ....................................................................... OIL<br />
161.600–162.000 ............................................MARI, RTV<br />
162.0125–162.35 ................................ GOVT, MIL, USXX<br />
162.400–162.5<strong>50</strong> ................................................... WTHR<br />
162.5625–162.6375 ............................ GOVT, MIL, USXX<br />
162.6625 ................................................................... MED<br />
162.6875–163.225 .............................. GOVT, MIL, USXX<br />
163.2<strong>50</strong> .....................................................................MED<br />
163.275–166.225 ................................ GOVT, MIL, USXX<br />
166.2<strong>50</strong> ................................................ GOVT, RTV, FIRE<br />
166.275–169.400 ..........................................GOVT, BIFC<br />
169.445 .......................................................Wireless Mics<br />
169.<strong>50</strong>0 ...................................................................GOVT<br />
169.<strong>50</strong>5 .......................................................Wireless Mics<br />
169.55–169.9875 ................................ GOVT, MIL, USXX<br />
1<strong>70</strong>.000 .....................................................................BIFC<br />
1<strong>70</strong>.025–1<strong>70</strong>.1<strong>50</strong> ................................. GOVT, RTV, FIRE<br />
1<strong>70</strong>.175–1<strong>70</strong>.225 ....................................................GOVT<br />
1<strong>70</strong>.245–1<strong>70</strong>.305 ........................................Wireless Mics<br />
1<strong>70</strong>.3<strong>50</strong>–1<strong>70</strong>.400 ............................................ GOVT, MIL<br />
1<strong>70</strong>.425–1<strong>70</strong>.4<strong>50</strong> ......................................................BIFC<br />
1<strong>70</strong>.475 ......................................................................PUB<br />
1<strong>70</strong>.4875–173.175 .................GOVT, PUB, Wireless Mics<br />
173.225–173.375 ................................MOV, NEWS, UTIL<br />
173.3875–173.5375 .................................................... MIL<br />
173.5625–173.5875 .................MIL Medical/Crash Crews<br />
173.60–173.9875 ....................................................GOVT<br />
Ultra High Frequency (UHF) (300 MHZ–3 GHz)<br />
Military Aircraft Band (319.1–383.9 MHz)<br />
380.000–383.900 ..........................................Coast Guard<br />
U. S. Government Band (406–4<strong>50</strong> MHz)<br />
406.125–419.975 ........................................ GOVT, USXX<br />
<strong>70</strong>-cm Amateur Band (420–4<strong>50</strong> MHz)<br />
420.000–4<strong>50</strong>.000 ......................................................HAM<br />
Low Band (4<strong>50</strong>–4<strong>70</strong> MHz)<br />
4<strong>50</strong>.0<strong>50</strong>–4<strong>50</strong>.925 .......................................................RTV<br />
451.025–452.025 ...........................IND, OIL, TELM, UTIL<br />
452.0375–453.00 ............ IND, TAXI, TRAN TOW, NEWS<br />
43
20-310.fm Page 44 Wednesday, August 4, 1999 10:49 AM<br />
453.0125–453.9875...................................................PUB<br />
454.000....................................................................... OIL<br />
454.025–454.975..................................................... TELB<br />
455.0<strong>50</strong>–455.925.......................................................RTV<br />
457.525–457.600.......................................................BUS<br />
458.025–458.175...................................................... MED<br />
460.0125–460.6375............................... FIRE, POL, PUB<br />
460.6<strong>50</strong>–462.175.......................................................BUS<br />
462.1875–462.4<strong>50</strong>.............................................BUS, IND<br />
462.4625–462.525.........................IND, OIL, TELM, UTIL<br />
462.5<strong>50</strong>–462.725......................................................GMR<br />
462.7<strong>50</strong>–462.925.......................................................BUS<br />
462.9375–463.1875.................................................. MED<br />
463.200–467.925.......................................................BUS<br />
FM-TV Audio Broadcast,<br />
UHF Wide Band (4<strong>70</strong>–512 MHz)<br />
(<strong>Channel</strong>s 14 through 20 in 6 MHz steps)<br />
475.7<strong>50</strong>...........................................................<strong>Channel</strong> 14<br />
481.7<strong>50</strong>...........................................................<strong>Channel</strong> 15<br />
487.7<strong>50</strong>...........................................................<strong>Channel</strong> 16<br />
493.7<strong>50</strong>...........................................................<strong>Channel</strong> 17<br />
499.7<strong>50</strong>...........................................................<strong>Channel</strong> 18<br />
<strong>50</strong>5.7<strong>50</strong>...........................................................<strong>Channel</strong> 19<br />
512.000...........................................................<strong>Channel</strong> 20<br />
Note: Some cities use the 4<strong>70</strong>–512 MHz band for land/<br />
mobile service.<br />
44
20-310.fm Page 45 Wednesday, August 4, 1999 10:49 AM<br />
AVOIDING IMAGE FREQUENCIES<br />
You might discover one of your regular stations on another<br />
frequency that is not listed. This might be what is known<br />
as an image frequency. For example, you might find a service<br />
that regularly uses a frequency of 453.275 also on<br />
474.675.<br />
To see if it is an image, do a little math.<br />
Note the new frequency. 474.675<br />
Double the intermediate frequency<br />
of 10.7 MHz (21.400) and subtract it<br />
from the new frequency. –21.400<br />
If the answer is the regular frequency, 453.275<br />
then you have tuned to an image.<br />
Occasionally you might get interference on a weak or distant<br />
channel from a strong broadcast 21.4 MHz below the<br />
tuned frequency. This is rare, and the image signal is usually<br />
cleared whenever there is a broadcast on the actual<br />
frequency.<br />
45
20-310.fm Page 46 Wednesday, August 4, 1999 10:49 AM<br />
FREQUENCY CONVERSION<br />
The tuning location of a station can be expressed in frequency<br />
(kHz or MHz) or in wavelength (meters). The following<br />
information can help you make the necessary<br />
conversions.<br />
46<br />
1 MHz (million) = 1,000 kHz (thousand)<br />
To convert MHz to kHz, multiply the number of MHz by<br />
1,000:<br />
30.62 MHz × 1000 = 30,620 kHz<br />
To convert from kHz to MHz, divide the number of kHz by<br />
1,000.<br />
127,800 kHz ÷ 1000 = 127.8 MHz<br />
To convert MHz to meters, divide 300 by the number of<br />
MHz.<br />
300 ÷ <strong>50</strong> MHz = 6 meters
20-310.fm Page 47 Wednesday, August 4, 1999 10:49 AM<br />
TROUBLESHOOTING<br />
If your scanner is not working as it should, these suggestions<br />
might help you eliminate the problem. If the scanner<br />
still does not operate properly, take it to your local <strong>Radio</strong><strong>Shack</strong><br />
store for assistance.<br />
<strong>PRO</strong>BLEM<br />
<strong>Scanner</strong> is<br />
totally inoperative.<br />
Poor or no<br />
reception<br />
Error<br />
appears on<br />
the display.<br />
Keypad<br />
does not<br />
work.<br />
POSSIBLE<br />
CAUSES<br />
The batteries<br />
are dead.<br />
The optional<br />
AC or DC<br />
power adapter<br />
is not connected.<br />
Improperly<br />
connected<br />
antenna.<br />
Programmed<br />
frequencies are<br />
the same as<br />
birdie frequencies.<br />
Programming<br />
error.<br />
Keylock is<br />
turned on.<br />
REMEDIES<br />
Replace the batteries<br />
with fresh ones<br />
or recharge the battery<br />
pack.<br />
Be sure the adapter<br />
is fully inserted into<br />
the PWR/DC 9V<br />
jack.<br />
Be sure the<br />
antenna is properly<br />
connected.<br />
Avoid programming<br />
frequencies<br />
listed under “Birdie<br />
Frequencies” on<br />
Page 37 or only<br />
select them manually.<br />
Reprogram the frequency<br />
correctly.<br />
Turn off keylock.<br />
47
20-310.fm Page 48 Wednesday, August 4, 1999 10:49 AM<br />
Keys do not<br />
work or display<br />
changes.<br />
48<br />
<strong>PRO</strong>BLEM<br />
<strong>Scanner</strong> is<br />
on but will<br />
not scan.<br />
In the scan<br />
mode, the<br />
scanner<br />
locks on frequencies<br />
that have an<br />
unclear<br />
transmission.<br />
POSSIBLE<br />
CAUSES<br />
Undetermined<br />
error.<br />
SQUELCH is not<br />
correctly<br />
adjusted.<br />
REMEDIES<br />
Turn the scanner<br />
off then on again,<br />
or reset the scanner<br />
(see “Resetting/Initializing<br />
the<br />
<strong>Scanner</strong>” on Page<br />
49).<br />
Adjust SQUELCH<br />
clockwise (see<br />
“Turning On the<br />
<strong>Scanner</strong> and Setting<br />
SQUELCH” on<br />
Page 21).<br />
Birdies. Avoid programming<br />
frequencies<br />
listed under “Birdie<br />
Frequencies” on<br />
Page 37 or only listen<br />
to them manually.
20-310.fm Page 49 Wednesday, August 4, 1999 10:49 AM<br />
RESETTING/INITIALIZING THE<br />
SCANNER<br />
If the scanner’s display locks up or does not work properly<br />
after you connect a power source, you might need to reset<br />
or initialize the scanner.<br />
IMPORTANT! If you have problems, first try to reset the<br />
scanner (see “Resetting the <strong>Scanner</strong>”). If that does not<br />
work, you can initialize the scanner (see “Initializing the<br />
<strong>Scanner</strong>” on Page <strong>50</strong>); however, this clears all information<br />
stored in your scanner’s memory.<br />
Resetting the <strong>Scanner</strong><br />
1. Turn off the scanner, then turn it on again.<br />
2. Insert a pointed object, such as a straightened paper<br />
clip, into the reset opening on the side of the scanner<br />
(as shown below) and gently press then release the<br />
reset button inside the opening.<br />
Note: If the scanner still does not work properly, you might<br />
need to initialize the scanner (see “Initializing the <strong>Scanner</strong>”<br />
on Page <strong>50</strong>).<br />
49
20-310.fm Page <strong>50</strong> Wednesday, August 4, 1999 10:49 AM<br />
Initializing the <strong>Scanner</strong><br />
Caution: This procedure clears all information you stored<br />
in the scanner’s memory. Initialize the scanner only when<br />
you are sure the scanner is not working properly.<br />
1. Turn off the scanner, then turn it on again.<br />
2. Press and hold CLEAR.<br />
3. While holding down CLEAR, insert a pointed object,<br />
such as a straightened paper clip, into the reset<br />
opening on the side of the scanner and gently press<br />
then release the reset button inside the opening.<br />
4. When the display reappears, release CLEAR.<br />
Note: You must release RESET before releasing CLEAR,<br />
otherwise the memory might not clear.<br />
<strong>50</strong>
20-310.fm Page 51 Wednesday, August 4, 1999 10:49 AM<br />
CARE AND MAINTENANCE<br />
To enjoy your <strong>Radio</strong><strong>Shack</strong> <strong>PRO</strong>-<strong>70</strong> <strong>50</strong>-<strong>Channel</strong> <strong>Portable</strong><br />
<strong>Scanner</strong> for a long time:<br />
Keep the scanner dry. If it gets wet, wipe it dry<br />
immediately. Liquids can contain minerals that<br />
can corrode the electronic circuits.<br />
Use only fresh batteries of the recommended<br />
size and type. Always remove old and weak<br />
batteries. They can leak chemicals that destroy<br />
electronic circuits.<br />
Handle the scanner gently and carefully. Dropping<br />
it can damage circuit boards and cases<br />
and can cause the scanner to work improperly.<br />
Use and store the scanner only in normal temperature<br />
environments. Temperature extremes<br />
can shorten the life of electronic<br />
devices, damage batteries, and distort or melt<br />
plastic parts.<br />
Keep the scanner away from dust and dirt,<br />
which can cause premature wear of parts.<br />
Wipe the scanner with a damp cloth occasionally<br />
to keep it looking new. Do not use harsh<br />
chemicals, cleaning solvents, or strong detergents<br />
to clean the scanner.<br />
Modifying or tampering with the scanner’s internal components<br />
can cause a malfunction and might invalidate its<br />
warranty and void your FCC authorization to operate it. If<br />
your scanner is not operating as it should, take it to your<br />
local <strong>Radio</strong><strong>Shack</strong> store for assistance.<br />
51
20-310.fm Page 52 Wednesday, August 4, 1999 10:49 AM<br />
SPECIFICATIONS<br />
Frequency Coverage:<br />
Ham ............................... 29–30 MHz (5.0 kHz steps)<br />
VHF Lo .......................... 30–<strong>50</strong> MHz (5.0 kHz steps)<br />
Ham ............................... <strong>50</strong>–54 MHz (5.0 kHz steps)<br />
Government............... 137–144 MHz (5.0 kHz steps)<br />
Ham ........................... 144–148 MHz (5.0 kHz steps)<br />
VHF Hi....................... 148–174 MHz (5.0 kHz steps)<br />
Ham/Government .... 380–4<strong>50</strong> MHz (12.5 kHz steps)<br />
UHF Lo .................... 4<strong>50</strong>–4<strong>70</strong> MHz (12.5 kHz steps)<br />
UHF Hi (T) ............... 4<strong>70</strong>–512 MHz (12.5 kHz steps)<br />
<strong>Channel</strong>s of Operation:................................ <strong>50</strong> <strong>Channel</strong>s<br />
and 1 Monitor Memory<br />
Sensitivity (20 dB S/N):<br />
29–54 MHz ......................................................1.0 μV<br />
137–174 MHz ..................................................1.0 μV<br />
380–512 MHz ..................................................1.0 μV<br />
Selectivity:<br />
±10 kHz ........................................................... –6 dB<br />
±18 kHz ......................................................... –<strong>50</strong> dB<br />
Spurious Rejection:<br />
29–54 MHz .................................... <strong>50</strong> dB at 40 MHz<br />
137–174 MHz .............................. <strong>50</strong> dB at 154 MHz<br />
Scanning Rate ........................Up to 25 channels/second<br />
Search Rate ................................. Up to <strong>50</strong> steps/second<br />
Delay Time ...................................................... 2 seconds<br />
Intermediate Frequencies (IF):<br />
1st.............................................................. 10.7 MHz<br />
2nd............................................................... 455 kHz<br />
IF Rejection: 10.7 MHz ....................... <strong>70</strong> dB at 154 MHz<br />
Squelch Sensitivity:<br />
Threshold....................................... Less than 1.0 μV<br />
Tight................................................... (S+N)/N 25 dB<br />
Antenna Impedance........................................... <strong>50</strong> Ohms<br />
52
20-310.fm Page 53 Wednesday, August 4, 1999 10:49 AM<br />
Audio Output Power (10%THD)........... 200 mW Nominal<br />
Built-in Speaker 13 /8 Inch (36 mm) 8 ohm, Dynamic Type<br />
Power Requirements ..................+9 V DC, 6 AA batteries<br />
AC Adapter (Cat. No. 273-1665)<br />
DC Adapter (Cat. No. 2<strong>70</strong>-1560)<br />
Rechargeable Battery Pack (Cat. No. 23-288)<br />
Current Drain (Squelched)......................................<strong>50</strong> mA<br />
Dimensions (HWD) ................... 63 /4 × 27 /16 × 19 /16 Inches<br />
(171 × 62 × 40 mm)<br />
Weight..................................................................... 8.1 oz<br />
(229 g)<br />
Supplied Accessory ............................................ Antenna<br />
Specifications are typical; individual units might vary.<br />
Specifications are subject to change and improvement<br />
without notice.<br />
53
20-310.fm Page 54 Wednesday, August 4, 1999 10:49 AM<br />
NOTES<br />
54
20-310.fm Page 55 Wednesday, August 4, 1999 10:49 AM<br />
55
20-310.fm Page 56 Wednesday, August 4, 1999 10:49 AM<br />
Limited One-Year Warranty<br />
This product is warranted by <strong>Radio</strong><strong>Shack</strong> against manufacturing defects in<br />
material and workmanship under normal use for one (1) year from the date of<br />
purchase from <strong>Radio</strong><strong>Shack</strong> company-owned stores and authorized <strong>Radio</strong><strong>Shack</strong><br />
franchisees and dealers. EXCEPT AS <strong>PRO</strong>VIDED HEREIN, <strong>Radio</strong><strong>Shack</strong><br />
MAKES NO EXPRESS WARRANTIES AND ANY IMPLIED<br />
WARRANTIES, INCLUDING THOSE OF MERCHANTABILITY AND FIT-<br />
NESS FOR A PARTICULAR PURPOSE, ARE LIMITED IN DURATION TO<br />
THE DURATION OF THE WRITTEN LIMITED WARRANTIES CONTAINED<br />
HEREIN. EXCEPT AS <strong>PRO</strong>VIDED HEREIN, <strong>Radio</strong><strong>Shack</strong> SHALL HAVE NO<br />
LIABILITY OR RESPONSIBILITY TO CUSTOMER OR ANY OTHER PER-<br />
SON OR ENTITY WITH RESPECT TO ANY LIABILITY, LOSS OR DAMAGE<br />
CAUSED DIRECTLY OR INDIRECTLY BY USE OR PERFORMANCE OF<br />
THE <strong>PRO</strong>DUCT OR ARISING OUT OF ANY BREACH OF THIS WARRANTY,<br />
INCLUDING, BUT NOT LIMITED TO, ANY DAMAGES RESULTING FROM<br />
INCONVENIENCE, LOSS OF TIME, DATA, <strong>PRO</strong>PERTY, REVENUE, OR<br />
<strong>PRO</strong>FIT OR ANY INDIRECT, SPECIAL, INCIDENTAL, OR CONSEQUEN-<br />
TIAL DAMAGES, EVEN IF <strong>Radio</strong><strong>Shack</strong> HAS BEEN ADVISED OF THE POS-<br />
SIBILITY OF SUCH DAMAGES.<br />
Some states do not allow the limitations on how long an implied warranty lasts<br />
or the exclusion of incidental or consequential damages, so the above limitations<br />
or exclusions may not apply to you.<br />
In the event of a product defect during the warranty period, take the product<br />
and the <strong>Radio</strong><strong>Shack</strong> sales receipt as proof of purchase date to any <strong>Radio</strong><strong>Shack</strong><br />
store. <strong>Radio</strong><strong>Shack</strong> will, at its option, unless otherwise provided by<br />
law: (a) correct the defect by product repair without charge for parts and labor;<br />
(b) replace the product with one of the same or similar design; or (c) refund<br />
the purchase price. All replaced parts and products, and products on which a<br />
refund is made, become the property of <strong>Radio</strong><strong>Shack</strong>. New or reconditioned<br />
parts and products may be used in the performance of warranty service. Repaired<br />
or replaced parts and products are warranted for the remainder of the<br />
original warranty period. You will be charged for repair or replacement of the<br />
product made after the expiration of the warranty period.<br />
This warranty does not cover: (a) damage or failure caused by or attributable<br />
to acts of God, abuse, accident, misuse, improper or abnormal usage, failure<br />
to follow instructions, improper installation or maintenance, alteration, lightning<br />
or other incidence of excess voltage or current; (b) any repairs other than<br />
those provided by a <strong>Radio</strong><strong>Shack</strong> Authorized Service Facility; (c) consumables<br />
such as fuses or batteries; (d) cosmetic damage; (e) transportation, shipping<br />
or insurance costs; or (f) costs of product removal, installation, set-up service<br />
adjustment or reinstallation.<br />
This warranty gives you specific legal rights, and you may also have other<br />
rights which vary from state to state.<br />
<strong>Radio</strong><strong>Shack</strong> Customer Relations, Dept. W,<br />
100 Throckmorton St., Suite 600, Fort Worth, TX 76102<br />
We Service What We Sell 3/97<br />
<strong>Radio</strong><strong>Shack</strong><br />
A Division of Tandy Corporation<br />
Fort Worth, Texas 76102<br />
GE-95D-1652<br />
5A7 Printed in Hong Kong


