SUNNY BEAM with Bluetooth® Wireless Technology ... - AltE Store
SUNNY BEAM with Bluetooth® Wireless Technology ... - AltE Store
SUNNY BEAM with Bluetooth® Wireless Technology ... - AltE Store

Create successful ePaper yourself
Turn your PDF publications into a flip-book with our unique Google optimized e-Paper software.
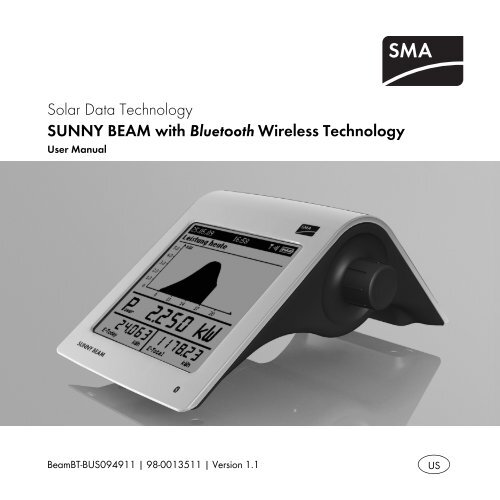
Solar Data <strong>Technology</strong><br />
<strong>SUNNY</strong> <strong>BEAM</strong> <strong>with</strong> Bluetooth <strong>Wireless</strong> <strong>Technology</strong><br />
User Manual<br />
BeamBT-BUS094911 | 98-0013511 | Version 1.1 US
SMA America, LLC Legal Restrictions<br />
Copyright © 2010 SMA America, LLC. All rights reserved.<br />
No part of this document may be reproduced, stored in a retrieval system, or transmitted, in any form<br />
or by any means, electronic, mechanical, photographic, magnetic or otherwise, <strong>with</strong>out the prior<br />
written permission of SMA America, LLC.<br />
SMA America, LLC makes no representations, express or implied, <strong>with</strong> respect to this documentation<br />
or any of the equipment and/or software it may describe, including (<strong>with</strong> no limitation) any implied<br />
warranties of utility, merchantability, or fitness for any particular purpose. All such warranties are<br />
expressly disclaimed. Neither SMA America, LLC nor its distributors or dealers shall be liable for any<br />
indirect, incidental, or consequential damages under any circumstances.<br />
(The exclusion of implied warranties may not apply in all cases under some statutes, and thus the<br />
above exclusion may not apply.)<br />
Specifications are subject to change <strong>with</strong>out notice. Every attempt has been made to make this<br />
document complete, accurate and up-to-date. Readers are cautioned, however, that<br />
SMA America, LLC reserves the right to make changes <strong>with</strong>out notice and shall not be responsible for<br />
any damages, including indirect, incidental or consequential damages, caused by reliance on the<br />
material presented, including, but not limited to, omissions, typographical errors, arithmetical errors<br />
or listing errors in the content material.<br />
All trademarks are recognized even if these are not marked separately. Missing designations do not<br />
mean that a product or brand is not a registered trademark.<br />
The Bluetooth ® word mark and logos are registered trademarks owned by Bluetooth SIG, Inc. and<br />
any use of such marks by SMA America, LLC is under license.<br />
SMA America, LLC<br />
3801 N. Havana Street<br />
Denver, CO 80239 U.S.A.<br />
User Manual BeamBT-BEN094911 3
Important Safety Instructions SMA America, LLC<br />
IMPORTANT SAFETY INSTRUCTIONS<br />
SAVE THESE INSTRUCTIONS<br />
This manual contains important instructions for SMA Bluetooth ® Piggy-Back system monitoring, that<br />
must be followed during installation and maintenance of the system monitoring.<br />
The SMA Bluetooth ® Piggy-Back is designed and tested according to international safety<br />
requirements, but as <strong>with</strong> all electrical and electronic equipment, certain precautions must be<br />
observed when installing and/or operating the SMA Bluetooth ® Piggy-Back. To reduce the risk of<br />
personal injury and to ensure the safe installation and operation of the SMA Bluetooth ® Piggy-Back,<br />
you must carefully read and follow all instructions, cautions and warnings in this installation guide.<br />
Warnings in this document<br />
A warning describes a hazard to equipment or personnel. It calls attention to a procedure or practice,<br />
which, if not correctly performed or adhered to, could result in damage to or destruction of part or all<br />
of the SMA equipment and/or other equipment connected to the SMA equipment or personal injury.<br />
DANGER<br />
DANGER indicates a hazardous situation which, if not avoided, will result in death or<br />
serious injury.<br />
WARNING<br />
WARNING indicates a hazardous situation which, if not avoided, could result in death or<br />
serious injury.<br />
4 BeamBT-BEN094911 User Manual
SMA America, LLC Important Safety Instructions<br />
CAUTION<br />
CAUTION indicates a hazardous situation which, if not avoided, could result in minor or<br />
moderate injury.<br />
NOTICE<br />
NOTICE is used to address practices not related to personal injury.<br />
Other Symbols in this document<br />
In addition to the safety and hazard symbols described on the previous pages, the following symbol<br />
is also used in this installation guide:<br />
Information<br />
This symbol accompanies notes that call attention to supplementary information that you<br />
must know and use to ensure optimal operation of the system.<br />
User Manual BeamBT-BEN094911 5
General Warnings SMA America, LLC<br />
General Warnings<br />
General Warnings<br />
Before installing or using the SMA Bluetooth ® Piggy-Back, read all of the instructions,<br />
cautions, and warnings on the SMA Bluetooth ® Piggy-Back in this installation guide.<br />
6 BeamBT-BEN094911 User Manual
SMA America, LLC Table of Contents<br />
Table of Contents<br />
1 Notes on this Manual. . . . . . . . . . . . . . . . . . . . . . . . . . . . . 12<br />
1.1 Validity . . . . . . . . . . . . . . . . . . . . . . . . . . . . . . . . . . . . . . . . . . . 12<br />
1.2 Target Group . . . . . . . . . . . . . . . . . . . . . . . . . . . . . . . . . . . . . . 12<br />
1.3 Additional Information . . . . . . . . . . . . . . . . . . . . . . . . . . . . . . . 12<br />
1.4 Nomenclature. . . . . . . . . . . . . . . . . . . . . . . . . . . . . . . . . . . . . . 12<br />
2 Sunny Beam <strong>with</strong> Bluetooth . . . . . . . . . . . . . . . . . . . . . . . 13<br />
2.1 Field of Application. . . . . . . . . . . . . . . . . . . . . . . . . . . . . . . . . . 13<br />
2.2 Functions . . . . . . . . . . . . . . . . . . . . . . . . . . . . . . . . . . . . . . . . . . 13<br />
3 Safety . . . . . . . . . . . . . . . . . . . . . . . . . . . . . . . . . . . . . . . . . 15<br />
3.1 Appropriate Usage. . . . . . . . . . . . . . . . . . . . . . . . . . . . . . . . . . 15<br />
3.1.1 Supported Products. . . . . . . . . . . . . . . . . . . . . . . . . . . . . . . . . . . . . . . . . . . . 15<br />
3.2 Safety Instructions . . . . . . . . . . . . . . . . . . . . . . . . . . . . . . . . . . . 16<br />
4 Unpacking. . . . . . . . . . . . . . . . . . . . . . . . . . . . . . . . . . . . . . 17<br />
4.1 Packing List . . . . . . . . . . . . . . . . . . . . . . . . . . . . . . . . . . . . . . . . 17<br />
4.2 Identifying the Sunny Beam . . . . . . . . . . . . . . . . . . . . . . . . . . . 17<br />
User Manual BeamBT-BEN094911 7
Table of Contents SMA America, LLC<br />
5 Installation Location. . . . . . . . . . . . . . . . . . . . . . . . . . . . . . 18<br />
5.1 Installation Location Requirements . . . . . . . . . . . . . . . . . . . . . . 18<br />
5.2 Installing the Sunny Beam. . . . . . . . . . . . . . . . . . . . . . . . . . . . . 18<br />
6 Commissioning . . . . . . . . . . . . . . . . . . . . . . . . . . . . . . . . . . 19<br />
6.1 Notes . . . . . . . . . . . . . . . . . . . . . . . . . . . . . . . . . . . . . . . . . . . . 19<br />
6.2 Sunny Beam Controls . . . . . . . . . . . . . . . . . . . . . . . . . . . . . . . . 20<br />
6.3 Determining free NetID. . . . . . . . . . . . . . . . . . . . . . . . . . . . . . . 21<br />
6.4 Commissioning the Sunny Beam. . . . . . . . . . . . . . . . . . . . . . . . 22<br />
7 Operation . . . . . . . . . . . . . . . . . . . . . . . . . . . . . . . . . . . . . . 35<br />
7.1 Display . . . . . . . . . . . . . . . . . . . . . . . . . . . . . . . . . . . . . . . . . . . 35<br />
7.1.1 Switching on the Display/Calling up the Main Menu . . . . . . . . . . . . . . . . . 36<br />
7.2 Menu . . . . . . . . . . . . . . . . . . . . . . . . . . . . . . . . . . . . . . . . . . . . 37<br />
7.3 Chart View . . . . . . . . . . . . . . . . . . . . . . . . . . . . . . . . . . . . . . . . 38<br />
7.3.1 Calling up the Chart "Complete PV System" . . . . . . . . . . . . . . . . . . . . . . . . . 39<br />
7.3.2 Calling up the Chart "No. of Inverters" . . . . . . . . . . . . . . . . . . . . . . . . . . . . . 41<br />
7.4 Power and Energy Display . . . . . . . . . . . . . . . . . . . . . . . . . . . . 43<br />
7.5 Symbols in the Chart View . . . . . . . . . . . . . . . . . . . . . . . . . . . . 44<br />
7.5.1 Symbol for the Connection Quality. . . . . . . . . . . . . . . . . . . . . . . . . . . . . . . . 45<br />
8 BeamBT-BEN094911 User Manual
SMA America, LLC Table of Contents<br />
7.5.2 Battery Symbol/Charging the Batteries . . . . . . . . . . . . . . . . . . . . . . . . . . . . 46<br />
7.5.3 Info, Error, and Warning Symbol . . . . . . . . . . . . . . . . . . . . . . . . . . . . . . . . . 47<br />
7.6 Calling up Events . . . . . . . . . . . . . . . . . . . . . . . . . . . . . . . . . . . 48<br />
7.7 Sunny Beam Alarms . . . . . . . . . . . . . . . . . . . . . . . . . . . . . . . . . 50<br />
7.7.1 Enable / Disable Alarm for Errors. . . . . . . . . . . . . . . . . . . . . . . . . . . . . . . . . 50<br />
7.8 Display Settings. . . . . . . . . . . . . . . . . . . . . . . . . . . . . . . . . . . . . 51<br />
7.8.1 Changing the Contrast . . . . . . . . . . . . . . . . . . . . . . . . . . . . . . . . . . . . . . . . . 51<br />
7.8.2 Changing the Display Switch-Off . . . . . . . . . . . . . . . . . . . . . . . . . . . . . . . . . 51<br />
7.8.3 Setting the Coefficients of Balance . . . . . . . . . . . . . . . . . . . . . . . . . . . . . . . . 52<br />
7.9 Data Query. . . . . . . . . . . . . . . . . . . . . . . . . . . . . . . . . . . . . . . . 53<br />
7.9.1 Changing the Data Query Frequency. . . . . . . . . . . . . . . . . . . . . . . . . . . . . . 53<br />
7.9.2 Deactivating Overnight Shutdown . . . . . . . . . . . . . . . . . . . . . . . . . . . . . . . . 54<br />
7.10 Service Functions . . . . . . . . . . . . . . . . . . . . . . . . . . . . . . . . . . . 55<br />
7.10.1 Checking the Connection Quality . . . . . . . . . . . . . . . . . . . . . . . . . . . . . . . . . 55<br />
7.10.2 Accessing Device Information . . . . . . . . . . . . . . . . . . . . . . . . . . . . . . . . . . . . 57<br />
7.10.3 Performing an Update. . . . . . . . . . . . . . . . . . . . . . . . . . . . . . . . . . . . . . . . . . 58<br />
7.10.4 Resetting the Sunny Beam. . . . . . . . . . . . . . . . . . . . . . . . . . . . . . . . . . . . . . . 60<br />
7.11 System Settings . . . . . . . . . . . . . . . . . . . . . . . . . . . . . . . . . . . . . 61<br />
7.11.1 Calling up the List of Connected Inverters. . . . . . . . . . . . . . . . . . . . . . . . . . . 61<br />
7.11.2 Entering the System Password. . . . . . . . . . . . . . . . . . . . . . . . . . . . . . . . . . . . 62<br />
User Manual BeamBT-BEN094911 9
Table of Contents SMA America, LLC<br />
7.11.3 Repeating the System Search . . . . . . . . . . . . . . . . . . . . . . . . . . . . . . . . . . . . 63<br />
7.11.4 Changing the Device Name . . . . . . . . . . . . . . . . . . . . . . . . . . . . . . . . . . . . . 64<br />
7.11.5 Adjusting the Energy Meter when Switching Devices . . . . . . . . . . . . . . . . . . 65<br />
7.11.6 Setting the Maximum System Power in kWp . . . . . . . . . . . . . . . . . . . . . . . . 66<br />
7.12 Country Settings . . . . . . . . . . . . . . . . . . . . . . . . . . . . . . . . . . . . 68<br />
7.12.1 Changing Languages . . . . . . . . . . . . . . . . . . . . . . . . . . . . . . . . . . . . . . . . . . 68<br />
7.12.2 Changing the Currency. . . . . . . . . . . . . . . . . . . . . . . . . . . . . . . . . . . . . . . . . 69<br />
7.12.3 Changing the Unit of CO2 Avoided . . . . . . . . . . . . . . . . . . . . . . . . . . . . . . . 69<br />
7.12.4 Changing the Decimal Separator . . . . . . . . . . . . . . . . . . . . . . . . . . . . . . . . . 69<br />
7.13 Time Settings . . . . . . . . . . . . . . . . . . . . . . . . . . . . . . . . . . . . . . . 70<br />
7.13.1 Changing the Date . . . . . . . . . . . . . . . . . . . . . . . . . . . . . . . . . . . . . . . . . . . . 70<br />
7.13.2 Changing the Time . . . . . . . . . . . . . . . . . . . . . . . . . . . . . . . . . . . . . . . . . . . . 70<br />
7.13.3 Changing the Date Format . . . . . . . . . . . . . . . . . . . . . . . . . . . . . . . . . . . . . . 71<br />
7.13.4 Changing the Timestamp Format. . . . . . . . . . . . . . . . . . . . . . . . . . . . . . . . . . 71<br />
7.13.5 Activating/Deactivating Daylight Saving Time . . . . . . . . . . . . . . . . . . . . . . . 71<br />
7.13.6 Changing the Time Zone. . . . . . . . . . . . . . . . . . . . . . . . . . . . . . . . . . . . . . . . 71<br />
8 PV System Data . . . . . . . . . . . . . . . . . . . . . . . . . . . . . . . . . 72<br />
8.1 System Requirements . . . . . . . . . . . . . . . . . . . . . . . . . . . . . . . . 73<br />
8.2 Copying PV System Data to the Computer . . . . . . . . . . . . . . . . 73<br />
8.2.1 CSV File. . . . . . . . . . . . . . . . . . . . . . . . . . . . . . . . . . . . . . . . . . . . . . . . . . . . . 74<br />
10 BeamBT-BEN094911 User Manual
SMA America, LLC Table of Contents<br />
9 Menu Overview . . . . . . . . . . . . . . . . . . . . . . . . . . . . . . . . . 75<br />
10 Maintenance and Care . . . . . . . . . . . . . . . . . . . . . . . . . . . 76<br />
10.1 Maintenance. . . . . . . . . . . . . . . . . . . . . . . . . . . . . . . . . . . . . . . 76<br />
10.1.1 Replacing the Batteries . . . . . . . . . . . . . . . . . . . . . . . . . . . . . . . . . . . . . . . . . 76<br />
10.2 Care . . . . . . . . . . . . . . . . . . . . . . . . . . . . . . . . . . . . . . . . . . . . . 78<br />
11 Decommissioning . . . . . . . . . . . . . . . . . . . . . . . . . . . . . . . . 79<br />
11.1 Decommissioning the Sunny Beam . . . . . . . . . . . . . . . . . . . . . . 79<br />
11.2 Disposing of the Sunny Beam . . . . . . . . . . . . . . . . . . . . . . . . . . 79<br />
11.3 Disposing of the Batteries . . . . . . . . . . . . . . . . . . . . . . . . . . . . . 79<br />
12 Troubleshooting . . . . . . . . . . . . . . . . . . . . . . . . . . . . . . . . . 80<br />
13 Technical Data . . . . . . . . . . . . . . . . . . . . . . . . . . . . . . . . . . 87<br />
13.1 FCC Compliance Information . . . . . . . . . . . . . . . . . . . . . . . . . . 89<br />
14 Accessories . . . . . . . . . . . . . . . . . . . . . . . . . . . . . . . . . . . . . 91<br />
14.1 USB Plug-in Power Supply . . . . . . . . . . . . . . . . . . . . . . . . . . . . 91<br />
14.2 Replacement Batteries. . . . . . . . . . . . . . . . . . . . . . . . . . . . . . . . 91<br />
15 Contact . . . . . . . . . . . . . . . . . . . . . . . . . . . . . . . . . . . . . . . . 92<br />
User Manual BeamBT-BEN094911 11
Notes on this Manual SMA America, LLC<br />
1 Notes on this Manual<br />
1.1 Validity<br />
This manual is valid for Sunny Beams <strong>with</strong> firmware version 1.0 and later.<br />
1.2 Target Group<br />
This manual is for qualified personnel and for the operator. Qualified personnel have received<br />
training and have demonstrated skills and knowledge in the operation of this device. Qualified<br />
personnel are trained to deal <strong>with</strong> the dangers and hazards involved in installing electric devices. The<br />
operator has been adequately supervised by qualified personnel to ensure a save use of this device.<br />
1.3 Additional Information<br />
You can find further information on the following subjects in the download section of<br />
www.SMA-America.com.<br />
• SMA Bluetooth <strong>Wireless</strong> <strong>Technology</strong><br />
• CO2 factor - What the CO2 factor is and why it is different for every region.<br />
1.4 Nomenclature<br />
In this document SMA America Production, LLC is referred to in the following as SMA.<br />
The following terminology is used in this document.<br />
Type Example of terminology<br />
Main menu item Select "Settings".<br />
Submenu item Select "Settings > Date".<br />
12 BeamBT-BEN094911 User Manual
SMA America, LLC Sunny Beam <strong>with</strong> Bluetooth<br />
2 Sunny Beam <strong>with</strong> Bluetooth<br />
2.1 Field of Application<br />
Sunny Beam is a communication device which requests, displays<br />
and saves data from up to 12 inverters in a Bluetooth PV system<br />
from SMA America Production, LLC. Communication <strong>with</strong> the<br />
inverters takes place via Bluetooth.<br />
2.2 Functions<br />
The most important Sunny Beam functions are:<br />
• Processing data from up to 12 inverters.<br />
• Connection to the inverters via Bluetooth Class 1.<br />
• Range of up to 328 ft (100 m) in the open <strong>with</strong> direct visual contact. In closed rooms the range<br />
depends on various factors.<br />
• Display of errors and warnings on the integrated display.<br />
• Acoustic alarms to indicate errors in the PV system and low battery states.<br />
• Connection to the computer via the USB connection cable (max. 9 ft (3 m) cable length).<br />
• Saving system data in CSB files for at least 90 days (see chapter 8 "PV System Data"<br />
(page 72)).<br />
The storage volume depends on the number of inverters. Once the memory is full, the Sunny<br />
Beam will begin to overwrite old data.<br />
User Manual BeamBT-BEN094911 13
Sunny Beam <strong>with</strong> Bluetooth SMA America, LLC<br />
• Graphical display of the following data for the whole system and for each inverter on the<br />
integrated display:<br />
– Performance today/Performance yesterday.<br />
– Energy for the last 31 days/Energy for the last 12 months.<br />
– Specific annual yield.<br />
– Revenue for current day / Revenue for entire runtime of the PV system.<br />
– CO2 avoided for current day/CO2 avoided for entire runtime of the system.<br />
• Display of the following values for the entire system and for individual inverters:<br />
– Present AC power.<br />
– Daily yield (E-Today).<br />
– Energy yield yesterday (E-Yday) when calling up the chart "Power yesterday".<br />
– Total energy yield (E-Total).<br />
14 BeamBT-BEN094911 User Manual
SMA America, LLC Safety<br />
3 Safety<br />
3.1 Appropriate Usage<br />
Sunny Beam is only suitable for indoor use. The ambient temperature must be between +32 °F and<br />
+104 °F (0 °C … +40 °C).<br />
The Sunny Beam data cannot be used for billing purposes.<br />
Data collected by Sunny Beam regarding the power generated by your PV system may<br />
deviate from the electricity meter.<br />
3.1.1 Supported Products<br />
Sunny Beam is only suitable for use <strong>with</strong> original accessories from SMA or accessories recommended<br />
by SMA. The power supply for Sunny Beam may only be provided by rechargeable nickel-metal<br />
hydride batteries (NiMH), type Mignon (AA) <strong>with</strong> low self-discharge, e.g. Eneloop batteries.<br />
The Sunny Beam supports the following products by SMA:<br />
• SMA inverters <strong>with</strong> integrated Bluetooth:<br />
– SB 3000TL-20 / SB 4000TL-20 / SB 5000TL-20: from software version 2.06<br />
– SB 2000HF / SB 2500HF / SB 3000HF<br />
– STP 10000TL-10 / STP 12000TL-10 / STP 15000TL-10 / STP 17000TL-10<br />
• SMA inverters <strong>with</strong> SMA Bluetooth Piggy-Back upgrade. A list of supported inverters can be<br />
found in the SMA Bluetooth Piggy-Back installation manual.<br />
• SMA Bluetooth Repeater<br />
User Manual BeamBT-BEN094911 15
Safety SMA America, LLC<br />
3.2 Safety Instructions<br />
Please follow all operating and safety instructions in this manual. Failure to follow these instructions<br />
may result in damage to the device and risk of personal injuries.<br />
NOTICE<br />
Damage to Sunny Beam caused by leaking batteries.<br />
Batteries of the wrong type may leak into the Sunny Beam and damage the device.<br />
• Do not use non-rechargeable batteries under any circumstances.<br />
• You must only use rechargeable nickel-metal hydride batteries (NiMH), type Mignon<br />
(AA) <strong>with</strong> low self-discharge, e.g. Eneloop batteries (see section 14 "Accessories"<br />
(page 91)).<br />
Safety of your PV system<br />
It is absolutely necessary that you change the preset system passwords for both user<br />
groups (installer and user). Otherwise your PV system will not be protected from<br />
unauthorized access. You can only change the passwords by using a computer <strong>with</strong><br />
Bluetooth and the Sunny Explorer software. You can obtain the Sunny Explorer for free in<br />
the download section of www.SMA-America.com.<br />
16 BeamBT-BEN094911 User Manual
SMA America, LLC Unpacking<br />
4 Unpacking<br />
4.1 Packing List<br />
Position Number Name<br />
A 1 Sunny Beam <strong>with</strong> Bluetooth <strong>Wireless</strong> <strong>Technology</strong><br />
B 1 USB connection cable for connection to the computer<br />
C 2 Nickel-metal hydride batteries (NiMH), type Mignon (AA) <strong>with</strong><br />
low self-discharge<br />
D 1 User Manual<br />
4.2 Identifying the Sunny Beam<br />
Type Plate<br />
You can identify the Sunny Beam by the type plate. The type plate is located on the lower side of the<br />
Sunny Beam.<br />
Firmware Version<br />
You can check the firmware version of the Sunny Beam in the Menu "Service > Diagnostics > Device<br />
information > Sunny Beam".<br />
User Manual BeamBT-BEN094911 17
Installation Location SMA America, LLC<br />
5 Installation Location<br />
5.1 Installation Location Requirements<br />
• Sunny Beam is only suitable for indoor use.<br />
• The ambient temperature must be between +32 °F and +104 °F (0 °C … +40 °C).<br />
• The indoor location must have access to sunlight in order for the integrated solar cells of the<br />
Sunny Beam to be able to recharge themselves.<br />
• Protect the Sunny Beam from dust, wet conditions and caustic substances.<br />
• The maximum total length of the USB connection cable is 9 ft (3 m).<br />
• Certain ambient conditions can reduce the connection quality and data transmission speed<br />
between Bluetooth devices.<br />
– Install the Bluetooth device at a distance of at least 3 ft (1 m) from the following devices:<br />
– WLAN devices<br />
– Microwave ovens<br />
– Other devices that use the 2.4 GHz frequency band.<br />
5.2 Installing the Sunny Beam<br />
As long as the requirements for the location are observed (see section 5.1), the Sunny Beam can be<br />
installed at any indoor location. Whether the installation location is suitable for a good connection<br />
quality can be found out after during commissioning of the Sunny Beam.<br />
18 BeamBT-BEN094911 User Manual
SMA America, LLC Commissioning<br />
6 Commissioning<br />
6.1 Notes<br />
A Bluetooth PV system must only be commissioned <strong>with</strong> 1 master (e.g. Sunny Beam <strong>with</strong><br />
Bluetooth, Sunny Explorer).<br />
Always commission a Bluetooth PV system <strong>with</strong> 1 master only. As soon as the Bluetooth<br />
network is up and running, you can introduce further masters into the Bluetooth network.<br />
Before commissioning the PV system, a free NetID needs to be detected.<br />
Before you can start operating your Bluetooth PV system, you need to detect a free NetID<br />
using the Sunny Beam. For more information see section 6.3 "Determining free NetID"<br />
(page 21).<br />
Alternatively, you can also determine a free NetID using a computer <strong>with</strong> Bluetooth and<br />
the Sunny Explorer software by SMA. For more information on how to do this, refer to the<br />
Sunny Explorer help. You can obtain the Sunny Explorer for free in the download section<br />
of www.SMA-America.com.<br />
User Manual BeamBT-BEN094911 19
Commissioning SMA America, LLC<br />
6.2 Sunny Beam Controls<br />
The Sunny Beam is operated using the push button that can<br />
be turned and pressed.<br />
Moving the selection frame<br />
The selection frame (see fig. on the right) indicates which menu<br />
item is currently selected. By turning the push button, you can<br />
move the selection frame to the next menu item or the previous<br />
menu item.<br />
Selecting a menu item, setting values<br />
When the selection frame is placed over a menu item, you may open the menu item by pressing the<br />
push button. When you have opened a menu item <strong>with</strong> a colon, you can set the values by turning the<br />
button.<br />
Selecting a button<br />
When the selection frame is placed over a button (see example in the fig. on the<br />
right), the button will be shaded. The selection frame is not displayed.<br />
Navigating backwards in the menu<br />
You can use the arrow icon to go back in the menu. By selecting the house icon,<br />
you will go straight to the main menu.<br />
20 BeamBT-BEN094911 User Manual
SMA America, LLC Commissioning<br />
6.3 Determining free NetID<br />
PV systems <strong>with</strong> SMA Bluetooth operating in close proximity to one another are distinguished by their<br />
individual NetID. All devices in a PV system must have the same NetID. The NetID can be a number<br />
from 1 to 9 or a letter from A to F. NetID 1 is not possible for Sunny Beam.<br />
A free NetID is a NetID that is used by no other PV system <strong>with</strong> SMA Bluetooth in your vicinity.<br />
Commission the Sunny Beam as described in section 6.4. During the commissioning process, you will<br />
receive instructions on how to detect a free NetID.<br />
Overview of the NetIDs and their functions<br />
NetID 0 and NetID 1 have special functions. Sunny Beam cannot detect any devices <strong>with</strong> the<br />
NetID set to 1.<br />
NetID Function<br />
0 Bluetooth is switched off.<br />
1<br />
Bluetooth is switched on.<br />
(Status upon delivery) The inverter or the SMA Bluetooth Repeater can only connect to a<br />
maximum of 2 computers <strong>with</strong> Sunny Explorer from SMA. A connection to<br />
the Sunny Beam is not possible.<br />
2 to 9 and A to F Bluetooth is switched on.<br />
The inverter or the SMA Bluetooth Repeater can interlink <strong>with</strong> all SMA<br />
Bluetooth products <strong>with</strong> the same NetID.<br />
User Manual BeamBT-BEN094911 21
Commissioning SMA America, LLC<br />
6.4 Commissioning the Sunny Beam<br />
The first steps are described in detail, so that you can familiarize yourself <strong>with</strong> the controls of Sunny<br />
Beam. Sunny Beam will guide you through the commissioning procedure. If a fault occurs during<br />
commissioning, you can restart commissioning by pressing the push button for about 10 seconds, until<br />
the SMA logo is displayed.<br />
1. Insert the included batteries into the battery compartment of the Sunny Beam according to the<br />
indication.<br />
2. Press the button.<br />
☑ The start screen appears.<br />
3. Press the button.<br />
22 BeamBT-BEN094911 User Manual
SMA America, LLC Commissioning<br />
☑ The page for setting the language appears. This page<br />
appears automatically after 10 seconds.<br />
Setting the language and the country<br />
4. If you want to change the selected language and country, press the button.<br />
☑ The background of the selected language and country becomes dark.<br />
5. Turn the button until the required language and country are displayed.<br />
6. Press the button.<br />
☑ No items remain dark. The language and country have ben set.<br />
7. Move the selection frame to the button ">>" (next) by turning the button.<br />
☑The button becomes dark.<br />
User Manual BeamBT-BEN094911 23
Commissioning SMA America, LLC<br />
8. Press the button.<br />
☑ The page for setting the time zone appears.<br />
Setting the time zone<br />
Inverters <strong>with</strong> SMA Bluetooth Piggy-Back<br />
If you use inverters <strong>with</strong> SMA Bluetooth Piggy-Backs, you must set the correct values for<br />
date, daylight saving time, time and time zone in the Sunny Beam. If you change these<br />
values after commissioning, thereby resetting the time, the data for this time difference will<br />
be deleted from the inverter.<br />
Please note that the time may also be reset if you change the settings for time zone or<br />
daylight saving time.<br />
Confirming the time settings<br />
Due to the extensive time management in your PV system, the first attempt to change the<br />
time settings may not be successful, if, for example, time has already been set using Sunny<br />
Explorer. This can occur, for example if the time has already been changed <strong>with</strong> the Sunny<br />
Explorer. Check the time settings again after commissioning and correct them, if required.<br />
The time you set in the Sunny Beam is also applied by the inverters.<br />
9. To change the time zone, press the button.<br />
☑ The time zone will become dark.<br />
10. Turn the button until the required time zone is displayed.<br />
24 BeamBT-BEN094911 User Manual
SMA America, LLC Commissioning<br />
11. Press the button.<br />
☑ No items remain dark. The time zone has been set.<br />
12. Move the selection frame to the button ">>" by turning the button.<br />
☑ The button becomes dark.<br />
13. Press the button.<br />
☑ The page for setting the date and time appears.<br />
Setting the date<br />
14. Press the button.<br />
☑ The first adjustable digits of the date become dark.<br />
15. Turn the button until the required value is displayed.<br />
16. Press the button and repeat the steps until no digits are dark.<br />
To change incorrect values, press the push button until the value that you need to change<br />
becomes dark.<br />
☑ The date has been set.<br />
User Manual BeamBT-BEN094911 25
Commissioning SMA America, LLC<br />
Activating daylight saving time<br />
17. To activate daylight saving time, move the selection frame<br />
to "Daylight saving time:" by turning the button, then press<br />
the button to tick the box.<br />
☑ Daylight saving time is activated.<br />
Setting the time<br />
18. Move the selection frame to "Time" by turning the button.<br />
19. Press the button.<br />
☑ The first adjustable digits of the time become dark.<br />
20. Turn the button until the required value is displayed.<br />
21. Press the button and repeat the steps until no digits are dark.<br />
The time will start counting again as soon as no digits in the menu item "Time" are dark.<br />
☑ The time has been set.<br />
26 BeamBT-BEN094911 User Manual
SMA America, LLC Commissioning<br />
22. Move the selection frame to the button ">>" by turning the button.<br />
☑ The button becomes dark.<br />
23. Press the button.<br />
☑ The page for searching for systems appears.<br />
Determining free NetID<br />
In order to check which NetID is still available, you need to<br />
perform a search for systems <strong>with</strong> the Sunny Beam at the<br />
installation location of every single device of your Bluetooth PV<br />
system, as described in the following.<br />
24. Place the Sunny Beam near a device of your Bluetooth PV system.<br />
25. If the "Start detection" button has not become dark, turn<br />
the operating button.<br />
☑ The button becomes dark.<br />
User Manual BeamBT-BEN094911 27
Commissioning SMA America, LLC<br />
26. Press the button.<br />
☑ The system search will begin.<br />
☑ The Sunny Beam detects all Bluetooth PV systems<br />
<strong>with</strong>in range and lists the NetIDs of the detected<br />
Bluetooth PV systems. In the list, the NetIDs are sorted<br />
according to connection quality. The NetID <strong>with</strong> the<br />
best connection quality is placed at the top. The listed<br />
NetIDs are already in use on Bluetooth PV systems in<br />
the vicinity. You may not use these NetIDs.<br />
– If the Sunny Beam does not list any NetIDs, there are no Bluetooth PV systems <strong>with</strong>in the<br />
radio range of the Sunny Beam. All NetIDs are free.<br />
27. Note down the NetIDs already in use, or cross them out in the following illustration.<br />
28. Repeat the system search <strong>with</strong> the Sunny Beam for each device in the PV system and at the<br />
desired installation site of the Sunny Beam itself. Note down the NetIDs already in use, or cross<br />
them out in the following illustration.<br />
Sunny Beam cannot detect any devices <strong>with</strong> the NetID set to 1. Therefore, NetID 1 has already<br />
been crossed out in this illustration.<br />
29. Once the system search has been carried out for all the devices, choose a NetID for your PV<br />
systems which was not displayed by the Sunny Beam.<br />
☑ The free NetID is determined.<br />
28 BeamBT-BEN094911 User Manual
SMA America, LLC Commissioning<br />
30. Set the NetID on all inverters and available SMA Bluetooth Repeaters, as described in the<br />
respective manual.<br />
31. Commission all devices of your Bluetooth PV system as described in the respective manual.<br />
Search for your own Bluetooth PV system<br />
Do not start the Sunny Beam again until you have set the free NetID on the inverters and available<br />
SMA Bluetooth Repeaters and have commissioned these devices.<br />
32. Set up the Sunny Beam at its intended installation site.<br />
33. To search for your Bluetooth PV systems, choose "Repeat search".<br />
You can also start the system search via the menu "Settings > PV plant > New plant search".<br />
☑ The system search will begin.<br />
☑ The Sunny Beam detects all Bluetooth PV systems<br />
<strong>with</strong>in range and lists the NetIDs of the detected<br />
Bluetooth PV systems.<br />
– If the Sunny Beam does not list the NetID of your<br />
Bluetooth system, please refer to section If the Sunny<br />
Beam does not list the NetID of your Bluetooth PV<br />
system, please refer to section 12 "Troubleshooting"<br />
(page 80).<br />
User Manual BeamBT-BEN094911 29
Commissioning SMA America, LLC<br />
Setting the NetID for your own Bluetooth PV system<br />
During commissioning, the Sunny Beam will display the NetIDs of all PV systems <strong>with</strong> SMA Bluetooth<br />
which are <strong>with</strong>in its radio range. You then need to select the NetID of your Bluetooth PV system, as<br />
described in the following:<br />
34. Move the selection frame to the NetID of your own<br />
Bluetooth PV system by turning the button.<br />
35. Press the button.<br />
☑ The Sunny Beam will establish a connection to your<br />
Bluetooth PV system.<br />
☑ The Sunny Beam then lists the serial numbers of the<br />
detected inverters.<br />
– If not all inverters of your Bluetooth PV system are<br />
listed, or if inverters from other systems are listed,<br />
please refer to section 12 "Troubleshooting"<br />
(page 80).<br />
Selecting the required inverters (only applies when more than 12 inverters are<br />
available)<br />
The Sunny Beam can only manage a maximum of 12 inverters. If your Bluetooth PV system comprises<br />
more than 12 inverters, you must select the 12 inverters that you want the Sunny Beam to manage.<br />
36. Press the button to select the inverters that are to be managed by the Sunny Beam.<br />
selected<br />
not selected<br />
30 BeamBT-BEN094911 User Manual
SMA America, LLC Commissioning<br />
Establish connection to the devices<br />
37. Move the selection frame to "OK" by turning the button.<br />
☑ The field "OK" becomes dark.<br />
38. Press the button.<br />
☑ The Sunny Beam establishes the connection to the selected inverters and retrieves the data.<br />
Position Meaning<br />
A The start date and end date of the time period from which the Sunny Beam will<br />
retrieve data.<br />
B The date for which the Sunny Beam is currently retrieving data from the inverters.<br />
When you establish a connection <strong>with</strong> your PV system through the Sunny Beam for the first time, the<br />
Sunny Beam will retrieve all data for the last two days and the data for the current day. If you are redetecting<br />
your PV system, the Sunny Beam will retrieve data from the days that have been saved in<br />
the inverter since the last retrieval.<br />
User Manual BeamBT-BEN094911 31
Commissioning SMA America, LLC<br />
☑ The Sunny Beam then lists the serial numbers of the<br />
connected inverters.<br />
System password<br />
The system password protects your Bluetooth PV system from<br />
unauthorized access to your device. All devices in a Bluetooth<br />
PV system must have the same system password.<br />
The Sunny Beam uses the same system password for the "User"<br />
user group. The factory setting for the default Sunny Beam password is 0000.<br />
Inverters that are marked <strong>with</strong> a checkmark ( ) have the same system password as the Sunny Beam.<br />
Sunny Beam can only manage data for inverters which have the same system password. If the<br />
inverters have a different system password than the Sunny Beam, they are marked <strong>with</strong> a lock ( ).<br />
39. Depending on whether the inverters are marked <strong>with</strong> a checkmark or a lock, the according steps<br />
are to be taken.<br />
If Then<br />
All inverters are marked <strong>with</strong> a checkmark. The inverters all still have the factory default<br />
password.<br />
• Changing the system password as<br />
described in section "Changing the system<br />
password of the inverters <strong>with</strong> Sunny<br />
Explorer" (page 33).<br />
32 BeamBT-BEN094911 User Manual
SMA America, LLC Commissioning<br />
If Then<br />
All inverters are marked <strong>with</strong> a lock. The factory default password for the inverters has<br />
already been changed using Sunny Explorer.<br />
• Enter the system password of the PV system<br />
into the Sunny Beam, as described in<br />
section "Enter the new system password in<br />
the Sunny Beam" (page 34).<br />
Some inverters are marked <strong>with</strong> a lock,<br />
others have a checkmark.<br />
• See section 12 "Troubleshooting"<br />
(page 80).<br />
Changing the system password of the inverters <strong>with</strong> Sunny Explorer<br />
The Sunny Beam can only manage data for inverters whose system password matches that of the<br />
Sunny Beam. You can only change the password by using a computer <strong>with</strong> Bluetooth and the Sunny<br />
Explorer software. You can obtain the Sunny Explorer for free in the download section of<br />
www.SMA‑America.com.<br />
40. Change the system password for inverters using Sunny Explorer, as described in the Sunny<br />
Explorer Help. Notify the system owner of the new system password for users.<br />
User Manual BeamBT-BEN094911 33
Commissioning SMA America, LLC<br />
Enter the new system password in the Sunny Beam<br />
41. Move the selection frame to "System password" by turning the button.<br />
☑ The field "System password" becomes dark.<br />
42. Press the button.<br />
☑ The input page appears.<br />
43. Choose the button <strong>with</strong> the arrow and press the button<br />
again to delete the set system password.<br />
Arrow: deletes the character which was entered last.<br />
Cross: cancels the input action.<br />
Checkmark: saves the system password for the Sunny<br />
Beam.<br />
44. In order to enter the new system password, turn the button until the desired character is<br />
highlighted. Then press the button in order to select the character. Enter the new system<br />
password for users.<br />
45. Select the check mark to save the entered system password.<br />
☑ The list of connected inverters is displayed.<br />
46. Select "OK".<br />
☑ The first chart for the complete PV system, "Power today", is displayed. The Sunny Beam is now<br />
in operation.<br />
34 BeamBT-BEN094911 User Manual
SMA America, LLC Operation<br />
7 Operation<br />
7.1 Display<br />
The Sunny Beam display is divided into two sections. The top section contains the menu and chart<br />
view, the lower section contains the power and energy display.<br />
Position Explanation<br />
A Menu and chart view<br />
B Power and energy display<br />
When the Sunny Beam attempts to establish a connection to the inverters in order to retrieve<br />
the current data, the hourglass appears in the middle of the display.<br />
User Manual BeamBT-BEN094911 35
Operation SMA America, LLC<br />
7.1.1 Switching on the Display/Calling up the Main Menu<br />
You can switch on the display by pressing or turning the button. The Sunny Beam opens the first chart,<br />
"Power today", in the chart view for the complete system. The chart view is described in section<br />
7.3 "Chart View" (page 38).<br />
You can switch from the chart view to the main menu by pressing the button. After 3 minutes, the Sunny<br />
Beam will always switch from the menu to the chart "Power today" for the complete system<br />
automatically, unless the display switches off automatically first.<br />
Automatic switching off the display<br />
To save energy the Sunny Beam will automatically switch off its display after being idle for 1 minute.<br />
You can change this duration as described in section 7.8.2 "Changing the Display Switch-Off"<br />
(page 51).<br />
36 BeamBT-BEN094911 User Manual
SMA America, LLC Operation<br />
7.2 Menu<br />
Using the menu, you can change settings on the Sunny Beam and the call up information of your<br />
complete PV system and about the individual inverters.<br />
Position Explanation<br />
A Main menu<br />
B Submenu (example page)<br />
C Arrow icon: go backwards in the menu.<br />
D House icon: go straight to the main menu.<br />
An overview of the whole menu is depicted in section 9 "Menu Overview" (page 75).<br />
User Manual BeamBT-BEN094911 37
Operation SMA America, LLC<br />
7.3 Chart View<br />
The Sunny Beam can visualize the data for the complete system and for each individual inverter in<br />
charts. The following charts exist:<br />
• Power today<br />
When the chart "Power today" is open, the Sunny Beam will query the current power and total<br />
energy yield (E-Total) one time.<br />
• Power yesterday<br />
• Yield values of last 31 days<br />
• Yield values of last 12 months<br />
• Specific annual yield (only as chart view for complete PV system)<br />
• Revenue for current day<br />
• Revenue for entire runtime of the PV system<br />
• CO2 avoided for current day<br />
• CO2 avoided for entire runtime of the PV system<br />
SMA Bluetooth Piggy-Back<br />
If you are using the SMA Bluetooth piggy-back, the inverter may not have switched on in<br />
the morning, which is why the chart "Power today" may still display the data from<br />
yesterday.<br />
38 BeamBT-BEN094911 User Manual
SMA America, LLC Operation<br />
7.3.1 Calling up the Chart "Complete PV System"<br />
1. Select "Complete PV system" in the main menu.<br />
☑ The first chart, "Power today", is displayed.<br />
2. Turn the button to see the next chart for the complete system.<br />
☑ The chart view for the complete system is displayed.<br />
To return to the main menu, press the button.<br />
User Manual BeamBT-BEN094911 39
Operation SMA America, LLC<br />
Complete PV system<br />
When you call up the chart "Power yesterday", the power and energy display will switch from<br />
"E-Today" (PV system energy today) to "E-Yday" (PV system energy yesterday).<br />
40 BeamBT-BEN094911 User Manual
SMA America, LLC Operation<br />
7.3.2 Calling up the Chart "No. of Inverters"<br />
The Sunny Beam can visualize the data of each individual inverter graphically. How to call up the<br />
chart view for an inverter:<br />
1. Select "No. of inverters" in the main menu.<br />
☑ The list of inverters appears.<br />
2. Select an inverter.<br />
☑ The first chart, "Power today", is displayed.<br />
3. Turn the button to view the next inverter chart.<br />
☑ The chart view of an inverter is displayed.<br />
To return to the menu, press the button.<br />
User Manual BeamBT-BEN094911 41
Operation SMA America, LLC<br />
Individual inverter<br />
When you access the "Power yesterday" chart, the power and energy display will switch from<br />
"E-Today" (energy of the inverter today) to E-Yday (energy of the inverter yesterday).<br />
42 BeamBT-BEN094911 User Manual
SMA America, LLC Operation<br />
7.4 Power and Energy Display<br />
In the power and energy display you can view the energy<br />
and power values of your PV system. The power and<br />
energy display in shown in the chart view. The power<br />
value is blanked out after 60 seconds, since the data is no<br />
longer valid. The power and energy display is not shown<br />
when the menu is open.<br />
Position Meaning<br />
A Power and energy display<br />
Chart view of the complete PV<br />
system:<br />
Chart view for individual<br />
inverters:<br />
B E-Today PV system energy today Inverter energy today<br />
E-Yday PV system energy yesterday Inverter energy yesterday<br />
C E-total Total energy yield of the PV<br />
system<br />
Total energy yield of the inverter<br />
D Power Current AC power of the PV<br />
system<br />
Current AC power of the<br />
inverter.<br />
User Manual BeamBT-BEN094911 43
Operation SMA America, LLC<br />
7.5 Symbols in the Chart View<br />
Sunny Beam shows the date, time, and symbols in the chart view. The symbols are explained in this<br />
section.<br />
Position Meaning Section<br />
A Date Section 7.13<br />
B Time<br />
C • Symbol for recent or unread warnings.<br />
Section 7.5.3<br />
• Symbol for recent or unread errors.<br />
• If there are no unread warnings or errors, no symbol<br />
will be displayed.<br />
D Symbol for the connection quality Section 7.5.1<br />
E Battery symbol which indicates the battery state of charge Section 7.5.2<br />
44 BeamBT-BEN094911 User Manual
SMA America, LLC Operation<br />
7.5.1 Symbol for the Connection Quality<br />
The symbol for connection quality indicates whether the Sunny<br />
Beam is connected to a device in your PV system and the quality<br />
of this connection.<br />
The Sunny Beam only shows the symbol together <strong>with</strong> the<br />
"Power today" chart.<br />
Symbol Connection quality<br />
very good<br />
good<br />
unreliable<br />
critical<br />
none<br />
When the Sunny Beam is establishing a connection, this is indicated by the following symbol: .<br />
A larger view of the connection quality and the serial number of the device (inverter or SMA Bluetooth<br />
repeater) through which the Sunny Beam is connected to the entire PV system can be found in the<br />
menu "Service > Diagnosis > Connection quality" (section 7.10.1 "Checking the Connection Quality"<br />
(page 55)).<br />
User Manual BeamBT-BEN094911 45
Operation SMA America, LLC<br />
7.5.2 Battery Symbol/Charging the Batteries<br />
The battery symbol indicates the state of charge of the Sunny<br />
Beam batteries. If the state of charge of the batteries is too low, a<br />
short acoustic signal will sound as soon as you use the Sunny<br />
Beam. The Sunny Beam also displays an additional message.<br />
Symbol Meaning<br />
The battery is fully charged.<br />
The battery is no longer fully charged.<br />
The battery is empty.<br />
If you are charging the batteries via the Sunny Beam USB connection, the Sunny Beam will visualize<br />
the charging process by displaying the battery symbols one after the other.<br />
Charging the batteries when there is sufficient daylight<br />
Put the Sunny Beam in a place <strong>with</strong> as much light as possible, ideally in direct sunlight, so that sufficient<br />
light hits the solar cell.<br />
Charging the batteries when there is insufficient daylight<br />
Connect the Sunny Beam to a USB port on the computer <strong>with</strong> the USB connection cable which is<br />
delivered <strong>with</strong> the Sunny Beam. The computer needs to remain switched on. If no computer is<br />
available, use the USB plug-in power supply. The USB plug-in power supply is not included in the<br />
scope of delivery (see section 14 "Accessories" (page 91)).<br />
USB hubs<br />
When using a USB hub to connect to the computer, only use self-powered USB hubs.<br />
46 BeamBT-BEN094911 User Manual
SMA America, LLC Operation<br />
7.5.3 Info, Error, and Warning Symbol<br />
The Sunny Beam indicates information, errors, or warnings for the<br />
inverter through an according symbol in the chart view.<br />
You can find details about existing information, errors, or<br />
warnings in the "Events" menu (see chapter 7.6 "Calling up<br />
Events" (page 48)). As soon as you call up the "Events" menu, the<br />
Sunny Beam will no longer display the symbol.<br />
The Sunny Beam additionally indicates errors through a warning<br />
sound (7.7.1 "Enable / Disable Alarm for Errors" (page 50)). If<br />
there are no unread warnings or errors, no symbol is displayed.<br />
Symbol Meaning<br />
Info An error or warning is finished.<br />
Warning An error may occur in the foreseeable future. The warning symbol is<br />
displayed if, for example, there is a frequent grid overvoltage.<br />
Error There is an error in an inverter.<br />
The error symbol is displayed if an inverter requires external help (from an<br />
installer) in order to function properly. Open the details for this event as<br />
described in section 7.6 "Calling up Events" (page 48). Contact your<br />
installer and inform him about the event message and the serial number of<br />
the inverter for which the event occurred.<br />
User Manual BeamBT-BEN094911 47
Operation SMA America, LLC<br />
7.6 Calling up Events<br />
The Sunny Beam shows the events for the inverters in the "Events" menu. Events can be information,<br />
errors, or warnings. Finished errors or warnings are changed to information by the Sunny Beam.<br />
The Sunny Beam shows unread events as symbols in the chart view, see chapter 7.5.3 "Info, Error,<br />
and Warning Symbol" (page 47).<br />
Events menu<br />
Position Meaning<br />
A Symbol of the event (information, warning, error)<br />
B Date of the event<br />
C Name or serial number of the inverter where the event occurred.<br />
1. Select "Events".<br />
2. Select the event for which you wish to see detailed information.<br />
☑ The details of the selected event are displayed.<br />
48 BeamBT-BEN094911 User Manual
SMA America, LLC Operation<br />
Details of an event<br />
Position Meaning<br />
A Symbol of the event (information, warning, error)<br />
B Date of the event<br />
C Name of the event (information, warning, error)<br />
D Name or serial number of the inverter where the event occurred.<br />
E • Start time ("since"), if the event has not yet ended or the end time is not known.<br />
• Start time to end time ("from: to:"), if the event has ended.<br />
• End time ("to:"), if the event has ended and the start time is unknown.<br />
F • Duration of the event in hours : minutes : seconds format<br />
• "--:--:--", if the event has not yet ended or the duration could not be calculated<br />
because the start time is unknown.<br />
G Symbol for errors. Contact your installer and inform him about the<br />
event message (H) and the serial number of the inverter (I) for which<br />
the event occurred.<br />
H Event message<br />
User Manual BeamBT-BEN094911 49
Operation SMA America, LLC<br />
Position Meaning<br />
I Serial number of the inverter where the event occurred.<br />
7.7 Sunny Beam Alarms<br />
The Sunny Beam has a buzzer which emits an alarm when an "Error" event occurs or when the battery<br />
state is too low. For more information see section 12 "Troubleshooting" (page 80).<br />
7.7.1 Enable / Disable Alarm for Errors<br />
When the "Error" event occurs, an alarm will be sounded and<br />
the error symbol will be shown in the chart view. The alarm is<br />
repeated after a certain interval set by the user until you press<br />
the button, however, not for more than 24 hours.<br />
1. Select "Settings > Alerts".<br />
2. Select "Signal every".<br />
3. Set interval after which to repeat the alarm.<br />
The default setting is 30 minutes. Select "- - -" if you do not want an alarm to be sounded for<br />
errors.<br />
☑ The alarm for errors has been set.<br />
50 BeamBT-BEN094911 User Manual
SMA America, LLC Operation<br />
7.8 Display Settings<br />
7.8.1 Changing the Contrast<br />
1. Select "Settings > Display options > Contrast".<br />
2. Select "Upper contrast" or "Lower contrast".<br />
3. Set the contrast.<br />
☑ The contrast is changed.<br />
7.8.2 Changing the Display Switch-Off<br />
To save energy the Sunny Beam will automatically switch off its display after being idle for 1 minute.<br />
You can adjust the duration or set the display to always remain switched on (Setting "-").<br />
1. Select "Settings > Display options > Display off after:".<br />
2. Set the interval.<br />
☑ The switch-off has been set up.<br />
Power consumption<br />
The longer the display remains switched on, the higher the power consumption of the<br />
Sunny Beam.<br />
User Manual BeamBT-BEN094911 51
Operation SMA America, LLC<br />
7.8.3 Setting the Coefficients of Balance<br />
The coefficients of balance are used to calculate revenue and CO 2 avoided.<br />
Revenue / kWh<br />
The coefficient used for calculating revenue is the feed-in rate per kWh.<br />
CO 2 / kWh<br />
The coefficient (CO 2 factor) used for calculating CO 2 avoided depends on the energy mix of the<br />
location where the PV system is installed. You can find out how high the CO 2 factor of the location is<br />
by asking your power supplier.<br />
You will find further information on the CO 2 coefficient in the download area of<br />
www.SMA-America.com.<br />
1. Select "Settings > Display options > Coefficients of balance".<br />
2. Select "Revenue / kWh:" or "CO2 / kWh:".<br />
3. Set the coefficient.<br />
☑ The coefficients of balance are now set.<br />
52 BeamBT-BEN094911 User Manual
SMA America, LLC Operation<br />
7.9 Data Query<br />
7.9.1 Changing the Data Query Frequency<br />
You can change the frequency at which the Sunny Beam is to query data from the inverters. The<br />
default setting is 1 hour.<br />
1. Select "Settings > Data query > Data query every:".<br />
2. Set frequency.<br />
☑ The frequency for data queries has been changed.<br />
Power consumption<br />
The higher the data query frequency is, the more energy the Sunny Beam will consume.<br />
One query per hour is sufficient. The data is cached in the inverter.<br />
Overnight shutdown of the Sunny Beam<br />
By default, the Sunny Beam will not query any data from the inverter overnight. Once the<br />
sun has set, solar inverters no longer feed in power; therefore they no longer produce data<br />
either. If you are using a wind inverter by SMA, you need to deactivate the Sunny Beam<br />
overnight shutdown to be able to query the complete data of the wind inverter (overnight<br />
deactivation, see section 7.9.2)<br />
User Manual BeamBT-BEN094911 53
Operation SMA America, LLC<br />
7.9.2 Deactivating Overnight Shutdown<br />
By default, the Sunny Beam will not query any data from the inverter overnight. Once the sun has set,<br />
solar inverters no longer feed in power; therefore they no longer produce data either. If you are using<br />
a wind inverter by SMA, you need to deactivate the Sunny Beam overnight shutdown to be able to<br />
query the complete data of the wind inverter.<br />
In order to deactivate overnight shutdown, proceed as follows:<br />
1. Select "Settings > Data query > Overnight Shutdown".<br />
2. Remove the checkmark from the "active" box.<br />
☑ Overnight shutdown is now deactivated.<br />
In order to prevent the batteries from discharging when overnight shutdown is deactivated, connect<br />
the Sunny Beam to a power source, as described in section 7.5.2 "Battery Symbol/Charging the<br />
Batteries" (page 46), part "Charging the batteries when there is insufficient daylight" (page 46).<br />
54 BeamBT-BEN094911 User Manual
SMA America, LLC Operation<br />
7.10 Service Functions<br />
7.10.1 Checking the Connection Quality<br />
In the menu "Service > Diagnosis > Connection quality", you can check the connection quality of the<br />
connection from the Sunny Beam to the device via which the Sunny Beam is connected to the complete<br />
PV system.<br />
Position Meaning<br />
A The connection quality as a symbol<br />
B The connection quality in decibel, relating to 1 mW<br />
C Serial number of the device (inverter or SMA Bluetooth Repeater) <strong>with</strong> SMA<br />
Bluetooth to which the Sunny Beam is connected.<br />
Very high power consumption<br />
When the menu "Connection quality" is displayed, the Sunny Beam is continuously<br />
retrieving new data from the inverters and will not switch off automatically. The power<br />
consumption of the Sunny Beam is therefore very high.<br />
User Manual BeamBT-BEN094911 55
Operation SMA America, LLC<br />
Levels of connection quality<br />
Symbol Connection quality Decibel in relation to 1 mW<br />
very good more than -68 dBm<br />
good -82 to -68 dBm<br />
unreliable -90 to -82 dBm<br />
critical -100 to -90 dBm<br />
none less than -100 dBm<br />
56 BeamBT-BEN094911 User Manual
SMA America, LLC Operation<br />
7.10.2 Accessing Device Information<br />
1. Select "Service > Diagnosis > Device information".<br />
2. Select "Sunny Beam" or one of the inverters.<br />
☑ The information about the selected device is displayed.<br />
The device information contains the following details:<br />
Sunny Beam<br />
• Serial number<br />
• Firmware version<br />
• Hardware<br />
• Bluetooth version<br />
• Battery voltage<br />
• NetID<br />
Inverter<br />
• Type<br />
• Serial number<br />
• The software package of the inverter <strong>with</strong> integrated<br />
Bluetooth or of the SMA Bluetooth Piggy-Back <strong>with</strong><br />
retrofitted Bluetooth.<br />
User Manual BeamBT-BEN094911 57
Operation SMA America, LLC<br />
7.10.3 Performing an Update<br />
When the Sunny Beam is updated, all the settings and data will be saved.<br />
To perform an update, you will need:<br />
• A computer <strong>with</strong> an Internet connection, in order to download the update file from the Internet.<br />
• An operating system that supports connecting the Sunny Beam (see section 8.1 "System<br />
Requirements" (page 73)).<br />
• The enclosed USB connection cable.<br />
1. Download the update file in the download section of www.SMA-America.com and save it to<br />
your computer. The file is named "SBeam2.UPD". Do not rename the update file, or the Sunny<br />
Beam will not recognize the file.<br />
2. Select "Service > Update" in the Sunny Beam main menu.<br />
3. Connect the Sunny Beam to the computer <strong>with</strong> the supplied USB connection cable.<br />
☑ The computer will recognize the Sunny Beam as a removable storage device. The drive<br />
"S<strong>BEAM</strong> 2 UPD" is added to the computer.<br />
4. Open the folder "UDPATE" on the drive "S<strong>BEAM</strong> 2 UPD".<br />
The Sunny Beam must remain connected to the computer!<br />
Do not unplug the USB connection cable from the Sunny Beam and do not switch the<br />
computer off until chart "Power today" is shown. Otherwise, the Sunny Beam will not be<br />
able to perform the update.<br />
58 BeamBT-BEN094911 User Manual
SMA America, LLC Operation<br />
5. Copy the file "SBeam2.UPD" to the folder "UPDATE". You can overwrite the existing file.<br />
6. Select "OK" on the Sunny Beam.<br />
☑The menu "Update" is displayed.<br />
7. Remove the Sunny Beam using the icon "Safely Remove Hardware" in the<br />
task bar of the computer. Otherwise, the Sunny Beam will not be able to<br />
perform the update correctly. The icon "Safely Remove Hardware" as<br />
displayed in the operating system Windows XP is depicted on the right.<br />
The Sunny Beam must remain connected to the computer via the USB connection cable.<br />
8. To start the update, confirm the request by pressing "Yes".<br />
☑ The update starts.<br />
As soon as the update is completed, a message is displayed.<br />
9. Select ">>".<br />
☑ The first chart for the complete PV system, "Power today", is displayed.<br />
10. Unplug the USB connection cable from the computer and the Sunny Beam.<br />
☑ The update is complete.<br />
User Manual BeamBT-BEN094911 59
Operation SMA America, LLC<br />
7.10.4 Resetting the Sunny Beam<br />
Resetting the Sunny Beam will restore the factory settings on the Sunny Beam.<br />
All system data for the PV system, CSV files, and settings in the Sunny Beam are erased<br />
when it is reset!<br />
If required, save the CSV files on your computer, as described in section 8.2 "Copying PV<br />
System Data to the Computer" (page 73). After resetting you need to commission the<br />
Sunny Beam as described in section 6.4 "Commissioning the Sunny Beam" (page 22).<br />
1. Select "Service > Reset".<br />
2. To perform the reset, confirm the request <strong>with</strong> "Yes".<br />
☑ The Sunny Beam performs the reset. This may take a few minutes. When the reset is<br />
complete, the Sunny Beam is switched off.<br />
☑ The reset is complete.<br />
60 BeamBT-BEN094911 User Manual
SMA America, LLC Operation<br />
7.11 System Settings<br />
7.11.1 Calling up the List of Connected Inverters<br />
You can call up a list of all inverters which are connected to the<br />
Sunny Beam. The Sunny Beam does not display SMA Bluetooth<br />
Repeaters to which there is a connection.<br />
1. Select "Settings > PV plant > Devices connected".<br />
☑ The list of connected inverters appears.<br />
Inverters that are marked <strong>with</strong> a checkmark ( ) have the same<br />
system password as the Sunny Beam. If the inverters have a<br />
different system password than the Sunny Beam, they are marked <strong>with</strong> a lock ( ). Inverters to which<br />
the Sunny Beam temporarily cannot establish a connection are marked <strong>with</strong> a cross (see section<br />
12 "Troubleshooting" (page 80)).<br />
User Manual BeamBT-BEN094911 61
Operation SMA America, LLC<br />
7.11.2 Entering the System Password<br />
If you have changed your system password <strong>with</strong> Sunny Explorer, you can enter the changed system<br />
password into the Sunny Beam.<br />
1. Select "Settings > PV plant > Devices connected".<br />
☑ The list of devices that are connected to Sunny Beam is<br />
displayed.<br />
2. Perform the steps from section "Enter the new system<br />
password in the Sunny Beam" (page 34).<br />
62 BeamBT-BEN094911 User Manual
SMA America, LLC Operation<br />
7.11.3 Repeating the System Search<br />
You need to repeat the system search, e.g., if one or more inverters have been added to the PV system.<br />
When performing the system search, all CSV files and settings in the Sunny Beam will be saved.<br />
Resetting the Sunny Beam before performing the system search is necessary in the<br />
following cases:<br />
• You want to register an external PV system <strong>with</strong> the Sunny Beam.<br />
• An inverter has been exchanged in the PV system.<br />
A reset is necessary in order for the data from the previously registered PV system or the<br />
exchanged inverter to be deleted from the Sunny Beam.<br />
No search for Bluetooth PV systems <strong>with</strong> NetID 1<br />
The Sunny Beam cannot search for Bluetooth PV systems <strong>with</strong> the NetID 1. Only NetIDs<br />
from 2 to 9 and from A to F are possible.<br />
3. Select "Settings > Plant > New plant search".<br />
4. Select "Start detection" to start the system search.<br />
☑ The system search will begin.<br />
If Then<br />
A free NetID is already set on the devices of<br />
your Bluetooth PV system.<br />
No free NetID has been set on the devices in<br />
your Bluetooth PV system.<br />
Perform the steps from section "Search for<br />
your own Bluetooth PV system" (page 29).<br />
Perform the steps from section "Determining<br />
free NetID" (page 27).<br />
User Manual BeamBT-BEN094911 63
Operation SMA America, LLC<br />
7.11.4 Changing the Device Name<br />
The device names of the detected inverters are displayed as serial numbers in the Sunny Beam. You<br />
can change the serial numbers to a descriptive device name, in order to better distinguish between<br />
the inverters in the Sunny Beam. The names you give the devices are only shown on the Sunny Beam<br />
and will not be transferred to the inverters or displayed on any other communication device (e.g.<br />
Sunny Explorer).<br />
1. Select "Settings > PV plant > Change device name".<br />
☑ The list of inverters that the Sunny Beam manages is<br />
displayed.<br />
2. Select the serial number or a previously assigned device<br />
name.<br />
☑ The input page appears.<br />
3. Select the button <strong>with</strong> the arrow and press the button<br />
again to delete the set device name.<br />
Arrow: deletes the character which was entered last.<br />
Cross: cancels the input action.<br />
Checkmark: the entered device name is saved.<br />
4. In order to enter the new device name, turn the button until the desired character is highlighted.<br />
Then press the button in order to select the character.<br />
64 BeamBT-BEN094911 User Manual
SMA America, LLC Operation<br />
Umlauts in device names are not displayed correctly in the CSV files.<br />
5. To save the device name, select the checkmark.<br />
☑ The device name has been changed.<br />
7.11.5 Adjusting the Energy Meter when Switching Devices<br />
The energy meter shows the value for the total generated energy (E-total) for every inverter. If you<br />
need to exchange in inverter in your PV system, you can set the value for the total energy of the<br />
previous inverter on the new inverter.<br />
1. Note down the E-total value of the previous inverter (see section 7.4 "Power and Energy<br />
Display" (page 43)).<br />
2. Select "Settings > PV plant > Offset energy meter".<br />
3. Select the new inverter.<br />
4. Select "Display".<br />
5. Enter the value of the previous inverter.<br />
☑ The energy meter has been adjusted.<br />
User Manual BeamBT-BEN094911 65
Operation SMA America, LLC<br />
7.11.6 Setting the Maximum System Power in kWp<br />
The system power in kWp (kilowatt peak) is the maximum possible power of the PV system. You can<br />
find out the value in kWp from your installer. The Sunny Beam requires the system power in kWp to<br />
calculate the specific annual yield (kWh/kWp). The specific annual yield makes it possible to directly<br />
compare PV systems of different sizes. The calculated specific annual yield indicates the energy yield<br />
for a system size <strong>with</strong> 1 kWp of power installed.<br />
The specific annual yield is one of the charts of the Sunny Beam<br />
(see figure on the right). The Sunny Beam can display the system<br />
performance for the last 20 years. The more years are included,<br />
the more narrow the columns will be.<br />
1. Select "Settings > PV plant > Plant power in kWp".<br />
2. Set the system power in kWp.<br />
☑ The system power in kWp has been set.<br />
Requires data from January to December<br />
The specific annual yield for one year is only representative if the Sunny Beam can use data<br />
for an entire year. If your PV system <strong>with</strong> the Sunny Beam was commissioned in July, for<br />
instance, data from the previous months are lacking. The present data (from July to<br />
December) will then be projected to the entire year by the Sunny Beam.<br />
Expanding your Bluetooth PV system<br />
If your Bluetooth PV system is to be expanded <strong>with</strong> more PV modules, you need to set the<br />
new system power in kWp on the Sunny Beam. The new inverters can be added to the<br />
Sunny Beam by performing a new system search (see section 7.11.3 "Repeating the<br />
System Search" (page 63)).<br />
66 BeamBT-BEN094911 User Manual
SMA America, LLC Operation<br />
Automatic calculation of the specific annual yield <strong>with</strong> the Sunny Beam<br />
The Sunny Beam calculates the specific annual yield as follows:<br />
• kWh (kilowatt hour) divided by kWp (kilowatt peak) = specific annual yield.<br />
You can find out the value in kWp from your installer.<br />
The value for kWh is calculated as follows:<br />
The total of all daily energy values (E-day), which the Sunny Beam has been provided <strong>with</strong><br />
for this year, divided by the number of daily energy values, multiplied by 365 days:<br />
• (E-day 1) + (E-day 2) + (E-day 3) + (E-day n) divided by the number of daily energy<br />
values, multiplied by 365 days = the value for kWh.<br />
Example:<br />
(E-day 1) + (E-day 2)....+ (E-day 250) divided by 250 days, multiplied by 365 days<br />
= x (kWh).<br />
x (kWh) divided by kWp = specific annual yield.<br />
User Manual BeamBT-BEN094911 67
Operation SMA America, LLC<br />
7.12 Country Settings<br />
In the menu "Settings > Country settings", you can make countryspecific<br />
settings. If you change the country, the settings in the<br />
menu items below the line will automatically be adjusted to the<br />
selected country. In addition, you can change the settings<br />
manually.<br />
• Country<br />
– Language<br />
– Currency<br />
– CO2 avoided<br />
– Formats<br />
– Decimal separator<br />
– Date format<br />
– Timestamp format<br />
7.12.1 Changing Languages<br />
1. Select "Settings > Country settings > Country".<br />
2. Set the language.<br />
☑ The language has been changed.<br />
68 BeamBT-BEN094911 User Manual
SMA America, LLC Operation<br />
7.12.2 Changing the Currency<br />
1. Select "Settings > Country settings > Currency".<br />
2. Set the currency.<br />
☑ The currency has been changed.<br />
7.12.3 Changing the Unit of CO 2 Avoided<br />
1. Select "Settings > Country settings > CO2 avoided".<br />
2. Set the unit.<br />
☑ The unit of CO2 avoided has been changed.<br />
7.12.4 Changing the Decimal Separator<br />
1. Select "Settings > Country settings > Formats".<br />
2. Select "Decimal separator:" and change the setting.<br />
☑ The decimal separator has been changed.<br />
The decimal separator in the power and energy display (section 7.4) on the Sunny Beam cannot be<br />
changed and will always be a point.<br />
User Manual BeamBT-BEN094911 69
Operation SMA America, LLC<br />
7.13 Time Settings<br />
Change time settings when the sun has set.<br />
Changing the time settings (date, daylight saving time, time, time zone) of the Sunny Beam<br />
is only possible if the sun has set and the inverters are no longer feeding in. The time<br />
difference therefore has no effect on the charts on the display of the Sunny Beam.<br />
Inverters <strong>with</strong> SMA Bluetooth Piggy-Back<br />
If you use inverters <strong>with</strong> SMA Bluetooth piggy-backs, you must set the correct values for<br />
date, daylight saving time, time and time zone in the Sunny Beam. If you change these<br />
values after commissioning, thereby resetting the time, the data for this time difference will<br />
be deleted from the inverter.<br />
Please note that the time may also be reset if you change the settings for time zone or<br />
daylight saving time.<br />
7.13.1 Changing the Date<br />
1. Select "Settings > Date & time".<br />
2. Select "Date" and change it.<br />
☑ The date has been changed.<br />
7.13.2 Changing the Time<br />
1. Select "Settings > Date & time".<br />
2. Select "Time" and change it.<br />
☑ The time has been changed.<br />
70 BeamBT-BEN094911 User Manual
SMA America, LLC Operation<br />
7.13.3 Changing the Date Format<br />
Abbreviations: D= day, M= month, Y= year<br />
1. Select "Settings > Country settings > Formats".<br />
2. Select "Date format" and change the setting.<br />
☑ The date format has been changed.<br />
7.13.4 Changing the Timestamp Format<br />
Possible settings: 12h or 24h (e.g. 6:00 pm or 18:00)<br />
1. Select "Settings > Country settings > Formats".<br />
2. Select "Timestamp format" and change the setting.<br />
☑ The timestamp format has been changed.<br />
7.13.5 Activating/Deactivating Daylight Saving Time<br />
1. Select "Settings > Date & time".<br />
2. Set or remove a checkmark in the box for "Daylight saving time". When there is a checkmark in<br />
the box, daylight saving time is activated. The time settings on the Sunny Beam and on the<br />
inverters will switch to daylight saving time.<br />
☑ Daylight saving time is activated/deactivated.<br />
7.13.6 Changing the Time Zone<br />
1. Select "Settings > Date & time".<br />
2. Select "Time zone" and change the setting.<br />
☑ The time zone is changed.<br />
User Manual BeamBT-BEN094911 71
PV System Data SMA America, LLC<br />
8 PV System Data<br />
The Sunny Beam will save the following CSV files for at least 90 days.<br />
File Content<br />
Daily file<br />
• Values for the generated power of the individual<br />
A file for every day <strong>with</strong> daily values. inverters for this day. A value is saved every<br />
10 minutes.<br />
• Value for the generated total energy of the<br />
individual inverters for this day.<br />
• Value for the total energy generated so far by the<br />
individual inverters.<br />
Monthly file<br />
• Values for the generated total energy of the<br />
A file for every month <strong>with</strong> final values for<br />
each day.<br />
individual inverters for every day of this month.<br />
Event file • Errors and warnings of all inverters.<br />
For inverters <strong>with</strong> integrated SMA Bluetooth Piggy-Back, it can take as long as until noon the next day,<br />
before the Sunny Beam can save the CSV files. The storage volume depends on the number of<br />
registered inverters. Once the memory is full, the Sunny Beam will begin to overwrite old data. How<br />
to copy the PV system data from the Sunny Beam to your computer is described in section<br />
8.2 "Copying PV System Data to the Computer" (page 73).<br />
72 BeamBT-BEN094911 User Manual
SMA America, LLC PV System Data<br />
8.1 System Requirements<br />
Supported operating systems for connecting the Sunny Beam to the computer:<br />
• Windows XP, Windows Vista, Windows 7<br />
• Linux (SUSE, RedHat, Ubuntu, Debian etc.) <strong>with</strong> support for USB and mass storage devices<br />
• Mac OS X, 10.3 and later.<br />
• Mac OS classic, 8.6 and later <strong>with</strong> support for USB<br />
8.2 Copying PV System Data to the Computer<br />
The Sunny Beam signs on to the computer as an inverter. This means that you can copy your PV system<br />
data to the computer as <strong>with</strong> a USB memory stick.<br />
To copy the system data to the computer, proceed as follows:<br />
1. Connect the Sunny Beam to the computer <strong>with</strong> the supplied USB connection cable.<br />
☑ The computer will recognize the Sunny Beam as a removable storage device. A drive is<br />
added to the computer. The drive contains the folder "S<strong>BEAM</strong>".<br />
2. Open the "S<strong>BEAM</strong>" folder and copy the CSV data to the computer.<br />
☑ The data has now been saved to the computer.<br />
User Manual BeamBT-BEN094911 73
PV System Data SMA America, LLC<br />
8.2.1 CSV File<br />
The CSV files can be opened in Microsoft Excel and used to create charts.<br />
File name<br />
The name of the file is always the date that the data was generated by the inverter. The sequence is<br />
always year, month, and day. The separator is always a hyphen.<br />
Daily file: YY-MM-DD.csv = Example: 09-07-15.csv<br />
Monthly file: YYYY-MM,csv = Example: 2009-11.csv<br />
Data format in the file<br />
Individual data is separated by a semicolon in the file. The decimal separator and the timestamp<br />
format in the files are determined by the country settings. For information on how to change the<br />
decimal separator and the timestamp format, please refer to section 7.12.4 "Changing the Decimal<br />
Separator" (page 69) and 7.13.4 "Changing the Timestamp Format" (page 71).<br />
Umlauts in device names are not displayed correctly in the CSV files.<br />
74 BeamBT-BEN094911 User Manual
SMA America, LLC Menu Overview<br />
9 Menu Overview<br />
Complete PV system<br />
Inverter<br />
Events<br />
Settings Display options Contrast Upper contrast<br />
Lower contrast<br />
Display off after Upper display<br />
Lower display<br />
Balance coefficients Revenue/kWh<br />
CO 2 /kWh<br />
Alarm Signal every<br />
Date & time Date<br />
Daylight saving time<br />
Time<br />
Time zone<br />
Data Query Data query every<br />
Overnight shutdown active<br />
Country settings Country<br />
Language<br />
Currency<br />
CO 2 avoided<br />
Formats Decimal separator<br />
Date format<br />
Timestamp format<br />
PV system Connected devices<br />
New system search<br />
Change device name<br />
Offset energy meter<br />
System power in kWp<br />
Service Diagnose Connection quality<br />
Device information<br />
Update<br />
Reset<br />
User Manual BeamBT-BEN094911 75
Maintenance and Care SMA America, LLC<br />
10 Maintenance and Care<br />
10.1 Maintenance<br />
10.1.1 Replacing the Batteries<br />
The batteries must be replaced when they no longer charge properly and this adversely affects the<br />
operation of the Sunny Beam.<br />
NOTICE<br />
Risk of damage to the Sunny Beam due to unsuitable batteries.<br />
• Do not use non-rechargeable batteries under any circumstances.<br />
• Batteries of the wrong type may leak into the Sunny Beam. You must only use<br />
rechargeable nickel-metal hydride batteries (NiMH), type Mignon (AA) <strong>with</strong> low selfdischarge,<br />
e.g. Eneloop batteries (see section 14 "Accessories" (page 91)).<br />
• Batteries <strong>with</strong> different states of charge damage the Sunny Beam. Always use and<br />
replace the batteries in pairs.<br />
76 BeamBT-BEN094911 User Manual
SMA America, LLC Maintenance and Care<br />
1. Replace the batteries as illustrated below.<br />
2. Press the button to switch the Sunny Beam on.<br />
☑ The Sunny Beam checks whether an update file has been saved on the Sunny Beam.<br />
If Then<br />
An update file has been saved on the Sunny The Sunny Beam will perform the update.<br />
Beam.<br />
No update file has been saved on the Sunny The Sunny Beam will start up.<br />
Beam.<br />
☑ The chart view for the complete system is displayed. The batteries have been replaced.<br />
Make sure that the time and date settings of the Sunny Beam are correct. If the settings are incorrect,<br />
change time and date (section 7.13 "Time Settings" (page 70)).<br />
User Manual BeamBT-BEN094911 77
Maintenance and Care SMA America, LLC<br />
10.2 Care<br />
NOTICE<br />
Damage to the Sunny Beam due to ingress of liquids.<br />
The Sunny Beam is not waterproof.<br />
• Only use a soft, damp cloth.<br />
• Do not use aggressive or corrosive cleaning agents.<br />
78 BeamBT-BEN094911 User Manual
SMA America, LLC Decommissioning<br />
11 Decommissioning<br />
11.1 Decommissioning the Sunny Beam<br />
Remove the batteries from the Sunny Beam as illustrated below.<br />
11.2 Disposing of the Sunny Beam<br />
Dispose of the Sunny Beam at the end of its service life in accordance <strong>with</strong> the disposal regulations<br />
for electronic waste which apply at the installation site at that time. Alternatively, send it back to SMA<br />
<strong>with</strong> shipping paid by sender, and labeled "FOR DISPOSAL". For the adress see section 15 „Contact“,<br />
page 92.<br />
11.3 Disposing of the Batteries<br />
Dispose of the batteries at the end of their service life in accordance <strong>with</strong> the disposal regulations for<br />
batteries which apply at the installation site at that time.<br />
You can order new batteries for the Sunny Beam from SMA (see section 14 "Accessories" (page 91)).<br />
User Manual BeamBT-BEN094911 79
Troubleshooting SMA America, LLC<br />
12 Troubleshooting<br />
Problem Cause Rectification<br />
System search Your Bluetooth PV system has no • Place the Sunny Beam closer to a<br />
The Sunny Beam does device <strong>with</strong>in the radio range of device of your Bluetooth PV<br />
not list the NetID of your your Sunny Beam.<br />
Bluetooth PV system.<br />
system. If this is not possible, use<br />
the SMA Bluetooth Repeater to<br />
bridge the radio gap.<br />
The devices of your Bluetooth PV • Determine a free NetID again, as<br />
system are not in operation. described in section "Determining<br />
free NetID" (page 27).<br />
Afterwards, commission the<br />
devices as described in the<br />
respective manual.<br />
The NetID 0 (Bluetooth off) or • Set the free NetIDs of your<br />
NetID 1 may have been<br />
Bluetooth PV system on the<br />
assigned to the devices. The inverters and any available SMA<br />
Sunny Beam cannot detect Bluetooth Repeaters, as described<br />
devices <strong>with</strong> NetID 1.<br />
in the respective manual. If no<br />
NetID has been determined for the<br />
Bluetooth PV system, determine a<br />
free NetID as described in section<br />
"Determining free NetID"<br />
(page 27).<br />
80 BeamBT-BEN094911 User Manual
SMA America, LLC Troubleshooting<br />
Problem Cause Rectification<br />
Devices not found For PV systems <strong>with</strong> many • Repeat the system search.<br />
The Sunny Beam does<br />
not list all inverters in<br />
your Bluetooth PV<br />
system.<br />
devices, it could take a while for<br />
all of the devices to become<br />
integrated in the Bluetooth<br />
network.<br />
The Sunny Beam will end the<br />
system search before all devices<br />
are integrated into the Bluetooth<br />
network.<br />
Inverters <strong>with</strong> upgraded SMA • As soon as the inverters switch on<br />
Bluetooth Piggy-Back switch off in the morning, the Sunny Beam is<br />
over night. Therefore, the Sunny able to establish a connection to<br />
Beam cannot establish a<br />
connection to these inverters.<br />
them again.<br />
The NetID of your Bluetooth PV • Check whether the NetID of your<br />
system has not been set on the Bluetooth PV system has been set<br />
missing inverters.<br />
on the inverters and SMA<br />
Bluetooth Repeaters, as described<br />
in the respective manual.<br />
The Sunny Beam was not able to • Check the connection quality of the<br />
establish a radio connection to inverters and SMA Bluetooth<br />
the missing inverters.<br />
Repeaters, as described in the<br />
respective manual. The connection<br />
quality of each device must be at<br />
least good.<br />
User Manual BeamBT-BEN094911 81
Troubleshooting SMA America, LLC<br />
Problem Cause Rectification<br />
Unknown devices<br />
detected<br />
The Sunny Beam lists<br />
your inverters as well as<br />
other inverters.<br />
Commissioning of<br />
connected devices<br />
Some inverters are<br />
marked <strong>with</strong> a lock<br />
symbol ( ), others<br />
have a checkmark<br />
( ).<br />
Cross after<br />
commissioning<br />
Inverters are sometimes<br />
marked <strong>with</strong> a cross<br />
( ).<br />
There is another Bluetooth PV<br />
system <strong>with</strong>in the radio range of<br />
the Sunny Beam, which uses the<br />
same NetID as your Bluetooth<br />
PV system.<br />
Different system passwords for<br />
users are set in the inverters.<br />
For inverters <strong>with</strong> SMA<br />
Bluetooth Piggy-Back, the cross<br />
symbol is displayed when the<br />
inverters switch off at night.<br />
Since the Sunny Beam cannot<br />
establish a connection to this<br />
inverter, it interprets this as an<br />
incorrectly entered password.<br />
The Sunny Beam cannot<br />
establish a connection to these<br />
inverters.<br />
• By determining a free NetID this<br />
should not occur. Determine a free<br />
NetID again, as described in the<br />
section "Determining free NetID"<br />
(page 27).<br />
• Set the same system password for<br />
all users in Sunny Explorer for all<br />
inverters, as described in the Sunny<br />
Explorer help section.<br />
• As soon as the inverters are<br />
switched on in the morning, the<br />
cross symbol will disappear.<br />
• As soon as the Sunny Beam has<br />
established a connection to these<br />
inverters again, the cross will<br />
disappear.<br />
82 BeamBT-BEN094911 User Manual
SMA America, LLC Troubleshooting<br />
Problem Cause Rectification<br />
Radio connection The Sunny Beam is too far away • Place the Sunny Beam closer to a<br />
The radio connection to from your Bluetooth PV system,<br />
the Sunny Beam is or the radio connection between<br />
unreliable.<br />
the Sunny Beam and your<br />
Bluetooth PV system is subject to<br />
interference. Reasons for the<br />
interference could be, for<br />
example, walls or ceilings which<br />
weaken the radio waves.<br />
device of your Bluetooth PV<br />
system. If this is not possible, use<br />
the SMA Bluetooth Repeater to<br />
bridge the radio gap.<br />
Time<br />
Due to the extensive time • Check the time settings after<br />
The time settings were<br />
not saved.<br />
management in your PV system,<br />
the first attempt to change the<br />
time settings may not be<br />
successful, if, for example, the<br />
time has already been set using<br />
Sunny Explorer. The time you set<br />
in the Sunny Beam is also<br />
applied by the inverters.<br />
commissioning and correct them, if<br />
required.<br />
User Manual BeamBT-BEN094911 83
Troubleshooting SMA America, LLC<br />
Problem Cause Rectification<br />
Connection to the<br />
computer<br />
The computer displays<br />
a message that the USB<br />
device could perform<br />
better.<br />
The message does not influence<br />
the functionality or speed of the<br />
Sunny Beam transmission.<br />
• You can switch the message off,<br />
but then other USB error messages<br />
will not be displayed.<br />
Proceed as follows. These steps<br />
are for Windows XP and may be<br />
different in other operating<br />
systems:<br />
– Right-click on "My Computer"<br />
and select "Device Manager."<br />
– Open the "USB Controller" in<br />
the Device Manager.<br />
– Right-click on the item<br />
"Host Controller".<br />
– Select "Properties".<br />
– Select "Advanced".<br />
– Tick the box that says "Do not<br />
display USB errors".<br />
84 BeamBT-BEN094911 User Manual
SMA America, LLC Troubleshooting<br />
Problem Cause Rectification<br />
Chart view After commissioning the Sunny • Do not change the time settings<br />
Gaps or extreme<br />
characteristics in the<br />
chart data.<br />
Beam, the time in the Sunny<br />
Beam was set forward or<br />
backwards.<br />
(date, daylight saving time, time,<br />
time zone) in the Sunny Beam more<br />
than necessary.<br />
This behavior only affects the • Only change the time settings of<br />
chart data on the Sunny Beam the Sunny Beam if the sun has set.<br />
display, and not the calculated The time difference therefore has<br />
data (total energy, energy no effect on the charts on the<br />
today, energy yesterday, etc.). display of the Sunny Beam.<br />
Alarm sound for the An error has occurred in an • Open the details for this event as<br />
Sunny Beam inverter.<br />
described in section 7.6 "Calling<br />
An alarm sound can be<br />
heard.<br />
up Events" (page 48). Contact<br />
your installer and inform him about<br />
the event message and the serial<br />
number of the inverter for which the<br />
event occurred.<br />
The state of charge of the • Charge the batteries as described<br />
battery is low.<br />
in section 7.5.2.<br />
Display<br />
The state of charge of the • Charge the batteries as described<br />
The display does not batteries is so low that reliable in section 7.5.2.<br />
switch on anymore. operation is impossible.<br />
Warning symbol An error may occur in the • No action is required.<br />
( )<br />
foreseeable future.<br />
The Sunny Beam<br />
displays a warning<br />
symbol.<br />
User Manual BeamBT-BEN094911 85
Troubleshooting SMA America, LLC<br />
Problem Cause Rectification<br />
Error symbol ( ) There is an error in an inverter. • Open the details for this event as<br />
The Sunny Beam<br />
displays an error<br />
symbol.<br />
described in section 7.6 "Calling<br />
up Events" (page 48). Contact<br />
your installer and inform him about<br />
the event message and the serial<br />
number of the inverter for which the<br />
event occurred.<br />
The computer is to be The Sunny Beam was connected • No action is required. It does not<br />
restarted<br />
to this computer for the first time. affect the computer or the Sunny<br />
After connecting the An update has been performed Beam if you do not restart the<br />
Sunny Beam to the<br />
computer, the computer<br />
will signal that it needs<br />
to be restarted.<br />
for the Sunny Beam.<br />
computer.<br />
Further information about SMA Bluetooth <strong>Wireless</strong> technology can be found in the<br />
download section at www.SMA-America.com.<br />
86 BeamBT-BEN094911 User Manual
SMA America, LLC Technical Data<br />
13 Technical Data<br />
Communication<br />
Inverter communication Bluetooth<br />
Computer communication USB 2.0<br />
Interfaces<br />
USB<br />
Max. number of devices<br />
Bluetooth 12<br />
Max. communication range<br />
Bluetooth in the open air up to 328 ft (100 m)<br />
Power supply<br />
Power supply integrated solar cell, USB connection cable, USB plug-in<br />
power supply<br />
Number of batteries 2<br />
Type of battery Rechargeable nickel-metal hydride batteries (NiMH),<br />
type Mignon (AA), 1.2 V DC <strong>with</strong> low self-discharge, e.g.<br />
Eneloop<br />
Environmental conditions for operation<br />
Ambient temperature +32 °F … +104 °F (0 °C … +40 °C)<br />
Protection rating IP20<br />
General data<br />
Dimensions, W/H/D 5 in./3 in./7 3 ⁄ 4 in. (127 mm/75 mm/195 mm)<br />
Weight approx. 350 g (<strong>with</strong> batteries)<br />
Mounting location indoors<br />
Status display LCD<br />
User Manual BeamBT-BEN094911 87
Technical Data SMA America, LLC<br />
Software language German, English, Spanish, French, Italian, Greek, Dutch,<br />
Portuguese, Czech<br />
Features<br />
Display LCD<br />
Operation Rotary push button<br />
Information displayed<br />
General information Time, date<br />
PV system data Current power, power today and power yesterday, total<br />
energy, daily energy, energy yesterday, energy for the<br />
last 31 days and the last 12 months, and specific annual<br />
yield, revenue today and total revenue, CO 2 avoided<br />
today and total, warnings, errors<br />
Accessories<br />
USB plug-in power supply<br />
Replacement batteries<br />
88 BeamBT-BEN094911 User Manual
SMA America, LLC Technical Data<br />
13.1 FCC Compliance Information<br />
SMA system monitoring unit, model SMA Sunny Beam Bluetooth.<br />
This device complies <strong>with</strong> Part 15 of the FCC Rules. Operation is subject to the following conditions:<br />
(1) This device may not cause harmful interference, and<br />
(2) this device must accept any interference received, including interference that may cause undesired<br />
operation.<br />
NOTE: This equipment has been tested and found to comply <strong>with</strong> the limits for a Class B digital<br />
device, pursuant to Part 15 of the FCC Rules. These limits are designed to provide reasonable<br />
protection against harmful interference in a residential installation. This equipment generates, uses,<br />
and can radiate radio frequency energy and if not installed and used in accordance <strong>with</strong> the<br />
instructions, may cause harmful interference to radio communications. However, there is no guarantee<br />
that interference will not occur in a particular installation. If this equipment does cause harmful<br />
interference to radio or television reception, which can be determined by turning the equipment off<br />
and on, the user is encouraged to try to correct the interference by one or more of the following<br />
measures:<br />
• Reorient or relocate the receiving antenna.<br />
• Increase the separation between the equipment and the receiver.<br />
• Connect the equipment into an outlet on a circuit different from that to which the receiver is<br />
connected.<br />
• Consult the dealer or an experienced radio/TV technician for help.<br />
• The user is cautioned that changes or modifications not expressly approved by SMA, could void<br />
the user’s authority to operate this equipment.<br />
Contact SMA for more information.<br />
User Manual BeamBT-BEN094911 89
Technical Data SMA America, LLC<br />
RF-exposure Statement<br />
The SMA Sunny Beam Bluetooth contains a modular transmitter. Thus it must have a separation of at<br />
least 7 7 ⁄ 8 in. between the antenna and the body of the user or nearby persons, excluding hands,<br />
wrists, feet, and ankles.<br />
90 BeamBT-BEN094911 User Manual
SMA America, LLC Accessories<br />
14 Accessories<br />
14.1 USB Plug-in Power Supply<br />
The USB plug-in power supply can be used to connect the Sunny Beam to a socket, to charge the<br />
batteries via the mains instead of using the solar cell.<br />
Order number: <strong>BEAM</strong>-BT-SUPPLY<br />
Position Number Name<br />
A 1 USB plug-in power supply<br />
B 4 Adapter<br />
14.2 Replacement Batteries<br />
Order number: <strong>BEAM</strong>-BT-BATTERY<br />
Position Number Name<br />
A 2 Eneloop rechargeable batteries<br />
User Manual BeamBT-BEN094911 91
Contact SMA America, LLC<br />
15 Contact<br />
If you have technical problems concerning our products, contact the SMA Serviceline. We require the<br />
following information in order to provide you <strong>with</strong> the necessary assistance:<br />
• Hardware version of the Sunny Beam (see section 7.10.2)<br />
• Sunny Beam firmware version <strong>with</strong> Bluetooth (see section 7.10.2)<br />
• Firmware version of the SMA Bluetooth Piggy-Back in the inverter<br />
• Type and serial number of the inverter<br />
In case you need to send in the Sunny Beam, remove the batteries first.<br />
SMA Solar <strong>Technology</strong> America, LLC<br />
4031 Alvis Court<br />
Rocklin, CA 95677<br />
Tel. +1 916 625 0870<br />
Tel. +1 877-MY SMA TECH<br />
Tel. +1 877 697 6283 (Toll free, available for USA, Canada and Puerto Rico)<br />
Fax +1 916 625 0871<br />
Service@SMA-America.com<br />
www.SMA-America.com<br />
92 BeamBT-BEN094911 User Manual
���������������������������<br />
�������������������