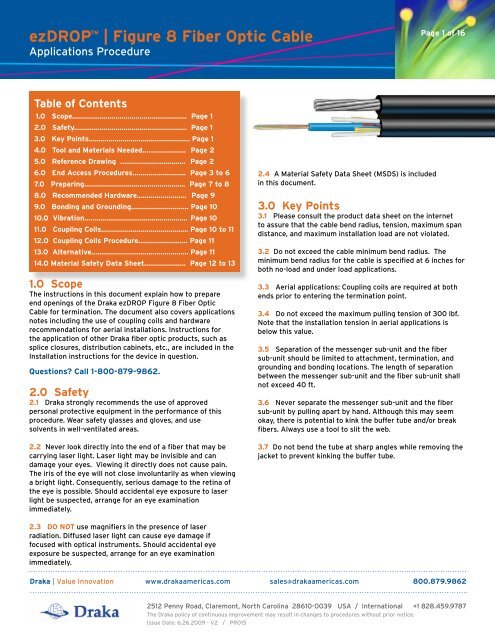
ezDROPTM | Figure 8 Fiber Optic Cable - Draka Communications
ezDROPTM | Figure 8 Fiber Optic Cable - Draka Communications
ezDROPTM | Figure 8 Fiber Optic Cable - Draka Communications

You also want an ePaper? Increase the reach of your titles
YUMPU automatically turns print PDFs into web optimized ePapers that Google loves.
ezDROP TM<br />
Applications Procedure<br />
1.0 Scope<br />
The instructions in this document explain how to prepare<br />
end openings of the <strong>Draka</strong> ezDROP <strong>Figure</strong> 8 <strong>Fiber</strong> <strong>Optic</strong><br />
<strong>Cable</strong> for termination. The document also covers applications<br />
notes including the use of coupling coils and hardware<br />
recommendations for aerial installations. Instructions for<br />
the application of other <strong>Draka</strong> fiber optic products, such as<br />
splice closures, distribution cabinets, etc., are included in the<br />
Installation instructions for the device in question.<br />
Questions? Call 1-800-879-9862.<br />
| <strong>Figure</strong> 8 <strong>Fiber</strong> <strong>Optic</strong> <strong>Cable</strong><br />
Table of Contents<br />
1.0 Scope.......................................................... Page 1<br />
2.0 Safety......................................................... Page 1<br />
3.0 Key Points................................................... Page 1<br />
4.0 Tool and Materials Needed...................... Page 2<br />
5.0 Reference Drawing ................................. Page 2<br />
6.0 End Access Procedures........................... Page 3 to 6<br />
7.0 Preparing................................................... Page 7 to 8<br />
8.0 Recommended Hardware......................... Page 9<br />
9.0 Bonding and Grounding............................. Page 10<br />
10.0 Vibration.................................................... Page 10<br />
11.0 Coupling Coils............................................ Page 10 to 11<br />
12.0 Coupling Coils Procedure......................... Page 11<br />
13.0 Alternative................................................. Page 11<br />
14.0 Material Safety Data Sheet..................... Page 12 to 13<br />
2.0 Safety<br />
2.1 <strong>Draka</strong> strongly recommends the use of approved<br />
personal protective equipment in the performance of this<br />
procedure. Wear safety glasses and gloves, and use<br />
solvents in well-ventilated areas.<br />
2.2 Never look directly into the end of a fiber that may be<br />
carrying laser light. Laser light may be invisible and can<br />
damage your eyes. Viewing it directly does not cause pain.<br />
The iris of the eye will not close involuntarily as when viewing<br />
a bright light. Consequently, serious damage to the retina of<br />
the eye is possible. Should accidental eye exposure to laser<br />
light be suspected, arrange for an eye examination<br />
immediately.<br />
2.3 DO NOT use magnifiers in the presence of laser<br />
radiation. Diffused laser light can cause eye damage if<br />
focused with optical instruments. Should accidental eye<br />
exposure be suspected, arrange for an eye examination<br />
immediately.<br />
2.4 A Material Safety Data Sheet (MSDS) is included<br />
in this document.<br />
Page 1 of 16<br />
3.0 Key Points<br />
3.1 Please consult the product data sheet on the internet<br />
to assure that the cable bend radius, tension, maximum span<br />
distance, and maximum installation load are not violated.<br />
3.2 Do not exceed the cable minimum bend radius. The<br />
minimum bend radius for the cable is specified at 6 inches for<br />
both no-load and under load applications.<br />
3.3 Aerial applications: Coupling coils are required at both<br />
ends prior to entering the termination point.<br />
3.4 Do not exceed the maximum pulling tension of 300 lbf.<br />
Note that the installation tension in aerial applications is<br />
below this value.<br />
3.5 Separation of the messenger sub-unit and the fiber<br />
sub-unit should be limited to attachment, termination, and<br />
grounding and bonding locations. The length of separation<br />
between the messenger sub-unit and the fiber sub-unit shall<br />
not exceed 40 ft.<br />
3.6 Never separate the messenger sub-unit and the fiber<br />
sub-unit by pulling apart by hand. Although this may seem<br />
okay, there is potential to kink the buffer tube and/or break<br />
fibers. Always use a tool to slit the web.<br />
3.7 Do not bend the tube at sharp angles while removing the<br />
jacket to prevent kinking the buffer tube.<br />
<strong>Draka</strong> | Value Innovation www.drakaamericas.com sales@drakaamericas.com 800.879.9862<br />
2512 Penny Road, Claremont, North Carolina 28610-0039 USA / International +1 828.459.9787<br />
The <strong>Draka</strong> policy of continuous improvement may result in changes to procedures without prior notice.<br />
Issue Date: 6.26.2009 - V2 / PR015
ezDROP TM | <strong>Figure</strong> 8 <strong>Fiber</strong> <strong>Optic</strong> <strong>Cable</strong><br />
Applications Procedure<br />
4.0 Tools and Materials Needed<br />
for <strong>Cable</strong> Access<br />
[+] Nine inch pliers<br />
[+] Wire strippers<br />
[+] Safety gloves<br />
[+] Buffer access tool<br />
[+] Utility knife<br />
[+] Snips<br />
[+] Needle nose pliers<br />
Not pictured:<br />
Vinyl tape, isopropyl alcohol, small black wire ties,<br />
lint free wipes<br />
4.1 Alternative Web-Slitter for<br />
End Access<br />
There are several web-slitting tools on the market that are<br />
designed to cut the web to separate the fiber sub-unit from<br />
the messenger sub-unit. <strong>Draka</strong> has tested and recommends<br />
using the Benner-Nawman UP-B36 <strong>Cable</strong> Slitter for slitting<br />
the web during end access. The largest opening should be<br />
used with the <strong>Draka</strong> ezDROP <strong>Figure</strong> 8 <strong>Fiber</strong> <strong>Optic</strong> <strong>Cable</strong>.<br />
Banner-Nawman, Inc.<br />
UP-B36 <strong>Cable</strong> Slitter<br />
http://www.benner-nawman.com/<br />
1-800-992-3833<br />
5.0 Reference Drawing<br />
<strong>Optic</strong>al <strong>Fiber</strong>s<br />
.............<br />
Page 2 of 16<br />
Central Core Tube<br />
(gel-filled)<br />
Strength Members<br />
(dielectric)<br />
Water Blocking<br />
Jacket<br />
.........................Ripcord<br />
Strength Yarns (polyethylene)<br />
................<br />
Integrated<br />
Messenger<br />
...................<br />
Messenger<br />
Sub-Unit<br />
<strong>Fiber</strong><br />
Sub-Unit<br />
..............<br />
......................<br />
..............<br />
Web<br />
Wire<br />
Messenger<br />
<strong>Fiber</strong> Buffer Tube<br />
Ripcord<br />
Strength<br />
Yarns<br />
Dielectric<br />
Strength Member
ezDROP TM | <strong>Figure</strong> 8 <strong>Fiber</strong> <strong>Optic</strong> <strong>Cable</strong><br />
Applications Procedure<br />
6.0 End Access Procedure<br />
1. Determine the length of fiber and tube needed for<br />
splicing as recommended by the manufacturer of the splice<br />
closure or termination box. Leave enough sub-unit length to<br />
route from the messenger attachment point to the closure.<br />
Mark the cable or place some tape to identify the end of the<br />
length to be accessed.<br />
2. Identify the fiber sub-unit and the messenger sub-unit.<br />
The fiber sub-unit will always be the half with print.<br />
3. At 12 inches from the end of the cable, cut a small hole<br />
through the web using a utility knife such that the knife<br />
blade will fit through the web. Place the knife blade through<br />
the web such that the sharp end is facing toward the end of<br />
the cable and away from your body. Rotate the knife such<br />
that it is pointing slightly towards the messenger and away<br />
from the fiber sub-unit. The tilting of the knife will prevent<br />
inadvertent cutting into the fiber sub-unit.<br />
4. Hold the knife in place at the slight angle and pull the<br />
cable towards your body, slitting web is with the utility<br />
knife.<br />
NOTE:<br />
By holding the knife in place at the slight angle and pulling<br />
the cable through the blade, the web is cut smoothly and<br />
consistently, minimizing risk of cutting into the fiber<br />
sub-unit.<br />
Printed located on fiber sub-unit<br />
Web<br />
↓<br />
↓<br />
Print Located On<br />
<strong>Fiber</strong> Sub-Unit<br />
Blade direction<br />
Hold knife in place and pull cable<br />
Page 3 of 16
ezDROP TM | <strong>Figure</strong> 8 <strong>Fiber</strong> <strong>Optic</strong> <strong>Cable</strong><br />
Applications Procedure<br />
5. At 2 inches from the end, score the fiber sub-unit, using<br />
14 AWG wire strippers.<br />
6. Grab a section of intact cable with one hand<br />
(downstream from the separated 12 inches) and use the wire<br />
strippers in the other hand to pull the 2-inch section of the<br />
sheath off of the fiber sub-unit. The ripcord, buffer tube, and<br />
strength elements will now be exposed.<br />
NOTE:<br />
Grab a section of the cable with the messenger still attached<br />
for leverage when stripping the 2-inch jacket section.<br />
7. From the end of the access window (location marked in<br />
Step 1), use the utility knife to separate the remaining length<br />
of cable. Again, make sure to slightly tilt the knife blade<br />
away from the fiber sub-unit (printed side) and<br />
towards the messenger sub-unit. Hold the knife in place and<br />
pull the cable towards your body. Pull in multiple steps,<br />
2–3 ft at a time.<br />
8. Cut the separated messenger sub-unit at the desired<br />
location. Make sure to leave some length for hardware<br />
attachment within the closure or termination unit and/or<br />
pole.<br />
NOTE:<br />
If the steel messenger needs to be exposed for grounding /<br />
bonding, use 14 AWG strippers to strip off the sheath from<br />
the messenger.<br />
Use the 14 AWG wire strippers<br />
Cut separated<br />
messenger sub-unit<br />
Separate remaining length<br />
Page 4 of 16
ezDROP TM | <strong>Figure</strong> 8 <strong>Fiber</strong> <strong>Optic</strong> <strong>Cable</strong><br />
Applications Procedure<br />
9. Make a second score of the fiber sub-unit at the end of<br />
the desired access window. The ripcord will be used<br />
to remove the sheath from the end of the cable up to<br />
this location.<br />
10. Locate the red ripcord and wrap it through and around<br />
the needle nose pliers. With one hand holding the buffer<br />
tube and strength elements, pull the ripcord in the opposite<br />
direction. Holding the tube and strength elements will<br />
counteract the force of pulling the ripcord in the opposite<br />
direction.<br />
NOTE:<br />
Hold the fiber sub-unit at one end while pulling the ripcord<br />
in the opposite direction. This will prevent kinking of the<br />
buffer tube.<br />
11. Pull the ripcord in 2–3 ft increments and re-grip the<br />
fiber sub-unit with the opposite hand. Pull the ripcord to the<br />
second score location.<br />
DO NOT wrap the buffer tube around the palm of your hand<br />
for leverage while pulling on the ripcord. This may kink the<br />
tube and break fibers. Keep the fiber buffer tube as straight<br />
as possible while pulling on the ripcord.<br />
Ring cut at end of<br />
access window<br />
Use ripcord to<br />
open fiber sub-unit<br />
Wrap Ripcord<br />
Around Pliers<br />
Page 5 of 16
ezDROP TM | <strong>Figure</strong> 8 <strong>Fiber</strong> <strong>Optic</strong> <strong>Cable</strong><br />
Applications Procedure<br />
12. While holding the buffer tube and strength elements<br />
in one hand, peel away the sheath. In order to prevent the<br />
tube from kinking, re-grip every 1–2 ft.<br />
NOTE:<br />
Pull a couple of the yarns through the beginning of the tear<br />
to initiate the opening. This will help guide the tube out of<br />
the jacket.<br />
13. Cut the strength yarns, ripcord and rigid<br />
strength elements.<br />
14. Determine the length of fibers to be accessed, score<br />
and snap the buffer tube and remove the tube in 12–15 inch<br />
(30–40 cm) increments until the desired length of fiber is<br />
exposed. Note that the small buffer tube can be routed in<br />
most splice trays eliminating the need for transportation<br />
tubing. Clean fibers and prepare for splicing.<br />
Hold tubes up and peel<br />
jacket off to side<br />
Page 6 of 16
ezDROP TM | <strong>Figure</strong> 8 <strong>Fiber</strong> <strong>Optic</strong> <strong>Cable</strong><br />
Applications Procedure<br />
7.0 Preparing the Messenger Sub-Unit<br />
for Hardware Attachment<br />
(AERIAL INSTALLATION ONLY)<br />
1. Determine the location on the cable at which the<br />
messenger will be attached to hardware. Mark that<br />
location and separate the messenger 8 inches on either side<br />
of that mark using a utility knife. Make sure to slightly tilt the<br />
knife blade away from the fiber sub-unit (printed side) and<br />
towards the messenger sub-unit. The tilting of the knife will<br />
prevent inadvertent cutting into the fiber sub-unit.<br />
Be sure to leave enough fiber sub-unit length for the coupling<br />
coil and routing of the buffer tube and fiber in the closure.<br />
2. Cut the messenger sub-unit at the marked location.<br />
3. At 2–3 inches from the end of the cable, score the<br />
messenger sub-unit, using 14 AWG wire strippers by<br />
repeatedly twisting. Use the wire strippers to pull the 2–3 inch<br />
section of sheath from the messenger. This will expose the<br />
stranded steel messenger and allow it to be attached to the<br />
clamps.<br />
Use 14-gage<br />
wire strippers<br />
to remove<br />
sheath<br />
Separate sub-units for<br />
hardware attachment<br />
Page 7 of 16
ezDROP TM | <strong>Figure</strong> 8 <strong>Fiber</strong> <strong>Optic</strong> <strong>Cable</strong><br />
Applications Procedure<br />
4. Slide the yoke of the Wirevise clamp onto the<br />
steel messenger.<br />
NOTE:<br />
The yoke will only slide on in one direction. It<br />
cannot be removed from the cable once initially installed.<br />
Careful measurements must be made to ensure the clamp<br />
is at the correct location on the cable.<br />
5. Once the yoke is secured, attach the bail to the yoke.<br />
The bail will be attached to hooks on the poles or house.<br />
In order to prevent additional separation of the fiber and<br />
messenger sub-units, vinyl tape should be applied around<br />
the cable adjacent to the wirevise clamp. A black wire<br />
tie should be applied over the vinyl tape for additional<br />
protection. Additionally, depending on recommended local<br />
practices, multiple twists should be applied for each aerial<br />
span.<br />
NOTE:<br />
Apply vinyl tape and a black wire tie to the cable to<br />
prevent undesired separation.<br />
Black wire tie<br />
Vinyl Tape<br />
Yoke<br />
Stranded<br />
steel<br />
messenger<br />
Page 8 of 16<br />
Bail
ezDROP TM | <strong>Figure</strong> 8 <strong>Fiber</strong> <strong>Optic</strong> <strong>Cable</strong><br />
Applications Procedure<br />
8.0 Recommended Hardware for the<br />
Aerial Installation of <strong>Draka</strong> ezDrop |<br />
<strong>Figure</strong> 8 <strong>Fiber</strong> <strong>Optic</strong> <strong>Cable</strong><br />
<strong>Draka</strong>’s ezDROP <strong>Figure</strong> 8 <strong>Fiber</strong> <strong>Optic</strong> <strong>Cable</strong> is designed<br />
for use with standard wirevise service drop wire clamps in<br />
aerial applications. Wirelink splices can be used to splice<br />
together the messenger at mid-point locations for<br />
continuity purposes.<br />
These parts are specifically designed for interface with the<br />
3/23” stranded galvanized steel messenger in the ezDROP<br />
<strong>Figure</strong> 8 <strong>Fiber</strong> <strong>Optic</strong> <strong>Cable</strong>.<br />
MacLean Power Systems<br />
Clamp: Wirevise Part # 5056<br />
Splice: Wirelink Part #5057 or 5057N<br />
http://www.macleanpower.com<br />
These parts are available through various<br />
distribution outlets.<br />
WARNING:<br />
The Wirevise clamps are the only approved clamps with the<br />
<strong>Draka</strong> ezDROP <strong>Figure</strong> 8 <strong>Fiber</strong> <strong>Optic</strong> <strong>Cable</strong>. Other clamps<br />
such as twisted wire dead end, universal clamps or drop<br />
wire wedge clamps are not compatible with the ezDROP<br />
<strong>Figure</strong> 8 <strong>Fiber</strong> <strong>Optic</strong> <strong>Cable</strong>. Use of unapproved clamps may<br />
lead to damage to the cable and/or fibers. Please<br />
consult <strong>Draka</strong> Customer Service if there are any questions,<br />
1-800-879-9862.<br />
Yoke<br />
Wirevise clamps<br />
Bail<br />
Wirelink splices<br />
Page 9 of 16
ezDROP TM | <strong>Figure</strong> 8 <strong>Fiber</strong> <strong>Optic</strong> <strong>Cable</strong><br />
Applications Procedure<br />
9.0 Bonding and Grounding<br />
When installed aerially in the vicinity of power lines,<br />
<strong>Figure</strong> 8 Drop cables (and all cables with metallic<br />
elements) are susceptible to an induced voltage. <strong>Draka</strong> strongly<br />
recommends the proper bonding and grounding of the metallic<br />
components according to National Electric Code (NEC) and the<br />
National Electrical Safety Code (NESC).<br />
Article 770 of NESC states that all non-current<br />
carrying metallic elements of an optical fiber cable must be<br />
bonded and grounded at the point of entrance into a building or<br />
residence.<br />
There may also be local and state regulations that supersede the<br />
NEC and NESC recommendations. <strong>Draka</strong> strongly recommends<br />
installation according to the proper local and state regulations.<br />
National Electrical Code, ANSI/NFPA 770, 1999 Edition<br />
National Electrical Safety Code, ANSI C2-1997<br />
10.0 Vibration (Aerial Installation Only)<br />
When installed aerially, ezDROP <strong>Figure</strong> 8 <strong>Fiber</strong> <strong>Optic</strong> <strong>Cable</strong>s may<br />
be subjected to wind, which can cause the cable to vibrate. Low<br />
frequencey, high amplitude vibration, often called galloping or<br />
dancing, may result under certain circumstances.<br />
In order to minimize galloping, <strong>Draka</strong> recommends applying one<br />
complete twist for every 20 to 40 ft of ezDROP <strong>Figure</strong> 8 <strong>Fiber</strong><br />
<strong>Optic</strong> <strong>Cable</strong>.<br />
11.0 Coupling Coils<br />
(AERIAL INSTALLATION ONLY)<br />
11.1 Coupling Coil Overview<br />
Coupling coils are necessary to prevent an undesirable<br />
phenomenon commonly referred to as “fiber retraction” at<br />
splice closures or other termination points. When installed<br />
aerially, a cable may be subjected to weather loading as a<br />
result of wind and ice. This weather loading can cause a<br />
significant elongation of the cable. In typical stranded loose<br />
tube cables, the fibers, buffer tube, and cable are coupled<br />
together by design, and will elongate or strain in equal<br />
amounts. However, in central-tube-type cables, there is<br />
insufficient coupling between the fibers and the buffer tube.<br />
Because of this lack of coupling, as the cable elongates due<br />
to weather loading, the fibers will retract at both ends of the<br />
cable. This fiber retraction at closures can lead to high<br />
optical loss at the termination points, or in a worst-case<br />
scenario, break the splice.<br />
The use of coupling coils is a necessary applications solution<br />
to prevent fiber retraction in the ezDROP <strong>Figure</strong> 8 <strong>Fiber</strong> <strong>Optic</strong><br />
<strong>Cable</strong>. Coupling coils are a means to couple the fibers to the<br />
buffer tube and the cable, such that they all behave together,<br />
similar to a stranded loose tube cable.<br />
<strong>Cable</strong> compling<br />
coil<br />
6”<br />
Page 10 of 16
ezDROP TM | <strong>Figure</strong> 8 <strong>Fiber</strong> <strong>Optic</strong> <strong>Cable</strong><br />
Applications Procedure<br />
<strong>Draka</strong> has conducted extensive testing and has found coupling coils<br />
to be the best solution to prevent fiber retraction. A coupling coil<br />
consists of four 6-inch loops of cable at each end of the cable.<br />
Details of preparing a coupling coil are included in Section 9.2.<br />
NOTE:<br />
A coupling coil must be placed at both ends of the cable to be<br />
effective. Failure to place a coupling coil at each end of the cable<br />
can lead to fiber retraction from the closure or termination box.<br />
12.0 <strong>Cable</strong> Coupling Coil Procedure<br />
12.1 Determine suitable location to place the cable coupling coil that<br />
is non-intrusive and does not cross into other rights-of-way.<br />
NOTE:<br />
Coupling coils should be placed at both ends of the cable between<br />
the clamp and the splice closure or termination box.<br />
12.2 Make a coil with at least 4 loops of cable, with a loop diameter<br />
of at least 6 inches. The coil should be no smaller than 6 inches, but<br />
may be larger.<br />
12.3 Secure the coil together by applying cable ties at 4 locations of<br />
the coupling coil, 90 degrees apart. Using less than 4 cable ties may<br />
result in the coil unraveling.<br />
13.0 Alternative: <strong>Fiber</strong> Sub-Unit<br />
Coupling Coil Procedure<br />
13.1 Determine a suitable location to place the fiber sub-unit<br />
coupling coil. A common practice is to attach the coil directly<br />
to the bail of the Wirevise clamps. Coils should be placed at<br />
both ends of the cable, between the clamp and the termination<br />
point.<br />
13.1 Make a coil with at least 4 loops of the fiber sub-unit,<br />
with a loop diameter of at least 4 inches. The coil should be no<br />
smaller than 4 inches, but may be larger.<br />
13.1 Secure the coil together by applying cable ties at 4<br />
locations of the coupling coil, 90 degrees apart. Using less<br />
than 4 cable ties may result in the coil unraveling.<br />
<strong>Fiber</strong> sub-unit<br />
coupling coil<br />
Page 11 of 16
ezDROP TM | <strong>Figure</strong> 8 <strong>Fiber</strong> <strong>Optic</strong> <strong>Cable</strong><br />
Applications Procedure<br />
14.0 Material Safety Data Sheet<br />
I. Company/Product Identification<br />
PRODUCT: <strong>Fiber</strong> <strong>Optic</strong> Telecommunications <strong>Cable</strong><br />
MANUFACTURER: <strong>Draka</strong> <strong>Communications</strong> USA, Inc.<br />
<strong>Optic</strong>al <strong>Cable</strong> Plant<br />
2512 Penny Road<br />
Claremont, North Carolina USA 28610-0039<br />
NAME OF PREPARER: Rick Miller, <strong>Cable</strong> Safety Coordinator<br />
INFORMATION PHONE: (800)-729-3737 within United States;<br />
Outside U.S.A. (828)-459-9821<br />
II. Composition/Information on Ingredients<br />
Page 12 of 16<br />
COMPONENT CAS# OSHA PEL ACGIH/OSHA TLV<br />
UV Acrylate N/A N/A N/A<br />
Amorphous polyolefin 009010-79-1 N/A N/A<br />
09002-88-4 N/A N/A<br />
Polybutene 9003-29-6 N/A N/A<br />
Buffer tube gel N/A N/A N/A<br />
Thermoplastic PVC N/A N/A N/A<br />
Epoxy/fiberglass rod N/A N/A N/A<br />
<strong>Optic</strong>al fiber N/A N/A N/A<br />
Thermoplastic polyethylene 25087-34-7 3.5 mg/m3 3.5 mg/m3<br />
Steel tape N/A N/A N/A<br />
III. Hazards Identification<br />
By nature of the product, no known immediate or<br />
chronic health hazards are expected. All industrial<br />
products containing<br />
chemicals should be handled with caution to avoid<br />
unnecessary exposure.<br />
IV. First Aid Measures<br />
[+] Eye contact with glass fiber or filling<br />
gel/flooding compound: Immediately flush eye(s)<br />
with water and seek medical attention.<br />
[+] Skin penetration with glass fiber: Remove fiber<br />
by mechanical means or seek medical attention.<br />
[+] Skin contact with filling gel/flooding compound:<br />
Wash thoroughly with soap and water.<br />
V. Fire Fighting Measures<br />
This material will burn if exposed to flame. Fire<br />
fighters should protect themselves from combustion<br />
products that may include carbon dioxide, carbon<br />
monoxide, or other toxic gases. Wear self-contained<br />
breathing apparatus and complete personal protective<br />
equipment. Fire extinguishing media include water,<br />
carbon dioxide, foam or dry chemical.<br />
VI. Accidental Release Measures<br />
By nature of the product, release is not to<br />
be expected.
ezDROP TM | <strong>Figure</strong> 8 <strong>Fiber</strong> <strong>Optic</strong> <strong>Cable</strong><br />
Applications Procedure<br />
VII. Handling and Storage<br />
No special precautions required.<br />
VIII. Exposure Controls/Personal Protection<br />
Use leather gloves when handling reels to prevent<br />
splinters, cuts and abrasions. Filling gel or flooding<br />
compound may cause skin irritation, use latex or nitrile<br />
gloves. Filling gel or flooding compound may cause<br />
eye irritation; always wear approved safety glasses,<br />
flush with plenty of water and seek medical attention if<br />
irritation persists. <strong>Cable</strong>s contain glass fibers, always<br />
wear approved safety glasses. Seek medical attention<br />
if glass fiber enters eye. <strong>Cable</strong>s may contain steel<br />
armor tape and steel wire which could cut or puncture<br />
skin, wear leather or other cut resistant gloves.<br />
IX. Physical and Chemical Properties<br />
Boiling Point: N/A Evaporation Rate: N/A<br />
Melting Point: N/A Specific Gravity: N/A<br />
Vapor Pressure: N/A Water Solubility: N/A<br />
Vapor Density: N/A pH: N/A<br />
X. Stability and Reactivity<br />
Chemical Incompatibilities: Unknown<br />
Chemical Instabilities: Unknown<br />
Hazardous Polymerization: Will not occur<br />
XI. Toxicological Information<br />
No known toxicity.<br />
XII. Ecological Information<br />
No known adverse ecological effects.<br />
XIII. Disposal Considerations<br />
Dispose in compliance with Federal, State and local<br />
laws and regulations.<br />
XIV. Transport Information<br />
Non-hazardous.<br />
XV. Regulatory Information<br />
None.<br />
XVI. Disclaimer<br />
The information contained herein is believed to be<br />
accurate but is not warranted to be so. <strong>Draka</strong> makes no<br />
warranty of any kind, expressed or implied, concerning<br />
the safe use of this material in your process or end<br />
use. User has the sole responsibility to determine the<br />
suitability for any use. User must meet all applicable<br />
safety and health standards.<br />
Page 13 of 16
ezDROP TM | <strong>Figure</strong> 8 <strong>Fiber</strong> <strong>Optic</strong> <strong>Cable</strong><br />
Applications Procedure<br />
Notes:<br />
Page 14 of 16
ezDROP TM | <strong>Figure</strong> 8 <strong>Fiber</strong> <strong>Optic</strong> <strong>Cable</strong><br />
Applications Procedure<br />
I N N O V A T I O N<br />
Value Innovation is a way of looking at<br />
the world. How can we help our customers<br />
do more, make more, save more, achieve<br />
more? <strong>Draka</strong> is a global leader in delivering<br />
advanced cable and network solutions.<br />
Focusing on the passive elements of the<br />
network, our goal is to deliver superior<br />
network, connectivity and cable solutions<br />
that meet your current and future network<br />
requirements, based on more bandwidth,<br />
longer life and absolute reliability.<br />
Page 15 of 16
TM<br />
<strong>Draka</strong> <strong>Communications</strong> - Americas