OPERATING INSTRUCTIONS - Mitsubishi Electric Australia
OPERATING INSTRUCTIONS - Mitsubishi Electric Australia
OPERATING INSTRUCTIONS - Mitsubishi Electric Australia

Create successful ePaper yourself
Turn your PDF publications into a flip-book with our unique Google optimized e-Paper software.
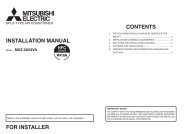
SPLIT-TYPE AIR CONDITIONERS<br />
<strong>OPERATING</strong> <strong>INSTRUCTIONS</strong><br />
INDOOR UNIT<br />
MSZ-A18YV<br />
MSZ-A24YV<br />
MSZ-A26YV<br />
MSZ-A30YV<br />
For customers<br />
Thank you very much for purchasing this <strong>Mitsubishi</strong> room air conditioner.<br />
• To use this unit correctly and safely, be sure to read this operating instructions<br />
before use. Keep this manual carefully for later reference.<br />
• Be sure to receive a guarantee card from your dealer and check that the purchased<br />
date and shop name, etc. are entered correctly.<br />
• This air conditioner should not be installed by the customer. (Safety and performance<br />
functions cannot be assured.)
CONTENTS<br />
SAFETY PRECAUTIONS ........................................................................................................................................................ 2<br />
NAME OF EACH PART ............................................................................................................................................................ 3<br />
PREPARATION BEFORE OPERATION .................................................................................................................................. 4<br />
I FEEL... AUTO OPERATION ................................................................................................................................................... 6<br />
MANUAL OPERATION (COOL, DRY, HEAT) ........................................................................................................................... 7<br />
AIR FLOW VELOCITY AND DIRECTION ADJUSTMENT ...................................................................................................... 7<br />
LONG OPERATION ................................................................................................................................................................. 8<br />
ECONO COOL OPERATION ................................................................................................................................................... 8<br />
TIMER OPERATION (ON/OFF TIMER) ................................................................................................................................... 8<br />
WHEN THE AIR CONDITIONER IS NOT GOING TO BE USED FOR A LONG TIME ............................................................ 9<br />
MAINTENANCE ....................................................................................................................................................................... 9<br />
CLEANING THE CATECHIN AIR FILTER .............................................................................................................................. 10<br />
REPLACEMENT OF THE AIR CLEANING FILTER ............................................................................................................... 10<br />
BEFORE CONTACTING THE SERVICE REPRESENTATIVE, CHECK THE FOLLOWING AGAIN ...................................... 11<br />
WHEN YOU THINK THAT TROUBLE HAS OCCURRED ...................................................................................................... 11<br />
INSTALLATION, RELOCATION AND INSPECTION .............................................................................................................. 12<br />
SAFETY PRECAUTIONS<br />
• Since rotating parts and parts which could cause an electric shock are used in this product, be sure to read<br />
these “Safety Precautions” before use.<br />
• Since the cautionary items shown here are important for safety, be sure to observe them.<br />
Marks and their meanings<br />
WARNING: Incorrect handling could cause a serious hazard, such as death, serious injury, etc. with a high probability.<br />
CAUTION: Incorrect handling could cause a serious hazard depending on the conditions.<br />
Meanings of symbols used in this manual<br />
• The colour of the sticker affixed to the unit is written in the parentheses.<br />
: Be sure not to do.<br />
2<br />
: Be sure to follow the instruction.<br />
(Black) : Never insert your finger or stick, etc.<br />
(Black) : Never step onto the indoor/outdoor unit and do not put anything on them.<br />
: Danger of electric shock. Be careful.<br />
: Be sure to disconnect the power supply plug from the power outlet.<br />
: Be sure to shut off the power.<br />
• After reading this manual, keep it together with the installation manual in a handy place for easy reference.<br />
Warning mark positions<br />
FRONT PANEL<br />
ENCLOSURE<br />
ENCLOSURE<br />
AIR OUTLET<br />
• This air conditioner is NOT intended for use by children or infirm persons without supervisions.<br />
WARNING<br />
Do not use intermediate connection of the power supply cord or the extension cord and do not<br />
connect many devices to one AC outlet.<br />
• A fire or an electric shock may result from poor contact, poor insulation, exceeding the permissible<br />
current, etc.<br />
Remove dirt from the power supply plug and securely insert the plug into the outlet.<br />
• If dirt adheres to the plug or insertion is incomplete, it may cause a fire or an electric shock.<br />
Do not scratch or process the power supply cord, etc.<br />
• Do not put heavy object on the power supply cord and do not scratch or process the cord. The cord may<br />
be damaged and this may cause a fire or an electric shock.<br />
Do not turn the breaker off/on and/or disconnect/connect the power supply plug during operation.<br />
• This may cause a fire due to spark, etc.<br />
• Be sure to turn off the breaker and/or disconnect the power supply plug absolutely after switching the<br />
indoor unit off with the remote controller.<br />
Do not expose your skin directly to cool air for a long time.<br />
• This could damage your health.<br />
Installation, repairs or relocation should not be done by the customer.<br />
• If this is done incorrectly, it may cause a fire, an electric shock, or injury from the unit falling, water<br />
leaking, etc. Consult your dealer.<br />
• If the power supply cord is damaged, it must be replaced by the manufacturer or its service agent in order<br />
to avoid a hazard.<br />
Do not insert your finger or a stick, etc. into the air inlet/outlet.<br />
• Since the fan rotates at high speed, this may cause an injury.<br />
• Young children should be supervised to ensure that they do not play with the air conditioner.<br />
When an abnormality (burning smell, etc.) occurs, stop the air conditioner and disconnect the power<br />
supply plug and/or turn off the breaker.<br />
• If the unit continues to be operated in an abnormal condition, it may cause a fire, trouble, etc. In this case,<br />
consult your dealer.<br />
CAUTION<br />
When the air filter is to be removed, do not touch the metal part of the indoor unit.<br />
• This may cause an injury.<br />
Do not touch the air inlet or aluminum fin of the outdoor unit.<br />
• This may cause an injury.<br />
Do not put a vase or glass on the indoor unit.<br />
• Water dropping into the indoor unit may deteriorate the insulation, causing electric shock.<br />
Do not use an insecticide or flammable spray.<br />
• This may cause a fire or deformation of the cabinet.<br />
Do not put a pet or houseplant where it will be exposed to direct airflow.<br />
• This could injure the pet or plant.<br />
Do not place other electric appliances or furniture under the indoor/outdoor unit.<br />
• Water may drip down from the unit, and this may cause damage or malfunction to them.<br />
Do not leave the unit on an installation stand which is damaged.<br />
• The unit may fall and this may cause an injury.<br />
Do not step onto an unstable bench when maintaining the unit, etc.<br />
• This may cause an injury, etc. if you fall down.<br />
Do not pull the power supply cord.<br />
• The core wire of the power supply cord may be disconnected and this may cause a fire.<br />
Do not charge or disassemble the batteries and do not throw them into a fire.<br />
• This may result in leakage, fire or an explosion.<br />
Do not operate the unit for a long time in high humidity, e.g. leaving a door or window open.<br />
• In the cooling mode, if the unit is operated in a room with high humidity (80% RH or more) for a long time,<br />
water condensed in the air conditioner may drop and wet or damage furniture, etc.
SAFETY PRECAUTIONS NAME OF EACH PART<br />
For installation<br />
• Consult your dealer for installation of the air conditioner.<br />
CAUTION<br />
Do not operate the unit at low outside temperature (less than -10°C) in the cooling mode.<br />
• In the cooling mode, if the unit is operated at low outside temperature (less than -10°C), water condensed<br />
in the air conditioner may drop and wet or damage furniture, etc.<br />
Do not use the unit for special purposes.<br />
• Do not use this air conditioner to preserve precision devices, food, animals, plants and art objects.<br />
This may cause deterioration of quality, etc.<br />
Do not put a stove, etc. where they are exposed to direct airflow.<br />
• This may cause imperfect combustion.<br />
When the unit is to be cleaned, switch it off and disconnect the power supply plug and/or turn off the<br />
breaker.<br />
• Since the fan rotates at high speed during operation, this may cause an injury.<br />
When the unit is not going to be used for a long time, disconnect the power supply plug and/or turn<br />
off the breaker.<br />
• Otherwise, dirt may collect and this may cause a fire.<br />
Replace the 2 batteries with new ones of same type.<br />
• Using an old battery together with a new one may result in heat generation, leakage or an explosion.<br />
If liquid from the batteries gets onto your skin or clothes, wash it well with clean water.<br />
• If liquid from the batteries gets into your eyes, wash them well with clean water and consult a doctor at<br />
once.<br />
Ventilate well in using the unit with a stove, etc.<br />
• An oxygen shortage may occur.<br />
Do not operate switches with wet hands.<br />
• This may cause an electric shock.<br />
Do not clean the air conditioner with water.<br />
• Water may enter the unit and degrade the insulation. This may cause an electric shock.<br />
Do not step or put anything on the indoor/outdoor unit.<br />
• This may cause an injury, etc. if you or something falls down.<br />
WARNING<br />
CAUTION<br />
Do not install the unit where flammable gas could leak.<br />
• If gas leaks and collects around the unit, it may cause an explosion.<br />
Earth the unit.<br />
• Do not connect the earth to a gas pipe, water pipe, lightning rod or the earth of a telephone. If the<br />
earthing is incorrect, it may cause an electric shock.<br />
Install an earth leakage breaker depending on the place where the air conditioner is to be installed<br />
(humid places, etc.).<br />
• If the earth leakage breaker is not installed, it may cause an electric shock.<br />
Drain should be fully drained.<br />
• If the drainage route is incomplete, water may drop from the unit. This may wet and damage the furniture.<br />
Indoor unit<br />
Outdoor unit<br />
Air cleaning filter<br />
(White bellows type)<br />
Catechin air filter<br />
Vertical vane<br />
Horizontal vane<br />
Operation section<br />
(When the front panel is opened)<br />
Emergency operation switch<br />
Front panel<br />
Air inlet<br />
Power supply cord<br />
Remote control<br />
receiving section<br />
Remote controller<br />
Display section<br />
Air inlet (back and side)<br />
Piping<br />
Drainage hose<br />
Air outlet<br />
Drain outlet<br />
Operation<br />
Indicator lamp<br />
Remote control<br />
receiving section<br />
3
NAME OF EACH PART<br />
Remote controller<br />
Open the front lid.<br />
4<br />
Signal transmitting section<br />
Operation display section<br />
ON/OFF (operate/<br />
stop) button<br />
VANE button<br />
(Horizontal vane button)<br />
Operation select button<br />
ECONO COOL button<br />
WIDE VANE button<br />
(Vertical vane button)<br />
RESET button<br />
ON/OFF<br />
ON/OFF<br />
I FEEL COOL<br />
HEAT DRY<br />
MODE<br />
ECONO COOL<br />
CLOCK<br />
TOO<br />
WARM<br />
TOO<br />
WARM<br />
FAN<br />
VANE<br />
WIDE VANE<br />
LONG<br />
RESET CLOCK<br />
˚C<br />
AMPM<br />
AMPM<br />
TOO<br />
COOL<br />
(This diagram shows an overall view.)<br />
AMPM<br />
TOO<br />
COOL<br />
STOP<br />
START<br />
HR.<br />
MIN.<br />
Temperature buttons<br />
Fan speed control button<br />
Off-timer button<br />
On-timer button<br />
HR.button<br />
MIN.button<br />
(Time set buttons)<br />
CLOCK set button<br />
LONG button<br />
PREPARATION BEFORE OPERATION<br />
Auto restart function<br />
■ These models are equipped with an auto restart function. If you do not want to use this function,<br />
please consult the service representative because the setting of the unit needs to be changed.<br />
Auto restart function is ...<br />
When the indoor unit is controlled with the remote controller, the operation mode, the set temperature and the fan speed are<br />
stored in the memory. If a power failure occurs or the main power is turned off during operation, “Auto restart function” sets<br />
automatically to start operating in the same mode as the one set with the remote controller just before the shutoff of the main<br />
power. (Refer to page 6 for details.)<br />
Indoor unit<br />
■ Insert the power supply plug into the power outlet and/or turn the breaker on.<br />
WARNING:<br />
Remove dirt from the power supply plug and insert the plug securely.<br />
If dirt adheres to the plug or insertion is incomplete, it may cause a fire or an electric shock.
PREPARATION BEFORE OPERATION<br />
Remote controller<br />
How to set the batteries and the current<br />
time<br />
1 Remove the front lid and insert batteries.<br />
Then reattach the front lid.<br />
Insert the minus pole of the batteries first.<br />
Check if the polarity of the batteries is correct.<br />
2 Press the RESET button.<br />
Press using a<br />
thin stick.<br />
• If the RESET button is not pressed, the remote controller<br />
may not operate correctly.<br />
3 Press the CLOCK set button.<br />
Press using a<br />
thin stick.<br />
4 Press the HR.<br />
and MIN.<br />
buttons (TIME SET<br />
buttons) to set the current time.<br />
I FEEL COOL<br />
HEAT DRY<br />
MODE<br />
ECONO COOL<br />
FAN<br />
VANE<br />
WIDE VANE<br />
LONG<br />
RESET CLOCK<br />
Insert the minus pole<br />
of the batteries first.<br />
STOP<br />
START<br />
HR.<br />
MIN.<br />
• Each time the HR.<br />
button is pressed, the set time<br />
increases by 1 hour, and each time the MIN.<br />
button<br />
is pressed, the set time increases by 1 minute.<br />
5 Press the CLOCK set button again and close<br />
the front lid.<br />
Handling of the remote controller<br />
• The range that the signal can reach is about 6 m when<br />
the remote controller is pointed at the front of the indoor<br />
unit.<br />
• When a button is pressed, one or two beeps will be<br />
heard from the indoor unit. If no sound is heard, operate<br />
again.<br />
• Use the remote controller carefully.<br />
If it is dropped, thrown or it gets wet, the remote controller<br />
may not operate.<br />
When installing on a wall, etc.<br />
• Install the remote controller holder in a position where<br />
the signal reception sound (beep) can be heard from<br />
the indoor unit when the ON/OFF<br />
button is pressed.<br />
How to install/remove the remote controller<br />
Installing :Insert the remote controller downward.<br />
Removing :Pull it up.<br />
Remote controller<br />
holder<br />
Dry-cell batteries<br />
■ Reference for replacing batteries<br />
Replace the batteries with new AAA alkaline batteries<br />
in the following cases:<br />
· When the indoor unit does not respond to the remote<br />
control signal.<br />
· When the display on the remote controller becomes<br />
dim.<br />
· When a button of the remote controller is pressed, all<br />
displays appear on the screen, and then disappear<br />
immediately.<br />
Do not use manganese batteries. The remote controller<br />
could malfunction.<br />
• The service life of an alkaline battery is about 1 year.<br />
However, a battery whose time limit is approaching<br />
may be exhausted soon. The recommended usable<br />
time limit is indicated (month/year) on the bottom of<br />
the battery.<br />
• To prevent liquid leakage, take out all batteries when<br />
the remote controller is not going to be used for a<br />
long time.<br />
CAUTION:<br />
If liquid from the batteries gets onto your skin or<br />
clothes, wash it well with clean water.<br />
If liquid from the batteries gets into your eyes, wash<br />
them well with clean water and consult a doctor at<br />
once.<br />
• Do not use rechargeable batteries.<br />
• Replace the 2 batteries with new ones of the same<br />
type.<br />
• Dispose of exhausted batteries in the correct manner.<br />
When the remote controller cannot be used (emergency operation)<br />
When the batteries of the remote controller run out or the remote controller malfunctions, the emergency operation<br />
can be done using the EMERGENCY OPERATION switch.<br />
1 Press the EMERGENCY OPERATION switch. 2 To stop the emergency operation, press the<br />
• Each time the EMERGENCY OPERATION switch is<br />
pressed, the unit will operate in order of EMER-<br />
EMERGENCY OPERATION switch once (in<br />
case of EMERGENCY HEAT MODE) or twice<br />
GENCY COOL MODE, EMERGENCY HEAT MODE<br />
and STOP MODE.<br />
However, when the EMERGENCY OPERATION<br />
switch is once pressed, the unit will operate in test<br />
run for 30 minutes and then the operation mode<br />
shifts to EMERGENCY MODE.<br />
(in case of EMERGENCY COOL MODE).<br />
• Details of EMERGENCY MODE are as shown below.<br />
However, the temperature control does not<br />
work for 30 minutes in test run and the unit is set<br />
to continuous operation. The fan speed is set to<br />
High in test run and shifts to Medium after 30 minutes.<br />
Operation mode COOL HEAT<br />
Set temperature 24°C 24°C<br />
Fan speed Medium Medium<br />
Horizontal vane Auto Auto<br />
Vertical vane Front Front<br />
• The operation mode is indicated by the Operation<br />
Indicator lamp on the indoor unit as following figure.<br />
Operation Indicator lamp<br />
EMERGENCY COOL EMERGENCY HEAT STOP<br />
Operation Indicator Operation Indicator Operation Indicator<br />
5
I FEEL... AUTO OPERATION<br />
With the “ (I FEEL...)” auto operation mode, the optimum room condition can be set automatically<br />
with a one-touch operation.<br />
6<br />
ON/OFF<br />
I FEEL COOL<br />
HEAT DRY<br />
MODE<br />
ECONO COOL<br />
CLOCK<br />
TOO<br />
WARM<br />
FAN<br />
VANE<br />
WIDE VANE<br />
LONG<br />
RESET CLOCK<br />
˚C<br />
AMPM<br />
AMPM<br />
TOO<br />
COOL<br />
STOP<br />
START<br />
HR.<br />
MIN.<br />
To start operation:<br />
ON/OFF<br />
Press the button.<br />
■<br />
When the “ (I FEEL...)” mode is selected, the air conditioner is automatically<br />
controlled at the optimum temperature.<br />
To stop operation:<br />
■ Press the ON/OFF<br />
button.<br />
○ ○ ○ ○ ○ ○ ○ ○ ○ ○ ○ ○ ○ ○ ○ ○ ○ ○ ○ ○ ○ ○ ○ ○ ○ ○ ○ ○ ○ ○ ○ ○ ○<br />
If you feel slightly warm:<br />
■<br />
Press the<br />
TOO<br />
WARM<br />
button to lower the temperature.<br />
One press lowers the temperature by about 1°C.<br />
If you feel slightly cool:<br />
■<br />
When “ (I FEEL...)” is not selected, press the MODE<br />
button until it is set.<br />
Each time the button is pressed, the operation mode is changed<br />
in sequence: (I FEEL...) → (COOL) → (DRY) →<br />
(HEAT)<br />
Description of “AUTO RESTART FUNCTION”<br />
Press the TOO<br />
COOL<br />
button to raise the temperature.<br />
One press raises the temperature by about 1°C.<br />
I FEEL COOL<br />
HEAT<br />
DRY<br />
MODE<br />
ECONO COOL<br />
FAN<br />
VANE<br />
WIDE VANE<br />
LONG<br />
STOP<br />
START<br />
• These units are equipped with an auto restart function. When the main power is turned on, the air conditioner will start<br />
operation automatically in the same mode as the one set with the remote controller before the shutoff of the main<br />
power.<br />
• If the unit was set to off with the remote controller before the shutoff of the main power, it will remain stopped even after<br />
the main power is turned on.<br />
• If the unit was in the emergency operation before the shutoff of the main power, it will start operation, when main power<br />
comes on, in the same mode as the one set with the remote controller before the emergency operation.<br />
• If the unit is operated in “I FEEL...” before power failure, the operation mode (COOL, DRY or HEAT) is not stored in the<br />
memory. When the main power is turned on, the unit decides the operation mode by the initial room temperature at<br />
restart and starts operation again.<br />
HR.<br />
MIN.<br />
Description of “I FEEL...” mode<br />
Details of operation<br />
According to the room temperature when the operation starts, the operation mode is automatically set to COOL, DRY or<br />
HEAT. However, when operation is started again within 2 hours after it is stopped, the same operation mode before the<br />
operation is stopped is selected. The operation mode selected first is not changed even if the room temperature changes.<br />
If the operation mode does not match the room condition, select the appropriate operation mode by pressing the MODE<br />
button.<br />
Details of auto operation<br />
Room temperature Operation mode Target temperature<br />
when started (initial state)<br />
About 25°C or higher COOL About 24°C<br />
About 25°C - 23°C DRY —<br />
About 23°C or lower HEAT About 26°C<br />
NOTE:<br />
COOL: When the room temperature is 2°C higher than the set temperature, the set temperature may not be<br />
changed since the air conditioner is operating to reach the target (set) temperature. In this case, please<br />
wait until the room temperature drops to within 2°C of the set temperature and then change the set<br />
temperature.<br />
HEAT: When the room temperature is 2°C lower than the set temperature, the set temperature may not be<br />
changed since the air conditioner is operating to reach the target (set) temperature. In this case, please<br />
wait until the room temperature rises to within 2°C of the set temperature and then change the set<br />
temperature.<br />
Details of display on the indoor unit<br />
The operation indicator at the right side of the indoor unit indicates the operation state.<br />
Operation Indicator<br />
Operation indicator lamp<br />
Indication<br />
Lighted<br />
Blinking<br />
Not lighted<br />
Operation state<br />
This shows that the air conditioner is operating to reach the<br />
target temperature. Please wait until the target temperature<br />
is obtained.<br />
This shows that the room temperature is approaching the<br />
target temperature.<br />
(In case of outdoor unit MXZ series only)<br />
Please refer to Information for multi system air conditioner.<br />
(Page 7)<br />
Difference between target<br />
temperature and room temperature<br />
About 2°C or more<br />
About 2°C or less<br />
—
MANUAL OPERATION (COOL, DRY, HEAT)<br />
ON/OFF<br />
I FEEL COOL<br />
HEAT DRY<br />
MODE<br />
ECONO COOL<br />
CLOCK<br />
TOO<br />
WARM<br />
FAN<br />
VANE<br />
WIDE VANE<br />
LONG<br />
RESET CLOCK<br />
˚C<br />
AMPM<br />
AMPM<br />
TOO<br />
COOL<br />
STOP<br />
START<br />
HR.<br />
MIN.<br />
To select the COOL, DRY or HEAT/FAN mode:<br />
1 Press the ON/OFF<br />
button.<br />
2 Select the operation mode by pressing the MODE button.<br />
Each time this button is pressed, the operation mode is changed in sequence:<br />
(I FEEL...) → (COOL) → (DRY) → (HEAT)<br />
To stop operation:<br />
■<br />
ON/OFF<br />
Press the button.<br />
After the operation mode is set once, the operation starts in the same mode as<br />
the one set previously from the next time by simply pressing the ON/OFF<br />
button.<br />
■ When the set temperature is to be changed:<br />
TOO<br />
WARM<br />
• Press the button to lower the temperature. One press lowers the temperature by about 1°C.<br />
○ ○ ○ ○ ○ ○ ○ ○ ○ ○ ○ ○ ○ ○ ○ ○ ○ ○ ○ ○ ○ ○ ○ ○ ○ ○ ○ ○ ○ ○ ○ ○ ○ ○ ○ ○ ○ ○ ○ ○ ○ ○ ○ ○ ○ ○ ○ ○ ○<br />
■<br />
• Press the<br />
TOO<br />
COOL<br />
button to raise the temperature. One press raises the temperature by about 1°C.<br />
In HEAT operation<br />
• If the air conditioner absorbs too much heat from the air, it may be overloaded. Following a judgement made by the<br />
microprocessor, the fan in the outdoor unit is automatically stopped to protect the air conditioner.<br />
When the outdoor unit’s fan is stopped, frost may form on the outdoor unit, but this is not a problem.<br />
In DRY operation<br />
• The temperature control (temperature setting) cannot be done.<br />
• The room temperature is slightly lowered in this operation mode.<br />
The details of the display on the indoor unit are explained on page 6.<br />
NOTE:<br />
When the ambient temperature is too high, the room temperature may not reach the set temperature since the unit<br />
operates to cool the room under a high load.<br />
Information for multi system air conditioner (Outdoor unit: MXZ series)<br />
Multi system air conditioner (Outdoor unit: MXZ series) can connect two or more indoor units with one outdoor<br />
unit. According to the capacity, two or more units can operate simultaneously.<br />
• When you try to operate two or more indoor units with one outdoor unit simultaneously, one for the cooling and the other<br />
for heating, the operation mode of the indoor unit that operates earlier is selected. The other indoor units that will start the<br />
operation later cannot operate, indicating an operation state. (Refer to the table of Operation Indicator lamp on page 6.)<br />
In this case, please set all the indoor units to the same operation mode.<br />
• When indoor unit starts the operation while the defrosting of outdoor unit is being done, it takes a few minutes (max. 10<br />
minutes) to blow out the warm air.<br />
• In the heating operation, the indoor unit that does not operate may get warm or the sound of refrigerant flowing may be<br />
heard. This is not a malfunction since the refrigerant continuously flows into the indoor unit that does not operate.<br />
Description of “AUTO RESTART FUNCTION”<br />
Refer to page 6.<br />
AIR FLOW VELOCITY AND DIRECTION ADJUSTMENT<br />
AIR FLOW velocity and direction can be selected as required.<br />
■ To change the AIR FLOW velocity, press the FAN button.<br />
Each time the button is pressed, the fan speed is changed in sequence:<br />
(Low) → (Med.) → (High) → (AUTO)<br />
ON/OFF<br />
I FEEL COOL<br />
HEAT DRY<br />
MODE<br />
ECONO COOL<br />
CLOCK<br />
TOO<br />
WARM<br />
FAN<br />
VANE<br />
WIDE VANE<br />
LONG<br />
RESET CLOCK<br />
˚C<br />
AMPM<br />
AMPM<br />
TOO<br />
COOL<br />
STOP<br />
START<br />
HR.<br />
MIN.<br />
■<br />
• Use the (High) notch to cool/heat the room more.<br />
• If the operating sound of the air conditioner disturbs your sleep, use the<br />
(Low) notch.<br />
To change the AIR FLOW blowing direction vertically, press the<br />
VANE button.<br />
Each time the button is pressed, the angle of the horizontal vane is changed in<br />
sequence: (1) → (2) → (3) → (4) → (5) → (SWING) → (AUTO)<br />
SWING OPERATION<br />
Use the swing operation for the air flow to reach all corners of the room.<br />
Recommended horizontal vane range<br />
Use the (AUTO) position usually.<br />
Use position (1) or (2) in the COOL or DRY mode<br />
and use positions (3) to (5) in the HEAT mode<br />
when adjusting to your requirements. HEAT<br />
NOTE:<br />
• In the cooling operation, when the air conditioner is operated with setting the horizontal vane to (4) or (5) for<br />
1 hour, the AIR FLOW direction is automatically set to horizontal to prevent condensed water from dropping.<br />
• Adjust the vertical AIR FLOW direction using the remote controller. If the horizontal vane is moved manually, it may<br />
cause trouble.<br />
• In the heating operation, if the air flow temperature is too low or when defrosting is being done, the horizontal vane<br />
position is set to (1).<br />
Auto air flow direction control operation<br />
When the AUTO mode is selected with the VANE<br />
button, the position of the horizontal vane is automatically set to<br />
correspond to the operation mode for effective operation.<br />
(1) HEAT: When the air flow temperature is too low, the air is blown out horizontally.<br />
When the air flow temperature rises, the air is blown out downwards.<br />
(2) COOL, DRY: The air is blown out horizontally.<br />
■ To change the AIR FLOW blowing direction horizontally, press the WIDE VANE button.<br />
Each time the button is pressed, the angle of the VERTICAL VANE is changed in sequence:<br />
→ → → → (SWING) → →<br />
SWING OPERATION<br />
Use the swing operation for the air flow to reach all corners of the room.<br />
Horizontal AIR FLOW blowing range<br />
COOL/DRY<br />
About 100°<br />
HEAT<br />
About 150°<br />
COOL<br />
DRY<br />
1<br />
2<br />
3<br />
4<br />
NOTE:<br />
Adjust the horizontal AIR FLOW direction using the remote<br />
controller. If the VERTICAL VANE is moved manually,<br />
it may cause trouble.<br />
5<br />
7
LONG OPERATION<br />
Use this operation when you want the air flow to reach a long distance.<br />
8<br />
ON/OFF<br />
I FEEL COOL<br />
HEAT DRY<br />
MODE<br />
ECONO COOL<br />
CLOCK<br />
TOO<br />
WARM<br />
FAN<br />
VANE<br />
WIDE VANE<br />
LONG<br />
RESET CLOCK<br />
˚C<br />
AMPM<br />
AMPM<br />
TOO<br />
COOL<br />
STOP<br />
START<br />
HR.<br />
MIN.<br />
Perform the following operations while the unit is operating.<br />
■ Press the LONG button.<br />
The fan speed increases.<br />
When the fan speed is set to (AUTO), the fan speed is higher than a fan<br />
speed determined by the room temperature and the set temperature.<br />
In addition, the HORIZONTAL VANE moves to the position for LONG mode.<br />
Mechanism of the LONG operation<br />
In the following example, the VERTICAL VANE is set to (front).<br />
COOL/DRY HEAT<br />
Fan speed: Higher<br />
Solid arrow: When the LONG mode is used<br />
Dotted arrow: When the LONG mode is not used<br />
To release the LONG mode:<br />
■ Press the LONG button again.<br />
○ ○ ○ ○ ○ ○ ○ ○ ○ ○ ○ ○ ○ ○ ○ ○ ○ ○ ○ ○ ○ ○ ○ ○ ○ ○ ○ ○ ○ ○ ○ ○ ○<br />
■ LONG mode is also released in the following ways.<br />
• By pressing the VANE<br />
button<br />
ECONO COOL<br />
• By pressing the button (only during COOL mode)<br />
■ Even when the LONG mode is being used, the air may not reach a long distance<br />
due to the installation location of the air conditioner.<br />
In this case, press the FAN<br />
button to set the fan speed to (High), and<br />
then press the LONG<br />
button.<br />
■ MODE , FAN<br />
, and WIDE VANE buttons, temperature buttons and the ON/OFF timer<br />
are available.<br />
ECONO COOL OPERATION<br />
Use this operation when you want to be comfortable in COOL mode even with energy saved.<br />
ON/OFF<br />
I FEEL COOL<br />
HEAT DRY<br />
MODE<br />
ECONO COOL<br />
CLOCK<br />
TOO<br />
WARM<br />
FAN<br />
VANE<br />
WIDE VANE<br />
LONG<br />
RESET CLOCK<br />
TIMER OPERATION (ON/OFF TIMER)<br />
It is convenient to set the timer when you go to bed, when you get home, when you get up, etc.<br />
How to set the ON timer<br />
1 Press the START button during operation.<br />
Each time the button is pressed, the ON timer mode<br />
alternates between ON and OFF.<br />
2 Set the time of the timer using the HR.<br />
and<br />
MIN.<br />
buttons.<br />
Each time the HR.<br />
button is pressed, the set time increases<br />
by 1 hour; each time the MIN.<br />
button is pressed,<br />
the set time increases by 10 minutes.<br />
To release the ON timer:<br />
■ Press the START button.<br />
˚C<br />
AMPM<br />
AMPM<br />
TOO<br />
COOL<br />
STOP<br />
START<br />
HR.<br />
MIN.<br />
Perform the following operations while the unit is operating<br />
in the MANUAL COOL mode.<br />
ECONO COOL<br />
■ Press the button.<br />
When the (ECONO COOL) operation is selected in COOL mode, the air<br />
conditioner performs swing operation in various cycle according to the temperature<br />
of air conditioner.<br />
Also SET TEMPERATURE is automatically set 2°C higher than in COOL mode.<br />
To release the ECONO COOL operation:<br />
■<br />
Press the ECONO COOL<br />
button again.<br />
○ ○ ○ ○ ○ ○ ○ ○ ○ ○ ○ ○ ○ ○ ○ ○ ○ ○ ○ ○ ○ ○ ○ ○ ○ ○ ○ ○ ○ ○ ○ ○<br />
• When the VANE<br />
button or the LONG<br />
button is pressed or the operation mode<br />
is changed during the ECONO COOL operation, ECONO COOL operation<br />
is released.<br />
• The FAN<br />
TOO<br />
TOO<br />
WARM<br />
COOL<br />
button, the or button and ON/OFF timer (explained below)<br />
are available.<br />
What is “ECONO COOL”?<br />
Swing air flow (change of air flow) makes you feel cooler than constant air flow. So, even though the set temperature is<br />
automatically set 2°C higher, it is possible to perform cooling operation with keeping comfort. As a result, energy can be saved.<br />
How to set the OFF timer<br />
1 Press the STOP button during operation.<br />
Each time the button is pressed, the OFF timer mode<br />
alternates between ON and OFF.<br />
2 Set the time of the timer using the HR.<br />
and<br />
MIN.<br />
buttons.<br />
Each time the HR.<br />
button is pressed, the set time increases<br />
by 1 hour; each time the MIN.<br />
button is pressed,<br />
the set time increases by 10 minutes.<br />
To release the OFF timer:<br />
■ Press the STOP button.<br />
Programming timer operation<br />
The ON timer and the OFF timer can be used in combination. The timer of the set time that is reached first will operate first.<br />
(“ ” mark indicates the order of timer operations.)<br />
• If the current time has not been set, the timer operation cannot be used.<br />
NOTE:<br />
If the main power is turned off or a power failure occurs while AUTO START/STOP timer is active, the timer setting is<br />
cancelled. As these models are equipped with an auto restart function, the air conditioner starts operating with timer<br />
cancelled at the same time that power is restored.
WHEN THE AIR CONDITIONER IS NOT GOING TO BE<br />
USED FOR A LONG TIME<br />
When it is not going to be used for a long<br />
time:<br />
1 Perform the FAN operation for 3 or 4 hours<br />
to dry the inside of the air conditioner.<br />
To perform FAN operation, set the remote controller to<br />
the highest temperature in the MANUAL COOL mode.<br />
(Refer to page 7.)<br />
2 Turn off the breaker and/or disconnect the<br />
power supply plug.<br />
CAUTION:<br />
Turn off the breaker or disconnect the power supply plug<br />
when the air conditioner is not going to be used for a<br />
long time.<br />
Dirt may collect and this may cause a fire.<br />
3 Remove the batteries from the remote controller.<br />
CAUTION:<br />
To prevent liquid leakage, take out all batteries when the<br />
remote controller is not going to be used for a long time.<br />
When the air conditioner is to be used<br />
again:<br />
1 Clean the air filter and install it in the indoor<br />
unit.<br />
(Refer to page 10 for cleaning instructions.)<br />
2 Check that the air inlet and outlet of the indoor/outdoor<br />
units are not blocked with any<br />
obstacles.<br />
3 Check that the earth is connected correctly.<br />
CAUTION:<br />
Earth the unit.<br />
Do not connect the earth to a gas pipe, water pipe, lightning<br />
rod or the earth of a telephone. If the earthing is<br />
incorrect, it may cause an electric shock.<br />
MAINTENANCE<br />
Before starting maintenance<br />
■<br />
Turn off the breaker and/or disconnect the<br />
power supply plug.<br />
CAUTION:<br />
When the unit is to be cleaned, switch it off and disconnect<br />
the power supply plug or turn off the breaker. Since<br />
the fan rotates at high speed during operation, it may<br />
cause an injury.<br />
1<br />
2<br />
Cleaning the indoor unit<br />
Do not open the front panel up past the level position.<br />
The panel may come off in order to prevent it from being damaged.<br />
• The front panel may also come off if the upper part of the front panel is pulled down.<br />
■<br />
Do not exceed.<br />
Movable<br />
range<br />
■<br />
CAUTION<br />
Clean the unit using a soft dry cloth.<br />
• If the dirt is noticeable, wipe the unit with a cloth<br />
soaked in a solution of mild detergent diluted in lukewarm<br />
water.<br />
• Do not use gasoline, benzine, polishing powder, or<br />
insecticide. The unit may be damaged.<br />
If the front panel comes off, attach it as explained below.<br />
Keeping the front panel level with one hand, insert the hinges one by one with the other hand<br />
into the notches at the left, right and center of the top of the indoor unit until they click into<br />
place. (1) Then, close the front panel. (2)<br />
Keep the front panel level and<br />
insert the hinges into the notches.<br />
• Do not step onto an unstable bench when maintaining the unit, etc. This may cause an injury, etc. if you fall<br />
down.<br />
9
CLEANING THE CATECHIN AIR FILTER<br />
Do not open the front panel up past the level position.<br />
The panel may come off in order to prevent it from being damaged.<br />
Cleaning the catechin air filter (about once every 2 weeks)<br />
1 Remove the catechin air filter.<br />
3 After washing with water/lukewarm water,<br />
dry the catechin air filter well in the shade.<br />
10<br />
Remove.<br />
Catechin air filter<br />
Open the front<br />
panel, then<br />
remove/replace<br />
the filter.<br />
CAUTION:<br />
When the catechin air filter is to be removed, do not touch<br />
the metal parts of the indoor unit.<br />
This may cause an injury.<br />
2 Remove dirt from the catechin air filter using<br />
a vacuum cleaner or by washing the filter<br />
with water.<br />
• If the dirt is noticeable, wash the filter with a solution<br />
of mild detergent diluted in lukewarm water.<br />
• If hot water (50 °C or more) is used, the filter may<br />
be deformed.<br />
• Do not expose the catechin air filter to direct sunlight<br />
or heat from a fire when drying it.<br />
4 Install the catechin air filter.<br />
○ ○ ○ ○ ○ ○ ○ ○ ○ ○ ○ ○ ○ ○ ○ ○ ○ ○ ○ ○ ○ ○ ○ ○ ○ ○ ○ ○ ○ ○ ○ ○ ○ ○ ○ ○ ○ ○ ○ ○ ○ ○ ○ ○ ○ ○ ○ ○<br />
○<br />
What is “Catechin air filter”?<br />
The air filter is dyed with a natural material, catechin, that is contained in tea. The catechin air filter deodorizes<br />
odor and noxious gases such as formaldehyde, ammonia, and acetaldehyde. Moreover, it restraints the activity of<br />
the viruses adhering to the filter.<br />
Install.<br />
REPLACEMENT OF THE AIR CLEANING FILTER<br />
When the capacity is lowered because of dirt, etc., it is necessary to replace the air cleaning filter.<br />
Air cleaning filter replacement<br />
1 Remove the catechin air filter.<br />
Catechin air filter<br />
2 Remove the air cleaning filter (White bellows<br />
type).<br />
About once every 4 months<br />
1 Install a new air cleaning filter.<br />
2 Install the catechin air filter and securely<br />
close the front panel.<br />
○ ○ ○ ○ ○ ○ ○ ○ ○ ○ ○ ○ ○ ○ ○ ○ ○ ○ ○ ○ ○ ○ ○ ○ ○ ○ ○ ○ ○ ○ ○ ○ ○ ○ ○ ○ ○ ○ ○ ○ ○ ○ ○ ○ ○ ○ ○ ○ ○<br />
Air cleaning filter<br />
Air cleaning filter<br />
• If the air cleaning filter is clogged, it may lower the unit’s capacity or cause condensation at the air outlet.<br />
• The air cleaning filter is disposable. The standard usable term is about 4 months. However, if the colour of the filter turns<br />
to dark brown, replace the filter at once.<br />
Optional parts Optional parts are available from your local dealer.<br />
Name of parts AIR CLEANING FILTER<br />
Parts number MAC-1700FT<br />
• Please purchase the optional parts (MAC-1700FT) as a set (2 pcs) for the first time use.
BEFORE CONTACTING THE SERVICE REPRE- WHEN YOU THINK THAT TROUBLE HAS OCCURRED<br />
SENTATIVE, CHECK THE FOLLOWING AGAIN Question<br />
Answer (not a malfunction)<br />
Question<br />
Check points or Remedy<br />
The air conditioner cannot • Is the breaker turned on?<br />
be operated.<br />
• Is the fuse blown?<br />
• Is the ON timer set? (Page 8)<br />
The room cannot be cooled<br />
or heated sufficiently.<br />
The air from the indoor unit<br />
smells strange.<br />
The display on the remote<br />
controller does not appear<br />
or it is dim. The indoor unit<br />
does not respond to the remote<br />
control signal.<br />
When a power failure occurs.<br />
• Is the temperature setting correct? (Page 7)<br />
• Is the filter clean? (Page 10)<br />
• Are there any obstacles blocking the air inlet or<br />
outlet of the indoor or outdoor unit?<br />
• Is a window or door open?<br />
• Is the filter clean? (Page 10)<br />
• Are the batteries exhausted? (Page 5)<br />
• Is the polarity (+, -) of the batteries correct?<br />
(Page 5)<br />
• Are any buttons on the remote controller of other<br />
electric appliances being pressed?<br />
• Does the air conditioner start operating again?<br />
If the air conditioner had operated before the<br />
power failure, as these models are equipped with<br />
an auto restart function, the air conditioner<br />
should start operating again. (Refer to Description<br />
of “AUTO RESTART FUNCTION” on page<br />
6.)<br />
Even if the above items are checked, when the air conditioner does not<br />
recover from the trouble, stop using the air conditioner and consult your<br />
dealer.<br />
In the following cases, stop using the air conditioner and consult your dealer.<br />
• When water leaks or drops from the indoor unit.<br />
• When the left operation indicator lamp blinks.<br />
• When the breaker trips frequently.<br />
• The remote control signal may not be received in a room where an electronic<br />
ON/OFF type fluorescent lamp (inverter-type fluorescent lamp, etc.) is used.<br />
• Operation of the air conditioner may interfere with radio or TV reception in<br />
areas where the reception is weak. An amplifier may be required for the affected<br />
device.<br />
• When thunder is heard, stop operation and disconnect the power supply plug<br />
or turn off the breaker. Otherwise, the electrical parts may be damaged.<br />
The air conditioner cannot<br />
be operated for about 3 minutes<br />
when restarted.<br />
Cracking sound is heard.<br />
The air from the indoor unit<br />
smells strange.<br />
The fan of the outdoor unit<br />
does not rotate even<br />
though the compressor is<br />
running. Even if the fan<br />
starts to rotate, it stops<br />
soon.<br />
The sound of water flowing<br />
is heard.<br />
The sound as burbling is<br />
heard.<br />
The room cannot be cooled<br />
sufficiently.<br />
Mist is discharged from the<br />
air outlet of the indoor unit.<br />
The air flow direction<br />
changes during operation.<br />
The direction of the horizontal<br />
vane cannot be adjusted<br />
with the remote controller.<br />
• This protects the air conditioner according to instructions<br />
from the microprocessor. Please wait.<br />
• This sound is generated by the expansion/contraction<br />
of the front panel, etc. due to change in<br />
temperature.<br />
• The air conditioner may suck in an odor adhering<br />
to the wall, carpet, furniture, cloth, etc. and<br />
blow it out with the air.<br />
• When the outside temperature is low, the fan may<br />
not operate to maintain sufficient cooling capacity.<br />
• This is the sound of refrigerant flowing inside the<br />
air conditioner.<br />
• This is the sound of condensed water flowing in<br />
the heat exchanger.<br />
• This is the sound of the heat exchanger defrosting.<br />
• This sound is heard when the outside air is absorbed<br />
from the drain hose in turning on the<br />
range hood or the ventilation fan and that makes<br />
water flowing in the drain hose spout out.<br />
This sound is also heard when the outside air<br />
blows into the drain hose in case the outside wind<br />
is strong.<br />
• When a ventilation fan or a gas cooker is used<br />
in a room, the cooling load increases, resulting<br />
in an insufficient cooling effect.<br />
• When the outside air temperature is high, the<br />
cooling effect may not be sufficient.<br />
• The cool air from the air conditioner rapidly cools<br />
moisture in the air inside the room, and it turns<br />
into mist.<br />
• When the air conditioner is operated in COOL<br />
or DRY mode, if the operation continues with air<br />
blowing down for 1 hour, the direction of the air<br />
flow is automatically set to horizontal to prevent<br />
condensed water from dropping.<br />
• In the heating operation, if the air flow temperature<br />
is too low or when defrosting is being done,<br />
the horizontal vane position is automatically set<br />
to horizontal.<br />
Question<br />
Answer (not a malfunction)<br />
Water leaks from the out- • During COOL and DRY operations, pipe or pipe<br />
door unit.<br />
connecting sections are cooled and this causes<br />
water to condense.<br />
• In the heating operation, the defrosting operation<br />
makes water frozen on the outdoor unit melt<br />
and drip down.<br />
• In the heating operation, water condensed on<br />
the heat exchanger drips down.<br />
White smoke is discharged<br />
from the outdoor unit.<br />
Air does not blow out soon<br />
in the heating operation.<br />
The operation is stopped<br />
for about 10 minutes in the<br />
heating operation.<br />
Hissing sound is sometimes<br />
heard.<br />
The room cannot be heated<br />
sufficiently.<br />
The swing operation of the<br />
VERTICAL VANE is suspended<br />
for about 15 seconds,<br />
then restarted.<br />
In a multi-unit system, the<br />
indoor unit which is not operating<br />
becomes warm and<br />
a sound, similar to water<br />
flowing, is heard from the<br />
unit.<br />
The air conditioner starts<br />
the operation only with the<br />
main power turned on,<br />
though you do not operate<br />
the unit with the remote<br />
controller.<br />
• In the heating operation, vapor generated by the<br />
defrosting operation looks like white smoke.<br />
• Please wait as the air conditioner is preparing<br />
to blow out warm air.<br />
• Defrosting of the outdoor unit is being done (Defrosting<br />
operation).<br />
Since this is completed in 10 minutes, please<br />
wait. (When the external temperature is too low<br />
and humidity is too high, frost is formed.)<br />
• This is the sound when the flow of refrigerant<br />
inside the air conditioner is switched.<br />
• When the outside air temperature is low, the<br />
heating effect may not be sufficient.<br />
• This is for the swing operation of the VERTICAL<br />
VANE to be performed normally.<br />
• A small amount of refrigerant continues to flow<br />
into the indoor unit even though it is not operating.<br />
• These models are equipped with an auto restart<br />
function. When the main power is turned off without<br />
stopping the air conditioner with the remote<br />
controller and is turned on again, the air conditioner<br />
will start operation automatically in the<br />
same mode as the one set with the remote controller<br />
just before the shutoff of the main power.<br />
11
INSTALLATION, RELOCATION AND INSPECTION<br />
Installation place<br />
Avoid installing the air conditioner in the following places.<br />
• Where flammable gas could leak.<br />
CAUTION:<br />
Do not install the unit where flammable gas could leak.<br />
If gas leaks and collects around the unit, it may cause<br />
an explosion.<br />
• Where there is much machine oil.<br />
• Salty places such as the seaside.<br />
• Where sulfide gas is generated such as a hot spring.<br />
• Where oil is splashed or where the area is filled with<br />
oily smoke.<br />
• Where there is high-frequency or wireless equipment.<br />
WARNING:<br />
If the air conditioner operates but does not cool or heat (depending on model) the room, consult your dealer since<br />
there may be a refrigerant leak. Be sure to ask the service representative whether there is refrigerant leakage or not<br />
when repairs are carried out.<br />
The refrigerant charged in the air conditioner is safe. Refrigerant normally does not leak, however, if refrigerant gas<br />
leaks indoors, and comes into contact with the fire of a fan heater, space heater, stove, etc., harmful substances will<br />
be generated.<br />
<strong>Electric</strong>al work<br />
• Provide an exclusive circuit for the power supply of the air conditioner.<br />
• Be sure to observe the breaker capacity.<br />
WARNING:<br />
• The customer should not install this unit.<br />
If installation is done incorrectly, it may cause a fire, an electric shock, or injury from the unit falling, water leaking,<br />
etc.<br />
• Do not use intermediate connection of the power supply cord or the extension cord and do not connect many<br />
devices to one AC outlet.<br />
A fire or an electric shock may result from poor contact, poor insulation, exceeding the permissible current, etc.<br />
Consult your dealer.<br />
Guaranteed operating range<br />
Cooling<br />
Heating<br />
12<br />
Upper limit<br />
Lower limit<br />
Upper limit<br />
Lower limit<br />
Indoor Outdoor<br />
32°C DB 43°C DB<br />
23°C WB —<br />
21°C DB -10°C DB<br />
15°C WB —<br />
27°C DB 24°C DB<br />
— 18°C WB<br />
20°C DB -10°C DB<br />
— -11°C WB<br />
To prevent the effects<br />
of a fluorescent lamp,<br />
keep as far apart as<br />
possible.<br />
1 m<br />
or more<br />
Cordless<br />
phone or<br />
Portable<br />
phone<br />
Radio<br />
1 m<br />
or more<br />
Inverter-type<br />
fluorescent lamp<br />
Keep a space<br />
to prevent the<br />
picture<br />
distortion or<br />
the noise.<br />
TV<br />
* The required space depends on the type of outdoor unit.<br />
The installation location of the outdoor unit should be at least<br />
3 m away from the antennas for TV sets, radios, etc. In areas<br />
where the reception is weak, provide greater space between<br />
the outdoor unit and the antenna of the affected device if operation<br />
of the air conditioner interferes with radio or TV reception.<br />
100 mm or<br />
more<br />
3 m<br />
or more<br />
Wellventilated<br />
dry place<br />
500 mm or<br />
more<br />
wall, etc.<br />
CAUTION:<br />
• Earth the unit.<br />
Do not connect the earth to a gas pipe, water pipe, lightning rod or the earth of a telephone. If the earthing is<br />
incorrect, it may cause an electric shock.<br />
• Install an earth leakage breaker depending on the place where the air conditioner is to be installed (humid places,<br />
etc.).<br />
If the earth leakage breaker is not installed, it may cause an electric shock.<br />
Inspection and maintenance<br />
• When the air conditioner is used for several seasons, the capacity may be lowered due to dirt inside the unit.<br />
• Depending on the condition, an odor may be generated or dehumidified water may not drain out smoothly due to dirt,<br />
dust, etc.<br />
• It is recommended that the unit be inspected and maintained (charged) by specialist in addition to normal maintenance.<br />
Consult your dealer.<br />
Operating sound considerations<br />
• Do not put an object around the air outlet of the outdoor unit. This may lower the capacity or increase the volume of the<br />
operating sound.<br />
• If an abnormal sound is heard during operation, consult your dealer.<br />
Relocation<br />
• When the air conditioner is to be removed or re-installed because of rebuilding, moving, etc., special techniques and<br />
work are required.<br />
WARNING:<br />
Repairs or relocation should not be done by the customer.<br />
If this is done incorrectly, it may cause a fire, an electric shock, or an injury from the unit falling, water leaking, etc.<br />
Consult your dealer.<br />
Disposal<br />
To dispose of this product, consult your dealer.<br />
If you have any questions, consult your dealer.
NOTE
NOTE
NOTE
HEAD OFFICE: MITSUBISHI DENKI BLDG., 2-2-3, MARUNOUCHI, CHIYODA-KU, TOKYO 100-8310, JAPAN<br />
SG79Y329H01