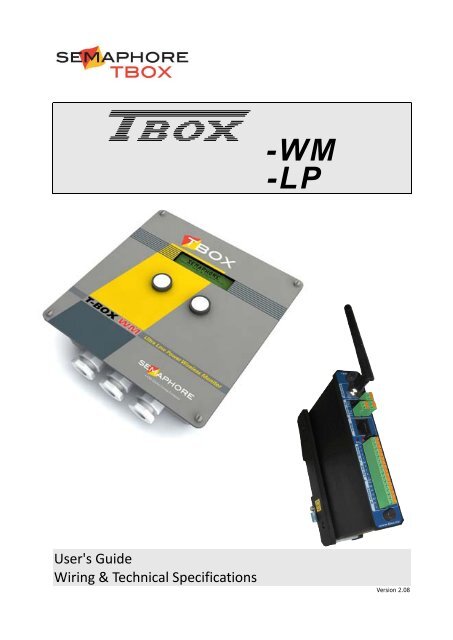
TBox-WM/-LP User's Guide
TBox-WM/-LP User's Guide
TBox-WM/-LP User's Guide

You also want an ePaper? Increase the reach of your titles
YUMPU automatically turns print PDFs into web optimized ePapers that Google loves.
A<br />
<strong>User's</strong> <strong>Guide</strong><br />
Wiring & Technical Specifications<br />
-<strong>WM</strong><br />
-<strong>LP</strong><br />
Version 2.08
Disclaimer<br />
Every effort has been made to ensure the accuracy of the information in this guide. However, SEMAPHORE. assumes no<br />
responsibility for the accuracy of the information. Product information is subject to change without notice.<br />
Windows 2000, 2003, XP, VISTA are trademark of Microsoft Corp.<br />
EXCEL and Internet Explorer aretrademark of Microsoft Corp.<br />
Copyright<br />
© 2004-2010 by<br />
Edition: December 07, 2010<br />
TWinSoft: 10.07<br />
Author: Jean Burton<br />
Drêve Richelle, 161. Bâtiment M<br />
B-1410 Waterloo<br />
Version: 2.08 <strong>TBox</strong> - U<strong>LP</strong> 2
Important Safety Instructions<br />
Read and understand all instructions. Save these instructions.<br />
Safety Instruction when used in Hazardous Location<br />
• WARNING: USE ONLY BATTERY PACK, reference ATEX-BAT-PACK<br />
• WARNING: DO NOT OPEN THE BOX IN EXPLOSIVE ATHMOSPHERE<br />
• WARNING: DANGER OF POTENTIAL ELECTROSTATIC CHARGE. CHECK THERE IS NO GAZ BEFORE TOUCHING<br />
THE CABINET<br />
• Read the instruction manual carefully before using the equipment and comply with the instructions that it<br />
contains to avoid mistakes and to prevent any personal injury or damage to property.<br />
• Warning ! It is mandatory that this equipment is earthed by the rack or IP68 enclosure. Connect the crimp<br />
terminal ring to the earth with a stranded wire between 1.5 and 2.5 mm² inclusively. The cable must be<br />
crimped consistent with rules of good practice.<br />
• Installation must be carried out by suitable, competent personnel, according to the steps and stated<br />
specifications described in this manual.<br />
• Use only the approved color-coded wires for connecting to mains. The green/yellow colored wire can be only<br />
used as earth wire.<br />
• This equipment has been designed for use only by qualified and instructed personnel in an industrial<br />
environment. This equipment must be operated in a restricted access location according to IEC60950.<br />
• It is a Safety Class III equipment, according to IEC classification; This equipment must be powered by a Safety<br />
Extra Low Voltage (SELV).<br />
• This equipment has been designed to meet IEC60950-1 requirements (safety of information technology<br />
equipment)<br />
• This equipment has been designed for indoor or for outdoor use when mounted in the IP68 enclosure. It can be<br />
used in a Pollution Degree 2 environment (dry non-conductive pollution).<br />
• The DIN rail mounting module must be fastened to the rack using a screw driver, with a recommended<br />
minimum torque of 0.5 N.m.<br />
• Caution – To reduce the risk of fire, use only No. 26 AWG or larger telecommunication line cord.<br />
• Your <strong>TBox</strong>-<strong>WM</strong> and <strong>TBox</strong>-<strong>LP</strong> can be used in a wet environment if mounted in IP68 enclosure.<br />
• Using this instrument in a way not specified by these instructions can impair the equipment safety. Do not<br />
operate the instrument outside its rated supply voltage and environmental ranges.<br />
• Do not open power supply unit. There are no user serviceable parts inside.<br />
• Do not connect or disconnect any connector when powered.<br />
• Protect your <strong>TBox</strong>-<strong>WM</strong> and <strong>TBox</strong>-<strong>LP</strong> from environmental hazards such as dirt, dust, food, liquids, excessive<br />
temperature, and sunlight overexposure.<br />
• Keep your <strong>TBox</strong>-<strong>WM</strong> and <strong>TBox</strong>-<strong>LP</strong> away from direct or excessive moisture or rain and extremely hot or cold<br />
temperatures to ensure that the <strong>TBox</strong> is used within the specified operating range.<br />
• Caution – Risk of explosion if battery is replaced by an incorrect type. Dispose of used batteries according to the<br />
local regulations.<br />
• Caution – When used in hot environment, the aluminum housing may reach a temperature higher than 70°C.<br />
Take precautions when touching the housing.<br />
Version: 2.08 <strong>TBox</strong> - U<strong>LP</strong> 3
Environmental Considerations<br />
Battery Disposal<br />
! CAUTION: There is a danger of a new battery exploding if it is incorrectly installed. Replace the battery only<br />
with the same or equivalent type recommended by the manufacturer. Do not dispose of the battery along with<br />
household waste. Contact your local waste disposal agency for the address of the nearest battery deposit site.<br />
Your <strong>TBox</strong>-<strong>WM</strong> uses lithium battery. The lithium battery is a long-life battery, and it is very<br />
possible that you will never need to replace it. However, should you need to replace it, see<br />
chapter 3.1 and 3.2 for instructions.<br />
General Precautions in Wiring<br />
• To avoid electrostatic discharge, drain off electrostatic charges by touching a known earth immediately before<br />
handling <strong>TBox</strong>, touching front plate button, connectors or cables.<br />
• Wiring of Inputs/Outputs, RS232 connections, GSM antennas cannot exceed 30 m., neither leave the building<br />
without surge protection.<br />
Wiring to DC power, PSTN modem and RS485 can exceed 30 m.<br />
• In case of DC power to a distribution network, it is mandatory to use a surge protection.<br />
Certifications<br />
ATEX ll 2 G<br />
for TBOX <strong>WM</strong><br />
ATEX ll 3 G<br />
for TBOX <strong>LP</strong><br />
SAFETY Metlabs<br />
CEBEC<br />
Ex ib IIB T4-T3 (CEI/EN 60079-0 and CEI/EN 60079-11)<br />
ISSeP10ATEX 036 X<br />
Ex ic IIB T4-T3 (CEI/EN 60079-0 and CEI/EN 60079-11)<br />
ISSeP10ATEX 037 X<br />
In progress<br />
IEC 60950-1:2005 (2 nd Edition) and EN 60950-1:2006<br />
EMC EN 61000-4-2:1995 + A1:1998 + A2:2001 EN 61000-4-8:1993 + A1:2001<br />
EN 61000-4-3:2002 + A1:2002 + A2:2005 EN 61000-4-11:2004<br />
EN 61000-4-4:1995 + A1:2000 + A2:2001 EN 55011:1998 + A1:1999 + A2:2002<br />
EN61000-4-5:2006 EN 61326-1:2006<br />
EN 61000-4-6:1996 + A1:2000 + A2:2005<br />
FCC CFR47: 2008 (Part15 Sub Part B)<br />
CE Low Voltage directive: 2006/95/EC<br />
Electromagnetic Compatibility Directive: 2004/108/EC<br />
C-TICK ACMA N3413<br />
Version: 2.08 <strong>TBox</strong> - U<strong>LP</strong> 4
TABLE OF CONTENTS<br />
Presentation..................................................................................................... 11<br />
1. How to use this manual? .........................................................................................14<br />
1.1. What is in the manual? .......................................................................................................... 14<br />
1.2. What is not in the manual? .................................................................................................... 14<br />
2. The Ultra Low Power Concept .................................................................................15<br />
2.1. Features .................................................................................................................................. 15<br />
2.2. Models .................................................................................................................................... 16<br />
2.2.1. I/O Options ................................................................................................................................... 16<br />
2.2.2. Communication Options ............................................................................................................... 16<br />
2.2.3. Housing Options ........................................................................................................................... 16<br />
2.2.4. LCD Display Options ...................................................................................................................... 16<br />
2.2.5. Gas Location Options .................................................................................................................... 16<br />
2.3. Low Power operation of CPU .................................................................................................. 17<br />
2.3.1. Sleep mode ................................................................................................................................... 17<br />
2.3.2. Awake mode ................................................................................................................................. 17<br />
2.3.3. Wake-up Intervals ......................................................................................................................... 17<br />
2.3.4. Permanent mode .......................................................................................................................... 17<br />
2.4. Low Power operation of GSM/GPRS ....................................................................................... 18<br />
2.5. Low Power operation with Analog Input ................................................................................ 18<br />
2.6. Current Consumption Estimation ........................................................................................... 19<br />
2.6.1. Battery Life Time Estimation in EXCEL .......................................................................................... 19<br />
2.6.2. Application Generation ................................................................................................................. 20<br />
2.6.3. Battery Consumption Monitoring ................................................................................................. 21<br />
Hardware ......................................................................................................... 23<br />
3. Installation of the<strong>TBox</strong> U<strong>LP</strong> ......................................................................................24<br />
3.1. Installation of batteries in ATEX environment ........................................................................ 24<br />
3.2. Installation of batteries in normal and Class1 Div1 environment ........................................... 24<br />
3.2.1. Replacement of the Battery in ATEX environment ....................................................................... 25<br />
3.2.2. Replacement of the Battery in Class1 Div1 and normal environment .......................................... 25<br />
3.3. External Power Supply ............................................................................................................ 25<br />
3.4. Mounting <strong>TBox</strong>-<strong>WM</strong> in Mini Rack enclosure .......................................................................... 26<br />
3.5. Mounting IP68 enclosure ........................................................................................................ 26<br />
3.6. Cable Glands ........................................................................................................................... 26<br />
3.7. Cover ....................................................................................................................................... 26<br />
3.8. Push-buttons (Optional) ......................................................................................................... 26<br />
3.9. “Safety Earth Ground” Connection ......................................................................................... 27<br />
3.9.1. With Mini Rack Enclosure ............................................................................................................. 27<br />
3.9.2. With IP68 enclosure ..................................................................................................................... 27<br />
3.10. Wiring ..................................................................................................................................... 28<br />
3.10.1. Wiring Mini Rack enclosure .......................................................................................................... 28<br />
3.10.2. Wiring IP68 enclosure ................................................................................................................... 29<br />
3.11. SIM card .............................................................................................................................. 30<br />
Version: 2.08 <strong>TBox</strong> - U<strong>LP</strong> 5
TWinSoft - Getting Started ................................................................................31<br />
4. Installation of TWinSoft ........................................................................................... 32<br />
4.1. System requirements .............................................................................................................. 32<br />
4.2. Installation of the CD-ROM ..................................................................................................... 33<br />
4.3. Programs of ‘TWinSoft Suite’ ................................................................................................. 35<br />
5. Starting TWinSoft .................................................................................................... 36<br />
5.1. Wizard ..................................................................................................................................... 37<br />
5.2. Communicating with <strong>TBox</strong> U<strong>LP</strong> ............................................................................................... 38<br />
5.3. PC Communication Set up ....................................................................................................... 38<br />
5.3.1. Communication possibilities of TWinSoft .................................................................................... 39<br />
5.3.2. IP address settings in TWinSoft PC Setup ..................................................................................... 40<br />
5.4. Testing communication ........................................................................................................... 41<br />
5.5. Reset of Tbox U<strong>LP</strong> ................................................................................................................... 42<br />
5.6. Global reset of <strong>TBox</strong> U<strong>LP</strong> ......................................................................................................... 42<br />
5.7. Upload ‘Operating System’ ..................................................................................................... 43<br />
5.8. LED « Status » ......................................................................................................................... 44<br />
5.9. Saving and Sending a Program ............................................................................................... 44<br />
5.9.1. Saving a document – Backup document ...................................................................................... 44<br />
5.9.2. Compiling an application .............................................................................................................. 45<br />
5.9.3. Sending an application ................................................................................................................. 45<br />
TWinSoft - Programming ...................................................................................47<br />
6. Introduction ............................................................................................................. 48<br />
7. RTU properties ........................................................................................................ 49<br />
7.1. General properties .................................................................................................................. 50<br />
7.2. Drivers ..................................................................................................................................... 51<br />
7.3. Security ................................................................................................................................... 51<br />
7.4. Info properties ........................................................................................................................ 52<br />
7.5. Advanced ................................................................................................................................ 52<br />
7.5.1. Start/Stop ..................................................................................................................................... 52<br />
7.5.2. Alarms .......................................................................................................................................... 54<br />
7.5.3. Flow Meters ................................................................................................................................. 56<br />
7.5.4. Sampling Tables ............................................................................................................................ 58<br />
7.5.5. Temperature ..................................................................................................................................... 58<br />
7.5.6. Remote Tags ................................................................................................................................. 59<br />
7.5.7. TCP/IP ............................................................................................................................................... 59<br />
7.5.8. Environment variables.................................................................................................................. 61<br />
7.5.9. Web and Report ........................................................................................................................... 61<br />
8. Resources ................................................................................................................ 63<br />
8.1. The CPU card ........................................................................................................................... 63<br />
8.2. Communication ports ............................................................................................................. 64<br />
8.2.1. Communication ports tabs ........................................................................................................... 64<br />
8.3. Serial ports .............................................................................................................................. 64<br />
8.4. GSM/GPRS modem ................................................................................................................. 65<br />
Version: 2.08 <strong>TBox</strong> - U<strong>LP</strong> 6
8.4.1. GSM in mode Low Power ............................................................................................................. 65<br />
8.4.2. GSM-data settings ........................................................................................................................ 67<br />
8.4.3. GPRS settings ................................................................................................................................ 68<br />
8.5. External Modem ..................................................................................................................... 73<br />
8.5.1. Low power operation of external modem (<strong>WM</strong>100, <strong>WM</strong>200, <strong>LP</strong>400) ......................................... 73<br />
8.5.2. Low power operation of external modem (<strong>LP</strong>450) ....................................................................... 74<br />
8.6. Communication Variables ....................................................................................................... 75<br />
8.6.1. Digital Communication Variable ................................................................................................... 75<br />
8.6.2. Analog Communication Variable .................................................................................................. 76<br />
8.7. Groups of I/O .......................................................................................................................... 78<br />
8.7.1. Group1 – System Analog Inputs ................................................................................................... 79<br />
8.7.2. Group 2 - Digital Inputs ................................................................................................................. 79<br />
8.7.3. Group 3 - Digital Outputs .............................................................................................................. 81<br />
8.7.4. Group 4 - Analog Inputs ................................................................................................................ 81<br />
8.7.5. Group6 – Analog Variables Associated to Digital Inputs ............................................................... 82<br />
8.7.6. Summary on the use of I/O .......................................................................................................... 85<br />
8.8. System variables ..................................................................................................................... 86<br />
8.8.1. Digital System Variables ................................................................................................................ 86<br />
8.8.2. Analog System Variables ............................................................................................................... 89<br />
8.9. Timers & Counters .................................................................................................................. 91<br />
9. Tags ..........................................................................................................................92<br />
9.1. Physical I/O ............................................................................................................................. 93<br />
9.2. Internal Variables (Registers) .................................................................................................. 94<br />
9.2.1. Digital Internal Variable ................................................................................................................ 94<br />
9.2.2. Analog Internal Variable ............................................................................................................... 96<br />
9.2.3. Text Internal Variable ........................................................................................................................ 97<br />
9.3. ModBus address ..................................................................................................................... 99<br />
9.3.1. ModBus address of System Variables ........................................................................................... 99<br />
9.4. Tags - Presentation / Write ................................................................................................... 100<br />
9.5. Run Time Parameters ........................................................................................................... 100<br />
9.5.1. Alarm Parameters ....................................................................................................................... 102<br />
9.5.2. Datalogging Parameters ............................................................................................................. 103<br />
9.5.3. IP Parameters.............................................................................................................................. 103<br />
9.5.4. GSM/GPRS Parameters ............................................................................................................... 104<br />
10. IP Parameters ........................................................................................................ 105<br />
10.1. ISP configuration .............................................................................................................. 106<br />
10.2. FTP Host ............................................................................................................................ 108<br />
10.3. SMTP Server ...................................................................................................................... 109<br />
10.3.1. About Redundancy ..................................................................................................................... 110<br />
10.4. POP3 Server ...................................................................................................................... 111<br />
10.4.1. Alarm Acknowledge Through POP3 ............................................................................................ 112<br />
10.5. NTP Server ........................................................................................................................ 113<br />
10.5.1. Time accuracy ............................................................................................................................. 113<br />
10.6. DynDNS ............................................................................................................................. 114<br />
10.6.1. How to configure DynDNS in <strong>TBox</strong> ............................................................................................. 115<br />
Version: 2.08 <strong>TBox</strong> - U<strong>LP</strong> 7
10.7. TCP/IP Debugging ................................................................................................................. 116<br />
11. Alarms.................................................................................................................... 119<br />
11.1. Introduction ...................................................................................................................... 119<br />
11.2. Digital Alarm Condition .................................................................................................... 120<br />
11.3. Analog Alarm Condition .................................................................................................... 122<br />
11.4. Recipients .......................................................................................................................... 124<br />
11.5. Group of Recipients ........................................................................................................... 127<br />
11.6. Messages .......................................................................................................................... 127<br />
11.6.1. Value of Tag in a message........................................................................................................... 128<br />
11.6.2. “String” in a message ................................................................................................................. 128<br />
11.7. Alarm Timetables .............................................................................................................. 129<br />
11.7.1. Time Slices .................................................................................................................................. 129<br />
11.7.2. Holidays ...................................................................................................................................... 129<br />
11.7.3. Timetables .................................................................................................................................. 130<br />
11.8. Alarms table ...................................................................................................................... 131<br />
11.8.1. Columns description .................................................................................................................. 131<br />
12. Read SMS embedded ............................................................................................ 133<br />
12.1. Introduction ...................................................................................................................... 133<br />
12.2. Acknowledgment of an alarm by sending SMS to the RTU .............................................. 134<br />
12.2.1. Structure of the message ........................................................................................................... 135<br />
12.2.2. Acknowledgment of the message .............................................................................................. 135<br />
12.3. Controlling the RTU using SMS message or reading e-mail using POP3 .......................... 136<br />
12.4. Automatic Update of a Recipient’s tel. number ................................................................ 140<br />
12.5. ReadSMS status ................................................................................................................ 140<br />
13. Datalogging............................................................................................................ 141<br />
13.1. Introduction ...................................................................................................................... 141<br />
13.2. The chronologies ................................................................................................................... 143<br />
13.2.1. Digital chronologies .................................................................................................................... 143<br />
13.2.2. Analog chronologies ................................................................................................................... 143<br />
13.3. The sampling tables .............................................................................................................. 144<br />
14. Remote Tags .......................................................................................................... 147<br />
14.1. Introduction ...................................................................................................................... 147<br />
14.2. Creating a Remote Device ................................................................................................. 147<br />
14.2.1. Remote Device – Advanced Properties ...................................................................................... 148<br />
14.3. Creating a Remote Tag ..................................................................................................... 149<br />
14.4. Timing configuration of Remote Tags ................................................................................... 151<br />
15. Periodic Events ...................................................................................................... 152<br />
16. Access security ...................................................................................................... 154<br />
16.1. RTU configuration ............................................................................................................. 155<br />
16.1.1. RTU Properties ........................................................................................................................... 155<br />
16.1.2. Port Properties ........................................................................................................................... 155<br />
16.2. TWinSoft document protected .............................................................................................. 156<br />
16.3. Password utility................................................................................................................. 157<br />
Version: 2.08 <strong>TBox</strong> - U<strong>LP</strong> 8
16.4. Login/Logout .................................................................................................................... 158<br />
16.4.1. With TWinSoft ............................................................................................................................ 158<br />
16.4.2. With Internet Explorer ................................................................................................................ 158<br />
16.5. Deactivating protection .................................................................................................... 159<br />
16.6. Deactivating protection of TWinSoft document ............................................................... 159<br />
Technical Specifications - Wiring ................................................................... 161<br />
17. Technical specifications ......................................................................................... 162<br />
17.1. Hazardous Environment ................................................................................................... 162<br />
17.2. Entity Concept ................................................................................................................... 162<br />
17.3. Entity Parameters ............................................................................................................. 163<br />
17.4. Barriers ............................................................................................................................. 163<br />
17.5. General ............................................................................................................................. 164<br />
17.5.1. Button (Working modes) ............................................................................................................ 165<br />
17.6. 5 VDC + LCD display (option) ............................................................................................ 165<br />
17.7. GSM (option) .................................................................................................................... 166<br />
17.8. RS232 & Switching (option) .............................................................................................. 166<br />
17.9. I/O ..................................................................................................................................... 167<br />
18. Wiring .................................................................................................................... 169<br />
18.1. Power Supply .................................................................................................................... 169<br />
18.1.1. -<strong>WM</strong>100, -<strong>WM</strong>200, -<strong>LP</strong>400 ......................................................................................................... 169<br />
18.1.2. -<strong>LP</strong>450 ......................................................................................................................................... 170<br />
18.2. RS232 – Main Board ......................................................................................................... 171<br />
18.3. RS232 – Option Board ....................................................................................................... 173<br />
18.3.1. Jumper Settings .......................................................................................................................... 175<br />
18.4. RS485 - Main Board .......................................................................................................... 176<br />
18.4.1. <strong>WM</strong>100, -<strong>WM</strong>200, -<strong>LP</strong>400 .......................................................................................................... 176<br />
18.4.2. -<strong>LP</strong>450 ......................................................................................................................................... 176<br />
18.5. Digital Inputs - Counter inputs .......................................................................................... 178<br />
18.5.1. -<strong>WM</strong>100, -<strong>WM</strong>200 ...................................................................................................................... 178<br />
18.5.2. -<strong>LP</strong>400, -<strong>LP</strong>450 ............................................................................................................................ 178<br />
18.6. Digital Outputs - Main Board ........................................................................................... 180<br />
18.6.1. -<strong>WM</strong>100, -<strong>WM</strong>200 ...................................................................................................................... 180<br />
18.6.2. -<strong>LP</strong>400, -<strong>LP</strong>450 ............................................................................................................................ 180<br />
18.7. Digital Outputs - Option Board ......................................................................................... 182<br />
18.8. Analog Inputs – Current .................................................................................................... 184<br />
18.8.1. -<strong>WM</strong>100, -<strong>WM</strong>200 ...................................................................................................................... 184<br />
18.8.2. -<strong>LP</strong>400, -<strong>LP</strong>450 ............................................................................................................................ 184<br />
18.9. Analog Inputs – Voltage ................................................................................................... 187<br />
18.9.1. -<strong>WM</strong>100, -<strong>WM</strong>200 ...................................................................................................................... 187<br />
18.9.2. -<strong>LP</strong>400, -<strong>LP</strong>450 ............................................................................................................................ 187<br />
Appendixes .................................................................................................... 191<br />
Appendix A. Licenses .................................................................................................. 192<br />
A.1. The Evaluation mode ................................................................................................................. 192<br />
A.2. The Dongle ................................................................................................................................ 192<br />
Version: 2.08 <strong>TBox</strong> - U<strong>LP</strong> 9
A.3. The Code (License) ..................................................................................................................... 192<br />
A.4. The TWinSoft LITE ...................................................................................................................... 192<br />
Appendix B. Time in RTU ............................................................................................. 193<br />
B.1. Time in <strong>TBox</strong> U<strong>LP</strong> ....................................................................................................................... 193<br />
B.2. Data logging .............................................................................................................................. 194<br />
B.3. System variables associated ...................................................................................................... 195<br />
B.4. Summary.................................................................................................................................... 195<br />
Appendix C. Pack & Go ................................................................................................ 196<br />
C.1. Presentation............................................................................................................................... 196<br />
C.2. Pack ........................................................................................................................................... 196<br />
C.3. Unpack ....................................................................................................................................... 197<br />
Appendix D. ModBus Rerouting .................................................................................. 199<br />
Appendix E. Terminal mode ........................................................................................ 201<br />
Appendix F. Synchronization of Counters ................................................................... 203<br />
Index ............................................................................................................... 204<br />
Version: 2.08 <strong>TBox</strong> - U<strong>LP</strong> 10
PRESENTATION<br />
Version: 2.08 <strong>TBox</strong> - U<strong>LP</strong> 11
The unique TBOX ULTRA LOW POWER, ‘All-In-One’ includes the best of<br />
3 Worlds:<br />
Telemetry<br />
+<br />
Internet<br />
+<br />
Automation<br />
Version: 2.08 <strong>TBox</strong> - U<strong>LP</strong> 12
Overview of TBOX ULTRA LOW POWER possibilities<br />
Consulting<br />
process through<br />
HTML pages<br />
Programming:<br />
locally or remotely<br />
IMPORTANT NOTE about Ultra Low Power concept<br />
Even if the features available with TBOX ULTRA LOW POWER are identical to other models of <strong>TBox</strong>, the<br />
fact it runs in ultra low power mode (µA consumption), imposes another way of considering telemetry.<br />
To achieve ultra low power consumption and to guarantee battery lifetime of several years, the wireless<br />
communication port will be switched off most of the time. Therefore, connection time must be reduced<br />
as much as possible, with in consequence a preference for using PUSH technology (sending SMS, e-mail<br />
or files) instead of classical PULL technology.<br />
As far as Analog Input is concerned, try to use “Voltage” sensors and schedule long period between<br />
sampling (several minutes).<br />
Process is also time consuming, then make it simple !<br />
Version: 2.08 <strong>TBox</strong> - U<strong>LP</strong> 13
1. How to use this manual?<br />
1.1. What is in the manual?<br />
This manual contains the essential of TBOX ULTRA LOW POWER documentation.<br />
It concerns two families of <strong>TBox</strong>: the TBOX <strong>WM</strong> and TBOX <strong>LP</strong>.<br />
To make reading easier, we will speak of TBOX U<strong>LP</strong> all along the manual.<br />
It first introduces to the hardware concept<br />
� The Ultra Low Power concept: chapter 2<br />
� Quick overview on installing and powering: chapter 3<br />
Then it brings you to the programming of TBOX U<strong>LP</strong> using TWinSoft.<br />
All features are explained using plenty of snapshots for an easy understanding �<br />
The main topics are:<br />
� Starting TWinSoft: chapter 5<br />
� Properties of TBOX U<strong>LP</strong>: chapter 7<br />
� Resources (CPU, com. Ports, I/O): chapter 8<br />
� Tags: chapter 9<br />
� IP configuration: chapter 10<br />
� Alarms: chapter 11<br />
� Datalogging: chapter 13<br />
� Periodic events: chapter 15<br />
All technical specifications and wiring are presented at the end of this manual.<br />
Information related to Licenses is available in Appendix A.<br />
All along this manual, I inform<br />
you with Notes and Remarks:<br />
“What a nice manual!”<br />
Text highlighted in blue concerns the use of TBOX U<strong>LP</strong> in hazardous environment.<br />
1.2. What is not in the manual?<br />
All along this manual, I insist<br />
on battery and ultra low<br />
power issues: “Save energy!”<br />
All along this manual, I<br />
warn you:<br />
“Read the manual!”<br />
One major topic you will not find in this manual concerns the programming of the process. TBOX U<strong>LP</strong><br />
supports BASIC and Ladder languages for developing any advanced process.<br />
Those languages are detailed in another manual: BASIC and LADDER for TBOX<br />
Another important feature, which is not presented into this manual, concerns the development of HTML<br />
pages, to use TBOX U<strong>LP</strong> as web server.<br />
This matter is explained in details in another manual: WEBFORM STUDIO – Getting Started<br />
Another software part of the TWinSoft Suite is Report Studio, for creating e-mail report or files to send.<br />
It is explained in the ‘On line’ help of Report Studio.<br />
Version: 2.08 <strong>TBox</strong> - U<strong>LP</strong> 14
2. The Ultra Low Power Concept<br />
2.1. Features<br />
<strong>TBox</strong> <strong>WM</strong> is a ultra low power RTU, powered with Lithium battery (one or two batteries).<br />
<strong>TBox</strong> <strong>LP</strong> is also ultra low power RTU, which can be powered with Lithium battery or external 12 V battery,<br />
typically connected to a solar panel.<br />
With limited number of communications, the average consumption turns around 100 µA.<br />
The typical applications are:<br />
1. Controlled locations that are not equipped with mains (pipeline monitoring, tank monitoring,<br />
river level monitoring, avalanche monitoring, asset monitoring, ...)<br />
2. Mobile applications.<br />
<strong>TBox</strong> U<strong>LP</strong> is a All-In-One RTU, including a fix number of I/O and of communication ports. It is not possible<br />
to add local I/O or communication ports.<br />
<strong>TBox</strong> U<strong>LP</strong> is also a powerful RTU with all the features available on all models of <strong>TBox</strong> RTU:<br />
� Automation program (using Ladder and/or BASIC languages)<br />
� Data logger<br />
� Alarm generator (sending of SMS, e-mail, files,...)<br />
� Serial protocol (Modbus-RTU, ModBus-ASCII, NMEA, ASCII)<br />
� TCP/IP protocols: ModBus-TCP, SMTP, POP3, FTP, HTTP (through GPRS)<br />
� WebServer embedded<br />
TBOX U<strong>LP</strong> is programmed using TWinSoft Suite.<br />
Version: 2.08 <strong>TBox</strong> - U<strong>LP</strong> 15
2.2. Models<br />
The TBOX U<strong>LP</strong> is available in different hardware versions.<br />
Product numbering syntax: <strong>WM</strong>- -<br />
<strong>LP</strong>- -<br />
Examples:<br />
<strong>WM</strong>-100-GD00: (with GSM, DIN rail mounting, without LCD, normal location)<br />
<strong>WM</strong>-200-GM01 (with GSM, IP68 enclosure, without LCD, ATEX zone 1)<br />
2.2.1. I/O Options<br />
Reference Power Supply DI DO AI (12 bits)<br />
<strong>WM</strong>-100 3.6 V Lithium battery 4 4 -<br />
<strong>WM</strong>-200 3.6 V Lithium battery 4 4 2 (4..20mA – 0..5V)<br />
<strong>LP</strong>-400 3.6 V Lithium battery 8 8 4 (4..20mA – 0..5V)<br />
<strong>LP</strong>450 12 VDC Lead battery 8 8 4 (4..20mA – 0..5V)<br />
2.2.2. Communication Options<br />
Reference Communication<br />
-G GSM/GPRS<br />
-S Serial<br />
2.2.3. Housing Options<br />
Reference DIN rail IP68 - Aluminum<br />
D √ -<br />
M optional √<br />
2.2.4. LCD Display Options<br />
Only available with the IP68 enclosure.<br />
Reference Display – 2 lines 2 buttons 5 VDC (max. 220mA)<br />
0 - - -<br />
1 √ √ √<br />
5 - - √<br />
2.2.5. Gas Location Options<br />
With TBOX <strong>WM</strong><br />
Reference Norm Zone<br />
0 Class1, Div1 Explosive Atmosphere can exist all the time. Normal location<br />
1 ATEX1 Explosive Atmospheres are likely to occur<br />
With TBOX <strong>LP</strong><br />
Reference Norm Zone<br />
0 Class1, Div2 Explosive Atmosphere are not likely to exist. Normal location<br />
1 ATEX2 Explosive Atmospheres are unlikely to occur<br />
Version: 2.08 <strong>TBox</strong> - U<strong>LP</strong> 16
2.3. Low Power operation of CPU<br />
To operate in ultra low power mode, TBOX U<strong>LP</strong> needs specific components (hardware) but also a<br />
dedicated Operating System (firmware) to reduce consumption by monitoring 2 working modes:<br />
• ‘Sleep’ mode.<br />
• ‘Awake’ mode.<br />
2.3.1. Sleep mode<br />
Most of the time, TBOX U<strong>LP</strong> runs in sleep mode. The microprocessor runs with a 32 kHz Quartz and<br />
executes few operations:<br />
• counting and storing pulses coming on the digital inputs while in sleep mode.<br />
• storing transitions on digital inputs<br />
• two inputs can also act on interrupt of the microprocessor to wake up the system on demand.<br />
2.3.2. Awake mode<br />
At fix intervals, TBOX U<strong>LP</strong> wakes up to carry on several tasks and check various items since the last<br />
wake-up:<br />
- reading the amount of pulses at the digital inputs.<br />
- checking the transitions on inputs.<br />
- checking the period for powering the analog inputs.<br />
- checking alarm conditions.<br />
- checking data logging conditions.<br />
- checking communication with remote device conditions.<br />
- execution of one cycle of Ladder/BASIC.<br />
2.3.3. Wake-up Intervals<br />
The period between wake-up can be selected among the followings:<br />
1sec., 5 sec., 10sec., 15 sec., 20 sec., 30 sec., 1 minute.<br />
The bigger the period is, the smaller the consumption will be !<br />
2.3.4. Permanent mode<br />
In this mode, the processor never returns to sleep mode, Ladder/BASIC is executed without<br />
interruption, handling of I/O, Alarms and data logging are still executed only every second.<br />
In this mode, the RTU does not work in low power !<br />
We consider real ultra low power operation when working at a wake-up rate of<br />
1 minute.<br />
Any local or remote ModBus communication awakes <strong>TBox</strong> U<strong>LP</strong>.<br />
Concerning I/O changing and effect on datalogging:<br />
- direct writing to outputs is immediately processed as well as chronologies.<br />
- inputs and sampling tables are processed at wake-up of the CPU.<br />
Version: 2.08 <strong>TBox</strong> - U<strong>LP</strong> 17
2.4. Low Power operation of GSM/GPRS<br />
In addition to RS232 and RS485 ports, a GSM/GPRS communication module is available with <strong>TBox</strong> U<strong>LP</strong>.<br />
The GSM/GPRS has been selected to fit low power application. In order to save as much energy as<br />
possible, this modem supports its own low power mechanism, independent from the CPU, allowing to<br />
turn off GSM power for any amount of time.<br />
There are 2 possible modes that you can select from the ‘Parameters’ menu (see chapter 8.4.1:<br />
GSM/GPRS modem).<br />
Permanent: the modem is always ready to communicate, independently from the wake-up rate of<br />
the <strong>TBox</strong> U<strong>LP</strong><br />
Low Power: the modem is by default unpowered. During wake-up of the CPU, the modem can be<br />
powered according to alarm with severity ‘High’ or with the help of communication<br />
variables [COM2.ModemPower & COM2.ModemPoT] or [COM2.ModemAlarm].<br />
The modem can be powered independently from CPU wake-up, using “interrupt”<br />
inputs. When an “interrupt” is detected, one cycle of Ladder/BASIC is launched which<br />
can cycle the power of the GSM/GPRS using communication variables (see chapter<br />
8.4.1).<br />
• GSM data / GPRS: when powered, the GSM module can be either in idle mode or in<br />
communication. The GSM selected for <strong>TBox</strong> U<strong>LP</strong> has a limited consumption during idle mode,<br />
still being able to detect incoming communication.<br />
Example of consumption with a GSM data availability of 60 minutes per week:<br />
o with 55 minutes in idle: 5 mA during 55 min.<br />
o with 5 minutes in communication: 132 mA during 5 min.<br />
o TOTAL=15.58 mA/h<br />
o Battery lifetime of 1 battery= 5 years and 44 days<br />
We consider real ultra low power operation when GSM is working<br />
at Low Power mode, with small periods of GSM wake-up and little<br />
communication.<br />
2.5. Low Power operation with Analog Input<br />
A key feature of ultra low power is the control on power of analog inputs.<br />
It is clear for everyone that with a 4..20mA sensor, the consumption may be of 20mA just for one<br />
analog input !<br />
Therefore, <strong>TBox</strong> U<strong>LP</strong> is able to control the power and the acquisition of the analog inputs.<br />
Each channel has 4 connections:<br />
o V out = to power the sensor (12 VDC or 24 VDC)<br />
o V in = input for 0..5 V sensor<br />
o I in = input for 4..20 mA sensor<br />
o GND = 0V.<br />
At regular, predefined periods, <strong>TBox</strong> U<strong>LP</strong> powers the sensor, waits and reads the signal.<br />
Version: 2.08 <strong>TBox</strong> - U<strong>LP</strong> 18
2.6. Current Consumption Estimation<br />
From the above description of low power operations, we can conclude that one of the major issue of an<br />
Ultra Low Power application is the current consumption of the <strong>TBox</strong> U<strong>LP</strong>.<br />
To estimate the current used and the resulting life time of the batteries, you will find in the directory of<br />
TWinSoft an EXCEL sheet: Consumption_U<strong>LP</strong>_x.xx.xls<br />
TO RUN PROPERLY THE EXCEL SHEET, MAKE SURE MACRO ARE ACTIVATED IN EXCEL.<br />
2.6.1. Battery Life Time Estimation in EXCEL<br />
Fill in the sheet and check at the bottom the resulting life time:<br />
Version: 2.08 <strong>TBox</strong> - U<strong>LP</strong> 19
2.6.2. Application Generation<br />
The EXCEL sheet provides also the generation of a <strong>TBox</strong> U<strong>LP</strong> application, including battery life time<br />
calculation.<br />
Click the button and it automatically generates an application with calculation of current consumption<br />
corresponding to the data filled in the EXCEL sheet.<br />
Example of a list of Tags of an application:<br />
To monitor battery consumption, it is highly recommended to<br />
start your own application from this document.<br />
Version: 2.08 <strong>TBox</strong> - U<strong>LP</strong> 20
2.6.3. Battery Consumption Monitoring<br />
There are 2 ways of checking battery consumption. Both can be used together in order to improve the<br />
battery monitoring.<br />
- Using a estimation, based on an addition of the different currents. The result is available in the variable<br />
“BatteryUse”<br />
Piece of BASIC code:<br />
Version: 2.08 <strong>TBox</strong> - U<strong>LP</strong> 21
- Using the voltage difference between the battery in charge and the battery without charge. When the<br />
delta is regularly of 0.3 V and higher, you should consider replacing the battery.<br />
Batteries are OK:<br />
Batteries reach end of life:<br />
Version: 2.08 <strong>TBox</strong> - U<strong>LP</strong> 22
HARDWARE<br />
Version: 2.08 <strong>TBox</strong> - U<strong>LP</strong> 23
3. Installation of the<strong>TBox</strong> U<strong>LP</strong><br />
3.1. Installation of batteries in ATEX environment<br />
<strong>TBox</strong> U<strong>LP</strong> runs with 3.6 V lithium batteries.<br />
In ATEX environment, use the battery pack ATEX-BAT-PACK.<br />
It contains 2 batteries with one power connection.<br />
Don't use any other power means<br />
3.2. Installation of batteries in normal and Class1 Div1 environment<br />
<strong>TBox</strong> U<strong>LP</strong> runs with 3.6 V lithium batteries.<br />
<strong>TBox</strong> U<strong>LP</strong> requires “High Power” battery, to support high current during short period of time when the<br />
GSM/GPRS switches on. It also requires batteries having the best performance in a large range of<br />
temperatures. The choice has been made for a model of battery providing the best efficiency: SAFT<br />
LSH20.<br />
Don't use any other model of battery !<br />
Working with IP68 enclosure, unscrew the top cover to access the battery slots.<br />
Two slots are available. Both are in parallel.<br />
Insert the battery with the + sign to the red side.<br />
Version: 2.08 <strong>TBox</strong> - U<strong>LP</strong> 24
3.2.1. Replacement of the Battery in ATEX environment<br />
Only qualified people are authorized to replace battery pack.<br />
Use only the reference ATEX-BAT-PACK<br />
First, connect the new battery pack to the power connection available.<br />
Then remove the old battery pack.<br />
3.2.2. Replacement of the Battery in Class1 Div1 and normal environment<br />
There is no other power supply than the lithium battery. Without battery, the <strong>TBox</strong> U<strong>LP</strong> loses its<br />
datalogging and its time will restart at 01/01/70 00:00:00 GMT.<br />
Working with one battery, place first the new battery in the empty slot then remove the old one<br />
Working with two batteries,<br />
replace the battery one by one.<br />
When using <strong>TBox</strong> U<strong>LP</strong> in a the Mini Rack enclosure, a<br />
separate DIN Rail enclosure contains the batteries.<br />
Two options are available, with 1 or 2 batteries:<br />
• Closed enclosure, see photo on the right<br />
(ref. ACC-BAT-ENC)<br />
3.3. External Power Supply<br />
During development and<br />
testing period DON’T USE<br />
battery. You risk to empty the<br />
battery during this period.<br />
Use the external power supply instead of battery<br />
(ref. ACC-PS-U<strong>LP</strong>-3.3V)<br />
Version: 2.08 <strong>TBox</strong> - U<strong>LP</strong> 25
3.4. Mounting <strong>TBox</strong>-<strong>WM</strong> in Mini Rack enclosure<br />
TBOX U<strong>LP</strong> is mounted on a mini rack equipped with one spring for DIN rail fixing.<br />
To fix it on a DIN rail:<br />
1. Place the spring of the Rack under the bottom side of the DIN rail and pull-up the TBOX U<strong>LP</strong>.<br />
2. Push the TBOX U<strong>LP</strong> against the DIN rail<br />
3.5. Mounting IP68 enclosure<br />
The back of IP68 enclosure can fixed on different ways, using different models of bracket options:<br />
� Wall mounting (reference: ACC-BKT-WALL)<br />
� Pipe 2”-3” fixing (reference: ACC-BKT-PIPE3)<br />
� Pipe 4” fixing (reference: ACC-BKT-PIPE4)<br />
• Mounting on a wall, make sure the wall is flat<br />
• Place the enclosure with glands to the bottom (see below). Check the glands are properly<br />
tightened and that no hole is left open.<br />
3.6. Cable Glands<br />
Cable glands are used to pass cable inside the enclosure.<br />
• Cable must be round, with a diameter between 5.5 and 10 mm.<br />
per gland.<br />
• Pass one cable<br />
• Rear fixing nut torque: 3.5 N.m.<br />
• Dome nut torque: 3.5 N.m<br />
3.7. Cover<br />
The cover is fixed with eight screws.<br />
• Tighten properly the eight screws.<br />
• Use a flat blade screwdriver and tighten with a torque between 2 and 3N.m.<br />
3.8. Push-buttons (Optional)<br />
The two optional push-buttons are fixed in the cover. Tightening the lock nut with a torque of 1.5 N.m.<br />
Version: 2.08 <strong>TBox</strong> - U<strong>LP</strong> 26
3.9. “Safety Earth Ground” Connection<br />
3.9.1. With Mini Rack Enclosure<br />
Each Rack is equipped with a “Safety Earth Ground”<br />
blue ring tongue PIDG. It is marked with the famous<br />
upside-down Christmas tree in a circle.<br />
3.9.2. With IP68 enclosure<br />
The blue ring tongue is available at one of<br />
the corners of the PCB.<br />
You have to fasten this ring tongue to a cable and screw this ring to the rack as indicated. On the other<br />
side, you must connect the cable to the ground.<br />
The cable must be a 2.5mm², colored green/yellow (ratio ±70% / 30%).<br />
Be sure all connections and joints are reliably made and that Safety Earth Ground connections have no<br />
other function that connection to ground.<br />
1. Be aware that RS485 of <strong>TBox</strong> is not isolated. If connecting several devices<br />
together, be sure they use the same ground connection; otherwise, you have to<br />
use ACC-RS485 (contact your local <strong>TBox</strong> distributor)<br />
2. If the environment is very noisy, like for instance with the presence of a<br />
frequency variator, be sure :<br />
- the connection to earth stake is as short as possible<br />
- to separate the connection of <strong>TBox</strong> to ground from other devices<br />
- not to mix AC cabling with low voltage DC cabling<br />
Version: 2.08 <strong>TBox</strong> - U<strong>LP</strong> 27
3.10. Wiring<br />
TBOX U<strong>LP</strong> is equipped with compact spring-cage<br />
terminal blocks.<br />
This connector allows a high density of connections.<br />
Press the orange plastic with a screwdriver to insert or remove the cable.<br />
Connection capacity<br />
Without cable shoe Solid cable: 0.2 .. 1.5 mm² (24..16 AWG)<br />
With cable shoe without plastic sleeve Solid or Stranded cable: 0.2 .. 1.5 mm²<br />
With cable shoe with plastic sleeve Solid or Stranded cable: 0.2 .. 0.75 mm²<br />
Ferrule specification for 0.75mm² cable<br />
B: minimum 10 mm<br />
C: 1.5 mm<br />
D: 3.5 mm<br />
3.10.1. Wiring Mini Rack enclosure<br />
Use only battery SALT LSH20 with <strong>TBox</strong> <strong>WM</strong> and <strong>LP</strong>400<br />
Depending on consumption, a second battery can be<br />
added to increase battery life time<br />
3.6 VDC battery<br />
3.6 VDC battery<br />
More information about cabling<br />
and technical specifications is<br />
available at the end of this manual<br />
+<br />
-<br />
+<br />
-<br />
Reference:<br />
Weidmüller 9021050000<br />
GSM: connection to the antenna<br />
RS 485: for communicating to<br />
remote device(s)<br />
RS232: for programming<br />
Digital Inputs<br />
Digital Outputs<br />
Analog Inputs<br />
Version: 2.08 <strong>TBox</strong> - U<strong>LP</strong> 28
3.10.2. Wiring IP68 enclosure<br />
The same PCB as the one used in “mini rack” enclosure is mounted in the IP68 enclosure.<br />
Connections are identical.<br />
Example with a <strong>WM</strong>-200<br />
Gnd<br />
RS 485<br />
A+ Gnd B-<br />
+ - +<br />
-<br />
3.6 VDC battery<br />
RS 232<br />
Digital IN<br />
0 1 2 3 GND<br />
Use only battery SALT LSH20 with <strong>TBox</strong> <strong>WM</strong> and <strong>LP</strong>400<br />
Depending on consumption, a second battery can be<br />
added to increase battery life time<br />
Dig. IN<br />
Dig. OUT<br />
Digital OUT<br />
GND 0 1 2 3<br />
More information about cabling and<br />
technical specifications is available at<br />
the end of this manual<br />
Analog IN<br />
Analog IN<br />
GND PS 0 U 0 I 0 PS 1 U 1 I 1<br />
Version: 2.08 <strong>TBox</strong> - U<strong>LP</strong> 29
3.11. SIM card<br />
TBOX <strong>WM</strong>XXX-G and TBOX <strong>LP</strong>XXX-G requires a SIM card.<br />
It must either support GSM-DATA (including a specific DATA number to be reached) or GPRS.<br />
The choice between GSM-DATA and GPRS will depend on the availability of your local GSM operator, the<br />
volume of TBOX U<strong>LP</strong> concerned, the frequency of communications, the volume of data, …<br />
With the “Mini rack” enclosure, the SIM card must be inserted at the back of the <strong>TBox</strong>.<br />
Press the eject button of the SIM card tray and place the SIM<br />
card.<br />
With the IP68 enclosure, the slot for the SIM card appears on top of the PCB.<br />
Press the eject button of the SIM card tray and place the SIM<br />
card.<br />
SIM card is mandatory in <strong>TBox</strong> <strong>WM</strong>xxx-G and <strong>TBox</strong> <strong>LP</strong>xxx-G . Without<br />
SIM card, the system tries to initialize the SIM card, without success.<br />
Without SIM card, the modem state machine will stop after several tries,<br />
but this still represents a useless consumption of the battery.<br />
Check if you have an operational SIM card !<br />
Version: 2.08 <strong>TBox</strong> - U<strong>LP</strong> 30
TWINSOFT - GETTING STARTED<br />
Version: 2.08 <strong>TBox</strong> - U<strong>LP</strong> 31
4. Installation of TWinSoft<br />
4.1. System requirements<br />
• Hardware: Pentium or higher.<br />
• Memory: 32 MB minimum.<br />
• Hard Disk: 150 MB required plus the application files.<br />
• Display: VGA, SVGA with a minimum resolution of 800 x 600.<br />
• Mouse: any Windows compatible mouse.<br />
• USB port: required in case of license with dongle for ‘USB’ port.<br />
• Serial port: required for a local connection to TBOX U<strong>LP</strong> and/or for an external modem.<br />
If no serial port available, USB to serial adapter should be used.<br />
• Ethernet port: 10/100 Mbps. Required for a connection to TBOX U<strong>LP</strong> through a LAN if<br />
the TBOX U<strong>LP</strong> uses GPRS.<br />
• Modem: any modem properly configured in Windows.<br />
• Operating system: Windows 2000, 2003, XP, VISTA, 7.<br />
To Browse the RTU:<br />
• Internet Browser: as ActiveX is used, Internet Explorer only can be used. Version 5.00 or<br />
higher is recommended to take benefit of the dialer.<br />
The CD-ROM of TWinSoft Suite includes MSIE version 5.00.<br />
Version: 2.08 <strong>TBox</strong> - U<strong>LP</strong> 32
4.2. Installation of the CD-ROM<br />
When running the Setup of CD-ROM of<br />
TWinSoft Suite, the following software’s are<br />
available<br />
• TWinSoft 10.xx<br />
TWinSoft is the software required for developing an application for the RTU. The basis for<br />
configuring a TBOX U<strong>LP</strong> application is described in this manual.<br />
Installation of TWinSoft includes:<br />
� WebForm Studio: HTML editor dedicated to RTU<br />
� Report studio: Report editor dedicated to RTU<br />
� WebForm Viewer: ActiveX and <strong>TBox</strong> Dial it! dialer from Internet Explorer (see next).<br />
(Administrator rights is required during installation)<br />
• WebForm Viewer<br />
This software contains the tool <strong>TBox</strong> Dial It ! uses to dial TBOX U<strong>LP</strong> with Internet Explorer.<br />
It also contains the ‘ActiveX’ used to display objects dedicated to the RTU.<br />
It must be installed on the operator's PC to dial TBOX U<strong>LP</strong> with Internet Explorer, when TWinSoft is<br />
not required.<br />
(Administrator rights is required during installation)<br />
Version: 2.08 <strong>TBox</strong> - U<strong>LP</strong> 33
• RM-xxx Configurator<br />
RM are Remote Modules, based on TBOX LITE architecture.<br />
They are programmed though an interface running TWinSoft in background.<br />
This entry installs this interface.<br />
(Administrator rights are required during installation)<br />
• <strong>TBox</strong> Mail<br />
This software is used to display a Chart view from data logging attached to e-mail. To store data in a<br />
global database, you should use T (call your local distributor).<br />
(Administrator rights is required during installation)<br />
• Hardware Dongle Driver<br />
In case you use a hardware dongle as TWinSoft license, you need to install this driver.<br />
• Manuals<br />
All technical documentation about hardware and software related <strong>TBox</strong> and accessories.<br />
• Acrobat Reader<br />
Software needed to read our documentation.<br />
• <strong>TBox</strong> Drivers<br />
Some features like DNP.3, IEC-60870 protocols, … are available as external drivers. The list of available<br />
drivers is available here.<br />
Version: 2.08 <strong>TBox</strong> - U<strong>LP</strong> 34
4.3. Programs of ‘TWinSoft Suite’<br />
During installation of TWinSoft, a group of programs is created where TWinSoft can be started.<br />
Other programs and menus:<br />
• Accessories: group containing the utility ‘Password generator’ and ‘Reset User preferences’:<br />
reset of registry information to restore the default configuration of TWinSoft.<br />
• Documentation: group containing various documents associated to TWinSoft and RTU.<br />
• Samples: group with TWinSoft documents installed as example.<br />
• <strong>TBox</strong> drivers: when 'C' custom drivers have been installed. The ‘on line’ help of the driver<br />
configuration is available in this folder.<br />
• Report Studio: to create reports dedicated to TBOX U<strong>LP</strong>.<br />
• TWinSoft: to start TWinSoft.<br />
• WebForm Studio: to start the HTML editor, dedicated to TBOX U<strong>LP</strong> when it is used as a Web<br />
Server.<br />
Version: 2.08 <strong>TBox</strong> - U<strong>LP</strong> 35
5. Starting TWinSoft<br />
I am the Wizard of TWinSoft!<br />
When you start TWinSoft the first time, or when you create a new<br />
document, I help you with some basic configurations.<br />
The use of TWinSoft is free, but sending of a program to TBOX U<strong>LP</strong> is<br />
protected.<br />
For more info about Licenses go to Appendix A. at the end of this<br />
manual.<br />
Version: 2.08 <strong>TBox</strong> - U<strong>LP</strong> 36
5.1. Wizard<br />
The ‘New Document Wizard’ helps you getting started with a new application by gathering information<br />
about your hardware and some basic settings.<br />
Except for the ‘Type of RTU’, settings can be modified later from the ‘RTU properties’.<br />
According to the hardware you<br />
have, select the corresponding<br />
family and type of RTU.<br />
!! You cannot change it later!!<br />
Free name of the RTU<br />
Sub address (0..255)<br />
Station address (1..255)<br />
Version: 2.08 <strong>TBox</strong> - U<strong>LP</strong> 37
5.2. Communicating with <strong>TBox</strong> U<strong>LP</strong><br />
Once you have opened a document, either a new one created with the Wizard or an existing one, you<br />
can establish the connection with your TBOX U<strong>LP</strong>.<br />
The possible communications are serial, TCP/IP or modem, according to the media used to connect to<br />
TBOX U<strong>LP</strong>.<br />
� Serial: check the Baudrate you have given to the serial port in your application (by default<br />
9600,N). See chapter 8.3.<br />
� TCP/IP: to communicate to your TBOX U<strong>LP</strong> through GPRS (see chapter 8.4.3).<br />
� Modem: check the tel. Number of TBOX U<strong>LP</strong>.<br />
5.3. PC Communication Set up<br />
To communicate with the TBOX U<strong>LP</strong>, you need to select a communication media on the PC.<br />
From the main menu of TWinSoft: � Communication � PC Setup:<br />
Example with a RS232 connection:<br />
� RJ45 cable to RJ45-DB9 converter (MS-CONV-232)<br />
� DB9 programming cable (MS-CABL-PROG)<br />
default Baudrate of <strong>TBox</strong> U<strong>LP</strong> : 9600,N<br />
� �<br />
Version: 2.08 <strong>TBox</strong> - U<strong>LP</strong> 38
5.3.1. Communication possibilities of TWinSoft<br />
• Offline: this option avoid sampling TBOX U<strong>LP</strong><br />
• Local: you select a serial port of the PC (typically RS232). The Baudrate must fit with the<br />
port of TBOX U<strong>LP</strong> you are connected to.<br />
If your PC is equipped with USB port,<br />
you have to use a USB-RS232 converter<br />
• TCP/IP: to establish a communication in TCP/IP, typically to your TBOX U<strong>LP</strong> configured in<br />
GPRS.<br />
By default, TWinSoft uses the IP address of the Ethernet (not available with TBOX U<strong>LP</strong>. Therefore<br />
you will have to specify another IP address, when communicating to the TBOX U<strong>LP</strong> through GPRS.<br />
(See details chapter 5.3.2 below)<br />
• Modem: to establish a remote connection to the TBOX U<strong>LP</strong> when the GSM is configured in<br />
DATA mode. TWinSoft takes full advantage of Windows' built-in modem support: simply install your<br />
modem in the control panel's modems applet of Windows and you are ready to call your TBOX U<strong>LP</strong>.<br />
You can develop your TWinSoft document without<br />
connection to the TBOX U<strong>LP</strong>, but it will be mandatory to send<br />
it to have the RTU running!<br />
The program can be sent through RS232, RS485, or GSM<br />
modem.<br />
When sending an application through the GSM (DATA or GPRS), the GSM will be<br />
kept powered independently from its low power seting<br />
(see chapter 8.4. GSM/GPRS modem).<br />
Communication will be interrupted when TWinSoft stops communication.<br />
Version: 2.08 <strong>TBox</strong> - U<strong>LP</strong> 39
5.3.2. IP address settings in TWinSoft PC Setup<br />
By default, TWinSoft displays the IP address of the Ethernet port of the RTU, which is not available with<br />
TBOX U<strong>LP</strong>. TWinSoft also automatically adapts itself to the Ethernet IP address of the RTU.<br />
To get around the problem, as you don’t program your TBOX U<strong>LP</strong> through a direct Ethernet connection<br />
and you don’t want to change its IP address use the following configuration:<br />
Example: you access you TBOX U<strong>LP</strong> through ADSL<br />
or through a direct GPRS modem.<br />
You type the current IP address of the TBOX U<strong>LP</strong>.<br />
(see chapter 8.6.2. Analog Communication<br />
Variables)<br />
When TWinSoft has finished uploading the<br />
program, it will not adapt itself to Ethernet IP<br />
address of the RTU (which does not exist!)<br />
Version: 2.08 <strong>TBox</strong> - U<strong>LP</strong> 40
5.4. Testing communication<br />
Once you have selected the media on the PC, you can test the communication.<br />
From the main menu of TWinSoft: Communication � RTU identification:<br />
The Status bar of TWinSoft displays the status of the connection:<br />
Available information:<br />
Name of the RTU<br />
Type of Hardware<br />
Version of Operating System<br />
Status of the process<br />
ModBus address of the Station<br />
Subaddress of the Station<br />
Access level of the current user<br />
Date/Time in the RTU<br />
General information about the program<br />
Process cycle time<br />
Unique ID of the RTU<br />
MMC / SD card not available<br />
The communication media used by the PC is indicated as well as the access level of your connection (see<br />
chapter 16: ‘Security’).<br />
If a connection cannot be established with the TBOX U<strong>LP</strong>, it might be because the configuration of its<br />
port does not fit with the PC setup you use (different Baudrate, different IP address, protocol other than<br />
ModBus, …).<br />
To set the TBOX U<strong>LP</strong> to a default configuration, you have to do a global reset (see next).<br />
Version: 2.08 <strong>TBox</strong> - U<strong>LP</strong> 41
5.5. Reset of Tbox U<strong>LP</strong><br />
Pressing the button ‘Reset’, restarts the program:<br />
- stack of alarms and event are erased<br />
- datalogging is maintained<br />
- Tags with initial value are set to the value; others are maintained<br />
- Timers are reset (status and value)<br />
- Counters are maintained<br />
5.6. Global reset of <strong>TBox</strong> U<strong>LP</strong><br />
The Global Reset is used to set TBOX U<strong>LP</strong> to a default, well-known configuration, in case it does not<br />
communicate anymore. The program running in the CPU is stopped and TBOX <strong>WM</strong> runs on the<br />
Operating System.<br />
This is very useful when you take a CPU from the stock and you have no idea how the port you want to<br />
communicate with is configured.<br />
The global reset is achieved using the button on the front side of TBOX U<strong>LP</strong><br />
Procedure:<br />
• Push and maintain the button to the ‘Reset’ side<br />
• Let the “Status LED” flash 3 times<br />
• Release the button<br />
IP68 enclosure<br />
Push up and maintain<br />
during 3 flash<br />
LED “status” under<br />
the PCB<br />
“Mini Rack” enclosure<br />
Version: 2.08 <strong>TBox</strong> - U<strong>LP</strong> 42
Global reset configuration:<br />
The global reset mode is indicated by the LED flashing at 0.5 Hz (instead of 2 Hz in RUN mode). In this<br />
mode, the TBOX U<strong>LP</strong> is configured like following:<br />
Port Baudrate Protocol Station<br />
address<br />
IP<br />
address<br />
COM1 (RS232) 9600,N,8,1 ModBus-RTU 1 -<br />
COM2 (GSM-DATA) ModBus-RTU maintained -<br />
COM2 (GPRS) ModBus/TCP maintained refreshed<br />
COM3 (RS485) 9600,N,8,1 ModBus-RTU 1 -<br />
5.7. Upload ‘Operating System’<br />
Operating System is the heart of your TBOX U<strong>LP</strong>.<br />
It contains all features of TBOX U<strong>LP</strong>.<br />
In some cases you might have to change this operating system, when new features are available or a bug<br />
fix released.<br />
From the main menu, select ‘Upload OS’<br />
Select the highest version to use the latest<br />
features and corrections.<br />
The Global Reset does not erase the current<br />
program. Doing an ordinary Reset will restart the<br />
program.<br />
Version: 2.08 <strong>TBox</strong> - U<strong>LP</strong> 43
5.8. LED « Status »<br />
Program runs 2 Hz<br />
Program stopped 0.5 Hz<br />
Operating System stopped 8 Hz<br />
To display the working mode of the TBOX U<strong>LP</strong>, you have to press the button to “test” side.<br />
IP68 enclosure<br />
Press down the button<br />
LED “Status” under<br />
the PCB<br />
5.9. Saving and Sending a Program<br />
“Mini Rack” enclosure<br />
Like any Windows program, TWinSoft creates ‘Documents’. One document corresponds to one TBOX U<strong>LP</strong><br />
application. Each of them must be saved using the Windows standard.<br />
5.9.1. Saving a document – Backup document<br />
Possibilities for saving a document:<br />
By default, the LED “Status” is switched off in<br />
order to save battery power<br />
• Use the icon of the main tool bar<br />
• From the main menu use: ‘File’ � ‘Save’<br />
• Use the accelerator keys <br />
Saving a document creates a file with the extension ‘.tws’ which is your TWinSoft application.<br />
But each time a TWinSoft project ‘.tws’ is opened successfully, it is saved in a back up file ‘.tbk’. If you<br />
encounter some problem retrieving your ‘.tws’ file, you can just replace the ‘.tbk’ extension by ‘.tws’ and<br />
use the back up.<br />
During the development of the application, it can be sent at any time to TBOX U<strong>LP</strong>, for testing purpose.<br />
When sending an application to TBOX U<strong>LP</strong>, it is first compiled and then sent, in the same sequence.<br />
Version: 2.08 <strong>TBox</strong> - U<strong>LP</strong> 44
5.9.2. Compiling an application<br />
Compilation converts the document into microprocessor code. You can execute it:<br />
• Use the icon of the main tool bar<br />
• Use the accelerator key <br />
The result of the compilation is available in the Results window. This windows automatically pops up<br />
when there is a problem but it can be opened manually:<br />
• from the main menu: ‘View’ � ‘Results’<br />
• using the accelerator keys <br />
The Results window provides useful data:<br />
Information: indicated in black<br />
Warning: indicated in bold dark green<br />
Error: indicated in bold red<br />
Test of memory still available<br />
The result window also displays memory still available:<br />
TBOX U<strong>LP</strong> ROM: 32 kbytes ROM: 512 kbytes RAM: 48 kbytes RAM: 72 kbytes<br />
Features Application Ladder / BASIC (64k)<br />
Sources, Web&Report<br />
5.9.3. Sending an application<br />
Application Chronologies & Sampling Tables,<br />
backup of Tag values<br />
In order to have the TBOX U<strong>LP</strong> running with the program developed with TWinSoft, you have to transfer<br />
it. You can use any media to achieve it (RS232, modem, TCP/IP, …).<br />
Possibilities for sending a program:<br />
• Use the icon of the main tool bar<br />
• From the main menu use: ‘Communication’ � ‘Send program’<br />
• Use the accelerator keys <br />
The sequence when sending is: Compiling + Transferring.<br />
If a problem occurs during compilation, the sequence is stopped and the ‘Results’ window pops-up (see<br />
above)<br />
If you interrupt the sending of the program or an error happens before the<br />
end of sending, TBOX U<strong>LP</strong> will not restart, even after a reset.<br />
The reason is that the program is composed of several modules; when TBOX U<strong>LP</strong><br />
starts, it checks the integrity of these modules. When they do not correspond to<br />
the same data transfer, the program does not start, even after a reset.<br />
You have then to re-send the program.<br />
The good news is that TBOX U<strong>LP</strong> keeps its original settings before it was<br />
stopped.<br />
Version: 2.08 <strong>TBox</strong> - U<strong>LP</strong> 45
Version: 2.08 <strong>TBox</strong> - U<strong>LP</strong> 46
TWINSOFT - PROGRAMMING<br />
Version: 2.08 <strong>TBox</strong> - U<strong>LP</strong> 47
6. Introduction<br />
TWinSoft uses the standard look and feel of ‘Windows Explorer’; on the left side a list of folders and on<br />
the right side the content of the folder selected.<br />
TWinSoft can be automated using “TWinSoft Automation”. It allows automating<br />
TWinSoft application from languages script such as Visual Basic. Automation<br />
allows creating specific users interfaces, targeted to vertical market.<br />
It could be also be considered in project with large number of RTU's.<br />
(see documentation in group of programs “Techno Trade”)<br />
In TWinSoft interface, each Folder consists in a list of items.<br />
For instance the list of Tags, or in the ‘Alarms’ folder the list of ‘Recipients’ or in the ‘Datalogging’ folder<br />
the list of ‘Sampling tables’, …<br />
The programming of a TBOX U<strong>LP</strong> application will be done in different steps:<br />
� Configuring the RTU properties<br />
� Configuring the communication ports and I/O's (from the ‘Resources’)<br />
� Creating Tags<br />
� Creating Programs using automation language Ladder and/or BASIC<br />
� Creating Alarms<br />
� Creating Datalogging<br />
� If you have a Remote device, creating Remote Tags, to exchange data<br />
The sequence in which those tasks are executed is not fixed, but at least RTU properties, Resources and<br />
Tags should be configured first, as being required for all other programming.<br />
All those configurations are explained in the following chapters.<br />
Version: 2.08 <strong>TBox</strong> - U<strong>LP</strong> 48
7. RTU properties<br />
Setting the properties of the TBOX U<strong>LP</strong> has never been so easy thanks to a set of comprehensive dialog<br />
boxes, available from the main tool bar.<br />
The RTU properties are divided into:<br />
RTU properties can be accessed<br />
easily by clicking this icon.<br />
• General the type of the RTU, telephone number, size of the chronologies, …<br />
• Drivers configuration of external software modules written in ‘C’, used to execute specific<br />
task or to communicate with other protocol than standard ones.<br />
• Info to type any info about your program, its different versions, …<br />
• Advanced for some features, some advanced parameters are available:during start-up, when<br />
sending alarms, concerning sampling tables, …<br />
Communication ports are configured from the ‘Resources’.<br />
General TCP/IP configuration is done from the ‘Workspace’ and<br />
folder IP parameters.<br />
Version: 2.08 <strong>TBox</strong> - U<strong>LP</strong> 49
7.1. General properties<br />
RTU Type: The type of RTU you have selected with the Wizard. It cannot be changed !<br />
Name: type a free name for the TBOX U<strong>LP</strong>. It will be displayed when doing a ‘RTU<br />
identification’ and used by the supervisory T.<br />
Maximum 8 characters.<br />
ModBus address: with ModBus protocol, each device must have a Station number. It is its ModBus<br />
address.<br />
Enter a number between 1 and 254 (default=1).<br />
Sub address: if more than 254 TBOX U<strong>LP</strong> must be installed in one project, you need to define a<br />
Sub address. As this is not ModBus standard, it is only supported by ‘TComm.dll’<br />
based software (TWinSoft, T, … please call your distributor for further<br />
information).<br />
Enter a number between 0 and 255 (default=0).<br />
Version: 2.08 <strong>TBox</strong> - U<strong>LP</strong> 50
OS version: when working Offline, it is the OS used to simulate the compilation.<br />
By default it is the OS version associated to version of TWinSoft.<br />
Telephone number: Configuration used by TWinSoft when it needs to dial TBOX U<strong>LP</strong>.<br />
Sizes: Number of records of Digital and Analog chronologies. The chronologies are the<br />
‘on event’ method of recording data in TBOX U<strong>LP</strong> (see chapter 13: Data logging).<br />
Digital Chronology: max. 12 000 (Default=100).<br />
Analog Chronology: max. 7 000 (Default=100).<br />
Time zone: The Time Zone where the TBOX U<strong>LP</strong> is installed.<br />
This information is used to create the time stamps when retrieving data from<br />
TBOX U<strong>LP</strong> according to its location. TBOX U<strong>LP</strong> uses Universal Coordinated Time<br />
(UTC) as internal time stamp. The conversion is carried out when retrieving the<br />
data.<br />
Summer/Winter: Allows automatic management of winter/summer time. This selection has to be<br />
made according to the location where the TBOX U<strong>LP</strong> is installed.<br />
See Appendix B : Time in the RTU<br />
Wake-up: Determine the period between wake-ups of the CPU. See also chapter 2.3.<br />
7.2. Drivers<br />
A driver is a module written in ‘C’ that executes a specific task, non-standard.<br />
Typically, it is communication to equipment not supporting standard protocol of TBOX U<strong>LP</strong>.<br />
Standard SCADA protocols are also supported: IEC-60870-5-101 -104, DNP3.0, TG800, Access Control<br />
devices, .... Check with your distributors.<br />
�<br />
�<br />
7.3. Security<br />
Access security is discussed at chapter 16.<br />
This kind of communication is not really<br />
applicable to ultra low power applications<br />
Version: 2.08 <strong>TBox</strong> - U<strong>LP</strong> 51
7.4. Info properties<br />
You can enter a version number, the name of the programmer and a description of your program.<br />
This information is not sent to TBOX U<strong>LP</strong>.<br />
7.5. Advanced<br />
7.5.1. Start/Stop<br />
By Start-up we mean:<br />
� Reset of RTU (hardware or software).<br />
� Sending of Program<br />
See also chapter 5.6 above<br />
Under those conditions two mechanisms of the RTU can be customized:<br />
START<br />
Reset all physical outputs: when active, at start-up the RTU reinitializes the outputs to ‘0’. After<br />
that the outputs are monitored according to the process.<br />
When not active, at start-up the outputs are maintained to their last status. After<br />
that, outputs are monitored according to the process.<br />
Version: 2.08 <strong>TBox</strong> - U<strong>LP</strong> 52
Wait start of condition: this feature relates to alarm condition.<br />
The mechanism of generating alarm is based on transition: the changing of a digital<br />
Tags or the overstepping of an analog threshold.<br />
This option allows changing this rule at start-up:<br />
With ‘Wait start of condition’ active:<br />
With ‘Wait start of condition’ not active: if the alarm condition is true at start-up, an internal ‘start of<br />
alarm - auto-ack’ is generated. When the alarm condition<br />
disappears, the alarm is generated.<br />
Internal<br />
Alarm<br />
STOP<br />
Alarm Alarm time<br />
startup<br />
Alarm Alarm<br />
Alarm<br />
startup<br />
Reset All physical outputs at program stop: when this option is active, the RTU reinitializes the<br />
outputs to '0' at stop. This is particularly useful if you want to reset the outputs when<br />
sending a new program, and you want to be sure they stay at '0' during the sending<br />
and restarting sequence.<br />
After that, outputs are monitored according to the process.<br />
Disconnect ModBus address at program stop: all variables will have their ModBus address<br />
disconnected, which means that an external equipment accessing the RTU will<br />
receive communication error.<br />
This feature has been implemented to allow a SCADA detecting immediately a <strong>TBox</strong> is<br />
stopped: as the ModBus addresses are not available, the RTU stays in communication<br />
but returns an 'Exception' error.<br />
Version: 2.08 <strong>TBox</strong> - U<strong>LP</strong> 53<br />
time
7.5.2. Alarms<br />
The advanced parameters of alarms concern the size of the stacks and customizing of e-mail and<br />
GSM message.<br />
Event stack: is a public stack, accessible by users, where alarms are available with date, time,<br />
recipient, message, status, ….<br />
The Event stack can be displayed from the main menu: ‘Communication’ � ‘Download’ �<br />
‘Alarms’.<br />
The object ‘Alarms’ used in a WebForm displays the Event stack. It corresponds also to the list<br />
of Alarms sent to T.<br />
Alarm stack: is an internal stack used to buffer alarms when there are several to handle.<br />
SMTP From: when receiving an e-mail from TBOX U<strong>LP</strong>, the field ‘From’ indicates the origin of the email.<br />
It accepts any text and the following parameters:<br />
%station% : replaced by the name of the station (see General properties)<br />
%email% : replaced by the e-mail address of the RTU<br />
Example: <strong>TBox</strong>_%station% <br />
Version: 2.08 <strong>TBox</strong> - U<strong>LP</strong> 54
SMTP subject: when receiving an e-mail from TBOX U<strong>LP</strong>, the field 'Subject' can be dynamized like<br />
following:<br />
When sending a message, the field ‘Subject’ contains the message or the<br />
title of the report (see Report Studio).<br />
It accepts any text and the following parameters:<br />
%station% : replaced by the name of the station (see General properties)<br />
%email% : replaced by the e-mail address of the RTU<br />
%time% : the time of the RTU when the e-mail was generated<br />
Example: Report <strong>TBox</strong> %station% - %time% :<br />
When sending a report, the subject field contains the Title of the report (see Report<br />
Studio); title that can contain the parameter %station%<br />
GSM & Printer message: when TBOX U<strong>LP</strong> sends a SMS, you can add information to the message.<br />
This information is sent in front of the message.<br />
You can type any text and the following parameters:<br />
%station% : replaced by the name of the station (see General properties)<br />
%time% : the time of the RTU when the SMS (or printing) was generated<br />
%condition% : It will result in an exclamation mark (!) in the message if the<br />
condition of the alarm is still active when the alarm is sent.<br />
End of Alarm prefix : allows specifying a text that will be sent in front of the message, when<br />
the alarm condition ends, to indicate it corresponds to the End of the alarm.<br />
Example:<br />
END:<br />
Message sent when the condition ends:<br />
END: Level too HIGH<br />
Check that the total length of SMS message does<br />
not exceed 160 characters<br />
Do not use accent<br />
Process alarm even when com. port not available:<br />
An alarm corresponds always to a communication (at the exception of "Internal" alarms).<br />
When a alarm condition is activated, by default, it waits the availability of the com. port<br />
to be handled (GSM present, ...) This can lead to problems in handling escalation: if a<br />
media is not present, the alarm process will be stopped.<br />
This option allows to carry on alarms, even when the port is not available.<br />
Alarm filter on both transitions : this option allows computing the filter of alarm condition during<br />
both transitions: when the Tag value goes to alarm condition AND when it leaves alarm<br />
condition.<br />
This option will be applied to all alarm conditions.<br />
This is particularly useful to filter interferences on inputs.<br />
Version: 2.08 <strong>TBox</strong> - U<strong>LP</strong> 55
Delay alarm processing when recipient's time table not available<br />
This feature is associated to the "Scheduling" attached to the recipient.<br />
If the recipient is not in an active time table when the alarm is initiated, this feature<br />
provides 2 options:<br />
- the alarm is auto-acknowledged (by default)<br />
- the alarm is maintained in the alarms table until the time table becomes active. The<br />
"Start" timestamp is the one at the moment the alarm condition was generated.<br />
Example:<br />
the alarm condition happens at 2:35 AM, but it is not an urgent alarm. It is an<br />
SMS meant to inform the technician. The "recipient" is configured with a time table<br />
starting at 8:00 AM (corresponding to the technician work shift). Therefore, the<br />
technician will receive the message at 8:00 AM, but with a timestamp of 2:35, informing<br />
him when the event happened<br />
Display alarm calls in alarm table<br />
This feature is associated to the alarm condition sent to a group of recipients.<br />
When this feature is active, the alarms table displays the event having initiated the alarm<br />
and all the calls generated (see below).<br />
Event stack displaying also alarm calls:<br />
Working with group of recipients, it is also possible to display each call with its acknowledgment<br />
status:<br />
Message: message preceded by (*) means that it corresponds to a call<br />
Start: always ack<br />
Recipient: name of each recipient of the group<br />
End timestamp: timestamp corresponding to the end of the call<br />
End: acknowledgment status of the call: Not Ack; Ack'ed or Auto ack.<br />
7.5.3. Flow Meters<br />
Flowmeters with ‘Pulse output’ (potential-free contact) can be connected to TBOX U<strong>LP</strong>.<br />
Even when TBOX U<strong>LP</strong> runs in sleep mode, it reads the input at a maximum frequency showed in the table<br />
bellow. The flow, index, alarms, … are computed at wake-up.<br />
The handling of the pulses depends on the duty cycle OPEN - CLOSE of the contact.<br />
Two main categories of pulses are available:<br />
• Duty cycle of 50 % : the contact is OPEN 50% of the period and 50% CLOSE.<br />
• Duty cycle of 10 % : the contact is OPEN 90% of the period and 10% CLOSE.<br />
Version: 2.08 <strong>TBox</strong> - U<strong>LP</strong> 56
With a wake up interval of max. 1 minute, according to the selection, the supported timings are:<br />
Setting: 50% Min. pulse duration Max. pulse frequency<br />
pulse at 50 % > 125 msec. < 4 Hz<br />
pulse at 10 % > 125 msec. < 0.8 Hz<br />
Setting: 10% Min. pulse duration Max. pulse frequency<br />
pulse at 50 % > 32 msec. < 2.28 Hz<br />
pulse at 10 % > 32 msec. < 3.2 Hz<br />
1. As you can see from the table, when working selecting a duty cycle of<br />
10%, the max. frequency is smaller than when working at 50 % of duty<br />
cycle.<br />
2. When working with 10% ratio, the time between 2 pulses must be of<br />
at least 125 msec.<br />
Version: 2.08 <strong>TBox</strong> - U<strong>LP</strong> 57
7.5.4. Sampling Tables<br />
This menu gives access to the parameters for long period recording in Sampling tables. (See chapter<br />
13.3: ‘Sampling tables’)<br />
Those configurations concern all sampling tables.<br />
� Daily: When ‘daily’ is selected in sampling table, it is the time of the day the recording is executed.<br />
� Weekly: When ‘weekly’ is selected in sampling table, it is the day of the week and the time the<br />
recording is executed.<br />
� Monthly: When ‘monthly’ is selected in sampling table, it is the day of the month and the time the<br />
recording is executed.<br />
7.5.5. Temperature<br />
For internal temperature (Group 1 of I/O), you can define a unit: Celsius, Fahrenheit or Kelvin.<br />
Version: 2.08 <strong>TBox</strong> - U<strong>LP</strong> 58
7.5.6. Remote Tags<br />
Reset the device Trigger only if success When communicating as ‘Master’ using ‘Remote<br />
Tags’, a Trigger is associated to the device the RTU communicates with<br />
(see chapter 14. Remote Tags).<br />
This Trigger activates the communication according to a ‘State’ or ‘Edge’.<br />
Working with Trigger ‘Edge’, the RTU restores automatically the Tag after<br />
the transaction(s).<br />
- With this option active: the Trigger is restored only when communication has been done<br />
successfully.<br />
- Without this option: the Trigger is restored when all Remote Tags associated to the device have<br />
been executed, with or without error.<br />
7.5.7. TCP/IP<br />
TCP Ports Numbers.<br />
Each TCP/IP service has its own unique TCP port. It provides a logical location for the delivery of TCP<br />
data.<br />
TCP Port number complies to a standard defined by the IANA to be sure everyone using a TCP service<br />
uses the same TCP ports according to protocols used.<br />
When working with TBOX U<strong>LP</strong>, in some cases, you might want to change this port number.<br />
Version: 2.08 <strong>TBox</strong> - U<strong>LP</strong> 59
HTTP: port used to access TBOX U<strong>LP</strong> as WebServer.<br />
ModBus/TCP-Slave: port used by a ‘Master’ to access TBOX U<strong>LP</strong> as ‘Slave’.<br />
ModBus/TCP-Master: port used when TBOX U<strong>LP</strong> is ‘Master’ to access a remote device.<br />
FTP: port used by TBOX U<strong>LP</strong> to send Files (by default=21).<br />
SMTP: port used by TBOX U<strong>LP</strong> to send e-mails (by default=25).<br />
TCP/IP addresses for incoming calls<br />
Range of addresses used during incoming calls.<br />
TBOX U<strong>LP</strong> uses the first address of the range and applies the following to the remote equipment.<br />
Typically, this information is needed when TBOX U<strong>LP</strong> is used as a Web Server, dialled from Internet<br />
Explorer and <strong>TBox</strong> Dial It !.<br />
The utility <strong>TBox</strong> Dial It ! , used to dial TBOX U<strong>LP</strong> automatically, detects the IP address and uses it as URL.<br />
TCP/IP miscellaneous<br />
1. Changing the TCP port does not affect access from TWinSoft using<br />
TCP/IP. This is always possible.<br />
2. The changing of TCP port is automatically applied to 'WebForms'<br />
when building the HTML pages using WebForm Studio.<br />
Avoid using addresses in the same range than IP address<br />
defined for the LAN card of the PC used as Browser.<br />
Extended Log: TBOX U<strong>LP</strong> provides a debugging mode to test TCP/IP connection (see chapter 10.7.)<br />
The extended log adds any IP information sent/received by the CPU. It allows extended spying<br />
of the line.<br />
Debugging uses Analog Chronology table. Check its size is sufficient (see chapter 7.1. General<br />
RTU properties).<br />
Version: 2.08 <strong>TBox</strong> - U<strong>LP</strong> 60
7.5.8. Environment variables<br />
The environment variables are used when particular configuration might be needed in external software.<br />
Available only when sending historical data through .tma file.<br />
Variable Value Description<br />
TViewPath \path The path in which the station will be created when<br />
importing data in T.<br />
The path is the relative path from the Project workspace<br />
of T.<br />
Longname<br />
Type any long name<br />
7.5.9. Web and Report<br />
Example: with the Value: \Lines\10<br />
Result in T :<br />
The name typed here will be used in T, instead of<br />
the one declared in the ‘General’ properties, which is<br />
limited to 8 characters<br />
Check user's WebFormViewer version: You activate the verification done by the WebForm Viewer.<br />
When creating a WebForm, an indication of minimum version of the Viewer is<br />
declared in HTML pages sent in TBOX U<strong>LP</strong>. When going in connection with IE,<br />
WebForm Viewer will check the version of WebForm, and in case it is newer, display a<br />
message (see next).<br />
Message: In case you have activated the option, you can specify a text that will be displayed in a<br />
message box.<br />
This message box appears when connecting with IE to a WebForm that needs an<br />
update of WebForm Viewer to be displayed.<br />
This information mainly depends on the type of connection used to access <strong>TBox</strong>:<br />
Version: 2.08 <strong>TBox</strong> - U<strong>LP</strong> 61
- The <strong>TBox</strong> is accessed through a modem point to point connection: as it is impossible to access<br />
Internet from this connection, you type a message to inform on the procedure to access<br />
Internet and download the WebForm Viewer It can be from <strong>TBox</strong> manufacturer site (see<br />
below).<br />
- The <strong>TBox</strong> is on Internet or part of a LAN: the message informs on the situation. By clicking<br />
'OK', you jump to the URL (see next).<br />
Download new version: This option can be checked to automatically download the last version of<br />
WebForm Viewer. It will be used in 2 cases:<br />
- The <strong>TBox</strong> is connected to Internet:. then you have also direct access to Internet to download<br />
WebForm Viewer. You can leave the URL of the manufacturer:<br />
http://www.tboxsupport.biz/free_downloads/DownloadWebFormViewer.html<br />
- The <strong>TBox</strong> is connected on a LAN: and one of the PC of the LAN contains the WebForm<br />
Viewer. You type the URL of the PC.<br />
Example: \\PCServer\C\<strong>TBox</strong>\Download\DownloadWebFormView.htm<br />
Unique Report file name format: When sending a report by FTP, you have the choice of sending the<br />
report with ‘Unique file name’ (see Report Studio � report properties � Advanced). In this case, the<br />
RTU includes supplementary parameters in head of the name of the report.<br />
Accepted parameters are:<br />
%station%: name of the RTU %email%:<br />
e-mail of the RTU<br />
%time%: complete date & time<br />
%condition%: ! (if alarm active)<br />
%YY%: year in 2 digits<br />
%YYYY%: year in 4 digits<br />
%M%: month in 1 digit (if possible)<br />
%MM%: month in 2 digits<br />
%MONTH%: month in letters<br />
%D%: day in 1 digit (if possible)<br />
%DD%: day in 2 digits<br />
%h%: Eur. hour in 1 digit (if possib.)<br />
%hh%: Eur. hour in 2 digits<br />
%H%: US hour in 1 digit (if possible)<br />
%HH%: US hour in 2 digits<br />
%mm%: minute in 2 digits<br />
%ss%: second in 2 digits<br />
%file%: name of the report<br />
%ampm%: US time am/pm<br />
~mytag~: value of Tag<br />
Any supplementary text can be added.<br />
Version: 2.08 <strong>TBox</strong> - U<strong>LP</strong> 62
8. Resources<br />
The resources represent the list of the hardware that your TBOX U<strong>LP</strong> has to its disposal.<br />
The TBOX U<strong>LP</strong>, being an all-in-one RTU, has a fixed hardware all built within one card:<br />
• A CPU<br />
• Communication ports<br />
• Several groups of I/O<br />
• If the CPU needs to communicate in ‘ModBus Master’ to another device (CPU, or an external<br />
ModBus device), the latter must be declared as a Remote I/O card (see chapter 14: ‘Remote Tags’)<br />
• The Resources also contain 2 lists with System variables.<br />
Systems variables have pre-defined<br />
function (see chapter 8.8 ‘System variables’)<br />
8.1. The CPU card<br />
When starting a new document, TWinSoft creates automatically the CPU card; the minimum for a TBOX<br />
U<strong>LP</strong> project !<br />
The communication ports of the CPU with their associated configuration and the I/O of the CPU are<br />
available from the ‘Resources’:<br />
The CPU card is divided in several groups:<br />
� Group 0 : communication ports<br />
� Group 1, 2, 3, … : different groups of I/O corresponding (See chapter 17.9. for more details<br />
about I/O).<br />
Version: 2.08 <strong>TBox</strong> - U<strong>LP</strong> 63
8.2. Communication ports<br />
8.2.1. Communication ports tabs<br />
By selecting the Group 0<br />
(CPU-COM) in the<br />
workspace, you can<br />
access each port<br />
separately.<br />
Depending on the type of communication port (RS232, modem or RS485), different tabs are available:<br />
Parameters: general parameters (Baudrate, Protocol).<br />
DCV: Digital Communication Variables. Special variables with a pre-defined function<br />
(communication error, modem online, …). (see chapter 8.6)<br />
ACV: Analog Communication Variables. Special variables with a pre-defined function<br />
(time-out, user ID, …). (see chapter 8.6)<br />
Advanced: mainly ‘timing’ parameters required when CPU is ‘Master’ or ‘Slave’ in a ModBus<br />
communication.<br />
TCP/IP: TCP IP configuration dedicated to the communication port, when available.<br />
To enter the configuration of the communication port, double click the port in ‘Group 0’.<br />
8.3. Serial ports<br />
Baudrate: 200…115200 bps<br />
Data bits: 7 or 8<br />
Parity: None, Odd, Even, Space,<br />
Mark<br />
Stop bits: 0, 1 or 2<br />
Protocol:<br />
ModBus (RTU/ASCII),<br />
Printer, NMEA<br />
Example with COM1 – RS232<br />
Version: 2.08 <strong>TBox</strong> - U<strong>LP</strong> 64
8.4. GSM/GPRS modem<br />
When present,<br />
GSM modem is<br />
available as<br />
COM2.<br />
8.4.1. GSM in mode Low Power<br />
Before entering GSM configuration, let's take a look at the consumption aspect of GSM.<br />
It is important with TBOX U<strong>LP</strong> to use the power the more efficiently. The hardware and software of<br />
TBOX U<strong>LP</strong> is designed with this highest target.<br />
On the same way, the GSM must be used to consume as less energy as possible.<br />
It is therefore possible to configure the GSM in a ‘Low Power mode’.<br />
� When the ‘Low power’ option is not checked: the GSM is powered permanently; ready to be<br />
dialed-up and to dial out.<br />
We consider real ultra low power operation when GSM is working at<br />
Low Power mode, with small periods of GSM wake-up and little<br />
communication.<br />
� When the ‘Low power’ option is checked: the GSM is powered according to 3 conditions:<br />
� At wake-up, when there is an alarm defined with severity ‘high’<br />
� When the DCV ‘COM2.ModemPower’ = 1 (see example below)<br />
� When the DCV ‘COM2.ModemAlarm’ = 1 (see example below)<br />
Version: 2.08 <strong>TBox</strong> - U<strong>LP</strong> 65
Wake-up of GSM in case of Alarm of ‘High’ severity<br />
In case an alarm of severity ‘High’ happens, at CPU wake-up, the GSM is powered, alarm is sent and the<br />
GSM returns to sleep mode. This is valid for GSM-DATA and GPRS communication.<br />
Wake-up of GSM using Communication Variables<br />
Three variables allow handling wake-up of the GSM, in order to save as much energy as possible.<br />
Type Name Description<br />
DCV COM2.ModemPower When ON, activate powering the GSM during the period defined in the<br />
Analog Communication Variable ‘COM2.ModemPoT’ (see next)<br />
ACV COM2.ModemPoT Time in minutes while GSM is maintained powered when<br />
‘COM2.ModemPower’ is ON.<br />
After this period, even if still in communication, the GSM is switched<br />
off.<br />
DCV COM2.ModemAlarm Start powering the GSM to send alarm of severity ‘Low’ and ‘Normal’.<br />
After sending alarms, the GSM switches off.<br />
Examples of waking-up GSM using BASIC:<br />
1. Wake-up of the GSM every Monday at 8:00 during 1/2 hour:<br />
Note:<br />
Those variables are used when the option ‘Low Power’ has been<br />
checked (see above)<br />
Com2_ModemPoT=30 ' Wake-up period of 30 minutes<br />
If (weekday=1) and (hours=8) and (minute=0) and (Com2_ModemPwr=0) then<br />
Com2_ModemPwr=1<br />
endif<br />
‘Com2_ModemPwr’ is automatically reset by the OS after the number of minutes declared in<br />
‘Com2_ModemPoT’<br />
2. Wake-up at 8:00 to send alarm of severity ‘Low’ and ‘Normal’:<br />
if (hours=8) and (Com2_ModemAla=0) then<br />
Com2_ModemAla=1<br />
endif<br />
Notes:<br />
1. The two modes can be used at the same time. In those 2 examples when ‘Com2_MademAla’ is<br />
active at 8:00, at the same time as ‘Com2_ModemPwr’, TBOX U<strong>LP</strong> will send alarms of severity<br />
‘Low’ and ‘Normal’ and will stay awake during the time defined in ‘Com2_PowerOn’.<br />
2. ‘Com2_ModemPwr’ can be reset to stop power before the end of the period. If this happens<br />
during a communication, the power will be stopped at the end of the communication.<br />
Version: 2.08 <strong>TBox</strong> - U<strong>LP</strong> 66
The GSM modem can be used in 2 modes:<br />
� as a GSM-data modem<br />
� in GPRS mode<br />
8.4.2. GSM-data settings<br />
Initialization: should not be changed<br />
In addition to standard modem<br />
configuration (initialization), some<br />
parameters are specific to GSM.<br />
The main option ‘GPRS’ determine<br />
the working mode of the modem:<br />
GSM-data OR GPRS<br />
PIN Code: If the SIM card you have inserted uses a PIN code, type it at the place of the<br />
letter n.<br />
Example: with the PIN code 4896, you should have in the field: AT+CPIN=“4896” including the<br />
quotes<br />
If the SIM card you have does not require a PIN code, you can leave the field as<br />
it is or erase it completely.<br />
Auto Answer: number of RINGS before the modem picks-up the line.<br />
Dialing to a GSM-data<br />
If you type the wrong PIN code, or you type a PIN code when the SIM<br />
card does not require one, you risk blocking the SIM card.<br />
It must then be restored with the PUK code using a mobile.<br />
The SIM card of a GSM has three telephone numbers: VOICE (the one you dial to speak), DATA and FAX.<br />
To dial to TBOX U<strong>LP</strong>, you have to be sure that data service is activated and that you dial the DATA<br />
number (please call your GSM operator).<br />
In some countries, like in US for instance, GSM operators do not<br />
provide DATA service.<br />
DATA communication is then only available in GPRS mode (see below)<br />
Version: 2.08 <strong>TBox</strong> - U<strong>LP</strong> 67
About sending e-mail or Files with GSM-data<br />
Some ISP requires specific telephone number for connecting through GSM (please check with your ISP).<br />
8.4.3. GPRS settings<br />
In ultra low power mode, as all alarms, e-mail or FTP can be<br />
generated either using a alarm with severity “high” or with the<br />
communication variable Com2.ModemAlarm.<br />
When you run a TBOX U<strong>LP</strong> with GSM and want to use GPRS, you have to activate the GPRS mode.<br />
You have to choose either ‘GSM-Data’ mode OR ‘GPRS’ mode.<br />
It is not possible to use the modem in both modes at the same<br />
time, but it is possible to combine GPRS mode and sending of<br />
SMS (see below).<br />
When selecting GPRS, TWinSoft<br />
automatically adapts Initialization<br />
and Operator Phone number fields<br />
(see next).<br />
If the connection requires a login,<br />
select the option ‘The server<br />
requires authentication’.<br />
If you receive a fixed IP address,<br />
declare it in ‘TCP/IP’ tab.<br />
Initialization: You have to update the initialization string with the APN (ask you GSM<br />
operator). Replace in the string the apn with the URL you receive from your<br />
GSM operator.<br />
Example with Mobistar: AT+CGDCONT=1,“IP”,“WEB.PRO.BE”.<br />
Version: 2.08 <strong>TBox</strong> - U<strong>LP</strong> 68
PIN Code: If the SIM card you have inserted uses a PIN code, type it at the place of the<br />
letter n.<br />
Example: with the PIN code 4896, you should have in the field: AT+CPIN=“4896”, including the<br />
double apostrophes<br />
If the SIM card you have does not require a PIN code, you can leave the field as<br />
it is or erase it completely.<br />
Operator Phone number: special number to establish the GPRS connection.<br />
Typically, the number is *99***1#. Check with your operator and type it following the<br />
command ATD.<br />
Example with Mobistar, Proximus, SFR, AllIP, …: ATD*99***1#<br />
Connection at start up: by default, this option is not selected (this is the proper way of working<br />
for an ultra low power RTU).<br />
TBOX U<strong>LP</strong> has to handle:<br />
first the modem wake-up, using COM2.ModemPower and COM2.ModemPoT,<br />
second the connection using the Communication Variables COM2.GPRSCon (see<br />
below).<br />
Examples of Activating GPRS connection using BASIC:<br />
When this option is selected, TBOX U<strong>LP</strong> powers the modem to keep<br />
the connection permanently... which is not compatible with ultra<br />
low power.<br />
Don't do it !<br />
Wake-up of the GSM every Monday at 8:00 during 1/2 hour:<br />
Com2_PowerPoT=30 ' Wake-up period of 30 minutes<br />
If (weekday=1) and (hours=8) and (minute=0) and (Com2_ModemPwr=0) then<br />
Com2_ModemPwr=1<br />
Com2_GPRSCon=1<br />
endif<br />
Communication Variables dedicated to GPRS<br />
Some communication variables allow monitoring GPRS and give information on the status.<br />
Version: 2.08 <strong>TBox</strong> - U<strong>LP</strong> 69
Digital Communication Variable<br />
COMx.GPRSCon * GPRS: Handles the GPRS connection.<br />
Working in manual connection, writing ‘1’ forces a connection; writing ‘0’ forces a<br />
disconnection.<br />
Analog Communication Variable<br />
When working with automatic connection at start up, if you reset this variable the<br />
connection will stop, but after maximum 5 minutes, it will be automatically<br />
restarted.<br />
Don't use this feature in ultra low power mode!<br />
COMx.GPRSState - GPRS: indicates the status of the GPRS connection.<br />
Value=0 : disconnected<br />
Value=1 : currently connecting<br />
Value=2 : connected<br />
Value=3 : currently disconnecting<br />
COMx.IPAddress - GPRS: this register gives the IP address used by TBOX U<strong>LP</strong> during its GPRS<br />
connection.<br />
The information is available in a DWORD, but in the list of Tags, you can display it<br />
as an IP address: from the list of Tags, right click the Tag � Display as � IP<br />
address.<br />
About sending alarms with GPRS<br />
This information is very important when working with dynamic IP address. It<br />
can be sent for instance by e-mail (see Report Studio), or displayed in a<br />
webform, to inform on IP address changing. Accessing TBOX U<strong>LP</strong> with dynamic<br />
IP can be done using DynDNS.<br />
With GPRS, you are able to send e-mail or files using FTP. You create recipient(s) associated to the SMTP<br />
or FTP server you have associated to the GSM/GPRS.<br />
In ultra low power mode, as all alarms, e-mail or FTP can be<br />
generated either using a alarm with severity “high” or with the<br />
communication variable Com2.ModemAlarm.<br />
For sending e-mail, you may need to use a SMTP server specific to the<br />
GPRS connection. Ask your GSM operator.<br />
Example with Mobistar: gprsmail.mobistar.be<br />
Version: 2.08 <strong>TBox</strong> - U<strong>LP</strong> 70
Sending of SMS with GSM configured in GPRS<br />
It is possible, but only when handling GPRS connection from the Ladder/BASIC.<br />
To use this feature, you have to monitor the GPRS connection manually:<br />
¯ Be sure the option ‘Connection at<br />
startup’ is not activated.<br />
¯ Make a Tag of the DCV ‘GPRSconnect’<br />
¯ Change it to 1 to activate GPRS<br />
¯ Change it to 0 before sending SMS<br />
When GPRS is de-activated, it is also possible to receive SMS (See chapter 12: Read SMS Embedded).<br />
GPRS IP settings<br />
GPRS represents a TCP/IP connection using GSM network. It then requires a TCP/IP configuration.<br />
Obtain IP address<br />
automatically:<br />
You work with dynamic IP<br />
address which is provided by<br />
the Operator at the connection.<br />
Use IP address:<br />
You work with fix IP address; it<br />
corresponds to the SIM card you<br />
use.<br />
Obtain DNS server addresses<br />
auto.:<br />
The Operator provides you with<br />
DNS.<br />
Use DNS Server addresses:<br />
You want to use specific DNS<br />
addresses.<br />
Version: 2.08 <strong>TBox</strong> - U<strong>LP</strong> 71
Using TWinSoft to communicate to an RTU in GPRS<br />
To access TBOX U<strong>LP</strong> through GPRS, GSM must be powered. Keep in<br />
mind the ultra low power concept and the monitoring of the GSM as<br />
explained 2.4.<br />
Typically, TWinsoft will access TBOX U<strong>LP</strong> from a LAN, using an Ethernet connection (if your LAN has a<br />
Gateway connection to Internet).<br />
In order to have a reliable communication, you have to increase some timing parameters in TWinSoft:<br />
menu ‘Communication’ � ‘PC Setup’; select ‘Ethernet’ and click ‘Advanced’.<br />
Change ‘Comm. Timeout’ to 5000 millisec.<br />
minimum<br />
Change ‘Inter-Frame Gap’ to 100 millisec.<br />
Before sending a program through GPRS, check the PC setup<br />
settings of TCP/IP, like explains chapter 5.3.2. IP address<br />
settings, point 3.<br />
Version: 2.08 <strong>TBox</strong> - U<strong>LP</strong> 72
8.5. External Modem<br />
TBOX U<strong>LP</strong>-XXX-S models have a serial port instead of a internal modem.<br />
This serial port can be used with an external modem.<br />
8.5.1. Low power operation of external modem (<strong>WM</strong>100, <strong>WM</strong>200, <strong>LP</strong>400)<br />
There are two ways of controlling the power, an automatic way and a manual way using system and<br />
communication variables.<br />
Automatic way:<br />
Power supply of this external modem must be controlled to avoid as<br />
much consumption as possible. This is achieved using the power<br />
connections available on the serial board (see details chapter 17.8)<br />
In the advanced parameters of the RS232 port, you select “Low Power Mode”. The modem can be<br />
powered either by internal 12 VDC (limited to 350mA) or if higher power is required by switching an<br />
external power supply (see details chapter 17.9).<br />
DO NOT TAG the variables associated to the outputs (see next)<br />
In this condition, the power of the modem will be automatically driven by the RTU, like it is for the<br />
internal GSM/GPRS: power cycled on demand with “Com2.ModemPower”, “Com2.ModemAlarm” or<br />
when alarm with severity high.<br />
Version: 2.08 <strong>TBox</strong> - U<strong>LP</strong> 73
Manual way:<br />
The Modem is powered manually using dedicated Outputs:<br />
One output drives the internal 12 VDC.<br />
One output drives the switch to external power supply.<br />
Tag ONLY THE ONE you need.<br />
Each time you want to communicate, you will have to switch on/off the variable used to power the<br />
modem, in addition to “Com2.ModemPower” or “Com2.ModemAlarm”.<br />
8.5.2. Low power operation of external modem (<strong>LP</strong>450)<br />
The major difference between <strong>LP</strong>450 and the others is that <strong>LP</strong>450 runs directly from 12 VDC battery.<br />
Therefore, the optional serial board does not provide a 12 VDC.<br />
To drive the external modem, use the same as described above, but exclusively using the output “Enable<br />
switch power”.<br />
Version: 2.08 <strong>TBox</strong> - U<strong>LP</strong> 74
8.6. Communication Variables<br />
Communication variables are dedicated registers to status of the communication.<br />
It is very useful for controlling the connection and the access level authority.<br />
Those variables are divided into 2 tabs, the Digital Communication Variables (DCV) and the Analog<br />
Communication Variable (ACV).<br />
When you need one, you double click it from the list and declare it as a Tag. It becomes then available in<br />
any feature of TBOX U<strong>LP</strong>.<br />
8.6.1. Digital Communication Variable<br />
Name R/W Description<br />
According to its function a<br />
communication variable is<br />
Read/Write or Read only.<br />
In the following table, the<br />
column R/W indicates:<br />
- : Read only.<br />
0 : Write ‘0’ only.<br />
1 : Write ‘1’ only.<br />
* : Write ‘0’ or ‘1’.<br />
COMx.NoReply 0 Communication: SET by TBOX U<strong>LP</strong> in case of communication error. The possible<br />
errors are:<br />
- Timeout.<br />
- ModBus: Unknown address, wrong quantity, CRC error.<br />
- TCP/IP: wrong closing of socket.<br />
Must be RESET by the user.<br />
COMx.HookLink * Modem: When at ‘1’, indicates the modem has picked-up the line and it<br />
connecting to another modem.<br />
The success of the connection can be checked from the next ‘Connect’ variables.<br />
Writing ‘0’ or ‘1’ forces the modem to hang-up. It is mandatory to use a<br />
positive or negative edge Trigger contact to a SET or RESET relay<br />
COMx.Call - Modem: Reading ‘1’ indicates the modems are synchronized with TBOX U<strong>LP</strong><br />
‘Calling’<br />
COMx.Answer - Modem: Reading ‘1’ indicates the modems are synchronized with TBOX U<strong>LP</strong><br />
‘Answering’<br />
COMx.NoDial 0 Modem: Reading ‘1’ indicates that no dial tone has been detected when the<br />
modem has picked-up the line.<br />
Must be RESET by the user.<br />
COMx.GPRSCon * GSM: Indicates the status of the GPRS. Writing ‘1’ forces a connection; writing ‘0’<br />
forces a disconnection.<br />
Version: 2.08 <strong>TBox</strong> - U<strong>LP</strong> 75
Name R/W Description<br />
COMx.ModBusResp 0 Communication: indicates the port is transmitting. At each transmission, TBOX<br />
U<strong>LP</strong> SET this register.<br />
To check TBOX U<strong>LP</strong> is transmitting, you RESET this register and test whether it<br />
is SET again (using Ladder or BASIC logic).<br />
COMx.ModemError 0 Communication: modem initialization failed.<br />
Modem has answered with an ERROR to one of the parameters of the init.<br />
String (see modem properties). A reason could be, working with GSM, because<br />
it is not registered yet.<br />
When you RESET this register, OS executes a warm start of the modem<br />
(sending init. string)<br />
COMx.ModemPower * LowPower: When ON, start powering the GSM during the period defined in the<br />
Analog Communication Variable ‘COM2.ModemPoT’ (see Com2.ModemPoT in<br />
ACV). See example chapter 8.4.1.<br />
COMx.ModemAlarm * LowPower: Start powering the GSM to send alarm of severity ‘Low’ and<br />
‘Normal’. After sending alarms, the GSM switches off<br />
8.6.2. Analog Communication Variable<br />
Name R/W Description<br />
According to its function a<br />
Communication variable is<br />
Read/Write or Read only.<br />
In the following table, the<br />
column R/W indicates:<br />
- : Read only.<br />
0 : Write ‘0’ only.<br />
1 : Write ‘1’ only.<br />
* : Write ‘0’ or ‘1’.<br />
COMx.Level * Access Control: access level of the user currently logged (see chapter 16).<br />
COMx.UserId * Access Control: user Id of the user currently logged (see chapter 16).<br />
The user Id and the authority level correspond to those you have defined with the<br />
utility ' PASSWORD '.<br />
The values returns to 0 when the user has disconnected.<br />
Values can be written to those registers.<br />
Example: when a user is connected you can modify its level access by writing a<br />
value in the register COMx.level (level available: 0, 1, 2 or 3).<br />
Those values can be stored in analog chronology for keeping a history on the<br />
access.<br />
When a user disconnects (Logout), the register returns to 0<br />
COMx.Timeout * Modem: global time-out for hanging-up the modem when there is no<br />
communication. Correspond to the ‘Inactivity time-out’ in the ‘Advanced<br />
properties’ of the modem.<br />
Version: 2.08 <strong>TBox</strong> - U<strong>LP</strong> 76
Name R/W Description<br />
COMx.GPRSState - GPRS: indicates the status of the GPRS connection.<br />
Value=0 : disconnected<br />
Value=1 : currently connecting<br />
Value=2 : connected<br />
Value=3 : currently disconnecting<br />
COMx.IPAddress - GPRS: this register gives the IP address used by TBOX U<strong>LP</strong> during its GPRS<br />
connection.<br />
The information is available in a DWORD. To be interpreted, you should<br />
compute this Tag with mask to read the 4 bytes composing the IP address.<br />
COMx.SigLevel - GSM: The quality of the GSM signal. The range of the value is 1 to 31. The<br />
value should be minimum 20 to be considered as an acceptable signal level.<br />
PSTN: Voltage on the line (+/- 20%)<br />
COMx.SmsState - GSM: associated to the GSM, can be used to check the status of ReadSMS.<br />
COMx.AutoAnswer * Modem:<br />
Read: indicates the number of RING before the off hook<br />
Write “0”: no off hook<br />
Write “1”: force off hook at the next RING<br />
COMx.ModemState - MODEM: gives current status of the modem. Some possible values:<br />
1: PIN code sent (GSM only when PIN code activated)<br />
2: Wait after PIN code is sent<br />
4: Init string accepted<br />
7: Idle mode<br />
9: Calling. Waiting CONNECT<br />
10: RING arriving<br />
11: Answering. Wait CONNECT<br />
...<br />
The last value is maintained, until the next status changing.<br />
COMx.CallerID * MODEM: variable which indicates the caller ID of the current incoming<br />
modem connection, 32 bits format, giving the 9 last digits of the calling<br />
number. It can be used in the program to trace and control who is calling<br />
Init string of GSM modem: Caller ID identification must be activated.<br />
Add at the end of the init string of GSM: ^AT+CLIP=1<br />
COMx.ModemPoT * LowPower: Time in minutes while GSM is maintained powered when<br />
‘COM2.ModemPower’ is ON. See example chapter 8.4.1.<br />
After this period, even if still in communication, the GSM is switched off.<br />
Except when sending a program or OS, the GSM will be maintained<br />
powered until the end of sending and the restart of the GSM.<br />
Version: 2.08 <strong>TBox</strong> - U<strong>LP</strong> 77
8.7. Groups of I/O<br />
The Hardware is represented in TWinSoft with a hierarchy of 3 levels:<br />
CARD<br />
� CARD: with TBOX U<strong>LP</strong>, it is all-in-one CPU card<br />
� GROUP: the communication ports form a group (Group 0) as well as each type of I/O: group<br />
of DI, group of DO, group of AI, …<br />
� CHANNEL: each physical connection, within a Group, corresponds to a channel.<br />
GROUP<br />
CHANNEL<br />
When connected to a TBOX U<strong>LP</strong> the column<br />
‘Value’ displays the current value, when the<br />
channel has been declared as a Tag and the<br />
program sent to the RTU.<br />
(see chapter 9 : ‘Tags’)<br />
See technical specifications of all I/O at the end of the manual.<br />
Version: 2.08 <strong>TBox</strong> - U<strong>LP</strong> 78
8.7.1. Group1 – System Analog Inputs<br />
From the ‘Resources’ and the list of I/O, open the ‘Group 1 (3 AI)’ to list internal I/Os.<br />
The main board is equipped with internal analog inputs giving system data:<br />
Variable Format Min Max Resolution<br />
Battery 1 voltage Float 0 3.6 0.1<br />
Battery 2 voltage Float 0 3.6 0.1<br />
Internal temperature Float -50°C +90°C 0.1<br />
8.7.2. Group 2 - Digital Inputs<br />
From the ‘Resources’ and the list of I/O, open the ‘Group 2 (4DI)’ to list variables associated to the digital<br />
input channels.<br />
TBOX U<strong>LP</strong> has 4 Digital Input Channels, scheduled to receive pulses. Associated to each channel, there<br />
are several variables.<br />
Tag: The easiest way to declare the variable as a Tag: double click it, edit it and save it.<br />
The icon changes according to its type (digital or analog).<br />
Value: The value is available only after the Tag has been declared and program sent to TBOX U<strong>LP</strong>.<br />
WARNING: the value is refreshed at the rate defined in the ‘Wake<br />
up’ properties (see chapter 7.1: General Properties)<br />
Version: 2.08 <strong>TBox</strong> - U<strong>LP</strong> 79
Digital Input - State<br />
It is the direct digital input. It is the image of the input contact at the moment of wake-up.<br />
Independently of wake-up interval, the input is sampled 8 times per second. In order to detect changing<br />
between ‘0’ and ‘1’ states, the later must have a minimum period of 125 msec. each (maximum<br />
frequency of 4 Hz with a maximum wake-up interval of 1 minute).<br />
Digital Input - positive edge<br />
In case a positive edge on the Digital Input has occurred between 2 intervals of wake-up, it is<br />
memorized.<br />
When TBOX U<strong>LP</strong> wakes up, it changes the variable to ‘1’ and treats it according to its use in the program<br />
(alarm, datalogging, remote Tags).<br />
The variable is automatically reset after treatment (see example � and � here below).<br />
Digital Input - negative edge<br />
In case a negative edge on the Digital Input has occurred between 2 intervals of wake-up, it is<br />
memorized.<br />
When TBOX U<strong>LP</strong> wakes up, it changes the variable to ‘0’ and treats it according to its use in the program<br />
(alarm, datalogging, remote Tags).<br />
The variable is automatically Set after treatment (see example � here below).<br />
�<br />
�<br />
�<br />
wake-up<br />
DI pulse<br />
DI positive<br />
edge<br />
DI pulse<br />
DI positive<br />
edge<br />
DI pulse<br />
DI negative<br />
edge<br />
Version: 2.08 <strong>TBox</strong> - U<strong>LP</strong> 80
Digital Input - Interrupt<br />
Digital Input 0 and 1 can act as interrupt on the microprocessor. This allows executing tasks without<br />
waiting for the next wake-up.<br />
When an interrupt is detected, a cycle of Ladder/BASIC is executed.<br />
Alarm conditions and chronology conditions will be tested after Ladder/BASIC has been carried on.<br />
8.7.3. Group 3 - Digital Outputs<br />
From the ‘Resources’ and the list of I/O, open the ‘Group 3 (4DO)’ to list digital outputs.<br />
8.7.4. Group 4 - Analog Inputs<br />
You will not see the value=1 of “Interrupt” before the wake-up. But<br />
the variable counter associated will be incremented. It can then be<br />
used in the Ladder/BASIC to indicate the interrupt has been detected.<br />
Using Interrupt variable has an impact on consumption, because<br />
the digital input stage must be powered permanently.<br />
From the ‘Resources’ and the list of I/O, open the ‘Group 4 (2AI)’ to list analog inputs.<br />
Tag: The easiest way to declare the variable as Tag: double click it, edit it and save it.<br />
The icon changes according to its type (digital or analog).<br />
Value: The value is available only after the Tag has been declared and program sent to TBOX U<strong>LP</strong>.<br />
WARNING: the value is refreshed at the rate defined in the<br />
‘Wake up’ properties (see chapter 7.1: General Properties)<br />
Version: 2.08 <strong>TBox</strong> - U<strong>LP</strong> 81
Voltage / Current Input<br />
Each channel can be cabled to receive either ‘Voltage’ or ‘Current’<br />
(see chapter 17: Technical specifications & wiring).<br />
Tag definition parameters:<br />
By double clicking the inputs, you enter into the ‘Tag definition’ menu:<br />
For each analog inputs, you have the<br />
choice:<br />
- voltage signal (0..5V)<br />
- current signal (4..20mA)<br />
As the sensor is powered by the input<br />
channel, 2 voltages are available:<br />
- 12 V sensors<br />
- 24 V sensors<br />
Format: You select the format you want to display the pressure, between,<br />
16bits - Signed or Unsigned or float.<br />
Scaling: A scaling can be configured to work with real values. The range depends on the<br />
format selected (see previous).<br />
(default: minimum=0 and maximum=1000).<br />
Type: You select in the list the sensor you use (see above).<br />
Resolution: The resolution allows reducing the handling of the variable for small variation and<br />
therefore to consume less energy.<br />
Example: with a resolution of ‘5’, TBOX U<strong>LP</strong> will only treat the variable when the value<br />
has changed from 5 units.<br />
Acquisition rate configuration<br />
In order to save energy, this menu allows controlling the power and acquisition of Analog Input:<br />
Frequency of Acquisition: you select a number of wake-up cycles between acquisition.<br />
Example: with a wake-up rate of 1 minute, 15 cycles corresponds to an acquisition<br />
each 15 minutes.<br />
“Setup time” period: the time needed for the sensor to stabilize. After this time, the value is<br />
read, and the process cycle is launched (Ladder/BASIC, datalogging, Alarms, ...)<br />
8.7.5. Group6 – Analog Variables Associated to Digital Inputs<br />
Version: 2.08 <strong>TBox</strong> - U<strong>LP</strong> 82
Some internal variables are associated to Digital Inputs, computing pulses to return calculated “Counter”<br />
and “Flow”.<br />
Counter (Totalizer)<br />
Each Digital Input is associated to a ‘Counter’ variable. It accumulates the pulses of the digital input. It<br />
requires a wake-up interval of max. 1 minute.<br />
Counters are saved when loading a new program or after a reset.<br />
Counter can be synchronized to a mechanical counter (see Appendix F: Synchronization of counters).<br />
Tag definition parameters:<br />
By double clicking the inputs, you enter into the ‘Tag definition’ menu:<br />
Totalizer: you can define the number of digits you want to use. Above the maximum values, the<br />
counter turns over:<br />
- 32 bits = max. 4294967295 (default).<br />
- 4 digits = max. 9999<br />
- 5 digits = max. 99999<br />
- ….<br />
- 9 digits = max. 999999999<br />
Counter (HS)<br />
Digital inputs 0 and 1 can be used for high speed counting (up to 10 kHz).<br />
To use one of these counters, create the Tag “Counter HS” associated to the digital input.<br />
Using HS counters increase the consumption, because the input<br />
stage needs to be powered permanently.<br />
Version: 2.08 <strong>TBox</strong> - U<strong>LP</strong> 83
Flow<br />
TBOX U<strong>LP</strong> executes a calculation to interpret pulses of the Digital Input as a Flow.<br />
It requires a wake-up interval of max. 1 minute.<br />
A configuration is available to adjust the measurement according to the duty cycle of pulses (see chapter<br />
7.5.3: Flowmeters)<br />
After starting, TBOX U<strong>LP</strong> needs at least 3 pulses to start calculating the Flow. There are 2 mechanisms<br />
used in flow calculation, depending on the time between pulses:<br />
- With at least 1 pulse every 12.5 sec.: the calculation is based on the quantity of pulses per<br />
period of time.<br />
- With less than 1 pulse every 12.5 sec.: the calculation is based on the time between the last<br />
pulse and the previous one.<br />
The precision is ± 1% of the reading value.<br />
Tag definition parameters:<br />
By double clicking the inputs, you enter into the ‘Tag definition’ menu:<br />
DI pulse<br />
Time unit: The unit in which you wish the calculation to be displayed.<br />
Example: ‘hour’ for m3/h.<br />
1 Pulse: The weight given to 1 pulse, according to the unit chosen above.<br />
Example: ‘0.01’ for 1 pulse=10 liters on a calculation based on m3.<br />
Zero Threshold: Calculation is based on time between pulses. When TBOX U<strong>LP</strong> does not receive<br />
pulses for a certain amount of time, it decreases the flow slowly.<br />
When the value reaches the ‘zero threshold’, the flow is forced to ‘ 0 ’<br />
Zero Threshold<br />
FLOW<br />
The precision of the Floating point register is applied to a range of 7 digits, starting<br />
with the highest number. (Precision = max 0.0001 %).<br />
It corresponds to the norm IEEE-754<br />
Examples:<br />
12035652,56 the value handled by TBOX U<strong>LP</strong> is 1203565xx,xx (x = any value).<br />
120356,52656 the value handled by TBOX U<strong>LP</strong> is 120356,5xxxx (x = any value).<br />
120,35652656 the value handled by TBOX U<strong>LP</strong> is 120,3565xxxx (x = any value).<br />
Version: 2.08 <strong>TBox</strong> - U<strong>LP</strong> 84
8.7.6. Summary on the use of I/O<br />
As we have seen above, each DI channel can be associated to several variables.<br />
As we have seen above, it is possible to wake up TBOX U<strong>LP</strong> using an “Interrupt” input.<br />
Using the digital system variable [49] “PgmCnt” (see below), it is possible to execute several ,successive<br />
process cycles.<br />
The table below illustrate how I/O and associated variables are handled:<br />
Variable Description Handled at wake-up Handled at each<br />
cycle<br />
DI “State” Current state at wake-up √ -<br />
DI “Edge” State during sleep maintain √ -<br />
DI “Interrupt” Launch one cycle √ (*) -<br />
DI “Counter” Number of Puls on DI (-> 4 Hz) √ √<br />
DI “Counter HS” Number of Puls on DI (-> 10 kHz) √ -<br />
DI “Flow” Flow based on puls/period on DI √ -<br />
DO Digital Output √ √<br />
AI Analog Input (0..5 V or 4..20mA) √ -<br />
(*) Even if the DI “Interrupt” wakes up the TBOX U<strong>LP</strong> , its digital value is only updated at the next wakeup<br />
Version: 2.08 <strong>TBox</strong> - U<strong>LP</strong> 85
8.8. System variables<br />
The system variables have pre-defined functions.<br />
They are very useful to check or to act on features of TBOX U<strong>LP</strong>.<br />
They are divided into ‘Digital’ and ‘Analog’.<br />
8.8.1. Digital System Variables<br />
According to its function a register is Read/Write or Read only. In the following table, the column R/W<br />
indicates:<br />
- : Read only.<br />
0 : Write ‘0’ only.<br />
1 : Write ‘1’ only.<br />
* : Write ‘0’ or ‘1’.<br />
When the action (SET) is specified, it means that the TBOX U<strong>LP</strong> maintains the variable at 1 to be sure it is<br />
detected. With such a variable, you need then to reset it using BASIC or Ladder logic.<br />
Index Name R/W Description<br />
0 TikSec 0 Tik Second: Changes of state every second. Useful for counting time.<br />
1 PrgRun - Program run: At each starting of TBOX U<strong>LP</strong> , this register changes to 1 and stays at<br />
1 as long as the BASIC/Ladder program runs.<br />
This register is used in BASIC/Ladder to execute operations only at the start of<br />
the program, with the help of a positive edge trigger function.<br />
2 NewPro - New program: Start of a program flag. Changes to 1 if TBOX U<strong>LP</strong> has started after<br />
having received a new program. Changes to 0 after a reset of the TBOX U<strong>LP</strong>.<br />
3 Reboot 1 Reboot: complete restart of TBOX U<strong>LP</strong>. It is equivalent to hardware reset.<br />
4 RstWat 1 Reset Watchdog: the watchdog checks the cycle time of BASIC/Ladder program. In<br />
case it is longer than 1 second, it resets TBOX U<strong>LP</strong>. This Watchdog can be reset<br />
to reinitialize the 1 second timer in case of cycle time longer.<br />
5 Ala_On 0 Alarm on: this register indicates that alarm is active (not acknowledged). Writing 0<br />
in this register causes a global acknowledgment of all alarms.<br />
It corresponds to a reset of the alarm stack.<br />
6 Alaerr 0 Alarm in error: TBOX U<strong>LP</strong> SET this register 1 when an alarm failed to be sent. This<br />
means that after the number of tries, the alarm has been auto-acknowledged.<br />
Must be Reset by User.<br />
7 RstAla - Reset Alarm: Not used. See ‘Ala_On’ here above.<br />
8 EnaDCr * Digital Chronology: General enable of recording in digital chronology.<br />
9 EnaACr * Analog Chronology: General enable of recording in analog chronology.<br />
10 EnaSam * Sampling Tables: General enable of recording in sampling tables (not available).<br />
11 EnaAla * Enable Alarm: General enable of generating alarms.<br />
12 DisCrd * Flag digital chronology: can be associated to any digital chronology configuration<br />
to inhibit recording. When at value ‘1’, inhibits recording in Database.<br />
13 DisCra * Flag analog chronology: can be associated to any analog chronology configuration<br />
to inhibit recording. When at value ‘1’, inhibits recording in Database.<br />
14 DisSam - Not used<br />
15 DisAla - Flag sending alarm: can be associated to any Alarm condition. When at value ‘1’,<br />
inhibits the sending of alarm.<br />
Version: 2.08 <strong>TBox</strong> - U<strong>LP</strong> 86
Index Name R/W Description<br />
16 DaySav - Time: 1 = summer time (the ASPE ZoneBias = + 3600 seconds).<br />
0 = wintertime.<br />
17 PrgEnb * Program Enable: when reset to ‘0’, allows stopping the execution of BASIC/Ladder<br />
program. It can be useful to execute the program manually (see next).<br />
18 PrgOnc 1 Program Once: when set to ‘1’, executes the cycle of BASIC/Ladder program once.<br />
Useful for debugging the program.<br />
TBOX U<strong>LP</strong> resets the variable automatically.<br />
19 TcpIpLog * TCP Logging: Setting this register activates the Debugging of TCP/IP connection.<br />
Very useful to trace problems when sending e-mail or FTP (see chapter 10.7).<br />
When this option has been activated, the information is available from TWinSoft<br />
main menu: ‘Communication’ � ‘Download’ � ‘TCP/IP debugging’.<br />
20 ALAovf * Alarm Overflow: overflow in the stack of alarms. The size of the stack of alarms<br />
can be adjusted from the ‘Advanced’ properties of the RTU<br />
21 ComErr 0 Communication error: general communication error flag. It means that one of the<br />
communication ports (of the CPU or of a communication card) used as ‘Master’<br />
has encountered a communication error. (SET)<br />
22 SmtpEr 0 Smtp Error: an error occurred while sending an e-mail. (SET)<br />
23 FtpErr 0 Ftp Error: an error occurred while sending files. (SET)<br />
24 NTPErr 0 NTP Error: an error occurred while setting time of TBOX U<strong>LP</strong>. (SET)<br />
25 GpsVF - GPS: GPS validity (connected on COM1). GPS returns a valid signal.<br />
Validity of the signal. When changes to ‘1’, it indicates the GPS receives<br />
sufficient signals to calculate its position (from minimum 3 satellites).<br />
When changing from 0 to 1, the time of TBOX U<strong>LP</strong> is set to the time of GPS,<br />
with correction in regards to GMT according to the location of <strong>TBox</strong>.<br />
If you want to update the time manually, you reset the variable<br />
26 GPRSErr 0 GPRS Error: an error occurred during GPRS connection. TBOX U<strong>LP</strong> does not<br />
succeed to connect (not supported yet) (SET)<br />
27 ModemLog * ModemLog: authorizes the modem connection to be logged into chronology. The<br />
communication port is declared in the ASV.24 [PortIdLog].<br />
The ASV.25 [EventLog] must be tagged also.<br />
The information is available in from the communication � Download � TraceLog<br />
(not supported yet)<br />
28 SystemEr 0 SystemErr: the RTU detected an error during starting. Typically a problem with a<br />
card (not supported yet) or a discordance between cards detected in program<br />
and cards installed (SET)<br />
29 MmcToRTU - MMC: indicates whether the program has been loaded from the MMC<br />
1 = the program of the MMC is different from the one of the RTU and has been<br />
loaded from the MMC<br />
0 = there is no MMC; the MMC is empty; the program of the MMC is identical to<br />
the one of the RTU (see also appendix C. Plug&Go)<br />
30 DigChrOv - Chronologies: Indicates that the amount of records in the digital chronology has<br />
reached the maximum selected<br />
30 DigChrOv - Chronologies: Indicates that the amount of records in the digital chronology has<br />
reached the maximum selected<br />
31 AnaChrOv - Chronologies: Indicates that the amount of records in the analog chronology has<br />
reached the maximum selected<br />
32 RsDigChr - Chronologies: Allows emptying the digital chronology using a SET. Automatically<br />
reset by OS<br />
33 RsAnaChr - Chronologies: Allows emptying the analog chronology using a SET. Automatically<br />
reset by OS<br />
Version: 2.08 <strong>TBox</strong> - U<strong>LP</strong> 87
Index Name R/W Description<br />
34 BusError - System: indicates an error on the BUS. For TBOX MS only<br />
35 MasterAnsw * Remote Tag: when set to 1, allows handling of remote Tags on incoming call. It<br />
concerns then only Remote Tags through modem<br />
36 DynDnsEr 0 TCPIP: error during a connection to DynDNS server. (SET)<br />
37... 44 Tsl_Xa - Alarm: There are 8 time slices that can be used to build Time Tables.<br />
Those 8 variables indicate the activity of each of them<br />
45 DisAla2 * Alarm: inhibition flag #2 of the alarms. Used as inhibition flag in the<br />
'Conditions' menu of the alarms. Let’s you temporarily prevent from<br />
executing an alarm when at 1.<br />
46 DisAla3 * Alarm: inhibition flag #3 of the alarms. Used as inhibition flag in the<br />
'Conditions' menu of the alarms. Let’s you temporarily prevent from<br />
executing an alarm when at 1.<br />
47 DisAla4 * Alarm: inhibition flag #4 of the alarms. Used as inhibition flag in the<br />
'Conditions' menu of the alarms. Let’s you temporarily prevent from<br />
executing an alarm when at 1.<br />
48 Pop3Err * Alarm: an error occurred while accessing POP3 server. (SET)<br />
49 PgmCnt 1 Low Power: to carry on one more Ladder/BASIC cycle. The variable is reset by<br />
the OS. You set it anywhere in the program and a new cycle will be carried on<br />
(by default, <strong>TBox</strong> U<strong>LP</strong> runs the BASIC/Lader cycle once at each wakeup)<br />
See how I/O are controlled in chapter 8.7.6 above.<br />
50 CntErr 0 Low Power: Counter synchronization (see Appendix F.)<br />
1 = sync of a counter with a ID that does not exist. (SET)<br />
Version: 2.08 <strong>TBox</strong> - U<strong>LP</strong> 88
8.8.2. Analog System Variables<br />
According to its function a variable is Read/Write or Read only. In the following table, the column R/W<br />
indicates:<br />
- : Read only.<br />
� : Writable.<br />
Index Name R/W Description<br />
0 Second * Time: Second in TBOX U<strong>LP</strong>.<br />
1 Minute * Time: Minute in TBOX U<strong>LP</strong>.<br />
2 Hours * Time: Hour in TBOX U<strong>LP</strong>.<br />
3 Date * Time: Day of the month in TBOX U<strong>LP</strong>.<br />
4 Month * Time: Month in TBOX U<strong>LP</strong>.<br />
5 Year * Time: Year in four digit in TBOX U<strong>LP</strong>.<br />
6 DayOfw * Time: Day of the week in TBOX U<strong>LP</strong>. (Mo=1; Tu=2; We=3; …)<br />
7 AlaCnt * Alarm quantity: Amount of alarms in the alarms stack. It means the quantity of<br />
alarms that have not been generated already.<br />
The size of the Alarm stack can be adjusted in the ‘Advanced RTU properties’).<br />
8 AlaID * Alarm last index: Absolute index of the last alarms generated (number between 0<br />
and 65535).<br />
Can be used to acknowledge an alarm by writing its index.<br />
9 ALACur * Alarm current index: Absolute index of the alarm being currently handled<br />
(number between 0 and 65535).<br />
10 ALARec * Alarm recipient: gives the index of the recipient of the current alarm.<br />
Can be used to acknowledge all alarms of a Recipient by writing its index (see<br />
index in the list of Recipients).<br />
11 SamQty * Sampling Table: Quantity of sampling tables defined.<br />
12 UtcTim - Time: Universal Coordinated Time (UTC). It is the number of seconds since<br />
01/01/1970, GMT time. It is used as time-stamp reference for datalogging.<br />
13 ZonBia * Time: Time difference in seconds with GMT.<br />
14 ZonID * Time: ID of the zone where TBOX U<strong>LP</strong> has been installed. It uses Regional Settings<br />
of PC, therefore it is important that you configure the PC according to the<br />
location where TBOX U<strong>LP</strong> is installed.<br />
15 WeYear * Time: week of the year (*)<br />
16 CycTim * Time: time for one cycle of the program (BASIC and Ladder). This register is<br />
refreshed after each cycle.<br />
Within the program, you could compute this register to memorize the highest<br />
value.<br />
17 AAcond - Alarms: Quantity of alarm conditions, which are still active.<br />
18 LevId - Events: absolute number of the last event (0…65535).<br />
19 AppVer - Application version: according to the ‘version’ indicated in the ‘Info’ of the RTU<br />
properties. This register returns a version in a WORD format: 0…65535<br />
20 OsVer - Operating System version: running in TBOX U<strong>LP</strong><br />
21 OsBuil - Operating System build: build number of the OS running in TBOX U<strong>LP</strong><br />
22 LoaVer - Loader version: Loader version running in TBOX U<strong>LP</strong><br />
23 LoaBui - Loader build: build number of the loader running in TBOX U<strong>LP</strong><br />
24 PortIdLog * Selection of the port for TCP debugging (see chapter 10.7)<br />
25 EventLog - Contains internal codes used for TCP debugging (see chapter 10.7)<br />
26 MilliS - TIME:<br />
With CPU-16: 10 milliseconds tik<br />
With CPU-32: 1 millisecond tik (not available yet)<br />
Version: 2.08 <strong>TBox</strong> - U<strong>LP</strong> 89
Index Name R/W Description<br />
27 GpsLat - GPS: current latitude given by the external GPS (ACC-GPS).<br />
Latitude in degrees multiplied by 1000000 (example: 50123456 means 50<br />
degrees + 0.123456 degree). Resolution : 11 cm. Precision 15 meters<br />
28 GpsLong * GPS: current longitude given by the external GPS (ACC-GPS).<br />
Longitude in degrees multiplied by 1000000 (example: 7123456 means 7<br />
degrees + 0.123456 degree). Resolution : 11 cm. Precision 15 meters<br />
29 GpsAlt - GPS: current altitude given by the external GPS (ACC-GPS).<br />
Altitude in meters. Resolution, 1 meter. Precision: depends on the quantity<br />
of satellites. Poor precision<br />
30 GpsSats - GPS: quantity of satellites detected by the external GPS (ACC-GPS). Must be of<br />
minimum 3, or even 4 to expect a good precision.<br />
31 Rerout * Modbus: variable 16 bits, each representing a COM Port from 1 to 16. The bits<br />
corresponding to the Ports in ReRouting are at 1, the other at 0. Can be use to<br />
set the mask.<br />
32 MasterErr * Communication: indicates the last station ID (modbus address) in communication<br />
error. Once an error has been detected, the value is maintained until next error.<br />
Usually, communication errors can be solved by modifying the time-out<br />
available in the ‘Advanced’ tab of the communication used (End of Fame<br />
Detection, IFG, Rx Time-out). To trace an error, we advise you to reset the<br />
variable and check it when it is different from 0.<br />
When this happens, you can handle it in your process and reset the variable, that<br />
it is ready for the next error<br />
33 CardErr * System: this variable indicates card(s) in error. For TBOX MS only<br />
34 CPUusage - Low Power: gives the number of seconds the CPU has run in high frequency (=with<br />
high consumption). It includes wake-up procedure, I/O scanning, process, alarm<br />
and datalogging handling, remote Tags communication, ... and the return to<br />
sleep mode procedure.<br />
35 SerialNb - Hardware: indicates the serial number of the CPU (see sticker on the side of the<br />
card).<br />
36 CPUmode - Redundancy: for TBOX MS32 only<br />
37 OpenSoc TCP/IP: number of sockets opened. The socket availability is:<br />
- 1 socket reserved for Remote Tags 'Client'<br />
- 2 sockets reserved for 'Alarms (FTP needs 2 sockets)<br />
- 5 sockets available for 'Server' connection<br />
38 GpsSpeed - GPS: with a GPS on <strong>TBox</strong>, current speed of <strong>TBox</strong>, expressed in km/h<br />
39 GpsRoute - GPS: with a GPS on <strong>TBox</strong>, current direction of <strong>TBox</strong>, expressed in degree (0 ..<br />
359.9 degree)<br />
40 AlaPop3 - Alarm: it indicates the number of alarm needing to be acknowledged by POP3<br />
connection<br />
41 EvenCur * Alarm: it indicates the current Event ID<br />
42 HardRev - HW: it indicates the hardware revision of the CPU<br />
43 Pop3State * Alarm: indicates the state of POP3 connection. Particularly useful when<br />
monitoring the RTU with POP3 connections. The last value is maintained:<br />
1 Accepted message received<br />
2 Acknowledgment received<br />
10 Invalid message<br />
11 Unknown command<br />
20 Incorrect password<br />
21 Incorrect password or not supplied for a com. Port protected<br />
30 Message received does not match a pre-defined message<br />
Version: 2.08 <strong>TBox</strong> - U<strong>LP</strong> 90
Index Name R/W Description<br />
44 CntID * Low Power: Variable containing the ID of the Counter. It is used when doing a<br />
counter synchronization (see Appendix F.)<br />
45 CntValue * Low Power: Value of the counter when it was pressed on TEST button. It is used<br />
when doing a counter synchronization (see Appendix F.)<br />
46 CntTime * Low Power: UTC time when it was pressed on TEST button. It is used when<br />
doing a counter synchronization (see Appendix F.)<br />
47 CrdIndex Datalogging: current position in the table of digital chronologies (circular<br />
counter)<br />
48 CrdSize Datalogging: size of the table of digital chronologies (see RTU properties →<br />
General)<br />
49 CraIndex Datalogging: current position in the table of analog chronologies (circular<br />
counter)<br />
50 CraSize Datalogging: size of the table of analog chronologies (see RTU properties →<br />
General)<br />
51 CreIndex Datalogging: current position in the table of events (circular counter)<br />
52 CreSize Datalogging: size of the table of events (see RTU properties → Advanced Alarms<br />
properties)<br />
(*) System variable 15. ‘Week of the year’ :<br />
This system variable indicates the week of the year according to the date in the RTU.<br />
The rules are the following:<br />
- the changing of week happens on Monday, 00:00 AM<br />
- the changing of week happens at January 1, whatever day it is<br />
- if January 1, is a Friday, Saturday or Sunday, there will be two ‘Week 1’<br />
Examples:<br />
Month Mon Tue Wed Thu Fri Sat Sun Week<br />
dec .. .. .. 17 18 19 20 50<br />
dec 21 22 23 24 25 26 27 51<br />
dec / jan 28 29 30 31 1 2 3 52 / 1<br />
jan 4 5 6 7 8 9 10 1<br />
jan 11 12 .. .. .. 2<br />
Month Mon Tue Wed Thu Fri Sat Sun Week<br />
dec .. .. .. 18 19 20 21 50<br />
dec 22 23 24 25 26 27 28 51<br />
dec / jan 29 30 31 1 2 3 4 52 / 1<br />
jan 5 6 7 8 9 10 11 2<br />
jan 12 13 .. .. .. 3<br />
8.9. Timers & Counters<br />
Timers and Counters are described in the manual<br />
BASIC & Ladder for <strong>TBox</strong><br />
Version: 2.08 <strong>TBox</strong> - U<strong>LP</strong> 91
9. Tags<br />
A Tag is essential for any programming<br />
• An alarm is conditioned from a Tag.<br />
• The Datalogging mechanism records values of Tags.<br />
• BASIC/Ladder logic executes a process by handling Tags.<br />
• …<br />
Any variable of the TBOX U<strong>LP</strong> that you want to use in any configuration, you have to declare it as a Tag.<br />
There are 4 types of variables:<br />
• The Physical I/O (DI, DO, AI, AO)<br />
• The System Variables (predefined analog and digital functions)<br />
• The Internal Variables, digital, analog and text (aka Registers)<br />
• The Communication Variables, digital and analog<br />
The Tags are gathered in the folder Tags of the Project Workspace:<br />
The Tags can be sorted into Groups of Tags.<br />
- From the list of Tags, right click.<br />
- From the Context menu, select ‘New → Group’.<br />
- You can then move/create Tags into the Group.<br />
Version: 2.08 <strong>TBox</strong> - U<strong>LP</strong> 92
9.1. Physical I/O<br />
The physical I/O’s are the signals available on I/O cards. They can be easily accessed from the ‘Resources’<br />
(see also chapter 8: ‘The Resources’).<br />
Details about the different I/O are available in chapters 8.7 and 17.9.<br />
To create a Tag of a variable from the Resources:<br />
� select it into the list and double click it<br />
� change its name and description<br />
� click <br />
If you are connected to a TBOX U<strong>LP</strong> when the Tag is created, you will see<br />
***** appearing in the column ‘Value’.<br />
This is because the ModBus address of the Tag needs to be sent to<br />
TBOX U<strong>LP</strong> (see chapter 9.3: ‘ModBus addresses’)<br />
Once the program has been sent, the value appears.<br />
You can use this icon to send<br />
the program.<br />
Version: 2.08 <strong>TBox</strong> - U<strong>LP</strong> 93
9.2. Internal Variables (Registers)<br />
An internal variable (also know as Register) is an addressable location of the memory. It is used as flag,<br />
as temporary value, to make a calculation, …<br />
There are 3 types of internal variables:<br />
� Digital (DIV) Boolean register with possible values: 0 or 1.<br />
� Analog (AIV) with several formats:<br />
• 8 bits, Signed or Unsigned<br />
• 16 bits, Signed or Unsigned<br />
• 32 bits, Signed or Unsigned<br />
• 32 bits Float, IEEE 754<br />
� TEXT (AIV) analog register associated to a string of characters<br />
9.2.1. Digital Internal Variable<br />
The internal variables can be only created from the list of Tags.<br />
To create a Digital Internal Variable, from the list of Tags, click ‘Add a Tag’ .<br />
Select ‘Digital’<br />
Version: 2.08 <strong>TBox</strong> - U<strong>LP</strong> 94
The Definition menu pops up:<br />
You type a Tag Name, a Comment and select as Type: ‘Internal Variable’<br />
The initial value is the value the Tag will have at the start-up of TBOX U<strong>LP</strong>.<br />
If you select ‘None’ the value is maintained at start-up.<br />
ModBus Address is discussed in chapter 9.3<br />
Version: 2.08 <strong>TBox</strong> - U<strong>LP</strong> 95
9.2.2. Analog Internal Variable<br />
To create an Analog Internal Variable (also known as Register), from the list of Tags, click ‘Add a Tag’ .<br />
Select ‘Analog’<br />
The Definition menu pops up:<br />
Example with a ’16 bits – Unsigned’ internal variable<br />
Version: 2.08 <strong>TBox</strong> - U<strong>LP</strong> 96
You type a Tag Name, a Comment and select as Type: ‘Internal Register’<br />
For each Analog Register, the formats available are:<br />
o 8 bits (Signed or Unsigned)<br />
o 16 bits (Signed or Unsigned)<br />
o 32 bits (Signed or Unsigned)<br />
o Float (32 bits, IEEE 754)<br />
The initial value is the value the Tag will have at the start-up of TBOX U<strong>LP</strong>.<br />
If you leave the field empty, the value is maintained at start-up.<br />
9.2.3. Text Internal Variable<br />
The Tag TEXT uses ASCII character encoding ISO/CEI 8859-1 of the Latin alphabet.<br />
To create a Tag TEXT (string of characters), from the list of Tags, click ‘Add a Tag’ .<br />
Select ‘Text’<br />
By default, TWinSoft creates Analog Internal Variable in format ‘Float’.<br />
Check whether it fits with the use you intend to have of the variable.<br />
ModBus Address is discussed in chapter 9.3<br />
Version: 2.08 <strong>TBox</strong> - U<strong>LP</strong> 97
The Definition menu pops up:<br />
Version: 2.08 <strong>TBox</strong> - U<strong>LP</strong> 98
9.3. ModBus address<br />
The ModBus address is the link to the outside world. When equipment must sample Tags in TBOX U<strong>LP</strong>, it<br />
uses its ModBus addresses; like T, SCADA or TWinSoft.<br />
Each Tag has a unique ModBus address. By default TWinSoft proposes a ModBus address.<br />
You can change it if you want.<br />
9.3.1. ModBus address of System Variables<br />
While being On-line, the value of the Tag can be displayed only<br />
when TWinSoft has sent the program to TBOX U<strong>LP</strong>.<br />
The Tag is then available for the outside world at the ModBus<br />
address you have declared.<br />
With System Variables it is a little bit different; they have two ModBus addresses:<br />
� One internal and fixed ModBus address. It explains why when you are connected to<br />
TBOX U<strong>LP</strong>, even without sending a program, you still can see values from the Resources.<br />
The address of these variables is 65280 + ID of the variable.<br />
Example: [AlaRec] = 65280+10=65290<br />
� One user ModBus address that you are allowed to modify if you want. When you create a Tag<br />
of system variable, you can change its default ModBus address.<br />
In case you wish to access the Tag, you declare this user ModBus address.<br />
Other Tabs of the Tag configuration refer to menu where the Tag<br />
can be declared:<br />
For Alarms, see chapter 11<br />
For Datalogging, see chapter 13<br />
For Remote Tags, see chapter 14<br />
About Presentation-write, see next chapter<br />
Version: 2.08 <strong>TBox</strong> - U<strong>LP</strong> 99
9.4. Tags - Presentation / Write<br />
This tab contains configuration used when the Tag is declared in a Report or in a WebForm. The<br />
Description is also used in T<br />
Presentation settings can also be used when the Tag value is included in a SMS.<br />
� Report: file edited with ‘Report Studio’ and used for instance as text body when sending email.<br />
(Start ‘Report Studio’ from ‘Windows’ and the group of Programs of Techno Trade or from the<br />
‘Project Workspace’ and the list of ‘Web and Report files’)<br />
� WebForm: file edited with ‘WebForm studio’. Used to display values of Tags in a HTML page.<br />
(Start ‘WebForm Studio’ from ‘Windows’ and the group of Programs of Techno Trade or from<br />
the ‘Project Workspace’ and the list of ‘Web and Report files’)<br />
� SMS: with Digital Tags, the ‘states’ defined here will be used and with Float Tags, the number<br />
of decimals.<br />
(See also chapter 11.6.1. Value of Tag in message)<br />
Presentation: makes the following information available to T, ‘Report’ and ‘WebForm’.<br />
Description: in a Report, text displayed as ‘Header’ in sampling table or as Tag information in<br />
chronologies when the data is retrieved.<br />
Units: text displayed as ‘Unit’ in datalogging when the data is retrieved. It can also be<br />
displayed when selecting as format ‘Value + unit’ in the report or WebForm.<br />
# decimal: the quantity of decimals displayed<br />
Write allowed: if the Tag is declared in a WebForm, allows defining a writing access to the Tag,<br />
within a specific range.<br />
9.5. Run Time Parameters<br />
Version: 2.08 <strong>TBox</strong> - U<strong>LP</strong> 100
Run time parameters feature allows accessing some TBOX U<strong>LP</strong> configurations through Tags, in order to<br />
modify them "on line".<br />
For instance, to change a tel. number of a SMS recipient, the e-mail address of a recipient, the address<br />
of SMTP server, the handling of a alarm condition.<br />
When a configuration provides access to run time parameters, a tab is attached to the configuration.<br />
Example with Alarm Recipient:<br />
You will associate a Tag to the run time parameter you want to add.<br />
The Tag, and therefore its associated parameter, can then be modified from TWinSoft, a WebForm, a<br />
SCADA, ...<br />
The format of the Tag depends on the parameter (Bool, Byte, Word, Float, Text)<br />
Changing of parameters is maintained in case of power cycle, reset, reboot and watchdog.<br />
Original configuration is restored in case of sending new program or OS and doing stop/start from<br />
TWinSoft.<br />
Version: 2.08 <strong>TBox</strong> - U<strong>LP</strong> 101
9.5.1. Alarm Parameters<br />
Alarm Condition<br />
Parameter Choice Tag Format<br />
Inhibition<br />
0 = enabled<br />
1 = disabled<br />
2 = power fail<br />
3 = DisAla<br />
4 = DisAla2<br />
5 = DisAla3<br />
6 = DisAla4<br />
Byte<br />
Threshold (analog) Byte or Word or DWord or Float<br />
Hysteresis (analog) Byte or Word or DWord or Float<br />
Alarm Recipient<br />
Parameter Recipient Type Tag Format<br />
Phone Number<br />
E-mail To<br />
E-mail Cc<br />
Alarm Time Slices<br />
Parameter Tag Format<br />
From Hour<br />
From Min<br />
To Hour<br />
To Min<br />
Alarm Holidays<br />
ModBus, SMS, Printer, RAS, Custom<br />
Email<br />
Email<br />
Byte<br />
Byte<br />
Byte<br />
Byte<br />
Parameter Tag Format<br />
Day<br />
Month<br />
Year<br />
Byte<br />
Byte<br />
Word<br />
Version: 2.08 <strong>TBox</strong> - U<strong>LP</strong> 102<br />
Text<br />
Text<br />
Text
9.5.2. Datalogging Parameters<br />
Chronologies Condition<br />
Parameter Choice Tag Format<br />
Inhibition<br />
0 = enabled<br />
1 = disabled<br />
2 = power fail<br />
3 = DisCra/DisCrd<br />
Variation (analog) Byte or Word or DWord or Float<br />
9.5.3. IP Parameters<br />
ISP<br />
Parameter Tag Format<br />
Phone Number<br />
User Name<br />
Password<br />
FTP<br />
Text<br />
Text<br />
Text<br />
Parameter Tag Format<br />
Host<br />
TCP Port<br />
User Name<br />
Password<br />
SMTP<br />
Text<br />
Word<br />
Text<br />
Text<br />
Parameter Tag Format<br />
Server<br />
TCP Port<br />
E-mail From<br />
Authentication<br />
Login<br />
Password<br />
POP3<br />
Text<br />
Word<br />
Text<br />
Bool<br />
Text<br />
Text<br />
Parameter Tag Format<br />
Server<br />
TCP Port<br />
Authentication<br />
Login<br />
Password<br />
Text<br />
Word<br />
Bool<br />
Text<br />
Text<br />
Version: 2.08 <strong>TBox</strong> - U<strong>LP</strong> 103<br />
Byte
NTP<br />
Parameter Tag Format<br />
Server Text<br />
9.5.4. GSM/GPRS Parameters<br />
GPRS Authentication<br />
Parameter Tag Format<br />
Authentication<br />
Login<br />
Password<br />
Bool<br />
Text<br />
Text<br />
Version: 2.08 <strong>TBox</strong> - U<strong>LP</strong> 104
10. IP Parameters<br />
IP parameters consist in the global configuration for:<br />
� connecting to an ISP (dial-up connection)<br />
� sending files (FTP)<br />
� sending e-mail (SMTP)<br />
� reading e-mail subject (POP3)<br />
� Time synchronization (NTP)<br />
� DynDNS (handling of public, dynamic IP addresses)<br />
All IP parameters are<br />
defined in this Folder,<br />
available from the<br />
‘Resources’.<br />
The FTP Host, SMTP Server, POP3 Server and NTP configurations correspond to connections to the<br />
appropriate servers. It is done for once, and called when creating a recipient of alarms.<br />
This makes creating alarm recipients very easy !<br />
Example with alarm for sending e-mail:<br />
Concerning IP configuration for incoming calls (WebServer),<br />
see advanced RTU properties → TCP/IP<br />
The Recipient is of type ‘e-mail’ with the e-mail address and it refers to a SMTP server.<br />
This SMTP server refers to an ISP<br />
In other way round, when TBOX U<strong>LP</strong> generates an e-mail, it sequences the tasks like following:<br />
connection to an ISP � connection to a SMTP Server � sending to a recipient (e-mail address)<br />
Version: 2.08 <strong>TBox</strong> - U<strong>LP</strong> 105
10.1. ISP configuration<br />
ISP stands for Internet Service Provider. An ISP represents the entrance to Internet.<br />
It is required to access Internet with a dial-up connection (GSM-DATA).<br />
It represents the company you call to access an internet service, like sending e-mail or files (FTP). Some<br />
among the most well-known: At&T, Scarlet, Tiscali, …<br />
When you want TBOX U<strong>LP</strong> to send e-mail or to send files to a FTP site, through GSM-DATA connection,<br />
you have to subscribe an account to an ISP.<br />
Name: It is the name of the provider.<br />
Using the button ‘Import…’, it gives you access<br />
to an existing ISP configuration you have<br />
tested successfully on the PC.<br />
A good piece of advice �<br />
Modem: a connection to an ISP is always carried out through modem. Select the modem.<br />
Phone number: It is the phone number of the provider the TBOX U<strong>LP</strong> must dial to send an e-mail or<br />
files.<br />
Dial Prefix: The default dial prefix to connect to the ISP (ATDT). It should not be changed unless<br />
the modem needs a particular configuration.<br />
User name: It is the name of your account needed to access Internet (usually it is given by the<br />
ISP).<br />
Version: 2.08 <strong>TBox</strong> - U<strong>LP</strong> 106
Password: It is the password of your account needed to access Internet (usually it is given by<br />
the ISP).<br />
DNS: A DNS converts names in IP address. It is needed in case the the Server (SMTP, FTP,<br />
NTP, POP3) is indicated in 'text' and not with an IP address.<br />
More and more ISPs support dynamic DNS, they provide the DNS addresses when<br />
connecting.<br />
If this is not the case, they provide you with a ‘Preferred’ and ‘Alternate’ DNS<br />
address.<br />
You can declare several ISP entries!<br />
Then they can be used in redundancy through the sending of e-mails.<br />
You are allowed to define several SMTP Servers (see next), associated to<br />
different ISPs.<br />
Creating the alarm recipient, you can select the ‘Redundancy’ option.<br />
Version: 2.08 <strong>TBox</strong> - U<strong>LP</strong> 107
10.2. FTP Host<br />
FTP stands for File Transfer Protocol. When subscribing an account to an ISP, usually you have some<br />
Mbytes to your disposal for sending files.<br />
The FTP host represents the target when sending files. The directory where the files are sent is defined<br />
in the Recipient (see chapter 11.4).<br />
First, TBOX U<strong>LP</strong> connects to Internet through an ISP or through GPRS and then sends the files.<br />
Host Name: It is a free name, to recall<br />
when you create the alarm recipient<br />
Host address: text and IP address are<br />
accepted.<br />
Connection: You select the way to<br />
connect to the Server (ISP or GPRS).<br />
TCP port: Each TCP/IP service has its own<br />
unique TCP port. It provides a logical<br />
location for the delivery of TCP data.<br />
TCP port used by TBOX U<strong>LP</strong> to<br />
establish FTP connection (default=21).<br />
Login: Depending on the account you have subscribed, you have a login or work with<br />
‘Anonymous login’.<br />
This is the basic configuration to connect to the ‘FTP site’.<br />
You do not declare a directory in this configuration, but when declaring the<br />
‘Recipient’ (see chapter 11.4. The Recipients).<br />
This allows creating any combination:<br />
- several ‘FTP recipients’ to one FTP site<br />
- several ‘FTP recipients’ to different FTP sites.<br />
- …<br />
Version: 2.08 <strong>TBox</strong> - U<strong>LP</strong> 108
10.3. SMTP Server<br />
SMTP stands for Simple Mail Transfer Protocol. It is usually the main reason for subscribing an account<br />
to an ISP, for sending e-mail.<br />
The SMTP Server represents the mail server used for sending e-mail (typically the one of the ISP where<br />
we have subscribed and account).<br />
First, TBOX U<strong>LP</strong> connects t to Internet through an ISP or through GPRS and then to the SMTP Server.<br />
Name: It is a free name, to recall when you create the alarm recipient.<br />
Mail Server (SMTP): It is the IP address (or the name) of the outgoing e-mail Server. It is the unique mail<br />
Server needed to send e-mails.<br />
E-mail address: It is the e-mail address of the TBOX U<strong>LP</strong>. You can usually choose it when you<br />
subscribe an account. This address will appear in the 'From:' when receiving the email.<br />
.<br />
Concerning e-mail, TBOX U<strong>LP</strong> is able to send e-mail (through SMTP<br />
server) and to read e-mail (through POP3 server)<br />
In order to protect the mail sever (and you) against spamming, the<br />
ISP risks to refuse sending e-mail if the address of the originator is<br />
not known. Therefore, be careful to indicate here the e-mail address<br />
you have received from your ISP.<br />
Connection: You select the way to connect to the Server (ISP or GPRS).<br />
Version: 2.08 <strong>TBox</strong> - U<strong>LP</strong> 109
TCP port: Each TCP/IP service has its own unique TCP port. It provides a logical location for the<br />
delivery of TCP data.<br />
TCP port used by TBOX U<strong>LP</strong> to establish SMTP connection (default=25).<br />
The Server requires Authentication: Depending on your ISP and on the way you send e-mail,<br />
authentication might be needed to send e-mail.<br />
Usually, when you have subscribed the e-mail account at your ISP it is not required.<br />
To be sure, if you have created this account to a PC, check its configuration<br />
otherwise contact your ISP.<br />
10.3.1. About Redundancy<br />
TBOX U<strong>LP</strong> supports one SMTP authentication protocol: PLAIN<br />
authentication.<br />
Check with your ISP.<br />
If you create more than one SMTP Server, they can be used in redundancy according to their order in the<br />
list.<br />
You decide to work with redundancy when creating the e-mail recipient (see chapter 11.4).<br />
Version: 2.08 <strong>TBox</strong> - U<strong>LP</strong> 110
10.4. POP3 Server<br />
POP3 stands for Post Office Protocol 3. It is used to check and collect e-mails in a mail box.<br />
The POP3 Server represents the mail server used to read mails previously sent to the attention of<br />
TBOX U<strong>LP</strong>.<br />
The use of POP3 is not to retrieve e-mail, but to read the field "Subject" and to take some actions.<br />
Two actions can be taken by sending e-mail to <strong>TBox</strong>:<br />
1. Alarm acknowledgment sent through e-mail (see next page)<br />
2. RTU monitoring with predefine message (see chapter 12. ReadSMS)<br />
First, TBOX U<strong>LP</strong> connects to Internet through an ISP or through GPRS and then to the POP3 Server.<br />
Name: It is a free name, to recall when you create the alarm recipient.<br />
POP3 Server: It is the IP address (or the name) of the POP3 Server to which TBOX U<strong>LP</strong> connects to<br />
read e-mails.<br />
Connection: You select the way to connect to the Server (ISP or GPRS).<br />
TCP port: Each TCP/IP service has its own unique TCP port. It provides a logical location for the<br />
delivery of TCP data.<br />
TCP port used by TBOX U<strong>LP</strong> to establish POP3 connection (default=110).<br />
The Server requires Authentication: If authentication required to collect e-mail: Login and Password.<br />
TBOX U<strong>LP</strong> does not support SSH.<br />
Version: 2.08 <strong>TBox</strong> - U<strong>LP</strong> 111
10.4.1. Alarm Acknowledge Through POP3<br />
Introduction<br />
With the TBOX U<strong>LP</strong> sending a SMS through a GSM, it is possible to acknowledge the alarm by sending<br />
back a SMS to TBOX U<strong>LP</strong><br />
In some cases, mostly working in GPRS, SMS can be sent through e-mail services. In return, it is then<br />
possible to acknowledge the alarm using POP3 connection.<br />
Sequence of connections<br />
1. TBOX U<strong>LP</strong> sends an e-mail. The alarm condition has been configured with the option "POP3 Ack". It<br />
is important you have a dedicated e-mail account for your RTU. The data sent by e-mail can be a<br />
report or a message.<br />
2. The recipient retrieves its e-mail. The field "Subject" of the e-mail is preceded with internal data:<br />
RTU Id (I) and Alarm index (A)<br />
Example of message: #I460000020107,A00004# My<strong>TBox</strong>: PUMP stopped<br />
3. The user sends back the e-mail. Typically, he will make a "Reply" and sends back the e-mail to the<br />
address as specified in point 1. above, in the SMTP server.<br />
4. TBOX U<strong>LP</strong> generates a POP3 connection (through alarm condition) and checks the presence of email<br />
with specific data in field "Subject". With this data, TBOX U<strong>LP</strong> knows which alarm for which<br />
RTU it can acknowledge.<br />
The POP3 connections have to be handled into your process and can be checked from System<br />
Variables (see below)<br />
Illustration with a <strong>TBox</strong> MS<br />
Version: 2.08 <strong>TBox</strong> - U<strong>LP</strong> 112
Supplementary information<br />
1. The time between phases 1 and 4 can be determined in RTU properties --> Advanced Alarms<br />
properties<br />
2. System Analog Variable: #40 [AlaPop3] indicates the number of alarm needing to be<br />
acknowledged by POP3 connection and #43 [Pop3State] indicates the state of connection.<br />
3. If escalation is required, Group of recipients can be associated to the alarm condition<br />
4. Like other alarms, failure in sending SMTP alarms can be checked using System Digital Variable:<br />
#06 [AlaErr] and System Analog Variable: #10 [AlaRec]<br />
5. Error in POP3 connection can be detected also using System Digital Variable: #48 [POP3Err]<br />
10.5. NTP Server<br />
NTP stands for Network Time Protocol, an Internet standard protocol (built on top of TCP/IP) that<br />
assures accurate synchronization of the clock of TBOX U<strong>LP</strong>.<br />
The NTP Server represents a server dedicated to time synchronization.<br />
First, TBOX U<strong>LP</strong> connects to Internet through an ISP or through GPRS and then to the NTP Server.<br />
Examples of Servers:<br />
time.windows.com<br />
europe.pool.ntp.org<br />
Example with a connection to Windows server through Ethernet<br />
You will find valuable information, like lists of Servers with open access at:<br />
www.ntp.org � public time server list<br />
The organization pool.ntp.org proposes servers using DNS round robin, which make a random selection<br />
from a pool of open access time servers. This is good enough when working with TBOX U<strong>LP</strong>.<br />
Round Robin DNS technique is used when the number of access to a server is unpredictable, to balance<br />
the use of IP addresses (load balancing technique).<br />
10.5.1. Time accuracy<br />
When setting time, TBOX U<strong>LP</strong> takes into account the propagation delay. This is particularly important<br />
when connecting to the server via modem.<br />
The precision is of 1 second.<br />
Version: 2.08 <strong>TBox</strong> - U<strong>LP</strong> 113
10.6. DynDNS<br />
DynDNS stands for Dynamic Data Name Server.<br />
It is a service, provided by the company DynDNS.org, offering the handling of dynamic IP addresses.<br />
When working with GPRS connection, using public dynamic IP addresses, it is not possible to access the<br />
RTU directly, as you don't know its IP address.<br />
The DynDNS service solves this problem: each time the RTU detects a changing of its IP address, it<br />
informs the DynDNS server.<br />
You then connect to the DynDNS Server that will redirect you to the RTU.<br />
Example of topology : connecting with Internet Explorer to a RTU having a GPRS dynamic IP address.<br />
Sequence:<br />
1. Detecting a changing in its IP address, the RTU informs the DynDNS Server.<br />
2. Internet Explorer connects to the DynDNS Server<br />
(example: http://waterloo.dyndns.org). The DynDNS Server resolves the name and sends back<br />
the corresponding IP address.<br />
3. Internet Explorer connects to the IP address it has received.<br />
Version: 2.08 <strong>TBox</strong> - U<strong>LP</strong> 114
10.6.1. How to configure DynDNS in <strong>TBox</strong><br />
1. Subscribe a DynDNS account:<br />
o Go to www.dydns.org<br />
o Create an Account<br />
o Create a Host<br />
2. Create in TWinSoft IP Parameters the connection to DynDNS:<br />
Name<br />
Type any name<br />
Server<br />
DynDNS Server to which <strong>TBox</strong> U<strong>LP</strong> will<br />
connect when it detects a changing in its IP<br />
address. It should not be changed.<br />
Path<br />
Location in the server of the table of<br />
correspondences between IP address --><br />
name. It should not be changed.<br />
Url<br />
You type the host address you have creating<br />
when subscribing the DynDNS account.<br />
Example: waterloo.dyndns.org<br />
Server requires authentication<br />
Select the option to type the login<br />
corresponding to the account you have<br />
created at DynDNS organization.<br />
User name<br />
Type the login name of your account.<br />
Password<br />
Type the login password of your account.<br />
3. Associate the DynDNS connection to the modem (see communication port: TCP/IP Advanced...)<br />
Version: 2.08 <strong>TBox</strong> - U<strong>LP</strong> 115
10.7. TCP/IP Debugging<br />
This feature is very convenient to trace problems when sending e-mails and/or files (with FTP).<br />
It informs on the different steps of the connection: Login to the ISP, obtain of DNS, SMTP<br />
communication, …<br />
It is based on 3 ‘System variables’: TcpIpLog, PortIdLog and EventLog<br />
Procedure<br />
1. One System variable must be Tagged: Analog # 25: EventLog<br />
Keep the ModBus address as it is (22080). Do not change it.<br />
It is not necessary to Tag the 2 other variables.<br />
2. Make the following lines of Ladder:<br />
This line activates Debugging process<br />
This means that we make<br />
debugging on COM2<br />
Example on debugging through LT-xxx with PSTN modem (COM2)<br />
As you can see, we use the system variables without having Tagged them (brown color). You can also Tag them if<br />
you want.<br />
3. Once the connection is finished, look at the trace from the ‘Communication menu’<br />
4. Once the connection is finished, look at the trace from the ‘Communication menu’<br />
Version: 2.08 <strong>TBox</strong> - U<strong>LP</strong> 116
Closing connection<br />
SMTP (e-mail) dialog<br />
Obtain DNS from ISP<br />
Agreement on options supported<br />
Authentication (PAP or CHAP)<br />
Agreement on options supported<br />
Modem connected<br />
TBOX U<strong>LP</strong> uses the ‘Analog Chronologies’ to store debugging data:<br />
- Check whether the size is sufficient<br />
(from the RTU properties �General)<br />
- If you retrieve data, for instance with T, you might receive<br />
strange data!<br />
Version: 2.08 <strong>TBox</strong> - U<strong>LP</strong> 117
5. Once the connection is finished, look at the trace from the ‘Communication menu’<br />
Closing connection<br />
FTP (sending files) dialog<br />
Obtain DNS from ISP<br />
Agreement on options supported<br />
Authentication (PAP or CHAP)<br />
Agreement on options supported<br />
Modem connected<br />
Values<br />
The column 'Value' returns messages from/to the Server.<br />
When there is a code, it is always information received from the Server:<br />
2xx: OK<br />
3xx: OK, but something still missing<br />
4xx: temporary error<br />
5xx: permanent error. When TBOX U<strong>LP</strong> receives such a code, it stops communication and<br />
closes the socket.<br />
Version: 2.08 <strong>TBox</strong> - U<strong>LP</strong> 118
11. Alarms<br />
11.1. Introduction<br />
Alarm module of TBOX U<strong>LP</strong> is the gate to the outside world.<br />
An alarm consists in a communication event, not only for sending warning messages but also to<br />
establish a connection, like we will see.<br />
Via alarms, you are able to call a SCADA, send SMS or message to Pagers, send e-mail, send files to a FTP<br />
site, dial another TBOX or send a report to a printer.<br />
Alarms can be used also to send historical data (datalogging) on regular base using e-mail or FTP. The<br />
historical data is sent as the attached file of a report, developed using Report Studio (see from<br />
‘Windows’ the group of programs of ‘Techno Trade’).<br />
TView, the supervisory software can then be used to collect data from a mail box or a FTP site.<br />
The initiation of alarms in the TBOX U<strong>LP</strong> relies on the variation of digital or analog Tags.<br />
For example, an intrusion contact or a flow level generates a call.<br />
There are three basic configurations for an alarm:<br />
� The condition: a changing in a Tag.<br />
When the modem is in low power mode, it will be automatically powered<br />
if an alarm with severity “high” is detected at the wake-up of the CPU.<br />
� The recipient: to whom the alarm is sent.<br />
� The message (or report): information to sent to the recipient.<br />
Each new alarm is immediately entered into a 32-alarms queue (adjustable) and processed, according to<br />
the availability of communication ports required and its severity level. Alarms are generated one by one.<br />
The alarm queue represents an internal buffer of alarms: if several alarms happen at the same time or if<br />
a communication port is not available when the alarm happens.<br />
The Events stack, gives information about alarms status (Started – Stopped – Acknowledged). ).<br />
The Events stack is discussed in chapter 11.8<br />
Version: 2.08 <strong>TBox</strong> - U<strong>LP</strong> 119
To access the definition of Conditions, click the folder ‘Alarms’ in the Project workspace and select<br />
‘Conditions’.<br />
According to the Tag you select, you define a digital alarm condition or an analog alarm condition.<br />
11.2. Digital Alarm Condition<br />
Tagname: The Tag selected to generate the alarm.<br />
Type: The edge on which the alarm is going to be started (rising, falling or both).<br />
Message or Report: text or file associated to the alarm.<br />
Depending on the type of recipient associated, you can send a message or a report. It<br />
can be a message sent to a GSM, a message or report sent as e-mail, to a printer or the<br />
file sent by FTP …<br />
It always appears in the table of alarms, to distinguish them (see chapter 11.8.).<br />
If the alarm condition sends an e-mail, it can be of 2 kinds:<br />
Message: a text message is sent and it appears in the ‘object’ field of the e-mail<br />
Report: sending of a report created with Report Studio. The report can be created from<br />
the Project Workspace and the list of ‘Web & Report files’.<br />
Recipient: Select a Recipient or a group of recipients. The ‘person’ you wish to contact in case of<br />
alarm (see ‘Recipients’ below).<br />
In case you select a ‘group of Recipients’ see next.<br />
Version: 2.08 <strong>TBox</strong> - U<strong>LP</strong> 120
Call all Recipients: can be used when selecting a Group of Recipients.<br />
When the option is cleared: TBOX U<strong>LP</strong> calls the first one in the group. In case the<br />
alarm cannot be acknowledged after the number of tries, TBOX U<strong>LP</strong><br />
automatically calls the next recipient in the group and so on until it<br />
succeeds. Then it stops. (Also known as ‘Chain’)<br />
When the option is checked: TBOX U<strong>LP</strong> sends the alarm to all recipients of the<br />
group. (Also known as ‘Link’)<br />
Filter: The time in hour:minute:second during which the condition must stay TRUE, before the<br />
call is generated.<br />
The availability of filter periods<br />
depends on the wake-up rate of<br />
the CPU. One cannot define a<br />
filter in “seconds” with a wakeup<br />
“each minute”.<br />
Handling: The handling option allows blocking each alarm condition, manually or automatically.<br />
� Enabled: alarm condition always active.<br />
� Disabled: alarm condition always de-activated.<br />
� PowerF: alarm condition disabled when there is a main power failure.<br />
� DisAla: alarm condition de-activated when the system variable ‘DisAla’ is at 1.<br />
Severity: Each alarm can be assigned a level of severity: Low, Normal or High. When several<br />
alarms are still present in the queue and then not processed yet, TBOX U<strong>LP</strong><br />
generates the calls according to the highest severity.<br />
End of Alarm: When the alarm condition is finished, the alarm is automatically re-sent to the same<br />
recipient with the same message preceded with a prefix (see chapter 7.5.2).<br />
Example: for a ‘positive edge’ alarm, it is when the Tag returns to ‘0’.<br />
It is also useful when the alarm condition is active when TBOX U<strong>LP</strong> starts up. When ‘end<br />
of alarm’ is checked, an alarm is automatically generated when the alarm condition<br />
disappears (see illustration chapter 11.8.: Alarms table)<br />
SMS acknowledge: See chapter 12.2.<br />
POP3 acknowledge: See chapter 10.4.1<br />
Filter can be tested either during<br />
both transitions or only during the<br />
transition selected (see chapter<br />
7.5.2)<br />
Alarm with a severity “high” will force power-up of the GSM at wake-up<br />
of TBOX U<strong>LP</strong> and be proceeded immediately.<br />
Other alarms will be proceeded at either:<br />
- next power-up of GSM<br />
- if variable Com2.ModemAlarm has been activated, it will force<br />
Power-up of GSM at wake-up of TBOX U<strong>LP</strong><br />
Version: 2.08 <strong>TBox</strong> - U<strong>LP</strong> 121
11.3. Analog Alarm Condition<br />
Tagname: The Tag selected to generate the alarm.<br />
Type: Maximum or Minimum.<br />
The threshold for which the alarm will be started. If the value of the analog Tag passes<br />
under (minimum) or over (maximum) this threshold, the alarm is started. If an alarm<br />
must be generated for both a maximum and a minimum threshold, 2 conditions must<br />
be declared with the same Tag.<br />
Value: The threshold value, according to the scaling defined when creating the Tag (see<br />
chapter 9. The Tags).<br />
Hysteresis: The amount that the level must fall or rise below or above the Max. or Min. value<br />
before an alarm can be re-started<br />
Relation between Value and Hysteresis<br />
With “MAXIMUM” threshold Value > threshold = Alarm TRUE<br />
Value < (threshold – hysteresis) = Alarm FALSE<br />
With “MINIMUM” threshold Value < threshold = Alarm TRUE<br />
Value < (threshold + hysteresis) = Alarm FALSE<br />
Recipient: Select a Recipient or a group of recipients. The ‘person’ you wish to contact in case of<br />
alarm (see ‘Recipients’ below).<br />
In case you select a ‘group of Recipients’ see next.<br />
Version: 2.08 <strong>TBox</strong> - U<strong>LP</strong> 122
Call all Recipients: To be used when selecting a Group of Recipients.<br />
When the option is cleared: TBOX U<strong>LP</strong> calls the first one in the group. In case the<br />
alarm cannot be acknowledged after the number of tries, TBOX U<strong>LP</strong><br />
automatically calls the next recipient in the group and so on until it<br />
succeeds. Then it stops. (Also known as ‘Chain’)<br />
When the option is checked: TBOX U<strong>LP</strong> sends the alarm to all recipients of the<br />
group. (Also known as ‘Link’)<br />
Message or Report: text or file associated to the alarm.<br />
Depending on the recipient associated, it is the SMS sent to a GSM, or the<br />
message/report sent as e-mail or the text printed, or the file sent by FTP …<br />
It also appears in the table of alarms, to distinguish them (see chapter 11.8.).<br />
If the alarm condition sends an e-mail, it can be of 2 kinds:<br />
Message: a text message is sent and it appears in the ‘object’ field of the e-mail<br />
Report: sending of a report created with ‘Report Studio’. The report can be created<br />
from the Project Workspace and the list of ‘Web & Report files’.<br />
Filter: The time in hour:minute:second during which the condition must stay TRUE, before the<br />
call is generated.<br />
The availability of filter periods<br />
depends on the wake-up rate of<br />
the CPU. One cannot define a<br />
filter in “seconds” with a wakeup<br />
“each minute”.<br />
Filter can be tested either during<br />
both transitions or only during the<br />
transition selected (see chapter<br />
7.5.2)<br />
Handling: The handling option allows blocking each alarm condition, manually or automatically.<br />
� Enabled: alarm condition always active.<br />
� Disabled: alarm condition always de-activated.<br />
� PowerF: alarm condition disabled when there is a main power failure.<br />
� DisAla: alarm condition de-activated when the system variable ‘DisAla’ is at 1.<br />
Severity: Each alarm can be assigned a level of severity: Low, Normal or High. When several<br />
alarms are still present in the queue and not processed yet, TBOX U<strong>LP</strong> generates the<br />
calls according to the highest severity.<br />
Alarm with a severity “high” will force power-up of the GSM at wake-up<br />
of TBOX U<strong>LP</strong> and be proceeded immediately.<br />
Other alarms will be proceeded at either:<br />
- next power-up of GSM<br />
- if variable Com2.ModemAlarm has been activated, it will force<br />
Power-up of GSM at wake-up of TBOX U<strong>LP</strong><br />
End of Alarm: When the alarm condition is finished, an alarm is automatically sent to the same<br />
recipient with the same message preceded with a prefix (see chapter 7.5.2).<br />
Example: for a ‘maximum’ alarm, it is when the value returns below<br />
maximum - hysteresis.<br />
It is also useful when the alarm condition is active when TBOX U<strong>LP</strong> starts up. When ‘end<br />
of alarm’ is checked, an alarm is automatically generated when the condition of alarm<br />
disappears (see illustration chapter 11.8.: Alarms table)<br />
Version: 2.08 <strong>TBox</strong> - U<strong>LP</strong> 123
SMS acknowledge: See chapter 12.2.<br />
POP3 acknowledge: See chapter 10.4.1<br />
11.4. Recipients<br />
To access the definition of Recipients, click the folder ‘Alarms’ in the Project workspace and select<br />
‘Recipients’.<br />
The types of recipients supported are:<br />
Internal: the alarm is saved in the stack of events and no call is generated.<br />
It can be used to memorize a particular event without generating an alarm or to test<br />
an alarm condition.<br />
ModBus: it can be Master or Slave.<br />
It is used to establish a ModBus connection to another ModBus device or a SCADA<br />
(for instance T).<br />
The difference between Master and Slave concerns the handling of the modem<br />
connection and acknowledgement.<br />
A ‘Slave’ connection means that TBOX U<strong>LP</strong> dials an equipment and doesn’t do<br />
anything else. The dialed equipment will sample, acknowledge and hang-up. Typically<br />
used for instance when dialing T.<br />
A ‘Master’ connection means that TBOX U<strong>LP</strong> dials a ModBus equipment and will also<br />
sample this equipment (with Remote Tags).<br />
TBOX U<strong>LP</strong> will then be also responsible of acknowledgment (see chapter 8.8.2 System<br />
Variables [8] AlaID or [10] AlaRec) and hanging-up (see ‘Advanced’ properties of the<br />
communication port used to send the alarm).<br />
A modem parameter: “Hang up<br />
timeout” is used by ‘ModBus-<br />
Master’ alarm to define the<br />
maximum connection time. The<br />
maximum value is 600 seconds.<br />
Version: 2.08 <strong>TBox</strong> - U<strong>LP</strong> 124
Pager/SMS: to send SMS to a mobile or message to a Pager.<br />
Select the Service corresponding to the pager or mobile and a Modem.<br />
Type the Phone Number of the Pager or Mobile.<br />
The default Dial prefix is ATDT. It should not be changed unless the modem needs a<br />
particular configuration.<br />
Printer: sending of message(s) or report to a local printer.<br />
E-mail: If you have subscribed an e-mail account (see chapter 10.3. SMTP Server), the TBOX<br />
U<strong>LP</strong> is able to send an e-mail. You only have to specify the e-mail address of the<br />
recipient.<br />
Version: 2.08 <strong>TBox</strong> - U<strong>LP</strong> 125
FTP: TBOX U<strong>LP</strong> is able to send files to a FTP Host (see chapter 10.2. FTP Host).<br />
In the recipient configuration you only need to indicate the directory where you want<br />
to send the files.<br />
NTP: TBOX U<strong>LP</strong> is able to synchronize its clock with an external NTP server.<br />
In the recipient, you only select a server you have created in the list of NTP Servers<br />
(see chapter 10.5. NTP Server).<br />
RAS: This type of recipient can be used to establish a ‘Client’ modem connection to a<br />
‘Server’. The Server is considered by TBOX U<strong>LP</strong> as an ISP: it requires a telephone<br />
number and a login to establish the connection. You associate an ISP (previously<br />
created in the IP parameters of TWinSoft), and when connection is established, the<br />
‘Server’ has to communicate in protocol ModBus-TCP<br />
It can be assimilated to a ‘Modbus-Slave’ connection using ModBus/TCP protocol. The<br />
Server is responsible of acknowledgment and hanging-up.<br />
Custom: in case a 'C' driver allows sending alarms<br />
Sending of e-mail supports Redundancy.<br />
If you have created several SMTP Servers and you select<br />
‘Redundancy’ instead of a Server, TBOX U<strong>LP</strong> will use the first one<br />
in the list (see chapter 10.3. SMTP Servers). If it fails, it will try<br />
with the second one and so on…<br />
POP3: allows reading e-mail to acknowledge e-mail or to operate <strong>TBox</strong> with a message (see<br />
details in chapter 10.4.1)<br />
Version: 2.08 <strong>TBox</strong> - U<strong>LP</strong> 126
11.5. Group of Recipients<br />
A group of recipients is composed of several recipients, which can be of different types (SMS, e-mail, …).<br />
You can declare several groups.<br />
Then previous to creating groups of recipients, you have to create first the recipients (see above).<br />
You can then associate an Alarm condition to a ‘recipient’ or a ‘group of recipients’.<br />
Working with groups of recipients offers 2 possibilities:<br />
1. You select the option ‘Call all recipients’: the alarm is sent to all recipients, one after each other<br />
(� equivalent to the ‘Link’ with previous generation of RTU, the <strong>TBox</strong> CPU-3).<br />
2. You don’t select the option ‘Call all recipients’: the alarm is sent to the first one in the list; if it<br />
fails, to the second one; if it fails to the third one ; …<br />
When it succeeds the sending process stops.<br />
(� equivalent to the ‘Chain’ with previous generation of RTU, the <strong>TBox</strong> CPU-3).<br />
11.6. Messages<br />
To access the definition of Alarm messages, click the folder 'Alarms' in the Project workspace and<br />
select 'Messages'.<br />
Message number : it indicates the index of the message, corresponding to its position in the list of<br />
messages.<br />
Type a message of maximum 120 characters.<br />
This message is user specific:<br />
- If it is for a Digital Pager, it will consist only of numbers.<br />
- If it is for a Text Pager or for a GSM, it will not contain accent (ü, é, à, ...)<br />
Version: 2.08 <strong>TBox</strong> - U<strong>LP</strong> 127
11.6.1. Value of Tag in a message<br />
Two kinds of value are available:<br />
The value at the moment the alarm is sent<br />
The value will be the value of the Tag at the moment the alarm is accessed: the SMS is sent, the alarm<br />
list is displayed in a WebForm, the alarms retrieved from TView, ...<br />
The syntax is: ~TAG~ (with TAG=the name of the Tag).<br />
The value at the moment the alarm appeared<br />
The value will be frozen to the one at the moment the alarm is stored in the stack of events.<br />
The syntax is: $TAG$ (with TAG=the name of the Tag).<br />
Remarks:<br />
1. Tag TEXT cannot be used in a message with $Tag$. No problem with ~Tag~.<br />
2. With -<strong>WM</strong>, -MS16 and -LITE: ONE $Tag$ can be inserted in a message. No limit with ~Tag~<br />
3. With -MS32: TWO $Tag$ can be inserted in a message. No limit with ~Tag~<br />
11.6.2. “String” in a message<br />
Possibility to include a series of ASCII characters in one alarm message.<br />
Put the character hyphen " - " in front of the TAG.<br />
Syntax like follows:<br />
I say ~-TAG~ to everybody<br />
~-TAG~ will be replaced by characters corresponding to ASCII code, starting at Tag "TAG". It ends<br />
when code 0x00 is encountered or after 32 characters.<br />
Example<br />
with the following value at TAG and following:<br />
TAG : 0x48 (H)<br />
TAG+1: 0x45 (E)<br />
TAG+2: 0x4C (L)<br />
TAG+3: 0x4C (L)<br />
TAG+4: 0x4F (O)<br />
TAG+5: 0x00<br />
With a Digital Tag for which you have defined ‘States’ in the ‘Presentation’<br />
menu, those states will be used; otherwise, 0 and 1.<br />
With a Float Tag for which you have defined a number of decimals in the<br />
‘Presentation’ menu, this number will be used; otherwise, fixed to 3<br />
decimals.<br />
The following message will be generated: I say HELLO to everybody<br />
Version: 2.08 <strong>TBox</strong> - U<strong>LP</strong> 128
11.7. Alarm Timetables<br />
Alarm timetables allows specifying an activity period associated to a recipient, in other words, periods of<br />
time during the day, the week, the year, when a recipient can receive an alarm.<br />
The time tables are based on the specification of ‘Time Slices’ (time periods of the day) and on ‘Days’<br />
(days of the week and holidays).<br />
11.7.1. Time Slices<br />
The time slices are used to trunk the day in different slices. Further, you select those time slices when<br />
creating timetables.<br />
To declare the time slice, just select the start time and the end time of the slice.<br />
A time slice can’t be part of 2 different days: no time slice can include midnight! (e.g. 18h30 to 08h30)<br />
11.7.2. Holidays<br />
The holidays offer to flag specific days of the year; these days constitute a group that can be checked in<br />
the timetables (all at once, not days separately) like if it was a specific day of the week (see Time Tables<br />
next).<br />
You can choose to keep each selected day as holiday for ‘every year’ (by default).<br />
Version: 2.08 <strong>TBox</strong> - U<strong>LP</strong> 129
11.7.3. Timetables<br />
Based on the ‘Time Slice’, days of the week and ‘Holidays’ you create different ‘Timetables’ according to<br />
activity periods in your company (day shift, night shift, holidays, week-end, …). A time table can then be<br />
associated to a recipient.<br />
You select for each days of the week which time slice will be part of the timetable (Holidays being<br />
treated like a unique ‘day’).<br />
Following, in the recipients’ setting, you can choose to have the recipient ‘always active’ which means<br />
that he will receive his alarms any time of the day, or you can also choose to have the recipient active<br />
only during a particular timetable (e.g. Day shift without week-end and holidays).<br />
If an alarm occurs when time table is active, the alarm will be sent. Otherwise, the alarm is automatically<br />
‘auto ack.’ as you can read in the ‘Alarm Table’ (See here under).<br />
Version: 2.08 <strong>TBox</strong> - U<strong>LP</strong> 130
11.8. Alarms table<br />
The Alarms table displays the Events stack of TBOX U<strong>LP</strong>.<br />
The Events stack is the visible part of the handling of some system events and alarms in TBOX U<strong>LP</strong>.<br />
The internal queue of alarms is not accessible.<br />
You access the Alarms table from the main menu: Communication � Download � Alarms<br />
Date/Time of the<br />
start of the<br />
condition<br />
The Alarms table does not only display alarms generated in TBOX U<strong>LP</strong>, but also system events like startup<br />
of the program, Reset of the TBOX U<strong>LP</strong>, …<br />
11.8.1. Columns description<br />
Message Acknowledg.<br />
Status of the<br />
Start<br />
Recipient Date/Time of the<br />
start of the<br />
condition<br />
Start Timestamp: Date and time when the alarm condition appears (‘Start’ condition)<br />
Message: Message (or name of the file) associated with the alarm.<br />
System events appear between brackets.<br />
Acknowledg.<br />
Status of the<br />
End<br />
Start: acknowledgment status of the ‘Start’ condition.<br />
The possibilities are:<br />
- Not ack.: the alarm is still in process.<br />
- Ack’ed: the alarm has been processed successfully.<br />
- Auto ack.: the alarm has not been processed successfully.<br />
In case of ‘system events’, it is always the case as it is not an alarm but an<br />
event.<br />
Recipient: The name of the Recipient (from the list of Recipients).<br />
The name is listed only if the alarm was sent successfully. With chained<br />
alarms, this allows to show the one that was used.<br />
In case of ‘system events’, there is no name.<br />
Version: 2.08 <strong>TBox</strong> - U<strong>LP</strong> 131
End Timestamp: Date and Time when the alarm condition disappears (‘End’ condition).<br />
End: acknowledgment status of the ‘End’ condition.<br />
When creating an alarm condition, there is an option ‘Notify end of alarm’.<br />
This option will automatically generate an alarm when the condition generating<br />
the alarm disappears.<br />
The possibilities are:<br />
- Not ack.: there is a ‘Notify end of alarm’ condition and the alarm is still in process.<br />
- Ack’ed: the ‘end of alarm’ has been processed successfully.<br />
- Auto ack.: the ‘end of alarm’ has not been processed successfully.<br />
When there is no ‘end of alarm’, it is immediately indicated as ‘Auto ack.’<br />
Version: 2.08 <strong>TBox</strong> - U<strong>LP</strong> 132
12. Read SMS embedded<br />
12.1. Introduction<br />
ReadSMS/POP3 is the capability of the RTU to receive and interpret incoming SMS messages, and to<br />
read “subject' of e-mail to execute tasks.<br />
This feature allows two uses:<br />
1. Acknowledgment of an alarm by sending back a SMS to the RTU<br />
2. Controlling the RTU by sending SMS message(s) or sending e-mail(s)<br />
An advanced menu is available in<br />
the RTU properties:<br />
The GSM must be powered to access the SIM card and its SMS messages.<br />
Working in GPRS, when it is in idle mode, SMS can be sent and received.<br />
When an incoming SMS is detected, it is monitored independently from the<br />
wake-up of the CPU. But the control of the message(s) will be done at wake-up.<br />
For any incoming connection, either for acknowledgement or for<br />
monitoring, the caller ID (phone number of the caller for the last<br />
call received) is available in the communication variable<br />
“Com2.Caller ID” (see chapter 8.6.2)<br />
Version: 2.08 <strong>TBox</strong> - U<strong>LP</strong> 133
12.2. Acknowledgment of an alarm by sending SMS to the RTU<br />
Two types of recipient may require an acknowledgment by SMS:<br />
- Pager/SMS: sending a message through a SMS-C (standard way)<br />
- E-mail: sending a message, which can be forwarded as SMS through a dedicated service<br />
Alarm conditions associated to one of these recipients provide the option: SMS acknowledge<br />
acknowledgment will be executed in 2 steps:<br />
1. The sending of the message by the TBOX U<strong>LP</strong> (to the SMS-C or to the e-mail provider) will be first<br />
performed. Retries and time-out defined in the recipient will be used to determine the success or failure<br />
of this first step.<br />
2. Then a second time-out, defined in the advanced ‘Alarms’ properties, will check if the incoming<br />
SMS required to acknowledge the alarm, arrives on time.<br />
The incoming SMS must arrive within this time-out for the alarm to be acknowledged. If not, a<br />
retry will be executed according to the definition in the Recipient. After the end of retries, the<br />
alarm will be considered as in error: “auto-ack” and the system variable ‘AlaErr=1’.<br />
Working with ‘Group of Recipients’:<br />
Version: 2.08 <strong>TBox</strong> - U<strong>LP</strong> 134
- with option ‘Call all recipients’: all recipients have to acknowledge the alarm.<br />
- without option ‘Call all recipients’: any recipient can acknowledge the alarm.<br />
Don’t set a time-out too short, to give time to the SMS Center to send the SMS back to the<br />
CPU, in case the service is busy. Also, if the CPU sends an SMS while acknowledgment SMS is<br />
coming in, it will miss the warning from the GSM, the SMS will be stored in the SIM card and<br />
will have to wait until the next auto-check from the CPU (max. 5 minutes).<br />
12.2.1. Structure of the message<br />
If the option ‘SMS acknowledge’ has been selected, the RTU will send a header with the message<br />
including an identification number.<br />
Example: #A00056# Level too HIGH<br />
# prefix (fixed).<br />
A precedes the absolute identification number of the alarm.<br />
00056 absolute identification number of the alarm.<br />
# suffix (fixed).<br />
message message associated to the alarm.<br />
12.2.2. Acknowledgment of the message<br />
By sending to the same header syntax to the RTU, you will acknowledge this specific alarm. Typically,<br />
this can be done using the option ‘Reply’ of the mobile. Verify that your mobile also sends the original<br />
message.<br />
Example: #A00056# Level too HIGH<br />
Reply: YES<br />
The text sent to the RTU does not matter, as long as the syntax #Axxxxx# is sent.<br />
Some variables are very useful to monitor the acknowledgment<br />
of the alarms by SMS: AlaErr, SmsState, CallerID (see chapters<br />
8.6. and 8.8.)<br />
Version: 2.08 <strong>TBox</strong> - U<strong>LP</strong> 135
12.3. Controlling the RTU using SMS message or reading e-mail using<br />
POP3<br />
ReadSMS/POP3 provides the possibility to control the RTU by sending predefined SMS or by reading email,<br />
meant to TBOX U<strong>LP</strong>, using POP3 service.<br />
Details of the different possibilities:<br />
1. Using pre-defined messages ( - )<br />
- From the ReadSMS properties menu, you<br />
select a ‘Message index Tag’ (analog Tag -<br />
16 bits format), that will contain a value<br />
associated to the message sent to the RTU<br />
- You add the message(s) you intend to send<br />
to the RTU<br />
When the RTU receives the message, it will<br />
put the corresponding value to the ‘Message<br />
index Tag’<br />
Notes:<br />
- SMS/POP3 message are not case sensitive<br />
- This method of monitoring, using message,<br />
is the only method supported by POP3.<br />
Message sent by SMS<br />
A message can combine one or several data: Password, acknowledgment ID, writing values directly to<br />
ModBus addresses,...<br />
It must always start and end with the character #<br />
Examples:<br />
#-START PUMP#<br />
#P1568,A00056,-START PUMP,W20480=123#<br />
The maximum number of messages supported is 20. In case you need to monitor more process, you can<br />
use the direct/indirect addressing (see next).<br />
Message sent by e-mail<br />
A message must include the RTU Id of the TBOX U<strong>LP</strong> , preceded by the letter I and a pre-defined<br />
message. It may also include an acknowledgment ID.<br />
It must always start and end with the character #<br />
Examples:<br />
#I460000020107,-START PUMP#<br />
#I460000020107,A00002,-START PUMP#<br />
Version: 2.08 <strong>TBox</strong> - U<strong>LP</strong> 136
2. Writing Tag with Direct addressing ( W )<br />
You write a value directly to a ModBus address.<br />
Syntax: #Wmodbus address=value#<br />
Example: #W20480=123#<br />
This message sent to the RTU will write value 123 to the analog Tag with ModBus address 20480<br />
Notes:<br />
1. You can combine several texts, separated by a comma. For instance:<br />
#W20480=123,W20481=456#<br />
2. ReadSMS checks access protection level of the port before writing (see point 5. below)<br />
3. Writing Tag with Indirect addressing – analog ( N )<br />
You write a value directly to a ModBus address representing a pointer.<br />
Syntax: #Nmodbus address=value#<br />
The value at ‘modbus address’ corresponds to the ModBus address to write in.<br />
Example: #N20480=123#<br />
If ModBus address 20480 contains the value 1000, the value 123 will be written to the ModBus address<br />
1000.<br />
We make a distinction between Target address corresponding to an<br />
analog Tag and a digital Tag (see next).<br />
With indirect addressing, ReadSMS does no check the access<br />
protection level of the GSM port<br />
4. Writing Tag with Indirect addressing - digital ( D )<br />
You write a value directly to a ModBus address representing a pointer.<br />
Syntax: #Dmodbus address=value#<br />
The value at ‘modbus address’ corresponds to the ModBus address to write in.<br />
Example: #D20481=1#<br />
If ModBus address 20481 contains the value 512, the value 1 will be written to the ModBus address 512.<br />
Version: 2.08 <strong>TBox</strong> - U<strong>LP</strong> 137
5. Access protection ( P )<br />
ReadSMS access protection is independent from the GSM port it is associated to. In other words, even<br />
if the communication port is protected, ReadSMS will not specially be protected.<br />
ReadSMS has its own<br />
independent access<br />
protection configuration,<br />
that can be activated<br />
from:<br />
RTU properties<br />
� Security.<br />
If ReadSMS protection is activated, a login is required in the incoming the SMS message.<br />
The login is composed of the last 8 digits of telephone number of the mobile used to send the SMS and<br />
a password.<br />
To obtain the Password, the utility 'Password Generator' is needed (Start � Programs � Techno Trade<br />
� Accessories � Password generator).<br />
From the Password utility, you define:<br />
- the global code used in the RTU<br />
- as NAME: the last 8 numbers of the telephone number of the mobile which will be<br />
used to send the SMS.<br />
- as Access Level: Engineer (Level 3).<br />
The resulting 'PASSWORD' must be used to login.<br />
Syntax: #Ppassword#<br />
Example: #P1568#<br />
6. acknowledgment ( A )<br />
See chapter 12.2 above<br />
If needed, the Password must be declared first.<br />
Acknowledgment (with code A) does not require password<br />
Version: 2.08 <strong>TBox</strong> - U<strong>LP</strong> 138
7. SET a digital Tag ( S )<br />
You write 1 to a digital Tag using its ModBus address.<br />
Syntax: #Smodbus address#<br />
Example: #S32#<br />
The digital Tag at ModBus address 32 will be set to 1.<br />
Note: ReadSMS checks access protection level of the port before writing (see point 5. above)<br />
8. RESET a digital Tag ( R )<br />
You write 0 to a digital Tag using its ModBus address.<br />
Syntax: #Rmodbus address#<br />
Example: #R32#<br />
The digital Tag at ModBus address 32 will be reset to 0.<br />
Note: ReadSMS checks access protection level of the port before writing (see point 5. above)<br />
9. Changing a telephone number ( T )<br />
You change the telephone number of a recipient using its index number (see list of recipients in<br />
TWinSoft).<br />
Syntax: #Tindex=telephone number#<br />
Example: #T05=0123456789#<br />
You replace the telephone number of recipient 5 with 0123456789.<br />
Notes:<br />
1. Maximum length: 21 characters.<br />
2. ReadSMS checks the access protection level of the port before writing (see point 5. above)<br />
10. Writing minutes since midnight into a register ( h )<br />
To write in an analog register, the current number of minutes since midnight at the moment the<br />
message is received.<br />
Syntax: #Wmodbus address=h#<br />
Example: #W20482=h#<br />
If the message is received at 15:23, the value 923 will be written at ModBus address 20482<br />
Note: ReadSMS checks the access protection level of the port before writing (see point 5. above)<br />
Version: 2.08 <strong>TBox</strong> - U<strong>LP</strong> 139
12.4. Automatic Update of a Recipient’s tel. number<br />
An existing recipient of type ‘Pager/SMS’ can be updated with the telephone number of the person<br />
calling the RTU.<br />
The idea is that the RTU verifies the<br />
message it receives (using the ReadSMS<br />
special register status - see next) and is<br />
able to send back a message to the<br />
originator.<br />
ReadSMS uses the caller ID of the<br />
originator to update the recipient you<br />
select in this menu, with originator’s<br />
telephone number.<br />
From the Process, you can then decide<br />
to send back an SMS, to confirm the<br />
order, to indicate the incoming message<br />
was invalid, that the password was<br />
incorrect, …<br />
If this option is activated, the selected recipient will be automatically updated with the telephone<br />
number of any incoming call (if caller ID of originator has been activated!).<br />
12.5. ReadSMS status<br />
A communication variable, associated to the GSM can be used to check the status of ReadSMS.<br />
From the GSM Com port, go to the tab ‘ACV’ and make a Tag of ‘SmsState’<br />
Value Description<br />
1 Accepted message received<br />
2 Acknowledgment received<br />
10 Invalid message<br />
11 Unknown command<br />
12 Equality character (=) not found or incorrect<br />
20 Incorrect password<br />
21 Incorrect password or not supplied for a com. Port protected<br />
30 Message received does not match a predefined message<br />
31 Writing to an unknown address<br />
32 Writing to an unknown address, using indirect addr. (address contained in the Tag not known)<br />
33 Changing the telephone number of an unknown recipient<br />
Version: 2.08 <strong>TBox</strong> - U<strong>LP</strong> 140
13. Datalogging<br />
13.1. Introduction<br />
Datalogging allows memorizing values of your process, in order to trace its history.<br />
TBOX U<strong>LP</strong> contains memory for recording historical values of Tags and events (see technical<br />
specifications); the latter is what we call the database of TBOX U<strong>LP</strong>.<br />
There are two categories of databases:<br />
The Chronologies<br />
Chronologies are 'On event' recordings, by means of changes in Tags (also known as “Sequence of<br />
Events”). Each event is recorded with the time, date, Tag and its status or value.<br />
1<br />
0<br />
180<br />
160<br />
140<br />
120<br />
100<br />
80<br />
60<br />
40<br />
20<br />
Example of ‘digital event’:<br />
The changes of status of the Tag represent the events.<br />
Example of ‘analog events’:<br />
The variations of the Tag represent the events.<br />
TBOX U<strong>LP</strong> stores chronologies in 2 tables: one for digital events and one for analog events.<br />
The size of the tables is defined in the General RTU properties, as described chapter 7.1.<br />
Version: 2.08 <strong>TBox</strong> - U<strong>LP</strong> 141<br />
t<br />
t
te<br />
m<br />
pe<br />
rat<br />
ur<br />
The Sampling Tables.<br />
Sampling tables use ‘Periodical’ recording, with a minimum period depending on the wake-up period of<br />
the CPU (see chapter 7.1. General RTU Properties).<br />
Recording in Sampling tables happens at fixed intervals and does not depend on signal variations; it uses<br />
the clock of the CPU to determine the recording.<br />
Only date and time of the last recording are stored. This mechanism requires less memory than<br />
chronology does.<br />
Example of ‘periodic recording’:<br />
Recording into chronologies happens ‘on event’, when the system is awake.<br />
The resolution of timestamp depends then on the wake-up period, with a<br />
minimum resolution of 1 second.<br />
9 :30 9 :45 10 :00 10 :15 10 :30 10 :45<br />
Each Tag is recorded into a separate table. There is no practical limit in the number of tables, but the size<br />
of each table is limited.<br />
The database information recorded in TBOX U<strong>LP</strong> can be retrieved with the use of SCADA software such as<br />
T or other HMI package with ‘TComm.dll’ based driver (please call your distributor).<br />
By doing a compilation you can check the space of<br />
memory available (see chapter 5.9.2).<br />
Version: 2.08 <strong>TBox</strong> - U<strong>LP</strong> 142<br />
t
13.2. The chronologies<br />
13.2.1. Digital chronologies<br />
Example of an entry in Digital chronology: Recording of the starting and stopping of a ‘Pump_1’.<br />
Edges: Recording on positive and (or) negative edge.<br />
Handling:<br />
� Enabled: always recorded.<br />
� Disabled: never recorded.<br />
� PowerF: recording disabled in case of ‘main’ power failure.<br />
� DisCRD: recording disabled when the system variable ‘DisCRD’ is at 1.<br />
13.2.2. Analog chronologies<br />
Example of an entry in Analog chronology: Recording of a variation of 2.5 bars in ‘Pressure_Pipe1’<br />
input.<br />
Variation: Recording in case of variation (higher or lower) in comparison with the previous<br />
recording. The unit is expressed according to the format selected in the Tag definition<br />
(see chapter 9.2.2: Analog Tags).<br />
Handling:<br />
� Enabled: always recorded.<br />
� Disabled: never recorded.<br />
� PowerF: recording disabled in case of ‘main’ power failure.<br />
� DisCRA: recording disabled when the system variable ‘DisCRA’ is at 1.<br />
Version: 2.08 <strong>TBox</strong> - U<strong>LP</strong> 143
13.3. The sampling tables<br />
Type: TBOX U<strong>LP</strong> is able to execute calculations on a minimum time base depending on the wakeup<br />
rate of the CPU and with a minimum resolution of 1 second. The result of the<br />
calculation is written in the sampling table after the period selected (see next).<br />
This value can be:<br />
- Minimum : minimum value during the period.<br />
- Maximum : maximum value during the period.<br />
- Average : arithmetic average value calculated during the period. For each period a new<br />
average is calculated.<br />
Tag format Limitation in recording<br />
8 bits All periods accepted<br />
16 bits Period limited to 12 hours<br />
32 bits Not available<br />
Float All periods accepted<br />
- Instantaneous : value at the moment of the recording.<br />
- Incremental : TBOX U<strong>LP</strong> records the difference between the current value and previously<br />
recorded value.<br />
Example of incremental recording:<br />
Value of the Tag 865 878 902 905 965 985<br />
Incremental value<br />
recorded<br />
… 13 24 3 60 20<br />
Period Period Period Period Period Period<br />
Version: 2.08 <strong>TBox</strong> - U<strong>LP</strong> 144
Period: Period between 2 recordings, depending on the wake-up rate of the CPU (see chapter 7.1.<br />
General RTU properties).<br />
You may choose between:<br />
1sec; 2sec; 4sec; 5sec; 10sec; 15sec; 30sec; 1min; 2min; 4min; 5min; 10min; 15min; 30min;<br />
1h; 2h; 4h; 6h; 12h; 24h; 48h; daily; weekly; monthly.<br />
The recording happens at ‘birthday’ time of the period selected.<br />
Example: if you select as period 5 minutes, the recording will be done at:<br />
9:25:00; 9:30:00; 9:35:00; 9:40:00 ...<br />
In case you wish to make recording every day, or even with a longer period, the options are:<br />
• daily: recording once a day<br />
• weekly: recording once a week<br />
• monthly: recording once per month.<br />
The hour of the day, the day of the week and/or the month are defined once for all<br />
sampling tables in the RTU Advanced properties (see chapter 7.5.4.)<br />
Size: The size can be expressed on two ways:<br />
Size: the number of records of the table.<br />
The recording works on the FIFO principle. According to the size, the duration is<br />
updated automatically (see next).<br />
The size can be of maximum 65 535 records, with a total of 72 kbytes for datalogging.<br />
Duration : you may prefer to enter a number of days and hours, in this case the size is<br />
automatically updated.<br />
Trigger:<br />
Synchronize each sample on external clock: the recording of the value is executed on the positive<br />
edge of the Tag selected, and not with the clock of the CPU.<br />
�<br />
�<br />
�<br />
�<br />
�<br />
�<br />
�<br />
�<br />
�<br />
�<br />
To adjust the sizes check the available memory with the compile<br />
option. See chapter 5.9.2: Compiling a program.<br />
The period between 2 pulses of the Trigger must correspond to a period<br />
between 2 recordings (see above). The latter is used when retrieving the<br />
data to compute time stamps using the last time stamp and the period.<br />
Version: 2.08 <strong>TBox</strong> - U<strong>LP</strong> 145
Example of use of external Trigger: quarter - hour management.<br />
In some industries, every 15 minutes (may vary slightly), your electric company sends a pulse<br />
which is used to calculate the consumption, based on average consumption during 15 minutes.<br />
You will be charged based on the highest consumption.<br />
In order to analyse your consumption and prevent from peaks, you can use this pulse as Trigger.<br />
Recording will be done each time the pulse arrives, but when retrieving data, the calculation of<br />
timestamp will be computed from the time stamp of the last recording and the period.<br />
This means it can only be used if the period between pulses corresponds to a period between 2<br />
recordings (see above).<br />
No sampling if trigger = 0: the CPU clock is used to record data (see period above), but the<br />
recording is only possible when the Tag Trigger is in “high state”. When it is negative, the<br />
recording stops. On the positive edge of the Tag, the table is erased and a new recording<br />
starts.<br />
Reset Tag after sampling: if this option is checked, the RTU automatically resets the register that<br />
has been recorded.<br />
This option works only with registers, NOT I/O !<br />
Version: 2.08 <strong>TBox</strong> - U<strong>LP</strong> 146
14. Remote Tags<br />
14.1. Introduction<br />
Remote Tags allow exchanging information between two or more ModBus stations via any<br />
communication ports.<br />
Typically, it is a TBOX U<strong>LP</strong> connected to a local ModBus device through RS485.<br />
One often speaks of 'Master Network' because it is a Master/Slave communication: the Master executes<br />
reading and writing in slave(s).<br />
TBOX U<strong>LP</strong>, being ‘Master’, reads and writes the variables with all other devices using the ModBus<br />
protocol<br />
Each Remote Tag corresponds to one transaction (reading or writing) with 1 slave.<br />
When there are several stations, TBOX U<strong>LP</strong> executes the different transactions of one station at a time,<br />
then transactions of the following station, and so on …<br />
Before creating a Remote Tag you have to create the equipment you are going to communicate with.<br />
14.2. Creating a Remote Device<br />
From the Project Workspace,<br />
select ‘Resources’ � ‘I/O’. Click<br />
‘I/O’ and in the list of I/O, click<br />
‘Add an I/O card’.<br />
ModBus device: any device<br />
supporting ModBus-RTU<br />
Communication consumes energy; 1.5 mA at 9600 bps !<br />
Try to reduce communication as much as possible.<br />
Communication is monitored by a “Trigger”. The frequency this trigger can<br />
be activated will depend on the wake-up rate of the CPU<br />
Version: 2.08 <strong>TBox</strong> - U<strong>LP</strong> 147
Name: You type any name. It will be<br />
available in a list of available<br />
equipment when creating ‘Remote<br />
Tags’ (see next).<br />
Address: It is the ModBus address of the<br />
Remote equipment. It must be<br />
different from the TBOX U<strong>LP</strong> and<br />
possible other equipment on the<br />
same network.<br />
RTU Port: The communication port used by<br />
TBOX U<strong>LP</strong> to communicate with the<br />
remote equipment.<br />
Trigger: Select a digital Tag that will trigger the communication, according to a ‘Condition’<br />
(see next). Working with several equipment, you can declare different Tags and then<br />
monitor differently the communication to each equipment.<br />
The Trigger must be a digital variable (DIV).<br />
Condition: Condition of Tag ‘Trigger’ to start communication. With ultra low power RTU,<br />
communication works on edge conditions, to carry on communication as little as<br />
possible and therefore reduce consumption.<br />
14.2.1. Remote Device – Advanced Properties<br />
Click on “Advanced” button in above configuration to access advanced properties<br />
An interesting feature related to low<br />
consumption device is “Wake-up frame”.<br />
TBOX U<strong>LP</strong> can send a wake-up frame to the<br />
remote device before starting<br />
communication.<br />
Version: 2.08 <strong>TBox</strong> - U<strong>LP</strong> 148
14.3. Creating a Remote Tag<br />
Example: reading of 2 “Flow” variables in <strong>TBox</strong>#2 at address 5000<br />
Tag: Select an existing Tag by clicking the button. Be sure you select a Tag of the same type<br />
of the address you want to access in the ‘Slave’ (Byte, Word or Float).<br />
If the Tag does not exist, you can create it after having clicked the button. It is the Tag of<br />
the Master; it contains the value you want to write in a Slave or it is a register that<br />
contains the value that Master reads in a Slave.<br />
In case of block communication (with a quantity > 1), this Tag is the one of first ModBus<br />
address.<br />
Operation :<br />
Operations<br />
READ<br />
MASTER (Tag) SLAVE (Address)<br />
WRITE<br />
Read : the Master executes a reading in the Slave.<br />
Write : the Master executes writing in the Slave.<br />
Quantity : Quantity of variables of successive addresses that are read (or written) in the Slave. It<br />
depends on the external source, the types of variable and the ModBus function used<br />
(see tables below).<br />
ModBus protocol handles only words (16 bits). When working with 32 bits,<br />
TWinSoft adapts the quantity to double the number of words.<br />
32 bits are handled with:<br />
…<br />
Version: 2.08 <strong>TBox</strong> - U<strong>LP</strong> 149
External Source. All the following parameters concern the Slave station:<br />
Device: select an existing external device from the ‘Resources’. You can create one clicking the<br />
button<br />
Type: select the type of the external variable. According to the external source, the choices<br />
are:<br />
With external source ‘ModBus device’ (another TBOX U<strong>LP</strong>, any ModBus device)<br />
Types Connection in remote device ModBus Function<br />
Digital input Only digital input(s) 2<br />
Coil Digital output(s) or register(s) 1, 5 or 15<br />
Analog input Only analog input(s) 4<br />
Holding register Analog output(s) or register(s) 3, 6 or 16<br />
Operations<br />
Types ModBus<br />
Functions<br />
Max. Quantity (*)<br />
Read Digital Digital Input 2 1600 (see Warning below)<br />
Read Digital Coil 1 1600 (see Warning below)<br />
Read Analog Analog Input 4 125 (16 bits) - 62 (32 bits)<br />
Read Analog Holding Register 3 125 (16 bits) - 62 (32 bits)<br />
Write Single Digital Coil 5 1<br />
Write Single Analog Holding Register 6 1 (word)<br />
Write Multiple Digital Coil 15 800 (see Warning below)<br />
Write Multiple Analog Holding Register 16 100 (16 bits) - 50 (32 bits)<br />
(*): Maximum quantities for TBOX U<strong>LP</strong>. You also have to check the maximum quantities of the ‘Remote device’they<br />
could be less.<br />
Address : The ModBus address must be typed according to the indication of the user’s guide of the<br />
Remote device.<br />
Communicating to TBOX U<strong>LP</strong>, you have to refer to the TWinSoft application and its<br />
configuration of Tags.<br />
Version: 2.08 <strong>TBox</strong> - U<strong>LP</strong> 150
14.4. Timing configuration of Remote Tags<br />
Several timings can be adjusted when communication through Remote Tags. Their value mostly depends<br />
on the media and the baudrate (see on line help for more info).<br />
They are available from the tab ‘Advanced’ of the properties of the communication port used to<br />
communicate with the remote device.<br />
Packet reception delay: maximum time for<br />
receiving a valid answer<br />
Master timeout: maximum time to receive an<br />
answer before sending the next query<br />
Number of Tries: in case of error, number of times<br />
a query is sent<br />
Interframe gap: after having received a valid<br />
answer, time before sending the next query.<br />
Version: 2.08 <strong>TBox</strong> - U<strong>LP</strong> 151
15. Periodic Events<br />
The idea is to enable events to be executed periodically, for<br />
example Remote Tags, alarm calls, datalogging, process, etc.,<br />
independently of any other condition.<br />
A periodic event could be compared to an automatic timer.<br />
A digital Tag is Triggered periodically: it is automatically SET when the period has elapsed. All tasks<br />
associated to a positive edge on this Tag will be launched, then the Tag will be automatically RESET,<br />
ready for the next period.<br />
Several tasks can be associated to the Tag triggered. This implies for the OS to RESET the Tag when all<br />
tasks have been launched.<br />
In the project workspace of TWinSoft, a folder is available to declare the Periodic Events:<br />
Version: 2.08 <strong>TBox</strong> - U<strong>LP</strong> 152
Example of a ‘daily event’:<br />
The Tag ‘Event1’ (a DIV) will be automatically SET every 30 minutes, at each xx:15:00 and xx:45:00.<br />
The task(s) associated to ‘Event1’ will be execute every 30 minutes.<br />
Example of a ‘weekly event’:<br />
The Tag ‘Event2’ (a DIV) will be automatically SET every day at 6:00:00 AM.<br />
The task(s) associated to ‘Event2’ will be execute at that moment.<br />
Version: 2.08 <strong>TBox</strong> - U<strong>LP</strong> 153
16. Access security<br />
This (optional) access security of the TBOX U<strong>LP</strong> prevents<br />
non-authorized persons from accessing the RTU and from<br />
opening the TWinSoft document.<br />
If the Access security option is activated, each port of the TBOX U<strong>LP</strong> can be independently protected.<br />
Once you activate the “Access security” option, the TWinSoft document will also be protected, even if<br />
no port has been selected!<br />
The protection concerns ‘ModBus’ protocol, on serial and modem ports.<br />
The protection is based on a four-digit hexadecimal global code that is saved in the TBOX U<strong>LP</strong>. This code<br />
allows different logins related to different users with different access levels to the TBOX U<strong>LP</strong>.<br />
Three access levels are available to access protected port(s):<br />
• Level 1: Surveillance mode or VISUALIZATION MODE. The operator can view all TBOX U<strong>LP</strong> values<br />
(local or remote), but cannot execute any command.<br />
• Level 2: COMMAND MODE, the operator can view all the values and execute commands (locally<br />
or remotely). Also known as READ/WRITE MODE.<br />
• Level 3: ENGINEER MODE, the operator can view all the values, execute commands and send new<br />
application (locally or remotely).<br />
Version: 2.08 <strong>TBox</strong> - U<strong>LP</strong> 154
16.1. RTU configuration<br />
The configuration of security of TBOX U<strong>LP</strong> is available from the ‘RTU properties’:<br />
- there is a general activation of the protection.<br />
- for each port you activate the protection.<br />
16.1.1. RTU Properties<br />
From the RTU properties � tab ‘Security’, you activate the general access security feature.<br />
Global code type in the code you used to generate the Access Codes with the utility<br />
PASSWORD.EXE (see chapter 16.3 below).<br />
Type it a second time, to confirm.<br />
TWinSoft presents you ports according to the TBOX U<strong>LP</strong> you are configuring.<br />
Next, you check the port you want to be protected.<br />
16.1.2. Port Properties<br />
Access level on each port can be checked using the Analog Communication Variables (see chapter<br />
8.6.2.).<br />
Version: 2.08 <strong>TBox</strong> - U<strong>LP</strong> 155
16.2. TWinSoft document protected<br />
Opening a protected document<br />
1. Once a document has been protected (see above), when opening it with TWinSoft, you are<br />
prompted to type a login.<br />
2. Type the NAME and PASSWORD you have created with the Password generator (see below)<br />
3. Click OK<br />
- The different access levels are not supported when opening a<br />
document. Any acceptable login will be supported.<br />
- If you click ‘Cancel’, TWinSoft will indicate the document is<br />
protected and will open a new document<br />
Version: 2.08 <strong>TBox</strong> - U<strong>LP</strong> 156
The utility program Password generates access codes.<br />
16.3. Password utility<br />
When installing TWinSoft Suite a password-creation program named PASSWORD is installed in the same<br />
directory as TWinSoft. It can be started from the 'Start' button of Windows and is located in the group<br />
of programs “Techno Trade” � “Accessories” created while installing TWinSoft.<br />
This program generates a password that will be necessary to Login to the TBOX U<strong>LP</strong> (see next).<br />
This password is composed of 4 hexadecimal characters in response to information related to the user. It<br />
is based on a complex algorithm using the global code, the user’s name and the access level. A 5-digit<br />
number that identifies persons who have accessed the TBOX U<strong>LP</strong> accompanies the password. This<br />
information can be used to trace users for example by inserting this number into a database, with the<br />
help of Analog Communication Variables (see chapter 8.6.2.).<br />
Global code This hexadecimal code of 4 characters is the basis for password generation. It is<br />
typed in the ‘RTU Properties’ (see above) of TWinSoft and sent to the TBOX U<strong>LP</strong>.<br />
When a user logs in, TBOX U<strong>LP</strong> checks whether NAME and PASSWORD fit with the<br />
global code. This means that if different users with different access levels must<br />
communicate with TBOX U<strong>LP</strong>, the global code used to generate passwords must<br />
be the same.<br />
User name The NAME you use as login.<br />
Access level Three access levels are available:<br />
� Level 1: Surveillance mode or VISUALIZATION MODE. The operator can view all TBOX U<strong>LP</strong><br />
values (local or remote), but can not execute any command.<br />
� Level 2: COMMAND MODE, the operator can view all the values and execute commands<br />
(locally or remotely).<br />
� Level 3: ENGINEER MODE, the operator can view all the values and execute commands and<br />
alter or send new TWinSoft documents (locally or remotely).<br />
When this information has been entered, click on the button "Get password".<br />
Version: 2.08 <strong>TBox</strong> - U<strong>LP</strong> 157
Two codes have been created:<br />
� The PASSWORD: this PASSWORD must be used together with the NAME when logging in.<br />
� The USER ID: this number is available in an Analog Communication Variable when a user is<br />
connected to a port of TBOX U<strong>LP</strong> that is protected.<br />
16.4. Login/Logout<br />
16.4.1. With TWinSoft<br />
The Login feature of TWinSoft allows connecting to a protected port of the TBOX U<strong>LP</strong> according to an<br />
access level. If a port is not protected, access level is automatically 3: Engineer.<br />
The Login/Logout is executed from the main<br />
menu bar � 'Tools'.<br />
Login<br />
If connected to a port of TBOX U<strong>LP</strong> that is<br />
protected, you need to Login to get an access<br />
level.<br />
You type the Name you used in the ‘Password’ utility and the Password that was created (see previous).<br />
According to those, you are in:<br />
� Read only mode<br />
� Read/write mode<br />
� Engineer<br />
The access level is displayed in the Status bar.<br />
If 'Save password' is checked and TWinSoft is connected to a protected port: when TWinSoft starts,<br />
it uses the access level corresponding to the password saved (see the status line).<br />
If it is not checked and TWinSoft is connected to a protected port: TWinSoft starts in 'Read only'<br />
mode. You need to do a Login to get your access level.<br />
Logout<br />
If the TWinSoft is connected to a protected port, the Logout sets TWinSoft in 'Read only' mode.<br />
16.4.2. With Internet Explorer<br />
Through a modem connection, you can access TBOX U<strong>LP</strong> as Web Server.<br />
From Internet Explorer, you use the tool <strong>TBox</strong> Dial It! to dial TBOX U<strong>LP</strong> directly. TBOX U<strong>LP</strong> is then<br />
considered first as an ISP and then as a Web Server.<br />
To connect to an ISP you need to login<br />
You type the NAME and PASSWORD you have<br />
used with password utility (see above)<br />
Version: 2.08 <strong>TBox</strong> - U<strong>LP</strong> 158
16.5. Deactivating protection<br />
Even if TBOX U<strong>LP</strong> is not protected, type a NAME and<br />
PASSWORD.<br />
Depending on Windows and IE versions, they may not<br />
allow a connection without login.<br />
There are two methods of deactivating TBOX U<strong>LP</strong> access protection:<br />
Global reset (see chapter 5.6.)<br />
The first method is by performing a global reset, which must be done on site. When the program has<br />
stopped, the local port is no longer protected.<br />
If the ‘modem’ has been declared protected, it will still<br />
be protected even after a global reset. To deactivate<br />
the protection, an unprotected TWinSoft document<br />
must be sent to TBOX U<strong>LP</strong> (see below).<br />
Sending an unprotected TWinSoft document<br />
The second method involves modifying the TWinSoft document and deactivating the Access Security<br />
option. The document is sent to the TBOX U<strong>LP</strong> after having done a Login as 'Engineer'.<br />
16.6. Deactivating protection of TWinSoft document<br />
You have to open the document and de-activate ‘Access security’ in tab ‘Security’ (RTU properties).<br />
If you have forgotten your login, but still remember the Global Code, you can generate a new login (see<br />
chapter 16.3. above).<br />
If you have forgotten your login and the Global Code, you have to contact your local distributor and send<br />
him the application, the .tws file.<br />
Version: 2.08 <strong>TBox</strong> - U<strong>LP</strong> 159
Version: 2.08 <strong>TBox</strong> - U<strong>LP</strong> 160
TECHNICAL SPECIFICATIONS<br />
-<br />
WIRING<br />
Version: 2.08 <strong>TBox</strong> - U<strong>LP</strong> 161
17. Technical specifications<br />
17.1. Hazardous Environment<br />
Depending on the model, TBOX U<strong>LP</strong> can be used in hazardous environment.<br />
TBOX U<strong>LP</strong> is then considered as an intrinsically-safe equipment and can then be installed in Class1 Div1,<br />
and Class 1 Div2 or ATEX locations.<br />
Intrinsically-safe equipment is defined as "equipment and wiring which is incapable of releasing<br />
sufficient electrical or thermal energy under normal or abnormal conditions to cause ignition of a<br />
specific hazardous atmospheric mixture in its most easily ignited concentration." (ISA-RP12.6)<br />
This is achieved by limiting the amount of power available to the electrical equipment in the hazardous<br />
area to a level below that which will ignite the gases.<br />
When an Intrinsically-safe equipment needs to be connected to a device which is not intrinsically-safe, a<br />
barrier must be used to electrically isolate the hazardous area from the outside.<br />
The basic design of an intrinsic safety barrier uses Zener Diodes to limit voltage, resistors to limit current<br />
and a fuse.<br />
Most applications require a signal to be sent out of or into the hazardous area. The equipment mounted<br />
in the hazardous area must first be approved for use in an intrinsically safe system. The barriers designed<br />
to protect the system from non intrinsically-safe device must be mounted outside of the hazardous area<br />
in an area designated as Non-hazardous or Safe in which the hazard is not and will not be present.<br />
17.2. Entity Concept<br />
The Entity concept specifies parameters which any approved intrinsically safe device and barrier must<br />
meet.<br />
The concept of Entity Approval allows inter-connections between different intrinsically safe apparatus,<br />
or barriers that have not been specifically approved as a complete system.<br />
The parameters used for the Entity Approval are available as pair of parameters, as it concerns<br />
connecting two intrinsically safe apparatus:<br />
Uo (or Uoc) Maximum Output Voltage (or Open Circuit Voltage) that can appear at the connection.<br />
Ui (or Umax) Maximum Input Voltage that can be applied to the connection.<br />
(With Uo of associated apparatus ≤ Ui)<br />
Io (or Isc) Maximum Output current (or Short Circuit Current) that can be taken from the<br />
connection.<br />
Ii (or Imax) Maximum Input Current that can be applied to the connection.<br />
(With Io of associated apparatus ≤ Ii)<br />
Po Maximum Output Power that can be taken from the connection.<br />
Pi Maximum Input Power that can be applied to the connection.<br />
(With Po of associated apparatus ≤ i)<br />
Version: 2.08 <strong>TBox</strong> - U<strong>LP</strong> 162
Co Maximum External Capacitance that can be connected to the connection.<br />
Ci Maximum equivalent Internal Capacitance that is considered as appearing at the<br />
connection.<br />
(With Co ≥ Ci + cable)<br />
Lo Maximum External Inductance that can be connected to the connection.<br />
Ci Maximum equivalent Internal Inductance that is considered as appearing at the<br />
connection.<br />
(With Lo ≥ Li + cable)<br />
Capacitance and inductance of the wiring and cables must be included in the loop evaluation.<br />
17.3. Entity Parameters<br />
For each type of connection (Power Supply, RS232, RS485, DI, DO, AI), a series of entity parameters are<br />
provided in their respective chapter.<br />
Some Entity Parameters are global for all connections of TBOX U<strong>LP</strong> :<br />
TBOX <strong>WM</strong>: TBOX <strong>LP</strong>:<br />
Co= 500 nF Co= 1.3 µF<br />
Lo= 250 µH Lo= 350 µH<br />
Lo/Ro= 73.3 µH/Ohm Lo/Ro= 191.6 µH/Ohm<br />
17.4. Barriers<br />
In case TBOX U<strong>LP</strong> is installed in hazardous environment and needs to be connected to a device not<br />
intrinsically-safe approved for used in hazardous area, an intrinsically-safe barrier must be wired<br />
between TBOX U<strong>LP</strong> and the device.<br />
The barrier must be installed in the non hazardous area.<br />
Version: 2.08 <strong>TBox</strong> - U<strong>LP</strong> 163
17.5. General<br />
CPU<br />
Processor 16 bits, 7.37 Mips<br />
Clock Realtime Clock, backed-up (see schema following)<br />
Button Push button : TEST - RESET<br />
Power Supply<br />
Power Source<br />
Quantity<br />
Energy<br />
Typical Voltage<br />
Minimum Voltage<br />
Maximum Voltage<br />
Max. Continuous Current<br />
Max. Peak Current<br />
Operating Temperature<br />
Current<br />
Sleep mode<br />
Run mode<br />
RS 232 com.<br />
RS 485 com.<br />
GSM/GPRS com.<br />
4 x DI slow sampling<br />
1 x DI fast sampling<br />
AI stage 4..20mA (24 V)<br />
AI stage 0..5V (12 V)<br />
LED “Test”<br />
<strong>WM</strong>-100, <strong>WM</strong>-200, <strong>LP</strong>-400 <strong>LP</strong>-450<br />
Lithium Battery: SAFT LSH20<br />
1 or 2 batteries<br />
13 AH<br />
3.6 VDC @ 25 °C<br />
2 VDC<br />
-<br />
1800 mA<br />
4000 mA/0.1 sec.<br />
-20°C ..+70°C<br />
On 3.6VDC:<br />
15 µA<br />
15 mA<br />
1.5 mA @ 9600 bps<br />
1.5 mA @ 9600 bps<br />
242 mA<br />
20 µA<br />
32 µA<br />
30 ms powering: 163 µA<br />
30 ms powering: 40 µA<br />
10 second flashing: 400 µA<br />
External LEAD Battery 12 VDC<br />
1 battery<br />
-<br />
12 VDC @ 25 °C<br />
8 VDC<br />
16 VDC<br />
-<br />
-<br />
-20°C ..+70°C<br />
On 12VDC:<br />
50 µA<br />
5.6 mA<br />
0.6 mA @ 9600 bps<br />
0.6 mA @ 9600 bps<br />
91 mA<br />
8 µA<br />
12 µA<br />
30 ms powering: 62 µA<br />
30 ms powering: 15 µA<br />
10 second flashing: 150 µA<br />
Check the battery life time, according to the frequency of sampling analog<br />
inputs and to the periods of communication.<br />
Do a simulation using the EXCEL sheet Consumption_U<strong>LP</strong>.xls available in<br />
TWinSoft directory.<br />
Protection<br />
Power Supply Reverse polarity protection<br />
FUSE battery Soldered Fuse of 2 A. Not replaceable by user.<br />
Memory<br />
Flash Internal: 256 kbytes<br />
- loader: 16 kbytes<br />
- OS: 192 kbytes<br />
- application: 32 kbytes<br />
External: 512 kbytes: Web Files, Report, Sources, BASIC/Ladder (max. 64 kbytes)<br />
Flash Internal: 20 kbytes<br />
External (backed up with lithium battery): 128 kbytes (-<strong>LP</strong>4xx: + 256 kbytes)<br />
- Datalogging, Alarm Stacks, Tag Values: 72 kbytes<br />
- Datalogging Sampling Tables: 256 kbytes (-<strong>LP</strong>4xx)<br />
- application: 48 kbytes<br />
- buffer TCP: 24 kbytes<br />
Version: 2.08 <strong>TBox</strong> - U<strong>LP</strong> 164
RS 232<br />
Connector RJ45<br />
Wiring (see schema next) TxD, RxD, GND, RTS, CTS<br />
Protocol ModBus-RTU ‘Slave’ (for programming)<br />
RS 485<br />
Connector Spring-cage terminal block<br />
Wiring (see schema next) 2 Wires: A, B<br />
Number of slaves 256 (if RS485 technology of slaves allows it too)<br />
Protocol ModBus-RTU ‘Master’ and ‘Slave’<br />
Isolation No isolation between signals A - B and Power Supply<br />
Termination Termination not required.<br />
Failsafe bias resistors included: pullup and pulldown resistors which assures a<br />
logical level TRUE when A and B are opened or in short-circuit.<br />
Temperature<br />
Storage -40…+70 °C<br />
Working -20...+70 °C<br />
Hydrometry 5 to 95 % without condensation<br />
Altitude Maximum 4000 m.<br />
Dimensions DIN Rail model - Rack1<br />
On Rack1, w/o connectors Height x Depth x Width: 150 x 115 x 40mm (5.9 x 4.53 x 1.58 inches)<br />
Weight 300 gr<br />
Dimensions IP68 model<br />
With glands Height x Depth x Width: 140 x 76.2 x 177.8 mm (5.51 x 3 x 7 inches)<br />
Weight (without battery) 1328 g<br />
Certifications<br />
See page 4<br />
17.5.1. Button (Working modes)<br />
On the front side of TBOX U<strong>LP</strong>, a button allows checking the working mode and resetting the CPU.<br />
See chapters 5.6. and 5.8.<br />
17.6. 5 VDC + LCD display (option)<br />
5 VDC Power Supply<br />
Current<br />
LCD<br />
Max. 220 mA<br />
Lines 2x16 alphanumeric characters<br />
Consumption<br />
With backlight: 160 mA<br />
Without backlight: 30 mA<br />
Operating temperature 0 .. + 50 °C<br />
Protocol ModBus-RTU: Feature: Address: Operation: Quantity:<br />
Row1 0000 write analog 8<br />
Row2 0008 write analog 8<br />
Backlight 0000 write digital 1<br />
Transitor Out 0001 write digital 1<br />
Transistor Output Jumper J5.<br />
Max. current on 5 VDC: 250 mA<br />
Version: 2.08 <strong>TBox</strong> - U<strong>LP</strong> 165
17.7. GSM (option)<br />
Modem GSM/GPRS<br />
Model SAGEM HiLo<br />
Frequencies Quad-BAND: GSM 850 / EGSM 900 / DCS 1800 / PCS 1900 MHz<br />
GPRS<br />
Class 10 (4+1/3+2) with support PBCCH , SMS and DATA<br />
Emitting power CLASS 4 (2W) for EGSM900<br />
CLASS 1 (1W) for DCS1800 and PCS1900<br />
Antenna connector Screw connector, type FME Plug<br />
17.8. RS232 & Switching (option)<br />
RS232<br />
On field, use ACC-GSM-ANT (+3 dB external antenna), ACC-GSM-ANT-FLAT (+2 dB<br />
external flat mount antenna) or ACC-GSM-CARANT (magnetic car antenna).<br />
In Hazardous environment, a +0 dB antenna should be used: ACC-GSM-ANTATEX<br />
IN ATEX MODEL (models with options -SM01),<br />
THIS BOARD DOES NOT INCLUDE THE 12 VDC OUTPUT<br />
Connector RJ50<br />
Wiring (see schema next) Full RS232 port, with 2 supplementary connections<br />
Communication Local or Modem<br />
12 VDC Power Supply Output - NOT AVAILABLE IN ATEX MODEL<br />
Availability on models <strong>WM</strong>100-S, <strong>WM</strong>200-S, <strong>LP</strong>400-S<br />
Voltage (typical) 12 VDC<br />
Current (max.) 350 mA<br />
Protection SMD fuse between battery and primary of power supply<br />
Connector Available on separate connector and RJ50 (see wiring)<br />
Variable Internal DO (D0.0.1.3) to switch the output<br />
Switch of Power Supply Output<br />
Availability on models <strong>WM</strong>100-S, <strong>WM</strong>200-S, <strong>LP</strong>400-S, <strong>LP</strong>450-S<br />
Type Current Sourcing (PNP transistor)<br />
Voltage (max.) 30 VDC<br />
Current - continuous (max.) 1.6 A<br />
Current - peak (max.) 7 A during 5 ms. each 100 ms.<br />
Protection No protection<br />
Connector Available on separate connector (see wiring)<br />
Variable Internal DO (D0.0.1.4) to switch the output<br />
Digital Output<br />
Type Current Sinking (NPN transistor)<br />
Voltage Maximum: 30 VDC<br />
Current Maximum: 45 mA<br />
Output Impedance 60 Ω<br />
Protection No protection<br />
Connector Available on RJ50 connector (see wiring)<br />
Variable Internal DO (D0.0.1.4) to switch the output (same DO as above)<br />
Version: 2.08 <strong>TBox</strong> - U<strong>LP</strong> 166
17.9. I/O<br />
Group 1 – Internal I/O<br />
AI_0: Battery 0 with -<strong>WM</strong> and <strong>LP</strong>-400, voltage of Lithium battery 1 (both battery in //)<br />
AI_1: Battery 1 with -<strong>WM</strong> and <strong>LP</strong>-400, voltage of Lithium battery 2 (both battery in //)<br />
AI_2: Internal Temp Temperature inside the module (°C)<br />
D0_3: Enable 12 V with -S model, enable 12 V output<br />
D0_4: Enable Swith Power with -S model, enable transistor switch<br />
AI_5: DC Power voltage with <strong>LP</strong>-450 only, Input DC voltage<br />
Principle of measurement - “Slow Sampling”<br />
Group 2 - Digital Inputs<br />
Group 6 - Counter / Flow<br />
Concerns the 4 DI of TBOX <strong>WM</strong> and the 8 DI of TBOX <strong>LP</strong><br />
To avoid unnecessary consumption, <strong>TBox</strong> U<strong>LP</strong> acquires the digital inputs during a very short time on a regular<br />
base. ‘Ultra Low Power’ application supposes no external power, which means <strong>TBox</strong> U<strong>LP</strong> must power Digital<br />
Inputs.<br />
TBOX U<strong>LP</strong> applies a voltage of 3.3V to a pull-up resistor during 739 µsec. After 500 µsec. TBOX U<strong>LP</strong> reads the input.<br />
This mechanism is carried out 8 times per second<br />
Principle of measurement - “Fast Sampling”<br />
Concerns DI-0 and DI-1 when their associated variable “Counter HS” is Tagged.<br />
The 2 first DI act as interrupts on the microprocessor.<br />
The corresponding input stage in then powered permanently, to support high frequency (< 10 kHz)<br />
Digital Input<br />
Dry Contact, NPN transistor Switch closed = logical '1'<br />
Switch open = logical '0'<br />
Voltage at input Voltage = 0 V = logical '1' (Switching '0' to '1' max. 2 V)<br />
Voltage > 2 V = logical '0' (Switching '1' to '0' min. 0.5 V)<br />
Current at input<br />
Typical Source Current<br />
(with dry contact or NPN cabling)<br />
Sink Current @ 12 VDC<br />
(with incoming voltage cabling)<br />
Resistance at input<br />
33 µA<br />
6.8 mA<br />
Impedance Typical 101 kΩ<br />
Minimum Typical 90 kΩ<br />
Protection<br />
Inverted polarity protected<br />
Protection EMC RC<br />
Isolation<br />
Between inputs No isolation<br />
To the power supply No isolation<br />
“Counter” & “Flow” inputs<br />
The 4 inputs 4 Hz with a cycle ratio of 50 %<br />
Wake up rate Max. 1 minute<br />
“Counter -HS” input<br />
DI-0 and DI-1 10 kHz<br />
Number of pulses Max. 65535 pulses between 2 wake up periods<br />
Version: 2.08 <strong>TBox</strong> - U<strong>LP</strong> 167
Group 3 - Digital Outputs<br />
Output<br />
Type Current Sinking (NPN transistor)<br />
Voltage per output Maximum: 30 VDC<br />
Current per output Maximum: 45 mA<br />
Output Impedance 60 Ω<br />
Protection<br />
No protection<br />
Isolation<br />
Between outputs No isolation<br />
To the power supply No isolation<br />
Group 4 - Analog Inputs<br />
Group 7 - Validity<br />
Principle of measurement<br />
Concerns the 2 AI of TBOX <strong>WM</strong> and the 4 AI of TBOX <strong>LP</strong><br />
To avoid unnecessary consumption, TBOX U<strong>LP</strong> reads Analog Inputs during a very short time on a regular base.<br />
‘Ultra Low Power’ application supposes no external power, which means TBOX U<strong>LP</strong> must power Analog Inputs<br />
(through V out).<br />
At a rate and during a period determined in the Tag configuration, TBOX U<strong>LP</strong> applies a voltage of 12V. or 24V. to<br />
power the sensor. See configuration in chapter 8.7.4: Analog Inputs – Acquisition rate<br />
V out<br />
+ 12 VDC max. 45 mA<br />
+ 24 VDC<br />
4..20mA<br />
max. 22 mA<br />
Resolution 12 bits<br />
Mode Unipolar<br />
Precision 0.1 %<br />
Input Impedance Max. 25.3 Ω<br />
Protection Reverse current, over-current (up to 100mA), short circuit between AI power<br />
supply and current input (sensor short circuit).<br />
DI: Validity input associated to Returns ‘0’ when signal < 2.4mA or > 21.6mA<br />
each analog input 4..20mA<br />
0..5 V<br />
Returns ‘1’ when the signal is valid.<br />
Resolution 12 bits<br />
Mode Unipolar<br />
Precision 0.1%<br />
Input Impedance Typical: 104 kΩ<br />
Protection<br />
Isolation<br />
No protection<br />
Between inputs No isolation<br />
To the power supply No isolation<br />
Version: 2.08 <strong>TBox</strong> - U<strong>LP</strong> 168
18. Wiring<br />
18.1. Power Supply<br />
18.1.1. -<strong>WM</strong>100, -<strong>WM</strong>200, -<strong>LP</strong>400<br />
+3.6 VDC<br />
+3.6 VDC<br />
Connector: Spring Cage Terminal block<br />
(see chapter 3.9)<br />
Battery<br />
There is no internal cell lithium battery. When<br />
the external battery is removed, datalogging will<br />
be lost and the RTC will restart at 01/01/1970<br />
(GMT)<br />
POWER SUPPLY IN ATEX ENVIRONMENT<br />
In ATEX environment, you have to use the battery pack ATEX-BAT-PACK.<br />
Version: 2.08 <strong>TBox</strong> - U<strong>LP</strong> 169<br />
+<br />
-<br />
+<br />
-
18.1.2. -<strong>LP</strong>450<br />
+12 VDC<br />
Entity Parameters<br />
RS485<br />
A+<br />
B-<br />
TBOX <strong>LP</strong>450: DC in-GND<br />
Ui= 17 V<br />
Ii= 1.34 A<br />
Pi= 5.69 W<br />
Ci= 2 µF<br />
Li= 0 µH<br />
Power Supply<br />
Connector: Spring Cage Terminal block<br />
(see chapter 3.9)<br />
There is no internal cell lithium battery. When the<br />
external battery is removed, datalogging will be<br />
lost and the RTC will restart at 01/01/1970<br />
(GMT)<br />
WIRING IN HAZARDOUS ENVIRONMENT<br />
Non ATEX classified<br />
Power Supply V OUT<br />
ATEX classified<br />
NON-HAZARDOUS Area<br />
GND<br />
NON-HAZARDOUS Area<br />
V OUT<br />
GND<br />
BARRIER<br />
12 VDC<br />
HAZARDOUS Area<br />
<strong>TBox</strong>-<strong>LP</strong>450<br />
HAZARDOUS Area<br />
<strong>TBox</strong>-<strong>LP</strong>450<br />
Version: 2.08 <strong>TBox</strong> - U<strong>LP</strong> 170<br />
+<br />
-<br />
A+<br />
B-<br />
DC in<br />
GND<br />
DC in<br />
GND
18.2. RS232 – Main Board<br />
Description:<br />
RS232 communication<br />
RS232<br />
Use RJ45 to DB9 adapter: ref. MS-CONV-232<br />
Use DB9 serial cable: ref. MS-CABL-PROG<br />
Connector:<br />
RJ 45<br />
WIRING IN NORMAL ENVIRONMENT<br />
Pin out:<br />
1. RI<br />
2. DCD<br />
3. DTR<br />
4. Gnd<br />
5. RxD (input)<br />
6. TxD (output)<br />
7. CTS (input)<br />
8. RTS (output)<br />
Version: 2.08 <strong>TBox</strong> - U<strong>LP</strong> 171
Wiring to Intrinsically-Safe Apparatus<br />
Entity Parameters<br />
WIRING IN HAZARDOUS ENVIRONMENT<br />
TBOX <strong>WM</strong>: Rx/Tx-GND TBOX <strong>LP</strong>: Rx/Tx-GND<br />
Uo=8.51 V Uo= 8.51 V<br />
Io= 37.5 mA Io= 37.5 mA<br />
Po= 80 mW Po= 80 mW<br />
Ui= 15 V Ui= 15 V<br />
Ii= 150 mA Ii= 150 mA<br />
Pi= 560 mW Pi= 560 mW<br />
Ci= 440 pF Ci= 440 pF<br />
Li= 0 µH Li= 0 µH<br />
Wiring to Non Intrinsically-Safe Apparatus<br />
Power<br />
Source<br />
Entity Parameters<br />
+<br />
NON-HAZARDOUS Area<br />
Non IS Apparatus<br />
Power<br />
- GND<br />
IS Apparatus<br />
Simple Apparatus<br />
TBOX <strong>WM</strong>: Rx/Tx-GND TBOX <strong>LP</strong>: Rx/Tx-GND<br />
Ui= 15 V Ui= 15 V<br />
Ii= 150 mA Ii= 150 mA<br />
Ci= 440 pF Ci= 440 pF<br />
Li= 0 µH Li= 0 µH<br />
Tx<br />
Rx<br />
GND<br />
HAZARDOUS Area<br />
Version: 2.08 <strong>TBox</strong> - U<strong>LP</strong> 172<br />
Tx<br />
Rx<br />
BARRIER<br />
GND<br />
RxD<br />
TxD<br />
<strong>TBox</strong>-U<strong>LP</strong><br />
GND<br />
HAZARDOUS Area<br />
<strong>TBox</strong>-U<strong>LP</strong><br />
RxD<br />
TxD<br />
GND
18.3. RS232 – Option Board<br />
Description:<br />
RS232 communication<br />
IN ATEX MODEL (with options -SM01),<br />
THIS BOARD DOES NOT INCLUDE THE 12 VDC OUTPUT<br />
RJ45 vs. RJ50<br />
A RJ45 connector enters a RJ50 socket.<br />
It uses pins 2 to 9 of RJ50 sockets and is<br />
then compatible with RJ45 socket.<br />
Connector:<br />
RJ 50<br />
RS 232 Adapter between RJ45 and SUB-D 9 + Wiring to a PC<br />
Pin out:<br />
RJ 50<br />
1. see jumper below<br />
2. RI (input)<br />
3. DCD (input)<br />
4. DTR (output)<br />
5. Gnd<br />
6. RxD (input)<br />
7. TxD (output)<br />
8. CTS (input)<br />
9. RTS (output)<br />
10. see jumper below<br />
Adapter PC Description<br />
RJ 45 DB-9 DB-9<br />
2 1 1 DCD (Data Carrier Detect)<br />
5 2 2 RxD (Receive Data)<br />
6 3 3 TxD (Transmit Data)<br />
3 4 4 DTR (Data Terminal Ready)<br />
4 5 5 GND (Ground)<br />
6 6 DSR (Data Set Ready)<br />
8 7 7 RTS (Request To Send)<br />
7 8 8 CTS (Clear To Send)<br />
1 9 9 RI (Ring indicator)<br />
Reference adapter= MS-CONV-232<br />
Reference RS232 cable= MS-CABL-PROG<br />
Use RJ45 to DB9 adapter: ref. MS-CONV-232<br />
Use DB9 serial cable: ref. MS-CABL-PROG<br />
WIRING IN NORMAL ENVIRONMENT<br />
Version: 2.08 <strong>TBox</strong> - U<strong>LP</strong> 173
Wiring to Intrinsically-Safe Apparatus<br />
Entity Parameters<br />
WIRING IN HAZARDOUS ENVIRONMENT<br />
TBOX <strong>WM</strong>: Rx/Tx-GND TBOX <strong>LP</strong>: Rx/Tx-GND<br />
Uo=8.51 V Uo= 8.51 V<br />
Io= 67.2 mA Io= 67.2 mA<br />
Po= 143 mW Po= 143 mW<br />
Ui= 15 V Ui= 15 V<br />
Ii= 150 mA Ii= 150 mA<br />
Pi= 560 mW Pi= 560 mW<br />
Ci= 970 pF Ci= 970 pF<br />
Li= 0 µH Li= 0 µH<br />
Wiring to Non Intrinsically-Safe Apparatus<br />
Power<br />
Source<br />
Entity Parameters<br />
+<br />
NON-HAZARDOUS Area<br />
Non IS Apparatus<br />
Power<br />
- GND<br />
IS Apparatus<br />
Simple Apparatus<br />
TBOX <strong>WM</strong>: Rx/Tx-GND TBOX <strong>LP</strong>: Rx/Tx-GND<br />
Ui= 15 V Ui= 15 V<br />
Ii= 150 mA Ii= 150 mA<br />
Ci= 970 pF Ci= 970 pF<br />
Li= 0 µH Li= 0 µH<br />
Tx<br />
Rx<br />
GND<br />
HAZARDOUS Area<br />
RxD<br />
TxD<br />
GND<br />
Version: 2.08 <strong>TBox</strong> - U<strong>LP</strong> 174<br />
Tx<br />
Rx<br />
BARRIER<br />
GND<br />
TxD<br />
GND<br />
Serial board<br />
HAZARDOUS Area<br />
Serial board<br />
RxD
18.3.1. Jumper Settings<br />
Jumper allows assigning different signals to pin 1 and pin 10 of RJ50 connector.<br />
You have to unscrew the serial board to access the jumper.<br />
JUMPER SETTINGS for C1D1 and NORMAL ENVIRONMENT models:<br />
Example: Serial model for<br />
Class1, Div1 or normal<br />
environment<br />
Jumper connections Jumper 1 - Pin1 Jumper 2 - Pin 10<br />
: 1-2. 12 VDC (tot: 350mA) + 12 VDC. max. 175mA + 12 VDC. max. 175mA<br />
: 3-4. “switch power” output<br />
(tot: 350mA)<br />
“in” from connector “Switch Power”.<br />
max. 175mA<br />
: 5-6 Digital Output (NPN). See wiring GND<br />
JUMPER SETTINGS for ATEX models:<br />
“out” from connector “Switch Power”<br />
max. 175mA<br />
Jumper connections Jumper 1 - Pin1 Jumper 2 - Pin 10<br />
: 1-2. NO CONNECTION NO CONNECTION NO CONNECTION<br />
: 3-4. “switch power” output<br />
(tot: 350mA)<br />
RS 232<br />
Power Supply<br />
“in” from connector “Switch Power”.<br />
max. 175mA<br />
: 5-6 Digital Output (NPN). See wiring GND<br />
See wiring the Digital Outputs at chapter 18.7.<br />
Protection<br />
Zener<br />
Jumper 1<br />
Jumper 2<br />
“out” from connector “Switch Power”<br />
max. 175mA<br />
Version: 2.08 <strong>TBox</strong> - U<strong>LP</strong> 175<br />
5-3-1
18.4. RS485 - Main Board<br />
Description:<br />
RS485 communication<br />
18.4.1. <strong>WM</strong>100, -<strong>WM</strong>200, -<strong>LP</strong>400<br />
18.4.2. -<strong>LP</strong>450<br />
RS485<br />
RS485<br />
Gnd<br />
About RS485 cabling:<br />
1 2 3<br />
A+<br />
Gnd<br />
B-<br />
Gnd<br />
A+<br />
Gnd<br />
B-<br />
A+<br />
B-<br />
Connector: Spring Cage Terminal block<br />
(see chapter 3.9)<br />
RS485<br />
RS485<br />
Use a twisted pair for signal A and B.<br />
RS 485 is not isolated. If cabling equipment in different buildings (different<br />
Earth), you have to use ACC-RS485 (ask your local distributor)<br />
Maximum length depends on quality of cable, speed and quantity of<br />
stations (max. 32 stations). In good condition, guaranteed to 1.2 km (max.<br />
32 stations @ 9600 Bps)<br />
In practice, longer distance can be reached with lower Baudrate and fewer<br />
stations.<br />
Cable:<br />
- Twisted pair (2 pairs)<br />
- cross-section: minimum 0.5mm²<br />
- screening : pair and global screening<br />
- reference: Li2YCY-PiMF<br />
Version: 2.08 <strong>TBox</strong> - U<strong>LP</strong> 176
Wiring to Intrinsically-Safe Apparatus<br />
Entity Parameters<br />
WIRING IN HAZARDOUS ENVIRONMENT<br />
TBOX <strong>WM</strong>: A/B-GND TBOX <strong>LP</strong>: A/B-GND<br />
Uo=8.51 V Uo= 8.51 V<br />
Io= 156 mA Io= 156 mA<br />
Po= 332 mW Po= 332 mW<br />
Ui= 8.51 V Ui= 8.51 V<br />
Ii= 310 mA Ii= 310 mA<br />
Pi= 660 mW Pi= 660 mW<br />
Ci= 220 pF Ci= 220 pF<br />
Li= 0 µH Li= 0 µH<br />
Wiring to Non Intrinsically-Safe Apparatus<br />
Power<br />
Source<br />
Entity Parameters<br />
+<br />
NON-HAZARDOUS Area<br />
Non IS Apparatus<br />
Power<br />
- GND<br />
TBOX <strong>WM</strong>: A/B-GND TBOX <strong>LP</strong>: A/B-GND<br />
Ui= 8.51 V Ui= 8.51 V<br />
Ii= 310 mA Ii= 310 mA<br />
Ci= 220 pF Ci= 220 pF<br />
Li= 0 µH Li= 0 µH<br />
A<br />
B<br />
GND<br />
IS Apparatus<br />
Simple Apparatus<br />
HAZARDOUS Area<br />
A<br />
B<br />
GND<br />
Version: 2.08 <strong>TBox</strong> - U<strong>LP</strong> 177<br />
A<br />
B<br />
BARRIER<br />
GND<br />
B<br />
GND<br />
<strong>TBox</strong>-U<strong>LP</strong><br />
HAZARDOUS Area<br />
A<br />
<strong>TBox</strong>-U<strong>LP</strong>
18.5. Digital Inputs - Counter inputs<br />
18.5.1. -<strong>WM</strong>100, -<strong>WM</strong>200<br />
I/O Connector<br />
18.5.2. -<strong>LP</strong>400, -<strong>LP</strong>450<br />
I/O Connector<br />
Connector: Spring Cage Terminal block<br />
(see chapter 3.9)<br />
WIRING IN NORMAL ENVIRONMENT<br />
Dry contact NPN transistor Voltage<br />
DI x<br />
GND<br />
Di 0 Di 1 Di 2 Di 3 Gnd<br />
Di 4 Di 5 Di 6 Di 7 Gnd<br />
Di 0 Di 1 Di 2 Di 3 Gnd<br />
Version: 2.08 <strong>TBox</strong> - U<strong>LP</strong> 178<br />
DI x<br />
GND<br />
Sensor<br />
DI x<br />
GND
WIRING IN HAZARDOUS ENVIRONMENT<br />
Wiring to Intrinsically-Safe Apparatus / Simple Apparatus<br />
Entity Parameters<br />
TBOX <strong>WM</strong>: Di x-GND TBOX <strong>LP</strong>: Di x-GND<br />
Uo= 7.51 V Uo= 7.51 V<br />
Io= 33.1 mA Io= 66.1 mA<br />
Po= 62 mW Po= 124 mW<br />
Ui= 10 V Ui= 10 V<br />
Ii= 100 mA Ii= 100 mA<br />
Pi= 250 mW Pi= 250 mW<br />
Ci= 440 pF Ci= 880 pF<br />
Li= 0 µH Li= 0 µH<br />
Wiring to Non Intrinsically-Safe Apparatus<br />
Power<br />
Source<br />
Entity Parameters<br />
+<br />
-<br />
NON-HAZARDOUS Area<br />
Non IS Apparatus<br />
POWER<br />
GND<br />
IS Apparatus<br />
Simple Apparatus<br />
SIGNAL<br />
GND<br />
TBOX <strong>WM</strong>: Di x-GND TBOX <strong>LP</strong>: Di x-GND<br />
Ui= 10 V Ui= 10 V<br />
Ii= 100 mA Ii= 100 mA<br />
Pi= 250 mW Pi= 250 mW<br />
Ci= 440 pF Ci= 880 pF<br />
Li= 0 µH Li= 0 µH<br />
HAZARDOUS Area<br />
SIGNAL<br />
Version: 2.08 <strong>TBox</strong> - U<strong>LP</strong> 179<br />
GND<br />
BARRIER<br />
Di x<br />
<strong>TBox</strong>-U<strong>LP</strong><br />
GND<br />
HAZARDOUS Area<br />
Di x<br />
<strong>TBox</strong>-U<strong>LP</strong><br />
GND
18.6. Digital Outputs - Main Board<br />
18.6.1. -<strong>WM</strong>100, -<strong>WM</strong>200<br />
18.6.2. -<strong>LP</strong>400, -<strong>LP</strong>450<br />
See wiring above.<br />
I/O Connector<br />
Gnd is common to<br />
all I/O's and to the<br />
power supply<br />
I/O Connector<br />
Connector: Spring Cage Terminal block<br />
(see chapter 3.9)<br />
WIRING IN NORMAL ENVIRONMENT<br />
Version: 2.08 <strong>TBox</strong> - U<strong>LP</strong> 180<br />
0 V<br />
Gnd DO 0 DO 1 DO 2 DO 3<br />
Load<br />
Load<br />
Load<br />
+5..30 VDC<br />
Load<br />
Gnd DO 4 DO 5 DO 6 DO 7<br />
Gnd DO 0 DO 1 DO 2 DO 3
WIRING IN HAZARDOUS ENVIRONMENT<br />
Wiring to Intrinsically-Safe Apparatus / Simple Apparatus<br />
Entity Parameters<br />
TBOX <strong>WM</strong>: DO x-GND TBOX <strong>LP</strong>: DO x-GND<br />
Uo= 7.51 V Uo= 7.51 V<br />
Io= 3.31 mA Io= 6.61 mA<br />
Po= 6.2 mW Po= 12.4 mW<br />
Ui= 10 V Ui= 10 V<br />
Ii= 100 mA Ii= 100 mA<br />
Pi= 250 mW Pi= 250 mW<br />
Ci= 880 pF Ci= 1.32 nF<br />
Li= 0 µH Li= 0 µH<br />
Wiring to Non Intrinsically-Safe Apparatus<br />
Power<br />
Source<br />
Entity Parameters<br />
+<br />
-<br />
NON-HAZARDOUS Area<br />
Non IS Apparatus<br />
POWER<br />
GND<br />
IS Apparatus<br />
Simple Apparatus<br />
INPUT<br />
GND<br />
TBOX <strong>WM</strong>: DO x-GND TBOX <strong>LP</strong>: DO x-GND<br />
Ui= 10 V Ui= 10 V<br />
Ii= 100 mA Ii= 100 mA<br />
Pi= 250 mW Pi= 250 mW<br />
Ci= 880 pF Ci= 1.32 nF<br />
Li= 0 µH Li= 0 µH<br />
HAZARDOUS Area<br />
INPUT<br />
Version: 2.08 <strong>TBox</strong> - U<strong>LP</strong> 181<br />
GND<br />
BARRIER<br />
DO<br />
<strong>TBox</strong>-U<strong>LP</strong><br />
GND<br />
HAZARDOUS Area<br />
DO<br />
<strong>TBox</strong>-U<strong>LP</strong><br />
GND
18.7. Digital Outputs - Option Board<br />
The Serial Option board is also equipped with:<br />
¯ an internal 12 VDC output (for instance to power an external modem)<br />
THIS OUTPUT IN NOT AVAILABLE ON ATEX MODEL<br />
¯ a NPN digital output<br />
¯ an electronic switch, to switch an external power<br />
Connectors<br />
RS232<br />
Wiring External Power Supply<br />
For equipotentiality reason, it is<br />
mandatory to cable 0V ( - ) of<br />
external power supply to GND.<br />
Make sure it is done before<br />
connecting + VDC or serial port<br />
Wiring 12 VDC output<br />
Switch Power<br />
12 VDC<br />
RJ50 is compatible with RJ45.<br />
To cable RS232 to RJ50 connector, see point 3 above.<br />
Switch Power<br />
12 VDC<br />
WIRING IN NORMAL ENVIRONMENT<br />
Switch Power<br />
12 VDC<br />
+ -<br />
Load<br />
External power:<br />
max. 1.6A at 30 VDC<br />
max. 0.35 A at 12 VDC<br />
Version: 2.08 <strong>TBox</strong> - U<strong>LP</strong> 182<br />
Load<br />
+<br />
External power:<br />
max. 1.6A at 30 VDC<br />
-
Pins 1 and 10 of RJ50 can be connected to different signals (See jumper settings at chapter 18.3.1).<br />
When the digital output NPN is cabled, use the following wiring:<br />
Wiring Digital Output (NPN)<br />
Wiring Digital Output (NPN)<br />
V out<br />
Power<br />
Source GND<br />
Wiring Switch Power<br />
V out<br />
Power<br />
Source GND<br />
Entity Parameters<br />
External Power:<br />
Max. 45mA/30VDC<br />
1. OUT<br />
2. RI (input)<br />
3. DCD (input)<br />
4. DTR (output)<br />
5. Gnd<br />
6. RxD (input)<br />
7. TxD (output)<br />
8. CTS (input)<br />
9. RTS (output)<br />
10. GND<br />
WIRING IN HAZARDOUS ENVIRONMENT<br />
Non IS Apparatus<br />
Non IS Apparatus<br />
0V<br />
NON-HAZARDOUS Area<br />
Load<br />
NON-HAZARDOUS Area<br />
Load<br />
Load<br />
BARRIER<br />
BARRIER<br />
TBOX <strong>WM</strong>: Output-GND TBOX <strong>LP</strong>: Output-GND<br />
Ui= 15 V Ui= 15 V<br />
Ii= 150 mA Ii= 150 mA<br />
Pi= 560 mW Pi= 560 mW<br />
Ci= 970 pF Ci= 970 pF<br />
Li= 0 µH Li= 0 µH<br />
HAZARDOUS Area<br />
<strong>TBox</strong>-U<strong>LP</strong><br />
RJ50<br />
Version: 2.08 <strong>TBox</strong> - U<strong>LP</strong> 183<br />
1<br />
10<br />
DO<br />
GND<br />
HAZARDOUS Area<br />
1<br />
2<br />
<strong>TBox</strong>-U<strong>LP</strong><br />
CITO-2
18.8. Analog Inputs – Current<br />
18.8.1. -<strong>WM</strong>100, -<strong>WM</strong>200<br />
18.8.2. -<strong>LP</strong>400, -<strong>LP</strong>450<br />
Wiring to 2-wires sensor<br />
+<br />
SENSOR<br />
-<br />
I/O Connector<br />
I/O Connector<br />
Connector: Spring Cage Terminal block<br />
(see chapter 3.9)<br />
In order to save energy, <strong>TBox</strong> U<strong>LP</strong> controls the power of the sensor. It activates<br />
power on pin PS x at a frequency and a period defined in the Tag configuration<br />
(see chapter 8.7.4. Analog Inputs – Acquisition rate).<br />
PS x +12 (45mA) or<br />
+24 (22mA)<br />
I in x<br />
GND<br />
WIRING IN NORMAL ENVIRONMENT<br />
Measure<br />
Version: 2.08 <strong>TBox</strong> - U<strong>LP</strong> 184<br />
R in<br />
Gnd PS U in<br />
0 0<br />
Gnd PS U in<br />
2 2<br />
Gnd PS U in<br />
0 0<br />
I in<br />
0<br />
I in<br />
0<br />
I in<br />
2<br />
PS<br />
1<br />
PS<br />
1<br />
PS<br />
3<br />
U in<br />
1<br />
U in<br />
1<br />
U in<br />
3<br />
I in<br />
1<br />
I in<br />
1<br />
I in<br />
3
WIRING IN HAZARDOUS ENVIRONMENT<br />
Wiring to Intrinsically-Safe Apparatus / Simple Apparatus<br />
Entity Parameters<br />
IS Apparatus<br />
Simple Apparatus<br />
TBOX <strong>WM</strong>: TBOX <strong>LP</strong>:<br />
I in x-GND PS-GND I in x-GND PS-GND<br />
Uo= 8.51 V Uo= 29.35 V Uo= 8.51 V Uo= 29.35 V<br />
Io= 113.3 mA Io= 181.74 mA Io= 8.7 mA Io= 92.65 mA<br />
Po= 241 mW Po= 1.33 W Po= 18.44 mW Po= 680 mW<br />
Ui= 29.35 V Ui= 29.35 V Ui= 29.35 V Ui= 29.35 V<br />
Ii= 120 mA Ii= 100 mA Ii= 100 mA Ii= 100 mA<br />
Pi= 881 mW Pi= 734 mW Pi= 734 mW Pi= 734 mW<br />
Ci= 660 pF Ci= 44 nF Ci= 1.32 nF Ci= 88 nF<br />
Li= 0 µH Li= 0 µH Li= 0 µH Li= 0 µH<br />
Analog Input: Current Sensor with 2 wires<br />
TBOX <strong>WM</strong>: TBOX <strong>LP</strong>:<br />
I in x - PS I in x - PS<br />
Uo= 29.35 V Uo= 29.35 V<br />
Io= 86.05 mA Io= 91.35 mA<br />
Po= 658 mW Po= 91.2 mW<br />
Ci= 44.66 nF Ci= 89.32 nF<br />
Li= 0 µH Li= 0 µH<br />
Analog Input: Current Sensor with 3 wires<br />
TBOX <strong>WM</strong>: TBOX <strong>LP</strong>:<br />
HAZARDOUS Area<br />
SIGNAL<br />
I in x + PS - GND I in x + PS - GND<br />
Uo= 29.35 V Uo= 29.35 V<br />
Io= 204.2 mA Io= 98.90 mA<br />
Po= 1.50 W Po= 726 mW<br />
Ci= 44.66 nF Ci= 89.32 nF<br />
Li= 0 µH Li= 0 µH<br />
Version: 2.08 <strong>TBox</strong> - U<strong>LP</strong> 185<br />
PS<br />
GND<br />
<strong>TBox</strong>-U<strong>LP</strong><br />
PS x<br />
I in x<br />
GND
Wiring to Non Intrinsically-Safe Apparatus<br />
Entity Parameters<br />
NON-HAZARDOUS Area<br />
Non IS Apparatus<br />
POWER<br />
SIGNAL<br />
GND<br />
BARRIER<br />
HAZARDOUS Area<br />
TBOX <strong>WM</strong>: TBOX <strong>LP</strong>:<br />
I in x-GND PS-GND I in x-GND PS-GND<br />
Ui= 29.35 V Ui= 29.35 V Ui= 29.35 V Ui= 29.35 V<br />
Ii= 120 mA Ii= 100 mA Ii= 100 mA Ii= 100 mA<br />
Pi= 881 mW Pi= 734 mW Pi= 734 mW Pi= 734 mW<br />
Ci= 660 pF Ci= 44 nF Ci= 1.32 nF Ci= 88 nF<br />
Li= 0 µH Li= 0 µH Li= 0 µH Li= 0 µH<br />
<strong>TBox</strong>-U<strong>LP</strong><br />
Version: 2.08 <strong>TBox</strong> - U<strong>LP</strong> 186<br />
PS x<br />
I in x<br />
GND
18.9. Analog Inputs – Voltage<br />
18.9.1. -<strong>WM</strong>100, -<strong>WM</strong>200<br />
I/O Connector<br />
18.9.2. -<strong>LP</strong>400, -<strong>LP</strong>450<br />
I/O Connector<br />
Wiring to 2-wires sensor<br />
PS x<br />
+ U in x<br />
Measure<br />
-<br />
SENSOR<br />
GND<br />
Connector: Spring Cage Terminal block<br />
(see chapter 3.9)<br />
In order to save energy, <strong>TBox</strong> U<strong>LP</strong> controls the power of the sensor. It activates<br />
power on pin PS x at a frequency and a period defined in the Tag configuration<br />
(see chapter 8.7.4. Analog Inputs – Acquisition rate).<br />
WIRING IN NORMAL ENVIRONMENT<br />
+12 (45mA) or<br />
+24 (22mA)<br />
Gnd PS U in<br />
0 0<br />
Gnd PS U in<br />
2 2<br />
Gnd PS U in<br />
0 0<br />
Version: 2.08 <strong>TBox</strong> - U<strong>LP</strong> 187<br />
I in<br />
0<br />
I in<br />
0<br />
I in<br />
2<br />
PS<br />
1<br />
PS<br />
1<br />
PS<br />
3<br />
U in<br />
1<br />
U in<br />
1<br />
U in<br />
3<br />
I in<br />
1<br />
I in<br />
1<br />
I in<br />
3
WIRING IN HAZARDOUS ENVIRONMENT<br />
Wiring to Intrinsically-Safe Apparatus / Simple Apparatus<br />
Entity Parameters<br />
TBOX <strong>WM</strong>: TBOX <strong>LP</strong>:<br />
I in x-GND PS-GND I in x-GND PS-GND<br />
Uo= 8.51 V Uo= 29.35 V Uo= 8.51 V Uo= 29.35 V<br />
Io= 113.3 mA Io= 181.74 mA Io= 8.7 mA Io= 92.65 mA<br />
Po= 241 mW Po= 1.33 W Po= 18.44 mW Po= 680 mW<br />
Ui= 29.35 V Ui= 29.35 V Ui= 29.35 V Ui= 29.35 V<br />
Ii= 120 mA Ii= 100 mA Ii= 100 mA Ii= 100 mA<br />
Pi= 881 mW Pi= 734 mW Pi= 734 mW Pi= 734 mW<br />
Ci= 660 pF Ci= 44 nF Ci= 1.32 nF Ci= 88 nF<br />
Li= 0 µH Li= 0 µH Li= 0 µH Li= 0 µH<br />
Analog Input: Voltage Sensor<br />
IS Apparatus<br />
Simple Apparatus<br />
TBOX <strong>WM</strong>: TBOX <strong>LP</strong>:<br />
U in x + PS - GND U in x + PS - GND<br />
Uo= 29.35 V Uo= 29.35 V<br />
Io= 204.3 mA Io= 101.66 mA<br />
Po= 1.5 W Po= 746 mW<br />
Ci= 44.66 nF Ci= 89.32 nF<br />
Li= 0 µH Li= 0 µH<br />
HAZARDOUS Area<br />
SIGNAL<br />
U in x<br />
Version: 2.08 <strong>TBox</strong> - U<strong>LP</strong> 188<br />
PS<br />
GND<br />
<strong>TBox</strong>-U<strong>LP</strong><br />
PS x<br />
GND
Wiring to Non Intrinsically-Safe Apparatus<br />
Entity Parameters<br />
NON-HAZARDOUS Area<br />
Non IS Apparatus<br />
POWER<br />
SIGNAL<br />
GND<br />
BARRIER<br />
HAZARDOUS Area<br />
TBOX <strong>WM</strong>: TBOX <strong>LP</strong>:<br />
U in x-GND PS-GND U in x-GND PS-GND<br />
Ui= 29.35 V Ui= 29.35 V Ui= 29.35 V Ui= 29.35 V<br />
Ii= 120 mA Ii= 100 mA Ii= 100 mA Ii= 100 mA<br />
Pi= 881 mW Pi= 734 mW Pi= 734 mW Pi= 734 mW<br />
Ci= 660 pF Ci= 44 nF Ci= 1.32 nF Ci= 88 nF<br />
Li= 0 µH Li= 0 µH Li= 0 µH Li= 0 µH<br />
<strong>TBox</strong>-U<strong>LP</strong><br />
Version: 2.08 <strong>TBox</strong> - U<strong>LP</strong> 189<br />
PS x<br />
U in<br />
GND
Version: 2.08 <strong>TBox</strong> - U<strong>LP</strong> 190
APPENDIXES<br />
Version: 2.08 <strong>TBox</strong> - U<strong>LP</strong> 191
Appendix A. Licenses<br />
The software itself is not protected; it can be installed on any<br />
PC and used to develop TWinSoft document (online or offline)<br />
and to monitor TBOX U<strong>LP</strong>.<br />
The only operation protected is the sending of an application to TBOX U<strong>LP</strong>.<br />
In order to find the best way for you we offer different possibilities:<br />
A.1. The Evaluation mode<br />
You don't need any software or hardware dongle. You are able to develop a complete TBOX U<strong>LP</strong> project<br />
without any restriction, but when you send the application to TBOX U<strong>LP</strong>, it will stop after 2 hours. This is<br />
a good solution for testing programs or creating a demo.<br />
A.2. The Dongle<br />
It is a hardware device placed on your PC. The dongle consists in a USB key. TWinSoft regularly checks<br />
the presence of it. It allows you sending applications to as many TBOX U<strong>LP</strong> as you want, with any PC.<br />
A.3. The Code (License)<br />
Available from the menu ‘Help’ � ‘License Register.’<br />
Using information of the PC (the Company name, the User name, a Serial Number), you receive a code<br />
that you enter in the 'License' field. Once entered, you can send any application as if you had a dongle<br />
(see previous).<br />
The only restriction is that it must always be on the same PC.<br />
If you wish to use another PC, you have the possibility to remove registration on the first PC and register<br />
back on the second.<br />
A.4. The TWinSoft LITE<br />
Available from the menu ‘Help’ � ‘TWinSoft Lite configuration.’<br />
This protection mode is ideal for users having one or two TBOX U<strong>LP</strong> units. The dongle or a license might<br />
be too expensive.<br />
TWinSoft LITE code is linked to one TBOX U<strong>LP</strong>; it allows you sending an application to the TBOX U<strong>LP</strong> for<br />
which you have the code.<br />
Version: 2.08 <strong>TBox</strong> - U<strong>LP</strong> 192
Appendix B. Time in RTU<br />
One of the biggest issues in Telemetry and data logging equipment is the handling of time.<br />
In order to have a universal solution, wherever the TBOX U<strong>LP</strong> is used, TWinSoft, OS of the RTU and<br />
‘Windows’ collecting data, shares the mechanism of time management.<br />
Time in the RTU is based on UTC time.<br />
B.1. Time in <strong>TBox</strong> U<strong>LP</strong><br />
The RTC (Real Time Clock)<br />
The TBOX U<strong>LP</strong> is equipped with a RTC chip (Real Time Clock). The RTC is used to manage all internal time.<br />
Functions of the RTC:<br />
• it is a calendar Y2000 compatible.<br />
• it updates the UTC time (see next).<br />
• it communicates with OS to handle the UTC time, used for data logging.<br />
The RTC time is used at start-up of TBOX U<strong>LP</strong> to update the UTC.<br />
UTC Time<br />
UTC time is based on the number of seconds since 1/1/1970 at Greenwich latitude. It is used as internal<br />
timestamp to each event (alarm, chronology, …)<br />
The UTC time is converted into Analog System Variables to give access to time information: second,<br />
minute, hour, day, month, year, week.<br />
Changing UTC time automatically updates the RTC.<br />
When time information needs to be sent (in a report, as header of an e-mail, in the Analog System<br />
Variable), it is always computed using the UTC time and according to the zone and daylight saving<br />
specified in the ‘General’ RTU properties.<br />
<strong>TBox</strong> U<strong>LP</strong> Time setting<br />
In order to set TBOX U<strong>LP</strong> to PC time, an option is available in the 'Communication' menu of the main<br />
menu bar; option available when connected (locally or remotely) to the RTU<br />
When sending an application to TBOX<br />
U<strong>LP</strong>, TWinSoft updates automatically the<br />
RTU time to the PC time.<br />
This feature can be deactivated from the<br />
‘Send application’ menu.<br />
RTU time can be checked anytime doing a RTU Identification, from the main 'Communication' menu.<br />
Version: 2.08 <strong>TBox</strong> - U<strong>LP</strong> 193
Winter/Summer time<br />
When installed in regions using daylight saving, the TBOX U<strong>LP</strong> handles the changes automatically.<br />
It means that the RTC and Analog System Variable [hour] are automatically updated when the time<br />
changes.<br />
Standard changing time in Europe:<br />
- last Sunday of October: 3:00 � 2:00<br />
- last Sunday of March: 2:00 � 3:00<br />
B.2. Data logging<br />
Chronologies<br />
In chronologies, the time is recorded for each log of data. The time recorded is the UTC time.<br />
When retrieving the data, the PC reads the UTC time and converts it according to the local time of the<br />
PC, depending on the time settings of the PC.<br />
When a winter/summer time change occurs, the TBOX U<strong>LP</strong> is informed and automatically adapts all<br />
coming timestamps to the new time.<br />
Sampling tables<br />
In sampling tables, the TBOX U<strong>LP</strong> records the timestamp of the last record only. The other timestamps<br />
are built up when retrieving the data (from TWinSoft, TView, in report, ...).<br />
A choice had to be made between with period > 1 hour: either having always the same period of<br />
recording or having always the same 'hour' of recording. The latter case has been chosen. When a<br />
winter/summer time change occurs, the target time is automatically updated for sampling tables having<br />
a period > 1 hour.<br />
Example:<br />
If recording a value once a day at 6.00 in the morning, the recording will always happen at 6.00, but<br />
when changing from winter to summer, the sampling period will be 23 hours and when changing from<br />
summer to winter the period will be 25 hours.<br />
Periodic events<br />
When a periodic event is defined with a period > 1 hour, its target time is automatically adjusted when a<br />
changing winter/summer happens.<br />
Version: 2.08 <strong>TBox</strong> - U<strong>LP</strong> 194
B.3. System variables associated<br />
Some System Variables of TBOX U<strong>LP</strong> are associated to the Time. They can be used in Ladder/BASIC logic<br />
to execute specific operations:<br />
Type Variable Comment<br />
Analog Second, 6 Registers giving the time in hour, minute, second, day, month and<br />
Minutes, … year.<br />
Analog UtcTim Time in UTC format (number of seconds since 1/1/1970 at Greenwich<br />
latitude)<br />
Analog ZonBia Time difference in seconds between the local time and time UTC<br />
Analog ZonID ID of the zone where RTU is installed. It uses regional settings of the<br />
PC<br />
B.4. Summary<br />
Summary of time handling in the different cases:<br />
1. System variables in the RTU They display the local time where the RTU is installed, according to the<br />
Regional settings declared in the ‘General’ RTU properties<br />
2. Identification from TWinSoft The UTC time is computed according to Regional settings of the PC<br />
3. List of alarms in a report The time is calculated according to RTU local time (see 1. above)<br />
4. List of alarms in TWinSoft See point 2. above<br />
5. Object ‘Time’ in WebForm See point 2. above<br />
6. System variables in WebForm Displays the value of the variables, as explained point 1. above<br />
Version: 2.08 <strong>TBox</strong> - U<strong>LP</strong> 195
Appendix C. Pack & Go<br />
C.1. Presentation<br />
Pack & Go is a tool that builds up one file with your complete project, including TWinSoft document,<br />
WebForms, Reports, OS,...<br />
The goal is to backup or to transfer a complete project without missing files or to update an RTU with<br />
the complete project without requiring advanced knowledge of TWinSoft.<br />
All files are compressed and packed into one file with the extension .tpg (TWinSoft Pack & Go).<br />
Once a project is packed, it can be unpacked and/or updated to the RTU from a double click on the .tpg<br />
file.<br />
TWinSoft needs to be installed on the machine used to update the RTU with .tpg file, but the TWinSoft<br />
license is not required. The license is required to pack.<br />
C.2. Pack<br />
To access Pack & Go menu, select from the main<br />
menu ‘File’ � ‘Pack & Go…’<br />
Select the button ‘Pack …’<br />
IF YOU ARE OFF LINE while compiling, TWinSoft uses the<br />
OS indicated as ‘Off line OS’ in the ‘General RTU<br />
properties’. This OS, and only this OS, will be sent to the<br />
RTU.<br />
Version: 2.08 <strong>TBox</strong> - U<strong>LP</strong> 196
All Files of the project, TWinSoft<br />
document, WebForm, html pages,<br />
OS, … are packed in one file, with<br />
the extension .tpg<br />
C.3. Unpack<br />
To open the Unpack window, double click a file with the extension .tpg.<br />
Unpack menu offers 2 features:<br />
1. Restore a project<br />
Extract a project into a directory of<br />
your PC. This option is very<br />
convenient for backing up a project<br />
being sure you don't miss any file.<br />
Option available from the main<br />
menu: ‘Tools’ � Unpack.<br />
Be sure the user running the .tpg file runs a<br />
version of TWinSoft at least equivalent to the one<br />
used to pack the files.<br />
Version: 2.08 <strong>TBox</strong> - U<strong>LP</strong> 197
2. Update an RTU<br />
Update an RTU with a complete<br />
project, including the application,<br />
OS, WebForms, report, ...from a<br />
unique file.<br />
The button ‘PC Setup…’ gives you<br />
access to the configuration of the<br />
PC, to communicate with the RTU.<br />
The button ‘Update RTU’ sends<br />
the project and OS to the RTU.<br />
If packed OS is different from OS in the RTU, Pack & Go<br />
updates the RTU with the OS.<br />
Languages supported are English, French and German.<br />
It cannot be selected from 'Unpack' menu but changed from TWinSoft main menu: 'Tools' �<br />
'Language'<br />
Version: 2.08 <strong>TBox</strong> - U<strong>LP</strong> 198
Appendix D. ModBus Rerouting<br />
ModBus rerouting allows associating two ‘ModBus-RTU’ communication ports, in order to access a<br />
remote RTU with TWinSoft from your computer by rerouting through a ‘Master’ RTU.<br />
The typical application, is dialling an RTU to access a remote RTU connected to the RS485 network.<br />
You access routing from the main menu of<br />
TWinSoft: Communication � Routing<br />
Address: Address of the RTU you are physically<br />
connected (the ‘Master’)<br />
Timeout: Rx timeout used to communicate with<br />
the Remote device<br />
Route from: incoming communication port (the<br />
port of the ‘Master’ TWinSoft is<br />
connected to)<br />
to: outgoing communication port (the<br />
port of the ‘Master’ connected to the remote<br />
device)<br />
Sequence to access a Remote RTU in rerouting:<br />
1. Open in TWinSoft the document corresponding to the ‘Master’ RTU<br />
2. Fill in the Routing request menu as explained above.<br />
3. Open in TWinSoft the document corresponding to the ‘Remote’ RTU (if you were using modem<br />
communication, you will have to redial the “Master”).<br />
You are in communication with the Remote Device.<br />
This sequence is only possible when Master and Remote are the<br />
same model of RTU. If not, you have to pre-configure the Analog<br />
system variable (see next)<br />
Version: 2.08 <strong>TBox</strong> - U<strong>LP</strong> 199
Analog System variable ‘Rerout’<br />
An analog system variable ‘Rerout’ can also be used in your Process to force a rerouting. This 16 bits<br />
variable represents 16 communication ports, with the LSB corresponding to COM1.<br />
Example: A rerouting between COM2(…000010) and COM3 (…000100) corresponds<br />
to the decimal value = 6 (…000110)<br />
Sending a program using Rerouting<br />
Rerouting is only possible with local communication ports<br />
configured in ModBus-RTU (not in ModBus-ASCII)<br />
For instance, you can send a program by dialing a “Master”, and accessing “Slaves” on RS485 network.<br />
Doing a ‘local’ rerouting, for instance from a RS232 port to a<br />
RS485, we recommend using the same Baudrate on all ports.<br />
If you have ‘Remote Tags’ running between ‘Master’ and<br />
‘Slave’, we recommend stopping them during rerouting, to<br />
avoid communication errors.<br />
Version: 2.08 <strong>TBox</strong> - U<strong>LP</strong> 200
Appendix E. Terminal mode<br />
The ‘Terminal’ mode allows accessing a modem in ‘AT command’.<br />
Before starting:<br />
The TWinSoft connection to the RTU MUST be through COM1 (RS232) at 115200 Bps<br />
(corresponding to the internal Baudrate of the modem).<br />
It is available from the menu ‘Communication’ � ‘Terminal’:<br />
Example with <strong>WM</strong>-200-G<br />
Version: 2.08 <strong>TBox</strong> - U<strong>LP</strong> 201
Examples of commands to check the availability of a GSM:<br />
To quit the Terminal mode, click the button “Stop”<br />
To activate the echo in the<br />
window, type<br />
ATE1 <br />
(you don’t see what you type, it is<br />
normal)<br />
The modem answers with<br />
OK<br />
From now on you will see<br />
what you type<br />
To check if the SIM card is<br />
ready, type<br />
AT+CPIN? <br />
The modem answers<br />
CPIN: READY<br />
To check the GSM operator<br />
has been found, type<br />
AT+COPS? <br />
The modem answers with a<br />
code or the name of the<br />
operator<br />
To check the quality of the<br />
signal, type<br />
AT+CSQ <br />
The modem answers<br />
+CSQ:xx,99<br />
xx: must be between 20<br />
and 31<br />
Version: 2.08 <strong>TBox</strong> - U<strong>LP</strong> 202
Appendix F. Synchronization of Counters<br />
If you use the Digital Inputs for counting pulses, and that a mechanical counter exits on site, you wish to<br />
have the equivalence in TBOX U<strong>LP</strong>. On this way, on a simple remote connection you can be informed on<br />
the value of the counter.<br />
To each digital input, a ‘Totalizer’ variable is associated. This variable is supposed to represent the<br />
mechanical counter.<br />
After installing the TBOX U<strong>LP</strong> on site, you will need to synchronize the counter of TBOX U<strong>LP</strong> to the<br />
mechanical counter.<br />
Procedure.<br />
1. Install and cable the TBOX U<strong>LP</strong> on site.<br />
2. Note the value of the mechanical counter on a paper.<br />
3. Press ‘PGM’ button. This action memorizes the current value of the counter of TBOX U<strong>LP</strong>.<br />
4. At the office, start TWinSoft and connect to TBOX U<strong>LP</strong>.<br />
5. When connected, open the<br />
menu: ‘Communication’ →<br />
‘Synchronize counters’<br />
6. In the list of counters, enter the<br />
value of mechanical counter(s)<br />
you noted(see point 2 above).<br />
7. The registers of TBOX U<strong>LP</strong> are now updated to the value of the mechanical counter + the<br />
number of pulses since the moment you pressed ‘PGM’.<br />
Version: 2.08 <strong>TBox</strong> - U<strong>LP</strong> 203
A<br />
Access level ........................................................... 157<br />
Access security<br />
deactivating ............................................................... 159<br />
TWinSoft document ................................................... 159<br />
Alarm<br />
end of alarm ................................................................ 55<br />
events stack ............................................................... 131<br />
Alarm stack ..................................................... 54, 119<br />
Alarms ................................................................... 119<br />
advanced parameters .................................................. 54<br />
analog condition ........................................................ 122<br />
chain .................................................................. 121, 123<br />
digital condition ......................................................... 120<br />
display list of .............................................................. 131<br />
e-mail ......................................................................... 125<br />
FTP ............................................................................. 126<br />
group of recipients ..................................................... 127<br />
holidays ...................................................................... 129<br />
link ..................................................................... 121, 123<br />
Message ..................................................................... 127<br />
ModBus...................................................................... 124<br />
NTP ............................................................................ 126<br />
printer ........................................................................ 125<br />
recipients ................................................................... 124<br />
SMS ............................................................................ 125<br />
time slices .................................................................. 129<br />
timetables .................................................................. 130<br />
Analog inputs<br />
configuration ............................................................... 81<br />
Awake mode ........................................................... 17<br />
B<br />
Battery<br />
installation ................................................................... 24<br />
life time ........................................................................ 19<br />
Button ........................................................ 42, 44, 165<br />
C<br />
Caller ID................................................................... 77<br />
Certifications ............................................................. 4<br />
Chronologies ......................................................... 141<br />
Communication<br />
PC Setup ....................................................................... 38<br />
status ........................................................................... 41<br />
testing with TWinSoft .................................................. 41<br />
to other RTU .............................................................. 147<br />
variables ....................................................................... 75<br />
Compiling an application ........................................ 45<br />
Consumption .......................................................... 19<br />
Counters<br />
synchronization .......................................................... 203<br />
INDEX<br />
CPU<br />
communication ports .................................................. 64<br />
Version: 2.08 <strong>TBox</strong> - U<strong>LP</strong> 204<br />
D<br />
Datalogging ........................................................... 141<br />
chronologies .............................................................. 143<br />
sampling tables ......................................................... 144<br />
Debugging ............................................................. 116<br />
Digital inputs<br />
duty cycle .................................................................... 57<br />
wiring ........................................................................ 178<br />
Document<br />
backup ......................................................................... 44<br />
Dongle ................................................................... 192<br />
Drivers ..................................................................... 51<br />
DynDNS ................................................................. 114<br />
E<br />
Earth Grounding ...................................................... 27<br />
e-mail ............................................. 100, 120, 123, 125<br />
SMTP from ................................................................... 54<br />
SMTP subject ............................................................... 55<br />
Event stack ...................................................... 54, 131<br />
F<br />
Flow input ............................................................... 84<br />
Flowmeters ............................................................. 56<br />
FTP ........................................................................ 126<br />
G<br />
Global code ........................................................... 157<br />
Global Reset ............................................................ 42<br />
GPRS ........................................................................ 68<br />
communicating with TWinSoft .............................. 40, 72<br />
communication variables ............................................ 69<br />
IP settings .................................................................... 71<br />
with SMS ..................................................................... 71<br />
GPS .......................................................................... 90<br />
Ground .................................................................... 27<br />
Group of Tags .......................................................... 92<br />
GSM<br />
Signal level ................................................................... 77<br />
GSM - data .............................................................. 67<br />
GSM message<br />
header ......................................................................... 55<br />
GSM/GPRS<br />
configuration ............................................................... 65<br />
technical specifications ..................................... 165, 166
H<br />
Hardware<br />
concept ........................................................................ 15<br />
installation ................................................................... 26<br />
Hazardous Environment ................................ 162, 163<br />
Historical data ....................................................... 119<br />
I<br />
I/O<br />
analog inputs ............................................................... 82<br />
battery voltage ............................................................ 79<br />
counter - High Speed ................................................... 83<br />
counter - Totalizer ........................................................ 83<br />
digital inputs ................................................................ 79<br />
digital outputs ............................................................. 81<br />
flow .............................................................................. 84<br />
system inputs ............................................................... 79<br />
technical specifications .............................................. 167<br />
temperature ................................................................ 79<br />
Intrinsically-safe .................................................... 162<br />
IP Parameters ........................................................ 105<br />
ISP.................................................................. 106, 108<br />
L<br />
LED Status................................................................ 44<br />
License................................................................... 192<br />
code ........................................................................... 192<br />
dongle ........................................................................ 192<br />
evaluation .................................................................. 192<br />
TWinSoft LITE ............................................................ 192<br />
Login/Logout ......................................................... 158<br />
Low power operation<br />
external modem .......................................................... 73<br />
of Analog Input ...................................................... 18, 82<br />
of GSM/GPRS ......................................................... 18, 65<br />
of the CPU ................................................................... 17<br />
M<br />
Memory ........................................................... 45, 164<br />
Message<br />
dynamic value ............................................................ 128<br />
ModBus<br />
rerouting .................................................................... 199<br />
ModBus address of station ..................................... 50<br />
default address ............................................................ 43<br />
Modbus device ...................................................... 147<br />
ModBus device<br />
trigger ........................................................................ 148<br />
Models .................................................................... 16<br />
Modem<br />
caller ID ........................................................................ 77<br />
external modem .......................................................... 73<br />
on PC ........................................................................... 39<br />
states ........................................................................... 77<br />
Version: 2.08 <strong>TBox</strong> - U<strong>LP</strong> 205<br />
N<br />
NTP ........................................................................ 113<br />
O<br />
Operating System .................................................... 43<br />
Overview ................................................................. 13<br />
P<br />
Pack & Go .............................................................. 196<br />
Password utility ..................................................... 157<br />
PC<br />
system requirement .................................................... 32<br />
PC Setup<br />
IP address settings ...................................................... 40<br />
Periodic events ...................................................... 152<br />
Permanent mode .................................................... 17<br />
POP3 ...................................................................... 111<br />
controlling RTU .......................................................... 136<br />
Power Supply<br />
battery......................................................................... 24<br />
external ....................................................................... 25<br />
Precautions................................................................ 4<br />
Protection<br />
TWinSoft document .................................................. 154<br />
PSTN<br />
signal level ................................................................... 77<br />
R<br />
RAS ........................................................................ 126<br />
ReadSMS ............................................................... 133<br />
Remote Tags .......................................................... 147<br />
creating ..................................................................... 149<br />
timing parameters ..................................................... 151<br />
Report............................................ 100, 119, 120, 123<br />
Reset ........................................................................ 42<br />
Resources ................................................................ 63<br />
CPU ............................................................................. 63<br />
I/O ............................................................................... 78<br />
RS232 (optional)<br />
technical specifications ............................................. 166<br />
RTC ........................................................................ 193<br />
RTU Properties ........................................................ 49<br />
advanced ..................................................................... 52<br />
general ........................................................................ 50<br />
name of the station ..................................................... 50<br />
Remote Tags ................................................................ 59<br />
report name ................................................................ 62<br />
summer/winter ........................................................... 51<br />
TCP/IP .......................................................................... 59<br />
Tel. number ................................................................. 51<br />
time zone .................................................................... 51<br />
wake-up....................................................................... 51<br />
RTU startup ............................................................. 52<br />
RTU Type ........................................................... 37, 50<br />
Run Time Parameters ............................................ 100
S<br />
Safety Earth XE "Ground"Ground ........................... 27<br />
Sampling tables ..................................................... 142<br />
advanced properties .................................................... 58<br />
Saving a document .................................................. 44<br />
Security ................................................................. 154<br />
Sending an application ............................................ 45<br />
Serial port ............................................................... 64<br />
SIM card .................................................................. 30<br />
Sleep mode ............................................................. 17<br />
SMS<br />
acknowledgment with incoming SMS ........................ 134<br />
controlling RTU .......................................................... 136<br />
header ......................................................................... 55<br />
SMTP ..................................................................... 109<br />
System Variables<br />
analog .......................................................................... 89<br />
digital ........................................................................... 86<br />
GPS .............................................................................. 90<br />
T<br />
Tags ......................................................................... 92<br />
analog variable............................................................. 96<br />
digital variable ............................................................. 94<br />
group ........................................................................... 92<br />
I/O ................................................................................ 93<br />
initial value .................................................................. 97<br />
internal variables ......................................................... 94<br />
ModBus address .......................................................... 99<br />
presentation .............................................................. 100<br />
text variable ................................................................. 97<br />
write .......................................................................... 100<br />
<strong>TBox</strong> Mail ................................................................ 33<br />
TCP ports ................................................................. 59<br />
TCP/IP<br />
debugging .................................................................. 116<br />
extended log ................................................................ 60<br />
GPRS settings ............................................................... 71<br />
PC setup settings ......................................................... 40<br />
TCP/IP address<br />
incoming call ................................................................ 60<br />
Technical Specifications<br />
all models .......................................................... 162, 164<br />
Temperature units ................................................... 58<br />
Terminal ................................................................ 201<br />
Time ...................................................................... 193<br />
system variables ........................................................ 195<br />
week of the year .......................................................... 91<br />
winter/summer ......................................................... 194<br />
Timers ..................................................................... 91<br />
TView .................................................................... 119<br />
TWinSoft<br />
starting ........................................................................ 36<br />
TWinSoft Suite<br />
installation ................................................................... 33<br />
programs ..................................................................... 35<br />
system requirement .................................................... 32<br />
Version: 2.08 <strong>TBox</strong> - U<strong>LP</strong> 206<br />
U<br />
UTC Time ............................................................... 193<br />
V<br />
Variables<br />
system ......................................................................... 86<br />
W<br />
Wake-up<br />
of CPU.................................................................... 17, 51<br />
of GSM in case of alarm .............................................. 66<br />
of GSM with communication variables ....................... 66<br />
WebForm .............................................................. 100<br />
WebForm Viewer .................................................... 33<br />
Week of the year ..................................................... 91<br />
Wiring<br />
analog input ...................................................... 184, 187<br />
connectors ................................................................... 28<br />
digital input ............................................................... 178<br />
digital output - main board ....................................... 180<br />
digital output - option board ..................................... 182<br />
power supply ............................................................. 169<br />
RS232 - Main Board .................................................. 171<br />
RS232 (optional) ........................................................ 173<br />
RS485 ........................................................................ 176<br />
Wizard ..................................................................... 37