THE FIRST LEGO LEAGUE TABLE
THE FIRST LEGO LEAGUE TABLE
THE FIRST LEGO LEAGUE TABLE

You also want an ePaper? Increase the reach of your titles
YUMPU automatically turns print PDFs into web optimized ePapers that Google loves.
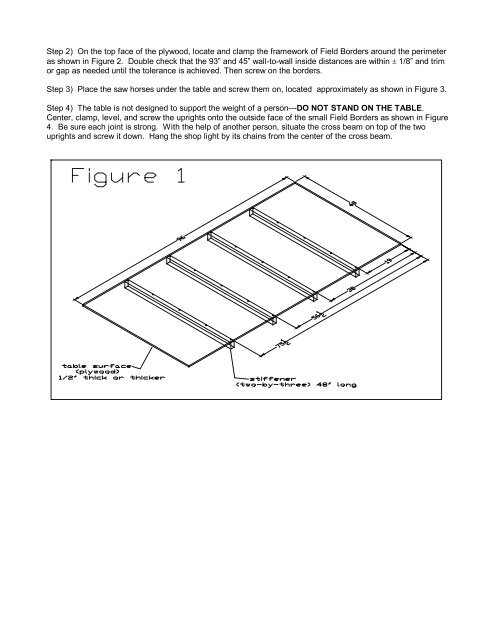
Step 2) On the top face of the plywood, locate and clamp the framework of Field Borders around the perimeter<br />
as shown in Figure 2. Double check that the 93 and 45 wall-to-wall inside distances are within ± 1/8 and trim<br />
or gap as needed until the tolerance is achieved. Then screw on the borders.<br />
Step 3) Place the saw horses under the table and screw them on, located approximately as shown in Figure 3.<br />
Step 4) The table is not designed to support the weight of a person---DO NOT STAND ON <strong>THE</strong> <strong>TABLE</strong>.<br />
Center, clamp, level, and screw the uprights onto the outside face of the small Field Borders as shown in Figure<br />
4. Be sure each joint is strong. With the help of another person, situate the cross beam on top of the two<br />
uprights and screw it down. Hang the shop light by its chains from the center of the cross beam.