Camp-on-a-Disk Guide - Robotics Academy - Carnegie Mellon ...
Camp-on-a-Disk Guide - Robotics Academy - Carnegie Mellon ...
Camp-on-a-Disk Guide - Robotics Academy - Carnegie Mellon ...
You also want an ePaper? Increase the reach of your titles
YUMPU automatically turns print PDFs into web optimized ePapers that Google loves.
<str<strong>on</strong>g>Camp</str<strong>on</strong>g>-<strong>on</strong>-a-<strong>Disk</strong> <strong>Guide</strong><br />
to planning, organizing and operating your own Robocamp<br />
The <strong>Robotics</strong> <strong>Academy</strong>, an educati<strong>on</strong>al outreach of <strong>Carnegie</strong> Mell<strong>on</strong> University,<br />
has been operating LEGO ® robotics camps (“Robocamps”) for several years.<br />
The formula that we’ve developed has been tested <strong>on</strong> thousands of children.<br />
By following the suggesti<strong>on</strong>s in this guide, you can take advantage of procedures<br />
that have proven useful in real camps. You also have the flexibility to<br />
customize camp operati<strong>on</strong>s to suit your own unique learning envir<strong>on</strong>ment.<br />
<str<strong>on</strong>g>Camp</str<strong>on</strong>g> Sessi<strong>on</strong>s<br />
This guide is divided into 10 sessi<strong>on</strong>s. A sessi<strong>on</strong> is an undefi ned unit<br />
of time– it could be a few hours or it could be a day.<br />
Generally, sessi<strong>on</strong>s are designed as half-day units of instructi<strong>on</strong>.<br />
So, if you are running a two week day-camp that runs from 9:00 A.M.<br />
until 11:30 A.M. each day you would complete <strong>on</strong>e sessi<strong>on</strong>. Sessi<strong>on</strong><br />
1 would start the camp. Sessi<strong>on</strong> 2 would run <strong>on</strong> day two, and so <strong>on</strong><br />
through Sessi<strong>on</strong> 10.<br />
The <strong>Robotics</strong> <strong>Academy</strong> recommends half-day camps. However, If your<br />
camp is planned for <strong>on</strong>e week <strong>on</strong>ly, the goal would be to complete two<br />
sessi<strong>on</strong>s per day.<br />
At times, it might make sense to run sessi<strong>on</strong>s in an order different from<br />
the way they are numbered.<br />
Sessi<strong>on</strong> Organizers<br />
• Sessi<strong>on</strong> 1<br />
Administrati<strong>on</strong>, part identifi cati<strong>on</strong>, building your fi rst robot<br />
• Sessi<strong>on</strong> 2<br />
Working in ROBOLAB, programming with motors and timers<br />
• Sessi<strong>on</strong> 3<br />
Programming with touch sensors<br />
• Sessi<strong>on</strong> 4<br />
Programming with rotati<strong>on</strong>/angle sensors<br />
• Sessi<strong>on</strong> 5<br />
Programming with light sensors<br />
• Sessi<strong>on</strong> 6<br />
Problem solving, integrating multiple sensors, advanced programming<br />
• Sessi<strong>on</strong>s 7 - 10<br />
Main competiti<strong>on</strong>– “Voyage to the Sea Lab Nautilus”<br />
Teaching is a craft; each of you do it differently. Every <str<strong>on</strong>g>Camp</str<strong>on</strong>g> Director<br />
has a different set of resources to offer their camp. Feel free to modify<br />
any and all of this material to suit your needs.<br />
AQUABOTS CD-Rom Navigati<strong>on</strong><br />
The Aquabots CD is divided into 3 activity areas: BASE, BOAT, and<br />
BERMUDA. Sessi<strong>on</strong>s 1 through 6 are designed to be implemented at<br />
the BASE and <strong>on</strong> the BOAT.<br />
Resources <strong>on</strong> the CD are identifi ed in this document using the following<br />
protocol: (example) Boat / ROBOLAB Trials / Touch Sensors / Bugbot.<br />
The fi rst word “Boat” indicates that you will fi nd these resources in<br />
the secti<strong>on</strong> of the CD named Boat. “ROBOLAB Trials” is an organizer<br />
within the Boat secti<strong>on</strong> and “Touch Sensors / Bugbot” is a selecti<strong>on</strong><br />
available under “ROBOLAB Trials.”<br />
The Nati<strong>on</strong>al <strong>Robotics</strong> Engineering C<strong>on</strong>sortium<br />
www.rec.ri.cmu.edu/educati<strong>on</strong><br />
roboed@rec.ri.cmu.edu<br />
Voyage to Sea Lab Nautilus AQUABOTS CD-Rom<br />
Start in the “Missi<strong>on</strong> Lockbox”<br />
Before anything else, take some time to review the material in the Missi<strong>on</strong><br />
Lockbox (accessed using the butt<strong>on</strong> at the lower right corner of the<br />
navigati<strong>on</strong>).<br />
The password to enter is “aquabots” (all lower case).<br />
There are many useful items in here, ranging from essentials like<br />
registrati<strong>on</strong> forms and an itinerary overview to promoti<strong>on</strong>al posters,<br />
scoring guides and more. Here’s a quick summary–<br />
Missi<strong>on</strong> Lockbox<br />
• Read First<br />
General CD operating informati<strong>on</strong>, support c<strong>on</strong>tact info, related<br />
product installs and links<br />
• Forms and Posters (some editable in Microsoft Word®)<br />
Applicati<strong>on</strong> / registrati<strong>on</strong> form, medical release, liability release,<br />
PR and/or informati<strong>on</strong>al release and color posters<br />
• Scoring<br />
Detailed list of how scoring works for AQUABOTS activities<br />
• Itinerary<br />
<str<strong>on</strong>g>Camp</str<strong>on</strong>g> rules, camp goals, overview of how camp will play out<br />
• Gameboard<br />
Map / layout of gameboard with measurements, prop positi<strong>on</strong>s, etc.<br />
Plans for c<strong>on</strong>structi<strong>on</strong> of the physical board are available in the<br />
Extra Resources folder in the root directory of the CD.<br />
• Rules<br />
General guide to rules that dictate challenge play and competiti<strong>on</strong>s.<br />
Can be modifi ed at camp director’s discreti<strong>on</strong>.<br />
• Overview<br />
Brief guide to logistical c<strong>on</strong>cerns and resources necessary to<br />
outfi t and run a Robocamp. Materials list also included.<br />
Note that much of this material is accessible from the root directory of the<br />
CD in a folder named Extra Resources.<br />
The Aquabots CD c<strong>on</strong>tains a wealth of resources that allow you to create<br />
an engaging educati<strong>on</strong>al experience in a n<strong>on</strong>-traditi<strong>on</strong>al learning envir<strong>on</strong>ment.<br />
The fi rst time you use a <str<strong>on</strong>g>Camp</str<strong>on</strong>g>-On-A-<strong>Disk</strong> CD-Rom you’ll want to<br />
click through all of the links to get a good feel for the available c<strong>on</strong>tent<br />
before you begin the camp.<br />
Extra Robocamp Activities<br />
You can implement these into the robocamp at your discreti<strong>on</strong>.<br />
Robots to Build<br />
It is diffi cult for students who are unfamiliar with LEGO parts to build<br />
structurally sound robots in their fi rst attempts. The Aquabots CD-Rom<br />
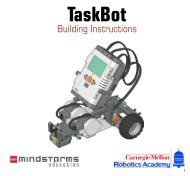
includes step-by-step instructi<strong>on</strong>s for building 8 different robot chassis;<br />
Tankbot, Blueballast, Mariner, Hydro Nut, Crabby, Sea Horse, Bottom<br />
Feeder, and the Remote Walker. Our intenti<strong>on</strong> is to give campers stable<br />
structures to work with initially and then to challenge them to modify the<br />
robots to accomplish more specialized tasks.<br />
Note that the “walking robots” are not as reliable for point-to-point<br />
navigati<strong>on</strong> as the wheeled robots.<br />
<str<strong>on</strong>g>Camp</str<strong>on</strong>g>ers Team Pages <strong>on</strong> the Web<br />
Not all Robocamps will have the resources to have attendees post<br />
web-based home pages, but this is a great activity that children love to<br />
participate in. If you have the capability, c<strong>on</strong>sider having each team create<br />
a website of their week’s challenges and triumphs.<br />
For examples, visit the <strong>Robotics</strong> <strong>Academy</strong> website, click <strong>on</strong> the link for “Robocamp”<br />
then scroll to click and view team websites from past years.
Voyage to Sea Lab Nautilus AQUABOTS CD-Rom<br />
Powerpoint Presentati<strong>on</strong>s<br />
Critical thinking, problem solving, and clear communicating are all<br />
skills children are asked to apply through their week in camp. If<br />
logistics allow for it, campers can be asked to create a Powerpoint<br />
presentati<strong>on</strong> summarizing their week of learning and fun.<br />
Crossword Puzzles<br />
Boat / Research Locker / Aquatic Activities. Aquabots provides a<br />
diverse variety of science material– including themed crossword<br />
puzzles. Answers to the crossword puzzles can be found <strong>on</strong> the<br />
Missi<strong>on</strong> Lockbox page (password “aquabots”). Click the blue “light<br />
fi xture” located at the top left of that page to access the answers.<br />
Sketching / Coloring<br />
Boat / Research Locker / Aquatic Activities. Sketching is a great<br />
communicati<strong>on</strong>s tool children can develop. Aquabots includes a<br />
sketching primer that campers will fi nd fun and interesting. There’s<br />
also some marine life and a pirate to color.<br />
Teams & Teamwork<br />
Children are assigned to teams at the beginning of the Robocamp.<br />
Counselors should try to create compatible teams. The camp <strong>on</strong>ly<br />
lasts a week (or two) and the better each team gets al<strong>on</strong>g with its<br />
members the easier the learning and fun will be.<br />
Team members are encouraged to assume different roles each day:<br />
programmer, engineer, project manager, communicati<strong>on</strong>s specialist.<br />
There’s no need to follow this rule to the letter, but we do encourage<br />
campers to share roles. Some campers <strong>on</strong>ly want to build, others<br />
“hog” the computer and <strong>on</strong>ly do programming. We m<strong>on</strong>itor the situati<strong>on</strong><br />
so that all have a chance to do both.<br />
NOTE:<br />
There are children that will go home and tell their parents that they didn’t get<br />
the opportunity to try programming or building robots. If you assign roles campers<br />
must fi ll throughout the week, changing their resp<strong>on</strong>sibilities <strong>on</strong>ce or twice,<br />
you will eliminate this problem to a large degree.<br />
Graduati<strong>on</strong> Day<br />
At the end of each camp, a “graduati<strong>on</strong>” can be held.<br />
The graduati<strong>on</strong> cerem<strong>on</strong>y does several things:<br />
1. Gives the children an opportunity to present what they have<br />
d<strong>on</strong>e / learned.<br />
2. Gives the parents an opportunity to see what their children did.<br />
3. Brings prestige to your camp; bring the media if possible–<br />
we identify a keynote speaker that makes opening remarks.<br />
Sessi<strong>on</strong> 1<br />
Welcoming campers / Building with LEGO<br />
This next secti<strong>on</strong> covers the fi rst day of camp, and is directed<br />
especially at the fi rst time camp director. Remember that Robocamp<br />
is intended to be fun. It’s a camp!<br />
Opening Day<br />
As parents drop children off for the fi rst day of camp remind them<br />
when they will need to come back to pick up their children. Be sure to<br />
tell parents that if they are going to have some<strong>on</strong>e else pick up their<br />
children that you should be notifi ed in advance.<br />
<str<strong>on</strong>g>Camp</str<strong>on</strong>g>ers will not all arrive at the same time. Have something for the<br />
“early birds” to do while waiting for the rest of the campers. Showing<br />
camp related videos <strong>on</strong> a TV or big screen (if possible) is a great way<br />
to fi ll this time.<br />
The fi rst day will involve many administrative tasks– you’ll want to<br />
have everything prepared and rehearsed with your staff in advance.<br />
• Provide NAME TAGS for your campers.<br />
• Assuming that most of the campers may not know each other,<br />
it’s a good idea to have some activity to allow them to ease into<br />
their new envir<strong>on</strong>ment. A good ICEBREAKER ACTIVITY is to<br />
have campers interview each other and then have <strong>on</strong>e camper<br />
introduce the other camper. You may want to prepare a LIST OF<br />
QUESTIONS for the children depending <strong>on</strong> their ages.<br />
• Hand-out a WRITTEN ITINERARY of<br />
how the camp will proceed. (What’s<br />
happening <strong>on</strong> day 1, day 2, etc.)<br />
<str<strong>on</strong>g>Camp</str<strong>on</strong>g>ers can take this home for<br />
parents to review.<br />
• If your camp includes a graduati<strong>on</strong> cerem<strong>on</strong>y, send an<br />
INVITATION to the camper’s parents allowing them some “lead time”<br />
to schedule the day if they wish to attend. When campers know<br />
there is a graduati<strong>on</strong> cerem<strong>on</strong>y where they are resp<strong>on</strong>sible<br />
for presentati<strong>on</strong>s it serves as motivati<strong>on</strong> to complete activities.<br />
• Welcome your campers & INTRODUCE YOURSELF and other<br />
staff members.<br />
• Assign campers to TEAMS. Our suggesti<strong>on</strong> is to pair boys with boys<br />
and girls with girls and also to separate children according to age.<br />
• ASSIGN KITS to teams; remind them about your cleanup<br />
procedures. Make sure that you have a cleanup procedure;<br />
remember that whatever campers d<strong>on</strong>’t clean up you get to clean up!<br />
Review camp rules:<br />
• <str<strong>on</strong>g>Camp</str<strong>on</strong>g>ers will treat every<strong>on</strong>e with respect.<br />
• Cleanup and storage procedures<br />
• Rules for leaving the room or camp facility<br />
• Parent pickup procedures<br />
• Lunch or snack rules<br />
• Your specifi c camp rules<br />
Review the big picture of what campers should be learning:<br />
• Technological literacy<br />
• Programming<br />
• Project Management<br />
• Teamwork<br />
• Problem solving<br />
• Time management<br />
(All qualities future employers will be looking for)<br />
Presenting the Big Picture<br />
The Aquabots Bermuda Triangle Adventure<br />
By adding your own enthusiasm to the “kick off” of the Robocamp, you<br />
can set a mood that will help your campers learn and have fun.<br />
This week, campers (addressed as “Aquanauts” <strong>on</strong> the CD) will be voyaging<br />
to Sea Lab Nautilus, deep beneath the ominous Bermurda Triangle.<br />
They will be designing robots to help accomplish tasks at the base. Over<br />
the length of the “voyage” cadets will experience roles as engineers,<br />
programmers, designers, and researchers.<br />
Roxie S. Rivetminder, the Aquabots Commander-in-Chief, will assist you<br />
in explaining the missi<strong>on</strong> in the Voyage Preview slideshow which can be<br />
found <strong>on</strong> the title page at the bottom left side of the main navigati<strong>on</strong> bar.<br />
Encourage campers to explore this CD because there’s a wealth of<br />
interesting science splashed throughout. For starters, you can direct them<br />
to the crossword puzzles in the Aquatic Activities secti<strong>on</strong> of the Research<br />
Locker. (Crossword answers are in the Missi<strong>on</strong> Lockbox.)<br />
Remind campers that they’ll be working in teams of two, three, or four<br />
depending <strong>on</strong> how the camp is set up. Since campers are encouraged<br />
to exchange roles each day, let them know the various tasks they can<br />
expect to be engaged in. Note what engineering entails, and how robots<br />
can be designed before they are built, but also the importance of “seeing”<br />
how the design might work or not as you actually put the pieces together.<br />
There’s more than <strong>on</strong>e way to do something right! Remind campers that<br />
<strong>on</strong>e of the goals is to develop teamwork, and it is important they work as<br />
a team, giving every<strong>on</strong>e a chance to c<strong>on</strong>tribute equally.<br />
Let campers know that they will complete <strong>on</strong>e or two exercises /<br />
challenges each day. (You can present awards at the graduati<strong>on</strong><br />
cerem<strong>on</strong>y for participati<strong>on</strong> in the challenges.) The challenges in the Base<br />
and Boat secti<strong>on</strong>s are designed to prepare campers for the week-ending<br />
competiti<strong>on</strong> built around the Bermuda / Sea Lab Nautilus Missi<strong>on</strong>.
Voyage to Sea Lab Nautilus AQUABOTS CD-Rom<br />
What to cover in this sessi<strong>on</strong><br />
Remember this is a camp– keep your formal presentati<strong>on</strong> to a<br />
mimimum, and teach c<strong>on</strong>cepts <strong>on</strong> a “need-to-know” basis<br />
• Part identifi cati<strong>on</strong> (they can learn these by reading the names<br />
as they fi nd the parts) encourage campers to use proper terminology<br />
when they discuss parts.<br />
• Parts of the RCX (this can be taught <strong>on</strong> a need-to-know basis)<br />
• Systems in Tankbot (this depends <strong>on</strong> the age of your campers)<br />
• Motors and Timers dem<strong>on</strong>strati<strong>on</strong><br />
• Have campers write a few simple ROBOLAB programs<br />
Learning Objectives for Sessi<strong>on</strong> 1<br />
• Learn camp rules.<br />
• Identify what makes a robot a robot: SPA (Sense / Plan / Act)<br />
• Identify the major comp<strong>on</strong>ents of the RCX.<br />
• Identify the systems that make up Tankbot<br />
- RCX: the c<strong>on</strong>troller<br />
- The Chassis: supports all systems <strong>on</strong> the robot.<br />
- The Motors: move the robot (menti<strong>on</strong> polarity here).<br />
- The C<strong>on</strong>necting Leads: send the signals from the RCX to<br />
the motors and from the sensors to the RCX.<br />
- Sensors: give feedback to the RCX<br />
• Identify parts and build a complete Tankbot.<br />
Sessi<strong>on</strong> 2<br />
<str<strong>on</strong>g>Camp</str<strong>on</strong>g>ers fi rst attempts at Programming<br />
In Sessi<strong>on</strong> 2, campers learn how to navigate in ROBOLAB, the<br />
programming language used to program LEGO robots. (You can also<br />
use other programming languages; NQC, RIS, etc., if you desire.)<br />
<str<strong>on</strong>g>Camp</str<strong>on</strong>g>ers can begin attempting the simple programming challenges<br />
in the Boat / ROBOLAB Trials secti<strong>on</strong>. These exercises teach the<br />
campers how to program their robots to complete some basic<br />
commands: move forward, backward, turn, add modifi ers, and how<br />
to use loops. Depending <strong>on</strong> the age and skill of your campers you<br />
may either point them to the answers given with the ROBOLAB<br />
Trials exercises, or challenge them to develop answers <strong>on</strong> their own.<br />
Based <strong>on</strong> the limited amount of time for Sessi<strong>on</strong> 2 (<strong>on</strong>e day) we<br />
suggest a dem<strong>on</strong>strati<strong>on</strong> of writing basic code to achieve certain<br />
robot “moves” and then challenging campers to revise the programming<br />
in some way.<br />
What to cover in this sessi<strong>on</strong><br />
Review from Sessi<strong>on</strong> 1. Have campers answer these questi<strong>on</strong>s:<br />
A. What is a robot?<br />
B. What does the RCX do?<br />
C. What is a system?<br />
D. Name a few basic LEGO parts.<br />
Starting ROBOLAB<br />
<str<strong>on</strong>g>Camp</str<strong>on</strong>g>ers will need to be able to navigate to ROBOLAB, open the<br />
program, and open Inventor Level Four. Staff from the camp should<br />
dem<strong>on</strong>strate how this is d<strong>on</strong>e.<br />
Storing programs<br />
<str<strong>on</strong>g>Camp</str<strong>on</strong>g>ers should be shown where they should store their programs<br />
<strong>on</strong> the computer. They need to learn how to make a folder, name it,<br />
and store all of their work into the folder.<br />
Basic programming<br />
Moving Forward<br />
• To introduce campers to ROBOLAB, have them write a simple<br />
program to make the robot move forward. This can be found in<br />
Boat / ROBOLAB Trials / Motors & Timers / Moving Forward.<br />
• After they have completed this, have the campers modify their<br />
program so that the robot moves forward for 7 sec<strong>on</strong>ds.<br />
- Teach the campers to use the Replace Tool in ROBOLAB.<br />
- Teach them to use modifi ers. Since<br />
there is no “7-sec<strong>on</strong>d” ic<strong>on</strong>, they will<br />
need to use the questi<strong>on</strong> mark ic<strong>on</strong><br />
and attach a modifi er (an example can<br />
be found in Boat / ROBOLAB Trials / Motors & Timers / Modifi ers)<br />
• Encourage campers to use language that is appropriate to<br />
programming, such as modifi er, ic<strong>on</strong>, and timer.<br />
• Dem<strong>on</strong>strate how to download the program to the RCX.<br />
Remind campers to cover their RCX and IR tower when<br />
sending programs.<br />
Moving Backward<br />
• Have campers write a program to make the robot move backwards<br />
after it has g<strong>on</strong>e forward. This exercise is located in<br />
Boat / ROBOLAB Trials / Motors & Timers / Forward/Reverse<br />
Turning<br />
This exercise encourages campers to think about the physics of turning.<br />
They can study the physical robot for clues.<br />
• Students must fi rst decide which directi<strong>on</strong> the wheels must turn in<br />
order to make a left turn or right turn, and note how this is different<br />
from a car. They should understand that there are three ways to<br />
make the robot turn:<br />
- One wheel remains stati<strong>on</strong>ary while the other wheel moves<br />
forward. (resulting in a wide turn)<br />
- One wheel moves backward while the other wheel moves forward.<br />
(resulting in a point turn)<br />
- One wheel remains stati<strong>on</strong>ary while the other wheel moves<br />
backward. (resulting in a wide turn)<br />
• An example of how to program a point turn can be found in<br />
Boat / ROBOLAB Trials / Rotati<strong>on</strong> Sensors / Point Turns.<br />
Challenge for the Day<br />
• Travel around a box or through a maze!<br />
Note: we are assuming that you are starting with novice programmers. You will<br />
move through these exercises quickly if your campers are more experienced.<br />
• Students will use their understanding of going straight and making<br />
point turns to make their robots travel in a complete square.<br />
• In order to make this a simpler task, have your students use loops.<br />
Get the code in Boat / ROBOLAB Trials / Motors & Timers / Loops.<br />
What might your students have trouble with today?<br />
• Wiring the ic<strong>on</strong>s together can be diffi cult fi rst time ROBOLAB users.<br />
• Troubleshooting programming problems– teach campers to use the<br />
broken arrow tool, which serves as the ROBOLAB compiler.<br />
• Moving between the hand tool, arrow tool, and wiring tool– Teach<br />
campers to use the spacebar and tab key to switch tools.<br />
• Downloading the program to the RCX– campers will often forget to<br />
turn their robots <strong>on</strong>.<br />
• When multiple campers are uploading programs to their RCXs they<br />
should remember to cover the IR tower and RCX or they run the risk<br />
of corrupting the fi rmware of other campers’ robots.<br />
Learning Objectives for Sessi<strong>on</strong> 2<br />
• Open up ROBOLAB<br />
• Write basic programs to move forward, backward, turn,<br />
and navigate around a square.<br />
• Use proper terminology<br />
• Upload code to robots<br />
• Troubleshoot programming problems<br />
Sessi<strong>on</strong> 3<br />
Touch Sensors and C<strong>on</strong>diti<strong>on</strong>al Statements<br />
In Sessi<strong>on</strong> 3, campers will get their fi rst experience programming sensors.<br />
Encourage campers to program using feedback from sensors instead of<br />
timing– children like timing and will try to use timing for everything.
Voyage to Sea Lab Nautilus AQUABOTS CD-Rom<br />
What to cover in this sessi<strong>on</strong><br />
Dem<strong>on</strong>strate how touch sensors work. Bugbot is a great<br />
dem<strong>on</strong>strati<strong>on</strong> of touch sensors that children understand and really<br />
like. (See Boat / ROBOLAB Trials / Touch Sensors / BugBot )<br />
Explain to campers that:<br />
• Touch sensors provide digital feedback; things are either <strong>on</strong> or off.<br />
• When the touch sensor is pressed the circuit is being completed,<br />
which sends a signal to the c<strong>on</strong>troller.<br />
• The RCX shows feedback the robot is getting <strong>on</strong> the view screen.<br />
A example of how touch sensors work can be found at:<br />
Base / Robot Hardware / Sensors / Touch Sensor<br />
Programming Exercises<br />
Go Forward until Touch<br />
Have campers build the touch sensor bumper; Base / Robot<br />
Hardware / Attachments / Touch Sensor.<br />
Challenge the campers to write a program that will make their robot<br />
move forward until the touch sensor hits the wall. When it hits the<br />
wall the robot should move backward, turn, and move forward again.<br />
(Boat / ROBOLAB Trials / Touch Sensors / Wait For Push)<br />
Note: Remind students to build robot behaviors in small parts. Write a simple<br />
behavior (move forward until it hits a wall and stops), test the behavior, and<br />
make sure that <strong>on</strong>e behavior works before adding other behaviors.<br />
Introducti<strong>on</strong> to C<strong>on</strong>diti<strong>on</strong>al Statements<br />
The “Wait For Touch” and “Wait For Let Go” ic<strong>on</strong>s introduce the<br />
c<strong>on</strong>cept of a “c<strong>on</strong>diti<strong>on</strong>al statement”. In “Wait for Let Go”, the robot<br />
will c<strong>on</strong>tinue to move forward until the touch sensor is pressed.<br />
Wait For Let Go<br />
Use the exercise Boat / ROBOLAB Trials / Touch Sensors / Wait<br />
For Let Go. This is in fact more of an engineering challenge than a<br />
programming challenge. <str<strong>on</strong>g>Camp</str<strong>on</strong>g>ers will need to design a switching<br />
system that attaches to the bottom of their robots. (Hint: have them<br />
attach a touch sensor to the light sensor attachment)<br />
“Base Clean-up” Training Task<br />
Remind students they are the new “deckmates” so they must clean<br />
up the base– a task given to all the youngest members of the crew.<br />
They have an advantage over most people given this task, though.<br />
They can use robots! <strong>Guide</strong> them to the challenge <strong>on</strong> the CD and let<br />
them come up with a soluti<strong>on</strong>. The exercise is found in Base / Training<br />
Tasks / Base Clean Up.<br />
What might your students have trouble with today?<br />
• Since this is their fi rst time working with sensors, students may<br />
have a diffi cult time remembering to add modifi ers to their<br />
sensors, and/or wire their sensors into the right ports.<br />
• You will need to teach what the default port is for each sensor<br />
(Port 1) and that the robot w<strong>on</strong>’t get proper feedback unless the<br />
sensor is wired correctly to the robot.<br />
• The ic<strong>on</strong>s for different functi<strong>on</strong>s (wait for push, wait for release,<br />
etc.) look fairly similar, so if something is not working check that<br />
campers are using the correct ic<strong>on</strong>.<br />
• The touch sensor can be diffi cult to use if– mechanically– the<br />
touch sensor attachment doesn’t operate smoothly. This is an<br />
engineering design problem– encourage campers to create their<br />
own soluti<strong>on</strong>.<br />
• Add port modifi ers to all sensor ic<strong>on</strong>s, even if they are using the<br />
default port. It gets campers into the habit of adding the port<br />
modifi ers and will keep them out of trouble when they are using<br />
multiple sensors in future projects.<br />
Learning Objectives for Sessi<strong>on</strong> 3<br />
<str<strong>on</strong>g>Camp</str<strong>on</strong>g>ers should be able to:<br />
• Describe what a sensor is.<br />
• Describe a c<strong>on</strong>diti<strong>on</strong>al statement.<br />
• Describe how modifi ers are used with touch sensors.<br />
• Read the feedback from the view screen<br />
<strong>on</strong> their robot.<br />
• Use c<strong>on</strong>diti<strong>on</strong>al statements to c<strong>on</strong>trol robot<br />
behavior.<br />
• Write programs that use touch sensors to complete<br />
director assigned challenges.<br />
• Cooperatively work in teams.<br />
Sessi<strong>on</strong> 4<br />
Introducti<strong>on</strong> to Rotati<strong>on</strong> / Angle Sensors<br />
The rotati<strong>on</strong> sensor (also known as an angle sensor) is a powerful tool<br />
that campers can use to move point to point <strong>on</strong> the board. To review how<br />
the rotati<strong>on</strong> sensor gives feedback to the RCX go to Base / Robot Hardware<br />
/ Sensors / Rotati<strong>on</strong> Sensors. There are a variety of challenges for<br />
campers that will help them learn how to integrate rotati<strong>on</strong> sensors into<br />
their robot design. Since this is a camp, and children should be learning<br />
by doing, many of these c<strong>on</strong>cepts can be taught <strong>on</strong> a need-to-know basis.<br />
An example that dem<strong>on</strong>strates <strong>on</strong>e way to c<strong>on</strong>nect a rotati<strong>on</strong> sensor can<br />
be found in Base / Robot Hardware / Attachments / Rotati<strong>on</strong> Angle I.<br />
In this sessi<strong>on</strong> campers will be challenged to:<br />
• Add a rotati<strong>on</strong> sensor to their robots:<br />
Base / Robot Hardware / Attachments / Rotati<strong>on</strong> Angle I<br />
• Program their robots to use a rotati<strong>on</strong> sensor<br />
Boat / ROBOLAB Trials / Rotati<strong>on</strong> Sensors / Move Straight<br />
Boat / ROBOLAB Trials / Rotati<strong>on</strong> Sensors / Point Turns<br />
• Complete an Aquabot challenge that uses rotati<strong>on</strong> sensor feedback<br />
Base / Training Tasks / Flag Tripper<br />
Boat / Boat Excursi<strong>on</strong>s / Mail Crate<br />
What to cover in this sessi<strong>on</strong><br />
Build a few robots programmed with rotati<strong>on</strong> sensors so that you can<br />
dem<strong>on</strong>strate how they work. Take a few minutes and explain the following<br />
to the campers:<br />
• A rotati<strong>on</strong> sensor works better than programming with timing. As the<br />
battery level of the RCX changes, the speed of the robot decreases<br />
and so does the distance the robot travels; this makes programming<br />
robots using timing unpredictable. The rotati<strong>on</strong> sensor counts how<br />
many times the wheel turns, therefore robot movement becomes<br />
more predictable.<br />
• A rotati<strong>on</strong> sensor provides analog feedback, which is a range of<br />
numbers.<br />
• The rotati<strong>on</strong> sensor gives both negative and positive feedback.<br />
• The rotati<strong>on</strong> sensor needs to be reset before it can be used. If the<br />
user forgets to reset the rotati<strong>on</strong> sensor, it will c<strong>on</strong>tinue to count,<br />
rather than begin to count at zero.<br />
• <str<strong>on</strong>g>Camp</str<strong>on</strong>g>ers should know that 1/16th of a revoluti<strong>on</strong> is 22.5 degrees.<br />
• Every time a rotati<strong>on</strong> sensor turns <strong>on</strong>e revoluti<strong>on</strong> it counts 16 clicks.<br />
• Feedback from the rotati<strong>on</strong> sensor can be seen immediately <strong>on</strong> the<br />
view screen of the RCX. Dem<strong>on</strong>strate how to use the view screen to<br />
see feedback from the sensor.<br />
The Wait for Rotati<strong>on</strong> ic<strong>on</strong><br />
The “wait for rotati<strong>on</strong>” ic<strong>on</strong> is dem<strong>on</strong>strated in:<br />
Boat / ROBOLAB Trials / Rotati<strong>on</strong> Sensors / Move Straight<br />
Boat / ROBOLAB Trials / Rotati<strong>on</strong> Sensors / Point Turns<br />
When campers have completed the programming exercises you can<br />
assign them another Aquabot exercise from the “Base” or “Boat”, or<br />
have them write a program to move the robot through their own “custom”<br />
camper developed challenge.
Voyage to Sea Lab Nautilus AQUABOTS CD-Rom<br />
What might your students have trouble with today?<br />
• Integrating sensors, grippers, etc. <strong>on</strong>to their robot. These are<br />
mechanical design problems; many campers will need directi<strong>on</strong><br />
implementing their ideas.<br />
• Assigning the proper port to the ic<strong>on</strong> and then actually c<strong>on</strong>necting<br />
the sensor to the right port. Often campers will modify their<br />
robot and it will no l<strong>on</strong>ger work the same because it may be<br />
wired differently.<br />
• Calculating rotati<strong>on</strong> sensor distance. Remind campers that<br />
as the wheel diameter changes so does the distance traveled<br />
per tick. This provides an opportunity to show campers how to<br />
calculate distance traveled per tick based <strong>on</strong> wheel size.<br />
• The rotati<strong>on</strong> sensor ic<strong>on</strong> counts in absolutes so there is no need<br />
to put a negative sign there.<br />
• Determining which is better to use: “the rotati<strong>on</strong> sensor fork” or<br />
the “wait for rotati<strong>on</strong>” ic<strong>on</strong>.<br />
• Students often fi nd their programs not working because they forget<br />
to reset the sensors. Remind your students to get in the habit<br />
of resetting their sensors each time they use the rotati<strong>on</strong> sensor.<br />
Learning Objectives for Sessi<strong>on</strong> 4<br />
• Students should be able to explain the rotati<strong>on</strong> sensor.<br />
• Students should be able to attach a rotati<strong>on</strong> sensor to their robot.<br />
• Students should be able to program their robot, using a<br />
rotati<strong>on</strong> sensor, to complete a camp challenge.<br />
Sessi<strong>on</strong> 5<br />
Introducti<strong>on</strong> to Light Sensors<br />
Light sensors are very reliable and signifi cantly enhance a robot’s<br />
functi<strong>on</strong>ality. Note that these less<strong>on</strong>s can be c<strong>on</strong>fusing to beginners.<br />
Do not move too quickly. Check for understanding by having<br />
campers complete all of the activities in the light sensor programming<br />
secti<strong>on</strong> <strong>on</strong> the “Boat”. After campers complete the programming<br />
exercises, assign them the task of “Scoping the Cruise Ship”. This<br />
challenge can be found in:<br />
Base / Training Tasks / Scope Cruise Ship<br />
Extensi<strong>on</strong> activities for advanced campers<br />
Typically, camps will c<strong>on</strong>tain a mix of campers with diverse skill sets.<br />
In order to challenge more advanced campers, you can modify any<br />
of the activities to make them simpler or more diffi cult. Additi<strong>on</strong>al<br />
challenges you can use include:<br />
Boat / Boat Excursi<strong>on</strong>s / Mail Crate<br />
Boat / Boat Excursi<strong>on</strong>s / Vent Sensor<br />
Boat / Boat Excursi<strong>on</strong>s / Clambot Grab<br />
These challenges are designed to incorporate all camper-learning to<br />
date. C<strong>on</strong>tinually encourage campers to use feedback from sensors.<br />
<str<strong>on</strong>g>Camp</str<strong>on</strong>g>ers will want to use timing. The fi nal “Boat” challenge is:<br />
BOAT – Botstacle Course<br />
What to cover in this Sessi<strong>on</strong><br />
A light sensor sends analog feedback to the robot. The light sensor<br />
system c<strong>on</strong>sists of two parts: a photo-transistor and a light emitting<br />
diode. The light emitting diode projects light, the photo-transistor<br />
reads either the refl ected light or if there is no refl ected light it reads<br />
the ambient light in the room. An illustrati<strong>on</strong> of how the sensor works<br />
can be found at: Base / Robot Hardware / Sensors / Light Sensors.<br />
<str<strong>on</strong>g>Camp</str<strong>on</strong>g>ers need to remember several things when working with light<br />
sensors:<br />
• A light sensor reads the light by sending out a signal from a<br />
Light Emitting Diode and then reading what ever refl ects off the<br />
surface that the light hits with a Photo-transmitter. For the best<br />
feedback the light sensor should be as close as possible to the<br />
surface that it is trying to get feedback from (about 6 millimeters<br />
or 1/4 inch).<br />
• The light sensor reads values between<br />
0-100; darker values are represented by<br />
lower numbers and lighter values are<br />
represented by higher numbers.<br />
• <str<strong>on</strong>g>Camp</str<strong>on</strong>g>ers need to be able to c<strong>on</strong>nect a light sensor to their robot.<br />
There are many ways to do this; beginners may want to start with<br />
Base / Robot Hardware / Attachments / Light Sensor.<br />
• The programmer needs to calculate the value of threshold<br />
when using a light sensor. Threshold is the value between light and<br />
dark. (Any value below the threshold is c<strong>on</strong>sidered by the robot to be<br />
dark, while any value above threshold is c<strong>on</strong>sider to be light).<br />
Programming Exercises<br />
1. Write a program that uses a light sensor and upload it to your robot.<br />
2. Run the robot <strong>on</strong>e time. This is a very important step that new RCX<br />
users often neglect. You need to run the program <strong>on</strong>e time so that<br />
the robot knows what type of feedback to expect <strong>on</strong> the port; analog<br />
or digital.<br />
3. Press the view butt<strong>on</strong> <strong>on</strong> the RCX until the view screen indicator<br />
(little triangle) is aligned with the port from which you want feedback.<br />
(If the light sensor is c<strong>on</strong>nected to port <strong>on</strong>e, then the indicator<br />
should align with port <strong>on</strong>e. You will know if you are aligned because<br />
the values <strong>on</strong> the view screen will c<strong>on</strong>tinue to change as the light<br />
sensor moves around.)<br />
4. Place the light sensor so that it is pointing over white and record<br />
your reading, keeping the sensor close to the surface for the best<br />
reading.<br />
5. Place the light sensor so that it is pointing over black and record<br />
your reading, keeping the sensor close to the surface for the best<br />
reading.<br />
6. Add the values together and divide by two; this gives you the value<br />
of threshold. This will be the modifi er value that you will use when<br />
you use the light sensor.<br />
Go Forward until Dark<br />
Have students program their robot to move forward until the sensor sees<br />
a line and stops. Sample code can be found in: Boat / ROBOLAB Trials /<br />
Light Sensors / Wait for Dark.<br />
Check campers understanding of the following:<br />
1. Threshold value calculati<strong>on</strong><br />
2. Using the view screen<br />
3. Why is it important to keep the light sensor close to the surface you<br />
are reading?<br />
Follow a Line (forks and fork merges)<br />
Dem<strong>on</strong>strate a robot following a line. Ask students to give ideas <strong>on</strong> how<br />
this works.<br />
A simple line following program uses a nested c<strong>on</strong>diti<strong>on</strong>al statement. The<br />
c<strong>on</strong>diti<strong>on</strong>al statement is executed inside the jump and the land (loop).<br />
The line track program is designed to c<strong>on</strong>tinuously check the value the<br />
light sensor sees. The value the sensor sees is then translated into a<br />
number and based <strong>on</strong> that number and the threshold value the RCX will<br />
turn <strong>on</strong> <strong>on</strong>e motor or the other. This procedure repeats itself forever if the<br />
programmer used jumps and lands. An example of this code can be found<br />
in: Boat / ROBOLAB Trials / Light Sensors / Line Track.<br />
Line Track using a Timer Fork (nested c<strong>on</strong>diti<strong>on</strong>al statements)<br />
The fi rst line track challenge campers will complete is a simple line track<br />
that executes “forever”. This program dem<strong>on</strong>strates how line tracking<br />
programs work, but isn’t necessarily useful. The program becomes much<br />
more useful when campers can write a program that tracks a line for a<br />
c<strong>on</strong>trolled c<strong>on</strong>diti<strong>on</strong>. The next exercise challenges campers to write a<br />
program that tracks a line for an amount of time: Boat / ROBOLAB Trials /<br />
Light Sensors / Line Track - Timer.
Voyage to Sea Lab Nautilus AQUABOTS CD-Rom<br />
In this example campers need to remember the following:<br />
1. Any time a programmer uses a timer they must reset the timer.<br />
This is d<strong>on</strong>e using the zero timer ic<strong>on</strong>.<br />
2. ROBOLAB can use up to three different timers simultaneously.<br />
Timers use modifi ers, be sure to c<strong>on</strong>nect the modifi ers to both<br />
the “zero timer” ic<strong>on</strong> and the “timer sensor fork” ic<strong>on</strong>.<br />
3. <str<strong>on</strong>g>Camp</str<strong>on</strong>g>ers often place the land before the “zero timer” ic<strong>on</strong>.<br />
This resets the timer and the robot tracks the line forever.<br />
4. Calculate threshold.<br />
5. Place the proper modifi ers <strong>on</strong> the sensor.<br />
What might your students have trouble with today?<br />
• Modifi ers– modifi ers should be used at all levels of programming<br />
with ROBOLAB. ROBOLAB uses default values when the<br />
programmer doesn’t place a modifi er, this simplifi es programming<br />
for the beginner. As programs become more complete it is<br />
good practice to add the appropriate modifi er at all times.<br />
• Threshold– campers often have diffi culty understanding this<br />
important c<strong>on</strong>cept.<br />
• Using multiple sensors– As campers begin to use multiple<br />
sensors, they often forget to identify the ports the sensors are<br />
c<strong>on</strong>nected to.<br />
• Light sensor placement– light sensors should be placed low <strong>on</strong><br />
the robot if they are going to be used to read lines <strong>on</strong> the table.<br />
If the sensor is placed high relative to the surface it is reading,<br />
the readings from the sensor can become distorted as light<br />
c<strong>on</strong>diti<strong>on</strong>s in the room change.<br />
• Nested c<strong>on</strong>diti<strong>on</strong>al statements– this is powerful programming<br />
c<strong>on</strong>cept. It is important to give campers plenty of practice reinforcing<br />
this topic.<br />
Learning Objectives for Sessi<strong>on</strong> 5<br />
<str<strong>on</strong>g>Camp</str<strong>on</strong>g>ers should be able to:<br />
• Explain the systems that make up a light sensor<br />
• C<strong>on</strong>struct a light sensor attachment<br />
• Use the view screen <strong>on</strong> the RCX to read the feedback from the<br />
light sensor<br />
• Calculate threshold<br />
• Program their robot to move forward until it sees a dark line<br />
• Program their robot to track a line<br />
• Program their robot to track a line for a specifi c amount of time<br />
Sessi<strong>on</strong> 6<br />
Robot Challenges...<br />
Problem solving, Sensor integrati<strong>on</strong>, Advanced programming<br />
<str<strong>on</strong>g>Camp</str<strong>on</strong>g>ers use their growing knowledge of light sensors, rotati<strong>on</strong> sensors,<br />
and touch sensors to complete the multiple camp challenges.<br />
Depending <strong>on</strong> the skill level of your campers and staff they may or<br />
may not have completed all of the challenges found in the fi rst two<br />
secti<strong>on</strong>s of Aquabots; the Base and the Boat.<br />
You might want to institute a checklist of all programming/engineering<br />
challenges and have campers attempt to complete all of them. Each<br />
camp is run differently and so the decisi<strong>on</strong> will be left to the camp<br />
director. (In the camps run by the <strong>Robotics</strong> <strong>Academy</strong> we give multiple<br />
awards at the end of the camp to all campers.) Below is a list of the<br />
challenges in the fi rst two secti<strong>on</strong>s:<br />
BASE / Training Tasks<br />
Scope Cruise Ship, Base Cleanup, Flag Tripper<br />
BOAT / ROBOLAB Trials<br />
Motors and Timers / 5 challenges<br />
Touch Sensors / 4 challenges<br />
Light Sensors / 4 challenges<br />
Rotati<strong>on</strong>/Angle Sensors / 3 challenges<br />
BOAT / Boat Excursi<strong>on</strong>s<br />
Mail Crate, Clambot Grab, Vent Sensor<br />
BOAT<br />
Botstacle course<br />
The last four challenges are designed to incorporate all camper-learning<br />
to date. C<strong>on</strong>tinually encourage campers to use feedback from sensors.<br />
<str<strong>on</strong>g>Camp</str<strong>on</strong>g>ers will want to use timing because it is easier for them to program.<br />
Students can build attachments that will allow them to complete the<br />
above challenges.<br />
What to cover in this sessi<strong>on</strong><br />
Sessi<strong>on</strong> 6 will be a day when students can really test their newly acquired<br />
skills. <str<strong>on</strong>g>Camp</str<strong>on</strong>g>ers will be assigned to complete several of the challenges as<br />
directed by the camp director.<br />
Issues for the camp director to c<strong>on</strong>sider<br />
• The level of understanding of their campers– It doesn’t make sense<br />
to have multiple diffi cult challenges if campers are frustrated. Move<br />
from group to group and help all campers. If there is a problem that<br />
is comm<strong>on</strong> across all groups, then bring every<strong>on</strong>e together and<br />
review the c<strong>on</strong>cept<br />
• The resources that your camp has– not all camps will have the<br />
ability to run every challenge. Feel free to modify the challenges<br />
as you see fi t.<br />
Sessi<strong>on</strong>s 7-10<br />
The Bermuda Triangle Missi<strong>on</strong>...<br />
Culminating competiti<strong>on</strong> / Challenges / Activity<br />
The culminating event of <strong>Robotics</strong> <strong>Academy</strong> camps is the fi nal set of<br />
challenges, which unfolds as a competiti<strong>on</strong> and adventure. The Aquabots<br />
fi nale– the arrival at Sea Lab Nautilus– takes place beneath the Bermuda<br />
triangle. There are eight different missi<strong>on</strong>s that campers can attempt<br />
to solve. We always let the campers decide the missi<strong>on</strong>s they want to<br />
attempt. They need to look at the diffi culty of the missi<strong>on</strong>, the amount of<br />
points awarded, and their interest in the challenge.<br />
We hold the competiti<strong>on</strong> either <strong>on</strong> graduati<strong>on</strong> day or the day before<br />
graduati<strong>on</strong>. The advantage of holding the competiti<strong>on</strong> <strong>on</strong> graduati<strong>on</strong> day<br />
is that parents get to see the campers compete. The disadvantage is that<br />
the camp director may get stuck sorting everything at the end of the day<br />
because parents and campers will want to leave after the competiti<strong>on</strong>.<br />
The game board can either be made by you before camp or it can be part<br />
of the camp activity. You may assign campers that are ahead of other<br />
campers to build the artifacts that make up the camp. We would cauti<strong>on</strong><br />
camp directors that this can take c<strong>on</strong>siderable time.<br />
The Sea Lab Nautilus Bermuda Missi<strong>on</strong> challenges are:<br />
Cap the Oxygen Tower<br />
C<strong>on</strong>nect the Air Pipeline<br />
Activate the S<strong>on</strong>ar Scanner<br />
Save the Giant Squid<br />
Deliver the Kelp Packets<br />
Activate the Research Derrick<br />
Extract the Vent Sensors<br />
Retrieve the Flight 19 Avenger<br />
The camp director is able to modify or change any of the activities to<br />
fi t the needs of their robotics camp. Awards should be given during<br />
the graduati<strong>on</strong> cerem<strong>on</strong>y. Our goal is that every camper takes multiple<br />
awards home.<br />
Summary<br />
Best of luck as you embark <strong>on</strong> this educati<strong>on</strong>al adventure. The <strong>Robotics</strong><br />
<strong>Academy</strong> website is a good place to visit for <strong>on</strong>going informati<strong>on</strong> about<br />
camps, robots, and everything related.<br />
Good luck,<br />
The <strong>Robotics</strong> <strong>Academy</strong> staff


