DG-1000S - DG Flugzeugbau
DG-1000S - DG Flugzeugbau
DG-1000S - DG Flugzeugbau

Create successful ePaper yourself
Turn your PDF publications into a flip-book with our unique Google optimized e-Paper software.
<strong>DG</strong> <strong>Flugzeugbau</strong> GmbH<br />
Otto-Lilienthal-Weg 2 / Am Flugplatz • D-76646 Bruchsal • Germany<br />
Postbox 1480, D-76604 Bruchsal • Germany<br />
Tel. 07251/3020-100 • Telefax 07251/3020-200 • eMail: dg@dg-flugzeugbau.de<br />
Spare part and material sales: Tel. 07251/3020-270 • lager@dg-flugzeugbau.de<br />
www.dg-flugzeugbau.de<br />
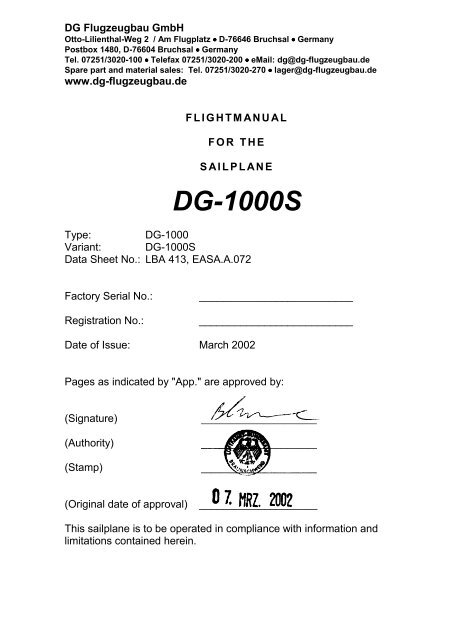
FLIGHTMANUAL<br />
FOR THE<br />
SAILPLANE<br />
<strong>DG</strong>-<strong>1000S</strong><br />
Type: <strong>DG</strong>-1000<br />
Variant: <strong>DG</strong>-<strong>1000S</strong><br />
Data Sheet No.: LBA 413, EASA.A.072<br />
Factory Serial No.: __________________________<br />
Registration No.: __________________________<br />
Date of Issue: March 2002<br />
Pages as indicated by "App." are approved by:<br />
(Signature)<br />
(Authority)<br />
(Stamp)<br />
(Original date of approval) ____________________<br />
This sailplane is to be operated in compliance with information and<br />
limitations contained herein.
Issued: March 2002<br />
Flight manual <strong>DG</strong>-<strong>1000S</strong><br />
Warnings<br />
• All sailplanes are very complex technical devices. If you don’t use yours as it<br />
is intended and within the certified operating limitations or if you fail to carry<br />
out proper maintenance work, it may harm your health or place your life in<br />
danger.<br />
• Prior to flying the aircraft read all manuals carefully and regard especially all<br />
warnings, caution remarks and notes given in the manuals.<br />
• Never take off without executing a serious pre-flight inspection according to<br />
the flight manual!<br />
• Always respect the relevant safety altitudes!<br />
• Respect the stall speeds and always fly with a safety margin above the stall<br />
speed according to the flight conditions, especially at low altitudes and in the<br />
mountains.<br />
• Use only the battery chargers as specified in the flight manual.<br />
• Don’t execute yourself any work on the control system except for greasing.<br />
• Repairs and maintenance work should only be accomplished by the<br />
manufacturer or at certified repair stations rated for this type of work. A list<br />
of stations which have experience with <strong>DG</strong> aircraft may be obtained from<br />
<strong>DG</strong> <strong>Flugzeugbau</strong>.<br />
• Even if no annual inspections are required in your country, have your aircraft<br />
checked annually, see maintenance manual section 2.<br />
• Please pay attention to our web-site www.dg-flugzeugbau.de. There you<br />
will find the latest technical notes and service information for your glider:<br />
www.dg-flugzeugbau.de/tech-mitteilungen-e<br />
The „<strong>DG</strong> Pilot Info“ informs you immediately by e-mail about the<br />
publication of new technical notes and service information.<br />
If you don’t receive this info service, please send a mail to<br />
weber@dg-flugzeugbau.de with subject "<strong>DG</strong> Newsletter please" to receive<br />
this service free of charge.
0 Revisions<br />
Flight manual <strong>DG</strong>-<strong>1000S</strong><br />
0.1 Record of revisions<br />
Any revision of the present manual, except actual weighing data, must be<br />
recorded in the following table and in case of approved sections endorsed by the<br />
responsible airworthiness authority.<br />
The new or amended text in the revised page will be indicated by a black<br />
vertical line in the right hand margin, and the Revision No. and the date will be<br />
shown on the bottom left hand of the page.<br />
Rev.<br />
No.<br />
Affected<br />
Pages/<br />
section<br />
1 0.3-0.5, 2.1,<br />
2.9, 2.11, 4.5,<br />
5.4, 6.3, 6.5,<br />
6.10, 7.10<br />
2 0.3, 2.12, 3.2,<br />
Description Issue<br />
Date<br />
Manual revision<br />
TN 413/2<br />
September<br />
2003<br />
LBA<br />
Approval<br />
Date<br />
Sept.<br />
25. 2003<br />
Manual revision May 2004 May<br />
4.3 TN 413/3<br />
10. 2004<br />
3 0.3, 0.5, 4.5, Ballast box in June 2004 June<br />
7.6 the fin<br />
TN 413/4<br />
29. 2004<br />
4 0.3, 0.5, 3.2, Canopies October January<br />
7.11 Gas-struts<br />
TN 413/6<br />
2004 13. 2005<br />
5 0.3, 0.4, 2.7, Manual revision January February<br />
3.5, 4.1, 4.17 TN 413/8 2005 22. 2005<br />
Rev. Affected Description Issue EASA<br />
No. Pages/<br />
Date Approval<br />
section<br />
Date<br />
6 0.1, 0.4, 0.5, landing gear February April 8.<br />
4.9, 4.13, 7.5 positive locking 2008<br />
device<br />
TN1000/13<br />
2008<br />
7 0.3, 0.5, 2.5, Rudder pedals- May 2008 June 11.<br />
2.9, 2.12, loops (safety<br />
2008<br />
7.13 bows), manual<br />
revisions<br />
TN1000/16<br />
Inserted<br />
Date<br />
Signature<br />
Inserted<br />
Date<br />
Signature<br />
Issued: May 2008 TN 1000/16 0.1
0.1 Record of revisions continued<br />
Rev.<br />
No.<br />
Affected<br />
Pages/<br />
section<br />
Flight manual <strong>DG</strong>-<strong>1000S</strong><br />
Description Issue<br />
Date<br />
8 0.5, 9.1-9.12 Electrically<br />
operated main<br />
landing gear<br />
9 0.6, 9.1, 9.2,<br />
9.13<br />
10 0.2 – 0.5, 1.4,<br />
1.5, 2.9, 2.10,<br />
4.3, 4.5, 4.6,<br />
4.8, 4.9, 4.12,<br />
6.3 ÷ 6.6,<br />
6.11, 7.1, 7.2,<br />
7.8, 7.10,<br />
7.12, 7.13,<br />
9.7, 9.13<br />
11 0.2, 0.5, 9.1,<br />
9.2, 9.14,<br />
9.15<br />
TN1000/14<br />
Special<br />
equipment for<br />
very small<br />
pilots<br />
TN1000/17<br />
Manual revision<br />
TN1000/18<br />
Special<br />
equipment for<br />
aerobatics<br />
TN1000/20<br />
12 0.2, 0.5, 9.15 TN1000/20<br />
Revision 1<br />
November<br />
2008<br />
EASA<br />
Approval<br />
Date<br />
28. January<br />
2009<br />
May 2010 20. July<br />
2010<br />
February<br />
2011<br />
March<br />
2011<br />
13.05.11<br />
6.05.2011<br />
June 2012 20.07.2012<br />
Inserted<br />
Date<br />
Signature<br />
Issued: June 2012 TN1000/20 Revision 1 0.2
Flight manual <strong>DG</strong>-<strong>1000S</strong><br />
0.2 List of effective pages<br />
Section page issued replaced/ replaced/<br />
0 0.0 March 2002<br />
0.1 see manual amendments<br />
0.2 "<br />
0.3 "<br />
0.4 "<br />
0.5 "<br />
0.6 March 2002<br />
1 1.1 "<br />
1.2 "<br />
1.3 "<br />
1.4 " Febr. 2011<br />
1.5 " Febr. 2011<br />
1.6 "<br />
2 App. 2.1 March 2002 Sept. 2003<br />
" 2.2 "<br />
" 2.3 "<br />
" 2.4 "<br />
" 2.5 " May 2008<br />
" 2.6 "<br />
" 2.7 " January 2005<br />
" 2.8 "<br />
" 2.9 " Sept. 2003 May 2008<br />
Febr. 2011<br />
" 2.10 " Febr. 2011<br />
" 2.11 " Sept. 2003<br />
" 2.12 " May 2004 May 2008<br />
3 " 3.1 March 2002<br />
" 3.2 " May 2004 Oct. 2004<br />
" 3.3 "<br />
" 3.4 "<br />
" 3.5 " January 2005<br />
4 " 4.1 March 2002 January 2005<br />
" 4.2 "<br />
" 4.3 " May 2004 Febr. 2011<br />
" 4.4 "<br />
Issued: February 2011 TN1000/18 0.3
Flight manual <strong>DG</strong>-<strong>1000S</strong><br />
0.2 List of effective pages (cont.)<br />
Section Page issued replaced/ replaced/<br />
4 App. 4.5 March 2002 Sept. 2003 June 2004<br />
Febr. 2011<br />
" 4.6 " Febr. 2011<br />
4.7<br />
" 4.8 " Febr. 2011<br />
" 4.9 " Febr. 2008 Febr. 2011<br />
" 4.10 "<br />
" 4.11 "<br />
" 4.12 " Febr. 2011<br />
" 4.13 " Febr. 2008<br />
" 4.14 "<br />
" 4.15 "<br />
" 4.16 "<br />
" 4.17 " January 2005<br />
" 4.18 "<br />
" 4.19 "<br />
" 4.20 "<br />
" 4.21 "<br />
" 4.22 "<br />
" 4.23 "<br />
" 4.24 "<br />
5 " 5.1 March 2002<br />
" 5.2 "<br />
" 5.3 "<br />
" 5.4 " Sept. 2003<br />
App. 5.5 "<br />
5.6 "<br />
5.7 "<br />
6 6.1 March 2002<br />
6.2 "<br />
6.3 " Sept. 2003 Febr. 2011<br />
6.4 " Febr. 2011<br />
6.5 " Sept. 2003 Febr. 2011<br />
6.6 " Febr. 2011<br />
6.7 "<br />
6.8 "<br />
6.9 "<br />
6.10 " Sept. 2003<br />
6.11 " Febr. 2011<br />
Issued: February 2011 TN1000/18 0.4
Flight manual <strong>DG</strong>-<strong>1000S</strong><br />
0.2 List of effective pages (cont.)<br />
Section Page issued replaced/ replaced/<br />
7 7.1 March 2002 Febr. 2011<br />
7.2 " Febr. 2011<br />
7.3 "<br />
7.4 "<br />
7.5 " Febr. 2008<br />
7.6 " June 2004<br />
7.7 "<br />
7.8 " Febr. 2011<br />
7.9 " Febr. 2011<br />
7.10 " Sept. 2003 Febr. 2011<br />
7.11 " Oct. 2004<br />
7.12 " Febr. 2011<br />
7.13 " May 2008 Febr. 2011<br />
8 8.1 March 2002<br />
8.2 "<br />
8.3 "<br />
8.4 "<br />
8.5 "<br />
8.6 "<br />
9 9.1 March 2002 May 2010 March 2011<br />
9.2 " May 2010 March 2011<br />
9.3 "<br />
9.4 "<br />
9.5 "<br />
9.6 "<br />
9.7 " Febr. 2011<br />
9.8 "<br />
9.9 "<br />
9.10 "<br />
9.11 "<br />
9.12 "<br />
9.13 May 2010 Febr. 2011<br />
9.14 March 2011<br />
9.15 March 2011 June 2012<br />
Issued: June 2012 TN1000/20 Revision 1 0.5
0.3 Table of contents<br />
Flight manual <strong>DG</strong>-<strong>1000S</strong><br />
Section<br />
General (a non-approved section) 1<br />
Limitations (an approved section) 2<br />
Emergency procedures (an approved section) 3<br />
Normal procedures (an approved section) 4<br />
Performance (a partly approved section) 5<br />
Mass (weight) and balance (a non-approved section) 6<br />
Sailplane and systems description (a non-approved section) 7<br />
Sailplane handling, care and maintenance (a non-approved section) 8<br />
Supplements 9<br />
Issued: March 2002 0.6
1 General<br />
Section<br />
Flight manual <strong>DG</strong>-<strong>1000S</strong><br />
Page<br />
1.1 Introduction.............................................................................................. 1.2<br />
1.2 Certification basis .................................................................................... 1.2<br />
1.3 Warnings, cautions and notes .................................................................. 1.3<br />
1.4 Descriptive data ....................................................................................... 1.4<br />
1.5 3 view drawing......................................................................................... 1.6<br />
Issued: March 2002 1.1
Flight manual <strong>DG</strong>-<strong>1000S</strong><br />
1.1 Introduction<br />
The sailplane flight manual has been prepared to provide pilots and instructors<br />
with information for the safe and efficient operation of the <strong>DG</strong>-<strong>1000S</strong> glider.<br />
This manual includes the material required to be furnished to the pilot by JAR<br />
Part 22. It also contains supplemental data supplied by the glider manufacturer.<br />
1.2 Certification basis<br />
This type of sailplane has been approved by the Luftfahrt-Bundesamt (LBA) in<br />
accordance with:<br />
Airworthiness requirements:<br />
JAR Part 22 „Sailplanes and powered sailplanes“, change 5, issued 28 th October<br />
1995.<br />
The Type Certificate No. 413 has been issued on March 12. 2002.<br />
Category of Airworthiness: "Utility" or<br />
„Aerobatic“ with 18m span without waterballast and<br />
if the required equipment is installed.<br />
Issued: March 2002 1.2
Flight manual <strong>DG</strong>-<strong>1000S</strong><br />
1.3 Warnings, cautions and notes<br />
The following definitions apply to warnings, cautions and notes used in the<br />
flight manual.<br />
"Warning" means that the non observation of the<br />
corresponding procedure leads to an<br />
immediate or important degradation of the<br />
flight safety.<br />
"Caution" means that the non observation of the<br />
corresponding procedure leads to a minor or<br />
to a more or less long term degradation of<br />
the flight safety.<br />
"Note" draws the attention on any special item not<br />
directly related to safety but which is<br />
important or unusual.<br />
Issued: March 2002 1.3
Flight manual <strong>DG</strong>-<strong>1000S</strong><br />
1.4 Descriptive data<br />
The <strong>DG</strong>-<strong>1000S</strong> is a two-place high performance sailplane for training and cross<br />
country flying and in addition for aerobatic training.<br />
The <strong>DG</strong>-<strong>1000S</strong> is available with different spans:<br />
A) Wing constructed from carbonfibre reinforced plastics with parting at y=<br />
8,6m and wing tips for 20 m span with Winglets.<br />
Wing tips for 18 m span are optional.<br />
B) Wing constructed from carbonfibre reinforced plastics with 18 m span<br />
without parting.<br />
Parting at y= 8,6m is optional<br />
• Automatic hook ups for all controls.<br />
• Comfortable seating and modern cockpit design similar to the <strong>DG</strong>-singleseaters<br />
- safety cockpit.<br />
• Large 2 piece canopy for very good in-flight vision.<br />
• Draught free canopy demist and 1 adjustable swivel air vent for each pilot.<br />
• Sealed airbrake and landing gear boxes.<br />
• Controls in each cockpit.<br />
• All controls are operated with the left hand, which enables the right hand to<br />
remain on the control stick.<br />
The <strong>DG</strong>-<strong>1000S</strong> is available with 3 different versions of the undercarriage:<br />
A) Very high spring mounted retractable main wheel with disc-brake, tail wheel.<br />
B) High spring mounted retractable main wheel with disc-brake, tail wheel and<br />
nose wheel<br />
C) Fixed spring mounted main wheel with disc-brake, tail wheel and nose<br />
wheel.<br />
The main undercarriages versions B and C are interchangeable.<br />
Other characteristics:<br />
Waterballast in the wings and in the fin are optional with 18m span and standard<br />
with 20m span.<br />
Standard: A ballast-box is installed in the fin. It can be used to compensate the<br />
mass of the rear pilot and as a trim-possibility for heavy pilots.<br />
Max. ballast capacity: 12 kg.<br />
Option: 2 ballast boxes in the front cockpit. The trim-weights used for the trimballast<br />
box in the fin also fit into these ballast boxes.<br />
Issued: February 2011 TN1000/18 1.4
Flight manual <strong>DG</strong>-<strong>1000S</strong><br />
Technical data<br />
Span m 18 20<br />
Wing area m 2 16,72 17,53<br />
Aspect ratio / 19,38 22,82<br />
Length m 8,57<br />
Fuselage height m 1,0<br />
Fuselage width m 0,73<br />
Span of the horizontal tailplane m 3,2<br />
Waterballast Wings max. kg (l) 160 160<br />
Waterballast fin max. kg 6,2<br />
Trim ballast fin max. kg 12<br />
Empty mass with basic instruments* ca. kg 411 415<br />
Wing loading (with one Pilot 80kg) ca. kg/m² 29,4 28,2<br />
max. take off mass (max. TOW) kg 750 750<br />
max. wing loading kg/m² 44,9 42,8<br />
Aerobatics unlimited<br />
Category „A“<br />
simple<br />
max. TOW for aerobatics kg 630 630<br />
max. speed km/h 270 270<br />
*Options will increase the empty mass accordingly!<br />
Issued: February 2011 TN1000/18 1.5
1.5 three view drawing<br />
Flight manual <strong>DG</strong>-<strong>1000S</strong><br />
Issued: March 2002 1.6
2 Limitations<br />
Section<br />
Flight manual <strong>DG</strong>-<strong>1000S</strong><br />
Page<br />
2.1 Introduction.............................................................................................. 2.2<br />
2.2 Airspeed ................................................................................................... 2.3<br />
2.3 Airspeed Indicator Markings ................................................................... 2.4<br />
2.4 Mass (weight)........................................................................................... 2.5<br />
2.5 Centre of gravity ...................................................................................... 2.6<br />
2.6 Approved manoeuvres ............................................................................. 2.6<br />
2.7 Manoeuvring load factors ........................................................................ 2.7<br />
2.8 Flight crew ............................................................................................... 2.7<br />
2.9 Kinds of operation.................................................................................... 2.8<br />
2.10 Minimum equipment................................................................................ 2.9<br />
2.11 Aerotow, winch and autotow launching ................................................ 2.10<br />
2.11.1 Weak links........................................................................................ 2.10<br />
2.11.2 Towing cables .................................................................................. 2.10<br />
2.11.3 Max. towing speeds ......................................................................... 2.10<br />
2.11.4 Tow Release..................................................................................... 2.10<br />
2.12 Crosswinds............................................................................................. 2.10<br />
2.13 Tyre Pressure ......................................................................................... 2.11<br />
2.14 Waterballast (Option)............................................................................. 2.11<br />
2.15 Fin tank (Option).................................................................................... 2.11<br />
2.16 Trim ballast box in the fin...................................................................... 2.11<br />
2.17 Limitations placards............................................................................... 2.12<br />
Issued: September 2003 TN 413/2 LBA app. 2.1
Flight manual <strong>DG</strong>-<strong>1000S</strong><br />
2.1 Introduction<br />
Section 2 includes operating limitations, instrument markings and basic placards<br />
necessary for safe operation of the glider, its standard systems and standard<br />
equipment.<br />
The limitations included in this section have been approved by the LBA.<br />
Issued: March 2002 LBA app. 2.2
Flight manual <strong>DG</strong>-<strong>1000S</strong><br />
2.2 Airspeed<br />
Airspeed limitations and their operational significance are shown below<br />
Speed IAS<br />
km/h<br />
VNE Never exceed<br />
speed<br />
(kts.)<br />
270<br />
(146)<br />
VRA Rough air speed 185<br />
(100)<br />
VA<br />
VW<br />
VT<br />
Manoeuvring<br />
speed<br />
Maximum winchlaunching<br />
speed<br />
Maximum aerotowing<br />
speed<br />
VLO Maximum landing<br />
gear operating<br />
speed<br />
185<br />
(100)<br />
150<br />
(81)<br />
185<br />
(100)<br />
185<br />
(100)<br />
Remarks<br />
Do not exceed this speed in any operation<br />
and do not use more than 1/3 of control<br />
deflection.<br />
Do not exceed this speed except in smooth<br />
air and then only with caution. Rough air<br />
is in lee-wave rotors, thunderclouds,<br />
visible whirlwinds or over mountain crests<br />
etc.<br />
Do not make full or abrupt control<br />
movement above this speed, because<br />
under certain conditions the sailplane may<br />
be overstressed by full control movement.<br />
Do not exceed this speed during winch- or<br />
auto-tow-launching<br />
Do not exceed this speed during<br />
aerotowing.<br />
Do not extend or retract the landing gear<br />
above this speed.<br />
Warning: At higher altitudes the true airspeed is higher than the indicated<br />
airspeed, so VNE is reduced with altitude according to the table below, see also<br />
section 4.5.5.<br />
Altitude in [m] 0-3000 4000 5000 6000 7000 8000<br />
VNE indicated km/h 270 256 243 230 217 205<br />
Altitude in [ft] 0-10000 13000 16000 20000 23000 26000<br />
VNE indicated kts. 146 138 131 124 117 111<br />
Issued: March 2002 LBA app. 2.3
Flight manual <strong>DG</strong>-<strong>1000S</strong><br />
2.3 Airspeed Indicator Markings<br />
Airspeed indicator markings and their colour code significance are shown<br />
below.<br />
Marking (IAS) value<br />
or range<br />
km/h (kts)<br />
Green Arc 88 – 185<br />
(47.5 – 100)<br />
Yellow Arc 185 – 270<br />
(100 – 146)<br />
Red Line 270<br />
(146)<br />
Yellow triangle 100<br />
(54)<br />
Significance<br />
Normal operating range<br />
(Lower limit is the speed 1,1*VS1<br />
with maximum mass and foremost<br />
C.G.<br />
Upper limit is the maximum rough<br />
air airspeed.)<br />
Manoeuvres must be conducted with<br />
caution and only in smooth air.<br />
Maximum speed for all operations.<br />
Approach speed at maximum weight<br />
without water ballast .<br />
Issued: March 2002 LBA app. 2.4
Flight manual <strong>DG</strong>-<strong>1000S</strong><br />
2.4 Mass (weight)<br />
Category A „Aerobatic“<br />
Maximum take off weight: 630 kg 1389 lbs.<br />
Maximum landing weight: 630 kg 1389 lbs.<br />
Category „Utility“:<br />
with waterballast:<br />
Maximum take off weight: 750 kg 1653 lbs.<br />
Maximum landing weight: 750 kg 1653 lbs.<br />
without waterballast: Maximum take-off and landing mass = WNLP + Wwings<br />
WNLP = Maximum mass of the non lifting parts (see below)<br />
Wwings = actual mass of the wings<br />
Maximum weight of the non lifting parts = 469 kg 1034 lbs.<br />
Caution: It is recommended to dump the waterballast before landing on<br />
airfields. Dump the ballast before an outlanding in any case.<br />
Maximum mass in baggage compartment: 15 kg 33 lbs.<br />
Caution: Heavy pieces of baggage must be secured to the baggage<br />
compartment floor (screwing to the floor or with belts). The max. mass secured<br />
on one half of the floor (left and right of fuselage centre line) should not exceed<br />
7,5kg (16.5 lbs.).<br />
Ballast<br />
1. Maximum waterballast<br />
in the wings: 160 kg 353 lbs.<br />
in the fin 6,2 kg 13.7 lbs.<br />
2. Maximum mass in the trim-ballast box in the fin: 12 kg 26.5 lbs.<br />
The max. take off mass is not to be exceeded with 1. and 2. together.<br />
Warning: Follow the loading procedures see section 6.<br />
Issued: May 2008 TN 1000/16 LBA app. 2.5
Flight manual <strong>DG</strong>-<strong>1000S</strong><br />
2.5 Centre of gravity<br />
Centre of gravity range in flight is<br />
190mm (7.48 inch) up to 440mm (17.32 inch) behind datum.<br />
Datum = wing leading edge at the rootrib.<br />
reference line = aft fuselage centre line horizontal.<br />
C.G. diagrams and loading chart see sect. 6.<br />
2.6 Approved manoeuvres<br />
Category „Utility“:<br />
The glider is certified for normal gliding in the "Utility" category.<br />
Simple aerobatics are approved but only without waterballast and with the<br />
weight of the rear pilot compensated by ballast in the ballast box in the fin see<br />
section 6.8.7.<br />
The following aerobatic manoeuvres are approved with all spans:<br />
Spins Chandelle<br />
Inside loop Turn<br />
Lazy Eight<br />
Recommended entry speeds see section 4.5.8.1.<br />
Category „Aerobatic“<br />
Span 18 m without waterballast, max. mass 630 kg (1389 lbs.) and with the<br />
required equipment see section 2.10 installed and with the weight of the rear<br />
pilot compensated by ballast in the ballast box in the fin see section 6.8.7.<br />
In addition to the manoeuvres in category „Utility“ the following manoeuvres<br />
are approved:<br />
Inverted flight half flick roll from normal to inverted flight with<br />
half loop<br />
half loop and half roll half flick roll from inverted to normal flight<br />
half roll and half loop<br />
slow roll<br />
Recommended entry speeds see section 4.5.8.2.<br />
Issued: March 2002 LBA app. 2.6
Flight manual <strong>DG</strong>-<strong>1000S</strong><br />
2.7 Manoeuvring load factors<br />
The following load factors must not be exceeded:<br />
Category Utility Aerobatic<br />
at manoeuvring speed VA +5,3 -2,65 +7,0 -5,0<br />
at max. speed VNE +4,0 -1,5 +7,0 -5,0<br />
with airbrakes extended VNE +3,5 0 +3,5 0<br />
2.8 Flight crew<br />
a) single seated, only permissible in the front seat<br />
max. load in the front seat 110 kg (242 lbs.)<br />
min. load in the front seat see placard in cockpit and weighing<br />
report page 6.7<br />
b) two seated<br />
Either the front seat or the rear seat may designated as seat of the pilot in<br />
command.<br />
If the rear seat is to be designated it must be assured that all necessary<br />
operating items and instruments are installed and that the pilot in command<br />
has sufficient training in flying safely from the rear seat.<br />
max. cockpit load is 210 kg (463 lbs.) with a max. of 105 kg (231 lbs.) in the<br />
front seat or 110 kg (242 lbs.) in the front seat and 90 kg (198 lbs.) in the rear<br />
seat.<br />
min. cockpit load in the front seat is the min. cockpit load see a) minus 40%<br />
of the load in the rear seat. This means that 10 kg (22 lbs.) in the rear seat<br />
replaces 4 kg (8.8 lbs.) missing cockpit load in the front seat.<br />
With these loads, the C.G. range given under 6.8 will be kept in the limits if the<br />
empty weight C.G. is in its limits. See loading chart in sect. 6.8.<br />
Caution:<br />
With lower pilot weights lead ballast must be added to the seat.<br />
Ballast put on the seat (lead ballast cushion) must be fastened at the safety belt<br />
anchor point.<br />
Option: Provision for removable trim-ballast in the front cockpit see sect 7.15.1.<br />
Note: For Australia the lower limit for the min. load in the cockpit should not<br />
exceed 66 kg (146 lbs.). A provision for removable ballast see sect. 7.15.1 is<br />
mandatory.<br />
Issued: January 2005 TN 413/8 LBA app. 2.7
Flight manual <strong>DG</strong>-<strong>1000S</strong><br />
2.9 Kinds of operation<br />
A) All configurations<br />
Flights according to VFR (daylight)<br />
Aerotow<br />
Winch- and auto-launching<br />
B) In addition when flying without waterballast<br />
1. Cloud flying (daylight): permitted when properly instrumented (see<br />
section 2.10).<br />
2. Simple aerobatics see sect. 4.5.8.1. Category „Utility“<br />
3. Aerobatics see section 4.5.8.2. Category „Aerobatic“ if the required<br />
equipment (see section 2.10 c) ) is installed, only with 18 m span.<br />
Note: Cloud flying is not permitted in the USA, Canada and Australia.<br />
Issued: March 2002 LBA app. 2.8
Flight manual <strong>DG</strong>-<strong>1000S</strong><br />
2.10 Minimum equipment<br />
As minimum equipment only the instruments and equipment specified in the<br />
equipment list (see maintenance manual) are admissible.<br />
Note: The actual equipment list is filed in the enclosures of the maintenance<br />
manual.<br />
a) Normal operation<br />
Airspeed indicator Range: 0-300 km/h (0-165kts.);<br />
Speed range markings see sect. 2.3<br />
Altimeter Range: 0 – min. 10.000 m,<br />
Altimeter with fine range pointer, 1 turn max. 1000 m (3000 ft.)<br />
Four piece symmetrical safety harness<br />
VHF - transceiver (ready for operation)<br />
Outside air temperature gauge with probe in the fuselage nose.<br />
Marking blue for temperatures below 2°C, (36°F).<br />
Battery Z110 or a ballast weight of 5.5kg (12.1 lbs.) installed in the battery<br />
box in the fin<br />
Parachute automatic or manual type or a suitable firm back cushion<br />
approximately 8 cm ( 3 in.) thick for the front seat and 3 – 8 cm (1 – 3 in.)<br />
thick for the rear seat<br />
Required placards, check lists<br />
Flight and maintenance manual.<br />
b) In addition for cloud flying<br />
(Not permitted in the USA, Canada and Australia)<br />
Magnetic compass compensated in the aircraft.<br />
Variometer<br />
Turn and bank indicator<br />
c) In addition for aerobatics (Category Aerobatic)<br />
Accelerometer capable of retaining max. and min. g-values<br />
with markings red radial lines at +7 g and -5 g.<br />
Remark:<br />
Experience has shown that the installed airspeed indicator system may be used<br />
for cloud flying.<br />
Issued: February 2011 TN1000/18 App. 2.9
Flight manual <strong>DG</strong>-<strong>1000S</strong><br />
2.11 Aerotow, winch and autotow launching<br />
2.11.1 Weak links<br />
Winch<br />
launching<br />
aerotow<br />
max. 11000 N<br />
(2425 lbs.)<br />
11000 N (2425 lbs.)<br />
recommended 10000 N 10000 N + 1000 N (2200 lbs. ± 220 lbs.) for tow<br />
+ 1000 N behind aeroplanes<br />
(2200 lbs. 6000 N + 600 N (1323 lbs. + 132 lbs.) for tow<br />
± 220 lbs.) behind slow tow planes eg. Ultralight planes or<br />
touring motorgliders<br />
2.11.2 Towing cables<br />
For aerotow 30-70 m (100 - 230 ft)<br />
Material: hemp- or plastic fibres<br />
2.11.3 Max. towing speeds<br />
maximum maximum<br />
Aerotow VT = 185km/h 100 kts.<br />
Winch- and autotow VW = 150 km/h 81 kts.<br />
2.11.4 Tow Release<br />
The C.G. tow release (installed in front of the main wheel) is suitable only for<br />
winch- and auto launching..<br />
The nose hook is to be used only for aerotow.<br />
2.12 Crosswinds<br />
The demonstrated crosswind velocity is 15 km/h (8 kts.) according to the<br />
airworthiness requirements.<br />
Issued: February 2011 TN1000/18 App. 2.10
Flight manual <strong>DG</strong>-<strong>1000S</strong><br />
2.13 Tyre Pressure<br />
Main wheel 2,5 bar (36 psi)<br />
Nose wheel (if installed) 2,5 bar (36 psi)<br />
Tail wheel 4,0 bar (58 psi)<br />
2.14 Waterballast (Option)<br />
Max. capacity 80 l (21.1 U.S. gal) per wing.<br />
Filling the water ballast is only allowed with a filling system which enables<br />
determination of the exact amount of ballast filled, e.g. water gauge or calibrated<br />
canisters. Only symmetrical loading is allowed.<br />
After filling, balance the wings by dumping enough water from the heavy wing,<br />
see 4.2.2.<br />
Flight with leaking watertanks is prohibited, as this may result in asymmetrical<br />
loading condition.<br />
Warning: Follow the loading chart, see section 6.8.<br />
The max. take off weight must not be exceeded.<br />
2.15 Fin tank (Option)<br />
Warning: As it is dangerous to fly with empty wing tanks while ballast is<br />
resting in the fin, it is prohibited to fill water into the fin tank if there is any<br />
risk of icing. The flight conditions must comply with the following table:<br />
min. ground temperature °C 13,5 17 24 31 38<br />
°F 56 63 75 88 100<br />
max. flight altitude m 1500 2000 3000 4000 5000<br />
ft 5000 6500 10000 13000 16500<br />
In addition the outside air temperature OAT gauge is to be watched.<br />
The OAT should not be lower than 2°C (36°F)!<br />
2.16 Trim ballast box in the fin<br />
A box for ballast (trim-weights) is installed in the fin. It can be used to<br />
compensate the mass of the rear pilot and as a trim-possibility for heavy pilots.<br />
Warning: Follow the loading chart see 6.8.7.<br />
Tape the cover of the fin ballast box with tape min. 19mm (3/4 in.)<br />
wide prior to each flight.<br />
Issued: September 2003 TN 413/2 LBA app. 2.11
2.17 Limitations placards<br />
Flight manual <strong>DG</strong>-<strong>1000S</strong><br />
<strong>DG</strong> <strong>Flugzeugbau</strong> GmbH<br />
Type: <strong>DG</strong> – <strong>1000S</strong> Serial No.: 10- S<br />
Year of construction:<br />
Maximum airspeeds km/h kts.<br />
Winch launching 150 81<br />
Aero-tow 185 100<br />
Manoeuvring VA 185 100<br />
Rough air 185 100<br />
Maximum speed VNE 270 146<br />
Approved aerobatic manoeuvres, only without<br />
waterballast:<br />
Pos. Loop, Chandelle, Spin, Stall turn<br />
In addition Category A:<br />
Only with 18 m span without waterballast:<br />
Half loop and half roll, half roll and half loop, slow roll,<br />
inverted flight, half positive flick roll from normal flight with<br />
half loop, half negative flick roll from inverted flight<br />
Maximum mass:<br />
Category A 630 kg 1389 lbs.<br />
Category U 750 kg 1653 lbs.<br />
Category U without waterballast kg lbs.<br />
Loading chart<br />
Cockpit load front seat rear seat (Parachute<br />
maximum 110 kg 242 lbs. 90 kg 198 lbs. included)<br />
or maximum 105 kg 231 lbs. 105 kg 231 lbs.<br />
minimum kg lbs. / /<br />
With lower pilot weight necessary ballast must be added.<br />
Cockpit Check<br />
1. Lead ballast (for under weight pilot)?<br />
2. Parachute worn properly?<br />
3. Safety harness buckled?<br />
4. Front seat: pedals adjusted?<br />
Rear seat: seating height adjusted?<br />
5. All controls and knobs in reach?<br />
6. Altimeter?<br />
7. Dive brakes cycled and locked?<br />
8. Positive control check ? (One person at the control<br />
surfaces).<br />
9. Fin ballast tank emptied or correct amount filled in?<br />
10. Trim ballast box in the fin, correct amount filled in?<br />
Locking device completely engaged?<br />
11. Trim?<br />
12. Both canopies locked?<br />
13. Runway free?<br />
limits for use of the waterballast tank<br />
minimum<br />
°C 13.5 17 24 31 38<br />
ground temperature °F 56 63 75 88 100<br />
maximum flight m 1500 2000 3000 4000 5000<br />
altitude above GND ft. 5000 6500 10000 13000 16500<br />
Altitude in [m] 0-3000 4000 5000 6000 7000 8000<br />
VNE IAS km/h 270 256 243 230 217 205<br />
Altitude in [ft] 0-10000 13000 16000 20000 23000 26000<br />
VNE IAS kts. 146 138 131 124 117 111<br />
Other cockpit placards<br />
see section 7<br />
Gepäck max. 15 kg<br />
baggage max. 33 lbs.<br />
Sollbruchstelle 10000 N<br />
rated load 2200 lbs.<br />
Reifendruck 4 bar<br />
Tyre pressure 58 psi<br />
Tail wheel<br />
Reifendruck 2,5 bar<br />
Tyre pressure 36 psi<br />
Main wheel<br />
Reifendruck 2,5 bar<br />
Tyre pressure 36 psi<br />
Nose wheel (if installed)<br />
Ballast box in the fin<br />
Min. load in the front seat<br />
kg kg<br />
box empty box filled<br />
At the control-light in the<br />
front instrument panel<br />
Warning:<br />
Rigging of the horizontal<br />
tailplane is only permitted with<br />
nose down trim-setting!<br />
at the upper left hand<br />
side of the fin<br />
Issued: May 2008 TN 1000/16 LBA app. 2.12
3 Emergency procedures<br />
Section<br />
Flight manual <strong>DG</strong>-<strong>1000S</strong><br />
Page<br />
3.1 Introduction.............................................................................................. 3.2<br />
3.2 Canopy jettison ........................................................................................ 3.2<br />
3.3 Bailing out................................................................................................ 3.2<br />
3.4 Stall recovery ........................................................................................... 3.2<br />
3.5 Spin Recovery.......................................................................................... 3.3<br />
3.6 Spiral dive recovery ................................................................................. 3.3<br />
3.7 Recovery from unintentional cloud flying............................................... 3.3<br />
3.8 Flight with asymmetric waterballast........................................................ 3.4<br />
3.9 Defective fin ballast dump....................................................................... 3.4<br />
3.10 Emergency wheel up landing................................................................... 3.4<br />
3.11 Emergency ground loop........................................................................... 3.5<br />
3.12 Emergency landing on water ................................................................... 3.5<br />
Issued: March 2002 LBA app. 3.1
Flight manual <strong>DG</strong>-<strong>1000S</strong><br />
3.1 Introduction<br />
Section 3 provides a checklist and amplification for coping with emergencies<br />
that may occur. Emergency situations can be minimized by proper pre-flight<br />
inspections and maintenance.<br />
Caution: Canopy jettison and bailing out should be trained several times on the<br />
ground before flying the aircraft.<br />
3.2 Canopy jettison<br />
To bail out the white-red canopy opening handle (left) has to be operated with<br />
your right hand. Open the canopy as far as possible.<br />
If the canopy doesn’t stay open (or is not blown away by the oncoming air), but<br />
is closed by the air pressure, you have to release the canopy in it’s closed<br />
position by operating the red emergency release handle (right) with your left<br />
hand, then push the canopy upwards.<br />
The retaining lines will tear off.<br />
The gas struts (if installed) will disengage automatically<br />
3.3 Bailing out<br />
First jettison both canopies, then open the safety harness and bail out.<br />
The low walls of the front cockpit allow for a quick push-off exit.<br />
3.4 Stall recovery<br />
Easing the stick forward and picking up a dropping wing with sufficient<br />
opposite rudder the glider can be recovered from the stall.<br />
To recognize and prevent the stall, please refer to section 4.5.2.<br />
Issued: October 2004 TN 413/6 LBA app. 3.2
Flight manual <strong>DG</strong>-<strong>1000S</strong><br />
3.5 Spin Recovery<br />
Apply full opposite rudder against direction of the spin, pause.<br />
Then ease stick forward until the rotation ceases, centralize the controls and<br />
carefully pull out of the dive.<br />
The ailerons should be kept neutral during recovery.<br />
Caution: To prevent unintentional spinning do not stall the sailplane. Fly with<br />
enough speed reserve especially in gusty conditions and in the landing pattern.<br />
Intentional spins with waterballast are not permitted.<br />
Height loss during recovery ca. 50-100 m (160-320ft)<br />
max. speed during recovery max. 200 km/h (108 kts.)<br />
3.6 Spiral dive recovery<br />
Apply rudder and aileron in opposite direction and carefully pull out of the dive.<br />
Spiral dive occurs only when spinning more than 2 turns with medium C.G.<br />
positions, see section 4.5.8.<br />
To prevent spiral dives intentional spinning should only be executed at aft C.G.<br />
positions.<br />
Recovery from unintentional spinning should be done immediately.<br />
3.7 Recovery from unintentional cloud flying<br />
Spins are not to be used to loose altitude. In an emergency, pull out the dive<br />
brakes fully before exceeding a speed of 200 km/h and fly with max. 200 km/h<br />
(108 kts.) until leaving the cloud.<br />
At higher speeds up to VNE pull out the dive brakes very carefully because of<br />
high aerodynamic and g-loads.<br />
Issued: March 2002 LBA app. 3.3
Flight manual <strong>DG</strong>-<strong>1000S</strong><br />
3.8 Flight with asymmetric waterballast<br />
If you suspect that the waterballast does not dump symmetrically you have to<br />
close the dump valves of the wingtanks immediately, to avoid greater<br />
asymmetry.<br />
Asymmetry can be verified by the necessary aileron deflection in straight flight<br />
at low airspeeds.<br />
When flying with asymmetric waterballast you have to increase the airspeed,<br />
especially in turns, so that you can avoid a stall at all costs.<br />
Fly the landing pattern and touch down aprox. 10 km/h (6 kts.) faster than<br />
usually and after touch down control carefully the bank angle to avoid the wing<br />
touching the ground too early.<br />
3.9 Defective fin ballast dump<br />
If the fin ballast dump valve handle can be operated with unusually low effort (<br />
force of the retaining spring is no longer apparent), you must assume that the fin<br />
ballast may no longer be dumped. In such a case, to avoid unsafe rearward C.G<br />
position, do not dump the wing ballast. Take into account the high mass of your<br />
glider and especially for the landing, increase the approach speed accordingly.<br />
3.10 Emergency wheel up landing<br />
It is not recommended to execute a wheel up emergency landing, as the energy<br />
absorption capability of the fuselage is much smaller than that of the landing<br />
gear.<br />
If the landing gear can't be extended touch down with small angle of attack.<br />
Issued: March 2002 LBA app. 3.4
Flight manual <strong>DG</strong>-<strong>1000S</strong><br />
3.11 Emergency ground loop<br />
If there is the risk of overshooting the landing strip you have to decide at least<br />
40 m (130 ft) before the end of the field to execute a controlled ground loop:<br />
- If possible turn into the wind!<br />
- At the same time try to lift the tail by pushing the stick forward.<br />
3.12 Emergency landing on water<br />
From the experience with emergency water landing we know that it is likely that<br />
the sailplane will dive into the water, cockpit first.<br />
Therefore an emergency landing on water should be the last choice.<br />
In the case of a water landing, however, extend the landing gear.<br />
Recommended procedures :<br />
On downwind leg of the landing pattern: Extend the landing gear, unlock the<br />
parachute harness (not the seat harness)<br />
Touch down: With landing gear extended and airspeed as low as possible.<br />
At point of touch-down: Use your left arm to protect your face against possible<br />
canopy fracture.<br />
After touch down: Unfasten seat belt harnesses and undo parachute.<br />
Leaving the cockpit under water: If the canopy has not fractured, opening the<br />
canopy may be possible only after the forward fuselage is almost<br />
completely filled with water.<br />
Issued: January 2005 TN 413/8 LBA app. 3.5
4 Normal procedures<br />
Section<br />
Flight manual <strong>DG</strong>-<strong>1000S</strong><br />
Page<br />
4.1 Introduction.............................................................................................. 4.2<br />
4.2 Rigging and derigging, filling the watertanks ......................................... 4.2<br />
4.2.1 Rigging............................................................................................... 4.2<br />
4.2.2 Filling the wing water ballast tanks ................................................... 4.4<br />
4.2.3 Filling the fin ballast tank .................................................................. 4.5<br />
4.2.4 Ballast box in the fin .......................................................................... 4.5<br />
4.2.5 Derigging ........................................................................................... 4.6<br />
4.3 Daily Inspection ....................................................................................... 4.7<br />
4.4 Pre-flight inspection............................................................................... 4.10<br />
4.5 Normal procedures and recommended speeds ...................................... 4.11<br />
4.5.1 Launch.............................................................................................. 4.11<br />
4.5.2 Free flight......................................................................................... 4.12<br />
4.5.3 Approach and landing ...................................................................... 4.13<br />
4.5.4 Flight with water ballast................................................................... 4.15<br />
4.5.5 Flight at high altitude and at low temperatures ............................... 4.16<br />
4.5.6 Flight in rain and thunderstorms...................................................... 4.17<br />
4.5.7 Cloud flying ..................................................................................... 4.17<br />
4.5.8 Aerobatics ........................................................................................ 4.18<br />
Issued: January 2005 TN 413/8 LBA app. 4.1
Flight manual <strong>DG</strong>-<strong>1000S</strong><br />
4.1 Introduction<br />
This section provides checklist and amplification procedures for the conduct of<br />
normal operation. Normal procedures associated with optional systems can be<br />
found in section 9.<br />
4.2 Rigging and derigging, filling the watertanks<br />
4.2.1 Rigging<br />
1. Open the rear canopy.<br />
2. Clean and lube the pins, bushings and the control connections.<br />
3. Rigging the inboard wing panels<br />
All controls hook up automatically. Therefore set the airbrake handle to the<br />
forward stop.<br />
Ailerons should be held neutral for rigging, airbrakes must be locked.<br />
Screw one of the rear wing securing pins on the tool W 38/2.<br />
Close both canopies. Push the right wing panel into place. Insert the rear<br />
securing pin with the tool at the rear attachment fitting. Push in the tool so<br />
far that the upper surface of the brass part of the tool is flush with the wing<br />
surface. Screw off the tool. Check if the locking device for the securing pin<br />
has engaged.<br />
Note: If the wing refuses to slip close to the fuselage, you may try to insert<br />
the rigging pin W58 instead of the locking pin and try to move the wing<br />
towards the fuselage with help of the conical shape of this pin.<br />
Screw the other securing pin onto the tool.<br />
Open the rear canopy. Push in the left wing. Mount and check the left<br />
securing pin by the same method as the right side.<br />
Push the two main pins in as far as possible.<br />
Turn the handles up to the fuselage wall, while pulling out the white<br />
securing knob, then release the knob back to its locked position.<br />
Issued: March 2002 LBA app. 4.2
Flight manual <strong>DG</strong>-<strong>1000S</strong><br />
4. Rigging of the stabilizer<br />
Install the battery Z110 or a ballast weight of 5.5kg (12.1 lbs.) in the battery<br />
box in the fin, connect the battery. Exemption for extremely light pilots, see<br />
section 6.8.4.<br />
Caution: Rigging of the horizontal tailplane is only permitted with nose<br />
down trim-setting. Therefore operate the trim release lever and push the<br />
control stick forward, then release the lever to engage the trim (don’t operate<br />
the trim control knob, the trim should not be pushed to the most nose down<br />
position).<br />
Screw the tool W 38/2 into the securing plate (near the top of the left surface<br />
of the fin). Pull out the securing plate with the tool, move it downwards to<br />
engage in the rigging position. Set the stabilizer on, so that the roller at the<br />
fuselage side push rod is inserted into the funnel at the elevator.<br />
Watch carefully the procedure!<br />
When the stabilizer is set down and laying<br />
on the fin, push it aft. The roller will engage<br />
and slide forward in the funnel if you hold<br />
the elevator in the pertinent position.<br />
Release the securing device by pulling out<br />
with the tool and engage the securing device<br />
by lifting the tool. The securing plate must be<br />
flush with the surface of the fin. Screw out the tool.<br />
Check for correct elevator connection by looking from the rear into the<br />
gap at the right hand side of the rudder.<br />
5. Rigging of the outboard wing panels (20m wing extensions or 18 m wing<br />
tips): Insert the wing tip extensions into the wing. Press in the locking pin<br />
with your finger.<br />
Insert the wing tip as far as the aileron connector starts to slide onto the<br />
aileron.<br />
Strike firmly with the palm of your hand on to the wing tip to lock in the<br />
wing tip extension.<br />
6. Tape the gaps of the wing-fuselage junction and at the wing joint.<br />
7. Execute a positive control check, one helper to hold firmly the control<br />
surfaces is needed.<br />
Issued: February 2011 TN1000/18 App. 4.3
Flight manual <strong>DG</strong>-<strong>1000S</strong><br />
4.2.2 Filling the wing water ballast tanks<br />
First open the fin tank and then open the right wing tank valve (top handle).<br />
Place the right wing tip on the ground. Attach the hose in the water outlet on the<br />
lower surface of the wing. Fill with water. Close the valve.<br />
Place the left wing tip to the ground and fill the left tank accordingly. Filling<br />
with water ballast is only allowed with a filling system which enables you to<br />
determine the exact amount of ballast filled in, e.g. water gauge or calibrated<br />
canisters.<br />
Warning: Fill the hose from your water containers but never from a main<br />
pressure water supply. Filling the wing tanks with excessive pressure (more than<br />
0.2 bar, 3 psi) will definitely burst the wing shell!<br />
Caution: If the tanks are to be filled up completely you must suck the air out of<br />
the tanks with the filling hose, as the tanks have no ventilation line.<br />
Fill with the desired amount of water regarding the loading chart see section<br />
6.8.5.<br />
In case a valve leaks slightly, you may try to pull out the PVC pushrod of the<br />
valve to stop the leak. If this cannot be done successfully refer to maintenance<br />
manual 1.8.1. and 4.1.<br />
It is not allowed to fly with leaking watertanks, as this may result in<br />
asymmetrical loading condition.<br />
After filling the tanks, check to see if the wings are balanced. If one wing is<br />
heavier, dump enough water to balance the wings.<br />
Finally press the Teflon-glass-fabric which shall close the dump holes against<br />
the wing-shell. There must be always a small amount of grease on the shell, to<br />
ensure that the covers stick to the shell.<br />
Warning: Follow the loading chart section 6.8 must be observed. The<br />
maximum take off weight must not be exceeded.<br />
Issued: March 2002 LBA app. 4.4
Flight manual <strong>DG</strong>-<strong>1000S</strong><br />
4.2.3 Filling the fin ballast tank<br />
This tank must be filled after filling the wingtanks. Determine the amount (see<br />
section 6.8.6). Connect the transparent funnel equipped filling hose (supplied<br />
with the aircraft) via the hose connector GRS 10-12 to the hose which comes out<br />
of the left rear end of the fuselage.<br />
The funnel can be suspended at the top of the rudder.<br />
Fill with clean water using a graduated measuring vessel.<br />
In addition you may check the content level by holding the filling hose against<br />
the scale on the fin.<br />
After filling, push the fin tank dump lever in a forward direction (the dump<br />
valve will be closed by a spring).<br />
Then remove the filling hose with the hose connector.<br />
4.2.4 Ballast box in the fin<br />
To fill the ballast box remove the Plexiglas cover plate by inserting a 6mm pin<br />
into the hole of the upper locking device and move the locking pin downwards.<br />
Determine the amount of trim-weights according to section 6.8.7. Slide the<br />
weights into the rails of the box. The heavy weights with 2,4 kg (5.3 lbs.) each<br />
must be installed in the lower 4 sections and the lighter weights with 1,2 kg<br />
(2.65 lbs.) each in the upper 2 sections. It doesn’t matter in which sections the<br />
weights are installed (in case that not all sections will be filled up), but it is not<br />
allowed to insert the light weights into the sections for the heavy weights. Close<br />
the compartment.<br />
Caution: When changing trim ballast, check condition and correct gluing of the<br />
foam rubber rings 10L45/2 in the ballast box in the fin. Without these rings a<br />
correct indication is not possible.<br />
Replace damaged rings according to Service Info 67-07, attached to the MM.<br />
Warning: Check that the locking device has engaged completely.<br />
Tape the cover of the fin ballast box with tape min. 19mm (3/4 in.) wide prior to<br />
each flight.<br />
A control light in the front instrument panel starts blinking after each transaction<br />
with the weights. By counting the amount of blinks, the amount of ballast can be<br />
determined. For a heavy weight 2 blinks appear and 1 blink for a light weight,<br />
this means 10 blinks if the box is filled up completely. After a pause of 2-3<br />
seconds the blinking will be repeated etc. The blinking can be stopped by<br />
pressing on the control light. Pressing again on the control light reactivates the<br />
blinking feature.<br />
After filling the ballast box you should check the correct indication of the<br />
control light.<br />
Issued: February 2011 TN1000/18 App. 4.5
Ballast box in the fin cont.<br />
Flight manual <strong>DG</strong>-<strong>1000S</strong><br />
In addition with TN413/4 executed, standard from ser. no. 10-49 on:<br />
A switch will be operated by the locking pin of the ballast box cover. As long as<br />
the switch is not closed, the control light for the ballast box will blink with<br />
doubled speed without interruption. The blinking can’t be switched off by<br />
pressing on the control light contrary to the blinking which indicates the amount<br />
of ballast.<br />
4.2.5 Derigging<br />
Derigging follows the reverse of rigging.<br />
Waterballast must be dumped first.<br />
Lock the airbrakes.<br />
For disassembling the securing pins of the wings the tool W 38/2 must be<br />
screwed into the thread completely.<br />
The brass part of the tool will then disengage the securing of this bolt.<br />
It is recommended to leave the securing pin in the right wing while you derig the<br />
left wing.<br />
Derigging of the outboard wing panels (20m wing extensions or 18 m wing<br />
tips):<br />
Use a 6 mm diameter pin for pressing in the locking pin on the wings upper side.<br />
Pull out the wing tip or the wing tip extension.<br />
Issued: February 2011 TN1000/18 App. 4.6
Flight manual <strong>DG</strong>-<strong>1000S</strong><br />
4.3 Daily Inspection<br />
Please keep in mind the importance of the inspection after rigging the glider and<br />
respectively each day prior to the first take off. It is for your safety.<br />
Caution: After a heavy landing or if other high loads have been imposed on<br />
your sailplane, you must execute a complete inspection referring to maintenance<br />
manual sect. 2.3 prior to the next take off. If you detect any damage, don't<br />
operate your aircraft before the damage is repaired. If the maintenance and<br />
repair manual don't give adequate information, please contact the manufacturer.<br />
A Inspection prior to rigging:<br />
1. Wing roots and spar ends<br />
a) check for cracks, delamination etc.;<br />
b) check the bushes and their glued connection in root ribs and the spar<br />
ends for wear;<br />
c) check the control hook ups at the rootrib for wear and corrosion;<br />
d) check the strings which hold the waterbags for sufficient tension (see<br />
maintenance manual sect. 4.1)<br />
2. Fuselage at wing connection<br />
a) check the lift pins for wear and corrosion;<br />
b) check the control hook ups including the water dump system for wear<br />
and corrosion.<br />
3. Top of the vertical fin<br />
a) check the mounting points of the horizontal tailplane and the elevator<br />
control hook up for wear and corrosion<br />
b) check if the battery is installed in the fin and connected<br />
4. Horizontal tailplane<br />
check the mounting points and the elevator control hook up for wear and<br />
corrosion;<br />
5. Rigging points for the outboard wing panels<br />
check the lift pins and bushes for wear and corrosion and check their glued<br />
connections. Check the locking device for function and sufficient spring<br />
force.<br />
Issued: March 2002 LBA app. 4.7
Flight manual <strong>DG</strong>-<strong>1000S</strong><br />
B Inspection after rigging - Walk around the aircraft<br />
1. All parts of the airframe<br />
a) check for flaws such as bubbles, holes, bumps and cracks in the<br />
surface;<br />
b) check leading and trailing edges of the wings and control surfaces for<br />
cracks;<br />
2. Cockpit area<br />
a) check the canopy locking mechanism;<br />
b) check the canopy emergency release see section 7.14 (not each day,<br />
but min. every 3 month);<br />
c) check the main pin securing;<br />
check the securing ropes of the headrest (not applicable for the<br />
Version mounted at the lift pin tube);<br />
d) check all controls for wear and function, incl. positive control check;<br />
e) check the tow release system for wear and function incl. cable release<br />
check;<br />
f) check for foreign objects;<br />
g) check the instrumentation for wear and function;<br />
h) check the radio and other parts of the electric system (fuses!) for<br />
function. If there is no electrical power, it can be expected that the<br />
battery in the fin is not fitted. Flying without this battery is only<br />
permitted when flying solo with an extremely under weight pilot,<br />
(see paragraph 6.8.4) otherwise the forward C.G. limit may be<br />
exceeded<br />
i) check the brake fluid level;<br />
j) check if the fin tank is empty<br />
3. C.G. Tow hook<br />
a) check the ring muzzle of the C.G. hook for wear and function;<br />
b) check for cleanliness and corrosion;<br />
Issued: February 2011 TN 1000/18 App. 4.8
Flight manual <strong>DG</strong>-<strong>1000S</strong><br />
4. Main landing gear and nose wheel (if fitted)<br />
a) check the struts, the gear box, the gear doors and the tyre for wear; dirt in<br />
the struts can hinder the landing gear from locking over centre the next<br />
time!;<br />
With TN1000/13 executed, standard from ser. no. 10-133 on:<br />
Check all parts of the landing gear positive locking device (notch and latch<br />
at the landing gear struts) for dirt. Check the Bowden cable for damage.<br />
b) check the tyre pressure;<br />
main wheel: 2.5 bar - 36 psi<br />
nose wheel: 2.5 bar - 36 psi<br />
c) check wheel brake and hose for wear and function;<br />
5. Left wing<br />
a) check locking of the outboard wing;<br />
b) check the aileron for excessive free play;<br />
c) check airbrake- and box and control rod for wear and free play. It must be<br />
possible to retract the airbrake, even if it is pressed backwards in direction<br />
of flight. If there is any water in the airbrake box this has to be removed;<br />
d) check the locking of the rear wing attachment pin.<br />
6. Tail wheel<br />
a) check for wear, free play and excessive dirt in the wheel box. Remove<br />
excessive dirt prior to take off;<br />
b) check tyre pressure: 4 bar -58 psi;<br />
7. Rear end of the fuselage<br />
a) check the lower rudder hinge and the connection of the rudder cables for<br />
wear, free play and correct securing;<br />
b) check the bulkhead and fin trailing edge shear web for cracks and<br />
delamination;<br />
8. Fin - horizontal tail<br />
a) check the upper rudder hinge for wear and free play;<br />
b) check the elevator for free play and correct control hook up, look from the<br />
rear into the gap at the right hand side of the rudder;<br />
c) check the securing of the stabilizer;<br />
d) check the horizontal tail for free play;<br />
e) check the TE or Multiprobe for correct insertion and fix it with tape<br />
f) check the trim-weight box, correct number of weights, locking device<br />
completely engaged?<br />
Caution: When changing the trim ballast check condition and correct gluing of the<br />
foam rubber rings to the mounting plate of the optical sensors in the trim-weight box.<br />
Without rings an indication error of the control lamp in the front instrument panel<br />
might occur. Replace missing rings according to Service Info 67-07 (attached to the<br />
maintenance manual).<br />
9. Right wing see item 5.<br />
10. Fuselage nose<br />
a) check the ports for the static pressure and the pitot pressure for cleanliness.<br />
b) if the sailplane was parked in rain, you have to empty the static ports by<br />
sucking out the water at the ports.<br />
c) check the nose hook for cleanliness and corrosion.<br />
Issued: February 2011 TN 1000/18 App. 4.9
4.4 Pre-flight inspection<br />
Flight manual <strong>DG</strong>-<strong>1000S</strong><br />
1. Lead ballast (for under weight pilot)?<br />
2. Parachute worn properly?<br />
3. Safety harness buckled?<br />
4. Front seat: pedals adjusted?<br />
Rear seat: seating height adjusted?<br />
5. All controls and knobs in reach?<br />
6. Altimeter?<br />
7. Dive brakes cycled and locked?<br />
8. Positive control check? (One person at the control surfaces).<br />
9. Fin ballast tank emptied or correct amount filled in?<br />
10. Trim-weight box in the fin, correct amount installed?<br />
Locking device completely engaged?<br />
11. Trim?<br />
12. Both canopies locked?<br />
13. Runway free?<br />
Issued: March 2002 LBA app. 4.10
Flight manual <strong>DG</strong>-<strong>1000S</strong><br />
4.5 Normal procedures and recommended speeds<br />
4.5.1 Launch<br />
Due to the towhook position being in the middle of the fuselage and the<br />
excellent effectiveness of the ailerons and rudder, the possibility of wing<br />
dropping or ground loops, even on a slowly accelerating aerotow is reduced.<br />
Take-off with strong crosswind is possible.<br />
4.5.1.1 Aerotow<br />
a) Aerotow is permitted only using the nose tow release. Set trim to neutral for<br />
aerotow.<br />
b) Version with nose wheel: Pull the stick until the nose wheel lifts off from the<br />
ground. Then control the aeroplane so that nose wheel and tail wheel don't<br />
touch the ground.<br />
Version without nose wheel: Keep the elevator in neutral position.<br />
Don't try to lift off before you reach an airspeed of 80 km/h (43 kts.) (without<br />
ballast). On a rough airfield hold the control stick tight. The undercarriage<br />
can be retracted at safety height during the tow.<br />
Normal towing speed is 120-130 km/h (65 - 70 kts.).<br />
For a cross country tow the speed can be as high as 185 km/h (98 kts.).<br />
Warning: Aerotow with high take off weight requires a powerful tow plane.<br />
Many tow planes are not certified to tow gliders with high take off weights.<br />
Reduce the take off weight if necessary!<br />
Issued: March 2002 LBA app. 4.11
Flight manual <strong>DG</strong>-<strong>1000S</strong><br />
4.5.1.2 Winch launch<br />
Winch launch is only allowed at the C.G. tow hook!<br />
Set the trim to neutral for winch launch.<br />
Caution: During ground roll and initial take-off (especially when flying solo)<br />
push the control stick to a forward position to prevent excessive nose-up<br />
pitching rotation during initial take-off.<br />
After reaching safety altitude gradually pull back on the stick, so that the glider<br />
will not pick up excessive speed. Don't pull too hard.<br />
After reaching release altitude pull the tow release knob.<br />
Recommended winch launch airspeed 110-130 km/h (60-70 kts.).<br />
Caution: Do not fly at less than 90 km/h (49kts.) or not more than 150 km/h<br />
(81 kts.).<br />
Warning: Winch launch with high take off weight requires a powerful winch!<br />
4.5.2 Free flight<br />
Stalling characteristics (level and turning flight)<br />
When stalled the <strong>DG</strong>-<strong>1000S</strong> will warn by buffeting. If the stick is pulled further<br />
the <strong>DG</strong>-<strong>1000S</strong> will drop one wing.<br />
Only at forward C.G. positions the <strong>DG</strong>-<strong>1000S</strong> can be flown in stall without wing<br />
dropping, maintain control during stalled flight only with the rudder, holding the<br />
ailerons neutral.<br />
With stick forward and opposite rudder if required, the <strong>DG</strong>-<strong>1000S</strong> can be<br />
recovered without much loss of height. Rain does not influence this behaviour<br />
noticeably. The loss of height is ca. 50 m (160 ft).<br />
Stall airspeeds see section 5.2.2.<br />
Caution: Flights in conditions conducive to lightning strikes must be avoided.<br />
Issued: February 2011 TN1000/18 App. 4.12
Flight manual <strong>DG</strong>-<strong>1000S</strong><br />
4.5.3 Approach and landing<br />
4.5.3.1 Normal landing<br />
It is recommended to dump the waterballast before landing even on airfields.<br />
Dump the ballast before an outlanding in any case.<br />
Abeam the landing point extend the landing gear. In calm weather approach<br />
with approx. 100 km/h (54 kts.) (ballast dumped!). With strong wind and / or<br />
waterballast fly faster! The very effective Schempp-Hirth dive brakes make a<br />
short landing possible. So a slip is not necessary as a landing technique.<br />
Caution: While slipping the rudder is sucked in its displaced position. So it is<br />
recommended to practise slipping at a higher altitude.<br />
The slip can be introduced at the recommended approach speed see above.<br />
To recover from the slip neutralize the aileron control first, this will reduce the<br />
force which sucks the rudder in its displaced position.<br />
During the slip the airspeed indicator shows airspeed values which are too low,<br />
so the slip must be executed with regard to the position of the horizon.<br />
No influence on the slipping characteristics when slipping with partially filled<br />
waterballast is noticeable.<br />
Strong crosswind offers no problem.<br />
Do not approach too slowly with fully extended airbrakes otherwise the aircraft<br />
may drop during flare out. When flaring out keep the airbrake setting you were<br />
using, opening them further may drop the sailplane!<br />
You can land the <strong>DG</strong>-<strong>1000S</strong> on soft fields with the landing gear extended, as<br />
there is no tendency of nosing over. During touch down pull the stick<br />
completely to avoid the fuselage nose touching the ground.<br />
After landing in a muddy field clean the landing gear and tow releases.<br />
Dirt in the front strut can keep the landing gear from locking over centre next<br />
time.<br />
With TN1000/13 executed, standard from ser. no. 10-133 on:<br />
Dirt in the landing gear positive locking device (notch and latch at the landing<br />
gear struts).may keep the latch from engaging in the notch next time.<br />
Simply hosing with water is the best cleaning method (don’t use a high pressure<br />
cleaner).<br />
Issued: February 2008 TN 1000/13 LBA app. 4.13
Flight manual <strong>DG</strong>-<strong>1000S</strong><br />
4.5.3.2 Landing with the landing gear retracted<br />
Wheel-up landing is not recommended see emergency procedures section 3.10.<br />
After wheel-up landing check the fuselage belly and the tow hook for damage.<br />
4.5.3.3 Landing with asymmetric waterballast<br />
See emergency procedures section 3.8<br />
Issued: March 2002 LBA app. 4.14
Flight manual <strong>DG</strong>-<strong>1000S</strong><br />
4.5.4 Flight with water ballast<br />
4.5.4.1 Wing tanks<br />
Recommended ballast for smooth thermals:<br />
rate of climb ballast<br />
m/s fpm litres U.S. gallons<br />
below 1,5 300 None<br />
1,5 – 3 300-600 100 26<br />
more than 3 600 max. ballast<br />
Do not exceed the maximum gross weight when loading the water ballast. The<br />
maximum quantity of water allowed is dependent on the empty weight and the<br />
cockpit load (see section 6.8.5).<br />
In flight the water drains at approx. 0.5 lt./sec. (1.1 lbs./sec).<br />
4.5.4.2 Fin water ballast tank<br />
For optimal thermalling performance and handling water ballast in the fin tank<br />
should be used to compensate the forward movement of C.G. due to the mass of<br />
the wing water ballast. Please refer to section 6.8.6.<br />
Warning: It is prohibited to use the fin tank in icing conditions see sect. 2.15.<br />
Warning: If there is the risk of freezing, dump all water before you reach<br />
freezing altitude, latest at +2°C (36°F), or descend to lower altitudes.<br />
If you suspect a tank is leaking, dump all water immediately.<br />
Water ballast raises the approach speed, so it is recommended to dump the<br />
waterballast before landing. Dump the ballast before an outlanding in any case.<br />
4.5.4.3 Filling the waterballast<br />
See sections 4.2.2 and 4.2.3. After filling level the wings and check if the dump<br />
valves are tight. It is not allowed to fly with leaking watertanks as this may<br />
result in an asymmetric loading condition.<br />
Issued: March 2002 LBA app. 4.15
Flight manual <strong>DG</strong>-<strong>1000S</strong><br />
4.5.4.4 Dumping of the waterballast<br />
First open the fin tank, then open both wing ballast tanks together. Do not empty<br />
one wing tank after the other to avoid an asymmetric loading condition.<br />
Warning: If the fin ballast dump valve handle can be operated with unusually<br />
low effort (force of the retaining spring is no more apparent) you must suspect<br />
that the fin ballast can’t be dumped any more. In such case don’t dump the wing<br />
ballast to avoid an unsafe backward C.G. position.<br />
4.5.4.5 Valves leaking, servicing<br />
Please refer to the maintenance manual sect. 1.8 and 4.1.<br />
4.5.5 Flight at high altitude and at low temperatures<br />
With temperatures below 0°C (32°F) for instance when wave flying or flying in<br />
winter, it is possible that the control circuits could become stiffer. Special care<br />
should be taken to ensure that there is no moisture on any section of the control<br />
circuits to minimize the possibility of freeze up. It could be advantageous to<br />
apply Vaseline along all the edges of the airbrake cover plates to minimize the<br />
possibility of freezing closed.<br />
Operate the controls regularly to prevent ice build-up.<br />
It is not allowed to carry waterballast.<br />
Caution:<br />
1. At temperatures below -20°C (-4°F) there is the risk of cracking the gelcoat.<br />
2. Attention must be paid to the fact that at higher altitudes the true airspeed is<br />
greater than the indicated airspeed.<br />
The max. speed VNE is reduced. See the following table:<br />
Altitude in [m] 0-3000 4000 5000 6000 7000 8000<br />
VNE indicated km/h 270 256 243 230 217 205<br />
Altitude in [ft] 0-10000 13000 16000 20000 23000 26000<br />
VNE indicated kts. 146 138 131 124 117 111<br />
3. Dump the water ballast before you reach freezing altitude or descend to<br />
lower altitudes.<br />
4. Do not fly below 0°C (32°F) when your glider is wet (e.g. after rain).<br />
Issued: March 2002 LBA app. 4.16
Flight manual <strong>DG</strong>-<strong>1000S</strong><br />
4.5.6 Flight in rain and thunderstorms<br />
With light rain the stall speed and the sink rate increases slightly and the<br />
approach speed has to be increased.<br />
Warning: Flights and especially winch launches in the vicinity of thunder<br />
storms should be avoided. Due to lightning discharge, carbon fibre structures<br />
may be destroyed.<br />
4.5.7 Cloud flying<br />
Cloud flying is only permitted without waterballast. Take care to fly smoothly<br />
and coordinated. It is prohibited to use a spin as a method for loosing altitude in<br />
cloud. In case of emergency, pull out the dive brakes fully before exceeding a<br />
speed of 200 km/h and dive with max. 200 km/h (108 kts.) to leave the cloud.<br />
Warning: Flying in or near thunderstorm-clouds is prohibited.<br />
Issued: January 2005 TN 413/8 LBA app. 4.17
Flight manual <strong>DG</strong>-<strong>1000S</strong><br />
4.5.8 Aerobatics<br />
Caution: The <strong>DG</strong>-<strong>1000S</strong> is a high performance sailplane. Therefore the speed<br />
increase in the dive, especially in inverted flight is high.<br />
Training aerobatics therefore should only be executed after a rating with an<br />
experienced pilot, or if you can master the manoeuvres on other sailplane types.<br />
In any case don't try to execute the manoeuvres with entry speeds other than<br />
those listed.<br />
Caution: Do not make full or abrupt control movement above the manoeuvring<br />
speed VA=185 km/h (97 kts.). At speeds between VA and VNE= 270km/h<br />
(146 kts.) reduce the control movements accordingly. At VNE only 1/3 of the<br />
max. control movements are allowed.<br />
4.5.8.1 Category U, Utility<br />
Warning: Execute only the approved manoeuvres.<br />
Approved manoeuvres valid for all spans, but only without waterballast and with<br />
the weight of the rear pilot compensated by ballast in the ballast box in the fin<br />
see section 6.8.7.<br />
Approved manoeuvres Entry speed g-loads<br />
Spin / /<br />
Inside loop 180 - 200 km/h (97 - 108 kts) 4.0<br />
Chandelle 180 - 200 km/h (97 - 108 kts) 3.5<br />
Lazy Eight 180 - 200 km/h (97 - 108 kts) 3.5<br />
Stall turn 200 - 220 km/h (108 - 119kts) 4.0<br />
Issued: March 2002 LBA app. 4.18
Spins<br />
Flight manual <strong>DG</strong>-<strong>1000S</strong><br />
Caution: Prolonged spinning is satisfactorily accomplished with aft C.G.<br />
positions. If prolonged spinning is intended, ballast in the ballast box in the fin<br />
should be used to achieve an aft C.G. position, see section 6.8.7.<br />
It is not necessary to extend the dive brakes during spin recovery. The<br />
<strong>DG</strong>-<strong>1000S</strong> displays a large nose down pitch attitude after leaving the spin. So<br />
you have to flare out correspondingly.<br />
With medium and forward C.G. positions prolonged spinning is not possible.<br />
The <strong>DG</strong>-<strong>1000S</strong> will terminate the spin by itself after a certain number of turns<br />
dependent on the C.G. position. The nose down pitch and speed will be high so<br />
with these C.G. positions not more than 1 turn spins should be executed, to<br />
avoid high g-loads.<br />
In addition there is a tendency that the spin will turn into a spiral dive after 1 or<br />
2 turns. On reaching this state you must recover immediately.<br />
Inducing the spin: Gradually bring the sailplane into a stall. When buffeting<br />
starts, pull the stick back completely and kick in full rudder in the direction of<br />
spin.<br />
Recovering from the spin: Apply full rudder opposite to the direction of spin,<br />
then ease stick forward until the rotation ceases, centralize the controls and<br />
carefully pull out of the dive. The ailerons should be kept neutral during<br />
recovery. Height loss during recovery is approx. 100 m (320 ft), the max. speed<br />
is 200 km/h (108 kts.).<br />
Issued: March 2002 LBA app. 4.19
Stall turn<br />
Flight manual <strong>DG</strong>-<strong>1000S</strong><br />
To fly a stall turn safely, proceed as follows:<br />
Don’t choose an entry speed of less than 200 km/h (108 kts.).<br />
During the pull out, when reaching the vertical flight path initiate rotation at<br />
min. 150 km/h (81 kts.) with the rudder. Push the rudder quickly, but not<br />
abruptly. During the turn apply a little aileron against the direction of turn and<br />
full forward stick deflection to execute the turn correctly in one plane.<br />
As soon as you reach the vertical dive, start to pull out of the dive to minimize<br />
the increase of airspeed and the g-loads.<br />
Be careful not to exceed the airspeed for max. control surface deflection as<br />
indicated in section 2.2.<br />
Caution: A classical stall turn with almost no airspeed at the highest point of the<br />
turn is very difficult to fly with a glider with larger wingspan, due to the high<br />
moment of inertia.<br />
This effect is taken into account when using the above mentioned procedure.<br />
Only a pilot who is trained in the technique to execute during the pull up a slight<br />
side-slip (with a little aileron deflection in the intended turn direction and<br />
appropriate rudder deflection against turn direction) can start to initiate the<br />
rotation at a lower speed of 120 km/h (65 kts.) with fast rudder deflection. The<br />
turn will look nicer and be narrower than with the method described above.<br />
Warning: If the rudder is applied too late and the rotation is insufficient, it is<br />
possible that the glider tailslides (falls tailwards) or falls sideways.<br />
If this happens it is important to hold all controls firmly, preferably at one of the<br />
stops, until the nose swings down. Otherwise, due to the reverse airflow, the<br />
control surfaces may flap against their stops and be damaged. In addition<br />
holding the control stick at the stop prevents the stick from making unnecessary<br />
movements due to the massbalance weights in the elevator control system.<br />
Then flare out immediately.<br />
Issued: March 2002 LBA app. 4.20
Flight manual <strong>DG</strong>-<strong>1000S</strong><br />
4.5.8.2 Category A, Aerobatic<br />
Only approved with 18m span and without waterballast, max. mass 630 kg<br />
(1389 lbs.) and with the weight of the rear pilot compensated by ballast in the<br />
ballast box in the fin see section 6.8.7 and with the required equipment installed<br />
see section 2.10.<br />
Execute only the approved manoeuvres.<br />
Don't execute aerobatics below the safety altitude required by national law.<br />
Approved manoeuvres (Category A, Aerobatic):<br />
All manoeuvres approved for category U, Utility and additionally:<br />
Approved manoeuvres recommended airspeed g-load<br />
Inverted flight 120 - 200 km/h (65-108 kts.) -1<br />
Approved manoeuvres entry speeds g-loads<br />
half loop and half roll 220 km/h (119 kts.) +5.0<br />
half roll and half loop 180 – 200 km/h (97-108 kts.) +4.5<br />
slow roll 180 - 200 km/h (97-108 kts.) +/-1.5<br />
half positive flick roll from normal 120 - 140 km/h (65 - 76 kts.)<br />
to inverted flight with half pos.<br />
loop<br />
+4.0<br />
half negative flick roll from<br />
inverted to normal flight<br />
130 – 150 km/h (70 - 81 kts.) -3.5<br />
Caution: the <strong>DG</strong>-<strong>1000S</strong> is equipped with a powerful longitudinal trimming<br />
device. In addition the mass balance weight of the elevator is incorporated in the<br />
elevator control system. Due to these facts the elevator control forces during<br />
inverted flight change considerably with trim position.<br />
It is strongly recommended to trim the glider to approx. 140 km/h (76 kts.) in<br />
horizontal flight prior to executing aerobatics, especially prior to inverted flight.<br />
Issued: March 2002 LBA app. 4.21
Inverted flight<br />
Flight manual <strong>DG</strong>-<strong>1000S</strong><br />
The speed in inverted flight should preferably be chosen between 120-200 km/h<br />
(65-108 kts.). At speeds greater than 185 km/h (100 kts.) no full control<br />
deflections are allowed.<br />
Warning:<br />
When the speed is reduced below the minimum speed (depending on weight and<br />
C.G. position between 105 - 115 km/h, 57 - 62 kts.) the <strong>DG</strong>-<strong>1000S</strong> will stall.<br />
The stall will be indicated by buffeting of the tailplane. The stall starts with the<br />
stick somewhat away from it’s forward position. When applying full stick<br />
forward the <strong>DG</strong>-<strong>1000S</strong> will enter an inverted stable stall with high sink-rate.<br />
The aircraft nose will noticeably point below the horizon and the airspeed<br />
increases. The efficiency of the ailerons and rudder will not be reduced.<br />
To avoid an uncontrolled flight condition or disorientation of the pilot, this<br />
manoeuvre should be terminated immediately by a half roll!<br />
Half loop and half roll<br />
After reaching the entry speed of 220 km/h (119kts.) pull the stick quickly, but<br />
not abruptly until reaching the inverted position.<br />
Before the nose starts pointing below the horizon apply full aileron in the<br />
desired direction to induce the half roll. When the wing passes the vertical<br />
position the rudder must be applied upwards to keep the nose above the horizon.<br />
Half roll and half loop<br />
After reaching the entry speed of 180 - 200 km/h (97 - 108 kts.) the nose must<br />
be raised approx. 30° above the horizon. After returning the stick to neutral<br />
apply full aileron into the desired direction to start the half roll. When the wing<br />
passes the vertical position the rudder must be applied upwards. When reaching<br />
inverted flight the ailerons must be neutralized and before reaching the stall<br />
speed pull back the stick, but not too abruptly, to start the half loop to level out.<br />
Note: If during the entry the nose is raised too high or the entry speed is too low,<br />
it can happen, that the glider continues to roll into normal upright position, even<br />
if the aileron was neutralized in inverted position .<br />
Issued: March 2002 LBA app. 4.22
Slow roll<br />
Flight manual <strong>DG</strong>-<strong>1000S</strong><br />
After reaching the entry speed of 180 - 200 km/h (97-108 kts.) the nose must be<br />
raised slightly above the horizon. After returning the stick to neutral, full aileron<br />
has to be applied in the desired direction.<br />
When the wing passes the vertical position the rudder must be applied a little in<br />
upwards direction.<br />
After the wing has passed the first vertical position the stick is to be pushed<br />
slightly (never abruptly) forward to keep the nose above the horizon. When the<br />
wing passes the second vertical position the rudder must be applied upwards to<br />
keep the nose above the horizon until normal flying position is reached.<br />
Note: If during the inverted flight the nose is raised too high above the horizon<br />
and the speed is reduced too much, a stall could occur when the wing reaches<br />
the second vertical position and the roll is finished as a "flicked" roll.<br />
The stall is indicated by buffeting of the tailplane.<br />
Issued: March 2002 LBA app. 4.23
Flick manoeuvres<br />
Flight manual <strong>DG</strong>-<strong>1000S</strong><br />
The flick manoeuvres which have been tested with the <strong>DG</strong>-<strong>1000S</strong> should only<br />
be executed by experienced aerobatic pilots. The result is dependent as for any<br />
other sailplane on several parameters like inducing control speed, C.G. position,<br />
control movement during rotation etc.<br />
Due to the large span and the resulting large moment of inertia, executing flick<br />
manoeuvres is more difficult than with smaller aerobatic gliders. Therefore you<br />
should not try these manoeuvres solo unless you have trained and mastered them<br />
on other gliders<br />
Half positive flick roll from normal to inverted flight with half positive loop<br />
Tested entry speed: 120 – 140 km/h (65 – 76 kts.).<br />
Prior to inducing the flick roll, place the nose a little below the horizon.<br />
Induce the half roll with full stick backwards and full rudder only. After the<br />
rotation starts ease the stick to neutral to avoid too large an angle of attack and<br />
unnecessary loss of speed.<br />
Stop the rolling motion in the inverted position by neutralizing the elevator<br />
control and with a little rudder against the rolling direction. Then pull the stick<br />
back to fly the half positive loop before the glider stalls in the inverted attitude.<br />
If you keep the stick pulled back for too long a time during entry, it may not be<br />
possible to stop the rotation in the inverted attitude and the glider will continue<br />
to roll into normal flight position.<br />
Half negative flick roll from inverted to normal flight<br />
Tested entry speed: 130 – 150 km/h (70 – 81 kts.).<br />
Induce the half roll with full stick forwards and full rudder only. If you use<br />
additional aileron there may be some vibration in the fuselage due to vortices.<br />
The vibrations don’t impair the flight characteristics.<br />
Shortly before reaching normal upright position, the rotation has to be stopped<br />
by pulling the stick backwards and applying some opposite rudder.<br />
Stopping the half roll in exactly horizontal attitude is nearly impossible. The<br />
glider will adopt a nose down position.<br />
Issued: March 2002 LBA app. 4.24
5 Performance<br />
Section<br />
Flight manual <strong>DG</strong>-<strong>1000S</strong><br />
Page<br />
5.1 Introduction.............................................................................................. 5.2<br />
5.2 Approved data.......................................................................................... 5.3<br />
5.2.1 Airspeed indicator system calibration................................................ 5.3<br />
5.2.2 Stall speeds......................................................................................... 5.4<br />
5.3 Additional Information ............................................................................ 5.5<br />
5.3.1 Demonstrated crosswind performance............................................... 5.5<br />
5.3.2 Gliding performance .......................................................................... 5.5<br />
5.3.3 Flight polar with 20 m wing span ...................................................... 5.6<br />
5.3.4 Flight polar with 18 m wing span ...................................................... 5.7<br />
Issued: March 2002 LBA app. 5.1
Flight manual <strong>DG</strong>-<strong>1000S</strong><br />
5.1 Introduction<br />
This section provides approved data for airspeed calibration, stall speeds and<br />
take-off performance and non-approved additional information.<br />
The data in the charts has been computed from actual flight tests with the<br />
sailplane in good and clean condition and using average piloting techniques.<br />
Issued: March 2002 LBA app. 5.2
270<br />
250<br />
230<br />
210<br />
190<br />
170<br />
150<br />
130<br />
110<br />
90<br />
70<br />
Flight manual <strong>DG</strong>-<strong>1000S</strong><br />
5.2 Approved data<br />
5.2.1 Airspeed indicator system calibration<br />
IAS = indicated airspeed<br />
CAS = calibrated airspeed<br />
Caution: The airspeed indicator is to be connected to the static ports and pitot<br />
probe in the fuselage nose.<br />
CAS [km/h]<br />
max. upper tolerance<br />
max. lower tolerance<br />
measurement<br />
IAS=CAS<br />
70 90 110 130 150 170 190 210 230 250 270<br />
IAS [km/h]<br />
Issued: March 2002 LBA app. 5.3
Flight manual <strong>DG</strong>-<strong>1000S</strong><br />
5.2.2 Stall speeds<br />
The given speeds are the minimum achievable speeds during level flight in km/h<br />
and (kts.).<br />
Airbrakes retracted 20m span<br />
mass kg 470 500 550 600 650 700 750<br />
mass lbs. 1036 1102 1213 1323 1433 1543 1653<br />
W/S kg/m² 26,8 28,5 31,4 34,2 37,1 39,9 42,8<br />
W/S lbs./ft.² 5.5 5.84 6.43 7.01 7.59 8.18 8.76<br />
V km/h 62,9 64,9 68,0 71,1 74,0 76,8 79,5<br />
V kts. 34 35 36.7 38.4 40 41.5 42.9<br />
Airbrakes retracted 18m span<br />
W/S kg/m² 28,1 29,9 32,9 35,9 38,9 41,9 44,9<br />
W/S lbs./ft.² 5.76 6.12 6.43 7.35 7.96 8.57 9.18<br />
V km/h 64,4 66,4 69,7 72,8 75,8 78,6 81,4<br />
V kts. 34.8 35.9 37.6 39.3 40.9 42.4 44<br />
Airbrakes extended 20m span<br />
mass kg 470 500 550 600 650 700 750<br />
V km/h 67,4 69,5 72,9 76,2 79,3 82,3 85,1<br />
V kts. 36,4 37,5 39,4 41,1 42,8 44,4 46,0<br />
Airbrakes extended 18m span<br />
V km/h 69,0 71,2 74,7 78,0 81,2 84,2 87,2<br />
V kts. 37,3 38,4 40,3 42,1 43,8 45,5 47,1<br />
The loss of height for stall recovery is approximately 30 m (100 ft) if recovered<br />
immediately.<br />
Issued: September 2003 TN 413/2 LBA app. 5.4
Flight manual <strong>DG</strong>-<strong>1000S</strong><br />
5.3 Additional Information<br />
5.3.1 Demonstrated crosswind performance<br />
The demonstrated crosswind velocity is 15 km/h (8 kts) according to the<br />
airworthiness requirements.<br />
5.3.2 Gliding performance<br />
Performance data with 20 m span (S = 17,53 m²)<br />
wing loading kg/m² 28 35 42<br />
minimum sink m/s 0,51 0,56 0,62<br />
at V [km/h] 79 88 98<br />
best glide ratio / 45,9 46,3 46,6<br />
at V [km/h] 93 104 120<br />
Performance data with 18 m span (S = 16,72 m²)<br />
wing loading kg/m² 30 36 45<br />
minimum sink m/s 0,60 0,65 0,72<br />
at V [km/h] 84 90 100<br />
best glide ratio / 41,5 41,7 42<br />
at V [km/h] 100 110 123<br />
A variation in speed by ± 10 km/h (5 kts.) from the above will decrease the best<br />
glide angle by 0.5 glide points and increase the min. sink rate by 1 cm/sec. (2<br />
ft/min).<br />
The polar curves can be seen on the next page.<br />
For optimum performance, the aircraft should be flown with a C.G. towards the<br />
rear of the allowable range. This especially improves thermalling performance.<br />
However the aircraft will be more pitch sensitive.<br />
The wing fuselage joint, wing parting and the tailplane fin joint should be taped<br />
up and the aircraft thoroughly cleaned to obtain maximum performance.<br />
The polars apply to a "clean" aircraft.<br />
With dirty wings or flight in rain, the performance drops accordingly.<br />
Issued: March 2002 LBA app. 5.5
Flight manual <strong>DG</strong>-<strong>1000S</strong><br />
5.3.3 Flight polar with 20 m wing span<br />
Issued: March 2002 5.6
Flight manual <strong>DG</strong>-<strong>1000S</strong><br />
5.3.4 Flight polar with 18 m wing span<br />
Issued: March 2002 5.7
6 Mass (weight) and balance<br />
Flight manual <strong>DG</strong>-<strong>1000S</strong><br />
Page<br />
6.1 Introduction.............................................................................................. 6.2<br />
6.2 Weighing procedures ............................................................................... 6.2<br />
6.3 Weighing record....................................................................................... 6.2<br />
6.4 Basic empty mass and C.G. ..................................................................... 6.2<br />
6.5 Mass of all non-lifting parts (WNLP)...................................................... 6.3<br />
6.6 Max. mass (weight).................................................................................. 6.3<br />
6.7 Useful loads ............................................................................................. 6.3<br />
6.8 Loading chart ........................................................................................... 6.4<br />
6.8.1 Cockpit load ....................................................................................... 6.4<br />
6.8.2 Removable ballast for underweight pilots ......................................... 6.4<br />
6.8.3 Baggage.............................................................................................. 6.4<br />
6.8.4 Battery in the fin ................................................................................ 6.5<br />
6.8.5 Waterballast in the wing tanks........................................................... 6.5<br />
6.8.6 Fin ballast tank................................................................................... 6.5<br />
6.8.7 Ballast box in the fin .......................................................................... 6.6<br />
6.8.8 Weighing report (for section 6.3)....................................................... 6.7<br />
6.8.9 Empty weight C.G. limits (for 6.4).................................................... 6.8<br />
6.8.10 <strong>DG</strong>-1000 ballast chart (for 6.8.5)....................................................... 6.9<br />
6.9 C.G. calculation ..................................................................................... 6.10<br />
Issued: March 2002 6.1
Flight manual <strong>DG</strong>-<strong>1000S</strong><br />
6.1 Introduction<br />
This section contains the payload range within which the sailplane may be safely<br />
operated.<br />
A procedure for calculating the in-flight C.G. is also provided.<br />
A comprehensive list of all equipment available for this sailplane is contained in<br />
the maintenance manual.<br />
6.2 Weighing procedures<br />
See maintenance manual <strong>DG</strong>-<strong>1000S</strong>.<br />
Datum: Wing leading edge at the rootrib.<br />
Reference line: aft fuselage centre line horizontal.<br />
The weighing is to be executed with all tanks emptied, without ballast in the<br />
trim ballast boxes in the fin and in the cockpit (optional), but with fin battery<br />
Z110.<br />
6.3 Weighing record<br />
The result of each C.G. weighing is to be entered on page 6.7. If the min.<br />
cockpit load has changed this data is to be entered in the cockpit placard as well.<br />
When altering the equipment, the new data can be gathered by a C.G.<br />
calculation (see section 6.9).<br />
The actual equipment list is enclosed in the maintenance manual.<br />
6.4 Basic empty mass and C.G.<br />
Actual data see page 6.7. With the empty weight C.G. and the cockpit loads in<br />
the limits of the diagram on page 6.8, the in-flight C.G. limits will not be<br />
exceeded.<br />
Issued: March 2002 6.2
Flight manual <strong>DG</strong>-<strong>1000S</strong><br />
6.5 Mass of all non-lifting parts (WNLP)<br />
The max. mass of all non-lifting parts is 469 kg (1034 lbs.).<br />
WNLP is to be determined as follows:<br />
WNLP = WNLP empty + cockpit load (pilots, parachute, baggage, trim ballast,<br />
waterballast in the fin, removable items of equipment etc.).<br />
WNLP empty = Total empty weight incl. permanently installed equipment<br />
minus weight of the wings.<br />
6.6 Max. mass (weight)<br />
Category A „Aerobatic“<br />
Maximum take off weight: 630 kg 1389 lbs.<br />
Maximum landing weight: 630 kg 1389 lbs.<br />
Category „Utility“<br />
with waterballast:<br />
Maximum take off weight: 750 kg 1653 lbs.<br />
Maximum landing weight: 750 kg 1653 lbs.<br />
without waterballast: Maximum take-off and landing mass = WNLP + Wwings<br />
WNLP = Maximum mass of all non lifting parts (see above)<br />
= actual mass of the wings<br />
Wwings<br />
6.7 Useful loads<br />
Max. load without waterballast<br />
= max. weight without waterballast - empty weight<br />
Max. load with waterballast<br />
= max. weight with waterballast - empty weight<br />
The data is recorded on page 6.7.<br />
Issued: February 2011 TN1000/18 6.3
Flight manual <strong>DG</strong>-<strong>1000S</strong><br />
6.8 Loading chart<br />
6.8.1 Cockpit load<br />
see weighing report section 6.8.8.<br />
a) single seated:<br />
max. load in the front seat 110 kg (242 lbs)<br />
min. load in the front seat see placard in cockpit and weighing report<br />
b) two-seated:<br />
max. cockpit load is 210 kg (463 lbs.) with a max. of 105 kg (231 lbs.) in the<br />
front seat or 110 kg (242 lbs.) in the front seat and 90 kg (198 lbs.) in the rear<br />
seat.<br />
min. cockpit load in the front seat is the min. cockpit load see a) minus 40%<br />
of the load in the rear seat.<br />
c) With these loads, the C.G. range given under section 6.8.8 will be kept in the<br />
limits if the empty weight C.G. is in its limits.<br />
With lower pilot weight necessary ballast must be added in the seat or in the<br />
optional ballast boxes see below. Ballast put on the seat (lead ballast cushion)<br />
must be fastened at the connections of the safety belts.<br />
Note: Extremely light pilots may remove the fin battery, see section 6.8.4.<br />
6.8.2 Removable ballast for underweight pilots<br />
Option: Ballast boxes in the front cockpit for removable Ballast (trim weights),<br />
see section 7.15.1.<br />
6.8.3 Baggage<br />
max. 15 kg (33lbs)<br />
Heavy pieces of baggage must be secured to the baggage compartment floor<br />
(screwing to the floor or with belts). The max. mass secured on one half of the<br />
floor (left and right of fuselage centre line) should not exceed 7,5 kg (16.5 lbs.).<br />
The added load in the fuselage must not exceed the max. load without<br />
waterballast (W.B.) see weighing report section 6.8.8.<br />
Issued: February 2011 TN1000/18 6.4
Flight manual <strong>DG</strong>-<strong>1000S</strong><br />
6.8.4 Battery in the fin<br />
Only the use of the factory supplied battery Z110 (mass 5.5 kg, 12.1 lbs.) is<br />
permitted.<br />
Warning: Flying is only allowed with the battery in the fin as otherwise the<br />
forward C.G. limit may be exceeded.<br />
Instead of the battery a suitable weight of 5,5 kg may be used.<br />
Note: Extremely light pilots may remove the fin battery. This lowers the min.<br />
front cockpit load by 16 kg (35 lbs.). Install a battery in the baggage<br />
compartment according to section 7.15.5 instead.<br />
6.8.5 Waterballast in the wing tanks (Option)<br />
The tanks have a capacity of 80 l (21,2 US gallons) per wing<br />
The permitted amount of waterballast is dependent on the empty weight and<br />
of the load in the fuselage and can be determined from the diagram “Ballast<br />
chart" section 6.8.10.<br />
It is only allowed to fly with symmetric wing ballast!<br />
6.8.6 Fin ballast tank (Option)<br />
Water ballast in the fin tank should be used to compensate the forward move of<br />
C.G. due to the water ballast in the wings.<br />
The amount of ballast in the fin is dependent on the amount of water in the wing<br />
tanks and to be determined from the following table.<br />
waterballast in the waterballast in the<br />
wings fin wings fin<br />
kg kg lbs. lbs.<br />
20 0,6 40 1,2<br />
40 1,3 80 2,7<br />
60 2,1 120 4,2<br />
80 2,9 160 5,9<br />
100 3,8 200 7,5<br />
120 4,6 240 9,2<br />
140 5,4 280 10,8<br />
160 6,2 320 12,4<br />
/ /<br />
350 13,5<br />
Issued: February 2011 TN1000/18 6.5
Flight manual <strong>DG</strong>-<strong>1000S</strong><br />
6.8.7 Ballast box in the fin<br />
a) Compensation of the C.G. shift due to the rear pilot:<br />
The ballast box can accommodate max. 4 weights of 2,4 kg mass (heavy weight)<br />
and 2 weights of 1,2 kg mass (light weight), so the max. mass is 12 kg.<br />
The number of weights can be determined by the following table:<br />
Mass of rear pilot Number of trim Number of blinks of the lamp in the<br />
weights<br />
front instrument panel see section<br />
kg lbs.<br />
4.2.4<br />
55 121 2 heavy + 1 light 5<br />
65 143 3 heavy 6<br />
75 165 3 heavy + 1 light 7<br />
85 187 4 heavy 8<br />
95 209 4 heavy + 1 light 9<br />
105 231 4 heavy + 2 light 10<br />
Warning: When flying solo the ballast box must be emptied!<br />
Otherwise you will fly with a dangerous C.G. position, exept see b).<br />
If the ballast box is filled up, the min. cockpit load in the front seat is raised by<br />
35 kg (77 lbs.).<br />
The resulting value (min. cockpit load in front seat from weighing without<br />
ballast + 35 kg) must be entered in the table on page 6.7 as value XX and also<br />
on the placard at the indication lights for the fin tank on the front instrument<br />
panel.<br />
When using the trim weights make sure not to exceed the max. weight of 750kg<br />
(1653 lbs.) Category „U” or 630kg (1389 lbs.) Category „A“.<br />
b) Trim-possibility for heavy pilots:<br />
The ballast box may be used for this purpose too.<br />
One trim weight of 1.2 kg raises the min. load in the front seat by 3.5 kg<br />
(7.7 lbs.).<br />
One trim weight of 2.4 kg raises the min. load in the front seat by 7 kg<br />
(15.4 lbs.).<br />
Example:<br />
Min. cockpit load of the glider: 70 kg permissible amount of trim weights<br />
Mass of the front pilot: 84 kg 2 x 2.4 kg<br />
Mass of the rear pilot: 65 kg 3 x 2.4 kg or 2 x 2,4 kg and 2 x 1,2 kg<br />
Total amount of trim ballast: 12 kg<br />
This means that the ballast box can be filled completely for this example.<br />
Higher pilot masses can’t be compensated.<br />
Issued: February 2011 TN1000/18 6.6
Flight manual <strong>DG</strong>-<strong>1000S</strong><br />
6.8.8 Weighing report (for section 6.3)<br />
Distances in mm, masses in kg -- 25.4 mm = 1 inch / 1 kg = 2.2046 lbs.<br />
Date of weighing:<br />
Executed by:<br />
Date of equipment<br />
list:<br />
wing span 18m 20m<br />
Empty mass<br />
Empty mass C.G.<br />
Max. mass<br />
without W.B.<br />
Cat. U<br />
Cat. A 630 /<br />
Max. load without<br />
W.B.<br />
Cat. U<br />
Cat. A<br />
max. mass with<br />
WB<br />
max. useful load<br />
with W.B.<br />
min. cockpit load<br />
YY (kg)<br />
min. cockpit load<br />
XX (kg)<br />
max. load in both<br />
seats<br />
Inspector,<br />
signature, stamp<br />
210 210<br />
YY= min. load in front seat for solo flying with fin ballast box empty.<br />
XX= YY+35= min. load in front seat for solo flying with fin ballast box filled.<br />
Weighing was executed with: battery in the fin Z110<br />
tailwheel with: plastic hub<br />
brass hub (see section 7.15.4)<br />
Issued: March 2002 6.7
Flight manual <strong>DG</strong>-<strong>1000S</strong><br />
6.8.9 Empty weight C.G. limits (for 6.4)<br />
xS mm<br />
820,0<br />
815,0<br />
810,0<br />
805,0<br />
800,0<br />
795,0<br />
790,0<br />
785,0<br />
780,0<br />
775,0<br />
770,0<br />
765,0<br />
760,0<br />
755,0<br />
750,0<br />
745,0<br />
740,0<br />
735,0<br />
730,0<br />
725,0<br />
720,0<br />
715,0<br />
710,0<br />
705,0<br />
700,0<br />
695,0<br />
690,0<br />
685,0<br />
680,0<br />
675,0<br />
670,0<br />
665,0<br />
660,0<br />
655,0<br />
650,0<br />
645,0<br />
640,0<br />
400 405 410 415 420 425 430 435 440 445 450 455 460 465 470 475 480<br />
Load front<br />
seat<br />
Aft C.G.<br />
limits<br />
Front C.G.<br />
limits<br />
Empty mass<br />
kg<br />
Issued: March 2002 6.8<br />
65 kg<br />
70 kg<br />
75 kg<br />
80 kg<br />
85 kg<br />
xSV
Flight manual <strong>DG</strong>-<strong>1000S</strong><br />
6.8.10 <strong>DG</strong>-1000 ballast chart (for 6.8.5)<br />
To determine the max. allowable waterballast in the wing tanks for max. take off<br />
weight 750kg<br />
1 kg = 2.2046 lbs.<br />
3.785 kg (l) = 1 US gal.<br />
Issued: March 2002 6.9
Flight manual <strong>DG</strong>-<strong>1000S</strong><br />
6.9 C.G. calculation<br />
The actual C.G. can be determined as follows:<br />
For each item, the moment mass x C.G. has to be determined and to be added up<br />
and divided by the total mass. See the following example:<br />
1 kg = 2.2046 lbs. = .264 US gal. water 0.305 m = 1 ft<br />
Item mass C.G. behind Moment<br />
[kg] Datum [m] [m×kg]<br />
Aircraft empty (with Battery in the fin) 430 0,740 318,20<br />
Pilot front 75 - 1,350 - 101,25<br />
Rear 85 - 0,280 - 23,80<br />
Waterballast in the wings 140 0,206 28,84<br />
Water in the fin tank 5,4 5,260 28,40<br />
Ballast in box in the fin 9,6 5,400 51,84<br />
Total: 745 XS= 0,406 302,2<br />
(XS = Moment/Mass)<br />
The limits of the in-flight C.G 0,190m - 0,440m should not be exceeded!<br />
The most important C.G. positions (behind datum):<br />
Pilot: The C.G. position is dependent on the pilots shape, mass and thickness of<br />
the parachute. The pilot C.G. position can be determined by executing a weight<br />
and balance measurement with glider empty and equipped with the pilot etc. see<br />
maintenance manual. Please note, that the distance a has to be measured with<br />
both configurations, as it may change due to deflection of the landing gear.<br />
The pilot C.G. can be determined by the following equation:<br />
XP = (XSF * MF - XSE * ME)/MP<br />
MF = flight mass XSF = flight C.G MP = pilot mass<br />
ME = empty mass XSE = empty C.G.<br />
Issued: September 2003 TN 413/2 6.10
Flight manual <strong>DG</strong>-<strong>1000S</strong><br />
If the actual pilot C.G. is not known, you have to take the values from the<br />
following table:<br />
flight: v = near the forward C.G.<br />
h = near the aft C.G.<br />
Pilot C.G. lever [m]<br />
Pilot mass [kg] Front cockpit Rear cockpit<br />
v h V h<br />
110 -1,388 -1,335 -0,317 -0,272<br />
105 -1,390 -1,336 -0,318 -0,273<br />
100 -1,391 -1,337 -0,319 -0,274<br />
95 -1,392 -1,338 -0,320 -0,275<br />
90 -1,393 -1,340 -0,321 -0,276<br />
85 -1,395 -1,341 -0,323 -0,277<br />
80 -1,396 -1,342 -0,324 -0,278<br />
75 -1,397 -1,343 -0,325 -0,279<br />
70 -1,399 -1,344 -0,326 -0,280<br />
65 -1,400 -1,345 -0,328 -0,281<br />
60 -1,401 -1,346 -0,329 -0,282<br />
55 -1,402 -1,347 -0,330 -0,283<br />
Further C.G. positions:<br />
Baggage and battery in baggage compartment 0,270 m<br />
Waterballast in the wings 0,206 m<br />
Fin ballast tank (see section 6.8.6) 5,260 m<br />
Ballast box in the fin (see section 6.8.7) 5,400 m<br />
Instruments in front panel -1,910 m<br />
Instruments in rear panel -0,740 m<br />
removable ballast (in front cockpit, Option, see section 7.15.1) -1,960 m<br />
Battery in fin (see section 6.8.4) 5,340 m<br />
Tail wheel /see section 7.15.4) 5,305 m<br />
Issued: February 2011 TM 1000/18 6.11
7 Sailplane and systems description<br />
Flight manual <strong>DG</strong>-<strong>1000S</strong><br />
Page<br />
7.1 Introduction.............................................................................................. 7.2<br />
7.2 Airframe................................................................................................... 7.2<br />
7.3 Cockpit, cockpit controls and placards.................................................... 7.3<br />
7.4 Flight controls .......................................................................................... 7.7<br />
7.5 Airbrakes.................................................................................................. 7.7<br />
7.6 Landing gear ............................................................................................ 7.8<br />
7.7 Tow hooks................................................................................................ 7.8<br />
7.8 Seats and safety harness........................................................................... 7.9<br />
7.9 Baggage compartment ............................................................................. 7.9<br />
7.10 Waterballast system<br />
(Optional with 18m wingspan, standard with 20m wingspan)................ 7.9<br />
7.11 Ballast box in the fin.............................................................................. 7.10<br />
7.12 Electrical system .................................................................................... 7.10<br />
7.13 Pitot and static system............................................................................ 7.11<br />
7.14 Canopies................................................................................................. 7.11<br />
7.15 Miscellaneous equipment (Options) ...................................................... 7.11<br />
7.15.1 Removable ballast for under weight pilots ...................................... 7.11<br />
7.15.2 Oxygen system................................................................................. 7.12<br />
7.15.3 ELT Emergency Locator Transmitter.............................................. 7.12<br />
7.15.4 Heavy tailwheel................................................................................ 7.12<br />
7.15.5 Battery in the baggage compartment with battery selector switch.. 7.13<br />
Issued: February 2011 TN1000/18 7.1
Flight manual <strong>DG</strong>-<strong>1000S</strong><br />
7.1 Introduction<br />
This section provides description and operating of the sailplane and its systems.<br />
M.M. = Maintenance manual<br />
Refer to section 9 "Supplements" for details of optional systems and equipment.<br />
7.2 Airframe<br />
The <strong>DG</strong>-<strong>1000S</strong> is a two-place high performance sailplane, either<br />
with 18 m span or<br />
with 20 m span and permanently installed winglets<br />
Construction<br />
Wings CFRP-foam-sandwich-shell with<br />
CFRP-roving spar caps<br />
Ailerons CFRP-foam-sandwich-shell<br />
Rudder GFRP-foam sandwich-shell<br />
Horizontal stabilizer GFRP-foam sandwich-shell with<br />
CFRP-roving spar caps<br />
Elevator GFRP-shell<br />
Fuselage GFRP-shell, fuselage boom sandwichshell<br />
with Tubus core<br />
Canopy<br />
Two canopies hinged at the right hand fuselage side. Canopy transparencies<br />
made from Plexiglas GS 241 or optionally green GS Green 2942.<br />
Tailplane<br />
T-Tail with conventional stabilizer-elevator and spring trim.<br />
Colour<br />
Airframe: white<br />
registration numbers: grey RAL 7001 (Pantone 444)<br />
or red RAL 3020 (Pantone 485)<br />
or blue RAL 5012 (Pantone 307)<br />
or green RAL 6001 (Pantone 349)<br />
Issued: February 2011 TN1000/18 7.2
Flight manual <strong>DG</strong>-<strong>1000S</strong><br />
7.3 Cockpit, cockpit controls and placards<br />
Issued: March 2002 7.3
Flight manual <strong>DG</strong>-<strong>1000S</strong><br />
1) Control column<br />
The rear control stick is removable. First open the snap shackle at the trim<br />
release lever to disengage the trim cable. Pull out the stick after unscrewing<br />
the cap nut.<br />
2) Release lever for the trim mechanism - green<br />
Operation see section 7.4 elevator control<br />
3) Trim position indicator and trim preselection lever<br />
4) Tow release knob - yellow<br />
5) Rudder pedal adjustment knob – black<br />
(only in front cockpit)<br />
By pulling on the knob, the locking pin will be disengaged and the rudder<br />
pedals can be pulled back towards the pilot or pushed forward away from the<br />
pilot.<br />
6) Front instrument panel<br />
After removing the side screws at the base 2 x M 6 and after removing the<br />
screws attaching the cover to the panel 6 x M 4, the cover can be removed<br />
towards the front. The panel remains in the aircraft.<br />
7) Compass installation position<br />
8) Radio installation position<br />
9) Rear instrument panel<br />
After removing the side screws attaching the panel to the cover (4 x M 4) the<br />
panel can be hinged backwards into the cockpit (take out the control stick<br />
first!).<br />
Issued: March 2002 7.4
Flight manual <strong>DG</strong>-<strong>1000S</strong><br />
10) Undercarriage retraction - extension handle - black<br />
back = retracted, front = extended,<br />
The undercarriage is locked in the extended position by an overcentre<br />
locking arrangement and an additional safety catch in the cockpit.<br />
The handle is to be turned towards the cockpit wall, so that the locking<br />
catch will engage.<br />
In retracted position the landing gear is locked over centre.<br />
With TN1000/13 executed, standard from ser. no. 10-133 on:<br />
An additional landing gear positive locking device (notch and latch at the<br />
landing gear struts) secures the landing gear in the extended position.<br />
An additional catch in the front upper area of the landing gear box secures<br />
the landing gear in retracted position.<br />
11) Airbrake handle - blue<br />
The wheel brake is operated at the end of the airbrake handle travel.<br />
Optional parking brake combined with an airbrake securing device<br />
(Piggott-hook): Pull the airbrake handle back to actuate the wheelbrake<br />
and rotate the handle to the cockpit wall. A detent will engage in one of 4<br />
notches to hold the system in this position.<br />
In case the airbrakes mistakenly haven’t been locked, a detent engages in<br />
one of several notches to avoid inadvertent deployment of the airbrakes. To<br />
open and to close the airbrakes the operating handle must be rotated into<br />
the cockpit so far that the detent passes the notches.<br />
12) Constantly open de-misting air vents<br />
13) Main air vent<br />
14) Main air vent operating knob<br />
pushed to front = closed<br />
pulled = open<br />
15) Swivel air vents<br />
Issued: February 2008 TN 1000/13 7.5
Flight manual <strong>DG</strong>-<strong>1000S</strong><br />
16) Canopy opening handle - white-red<br />
towards the nose = closed<br />
into cockpit = open<br />
17) Canopy emergency release handle - red<br />
towards the nose = closed<br />
into cockpit = open<br />
For emergency release also handle 16<br />
has to be operated!<br />
18) Water ballast dump handles - silver<br />
lever on top of the handles = fintank<br />
Rotate backward to dump. The wing waterballast can only be dumped after<br />
dumping the fin waterballast<br />
upper handle = right wingtank<br />
lower handle = left wingtank<br />
forward = valve closed<br />
into the cockpit = valve open. The wing ballast can only be<br />
dumped after opening the fin tank<br />
19) Push to talk button (Option)<br />
20) 12 V socket for charging the batteries.<br />
21) Adjustment strap for the rear seat shell (to be operated on the ground)<br />
22) Outside-air temperature gauge (required with fin tank).<br />
23) Control light for the trim ballast box in the fin:<br />
The control light in the front instrument<br />
panel starts blinking after each transaction<br />
Senden<br />
transmit<br />
Trim-ballast box in the fin<br />
Min. load in the front seat<br />
kg kg<br />
box empty box filled<br />
with the weights. By counting the amount<br />
of blinks, the amount of ballast can be<br />
determined. For a heavy weight 2 blinks appear and 1 blink for a light<br />
weight, this means 10 blinks if the box is filled up completely. After a<br />
pause of 2-3 seconds the blinking will be repeated etc.. The blinking can be<br />
stopped by pressing on the control light. Pressing again on the control light<br />
reactivates the blinking feature.<br />
In addition with TN413/4 executed, standard from ser. no. 10-49 on:<br />
A switch will be operated by the locking pin of the ballast box cover.<br />
As long as the switch is not closed, the control light for the ballast box will<br />
blink with doubled speed without interruption. The blinking can’t be<br />
switched off by pressing on the control light.<br />
Issued: June 2004 TN413/4 7.6
Flight manual <strong>DG</strong>-<strong>1000S</strong><br />
7.4 Flight controls<br />
Rudder control<br />
See diagram 2 M.M<br />
Cable system with adjustable pedals in the front cockpit.<br />
Elevator control<br />
See diagram 1 M.M.<br />
All pushrods slide in maintenance free nylon ball guides.<br />
Automatic control hook up system. Spring trimmer with release lever at the<br />
control stick and control knob at the left cockpit wall. To trim, you have to<br />
operate the release lever at the control stick and place the control knob to the<br />
desired position.<br />
Aileron control<br />
See diagram 3 and 4 M.M.<br />
Pushrods slide in maintenance free nylon ball guides.<br />
Automatic control hook up system.<br />
7.5 Airbrakes<br />
See diagram 3 and 4 M.M.<br />
Double storey Schempp-Hirth type airbrakes on the upper wing surface.<br />
The wheel brake is operated by the airbrake system. Pushrods in the wings slide<br />
in maintenance free nylon ball guides. Automatic control hook up system.<br />
Issued: March 2002 7.7
Flight manual <strong>DG</strong>-<strong>1000S</strong><br />
7.6 Landing gear<br />
The <strong>DG</strong>-<strong>1000S</strong> is available with 3 different versions of the undercarriage:<br />
A) Very high, spring mounted, retractable main wheel with hydraulic disc brake,<br />
see diagram 7 M.M, tail wheel.<br />
B) High spring mounted retractable main wheel with hydraulic disc brake, see<br />
diagram 8 M.M, tail and nose wheel<br />
C) Spring mounted, fixed main wheel with disc brake, see diagram 9 M.M., tail<br />
and nose wheel.<br />
The main undercarriages versions B and C are interchangeable.<br />
a) Main wheel:<br />
retractable, assisted by a gas strut (locked in retracted position by an<br />
overcentre locking device) or non retractable.<br />
Spring mounted with steel compression springs, fully sealed landing gear<br />
box,.<br />
Tyre: 380 x 150 6 PR, diameter 380 mm (15 in.),<br />
Wheel: Tost 5” wheel with disc brake, width 134 mm, axle 30 mm<br />
Tyre pressare: 2,5 bar (36 psi)<br />
b) Tail wheel:<br />
Tyre 200 x 50 6 PR, diameter 200 mm (7,87in.)<br />
Wheel: Plastic hub with ball bearings, part. No. S23<br />
Tyre pressure 4 bar (58 psi)<br />
c) Nose wheel (only version B) and C)):<br />
Tyre: 260 x 85, diameter 260 mm (10,2 in)<br />
Wheel: Tost 4” wheel, width 85 mm, axle 20 mm<br />
Tyre pressure: 2,5 bar (36 psi)<br />
7.7 Tow hooks<br />
See diagram 5 M.M.<br />
Safety release "Europa G 88" for winch launch installed near the C.G.<br />
"nose release E 85" installed in the fuselage nose for aerotow.<br />
Both hooks are operated by the same handles.<br />
Issued: February 2011 TN1000/18 7.8
Flight manual <strong>DG</strong>-<strong>1000S</strong><br />
7.8 Seats and safety harness<br />
The front seat is constructed as an integral inner shell.<br />
The rear seat is height adjustable. The adjustment is by means of a strap similar<br />
to the shoulder harness.<br />
As safety harness only symmetric 4-point harnesses fixed at the given fixing<br />
points are allowed.<br />
7.9 Baggage compartment<br />
Max. load 15 kg (33 lbs.).<br />
Heavy pieces of baggage must be secured to the floor.<br />
7.10 Waterballast system<br />
(Optional with 18m wingspan, standard with 20m wingspan)<br />
See diagram 6 M.M.<br />
The wingtanks are constructed as double wall bags with a capacity of 80 l per<br />
wing. The dump valves are mounted in the wings and the control is hooked up<br />
automatically when rigging the glider.<br />
Fin ballast tank<br />
Ballast to compensate the mass of the water ballast in the wings, max. 6,2 kg.<br />
This tank is an integral tank with a dump hose, an overflow and a ventilation<br />
line. The ventilation line ends in the fin trailing edge shear web, the dump hose<br />
and the overflow line are ending at the rear end of the fuselage besides the lower<br />
rudder mount.<br />
Filling is via the dump hose. The dump valve is opened by a cable and closed by<br />
a steel tension spring.<br />
Control handles<br />
The handle for the fintank (wide plate) is above the wingtank handles, so that<br />
the wingtanks can only be emptied after opening the fintank.<br />
Warning: It is prohibited to change this system!<br />
The handle for the fintank will stay in the open position by an overcentre device.<br />
The upper handle is for the right and the lower handle for the left wingtank.<br />
Issued: March 2002 7.9
Flight manual <strong>DG</strong>-<strong>1000S</strong><br />
7.11 Ballast box in the fin<br />
A box for ballast (trim-weights) is installed in the fin. It can be used to<br />
compensate the mass of the rear pilot and as a trim-possibility for heavy pilots.<br />
Max. ballast capacity: 12 kg.<br />
Filling see section 4.2.4, determination of the permissible amount of ballast see<br />
section 6.8.7.<br />
Indication of the amount of ballast inserted is via a control light in the front<br />
instrument panel see section 4.2.4 and section 7.3 item 23).<br />
7.12 Electrical system<br />
Battery in the fin.<br />
For C.G. reasons the battery is installed in the fin. Only the use of the factory<br />
supplied battery Z110 (12 V, min. 12 Ah, mass 5.5 kg, 12.1 lbs.) is permitted.<br />
The battery fuse is installed at the battery, type: G fuse 250 V with indicator 5 x<br />
25 medium slow / 4 A.<br />
After inserting the connector plug in the fin the battery is connected to the<br />
electrical system of the glider. If you want to charge the battery inside the glider<br />
this can be done via the socket see section 7.3 item 20).<br />
Warning: Use only automatic chargers designed to charge sealed lead acid<br />
batteries. To charge the battery to its full capacity a charger with 14.4 V max.<br />
charging voltage is necessary (normal automatic chargers charge only up to<br />
13.8V). Such a charger is available from <strong>DG</strong> <strong>Flugzeugbau</strong> code no. Z 08.<br />
For periodical recharging the “power independent “ unit is suitable. This unit is<br />
also available from <strong>DG</strong> <strong>Flugzeugbau</strong>.<br />
All current - carrying wiring confirms to aeronautical specifications.<br />
Issued: February 2011 TN1000/18 7.10
Flight manual <strong>DG</strong>-<strong>1000S</strong><br />
7.13 Pitot and static system<br />
see diagram 8 M.M.<br />
Pitot probe in fuselage nose, static ports a short distance behind fuselage nose.<br />
The airspeed indicator and the altimeter are to be connected to these ports and<br />
probe. Additional holder for a TE-probe or a Multiprobe in the fin is to operate<br />
variometer and flight computer systems. To preserve the sealings inside the<br />
holder, the end of the probe should be greased with e.g. Vaseline from time to<br />
time.<br />
7.14 Canopies<br />
To jettison the canopies in flight see section 3.2.<br />
Removing a canopy:<br />
Open the canopy, detach the restraining cable and if installed detach the gas strut<br />
from the front canopy. Then close the canopy and operate the red canopy<br />
emergency release handle (right) and the white-red canopy opening handle<br />
(left). Lift the canopy upwards.<br />
Reinstalling a canopy:<br />
Open emergency release and canopy locking levers. Place the canopy in vertical<br />
direction onto the fuselage. Close the emergency release. Open the canopy and<br />
snap in the retaining cable and the gas-strut (if installed).<br />
Checking the canopy emergency release system:<br />
a) check with open front canopy if the gas-struts (if installed) can be<br />
disengaged from their ball fittings (from canopy and from fuselage). Grease<br />
the ball fittings.<br />
b) check with closed canopy if the emergency release handle can be operated<br />
and if the canopy can be removed easily, resp. if the canopy will be lifted<br />
by the gas-strut. Grease the locking pins.<br />
7.15 Miscellaneous equipment (Options)<br />
7.15.1 Removable ballast for under weight pilots<br />
The ballast boxes (Option) at the right and left hand side of the instrument<br />
console underneath the carpets can accommodate 2 ballast weights of min 2.4 kg<br />
(5.3 lbs.) each. Each weight compensates a pilot mass of 3.2 kg (7 lbs.). So a<br />
max. of 12.8 kg (28 lbs.) missing pilot mass can be compensated.<br />
The ballast weights are to be fixed in the box with a M8 knurled nut.<br />
Note: The ballast weights used for the ballast box in the fin may be used for<br />
these ballast boxes too.<br />
Issued: October 2004 TN 413/6 7.11
Flight manual <strong>DG</strong>-<strong>1000S</strong><br />
7.15.2 Oxygen system<br />
a) Installation of the oxygen cylinders<br />
Max. size of oxygen bottle is 7 l capacity with diameter 140 mm (5.5 in.)- If<br />
a bottle with smaller diameter is used, this bottle must be wrapped with<br />
plastic to come to the same diameter of 140 mm. The bottle must be fixed at<br />
its neck with a bracket Z 14 (available at <strong>DG</strong>-<strong>Flugzeugbau</strong> GmbH).<br />
b) Installation of the oxygen equipment<br />
To ensure a safe installation ask <strong>DG</strong> <strong>Flugzeugbau</strong> for an installation<br />
instruction. For the installation of the Dräger Höhenatmer E 20088 you will<br />
find an installation plan 5EP34 in the maintenance Manual.<br />
7.15.3 ELT Emergency Locator Transmitter and Transponder<br />
Installation see maintenance manual <strong>DG</strong>-<strong>1000S</strong> section 6.<br />
Caution: Concerning 7.15.2 and 7.15.3<br />
The installation has to be accomplished by <strong>DG</strong>-<strong>Flugzeugbau</strong> or by an approved<br />
service station and to be inspected and entered in the aircraft log book by a<br />
licensed inspector.<br />
7.15.4 Heavy tailwheel<br />
Instead of the standard tailwheel with plastic hub S23 a tailwheel with brass hub<br />
S27/1 may be installed. The installation kit S27/4 is available at<br />
<strong>DG</strong> <strong>Flugzeugbau</strong>.<br />
The difference in mass between both hubs is 3.1 kg (6.84 lbs.). With the brass<br />
hub the min. front cockpit load is increased by 8.5 kg (18.74 lbs.). This higher<br />
value must be entered in the cockpit data placards and on page 6.7. Even if the<br />
heavy tailwheel is installed only sometimes, the higher min. cockpit load must<br />
be entered.<br />
Issued: February 2011 TN1000/18 7.12
Flight manual <strong>DG</strong>-<strong>1000S</strong><br />
7.15.5 Battery in the baggage compartment with battery selector switch<br />
An additional battery Z01 12V 12AH may be installed in the baggage<br />
compartment.<br />
The battery fuse is installed at the battery, type: G fuse 250 V 5 x 25 medium<br />
slow / 4 A.<br />
A battery selector switch must be installed in the front instrument panel.<br />
In the centre position of the switch both batteries are disconnected from the<br />
gliders electrical system.<br />
In position I (left) the battery in the fin is connected to the electrical system.<br />
In position II (right) the battery in the baggage compartment is connected to the<br />
electrical system.<br />
From ser. No. 10-170 on and all ser. No.’s with electrically operated landing<br />
gear: The selector switch is installed in the console below the front instrument<br />
panel.<br />
up= battery in baggage compartment<br />
down= battery in the fin<br />
intern<br />
battery<br />
Issued: February 2011 TN1000/18 7.13<br />
fin
Flight manual <strong>DG</strong>-<strong>1000S</strong><br />
8 Sailplane handling, care and maintenance<br />
Page<br />
8.1 Introduction.............................................................................................. 8.2<br />
8.2 Inspection period, maintenance ............................................................... 8.2<br />
8.3 Alterations or repairs................................................................................ 8.3<br />
8.4 Tie Down, Parking................................................................................... 8.3<br />
8.5 Transport .................................................................................................. 8.4<br />
8.6 Towing on the ground.............................................................................. 8.4<br />
8.7 Cleaning and Care.................................................................................... 8.5<br />
Issued: March 2002 8.1
Flight manual <strong>DG</strong>-<strong>1000S</strong><br />
8.1 Introduction<br />
This section contains manufacturer's recommended procedures for proper<br />
ground handling and servicing of the sailplane. It also identifies certain<br />
inspection and maintenance requirements which must be followed if the<br />
sailplane is to retain that new-plane performance and dependability. It is wise to<br />
follow a planned schedule of lubrication and preventive maintenance based on<br />
climatic and flying conditions encountered.<br />
8.2 Inspection period, maintenance<br />
The "Instructions for continued airworthiness” (maintenance manual) for the<br />
<strong>DG</strong>-<strong>1000S</strong> have to be followed.<br />
A Before each rigging all the connecting pins and bushes should be cleaned and<br />
greased. This includes the control connectors.<br />
B The contact surfaces of the canopies to the fuselage are to be rubbed with<br />
colourless floor-polish (canopy and fuselage side) to reduce grating noise in<br />
flight. Polish at the beginning of the flight season and then every month.<br />
C Once a year all the bearings and hinges should be cleaned and greased. See<br />
the greasing programme of the maintenance manual.<br />
Each year the control surface displacements, adjustments and general<br />
condition must be checked. (See the maintenance manual).<br />
Issued: March 2002 8.2
Flight manual <strong>DG</strong>-<strong>1000S</strong><br />
8.3 Alterations or repairs<br />
It is essential that the responsible airworthiness authority be contacted prior to<br />
any alterations on the aeroplane, to ensure that the airworthiness of the sailplane<br />
is not impaired. It is prohibited to execute the alteration without the approval of<br />
the airworthiness authority. The manufacturer will not be liable for the alteration<br />
or for damages resulting from changes in the characteristics of the aircraft due to<br />
alteration. So it is strongly recommended to execute no alternatives which are<br />
not approved by the aircraft manufacturer.<br />
External loads such as external camera installations are to be regarded as<br />
alterations! Repair instructions can be found in the <strong>DG</strong>-<strong>1000S</strong> repair manual.<br />
No repairs should be carried out without referring to the manual.<br />
8.4 Tie Down, Parking<br />
Use textile ropes or straps to tie down the wing tips. The fuselage should be tied<br />
down just ahead of the fin.<br />
Water ballast can be left in the wings for a few days only, but not when there is<br />
the possibility of freezing! On sunny days the cockpit should be closed and<br />
covered.<br />
Note: Longer parking with exposure to sun and humidity will cause premature<br />
ageing of the external surfaces of your sailplane.<br />
Issued: March 2002 8.3
Flight manual <strong>DG</strong>-<strong>1000S</strong><br />
8.5 Transport<br />
It is recommended to carry this valuable sailplane in a factory approved closed<br />
trailer.<br />
Approved fitting points:<br />
Inner wing panels:<br />
• Wing spar as close to wing rootrib as possible or a rootrib wing cradle.<br />
• A wing cradle at the taper change.<br />
Horizontal tailplane and outboard wing panel:<br />
• Cradles as desired<br />
Fuselage:<br />
• A felt lined fibreglass nose cap which does not extend over the canopy,<br />
secured to floor.<br />
• Fuselage dolly in front of the undercarriage<br />
• Tail wheel-well in trailer floor. Secure fuselage with a belt in front of the fin<br />
or hold it down with the trailer top (soft foam in top).<br />
All aircraft structures should not be subject to any unusual loads. With high<br />
temperatures that can occur inside trailers, these loads in time can warp any fibre<br />
reinforced plastic sailplane.<br />
The trailer should be well ventilated so as to prevent moisture build up which<br />
could result in bubbles forming in the gelcoat. A solar powered ventilator is<br />
recommended.<br />
8.6 Towing on the ground<br />
a) by towing from the nose hook using a rope with the standard double ring<br />
approved for the release<br />
b) by using a tow bar which is fixed at the tail dolly and a wing tip wheel.<br />
The tow bar and wing tip wheel may be ordered through the <strong>DG</strong> <strong>Flugzeugbau</strong><br />
factory.<br />
Issued: March 2002 8.4
Flight manual <strong>DG</strong>-<strong>1000S</strong><br />
8.7 Cleaning and Care<br />
Exterior surfaces of the fibre-reinforced plastic parts<br />
The surfaces are coated by a UP-gelcoat or Polyurethane paint (Option). This<br />
surface is protected by a hard wax coating which has been applied during<br />
production with a rotating disc ("Schwabbel" procedure). Do not remove the<br />
wax, because this would lead to shading, swelling and cracking of the surface. In<br />
general, the wax coat is very resistant. As soon as the wax coat is damaged or<br />
worn, a new coat has to be applied (see maintenance manual sect. 3.1). If you<br />
store your aircraft often outside, this may be necessary every half year!<br />
Hints for care<br />
- Wash the surface only with clean water using a sponge and chamois.<br />
- The adhesive remains of tape may be removed with petroleum ether (pure<br />
petroleum spirit) which should be applied and removed immediately,<br />
otherwise this may lead to swelling of the gelcoat.<br />
- More stubborn dirt which cannot be removed by washing may be cleaned off<br />
with silicone-free, wax containing car polishes (e.g. 1Z Extra, Meguiars in<br />
USA).<br />
- Long-term dirt and shading can be removed by applying a new hard wax coat<br />
(see maintenance manual sect. 3.1).<br />
- Never use alcohol, acetone, thinner etc.. Do not use detergents for washing!<br />
- Protect the surface from intense sunlight.<br />
- Protect the aircraft from water and moisture. See sections 8.4 and 8.5.<br />
- Remove water that has entered and allow the aircraft to dry out.<br />
- Never store your wet aircraft in a trailer.<br />
Issued: March 2002 8.5
Flight manual <strong>DG</strong>-<strong>1000S</strong><br />
Plexiglas canopy<br />
- Use clean water and a chamois for cleaning.<br />
- Stubborn dirt and small scratches can be removed by use of the "Schwabbel<br />
procedure" (see maintenance manual sect. 3.1).<br />
Metal parts<br />
- The pins and bushes for rigging the aircraft are not surface protected and<br />
must be covered with grease at all times.<br />
- The other metal parts, especially the control stick and all handles should<br />
occasionally be preserved with metal polishes.<br />
Issued: March 2002 8.6
Flight manual <strong>DG</strong>-<strong>1000S</strong><br />
9 Supplements<br />
Section page<br />
9.1 Introduction 9.2<br />
9.2 List of inserted supplements 9.2<br />
9.3 Electrically operated main landing gear 9.3 – 9.12<br />
9.4 Special equipment for very small pilots 9.13<br />
9.5 Special equipment for aerobatics 9.14, 9.15<br />
Issued: March 2011 TN 1000/20 9.1
9.1 Introduction<br />
Flight manual <strong>DG</strong>-<strong>1000S</strong><br />
This section contains the appropriate supplements necessary to safely and<br />
efficiently operate the sailplane when equipped with various optional systems<br />
and equipment not provided with the standard sailplane.<br />
9.2 List of inserted supplements<br />
Date of<br />
insertion<br />
Document No. Title of the inserted supplement<br />
November Section 9.3 Electrically operated main landing gear<br />
2008<br />
TN1000/14<br />
May 2010 Section 9.4 Special equipment for very small pilots<br />
TN1000/17<br />
March 2011 Section 9.5 Special equipment for aerobatics TN1000/20<br />
Issued: March 2011 TN 1000/20 9.2
Flight manual <strong>DG</strong>-<strong>1000S</strong><br />
9.3 Electrically operated main landing gear<br />
Introduction<br />
In the following text the changes to those sections of the flight manual which are<br />
affected by the installation of the electrically operated main landing gear will be<br />
given<br />
Section 1 General<br />
1.4 Descriptive data<br />
Subsection amended<br />
With landing gear version A) the main landing gear may be operated electrically<br />
as an option, Version D).<br />
D) Very high, spring mounted, electrically operated retractable main landing<br />
gear, wheel with hydraulic disc brake, tail wheel<br />
With this version there are no handles and control rods for manual operation of<br />
the landing gear like Version A.<br />
A landing gear warning device is integrated into the system.<br />
Both cockpits are equipped with all controls and control lights<br />
A manually operated emergency extension system is provided.<br />
Technical data:<br />
Extension and retraction time (electrically operated): approx. 7seconds<br />
Extension time emergency operation: approx. 2 seconds<br />
Issued: November 2008 TN 1000/14 9.3
Section 2 Limitations<br />
subsections amended<br />
Flight manual <strong>DG</strong>-<strong>1000S</strong><br />
2.2 Airspeed<br />
Note: VLO is not changed compared to the manually operated main landing<br />
gears<br />
Speed IAS<br />
km/h<br />
VLO Maximum landing<br />
gear operating<br />
speed<br />
VLE Never exceed speed<br />
in case the landing<br />
gear is not locked<br />
(kts.)<br />
185<br />
(100)<br />
150<br />
(81)<br />
Remarks<br />
Do not extend or retract the landing gear<br />
above this speed.<br />
Do not exceed this speed in case the landing<br />
gear is not locked, see emergency<br />
procedures sect. 3.20<br />
Warning: If the landing gear is operated at speeds higher than VLO and if gusts<br />
generate accelerations higher than 4 g the landing gear may be damaged.<br />
2.9 Approved manoeuvres<br />
No aerobatic manoeuvres are allowed during extension and retraction of the<br />
landing gear and in case you fly with the landing gear unlocked (see emergency<br />
procedures sect. 3.20).<br />
2.10 Manoeuvring load factors<br />
max. speed g-load<br />
operating the landing gear VLO +4<br />
-2,65<br />
in case the landing gear is not locked VLE +4<br />
-2,65<br />
2.17 Limitation placards<br />
Below the controls and control lights for the electrically operated landing gear<br />
see sect. 7.3:<br />
LG ext.-retr. up to 185 km/h 100 kts.<br />
Issued: November 2008 TN 1000/14 9.4
Section 3 Emergency procedures<br />
new subsection<br />
Flight manual <strong>DG</strong>-<strong>1000S</strong><br />
3.19 Emergency extension of the electrically operated main landing gear<br />
If extending the landing gear via the electrical system is not possible, the landing<br />
gear may be extended manually. The extension force is produced by a gas strut.<br />
For emergency extension pull on one of the 2 black-red emergency extension<br />
handles (located at the left hand fuselage wall, one in each cockpit), pull the<br />
handle until the landing gear is fully extended. The travel is about 15 mm (.6<br />
in.), the extension time about 2 seconds. During extension the centre (red) LED<br />
is shining. When the landing gear is fully extended the lower green LED also<br />
starts shining.<br />
Warning: Don’t let the handle go before the green LED starts shining. If you<br />
don’t pull for long enough the landing gear will rest in a position not locked<br />
over centre and will be destroyed at touch down.<br />
Caution: If you execute the emergency extension at high airspeed it may take a<br />
longer time until the landing gear is fully extended. You should shorten the time<br />
by reducing the airspeed.<br />
Caution: If emergency extension was necessary check the system to detect the<br />
failure and repair the system.<br />
Resetting the system for normal operation see section 4.5.12.3.<br />
3.20 Incompletely retracted electrically operated main landing gear<br />
If the landing gear is not locked the centre (red LED) starts blinking approx. 22<br />
seconds after the start of the retraction.<br />
In this condition the retraction mechanism may be damaged with g-loads<br />
exceeding 4 g.<br />
Instruction 1: Extend and retract the landing gear again.<br />
Instruction 2: If instruction 1 was not successful extend the landing gear and<br />
land as soon as possible to fix the problem. For the remainder of the flight, don’t<br />
fly faster than 150 km/h (81 kts.) and avoid abrupt manoeuvres.<br />
Issued: November 2008 TN 1000/14 9.5
Section 4 Normal procedures<br />
4.2 Rigging and derigging<br />
new subsection<br />
Flight manual <strong>DG</strong>-<strong>1000S</strong><br />
4.2.8 Extension and retraction of the electrically operated main landing<br />
gear<br />
Extension see 4.5.12.1 normal procedures<br />
Warning: The main landing gear can only take up the weight of the glider when<br />
fully extended and locked. Therefore it is esential that during extension of the<br />
landing gear no load is applied to the main wheel. Lift the trailer ramp high<br />
enough. If there is a risk that the ramp may come down while the landing gear is<br />
extending secure the ramp, e.g. with blocks.<br />
If such a case happens nevertheless switch the landing gear to retraction. To<br />
accomplish this you must switch up and hold the toggle switch and press the<br />
press button simultaneously 3 times within 2 seconds.<br />
Warning: If you operate the retraction or extension the landing gear will travel<br />
to the up or down stop. So make sure that there are no obstacles which may be<br />
caught by the landing gear to prevent damage or injuries.<br />
You can stop the travelling by switching the toggle switch in the reverse<br />
direction and pressing the press button simultaneously<br />
Issued: November 2008 TN 1000/14 9.6
4.5 Normal procedures<br />
new subsection<br />
Flight manual <strong>DG</strong>-<strong>1000S</strong><br />
4.5.12 Electrically operated main landing gear<br />
4.5.12.1 Extension and retraction in flight<br />
Retraction: For retraction switch and hold the toggle switch up and press the<br />
press button twice within 2 seconds. With each press on the button a signal will<br />
sound. The landing gear will retract automatically. You may let go of the<br />
switches. During retraction the centre (red) LED will shine and the upper green<br />
LED will blink. As soon as the landing gear is retracted and locked only the<br />
upper green LED will shine.<br />
Warning: If the upper green LED doesn’t start to shine and the red LED instead<br />
starts blinking refer to section 3.20 emergency procedures.<br />
Extension: For extension switch the toggle switch down and let go.. The<br />
landing gear will be extended and locked.<br />
During extension the centre (red) LED will shine and the lower green LED will<br />
blink. As soon as the landing gear is extended and locked only the lower green<br />
LED will shine.<br />
Note: In case of high acceleration during extension or retraction an over current<br />
cut off system will switch off the spindle drive to protect the system. As soon as<br />
the g-loads decreasa, the landing gear will continue to travel.<br />
Note: To save electrical power during flight the upper green LED will stop<br />
shining after approx. 5 minutes, landing gear retracted and locked.<br />
4.5.11.2 Extending the landing gear via the emergency extension system.<br />
The emergency extension system is also designed to be operated for in flight<br />
training purposes. Operation see section 3.19.<br />
Resetting the system for normal operation should be executed after landing, for<br />
procedure see section 4.5.12.3.<br />
Caution: It is strongly recommended to train the emergency extension in flight.<br />
Note: Resetting the system for normal operation is also possible in flight.<br />
However, this is only permissible if there are 2 pilots on board, one pilot flying<br />
the glider and the other resetting the system.<br />
Then you may retract the landing gear again according to section 4.5.12.1. to<br />
continue the flight.<br />
Issued: February 2011 TN 1000/18 9.7
Flight manual <strong>DG</strong>-<strong>1000S</strong><br />
4.5.12.3 Resetting the emergency extension system for normal operation<br />
After an emergency extension the system must be reset for normal operation. To<br />
accomplish this you must pull one of the 2 emergency extension handles and<br />
simultaneously switch the toggle switch down. The centre (red) and the lower<br />
green LED will shine.<br />
Switch and handle must be operated until the centre LED stops shining and only<br />
the lower green LED continues shining. The spindle drive will then stop<br />
operating, then let go handle and switch<br />
Thereafter you may retract the landing gear again according to section 4.5.12.1.<br />
4.5.12.4 Part extension and retraction for inspection and servicing<br />
The retraction may be stopped by switching the toggle switch down,<br />
The extension may be stopped by switching the toggle switch up and pressing<br />
simultaneously the press button.<br />
Only the red LED will shine.<br />
For any service work switch off the main switch!<br />
With the procedures described in section 4.5.12.1 you may retract or extend the<br />
landing gear again.<br />
4.5.12.5 Precautionary measures against retracting the landing gear while<br />
on the ground<br />
If the glider is resting on the main landing gear the landing gear should not be<br />
retracted, as retraction will result in damage of the landing gear. To minimise<br />
the risk of such operating error the following safety features have been<br />
incorporated:<br />
1. If the toggle switch is switched up, nothing will happen.<br />
2. If the toggle switch is switched up and the press button is pressed 1 time a<br />
warning tone will sound, otherwise, nothing will happen.<br />
3. Only if the toggle switch is switched up and the press button is pressed 2<br />
times within 2 seconds the landing gear will be retracted.<br />
Caution: If you leave the <strong>DG</strong>-1000 unattended switch off the main switch to<br />
prevent any operating error.<br />
Issued: November 2008 TN 1000/14 9.8
Flight manual <strong>DG</strong>-<strong>1000S</strong><br />
Section 7 Sailplane and system description<br />
7.3 Cockpit, cockpit controls and placards<br />
Subsection amended<br />
Controls and control lights for<br />
the electrically operated<br />
landing gear in front and rear<br />
instrument panel (upper left<br />
hand side):<br />
40) Toggle switch for extension and retraction of the electrically operated<br />
main landing gear<br />
up retracted and locked<br />
down extended and locked over centre<br />
41) Press button for retraction of the electrically operated main landing gear<br />
For retraction switch and hold the toggle switch up and press the press<br />
button 2 times within 2 seconds.<br />
42) – 44)<br />
gear:<br />
control lights (LED’s) for the electrically operated main landing<br />
Condition control light indication<br />
Normal operation<br />
LG retracted and locked 42) upper green shines<br />
LG extended and locked 44) lower green shines<br />
LG retracting 43) red shines, 42) upper green blinking<br />
LG extending 43) red shines, 44) lower green blinking<br />
LG stopped in intermediate 43) red shines<br />
position<br />
Emergency operation<br />
LG extends 43) red shines<br />
LG extended and locked 44) lower green shines, 43) red shines<br />
System resetting 44) lower green shines, 43) red shines<br />
Failure messages<br />
Time overflow: Signal appears if<br />
within 22 seconds after start of<br />
the travelling no limit switch<br />
activates<br />
43) red blinking + upper or lower green<br />
blinking according to travel direction<br />
One limit switch defective all LED’s blinking<br />
Note: To save electrical power during flight the upper green LED will stop<br />
shining after approx. 5 minutes if the landing gear is retracted and locked.<br />
Issued: November 2008 TN 1000/14 9.9
Flight manual <strong>DG</strong>-<strong>1000S</strong><br />
45) Landing gear emergency extension handles black-red<br />
The handles are located at the left hand fuselage wall, one in<br />
each cockpit at the positions of the handles for the manually<br />
operated landing gears, item 10).<br />
For emergency extension pull on one of the 2 red emergency<br />
extension handles, pull the handle until the landing gear is<br />
fully extended.<br />
console below<br />
the front<br />
instrument<br />
panel<br />
46) Main switch for the entire electrical system<br />
up= on<br />
on<br />
main<br />
off<br />
down= off<br />
Note: If you don’t operate the <strong>DG</strong>-1000, switch off the main switch. Otherwise<br />
the landing gear control unit will draw a small current and will empty the battery<br />
with time.<br />
47) Circuit breaker for the instruments 4A<br />
48) Selector switch for instrument power supply<br />
up= battery in baggage compartment<br />
down= battery in the fin<br />
intern<br />
battery<br />
Note: 26) Control light for the trim ballast box in the fin may not be installed at<br />
the position shown in the sketch on page 7.3 but at another suitable place in the<br />
front instrument panel.<br />
Issued: November 2008 TN 1000/14 9.10<br />
fin<br />
Avionic
7.6 Landing gear<br />
Subsection amended<br />
Flight manual <strong>DG</strong>-<strong>1000S</strong><br />
D) Very high, spring mounted, electrically operated retractable main landing<br />
gear, wheel with hydraulic disc brake, see diagrams 20 and 21 M.M, tail wheel<br />
With this version there are no handles and control rods for manual operation of<br />
the landing gear like Version A.<br />
In the normal operating mode the landing gear will be retracted and extended by<br />
an electrical spindle drive.<br />
A control unit which is installed in the rear instrument tower controls all<br />
electrical functions and the control lights.<br />
A landing gear warning device is integrated into the system.<br />
Both cockpits are equipped with all controls and control lights<br />
The landing gear will be locked in the extended position by over centre locking<br />
of the drag struts.<br />
The landing gear will be locked in the retracted position by 2 latches.<br />
The system is equipped with a safety circuit against retraction of the landing<br />
gear on the ground see section 4.5.12.5.<br />
The system is equipped with an over current cut off which stops the extension or<br />
retraction if high accelerations occur to protect the drive against damage. As<br />
soon as the g-loads lower, the landing gear will continue to travel.<br />
Emergency operation: If the electrical system is damaged or no battery power is<br />
available, the landing gear may be extended manually. The handles are located<br />
at the left hand fuselage wall, one in each cockpit at the positions of the handles<br />
for the manually operated landing gears).<br />
Pulling on one of the 2 red emergency extension handles will open the valve of a<br />
lockable gas strut. The gas strut will push the spindle drive forward on a linear<br />
guide to extend and lock the landing gear.<br />
Technical data:<br />
Extension and retraction time (electrically operated): approx. 7seconds<br />
Extension time emergency operation: approx. 2s<br />
Power: 12V, max. 10 A<br />
Issued: November 2008 TN 1000/14 9.11
7.12 Electrical system<br />
Subsection amended<br />
Flight manual <strong>DG</strong>-<strong>1000S</strong><br />
Electrical system with electrically operated landing gear<br />
Wiring see wiring plans 10E3 and 10E4 enclosed to the maintenance manual.<br />
Batteries: To operate the electrically operated landing gear a battery Z01/2 must<br />
be installed in the baggage compartment. This battery must be equipped with a<br />
fuse G 250V 5x20 / 16A.<br />
The battery in the fin Z110 (with fuse 4A) supplies power only to the<br />
instruments. The instruments may be switched by a selector switch in the front<br />
instrument panel to the battery in the baggage compartment.<br />
Fuses and circuit breakers:<br />
The electrically operated landing gear is protected by an automatically reset fuse<br />
in the landing gear control unit.<br />
The wiring between battery and control unit is protected by the fuse at the<br />
battery.<br />
The instruments are protected by a 4 A circuit breaker in the console below the<br />
front instrument panel.<br />
Landing gear warning:<br />
A landing gear warning device is integrated into the system. Warning is by a<br />
buzzer.<br />
Issued: November 2008 TN 1000/14 9.12
Flight manual <strong>DG</strong>-<strong>1000S</strong><br />
9.4 Special equipment for very small pilots (TN1000/17)<br />
To facilitate the operation of the glider by very small pilots 3 different items<br />
have been developed, which may be used separately or together.<br />
9.4.1 Removable seat back for the front seat<br />
a) Installation of the seat back: Install the seat back with 2 screws M6x16<br />
DIN965 4.8 BIC with cup washers 15 x M6 MS NI NR4157 to the threads<br />
which have been installed according to working instruction No. 1 for<br />
TN1000/17.<br />
b) The seat back may be adjusted further to the front by part Z198. Fix the part<br />
to the Velcro straps installed at the rear of the seat back.<br />
c) <strong>DG</strong>-1000 from ser. no. 10-19 on: Remove the headcushion 8R80/2 from the<br />
holder on the rear instrument panel cover (fixed with Velcro). When<br />
removing the seat back reinstall the head cushion at the holder.<br />
Install the head cushion see above to the Velcro straps installed at the front<br />
of the seat back. Instead of the approx. 70 mm (2.8 in.) thick head cushion a<br />
thinner head cushion approx. 40 mm (1.6 in.) thick may be used.<br />
d) <strong>DG</strong>-1000 up to ser. no. 10-18: Remove the head rest from the seat (screwed<br />
connection. When removing the seat back reinstall the headrest.<br />
Install a head cushion 8R80/4 to the Velcro straps installed at the front of<br />
the seat back.<br />
9.4.2 Airbrake-pushrod with additional handle in front cockpit<br />
For pilots with arms too short to lock the airbrakes an airbrake-pushrod with<br />
additional handle part 5St69/2 may be instead in the front cockpit according to<br />
working instruction No. 2 for TN1000/17 instead of part 5St69.<br />
This part may remain in the glider for normal operation.<br />
9.4.3 Rudder pedal plates for rear cockpit Z197<br />
Pilots with very short legs may clip rudder pedal plates part no. Z197 on to the<br />
rudder pedals. Plates may be installed and removed as often as desired.<br />
Issued: February 2011 TN 1000/18 9.13
Flight manual <strong>DG</strong>-<strong>1000S</strong><br />
9.5 Special equipment for aerobatics TN1000/20<br />
9.5.1 Smoke grenades at the 18 m wing tips<br />
Section 4 normal procedures<br />
As optional equipment 18 m wing tips with holders for 2 smoke grenades per<br />
wing according to TN1000/20 instruction 1 may be installed.<br />
Fix the 2 grenades to the endplate according to the sketch by tightening the 4<br />
bolts of the mounting brackets.<br />
Connect the wires of the grenades according to the sketch:<br />
Caution: Switch off main switch prior to connecting the grenades.<br />
To ensure there is no heat damage to the nose cone there must be an air gap<br />
between the forward end of the smoke grenade and the nose cone.. The front end<br />
of the grenade should match with the edge of the forward clamp, see sketch.<br />
Warning: Don’t ignite the grenades while aircraft is on the ground.<br />
If a grenade is still producing smoke after landing, keep away from smoke.<br />
Don’t touch the grenade. Avoid breathing in smoke.<br />
Issued: February 2011 TN 1000/20 9.14
Flight manual <strong>DG</strong>-<strong>1000S</strong><br />
Section 7 Sailplane and system description<br />
Guarded momentary switches to activate the grenades are mounted at the front<br />
instrument panel. The switches are guarded by red covers which must the lifted<br />
first to activate the switch.<br />
Left switch: smoke grenades system 1,<br />
Right switch: smoke grenades system 2<br />
Up= activate left grenade, centre= off, down= activate right grenade<br />
The momentary switches return by itself to the off position.<br />
A 1 amp circuit breaker for the smoke system is provided in the console below<br />
the instrument panel at the left hand side of the radio.<br />
Ignite only 1 system at a time.<br />
Ignite one grenade after the other for one of the 2 systems.<br />
If one grenade doesn’t fire try to ignite a second time.<br />
Don’t operate the switch for a grenade already burning as an internal short<br />
circuit may occur in the grenade and the 1 A circuit breaker will pop out.<br />
9.5.2 5 point harnesses<br />
Section 2.10 Minimum equipment<br />
Instead of four piece symmetrical safety harnesses four piece symmetrical safety<br />
harnesses with additional 5 th strap (crotch belt) may be installed. To accomplish<br />
this mounting bolts for the 5 th strap must be installed during production or<br />
retrofitted according to TN1000/20 instruction 2..<br />
Section 4 normal procedures<br />
Tighten first the lap and shoulder belts before tightening the crotch belt.<br />
9.5.3 G-logger<br />
Section 7 Sailplane and system description<br />
A G-logger type <strong>DG</strong>-GL may be installed according to installation plan 10EP41<br />
(attached to the MM).<br />
At the main bulkhead behind the right shoulder of the rear pilot a socket for data<br />
transfer and a push button (black cap) to test the G-logger are installed.<br />
Test: Press the push button for 2 seconds. If the G-logger only beeps once the<br />
logger is OK. If the G-logger beeps multiple times (* * * - - - * * *) this indicates<br />
that g-limits or speed limits have been exceeded.<br />
To reset you have to download the data from the G-logger and reset the alarms<br />
via the G-logger software.<br />
Download see manual for G-logger <strong>DG</strong>-GL.<br />
Caution: All over-limits of g-loads and speeds should be noted in the glider’s<br />
log-book including information on how high the over-limit was.<br />
Carefully check the glider for any damage prior to next flight.<br />
Issued: June 2012 TN1000/20 Revision 1 9.15