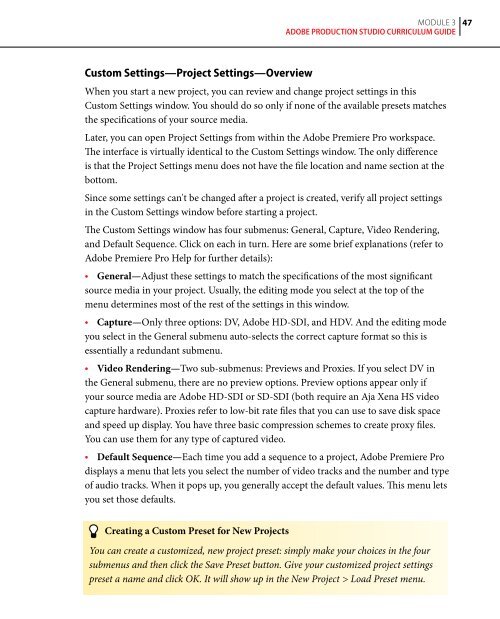
- Page 1 and 2: 24 step-by-step modules to help edu
- Page 3 and 4: Introduction About the author of th
- Page 5 and 6: Module 1 Workflow, Project Planning
- Page 7 and 8: Module 1 Workflow, Project Planning
- Page 9 and 10: Module 1 Workflow, Project Planning
- Page 11 and 12: 10 Module 1 Workflow, Project Plann
- Page 13 and 14: 1 Module 1 Workflow, Project Planni
- Page 15 and 16: 1 Module 1 Workflow, Project Planni
- Page 17 and 18: 1 Module 1 Workflow, Project Planni
- Page 19 and 20: Exercises and Activities 1 Scriptwr
- Page 21 and 22: 0 Module 2 Camcorder Features and S
- Page 23 and 24: Module 2 Camcorder Features and Sho
- Page 25 and 26: Module 2 Camcorder Features and Sho
- Page 27 and 28: Module 2 Camcorder Features and Sho
- Page 29 and 30: Module 2 Camcorder Features and Sho
- Page 31 and 32: 30 Module 2 Camcorder Features and
- Page 33 and 34: 3 Module 2 Camcorder Features and S
- Page 35 and 36: 3 Module 2 Camcorder Features and S
- Page 37 and 38: 3 Module 2 Camcorder Features and S
- Page 39 and 40: Review review Questions 1 Why is ge
- Page 41 and 42: 3 Touring Adobe Premiere Pro 2.0 It
- Page 43 and 44: Module 3 Touring Adobe Premiere Pro
- Page 45 and 46: Module 3 Touring Adobe Premiere Pro
- Page 47: Module 3 Touring Adobe Premiere Pro
- Page 51 and 52: 0 Module 3 Touring Adobe Premiere P
- Page 53 and 54: Module 3 Touring Adobe Premiere Pro
- Page 55 and 56: Module 3 Touring Adobe Premiere Pro
- Page 57 and 58: Module 3 Touring Adobe Premiere Pro
- Page 59 and 60: Module 3 Touring Adobe Premiere Pro
- Page 61 and 62: Review review questions 1 Why is Ad
- Page 63 and 64: Video Capture and Asset Management
- Page 65 and 66: Module 4 Video Capture and Asset Ma
- Page 67 and 68: Module 4 Video Capture and Asset Ma
- Page 69 and 70: Module 4 Video Capture and Asset Ma
- Page 71 and 72: 0 Module 4 Video Capture and Asset
- Page 73 and 74: Module 4 Video Capture and Asset Ma
- Page 75 and 76: Module 4 Video Capture and Asset Ma
- Page 77 and 78: Module 4 Video Capture and Asset Ma
- Page 79 and 80: Module 4 Video Capture and Asset Ma
- Page 81 and 82: 0 Module 4 Video Capture and Asset
- Page 83 and 84: Module 4 Video Capture and Asset Ma
- Page 85 and 86: Module 4 Video Capture and Asset Ma
- Page 87 and 88: Module 4 Video Capture and Asset Ma
- Page 89 and 90: Module 4 Video Capture and Asset Ma
- Page 91 and 92: 0 Module 4 Video Capture and Asset
- Page 93 and 94: 6 You can pan and zoom in on them a
- Page 95 and 96: Module 5 Creating Cuts-only Videos
- Page 97 and 98: Module 5 Creating Cuts-only Videos
- Page 99 and 100:
Module 5 Creating Cuts-only Videos
- Page 101 and 102:
100 Module 5 Creating Cuts-only Vid
- Page 103 and 104:
10 Module 5 Creating Cuts-only Vide
- Page 105 and 106:
10 Module 5 Creating Cuts-only Vide
- Page 107 and 108:
10 Module 5 Creating Cuts-only Vide
- Page 109 and 110:
10 Module 5 Creating Cuts-only Vide
- Page 111 and 112:
110 Module 5 Creating Cuts-only Vid
- Page 113 and 114:
11 Module 5 Creating Cuts-only Vide
- Page 115 and 116:
Review review questions 1 How can s
- Page 117 and 118:
Adding Video Transitions Transition
- Page 119 and 120:
11 Module 6 Adding Video Transition
- Page 121 and 122:
1 0 Module 6 Adding Video Transitio
- Page 123 and 124:
1 Module 6 Adding Video Transitions
- Page 125 and 126:
1 Module 6 Adding Video Transitions
- Page 127 and 128:
1 Module 6 Adding Video Transitions
- Page 129 and 130:
1 Module 6 Adding Video Transitions
- Page 131 and 132:
130 Module 6 Adding Video Transitio
- Page 133 and 134:
13 Module 6 Adding Video Transition
- Page 135 and 136:
6 Drag the edge of the transition r
- Page 137 and 138:
13 Module 7 Creating Dynamic Titles
- Page 139 and 140:
13 Module 7 Creating Dynamic Titles
- Page 141 and 142:
1 0 Module 7 Creating Dynamic Title
- Page 143 and 144:
1 Module 7 Creating Dynamic Titles
- Page 145 and 146:
1 Module 7 Creating Dynamic Titles
- Page 147 and 148:
1 Module 7 Creating Dynamic Titles
- Page 149 and 150:
1 Module 7 Creating Dynamic Titles
- Page 151 and 152:
1 0 Module 7 Creating Dynamic Title
- Page 153 and 154:
1 Module 7 Creating Dynamic Titles
- Page 155 and 156:
1 Module 7 Creating Dynamic Titles
- Page 157 and 158:
Review review questions 1 What are
- Page 159 and 160:
Applying Specialized Editing Tools
- Page 161 and 162:
1 0 Module 8 Applying Specialized E
- Page 163 and 164:
1 Module 8 Applying Specialized Edi
- Page 165 and 166:
1 Module 8 Applying Specialized Edi
- Page 167 and 168:
1 Module 8 Applying Specialized Edi
- Page 169 and 170:
1 Module 8 Applying Specialized Edi
- Page 171 and 172:
1 0 Module 8 Applying Specialized E
- Page 173 and 174:
1 Module 8 Applying Specialized Edi
- Page 175 and 176:
1 Module 8 Applying Specialized Edi
- Page 177 and 178:
1 Module 8 Applying Specialized Edi
- Page 179 and 180:
1 Module 8 Applying Specialized Edi
- Page 181 and 182:
1 0 Module 8 Applying Specialized E
- Page 183 and 184:
Review review questions 1 What’s
- Page 185 and 186:
Adding Video Effects Adobe® Premie
- Page 187 and 188:
1 Module 9 Adding Video Effects 4 C
- Page 189 and 190:
1 Module 9 Adding Video Effects 12
- Page 191 and 192:
1 0 Module 9 Adding Video Effects 2
- Page 193 and 194:
1 Module 9 Adding Video Effects 8 D
- Page 195 and 196:
1 Module 9 Adding Video Effects Eff
- Page 197 and 198:
1 Module 9 Adding Video Effects •
- Page 199 and 200:
1 Module 9 Adding Video Effects it
- Page 201 and 202:
00 Module 9 Adding Video Effects Co
- Page 203 and 204:
0 Module 9 Adding Video Effects 10
- Page 205 and 206:
0 Module 9 Adding Video Effects 18
- Page 207 and 208:
Exercises and Activities 1 Layer mu
- Page 209 and 210:
0 Module 10 Putting Clips in Motion
- Page 211 and 212:
10 Module 10 Putting Clips in Motio
- Page 213 and 214:
1 Module 10 Putting Clips in Motion
- Page 215 and 216:
1 Module 10 Putting Clips in Motion
- Page 217 and 218:
1 Module 10 Putting Clips in Motion
- Page 219 and 220:
1 Module 10 Putting Clips in Motion
- Page 221 and 222:
0 Module 10 Putting Clips in Motion
- Page 223 and 224:
Module 10 Putting Clips in Motion 8
- Page 225 and 226:
Module 10 Putting Clips in Motion 7
- Page 227 and 228:
Module 10 Putting Clips in Motion C
- Page 229 and 230:
5 The Motion fixed effect is the la
- Page 231 and 232:
30 Module 11 Acquiring and Editing
- Page 233 and 234:
3 Module 11 Acquiring and Editing A
- Page 235 and 236:
3 Module 11 Acquiring and Editing A
- Page 237 and 238:
3 Module 11 Acquiring and Editing A
- Page 239 and 240:
3 Module 11 Acquiring and Editing A
- Page 241 and 242:
0 Module 11 Acquiring and Editing A
- Page 243 and 244:
Module 11 Acquiring and Editing Aud
- Page 245 and 246:
Module 11 Acquiring and Editing Aud
- Page 247 and 248:
Module 11 Acquiring and Editing Aud
- Page 249 and 250:
Module 11 Acquiring and Editing Aud
- Page 251 and 252:
Review review questions 1 Why shoul
- Page 253 and 254:
1 Sweetening Your Sound and Mixing
- Page 255 and 256:
Module 12 Sweetening Your Sound and
- Page 257 and 258:
Module 12 Sweetening Your Sound and
- Page 259 and 260:
Module 12 Sweetening Your Sound and
- Page 261 and 262:
0 Module 12 Sweetening Your Sound a
- Page 263 and 264:
Module 12 Sweetening Your Sound and
- Page 265 and 266:
Module 12 Sweetening Your Sound and
- Page 267 and 268:
Module 12 Sweetening Your Sound and
- Page 269 and 270:
Module 12 Sweetening Your Sound and
- Page 271 and 272:
0 Module 12 Sweetening Your Sound a
- Page 273 and 274:
Module 12 Sweetening Your Sound and
- Page 275 and 276:
Review review questions 1 There are
- Page 277 and 278:
13 Compositing Techniques One impor
- Page 279 and 280:
Module 13 Compositing Techniques So
- Page 281 and 282:
0 Module 13 Compositing Techniques
- Page 283 and 284:
Module 13 Compositing Techniques Ta
- Page 285 and 286:
Module 13 Compositing Techniques No
- Page 287 and 288:
Module 13 Compositing Techniques 3
- Page 289 and 290:
Module 13 Compositing Techniques Ta
- Page 291 and 292:
0 Module 13 Compositing Techniques
- Page 293 and 294:
Module 13 Compositing Techniques Us
- Page 295 and 296:
Module 13 Compositing Techniques 7
- Page 297 and 298:
Module 13 Compositing Techniques Yo
- Page 299 and 300:
Module 13 Compositing Techniques Yo
- Page 301 and 302:
300 Module 13 Compositing Technique
- Page 303 and 304:
30 Module 13 Compositing Techniques
- Page 305 and 306:
5 It’s the best way to view your
- Page 307 and 308:
30 Module 14 Enhancing Color, Editi
- Page 309 and 310:
30 Module 14 Enhancing Color, Editi
- Page 311 and 312:
310 Module 14 Enhancing Color, Edit
- Page 313 and 314:
31 Module 14 Enhancing Color, Editi
- Page 315 and 316:
31 Module 14 Enhancing Color, Editi
- Page 317 and 318:
31 Module 14 Enhancing Color, Editi
- Page 319 and 320:
31 Module 14 Enhancing Color, Editi
- Page 321 and 322:
3 0 Module 14 Enhancing Color, Edit
- Page 323 and 324:
3 Module 14 Enhancing Color, Editin
- Page 325 and 326:
3 Module 14 Enhancing Color, Editin
- Page 327 and 328:
3 Module 14 Enhancing Color, Editin
- Page 329 and 330:
3 Module 14 Enhancing Color, Editin
- Page 331 and 332:
330 Module 14 Enhancing Color, Edit
- Page 333 and 334:
33 Module 14 Enhancing Color, Editi
- Page 335 and 336:
33 Module 14 Enhancing Color, Editi
- Page 337 and 338:
Review review questions 1 What’s
- Page 339 and 340:
1 Project Management In the profess
- Page 341 and 342:
3 0 Module 15 Project Management th
- Page 343 and 344:
3 Module 15 Project Management Note
- Page 345 and 346:
3 Module 15 Project Management If y
- Page 347 and 348:
3 Module 15 Project Management Task
- Page 349 and 350:
3 Module 15 Project Management revi
- Page 351 and 352:
3 0 Module 15 Project Management Hi
- Page 353 and 354:
3 Module 15 Project Management The
- Page 355 and 356:
Review review questions 1 What are
- Page 357 and 358:
1 Exporting Frames, Clips, and Sequ
- Page 359 and 360:
3 Module 16 Exporting Frames, Clips
- Page 361 and 362:
3 0 Module 16 Exporting Frames, Cli
- Page 363 and 364:
3 Module 16 Exporting Frames, Clips
- Page 365 and 366:
3 Module 16 Exporting Frames, Clips
- Page 367 and 368:
3 Module 16 Exporting Frames, Clips
- Page 369 and 370:
3 Module 16 Exporting Frames, Clips
- Page 371 and 372:
3 0 Module 16 Exporting Frames, Cli
- Page 373 and 374:
3 Module 16 Exporting Frames, Clips
- Page 375 and 376:
Review review questions 1 What’s
- Page 377 and 378:
1 Authoring DVDs with Adobe Premier
- Page 379 and 380:
3 Module 17 Authoring DVDs with Ado
- Page 381 and 382:
3 0 Module 17 Authoring DVDs with A
- Page 383 and 384:
3 Module 17 Authoring DVDs with Ado
- Page 385 and 386:
3 Module 17 Authoring DVDs with Ado
- Page 387 and 388:
3 Module 17 Authoring DVDs with Ado
- Page 389 and 390:
3 Module 17 Authoring DVDs with Ado
- Page 391 and 392:
Exercises and Activities 1 Burn a c
- Page 393 and 394:
3 Module 18 Digital Still Photograp
- Page 395 and 396:
3 Module 18 Digital Still Photograp
- Page 397 and 398:
3 Module 18 Digital Still Photograp
- Page 399 and 400:
3 Module 18 Digital Still Photograp
- Page 401 and 402:
00 Module 18 Digital Still Photogra
- Page 403 and 404:
0 Module 18 Digital Still Photograp
- Page 405 and 406:
1 Using Adobe Photoshop CS2 for DV
- Page 407 and 408:
0 Module 19 Using Adobe Photoshop C
- Page 409 and 410:
0 Module 19 Using Adobe Photoshop C
- Page 411 and 412:
10 Module 19 Using Adobe Photoshop
- Page 413 and 414:
1 Module 19 Using Adobe Photoshop C
- Page 415 and 416:
1 Module 19 Using Adobe Photoshop C
- Page 417 and 418:
Review review questions 1 How do yo
- Page 419 and 420:
1 Module 20 Creating Animated Text
- Page 421 and 422:
0 Module 20 Creating Animated Text
- Page 423 and 424:
Module 20 Creating Animated Text wi
- Page 425 and 426:
Module 20 Creating Animated Text wi
- Page 427 and 428:
Module 20 Creating Animated Text wi
- Page 429 and 430:
Module 20 Creating Animated Text wi
- Page 431 and 432:
30 Module 20 Creating Animated Text
- Page 433 and 434:
Review review questions 1 How do yo
- Page 435 and 436:
1 Adobe After Effects 7.0 Motion Gr
- Page 437 and 438:
3 Module 21 Adobe After Effects 7.0
- Page 439 and 440:
3 Module 21 Adobe After Effects 7.0
- Page 441 and 442:
0 Module 21 Adobe After Effects 7.0
- Page 443 and 444:
Module 21 Adobe After Effects 7.0 M
- Page 445 and 446:
Module 21 Adobe After Effects 7.0 M
- Page 447 and 448:
Review review questions 1 You want
- Page 449 and 450:
Adobe Audition 2.0: A Professional
- Page 451 and 452:
0 Module 22 Adobe Audition 2.0: A P
- Page 453 and 454:
Module 22 Adobe Audition 2.0: A Pro
- Page 455 and 456:
Module 22 Adobe Audition 2.0: A Pro
- Page 457 and 458:
Module 22 Adobe Audition 2.0: A Pro
- Page 459 and 460:
Module 22 Adobe Audition 2.0: A Pro
- Page 461 and 462:
0 Module 22 Adobe Audition 2.0: A P
- Page 463 and 464:
Module 22 Adobe Audition 2.0: A Pro
- Page 465 and 466:
Module 22 Adobe Audition 2.0: A Pro
- Page 467 and 468:
Module 22 Adobe Audition 2.0: A Pro
- Page 469 and 470:
Module 22 Adobe Audition 2.0: A Pro
- Page 471 and 472:
Exercises and Activities 1 Record s
- Page 473 and 474:
Module 23 Using Adobe Illustrator C
- Page 475 and 476:
Module 23 Using Adobe Illustrator C
- Page 477 and 478:
Module 23 Using Adobe Illustrator C
- Page 479 and 480:
Module 23 Using Adobe Illustrator C
- Page 481 and 482:
0 Module 23 Using Adobe Illustrator
- Page 483 and 484:
Module 23 Using Adobe Illustrator C
- Page 485 and 486:
Module 23 Using Adobe Illustrator C
- Page 487 and 488:
Module 23 Using Adobe Illustrator C
- Page 489 and 490:
Module 23 Using Adobe Illustrator C
- Page 491 and 492:
0 Module 23 Using Adobe Illustrator
- Page 493 and 494:
Exercises and Activities 1 Get to k
- Page 495 and 496:
Module 24 Authoring DVDs with Adobe
- Page 497 and 498:
Module 24 Authoring DVDs with Adobe
- Page 499 and 500:
Module 24 Authoring DVDs with Adobe
- Page 501 and 502:
00 Module 24 Authoring DVDs with Ad
- Page 503 and 504:
0 Module 24 Authoring DVDs with Ado
- Page 505 and 506:
0 Module 24 Authoring DVDs with Ado
- Page 507 and 508:
0 Module 24 Authoring DVDs with Ado
- Page 509 and 510:
0 Module 24 Authoring DVDs with Ado
- Page 511 and 512:
10 Module 24 Authoring DVDs with Ad
- Page 513 and 514:
1 Module 24 Authoring DVDs with Ado
- Page 515 and 516:
1 Module 24 Authoring DVDs with Ado
- Page 517 and 518:
1 Module 24 Authoring DVDs with Ado
- Page 519 and 520:
1 Module 24 Authoring DVDs with Ado
- Page 521 and 522:
0 Module 24 Authoring DVDs with Ado
- Page 523 and 524:
Module 24 Authoring DVDs with Adobe
- Page 525 and 526:
Module 24 Authoring DVDs with Adobe
- Page 527 and 528:
Module 24 Authoring DVDs with Adobe
- Page 529 and 530:
Review review questions 1 You drag


