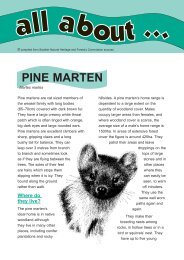
information - Scottish Natural Heritage
information - Scottish Natural Heritage
information - Scottish Natural Heritage

You also want an ePaper? Increase the reach of your titles
YUMPU automatically turns print PDFs into web optimized ePapers that Google loves.
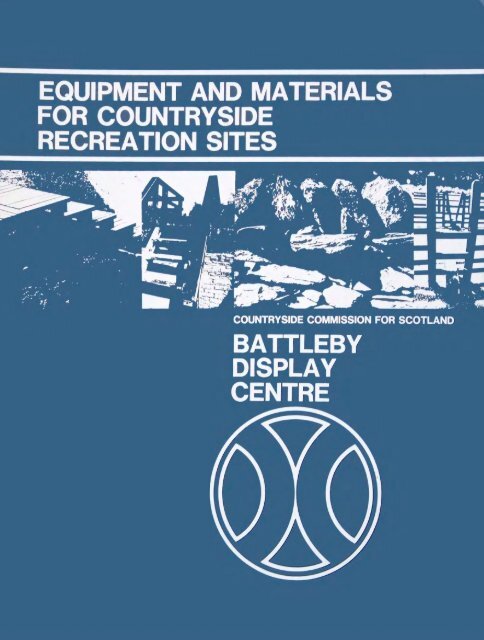
EQUIPMENT AND MATERIALS<br />
FOR COUNTRYSIDE<br />
RECREATION SITES<br />
COUNTRYSIDE COMMISSION FOR SCOTLAND<br />
BATTLEBY<br />
DISPLAY<br />
CENTRE
Note to Subscribers<br />
The role of the Battleby Display Centre is to encourage and<br />
develop high standards of design and to provide guidance on the<br />
choice of equipment and materials appropriate to the<br />
countryside. A wide range of products is displayed embracing<br />
most materials and techniques likely to be of interest to those<br />
making informal recreation provision. Display Centre staff keep<br />
under review relevant trade literature and develop new design<br />
solutions which are produced in the Commission's workshop.<br />
Priority is given to the development of cost-effective new designs<br />
and production methods geared to the financial and manpower<br />
resources likely to be available to providers. The Centre cannot<br />
recommend 'best buys,' but shows a range of design solutions to<br />
help users to make their own decisions on what to buy or how to<br />
develop designs appropriate to their circumstances.<br />
To make the Commission's advice of this kind available to others<br />
the Display Centre publishes a series of <strong>information</strong> sheets held<br />
in ring binders. These sheets are supplied free of charge to all<br />
<strong>Scottish</strong> local authorities and, at a modest fee, to other<br />
subscribers.<br />
The four main facilities currently provided by the Display Centre<br />
are as follows:<br />
— an outdoor display area, containing items listed in Section 20;<br />
— a series of <strong>information</strong> sheets, each describing a product or<br />
technique;<br />
— a reference library containing an extensive selection of<br />
manufacturers' <strong>information</strong>; and<br />
— a reference collection of 2,500 colour slides showing the<br />
application of products and techniques in the field.<br />
Staff of the Display Centre will always do their best to respond to<br />
enquiries for advice and, if necessary, will refer to alternative<br />
sources on subjects not covered by the <strong>information</strong> sheets. For<br />
this the slide collection and the trade catalogue library are useful<br />
additional aids to visitors.<br />
The activities of the Display Centre are based on development<br />
and innovation, and new or revised <strong>information</strong> sheets are issued<br />
to subscribers at regular intervals. The Commission has received<br />
much valuable feed-back <strong>information</strong> from users and thus the<br />
Centre is itself a means of exchanging <strong>information</strong> about the<br />
merits and shortcomings of new products. It is hoped that this<br />
two-way flow of <strong>information</strong> will continue. Any subscribers<br />
wishing to make enquiries or make suggestions should write to<br />
the Display Centre Manager, Battleby, Redgorton, Perth PH1<br />
3EW, or make contact by telephoning 0738-27921.
Countryside Commission for Scotland<br />
Battleby Redgorton Perth PH1 3EW<br />
S Perth (0738) 27921<br />
INFORMATION SHEETS<br />
EQUIPMENT AND MATERIALS<br />
CONTENTS Spring 1988<br />
This is a list of all sheets published in the <strong>information</strong> sheet series on<br />
equipment and materials at December 1987. Replacement or duplicate sheets<br />
may be purchased from the Battleby Display Centre at a cost of 10p per sheet.<br />
This list may be used as a re-order sheet, by making an entry in the 'quantity<br />
column.<br />
Quantity Sheet No. Title<br />
c.c.s.<br />
LITTER BINS<br />
1.1.1<br />
LITTER BIN concrete pipe and wire mesh basket with lid<br />
1.1.2<br />
LITTER BIN concrete pipe and wire mesh basket with GRP lid<br />
1.1.5<br />
LITTER BIN Solway 'tidiway'<br />
1.1.7<br />
LITTER BIN Concrete pipe disposable sack GRP lid<br />
1.3.1; 1.7.1 LITTER BASKET with timber surround<br />
1.3.2<br />
LITTER BASKET with timber surround<br />
1.4.2<br />
LITTER BIN free-standing, guarded, slab clad<br />
1.5.3<br />
LITTERBIN 'Yorke'<br />
1.6.5<br />
LITTERBIN post-mounted<br />
1.7.2<br />
LITTERBIN 'Compton'<br />
1.7.5<br />
LITTER BIN circular using square posts<br />
1.7.6<br />
LITTERBIN circular using round posts<br />
1.7.8<br />
LITTER BIN post and rail mounted sackholder<br />
1.7.11 LITTERBIN with slab surround<br />
1.7.13 LITTER BIN rail, post and surround<br />
EXHIBITS ON DISPLAY AT BATTLEBY 1. Litter bins<br />
SUPPLIERS AND PRODUCTS 1. Litterbins<br />
SIGNS, NOTICES AND INFORMATION BOARDS<br />
2.1.1 WORD AND LINE SPACING<br />
2.1.2 SIGN LAYOUT<br />
2.1.3 WAYMARK SYMBOLS 1. Standard arrow. 2. <strong>Scottish</strong> long distance route symbol<br />
2.2.2 TRAILSIDE INFORMATION BOARD<br />
2.2.3 CAIRN MOUNTED INFORMATION BOARD<br />
2.2.4 INFORMATION BOARD<br />
2.2.5 FRAMED INFORMATION BOARD<br />
2.2.6 INFORMATION SHELTER<br />
2.2.8 INFORMATION SHELTER NTS DESIGN<br />
2.2.9 VIEWPOINT INDICATOR FIXING<br />
2.2.10 TEMPORARY SIGNS 1. Signboard 2. Direction marker<br />
2.2.11 TEMPORARY SIGNS 3. Post-mounted. 4. Free-standing<br />
2.3.3 SANDBLASTED SIGNS<br />
2.4.3 VACUUM-FORMED PLASTIC SIGNS<br />
2.5.1 ROUTING: GENERAL METHOD<br />
2.5.3 FORESTRY COMMISSION SIGN SYSTEM<br />
2.5.4 WAYMARKERS<br />
2.5.5 WAYMARK CAIRN<br />
2.5.6 LONG DISTANCE ROUTE FINGERPOSTS<br />
2.5.7 LONG DISTANCE ROUTE WAYMARK POSTS<br />
2.7.2 SIGNS WITH ADHESIVE LETTERING<br />
2.8.4 SIGN SCREEN - PRINTED ON ADHESIVE PVC<br />
2.8.5 GRP MUSHROOM WAYMARKER<br />
2.9.1 MELAMINE LAMINATE SIGNS<br />
EXHIBITS ON DISPLAY AT BATTLEBY 2. Signs<br />
SUPPLIERS AND PRODUCTS 2. Signs
Quantity Sheet No. Title<br />
SURFACING MATERIALS<br />
3.1 GRASS REINFORCEMENT 'Grasscrete'<br />
3.2 GRASS REINFORCEMENT 'Mono BG slabs'<br />
3.3 SURFACING Local washed river gravel on quarry aggregate<br />
3.4 PAVING BLOCK concrete interlocking 'Uni-block'<br />
3.5 GRASS REINFORCEMENT 'Broplene' land mesh<br />
3.6 GRASS REINFORCEMENT Sommerfeld reinforcement track<br />
3.7 GRASS REINFORCEMENT 'Grassblock' system<br />
3.9 GRASS REINFORCEMENT 'Wyretex'<br />
3.10 PAVING BLOCK concrete, interlocking<br />
3.11 GRASS REINFORCEMENT 'Grasscel'<br />
BARRIERS AND FENCING<br />
4.1.11/12 FENCING interwoven<br />
4.1.14 FENCING 2.5m high screen/security<br />
4.1.16/17 FENCING timber post and rail<br />
4.2.2 FENCING PVC 'Intrad' horizontal<br />
4.2.3 FENCING PVC 'Intrad' vertical<br />
4.3.1 VEHICLE BARRIER<br />
4.3.2 VEHICLE BARRIER/SEAT<br />
4.3.3 VEHICLE BARRIER log kerb stockade type<br />
4.3.4/5 VEHICLE BARRIERS<br />
4.3.6 VEHICLE BARRIER temporary<br />
4.3.7 BOLLARD<br />
4.3.12 VEHICLE BARRIER<br />
4.3.13 BOOM BARRIER with concrete counterweight<br />
4.3.14 CARAVAN BARRIER<br />
4.5.1/2 FENCING high tensile wire<br />
4.5.3/4/5/6 FENCING single strand barbed wire<br />
4.8.2 FIELD GATE universal model<br />
4.8.3 GATE long and short gate combination<br />
4.8.4 KISSING GATE<br />
4.9 STILES<br />
4.9.1 STILE gap and single step<br />
4.9.2 STILE squeezer type<br />
4.9.3 STILE ladder type<br />
4.9.5 STILE two step, crossover<br />
4.9.6 STILE demountable<br />
4.9.7 STILE vertical ladder type<br />
4.9.9 STILE lift up and step through<br />
4.9.10 STILE high ladder<br />
4.9.11 STILE two step, straight<br />
4.9.12 STILE two step, crossover<br />
4.9.13 STILE the 'Rambler'<br />
4.10 DRYSTANE DYKES<br />
4.10.3 TYPES OF DRYSTONE WALLING<br />
4.10.4 TYPES OF COPE<br />
4.10.5 BASIC DYKE CONSTRUCTION<br />
4.10.6 WALLHEADS<br />
4.10.7 GAP STILE<br />
4.10.8 THROUGH-STEP STILE and HANDHOLD<br />
4.10.9 LUNKIE HOLE<br />
4.10.10 DYKES ON SLOPES<br />
4.10.11 RETAINING WALL<br />
4.10.12 DYKES CROSSING WETLAND, STREAMS etc<br />
4.10.13 DYKES and TREE ROOTS<br />
4.10.14 GALLOWAY HEDGE and other methods of heightening dykes<br />
4.10.15 DYKE with wire fence top<br />
| I EXHIBITS ON DISPLAY AT BATTLEBY 4. Barriers and Fencing<br />
I I SUPPLIERS AND PRODUCTS 4. Barriers and Fencing
Quantity Sheet No. Title<br />
PICNIC FURNITURE AND SEATING<br />
5.1 BENCH SEAT AND TABLE<br />
5.2 TABLE AND SEAT COMBINED<br />
5.3 GRIZEDALE BENCH<br />
5.4 PICNIC BENCH 'Grizedale'<br />
5.5 PICNIC TABLE/SEATS combined<br />
5.6 SEAT/PICNIC BENCH<br />
5.7 SEAT WITH BACKREST<br />
5.9 PICNIC TABLE 'Totland'<br />
5.10 PICNIC TABLE heavy duty<br />
5.11 BENCH SEAT<br />
5.12 BENCH SEAT<br />
5.13 SEAT with backrest<br />
5.15 BENCH seat/table<br />
5.16 PICNIC TABLE/SEATS (combined)<br />
5.17 PICNIC TABLE and SEAT<br />
5.18 PICNIC SEAT<br />
5.19 PICNIC TABLE/SEATS (combined)<br />
5.20 PICNIC TABLE/SEATS (combined)<br />
5.21 PICNIC TABLE/SEATS (combined)<br />
5.22 PICNIC TABLE<br />
5.23 BENCH SEAT<br />
5.25A PICNIC TABLE; BENCH SEAT<br />
5.25B TABLE; SEAT<br />
5.26 PICNIC PALLET<br />
5.27 PICNIC SEAT<br />
5.28 PICNIC SEAT<br />
5.40 PICNIC TABLE (see 5.41 for matching seat)<br />
5.41 BENCH SEAT (to match 5.40)<br />
EXHIBITS ON DISPLAY AT BATTLEBY 5. Picnic furniture and seating<br />
SUPPLIERS AND PRODUCTS 5. Picnic furniture and seating<br />
FOOTPATHS, STEPS AND WALKWAYS<br />
6.1 STEPPED RAMP CONSTRUCTION plank/sleeper/log + infill<br />
6.2 TIMBER WALKWAY railway sleeper<br />
6.3 TIMBER PILING CAUSEWAY<br />
6.7/8 FOOTPATH construction over soft ground using fabric<br />
6.9 BOARD WALK<br />
6.10 BOARD WALK<br />
6.11 TIMBER STEPS<br />
6.13 BOARD WALK<br />
6.14/15/16 TIMBER STEPS; STONE/CONCRETE SLAB STEPS<br />
6.17 PLATFORM/DECK viewing platform/stairhead construction<br />
6.19 STEP DETAIL<br />
BUILDING FINISHES AND MATERIALS<br />
13.1* THE TREATMENT OF EXTERIOR TIMBER AGAINST DECAY<br />
EXHIBITS ON DISPLAY AT BATTLEBY 13.1 Timber protection<br />
SUPPLIERS AND PRODUCTS 13.1 Timber protection<br />
FIREPLACES, BARBECUES ETC<br />
14.4 PARK CHEF charcoal barbecue<br />
14.5 CAMP COOKING BENCH<br />
14.6 BARBECUE converted oil drum<br />
16.1 FOOTBRIDGE<br />
* 13.1 is a 20-page A4 leaflet costing £1.50
Quantity Sheet No. Title<br />
PROVISION FOR DISABLED PEOPLE<br />
17.1 GENERAL NOTES ON DESIGN FOR ACCESS TO THE COUNTRYSIDE BY<br />
DISABLED PEOPLE<br />
17.2 CAR PARKING FOR THE DISABLED<br />
17.3 RAMPS AND GRADIENTS<br />
17.3.1 RAMP CONSTRUCTION for wheelchair users<br />
17.5.1 CIRCULATION SPACE ambulant disabled people<br />
17.5.2 CIRCULATION SPACE wheelchairs<br />
17.5.3 CIRCULATION SPACE wheelchairs<br />
17.6 FOOTPATH SURFACES for ambulant disabled people and wheelchair users<br />
17.6.1 FOOTPATH CONSTRUCTION for ambulant disabled people and<br />
wheelchair users<br />
I wish to order <strong>information</strong> sheets as above at a cost of 10p per sheet.<br />
Name<br />
Dept<br />
Organisation<br />
Address<br />
Signature<br />
Date
Countryside Commission for Scotland<br />
Battleby Redgorton Perth PH13EW<br />
tt Perth (0738) 27921<br />
LITTER BIN concrete pipe and wire mesh basket with lid<br />
ec.c.s.<br />
INFORMATION<br />
SHEET 1.1.1
Countryside Commission for Scotland<br />
Battleby Redgorton Perth PH13EW<br />
& Perth (0738)27921<br />
cc.c.s.<br />
INFORMATION<br />
SHEET<br />
1.1.2<br />
LITTER BIN concrete pipe and wire mesh basket with GRP lid scale 1:10
Countryside Commission for Scotland<br />
Battleby Redgorton Perth PH13EW<br />
tt Perth (0738)27921<br />
Litter Bin concrete pipe disposable sack GRP lid scale 1:10<br />
©c.c s 10:83<br />
INFORMATION<br />
1.1.7<br />
SHEET
Countryside Commission for Scotland<br />
Battleby Redgorton Perth PH13EW<br />
Perth (0738)27921<br />
©c.c.s.<br />
INFORMATION<br />
SHEET 1.3.1 and 1.7.1<br />
LITTER BASKET with timber surround scale1:10<br />
ELEVATION
Countryside Commission for Scotland<br />
Battleby Redgorton Perth PH13EW<br />
Perth (0738)27921<br />
1.3.2<br />
Litter Basket with timber surround scale 1:10<br />
NOTES:<br />
oc.c.s.<br />
INFORMATION<br />
SHEET
Countryside Commission for Scotland<br />
Battleby Redgorton Perth PH13EW<br />
a Perth (0738)27921<br />
LITTER BIN free-standing, guarded,'slab'clad scale 1:10<br />
©c.cs. 10:83<br />
INFORMATION<br />
SHEET<br />
1.4.2
Countryside Commission for Scotland<br />
Battleby Redgorton Perth PH13EW<br />
tt Perth (0738)27921<br />
INFORMATION<br />
SHEET<br />
1.7.2<br />
Litter Bin Compton W F Broomfield scale 1:20<br />
©c.c s. 10:83
Countryside Commission for Scotland<br />
Battleby Redgorton Perth PH13EW<br />
& Perth (0738)27921<br />
LITTER BIN (circular using square posts)<br />
c.c.s. 10:83<br />
INFORMATION 1.7.5<br />
SHEET
Countryside Commission for Scotland<br />
Battleby Redgorton Perth PH13EW<br />
©Perth (0738)27921<br />
LITTER BIN (circular using round posts)<br />
©c.c.s 9.80<br />
INFORMATION 1.7.6<br />
SHEET<br />
Scale 1:10
Countryside Commission for Scotland<br />
Battleby Redgorton Perth PH13EW<br />
tt Perth (0738)27921<br />
LITTER BIN post and rail mounted sackholder<br />
© c.c.s 10:83<br />
INFORMATION 1.7.8<br />
SHEET
Countryside Commission for Scotland INFORMATION<br />
1.7.11<br />
Battleby Redgorton Perth PH13EW<br />
tt Perth (0738)27921 SHEET<br />
LITTER BIN with slab surround Durham c.c.Design Scale 1:20<br />
©
Countryside Commission for Scotland<br />
Battleby Redgorton Perth PH13EW<br />
« Perth (0738)27921<br />
1.7.13<br />
LITTER BIN Rail, post and surround East Lothian design Scale1:20<br />
PLAN/<br />
INFORMATION<br />
SHEET<br />
V<br />
© c.c.s. 9.80
Countryside Commission for Scotland<br />
Battleby Redgorton Perth PH1 3EW<br />
Perth (0738) 27921<br />
WORD AND LINE SPACING<br />
Word spacing<br />
As with letters, the spaces between<br />
words should be the minimum<br />
necessary in order to separate one<br />
from another, but should be<br />
separated sufficiently to prevent<br />
them from merging together. As a<br />
general rule, the space between<br />
words should be approximately the<br />
width of two lower-case 'i's' as<br />
shown below.<br />
Word and line spacing<br />
Line spacing<br />
The space between lines must be<br />
sufficient to ensure that the eye can<br />
travel easily along each horizontal<br />
line of type and absorb the meaning.<br />
This means a line-space of<br />
approximately two lower-case 'i's'<br />
on their side between the bottom of a<br />
Line-space<br />
descender and the top of an Space occupied by<br />
ascender in the next line. 'ascenders'<br />
© c.c.s.<br />
INFORMATION<br />
2.1.1<br />
SHEET<br />
^<br />
Space occupied by<br />
'descenders'
Countryside Commission for Scotland<br />
Battleby Redgorton Perth PH1 3EW<br />
® Perth (0738) 27921<br />
Signing systems have to be read<br />
with light, dark and textured<br />
backgrounds. The lower examples<br />
use a broad border — this can aid<br />
visual impact.<br />
Remember that the seasons change<br />
and signs easily seen in winter can<br />
become obscured by summer<br />
foliage.<br />
Attention to detail, the refinement of<br />
layout and construction increases<br />
effectiveness.<br />
This pair of signs will be more easily<br />
understood . . .<br />
© c.c.s.<br />
FOOTBRIDGE<br />
FOOTBRIDGE<br />
FOOTBRIDGE<br />
HILL TRAIL-<br />
laid out like this FOOTBRIDGE<br />
INFORMATION<br />
2.1.2<br />
SHEET<br />
HILL TRAIL
Odia etia<br />
Odia etiam sunt<br />
luptam propter<br />
atque ut odia<br />
etiam sunt luptam<br />
propter.<br />
Odia etiam sunt<br />
luptam propter<br />
atque ut odia<br />
etiam sunt luptam<br />
propter.<br />
When the heading is<br />
in a larger size than<br />
the text within one<br />
panel, the type<br />
should line to the<br />
same margin.<br />
If the panel and<br />
type-sizes are to be<br />
kept constant, it is<br />
important not to<br />
'stretch' a shorter<br />
message to fit the<br />
area, but to leave<br />
space.<br />
Odia etiam sunt<br />
lumptam propter<br />
atque ut odia<br />
etiam sunt luptam<br />
propter. Atque ut<br />
odia etiam sunt<br />
luptam propter at<br />
ut odia<br />
Odia etiam sunt<br />
luptam propter<br />
atque ut odia etia<br />
sunt luptam<br />
propter. Atque ut<br />
odia etiam sunt lu<br />
propter atque<br />
WOODLAND<br />
ESTATES<br />
FOOTBRIDGE<br />
Signing like this can look like this.<br />
© c.c.s.<br />
There could be<br />
situations when<br />
there are a number<br />
of panels equal in<br />
size, with the type<br />
equal in height but<br />
the length of<br />
message variable.<br />
There may be<br />
instances when<br />
space is required for<br />
the purpose of<br />
separating text and<br />
isolating titles and<br />
headings.<br />
HILL TRAIL }<br />
Please keep to the paths<br />
HIGH FIRE RISK AREA<br />
Note the use of two panel depths, various<br />
colour combinations and word styles to give<br />
priorities.<br />
A temporary notice is at the foot of the panel<br />
to enable removal immediately the danger is<br />
over.
Countryside Commission for Scotland<br />
Battleby Redgorton Perth PH1 3EW<br />
® Perth (0738) 27921<br />
WAYMARK SYMBOLS 1. Standard Arrow<br />
To draw waymark<br />
arrow using rule<br />
and compasses<br />
1. Draw vertical and<br />
horizontal axes AD<br />
and HG.<br />
(These will be at 45°<br />
for upward pointing<br />
left or right arrows).<br />
2. Draw circle of radius<br />
45mm centred on<br />
intersection of axes.<br />
3. Mark 15mm intervals<br />
from circumference<br />
at B & C on vertical<br />
axis.<br />
4. Draw BE and CF<br />
parallel to horizontal<br />
axis.<br />
5. Join EF, DG and AG.<br />
Some notes on basic waymarking<br />
1. Keep it to a minimum. The best waymark of<br />
all is the path itself, so waymark only where<br />
a stranger would otherwise have difficulty<br />
following the correct path.<br />
2. Use existing surfaces on man-made objects<br />
(gates, fence-posts, the cope of a dyke etc)<br />
wherever possible, and natural objects (eg<br />
tree-trunks) only as a last resort.<br />
3. Remember that paths are two-directional<br />
and therefore the route should be clear to<br />
people approaching from either direction.<br />
4. Waymarks should always be directly facing<br />
the oncomer and where possible be placed<br />
before a junction or change of direction.<br />
5. The recommended colours are:—<br />
Footpaths: Yellow B.S. No. 08 E 51<br />
Bridleways: Blue B.S. No. 20 E 51<br />
Further references: "Waymarking public paths<br />
— a practical guide", a<br />
leaflet obtainable from the<br />
Countryside Commission<br />
for Scotland.<br />
"Waymarking for footpath<br />
and bridleway", HMSO<br />
1974<br />
© c.c.s.<br />
INFORMATION<br />
SHEET 2.1.3<br />
Top of arrow<br />
horizontal
WAYMARK SYMBOLS 2. <strong>Scottish</strong> Long Distance Route Symbol<br />
A white-painted thistle in the form illustrated<br />
right is the standard symbol waymarking all<br />
official long distance routes. It can be applied<br />
by a number of techniques, by stencil and<br />
paint to a wayside boulder for example, but it<br />
is most often found on timber waymark posts<br />
(see sheets 2.5.6 and 2.5.7) where the image is<br />
first routed into the wood then painted white.<br />
The diagram below shows how the symbol<br />
can be drawn up to allow the construction of<br />
stencils or templates for use with routing<br />
machines — see <strong>information</strong> sheet 2.5.1.<br />
Begin by drawing the horizontal and vertical<br />
axis AB and CD.<br />
With the intersection O as centre draw circles<br />
with radii of 45, 25, and 19mm.<br />
With the 45mm radius draw arcs centred on A<br />
and B to cut the outer circle at E, F, G, and H.<br />
Draw the hexagon AEFBGH. Draw parallel<br />
lines 3.5mm and 9.5mm on either side of the<br />
axis CD to intersect the base of the hexagon<br />
and the two innercircles as shown.<br />
Draw JF and EK as shown then LO and MO<br />
parallel to JF and EK.<br />
© C.C.S.<br />
The symbols on this sheet are drawn to the<br />
recommended size for use on all waymark<br />
posts and route boards.<br />
When using a router it may be convenient to<br />
cut out the bulk of the symbol quickly with a<br />
large cutter then tidy up the corners with as<br />
fine a cutter as possible.<br />
Initial cut<br />
with 6mm<br />
cutter.
Countryside Commission for Scotland<br />
Battleby Redgorton Perth PH1 3EW<br />
Perth (0738) 27921<br />
TRAILSIDE INFORMATION BOARD<br />
Bevel cut the end of the,<br />
sleeper to 30° so that<br />
display is set at 30°<br />
to the horizontal. /<br />
This method of displaying <strong>information</strong> has<br />
been designed to present interpretive material<br />
at the trail-side so that it may be easily read by<br />
both adults and children.<br />
It is robust and difficult to vandalise, and trail<br />
numbers or direction arrows may be routed<br />
into the sleepers.<br />
© c.c.s.<br />
75mm long<br />
screw here i<br />
INFORMATION<br />
SHEET 2.2.2<br />
'Pop' rivets<br />
(6-off at app<br />
250mm<br />
centres)<br />
25mm from<br />
edge<br />
100mm 16g zinc plated<br />
pozidrive 'Twinfast'<br />
c/sunk screws<br />
For upright panel<br />
250 x 125, set on edge<br />
eg railway sleeper<br />
For landscape position<br />
set sleeper as below.<br />
Display panel
Countryside Commission for Scotland<br />
Battleby Redgorton Perth PH1 3EW<br />
© Perth (0738) 27921<br />
CAIRN MOUNTED INFORMATION BOARD<br />
A robust mortar-built stone plinth displaying<br />
interpretive <strong>information</strong> screen-printed onto<br />
melamine which is bonded to marine ply:—<br />
Front elevation<br />
f 425<br />
End elevation<br />
Plan view Section through board and fixing<br />
bracket.<br />
© C.C.S.<br />
INFORMATION<br />
SHEET 2.2.3<br />
Screen-printed melamine display boards<br />
580 x 762 (as drawn) or 457 x 762mm.<br />
Scale 1:10 For the smaller size reduce the plinth to the size<br />
indicated by the dotted line.<br />
Fixing<br />
brackets<br />
embedded<br />
in mortar<br />
Reduced to 775 for smaller board — j<br />
. 3mm Melamine laminate<br />
18mm marine ply<br />
3mm Flat Bar bracket screwed to<br />
underside of board with 18mm x<br />
14mm guage zinc-plated round-head<br />
screws.
Countryside Commission for Scotland<br />
Battleby Redgorton Perth PH1 3EW<br />
Perth (0738) 27921<br />
INFORMATION BOARD<br />
12mm solid display panel<br />
Detail of tenon<br />
Fixing for melamine panels<br />
Gel-coat with image.<br />
Glass cloth and resin<br />
Core material<br />
Glass/resin —<br />
Fixing<br />
Glass/resin —<br />
Fixing for GRP panels<br />
© C.C.S.<br />
Section B-B<br />
'Bighead' fastener<br />
bonded to rear of panel<br />
View on<br />
15° weather<br />
counterbore<br />
75 x 25<br />
/Fasteners at<br />
. centre of rail<br />
50mm long<br />
countersunk<br />
INFORMATION<br />
SHEET 2.2.4<br />
15° weather<br />
This is a strongly built post and frame<br />
construction designed for mounting<br />
<strong>information</strong> panels which have had fasteners<br />
bonded to them either in the core material —<br />
such as would be the case with a GRP panel —<br />
or to the rear surface, using a fixing such as the<br />
'Bighead' fastener illustrated.<br />
The panel should be specified with fasteners<br />
set at the corners about 100mm from each<br />
edge, and at centres elsewhere no greater than<br />
500mm. Thus the overall dimensions of the<br />
framing will be determined by the size of the<br />
panel.<br />
The timber may be hardwood, such as oak, or a<br />
softwood suitably preservative-treated.<br />
For details of melamine and GRP panels see<br />
<strong>information</strong> sheets 2.9.1, 2.9.2.
Countryside Commission for Scotland<br />
Battleby Redgorton Perth PH1 3EW<br />
Perth (0738) 27921<br />
FRAMED INFORMATION BOARD<br />
Sectional plan BB<br />
Wedges<br />
to be<br />
glued<br />
Detail of mortise and tenon<br />
© C.C.S.<br />
Scale 1:5<br />
Slots for panel<br />
Mortise tapered<br />
Dowel<br />
Sectional<br />
elevation AA<br />
INFORMATION<br />
SHEET 2.2.5<br />
Groove<br />
10 x 10 mm<br />
^ 6mm<br />
Bevel<br />
Weather 15°<br />
1550<br />
Solid grade<br />
display panel<br />
See detail 'C'<br />
800 x 500 x 9mm thick<br />
See detail 'D'<br />
20mm<br />
less than panel<br />
width, (see note)<br />
1150<br />
Concrete<br />
where necessary<br />
Scale 1:20<br />
This is a sturdy post and frame construction<br />
designed to display <strong>information</strong> panels (such<br />
as solid-grade melamine) without recourse to<br />
nut and bolt fastenings.<br />
The panel is mounted in 10mm slots routed<br />
into the inside face of solid framework<br />
constructed using mortise-and-tenon joints<br />
which are both wedged and dowelled.<br />
The timber may be hardwood, such as oak, or a<br />
softwood such as larch or pine which should be<br />
preservative-treated.<br />
The mounting slot should be about 1mm wider<br />
than the thickness of the panel to be mounted,<br />
and approximately 10-12mm deep. To allow for<br />
expansion, add 1mm extra per 500mm of each<br />
dimension of panel.<br />
For details of display panels see <strong>information</strong><br />
sheet sections 2.6, 2.8 and 2.9.
Countryside Commission for Scotland<br />
Battleby Redgorton Perth PH1 3EW<br />
Perth (0738) 27921<br />
INFORMATION SHELTER<br />
Scale 1:20 2080 j<br />
(30 x<br />
Stiffener<br />
Scale 1:10<br />
(150 x 50) angled<br />
This construction requires a certain<br />
amount of joinery skill and is<br />
suitable for the display of semiweatherproof<br />
panels. It also affords<br />
some protection to the reader. The<br />
framing is manufactured in larch,<br />
with standard sarking used for<br />
roof cladding.<br />
For suitable timber finishes<br />
see <strong>information</strong> sheet<br />
© C.C.S.<br />
Concrete<br />
1050<br />
INFORMATION<br />
2.2.6<br />
SHEET<br />
150 x 50)<br />
x 30)<br />
Stiffener<br />
main framing<br />
150 x50)<br />
Stiffener<br />
1m in length.<br />
Cutting list<br />
Roof angles<br />
Roof framing<br />
Roof & main framing<br />
Stiffener<br />
Main upright<br />
Main framing<br />
Seam laps<br />
Ridge piece<br />
Roof cladding<br />
Stiffeners<br />
290<br />
(180x25)<br />
(55x25)<br />
2-off 620x100x50<br />
2-off 1150x100x50<br />
2-off 1370x100x50<br />
2-off 2080x100x50<br />
1 -off 1820x100x50<br />
2-off 2080x150x50<br />
2-off 1000x150x50<br />
4-off 4800x150x50<br />
2-off 1820x150x50<br />
20-off 1460x 55x15<br />
20-off 790x 55x15<br />
2-off 2240x 55x15<br />
20-off 1500x180x15<br />
20-off 810x180x15<br />
2-off 2080x 30x30<br />
Construction<br />
Pre-treat all components before assembly.<br />
1. The main roof framing is constructed<br />
(without cladding) prior to erection.<br />
2. The main frame must be pre-cut, but is<br />
assembled on site.<br />
3. Set main frame assembly in concrete —<br />
checking levels — using temporary<br />
supporting stays. Leave for 24 hours.<br />
4. Fix roof framing and clad.<br />
5. Fix <strong>information</strong> panels.
Countryside Commission for Scotland<br />
Battleby Redgorton Perth PH1 3EW<br />
© Perth (0738) 27921<br />
3400<br />
INFORMATION SHELTER N.T.S. DESIGN<br />
Scale 1:20<br />
© c.c.s.<br />
*"=r<br />
250x50<br />
cill<br />
100x100x38 .<br />
spacer block<br />
(125x50)<br />
upright<br />
Padstone<br />
and hardcore<br />
alternative<br />
(150x25) I<br />
INFORMATION<br />
2.2.8<br />
SHEET<br />
100x125<br />
(175x150)<br />
ridge<br />
frame<br />
150x50 filler<br />
3225 —^<br />
- 950 ») frlOM^<br />
NATIONAL T<br />
225x50 mounting board<br />
175x50 uprights<br />
Alternative method of 'slotting' mounting boards<br />
Simple joinery skills are required for this<br />
design, and some workshop preparation of<br />
components would be an advantage. The posts<br />
are first set up with temporary stays using a<br />
mounting board and the ridge piece to gauge<br />
the centres accurately. The mounting panels<br />
must be incorporated before the roof structure<br />
is added.<br />
The roof structure should be built, starting with<br />
the lower horizontal end frames, continuing<br />
with the 'rafters' and eave board, finally adding<br />
the 175 x 38 ridge plank and roof cladding<br />
boards. An optional name board may be added<br />
as shown.<br />
The plinth may be started once the uprights are<br />
firm, and should be built up to the level of the<br />
cill. Cement pointing should slope from cill to<br />
edge.<br />
Finally, after painting, mount display panels
Countryside Commission for Scotland<br />
Battleby Redgorton Perth PH1 3EW<br />
© Perth (0738) 27921<br />
VIEWPOINT INDICATOR FIXING<br />
Peripheral studs threaded or ragged,<br />
6mm dia., 6mm long<br />
Central pivot stud<br />
6mm dia., 50mm long<br />
Peripheral slots<br />
cut 8mm wide<br />
at 275mm radius.<br />
Hole at centre 12mm dia<br />
12mm between slots C<br />
At wide spans<br />
(> 125mm)<br />
bore hole<br />
in stone to<br />
take plug<br />
Fixing Procedure:<br />
2.<br />
3.<br />
4.<br />
6.<br />
7.<br />
600mm dia. 6mm thick acrylic disc.<br />
Set plugs at appropriate positions in mortar<br />
joints.<br />
Ensuring that the centres of slots in acrylic<br />
disc are orientated to allow accurate final<br />
adjustment, mark centres for fixing-plugs.<br />
Bore and countersink acrylic disc.<br />
When mortar is set, screw down acrylic<br />
onto a thin bed of soft, fine mortar, keeping<br />
peripheral slots clear of excess mortar.<br />
Fill slots and coat acrylic disc with<br />
'Araldite'.<br />
Fill central hole with 'Rockite' grouting.<br />
Press home s/steel disc, slewing to give<br />
final, accurate orientation.<br />
© c.c.s.<br />
INFORMATION<br />
2.2.9<br />
SHEET<br />
600mm dia. 16g. stainless steel disc,<br />
image deep-etched, filled black 6mm dia. stud<br />
welded to plate<br />
Section at edge<br />
of s/steel disc<br />
c/sink underside of slot<br />
Section at edge<br />
of acrylic disc<br />
Heavy duty plugs set in<br />
concrete to take brass screws<br />
'Araldite'<br />
•1½ x 12 gunmetal or<br />
brass c/sunk screw<br />
'Rawlplug' or 'Thunderplug'
Countryside Commission for Scotland<br />
Battleby Redgorton Perth PH1 3EW<br />
ffi Perth (0738) 27921<br />
TEMPORARY SIGNS 1. Signboard<br />
Scale 1:2<br />
This is a temporary signboard, designed to be<br />
easily transportable when dismantled, but<br />
large enough to be legible to motorists at<br />
moderate speeds.<br />
The main board may be made from melamine<br />
surfaced exterior grade ply, 19mm thick. On<br />
this may be printed or stencilled the logo and<br />
title.<br />
The individual title-boards may be made from<br />
150 x 20mm white plastic fencing planks; the<br />
lettering is 100mm black 'Letrasign'.<br />
© c.c.s.<br />
INFORMATION<br />
SHEET 2.2.10<br />
FAMILY DAY<br />
ON THE<br />
FARM<br />
COLTON<br />
MAINS<br />
In windy conditions drivesecuring<br />
pins into ground<br />
at angles, or on solid<br />
ground weight base<br />
frame with sand bags<br />
The 'Level adjusting clamp' is made from a 125<br />
x 9mm bolt bent through 75°, with the head<br />
removed.<br />
All metal components should be hot-dip<br />
galvanised.
TEMPORARY SIGNS 2. Direction Marker<br />
A useful method of marking a route on a<br />
temporary basis, such as is required for a Farm<br />
Open Day. Not being permanently fixed, it is<br />
suitable only for use on occasions when there<br />
is a high level of site management.<br />
For permanent protection the market should be<br />
hot-dip galvanised.<br />
Arrows may be painted on — a stencil cut to the<br />
required shape is useful for marking out a<br />
standard pattern.<br />
Alternatively, black self-adhesive plastic<br />
'Letrasign' (100mm size) may be used. This<br />
may be obtained from 'Letraset' stockists.<br />
Letrasign arrows have the advantage of being<br />
easily replaced to cater for local conditions, or<br />
not affixed until the site requirements are<br />
known.<br />
© c.c.s.<br />
Ex. 3mm plate<br />
Weld-<br />
12mm square bar<br />
Weld<br />
Scale 1:10<br />
Buff corners to app.<br />
12mm. radius<br />
1200<br />
100<br />
G.L.<br />
300
Countryside Commission for Scotland<br />
Battleby Redgorton Perth PH1 3EW<br />
© Perth (0738) 27921<br />
TEMPORARY SIGNS 3. Post-mounted<br />
Top frame.<br />
Top frame<br />
390 x 580<br />
(internal)<br />
End Elevation<br />
6mm dia lug welded to<br />
frame to locate in main<br />
frame. See detail \<br />
View showing assembly<br />
— note, Display Panel<br />
omitted.<br />
© c.c.s.<br />
frame.<br />
Display panel<br />
Main frame.<br />
Hole for padlock in ( jr<br />
12mm dia. locking bolt<br />
Flap hinges<br />
welded to<br />
frame.<br />
INFORMATION<br />
SHEET 2.2.11<br />
Hinge not<br />
shown.<br />
Corners mitred by cutting<br />
90° notch at 45° folding to<br />
right angle and welding<br />
flange.<br />
A method of temporarily displaying<br />
Information Boards in any location with square<br />
fence posts.<br />
15mm diam. hole to take<br />
locking bolt<br />
Display panel<br />
575x385x3mm<br />
Main frame<br />
25x25x3mm O.A.<br />
Elevation<br />
from 'field' side<br />
of fence.<br />
9mm dia hole for lug in<br />
top frame<br />
Hinge not<br />
shown<br />
75x75mm fence post<br />
Note: Augur hole<br />
through post to 18mm<br />
dia.<br />
.'Box' formed from 12g<br />
M.S. plate to be 80 x<br />
80mm internal cross<br />
section.<br />
View showing<br />
method of locking<br />
top frame to main<br />
frame and post.<br />
Note: The main frame may be hot-dip<br />
galvanised but NOT the top-frame (the hinge<br />
would seize) which should be given one coat<br />
metal primer and one coat black gloss enamel
TEMPORARY SIGNS 4. Freestanding<br />
Standard section of<br />
folded steel U-channel<br />
used for frame (scale<br />
actual size)<br />
Material required per<br />
sign:<br />
1.120m channel<br />
2.000m tube @ 25 x 25<br />
0.300m tube @ 20 x 20<br />
DAN|GER<br />
© c.c.s.<br />
Lettering and arrows<br />
from black self-adhesive<br />
'LETRASIGN'<br />
fold mitred corners:<br />
Cut 90° notch at 45°<br />
in channel sides<br />
Fold together<br />
Weld at 90'<br />
Ground spike to secure<br />
base in strong wind.<br />
Ex. 9mm rod.<br />
150 x 18mm white plastic<br />
'planking' cut to 485mm<br />
lengths from Marley<br />
fencing.<br />
500<br />
BULL PENS<br />
Weld<br />
1000<br />
TfT"<br />
310<br />
-25 x 25 Hollow<br />
square tube<br />
•20 x 20 Hollow square<br />
tube welded to centre of<br />
crossfoot to take upright.<br />
25 x 25 Hollow square<br />
tube.<br />
Plan view • .<br />
at centre of yr<br />
base unit<br />
Weld<br />
This free standing <strong>information</strong>/direction board<br />
is made up of two components — a base and a<br />
frame unit. The frame takes two 'planks' giving<br />
a high degree of flexibility in the selection of<br />
suitable wording. For permanent protection the<br />
base and frame units should be hot-dip<br />
galvanised.<br />
Scale 1:10
Countryside Commission for Scotland<br />
Battleby Redgorton Perth PH1 3EW<br />
Perth (0738) 27921<br />
SAND BLASTED SIGNS<br />
Sand-blasting<br />
This is a technique developed and widely used<br />
in America, now available commercially in<br />
the United Kingdom. It allows quite intricately<br />
detailed carving to be done at a reasonable<br />
cost, and lends itself to 'one-off' or small<br />
number production.<br />
The method used is to transfer the finished<br />
graphic layout to a sheet of self-adhesive<br />
masking material which is applied to the<br />
prepared board. If the graphics are to be in<br />
relief, then the background areas of the mask<br />
are cut away. Once the masking is prepared<br />
then a dry sand/air mix blasts away the<br />
exposed surface. Because timber has grain of<br />
varying degrees of hardness, it erodes at<br />
different rates, producing a textured finish. To<br />
obtain this effect, open-grained timber such as<br />
western red cedar is used. Hard timbers such<br />
as iroko, oak, etc., are not suitable.<br />
Finally, the sign is hand-finished with stains<br />
and surface coatings appropriate to the<br />
graphics.<br />
Areas protected by<br />
masking<br />
Undercut areas showing<br />
textured grain<br />
background.<br />
Composite panel<br />
made up from several<br />
boards.<br />
© C.C.S.<br />
INFORMATION<br />
SHEET 2.3.3
Protective tape being applied to wood<br />
Burnish down to remove wrinkles and even<br />
bond. Trim off excess tape<br />
Transfer design to tape, cut around design and<br />
strip away cut tape<br />
© c.c.s.<br />
Sandblast, holding blaster at some distance<br />
from surface and at right angles to surface.<br />
Blast evenly until the wood grain develops a<br />
rich texture. Watch out for any sign of tape lift<br />
off.<br />
Tape removed ready for applying wood stain.
Countryside Commission for Scotland<br />
Battleby Redgorton Perth PH1 3EW<br />
Perth (0738) 27921<br />
VACUUM-FORMED PLASTIC SIGNS<br />
INFORMATION<br />
A simple and inexpensive method of making<br />
signs by vacuum-forming thermoplastic sheet<br />
over raised letter moulds.<br />
They are lightweight, durable and available in<br />
plain plastic or with plywood backing.<br />
For vehicles, magnetic or adhesive signs are<br />
available.<br />
© c.c.s.<br />
INFORMATION<br />
2.4.3<br />
SHEET<br />
RANGER SERVICE<br />
COUNTRYSIDE<br />
COMMISSION<br />
FOR SCOTLAND<br />
Individual symbols may be incorporated and<br />
lettering is available 3", 2",,1½" and 1" high in<br />
capitals with serifs as in "RANGER SERVICE"<br />
above.<br />
I½" high script with capitals and lower case<br />
letters is also available.<br />
All letters are coloured, the background white.
Countryside Commission for Scotland<br />
Battieby Redgorton Perth PH13EW<br />
« Perth (0738)27921<br />
©c.c.s 579/2<br />
metus plena sit, ratiodipsa monet<br />
pariender iuptam seiung non<br />
amititiao non modo fautrices file<br />
Lorem ipsum dolor si amet, cons<br />
incidunt ut labore et dolore<br />
nostrud exercitation ullamcorper<br />
duis autem vel eum irure dolor<br />
dolore eu fugiat nulla pariatur. At<br />
praesant luptatum delenit aigue<br />
provident, simil tempor sunt in<br />
fuga. Et harumd dereud facilis<br />
INFORMATION<br />
2.4.12/13<br />
SHEET<br />
Waymarker using Standard Arrow and or Legend Board scale 1:10
Countryside Commission for Scotland<br />
Battleby Redgorton Perth PH13EW<br />
Perth (0738) 27921<br />
WAYMARKER CAIRN scale 1:10<br />
©ccs 579<br />
INFORMATION<br />
SHEET 2.4.14<br />
Fiqures and wayrnark arrow<br />
routed 3mm deep and painted with<br />
emulsion paint BS 08E51
Countryside Commission for Scotland<br />
Battleby Redgorton Perth PH13EW<br />
Perth (0738)27921<br />
STANDARD WAYMARK ARROW<br />
SOME NOTES ON BASIC WAYMARKING<br />
INFORMATION 2.4.15<br />
SHEET<br />
TO DRAW WAYMAHK ARROW USING RULE AND COMPASSES<br />
1. Draw vertical and horizontal axes AD and HG.<br />
(These will be at U5 for upward pointing left or<br />
right arrows).<br />
2. Draw circle of radius 45mm centred on intersection<br />
of axes.<br />
3. Mark 15mm intervals from circumference at B & C on<br />
vertical axis.<br />
U. Draw BE and CF parallel to horizontal axis.<br />
5. Join EF, DG and AG.<br />
Keep it to a minimum. The best waymark of all is the path itself, so waymark<br />
only where a stranger would otherwise have difficulty following the correct path.<br />
2. Use existing surfaces on man-made objects (gates, fence-posts, the cope of a<br />
dyke etc) wherever possible, and natural objects (eg tree-trunks) only as a last<br />
resort.<br />
3. Remember that paths are two-directional and therefore the route should be clear<br />
to people approaching from either direction.<br />
U. Waymarks should always be directly facing the oncomer and where possible be<br />
placed before a junction or change of direction.<br />
5. The recommended colours are:-<br />
Footpaths : Yellow.<br />
Bridleways: Blue.<br />
B.S. No. 08 E 51<br />
B.S. No. 20 E 51<br />
Further references: "Waymarking public paths - a practical guide", a leaflet<br />
obtainable from the Countryside Commission for Scotland.<br />
"Waymarking for footpath and bridleway", HMSO 197^<br />
©C.C.S. 11.79.
Countryside Commission for Scotland<br />
Battleby Redgorton Perth PH13EW<br />
Perth (0738) 27921<br />
LONG DISTANCE ROUTES - Fingerposts: General dimensions Scale1:5<br />
NOTES: All "fingers" made with 60 Bevel cuts at both<br />
ends (as in Type l) and trimmed square and drilled for<br />
bolts on site to suit direction.<br />
Timber preservative for finger and post :<br />
SADOLINS ACRYL 101 colour No. 28 Dark Brown or<br />
equivalent in BS No 08 B 29, symbol white.<br />
An alternative application in certain special cases<br />
is to use a place name on the "finger" and rout the<br />
name of the L.D.R. vertically on the post.<br />
This <strong>information</strong> sheet has been prepared as a guide to<br />
local authorities engaged in implementing Long-Distance<br />
Route proposals approved in Scotland by the Secretary of<br />
State for Scotland in terms of Section 1+0 of the<br />
Countryside (Scotland) Act 1967.<br />
©C.C.S 11.19<br />
INFORMATION 2.4.16<br />
SHEET
Countryside Commission for Scotland<br />
Battleby Redgorton Perth PH13EW<br />
& Perth (0738) 27921<br />
LONG DISTANCE ROUTES - FINGERPOSTS: Typical locations<br />
FINGERPOST<br />
Type 1 : "Finger" centred to<br />
indicate line of L.D.R. at<br />
'T' - junctions and straight<br />
crossings.<br />
FINGERPOST<br />
Type 2 : One "finger", used<br />
each side of the direct crossing<br />
of a road where a Type 1 at one<br />
side is deemed insufficient.<br />
FINGERPOST<br />
Type 3 : Two "fingers" at<br />
Right Angles used, for example,<br />
where the L.D.R. crosses a road<br />
indirectly, and the posts are<br />
reasonably distant or obscured<br />
from one another.<br />
This <strong>information</strong> sheet has been prepared<br />
as a guide to local authorities engaged<br />
in implementing Long-Distance Route<br />
proposals approved.in Scotland by the<br />
Secretary of State for Scotland in terms<br />
of Section UO of the Countryside<br />
(Scotland) Act 1967.<br />
©c.cs. 11.79<br />
INFORMATION<br />
SHEET<br />
2.4.16.a
Countryside Commission for Scotland<br />
Battleby Redgorton Perth PH13EW<br />
Perth (0738)27921<br />
LONG DISTANCE ROUTES - WAYMARKER POSTS: General dimensions Scale 1:10<br />
STANDARD WAYMARK POSTS<br />
The standard waymark post, with a logo and<br />
legend (name of route) on one face only and<br />
a logo alone on opposite face, is non-directional<br />
and designed to confirm the presence of a Long<br />
Distance Route at a particular point. It maybe<br />
either of a short or long post type, as<br />
illustrated, and where a series of posts are<br />
used it may not be necessary to repeat the<br />
legend on each.<br />
SHORT POST TYPE :<br />
Recommended height 750 - 1000 mm.<br />
Used where:-<br />
i) It is not possible or desirable to<br />
see posts over long distances.<br />
ii)<br />
in i)<br />
The post will not be obscured by other<br />
objects such as dykes or the seasonal<br />
growth of vegetation.<br />
The ground is open, beside buildings<br />
or in areas of low ground cover.<br />
LONG POST TYPE :<br />
Recommended height 2000 - 2225 mm.<br />
Used where:-<br />
i) Objects such as dykes or vegetation<br />
(bracken, farm crops etc.) would<br />
obscure the shorter posts.<br />
ii) In open countryside where it may be<br />
possible to see longer posts over<br />
greater distances, thus enabling<br />
fewer posts to be used.<br />
iii) In situations where the logo and<br />
waymark arrow, if added, might be<br />
rubbed by stock on a shorter post.<br />
VARIATIONS.<br />
The standard waymark pes'", may be made<br />
directional by the addition of a standard<br />
waymark arrow (sec sheet 2.U.15 ) beneath<br />
the logo as illustrated, and if required,<br />
associated with an additional logo on an<br />
adjacent or opposite face of the post as<br />
illustrated on sheets<br />
This <strong>information</strong> sheet has been prepared<br />
as a guide to local authorities engaged in<br />
implementing Long-Disxance Route proposals<br />
approved in Scotland by the Secretary of<br />
State for Scotland in terms of Section 1+0<br />
of tne Countryside (Scotland) Act 1967-<br />
cc.c.s. 11.79<br />
INFORMATION 2.4.17<br />
SHEET
Countryside Commission for Scotland<br />
Battleby Redgorton Perth PH13EW<br />
» Perth (0738)27921<br />
LONG DISTANCE ROUTES - WAYMARKER POSTS: Typical locations<br />
STANDARD CONFIRMATORY WAYMARK<br />
SHORT POST TYPE :<br />
Lettering and logo on one face only with<br />
logo alone on opposite face so that it<br />
may he seen from both directions.<br />
STANDARD CONFIRMATORY WAYMARK<br />
LONG POST TYPE :<br />
As above but used where seasonal<br />
vegetation or other objects (drystane<br />
dykes etc) may obscure the standard<br />
post, or where post should be seen at<br />
a distance etc.<br />
PATH JUNCTION VARIATION<br />
SHORT OR LONG POST TYPES :<br />
Logo and arrow used on second face<br />
to indicate line of route at<br />
"Y" - junction with other path.<br />
This <strong>information</strong> sheet has been prepared as a guide to<br />
local authorities engaged in implementing Long-Distance<br />
Route proposals approved in Scotland by the Secretary of<br />
State for Scotland in terms of Section 40 of the<br />
Countryside (Scotland) Act 1967.<br />
©CCS. 11.79<br />
INFORMATION<br />
2.4.17.a<br />
SHEET
Countryside Commission for Scotland<br />
Battleby Redgorton Perth PH13EW<br />
a Perth (0738) 27921<br />
LONG DISTANCE ROUTES-Standard <strong>Scottish</strong> Symbol<br />
To draw the standard <strong>Scottish</strong> LDP waymark<br />
below, construct as follows:<br />
1. Draw horizontal and vertical axes<br />
A B and C D.<br />
2. With the intersection 0 as the<br />
centre, draw circles of radius 19,<br />
25 and l+5mm.<br />
3. Using radius U5, describe arcs<br />
centred on A and B to intersect<br />
circumference at F and G and<br />
E and H respectively.<br />
J+. Draw nexagon A G H B E F A.<br />
5- Draw parallel lines 3-5 ana<br />
9- 5mm either side of vertical<br />
axis to intersect base of<br />
hexagon and the two centre<br />
circles as shown.<br />
6. Draw F K and E J as shown.<br />
7. Draw L M and N P 6mm from, and<br />
parallel to E J and F K.<br />
INFORMATION<br />
SHEET<br />
TEMPLATE<br />
2.4.18<br />
To construct a template for use with<br />
a pantographic router:<br />
1. Using the principles of<br />
construction for the symbol and<br />
the above dimensions draw the<br />
above on 0.5mm 'Plasticard'<br />
(obtainable from model shops).<br />
2. Cut out stippled areas shown as<br />
'Groove'.<br />
3. Bond in place on 1.5mm<br />
'Plasticard'. The above<br />
template will cut the pattern<br />
below, using a 2mm stylus and<br />
a 6mm cutter.
Countryside Commission for Scotland<br />
Battleby Redgorton Perth PH13EW<br />
« Perth (0738)27921<br />
ROUTING:GENERAL-Freehand Method<br />
2.4.19<br />
Routing' is a method of cutting away a material such as wood using a<br />
special cutter revolving at high speed. This may be done free hand<br />
or under some kind of control such as a template, or machine table,<br />
"The cutter is usually moved over a fixed workpiece although, less usually,<br />
"the converse may be the case<br />
To ROUT SIMPLE WORDING,SUCH AS A NAME-BOARD, WITHOUT A TEMPLATE<br />
Prepare an actual size tracing of<br />
"the words in the typeface required<br />
and using transfer paper or<br />
office carbon paper trace the<br />
outline onto a prepared board.<br />
A standard set of packing case,<br />
stencils can also be used to<br />
pencil the outline, on to the board.<br />
When a satisfactory layout has been<br />
achieved, rout about 3mm deep<br />
This method may be used on'off-saw'timber; but planed timber or-plywood is easier<br />
© c.c.s. 579<br />
INFORMATION<br />
SHEET<br />
Finally -the timber may be -treated with<br />
preservative (see 15.13.1) and the<br />
lettering may be infilled with a contrasting<br />
colour.<br />
For word and line spacing advice see:<strong>information</strong><br />
sheets 18.8; 18.9;
Countryside Commission for Scotland<br />
Battleby Redgorton Perth PH1 3EW<br />
Perth (0738) 27921<br />
ROUTING: GENERAL METHOD<br />
Routing is a method of cutting away a material<br />
such as wood using a special cutter revolving<br />
at high speed. This may be done free hand or<br />
under some kind of control such as a template<br />
or machine table. The cutter is usually moved<br />
over a fixed workpiece although, less usually,<br />
the converse may be the case.<br />
The method may be used on timber, plastic,<br />
aluminium or where a machine table is used.<br />
Planed timber or plywood are easier to rout<br />
than 'off-saw' timber.<br />
Routing simple wording without a template<br />
Prepare an actual size tracing of the words in<br />
the typeface required and using transfer paper<br />
or office carbon paper trace the outline onto a<br />
prepared board.<br />
Trace typeface required<br />
and transfer.<br />
Or — outline typeface<br />
with stencils.<br />
A standard set of packing case stencils can<br />
be used to pencil the outline on to the board.<br />
© C.C.S.<br />
INFORMATION<br />
SHEET 2.5.1<br />
When a satisfactory layout has been achieved,<br />
rout about 3mm deep.<br />
It is usual to cut the letters as recesses, but for a<br />
'one-off' job the background may be cut away<br />
leaving the letters standing proud. Greater care<br />
is needed however, to avoid spalling using this<br />
method.<br />
Finally the timber may be treated with<br />
woodstain (see <strong>information</strong> sheet 13.1) and<br />
the lettering may be infilled with a contrasting<br />
colour. For word and line spacing advice see<br />
<strong>information</strong> sheet 2.1.1.
Countryside Commission for Scotland<br />
Battleby Redgorton Perth PH1 3EW<br />
Perth (0738) 27921<br />
FORESTRY COMMISSION SIGN SYSTEM<br />
Secondary sign<br />
Scale 1:20<br />
All Forestry Commission signs are<br />
standardised in that all lettering is routed in<br />
one selected typeface, in-filled with white<br />
enamel paint on a dark-green emulsion painted<br />
board. The panels are of either of two lengths<br />
or of either of two depths, mounted on two<br />
posts.<br />
The system allows for a wide variety of<br />
legends, titles and selected symbols; the signs<br />
sit well against a wide variety of forest<br />
backgrounds throughout the seasons. Above<br />
all, the signs are simple, legible and<br />
unobtrusive from a distance — unmistakeably<br />
'Forestry Commission'.<br />
© c.c.s.<br />
6mm galv. bolt<br />
and nut<br />
Board<br />
fixing<br />
Scale 1:5<br />
INFORMATION<br />
SHEET 2.5.3<br />
Example of main threshold sign<br />
Specification<br />
Additional boards are<br />
NOT added to main entry<br />
signs — a separate sign is<br />
required.<br />
Panels 25mm Iroko, good both sides, painted<br />
with exterior grade emulsion. Letters routed<br />
75mm high, filled with white enamel. Posts 100<br />
x 75mm pressure-treated softwood. Fastenings<br />
100 x 6mm zinc-plated bolts and nuts, with nuts<br />
countersunk.
Countryside Commission for Scotland<br />
Battleby Redgorton Perth PH1 3EW<br />
Perth (0738) 27921<br />
WAYMARKERS<br />
Scale 1:10 Forestry Commission design<br />
Grooves infilled with<br />
different colours to<br />
delineate routes<br />
© C.C.S.<br />
Posts<br />
,100 x 100<br />
Top weathered 4 times to<br />
Scale 1:5<br />
INFORMATION<br />
2.5.4<br />
SHEET<br />
Method of mounting panel to post: scale 1:5<br />
75mm x No 14<br />
plated c/s<br />
screw N<br />
K<br />
V 6mm bevel<br />
Blind' s/s pop rivet<br />
c/sink to seat nut and<br />
washer<br />
3mm panel on<br />
18mm backing<br />
Recess to accommodate<br />
'Bighead' fastener<br />
bonded to back of panel<br />
Nut c/sunk<br />
Alternative methods of fixing panel<br />
18mm Marine ply<br />
Scale full size<br />
Although the best waymark is the good, wellconstructed<br />
and well-used footpath itself, there<br />
are instances when it is necessary to make the<br />
route by other means: for example a simple<br />
waymarker post will delineate the correct route<br />
where there are several alternatives. The<br />
waymark could be a symbol, and may also<br />
have a directional arrow with it. It should be<br />
remembered that a path is usually two<br />
directional and therefore waymarking should<br />
be considered from both directions.<br />
Occasionally it may be appropriate for the<br />
waymark to carry simple interpretive<br />
<strong>information</strong>, in which case an A4 (297 x 210mm)<br />
panel fixed as shown should suffice.<br />
The posts are prepared off-site, and dug-in in<br />
carefully selected positions: see <strong>information</strong><br />
sheet 2.5.7 for guidance.<br />
For details of standard waymark arrow see<br />
<strong>information</strong> sheet 2.1.3.
Countryside Commission for Scotland<br />
Battleby Redgorton Perth PH1 3EW<br />
Perth (0738) 27921<br />
WAYMARK CAIRN<br />
(1000 x 100 x 100) larch post<br />
A * ~<br />
350<br />
<<br />
© C.C.S.<br />
Scale 1:10<br />
I<br />
y i<br />
App. 20°<br />
Batter<br />
A sturdy waymark cairn chiefly of use on rocky<br />
terrain where posts cannot be driven. In some<br />
cases the cairn may be 'dry-stane' as shown<br />
above, or a mortar mix of coarse sand, lime and<br />
Portland cement may be used. Water should be<br />
used sparingly to give a 'dry' mix of the<br />
consistency of damp sand.<br />
uilders paper to facilitate post removal for maintenance<br />
750 ><br />
INFORMATION<br />
SHEET 2.5.5<br />
Rout figures and waymark arrow 3mm deep —<br />
see <strong>information</strong> sheet 2.5.1 on routing and 2.1.3<br />
for the standard waymark arrow design.<br />
Pre-treat post with a non oily timber<br />
preservative after routing. When thoroughly<br />
dry apply emulsion paint to the routed<br />
numbers, arrows or symbols.
Countryside Commission for Scotland<br />
Battleby Redgorton Perth PH1 3EW<br />
ffi Perth (0738) 27921<br />
LONG DISTANCE ROUTE FINGERPOSTS<br />
Check<br />
110 x 40<br />
Type 1 Type 2 Type 3<br />
All "Fingers" made with 60° Bevel cuts at both<br />
ends (as in Type 1) and trimmed square and<br />
drilled for bolts on site to suit direction.<br />
Finger and post treated with wood stain<br />
colour BS 08 B 29, a dark brown. Symbol is<br />
infilled with white.<br />
Weathered 4 times to 30°<br />
LEGEND<br />
->25 Length to suit legend<br />
(690 for West Highland Way)<br />
An alternative application in certain special<br />
cases is to use a place name on the "finger"<br />
and rout the name of the LDR vertically on the<br />
post.<br />
© C.C.S.<br />
Countryside Commission for Scotland<br />
Battleby Redgorton Perth PH1 3EW<br />
Perth (0738) 27921<br />
LONG DISTANCE ROUTE WAYMARK POSTS<br />
STANDARD WAYMARK POSTS<br />
The standard waymark post, with a logo and<br />
legend (name of route) on one face only and a<br />
logo along on opposite face, is non-directional<br />
and designed to confirm the presence of a Long<br />
Distance Route at a particular point. It may be<br />
either of a short or long post type, as<br />
illustrated, and where a series of posts are used<br />
it may not be necessary to repeat the legend on<br />
each.<br />
SHORT POST TYPE:<br />
Recommended height 750-1000mm.<br />
Used where:—<br />
(i) It is not possible or desirable to see posts<br />
over long distances.<br />
(ii) The post will not be obscured by other<br />
objects such as dykes or the seasonal<br />
growth of vegetation.<br />
(iii) The ground is open, beside buildings or in<br />
areas of low ground cover.<br />
LONG POST TYPE:<br />
Recommended height 2000-2225 mm.<br />
Used where:—<br />
i) Objects such as dykes or vegetation<br />
(bracken, farm crops etc.) would obscure<br />
the shorter posts.<br />
ii) In open countryside where it may be<br />
possible to see longer posts over greater<br />
distances, thus enabling fewer posts to<br />
be used.<br />
iii) In situations where the logo and<br />
waymark arrow, if added, might be<br />
rubbed by stock on a shorter post.<br />
VARIATIONS<br />
The standard waymark post may be made<br />
directional by the addition of a standard<br />
waymark arrow (see sheet 2.1.3) beneath the<br />
logo as illustrated, and if required, associated<br />
with an additional logo on an adjacent or<br />
opposite face of the post as illustrated on<br />
sheets.<br />
© C.C.S.<br />
INFORMATION<br />
SHEET 2.5.7<br />
Top weathered 4 times to 30'<br />
Max Ht. 2225<br />
above G.L.<br />
265<br />
Note: if no arrow is<br />
required, leave a space of<br />
165mm between Logo<br />
and top letter of legend.<br />
To suit<br />
height<br />
of legend<br />
150<br />
25<br />
75<br />
50<br />
"•T<br />
90<br />
25<br />
To suit<br />
height<br />
165<br />
of legend<br />
900<br />
G.L.<br />
Scale 1:10
Countryside Commission for Scotland<br />
Battleby Redgorton Perth PH13EW<br />
Perth (0738) 27921<br />
INFORMATION<br />
2.5.9<br />
SHEET<br />
TEMPORARY DIRECTION MARKER Scales 1:5 & 1:10<br />
cc.c-s. lo.ai
SIGN - portable, temporary.<br />
INFORMATION<br />
SHEET<br />
C.C.S. Design Scale 1:10<br />
Countryside Commission for Scotland<br />
Battleby Redgorton Perth PH13EW<br />
& Perth (0738)27921 2.5.10<br />
OC.C.S. IO:83
Countryside Commission for Scotland<br />
Battleby Redgorton Perth PH1 3EW<br />
• Perth (0738)27921<br />
INFORMATION<br />
2.5.12<br />
SHEET<br />
RESERVE BOUNDARY MARKER scale 1:5<br />
©c.c.s.579<br />
TERN<br />
BREEDING<br />
GROUNDS<br />
PLEASE DO<br />
NOT ENTER<br />
OR DISTURB
INFORMATION BOARD SHELTER<br />
INFORMATION<br />
SHEET<br />
CCS Design scale 1:20<br />
Countryside Commission for Scotland<br />
Battleby Redgorton Perth PH1 3EW<br />
tt Perth (0738)27921 2..6.11<br />
©C.C.S. l10:83
Countryside Commission for Scotland<br />
Battleby Redgorton Perth PH13EW<br />
® Perth (0738)27921<br />
INFORMATION<br />
SHEET<br />
2.6.13<br />
INFORMATION BOARD SHELTER NTS. Design scale 1:20<br />
©c.cs.579
Countryside Commission for Scotland<br />
Battleby Redgorton Perth PH13EW<br />
S Perth (0738)27921<br />
"Mushroom" GRP Waymark scale 1:20<br />
©c.c s 579<br />
INFORMATION 2.6.14<br />
SHEET
Countryside Commission for Scotland<br />
Battleby Redgorton Perth PH1 3EW<br />
© Perth (0738) 27921<br />
SIGNS WITH ADHESIVE LETTERING<br />
© c.c.s.<br />
Weather<br />
top of posts.<br />
18mm —Jl<br />
Corner radius.<br />
Edge<br />
profile<br />
100 x 50 support stay at<br />
45° optional — useful in<br />
soft ground conditions or<br />
where sign is exposed to<br />
strong winds.<br />
INFORMATION<br />
2.7.2<br />
SHEET<br />
Hooks mounted in lowest<br />
board to take temporary<br />
additional board<br />
Pack with well rammed<br />
hard core<br />
for greater security use<br />
concrete at base of posts<br />
Lettering to be 100mm white 'Letrasign' —<br />
'Helvetica Medium', Upper and Lower case<br />
Boards, made from 18mm marine ply,<br />
should be given two coats of exterior wood<br />
stain. Mid-toned boards on dark-toned<br />
posts look well.<br />
Boards should all be of the same length<br />
and, as a general rule, no more than two<br />
depths of board should be mounted on one<br />
set of posts.<br />
Title board and planks are fixed with 50mm<br />
size 14 zinc plated 'pozidrive' c/sunk<br />
woodscrews, and must be positioned clear<br />
of lettering.
Countryside Commission for Scotland<br />
Battleby Redgorton Perth PH1 3EW<br />
© Perth (0738) 27921<br />
SIGN SCREEN-PRINTED ON ADHESIVE P.V.C.<br />
Wall thickness 6mm.<br />
900<br />
300/600<br />
to suit<br />
ground<br />
conditions.<br />
PLEASE DO<br />
NOT ENTER<br />
OR DISTURB<br />
TERN<br />
BREEDING<br />
GROUNDS<br />
PLEASE DO<br />
NOT ENTER<br />
OR DISTURB<br />
Label: Red symbol<br />
and lettering.<br />
INFORMATION<br />
SHEET 2.8.4<br />
Lengths of lightweight plastic pipe with printed<br />
self-adhesive PVC labels are an effective<br />
method of delineating temporary boundaries at<br />
critical times of the year, such as during the<br />
tern breeding season on a reserve.<br />
75mm bore 6mm wall thickness dark grey class<br />
B PVC piping is suitable, obtainable in 6m<br />
lengths.<br />
Cut 5 @ 1200mm length for firm ground or 4 @<br />
1500mm for soft sand or mud.<br />
A log may be turned to fit the top of the tube as<br />
shown, to protect the tube whilst driving into<br />
firm ground. Alternatively a soft wood off-cut<br />
may be used.<br />
In soft ground the tube may be driven carefully<br />
without protection.<br />
© c.c s.
Countryside Commission for Scotland<br />
Battleby Redgorton Perth PH1 3EW<br />
© Perth (0738) 27921<br />
G.R.P. 'MUSHROOM' WAYMARKER<br />
100<br />
To obtain an image integral with the panel, the<br />
original drawings (ink on tracing-paper) are<br />
transferred, in reverse, to silk screens, and<br />
used to screen an image on to a mould in<br />
reverse. This is then backed with a layer of<br />
gel resin in the background colour, followed by<br />
layers of glass strand matting and rovings in<br />
the usual way. After curing, the flat truncated<br />
triangular panels are accurately trimmed to<br />
size and laid in a female mould the shape of the<br />
finished 'mushroom'. After bonding the<br />
adjacent edges and further laying up, 12mm<br />
plywood stiffening panels are added and<br />
overlayed with a final layer of GRP. Also at this<br />
stage the mounting bracket is incorporated.<br />
On site, each top, post and base plate is<br />
assembled, the hole dug, and the assembly<br />
concreted in, orientated in the proper direction.<br />
The unit sketched here is manufactured by —<br />
Glasdon Ltd.<br />
© CCS<br />
INFORMATION<br />
SHEET 2.8.5<br />
This design provides interpretive <strong>information</strong><br />
on several themes at each of a number of halts<br />
on a trail — each of which can be colour coded<br />
in relation to a section of a trail booklet. In<br />
addition each post is capable of carrying<br />
directional arrowheads in colours related to<br />
adjacent posts.<br />
A combination of screen printing glass<br />
reinforced plastic lay up and moulding<br />
techniques is used, the finished pentagonal<br />
'mushroom' shape being mounted on a<br />
standard resin coated 100mm steel tube<br />
concreted into the ground.
Countryside Commission for Scotland<br />
Battleby Redgorton Perth PH1 3EW<br />
Perth (0738) 27921<br />
MELAMINE LAMINATE SIGNS<br />
Melamine lamination allows a detailed<br />
screen-printed image to be encapsulated in a<br />
totally weatherproof and light-fast package.<br />
The image is screen-printed using special inks<br />
onto specially prepared paper: this is then<br />
bonded under heat and pressure with layers of<br />
Kraft paper.<br />
To prevent warping a 'balancing' layer of paper<br />
similar to the printed sheet is incorporated in<br />
the back of the panel.<br />
The finished signs may be drilled for fixing<br />
without fear of moisture seeping into the<br />
plastic.<br />
Original artwork may also be encapsulated in<br />
this way, if painted on special paper.<br />
© C.C.S.<br />
INFORMATION<br />
SHEET 2.9.1<br />
TAKE CARE<br />
DO NOT START FIRE<br />
^ Riverside Walk •<br />
'Transparent protective layer.<br />
Screen-printed image on special paper<br />
Backing sheets of Kraft paper<br />
'' impregnated with phenolic resin<br />
..'Balancing' layer<br />
Standard signs in this material may be<br />
produced in quantity by the manufacturers to<br />
be bought 'off the shelf'. The 'Fire Risk' sign is<br />
an example.<br />
The finished laminate may be any thickness,<br />
the thinner grades (app. 1.5mm thick) usually<br />
being bonded to a core material such as<br />
aluminium or marine-ply. However, by<br />
choosing 6mm or 9mm thickness, the core can<br />
be eliminated, the material being stiff enough<br />
to be self-supporting.<br />
For suggestions on mounting interpretive<br />
panels made in melamine laminate,<br />
see <strong>information</strong> sheets 2.2.2, 2.2.3, 2.2.4 and<br />
2.2.5.
Countryside Commission for Scotland<br />
Battleby Redgorton Perth PH13EW<br />
« Perth (0738) 27921 3.1<br />
GRASS REINFORCEMENT- GRASSCRETE<br />
GCI GC2 GC3<br />
Plan shapes<br />
Appearance:<br />
GCI, 44 per cent grass, 56 per<br />
cent concrete.<br />
GC2, 43 per cent grass, 57 per<br />
cent concrete.<br />
GC3, 48 per cent grass, 52 per<br />
cent concrete.<br />
Section : GCI<br />
Scale MS<br />
©c.c.s.<br />
grass<br />
concrete infill<br />
reinforcing mesh<br />
* 143 ^<br />
INFORMATION<br />
SHEET<br />
Description:<br />
Grasscrete is an in-situ process<br />
using polystyrene formers, reinforced<br />
concrete and grass which<br />
combines the load-bearing and<br />
durability of concrete with the<br />
appearance of grass.<br />
The GC1 former is suitable for<br />
moderately heavy vehicles and<br />
pedestrians, the GC2 for heavy<br />
vehicles, pedestrians and heavy<br />
water flow, and GC3 for pedestrians,<br />
light vehicles and embankment<br />
stabilisation.<br />
Materials and manufacture:<br />
Formers, polystyrene.<br />
Concrete, minimum strength,<br />
28MN/sq.m.: maximum recommended<br />
size of aggregate, 10mm.<br />
Installation:<br />
The top soil is removed and the<br />
ground contoured to the required<br />
level, any organic or very soft<br />
soil being replaced by gravel or<br />
similar material. Should a subbase<br />
be required, it should be<br />
fully compacted before laying the<br />
formers. Steel reinforcing mesh is<br />
placed round the formers to position<br />
them accurately and later control<br />
surface cracking of the concrete.<br />
The concrete mix (which should<br />
include an air entraining agent to<br />
assist working) is then poured into<br />
the formers, tamped and floated off<br />
and, after a short interval, the<br />
- surface brushed level. Expansion<br />
joints are required at 10m intervals.<br />
When the concrete has hardened, the<br />
polystyrene former tops are burnt<br />
off and the voids which are left<br />
filled with soil. When the level<br />
of the soil has subsided after rainfall,<br />
the voids are topped up with a<br />
mixture of soil and grass seed.
Countryside Commission for Scotland<br />
Battleby Redgorton Perth PH13EW<br />
ft Perth (0738)27921<br />
INFORMATION<br />
SHEET 3.2<br />
GRASS REINFORCEMENT - MONO BG SLABS<br />
Approved by<br />
Design Council<br />
Length<br />
Width<br />
Depth<br />
Weight<br />
600 mm<br />
400 mm<br />
100 mm<br />
35 kg<br />
(23 n<br />
(15*")<br />
( 4J")<br />
(80 lb)<br />
SALES OFFICE: Wettern House,<br />
Dingwall Road, Croydon,<br />
CR9 2NYTel: 01-686 4311<br />
©c.c.s.<br />
Mono Bg slabs produce a mud defeating surface at<br />
low cost.<br />
They require only the minimum of surface preparation,<br />
usually mere levelling of the ground is all that is required.<br />
Drainage is no problem, they do not require gullies,<br />
pipework or soakaways. Providing the soil is of average<br />
permeability, rain soaks away as quickly as it falls and<br />
there is no danger of waterlogging.<br />
Laying is simple and easily handled by any available<br />
labour, another help in reducing costs.<br />
Mono have four manufacturing works in the U.K. and<br />
rapid delivery of Mono Bg slabs can always be made.<br />
FILLING AND SEEDING<br />
Use clean, friable soil, or soil with an<br />
additional mixture of peat. Level off 30 mm<br />
(1 i") below the top and sow grass seed.<br />
Fill further with of fine soil and level with<br />
a hard broom. Final level should settle to<br />
25 mm (1") below upper surface<br />
of the slabs. (This is important in order not<br />
to impede germination.) Always seed<br />
immediately after filling while soil is still<br />
loose.<br />
A leaflet is available on laying and seeding<br />
procedure.<br />
ROAD & TRACKS<br />
The amount of foundation preparation required before<br />
laying a road surface of MonoBgslabs, depends on the<br />
existing stability of the sub-soil and the weight of the<br />
vehicles expected to use the road.<br />
Normally, forthe usual vehicle used in agriculture only a<br />
firm bed of well tamped sharp sand, 20 mm. (f") thick is<br />
all that is required.<br />
For roads carrying heavy vehicles a sub-grade of well<br />
tamped ballast 150 mm. (6") thick, followed by a bedding<br />
layer of sharp sand 20 mm. (f ") thick is necessary.<br />
CAR PARKS<br />
For motorcars, the 20 mm. ($") sand bed described above<br />
is quite adequate.<br />
A significant advantage of Mono Bg slabs overthe<br />
conventional hard surface is that they are not prone to<br />
flooding. The soil filling the gaps lies directly onto the<br />
sub-base beneath, and providing the sub-soil is of average<br />
permeability, rain soaks away as quickly as it falls.<br />
No pipes or gullies for drainage are needed.<br />
HARD STANDINGS<br />
Forcaravanersand camping trailers the foundation<br />
requirements for light vehicles may be employed. Areas of<br />
hard standing can either be provided for each individual<br />
caravan orforthetotal parking area concerned.<br />
For heavy vehicles the recommendation as previously laid<br />
down should be adhered to.<br />
COMMENT<br />
A hard, wearing surface with "the<br />
appearance of natural grass. This<br />
appearance can give rise to a<br />
reluctance to park on it "by some<br />
motorists, a factor which should he<br />
considered when designing car parking<br />
areas. It should also be borne in<br />
mind that the surface is not easy to<br />
walk on due to the castellated nature<br />
of the concrete slabs, which also make<br />
wheelchair movement very difficult.
Countryside Commission for Scotland<br />
Battleby Redgorton Perth PH13EW<br />
& Perth (0738)27921<br />
Local washed river gravel on quarry aggregate scale 1:5<br />
©c.c.s.<br />
INFORMATION<br />
SHEET<br />
3.3
Countryside Commission for Scotland INFORMATION<br />
Battleby Redgorton Perth PH13EW<br />
S Perth (0738)27921 SHEET<br />
3.4<br />
PAVING BLOCK, CONCRETE INTERLOCKING UNI-BLOCK<br />
Technical Details<br />
Quality of Concrete:<br />
Weight:<br />
Size:<br />
No. of Blocks m 2:<br />
No. of edge blocks lin m<br />
Standard Colour:<br />
Special Colours:<br />
Average crushing strength<br />
50 N/mm 2<br />
Average per m 2172 kgs.<br />
Length 225 mm<br />
Width 112.5 mm<br />
Thickness 80 mm<br />
39<br />
9<br />
Grey<br />
Red, Yellow and Charcoal<br />
BRITISH DREDGING<br />
CONCRETE PRODUCTS. LTD<br />
Corporation Road,<br />
Newport, Mon., NPT OWT<br />
Tel:0633 52181<br />
Telex: 497783<br />
oc.c.s.<br />
Preparation and laying<br />
Before laying Uni-block paving, a<br />
suitable base and sub-base should be<br />
prepared, taking into consideration the type of<br />
sub-soil and the intended use of the paved<br />
area.<br />
Any falls required for surface water<br />
drainage should be built in during preparation<br />
of the sub-base, which is then compacted for<br />
stability and "blinded" so that the subsequent<br />
layer of sand cannot penetrate to any<br />
appreciable degree.<br />
The laying base of 0-3 mm sand is laid at<br />
50 mm thickness and should be accurately<br />
screeded and levelled, when any inaccuracies<br />
in the sub-base can be allowed for, subject to<br />
the minimum thickness of 50 mm of sand being<br />
maintained. The screeded height of the laying<br />
base should be approx. 60 mm lower than the<br />
required finished level of paved area to allow<br />
the blocks to be vibrated down. Once<br />
screeded and levelled, the laying base must not<br />
be compacted or disturbed.<br />
The Uni-blocks should then be laid and<br />
vibrated down, using a plate vibrator, until the<br />
required level is reached. After vibrating, 0-3<br />
mm sand (preferably dry) should be brushed<br />
over the entire surface to fill the joints<br />
completely. The paved area is then ready for<br />
immediate use.<br />
HERRINGBONE<br />
NORMAL<br />
PARQUET
Countryside Commission for Scotland<br />
Battleby Redgorton Perth PH13EW<br />
» Perth (0738) 27921<br />
GRASS REINFORCEMENT - BROPLENE LAND MESH<br />
for use on<br />
permanent grass<br />
parking areas<br />
landscaping<br />
river and flood banks<br />
©c.c.s<br />
INFORMATION<br />
SHEET 3.5<br />
Broplene Land Mesh provides an effective reinforcement when<br />
it becomes firmly enmeshed with grass roots; the time taken<br />
depends upon the season of laying and weather conditions<br />
during consolidation.<br />
Areas for treatment must be well drained and able to sustain a<br />
healthy growth of grass. Broplene Land Mesh gives best results<br />
when laid towards year end when grass growth is minimal,<br />
but it can be applied any time before commencement of spring<br />
growth, provided the ground is not over hard. Winter<br />
weather helps the Mesh to become embedded but traffic should<br />
be kept off the treated area during this period.<br />
The area is reinforced for use when grass growth causes the<br />
Mesh to disappear from sight.<br />
Preparation of the Site<br />
Cut grass short and remove debris.<br />
Fill in bad depressions, pot holes and ruts; remove large-leaf<br />
weeds and level area to be treated.<br />
Turf or reseed bare and disturbed patches of ground with<br />
deep-rooted varieties of grass.<br />
Spike roll the area if possible.<br />
Remove further debris and lightly roll the area before and<br />
after laying the Mesh.<br />
Lay the Mesh with as little ground disturbance as possible and<br />
lightly reseed when the Mesh is in position.<br />
Method of Laying<br />
As a positioning guide for the laying operation, a straight line<br />
along one side of the area should be marked by stakes. These can<br />
be removed later.<br />
Pull out from the package about 30 feet of the Mesh from the<br />
end of the length.<br />
Position the full 25 feet width at the end of the area to be<br />
covered and pin down temporarily.<br />
Pull out the full length and place in position with one edge<br />
following the line marked by the stakes.<br />
Permanently pin down at approximately 18" intervals with the<br />
25 feet end temporarily secured, making sure that the<br />
width is stretched as tight as possible without causing distortion<br />
of the Mesh.<br />
Secure about 30 feet of the length along the side aligning<br />
the stakes, again spacing the pins at 18", then pull and stretch<br />
the Mesh in the opposite direction and away from the end,<br />
as tight as possible without causing distortion, and pin down<br />
for an equivalent length along the other edge. Repeat until the<br />
entire length has been laid.<br />
In most cases it will be found advisable to put in a further row<br />
of pins down the centre of the length spaced at wider intervals.<br />
It is important that complete contact between the<br />
whole of the Mesh and the ground is established.<br />
Additional pins should be used where the Mesh may<br />
appear to ride over small surface depressions.<br />
When the Mesh is firmly consolidated, the pins can be removed<br />
for future use. A short length of twine attached to the head<br />
of each pin will assist in locating them for subsequent recovery.<br />
Particular attention should be given to the anchorage of the<br />
Mesh on river banks. In some instances such places will require<br />
the use of extra long securing pins.<br />
Care of Broplene Land Mesh<br />
When grass is first cut, set cutter blades at maximum height and<br />
watch for snags. Any damage to ground surface should be<br />
repaired in the normal way. Re-pin any exposed Land Mesh.<br />
When the Mesh is established, animals may graze on the site.
Countryside Commission for Scotland<br />
Battleby Redgorton Perth PH13EW<br />
Perth (0738)27921<br />
Sommerfeld Reinforcement track<br />
I SO YD OF<br />
STIFFENED NETTING<br />
WEIGHS ABOUT 7 LBS<br />
I ROLL WEIGHS APPROX<br />
5 CWT 2QRS 14 LBS<br />
32 ROLLS WEIGH 9 TONS AF<br />
£ OIA M S RODS INTERLACED AT ABOUT B" ^ ^<br />
CENTRES INTO GALVANISED WIRE NETTING<br />
3" MESH, 12 GAUGE (13 GAUGE ADMISSIBLE)lO'WIDE<br />
A WEIGHT OF WIRE NETTING PRODUCED ON<br />
DFFtRENT MACHINES VARIES COMSOERABLY<br />
TRACK BEFORE STRAINING<br />
SHOWING CLEARANCE FOR BARS,<br />
LINKING<br />
TRACK AFTER STRAINING<br />
'WELDED<br />
-APPROX.4 PLY SELVAGE<br />
12 GAUGE<br />
03 .G. ADMSSCLE)<br />
STRETCHING THE TRACK<br />
I. HIT PICKET [PREFERABLY WITH<br />
14 LB SLEDGE HAMMER]AT THE<br />
SAME TIME PULL IT OUTWARDS<br />
WHILE EDGE OF THE TRACK IS<br />
ABOVE GROUND LEVEL.<br />
D . PICKET IS DRIVEN<br />
HOME. THE TRACK IS<br />
STRETCHED & FLUSH<br />
WITH GROUND LEVEL.<br />
©c.cs<br />
INFORMATION<br />
SHEET<br />
MATERIAL SUPPLIED FOR MOVABLE ROAD TRACK<br />
INCLUDMG A SUFFICENT NUMBER OF SPARES.<br />
COMPONENTS<br />
STIFFENED NET TNG ROLLS<br />
25 YDS. LONG BY IO'-7*<br />
BARS, LINKING l£x gx 15 FT<br />
IO PER ROLL + 5* BQ9<br />
NUMBER SUPPLIED NO. SUPPLED PER<br />
PER 25 YD. ROLL IOOOYDS LINEAL.<br />
1 - 88-2 SO.YDS 40<br />
IO-5 420<br />
Zn PICKETS') ONE PICKET 18-75 750<br />
PICKETS) ROAD TRACK 6-25 250<br />
BUCKLES.ENO JOINTING 6 * 257. SPARES<br />
2 4 0 FIXCD TO POLLS<br />
6 0 SPARES M BACS<br />
END RODS FASTENED<br />
TOGETHER WITH SIX<br />
SPECIAL BUCKLES<br />
24 GAUGE SHERARDISED SHEET<br />
METAL BUCKLES, 5" LONG<br />
6 BUCKLES ARE ATTACHED TO INSIDE<br />
ROD OF EACH ROLL AND 25% SPARES<br />
SUPPLIED SEPARATELY IN A BAG.<br />
M.S. FLATS<br />
3.6
Countryside Commission for Scotland<br />
Battleby Redgorton Perth PH13EW<br />
« Perth (0738) 27921<br />
INFORMATION<br />
3.7<br />
SHEET<br />
GRASS REINFORCEMENT - GRASSBLOCK SYSTEM<br />
©c.c.S<br />
600mm<br />
(average)<br />
Not to scale SECTION A-A<br />
soil<br />
sand layer<br />
sub-base<br />
reinforcement<br />
\<br />
SUB-BASE<br />
In common with any other surfacing system the preparation<br />
and compaction of the sub-base is an important step in<br />
achieving a stable and level finished surface.<br />
Where a new sub-base is being provided, sufficient ground<br />
must be removed to allow an adequate thickness of<br />
compacted sub-base material to be laid. Generally this will<br />
be a minimum of 100mm (4") although it is not possible<br />
to lay down hard and fast rules as conditions on each site<br />
will vary. The sub-base preparation should conform to the<br />
minimum standards laid down for an equivalent solid<br />
surface designed for the same loading conditions. On to<br />
this sub-base should be placed a blinding layer of sand<br />
approximately 20mm thick. A light compaction of the<br />
sand should be carried out before laying the GRASSBLOCK<br />
units.<br />
LAYING<br />
The laying of GRASSBLOCK precast concrete units is simple.<br />
Once the sub-base and sand have been laid and compacted, the<br />
blocks are laid edge to edge on the sand bed. To help in<br />
reducing the risk of variable settlement the precast concrete<br />
units can be tamped in position with a surface compactor.<br />
SOILING and SEEDING<br />
For filling in the voids through the GRASSBLOCK surface a<br />
good quality topsoil should be used free from weeds and all<br />
injurious substances. Grass seed containing a high<br />
proportion of fescue grasses should be sown in the normal<br />
way. At the same time an application of suitable root-<br />
promoting fertiliser should be given.<br />
As with any newly seeded surface care should be taken to<br />
ensure that the seed is kept moist.<br />
Following either watering or rainfall the soil in the holes<br />
will settle by up to 15mm, which will mean that the growth<br />
of grass can develop undisturbed by the surface traffic. The<br />
use of the root-promoting fertiliser will encourage the grass<br />
roots to establish quickly and after establishment of growth<br />
it is advisable to apply a further two treatments of a<br />
suitable top dressing fertiliser.<br />
LANDSCAPE<br />
GRASS<br />
CONCRETE<br />
LIMITED<br />
22 BOND STREET, WAKEFIELD,<br />
YORKSHIRE, WF1 2QP<br />
Telephone: Wakefield 74818 (STD 0924)
Countryside Commission for Scotland<br />
INFORMATION<br />
3.9<br />
Battleby, Redgorton, Perth PH1 3EW<br />
SHEET<br />
S Perth (0738) 27921<br />
'WYRETEX' Malcolm, Ogilvie & Co Ltd<br />
"WYRETEX" is woven from a galvanised wire<br />
and reinforced jute or polypropylene fibre<br />
thread to form a stiff fabric. It is available in<br />
ten standard fabric structures from very close<br />
to very open mesh, and is also available<br />
coated with olive 'drab' or other coloured<br />
PVC. The polypropylene 'WYRETEX' is U.V.<br />
stabilised and acid resistant for use in<br />
sunlight and acid soils.<br />
The fabric is marketed jointly by Malcolm,<br />
Ogilvie and Company Limited, and John<br />
Boath (Jnr) Limited. It was first produced by<br />
Malcolm, Ogilvie some years ago to meet<br />
Ministry of Defence requirements for the<br />
revetting of trenches and underground<br />
shelters in the military role. It has been<br />
extensively tested and used successfully by<br />
the Ministry for a number of years.<br />
The two companies have now been allowed<br />
to develop variations of the material for the<br />
construction, civil engineering, agriculture<br />
and forestry industries for use in the following<br />
applications:—<br />
Grass Conservation — grass car parks,<br />
recreation areas, footpaths, golf courses<br />
and caravan sites.<br />
Soil/sand stabilisation, riverbank<br />
reinforcement.<br />
Protection against sand and soil erosion.<br />
Path and roadway membranes, temporary<br />
roads and paths.<br />
Visual screening, snow and windbreak<br />
fencing.<br />
Structures such as wildlife observation<br />
hides and shelters.<br />
Trench lining and concrete formwork.<br />
Fabric Number 7<br />
© c.c.s.<br />
Some examples of the lighter weight fabrics.<br />
"WYRETEX" has the following properties:—<br />
Strength; flexibility; ease of handling; easy to<br />
secure; compactness and ease of storage (it<br />
comes in roll form); porosity or waterproofed;<br />
variability of construction as required;<br />
recoverability, providing economy of use.<br />
Full details are available on request from:—<br />
MALCOLM, OGILVIE & CO LTD<br />
CONSTABLE WORKS<br />
31 CONSTITUTION STREET<br />
DUNDEE DD36NL<br />
Telephone Dundee 0382 22974<br />
Fabric Number 8 Fabric Number 9
Countryside Commission for Scotland<br />
Battleby Redgorton Perth PH13EW<br />
Perth (0738)27921<br />
Technical content<br />
Quikpave blocks are manufactured from selected high strength<br />
concrete by sophisticated production methods ensuring long term<br />
durability and dimensional accuracy.<br />
They have been designed on a modular basis, to a grid of<br />
200 mm x 100 mm.<br />
Full block<br />
No. blocks per No. edge blocks Average weight<br />
sq. m — 49 per lin. m — 5 per sq. m —147 Kg. (65mm)<br />
per sq. m-174 Kg. (80mm)<br />
Standard colour — grey. Also available random buff or red.<br />
Corner block'"'and edge block * available 65mm thick only<br />
Quikpave pattern permutations<br />
Quikpave blocks are fully interlocking in all directions, thus, even<br />
natural coloured blocks can be effectively laid in many pattern<br />
permutations.<br />
In addition, random coloured blocks are available which adds<br />
immensely to the decorative possibilities.<br />
Contrasting colours can also be used to form letters, direction<br />
markings and car parking bays.<br />
1 Staggered joints 2 Herringbone<br />
3 Squares 4 Stripes<br />
ec.c.s.<br />
INFORMATION<br />
SHEET<br />
3.10<br />
Paving Block, concrete, interlocking Quikpave<br />
N.B. Other than for pedestrian areas, patterns 2:4 (or other broken<br />
bond patterns) are recommended.<br />
Head Office:<br />
1 Market Close, Poole, Dorset BH15 1NQ.<br />
Telephone Poole 5751/2/3<br />
<strong>Scottish</strong> Works:<br />
Grange Road, Houston Industrial Estate, Livingston,<br />
Lothian EH54 5DD.<br />
Telephone Livingston 32307<br />
Laying instructions for Quikpave blocks<br />
1. Sub-Base<br />
a. Where surface water drainage is required, minimum falls of<br />
1 in 40 are recommended. The appropriate gradients should be built<br />
in during the construction of the sub-base.<br />
b. Lay the sub-base, compact by using a vibrator roller or tamping,<br />
and blind the surface with fine material to achieve a smooth even<br />
finish to within an accuracy of ± 10 mm of the correct levels.<br />
(An ideally compacted sub-base will permit a man to stand on it<br />
without leaving any footprints).<br />
c. If the perimeter line of the sub-base is unrestrained, it should be<br />
extended by at least 300 mm beyond the finished edge of the paving.<br />
d. Any free-standing water or) the sub-base, should be dispersed<br />
prior to laying the sand bed.<br />
2. Laying Course<br />
a. A laying course, formed from sand (0-5 mm grain size) is placed<br />
on the sub-base and accurately screeded and levelled to a thickness<br />
of 50 mm. The sand should not contain any free draining water.<br />
b. On large areas, it may be advisable to sub-divide the area by the<br />
use of accurately aligned 50 mm high screed boards, firmly anchored<br />
to the sub-base.<br />
c. Where the edge blocks are being used without any side restraint,<br />
extend the area as in 1 .c.<br />
ONCE THE SAND BED HAS BEEN FORMED, IT SHOULD NOT<br />
BE DISTURBED OR STEPPED ON.<br />
3. Wearing Surfaces<br />
a. Laying of the paving blocks should commence at right angles to<br />
the main pavement axis, preferably starting from one end of the area.<br />
b. The blocks must be placed on the sand bed in such a manner as<br />
not to disturb the already laid blocks. This is clearly illustrated in<br />
figure A, where work has commenced<br />
from the right hand side<br />
of the area to be paved. A similar<br />
approach should be adopted when<br />
starting from the left. Given<br />
correct laying procedure a<br />
maximum joint gap of 2mm can<br />
occur between adjacent blocks.<br />
c. After laying the first two or three rows, check the paving for<br />
over all dimensional accuracy, uniformity of the joint gap,<br />
alignment and squareness.<br />
d. As laying proceeds, preferably completing each course before<br />
commencing the next, it is advisable that the paver should lay the<br />
blocks whilst standing on the blocks already laid.<br />
e. l-or efficient<br />
operations, stockpiles<br />
of the blocks should be<br />
positioned on the already<br />
paved area, within easy<br />
reach of the paver.<br />
f. Where edge blocks<br />
are used, they should<br />
be incorporated as<br />
the laying progresses.<br />
g. Checks for alignment,<br />
squareness and falls<br />
should be carried out<br />
at regular intervals.<br />
h. The paving should be consolidated down to the required levels<br />
using a plate vibrator, having a compaction force of 9-16 Kilo<br />
Newtons. (Suitable products are manufactured by Wacker and<br />
Vibromax).<br />
N.B. The blocks will compact down approximately 20-25% during<br />
this operation.<br />
i. No paving should be left uncompacted overnight except for a<br />
margin 600 mm wide adjacent to subsequent laying.<br />
j. When all the paved area has been laid and compacted, finally<br />
check the alignment and the surface irregularity, which should not<br />
exceed ± 5 mm from the correct levels or profile,<br />
k. Should any surface irregularities be found, the blocks in the<br />
affected areas should be removed, to adjust the sand bed, then<br />
re-instated to the correct levels.<br />
I. Finally, sweep fine sand (0-3 mm particle size) over the paving<br />
until all the joints are filled, followed by a further pass with the<br />
plate vibrator.
Countryside Commission for Scotland<br />
Battieby Redgorton Perth PH13EW<br />
& Perth (0738)27921<br />
INFORMATION 3.11<br />
SHEET<br />
Grass Reinforcement GrassCel<br />
Specification<br />
GrassCel units consist of<br />
a series of cavity forming interconnecting<br />
concrete bars with<br />
localised upstands for wheel contact<br />
at the surface. The cavities and<br />
channels are filled in with soil, and<br />
grass is sown, resulting in a surface<br />
consisting of 75% grass and only<br />
25% concrete.<br />
There is just one basic unit,<br />
manufactured frbm high quality<br />
concrete to ensure long term<br />
durability.<br />
Quikkova GrassCel units are based<br />
on a modular grid of 600 x 400 mm<br />
and each unit is 120 mm thick.<br />
Weight per unit = 35 Kg<br />
Number per sq. m = 4.16<br />
Top soil requirement = approx.<br />
1 tonne per 10 sq. m of area.<br />
Laying Course<br />
A laying course formed from sharp<br />
sand(0-5mm grain size) is placed<br />
on the sub-base and screeded and<br />
levelled to a thickness of 20 mm.<br />
Prior to layinq the GrassCel the<br />
sand should be lightly compacted<br />
using a tamping board.<br />
Soiling and Seeding<br />
(a) Fill the voids and channels with<br />
clean, good quality top soil.<br />
(b) Level off 10mm below the top<br />
surface, using a stiff broom and<br />
sow the grass seed.<br />
©cccs<br />
Sand bed<br />
Sub-base or sub-grade<br />
Wearing Course<br />
(a) Place the GrassCel units, edge to<br />
edge, onto the prepared sand bed.<br />
(c) If required, apply a suitable root<br />
promoting fertilizer.<br />
(d) Add a further 10mm layer of<br />
fine soil and level off to the<br />
top surtace.<br />
Typical section on AA<br />
Recommended construction for<br />
Quikkova GrassCel<br />
The Quikkova GrassCel system<br />
consists of three main elements:<br />
(i) a free draining sub-base (granular<br />
material, hardcore, hoggin etc.).<br />
(ii) a 20 mm thick laying course of<br />
sharp sand.<br />
(iii) 120mm thick Quikkova GrassCel<br />
upits infilled with soil and grass.<br />
Laying instructions<br />
Sub-base<br />
(a)<br />
Lay the sub-base, compact by using<br />
a vibrator roller or tamping and blind<br />
the surface to achieve a smooth, even<br />
finish. (An ideally compacted subbase<br />
will permit a person to stand on<br />
it without leaving any footprints).<br />
(b)<br />
If the perimeter line of the sub-base<br />
is unrestrained, it should be extended<br />
by at least 300 mm beyond the<br />
finished edge of the GrassCel.<br />
The units should be consolidated<br />
into position by using a wooden<br />
tamping board.
Countryside Commission for Scotland<br />
Battleby Redgorton Perth PH13EW<br />
B Perth (0738)27921<br />
FENCING, Interwoven<br />
4.1.11<br />
4.1.12<br />
© CCS<br />
INFORMATION<br />
SHEET 4.1.11 ; 4.1.12
Countryside Commission for Scotland<br />
Battleby Redgorton Perth PH13EW<br />
Perth (0738)27921<br />
FENCING 2.5m high screen/security CCS Design scale1:20<br />
©c.c.s<br />
INFORMATION<br />
4.1.14<br />
SHEET
Countryside Commission for Scotland<br />
Battleby Redgorton Perth PH13EW<br />
« Perth (0738)27921<br />
FENCING-Timber Post and Rail<br />
4.1.16<br />
4.1.17<br />
©c.c.s.<br />
INFORMATION 4.1.16:4.1.17<br />
SHEET
Countryside Commission for Scotland<br />
Battieby Redgorton Perth PH1 3EW<br />
a Perth (0738) 27921<br />
FENCING PVC Intrad' horizontal Harrison Thompson scale 1:2.5<br />
c.c.s.<br />
INFORMATION<br />
SHEET<br />
4.2.2
Countryside Commission for Scotland<br />
Battleby Redgorton Perth PH13EW<br />
» Perth (0738) 27921<br />
FENCING PVC Intrad vertical Harrison Thompson 1:20<br />
©c.c.s.<br />
INFORMATION<br />
4.2.3<br />
SHEET
Countryside Commission for Scotland INFORMATION<br />
Battleby Redgorton Perth PH13EW<br />
S Perth (0738)27921 SHEET<br />
4.3.1<br />
VEHICLE BARRIER SCALE 1:20<br />
C.C-S.
Countryside Commission for Scotland<br />
Battleby Redgorton Perth PH13EW<br />
» Perth (0738)27921<br />
VEHICLE BARRIER/SEAT<br />
©c.c.s.<br />
INFORMATION<br />
SHEET<br />
4.3.2
Countryside Commission for Scotland<br />
Battleby Redgorton Perth PH13EW<br />
a Perth (0738) 27921<br />
©c.c.s.<br />
INFORMATION<br />
SHEET<br />
VEHICLE BARRIER-Log Kerb'stockade'type<br />
4.3.3<br />
SCALE 1:5
Countryside Commission for Scotland<br />
Battleby Redgorton Perth PH13EW<br />
Perth (0738)27921<br />
VEHICLE BARRIERS<br />
©c.c.s.<br />
INFORMATION<br />
SHEET 4 . 3 . 4 ; 4 . 3 . 5
Countryside Commission for Scotland<br />
Battleby Redgorton Perth PH13EW<br />
& Perth (0738)27921<br />
INFORMATION<br />
SHEET 4.3.6<br />
Vehicle Barrier temporary CCS Design scales 1:50 and 1:10<br />
©c.c.s
Countryside Commission for Scotland<br />
Battleby Redgorton Perth PH13EW<br />
« Perth (0738)27921<br />
BOLLARD<br />
©c.c.s.<br />
INFORMATION<br />
4.3.7<br />
SHEET<br />
scale 1:5
Countryside Commission for Scotland<br />
Battleby Redgorton Perth PH13EW<br />
8 Perth (0738)27921<br />
VEHICLE BARRIER<br />
©c.cs.<br />
INFORMATION<br />
SHEET<br />
4.3.12
Countryside Commission for Scotland<br />
Battleby Redgorton Perth PH13EW<br />
& Perth (0738)27921 4.3.13<br />
BOOM BARRIER with concrete counterweight c.c.s .Design<br />
©C C S. 10:83<br />
INFORMATION<br />
SHEET
Countryside Commission for Scotland<br />
Battleby Redgorton Perth PH13EW<br />
S Perth (0738)27921<br />
INFORMATION 4.3.14<br />
SHEET<br />
CARAVAN BARRIER.CCS Design. scales 1:20&1:50<br />
©c.cs
Countryside Commission for Scotland<br />
Battleby Redgorton Perth PH13EW<br />
® Perth (0738)27921<br />
INFORMATION<br />
SHEET 4.5.1; 4.5.2<br />
FENCING High tensile wire Fountain Forestry scale 1:25<br />
4.5.2<br />
©c c s.
Countryside Commission for Scotland<br />
Battleby Redgorton Perth PH1 3EW<br />
S Perth (0738) 27921<br />
4.8.2<br />
FIELD GATE Universal Model British Gates(&Timber) Ltd<br />
©C.C.8.<br />
INFORMATION<br />
SHEET
Countryside Commission for Scotland<br />
Battleby Redgorton Perth PH13EW<br />
& Perth (0738)27921<br />
INFORMATION 4.8.3<br />
SHEET<br />
Long and Short Gate Combination scale 1.25<br />
©c.c.s
Countryside Commission for Scotland<br />
Battleby Redgorton Perth PH13EW<br />
& Perth (0738)27921<br />
INFORMATION<br />
SHEET 4.8.4<br />
Kissing Gate scale 1:10<br />
©c.c.s. 5.80
Countryside Commission for Scotland<br />
Battleby Redgorton Perth PH13EW<br />
a Perth (0738)27921<br />
STILES<br />
A stile should provide a simple, and inexpensive way<br />
of crossing a fence or wall. It must be strong and safe,<br />
yet it must remain as a barrier to stock. A well-built<br />
stile with handhold can be a good waymark, visible<br />
from some distance from the fence or wall.<br />
Type of fence<br />
A stile should be made from materials similar to the<br />
barrier it crosses. Thus, a dry-stane dyke should have<br />
long through-band stone steps in preference to timber<br />
treads (see I S. 4.10.8). A post-and-rail fence should<br />
have a timber stile, while a post-and-wire fence will<br />
probably best be crossed with a timber structure<br />
related to the wooden post on which will be mounted<br />
any hand-hold provided.<br />
Type of user<br />
A simple structure such as a vertical ladder stile (I.S.<br />
4.9.7) is adequate for occasional access, but not for<br />
large numbers of the general public. A vertical ladder<br />
stile is also useful where farming operations, like<br />
ploughing, run close to the line of the fence. The<br />
demountable stile (I S. 4.9.6) is of use for machinery<br />
access or where at some times of year the way may be<br />
left open. In areas where dogs are walked near<br />
residential areas, a small vertical sliding 'hatch' for the<br />
dog may be built beside the stile, or a design like the<br />
'Rambler' (I.S. 4.9.13) may be used.<br />
Skills<br />
Most stiles are simple to construct, but they require to<br />
be stable and safe, with properly fixed hand-holds.<br />
©c.c.s.<br />
INFORMATION<br />
SHEET<br />
DESIGN AND CONSTRUCTION<br />
4.9<br />
Scale<br />
The optimum 'riser' height is about 250mm, the maximum<br />
350mm. All vertical intervals should be the same. Except for a<br />
'bar' rung on a ladder, the width of tread should not be less<br />
than 150mm.<br />
Construction<br />
Always support treads directly onto uprights. If treads are<br />
supported on a cross-piece it is prudent to use a small bolt and<br />
nut to secure the cross-member, not a nail. In addition, a small<br />
check in the upright will give better support than just a<br />
fastening, but the check should not be such as to weaken the<br />
upright.<br />
Safety<br />
If a fence used barbed wire, the barbs should be removed or<br />
covered in some way to prevent injury to users. Hand-holds<br />
should be provided wherever possible.<br />
Maintenance<br />
Inspect for damage or deterioriation every six months — more<br />
often at heavily used sites.<br />
Treatment<br />
All components should be treated to B.S. 4072. Timber cuts<br />
made on site should be deluged with preservative before final<br />
assembly.
Countryside Commission for Scotland<br />
Battleby Redgorton Perth PH13EW<br />
Perth (0738) 27921<br />
©c.c.s.<br />
INFORMATION<br />
4.9.1<br />
SHEET<br />
STILE-GAP and SINGLE STEP Scale 1:10
Countryside Commission for Scotland<br />
Battleby Redgorton Perth PH13EW<br />
& Perth (0738) 27921<br />
©c.cs 11.95<br />
INFORMATION<br />
4.9.2<br />
SHEET<br />
STILE "Squeezer'type C.C.S.Design Scale 1:20
Countryside Commission for Scotland<br />
Battleby Redgorton Perth PH13EW<br />
tt Perth (0738)27921<br />
©C.C.S.<br />
INFORMATION<br />
4.9.3<br />
SHEET<br />
Stile ladder type scale 1:20
I N F O R M A T I O N<br />
S H E E T 4.9.5<br />
Stile "two-step crossover" C.C.S. Design. Scale 1:20<br />
SIDE ELEVATION FRONT ELEVATION<br />
C.C.S revised 1989<br />
Split tube<br />
protection<br />
-100 x100mm<br />
Countryside Commission for Scotland Battleby, Redgorton, Perth PHI 3EW<br />
Telephone: (0738) 27921, Fax: (0738) 30583<br />
700mm<br />
1200mm<br />
N o t e s<br />
1This stile is simple to construct<br />
requiring no joinery skill. It is ideal for<br />
broad application of negotiating 7 strand<br />
farmland fences with safety as it avoids the<br />
need to turn around on the descent. It is<br />
unobtrusive yet obvious to the footpath user.<br />
2The riser height of the steps is at the<br />
suggested maximum dimension of<br />
350mm, with 400mm from the top step over the<br />
wire. The minimum width of the steps is<br />
150mm.The hand rail can be nailed, or for<br />
extra strength, bolted to the fence post<br />
upright.<br />
3For added safety and long term stability,<br />
the fence post upright can be concreted<br />
into the ground. The split tube protection over<br />
the barbed wire is essential to avoid injury and<br />
clothing damage. Some barbs are removable, if<br />
so remove them in the way of the stile.<br />
C u t t i n g L i s t<br />
Uprights 2-off 1250x100x100mm<br />
2-off 900x100x100mm<br />
Steps 2-off 1000x150x50mm<br />
Handhold 1-off 1200x 75x50mm<br />
Stiffening Blocks 2-off 200x100x50mm
Countryside Commission for Scotland<br />
Battleby Redgorton Perth PH13EW<br />
8 Perth (0738)27921<br />
INFORMATION<br />
4.9.6<br />
SHEET<br />
STILE, DEMOUNTABLE scale 1:10<br />
©c.c.s
Countryside Commission for Scotland<br />
Battleby Redgorton Perth PH13EW<br />
ffi Perth (0738) 27921<br />
©c.c.s.<br />
INFORMATION<br />
SHEET<br />
4.9.7<br />
STILE-Vertical ladder'type scale1:20
Countryside Commission for Scotland<br />
Battleby Redgorton Perth PH13EW<br />
Perth (0738)27921<br />
INFORMATION<br />
SHEET 4.9.9.<br />
STILE "Lift up and step through" West Yorkshire pattern<br />
©c.cs 11.85<br />
Scale 1:10<br />
and as marked
Countryside Commission for Scotland<br />
Battleby Redgorton Perth PH13EW<br />
» Perth (0738)27921<br />
INFORMATION<br />
SHEET 4.9.10<br />
STILE "high ladder" C.C.S.Design Scale 1:20<br />
©C.C.S.1.86
Countryside Commission for Scotland<br />
Battleby Redgorton Perth PH1 3EW<br />
tt Perth (0738) 27921<br />
INFORMATION 4.9.11<br />
SHEET<br />
STILE—'Two step,straight' Scale 1:10<br />
©c.c.s. 11.79.
Countryside Commission for Scotland<br />
Battleby Redgorton Perth PH13EW<br />
B Perth (0738)27921<br />
STILE Two-step crossover" Jacksons Fencing Scale 1:20<br />
©c.c.s 10.65<br />
INFORMATION<br />
SHEET 4 . 9 . 1 2
Countryside Commission for Scotland<br />
Battleby Redgorton Perth PH13EW<br />
©Perth (0738)27921<br />
STILE - The "Rambler" British Gates and Timber Ltd. Scale1:10<br />
c c s 9.85<br />
INFORMATION<br />
4.9.13<br />
SHEET
Countryside Commission for Scotland INFORMATION<br />
4.10<br />
Battleby Redgorton Perth PH13EW<br />
Perth (0738) 27921 SHEET<br />
DRYSTANE DYKES<br />
Publications<br />
Brooks, Alan 1977 Dry Stone Walling — A<br />
Practical Conservation<br />
Handbook<br />
Hart, Edward 1980 The Dry Stone Walling<br />
Handbook — Employing<br />
the Permanence and<br />
Beauty of <strong>Natural</strong><br />
Stone<br />
The skills of building 'dry', without mortar, are ancient. The<br />
construction of Iron Age brochs show the same technique which<br />
was used widely in the 18th and 19th Centuries to mark out and<br />
enclose fields. The technique has survived so long because<br />
drystane dykes are strong, durable and afford excellent protection<br />
both for and against stock. They shelter animals from wind<br />
and snow and reduce the blowing of soil. The stones provide a<br />
habitat for wild plants, insects, animals and birds.<br />
Dykes can be built in places too bleak for hedges and too rocky<br />
for fences and, constructed by skilled labour, they will outlast a<br />
fence several times. Once the material is on site a man can build<br />
up to 6.0 lineal metres a day, depending on the nature of the<br />
stone and the terrain.<br />
The way a dyke is built reflects its surroundings, the slope and<br />
nature of the ground, the type of stone available locally and the<br />
experience, skill and inventiveness of the dyker. Each dyker<br />
develops his own style, and the <strong>information</strong> sheets which follow<br />
illustrate a few of the variations on this technique.<br />
The sheets describe traditional constructions and include some<br />
of the ways of building around obstacles; they are provided to<br />
encourage those who may consider building or repairing dry<br />
stane dykes, and to help all readers to see pattern, skill and<br />
tradition in the 'drystane' method.<br />
Footnote: With regard to costs it can be the case that to repair an existing dyke is<br />
little more expensive per running metre than to replace it with a post-and-wire<br />
fence.<br />
British Trust for Conservation<br />
Volunteers<br />
36 St. Mary's Street<br />
Wallingford<br />
Oxfordshire 0X10 OEU<br />
Thorsons Publishers Ltd<br />
Wellingborough<br />
Northamptonshire<br />
Rainsford-Hannay, F 1976 Dry Stone Walling Stewartry of Kirkcudbright<br />
Drystane Dyking Association<br />
Gatehouse-of-Fleet<br />
Kirkcudbrightshire<br />
©c.cs
Countryside Commission for Scotland<br />
Battleby Redgorton Perth PH13EW<br />
Perth (0738)27921 4.10.3<br />
TYPES OF DRYSTONE WALLING Cdrystane dyke')<br />
©CCS<br />
INFORMATION<br />
SHEET<br />
Variation<br />
half dyke<br />
Single dyke<br />
Galloway double dyke<br />
uses throughband<br />
Coursed dyke<br />
uses trimmed quarry stone<br />
Rubble dyke<br />
double dyke without through<br />
band<br />
Caithness flag fence<br />
flagstones may be linked<br />
at top with metal staples
Countryside Commission for Scotland<br />
Battleby Redgorton Perth PH13EW<br />
Perth (0738) 27921<br />
TYPES OF COPE<br />
©CCS<br />
ELEVATIONS<br />
4.10.4<br />
Note: the cope is an important element<br />
of the dyke in terms of strength and<br />
appearance. The cope height is<br />
determined and suitable stone selected,<br />
a guide line is stretched as shown and<br />
the cope built to it, where stones of<br />
suitable size are not to hand, height<br />
is achieved using smaller stones.<br />
Buck and Doe<br />
Advantages: decorative, wall height<br />
increased with minimum of material.<br />
Disadvantages: weak, stone must be<br />
selected.<br />
Dressed Cope<br />
Advantages: neat appearance, tight<br />
construction.<br />
Disadvantages: more material required,<br />
availability, expense.<br />
Locked Top<br />
Advantages: strong, when used with<br />
hard rough stone.<br />
Disadvantages: slow to build, loosens<br />
on settlement.<br />
Tilted Cope<br />
Advantages: suitable.on slopes,<br />
bind as wall settles.<br />
Disadvantages: less heigh achieved,<br />
stone must be selected.<br />
Turf Cope<br />
Advantage: quick to build.<br />
Disadvantages: less height achieved,<br />
turf may fail to 'take' and be<br />
displaced.<br />
Flat Cope<br />
Advantages: speed of construction,<br />
neat appearance.<br />
Disadvantages: less height gained,<br />
massive size.<br />
Rubble Cope<br />
Advantages: quick construction, mixed<br />
stones may be used.<br />
Disadvantages: less stable than other<br />
types of construction.<br />
Mortared Cope<br />
Advantages: useful where there is a<br />
shortage of suitable cope stones.<br />
Disadvantages: lacks flexibility when<br />
wall settles, mortar may not harmonise<br />
with stone.
Countryside Commission for Scotland<br />
Battleby Redgorton Perth PH13EW<br />
« Perth (0738)27921<br />
BASIC DYKE CONSTRUCTION<br />
INFORMATION<br />
4.10.5<br />
SHEET<br />
Note: Trench excavated to a depth of 50 - 150mm according to soil conditions<br />
and to a width allowing up to 50mm projection of founds (scarcement) on either<br />
side of the base. A light timber wall frame may be used as a template for<br />
the cross sectional profile of the dyke. A plumb line is suspended from the<br />
top of the frame, lines from the frame are drawn taut and pinned to the wall<br />
so providing guides, dimensions are to the outer edges of the frame.<br />
Construction Guidelines:<br />
i. Place the biggest stones to the bottom<br />
ii. Break the joints<br />
iii. Taper the dyke to batter suitable<br />
for stone used<br />
iv. Keep the hearting full<br />
v. Longest dimension of stone should<br />
run into dyke<br />
©c.c.s
Countryside Commission for Scotland<br />
Battleby Redgorton Perth PH13EW<br />
0 Perth (0738)27921<br />
WALLHEADS<br />
Note: wall heads are constructed where it is desired to terminate a dyke;<br />
to denote change of ownership; where openings or partial openings<br />
are created and to impart stability by the regular inclusion of<br />
wall heads in a dyke on a continuous slope.<br />
©c.c.s.<br />
INFORMATION<br />
SHEET<br />
4.10.6
Countryside Commission for Scotland<br />
Battleby Redgorton Perth PH13EW<br />
tt Perth (0738)27921<br />
GAP STILE<br />
Note: Height of step above ground and width<br />
of opening are crucial factors in ensuring<br />
that the slit stile is impassable for all<br />
but the most agile sheep breeds.<br />
©CCS<br />
wall brought to a head<br />
through stone step<br />
INFORMATION<br />
4.10.7<br />
SHEET<br />
large end cope stone
Countryside Commission for Scotland<br />
Battleby Redgorton Perth PH13EW<br />
tt Perth (0738)27921<br />
THROUGH-STEP STILE and HANDHOLD<br />
NB:<br />
the construction of this<br />
stile depends upon suitable<br />
stone being available.<br />
Railway sleeper sections<br />
are an acceptable alternative<br />
longer than normal<br />
end cope stones<br />
diagram of fixing<br />
of posts using fence<br />
wire doubled<br />
passing through<br />
wall and round "batten<br />
©c.c.s.<br />
INFORMATION<br />
4.10.8<br />
SHEET<br />
through stone<br />
forms top step<br />
I<br />
diagram shoving<br />
'locking in' of<br />
sten in wall<br />
Handholds, provided as<br />
shown, are necessary as<br />
stone covered with moss<br />
or mud in wet conditions<br />
can be slippery.
Countryside Commission for Scotland<br />
Battleby Redgorton Perth PH13EW<br />
Perth (0738)27921<br />
LUNKIE HOLE<br />
Note: to construct a sound<br />
lunkie hole it is<br />
necessary to have<br />
available an adequatelysized<br />
lintel stone.<br />
©c.c.s.<br />
lunkie hole must be paved to protect<br />
wall and founds against wear and erosion<br />
INFORMATION<br />
4.10.9<br />
SHEET<br />
wall brought to a head
Countryside Commission for Scotland<br />
Battleby Redgorton Perth PH13EW<br />
Perth (0738)27921<br />
DYKES ON SLOPES<br />
Dyke construction on a slope should start at the<br />
bottom. Large base stones are laid :<br />
at the slope, with subsequent<br />
courses of diminishing<br />
size laid to true<br />
horizontal.<br />
vail with no stock proof<br />
purpose may be stepped<br />
up a slope in this manner<br />
wall brought to<br />
with one course tying<br />
into lower portion of wall<br />
©c.c.s<br />
cope stones vertical or<br />
canted up-hill<br />
note importance<br />
of end cope stone<br />
wall heads<br />
batter may be<br />
increased on<br />
downhill face<br />
cope stones are tilted<br />
up-hill or are vertical<br />
INFORMATION<br />
4.10.10<br />
SHEET<br />
continuous uphill wall<br />
should be brought to a head<br />
at 20m intervals to<br />
improve stability<br />
Wall height<br />
should be constant<br />
measured at right<br />
angles to the ground<br />
A dyke meeting an<br />
out-crop or obstacle<br />
is brought to a head<br />
against it and is<br />
continued above to<br />
remain stock proof.<br />
wall face vertical<br />
or near to vertical<br />
section through<br />
wall traversing slope
Countryside Commission for Scotland<br />
Battleby Redgorton Perth PH13EW<br />
ft Perth (0738)27921<br />
RETAINING WALL<br />
should run off water<br />
endanger wall, cut off<br />
drain 400-600mm deep<br />
by 400-600mm wide may<br />
be formed<br />
occasional<br />
large stones<br />
recessed into<br />
bank to key,<br />
known as<br />
'tusking*<br />
©c.c.s<br />
VERTICAL SECTION<br />
INFORMATION<br />
4.10.11<br />
SHEET<br />
stones are laid lengthwise into the<br />
retained soil<br />
retaining wall<br />
running into "bank<br />
individual stones<br />
being keyed in
Countryside Commission for Scotland<br />
Battleby Redgorton Perth PH13EW<br />
0 Perth (0738)27921<br />
DYKES CROSSING WETLAND, STREAMS etc.<br />
A dyke crossing wetland may "be<br />
constructed as "below with a series<br />
of small lunkie holes allowing a<br />
through flow of water.<br />
If dyke construction of any type is impossible the<br />
dyke may be brought to a wall head on either side<br />
of the soft bearing and a fence used to continue<br />
the line of the dyke.<br />
Small diameter sections of<br />
clayware pipe built into a dyke<br />
at suitable intervals along the<br />
base allows water movement.<br />
A lunkie hole built<br />
to allow a stream<br />
passage through a<br />
dyke. A metal grille<br />
hung on the downstream<br />
face of the lintel and<br />
swinging freely deters<br />
animals but allows<br />
debris through.<br />
INFORMATION<br />
4.10.12<br />
SHEET<br />
If the bearing is soft, found stones<br />
should "be increased in size and bedded<br />
in gravel. Lining the trench with<br />
woven/non-woven textile membranes<br />
will give excellent stabilization.<br />
A section of reinforced concrete<br />
drain may be used allowing a<br />
small stream to pass through a<br />
dyke.<br />
NB: Dykes must have more massive founds where water erosion is possible,<br />
stream beds should be consolidated in the vicinity of dykes, openings<br />
should be adequate to deal with spate conditions.<br />
©c.cs.<br />
t
Countryside Commission for Scotland<br />
Battleby Redgorton Perth PH13EW<br />
Perth (0738)27921<br />
DYKES and TREE ROOTS<br />
Where it is<br />
not possible to divert the<br />
line of the dyke small lunkie'<br />
holes may he built to allow tree roots<br />
to pass through wall. Allowance must be made<br />
for growth. ,<br />
INFORMATION<br />
4.10.13<br />
SHEET<br />
Alternatively, the dyke may be brought to heads on either side<br />
of the tree, and a fence used to continue the wall line.<br />
©c.c.s.
Countryside Commission for Scotland<br />
Battleby Redgorton Perth PH13EW<br />
Perth (0738)27921<br />
INFORMATION 4.10.14<br />
SHEET<br />
GALLOWAY HEDGE and other methods of heightening dykes<br />
Galloway hedge suitable<br />
for use across sloping<br />
ground. Thorn hush is<br />
planted in the dyke at<br />
time of construction<br />
and effectively increases , no batter to this face<br />
dyke height,particularly<br />
on the uphill side.<br />
single wire fence with posts'<br />
at 5.00m centres deters more<br />
active sheep breeds from<br />
climbing the dyke.<br />
posts secured to dykes<br />
with doubled fencing wire<br />
passing round posts through<br />
wall and strained to battens<br />
Method of increasing 1.5m dyke to make deer proof.<br />
©CCS<br />
original profile of slope<br />
soil excavated from here is<br />
transferred uphill for use as<br />
backfill on uphill side of<br />
completed dyke.<br />
2.1m treated thinnings<br />
at 5.00m centres
Countryside Commission for Scotland<br />
Battleby Redgorton Perth PH13EW<br />
tt Perth (0738)27921<br />
DYKE with wire fence top<br />
Suitable flat steel standards<br />
(preferably galvanised) drilled<br />
to accept wire<br />
Note: may be used to extend<br />
existing dyke height<br />
or built into dyke<br />
under construction<br />
Standard cut and<br />
key formed to bed<br />
into mortar<br />
©C.C.S.<br />
INFORMATION<br />
4.10.15<br />
SHEET<br />
Standards spaced as necessary (2 - 3m)<br />
'through stone
INFORMATION<br />
SHEET 5.1<br />
BENCH SEAT AND TABLE scale 1.20<br />
Countryside Commission for Scotland<br />
Battleby Redgorton Perth PH13EW<br />
B Perth (0738) 27921<br />
©c.c.s
Countryside Commission for Scotland<br />
Battleby Redgorton Perth PH13EW<br />
Perth (0738)27921<br />
INFORMATION<br />
SHEET 5.2<br />
TABLE AND SEAT COMBINED scale 1:20<br />
SlDE ELEVATION
Countryside Commission for Scotland<br />
Battleby Redgorton Perth PH13EW<br />
Perth (0738)27921<br />
©c.c.s<br />
INFORMATION<br />
SHEET<br />
5.3<br />
GRIZEDALE BENCH scale 1.20
Countryside Commission for Scotland<br />
Battleby Redgorton Perth PH13EW<br />
Perth (0738) 27921<br />
©c.c.S<br />
INFORMATION<br />
SHEET<br />
5.4<br />
PICNIC BENCH Grizedale' Forestry Commission scale1:20
Countryside Commission for Scotland<br />
Battleby Redgorton Perth PH13EW<br />
Perth (0738) 27921<br />
©c.c s 980<br />
INFORMATION<br />
SHEET<br />
5.5<br />
PICNIC TABLE/SEATS combined 'Battenhursfdesign Scale 1:20
Countryside Commission for Scotland<br />
Battleby Redgorton Perth PH13EW<br />
Perth (0738) 27921<br />
INFORMATION<br />
SHEET 5.6<br />
SEAT/ PICNIC BENCH Scale 1:10<br />
©c.cs
Countryside Commission for Scotland<br />
Battleby Redgorton Perth PH13EW<br />
& Perth (0738) 27921<br />
INFORMATION 57<br />
SHEET<br />
SEAT WITH BACKREST c.c.s . Design scale1:10<br />
©CCS
5.8<br />
I N F O R M A T I O N<br />
SHEET<br />
Timber Seat C.C.S. Design. Scale 1:20,1:5,1:2.<br />
©C.C.S revised 1<br />
Countryside Commission for Scotland Battleby, Redgorton, Perth PHI 3EW<br />
Telephone: (0738)27921, Fax: (0738)30583
I N F O R M A T I O N<br />
S H E E T<br />
Timber Seat C.C.S. Design. Scale 1:20,1:5,1:2.<br />
Frame dimensions and<br />
structural details<br />
Scale 1:5<br />
Base<br />
Section front slat<br />
Scale 1:2<br />
\ /<br />
Holes for 100x5mm<br />
galvanised nails to be bored<br />
145 x95mm<br />
Dressed timber<br />
Slope concrete away from seat<br />
upright to prevent rain water<br />
collecting at base of upright.
600 to 800mm<br />
deep<br />
FRONT ELEVATION<br />
Scale 1:20<br />
END ELEVATION<br />
©C.C.S revised 1989<br />
If necessary for<br />
vandal resistance<br />
include a 200mm<br />
length of steel pipe.<br />
• 2000mm -<br />
Details at R<br />
N.T.S.<br />
Countryside Commission for Scotland Battleby, Redgorton, Perth PHI 3EW<br />
300mm—<br />
450mm<br />
5.8<br />
N o t e s<br />
1An aesthetically pleasing timber seat,<br />
offering a great degree of comfort due<br />
to the rake of the back, seat and the shaped<br />
slats. Suitable for use when extended stays are<br />
expected such as children's play areas,<br />
viewpoints, parks and picnic areas. The<br />
construction is not suitable for the unskilled<br />
woodworker and the use of machine tools is<br />
necessary. Great care needs to be taken to<br />
obtain the correct rake of the seat back to the<br />
seat.<br />
2Cut out and shape all the pieces and<br />
bore holes where indicated. Holes for<br />
nails should be slightly undersized. Treat with<br />
exterior stain before assembly. Stake the seat in<br />
an upright position whilst the concrete sets.<br />
Use a spirit level against the back of the seat to<br />
check the seat is in the correct position when<br />
cementing in.<br />
3Apply an exterior stain (Ref. Blue Sheet<br />
13.1 'Timber Protection') Creosote or<br />
other oily stains are unsuitable as they will<br />
mark clothing.<br />
C u t t i n g L i s t<br />
Timber: Pine or Douglas Fir pressure treated<br />
against fungal rot.<br />
Uprights 2-off 1480x145x95mm<br />
dressed timber<br />
Seat bearers 4-off 595x 145x70mm<br />
dressed timber<br />
Seat slats & 5-off 2000 x95x45mm<br />
back slats dressed timber<br />
Plugs 20-off 15x 12mm diameter<br />
F i x i n g s<br />
Coach Bolts (galvanised) 4-off 200x12mm<br />
Fence Nails or<br />
Coach Screws (galvanised) 20-off 100mm
Countryside Commission for Scotland<br />
Battleby Redgorton Perth PH13EW<br />
Perth (0738) 27921<br />
INFORMATION 5.9<br />
SHEET<br />
PICNIC TABLE -'Totland' wfBroomfield Ltd scale 1:20<br />
©ccs 579
Countryside Commission for Scotland<br />
Battleby Redgorton Perth PH13EW<br />
Perth (0738)27921<br />
5.10<br />
PICNIC TABLE - Heavy Duty wf Broomfield Ltd Scale 1:20<br />
©c.cs<br />
INFORMATION<br />
SHEET
Countryside Commission for Scotland<br />
Battleby Redgorton Perth PH13EW<br />
Perth (0738)27921<br />
5.11<br />
BENCH SEAT C.C.S.Design scale 1:20<br />
©c.cs<br />
INFORMATION<br />
SHEET
Countryside Commission for Scotland<br />
Battleby Redgorton Perth PH13EW<br />
Perth (0738) 27921<br />
BENCH SEAT<br />
©CCS<br />
INFORMATION<br />
SHEET 5.12
Countryside Commission for Scotland<br />
Battleby Redgorton perth PH13EW<br />
Perth (0738)27921<br />
SEAT with backrest<br />
©CCS<br />
INFORMATION 5.13<br />
SHEET<br />
scale 1:20
Countryside Commission for Scotland<br />
Battleby Redgorton Perth PH13EW<br />
Perth (0738)27921 5.15<br />
BENCH SEAT/TABLE scale 1:20<br />
©c.c.s. 9.80<br />
INFORMATION<br />
SHEET
Countryside Commission for Scotland<br />
Battleby Redgorton Perth PH13EW<br />
Perth (0738) 27921<br />
©CC S 579<br />
INFORMATION<br />
SHEET<br />
5.16<br />
PICNIC TABLE/SEATS (combined) c.c.s .Design scale 1:20
Countryside Commission for Scotland<br />
Battleby Redgorton Perth PH13EW<br />
Perth (0738) 27921<br />
5.17<br />
PICNIC TABLE and SEAT c.c.s.Design scale 1.20<br />
©c.c.s<br />
INFORMATION<br />
SHEET
Countryside Commission for Scotland<br />
Battleby Redgorton Perth PH13EW<br />
Perth (0738)27921<br />
5.18<br />
PICNIC SEAT C.C.S.Design scale 1:20<br />
©c.c s 579<br />
INFORMATION<br />
SHEET
Countryside Commission for Scotland<br />
Battleby Redgorton Perth PH13EW<br />
Perth (0738) 27921<br />
©ccs<br />
INFORMATION<br />
SHEET<br />
5.19<br />
PICNIC TABLE/SEATS (combined) c.cs Design scale1:20
Countryside Commission for Scotland<br />
Battleby Redgorton Perth PH13EW<br />
Perth (0738)27921<br />
PICNIC TABLE/SEATS (combined) C.C.S. Design<br />
©C C S<br />
INFORMATION<br />
SHEET<br />
5.20<br />
scale1:20
©C.C.S revised 1989<br />
I N F O R M A T I O N<br />
S H E E T 5.21<br />
Picnic Table/Seats (combined) CCS Design. Scale 1:20,1:10<br />
Fix below or above with 9x 130 coach screws c/sunk and<br />
plugged if fixed from above. Timber Connector<br />
Countryside Commission for Scotland Battleby, Redgorton, Perth PHI 3EW<br />
Telephone: (0738) 27921, Fax: (0738)30583<br />
Detail of Bottom<br />
Rail/Seat<br />
Support Joint<br />
Scale 1:10<br />
N o t e s<br />
1A popular heavy duty, free standing unit<br />
best made with pine or Douglas fir or<br />
combined with larch for ground contact<br />
members.<br />
Designed with timber connectors only<br />
2on bottom rail/upright joints to allow<br />
unbolting of table-top, seats and struts after<br />
initial assembly for transportation and<br />
stacking units for winter storage and<br />
maintenance. It is only necessary to include<br />
one timber connector to the bottom end of<br />
each of the table and seat supports.<br />
Timber should be planed and exposed<br />
3edges bevelled to 4mm.<br />
4An exterior, non-toxic stain finish such<br />
as listed on blue sheet 13.1 Timber<br />
Protection' should be applied preferably<br />
before assembly of the unit. 'Creosote' or other<br />
oily finishes may stain clothing and should be<br />
avoided. Dark brown framework and midbrown<br />
table and seats look well in a<br />
countryside setting.<br />
This unit is not easily moved and<br />
5therefore should have a hardstanding<br />
as a base to alleviate the problem of grass<br />
cutting round the unit.<br />
Slightly lighter weight versions of this 6design are available from certain<br />
manufacturers. Please contact Battleby Centre<br />
staff for details.<br />
C u tt tt i nn g LL ii s t<br />
Table-top/Seats 8-off 200x60x 1850mm<br />
Table-top bearers 2-off 100x50x810mm<br />
Seat bearers 4-off 100x50x400mm<br />
Bottom rails 2-off 100x50x1620mm<br />
Seat supports 8-off 200x60x365mm<br />
Table supports 4-off 200x60x665mm<br />
Footrest 1-off 880x100 x50mm<br />
F i x i n g s<br />
16-off 180x12mm Bolts<br />
16-off 100x12mm Bolts<br />
32-off 130x9mm Coach Screws<br />
2-off 100x9mm Coach Screws<br />
8-off Timber connectors
Countryside Commission for Scotland INFORMATION<br />
5.22<br />
Battleby Redgorton Perth PH13EW<br />
Perth (0738)27921 SHEET<br />
Picnic Table scale 1:20
Countryside Commission for Scotland<br />
Battleby Redgorton Perth PH13EW<br />
Perth (0738) 27921<br />
BENCH SEAT Model SF1 scale 1:20<br />
©cc s 579<br />
INFORMATION<br />
SHEET
Countryside Commission for Scotland<br />
Battleby Redgorton Perth PH13EW<br />
Perth (0738)27921<br />
5.25A<br />
PICNIC TABLE; BENCH SEAT SF9;SF5 scale 1:20<br />
©c.c s 579<br />
INFORMATION<br />
SHEET
Countryside Commission for Scotland<br />
Battleby Redgorton Perth PH13EW<br />
Perth (0738) 27921<br />
TABLE;SEAT SF11:PG18<br />
c c s 579<br />
INFORMATION<br />
SHEET<br />
5.25B<br />
scale 1:20
Countryside Commission for Scotland<br />
5.26<br />
Battleby Redgorton Perth PH13EW<br />
Perth (0738) 27921 SHEET<br />
PICNIC PALLET ccs Design scale 1:10<br />
©c.c s 579<br />
INFORMATION
Countryside Commission for Scotland<br />
Battleby Redgorton Perth PH13EW<br />
Perth (0738) 27921<br />
5.27<br />
PICNIC SEAT c.c.s.Design scale 1:20<br />
© CCS<br />
INFORMATION<br />
SHEET
Countryside Commission for Scotlsnd<br />
Battleby Redgorton Perth PH13EW<br />
Perth (0738)27921<br />
PICNIC SEAT C.C.S.Design 1:25<br />
©c.c s 579<br />
INFORMATION<br />
SHEET<br />
5.28
Countryside Commission for Scotland<br />
Battleby Redgorton Perth PH13EW<br />
Perth (0738)27921<br />
5.40<br />
PICNIC TABLE (see 5.41 for matching seat) c.c.s.Design Scale 1:20<br />
© CCS<br />
INFORMATION<br />
SHEET
Countryside Commission for Scotland<br />
Battleby Redgorton Perth PH13EW<br />
Perth (0738)27921<br />
INFORMATION 5.41<br />
SHEET<br />
BENCH SEAT (to match 5.40) C.C.S. Design Scale 1:20<br />
©C.C.S 579
Countryside Commission for Scotland<br />
Battleby Redgorton Perth PH13EW<br />
0738 27921<br />
5 Picnic furniture and seating<br />
5.1 Bench Seat and Table<br />
5.2 Table and Seats Combined<br />
5.3 Single Bench, Concrete Base<br />
5.4 Table and Seat Combined (concrete base)<br />
5.5 Table and Seat Combined<br />
5.6 Seat/Picnic Bench<br />
5.7 Seat with Backrest<br />
5.9 Table and Seat Combined 'Totland'<br />
5.10 Table and Seat Combined 'Heavy Duty'<br />
5.11 Bench Seat<br />
5.12 Bench Seat<br />
5.13 Seat with Backrest<br />
5.14 Seat/Picnic Bench<br />
5.15 Bench Seat/Table<br />
5.16 Combined Seat/Table<br />
5.17 Seat and Table<br />
5.18 Bench Seat<br />
5.19 Combined Seat/Table<br />
5.20 Picnic Table/Seats<br />
5.21 Picnic Table/Seats<br />
5.22 Combined Seat/Table<br />
5.23 Southampton Island Bench SF1<br />
5.24 Southampton Seat SF111<br />
5.25a Picnic Table and Bench SF9 and SF5<br />
5.25b Picnic Table and Bench SF11 and PG1B<br />
5.26 Picnic Pallet<br />
5.27 Picnic Seat<br />
5.28 Picnic Seat<br />
5.29 Picnic Bench 306HB<br />
5.30 Picnic Table and Seat 30HP<br />
5.31 Seat with Backrest 306H<br />
5.32 Seat with Backrest 304H<br />
5.38 Heavy Duty Picnic Unit<br />
5.39 Heavy Duty Bench with Backrest<br />
5.40 Picnic Table<br />
5.41 Bench Seat to match 5.40<br />
5.45 Seat with Backrest<br />
5.45 "Kelvin" Bench<br />
5.47 "Kelvin" Seat<br />
5.48 "Freshwater" Seat with Backrest and<br />
Concrete Uprights<br />
EXHIBITS ON DISPLAY AT BATTLEBY<br />
5 Picnic Furniture and Seating<br />
Forestry Commission (Scotland)<br />
Forestry Commission (Grizedale)<br />
W F Broomfield Ltd<br />
3 & 3 Learmonth<br />
Neptune Concrete Ltd<br />
Abacus Municipal Ltd<br />
Forestry Commission (Grizedale)<br />
A M Russell Ltd<br />
ii<br />
Marshalls Mono Concrete (Scotland) Ltd<br />
W F Broomfield Ltd<br />
M<br />
Spring 1986
(5. Continued)<br />
5.49 "Brightstone" Bench with Concrete Uprights W F Broomfield Ltd<br />
5.50 "Eagle" Combination Table/Seat F W Hawker 4 Sons Ltd<br />
5.51 "Falcon" 5'0" Long Seat "<br />
5.52 "Happy Wanderer" Combination Table/Seat Wicksteed Leisure<br />
5.53 "Oakley" Bench "<br />
5.54 "Huntingdon" Seat "<br />
5.55 "Kelmarsh" Bench "<br />
5.56 "Napier" Seat A M Russell Ltd<br />
Spring 1986
Countryside Commission for Scotland<br />
Battleby Redgorton Perth PH13EW<br />
0738 27921<br />
SUPPLIERS AND PRODUCTS<br />
5 Picnic Furniture and Seating<br />
5 Picnic furniture and seating Spring 1986<br />
Abacus Municipal Ltd Tel 0623 511111<br />
SUTTON-IN-ASHFIELD Nottinghamshire NG17 5FT<br />
Alcan High Duty Extrusions Ltd Tel 0900 2581<br />
Lillyhell WORKINGTON Cumbria CA14 4JY<br />
Arden Associates Tel 01 337 3975<br />
42 Ebbiaham Road WORCESTER PARK Surrey KT4 8NE<br />
(Agents)<br />
Artisan Accommodation Units Ltd Tel 841 62321<br />
Cexton Way THETF0RD Norfolk (Agents)<br />
Astolat Co Ltd Tel 0483 575211<br />
Six Acre Works Peasmarsh GUILDFORD Surrey GU3 1NE<br />
A Ballaritine 4 Sons Ltd Tel 0506 822721<br />
New Grange Foundry B0'NESS West Lothian EH51 9PW<br />
Bardsleys Colchester Ltd Tel 0206 853670<br />
196 Bergholt Road COLCHESTER C04 5AL (Agents)<br />
Barlow Tyrie Ltd Tel 0376 22505<br />
Springwood Industrial Estate BRAINTREE<br />
Essex CM7 7RN<br />
T P Bather Tel 0544 230860<br />
Hergest Camp KINGTON Herefordshire HR5 3ER<br />
W F Broomfield Ltd Tel 0983 752921<br />
Afton Road FRESHWATER Isle of Wight P040 9UH<br />
Broxap and Corby Ltd Tel 061 773 7831<br />
Walker Street Radcliffe MANCHESTER M26 9JH<br />
(Agents)<br />
Chipman Ltd<br />
HORSHAM West Sussex RH12 2NR<br />
Dorothea Restoration Engineers Ltd Tel 0298 3834/77115<br />
Pearl Assurance House Hardwick Street BUXTON<br />
Derbyshire SK17 6DH<br />
Empire Stone Co Ltd<br />
NARBOROUGH Leicester LE9 5GR<br />
Tel 0533 864301<br />
Forestry Commission Tel 0343 820223<br />
Speyside Forest District Balnacoul FOCHABERS<br />
Moray IV32 7LL<br />
Forestry Commission<br />
South Lakes Forest District<br />
Cumbria LA22 0QJ<br />
Tel 0403 60341/5 Log bench.<br />
Tel 0229 84373<br />
Grizedale AMBLESIDE<br />
Furniture International Ltd Tel 01 691 0016<br />
International House 90 Royal Hill Greenwich<br />
LONDON SQ0 8RT<br />
Glasdon Ltd Tel 0253 694811<br />
Industrial A Municipal Sales Division<br />
Preston New Road BLACKPOOL Lancashire FY4 4UL<br />
(Agenta)<br />
Gloster Leisure Furniture Ltd Tel 0272 540349<br />
Universal House Pennywell Road BRISTOL BS5 0TJ<br />
Hangar Products Ltd Tel 096273 4644/5<br />
Construct House Winchester Road ALRESF0RD<br />
Hampshire<br />
Seats, double seats, bench, tables and<br />
combined picnic table and seats. All with<br />
Square rectangular hollow section mild eteel<br />
supports. Timber in pine or iroko.<br />
SeatB with backrests. Aluminium extrusions<br />
for seats, back supports and pedestals.<br />
Seats with backrests and benches. Steel box<br />
section and timber uprights. Timber in<br />
Burma teak.<br />
Seat with backrest, bench and combined picnic<br />
table and seats.<br />
Seats with backrest. Timber, concrete and<br />
metal uprights. Timber in teak, iroko and<br />
hardwood.<br />
SeatB with backrests. Cast iron uprights.<br />
Seats with backrests. Timber and metal<br />
uprights. Timber in teak and iroko.<br />
Seats with backrests. Timber and metal<br />
uprights. Timber in teak.<br />
Combination table and Beats.<br />
English oak and pine.<br />
Timber in<br />
Seats and combined picnic table and seats,<br />
heavy duty with concrete and timber uprights.<br />
Timber in deal, pine, selected hardwoods and<br />
iroko.<br />
Seats with backrests and arms. Benches and<br />
combined picnic table and seats. Timber in<br />
iroko, hardwoods or softwood. Metal, timber<br />
or concrete uprights. Free-standing or<br />
ground fixings.<br />
Seats with backrests and benches. Iron<br />
castings uprights. Timber in iroko.<br />
Seats in precast concrete and reconstructed<br />
stone.<br />
Combined picnic table and seats. Seat with<br />
backrest. Timber in home grown Douglas fir.<br />
Heavy duty combined picnic table and seats,<br />
benches, and seats with backrest. Timber and<br />
concrete uprights. Free-standing and ground<br />
fixings.<br />
Combined picnic table and seats, benches, and<br />
seats with backrests. Timber in teak, iroko<br />
and hardwoods. Timber, metal and concrete<br />
uprights.<br />
Combined picnic table and seats, bench and<br />
seats with backrests. Concrete, metal end<br />
timber uprights. Free-standing and ground<br />
fixings.<br />
Seats with backrests and bench. Timber in<br />
teak. Metal and timber uprights.<br />
Combined picnic table and seats.
(5. Continued)<br />
F M Hawker & Sons Ltd Tel 0225 858233<br />
Northend Joinery Works North End BATHEASTON<br />
Bath BA1 7HN<br />
B Hirst 4 Sons Ltd Tel 0422 53073/57763<br />
Fenton Road Works King Cross HALIFAX<br />
West Yorkshire HX1 3SL<br />
Hoiton Builders Ltd Tel 0673 858348<br />
H0LT0N CUH BECKERING Lincoln LN3 5NG<br />
Koapan (UK) Ltd Tel 0908 642466<br />
3 Holdom Avenue BLETCHLEY Milton Keynes MK1 1QU<br />
3 & 3 Learmonth Tel 0575 72112<br />
The Poplars KIRRIEMUIR Angus DD8 5LH<br />
Levercrest Ltd Tel 0634 727164<br />
16 Lingley House Commissioners Road ROCHESTER<br />
Kent ME2 4EE<br />
Macemain Engineering Ltd Tel 01 946 1062<br />
54 Weir Road Durnsford Road Industrial Estate<br />
WIMBLEDON SW19 8UG<br />
Mclays Playground Supplies Ltd Tel 041 763 0000<br />
35 Sandilands Street Annick Street Industrial<br />
Estate GLASGOW G32 0HT (Agents)<br />
Marshalls Mono (Scotland) Ltd Tel 0324 22922<br />
Bleachfield Works FALKIRK FK2 7YQ<br />
Bill Moore Products<br />
32 Harper Road COVENTRY CV1 2AP<br />
Tel 0203 553005<br />
Neptune Concrete Ltd Tel 0703 225513<br />
Quayside Road BITTERNE MANOR Southampton S09 4YP<br />
Norman 4 Sons (Marketing) Pre-Formed Components Ltd<br />
Tel 01 391 0533 or 01 397 9166<br />
Davis Road CHESSINGT0N Surrey KT9 ITU<br />
(Agents)<br />
Orchard Seating Ltd Tel 0491 36588/35529<br />
21 St Martin's Street WALLINGF0RD Oxon 0X10 ODE<br />
Pamal Tel 0476 860266<br />
The Cottage Sproxton MELTON MOWBRAY<br />
Leicestershire<br />
F Peart 4 Co Ltd Tel 0429 63331<br />
Baltic Works Baltic Street HARTLEPOOL<br />
Cleveland TS25 1PW (Agents)<br />
Playscape Ltd Tel 0902 331868/761763<br />
33 Leithton Road Pattingham WOLVERHAMPTON WV4 4AP<br />
Road Signs-Franco Ltd Tel 0902 782444<br />
Boundary Estate Stafford Road Fordhouses<br />
WOLVERHAMPTON WV10 7ET<br />
Russell Leisure Products Ltd Tel 031 333 3525<br />
P0 Box 415 Roddinglsw Gogar EDINBURGH EH12 9DW<br />
SMP (Playgrounds) Ltd Tel 09328 68081/68090<br />
Pound Road CHERTSEY Surrey KT16 8EJ<br />
Combination picnic table and seats,<br />
with backrest, tables and chair*<br />
Seat<br />
Combined picnic table and seats. Seats with<br />
backrests and benches. Metal and timber<br />
uprights. Timber in softwood.<br />
Seat with backrests, benches and combined<br />
table and seats, double seat with arms.<br />
Uprights in concrete and timber.<br />
Combined picnic table and sests for children.<br />
Timber in a special weather-reBistsnt plywood<br />
in a proprietary paint end stsin for the<br />
tops and seats.<br />
Sests with backrests,<br />
and seats.<br />
Combined picnic table<br />
Seats with backrest and bench. Steel hollow<br />
square sectional uprights. Free-standing and<br />
ground fixtures.<br />
Combined picnic table and seats. Seat with<br />
backrest. Tubular steel framework and timber<br />
in iroko.<br />
Seats with bsckrest, tables, benches.<br />
Combined picnic table and seats. Metal,<br />
concrete and timber uprights. Timber in<br />
softwood or hardwood.<br />
Seat with backrests and benches. Timber in<br />
hardwood or iroko. Concrete uprights. Freestanding<br />
and ground fixings.<br />
Combination table and seats, benches and seats<br />
with backrests. One design feature is the<br />
use of round and half round logs in some<br />
furniture. Timber in softwood and hardwood.<br />
Combined picnic table and seats, benches,<br />
cantilever seats, and seats with backs.<br />
Concrete uprights. Timber in hardwood.<br />
Seat with backrest, benches and combined<br />
picnic table and seats. Metal or wood<br />
uprights. Free-standing, ground or wall<br />
fixing. Timber in softwood, hardwood or<br />
iroko.<br />
Seats with backrests, benches and combined<br />
picnic table and aeats. Metal and timber<br />
uprights. Free-standing or ground fixings.<br />
Combination table and seats,<br />
or pressure-treated softwood.<br />
Timber in iroko<br />
Combination table and seats, benches and seats<br />
with backrests. Also angled bench seating.<br />
Concrete, metal and timber uprights. Timber<br />
in softwood and hardwood (iroko or English<br />
oak).<br />
Seats with backrest and benches. Steel hollow<br />
square sectional uprights. Timber in iroko.<br />
Free-standing and ground fixings.<br />
Seats with backrests,<br />
and concrete uprights.<br />
Tubular steel, timber<br />
Timber in hardwood.<br />
Seat with backrests, combined picnic table<br />
and seats, and benches.<br />
Benches, seats with backrests, tables and<br />
combination tables and seats, some with<br />
canopies. Children's benches. Timber in<br />
hardwood.
(5. Continued)<br />
Street Equipment Ltd<br />
Unit 4 Goldhawk Industrial Estate<br />
2a Brackenbury Road LONDON W6 OBA<br />
Tel 01 749 5906<br />
Superwood Ltd Tel 952011/2/3/4<br />
16 Sandyford Industrial Estate DUBLIN 18<br />
Swan Seats Tel 0952 615581<br />
Stafford Park 15 TELFORD Shropshire TF3 3BB<br />
Town Art + Design (Scotland) Ltd Tel 041 778 1717<br />
9 Sandilanda Street GLASGOW G32 0HT<br />
Townscape Products Ltd Tel 0623 513355<br />
Fulwood Road South SUTTON-IN-ASHFIELD<br />
Nottinghamshire NG17 2JZ (Agents)<br />
Urban Enviroscape Ltd Tel 0256 54446<br />
Telford Road Houndmills BASINGSTOKE RG21 2YW<br />
Wealden Woodlands (Kent) Ltd<br />
Heme Common HERNE BAY Kent<br />
Tel 0227 710694<br />
Wicksteed Leisure Tel 0536 517028<br />
Digby Street KETTERING Northamptonshire NN16 8YJ<br />
Woodscape Ltd<br />
374 North Road<br />
PRESTON PR1 1RU<br />
Tel 0772 57558<br />
Wrinch A Sons Ltd Tel 0473 78128<br />
Leisure Division St Lawrence Works Nacton Road<br />
IPSWICH IP3 9Q3<br />
Seat with backrest.<br />
Seat with backrest. Concrete uprighta.<br />
Laths in solid plastic.<br />
Spring 1986<br />
Combined picnic table and seats, bench and<br />
seatB with backrests. Concrete and timber<br />
uprights.<br />
Seats with backrests and benches. Metal or<br />
concrete uprights. Timber in softwood or<br />
hardwood. Free-standing or ground fixings.<br />
Combination table and seats, benches and seats<br />
with backrests. Also circular shaped table<br />
and seats. Metal uprights. Timber in<br />
harcWood.<br />
Seat with backrest,<br />
in hardwood.<br />
Metal uprights. Timber<br />
Sest with backrest and combined picnic table<br />
and seats. Timber in softwood and hardwood.<br />
Combined picnic table and seats, seats with<br />
backrest, benches. Wicksteed range all have<br />
metal and hardwood timber uprights. Lappset<br />
range are all softwood.<br />
Benches snd seats with backrests,<br />
greenheart. Ground fixings.<br />
Timber in<br />
Seat with backrest, benches and combined<br />
picnic table and seats. Timber and metal<br />
uprights. Timber in iroko or teak.
STEPPED RAMP CONSTRUCTION<br />
6.1<br />
Plank/sleeper/log+infill (scales as marked)
Countryside Commission for Scotland<br />
Battleby Redgorton Perth PH13EW<br />
Perth (0738) 27921<br />
INFORMATION<br />
SHEET<br />
6.2<br />
TIMBER WALKWAY (Railway Sleepers) Scale 1:20
Countryside Commission for Scotland INFORMATION<br />
Battleby Redgorton Perth PH13EW SHEET<br />
Perth (0738) 27921<br />
6.3<br />
TIMBER PILING CAUSEWAY Scale 1:20<br />
© CCS
Countryside Commission for Scotland<br />
Battleby Redgorton Perth PH1 3EW<br />
Perth (0738)27921<br />
Footpath Construction over soft ground using 'Wiretex' or 'Terram' fabric. Scale 1:20<br />
©c.c.s.<br />
INFORMATION<br />
SHEET 6.7;6.8
Board-walk Scale 1:25,1:5<br />
©C.C.S revised 1989<br />
Countryside Commission for Scotland Battleby, Redgorlon, Perth PHI 3EW<br />
Telephone: (0738) 27921, Fax: (0738) 30583<br />
6.9
Board-walk Scale 1:25,1:5<br />
SIDE ELEVATION<br />
Detail<br />
at end of<br />
board walk.<br />
150 x50mm<br />
I<br />
i l<br />
50 x 50mm<br />
50 x 50mm<br />
Larch edge rail<br />
I N F O R M A T I O N<br />
75mm<br />
galv. nails<br />
I<br />
Detail<br />
Scale 1:5.<br />
T<br />
50mm<br />
END ELEVATIONS<br />
Scale 1:25<br />
Spacing between<br />
I boards 10mm<br />
S H E E T<br />
T7 -<br />
II 100mm<br />
galv. nails<br />
150 x 50mm<br />
Larch decking<br />
Larch Brackets<br />
200 x100 x50mm<br />
All fixings (except edge rails)<br />
100mm galvanised nails.<br />
Edge rail<br />
50 x 50mm-<br />
For heights above ground-level in excess of 600mm<br />
use 75x38mm cross-braces.<br />
(stringers 2.0m in length)<br />
-2m centres —<br />
Minimum I<br />
600mm I
Edging is important<br />
where disabled access<br />
is intended.<br />
To curve edge-rails<br />
make sawcuts %<br />
way through at app.<br />
100mm intervals.<br />
NOTE: For a trim appearance it is<br />
essential that the boards at the bend<br />
are out to an even taper - use a<br />
line and peg to make it thus:-<br />
Drawing exaggerated forclarity<br />
NOT TO SCALE<br />
©C.C.S revised 1989<br />
offcut<br />
COMPLETE BOARD<br />
PLAN<br />
Isometric View<br />
To maintain a regular curve<br />
use the stake and line as<br />
compasses to position the<br />
outer ends of the boards.<br />
Countryside Commission for Scotland Battleby, Redgorton, Perth PHI 3EW<br />
Telephone: (0738) 27921, Fax: (0738) 30583<br />
Edge rail<br />
shown<br />
6.9<br />
N o t e s<br />
1A board-walk is an obtrusive element in<br />
the landscape, and should be used<br />
selectively. They can add interest to wildlife<br />
interpretation by allowing close access to<br />
interesting vegetation. The use of curved runs<br />
adds interest and enables the board-walk to be<br />
fitted into natural uneven terrain. They are<br />
most useful for the protection of fragile areas<br />
to which controlled access is required, and<br />
provide a smooth, firm surface for wheelchair<br />
users. If used as ramps, the maximum gradient<br />
should not exceed 1:12, but 1:20 is better.<br />
2Surface coatings or pressure treated<br />
timber should not be used where<br />
subsequent damage to adjacent wildlife may<br />
occur. This is specially important in Sites of<br />
Special Scientific Interest. In such cases use<br />
larch for ground/water contact members and<br />
check regularly for rot.<br />
FINISHES<br />
3Subject to note 2 above, all timber<br />
should be pressure-treated against<br />
fungal rot. For a non-slip surface spray boards<br />
with hot tar and dust with grit, or fix chicken<br />
wire to surface, using galvanised staples.<br />
C u t t i n g L i s t<br />
PER 2.0 meter RUN<br />
Piles 4-off 1500x100x 100mm<br />
Boards 13-off 1500x150x50mm<br />
Stringers 2-off 2000x100x100mm<br />
EdgeRail 4lin. metres 50x50mm<br />
Brackets 4-off 200x100x50mm<br />
F i x i n g s<br />
Galv. Nails 26-off 75mm<br />
60-off 100mm
Countryside Commission for Scotland<br />
Battleby Redgorton Perth PH13EW<br />
©Perth (0738)27921<br />
INFORMATION 6.10<br />
SHEET<br />
BOARDWALK C.C.S.Design Scales as marked<br />
©c c s
Countryside Commission for Scotland INFORMATION<br />
6.11<br />
Battleby Redgorton Perth PH13EW<br />
• Perth (0738)27921 SHEET<br />
TIMBER STEPS scale 1:10<br />
© CCS
6.13<br />
Countryside Commission for Scotland INFORMATION<br />
Battleby Redgorton Perth PH1 3EW SHEET<br />
Board Walk Scales 1:10&1:25<br />
©CCS
Countryside Commission for Scotland<br />
Battleby Redgorton Perth PH13EW<br />
• Perth (0738) 27921<br />
©C C S 579<br />
INFORMATION<br />
SHEET 6.14;6.15;6.16<br />
TIMBER STEPS - ex.sleeper, STONE /CONCRETE SLAB STEPS 1:10
6.17<br />
Countryside Commission for Scotland INFORMATION<br />
Battleby Redgorton Perth PH1 3EW<br />
tt Perth (0738) 27921<br />
SHEET<br />
PLATFORM/DECK' for overlook viewing platform/stairhead construction anc| as marked<br />
©c.c.s.
Countryside Commission for Scotland<br />
Battleby Redgorton Perth PH13EW<br />
Perth (0738) 27921<br />
6.19<br />
STEP DETAIL Scales as marked<br />
©c.cs<br />
INFORMATION<br />
SHEET
The Treatment of Exterior Timber against Decay<br />
INFORMATION<br />
SHEET 13.1<br />
COUNTRYSIDE COMMISSION FOR SCOTLAND
page 3<br />
The Treatment of<br />
Exterior against Decay Timber<br />
1.<br />
2.<br />
3.<br />
4.<br />
CONTENTS<br />
Introduction<br />
The causes of timber decay and the means of its<br />
control 3<br />
Durability<br />
The natural durability of different timbers and<br />
their ease of treatment by preservatives 5<br />
Preservation<br />
Types of preservative and their methods of<br />
application 10<br />
Surface Coatings<br />
Paints, varnishes, oils and exterior stain finishes 18<br />
COUNTRYSIDE COMMISSION FOR SCOTLAND<br />
Battleby, Redgorton, Perth PH1 3EW Tel: (0738) 27921<br />
Acknowledgements<br />
This guide has been prepared under contract by the Information and Advisory<br />
Section of the Timber Research and Development Association. The<br />
Countryside Commission for Scotland are grateful both to that organisation<br />
and to the Building Research Establishment for their willingness for<br />
<strong>information</strong> to be abstracted from their technical publications.<br />
Countryside Commission for Scotland, 1983<br />
ISBN 0 902226 68 1<br />
All rights reserved. No part of this publication may be reproduced or transmitted in any form or by<br />
any means, electronic or mechanical, including photocopying, recording or any <strong>information</strong><br />
storage and retrieval system, without permission in writing from the Publisher.
CONDITIONS FAVOURABLE<br />
TO DECAY —<br />
1 FOOD<br />
2 MOISTURE<br />
3 OXYGEN<br />
4 WARMTH<br />
The spores germinate, producing fungal strands<br />
Fruiting Body of Fungus releases spores which penetrate and digest the timber<br />
page 4
page 5<br />
1. INTRODUCTION<br />
Causes of timber decay<br />
Timber is an attractive, sympathetic and practical material for a wide variety of<br />
uses in the countryside such as buildings, fences, bridges, signs and picnic<br />
furniture. Sunshine and rain, however, do present special problems, and an<br />
understanding of the measures which can be taken to combat these will<br />
lessen the risk of premature failure through fungal decay, or disappointing<br />
results through the development of an unattractive appearance.<br />
Although insects may attack timbers used outside, the principles and<br />
remedies outlined for the prevention of fungal decay will also in practice<br />
prevent insect attack. Under dry internal conditions where decay is not a<br />
problem, insects may warrant separate consideration and further advice<br />
should be sought.<br />
Wetting and ageing do not in themselves reduce the strength of timber. Decay<br />
is due to the growth of very simple plants called Fungi. Their reproductive<br />
spores, each one invisible to the naked eye, are released in unimaginably vast<br />
numbers and are carried by natural air currents to every part of our<br />
environment. Certain types of fungi use wood as food, and timber decay is the<br />
direct result of their feeding and digestion The frontispiece shows the typical<br />
life of these fungi.<br />
Fungi have four basic requirements for growth: Food, Moisture, Oxygen and<br />
Warmth. If any of these is lacking, growth will be prevented. A closer look at<br />
these basic requirements provides the key to methods of preventing decay<br />
FOOD<br />
Some species of timber are classed as 'naturally durable' as they possess<br />
substances produced within the tree which are harmful or toxic to fungi.<br />
Timber that does not contain these substances may be treated with wood<br />
preservatives containing chemicals which achieve the same result The use of<br />
naturally decay-resistant timbers and wood preservatives are the most widely<br />
used means of preventing decay.<br />
A group of fungi known as 'moulds' may produce unsightly black, green or<br />
orange discolourations. They feed upon a variety of airborne debris which<br />
collects on the surface of most damp materials, but they cannot cause decay<br />
of timber. Surface coatings may contain special fungicides to prevent these<br />
growths but these are not effective in preventing timber decay. Conversely<br />
wood preservatives will not necessarily prevent mould growth.<br />
MOISTURE<br />
Freshly felled timber can contain as much weight of water as wood substance,<br />
in which state the timber is said to be at 100% moisture content. Timber which<br />
has a moisture content below 20% will not decay. Simple moisture meters may<br />
be obtained which will readily determine whether timber is above or below this<br />
value When used outside, timber which has been dried to below 20%<br />
moisture content will not exceed this level simply by exposure to damp air.<br />
However, direct wetting by rain, splashing or condensation may cause the<br />
moisture content to rise above 20%. When exposed to these risks, control may<br />
be achieved by careful design to avoid water traps and to provide maximum<br />
ventilation. Further protection may be provided by the application of water<br />
resistant coatings to the surface, such as oils, waxes, paints, varnishes and<br />
exterior stain finishes. Timber in contact with the ground is most at risk since<br />
it is difficult to avoid high moisture contents for long periods.<br />
OXYGEN<br />
For growth, fungi require only minute traces of oxygen for which there is no<br />
effective means of control Surface coatings such as paints and varnishes, or<br />
wrapping in plastics or metal will not exclude sufficient oxygen to prevent<br />
decay. Timber which is totally immersed in water, or is buried under an<br />
impermeable soil type such as clay, may be sufficiently isolated from oxygen<br />
to have a greatly extended life.<br />
WARMTH<br />
Decay is most active at around 20° C., i.e., during summer months, but will<br />
continue down to 5° C. before becoming dormant. Therefore temperature<br />
does not provide an effective means of controlling fungal growth under<br />
normal exterior conditions in the UK.
Protection methods<br />
The treatments used to prevent decay may be either wood preservatives or<br />
water resistant surface coatings, and in some circumstances both may be<br />
used. However, the distinction between these treatments is sometimes<br />
blurred, and confusion between them in either their application or intention<br />
can lead to failure. One is not a substitute for the other, as will be seen from<br />
the following table.<br />
TABLE 1<br />
EXAMPLES 1. Organic solvents<br />
2. Pentachlorophenol in heavy oil<br />
3. Water borne copper chrome arsenate<br />
4 Creosote<br />
WOOD PRESERVATIVES SURFACE COATINGS<br />
1. Paints and varnishes<br />
2. Oils<br />
3. Exterior stain finishes<br />
PURPOSE To make the wood toxic to fungi To prevent the wood becoming wet.<br />
To improve the appearance of the wood surface<br />
page 6<br />
ADVANTAGES To prevent decay if the wood becomes wet. To lower the risk of decay.<br />
To provide a variety of colours and appearance.<br />
To help keep the surface clean and free of mould growth.<br />
To stabilise the timber to reduce shrinkage, swelling and<br />
splitting.<br />
APPLICATION Intended to produce maximum depth of penetration.<br />
Achieved by forcing in under pressure and/or vacuum, by<br />
alternate hot and cold cycles, or prolonged immersion.<br />
(B.S. levels of treatment do not approve of brush or spray<br />
applications).<br />
Specification of the method of application is as important<br />
as the choice of a particular preservative type.<br />
MAINTENANCE NONE — usually only applied initially<br />
Limited specialist products are available where in-situ<br />
remedial work is necessary.<br />
STANDARDS Both the product type and the method of application are<br />
adequately covered by British Standards<br />
Safety aspects are given special consideration by the<br />
Health and Safety Executive PSPS (Pesticide Safety<br />
Precaution Scheme).<br />
It will be seen that surface coatings have a less straightforward role than that<br />
of wood preservatives but that their main purpose is to prevent excessive<br />
water absorption by the timber.<br />
No surface coating has been found to remain completely impermeable to<br />
moisture. When used in a particular exterior situation the life expectancy of<br />
timber is normally assessed by a consideration of its natural characteristics<br />
and the type of wood preservative treatment, if any, which has been applied<br />
For much work in the countryside maintenance may not be a realistic<br />
proposition and a weather-beaten appearance may be acceptable or even<br />
desirable providing the timber retains its strength. In such cases surface<br />
coatings may be eliminated altogether.<br />
Summary<br />
There are therefore three major decisions which must be taken.<br />
What timber species will be used?<br />
What wood preservative if any is to be used and how is it to be applied?<br />
What surface coating if any will be applied?<br />
These three choices cannot be taken independently of each other as the<br />
timber must be capable of absorbing sufficient preservative and the<br />
preservative must be compatible with the surface coating.<br />
The following sections provide assistance in making these decisions.<br />
DURABILITY — Provides estimates of service life, British Standards<br />
Specifications, choice of timbers, their natural durability and their response to<br />
preservatives.<br />
PRESERVATION — Offers guidance on types of preservative, methods of<br />
application, safety, uses; and lists commercial products.<br />
SURFACE COATINGS — Offers guidance on types of surface coatings,<br />
advantages, methods of application and lists commercial products<br />
Intended to achieve a high concentration on the surface<br />
Achieved by brush, spray or simple dipping. Usually 2 - 4<br />
coats<br />
Specification of individual commercial products is most<br />
important as there can be big differences in performance<br />
between apparently similar types.<br />
NECESSARY— All products of this type require periodic<br />
maintenance.<br />
Typically at 2 - 6 year intervals depending upon type of<br />
product and type of exposure.<br />
Virtually no standards covering product types: reliance<br />
must be placed on manufacturers' specifications for a<br />
product and its application
page 7 2. DURABILITY<br />
The term durability,' applied to timber, is solely concerned with the resistance<br />
of the timber to fungal decay. It gives no indication of the hardness, strength,<br />
or abrasion resistance of the timber, despite the wider use of this term in<br />
everyday language. An understanding of the principles which affect durability<br />
will assist in choosing an appropriate timber, preservative treatment, and<br />
exterior finish, for any particular countryside application.<br />
Structure of a Tree<br />
The trunk of a tree consists of a main core of heartwood, surrounded by<br />
sapwood and finally wrapped in bark. Table 2 shows the major characteristics<br />
of these regions.<br />
FEATURE HEARTWOOD SAPWOOD BARK<br />
Appearance Varies with species: may be rich dark brown or red, e.g., YEW,<br />
MAHOGANY or pale, indistinct from sapwood, e.g.. BEECH,<br />
SPRUCE.<br />
White or pale colour Usually brown<br />
Thickness Depends on diameter of tree, may be greater than 2000 mm Variable —<br />
commonly 10-100 mm<br />
Strength High strength, varies with different species and is roughly<br />
proportional to density<br />
Resistance to<br />
decay<br />
Permeability to<br />
preservatives<br />
Bark is an impermeable layer and must always be removed prior to<br />
preservative treatment, and its presence is a certain indication of the<br />
presence of sapwood<br />
TABLE 2<br />
Variable —<br />
commonly 10—50mm<br />
Same as Heartwood Low, often corky<br />
Varies with species from very high to low Low Moderate<br />
Varies with species May be impermeable and<br />
difficult to treat or permeable and easy<br />
Permeable and relatively<br />
easy to treat.<br />
Impermeable —<br />
must be removed<br />
before treatment
Sapwood has a low natural resistance to decay but is relatively easy to treat Page 8<br />
with preservatives. The ring of permeable sapwood is particularly useful when<br />
preserving poles and round timbers as it allows deep penetration of the outer<br />
layers. The presence of sapwood can be seen as an advantage when<br />
preservative treatments are applied and a disadvantage where reliance is<br />
placed upon high natural durability.<br />
Heartwood varies widely in both its natural durability and its permeability to<br />
preservatives, depending upon the species.<br />
Where timber has a low natural durability, then preservative treatment may<br />
provide the necessary protection if the timber is sufficiently permeable to<br />
absorb enough preservative. These key characteristics of natural durability<br />
and permeability are described below and in Table 3. The classifications are<br />
those used by the Building Research Establishment, Princes Risborough<br />
Laboratory published as Technical Note No. 40, 'The <strong>Natural</strong> Durability of<br />
Timber' and Information Paper 15/79 'The resistance of timbers to<br />
impregnation with wood preservative.'<br />
<strong>Natural</strong> durability<br />
The heartwoods of timber species have been assessed for their natural<br />
resistance to decay by partly burying standard sized posts (50mm x 50mm<br />
square) in the ground, a condition which represents the most hazardous<br />
circumstances normally encountered. Their average life under these<br />
conditions places them in one of five classes:<br />
PERISHABLE. Timbers expected to last for less than five years in ground contact.<br />
NON-DURABLE: Timbers expected to last between five and ten years in ground contact.<br />
MODERATELY DURABLE: Timbers expected to last between ten and fifteen years in ground contact<br />
DURABLE: Timbers expected to last between fifteen and twenty-five years in ground contact.<br />
VERY DURABLE: Timbers expected to last more than twenty-five years in ground contact<br />
In practice, timbers may not be in ground contact and may not be of these<br />
dimensions. Most situations out of ground contact would be less hazardous<br />
and greater service life would be achieved, subject to wide variations<br />
depending upon the site conditions, the design of the components and the<br />
future prevailing weather conditions. Also, the service life of timber is more or<br />
less proportional to its minimum cross-sectional dimension. For example, a<br />
post measuring 100 x 100mm would have approximately twice the life<br />
expectancy of a post measuring 100x 50mm The use of substantial timbers<br />
has practical as well as possible aesthetic value.<br />
Ease of preservation<br />
Depending upon the ability of the heartwood to absorb preservative, timbers<br />
are placed in one of four groups:<br />
PERMEABLE: These timbers can be penetrated deeply and almost completely<br />
under pressure without difficulty<br />
MODERATELY RESISTANT. These timbers are fairly easy to treat and<br />
worthwhile protection may be achieved using any of the approved methods of<br />
application.<br />
RESISTANT: These timbers are difficult to impregnate even under pressure<br />
and require a long period of treatment.<br />
EXTREMELY RESISTANT: These timbers cannot be penetrated to any<br />
appreciable depth and are generally not worth treating<br />
Regardless of the heartwood permeability, the sapwood of any of the<br />
commercial species will be either moderately resistant or permeable and<br />
therefore can be effectively treated
SPECIES<br />
Afrormosia<br />
Afzelia<br />
Alder<br />
Balau<br />
Beech<br />
Birch<br />
Cedar, South American<br />
Cedar, Western Red"<br />
Cedar, Western Red<br />
Danta<br />
Douglas Fir-<br />
Douglas Fir<br />
Elm Dutch<br />
Elm English<br />
Elm Rock<br />
Elm White<br />
Elm Wych<br />
Fir Balsam<br />
Fir Grand*<br />
Fir Noble<br />
Fir Silver<br />
Greenheart<br />
Guarea<br />
Hemlock Western*<br />
Hemlock Western<br />
Hornbeam<br />
Horse Chestnut<br />
Idigbo<br />
Iroko<br />
Jarrah<br />
Kapur<br />
Kempas<br />
Keruing<br />
Larch European<br />
Larch Japanese<br />
Lauan Dark Red<br />
Lauan Light Red<br />
Lime<br />
Mahogany African<br />
Mahogany American<br />
Makore<br />
NATURAL DURABILITY<br />
TABLE 3<br />
EASE OF PRESERVATION<br />
HIGH LOW DIFFICULT EASY
TABLE 3 — continued<br />
SPECIES Years 2 5 1 5 1 3 !<br />
Maple<br />
Meranti, Dark Red<br />
Meranti, Light Red<br />
Merbau<br />
Oak American Red<br />
Oak American White<br />
Oak European<br />
Obeche<br />
Opepe<br />
Parana Pine<br />
Pine, Lodgepole*<br />
Pine, Maritime<br />
Pine, Pitch (American)<br />
Pine, Pitch (Caribbean)<br />
Pine, Radiata<br />
Pine, Scots<br />
Poplar, Black Italian*<br />
Poplar, Grey<br />
Ramin<br />
Redwood (European)<br />
Robinia<br />
Sapele<br />
Sequoia*<br />
Spruce, Canadian<br />
Spruce, European<br />
Spruce, Sitka*<br />
Sweet Chestnut<br />
Sycamore<br />
Teak<br />
Utile<br />
Wallaba<br />
Walnut, African<br />
Walnut, European<br />
Willow, White<br />
Willow, Crack<br />
Yew<br />
* Information relates to home-grown timber<br />
NATURAL DURABILITY EASE OF PRESERVATION<br />
HIGH LOW DIFFICULT EASY
page 11<br />
Choice of specification<br />
The decision whether to specify preservative treatment of a timber with a low<br />
natural durability or whether to specify naturally durable timber without<br />
preservative treatment can usually be determined by answering two simple<br />
questions. If the answer to both of these questions is YES', then either option<br />
may be considered.<br />
Is there a choice of timber species?<br />
In a lot of countryside work there is a natural desire to use locally available<br />
timber which may restrict the choice. Inspection of the natural durability and<br />
permeability characteristics should determine if the timber has sufficient<br />
natural durability or will accept preservative treatment. If sapwood cannot be<br />
excluded or limited, preservative treatment will be necessary.<br />
Is 'on-site' fabrication limited to boring and cross cutting?<br />
For effective preservative treatment, deep penetration is necessary but with<br />
most timber species even pressure impregnation does not fully penetrate but<br />
only provides an envelope of protection. Cutting or machining the timber may<br />
remove this protection and reduce the effectiveness of the treatment. The end<br />
grain of timber is particularly absorbent and providing working is limited to<br />
cross cutting or boring which only exposes end grain surfaces then a liberal<br />
brush application to deluge these areas will restore the protection. The<br />
methods of applying preservatives to give high levels of protection do not lend<br />
themselves to 'on-site' application and where more elaborate site work is<br />
envisaged the use of naturally durable heartwood timber would be preferable.<br />
Life expectancy<br />
The life expectancy of a particular timber component is embodied in the<br />
question How long do you want it to last?' The usual reply of, as long as<br />
possible,' or 'forever,' may produce an impracticable or uneconomic solution<br />
and a more realistic question would be What is the shortest life that will be<br />
considered satisfactory?' The specification that will achieve this service life<br />
will balance the degree of hazard against the possible combinations of natural<br />
durability and preservative treatment.<br />
Current British Standards provide assistance in making this decision by<br />
reference to Performance Categories,' which, though not guarantees of<br />
performance, do indicate the defined service life against which the<br />
specification was drawn up. British Standard 5589: 'Code of Practice for<br />
preservation of timber' relates to a variety of end use situations, many of<br />
which will be relevant to work in the countryside This Standard provides a<br />
comprehensive specification for preservative type and application and<br />
indicates appropriate commercial timbers which will accept the treatment It<br />
also advises on timbers with sufficient natural durability to meet the<br />
performance levels without preservation. Table 4 overleaf indicates the<br />
relevant situations covered by this Standard and the anticipated service lives<br />
British Standards do not cover all countryside purposes, nor those<br />
circumstances where a relatively short service life may be acceptable. A<br />
suitable timber for use without preservative treatment can often be<br />
determined by considering the natural durability aspect of Table 3, as this<br />
gives a more or less direct indication, after appropriate allowance for<br />
dimensions, of performance under the worst circumstances. Also, the table<br />
generally indicates timbers which are permeable enough to acccept a<br />
preservative treatment. Guidance on appropriate preservative types and<br />
methods of application may be found in the next section.<br />
Finishes<br />
Surface coatings may be applied over most timber and preservative<br />
combinations (except creosote) and their use may provide supplementary<br />
protection from decay and a more attractive appearance. Also, some<br />
preservative treatments require a surface coating in order to prevent leaching<br />
of the preservative.
TABLE 4<br />
B.S. 5589: 1978 Code of Practice for Preservation of Timber<br />
TYPE OF USE EXAMPLES ANTICIPATED SERVICE LIFE<br />
SECTION TWO —<br />
External woodwork in buildings and<br />
out of contact with the ground<br />
SECTION THREE —<br />
Agricultural and horticultural timbers<br />
SECTION FOUR —<br />
Timber for use permanently or<br />
intermittently in contact with sea or<br />
fresh water<br />
SECTION SIX —<br />
Fencing timber<br />
3. PRESERVATION<br />
TABLE 5<br />
QUESTION<br />
Can the treated timber<br />
be painted, varnished<br />
or glued?<br />
What colour is the<br />
treatment?<br />
Does the treatment<br />
reduce the strength of<br />
the timber?<br />
Does the treatment<br />
affect the stability of<br />
the timber?<br />
Is the treatment<br />
corrosive to metals?<br />
Are plants safe in<br />
contact with the treated<br />
timber?<br />
Are animals safe in<br />
prolonged direct<br />
contact with the treated<br />
timber?<br />
ORGANIC SOLVENT<br />
TYPE<br />
Generally YES, check<br />
with supplier<br />
Generally colourless,<br />
some horticultural<br />
grades are green<br />
Dyes may be added,<br />
check with supplier<br />
External Joinery:<br />
window frames<br />
casements and sashes<br />
surrounds for non-wooden windows<br />
doors (excluding flush doors)<br />
door frames<br />
porches<br />
External cladding<br />
External fittings:<br />
soffits, fascias and barge boards<br />
Agricultural timber: in buildings and equipment for housing<br />
livestock or the storage of farm products and machinery<br />
Horticultural timber: in buildings and equipment for the<br />
growing, storage and processing of produce.<br />
Marine piling<br />
Structural timbers in piers, jetties, quays, dolphins, etc<br />
Lock and dock gates and sluices<br />
Revetments on inland waterways<br />
Timber used in sea defence works<br />
Wooden foundations and piers for bridges<br />
Structural timbers in cooling towers<br />
Fence and gate-posts and struts<br />
Gravel boards<br />
Rails<br />
Timbers for gates<br />
Boarding and slats<br />
Droppers<br />
Post caps<br />
Dowels<br />
COPPER-CHROME ARSENATE<br />
WATERBORNE TYPE<br />
YES, but treatment may roughen<br />
surface. Treated timber should<br />
be allowed to dry before use<br />
CREOSOTE<br />
TAR OIL TYPE<br />
Two levels of material/<br />
specification are described,<br />
referring to service lives of 60<br />
years and 30 years<br />
Two levels of material/<br />
specification are described,<br />
referring to service lives of 50<br />
and 20 years<br />
In fresh water:<br />
30 years<br />
In sea water:<br />
15 years<br />
NO NO<br />
Two levels of material/<br />
specification are described,<br />
referring to service lives of 40<br />
years and 20 years<br />
PENTACHLORO-<br />
PHENOL<br />
IN HEAVY OIL<br />
Pale green, occasionally brown Light to dark brown Colourless<br />
NO NO NO NO<br />
NO — If the product<br />
includes a water<br />
repellent, stability may<br />
improve<br />
Generally NO Some<br />
grades may corrode<br />
aluminium<br />
Variable Special<br />
Horticultural grades<br />
available Check with<br />
supplier<br />
NO, but may be<br />
isolated by surface<br />
coatings — check<br />
with manufacturer<br />
Treatment may cause slight<br />
swelling and distortion After<br />
re-drying stability is not impaired<br />
Slightly increased corrosion<br />
risk Avoid direct contact with<br />
aluminium Allow 7 days after<br />
treatment and re-drying before<br />
contact with other metals<br />
No loss of stability — General oiliness may give<br />
slight improvement<br />
NO NO<br />
YES NO NO<br />
Generally YES after 7 days<br />
Check with manufacturer<br />
NO NO
page 13<br />
Wood preservatives offer a means of greatly extending the life of timbers<br />
which have a low natural resistance to decay. There are four main types of<br />
preservative suitable for general use in countryside work and Table 5 outlines<br />
the main characteristics relevant to their use in the countryside.<br />
The protection given by these preservatives is related directly to their depth of<br />
penetration into the timber and the most effective treatments must be applied<br />
using specialised equipment. The method of application chosen will depend<br />
partly upon the type of preservative and partly on the degree of protection<br />
required. Table 6 provides general guidance to the appropriate methods of<br />
application for wood preservative types, and an indication of the performance<br />
which may be achieved when applied to timbers with a low natural durability.<br />
Users should consult preservative suppliers' instructions for further details of<br />
the treatment appropriate to their particular timber species and end use.<br />
As described in the previous section, for certain types of countryside work,<br />
BS 5589 'Code of Practice for Preservation of Timber' provides a detailed<br />
specification of preservative types and methods of application, and where<br />
appropriate this standard should be employed.<br />
Preservative Types<br />
ORGANIC SOLVENT PRESERVATIVES<br />
These consist of active ingredients such as pentachlorophenol, tributyl tin<br />
oxide, copper and zinc naphthenates, which separately or in a mixture are<br />
dissolved in an organic solvent similar to 'white spirit.' The choice of possible<br />
ingredients and solvent types permit wide variations in the characteristics of<br />
individual commercial products in this group and full details of a particular<br />
product should be sought from the manufacturers. The organic solvent<br />
carries the ingredients into the timber and then evaporates leaving them<br />
behind. These solvents are usually flammable and care is necessary in their<br />
storage and during application. After the solvent has evaporated the treated<br />
timber has no increased flammability. These preservatives do not contain<br />
water; their application causes no swelling or distortion to timber and does<br />
not raise the grain. In exterior situations subject to persistent wetting,<br />
preservative may be washed out or 'leached' from the surface iayers. This<br />
may be reduced or prevented by application and maintenance of a surface<br />
coating such as a paint, varnish, or exterior wood stain. Organic solvent<br />
preservatives commonly have a degree of water repellency present which will<br />
extend the life of surface coatings. Such preservatives are not generally<br />
intended as a final finish.<br />
PENTACHLOROPHENOL IN HEAVY OIL<br />
These products are a solution of the active ingredient pentachlorophenol in a<br />
heavy non-evaporating oil which prevents them being leached when in<br />
ground contact or immersed in water They require no additional protection,<br />
and their general oiliness makes them incompatible with most surface<br />
coatings.<br />
WATERBORNE COPPER CHROME ARSENATE (CCA) PRESERVATIVES<br />
These are solutions of copper, chromium and arsenate salts dissolved in<br />
water. The wetting associated with this treatment may cause the timber to<br />
swell or distort which generally restricts their use to items such as fences and<br />
structural members where precise dimensional tolerance is not required.<br />
Despite being initially water soluble, over a period of approximately seven<br />
days after treatment they become chemically bonded to the timber and are<br />
then highly resistant to leaching. CCA preservatives are thus suitable for<br />
ground contact and water immersion situations, and will generally accept a<br />
wide range of surface coatings. These preservatives are characteristically<br />
pale green in colour, and are only applied by vacuum pressure methods.<br />
Re-drying after treatment is not part of the preservative process and should<br />
be specified if required.<br />
CREOSOTE<br />
These products are sometimes known as tar oils and although traditional are<br />
still very effective wood preservatives. They are highly resistant to leaching<br />
and are suitable for ground contact or immersion situations. It is not generally<br />
possible to apply other surface coatings to the treated timber They vary in<br />
colour from light to dark brown and may be regarded as decorative. They<br />
have a persistent odour, and may become slightly sticky during hot summer<br />
weather. Some grades of creosote (to BS.144) are fairly viscous and are only<br />
suitable for application hot by pressure methods Other grades (BS.3051) are<br />
very fluid and may be applied by any of the normal methods including<br />
brushing or immersion
Application methods<br />
VACUUM PRESSURE<br />
This is sometimes just referred to as pressure impregnation. The timber is<br />
loaded into a cylinder which is sealed and a vacuum is drawn to partially<br />
extract the air from the timber. The cylinder is then flooded with preservative<br />
and pressure applied to force it into the wood. This type of treatment provides<br />
the highest levels of protection for the most hazardous circumstances and is<br />
used with either the CCA waterborne preservatives or creosote types.<br />
DOUBLE VACUUM TREATMENT<br />
This method again uses a cylinder into which the timber is loaded and an<br />
initial vacuum drawn to remove the air; it is then flooded with preservative and<br />
the vacuum released, causing the wood to suck in the preservative. This may<br />
be followed by a holding period during which pressure may be applied before<br />
a second vacuum is drawn to remove surplus solvents and to speed drying.<br />
This method of application is only used with either the organic solvent type<br />
preservatives or the pentachlorophenol in heavy oil, and it is the most<br />
effective method of applying these types of preservative.<br />
HOT AND COLD OPEN TANK<br />
This method of application is only used to apply creosote and consists of<br />
immersing the timber for a few hours in creosote heated to approximately<br />
90° C. This causes expansion of the air within the timber. The timber is then<br />
permitted to cool, still immersed in preservative, and the contraction<br />
associated with the cooling draws in the preservative. This provides a useful<br />
method of providing high levels of protection where creosote is an acceptable<br />
preservative, and without the need for sophisticated equipment. Full details of<br />
this procedure are provided by BRE/ PRL Technical Note 42, 'The Hot and<br />
Cold Open Tank Process for Impregnating Timber.'<br />
IMMERSION TREATMENTS<br />
These simply require that the timber be totally submerged in preservative for a<br />
defined period, which should not be less than three minutes. Only<br />
preservatives of the organic solvent type or the fluid grades of creosote may<br />
be applied by these means and the treatment is suitable for medium hazard<br />
situations. This method requires no sophisticated equipment and a simple<br />
temporary bath could be produced by laying two layers of heavy gauge<br />
polythene over a brick or timber surround. Timbers may need to be weighted<br />
or turned to ensure that all surfaces receive treatment. Particular attention<br />
should be paid to manufacturers' safety warnings regarding storage, spillage<br />
and operators' protection.<br />
BRUSH OR HIGH PRESSURE SPRAY<br />
These methods are generally not recognised as providing substantial<br />
protection against decay due to the limited penetration which they achieve.<br />
They are used only in situations where other methods cannot be employed.<br />
Where no surface coatings are to be used reapplication (every 2 - 3 years)<br />
must be anticipated. To obtain maximum benefit they should be applied as at<br />
least two generous flood coats, paying particular attention to end grain and<br />
joint areas, and the second coat should be applied as soon as the first coat<br />
has started to dry on the surface, to keep the preservative moving into the<br />
timber. When applied to relatively thin timbers, e.g., woven fence panels,<br />
surface application can provide realistic protection against decay. Careful<br />
attention should be paid to manufacturers' safety warnings and attention is<br />
drawn to the particular hazards of splashes or spray entering the eyes.<br />
page 14
page 15 STORAGE TANKS<br />
PRESSURE PUMP<br />
TRANSFER PUMP<br />
VACUUM PUMP<br />
VACUUM<br />
, CHEST<br />
HOT AND<br />
DOLD OPEN TANK<br />
TREATMENT<br />
IMMERSION TREATMENT<br />
CYLINDER<br />
VACUUM/PRESSURE OR DOUBLE<br />
VACUUM TREATMENT PLANT<br />
BRUSH or<br />
HIGH PRESSURE<br />
SPRAY
TABLE 6<br />
PRESERVATIVE PROCESS<br />
PENTACHLOROPHENOL<br />
IN HEAVY OIL<br />
COPPER CHROME<br />
ARSENATE<br />
CREOSOTE<br />
ORGANIC SOLVENT<br />
1. Vehicle Barriers<br />
Double vacuum<br />
impregnation<br />
Vacuum pressure<br />
impregnation<br />
Vacuum pressure<br />
impregnation<br />
Hot and cold<br />
open tank<br />
Immersion<br />
minimum 3 minutes<br />
Brush or spray<br />
minimum 2 flood coats<br />
Double vacuum<br />
impregnation<br />
Immersion<br />
minimum 3 minutes<br />
Brush or spray<br />
minimum 2 flood coats<br />
ANTICIPATED SERVICE LIFE<br />
YEARS<br />
10 • • • • • • •<br />
Fences Fences<br />
Gates<br />
Steps IN IN GROUND CONTACT<br />
CONTACT<br />
Posts, Gravel, Boards, etc.<br />
20<br />
40<br />
• •<br />
•<br />
•<br />
•<br />
•<br />
Stiles<br />
Walkways<br />
NOT IN GROUND CONTACT<br />
10<br />
20<br />
• • •<br />
•<br />
• • •<br />
•<br />
•<br />
•<br />
•<br />
•<br />
•<br />
•<br />
Rails, bars, treads,<br />
infill panels<br />
40 • • •<br />
2. Notice Boards, Signs, Litter Bins 10 • • • • • • • • •<br />
20 • • • • • • •<br />
30 • • • • •<br />
3. Picnic and Recreational Furniture<br />
10 • • • • • • •<br />
* Caution Caution — see see note note on Safety Safety aspects aspects<br />
20 • • • • • •<br />
30 • • • •<br />
4. Cladding and Joinery of outbuildings, 20 • • • • • • •<br />
huts and small buildings<br />
40 • • • • •<br />
5. Footbridges, wooden foundations, piles 30 • •
page 17 General Considerations<br />
CONDITION OF TIMBER<br />
When timber is freshly felled it contains a lot of water, commonly 70% or more.<br />
This water will prevent the absorption of other liquids and it is essential that<br />
the timber be at least partly dried before preservative treatment is carried out.<br />
The zone of timber which is expected to be treated with preservative should<br />
have a moisture content no higher than 28%.<br />
To satisfy this requirement, fresh sawn timber should be carefully stacked to<br />
ensure ventilation to all faces and protected from the rain. Air drying will then<br />
normally take between one and six months, depending upon the timber<br />
thickness and time of year. Even pressure impregnation of wet timber is a<br />
waste of resources and will lead to poor performance. The bark of trees is<br />
impermeable and it is essential that this should be removed prior to drying and<br />
preservation.<br />
Wherever possible all machining and working of the timber should be carried<br />
out before preservative treatment. Simple cross cutting and boring operations<br />
after treatment should be followed by generous brushing with further<br />
preservative. Suppliers of pressure impregnated timber will normally provide a<br />
product for this purpose; if not, an organic solvent or fluid creosote type<br />
should be used.<br />
CHECKING ON PRESERVATIVE TREATMENT<br />
Many timbers, particularly after a short period of weathering, give little<br />
outward sign that preservative has been applied. There are no simple<br />
universal tests that can be applied to determine the presence or absence of<br />
preservatives and detection would usually require the cutting out and removal<br />
of samples for laboratory testing. This testing can determine whether<br />
preservative chemicals are present or not but cannot give reliable <strong>information</strong><br />
regarding the method of application, or whether a particular specification has<br />
been correctly carried out. It is therefore important that specifiers should use<br />
reliable processors, and where appropriate should be prepared to send<br />
inspectors to check that correct procedures are being carried out.<br />
Initial moisture content can easily be checked using a moisture meter of the<br />
resistance type. Such a meter measures the electrical resistance across two<br />
steel pins which are pushed into the timber. As water conducts electricity, the<br />
pins in wet timber will pass more electricity than those in dry. The meter is<br />
calibrated to show this value as moisture content. The most useful<br />
instruments for this work have pins with insulated shanks which can be driven<br />
up to 20mm into the timber, thereby avoiding false readings from the surface<br />
which may be superficially wet or dry.<br />
SAFETY AND HEALTH<br />
All wood preservatives are by nature toxic and their use requires careful<br />
regard for potential health hazards. Wood preservatives are covered by the<br />
Pesticide Safety Precaution Scheme (PSPS) operated by the technical<br />
secretariat of the Health and Safety Executive and the Ministry of Agriculture<br />
and Fisheries and Foods. Specifiers and users should ensure that any wood<br />
preservative proposed for use has been cleared under this scheme .<br />
Manufacturers of preservatives should be able to confirm the acceptance of<br />
their product under this scheme and product containers should carry labels to<br />
this effect. The PSPS ensures that the active ingredients of a preservative<br />
have been evaluated for their possible effects upon both the processors, the<br />
users and the environment and that approved products are considered<br />
satisfactory when used for the purpose and in the manner designated by the<br />
scheme.<br />
Particular attention is drawn to the possible hazards which may occur when<br />
applying preservative fluids 'in-situ' in the countryside, when special<br />
consideration must be given to the disposal of any containers and residues<br />
and possible accidental spillage into water courses.<br />
Persons applying wood preservatives or handling treated timber should be<br />
provided with protective clothing and should avoid prolonged skin contact.<br />
Facilities to permit operatives to wash thoroughly before eating, drinking or<br />
smoking should be provided. If used in closed areas, adequate ventilation is<br />
essential and face masks may be necessary, especially if spraying
Items such as picnic table tops, children's play equipment, containers for Page 18<br />
foodstuffs such as potatoes, and surfaces which may be in prolonged contact<br />
with animals, require special consideration. The only wood preservatives<br />
which should be considered are the CCA types. These preservatives are free<br />
of taint or odour and have a satisfactory record of use in these areas. Before<br />
being used for these purposes, the treated timber should be left for at least<br />
seven days followed by hosing down and light scrubbing to remove any loose<br />
surface deposit. Low levels of arsenic occur naturally in our everyday<br />
environment and although not to be encouraged, the ingestion of small wood<br />
particles treated with this form of preservative is unlikely to be of serious<br />
consequence. Where surface coatings are used in these sensitive areas, the<br />
manufacturer should provide an assurance of their suitability.<br />
Where preservatives may come into close contact with valuable plants, the<br />
waterborne CCA preservatives will generally present no problems when<br />
treated as above, but creosote, pentachlorophenol in heavy oil, and some of<br />
the organic solvent based preservatives may be damaging. Organic solvent<br />
preservatives are made in special horticultural grades, usually bright green in<br />
colour, and providing the preservative is allowed to thoroughly dry after<br />
application, they are harmless to most plants.
page 19<br />
List of Wood Preservatives and Methods of Application<br />
The following products are suitable for general use in the countryside. This list is based<br />
upon the Building Research Establishment Princes Risborough Laboratory Technical Note<br />
No. 24 'Preservative Treatments for External Softwood Joinery Timer' Appendix B.<br />
Preservative Type — Copper Chrome Arsenate<br />
Application Method — Vacuum/Pressure Impregnation<br />
Manufacturer<br />
Hickson's Timber Products Ltd.<br />
Castleford<br />
Yorkshire WF10 2JT<br />
Rentokil Ltd.<br />
Felcourt<br />
East Grinstead<br />
Sussex RH19 2JY<br />
Preservative Type — Organic Solvent<br />
Product<br />
Tanalith C(CT 106)<br />
Celcure A<br />
Treatim CCA<br />
Application Method — Double Vacuum Treatment<br />
Manufacturer<br />
Cuprinol Ltd.<br />
Adderwell House<br />
Frome<br />
Somerset BA11 1NL<br />
Hickson's Timber Products Ltd.<br />
Castleford<br />
Yorkshire WF10 2JT<br />
Fosroc Ltd.<br />
Timber Treatments Division<br />
Fieldhouse Lane<br />
Marlow<br />
Buckinghamshire SL7 1LS<br />
Rentokil Ltd.<br />
Felcourt<br />
East Grinstead<br />
Sussex RH19 2JY<br />
Wykamol Ltd.<br />
Tingewick Road<br />
Buckingham MK18 1AN<br />
Product<br />
Cuprinol Industrial Clear<br />
*Cuprinol Industrial Clear WR<br />
Cuprinol Industrial P<br />
Cuprinol Joinery QD<br />
*Cuprinol Joinery Clear WR<br />
Cuprinol Joinery Clear<br />
(applied by the Cuprivac process)<br />
Vacsol<br />
Vacsol J<br />
*Vacsol WR<br />
•Vacsol JWR<br />
(applied by the Vac-Vac process)<br />
Protim 80<br />
•Protim 80WR<br />
Protim 90<br />
Protim FD<br />
•Protim JP<br />
(applied by the Prevac process)<br />
Rentokil Joinery Preservative<br />
*Rentokil Joinery Preservative—WR<br />
Rentokil Protektim<br />
•Rentokil Protektim — WR<br />
(applied by the Multivac process)<br />
Dispar Clear<br />
•Statox<br />
•Statox L<br />
(applied by the VIV process)<br />
•Possess a degree of water repellency but suitable for overpainting.<br />
Preservative Type — Organic Solvent<br />
Application Method — Immersion Treatment<br />
(also suitable for brush or spray application).<br />
Manufacturer<br />
Blundell-Permoglaze Ltd.<br />
Sculcoates Lane<br />
Hull HU5 1RU<br />
Catomance Ltd.<br />
88/96 Bridge Road East<br />
Welwyn Garden City<br />
Hertfordshire PL7 1JW<br />
Cuprinol Ltd.<br />
Adderwell House<br />
Frome<br />
Somerset BA11 1NL<br />
Feb (Great Britain)<br />
Albany House<br />
Swinton Hall Road<br />
Swinton<br />
Manchester M27 1DT<br />
Hickson's Timber Products Ltd.<br />
Castleford<br />
Yorkshire WF10 2JT<br />
LTD Building Products<br />
Church Road<br />
Litherland<br />
Liverpool L21 8NX<br />
Fosroc Ltd.<br />
Timber Treatments Division<br />
Fieldhouse Lane<br />
Marlow<br />
Buckinghamshire<br />
SL7 1LS<br />
RD (Chemicals & Wood<br />
Processes) Ltd.<br />
300 Bearsden Road<br />
Glasgow G13 1EP<br />
Rentokil Ltd.<br />
Felcourt<br />
East Grinstead<br />
Sussex RH19 2JY<br />
Name of Product<br />
*Timbafilme<br />
•Permoglaze Timber<br />
Preservative WR<br />
Permoglaze General Purpose<br />
Timber Preservative Clear<br />
Mystoc PCP No. 2<br />
Cuprinol<br />
Cuprinol<br />
Cuprinol<br />
*Cuprinol<br />
Cuprinol<br />
Clear<br />
Cuprinol<br />
•Cuprinol<br />
Cuprinol<br />
Cuprinol<br />
Green<br />
Joinery Clear<br />
Joinery QD<br />
Joinery QD Special<br />
Joinery Clear WK<br />
Wood Preservative<br />
Industrial Clear<br />
Industrial Clear WF<br />
Industrial P<br />
Wood Preservative<br />
Febwood WP3 Clear<br />
Imersol<br />
"Imersol WR<br />
Arborsan 109<br />
Arborsan 110<br />
Protim GD<br />
•Protim JP<br />
Protim 80<br />
•Protim 80 WR<br />
Protim 90<br />
Woodseal GP<br />
Woodseal WR<br />
Celpruf<br />
Sadolin (UK) Ltd. Sadovac<br />
Tower Close<br />
St. Peter's Industrial Park<br />
Huntingdon<br />
Cambridgeshire PE18 7DR<br />
Rentokil Joinery<br />
Preservative<br />
•Rentokil Joinery<br />
Preservative — WR<br />
Rentokil Preservative<br />
for Wood, Clear<br />
Rentokil Protektim<br />
•Rentokil Protektim — WR<br />
Sikkens UK Ltd. Sikkens WP Special<br />
Sikkens House<br />
Station Road<br />
Didcot<br />
Oxon OX11 7NQ<br />
Solignum Ltd.<br />
Thames Road<br />
Crayford<br />
Dartford<br />
Kent DA1 4QJ<br />
Sovereign Chemical<br />
Industries Ltd.<br />
Park Road<br />
Barrow-in-Furness<br />
Cumbria LAM 4QU<br />
Tenneco Organics Ltd.<br />
Rockingham Works<br />
Avonmouth<br />
Bristol BS11 0YT<br />
Wykamol Ltd.<br />
Tingewick Road<br />
Buckingham<br />
MK18 1 AN<br />
Soljoin 2<br />
Soljoin 4<br />
*Soljoin 6<br />
*Soljoin 8<br />
Colourless Solignum<br />
•Colourless WR Solignum<br />
Sovereign Clear 24<br />
Sovereign Light Green 24<br />
•Sovereign Water-<br />
Repellent 24<br />
•Timbrene Clear<br />
•Timbrene Clear Grade E<br />
Dispar Clear<br />
•Statox<br />
•Statox L
4. SURFACE COATINGS<br />
Bare timber, left outside exposed to the combined effects of sunshine and<br />
rain, gradually has the natural colour washed out from its surface. Regardless<br />
of the type of timber, the appearance will eventually change to a silvery grey in<br />
clean atmospheres and a dirty grey black where there is more pollution. At the<br />
same time the alternate wetting and drying of the timber surface will result in<br />
wood fibres becoming loosened from the surface, causing roughening and<br />
possibly the development of cracks or splits. For many situations in the<br />
countryside this appearance is acceptable and has the advantage of not<br />
requiring maintenance.<br />
Some uses, however, are more demanding, requiring minimal shrinkage and<br />
swelling to keep joints tight, and perhaps a smoother and more attractively<br />
coloured surface. Creosote provides both a colour and a degree of water<br />
repellency and therefore goes some way towards meeting these<br />
requirements. Traditionally its appearance is considered acceptable for many<br />
applications in rural areas. Most other preservatives do not provide a lasting<br />
decorative appearance and timber so treated will require additional surface<br />
coatings.<br />
There are four main types of exterior decorative finishes and the major<br />
characteristics of these are described. Individual commercial products may<br />
however have intermediate properties and it may be difficult to decide to<br />
which group they belong.<br />
Paints<br />
In their simplest form paints consist of a solvent, such as white spirit,<br />
containing coloured pigments dispersed in a resin or 'binder.' When applied,<br />
the solvent evaporates and the binder forms a tough, flexible, water resistant<br />
skin, coloured by the pigments. Paints are often described by the type of<br />
binder, e.g., alkyd, oleoresinous, acrylic, or polyurethane, and by the type of<br />
pigment, e.g., aluminium, red lead, red oxide.<br />
The use of paint should be restricted to areas where a high quality of smooth<br />
surface finish is required and where regular maintenance (3-5 years) can be<br />
provided. Paints provide an obliterating opaque colour to the surface and<br />
when well maintained ensure maximum dimensional stability to the timber. If<br />
neglected, a partly failed paint coating may increase the risk of decay by<br />
allowing water to penetrate but retarding its escape.<br />
Paints should only be applied to smooth surfaces, generally as four coats,<br />
using a 'system' of primer (1 coat), undercoat (1 or 2 coats) and top coat (1 or<br />
2 coats). To prevent possible problems of compatibility it is better to avoid<br />
mixing different manufacturers' systems.<br />
Maintenance is complicated, requiring removal of blistered or loosened paint<br />
film, local priming to exposed timber, followed by undercoat and top coats. If<br />
paint failure has allowed water entry, careful redrying may be necessary to<br />
avoid further applications of paint from sealing moisture in.<br />
Paint performance may be improved by the prior use of organic solvent type<br />
wood preservatives with a degree of water repellency, which will reduce the<br />
absorption of water through a broken paint film.<br />
Further guidance on the choice and application of paints may be found in<br />
BS.6150 : 1982 'Code of Practice for Painting of Buildings.<br />
Varnishes<br />
A typical varnish consists of a resin, dispersed in a solvent, which when<br />
applied to a surface forms a tough, flexible, transparent skin. Varnishes are<br />
not suitable for general purpose work in the countryside and should be<br />
restricted to specialist high class joinery where the item is not exposed to full<br />
weathering and where comprehensive maintenance can be provided They do<br />
however provide the only means of retaining the original natural colour of the<br />
wood.<br />
These products should be applied as a minimum of four coats and the better<br />
products would probably require maintenance at approximately two-year<br />
intervals. If neglected, maintenance problems will escalate dramatically due to<br />
discolouration of the timber.<br />
page 20
page 21<br />
Oils<br />
The application of simple vegetable or mineral oils, e.g., linseed oil, is not<br />
generally recommended. The water repellence of these materials does not<br />
last longer than a few months and the frequent reapplications necessary<br />
progressively darken the surface of the wood.<br />
The term 'Teak Oil' is not specific and commercial products may be of either a<br />
varnish or exterior stain finish type.<br />
Creosote may be applied as a decorative surface coating, and provides a<br />
moderate degree of water repellency. Colour is generally limited to shades of<br />
brown and maintenance is likely to be at 2 - 5 year intervals. Creosote should<br />
not be diluted with old engine oil; this reduces its effectiveness as both a<br />
wood preservative and a surface coating.<br />
Exterior Stain Finishes<br />
These are the most recently developed finishes and have been known<br />
variously as 'Water repellent preservatives' and 'Preservative Stains,' which<br />
has led to their widespread confusion with wood preservatives, which they are<br />
not.<br />
They do, however, provide a most suitable general purpose finish for<br />
countryside work, and are available in a wide choice of colours, from<br />
translucent natural wood shades which allow the grain and character of the<br />
timber to show through, to opaque reds, blues and greens, where a more<br />
dramatic effect is required. Exterior stain finishes tend to be absorbed by<br />
the surface layer of fibres rather than forming a skin on the surface. In<br />
contrast to paints and varnishes, their performance is enhanced when<br />
applied to rough sawn and weathered surfaces which tend to absorb more<br />
stain.<br />
A feature of exterior stain finishes is their relatively high permeability to water<br />
vapour. Comparison with paints and varnishes may be likened to comparing a<br />
gaberdine fabric raincoat and a plastic mac. Both will keep out the rain but the<br />
fabric, with high vapour permeability, will permit any moisture which does<br />
penetrate to escape by evaporation. As no known surface coating can be relied<br />
upon to remain 100% intact on outside woodwork, the advantage of vapour<br />
permeability is obvious and is the reason for the spawning of this new<br />
generation of 'breathable' finishes.<br />
Exterior stain finishes are sometimes referred to as 'high solids' or low<br />
solids.' High solids' products tend to leave a distinct surface deposit,<br />
producing a noticeable sheen. They have a high water repellency and are<br />
most suited for situations where the surface is unlikely to absorb much finish,<br />
e.g., smooth planed dense hardwoods, or where maximum dimensional<br />
stability is required. Their possible disadvantage lies in the greater risk of<br />
eventual failure by flaking or cracking, reducing their ease of maintenance.<br />
Low solids' products produce a more or less matt finish without a surface<br />
deposit, relying on absorption by the surface fibres. The lack of surface<br />
deposit usually ensures that eventual failure, as with the better high solids<br />
materials, will be by a gradual erosion and bleaching, leaving a surface ready<br />
for recoating with little further preparation<br />
Exterior stain finishes are usually applied as 2 - 3 coats, although their<br />
individual manufacturer's instructions should be followed in this respect.<br />
These products are usually much more fluid than paints or varnishes and<br />
require a slightly different application technique. They should be generously<br />
flowed onto the timber rather than being brushed out, providing the surface<br />
with as much as it will hold without excessive runs This may result in uneven<br />
brush marks but these may be removed by lightly rebrushing the areas some<br />
5-15 minutes after the initial application. Particular attention should be paid<br />
to the manufacturers' instructions regarding stirring, before and during<br />
application as these products tend to settle in containers more rapidly than<br />
paints<br />
Maintenance is likely to be at 3 - 5 year intervals and with the better materials<br />
a simple wash or brush down to remove any accumulation of dirt should be all<br />
that is necessary before reapplication. After weathering, a change of stain<br />
finish product generally presents no problems. Surfaces with traces of old<br />
paints or varnishes will reduce absorption and may impair the performance of<br />
exterior stain finishes, although further weathering will eventually remove<br />
these remaining deposits.
Commercial exterior stain finishes are tested by the Timber Research and<br />
Development Association (TRADA) and products are assessed for their water<br />
repellency, colour retention and ease of maintenance after approximately two<br />
years' exposure to natural weathering. A number of exterior stain products<br />
are also exhibited in the Battleby Display Centre at the headquarters of the<br />
Countryside Commission for Scotland.<br />
The following list of exterior stain finishes indicates products which have<br />
performed satisfactorily in these trials.<br />
Manufacturer/Agent<br />
A. T. Woodfinishes Ltd.<br />
42 Saughton Crescent<br />
Edinburgh EH12 5SH<br />
Berger Decorative Paints<br />
Petherton Road<br />
Hengrove<br />
Bristol BS99 7JA<br />
Product<br />
Valtti wood protection T. & R. Williamson Ltd.<br />
Ripon<br />
North Yorkshire<br />
Berger Cuprinol paints and<br />
stains<br />
Cuprinol Ltd. Berger Cuprinol paints and<br />
Adderwell stains<br />
Frome<br />
Somerset BA11 1NL<br />
Carson Hadfield Timbadecor and Timbatop<br />
Mitcham<br />
Surrey CR4 3YQ<br />
Donald MacPherson & Co. Ltd. Flexarb Timber Coatings<br />
Trade Division Transparent Wood Finish<br />
Radcliffe Road Opaque Wood Finish<br />
Bury<br />
Lancashire BL9 9NB<br />
Dulux Trade Group<br />
ICI Paints Division<br />
Wexham Road<br />
Slough SL2 5DS<br />
Fosroc Ltd.<br />
Fieldhouse Lane<br />
Marlow<br />
Buckinghamshire SL7 1LS<br />
Glasurit Beck Ltd.<br />
Slinfold<br />
Horsham<br />
West Sussex RH13 7SH<br />
Dulux Timbercolour<br />
Dulux Woodsheen<br />
Dulux Weathershield<br />
Bondex<br />
Lasutect HL & DSL<br />
Venti 1-2-3<br />
Glen Products Impra-Elan<br />
Glencoe Impra-Color<br />
Woodland Avenue<br />
Hagley<br />
Nr. Stourbridge<br />
West Midlands DY8 2XQ<br />
Joseph Mason Paints (Scotland) Ltd. Masopar<br />
Randolph Industrial Estate<br />
Kirkcaldy<br />
Fife<br />
Jotun Decorative Coatings Ltd. Benar<br />
16 Alston Drive Oxan<br />
Bradwell Abbey Demidekk<br />
Milton Keynes MK13 9HA<br />
Kay-Metzeler Ltd. Xyladecor<br />
Wood Preservative Division Consolan-S<br />
Bollington<br />
Macclesfield<br />
Cheshire SK10 5JJ<br />
Manders Paints Ltd.<br />
PO Box 9<br />
Mander House<br />
Wolverhampton WV1 3NA<br />
Monzie JoineryLtd.<br />
Monzie<br />
Crieff<br />
Perthshire PH7 4HE<br />
Sadolin (UK) Ltd.<br />
Tower Close<br />
St. Peter's Industrial Park<br />
Huntingdon<br />
Cambridgeshire PE18 7DR<br />
Sikkens (UK) Ltd.<br />
Didcot Industrial Estate<br />
Station Road<br />
Didcot<br />
Oxfordshire 0X11 7NQ<br />
Timbercare wood finishes<br />
Butinox<br />
Dekkbeis<br />
Classic<br />
Extra<br />
Focus<br />
Cetol HLS<br />
Cetol THB<br />
Cetol Filter 7<br />
Solignum Ltd. Architectural Solignum<br />
Thames Road Timbertone<br />
Crayford<br />
Dartford<br />
Kent DA1 4QJ<br />
Sovereign Chemical Industries Ltd. SX70<br />
Barrow-in-Furness<br />
Cumbria CA14 4QU<br />
Spencer (Aberdeen) pic<br />
Froghall Terrace<br />
Aberdeen AB2 3JN<br />
Preserva Wood<br />
W. W. Hill, Son & Wallace Ltd.<br />
Elton Street<br />
Broughton Bridge<br />
Salford M7 9TL<br />
Spurseel<br />
Granyte 20-20<br />
page 22
REFERENCES<br />
Section 2 — Durability<br />
PRINCES RISBOROUGH LABORATORY. The natural durability classification<br />
of timber. Technical Note 40. Garston, Building Research Establishment 1969<br />
(1979).<br />
BUILDING RESEARCH ESTABLISHMENT. The resistance of timbers to<br />
impregnation with wood preservatives. Information Paper 15/79, Garston,<br />
BRE. 1979.<br />
BRITISH STANDARDS INSTITUTION. Code of practice for preservation of<br />
timber. British Standard BS 5589. London, BSI. 1978.<br />
Section 3 — Preservation<br />
BRITISH STANDARDS INSTITUTION. Specification for coal tar creosote for<br />
the preservation of timber. British Standard BS 144. London, BSI. 1973.<br />
BRITISH STANDARDS INSTITUTION. Specification for coal tar creosotes for<br />
wood preservation (other than creosotes to BS 144). British Standard BS<br />
3051. London, BSI. 1972.<br />
PRINCES RISBOROUGH LABORATORY. The hot-and-cold open tank process<br />
of impregnating timber. Technical Note 42, Garston, Building Research<br />
Establishment. 1969.<br />
PRINCES RISBOROUGH LABORATORY. Preservative treatments for external<br />
softwood joinery timber. Technical Note 24, Garston, Building Research<br />
Establishment. 1979.<br />
Section 4 — Surface Coatings<br />
BRITISH STANDARDS INSTITUTION. Code of practice for painting of<br />
buildings. British Standard BS 6150. London, BSI. 1982.
Countryside Commission for Scotland<br />
Battleby Redgorton Perth PH1 3EW<br />
© Perth (0738) 27921<br />
EXHIBITS ON DISPLAY AT BATTLEBY<br />
13.1 Timber Protection<br />
Exterior Stain Finishes Autumn 1986<br />
13.1.1 'Butinox'<br />
13.1.2 'Bondex'<br />
13.1.3 'Uvitec' Preservative and Varnish<br />
13.1.4 'Timbrene'<br />
13.1.5 'Cetol Transparent'<br />
13.1.6 'Rubbol THB and Cetol Transparent'<br />
13.1.7 'Decor*<br />
13.1.8 'Architectural Solignum'<br />
13.1.9 'Timbertone'<br />
13.1.10 Exterior Browns<br />
13.1.11 'Oxan'<br />
13.1.12 'Rustikal'<br />
13.1.13 'Timbertection'<br />
13.1.14 Wood Preservative Stain<br />
13.1.15 Sadolin Classic<br />
13.1.16 Sadolin Pinotex Focus<br />
13.1.17 Sadolin Pinotex Superdec<br />
13.1.18 'Timba-Dura'<br />
13.1.19 'Granyte 20-20'<br />
13.1.20 'Lasutect*<br />
13.1.21 'Masopar'<br />
13.1.22 'Xyladecor'<br />
13.1.23 'Consolan - S'<br />
13.1.24 'Spurseel'<br />
13.1.25 2021 Colour Collection 'Rubbol DSA'<br />
13.1.26 'Demi Dekk' High Opaque Wood Stain<br />
13.1.27 'Timbadecor' - Hadfields<br />
13.1.28 Sadotop<br />
13.1.29 Dulux Woodcare Light Preservative Basecoat<br />
13.1.30 Dulux Woodcare Dark Preservative Basecoat<br />
13.1.32 'Benar'<br />
13.1.33 Transparent Wood Finish<br />
13.1.34 Opaque Wood Finish<br />
13.1.35 Butinox Dekkbeis Highly Pigmented<br />
13.1.36 XTP Exterior Timber Protection<br />
13.1.37 Valtti Wood Protection<br />
13.1.38 Cetol Filter 7<br />
13.1.39 Permoglaze MVP<br />
13.1.40 Nordac System 52<br />
13.1.41 Dulux Timbercolour<br />
© C.C.S.<br />
Monzie Joinery<br />
Protim Ltd<br />
L G Wilkinson Ltd<br />
Tenneco Organics Ltd<br />
Sikkens UK Ltd<br />
it<br />
Hickson's Timber Products Ltd<br />
Solignum Ltd<br />
Jotun Decorative Coatings Ltd<br />
Sigma (Coatings) Ltd<br />
Timbertection Ltd<br />
Leyland Paint and Wallpaper Ltd<br />
Sadolin (UK) Ltd<br />
Timba-Dura Ltd<br />
W W Hill, Son & Wallace Ltd<br />
Glasurit (GB) Ltd<br />
Joseph Mason Paints (Scotland) Ltd<br />
Bo'ness Iron Company Ltd<br />
TAR Williamson Ltd<br />
Sikkens (UK) Ltd<br />
it<br />
Jotun Decorative Coatings Ltd<br />
Carsons Hadfield<br />
Sadolin (UK) Ltd<br />
Dulux Trade Group<br />
ii<br />
Jotun Decorative Coatings Ltd<br />
Donald MacPherson 4 Co Ltd<br />
Monzie Joinery Ltd<br />
II<br />
Berger Paints<br />
A T Woodfinishes Ltd<br />
Sikkens UK Ltd<br />
Blundell-Permoglaze Ltd<br />
Dacrylate Paints Ltd<br />
Dulux Trade Group
(13.1 Continued)<br />
13.1.42 Dulux Woodsheen<br />
13.1.43 Preserve Wood<br />
13.1.44 Velti 1-2-3<br />
13.1.45 Timbercare Satin Finish<br />
13.1.46 Timbercare Preservative<br />
13.1.47 Timbercare Gloss Finish<br />
13.1.48 SX70<br />
13.1.49 Uvitec Varnish<br />
13.1.50 Flexarb Joinery Gloss<br />
13.1.51 Flexarb Timber Coating<br />
13.1.52 Flexarb Timber Coating + Uvitec<br />
13.1.53 Microporous Gloss<br />
13.1.54 Dulux Weathershield<br />
13.1.55 Timbadecor 4 Timbatop<br />
13.1.56 Impra-Elan<br />
13.1.57 Impra-Colour<br />
13.1.58 Wood Paint Matt<br />
13.1.59 Wood Paint Sheen<br />
13.1.60 Wood Stain <strong>Natural</strong><br />
13.1.61 Wood Stain Sheen<br />
13.1.62 Wood Stain Hardwood<br />
13.1.63 Wood Paint Gloss<br />
© C.C.S.<br />
Dulux Trade Group<br />
Spencer (Aberdeen) PLC<br />
Glasurit Beck Ltd<br />
Menders Paints Ltd<br />
Sovereign Chemical Industries Ltd<br />
Donald MacPherson & Co Ltd<br />
Dulux Trade Group<br />
Carsons Hadfield<br />
Glen Products<br />
it<br />
Berger Decorative Paints<br />
Autumn 1986
Countryside Commission for Scotland<br />
Battleby Redgorton Perth PH1 3EW<br />
Perth (0738) 27921<br />
SUPPLIERS AND PRODUCTS<br />
13.1 Timber Protection<br />
Timber Preservatives - Copper Chrome Arsenate Autumn 1986<br />
Hickson's Timber Products Ltd Tel 0977 556565 Tanalith C.<br />
CASTLEFORD Yorkshire WF10 2JT<br />
Rentokil Ltd Tel 0342 833022 Celcure A, Treatim CCA.<br />
Felcourt EAST GRINSTEAD Sussex RH19 23Y<br />
Timber Preservatives- Organic Solvent<br />
Blundell-Permoglaze Ltd<br />
Sculcoates Lane HULL HU5 1RU<br />
Catomance Ltd Tel 07073 24373<br />
88/96 Bridge Road East WELWYN GARDEN CITY<br />
Hertfordshire PL7 13W<br />
Cuprinol Ltd Tel 0373 65151<br />
Adderwell House FR0ME Somerset BA11 1NL<br />
Feb (Great Britain) Ltd Tel 061 794 7411<br />
Albany House Swinton Hall Road SWINT0N<br />
Manchester M27 IDT<br />
Hickson's Timber Products Ltd<br />
CASTLEFORD Yorkshire WF10 2JT<br />
LTD Building Products<br />
Church Road Litherland LIVERPOOL L21 8NX<br />
Tel 0482 492241 Permoglaze, Timbafilme.<br />
Tel 0977 556565<br />
Fosroc Ltd Tel 06284 6644<br />
Timber Treatments Division Fieldhouse Lane<br />
MARL0W Buckinghamshire SL7 1LS<br />
RD (Chemicals & Wood Processes) Ltd Tel 041 954 8021<br />
300 Bearsden Road GLASGOW G13 1EP<br />
Rentokil Ltd Tel 0342 833022<br />
Felcourt EAST GRINSTEAD Sussex RH19 2JY<br />
Sadolin (UK) Ltd Tel 0480 50041<br />
Tower Close St Peter's Industrial Park<br />
HUNTINGDON Cambridgeshire PE18 7DR<br />
Sikkens UK Ltd Tel 0235 815141<br />
Sikkens House Station Road DIDC0T Oxon 0X11 7NQ<br />
Solignum Ltd Tel 0322 526966<br />
Thames Road Crayford DARTF0RD Kent DAI 4QJ<br />
Sovereign Chemical Industries Ltd Tel 0229 25045<br />
BARROW-IN-FURNESS Cunbria LA14 4QU<br />
Tenneco Organics Ltd Tel 0272 823611<br />
Rockingham Works AV0NM0UTH Bristol BS11 0YT<br />
Wykamol Ltd<br />
Tingewick Road BUCKINGHAM MK18 IAN<br />
Exterior Stain Finishes<br />
A T Woodfinishes Ltd Tel 031 337 2187<br />
42 Saughton Crescent EDINBURGH EH12 5SH<br />
Berger Decorative Paints Tel 0272 836110<br />
Petherton Road Hengrove BRISTOL BS99 7JA<br />
Cuprinol Ltd<br />
Adderwell FR0ME Somerset BA11 1NL<br />
Carson Hadfield<br />
MITCHAM Surrey CR4 3YQ<br />
Donald MacPherson & Co Ltd Tel 061 764 6030<br />
Trade Division Radcliffe Road BURY<br />
Lancashire BL9 9NB<br />
Mystoc.<br />
Various Cuprinol products.<br />
Febwood.<br />
Vacsol.<br />
Arborsan.<br />
Various Protim products.<br />
Woodseal, Celpruf.<br />
Various Rentokil products.<br />
Sadovac.<br />
Sikkens.<br />
Soljoin, Solignum.<br />
Sovereign.<br />
Timbrene.<br />
Dispar, Statox.<br />
Valtti wood protection.<br />
Berger Cuprinol paints and stains.<br />
Tel 0373 65151 Berger Cuprinol paints and stains.<br />
Tel 01 648 3422 Timbadecor and Timbatop.<br />
Flexarb Timber Coatings, Transparent Wood<br />
Finish, Opaque Wood Finish.
(13.1 Continued)<br />
Dulux Trade Group Tel 0753 34225<br />
ICI Paints Division Wexham Road SLOUGH SL2 5DS<br />
Fosroc Ltd Tel 06284 6644<br />
Fieldhouse Lane MARLOW Buckinghamshire SL7 1LS<br />
Glasurit Beck Ltd Tel 0402 790332<br />
Slinfold HORSHAM West Sussex RH13 7SH<br />
Glen Products Tel 0562 884541<br />
Glencoe Woodland Avenue Hagley Nr STOURBRIDGE<br />
West Midlands DY8 2XQ<br />
Joseph Mason Paints (Scotland) Ltd Tel 0592 51041/2<br />
Randolph Industrial Estate KIRKCALDY Fife<br />
Jotun Decorative Coatings Ltd Tel 0234 219792/3<br />
16 Alston Drive Bradwell Abbey<br />
MILTON KEYNES MK13 9HA<br />
Kay-Metzeler Ltd Tel 0625 73366<br />
Wood Preservative Division Bollington<br />
MACCLESFIELD Cheshire SK10 533<br />
Manders Paints Ltd Tel 0902 711511<br />
P0 Box 9 Mander House WOLVERHAMPTON WV1 3NA<br />
Monzie 3oinery Ltd<br />
Monzie CRIEFF Perthshire PH7 4HE<br />
Sadolin (UK) Ltd Tel 0480 50041<br />
Tower Close St Peter's Industrial Park<br />
HUNTINGDON Cambridgeshire PE18 7DR<br />
Sikkens (UK) Ltd Tel 0235 815141<br />
Didcot Industrial Estate Station Road DIDC0T<br />
Oxfordshire 0X11 7NQ<br />
Solignum Ltd Tel 0322 526966<br />
Thames Road Crayford DARTF0RD Kent DAI 4Q3<br />
Sovereign Chemical Industries Ltd Tel 0229 25045<br />
BARROW-IN-FURNESS Cumbria CA14 4QU<br />
Spencer (Aberdeen) pic<br />
Froghall Terrace ABERDEEN AB2 3JN<br />
T & R Williamson Ltd<br />
RIP0N North Yorkshire<br />
Tel 0224 636677<br />
Tel 0765 2525<br />
W W Hill, Son & Wallace Ltd Tel 061 832 4276<br />
Elton Street Broughton Bridge SALF0RD M7 9TL<br />
© C.C.S.<br />
Dulux Timbercolour, Dulux Woodsheen,<br />
Dulux Weathershield.<br />
Bondex.<br />
Lasutect HL & DSL, Venti 1-2-3.<br />
Impra-Elan, Impra-Color.<br />
Masopar.<br />
Benar, Oxan, Demidekk.<br />
Xyladecor, Consolan-S.<br />
Timbercare wood finishes.<br />
Tel 0764 2740 Butinox, Dekkbeis.<br />
Classic, Extra, Focus.<br />
Cetol HLS, Cetol THB, Cetol Filter 7.<br />
Architectural Solignum, Timbertone.<br />
3X70.<br />
Preserva Wood.<br />
Spurseel.<br />
Granyte 20-20<br />
Autumn 1986
Countryside Commission for Scotland<br />
Battleby Redgorton Perth PH13EW<br />
Perth (0738)27921<br />
INFORMATION<br />
14.4<br />
SHEET<br />
PARK CHEF CHARCOAL BARBECUE 1:100<br />
©C.C S 579
Countryside Commission for Scotland<br />
Battleby Redgorton Perth PH13EW<br />
Perth (0738) 27921<br />
14.5<br />
CAMP COOKING BENCH ccs Design scale 1:10<br />
©c.c s 11.79<br />
INFORMATION<br />
SHEET
Countryside Commission for Scotland<br />
Battleby Redgorton Perth PH1 3EW<br />
Perth (0738)27921<br />
INFORMATION<br />
SHEET<br />
14.6<br />
BARBECUE — Converted oil drum c.c.s. Design Scales as marked<br />
©c.c.s. 1179
Countryside Commission for Scotland<br />
Battleby Redgorton Perth PH13EW<br />
Perth (0738)27921<br />
FOOTBRIDGE -Timber (ex railway sleeper stringer) C.C.S.Design Scales as marked<br />
©C.C.S.10:83<br />
INFORMATION 16.1<br />
SHEET
Countryside Commission for Scotland<br />
Battleby Redgorton Perth PH13EW<br />
Perth (0738) 27921<br />
GENERAL NOTES ON DESIGN FOR ACCESS TO<br />
THE COUNTRYSIDE BY DISABLED PEOPLE<br />
'Provision for all'<br />
In general, an attempt should be made to cater for<br />
all people, avoiding 'special' provisions for people<br />
with disabilities wherever possible However, in<br />
some instances — toilets, for example — special<br />
facilities must, of course, be provided<br />
By following this principle, misguided attempts to<br />
provide facilities of too ambitious a nature in the<br />
countryside for people with disabilities can be<br />
avoided The countryside cannot be manipulated to<br />
accommodate them to the extent in which the built<br />
environment can; not only would it be impractical<br />
and impossibly costly to do so on a wide scale, but<br />
it is unlikely to be desired by the majority of those<br />
with disabilities.<br />
Information based on "Designing for the Disabled" by Selwyn Goldsmith,<br />
RIBA Publications, 1976<br />
©c.c s<br />
INFORMATION<br />
SHEET<br />
17.1<br />
Simple detailing related to popular sites with car<br />
parking and toilet facilities will provide, at modest<br />
cost, most of what is required by the majority of<br />
people with disabilities when visiting the<br />
countryside; most importantly, the provision will not<br />
appear 'special' and may not even be noticed<br />
except by people who have a disability. The types of<br />
consideration and detail required can be<br />
summarised as follows:—<br />
I. If possible choose level sites.<br />
2 Ramps and steps should be provided where<br />
changes of level cannot be avoided See<br />
Information Sheets 17.3 and 6 14/15/16/19.<br />
3 Handrails should be capable of being gripped<br />
by weak and stiff hands, and be weight<br />
bearing. See Information Sheet 17.4<br />
4 Unobstructed paths should have a<br />
guide-rail/fence/tapping rail or some other<br />
means of defining the route See Information<br />
Sheet 17.4<br />
5. Ground surfaces should be non-slip and firm.<br />
See Information Sheet 17.6<br />
6. Advice should be sought and followed on<br />
specialised provisions such as Braille<br />
Information Boards from the local Association<br />
for the Blind<br />
7. All toilets should have a disabled persons<br />
compartment. See Information Sheet 17.8.<br />
8. Furniture should be so designed as to<br />
accommodate wheelchair users and other<br />
people with disabilities. See Information Sheet<br />
17.9<br />
9. Barriers, such as kissing gates should,<br />
preferably, be avoided, but where necessary<br />
be designed to accommodate wheelchair<br />
users. See Information Sheet 4 8.13.<br />
10. Stiles should not have more thar, one upright<br />
so that the walker with a stiff knee-joint can<br />
swing over without difficulty. A hand-hold is a<br />
great help See Information Sheet 4 9.12.<br />
II. Treads to stiles and steps should be of a<br />
generous proportion. See Information Sheet<br />
4.9 12.<br />
12 Provide reserved car parking spaces See<br />
Information Sheet 17.2.<br />
13. Install displays or direction signs at low level<br />
so that wheelchair-bound people and children<br />
— as well as the able-bodied — can read<br />
them with ease.<br />
14. Type size no smaller than 38 mm (1 J") will aid<br />
legibility for those with impaired vision.<br />
15. Access routes with physical restrictions on<br />
either side (boardwalks, bridges, footpaths<br />
etc.) more than a few metres in length should<br />
be wide enough to allow the passage of a<br />
wheelchair in one direction and a walker in<br />
the other. See Information Sheet 17 9.<br />
16 Remember that disability can take many forms<br />
and vary in degree — joint stiffness,<br />
amputation, paraplegia, deafness, blindness,<br />
muscular weakness, respiratory and cardiac<br />
impairment and so on
Countryside Commission for Scotland<br />
Battleby Redgorton Perth PH13EW<br />
Perth (0738)27921<br />
CAR PARKING FOR THE DISABLED<br />
In car parks used by the general public provision<br />
should be made for disabled drivers and cars<br />
carrying disabled passengers.<br />
Special spaces, located at the end of a row of<br />
parking bays, leaving one side clear for access by<br />
the disabled need not be wider than standard bays<br />
for general purposes.<br />
The parking surface must be firm, smooth and level,<br />
suitable finishes being:<br />
brush finished concrete<br />
Tarmacadam<br />
paving slabs<br />
interlocking paviors<br />
rough, or porous, brick<br />
(hot engineering)<br />
See Information Sheet<br />
Gravel, turf and concretereinforced<br />
grass are not suitable.<br />
Specially reserved places should be signposted.<br />
See Information Sheet 17.7<br />
Where adjacent spaces are reserved for disabled<br />
people, an access area may be marked on the<br />
ground to indicate that cars should be parked to<br />
either side.<br />
INFORMATION<br />
SHEET<br />
Information based on "Designing for the Disabled" by Selwyn Goldsmith,<br />
RIBA Publications, 1976.<br />
©c.c.s.<br />
In Britain the standard parking bay width is<br />
approximately 2.400m wide.<br />
17.2<br />
To allow for assisted wheelchair users the preferred<br />
width of special spaces for disabled drivers is<br />
3.600m wide, minimum 3.200m wide. (See plan<br />
below).<br />
To allow for ambulant disabled people the preferred<br />
width of parking spaces is 3.00m, minimum 2.800m.<br />
3.000m will, in practice, just allow wheelchair<br />
manoeuvring.
Countryside Commission for Scotland<br />
Battleby Redgorton Perth PH1 3EW<br />
tt Perth (0738)27921<br />
RAMPS AND GRADIENTS<br />
General: For wheelchairs users access to facilities<br />
must be level or ramped<br />
A level or ramped access is also advantageous to<br />
elderly people and mothers with prams.<br />
In many situations able-bodied and ambulant<br />
handicapped can more easily, safely and<br />
comfortably manage steps rather than ramps: in wet<br />
or icy conditions ramps can be more dangerous<br />
than steps<br />
Handrails should be provided for ramps with a total<br />
rise of 600mm, at a height of 1 000m above ramp<br />
level.<br />
Where the gradient is 1:20 or less, no handrail need<br />
be provided.<br />
Kerbs:<br />
A kerb should be provided to the exposed side of<br />
any ramp, not less than 75mm high or 50mm where<br />
there is a handrail.<br />
Finishes:<br />
All ramps must have non-slip surfaces. A textured<br />
finish with coarse aggregate not finer than 10mm is<br />
recommended Asphalt should be roughened<br />
Concrete must not be polished, and the surface<br />
treated with carborundum to prevent slipping when<br />
wet.<br />
For further details see I S 17.6<br />
Even though the ideal specification for ramps may<br />
not be possible to achieve in some places, still<br />
provide a ramp — even though it is steep — and<br />
some wheelchair users will negotiate it with<br />
assistance<br />
INFORMATION<br />
SHEET<br />
Recommended ramp gradients:<br />
Length of ramp<br />
ambulant disabled<br />
independant<br />
wheelchair users<br />
wheelchair pushed<br />
by attendant<br />
electric wheelchairs<br />
All users,<br />
preferred max<br />
gradient<br />
Information based on "Designing for the Disabled" by Selwyn Goldsmith,<br />
RIBA Publications, 1976.<br />
cc.c s<br />
17.3<br />
up to over<br />
3 0 3.0-6.0 6.0m<br />
1:9 1:12 1:12<br />
1:10 1:16 1:20<br />
1:9 1:12 1:20<br />
1:16 1:16 1:20<br />
1:8 1:12 1:12<br />
Dimensional data:<br />
Preferred minimum width 1,500m.<br />
For short ramps minimum width 1,200m.<br />
In long ramps a rest platform should be provided for<br />
every 10.0m of ramp or each 0 800m of vertical rise.<br />
The length of rest platforms should be not less than<br />
1 800m
Countryside Commission for Scotland<br />
Battleby Redgorton Perth PH13EW<br />
Perth (0738)27921<br />
RAMP CONSTRUCTION for wheelchair users<br />
©CCS<br />
INFORMATION 17.3.1<br />
SHEET<br />
Scales as marked
Countryside Commission for Scotland<br />
Battleby Redgorton Perth PH13EW<br />
tt Perth (0738)27921<br />
CIRCULATION SPACE: AMBULANT DISABLED PEOPLE<br />
General: Although stick users can negotiate a<br />
passage width of 800mm (2' 8") this is not<br />
recommended, and a minimum passage width of<br />
900mm (3' 0") should be observed.<br />
In practice all stick users, crutch users and people<br />
with walking aids can be accommodated by a<br />
passage width of 1,000m (3' 3").<br />
Circulation space requirements for ambulant<br />
disabled people.<br />
( 0-75O ^<br />
Single walking stick<br />
0.900<br />
Tripod walking aids<br />
Information based on "Designing for the Disabled" by Selwyn Goldsmith,<br />
RIBA Publications, 1976.<br />
©CCS<br />
INFORMATION 17.5.1<br />
SHEET<br />
0. 950<br />
Shoulder crutches
Countryside Commission for Scotland<br />
Battleby Redgorton Perth PH1 3EW<br />
Perth (0738)27921<br />
CIRCULATION SPACE: WHEELCHAIRS<br />
Standard wheelchairs may be up to 675mm wide<br />
(2' 3") The recommended clearance between a<br />
wheelchair and its surroundings should be no less<br />
than 50mm (2") Therefore the minimum space for<br />
the passage of wheelchairs is 775mm (2' 7"),<br />
although in practice 800mm (2' 8") is used.<br />
STRAIGHT LINE MOVEMENT<br />
Wheelchair<br />
with attendant<br />
PASSING SPACE<br />
1.800<br />
Self-propelled<br />
wheelchair<br />
Two wheelchairs<br />
with attendant<br />
Two self-propelled<br />
wheelchairs<br />
Information based on "Designing for the Disabled" by Selwyn<br />
Goldsmith, RIBA Publications, 1976<br />
©c.c.s.<br />
INFORMATION<br />
SHEET<br />
17.5.2<br />
The diagrams give the recommended dimensions for the<br />
movement of wheelchairs in relation to other users of<br />
circulation space, and their requirements for<br />
manoeuvring.<br />
Space for wheelchair<br />
turn through 180°<br />
Planning rule for<br />
unobstructed space<br />
for wheelchair<br />
turning<br />
Wheelchair turn<br />
through 90° in<br />
circulation route
Countryside Commission for Scotland<br />
Battleby Redgorton Perth PH13EW<br />
0 Perth (0738)27921<br />
CIRCULATION SPACE: WHEELCHAIRS<br />
Wheelchair manoeuvres through a door or gateway<br />
from a passage or restricted pathway: examples of<br />
preferred conditions.<br />
Spatial requirement<br />
to turn a wheelchair<br />
through an opening<br />
ec.c.s<br />
INFORMATION 17.5.3<br />
SHEET<br />
Information based on "Designing for the Disabled" by Selwyn Goldsmith,<br />
RIBA Publications, 1976.
17.6<br />
INFORMATION<br />
SHEET<br />
FOOTPATH SURFACES for ambulant disabled people & wheelchair users<br />
Countryside Commission for Scotland<br />
Battleby Redgorton Perth PH13EW<br />
tt Perth (0738)27921<br />
General: The primary requirement is for a firm, evenly graded non-slip surface for pedestrian users, in<br />
preference to a perfectly smooth surface that might be preferred by wheelchair users. However, pleasure can<br />
be derived from the occasional opportunity for ambulant disabled people to walk on firm natural surfaces<br />
such as well maintained grass. Unsealed gravel surfaces should be avoided.<br />
Suitable Surfaces:<br />
1. Tarmacadam and similar — so-called 'flexible surfaces' should be in accordance with B.S. 4987:1973<br />
which includes specifications for aggregates (coarse and fine), filler and binder. Also included is data on<br />
the proper manufacture and laying of bitumen surfaces.<br />
2. Concrete — the Cement and Concrete Association publish detailed advice covering all aspects of<br />
cement, aggregates, sub-grades, base, form-setting, spreading, compacting, finishing and curing.<br />
Suitable finishes include 'exposed aggregate' and 'brush finished'.<br />
3. Unit paving — this includes:—<br />
Pre-cast concrete slabs<br />
<strong>Natural</strong> stone flags<br />
Brick, porous — not engineering brick<br />
Clay tiles<br />
Granite setts (providing they have flat upper faces)<br />
Precast interlocking paviours<br />
4. Timber decking — slats at right angles to direction of travel<br />
Unsuitable surfaces:<br />
Gravel<br />
Sand<br />
Rough grass<br />
Concrete reinforced grass surfaces<br />
Steel mesh gratings<br />
Engineering brick<br />
Slip-resistant finishes — there are a number of proprietary products on the market which can reduce the slip<br />
hazard.<br />
1. Patented rubber treaded flags — Shap Granite Co Ltd, Shap.<br />
2. Non-slip epoxy or bauxite grit floor coating for internal or external surfaces — Tretol Ltd, London.<br />
3. Self-adhesive non-slip strips — 3M Company Ltd.<br />
Timber board-walks, and footbridge decking may be made slip resistant by coating with hot bitumen<br />
emulsion onto which is sprinkled clean sharp sand.<br />
©c.cs.
Countryside Commission for Scotland<br />
Battleby Redgorton Perth PH13EW<br />
Perth (0738)27921<br />
©c.cs<br />
INFORMATION<br />
17.6.1<br />
SHEET<br />
FOOTPATH CONSTRUCTION for ambulant disabled people & wheelchair users
Countryside Commission for Scotland<br />
Battleby Redgorton Perth PH13EW<br />
Perth (0738) 27921<br />
WORD AND LINE SPACING<br />
©c.c.s.<br />
INFORMATION<br />
SHEET<br />
18.8
Countryside Commission for Scotlsnd<br />
Battleby Redgorton Perth PH13EW<br />
Perth (0738)27921<br />
SIGN LAYOUT Notes for guidance 1<br />
©c.c.s.<br />
INFORMATION 18.9<br />
SHEET
Countryside Commission for Scotland<br />
Battleby Redgorton Perth PH13EW<br />
0 Perth (0738) 27921<br />
SIGN LAYOUT Notes for guidance 2<br />
Odia etia<br />
Odia etiam sunt<br />
luptam propter<br />
atque ut odia<br />
etiam sunt luptam<br />
propter.<br />
Odia etiam sunt<br />
luptam propter<br />
atque ut odia<br />
etiam sunt luptam<br />
propter.<br />
©c.c.s.<br />
INFORMATION<br />
SHEET<br />
Odia etiam sunt<br />
lumptam propter<br />
atque ut odia<br />
etiam sunt luptam<br />
propter. Atque ut<br />
odia etiam sunt<br />
luptam propter at<br />
ut odia<br />
Odia etiam sunt<br />
luptam propter<br />
atque ut odia etia<br />
sunt luptam<br />
propter.Atque ut<br />
odia etiam sunt lu<br />
propter atque<br />
WOODLAND<br />
ESTATES<br />
FOOTBRIDGE<br />
HILL TRAIL<br />
Please keep to the paths<br />
HIGH FIRE RISK AREA<br />
18.10
Countryside Commission for Scotland<br />
Battleby Redgorton Perth PH13EW<br />
Perth (0738)27921<br />
VIEWPOINT INDICATOR FIXING TECHNIQUE c.c.s.Design<br />
©c.c.s.<br />
INFORMATION<br />
SHEET<br />
18.11