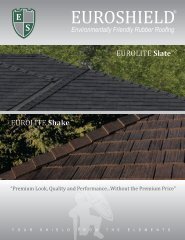
EuroLite Slate Installation Guide Revised Sept 2011 - Euroshield
EuroLite Slate Installation Guide Revised Sept 2011 - Euroshield
EuroLite Slate Installation Guide Revised Sept 2011 - Euroshield

Create successful ePaper yourself
Turn your PDF publications into a flip-book with our unique Google optimized e-Paper software.
EAVE STARTER STRIP<br />
After the roof deck has been prepared and ice/water membrane and woven synthetic underlayment<br />
is in place (see illustrations to follow), begin the installation of the starter strips for eave, valleys<br />
and rake edges.<br />
Starting at the left side of the roof eave edge, chalk a straight line 222mm (8 ¾”) from the lower<br />
most point of the eave edge. Align the top edge of the eave starter strip with the chalk line such<br />
that the bottom edge of the starter extends ¾” past the bottom of the eave edge.<br />
Starting at the left side of the roof, install <strong>EuroLite</strong> eave starter strip panels over the ice/water<br />
membrane maintaining a ¾” overhang along both eave edge and rake edge. Apply a continuous<br />
bead of caulk to the underside eave edge prior to installing the starter strip as shown in the Gable<br />
and Eave Edge illustration. This first piece must be a part-panel (cut eave starter panel in half) so<br />
that the starter “keyway” (space between panels/tiles) does not line up with the “keyway” of the<br />
first full course of <strong>EuroLite</strong> <strong>Slate</strong> going down directly on top of the starter row.<br />
<strong>Euroshield</strong> <strong>Installation</strong> <strong>Guide</strong> – EUROLITE SLATE <strong>Sept</strong>ember <strong>2011</strong><br />
Page18