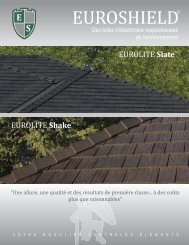
Recommended installation procedures for EuroLite ... - Euroshield
Recommended installation procedures for EuroLite ... - Euroshield
Recommended installation procedures for EuroLite ... - Euroshield
You also want an ePaper? Increase the reach of your titles
YUMPU automatically turns print PDFs into web optimized ePapers that Google loves.
<strong>Recommended</strong> <strong>installation</strong> <strong>procedures</strong> <strong>for</strong> <strong>EuroLite</strong> Shake<br />
Do not begin <strong>installation</strong> until you have read and fully understand the <strong>procedures</strong><br />
outlined in this Guide.<br />
Contact us at:<br />
9330 – 48 th Street SE<br />
Calgary, Alberta, Canada<br />
T2C 2R2<br />
Office (403) 215-3333<br />
Toll Free (877) 387-7667<br />
Fax (403) 287-2012<br />
Website: www.euroshieldroofing.com<br />
Email: info@euroshieldroofing.com<br />
G.E.M. Inc. is the manufacturer & distributor of EuroShield® rubber roof roofing systems<br />
manufactured in Calgary, Alberta, Canada.<br />
CCMC (Canadian Construction Materials Council) Reg. Number 12118-R<br />
Ver. 210312S<br />
<strong>Euroshield</strong>® Installation Guide – EUROLITE SHAKE March 2012<br />
Page1
TABLE OF CONTENTS<br />
Introduction - corporate profile<br />
- Feature / benefit page<br />
Components - spec data sheets<br />
- Packaging, handling<br />
Pre-<strong>installation</strong> - system introduction<br />
- Roof deck, structure, load, eave protection<br />
- ice dam, re-roofing, slope<br />
- underlay<br />
- ventilation<br />
- fastening, impact, shading, fade<br />
Installation - deck, eave protection, loading, valleys, protrusions, openings<br />
- Starter tile, field tile<br />
- Ridge, gable, hip caps<br />
- detail finishing, maintenance, flashing profiles<br />
<strong>Euroshield</strong>® Installation Guide – EUROLITE SHAKE March 2012<br />
Page2
INTRODUCTION<br />
Corporate profile<br />
Calgary based Global Environmental Manufacturing Inc. (GEM), founded by Henry Kamphuis in<br />
1999, has developed innovative technology to produce competitively priced, premium quality<br />
building products using a minimum of 75% in recycled materials (e.g. recycled tires). GEM’s<br />
unique technology, insulation properties and product design is capable of producing significant<br />
energy benefits and savings. The product is competitively priced while being ultraenvironmentally<br />
friendly. GEM’s proprietary, unique Rein<strong>for</strong>ced Rubber Based Compound<br />
including carbon black <strong>for</strong>ms the basis of all of GEM’s products. Aside from adding durability<br />
and strength, Carbon Black is widely considered the best U.V. inhibitor in the world.<br />
GEM’s EuroShield® Roof is a pitched roofing system using rubber-based panels. Its unique<br />
selling features include unsurpassed durability and protection against all the elements and a simple<br />
<strong>installation</strong> resulting in a significant reduction in labour costs in comparison to other premium<br />
products. GEM’s roofing system also provides an enhanced aesthetic appeal while providing<br />
superior lasting protection.<br />
Features and benefits<br />
• Long lasting, durable<br />
• Aesthetically pleasing<br />
• Flexible and versatile<br />
• Weather resistant<br />
• Environmentally friendly<br />
• Fast and easy to install<br />
• Hail resistant<br />
• Very Lightweight (approx. 2.2 lbs per sq/ft)<br />
• Af<strong>for</strong>dable<br />
• Potential discount on homeowners insurance policy<br />
• Maintenance free<br />
• Keeps your house cooler in the summer and warmer in the winter<br />
• Fire resistant<br />
• Increases the value of your home<br />
EuroShield® is the most advanced roofing system in the market today.<br />
<strong>Euroshield</strong>® Installation Guide – EUROLITE SHAKE March 2012<br />
Page3
Components<br />
Spec data sheet<br />
<strong>EuroLite</strong> Slate<br />
Weight/pc 4.7 lbs. approx.<br />
Pieces/sq 48 approx.<br />
Bundles/sq. 3<br />
Pieces/Bundle 16<br />
Lbs/sq. 225 approx.<br />
Length 40” approx.<br />
Width 17” approx.<br />
Exposure/panel 2.12 sq. ft.<br />
Exposure/To-the-Weather 7 5/8” x 40”<br />
Note: pricing is based on 48 pieces per square.<br />
Ridge cap<br />
Weight .94 lb. approx.<br />
Length 15” approx.<br />
Width 2 angles each side approx. 5.0”<br />
Exposure 7 5/8” approx.<br />
Hip cap<br />
Weight/pc .94 lb approx.<br />
Length 15” approx.<br />
Width 2 angles each 5.0” approx.<br />
Exposure 7 5/8” approx.<br />
Starter Strip 1.96 lbs (40”W x 9.44”H)<br />
Packaging and handling<br />
<strong>EuroLite</strong> Shake<br />
16 panel pieces per bundle<br />
3 bundles per square (101.76 sq.ft TTW)<br />
320 pcs per pallet (20 bundles) standard loading<br />
1554 lbs per standard pallet (approx. weight incl. pallet)<br />
Approx. 174 square – 26 pallets - per 53 ft truck* (40,450 lbs incl. skids)<br />
Approx. 228 square – 18 pallets + 16 pallets - per B-Train 32’ + 28’ (34 skids -53,000lbs)<br />
<strong>Euroshield</strong>® Installation Guide – EUROLITE SHAKE March 2012<br />
Page4
Ridge Cap<br />
16 caps per bundle<br />
36 bundles per pallet<br />
Up to 960 pcs per pallet<br />
540 lbs per pallet (approx. including skid)<br />
Hip Cap<br />
16 caps per bundle<br />
36 bundles per pallet<br />
Up to 960 pcs per pallet<br />
540 lbs per pallet (approx.)<br />
Starter Strip<br />
16 pieces per bundle<br />
30 bundles per skid (480 pieces)<br />
915 lbs incl. skid<br />
Note: Hip and Ridge is ordered by the bundle.<br />
* will vary with size and weight of truck.<br />
PRE-INSTALLATION<br />
System Introduction<br />
This manual contains the acceptable requirements <strong>for</strong> GEM’s <strong>EuroLite</strong> Shake Roofing System.<br />
Installation specifications and details are designed <strong>for</strong> slopes 4/12 or steeper. Low slope<br />
applications less than 4/12 may warrant extra precautions; please contact GEM to qualify your<br />
particular circumstances and conditions.<br />
The recommended temperature range <strong>for</strong> installing <strong>EuroLite</strong> Shake roofing products is -10<br />
degrees Celsius to +35 degrees Celsius. Do not install <strong>EuroLite</strong> Shake products outside of this<br />
temperature range. If installing <strong>EuroLite</strong> Shake on a Mansard or vertical slope, please contact us<br />
prior to installing.<br />
Cautionary Note: <strong>EuroLite</strong> Shake uses an adhesive strip in addition to nails to fasten product.<br />
Like asphalt shingles, this adhesive requires sunlight and sufficient warmth to melt and bond to<br />
the panel below. A proper bond may not occur in the absence of heat and there is the potential risk<br />
of blow-off should high winds set upon the roof prior to sealing of the adhesive strip. G.E.M. Inc.<br />
is not responsible <strong>for</strong> the blow-off of product due to <strong>installation</strong> in conditions that will not result in<br />
the proper bonding of <strong>EuroLite</strong> panels. It is the responsibility of the contractor to determine the<br />
suitability of conditions prior to beginning <strong>installation</strong> of the <strong>EuroLite</strong> Shake.<br />
This <strong>installation</strong> manual establishes a standard <strong>for</strong> the EuroShield® System that meets or exceeds<br />
the requirements of CMHC and the National Building Code of Canada (2005).<br />
<strong>Euroshield</strong>® Installation Guide – EUROLITE SHAKE March 2012<br />
Page5
Installers must familiarize themselves with the contents of this <strong>installation</strong> manual in order that the<br />
EuroShield® System is installed to its uncompromised standard.<br />
GEM reserves the right to limit or cancel the sale of EuroShield® products should <strong>installation</strong> of<br />
the products not meet or exceed our standards.<br />
These recommended <strong>installation</strong> <strong>procedures</strong> may be amended as required from time to time.<br />
As long as the minimum standards of <strong>installation</strong> are adhered to in accordance with this<br />
<strong>installation</strong> manual, <strong>installation</strong> practices and <strong>procedures</strong> may be modified; however, installers<br />
must comply with local building code standards in keeping with the needs and requirements <strong>for</strong><br />
their area and application.<br />
ROOF DECK<br />
The roof area shall be sheathed with plywood, OSB or equivalent; minimum 10mm (3/8”) thick<br />
satisfying the requirements of the National Building Code, cut flush with fascia at both eaves and<br />
gable. Distance between support trusses or joists should not exceed 600mm (24”). Our technical<br />
department <strong>for</strong> individual attention should qualify distances exceeding 600mm (24”). Sheathing<br />
shall be fastened and clipped according to local building codes.<br />
STRUCTURE AND LOAD REQUIREMENTS<br />
There are no special structural changes or enhancements to make or special load requirements<br />
necessary <strong>for</strong> GEM’s EuroShield® Roof. The roof structure and load requirements must meet the<br />
requirements of the National Building Code (or corresponding province/state building code where<br />
applicable).<br />
EAVE PROTECTION<br />
Eave protection materials must con<strong>for</strong>m to National Building Code. Install protection membrane<br />
material along all eaves overhanging fascia 25mm (1”). End laps of material are to be 150mm (6”)<br />
and sealed according to manufacturer’s instructions. Only film surfaced material should be used so<br />
a separation exists between the bitumen and <strong>Euroshield</strong>® panels.<br />
Roof systems will sometimes fail due to the <strong>for</strong>mation of ice dams. Ice dams are <strong>for</strong>med by the<br />
continuous melting and freezing of snow and the backing up of frozen slush from the gutters, due<br />
to heat escaping from the house. The melted water flows under the snow and freezes as it reaches<br />
the unheated soffit, thus creating the ice dam. When this occurs, water can be <strong>for</strong>ced under the<br />
panels and into the attic, causing damages to the home’s ceilings, walls, insulation, gutters, eaves<br />
and roof.<br />
<strong>Euroshield</strong>® Installation Guide – EUROLITE SHAKE March 2012<br />
Page6
To reduce ice dam <strong>for</strong>mation and help minimize ice dam problems:<br />
1. Keep the attic space cold by insulating it from the warm house interior, thus reducing or<br />
eliminating snow melt.<br />
2. Use high heel trusses, insulate to the outside of the plates and install cardboard baffles to<br />
ensure ventilation at the eaves.<br />
3. Ensure that the outer edges of the gutters or eavestroughs are lower than the slope line to<br />
allow snow and ice to slide clear. Also ensure gutters are free of debris.<br />
Reference: Canadian Mortgage and Housing Corporation, Roofing and Flashing Problems,<br />
publication NHA 6076.<br />
In areas where snowfall occurs, snow guards may be required to help prevent slides from the roof<br />
surface to the ground below. If snow guards are to be used with the <strong>Euroshield</strong>® product, they<br />
must be applied at the time of <strong>installation</strong>. It is the responsibility of the <strong>installation</strong> contractor, in<br />
conjunction with the homeowner, to determine the suitability of installing snow guards on the<br />
roof, unless specified in the local building code. GEM Inc. assumes no responsibility <strong>for</strong> the<br />
supply or install of these devices on the roof.<br />
In high snow areas with a ground snow load greater than 3.5 kPa as identified in Chapter 1 of the<br />
supplement to the National Building Code of Canada, the eaves protection must extend from the<br />
edge of the roof to a minimum distance of 1700mm (67”) up the roof to a line not less than<br />
1100mm (43 ½”) inside the inner beam.<br />
Fasten and adhere the protection material to the sheathing sufficiently to prevent wind up lift and<br />
damage with hot galvanized or coated fasteners.<br />
Valleys utilize the same materials as eaves protection. Material is applied parallel to valley<br />
centerline with half roll width on each side of the centreline and overhanging the fascia and eaves<br />
25mm (1”). In areas with high snowfall combined with freeze thaw conditions use double roll<br />
width extending 860mm (34”) to both sides including 100mm (4”) lap at centreline.<br />
<strong>Euroshield</strong>® Installation Guide – EUROLITE SHAKE March 2012<br />
Page7
RE-ROOFING<br />
It is imperative that the existing roof and the underlying roof structure are inspected to determine<br />
whether (i) the substrate has not rotted and is of enduring quality; and (ii) the roof covering<br />
(asphalt shingles, shakes, etc.) has not curled and the leading edge is securely fastened. If either of<br />
the a<strong>for</strong>ementioned conditions exists, EuroShield® should not be installed over an existing roof<br />
covering; asphalt shingles or shakes. Remove existing roof covering to ensure trusses, sheathing<br />
fascia and other components including masonry, plumbing and mechanical are in good repair to<br />
support the EuroShield® System through its durable lifetime. In any case, any existing wood roof<br />
covering (cedar, pine or other) must be removed prior to <strong>installation</strong> of a <strong>Euroshield</strong>® roof.<br />
SLOPE<br />
EuroShield® was designed to be installed on roofs with a slope of 4/12 or greater as described in<br />
the National Building Code. For low slope application (less than 4/12), contact our technical<br />
department at (877) 387-7667 prior to the <strong>installation</strong> of <strong>Euroshield</strong>® products. The <strong>installation</strong> of<br />
<strong>Euroshield</strong>® roofing products is not recommended on sloped roofing with a pitch of 2/12 or less.<br />
UNDERLAY<br />
In standard applications, whether installing on new sheathing or on existing sheathing, install ice<br />
dam protection and woven synthetic (plastic/polymer/fiber rein<strong>for</strong>ced) underlay, as described in<br />
<strong>Euroshield</strong>® Installation Guide – EUROLITE SHAKE March 2012<br />
Page8
the National Building Code (or corresponding province/state code where applicable). Note that<br />
though your building codes may not require underlay on the entire roof, GEM’s warranty does<br />
require it.<br />
There are many reasons why the use of underlayment prior to applying <strong>Euroshield</strong>® makes good<br />
roofing sense.<br />
• Underlayment protects the wooden deck from the moisture penetration until the<br />
EuroShield® is applied, thus greatly reducing problems to structure.<br />
• Installing underlayment helps to minimize “picture framing”, i.e. the visible outline of<br />
deck panels cause by irregularities in roof construction.<br />
• The water resistance of underlayment provides secondary protection by helping to shield<br />
the deck from wind-driven rain.<br />
• Underlayment offers protection to the EuroShield® from the resins that can be released by<br />
the wood decking.<br />
• The underlayment material should meet the following industry standard:<br />
Synthetic Woven Underlayment - In accordance with approved alternative to<br />
ASTM D226, Type 1, 15# or type 2, 30# asphalt saturated organic felts, nonper<strong>for</strong>ated]<br />
The proper application techniques recommended by the manufacturer should be followed to<br />
ensure optimum per<strong>for</strong>mance of underlayment. The underlayment above eaves protection should<br />
be installed in minimum 1118mm (44”) widths, parallel to eaves lines with a minimum 100mm<br />
(4”) head lap and 150mm (6”) side lap. Fasten underlayment to roof deck with galvanized nails or<br />
staples sufficient to prevent wind lift and damage prior to <strong>EuroLite</strong> Shake <strong>installation</strong>. Extend<br />
underlayment a minimum 150mm (6”) up all walls, chimneys, skylights, etc. and seal corners with<br />
GEM Sealant (or equivalent co-polymer sealant). Underlayment must overlap valley protection<br />
18” past centreline. Any underlayment damage must be repaired or replaced prior to <strong>EuroLite</strong><br />
Shake application. For low slope underlay requirements see manual sections on Slope and Eave<br />
Protection.<br />
VENTILATION<br />
The proper ventilation of the attic area is an essential factor in attaining the maximum service life<br />
available from the building materials used in the roof assembly, in addition to improving heating<br />
and cooling costs. Overlooking this consideration may result in premature failure of the roofing<br />
system due to:<br />
1) Accelerated aging of the EuroShield® System.<br />
2) Rotting of the wood structure, wet insulation due to condensation.<br />
3) Buckling of the roof deck.<br />
Failure to adequately ventilate the attic space to meet minimum local building code standards may<br />
result in premature product failure and void your <strong>Euroshield</strong>® product warranty.<br />
<strong>Euroshield</strong>® Installation Guide – EUROLITE SHAKE March 2012<br />
Page9
In the wake of technical advances and the proliferation of energy conservation measures, the<br />
‘trapping’ of air and moisture in the attic is problematic. Improved insulation and better weather<br />
stripping are the two major reasons <strong>for</strong> this occurrence.<br />
To correct this problem one needs to provide proper ventilation to ensure free and unobstructed air<br />
movement beneath the roof surface.<br />
The National Building Code (Canada) requires that all roof and attic spaces above an insulated<br />
ceiling shall be ventilated with openings to the exterior to provide unobstructed vent areas of not<br />
less than 1 sq.ft./300 sq.ft with a suggested minimum of 1sq.ft/200 sq.ft. The vents shall be<br />
uni<strong>for</strong>mly distributed on opposite sides of the building, in such a way that approximately 50% are<br />
near the lower part of the roof (inflow) and approximately 50% are near the ridge (outflow).<br />
Cathedral ceilings covered with the EuroShield® System require adequate ventilation like any<br />
other roof to prevent damage to the products or structure. There should be a minimum space of 2<br />
inches between the roof sheathing and the insulation to allow <strong>for</strong> unobstructed air movement.<br />
When vapour barrier is used, cathedral ceilings require a minimum total net area <strong>for</strong> the inlet and<br />
outlet vents equivalent to 1/300 of the total ceiling area with a suggested minimum of 1/200. Cross<br />
ventilation should be ensured by locating half the required vent area at the eaves and the other half<br />
at the ridge.<br />
Vent manufacturers should be consulted on the proper use of their products.<br />
FASTENING<br />
THE SHAKE IS ATTACHED USING SEVEN (7) 1 ¾”galvanized nails in the locations<br />
shown in the image below. Nails should be placed ¾” above the open keyways as indicated by the<br />
arrows. This will ensure that there are 14 attachment points in each <strong>EuroLite</strong> Shake panel, as<br />
the seven (7) nails will go through the top of the panel in the course below.<br />
Care should be taken to make sure nails are driven flush with the surface of the <strong>EuroLite</strong> Shake<br />
panel. Nails driven below the panel surface such that a depression or cavity is created in the rubber<br />
panel can reduce the surface contact area <strong>for</strong> proper bonding of the adhesive strip. If using a<br />
compressor-operated nailer, adjust pressure to the point where the nail is driven flush with the<br />
panel surface.<br />
<strong>Euroshield</strong>® Installation Guide – EUROLITE SHAKE March 2012<br />
Page10
Each Eave/Rake/Valley Starter Strip is fastened using seven (7) 1 ¾” galvanized roofing<br />
nails in the locations indicated in the illustration below. The starter strip is applied over the<br />
ice/water barrier at the eave edge and over the metal valley as indicated in the deck detail<br />
illustrations contained in this guide. Be sure to caulk the outside edge of the underside of the<br />
starter and the underside and topside edge of the valley starter and rake starter as indicated in the<br />
illustrations in this guide.<br />
<strong>Euroshield</strong>® Installation Guide – EUROLITE SHAKE March 2012<br />
Page11
Gable end (rake) is prepared by applying the starter strip over the woven synthetic underlayment<br />
vertically along the rake edge with the thicker portion to the outer edge of the rake and<br />
overlapping the rake edge by ¾”. A bead of GEM Sealant (or equivalent co-polymer sealant) is<br />
applied along the outside edge in a continuous bead from eave edge to roof peak prior to<br />
<strong>installation</strong> of the field panels.<br />
Valleys are prepared in similar fashion with the starter strip running vertically up the valley,<br />
placed over the metal valley, 2 inches out from the center on both sides of the valley. The thicker<br />
portion of the starter panel is closest to the center of the valley. GEM Sealant (or equivalent copolymer<br />
sealant) is applied along the underside and topside inside edge in a continuous bead from<br />
eave edge to top edge of the valley prior to <strong>installation</strong> of the field panels.<br />
Each hip cap is fastened using four (4) 3” galvanized deck screws, (2) on each side, placed so that<br />
the next hip cap covers the exposed fastener heads.<br />
Each ridge cap is fastened using four (4) 3” galvanized deck screws, (2) on each side, so that the<br />
next hip cap covers the exposed fastener heads.<br />
IMPACT AND HAIL RESISTANCE<br />
EuroShield® demonstrates excellent resistance to mechanical impact and hail. The rugged and<br />
elastic nature of the rubber base material should weather the heaviest of storms.<br />
SHADING<br />
As a roof is viewed from different angles, and/or different lighting conditions, certain areas may<br />
appear darker or lighter. This inconsistency in colour has been designed to achieve the authentic<br />
look of slate.<br />
INSTALLATION INSTRUCTIONS<br />
ROOF DECK<br />
See pre-<strong>installation</strong> and preparation section regarding material requirements and codes applicable.<br />
Check all roof gables <strong>for</strong> squareness. Check eave edge <strong>for</strong> squareness. Be<strong>for</strong>e work begins, the<br />
work of all other trades on the roof should be complete.<br />
EAVE PROTECTION AND UNDERLAY<br />
See pre-<strong>installation</strong> and preparation section regarding material requirements and codes applicable.<br />
Check and repair if necessary any damage to eave protection or underlayment, be sure the<br />
underlayment overhangs 25mm (1”), that head laps and side laps are sufficient to code and underlay<br />
extends up walls, chimneys, skylights, etc.<br />
<strong>Euroshield</strong>® Installation Guide – EUROLITE SHAKE March 2012<br />
Page12
LOADING<br />
Always load EuroShield® products toward the peak in such a manner as to not overload any one<br />
section of the roof, keeping in mind that the application will start on the left side, and bottom of<br />
the roof.<br />
Distribute materials to allow <strong>for</strong> close proximity during <strong>installation</strong>, allowing extra room on the<br />
left side to start each course.<br />
VALLEYS, PROTRUSIONS AND OPENINGS<br />
Take extra care to make sure underlayment and eave protection is sealed and watertight at all<br />
valleys, chimneys, protrusions and openings.<br />
Apply one layer of peel and stick to the valley with 24 to 36 inch metal valley on top.<br />
Apply Valley Starter Strip up both sides of the valley, 2 inches out from the center of the valley,<br />
after applying a continuous bead of caulk to the roof deck 3 inches out from the center of the<br />
valley from ridge to eave. Nail starter where indicated on the panel.<br />
<strong>Euroshield</strong>® Installation Guide – EUROLITE SHAKE March 2012<br />
Page13
Start the <strong>EuroLite</strong> Shake panel 2 inches from the centre of the valley and crop the top of each<br />
piece similar to asphalt shingles.<br />
If a chimney is more than 750mm (30”) wide, building code demands a saddle be built <strong>for</strong> better<br />
drainage. A saddle need not be installed if a sheet metal flashing is used that extends up the<br />
chimney to a height equal to not less than one sixth the width of the chimney, but not less than<br />
150mm (6”), and up the slope to a point equal in height to the flashing on the chimney, but not<br />
less than 1.5 times the slate exposure. Provincial building code demands flashing <strong>installation</strong> on<br />
all roof/wall intersections, thickness described previously.<br />
Circular chimneys are flashed using a metal flashing (provided by mechanical contractor). Flange<br />
of flashing is to be woven into EuroShield® courses at top of the slope and sealed around<br />
complete flange with GEM Sealant (or equivalent co-polymer sealant).<br />
Plumbing vent stacks are flashed using a metal vent pipe flashing, metal or a flexible rubber<br />
flashing (normally supplied by mechanical contractor,) and woven into the EuroShield® courses<br />
at the top of the slope.<br />
Note – if mechanical contractor is flashing, be sure they are on site be<strong>for</strong>e commencing<br />
EuroShield® application.<br />
Ensure all other protrusions are properly flashed and woven into the <strong>Euroshield</strong>® courses and<br />
sealed in a lightweight manner. For unique circumstances contact G.E.M.’s technical department.<br />
<strong>Euroshield</strong>® Installation Guide – EUROLITE SHAKE March 2012<br />
Page14
VENT PIPE INSTALLATION<br />
(Top and sides of pipe flashing covered by panels should be overlapped with 6” strip of ice and<br />
water membrane prior to installing roof panels)<br />
ATTIC VENT INSTALLATION<br />
(Top and sides of attic vent flashing portion covered by panels should be overlapped with 6” strip<br />
of ice and water membrane prior to installing roof panels)<br />
<strong>Euroshield</strong>® Installation Guide – EUROLITE SHAKE March 2012<br />
Page15
FLASHING DETAIL<br />
<strong>Euroshield</strong>® Installation Guide – EUROLITE SHAKE March 2012<br />
Page16
CHIMNEY INSTALLATION<br />
<strong>Euroshield</strong>® Installation Guide – EUROLITE SHAKE March 2012<br />
Page17
EAVE STARTER STRIP<br />
After the roof deck has been prepared and ice/water membrane and woven synthetic underlayment<br />
is in place (see illustrations to follow), begin the <strong>installation</strong> of the starter strips <strong>for</strong> eave, valleys<br />
and rake edges.<br />
Starting at the left side of the roof eave edge, chalk a straight line 222mm (8 ¾”) from the lower<br />
most point of the eave edge. Align the top edge of the eave starter strip with the chalk line such<br />
that the bottom edge of the starter extends ¾” past the bottom of the eave edge.<br />
Starting at the left side of the roof, install <strong>EuroLite</strong> eave starter strip panels over the ice/water<br />
membrane maintaining a ¾” overhang along both eave edge and rake edge. Apply a continuous<br />
bead of caulk to the underside eave edge prior to installing the starter strip as shown in the Gable<br />
and Eave Edge illustration. This first piece must be a part-panel so that the starter “keyway”<br />
(space between panels/tiles) does not line up with a “keyway” of the first full course of <strong>EuroLite</strong><br />
Shake going down directly on top of the starter row.<br />
<strong>Euroshield</strong>® Installation Guide – EUROLITE SHAKE March 2012<br />
Page18
Moving up the rake edge, install the rake starter such that it overhangs the gable edge by ¾” and<br />
butts up to the eave starter strip at its top edge. Apply a continuous bead of caulk along the rake<br />
edge on both the underside and topside outer edges as shown in the illustration below. Continue<br />
with gable starter up the roof to the peak, fitting the panels together as shown in the illustration<br />
below (Gable and Eave Detail).<br />
<strong>Euroshield</strong>® Installation Guide – EUROLITE SHAKE March 2012<br />
Page19
Working from left to right, install the first <strong>EuroLite</strong> Shake panel such that the raised nibs on the<br />
back of the panel touch the top of the eave starter strip below. The first full panel will extend ¾”<br />
past the gable edge. Nail the first panel in place using 7 – 1 ¾” galvanized roofing nails where<br />
indicated in the diagram (see Fastening section). The locking tab in the upper left corner of the<br />
panel will be trimmed off at this point with a knife so the edge is smooth. The next panel will then<br />
be lowered down until the alignment nibs on the back of the panel touch the top portion of the<br />
eave starter in the same manner as the first panel and then slide the panel gently to the left so that<br />
the tab fits into the receiver of the first panel. Press the butt edge of each panel section down so<br />
that the adhesive strip makes contact with the panel below. Continue in this manner until the right<br />
gable is reached and trim the last panel such that you have ¾” overhang on the gable end and are<br />
flush with the edge of the eave starter overhang.<br />
<strong>Euroshield</strong>® Installation Guide – EUROLITE SHAKE March 2012<br />
Page20
Do not nail the face of the panel as the fascia will have to be installed under the drip edge.<br />
<strong>Euroshield</strong>® Installation Guide – EUROLITE SHAKE March 2012<br />
Page21
As with the starter strip panels, <strong>installation</strong> must start at the left side of the roof. If working left to<br />
right out of a valley, place the top left portion of the panel in the valley such that the diagonal cut<br />
down, 4 inches out from the centerline of the valley, from left to right cuts through the entire<br />
panel. The overlap on each piece is fitted into the overlap of the preceding one. At the ends of the<br />
courses trim panels (using a power saw or knife), to be flush with the edge. Care should be taken<br />
to keep the cuts straight.<br />
Panels are installed using five (7) 1 ¾” galvanized roofing nails (see illustration above and in<br />
“Fastening” section). This will ensure that there are ten (14) attachment points in each panel as the<br />
fasteners will go through the top portion of the panel below.<br />
ROOF JACKS<br />
Roof Jacks may be fitted and removed in the same manner as with asphalt shingles.<br />
Upon reaching the peak of the roof, the last row of panels may have to be trimmed along the upper<br />
edge, flush with the ridge.<br />
<strong>Euroshield</strong>® Installation Guide – EUROLITE SHAKE March 2012<br />
Page22
Walls, chimneys, plumbing vents, attic vents, skylights etc. must be flashed and sealed as<br />
described in other sections of this manual, and woven into the <strong>Euroshield</strong>® as the field panels are<br />
progressively installed up the slope of the roof.<br />
RIDGE CAP – (Note that <strong>EuroLite</strong> Shake ridge and hip caps are the same)<br />
<strong>EuroLite</strong> Shake can be installed over ridge venting. Please consult the ridge vent manufacturer<br />
<strong>for</strong> details on application. Note that the caps cover approximately 4.5” on each side.<br />
When the field panels are completely installed the ridge cap panels can be added. Ridge caps are<br />
installed starting from east or south side so they do not face prevailing winds.<br />
<strong>Euroshield</strong>® Installation Guide – EUROLITE SHAKE March 2012<br />
Page23
Each cap is fastened using four (4) 3” galvanized deck screws, two (2) on either side. The last cap<br />
must be “face fastened”, and exposed fastener heads must be sealed using G.E.M. sealant (or<br />
equivalent co-polymer sealant).<br />
<strong>Euroshield</strong>® Installation Guide – EUROLITE SHAKE March 2012<br />
Page24
HIP CAP<br />
The hip caps are the same piece as the ridge caps and are installed in the same manner as ridge<br />
caps. Beginning at the eave, overhang the first cap by ¾” and fasten where indicated in the<br />
diagram on page 24. Place the next cap above the first and lower until the nibs on the underside of<br />
the cap touch the top portion of the cap below. The correct exposure of 7 5/8” in now set<br />
automatically. Continue working your way up the hip in similar fashion, fastening each cap with<br />
four (4) 3” galvanized deck screws, two (2) on each side such that the overlapping cap covers the<br />
fastener. Note that the caps are notched at the butt edge to allow <strong>for</strong> variable pitch applications<br />
And the notch can be cut (widened) further to allow <strong>for</strong> steep pitch applications.<br />
HIP DETAIL AT RIDGE<br />
<strong>Euroshield</strong>® Installation Guide – EUROLITE SHAKE March 2012<br />
Page25
VALLEYS<br />
Width - 24” to 36” <strong>for</strong> Open Types of Metal:<br />
Copper<br />
Stainless Steel<br />
Color Clad Steel<br />
Color Clad Aluminum<br />
Note: When fastening shingles in valley areas, nail as far away from the centre of the valley as<br />
possible to avoid penetrating the valley metal.<br />
DETAIL FINISHING<br />
The above instructions should conclude the application of the EuroShield® System, excepting the<br />
completion of the details on walls, chimneys, skylight, vents etc.<br />
They should be sealed with G.E.M. Sealant (or equivalent co-polymer sealant) and be flashed<br />
appropriately in accordance with C.R.C.A. Standard specifications, in conjunction with G.E.M.<br />
detail drawings contained within this Guide.<br />
Plumbing vents must be sealed to the pipes with G.E.M. Sealant (or equivalent co-polymer<br />
sealant) and clamped according to pipe flashing manufacturer’s instructions.<br />
MAINTENANCE<br />
The EuroShield® System requires very little ongoing maintenance. Renew G.E.M. Sealant (or<br />
equivalent co-polymer sealant) on details and exposed fastener heads from time to time as<br />
required, maintain gutters, troughs, downpipes and drain to remain free of debris so drainage water<br />
flows away unrestricted. Should alterations be required involving the roof as time goes on, please<br />
contact G.E.M.’s technical department <strong>for</strong> assistance. Repairs per<strong>for</strong>med with non – EuroShield®<br />
system components or incompatible materials will void the EuroShield® warranty.<br />
Suggested Panel Layout Pattern<br />
The suggested layout pattern below <strong>for</strong> <strong>EuroLite</strong> Shake helps minimize the effect of discernable<br />
patterns and ensures the individual keyways on each course do not line up with the keyways in the<br />
course below, taking care not to expose nails in the open keyways below. In no case shall a panel<br />
joint (area where two panels meet in a course) be within 5 inches of the panel joint in the course<br />
below or above.<br />
<strong>Euroshield</strong>® Installation Guide – EUROLITE SHAKE March 2012<br />
Page26
Panels have an SBR adhesive strip along the underside of the butt edge. During <strong>installation</strong>, after<br />
the panel is nailed down, the butt edge of the panel must be pressed down to make firm<br />
contact with the course below.<br />
Over a short period of time, in combination with the sun’s heat, this adhesive will bond the courses<br />
together in a manner similar to that observed with asphalt shingles.<br />
The illustrations below are examples of a suggested panel layout, working left to right from a gable<br />
end. Note that there are 2 different mold patterns. Please make sure you match the layout pattern to<br />
the mold number (#22 or #23) on the product you have received. It is marked on the reverse side of<br />
the panel. It is intended to show how each course could be started to minimize the effects of<br />
patterning on the roof. It is not necessary to use this particular layout, only that you should use a<br />
different start point <strong>for</strong> each course. Be sure to fasten the nails above the keyways (refer to nailing<br />
diagram on page 11) such that they are not visible in the keyway as the next course of panels is<br />
applied. It is recommended to keep panel-to-panel joints (where 2 panels meet in a course) six (6)<br />
inches or more from a similar panel-to-panel joint in the course below.<br />
<strong>Euroshield</strong>® Installation Guide – EUROLITE SHAKE March 2012<br />
Page27
If you have any questions regarding the layout, or any other <strong>installation</strong>-related questions,<br />
please call our North American Toll Free Number (877) 387-7667 prior to beginning<br />
<strong>installation</strong>.<br />
Thank you <strong>for</strong> your purchase of <strong>Euroshield</strong>® roofing products.<br />
<strong>Euroshield</strong>® Installation Guide – EUROLITE SHAKE March 2012<br />
Page28


