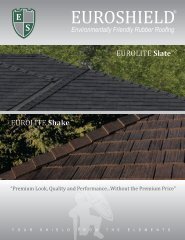
Download EuroLite Shake® Installation Manual - Euroshield
Download EuroLite Shake® Installation Manual - Euroshield
Download EuroLite Shake® Installation Manual - Euroshield

Create successful ePaper yourself
Turn your PDF publications into a flip-book with our unique Google optimized e-Paper software.
Start the <strong>EuroLite</strong> <strong>Shake®</strong> panel 2 inches from the centre of the valley and crop the top of each<br />
piece similar to asphalt shingles.<br />
If a chimney is more than 750mm (30”) wide, building code demands a saddle be built for better<br />
drainage. A saddle need not be installed if a sheet metal flashing is used that extends up the<br />
chimney to a height equal to not less than one sixth the width of the chimney, but not less than<br />
150mm (6”), and up the slope to a point equal in height to the flashing on the chimney, but not<br />
less than 1.5 times the slate exposure. Provincial building code demands flashing installation on<br />
all roof/wall intersections, thickness described previously.<br />
Circular chimneys are flashed using a metal flashing (provided by mechanical contractor). Flange<br />
of flashing is to be woven into EuroShield® courses at top of the slope and sealed around<br />
complete flange with GEM Sealant (or equivalent co-polymer sealant).<br />
Plumbing vent stacks are flashed using a metal vent pipe flashing, metal or a flexible rubber<br />
flashing (normally supplied by mechanical contractor,) and woven into the EuroShield® courses<br />
at the top of the slope.<br />
Note – if mechanical contractor is flashing, be sure they are on site before commencing<br />
EuroShield® application.<br />
Ensure all other protrusions are properly flashed and woven into the <strong>Euroshield</strong>® courses and<br />
sealed in a lightweight manner. For unique circumstances contact G.E.M.’s technical department.<br />
<strong>Euroshield</strong>® <strong>Installation</strong> Guide – EUROLITE SHAKE® November 2012<br />
Page14