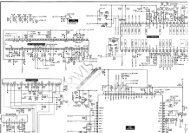
LCD TV SERVICE MANUAL - diagramas.diagram...
LCD TV SERVICE MANUAL - diagramas.diagram...
LCD TV SERVICE MANUAL - diagramas.diagram...

Create successful ePaper yourself
Turn your PDF publications into a flip-book with our unique Google optimized e-Paper software.
## USB DOWNLOAD<br />
1) Put the USB Stick to the USB socket<br />
2) Automatically detecting update file in USB Stick<br />
3) Select “Start” Button and press “ok” button<br />
Updating is staring.<br />
4) Finishing the version updating, you have to put out USB<br />
stick and “AC Power” off.<br />
5) After putting “AC Power” on and check updated version<br />
on your <strong>TV</strong>.<br />
4. ADC Process<br />
* Required Equipments<br />
- Remote controller for adjustment<br />
- MSPG-925F Pattern Generator<br />
4-1. Method of Auto RGB Color Balance<br />
- Convert to RGB PC in Input-source<br />
- Input the PC 1024x768 @ 60Hz 1/2 Black & White<br />
Pattern(MSPG-925F model:60, pattern:54) into RGB.<br />
- Adjust by commanding AUTO_COLOR_ADJUST(0xF1) 0x00<br />
0x02 instruction.<br />
Copyright © 2008 LG Electronics. Inc. All right reserved.<br />
Only for training and service purposes<br />
- 10 -<br />
(1) Confirmation<br />
- We confirm whether “0xF1 (offset), 0xF2 (gain)” address<br />
of EEPROM “0xBC” is “0xAA” or not.<br />
- If “0xF1”, “0xF2” address of EEPROM “0xBC” isn’t “0xAA”,<br />
we adjust once more<br />
- We can confirm the ADC values from “0x00~0x05”<br />
addresses in a page “0xBC”<br />
* Manual ADC process using Service Remocon. After enter<br />
Service Mode by pushing “ADJ” key, execute “Auto-RGB”<br />
by pushing “_” key at “Auto-RGB”.<br />
4-2. Component input ADC<br />
(1) Component Gain/Offset Adjustment7<br />
- Convert to Component in Input-source<br />
- Input the Component ( Which has 720p@60Hz YPbPr<br />
signal : 100% Color Bar (MSPG-925F Model: 217/<br />
Pattern: 65 ) into Component.<br />
- Adjust by commanding AUTO_COLOR_ADJUST (0xF1)<br />
0x00 0x02 instruction<br />
(2) Confirmation<br />
- We confirm whether “0xF3 (offset), 0xF4 (gain)”<br />
address of EEPROM “0xBC” is “0xAA” or not.<br />
- If “0xF3”, “0xF4” address of EEPROM “0xBC” isn’t<br />
“0xAA”, we adjust once more.<br />
- We can confirm the ADC values from “0x06~0x0B”<br />
addresses in a page “0xBC”.<br />
* Manual ADC process using Service Remocon. After<br />
enter Service Mode by pushing “ADJ” key, execute<br />
“Auto-RGB” by pushing “_” key at “Auto-RGB”.<br />
** TOOL Option, Area Option change and AC off<br />
Before PCBA check, you have to change the Tool option, Area<br />
option and have to AC off/on (Plug out and in)<br />
(If missing this process, set can operate abnormally)<br />
5. TOOL Option, Area Option change<br />
(1) Profile : Must be changed the option value because being<br />
different with some setting value depend on module maker,<br />
inch and market.<br />
(2) Equipment : adjustment remote control.<br />
(3) Adjustment method<br />
The input methods are same as other chassis.(Use IN-<br />
START Key on the Adjust Remocon.)<br />
(If not changed the option, the input menu can differ the<br />
model spec.)<br />
* Refer to Job Expression of each main chassis ass’y<br />
(EBTxxxxxxxx) for Option value<br />
* Never push the IN-STOP KEY after completing the function<br />
inspection.<br />
LGE Internal Use Only